3-2-1 > Active Backup

Since Active Backup for Business version 2.2.0-1761, Synology has added two new features.
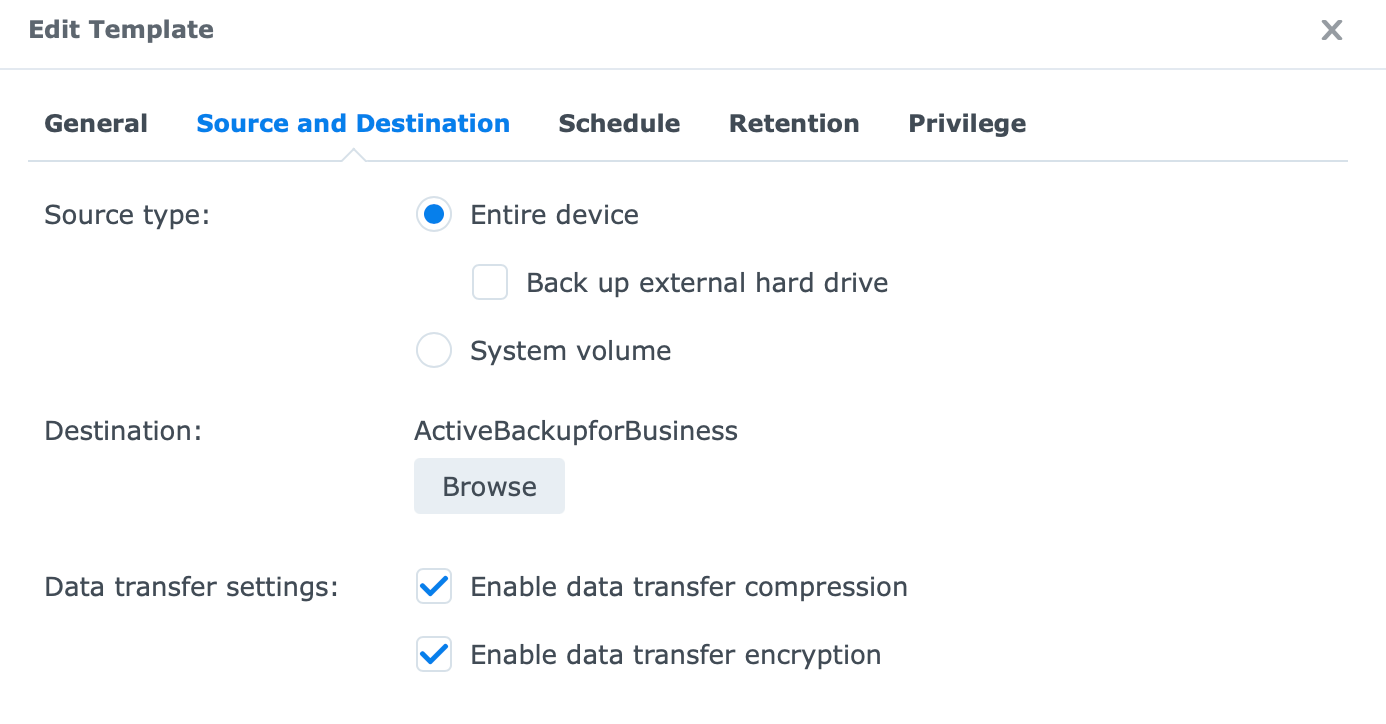
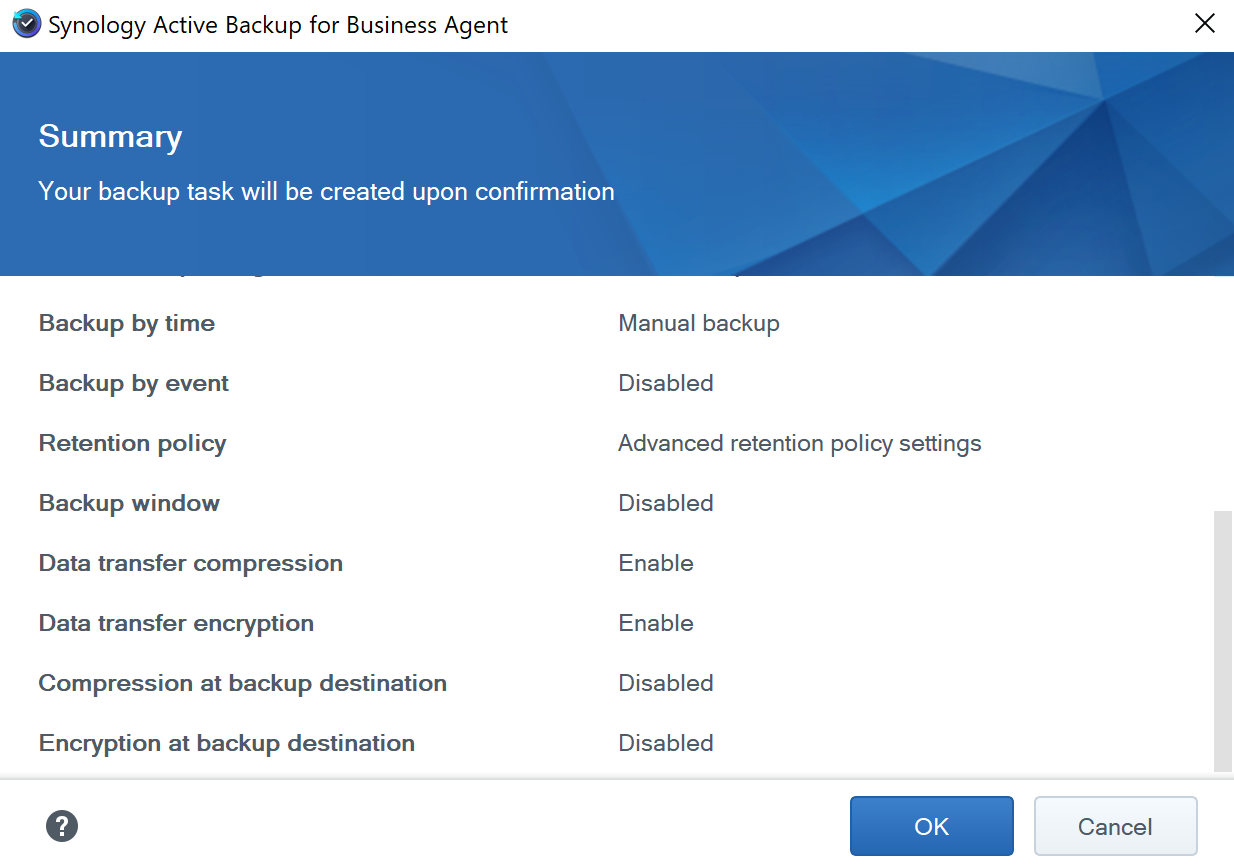
Enable data transfer compression
Enable data transfer encryption
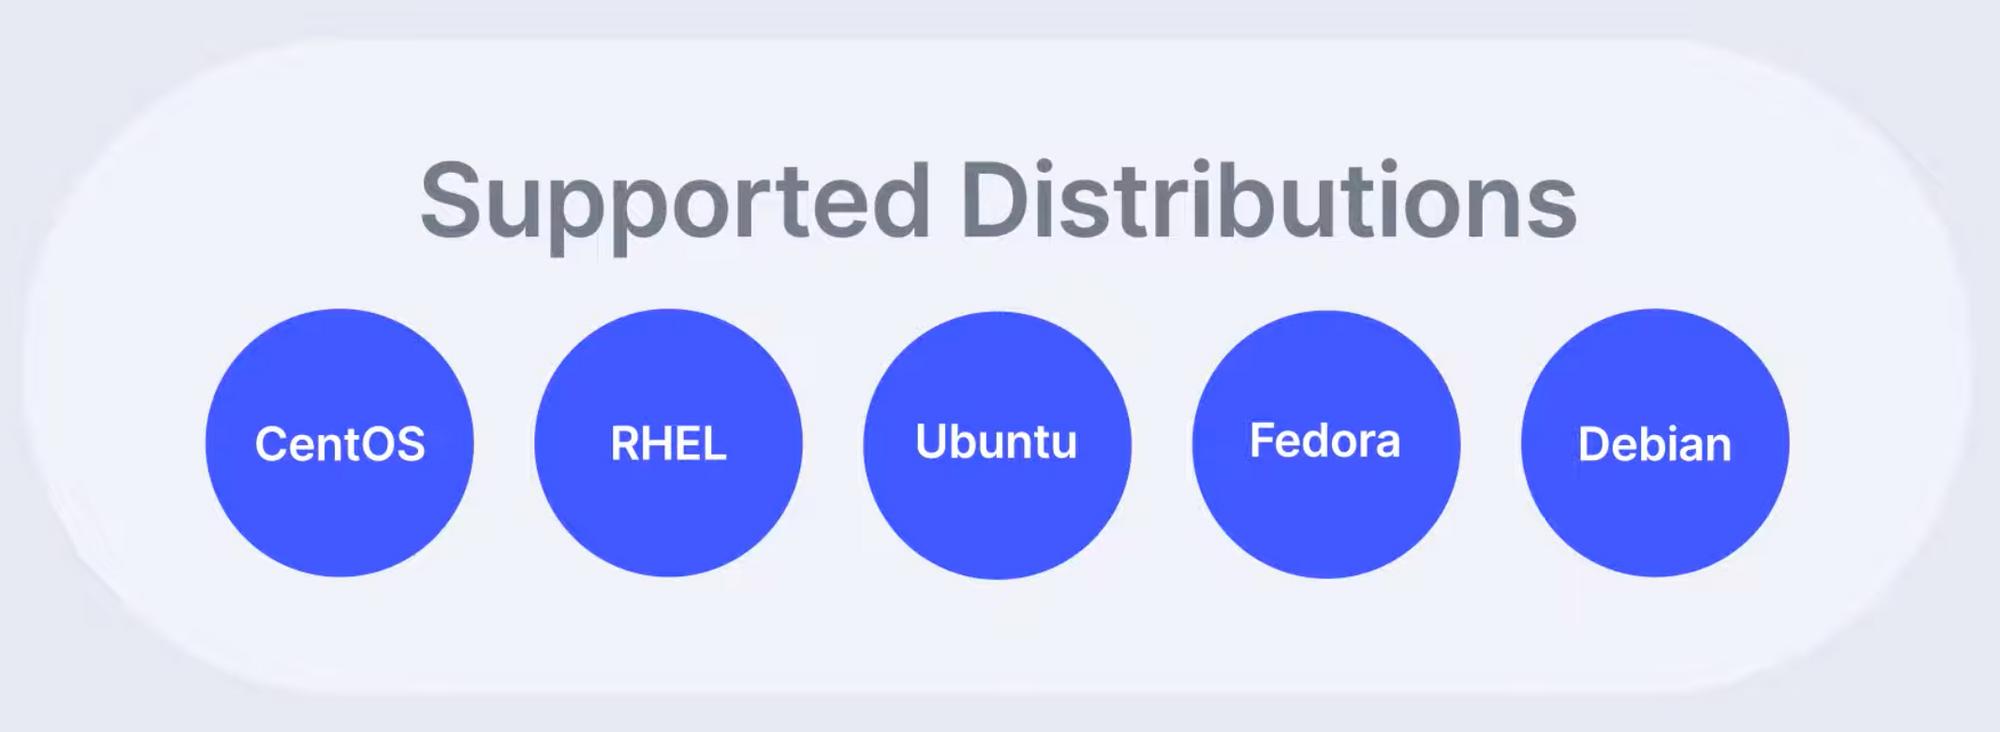
macOS agent support is still under development and its coming

Several new features coming in this version:
- Supports AES-256 data encryption and data compression at rest
- Supports Linux backup using Active Backup for Business Agent for Linux (command line)
- Supports migrating instantly restored virtual machines from Synology VMM back to Hyper-V or VMware
- Fix for ABB skiping backups when encountering bad sectors
Synology's recent addition to their collection of great apps and solutions include a new version of Active Backup for Business package.
In this article, I will reflect on the tool, how it can benefit you and see various scenarios it can be implemented in.
Let's be honest. How many times have you lost data because you didn't have a backup? Anyone who is using a computer, tablet or even a phone now days has at least something they wish to save and never lose right? With that in mind, it's usually a question of how to implement it, how much it cost and why bother with it.
Whats Active Backup?
Most of the time I get asked what's the difference between this and that backup package on Synology? Isn't that the same function? How can I backup this and that, etc?
Before I go further let's make one thing clear. AB (Active Backup) is a backup tool for all your devices that contain data that you wanna backup to your NAS as a final destination. With that in mind, do not mix AB with HB (Hyper Backup app). HB is a tool that allows you to backup your data on the NAS itself to another destination (like a different server, NAS or cloud).
So AB is a backup platform that will allow you to backup your computers (Linux, Win, and Mac - still coming in 2020), servers as well as HyperV and VMware virtual machines using a single solution. Some scenarios will even allow you for agentless pull backups. File backup is one of them. It is possible to set up a path from your NAS to your target computer folder and backup data with no need to install any AB agent tool. More of this later on.
What can Active Backup do for you?
It can do a lot! Did I mention that its free? By free I mean no matter how many clients you have you will not have to buy any licenses at all. Once you try it and see how well it works, you won't spend any more money on backup solutions but this.
All jokes aside what can AB do? Backup your entire machine for a full bare metal restore, backup certain files, backup virtual machines (both HyperV and VMWare), incremental and multi version backups, manage templates for each user or group that will have access to AB and much more.
On top of this AB has a user Portal that will allow all users to get to their backups and content without the need to issue a ticket towards a local helpdesk that will engage IT dep to do it. Now, this is a huge benefit for everyone (I'm sure there are people that will see the upside of this of the bat) who work in medium-large companies.
Backing up and restoring using AB
In this section, I will show two of the most common scenarios using AB. Backing up files and backing up a whole machine as well as restore of specific file and a complete bare metal computer restore using a PXE boot.
Backing up files (agentless)
Let's say you have a number of computers that you wanna backup on a file level. Maybe just users folders or something along that line. With AB you can use this method by following these steps.
- Open up AB and go to the File Server section on the left hand side
- Click Add server button and you will get an Add server wizard.
- Depending on the destination computer you will choose one of 2 options (SMB or rsync). In this example, I will use SMB considering that my computer is a WindowsOS based
- In the server address field enter your computer IP address and enter username and password that has enough permissions to read the data
- Once the test connection has passed (make sure that firewall is not an issue here) you can begin creating a backup task
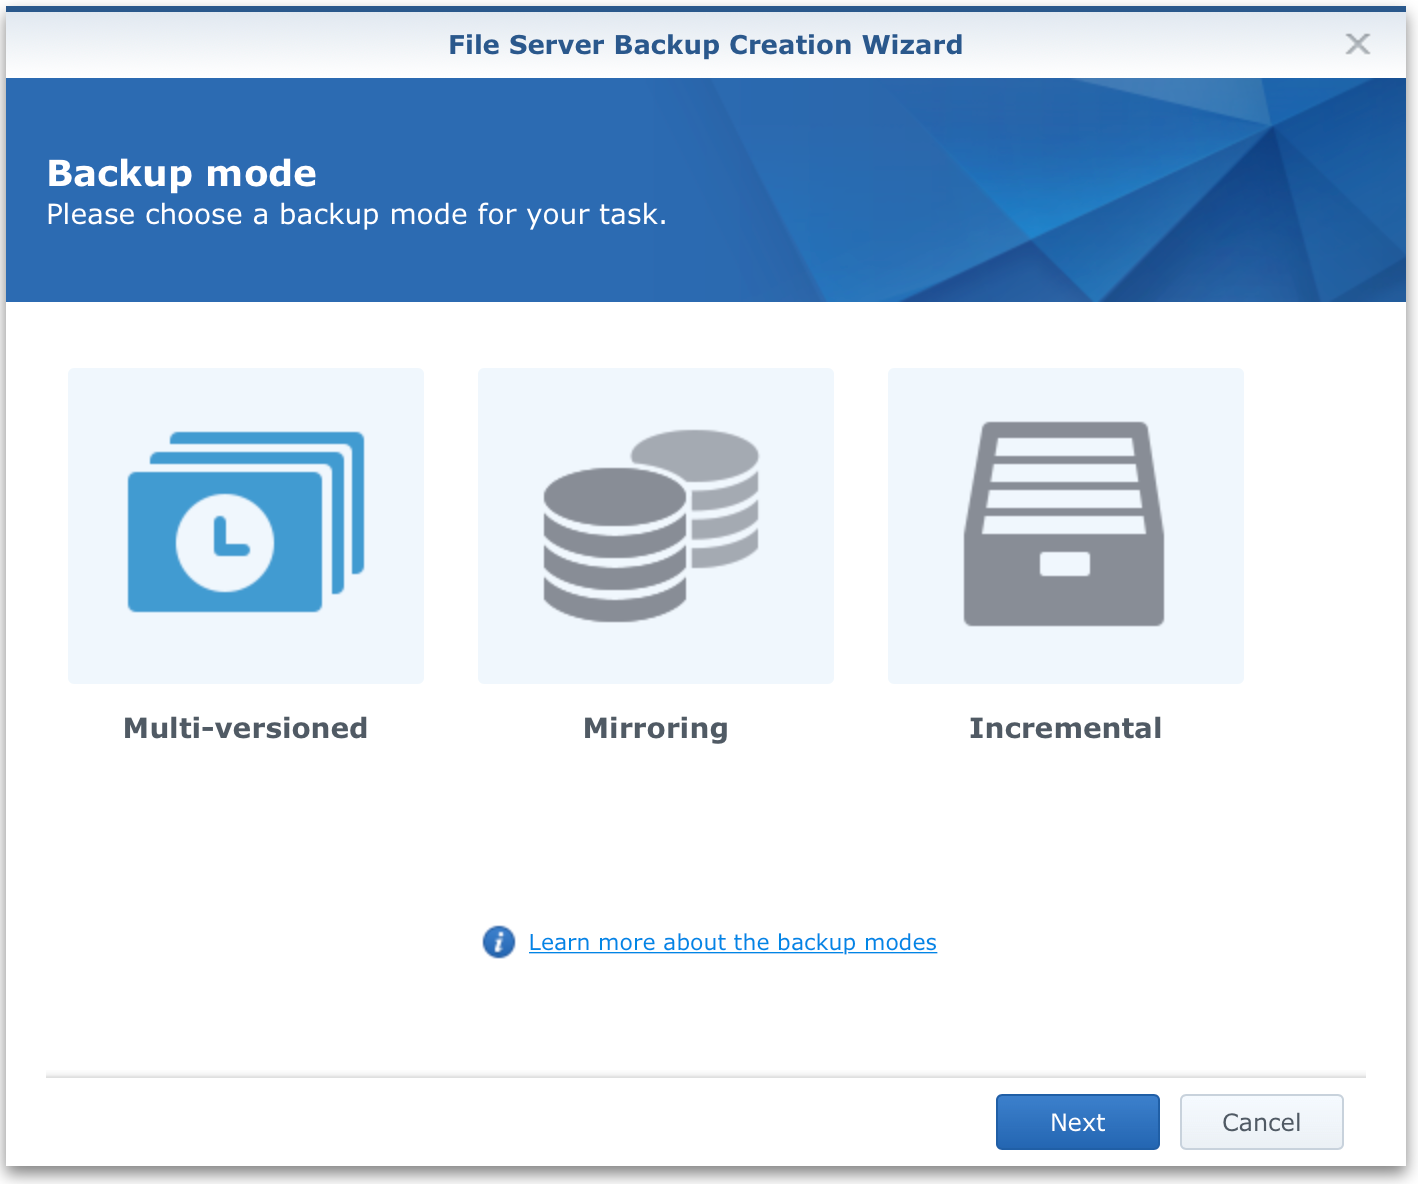
- Choose a backup method of your choice
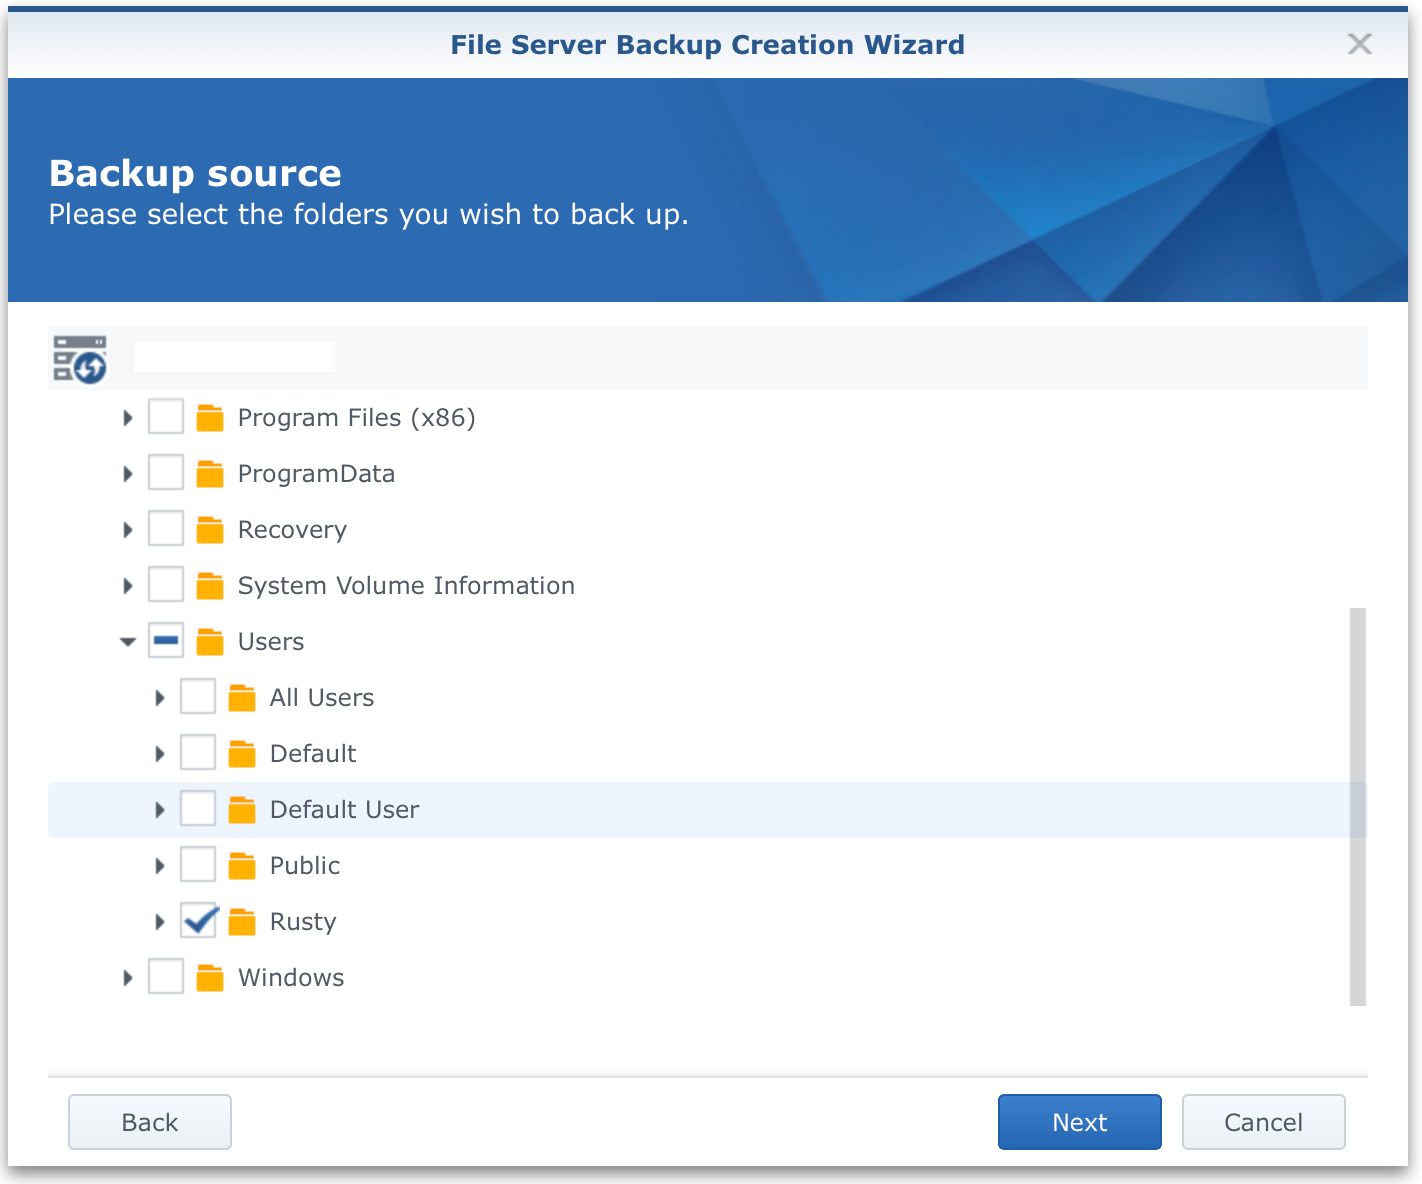
- Select the folders that you want in your backup
- Type in the name of the task as well as the location on your NAS where you want your backed up data to live
- As an option, you can set up a scheduled time table for this job as well
That's it. Now your job is ready to be manually started or triggered by the time table that you have set up
Restoring files using AB Restore portal
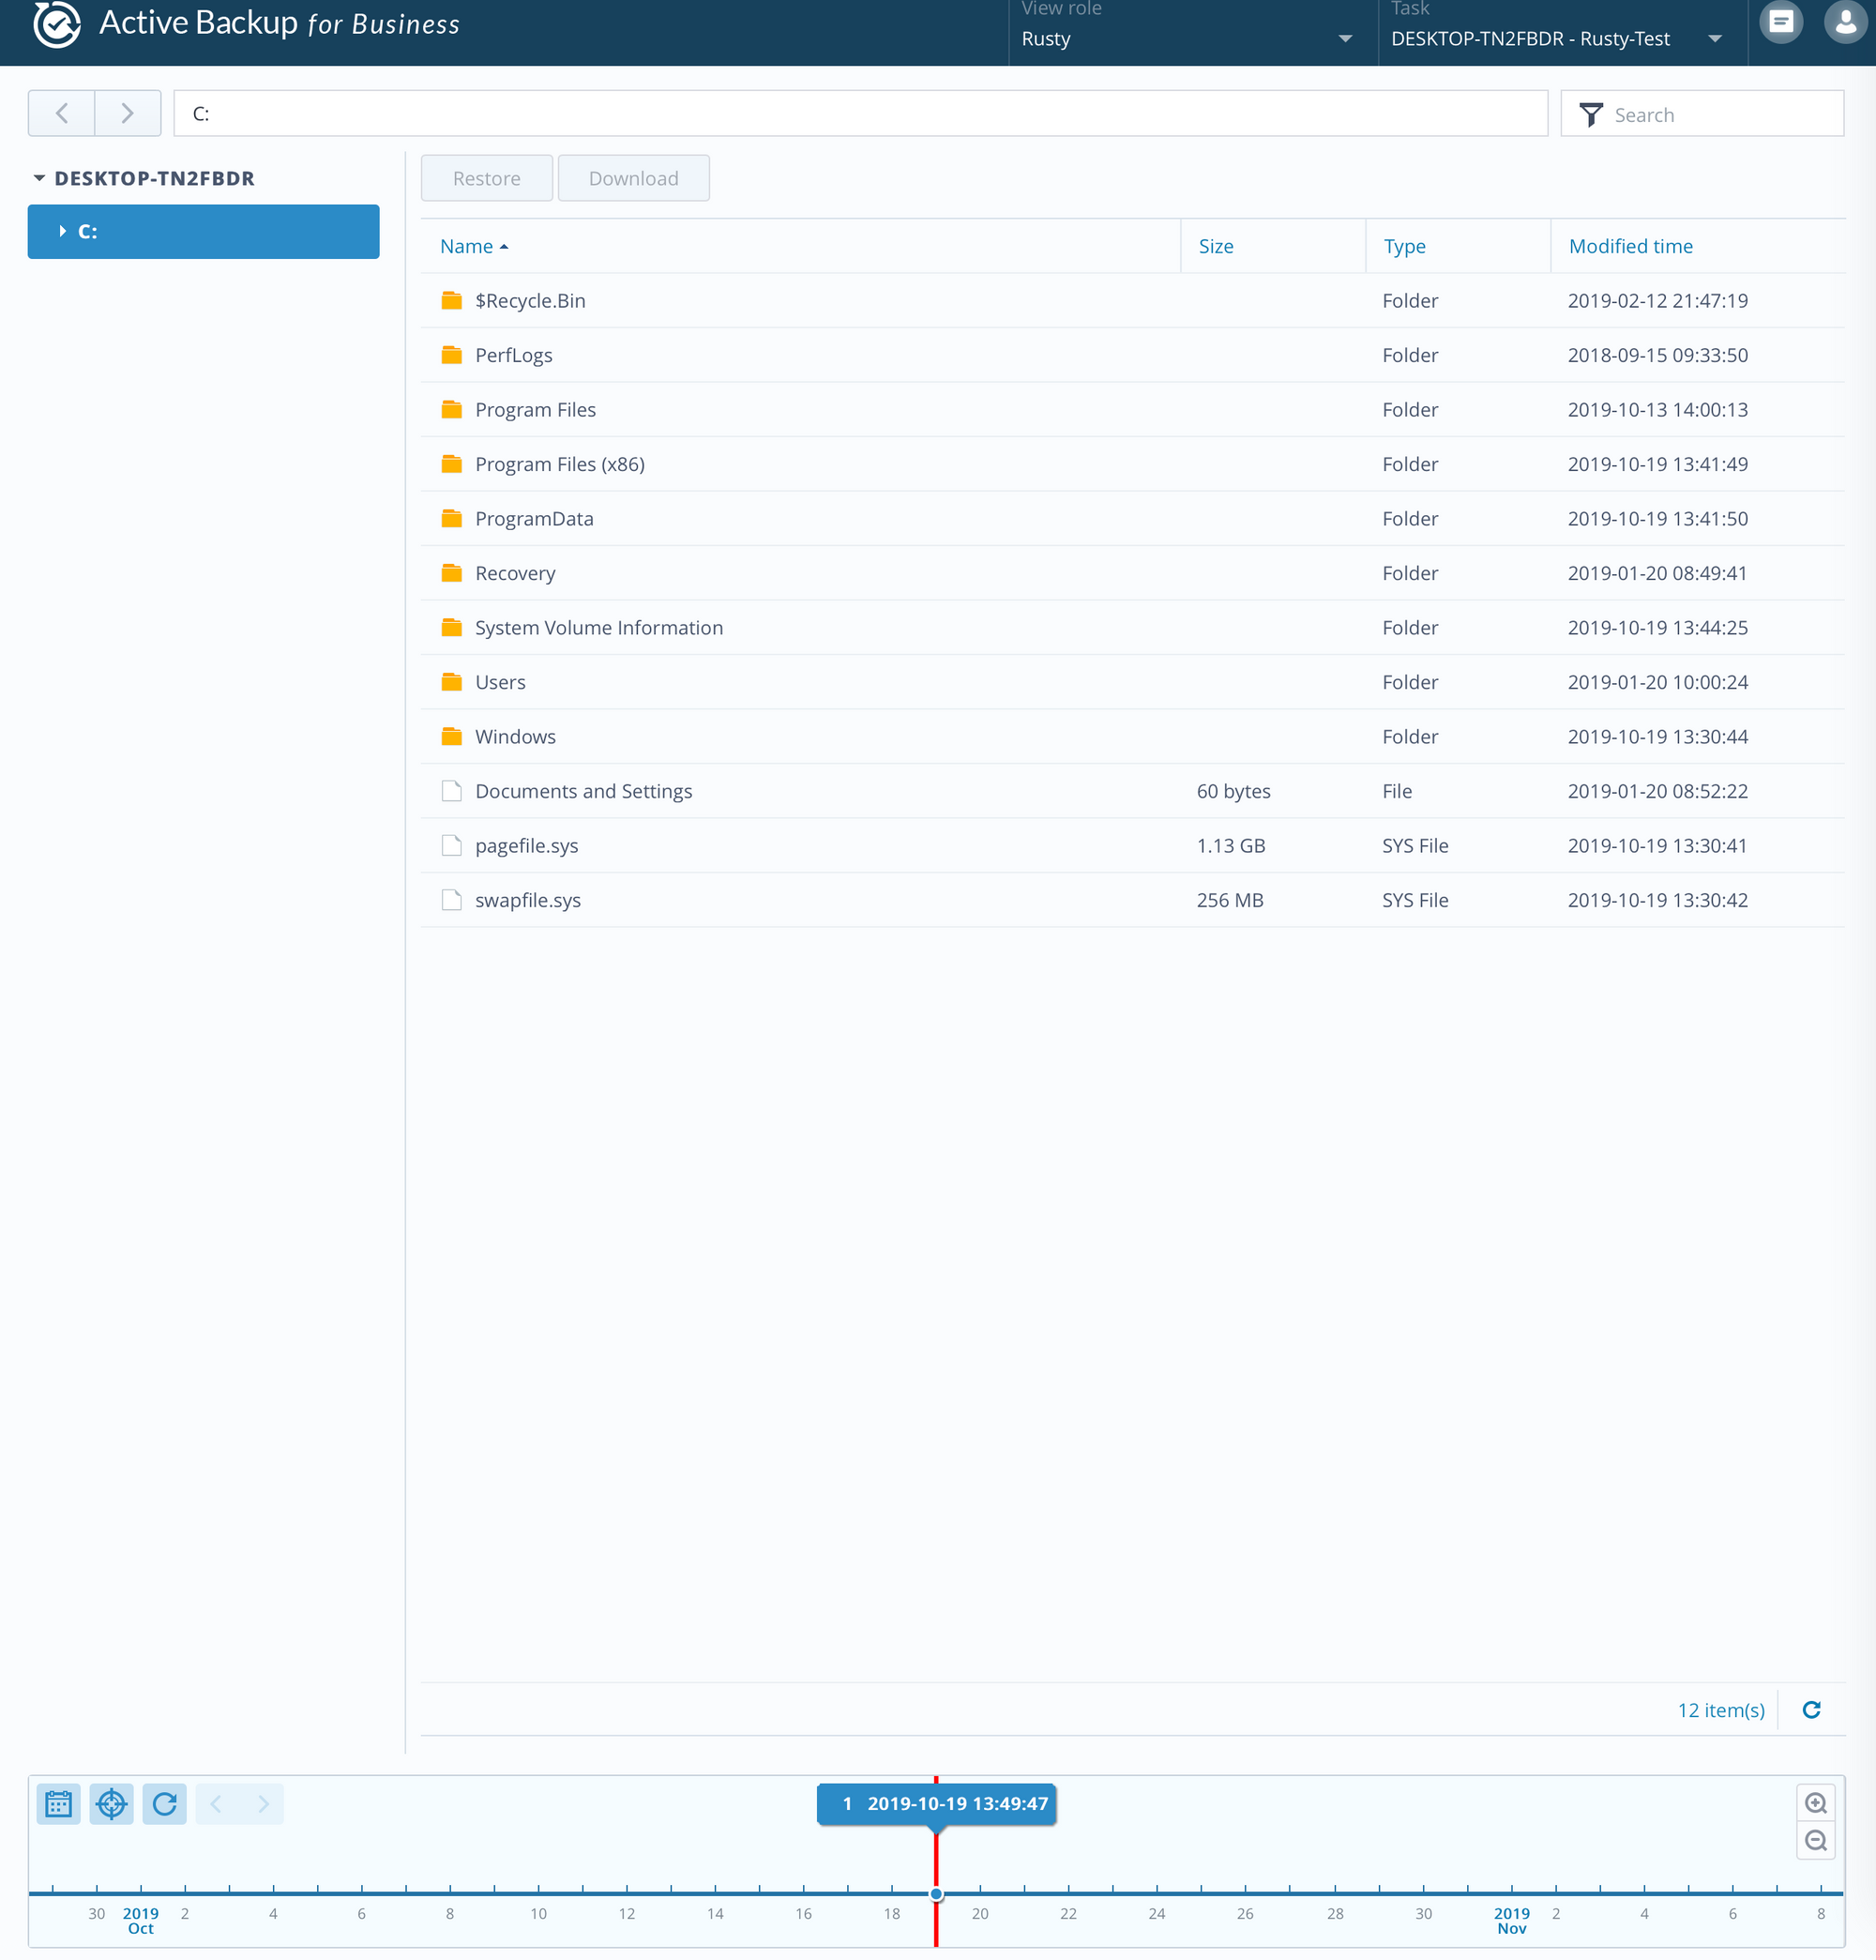
Now that you have completed your backup, let's see how can one restore a specific file from that backup task using Active Backup Restore portal.
You can invoke the Portal via Active backup > File server section using the Open Restore Portal button, or if you are already logged into DSM, by clicking on the Active Backup for Business Portal icon. In any case, user interface will open
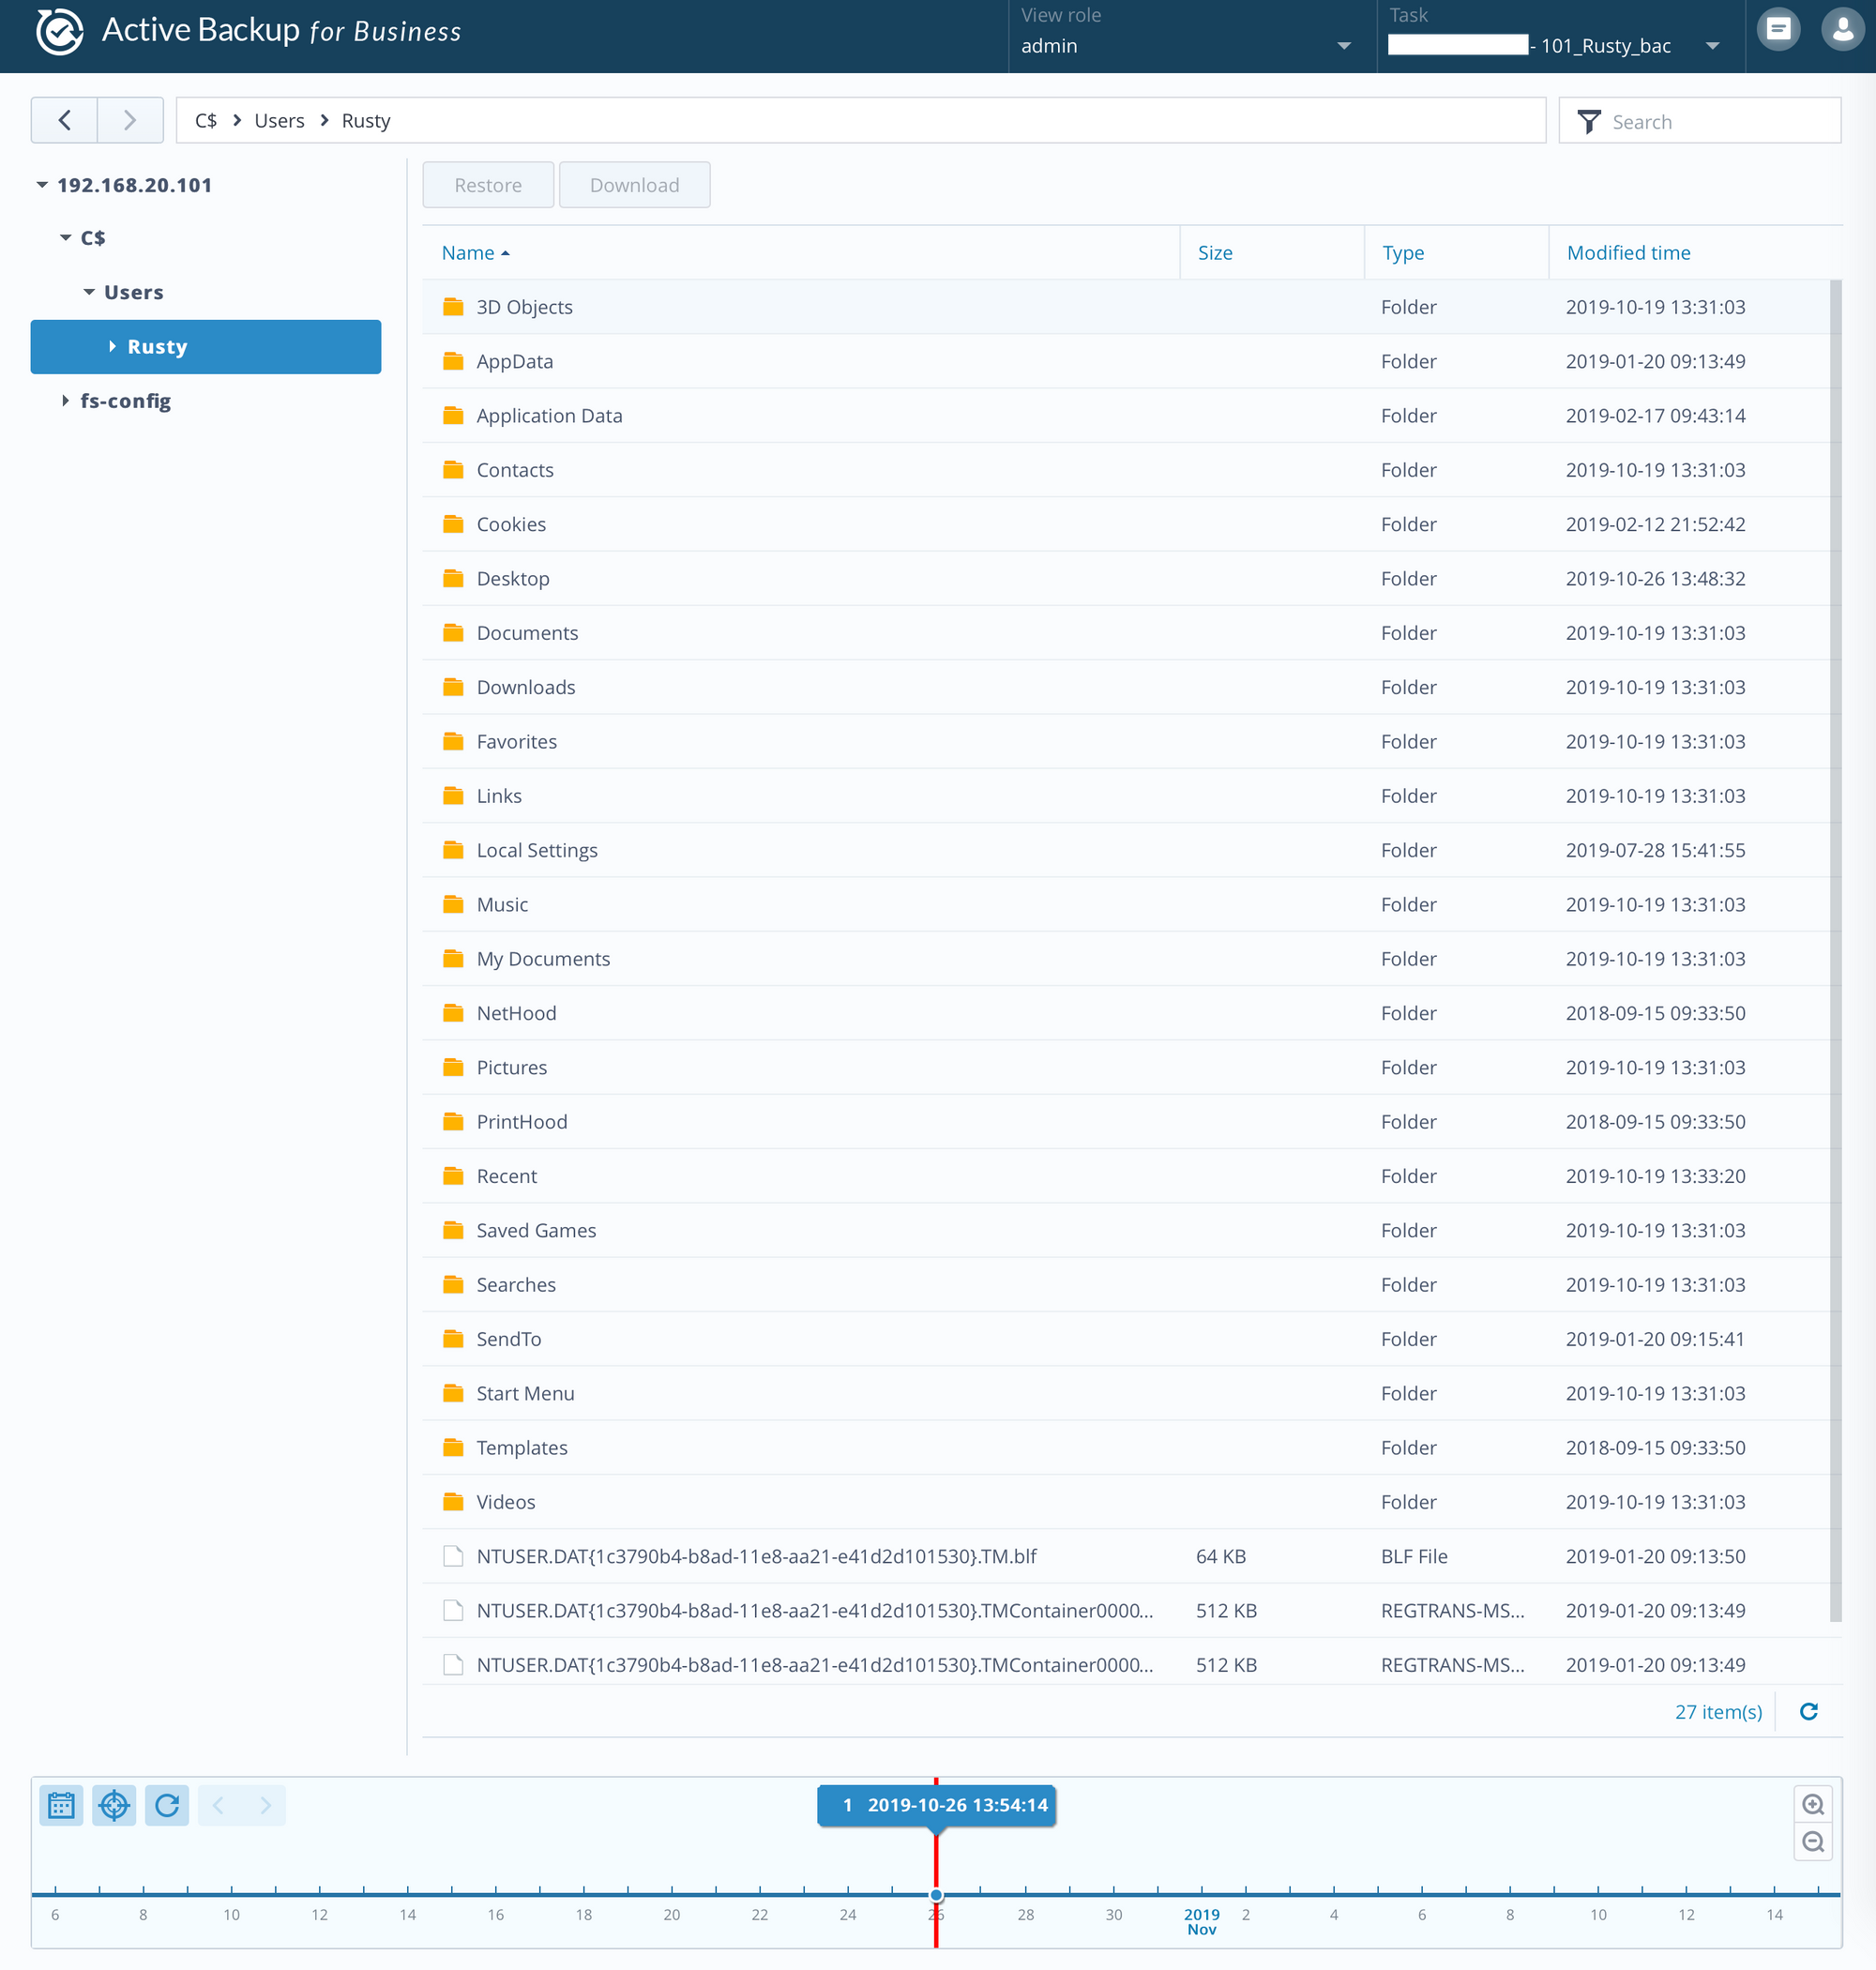
Depending on the user that you are logged into Restore portal, you will be able to see some, all or none of the tasks that AB currently handles. This can be changed by using the "View role" drop down menu on the top. Along side that you will be able to chose and list all the taks that that role/user has.
Now simply find that task that best fits your needs, locate the file and download or restore it to its orginal location using the Restore/Download buttons along the top bar.
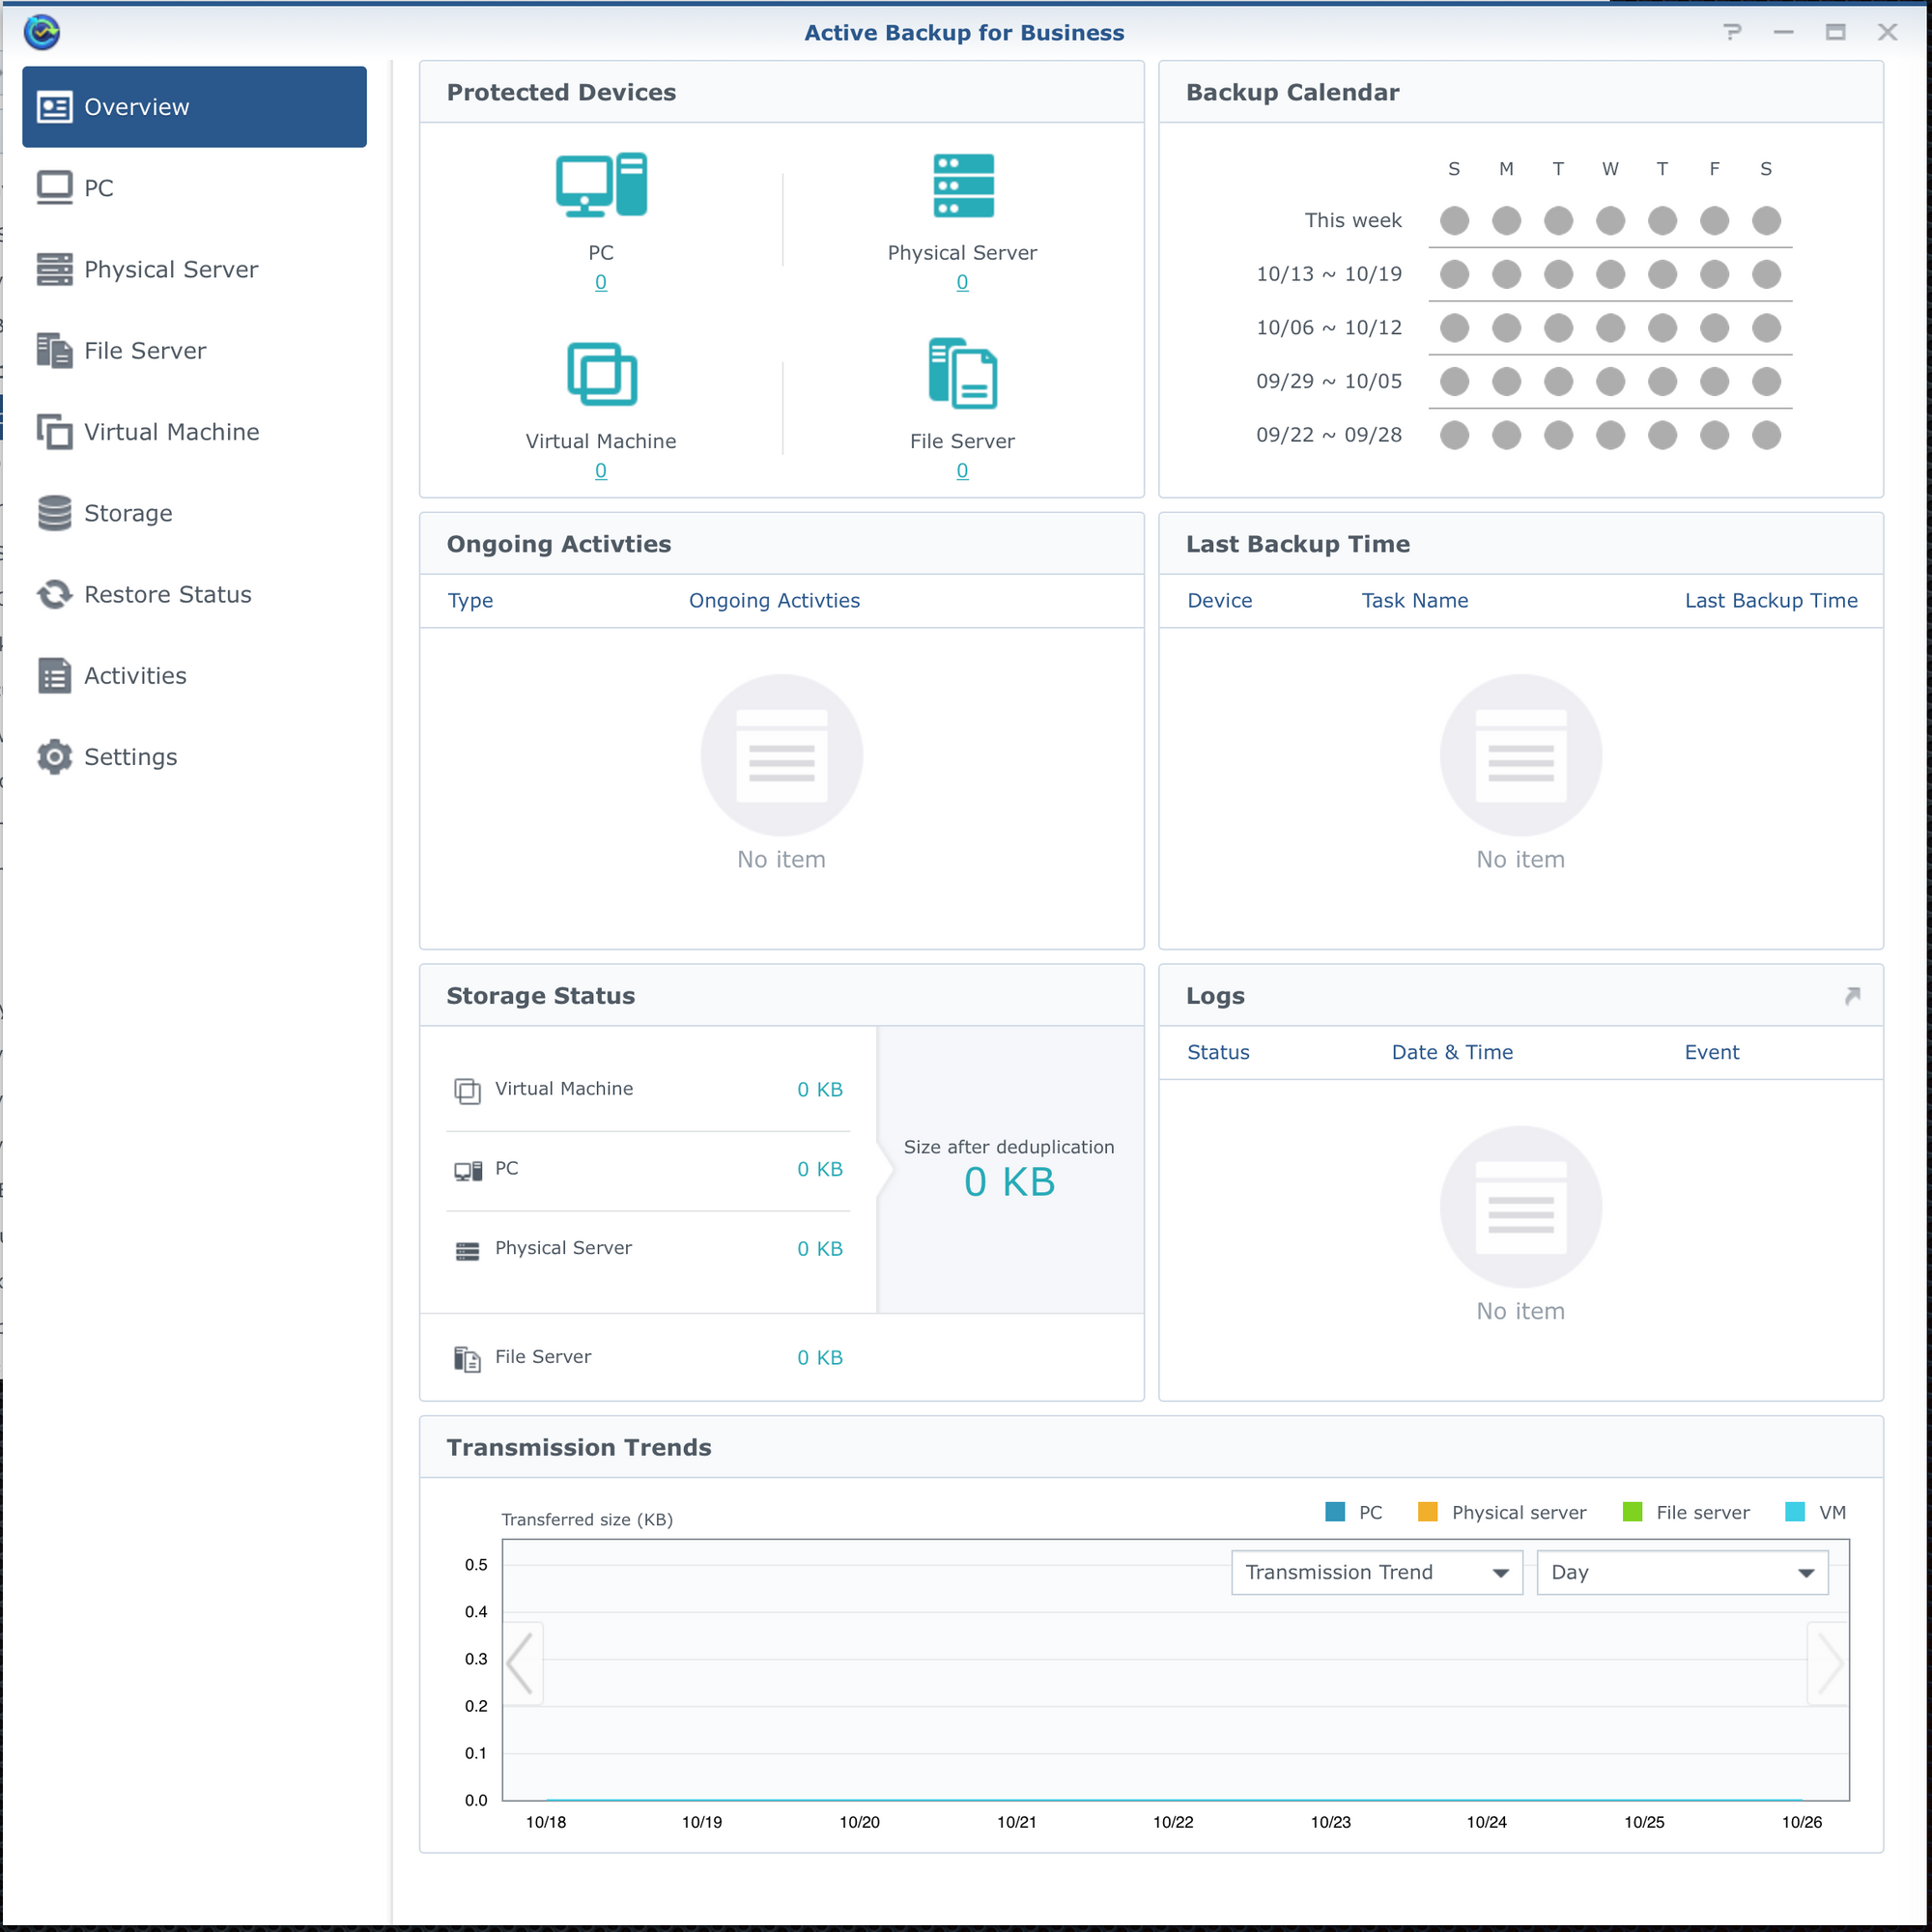
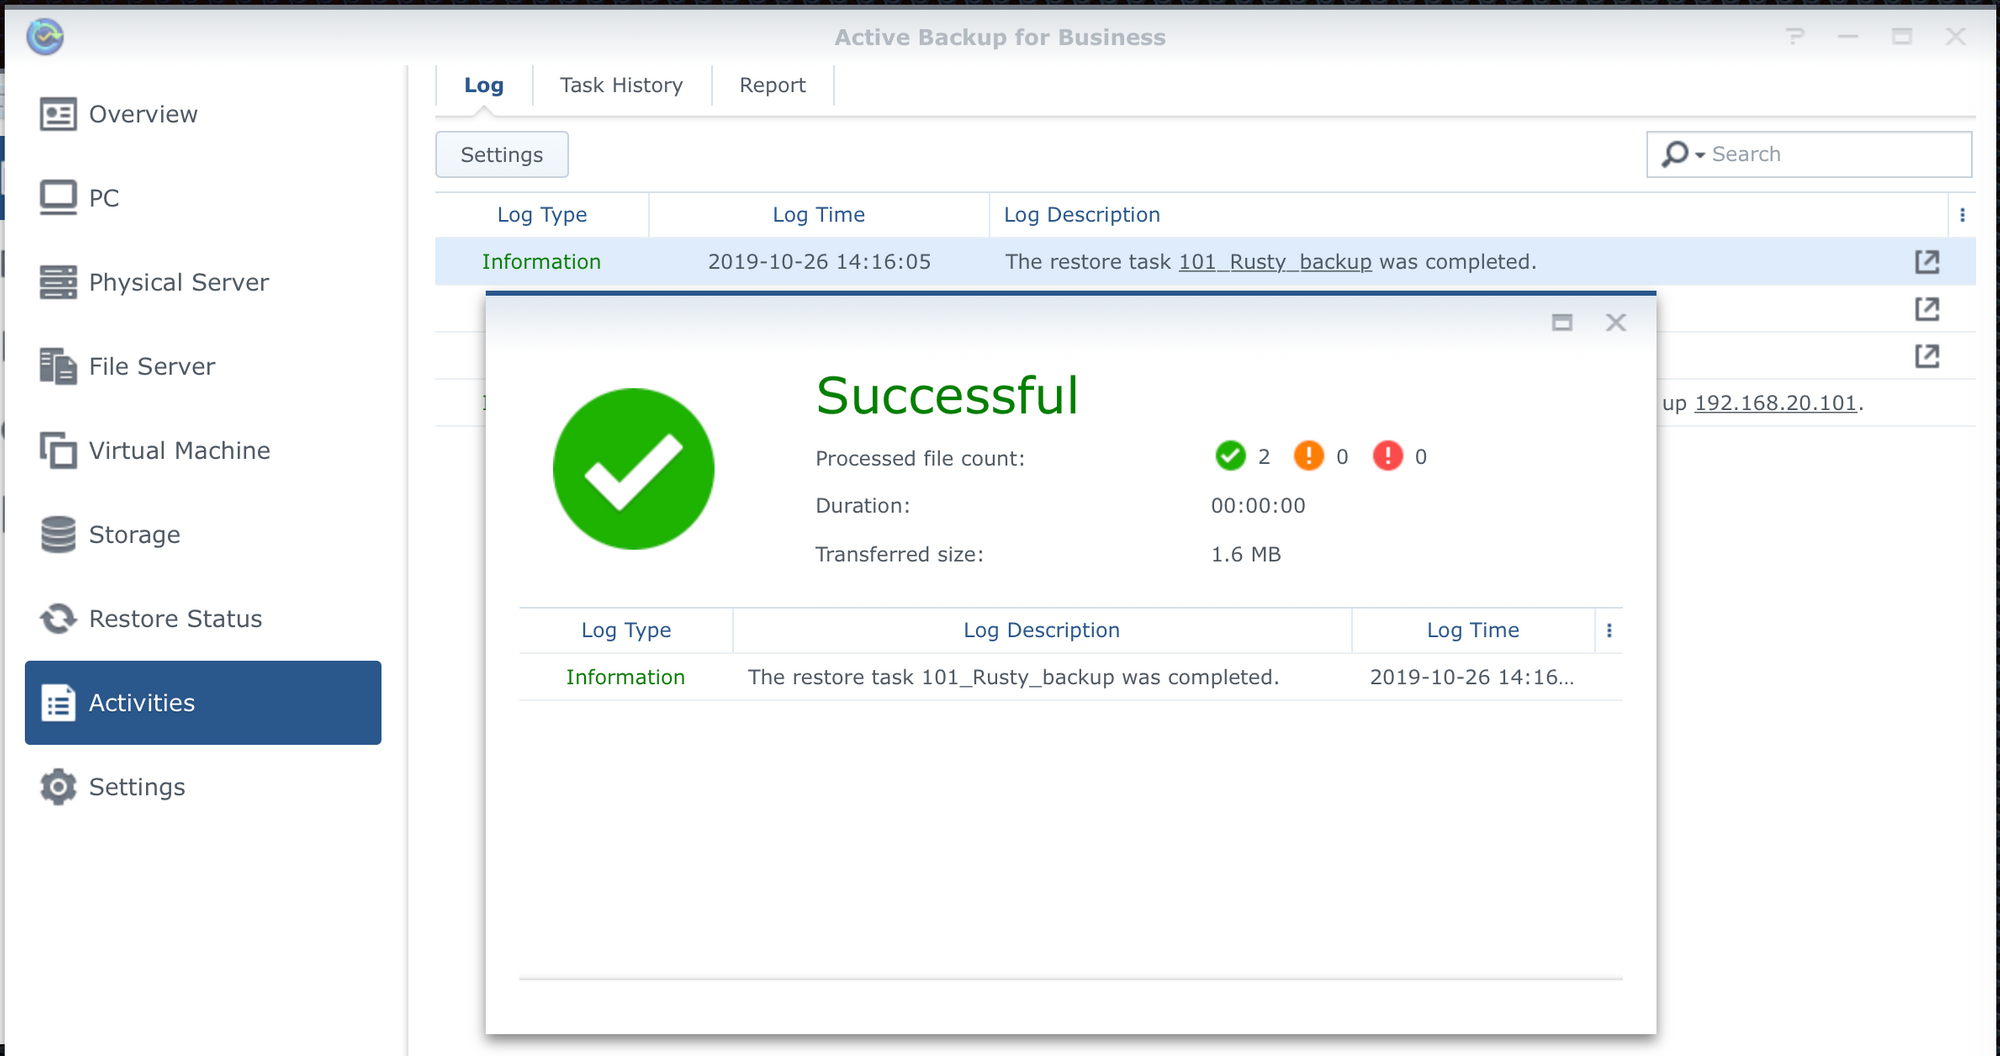
All tasks regarding backups and restore process as well as logs are located in the Active Backup activity section
In the next section I will talk about how you can create a backup of your entire computer and clone that same backup onto a new computer using Synology Restore Media (in ISO format via PXE).
Creating a full computer backup
Now unlike a file/folder backup, full computer backup is not agentless. You will need to install a 32 or 64bit version (depeding on your computer) of Active Backup for Business Agent.
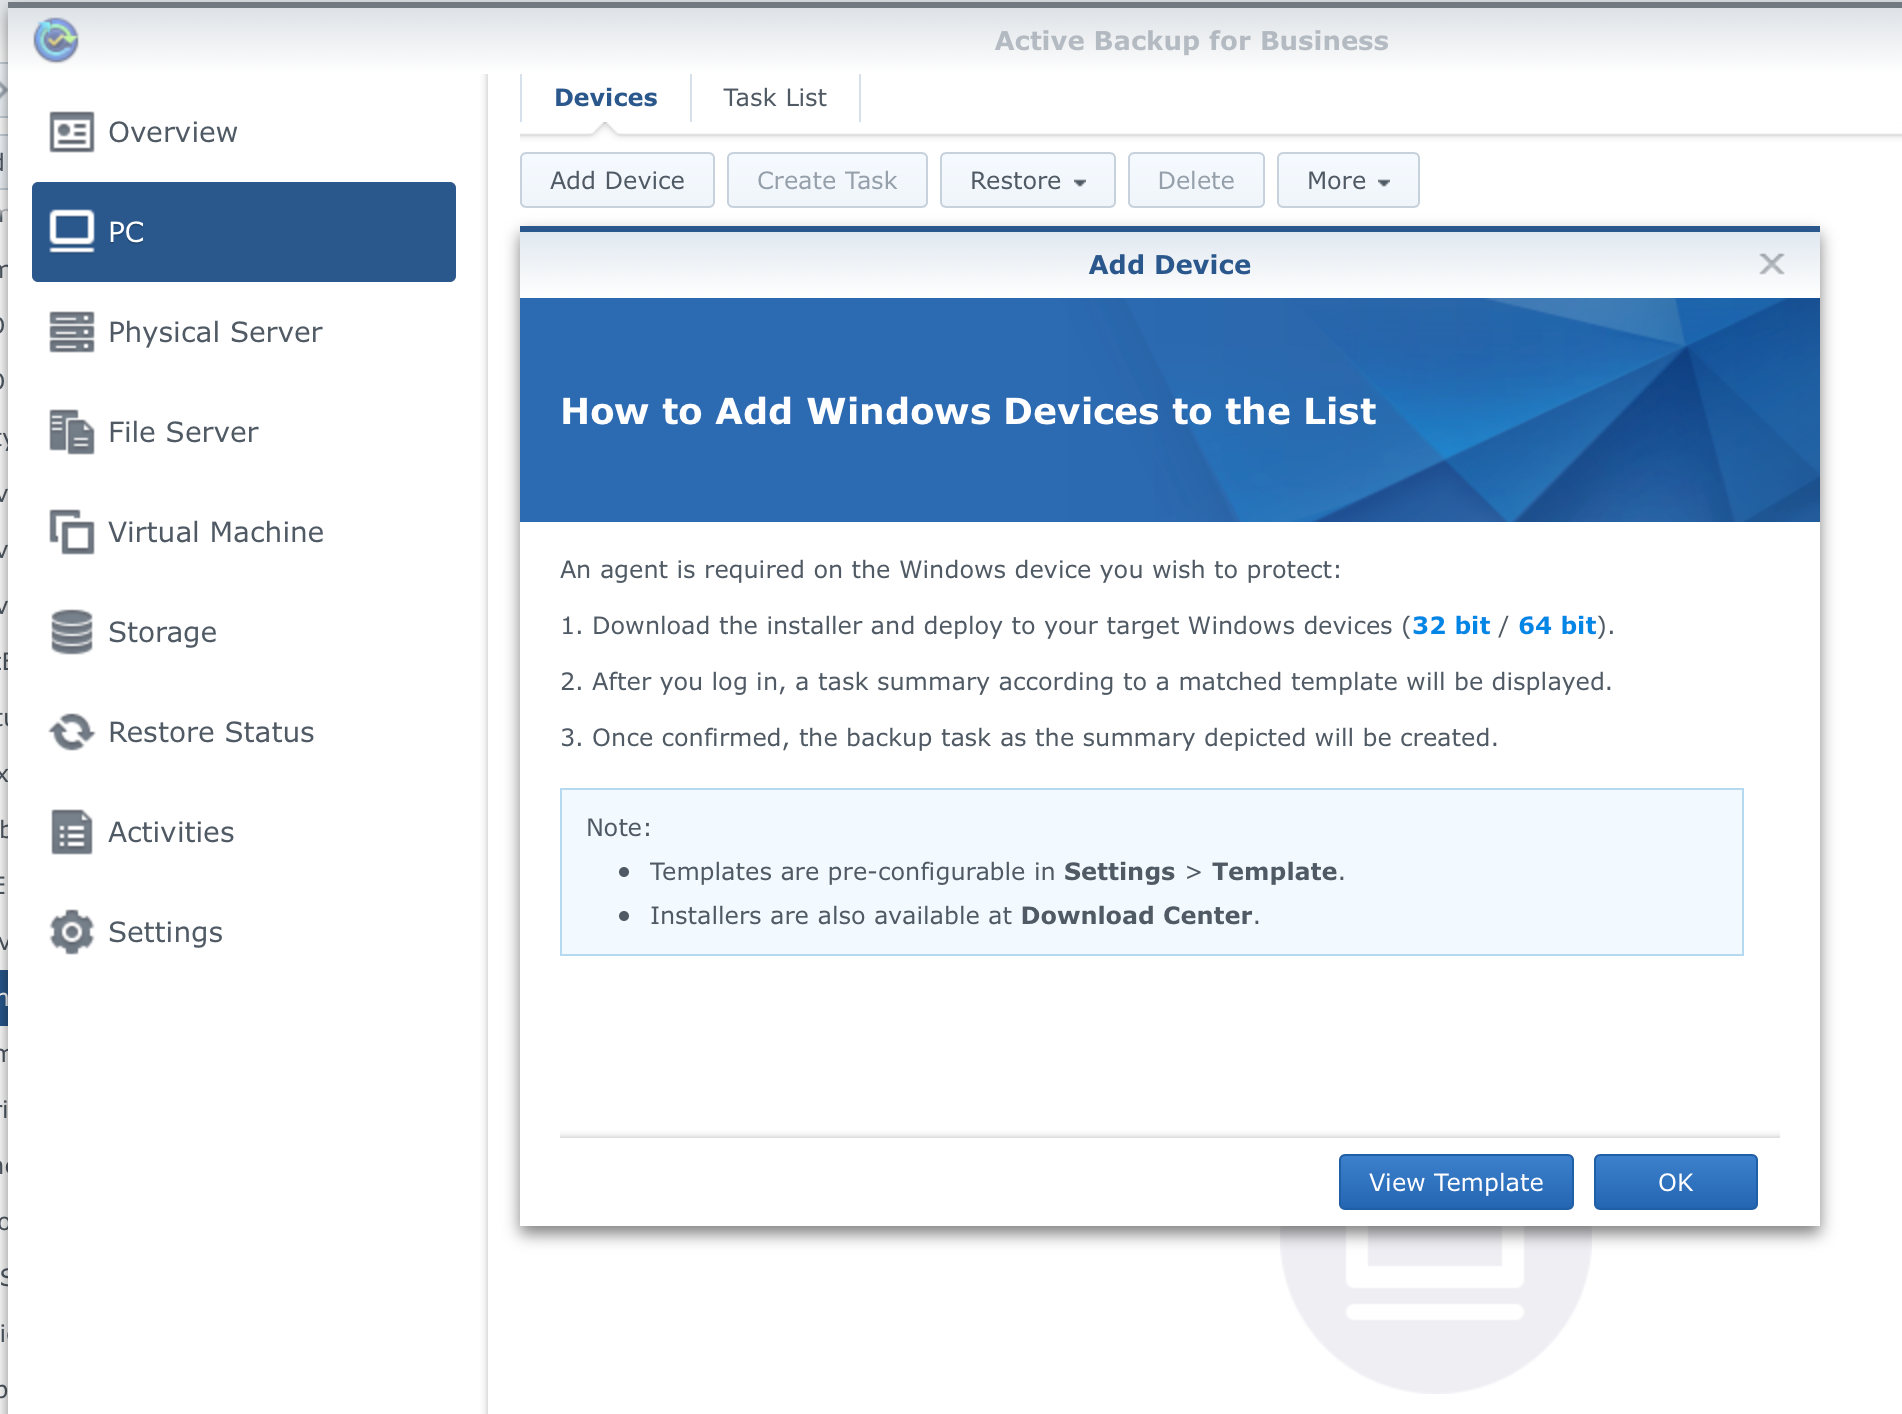
To begin the process you will need to do 2 things beforehand. As indicated by the screenshot above when adding a device to AB for a complete backup process, you will need to install AB agent onto that computer and create a template that that computer and its user (this is a DSM account) will have permission to in order to create a backup in the first place. This is not 100% true considering that there is an admin group based template, but if you wanna create one that fits specific users, their needs (schedule, number of versions, location of the backup, etc) you will need to create a custom template using the Settings section in Active Backup dashboard.
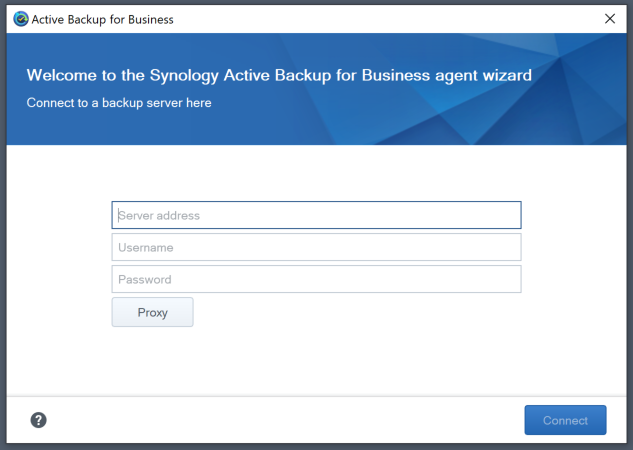
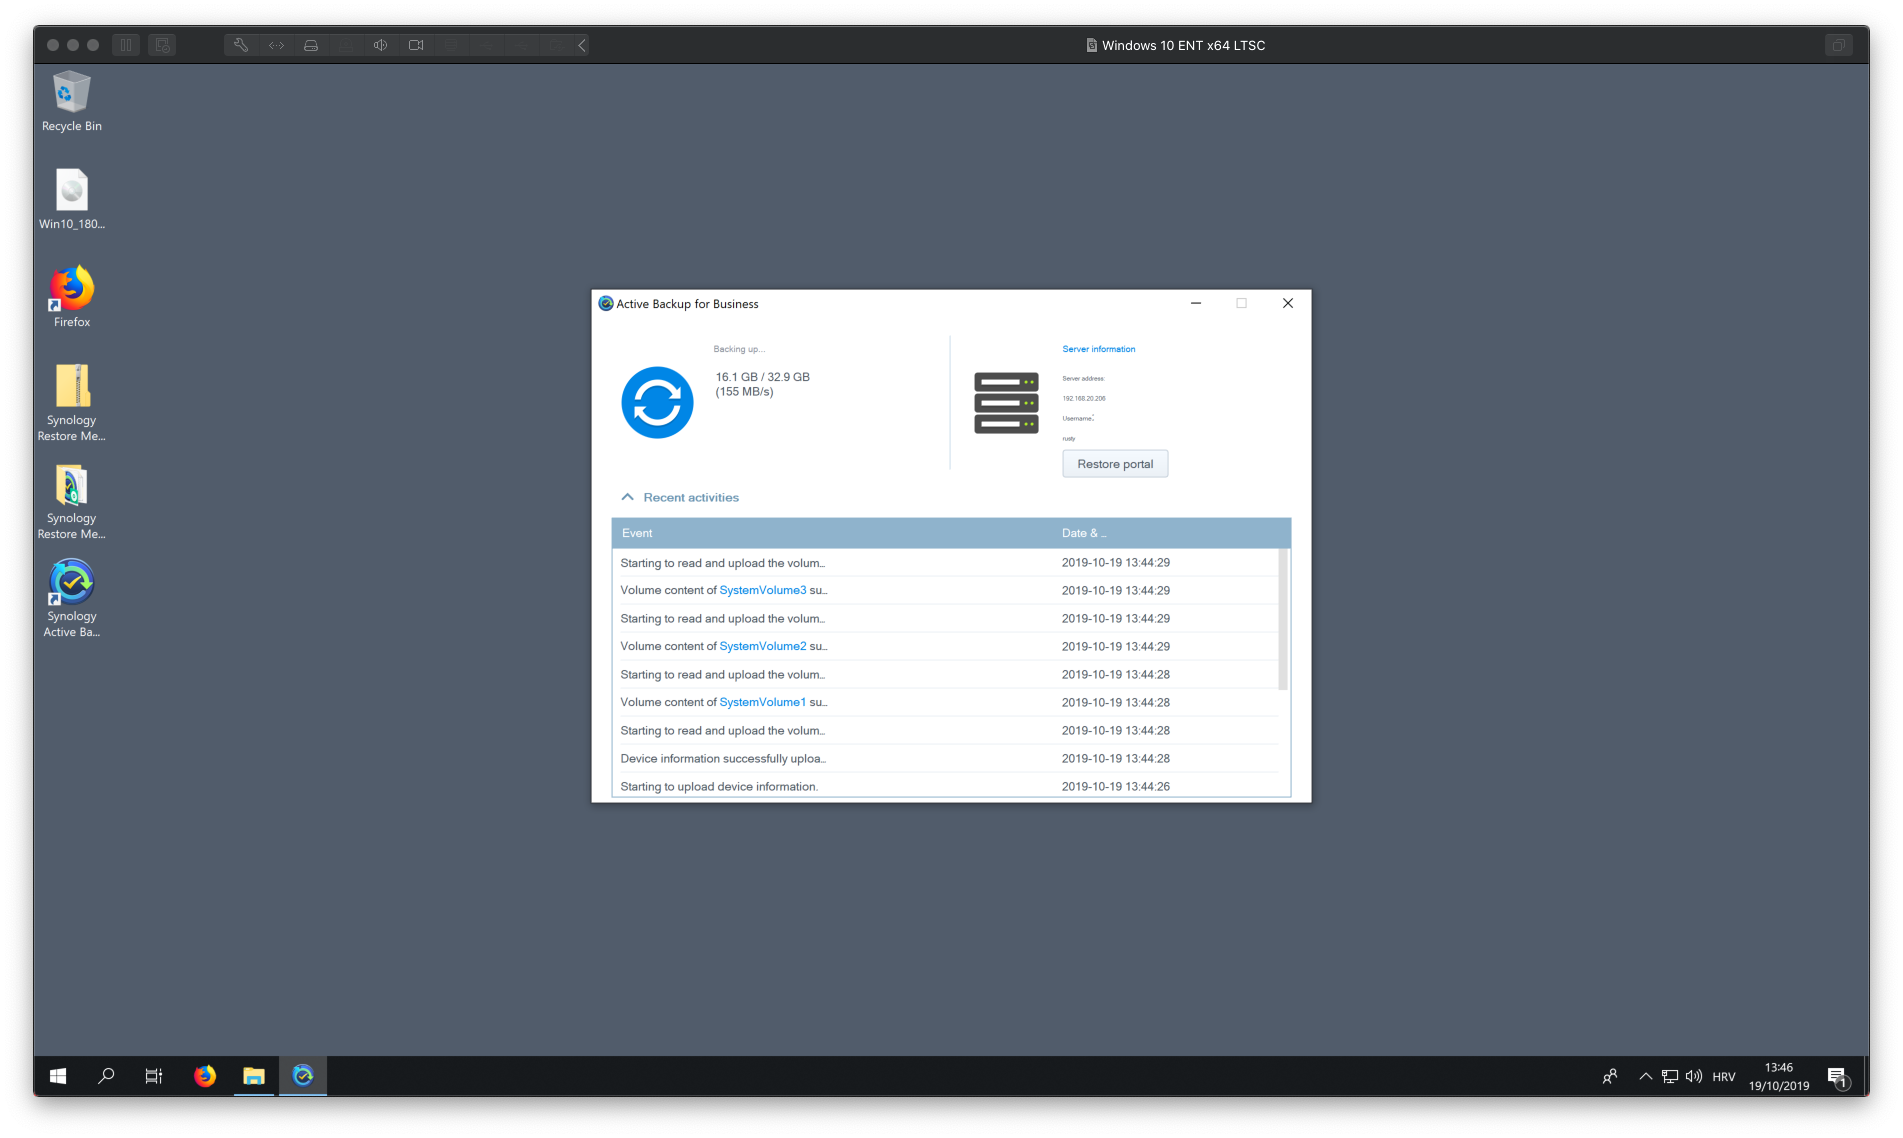
After you have installed the agent and prepared the template, its time to connect your computer using the agent and initiate a backup.
- Log into your computer and open up Active Backup agent
- Log into your AB instance by using the server address, username and password (these are all NAS/DSM informations)
After you have setup the task, your computer will be visible in the AB dashboard as well as any tasks running.

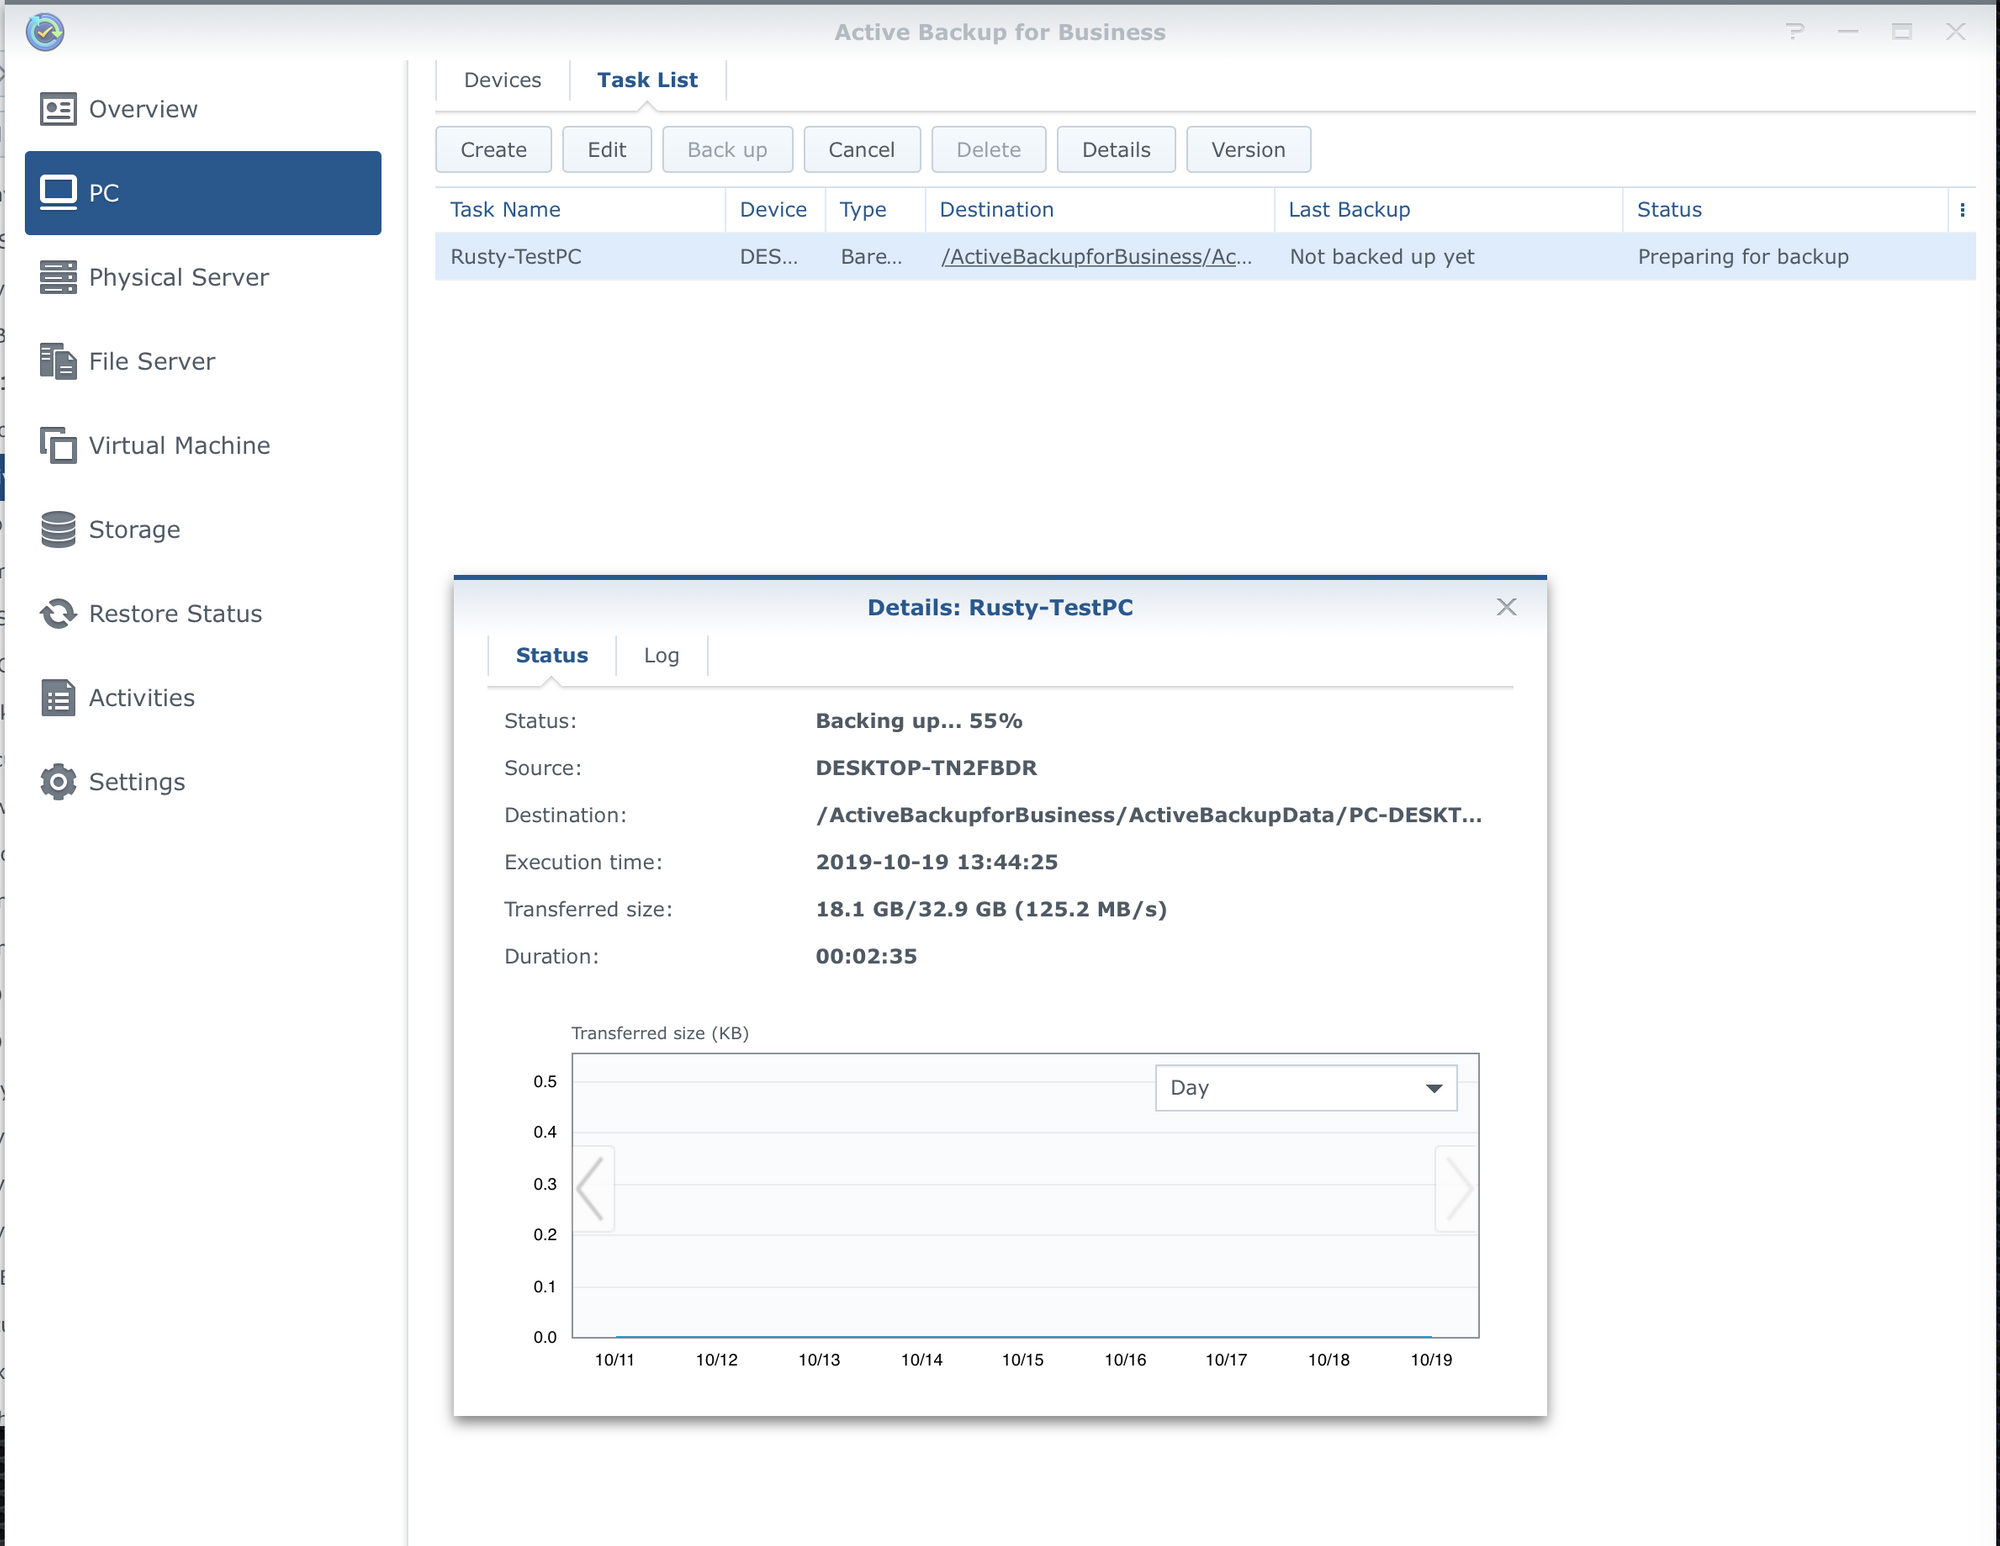
After the backup has completed you have two options. One is to use the Restore portal like in the first scenario to access the backup on a file/folder level and pull any single file that you might need.
Second option is to restore this backup as a completely new computer with all the data on it.
Restoring a full computer backup using Restore Media (PXE method)
When restoring your machine onto a new computer you can do it using a USB key or a DVD/CD restore via ISO file (but really who does that in 2019?). I will focus on the ISO method that will be run on the computer via a network boot (PXE).
To make this work you need several things up and running. First, we need to create a Recovery Media (USB or ISO) and then setup a PXE platform that will actually use the ISO file to boot up the computer and allow it to connect to the Active Backup server.
For a PXE boot configuration please have a look at this tutorial. PXE process will not be covered in this tutorial.
To create a recovery media you can open up Active Backup on your NAS and switch to PC section. Under the restore drop down you will have Create Recovery Media.
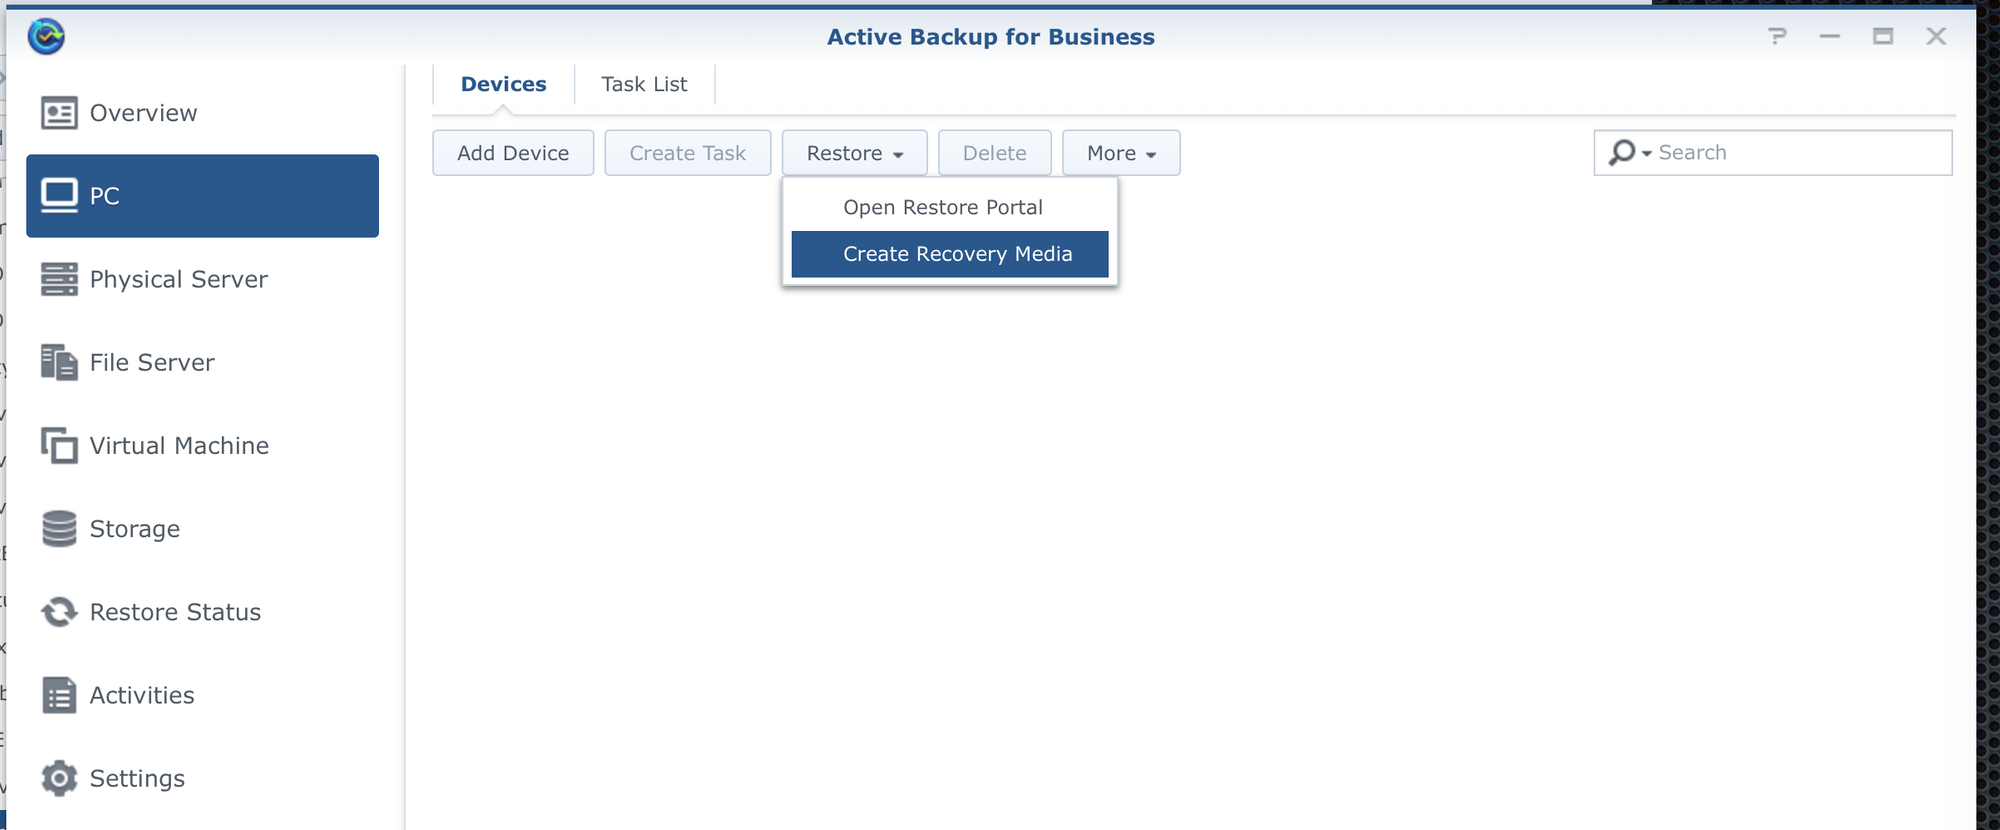
One would expect that this will start a wizard but that will not happen. In fact, you will get a link to a valid PDF document that covers the whole Active Backup Media creation.
This is the URL: https://global.download.synology.com/download/Document/Software/AdminGuide/Package/ActiveBackup/All/enu/ABB_Recovery_Media_Creation_Guide_enu.pdf
In short you will need to download the installer onto a Windows OS machine (no alternatives at this moment) and then, using a wizard, create an USB key or an ISO file. This process will also automatically download Windows Preinstallation Environment (Windows PE) and Windows Assessment and Deployment Kit (Windows ADK) (if they are not already detected on the computer), so there is no need to find them upfront.
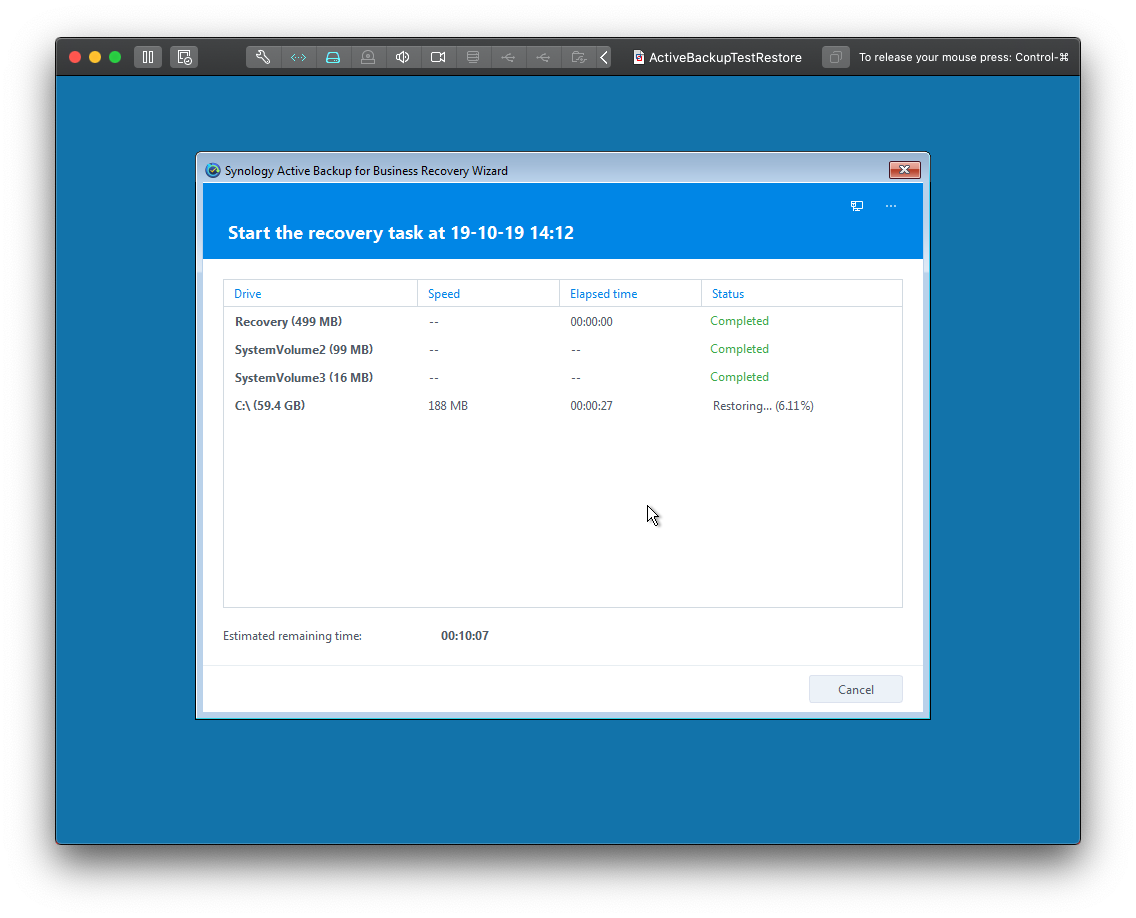
After the process has completed, you have a method of booting your bare metal computer and restoring a complete machine backup (or single volume) onto it.
Regardless of how you will boot your computer, after the initial procedure, you will be greeted with the following Recover wizard window.


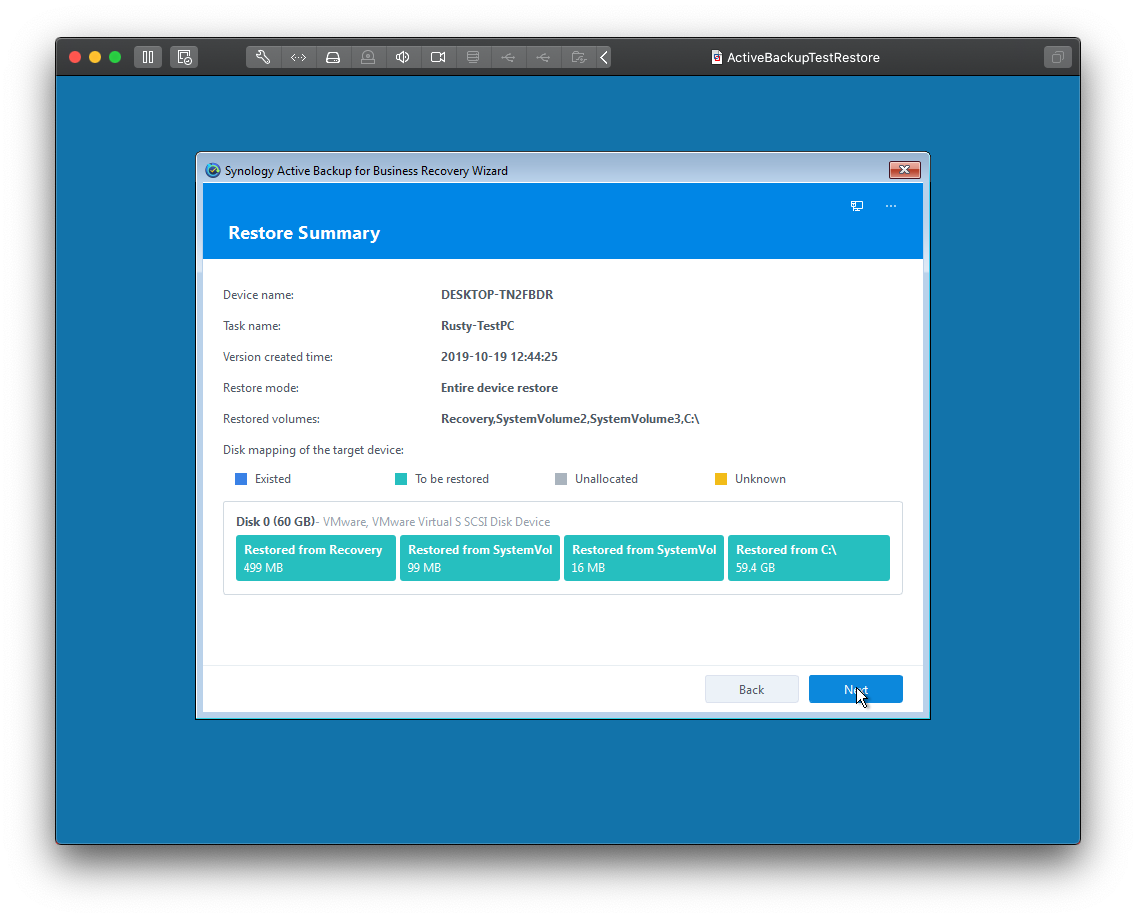
That's it. Easy, simple and powerful. One thing to point out here is that at the beginning of this restore you will be greated with the same server/username window where you need to fill in the address of your Active Backup server. Once again, you can fill in an FQDN address of your Active Backup location if for example, you are doing an Internet restore. In any other case just enter the IP address of your NAS.
In summary, Active Backup at the moment is a powerful platform that will cover all your backup needs. Remember that this tool covers VMWare (ESXi) and HyperV environment as well (might do a tutorial on that as well at some point). As always feel free to comment on the subject. Thanks for reading!