Bitwarden - LiveSync feature

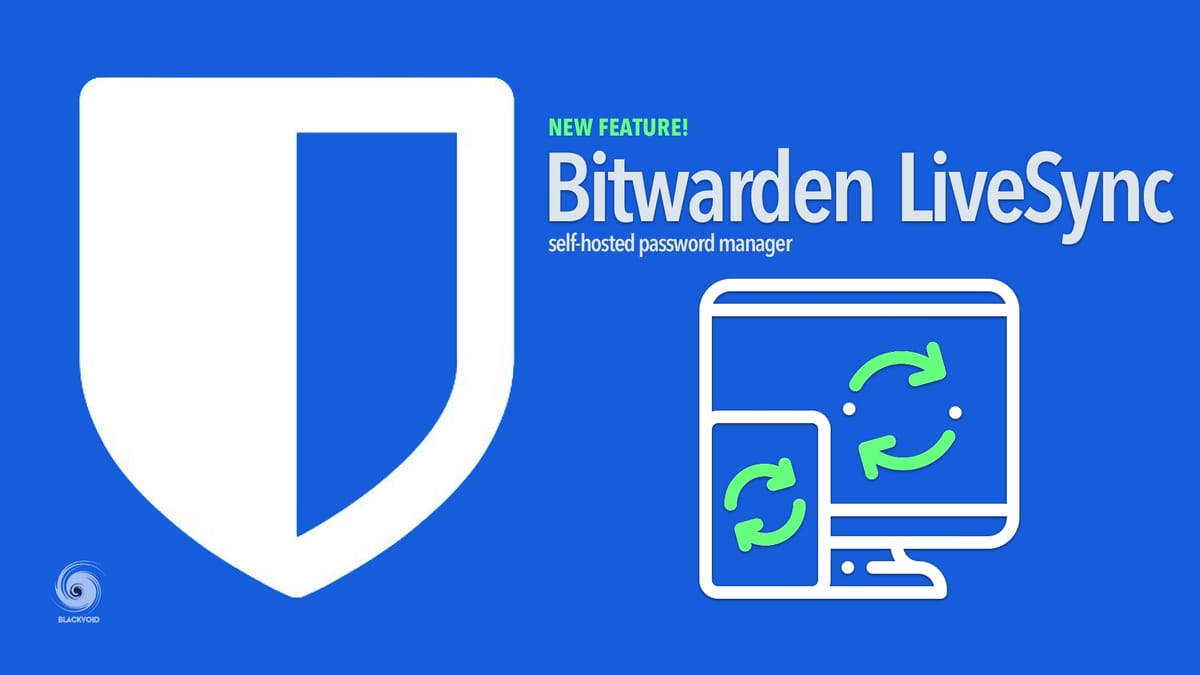
This update will focus on the "LiveSync" feature that offers BW users instant sync of any updates across platforms. So for example, if you add a new entry using the web UI that same entry will be visible in any web browser extension as well as your app. The process works in all directions and it's really instant.
This is possible using the WebSocket protocol. Considering that the official version (paid) method will not work with this custom one, developers have offered an alternative that works just as well.
In the default setup of this image, you can see that the web ui is using one port (port 80 by default) and that there is also a port 3012. This is the port that can be used for all WebSocket needs.
There is a prerequisite for this to work and that's a reverse proxy (more info here: dani-garcia/bitwarden_rs). Now I will assume that you already are using it (there is also a resource on that) but keep in mind that in order to make this work, setting up a reverse proxy entry via DSM UI will NOT give you the desired effect.
As you can see in the link above there are 2 application paths that need to be set via reverse proxy. This is not possible using the UI and needs to be done by hand.
Now I will assume also that you have had your BW setup so far via the built-in reverse proxy, so the next steps need to be followed (if you haven't then just skip to step 3).
01. Stop your BW container
02. Delete the existing reverse proxy BW entry from Control Panel > Application Portal > Reverse proxy
03. Using a text editor create a .conf file with the name of your choice (custom_rp.conf for example)
04. Paste the following content inside it and change the following elements!
- server_name > enter your bw public domain name
- ssl_certificate > path to your SSL certificate (full chain would be preferred)
- ssl_certificate_key > path to your ssl certficate private key
- proxy_pass > change the URL to point to your NAS ip address as well the port that you are using with your BW docker.
server {
    listen 443 ssl;
    listen [::]:443 ssl;

    server_name your_bitwarden_public_domain_name;

    ssl_certificate /path/to/your/ssl/cert/fullchain.pem;

    ssl_certificate_key /path/to/your/ssl/cert/privkey.pem;

    location / {

        proxy_connect_timeout 60;

        proxy_read_timeout 60;

        proxy_send_timeout 60;

        proxy_intercept_errors off;

        proxy_http_version 1.1;

        proxy_set_header        Host            $http_host;

        proxy_set_header        X-Real-IP            $remote_addr;

        proxy_set_header        X-Forwarded-For            $proxy_add_x_forwarded_for;

        proxy_set_header        X-Forwarded-Proto            $scheme;

        proxy_pass http://NAS_IP_ADDRESS:80;

    }

    location /notifications/hub {
        proxy_pass http://NAS_IP_ADDRESS:3012;
        proxy_set_header Upgrade $http_upgrade;
        proxy_set_header Connection "upgrade";
    }

    location /notifications/hub/negotiate {
        proxy_pass http://NAS_IP_ADDRESS:80;
    }

    error_page 403 404 500 502 503 504 @error_page;

    location @error_page {
        root /usr/syno/share/nginx;
        rewrite (.*) /error.html break;
        allow all;
    }

}
04. Copy the file to your NAS (a temp location)
05. Log in your NAS via SSH and elevate to root permission (sudo -i)
06. Copy the file to this location: /usr/local/etc/nginx/sites-enabled using cp
command
07. Restart Nginx service with the following command: synoservice -restart nginx
That's it! This revers entry will not be visible inside your RP or Certificates dialog so keep this in mind. Test out your BW LiveSync and never again click the "sync now" button!
UPDATE: using LiveSync feature over a 3rd party non-Synology reverse proxy
In case you are running some other NGINX reverse proxy, like "proxy manager" you can do this very easily by simply adding these two elements in the "advanced" section of your BW reverse proxy entry.
Here is the example of using it via NGINX proxy manager
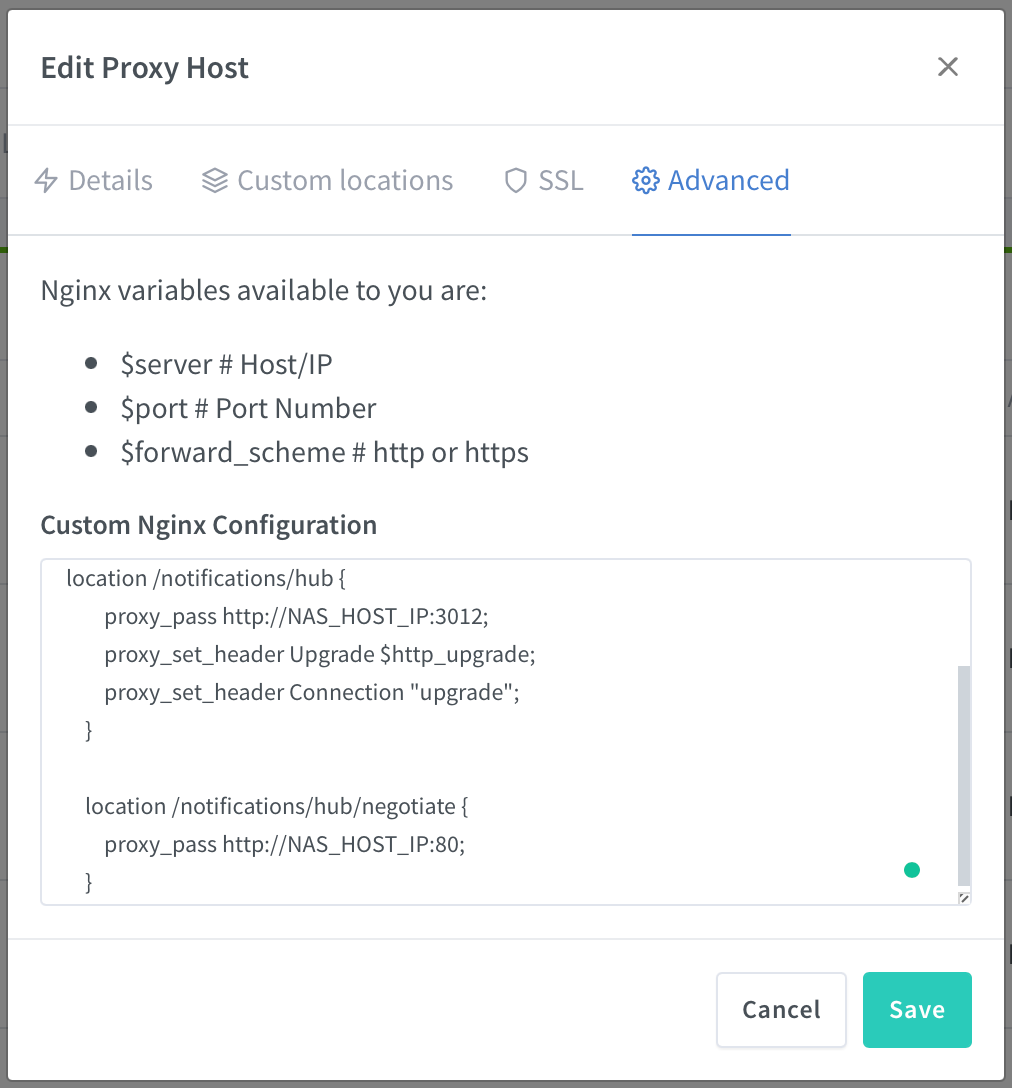
location /notifications/hub {
        proxy_pass http://NAS_HOST_IP:3012;
        proxy_set_header Upgrade $http_upgrade;
        proxy_set_header Connection "upgrade";
    }

    location /notifications/hub/negotiate {
        proxy_pass http://NAS_HOST_IP:80;
    }