Bitwarden unified self-host deployment

Running your own services can seem a bit challenging for someone with no experience, but personally, I am a huge advocate of self-hosting. One of the main services that I self-host is a password manager. Being a fan of Bitwarden for years, I have my own instance of the open-source version of it running (Vaultwarden), and all I can say is I can't be happier with it.
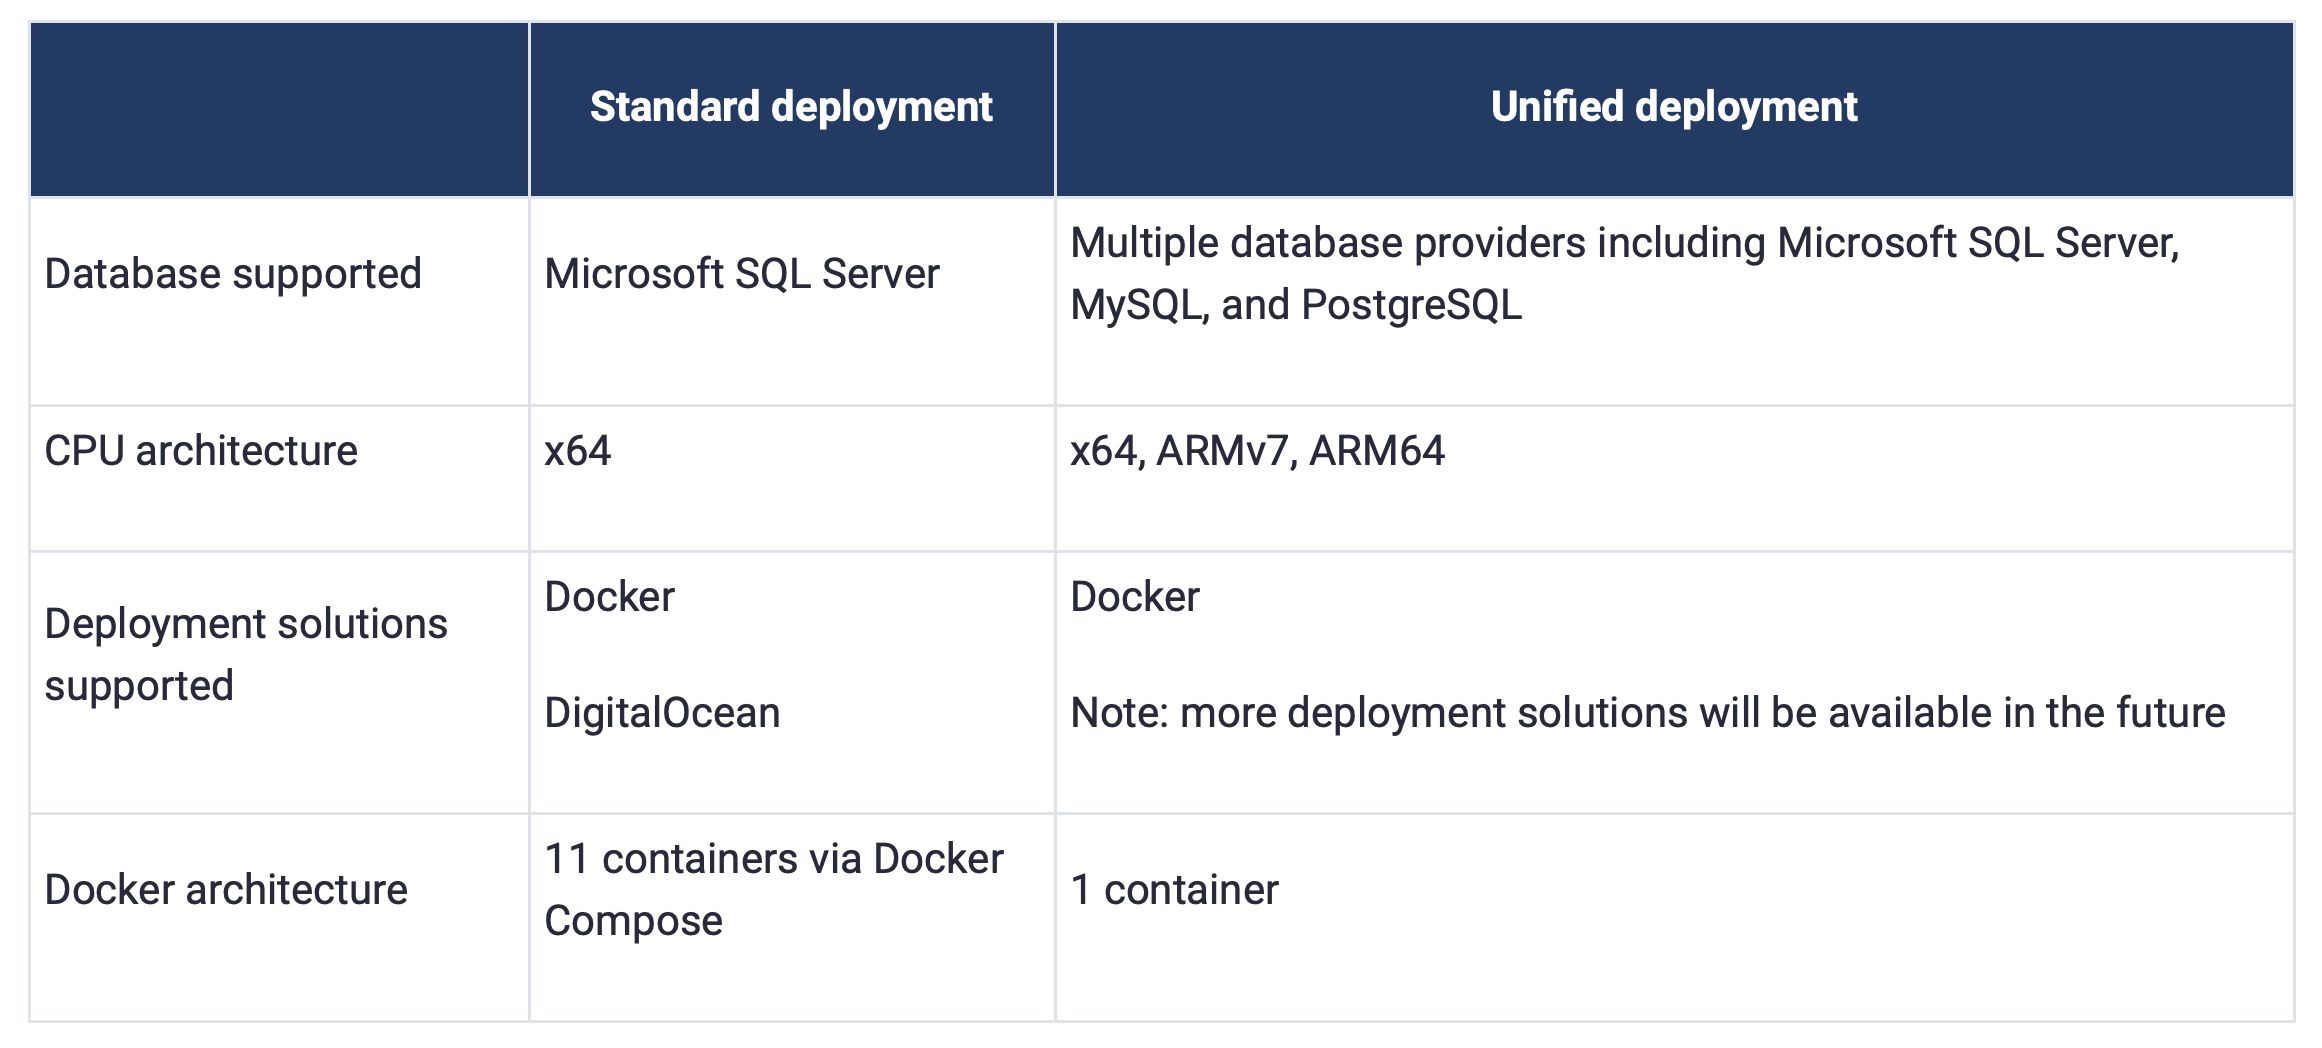
The official Bitwarden solution can also be self-hosted via Docker but it is a bit much to maintain coming in with a big stack of eleven (11) containers. Now, that are a lot of images and elements to keep in sync just to provide a password manager solution. This is another reason that self-hoster for the most part use VaultWarden implementation.
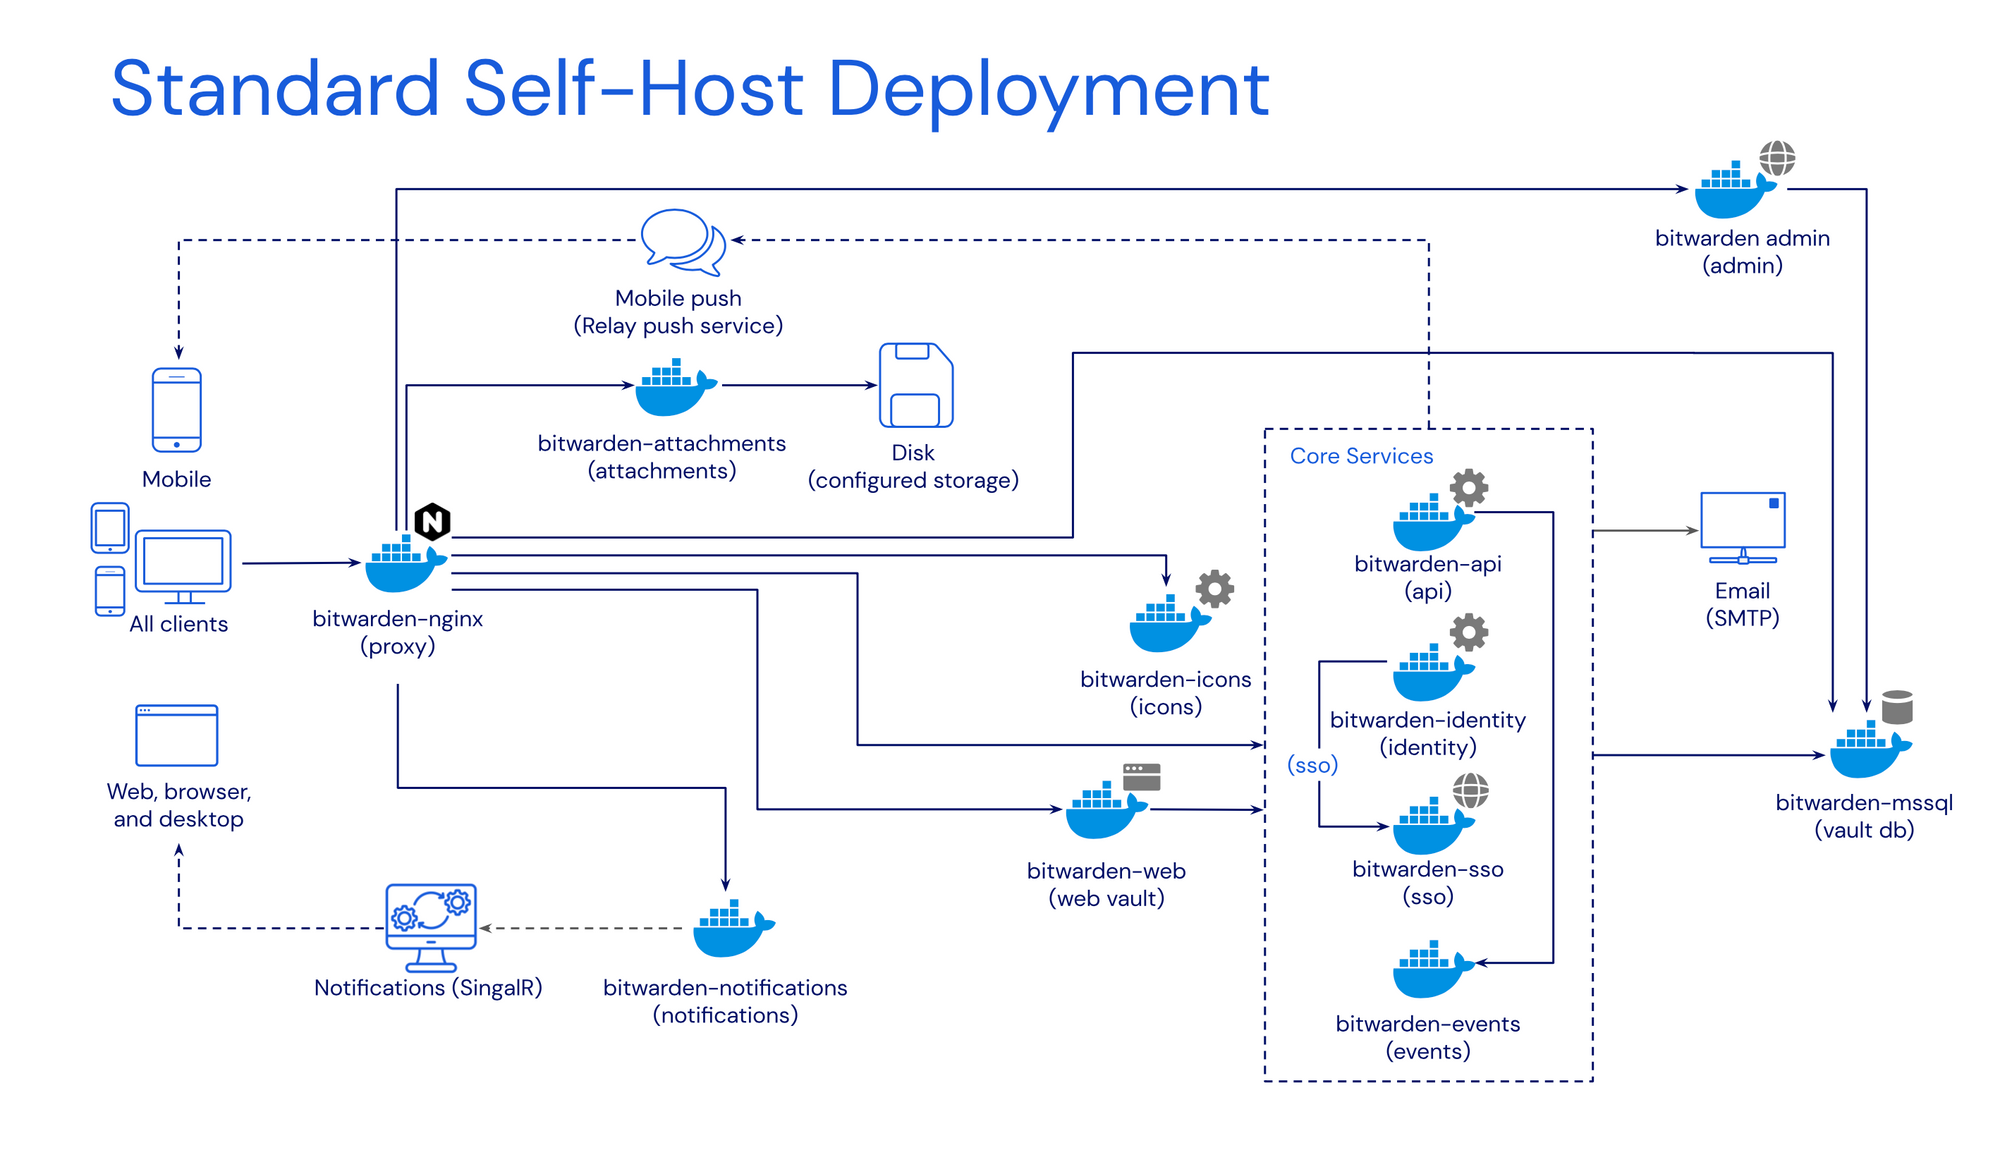
Back at the start of December 2022, Bitwarden started to develop its own single-image version (well with a database as being a separate one) to concatenate all the different core, front-end, and back-end services under one container.
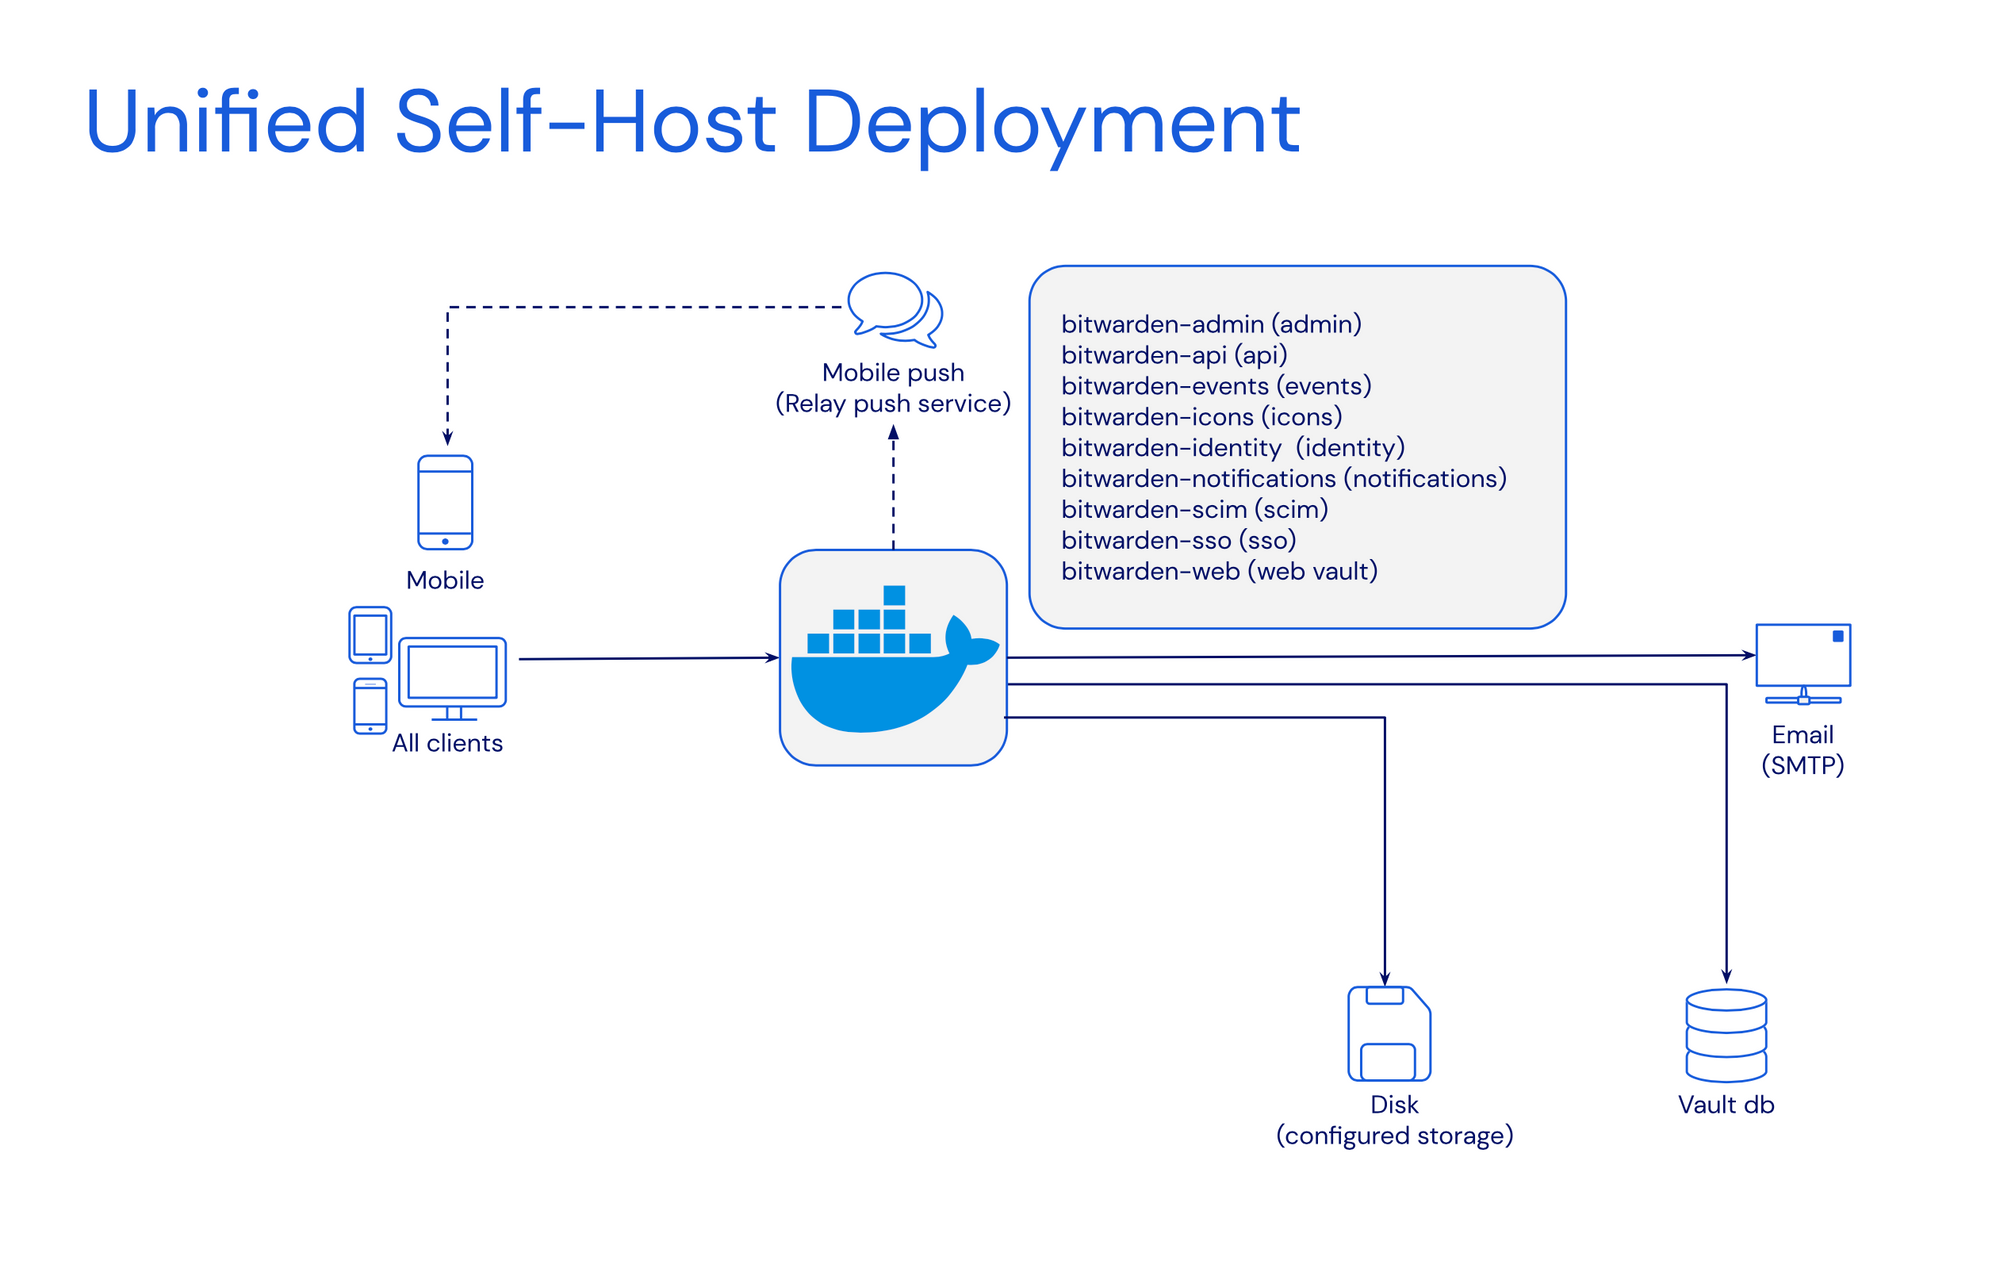
Dubbed a unified self-host deployment solution, this version of Bitwarden will be by far much easier to maintain as it has only two major moving parts. The BW container and an outside database. While this is also not the only version this solution can be run, if there is no way to connect to an external DB, it can be configured to use an internal SQLite DB. This will indeed make it a single-container deployment.
The Bitwarden KB page dedicated to the unified deployment is very extensive and detailed that copying anything from that page would be redundant, so make sure to visit it if this is something that is interesting to test out.
The setup can be run using docker run or docker-compose method with any number of variables to tweak it to our liking.
At the moment of the current beta, any issues are reported to a specific subsection on Bitwarden's GitHub page.
Bitwarden Unified with external MySQL
Below is the docker-compose code that will allow for connecting to the external MySQL instance. The first version runs with a globalSettings__mysql__connectionString variable that includes the server name, custom port, database name, DB username, and password.
version: "3.8"

services:
  bwuat:
    image: bitwarden/self-host:beta
    restart: always
    network_mode: "bridge"
    container_name: "bwuat"
    ports:
      - "80:8080"
    volumes:
      - /local_path/:/etc/bitwarden
    environment:

      - "BW_DOMAIN=bitwarden.domain.com"
      - "globalSettings__mysql__connectionString=server=db_server;port=db_port;database=db_name;user=db_user;password=db_password"
      - "BW_DB_PROVIDER=mysql"
      - "BW_INSTALLATION_ID=xxxxxxxxxxxxxx"
      - "BW_INSTALLATION_KEY=xxxxxxxxxxxxxx"
      - "[email protected]"
      - "[email protected]"
      - "globalSettings__mail__smtp__host=smtp.mail.com"
      - "globalSettings__mail__smtp__port=587"
      - "globalSettings__mail__smtp__ssl=false"
      - "globalSettings__mail__smtp__username=mail_username"
      - "globalSettings__mail__smtp__password=mail_password"
      - "globalSettings__disableUserRegistration=false"
The second compose version uses the BW_DB_PORT variable. In case the SQL instance is running on a custom port, this variable can be used.
version: "3.8"

services:
  bwuat:
    image: bitwarden/self-host:beta
    restart: always
    network_mode: "bridge"
    container_name: "bwuat"
    ports:
      - `80:8080"
    volumes:
      - /local_path/:/etc/bitwarden
    environment:

      - "BW_DOMAIN=bitwarden.domain.com"
      - "BW_DB_PROVIDER=mysql"
      - "BW_DB_SERVER=10.10.10.71" #your SQL IP address or name
      - "BW_DB_PORT=3306" #enter the SQL port that the instance is running on
      - "BW_DB_DATABASE=database"
      - "BW_DB_USERNAME=db_user"
      - "BW_DB_PASSWORD=db_password"
      - "BW_INSTALLATION_ID=xxxxxxxxxxxx"
      - "BW_INSTALLATION_KEY=xxxxxxxxxxxx"
      - "[email protected]"
      - "[email protected]"
      - "globalSettings__mail__smtp__host=smtp.mail.com"
      - "globalSettings__mail__smtp__port=587"
      - "globalSettings__mail__smtp__ssl=true"
      - "globalSettings__mail__smtp__username=mail_username"
      - "globalSettings__mail__smtp__password=mail_password"
      - "globalSettings__disableUserRegistration=false"
Along with all the rest variables, there are many that can be configured using the documentation link at the start of this article. In these examples, there are several regarding SMTP configuration (this needs to be in place for admin page access as well as password reset and registration), as well as one variable to disable user registration (after the initial one).
Presently, the SQL database will create 30 tables after the initial configuration has been completed.
Any troubleshooting will require looking into the logs folder that should be accessible via the volume bind listed in the example (part of the etc/bitwarden path).
-rw-r--r--    1 bitwarde bitwarde       414 Dec 28 00:39 admin.log
-rw-r--r--    1 bitwarde bitwarde       412 Dec 28 00:38 api.log
-rw-r--r--    1 bitwarde bitwarde       952 Dec 28 00:38 icons.log
-rw-r--r--    1 bitwarde bitwarde       417 Dec 28 00:38 identity.log
-rw-r--r--    1 bitwarde bitwarde         0 Dec 28 00:38 nginx.log
-rw-r--r--    1 bitwarde bitwarde       960 Dec 28 00:38 notifications.log
These are the files and each of them needs to have a clean log without any errors.
As an example, admin.log looks like this:
/var/log/bitwarden $ cat admin.log

info: Microsoft.Hosting.Lifetime[14]
      Now listening on: http://[::]:5000
info: Microsoft.Hosting.Lifetime[0]
      Application started. Press Ctrl+C to shut down.
info: Microsoft.Hosting.Lifetime[0]
      Hosting environment: Production
info: Microsoft.Hosting.Lifetime[0]
      Content root path: /app/Admin
Available features
Once the Bitwarden app is up and running, and the initial account has been created and verified, let's see what this unified version offers.
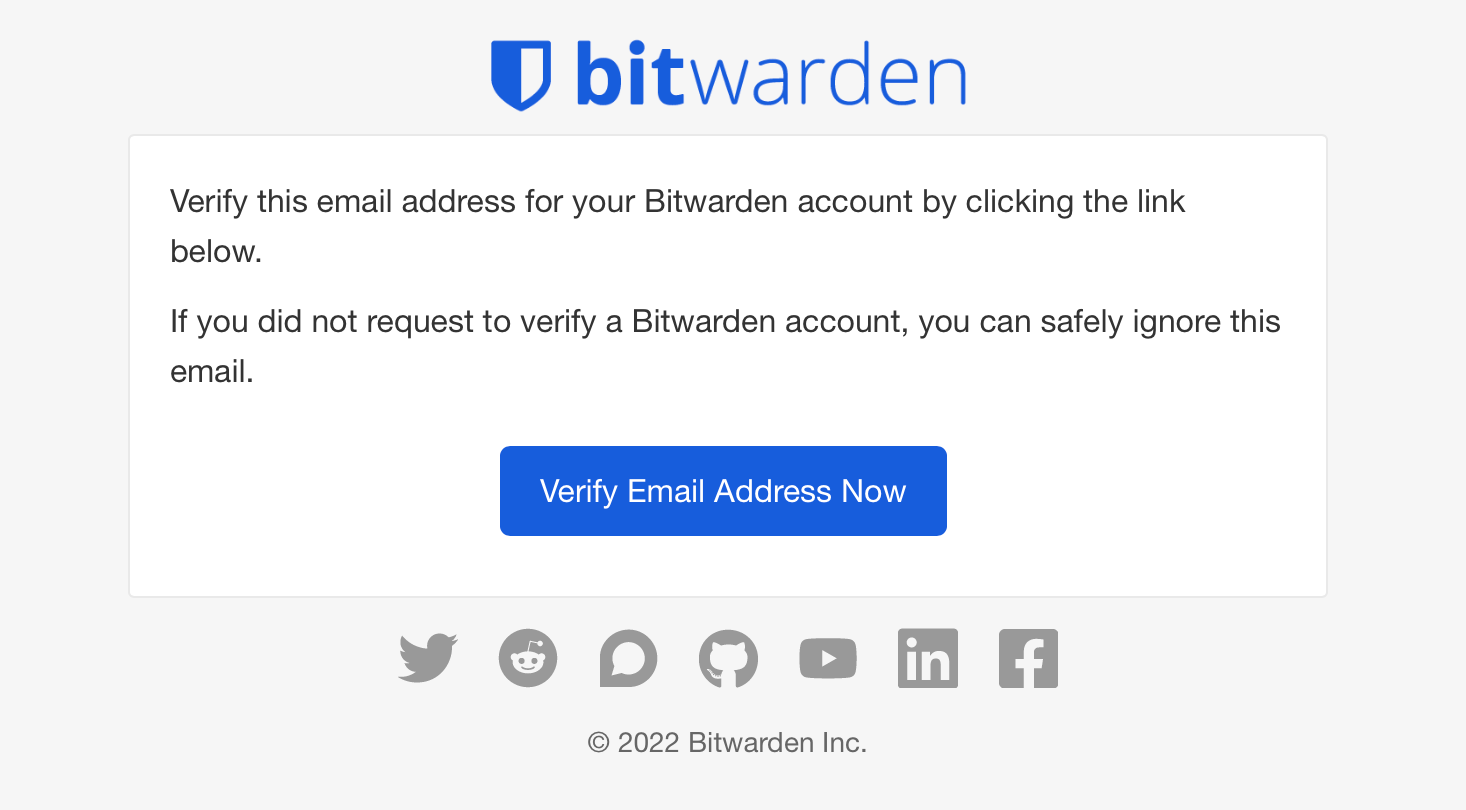
If the SMTP parameter has been configured, we can verify the email address used to log into Bitwarden.
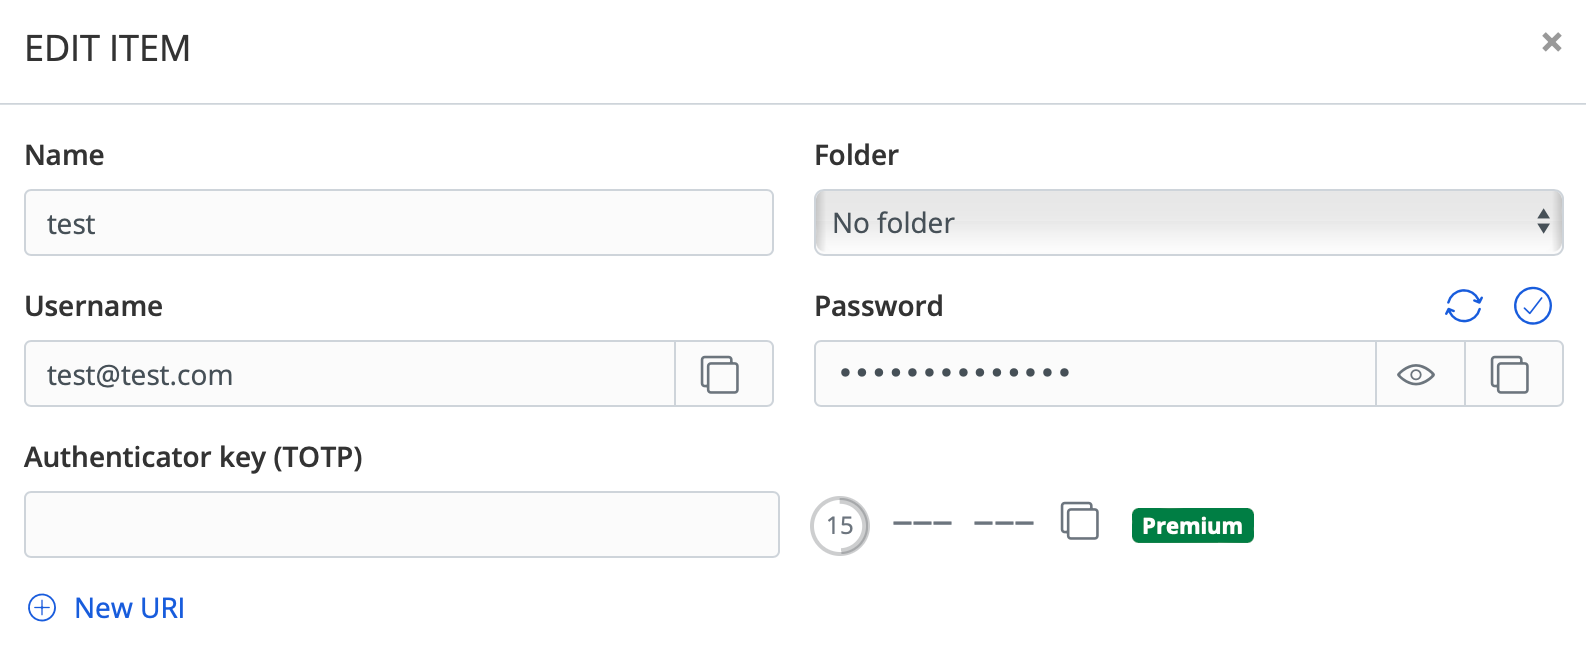
In terms of features, adding new items, and creating new organizations are possible without any issues. What stuck out for me, was the lack of 2FA (TOTP) for a login item. Not so much a lack of it, but it is flagged as a premium feature.
Alongside that, reports are all premium apart from the data breach one.

To not list all the features that are locked, here is the list of all the options that will be unlocked once the upgrade has been completed for a price of $10/year.
Upgrade your account to a premium membership and unlock some great additional features.

* 1 GB encrypted storage for file attachments.
* Additional two-step login options such as YubiKey, FIDO U2F, and Duo.
* Emergency Access
* Password hygiene, account health, and data breach reports to keep your vault safe.
* TOTP verification code (2FA) generator for logins in your vault.
* Priority customer support.
* All future premium features. More coming soon!
Once the upgrade has been completed and paid for, a license file will be delivered and can be uploaded via the UI.

Personally, $10/y is nothing compared to what is happening to some of the competitors out there, let alone having all these features on a self-hosted setup. Well worth IMHO, and it will also provide support for the Bitwarden team to make the platform even better.
Admin page access
Bitwarden also has an admin page section that is available using the following URL: https://bitwarden.domain.com/admin.
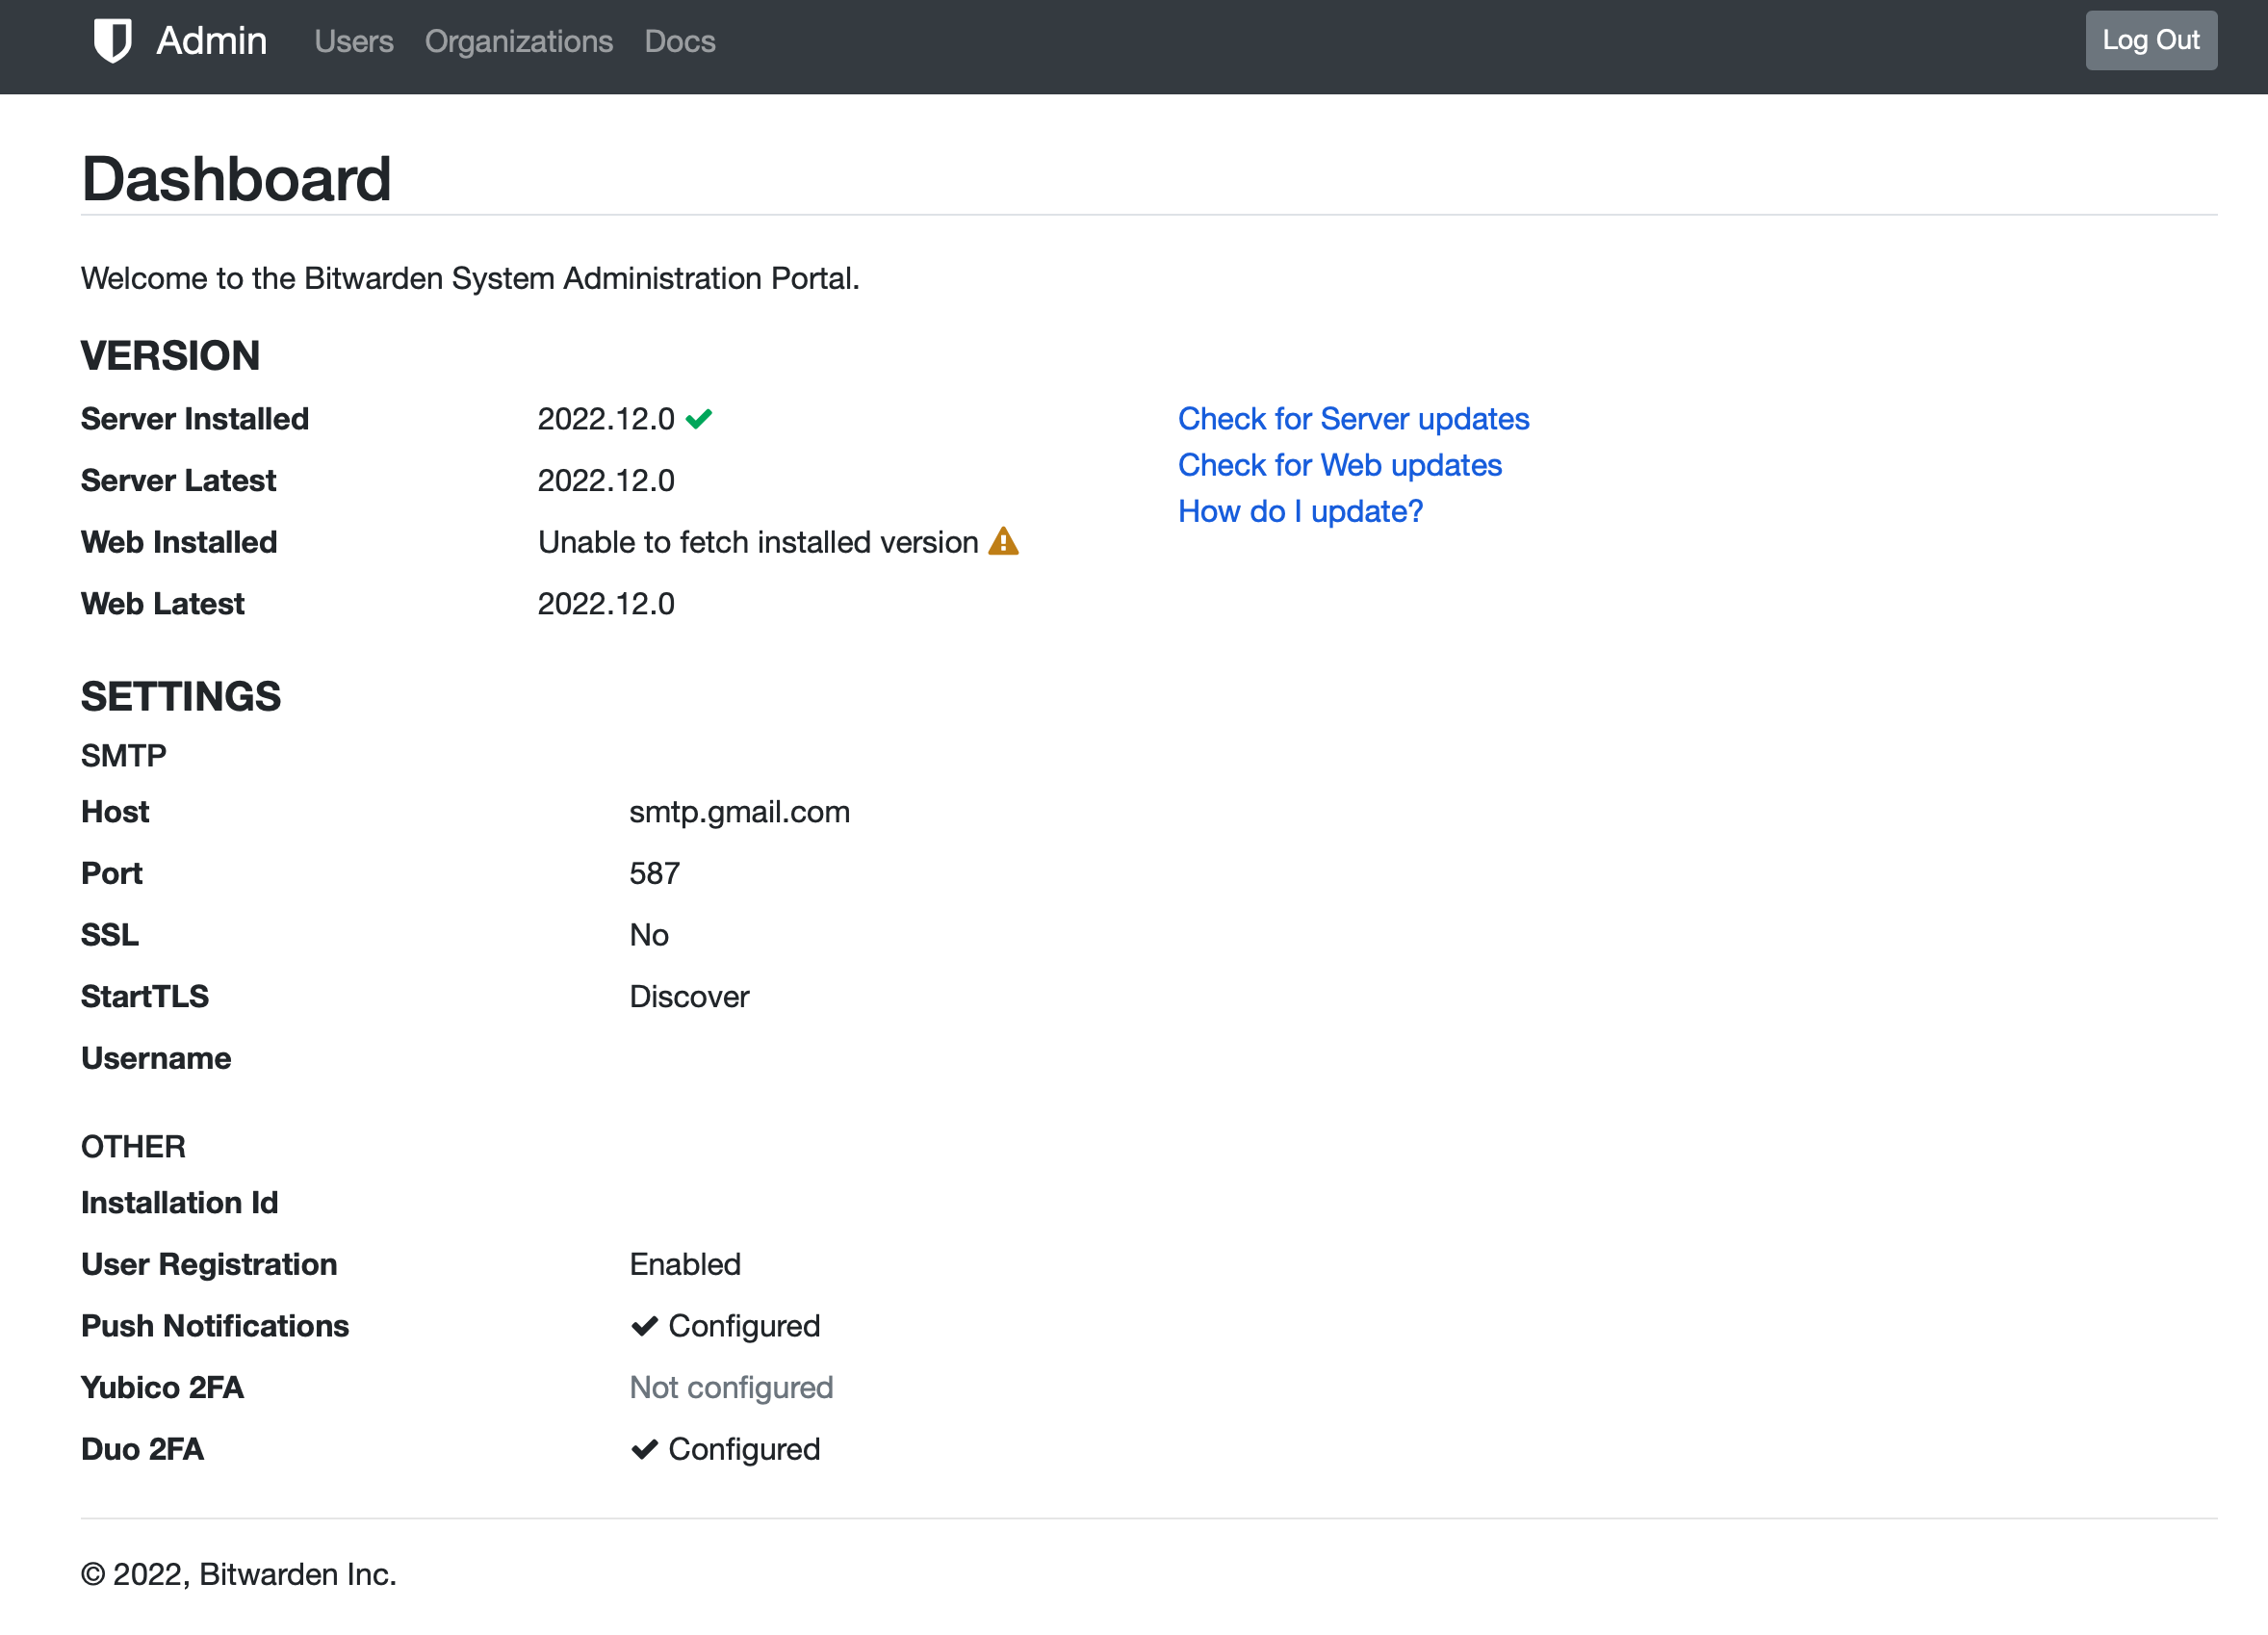
In order to log into it, the docker variable needs to be configured that will send an email that can be used to log in. The variable is used to list verified email addresses (one or more), that are authorized to unlock the admin page.
The variable needs to be configured like this adminSettings__admins=[email protected], [email protected].
Login to the admin section is not done using an existing BW account, and the address in question does not has to be registered as a working BW account.
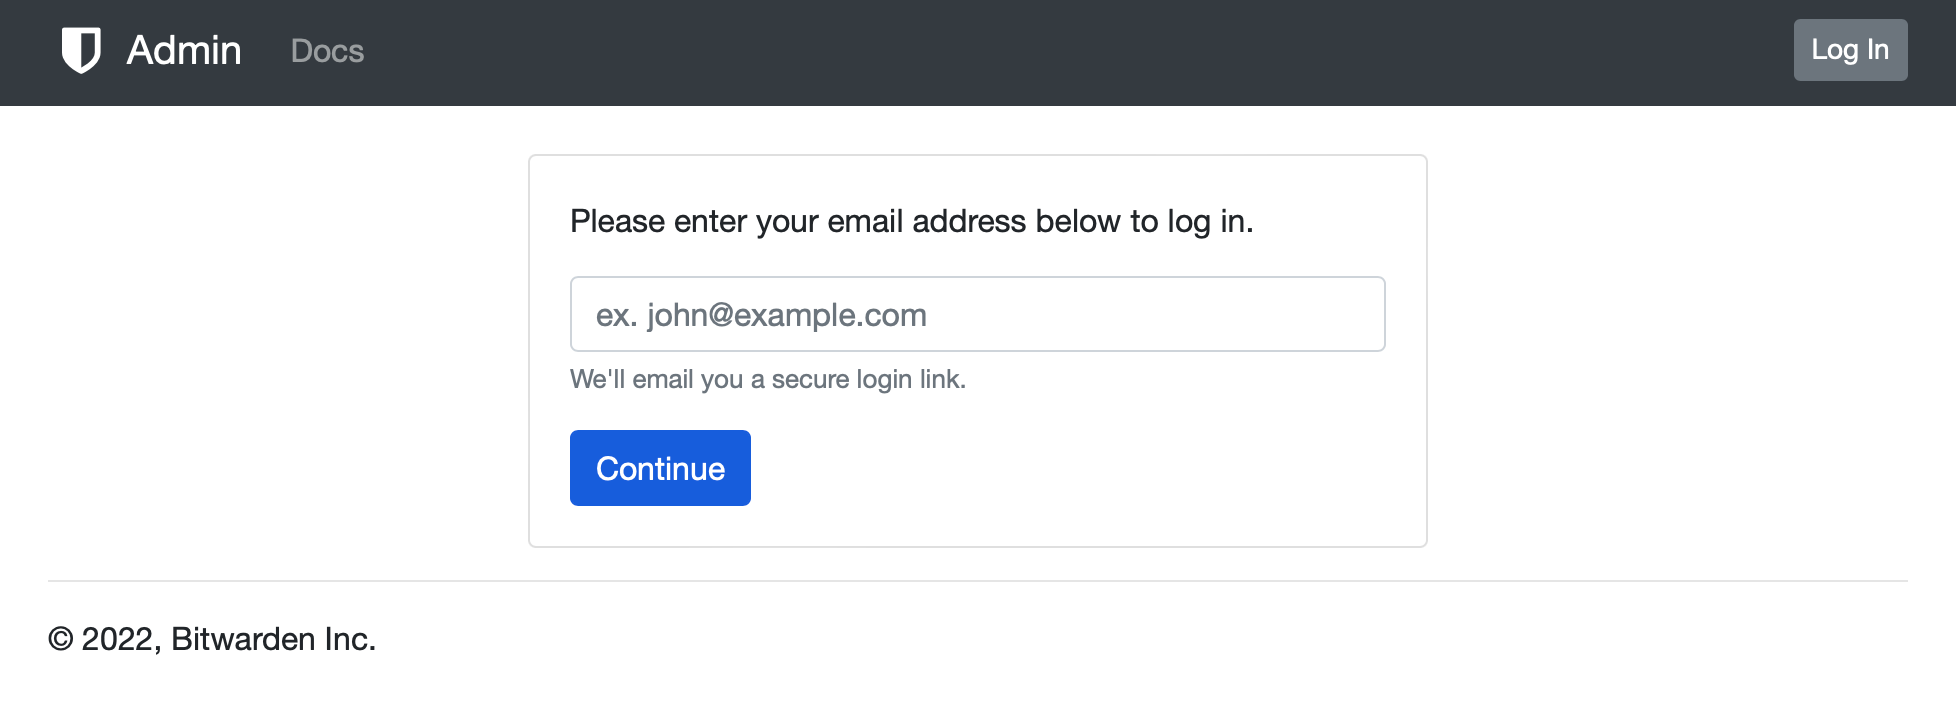
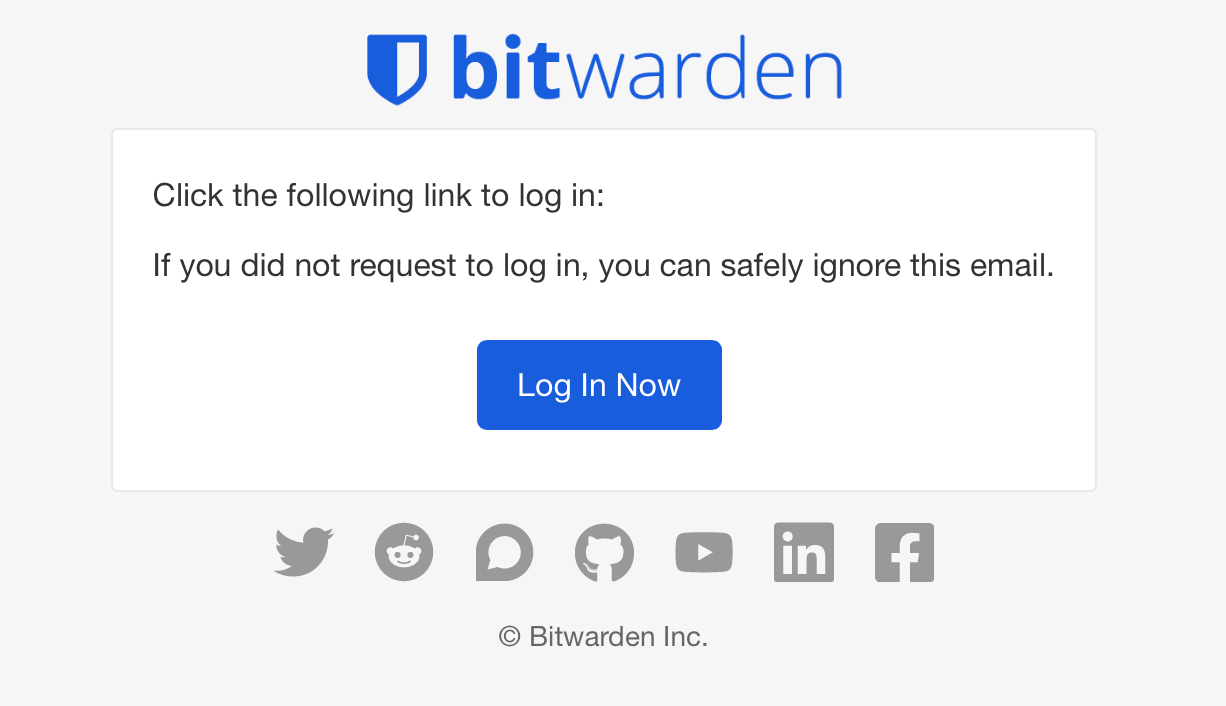
Entering a valid email address (one of the listed ones in the admin variable) will send a timed email address. Clicking the link inside it will automatically log in to the admin user.
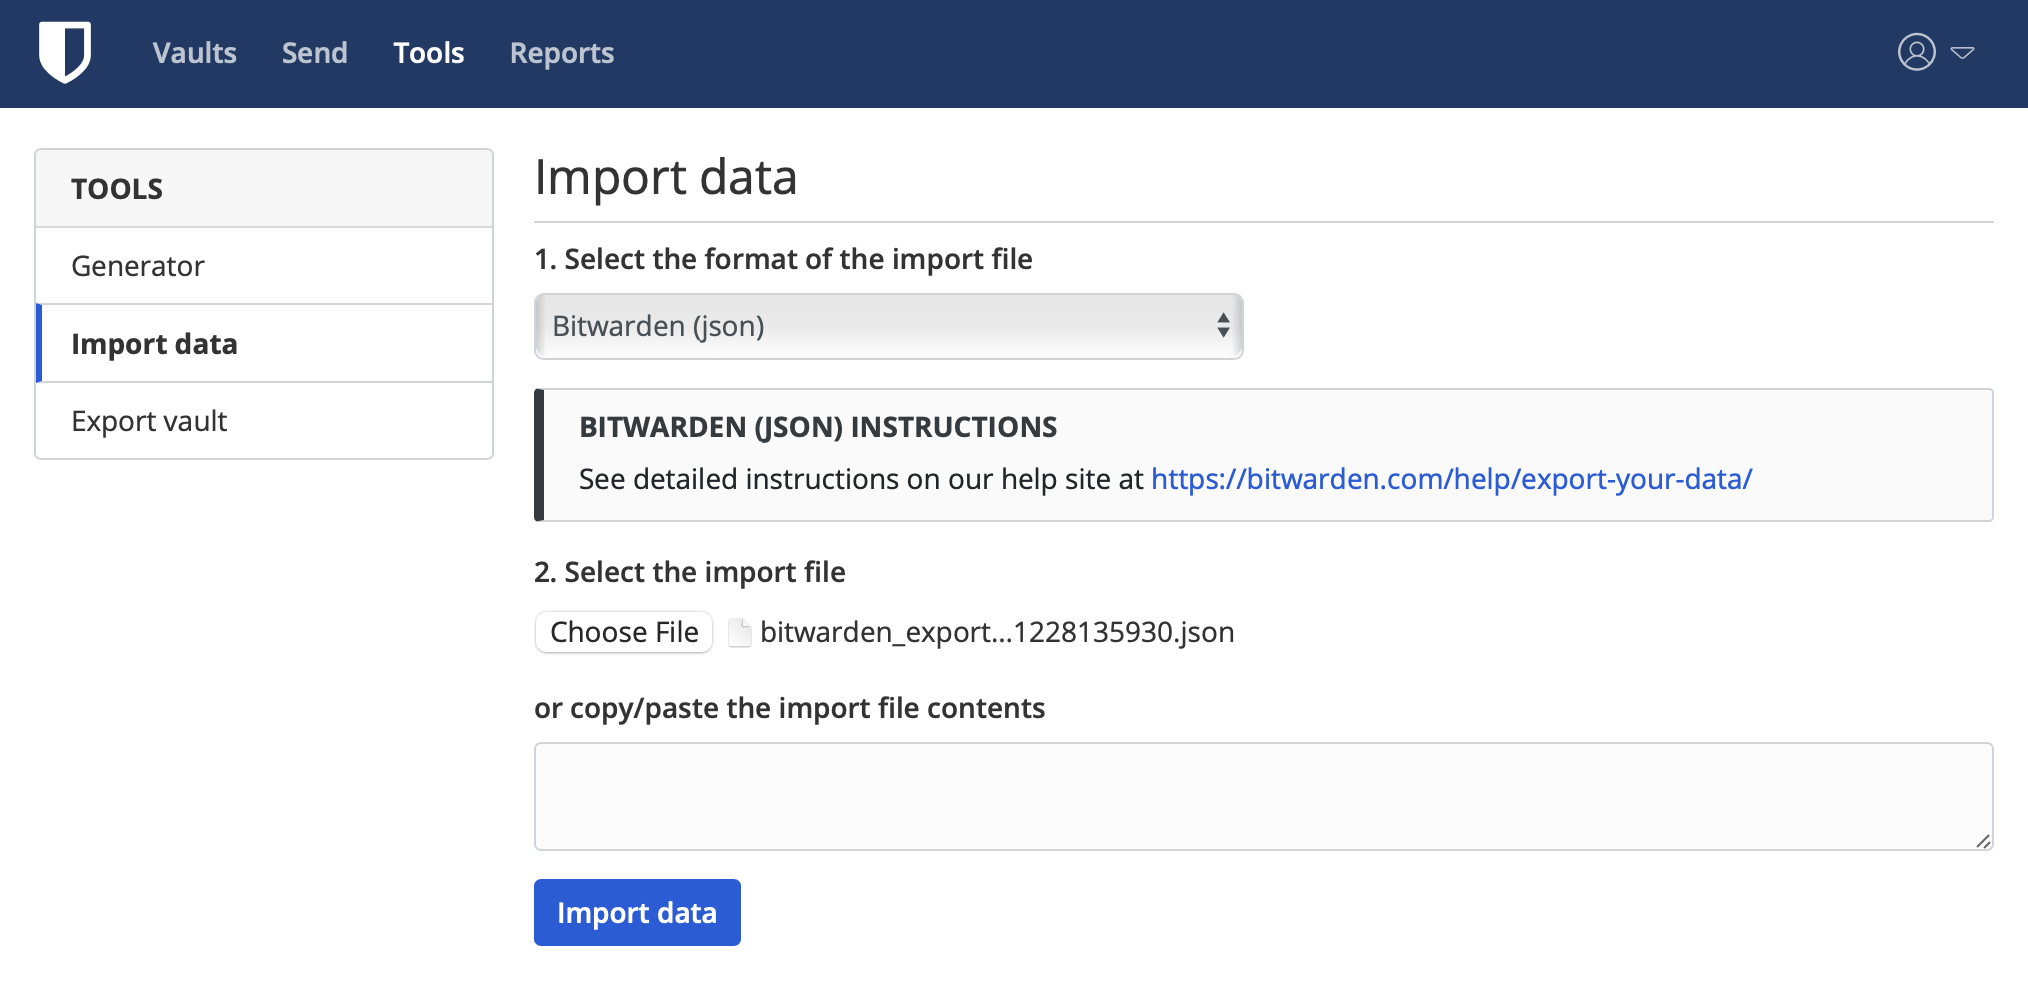
Import from another premium Bitwarden instance
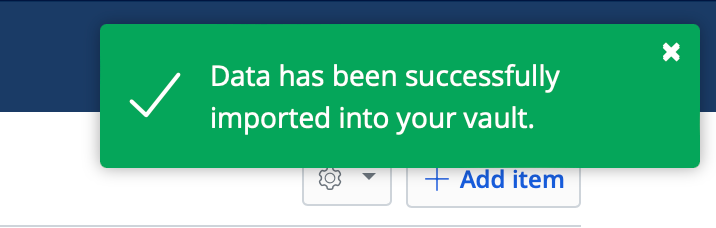
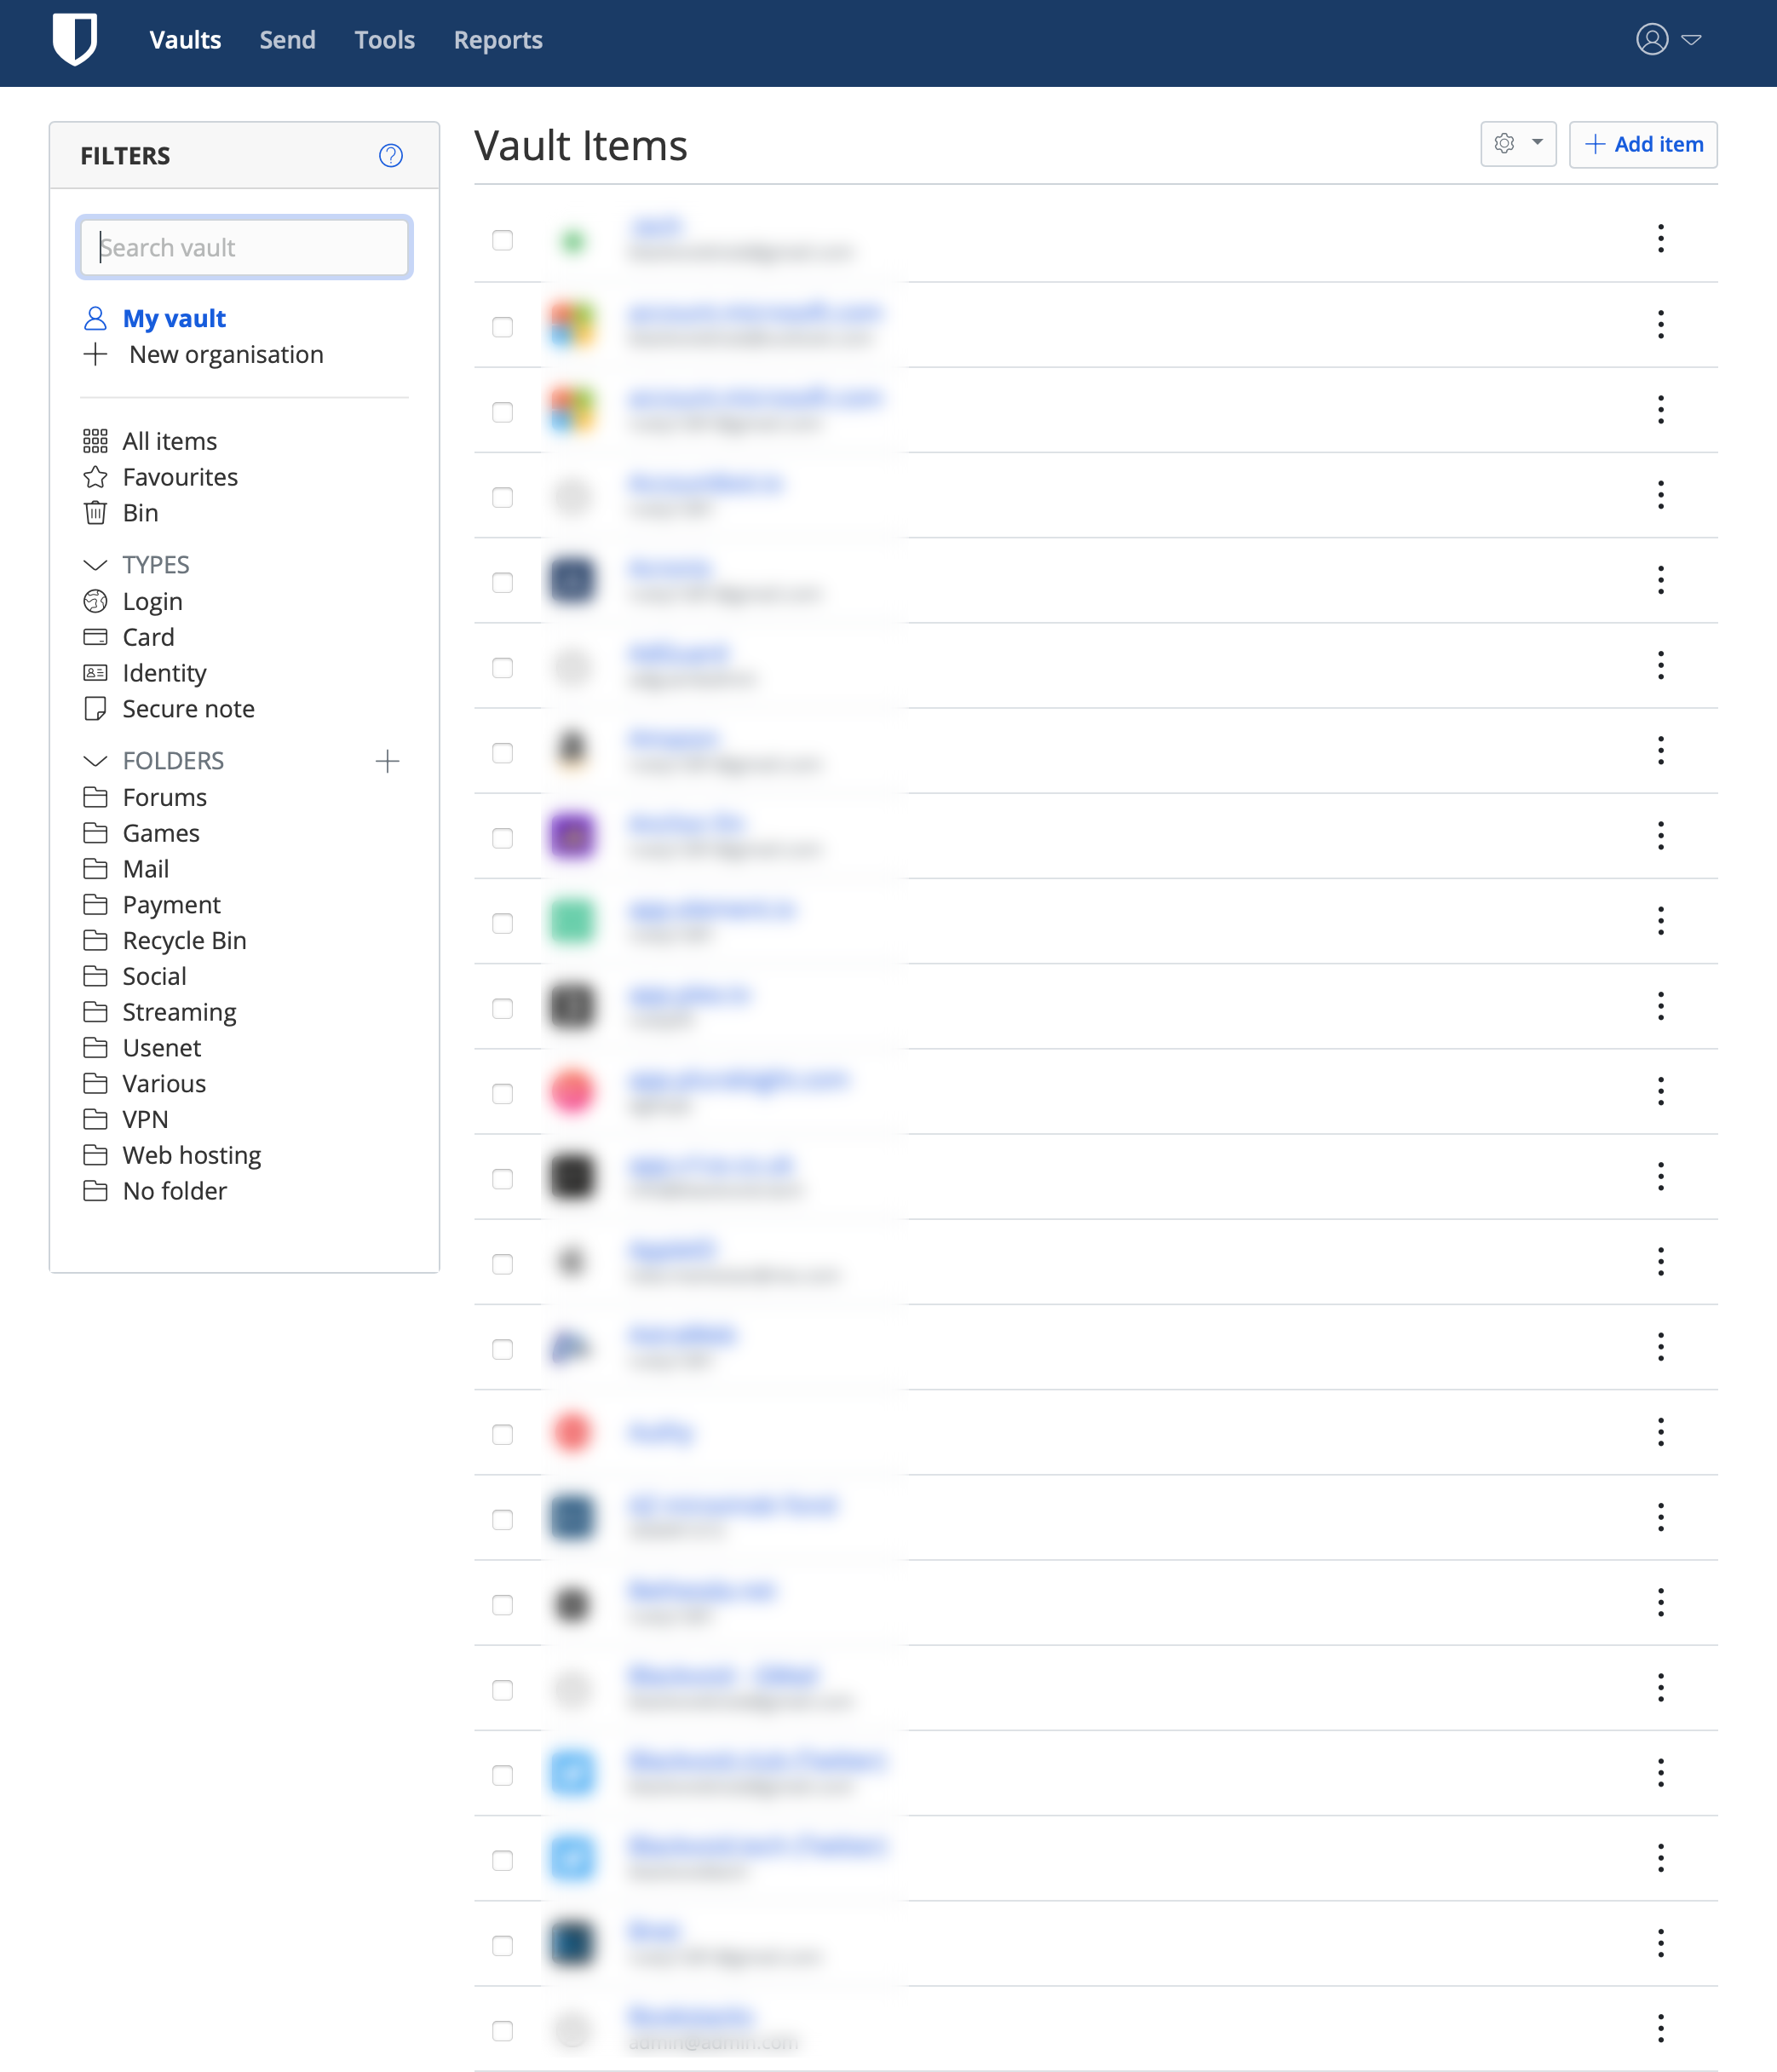
Importing personal vaults from another Bitwarden instance is possible and works with no issue at all.
In order to import data use the Tools section with its export vault and import data options. By default, Bitwarden will use the JSON file format for the export.
Selecting the same format as well as the JSON file import will be done in a matter of seconds.
Now, if the source instance was a premium one or the alternative VaultWarden any premium feature will not work if the unified instance is also not unlocked for premium features.
One example is the TOTP (2FA) feature. Opening the item will not list a working TOTP code, but it will show the authentication key so that it can be used once the features are unlocked.
Nothing unexpected I would say, but just something to keep in mind going forward.
Will some of the features make it in the initial unified version is hard to say (I would say no), so if you have your heart set on them be ready to pay less than $1/m to unlock them.
Speaking of features, the Unified setup will also support, currently exclusive to the official cloud only, Log in with device option.
With this feature we will be able to log into the Bitwarden site passwordless, that is without entering the actual password but instead, we will use an allowed device such as a mobile device or a computer with Bitwarden apps that support this feature.
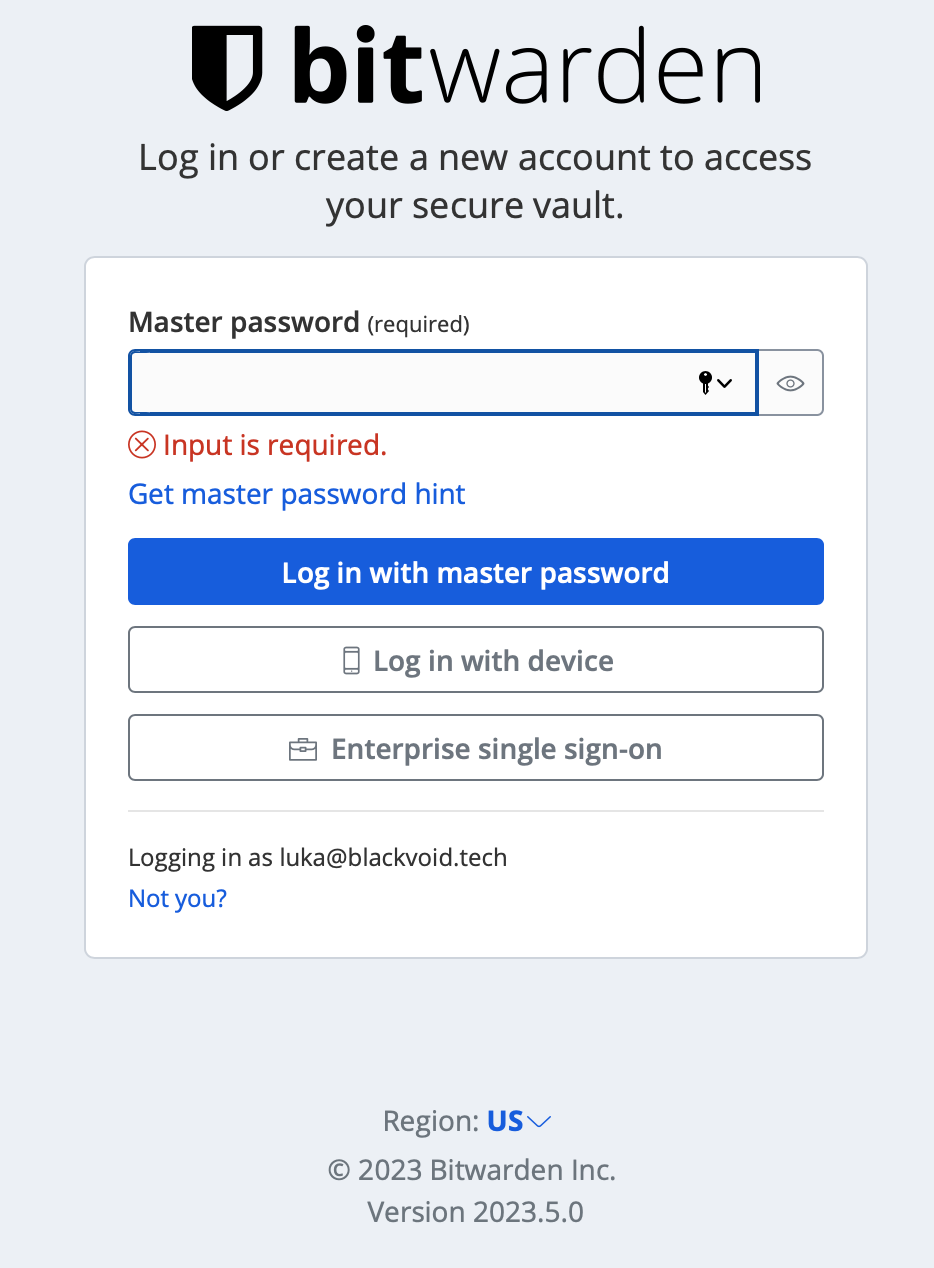
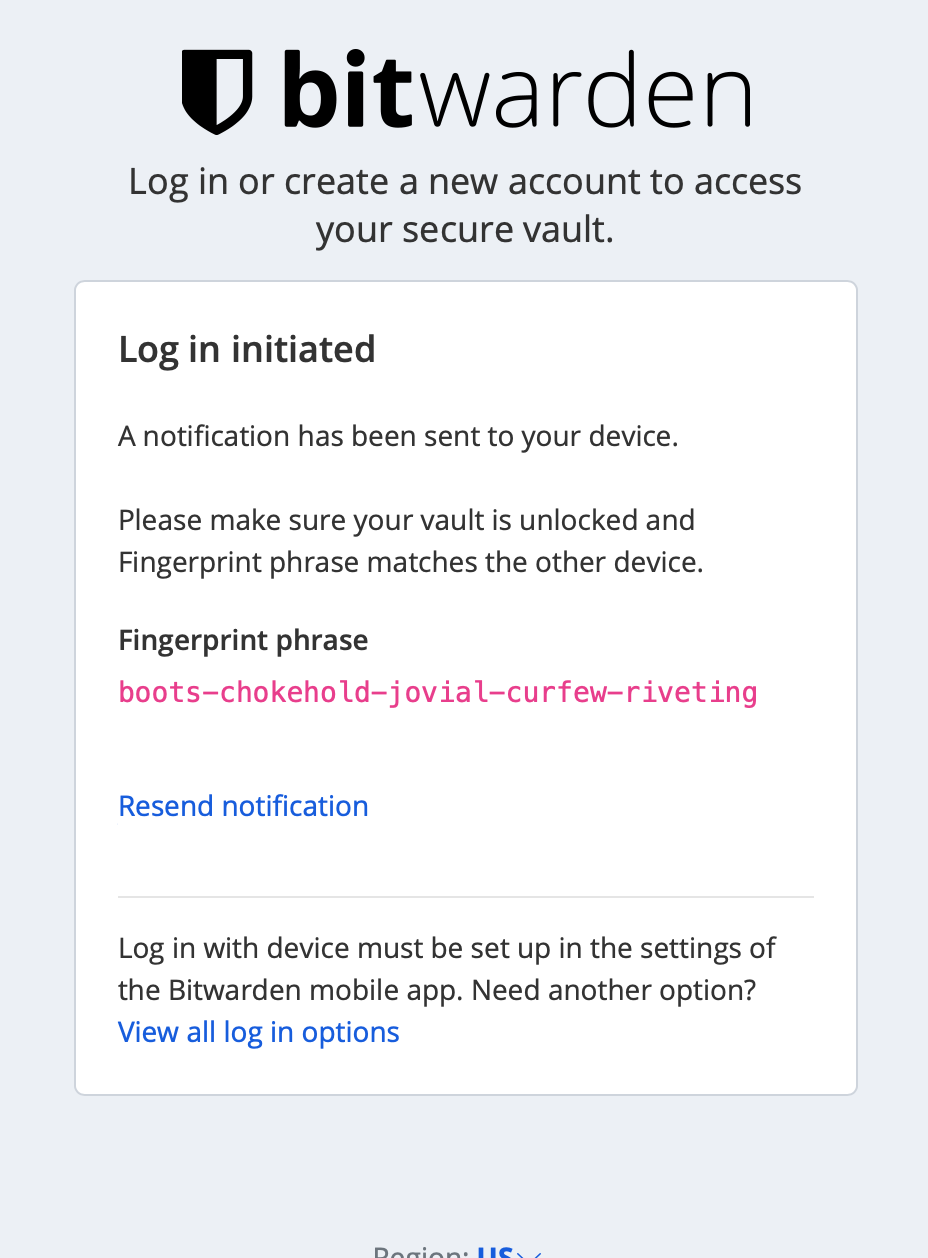
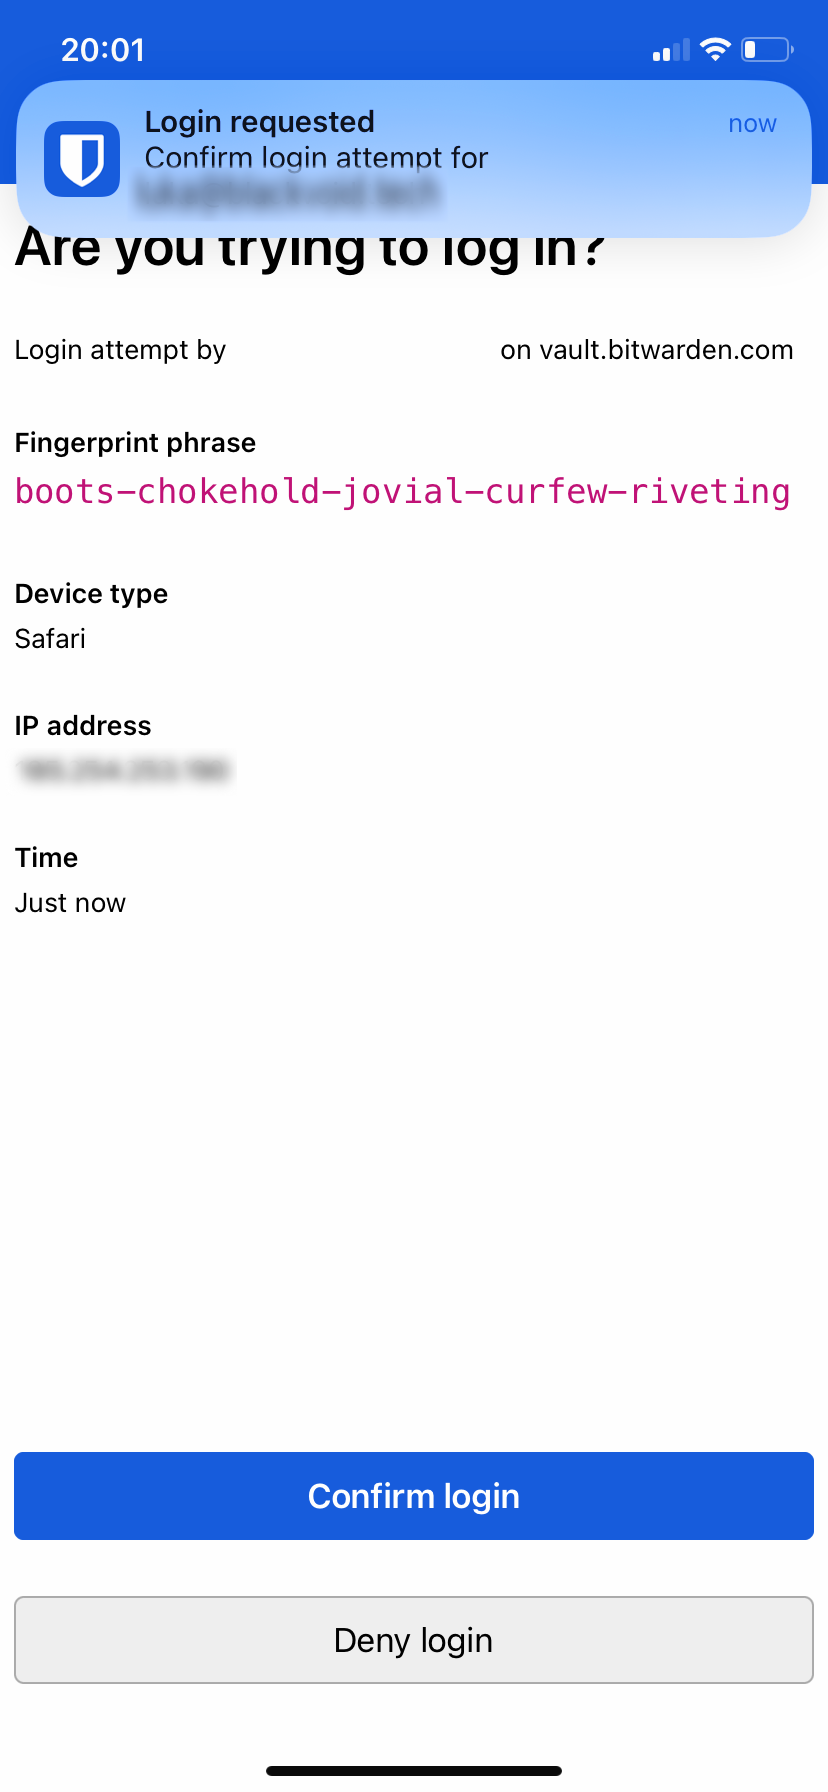
Once the login has been confirmed the user will be granted access.
Let me know in the comment section below if you have tried or are running this setup yourself, and also what your experience so far is.