NEW SAN manager in DSM 7

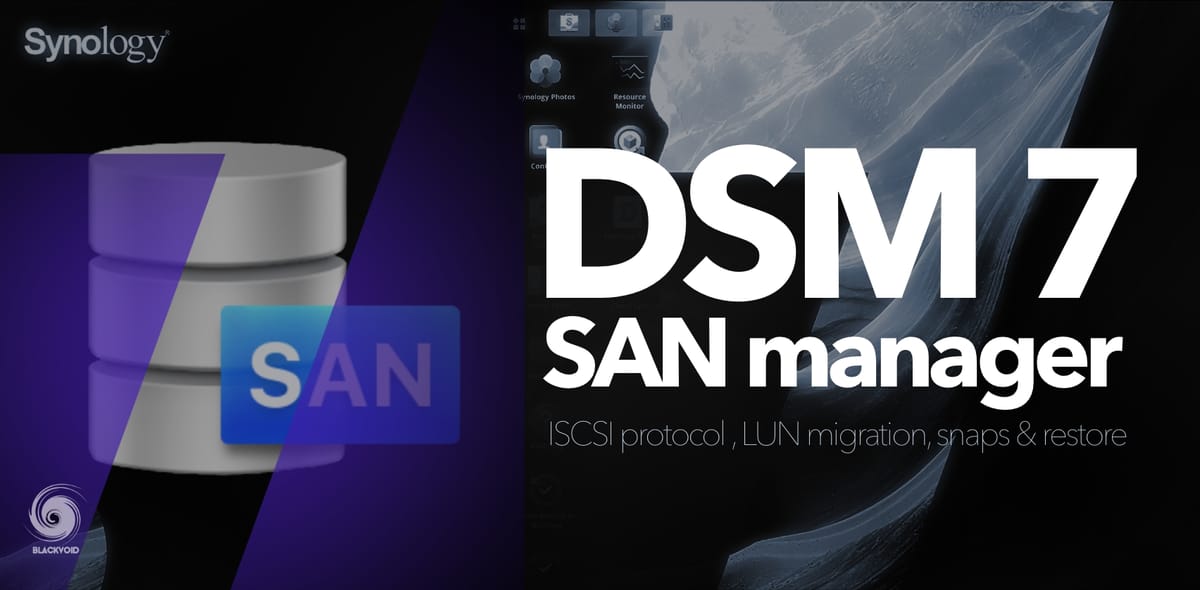
If you have been using Synology for a while, you will know that iSCSI support has been in there since forever. In the new DSM 7, this particular set of features are being removed from the DSM 6 Storage Manager, and now have a dedicated package called SAN Manager.
Before we continue, keep in mind that there is still no way to make one Synology NAS connect as a client to another NAS that is hosting the LUN(s). So you will need an iSCSI initiator in order to be able to connect.
This last statement is not entirely true as, Synology does support the initiator role in DSM, but no longer from a user acceptable UI, and it is no longer officially supported. They use it for internal operations for VMM, SAN manager, and the likes, but you can't and shouldn't attempt to make this happen (serious SSH hacking involved!).
This article will focus on the use of iSCSI protocol, in order to connect a Windows 10 machine to a LUN. Later on, I will show how we can migrate the LUN, make a snapshot, and restore from it, and eventually delete the LUN.
Configure iSCSI target and LUN(s)
Create a target
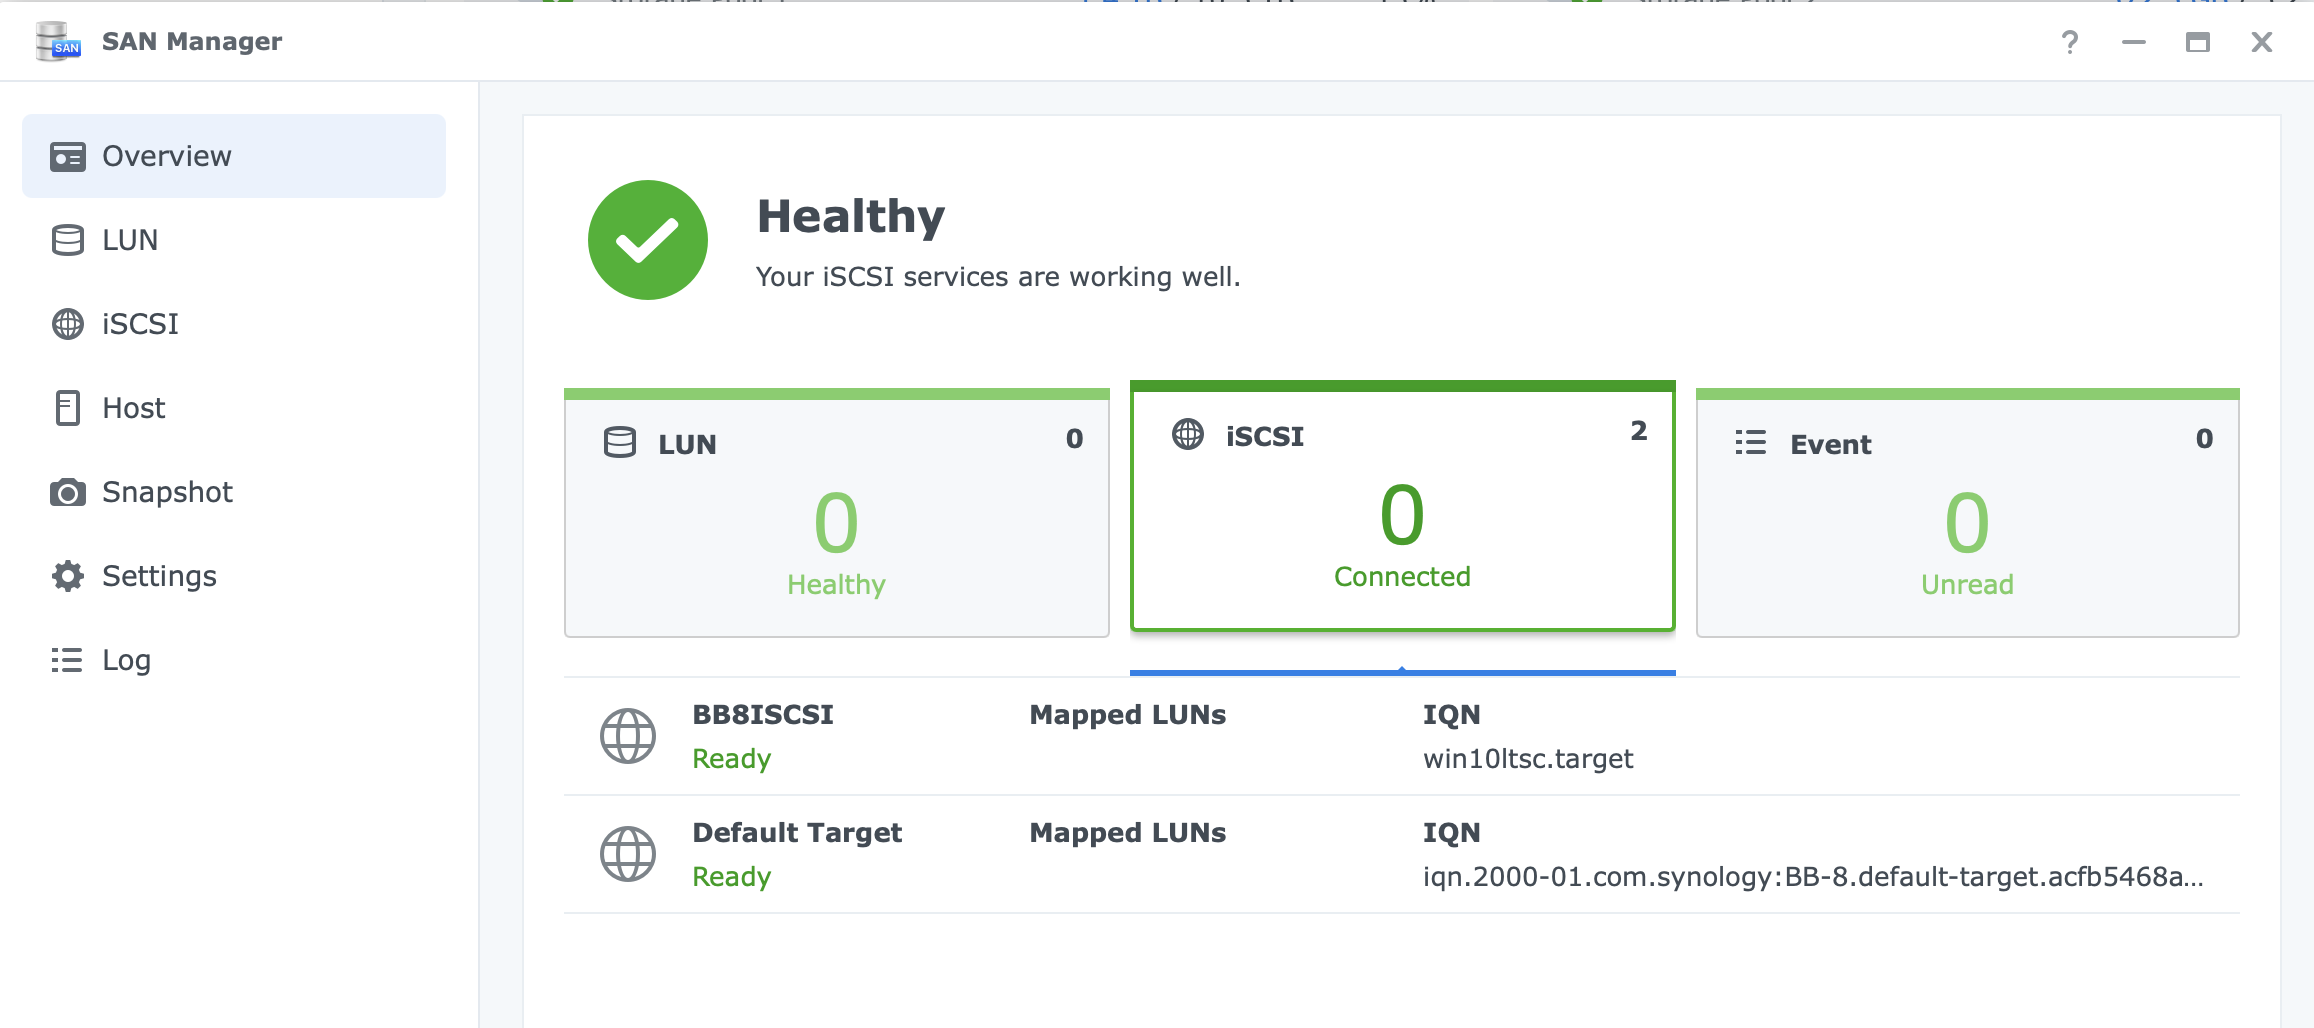
In order to get started, you will need two things. iSCSI target, and one LUN connected to that target. By default, there is already one target waiting and ready once you open up SAN Manager, but you are welcome to create a new one, change its settings, name, and other settings.
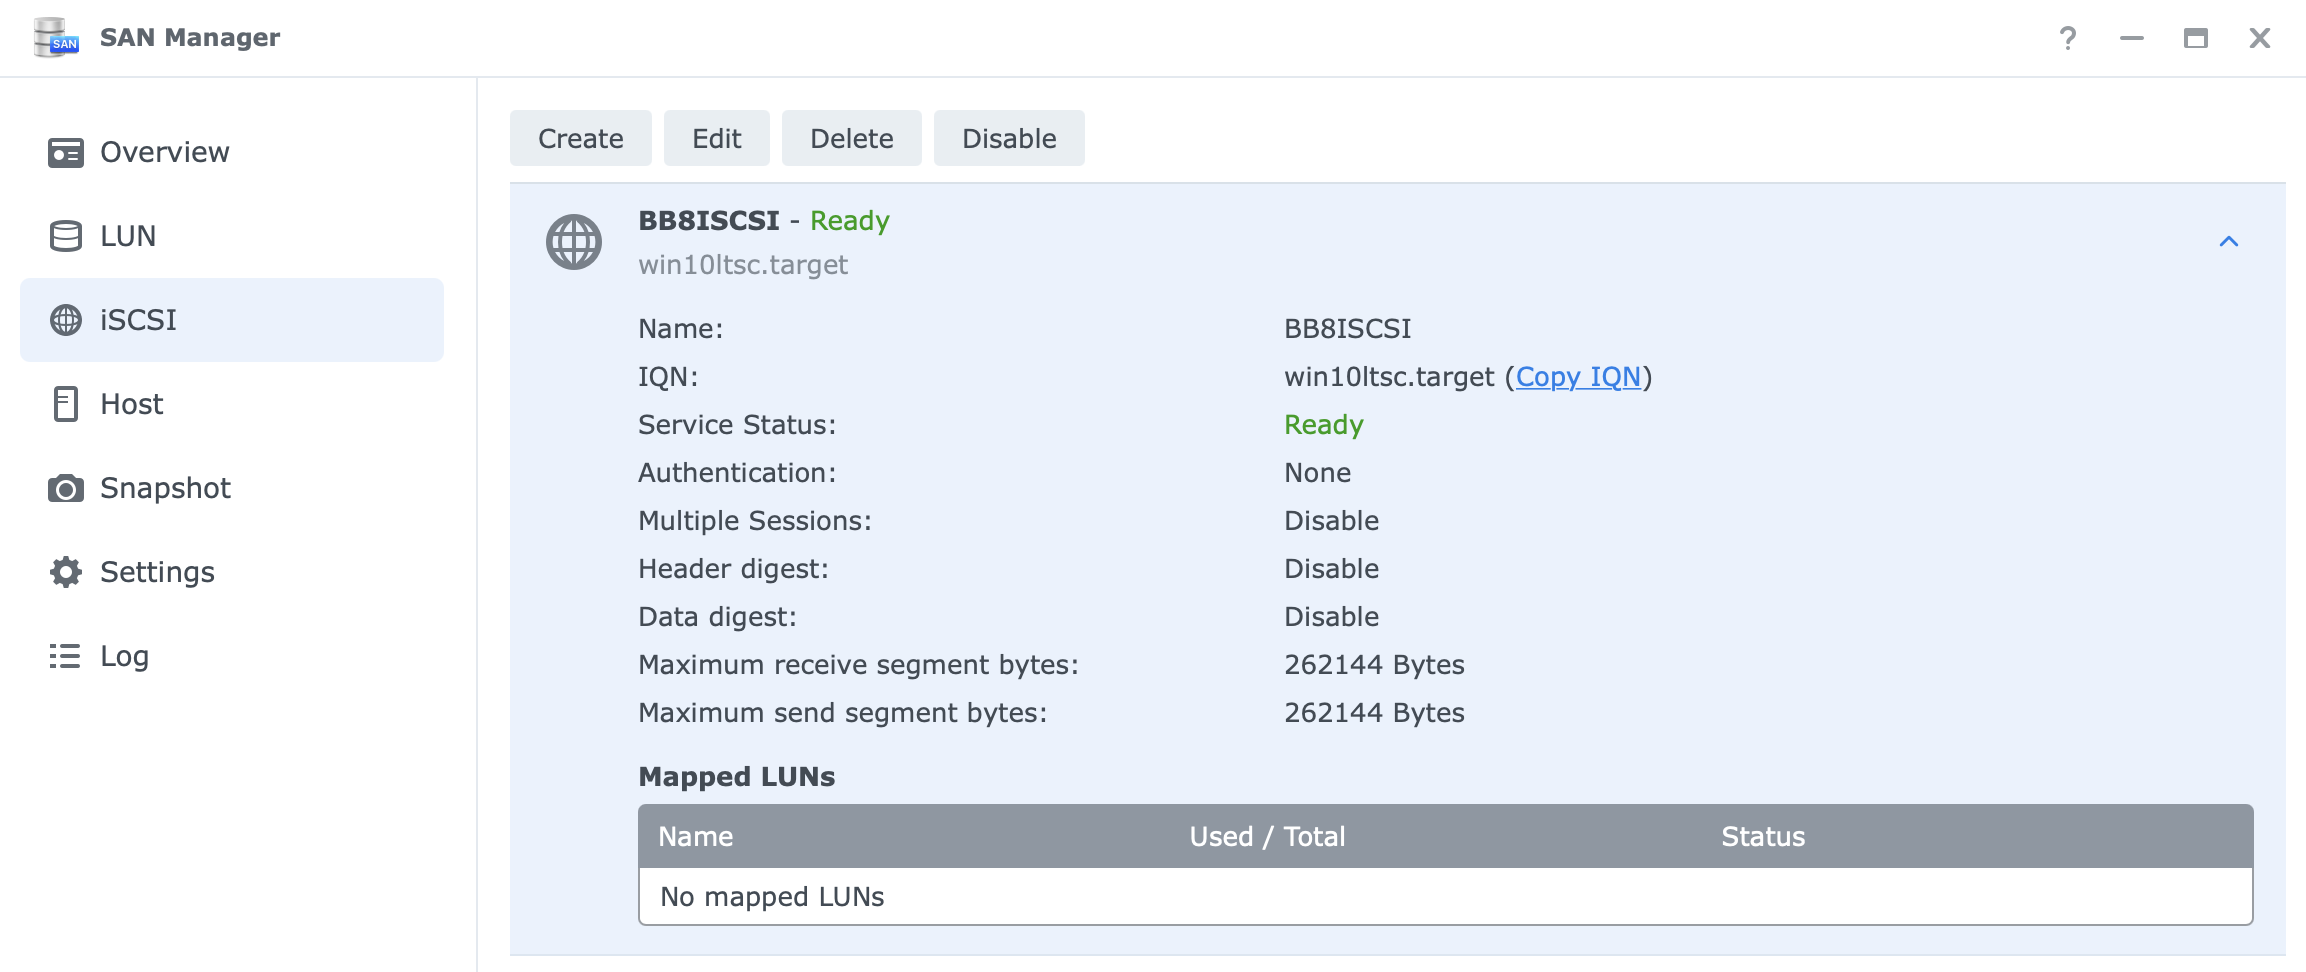
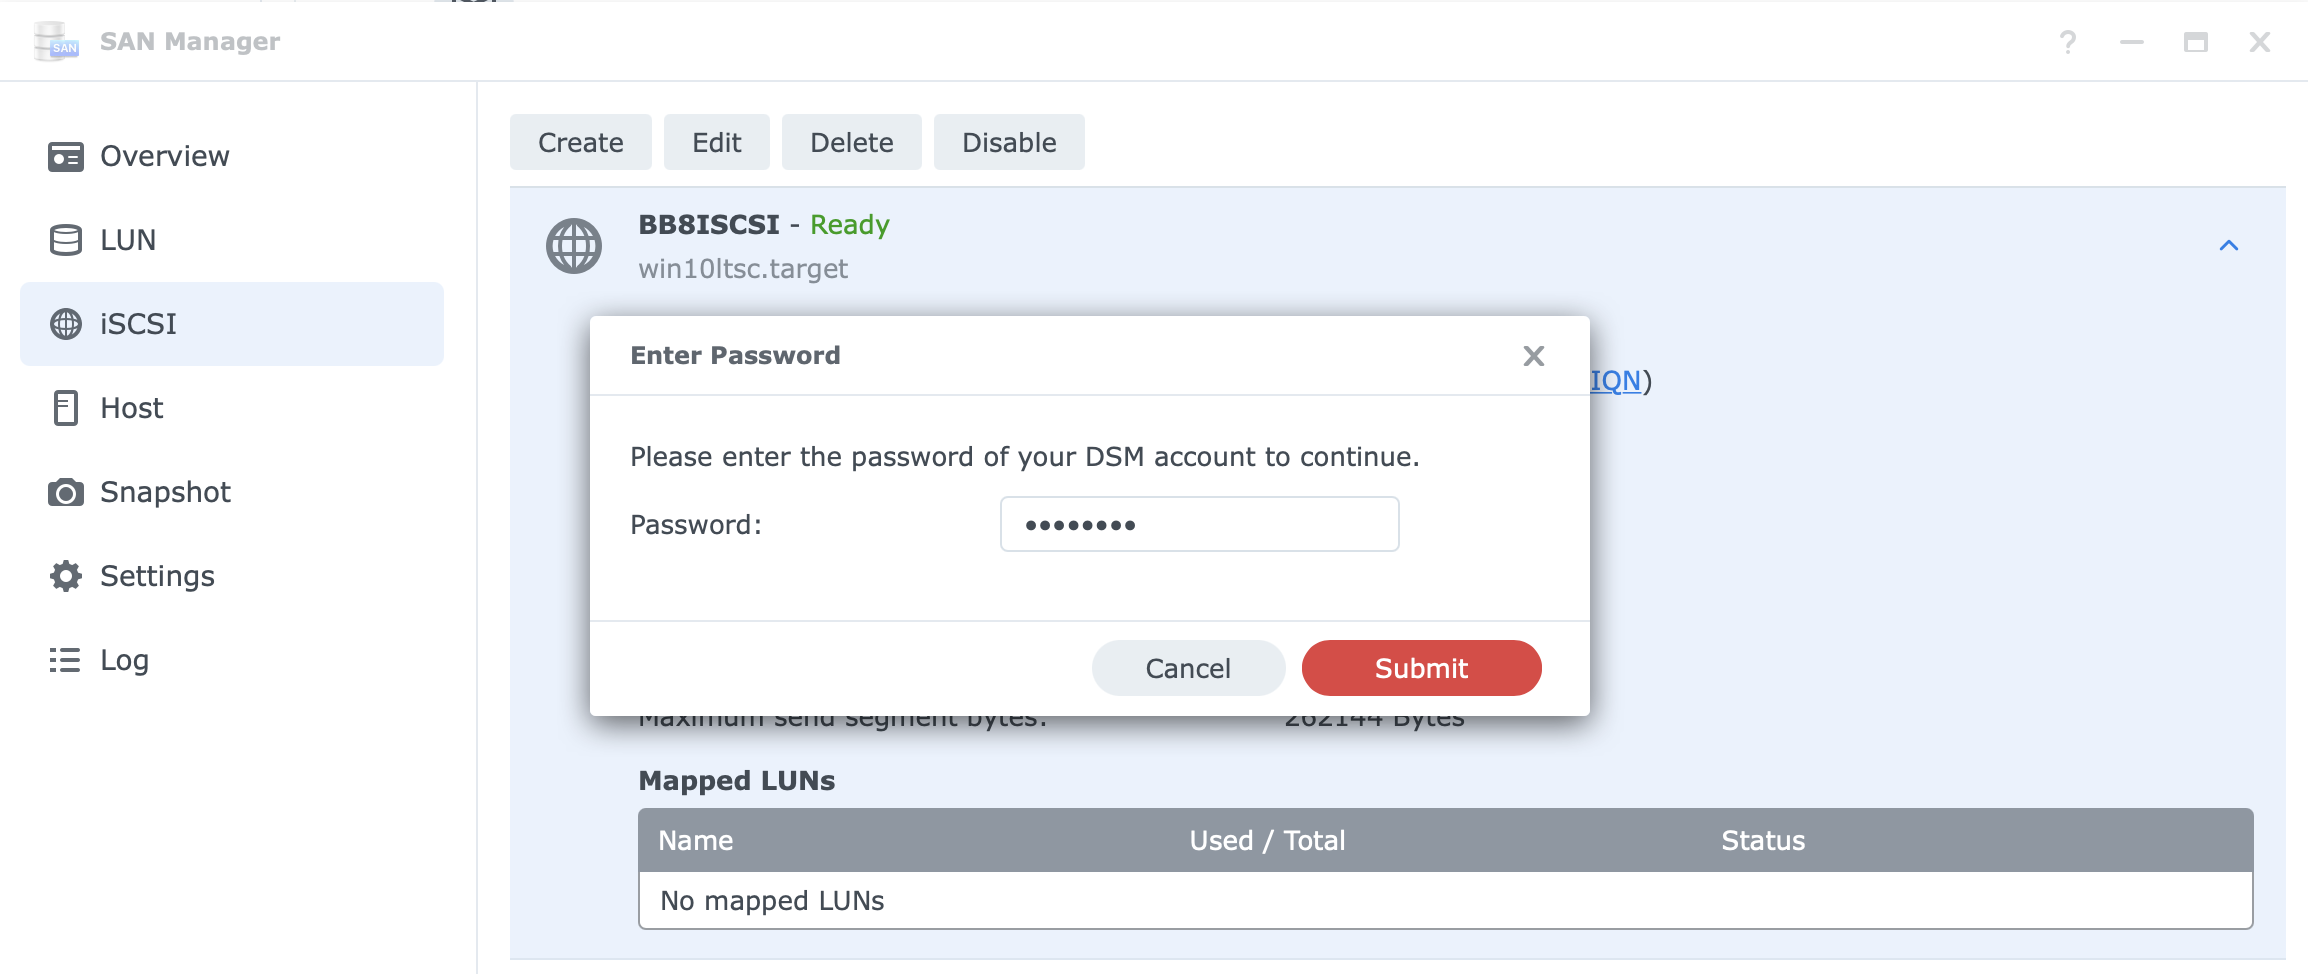
Open the iSCSI section in your SAN Manager and you will see several options (create, edit, delete, and disable), as well as a list of your current targets, settings, status, and any mapped LUNs.
Click the Create button to start the wizard. You can enter any value for the Name and IQN that fits your needs. Considering that I will be using this to demonstrate a single client connection to the LUN, I will not use any other options like multiple sessions or authentification.
Create a LUN
Now that we have a target, it is time to make a new LUN that the client will then be able to present as a working drive and transfer data.
Jump to the LUN section of the SAN Manager, and click Create to start the wizard.
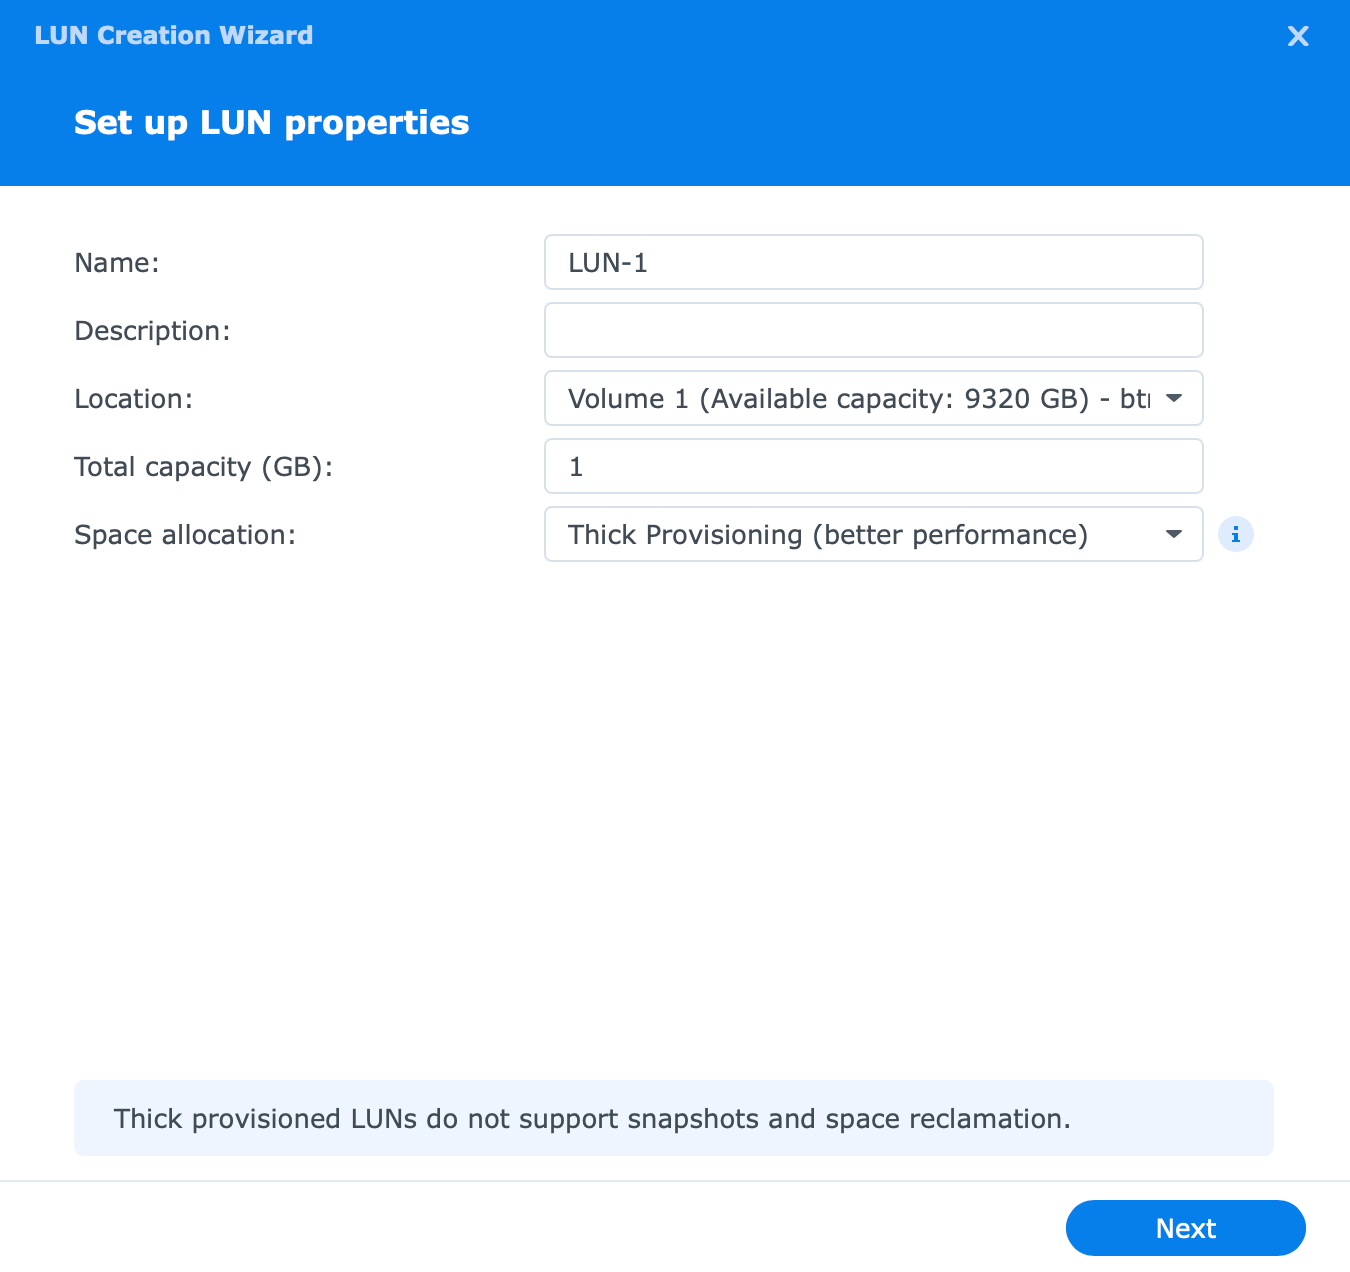
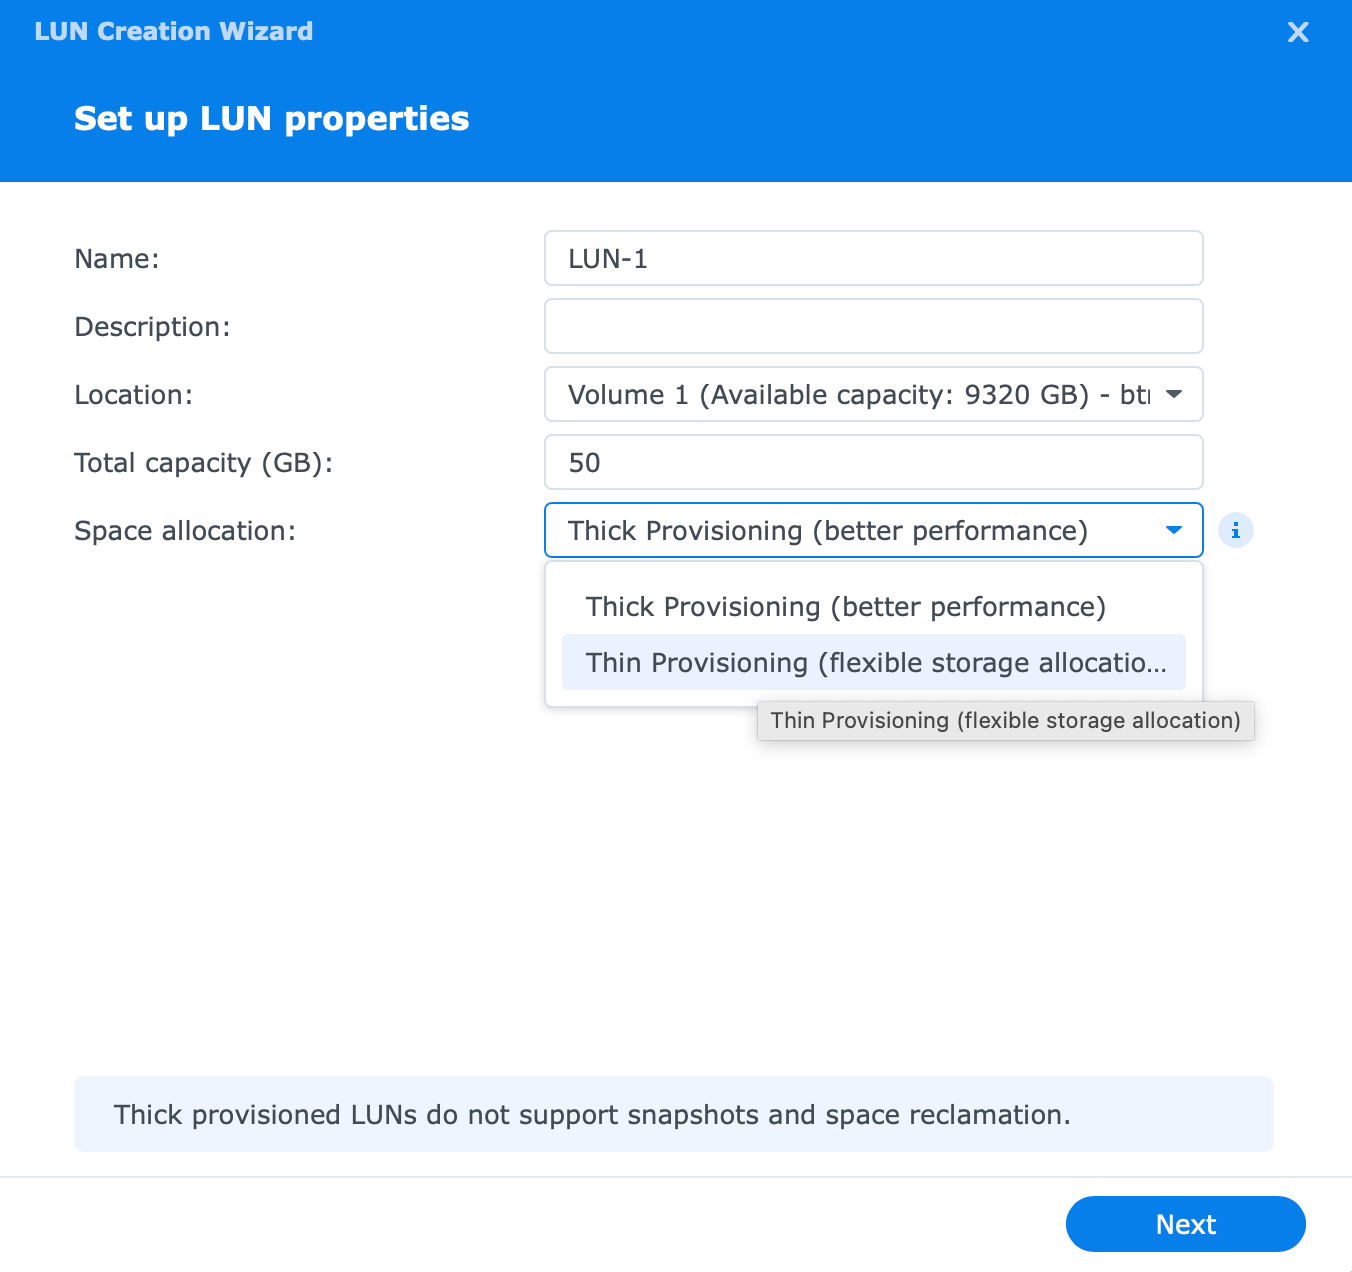
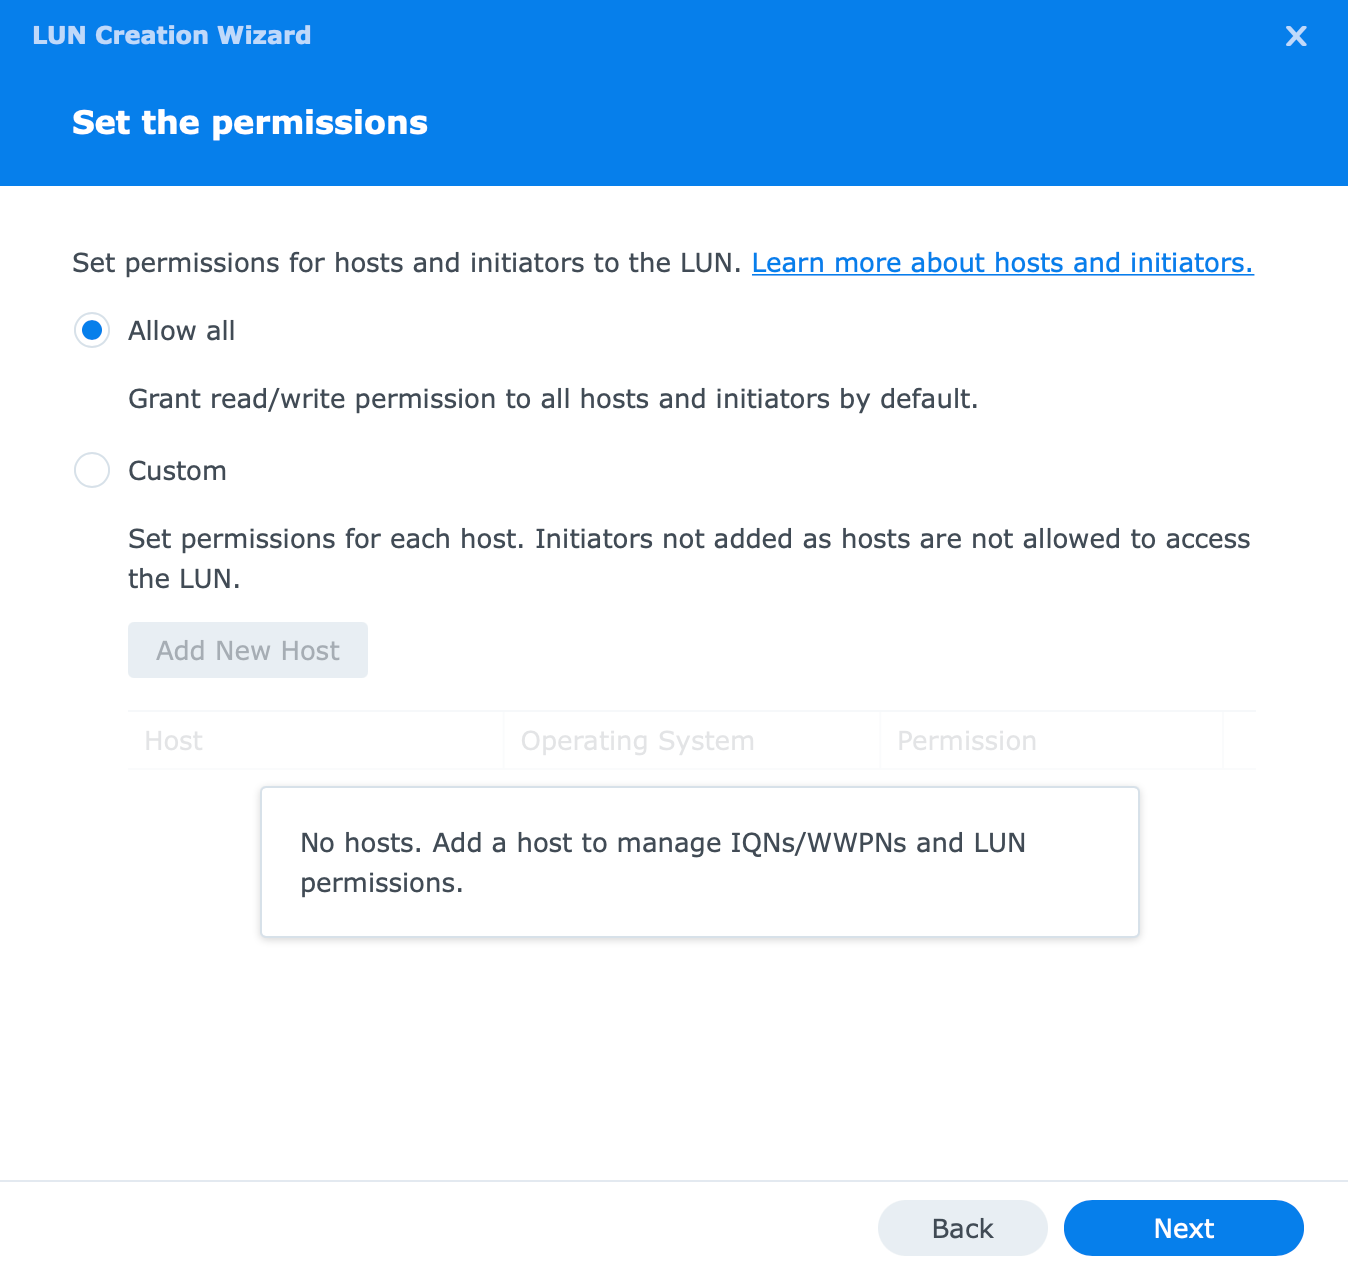
As you can see there are several options that need our attention but I would like to focus on some of them. Apart from the obvious elements here like name, and capacity, there are also location and space allocation settings.
Now if you are running multiple volumes NAS, you will have the option to choose where you want your LAN to live initially. Initially, because you will have the option to migrate the LUN at a later time if you choose to do so. This is a new feature and a welcome one to that. More on this later on.
When it comes to space allocation setting you will have two options here. Thick and thin provisioning. One is slower but can support snapshots (thin), one is faster but doesn't support snapshots. So it will be up to you to decide on the provisioning type.
I will use thin, as I want to get the benefit of snapshots and replication. Click Next when ready.
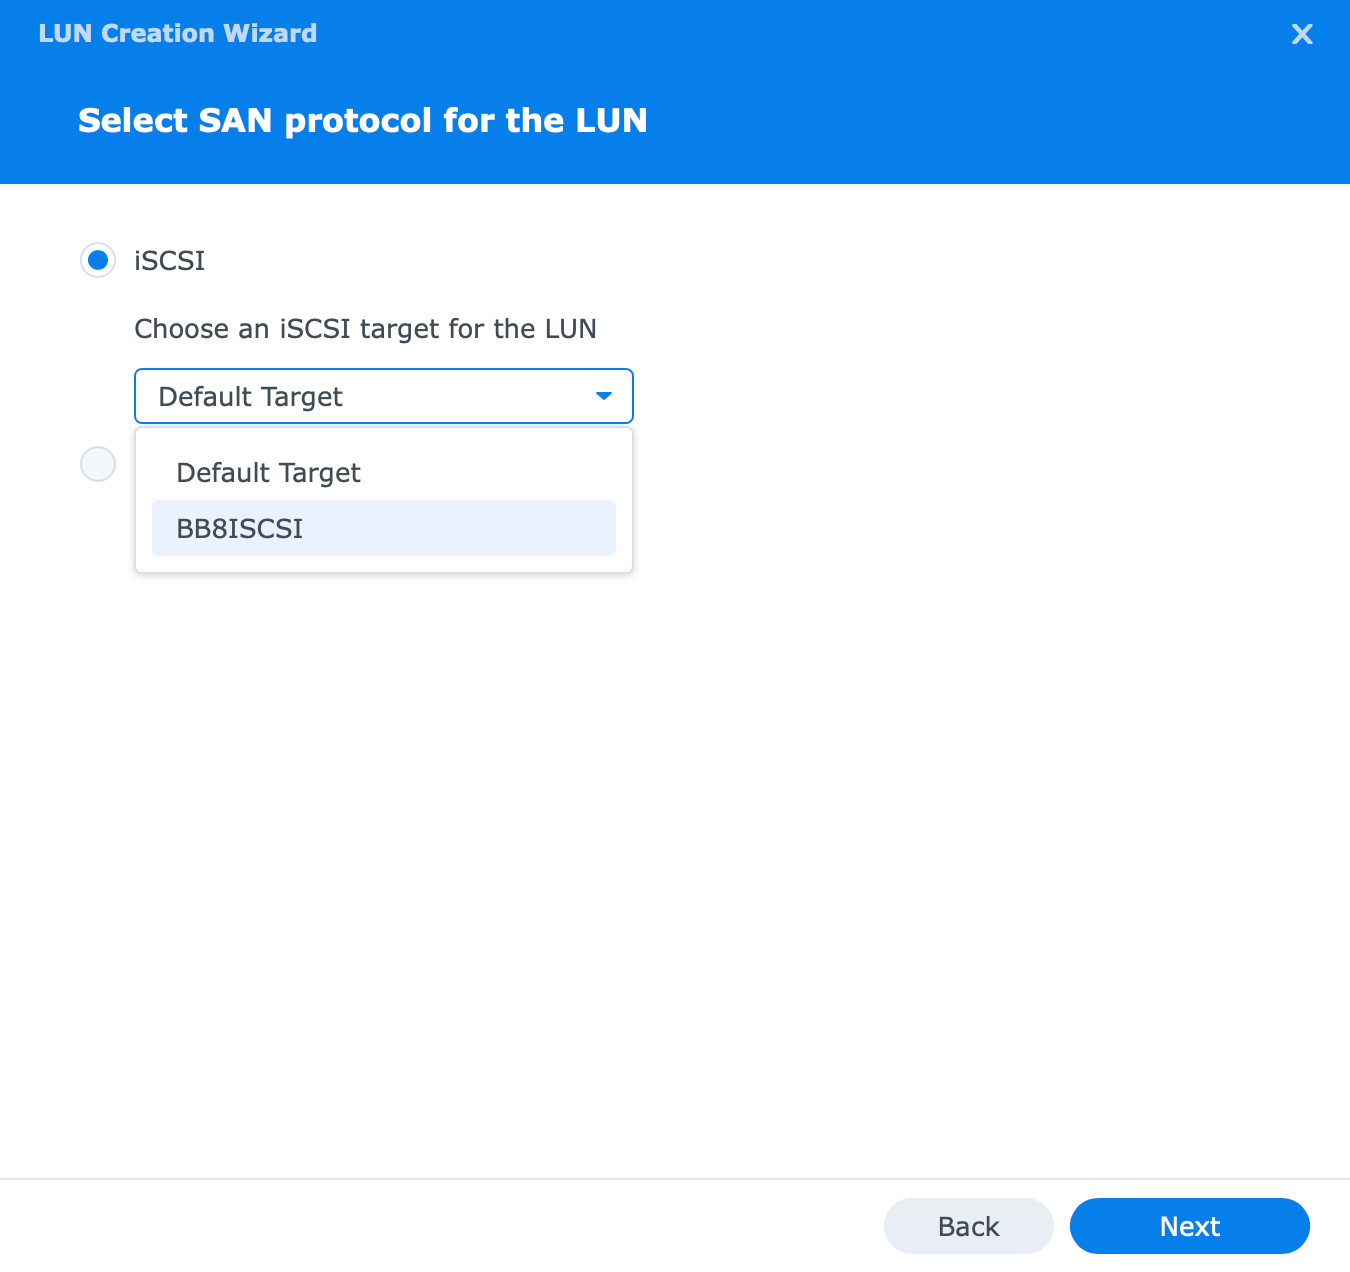
After you have set the configuration of the LUN it is time to either map the LUN to a specific target or skip it for now.
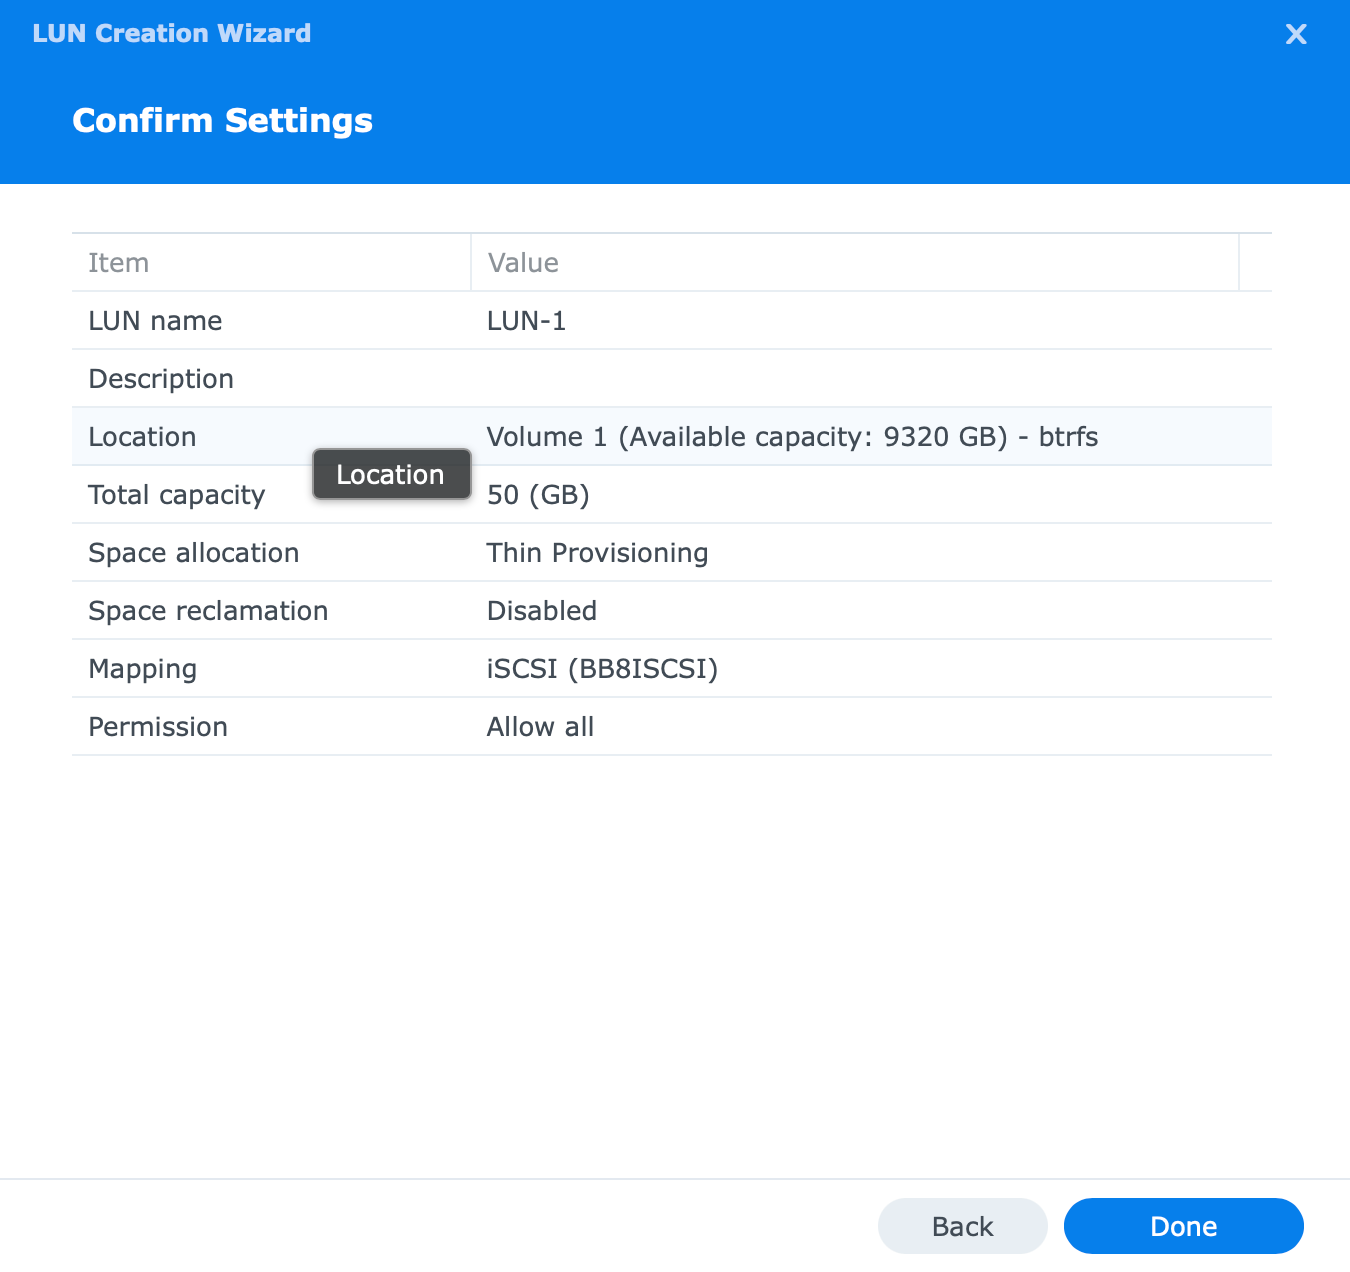
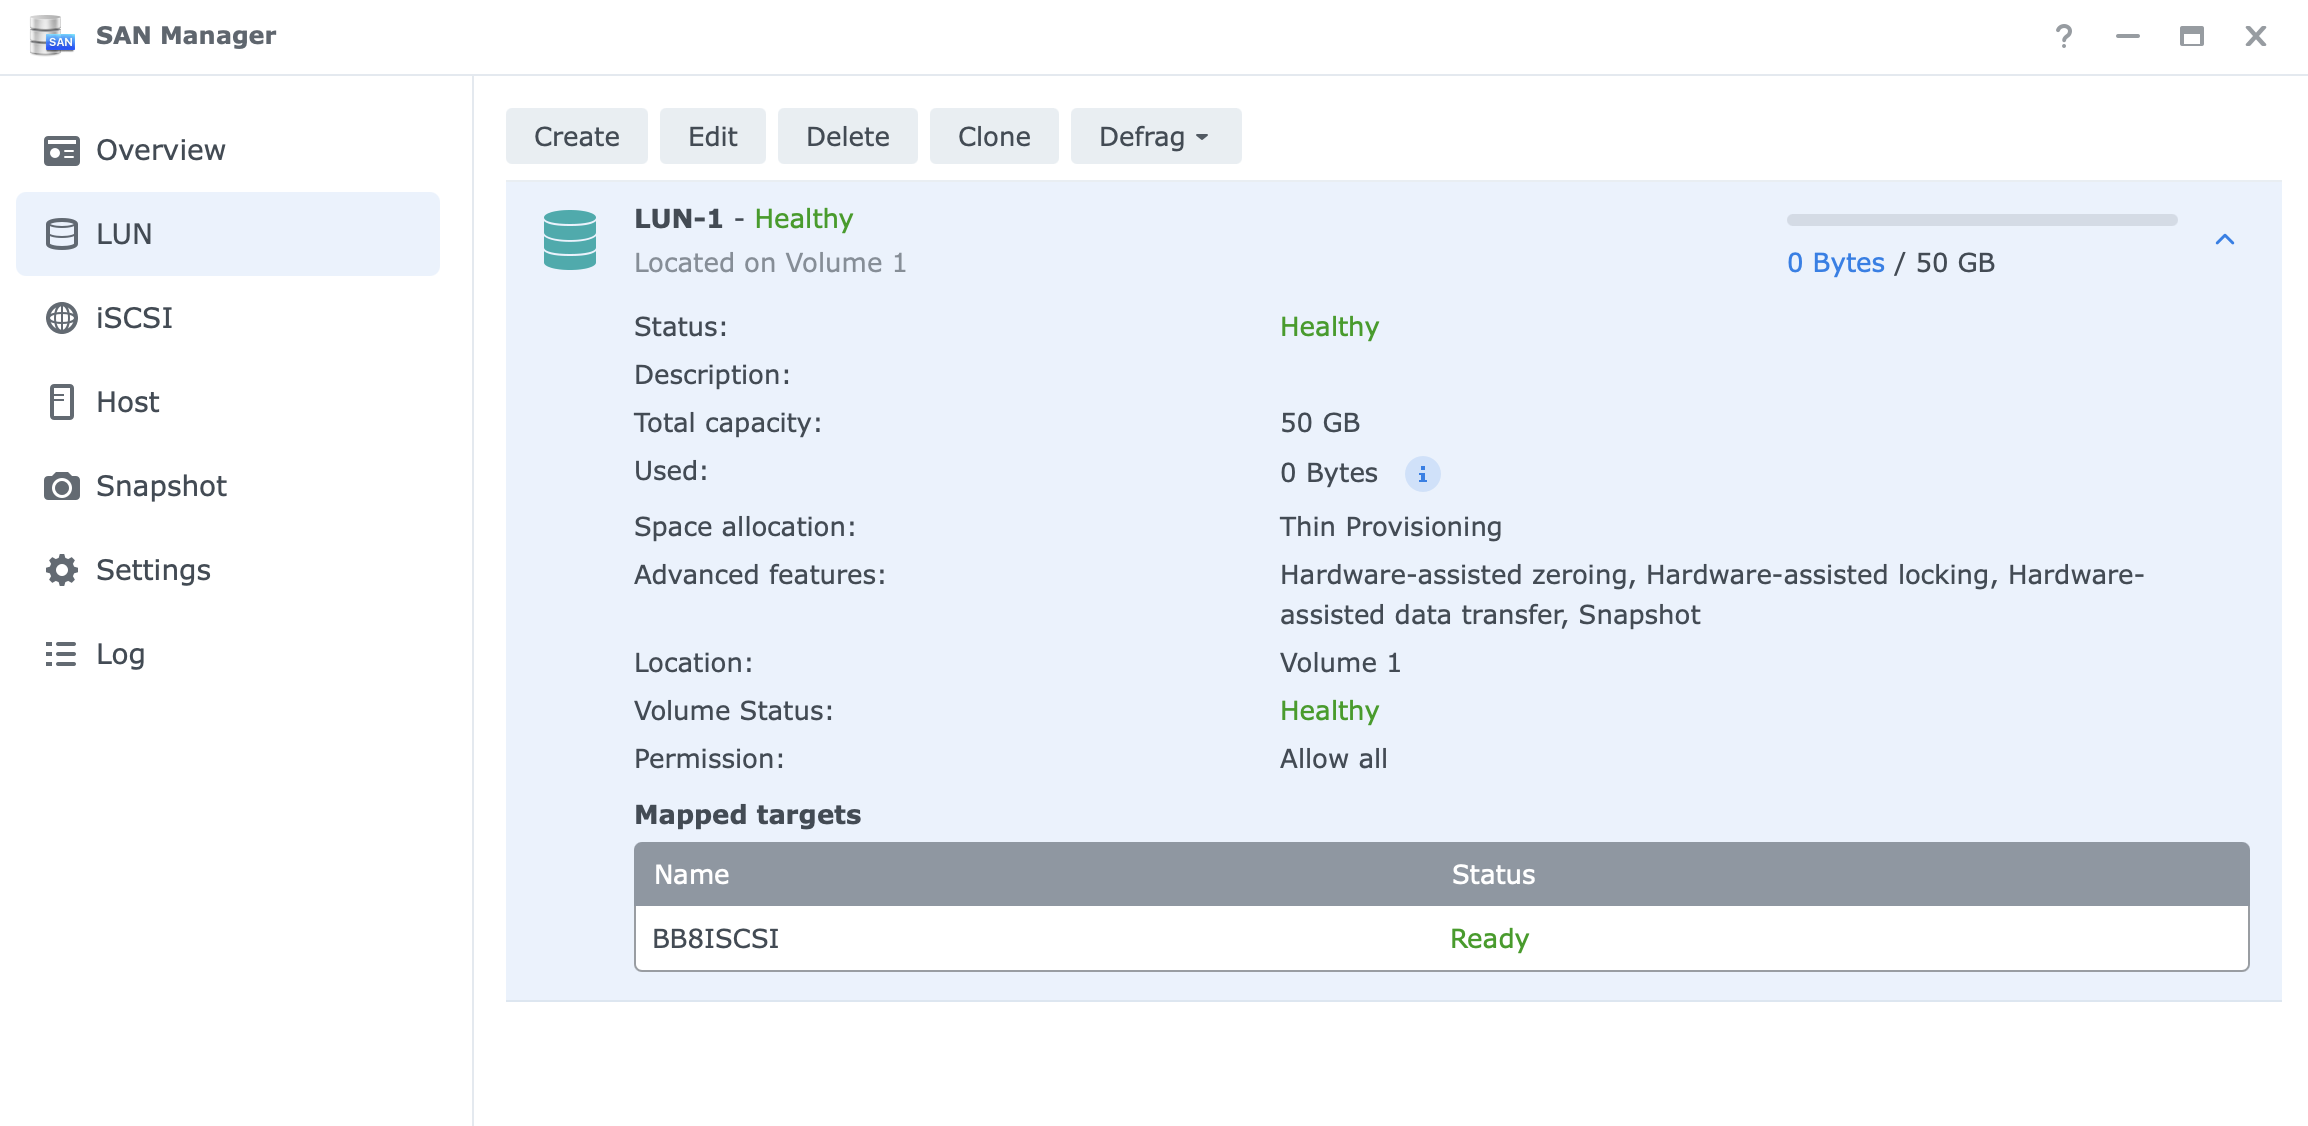
Once the process is complete, the LUN will appear in the SAN Manager.
Now that you have both the target and LUN ready, it is time to connect them to the client end and make use of it. As I said before, Windows 10 client will be used for this demo.
Connect and format your iSCSI LUN
Before you can start using your iSCSI LUN, you will need to have a client device with an OS that supports iSCSI protocol. By default, Windows OS supports it and has a free built-in iSCSI initiator.
iSCSI Initiator
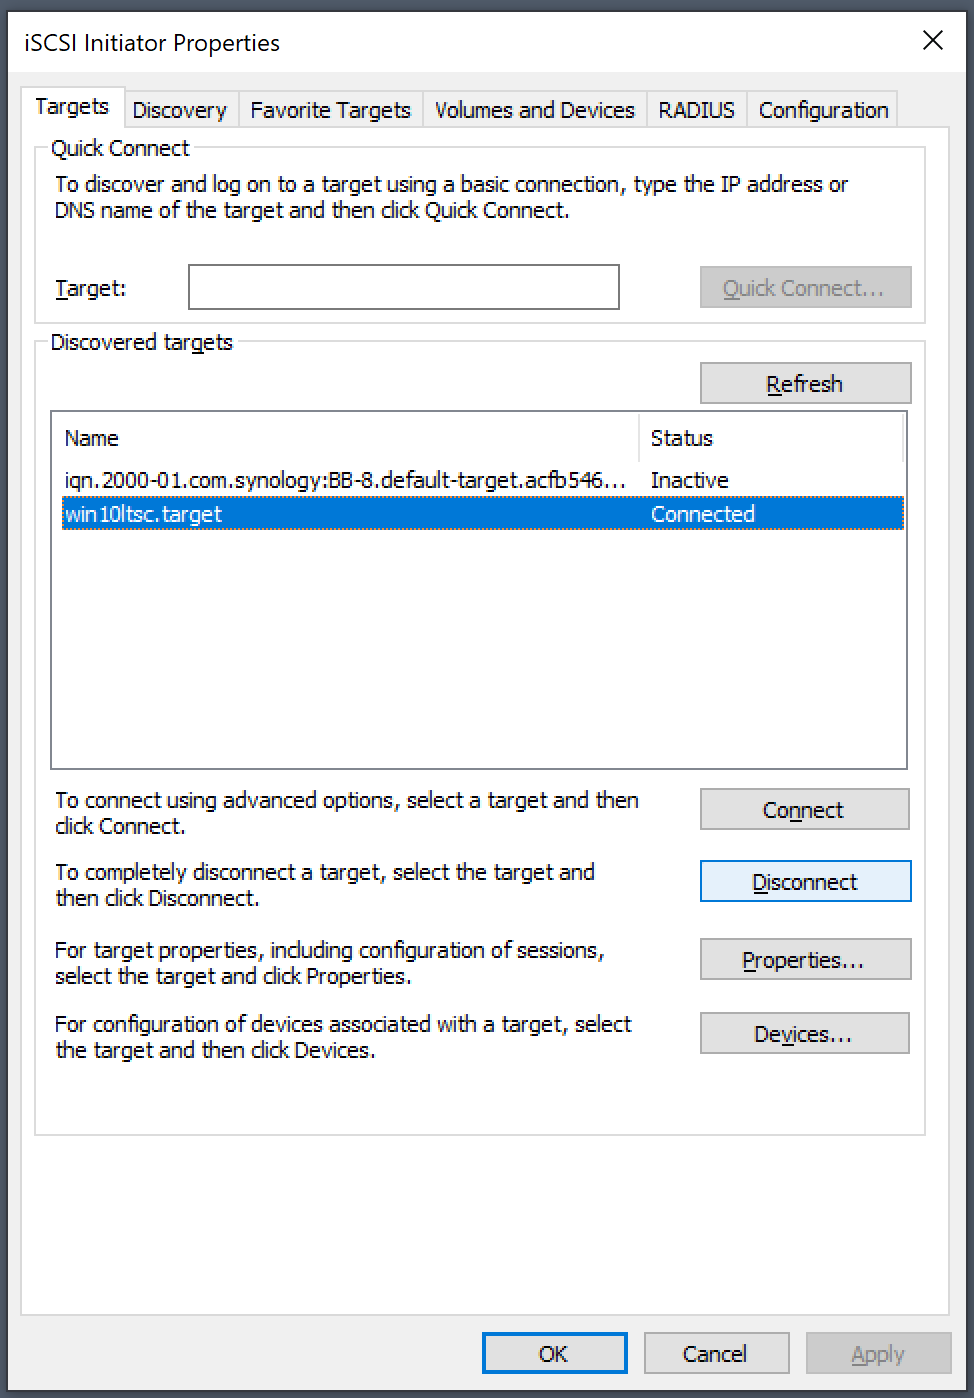
To start off, open your Start menu and type "iSCSI" this will open up iSCSI Initiator that you can configure.
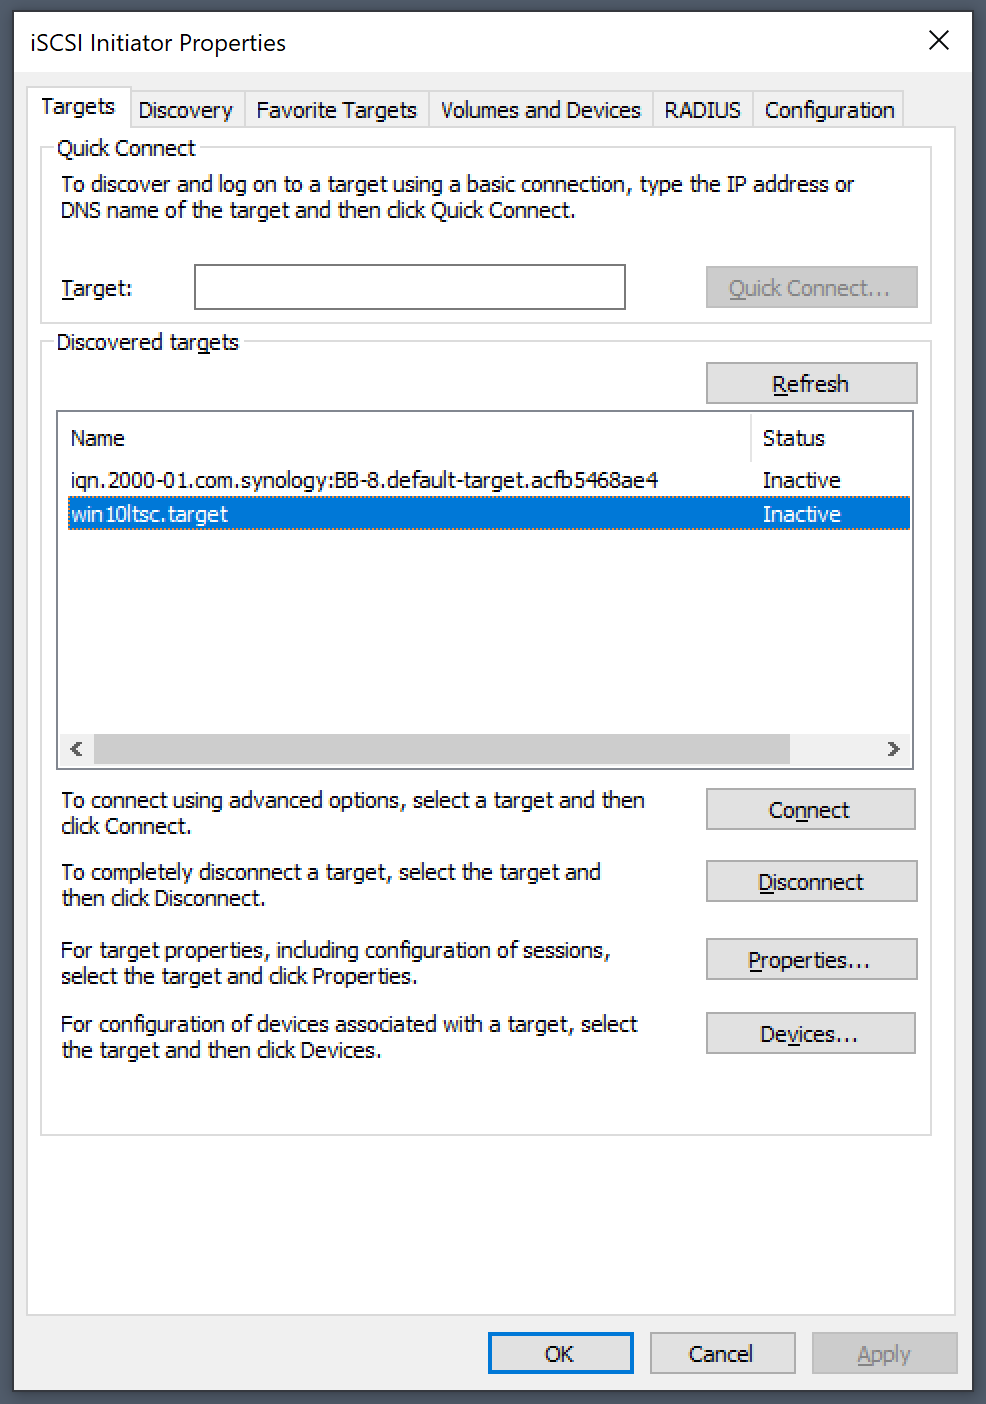
By default, iSCSI runs on TCP/3260 port, so in order to connect your Windows 10 machine with your NAS and it's iSCSI target, you need to enter the IP address of your NAS in the Target field and connect.
As a result (picture above), you will get the list of all discovered targets. You will notice that the name of the targets is identical to the names in the SAN Manager on DSM end.
Next, choose your target, and click the Connect button.

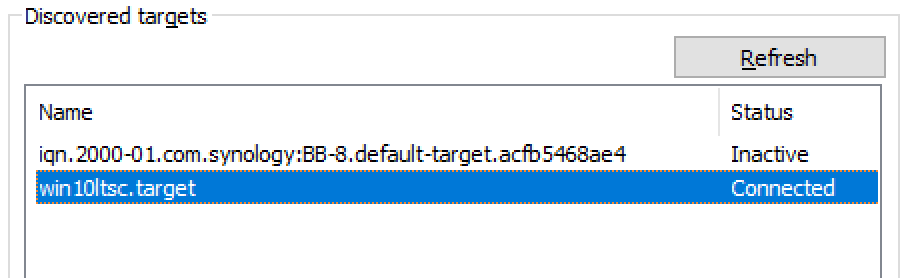
Once you have connected to your target, you will see the status has changed to Connected.
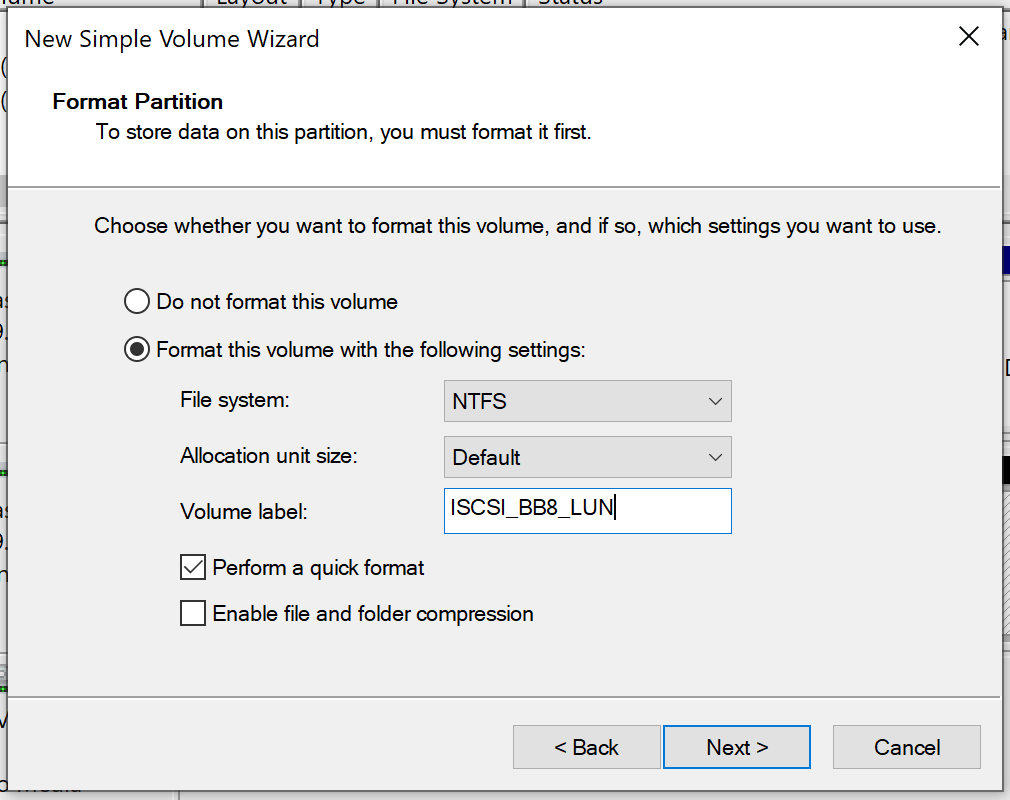
Disk management and format
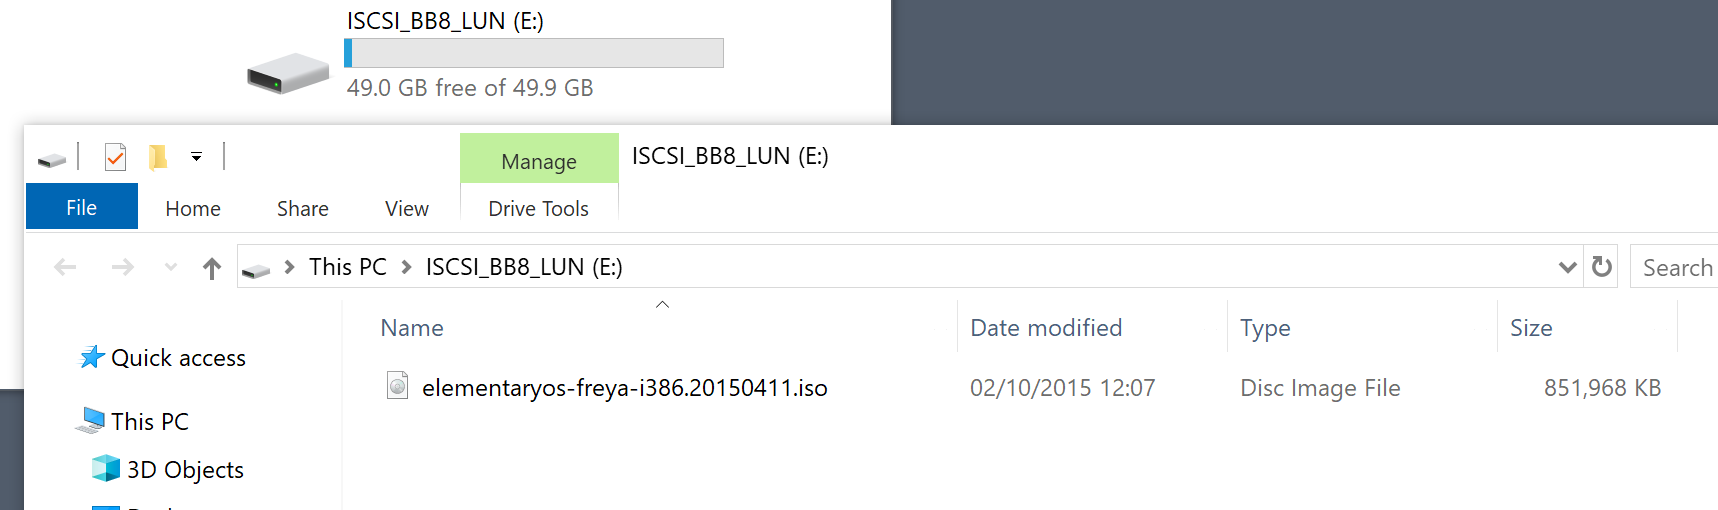
Finally, we need one more thing before we can use our LUN on the Windows 10 machine. Once you are connected to a brand new LUN, we need to format it for that system in order to use it. Consider this like adding a new hard drive and preparing it for initial use.
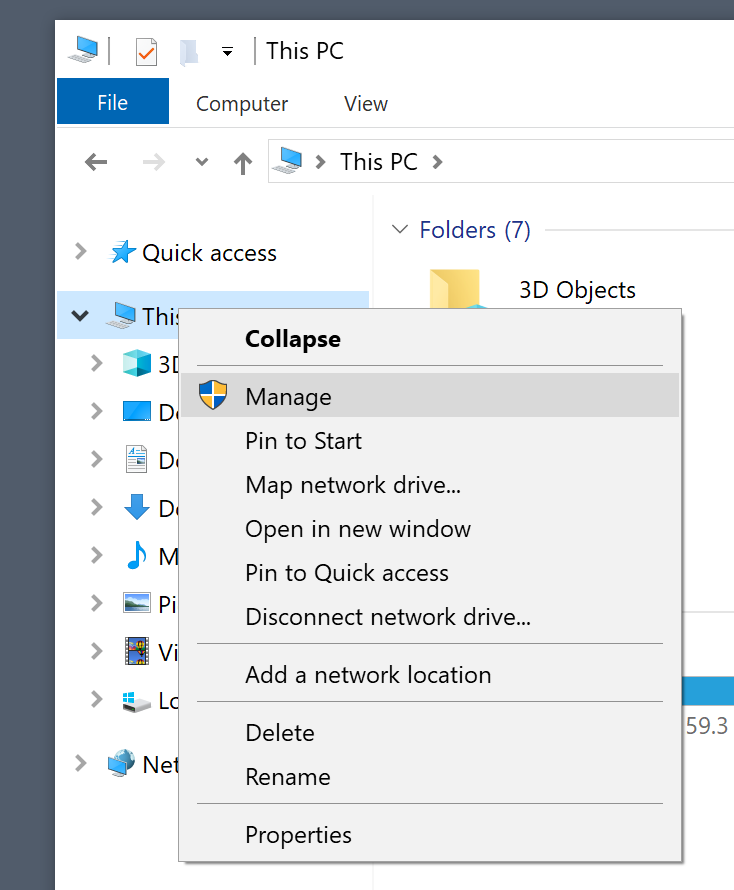
To make that happen we need to open Computer Management on your Windows 10 machine.
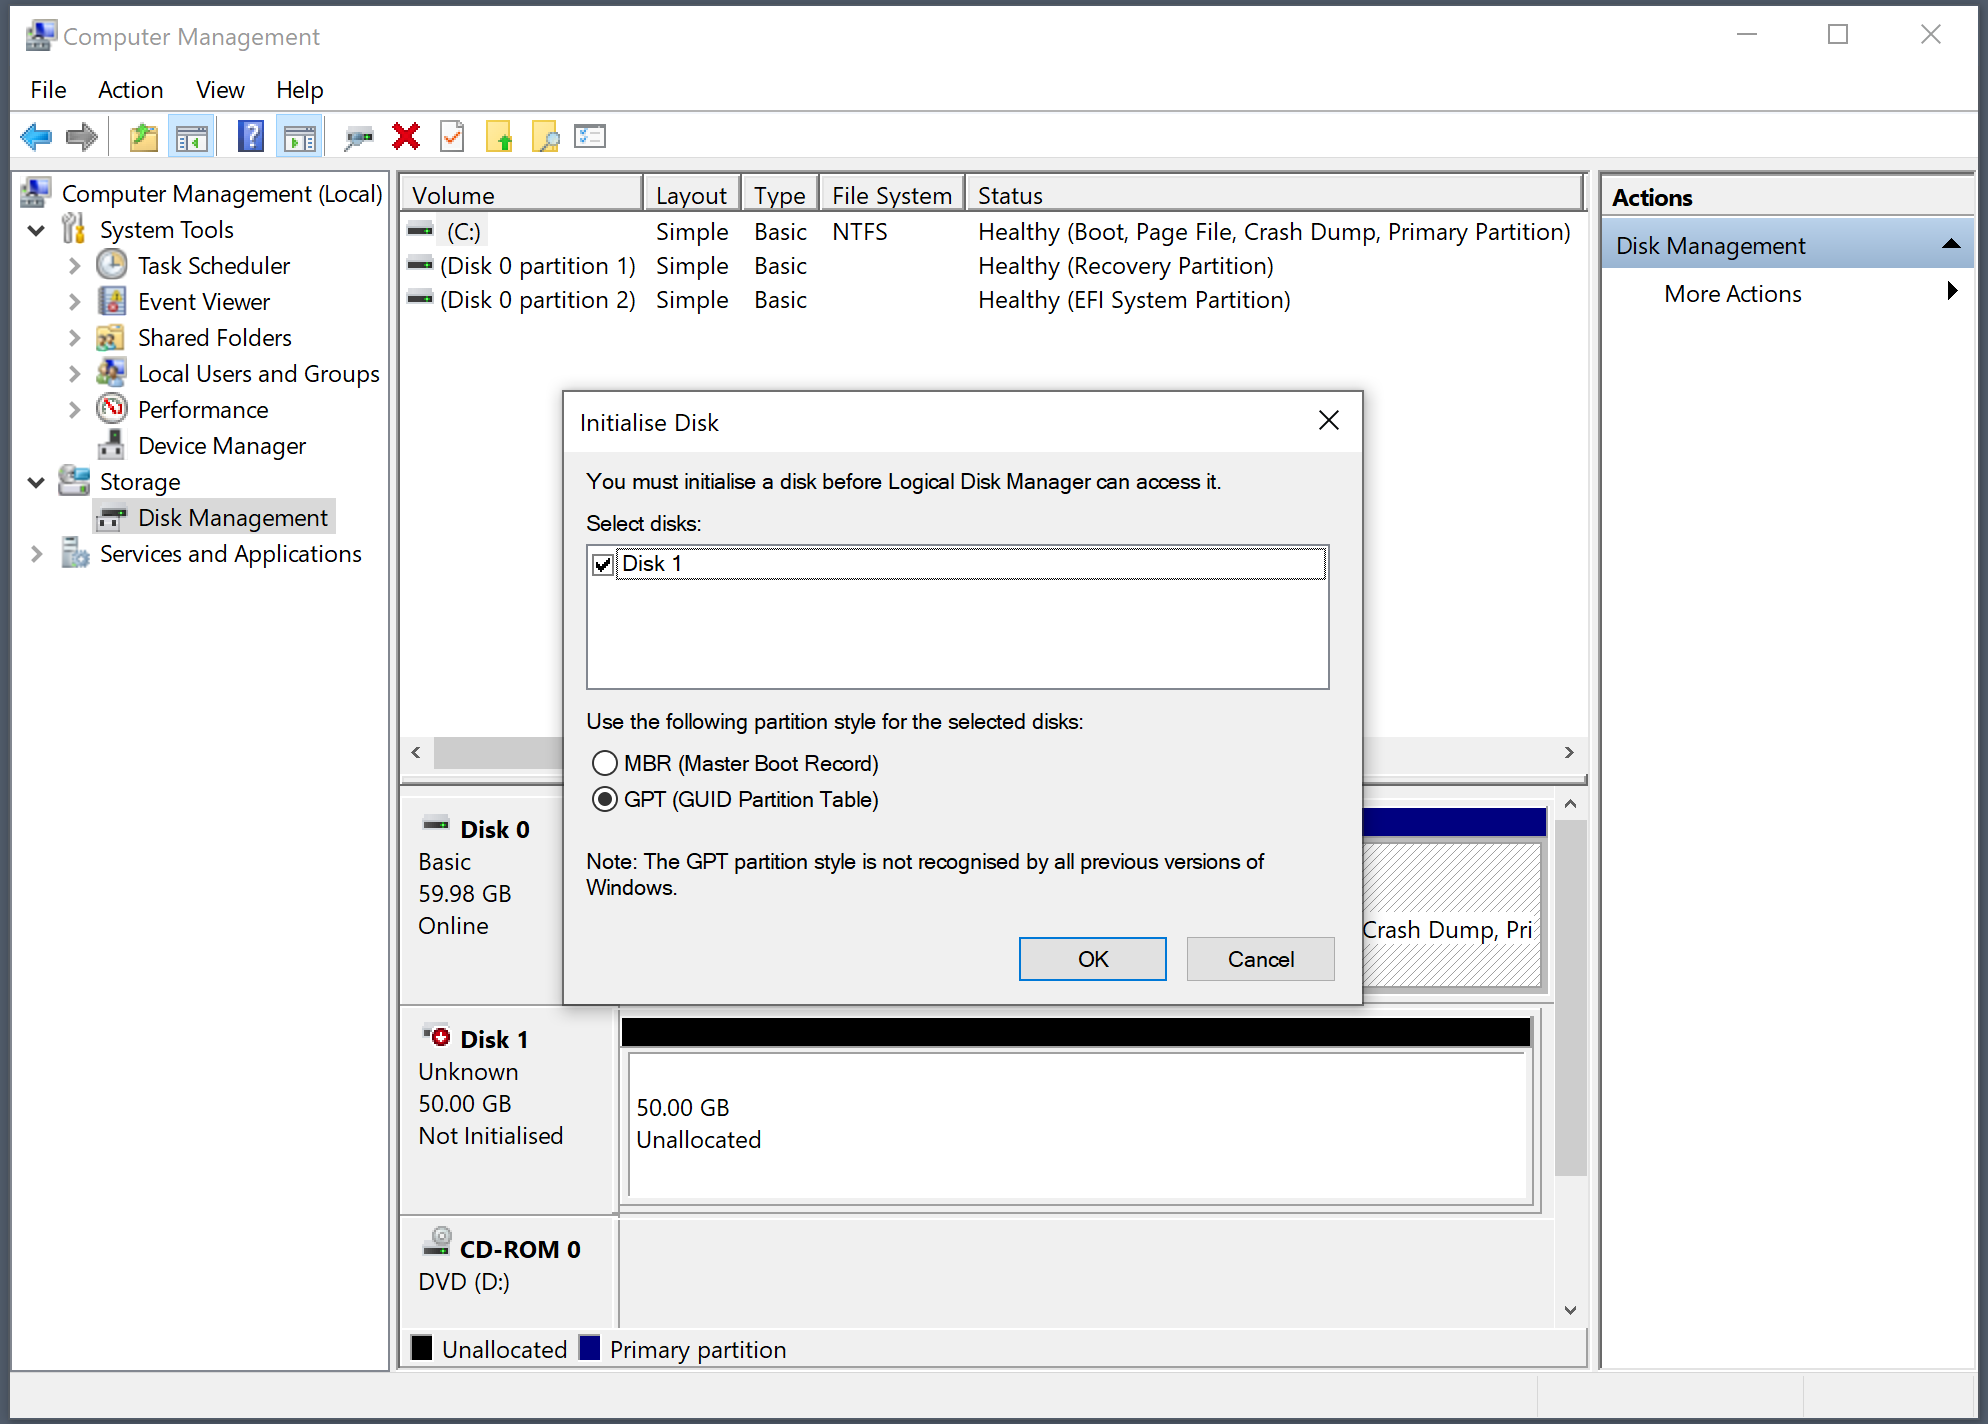
Once you jump into the Disk Management section, you will be prompted to initialize the new drive. Confirm it and format the drive as any other drive. Give it a drive letter, and a name, and you are good to go!
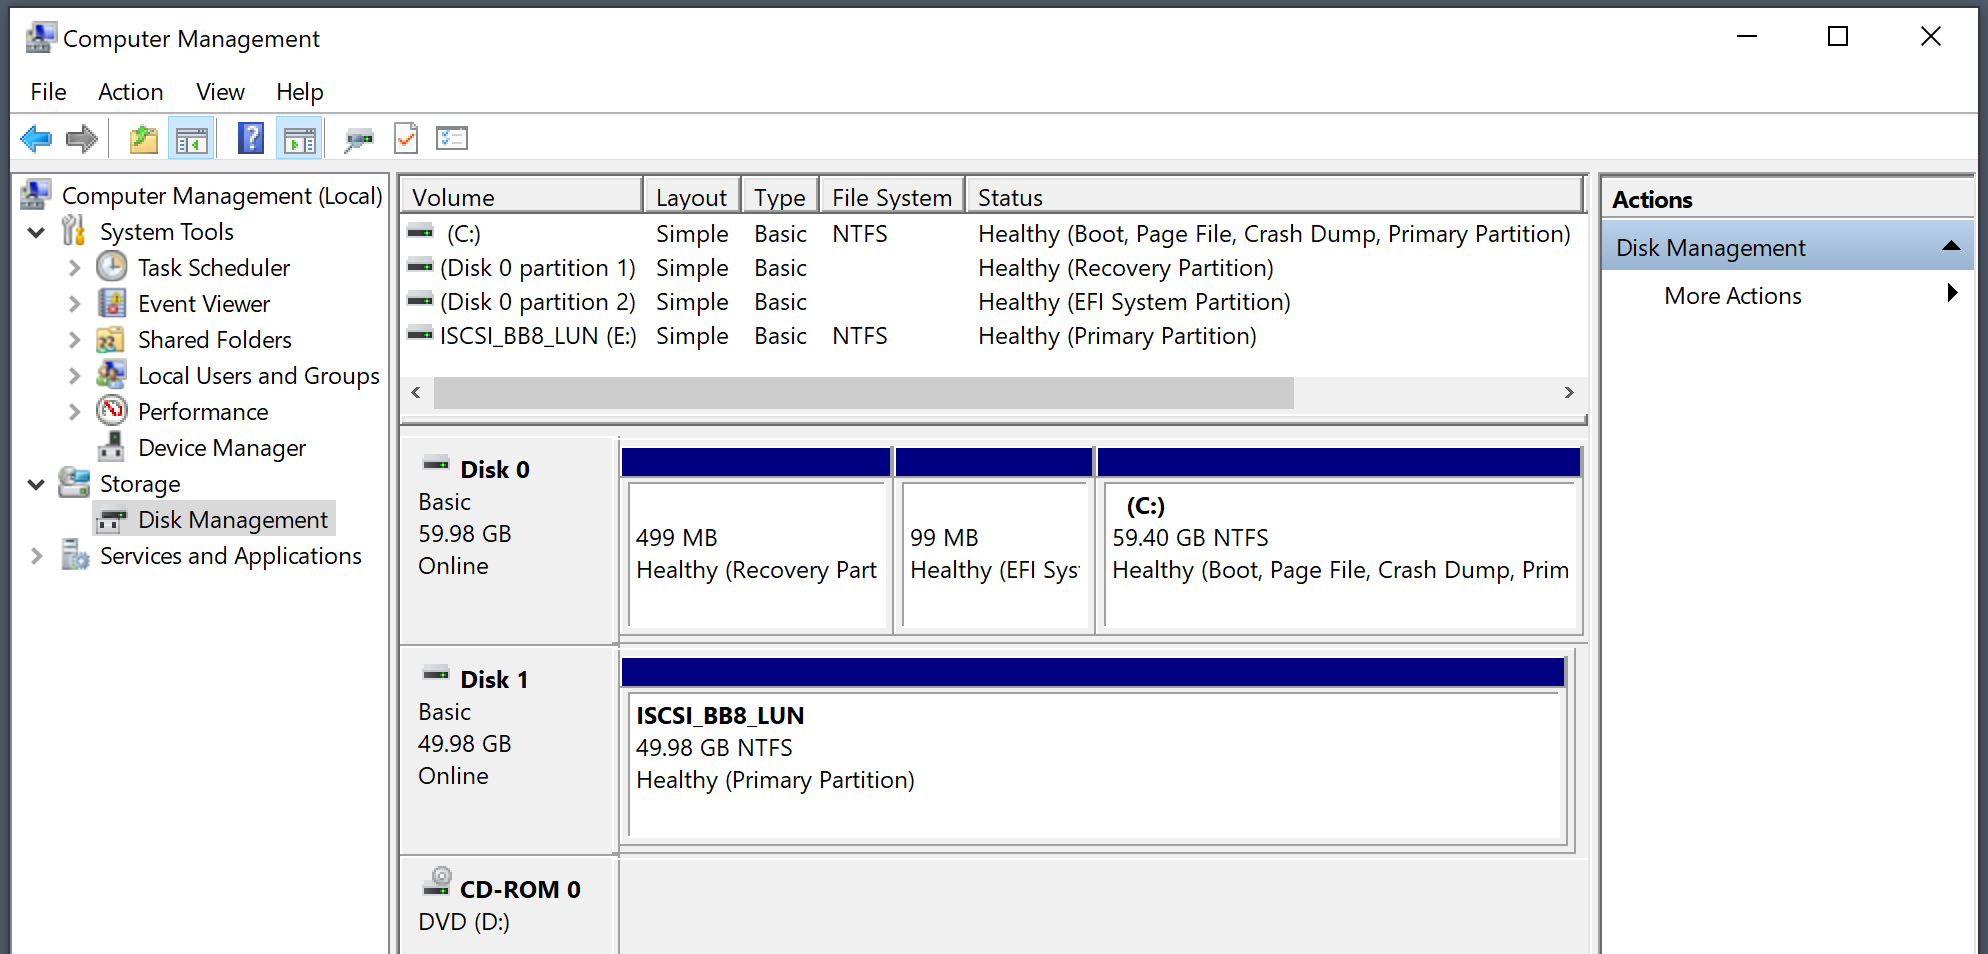
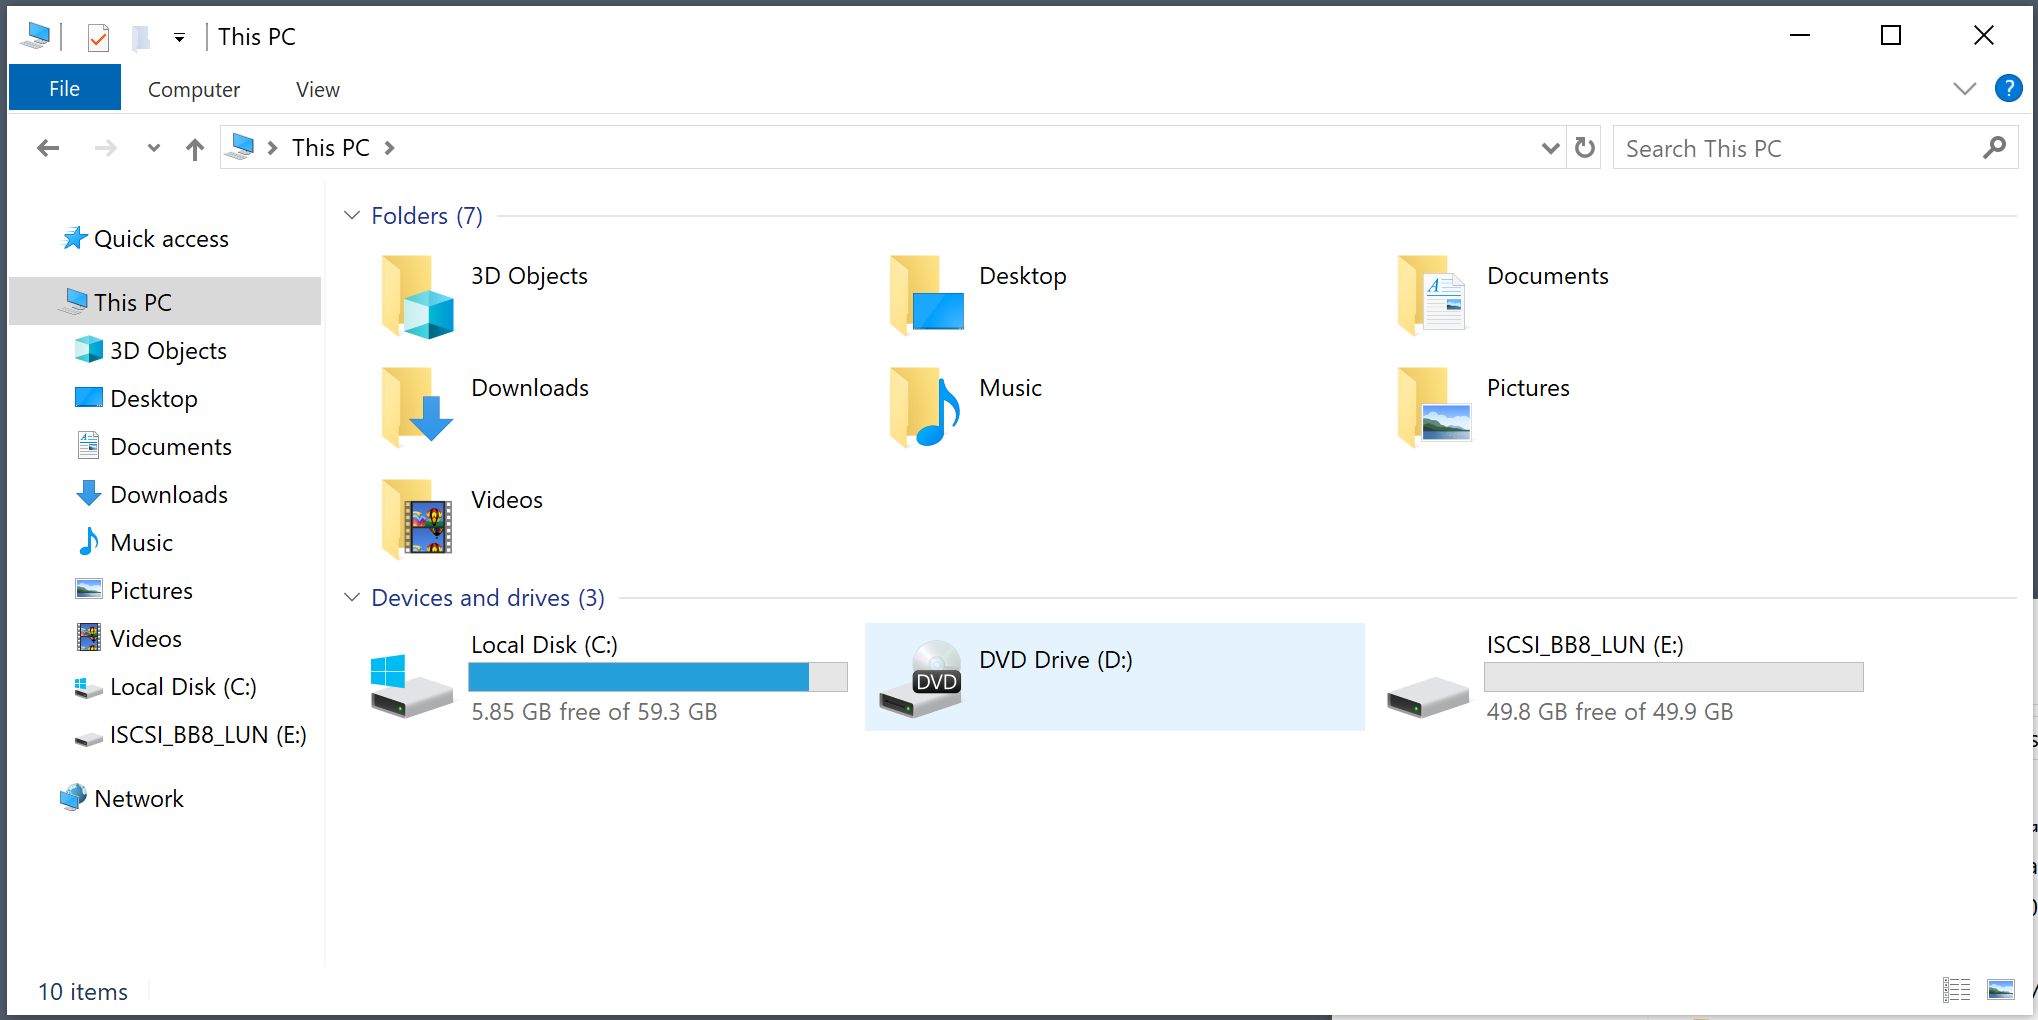
As stated before, you can see the new iSCSI LUN as a regular "drive" connected to your Windows 10 machine.
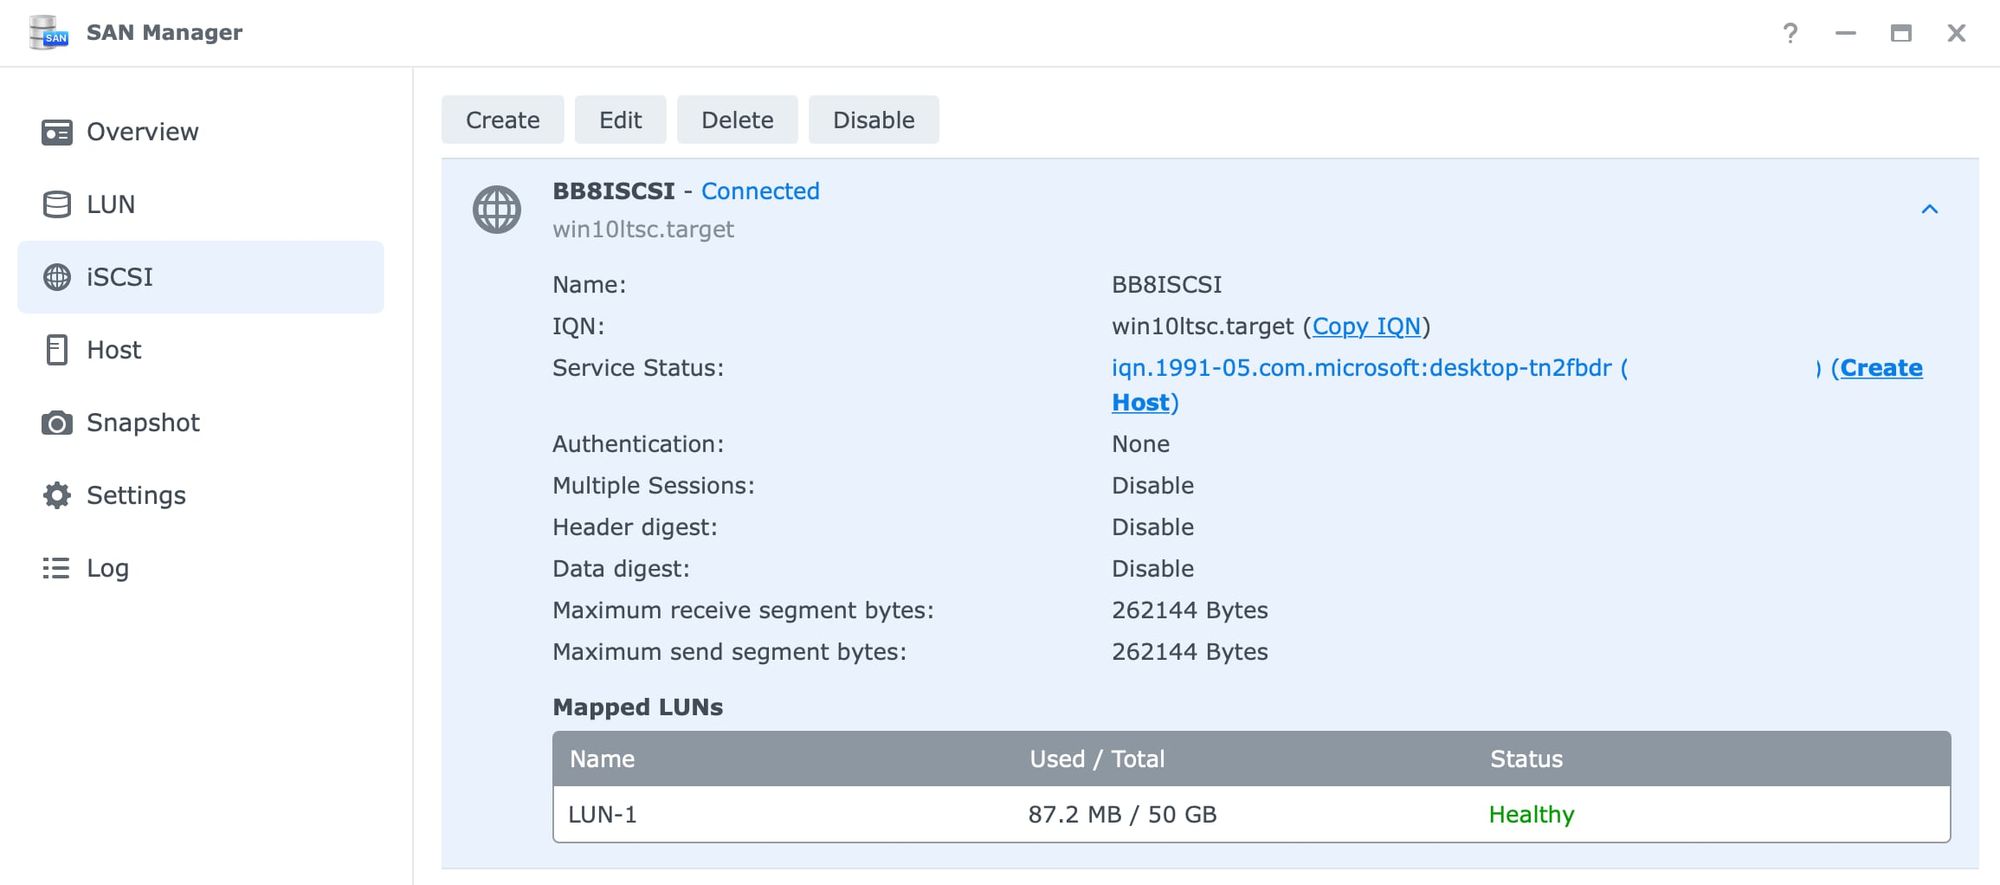
Back in DSM, the status has changed for both the iSCSI target and the LUN as well.
After some data transfer on the Windows side, the LUN capacity shows change on both ends, Windows 10, and in the SAN Manager.
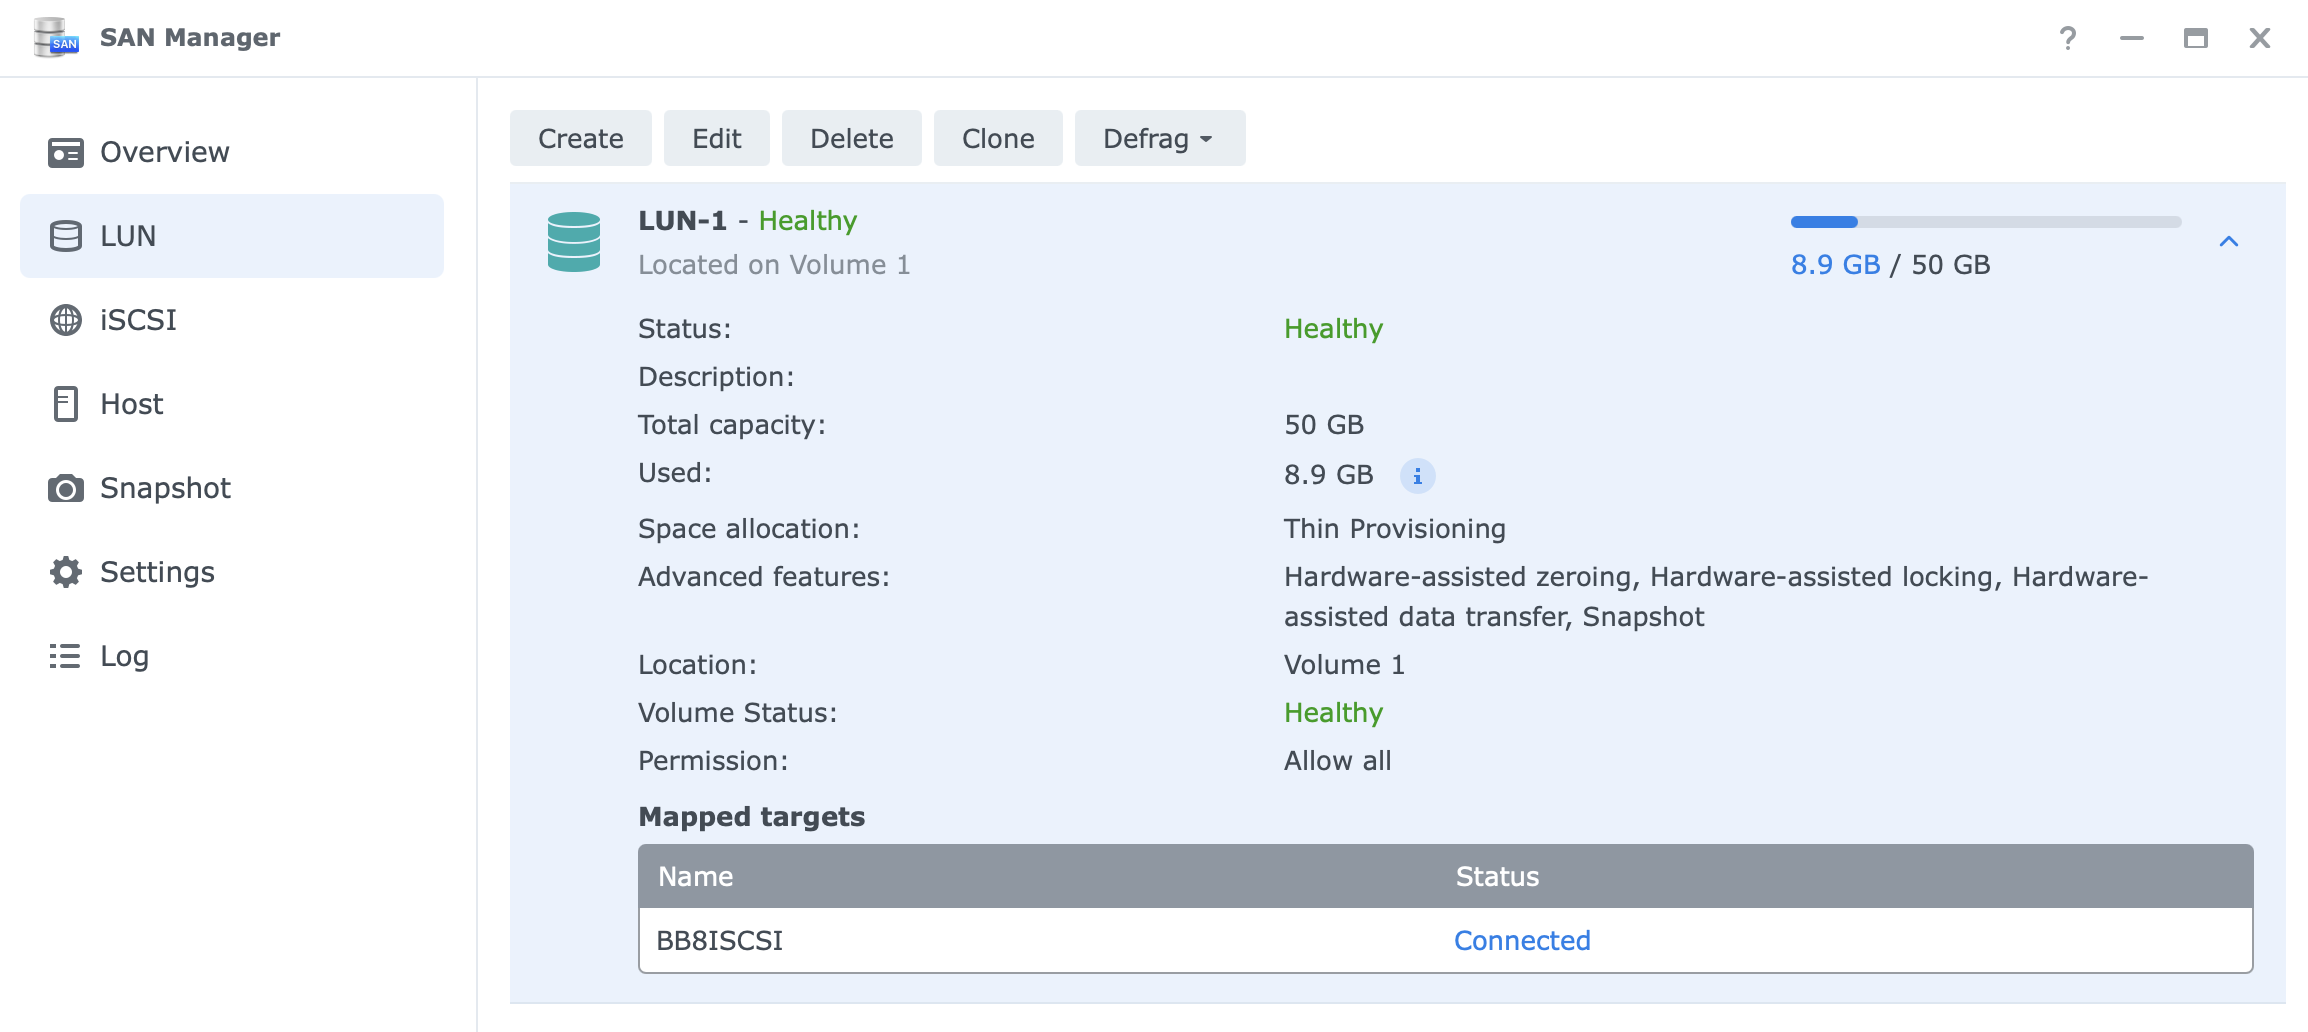
So, this confirms that the LUN is working in order and data manipulation can begin. Once you start using your iSCSI LUN as a "storage" space, be sure to remember that even though it is actually living on the NAS, you data still needs to be backed up.
LUN corruption, accidental deletion, etc, can all be the cause of many headaches, so plan accordingly!
LUN migration
Another nice feature with SAN Manager is the fact that you can migrate your LUNs from one volume to the other. This might be interesting in case you have any problems with your current volume, want to migrate specific LUNs to a faster one, or just have multiple LUNs separated to optimize performance.
In any case, migration is really easy.
NOTE: be sure to disconnect from the iSCSI target before you attempt the migration. It can be done "live", but Windows 10 might be stuck in a "reconnecting" state until you manually disconnect and connect back.
Head over to the LUN section of your SAN Manager once you have stopped the connection from your Windows 10 machine, and then click the Edit button for a LUN you want to migrate.
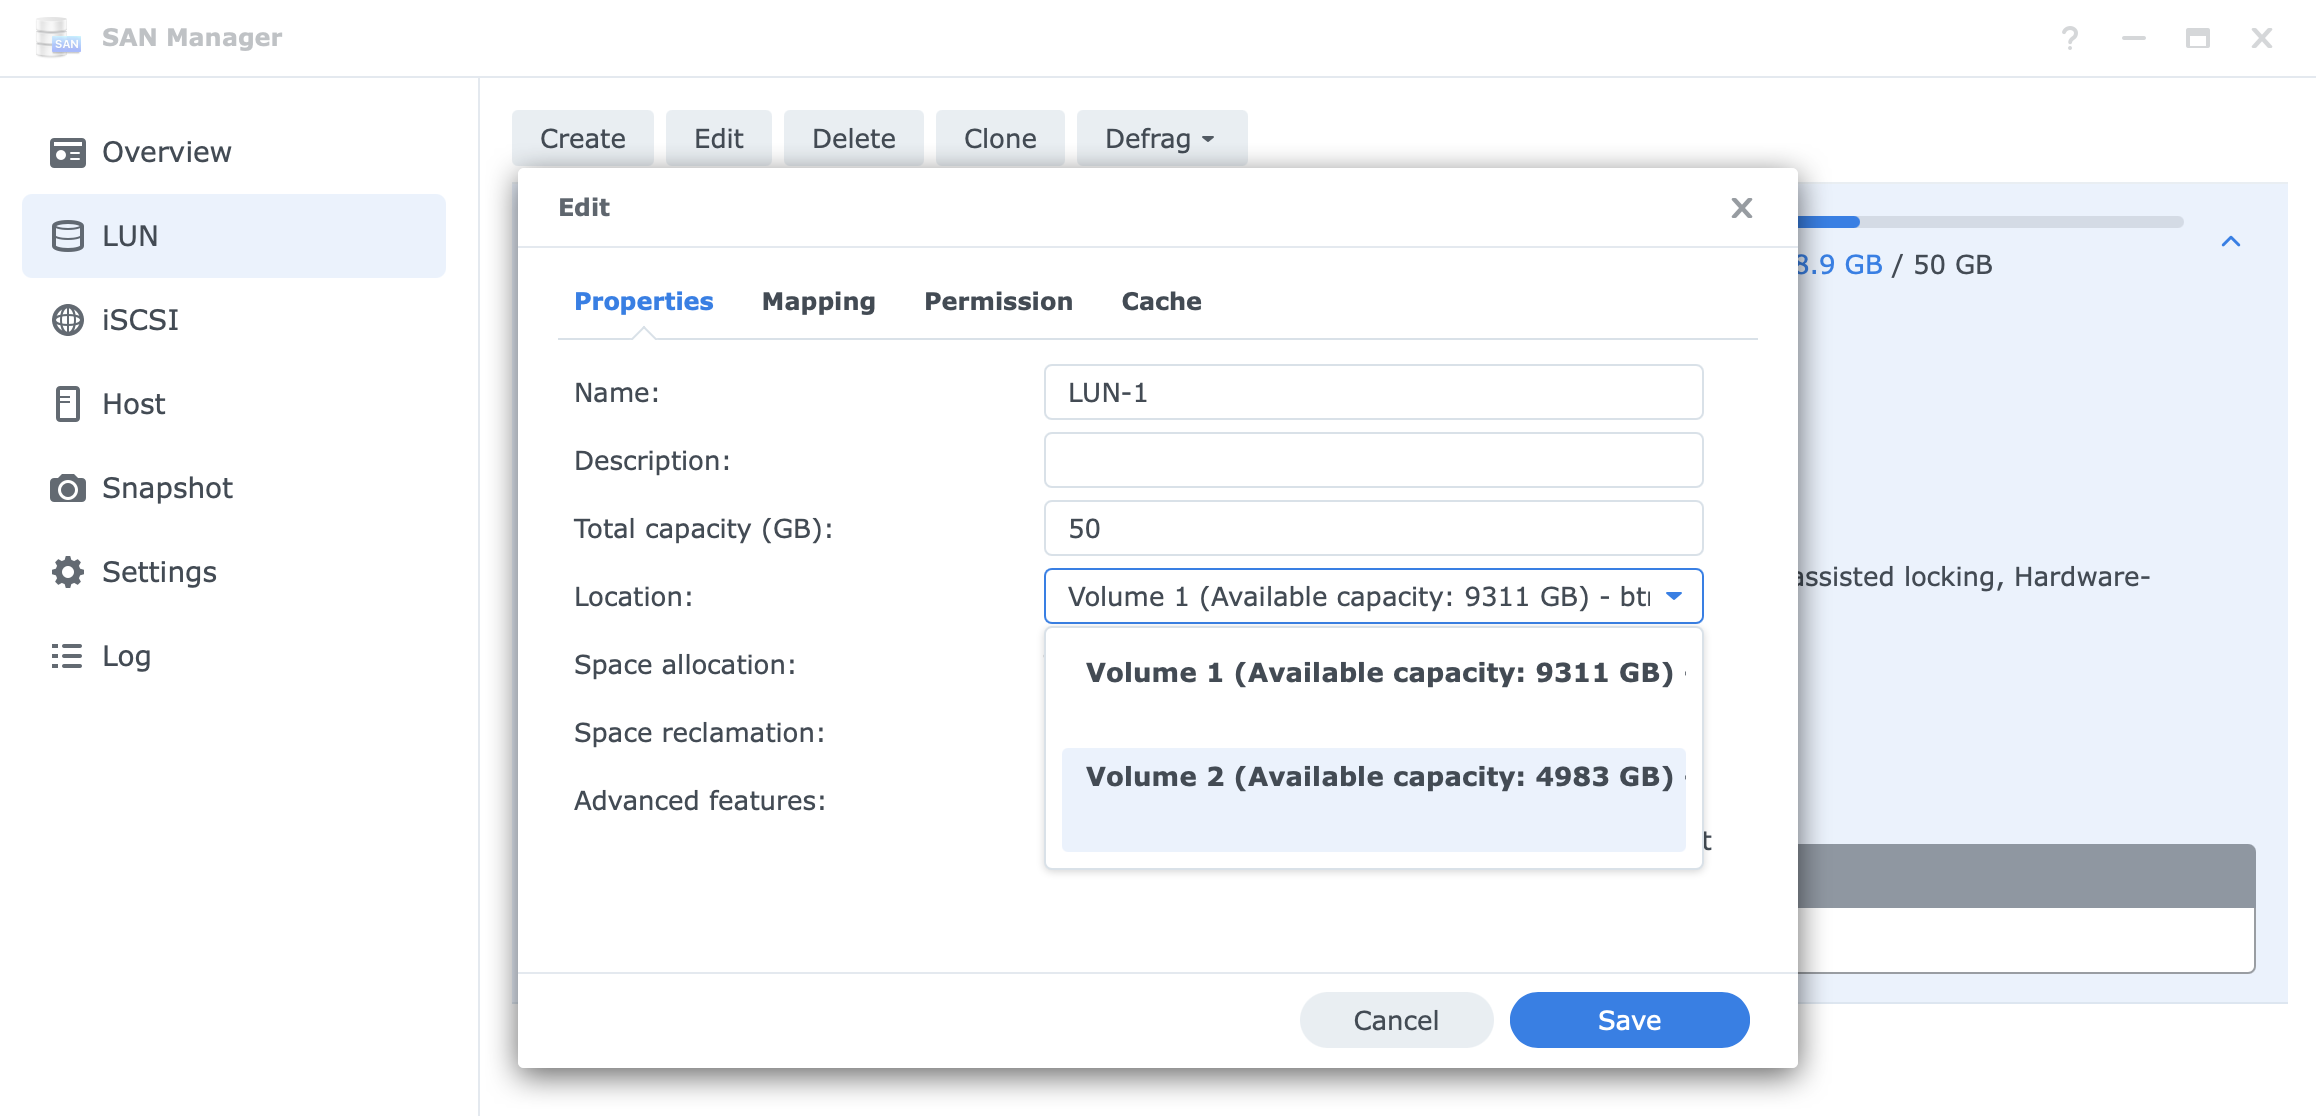
From the Location dropdown menu, select a new volume and click Save. That's it.

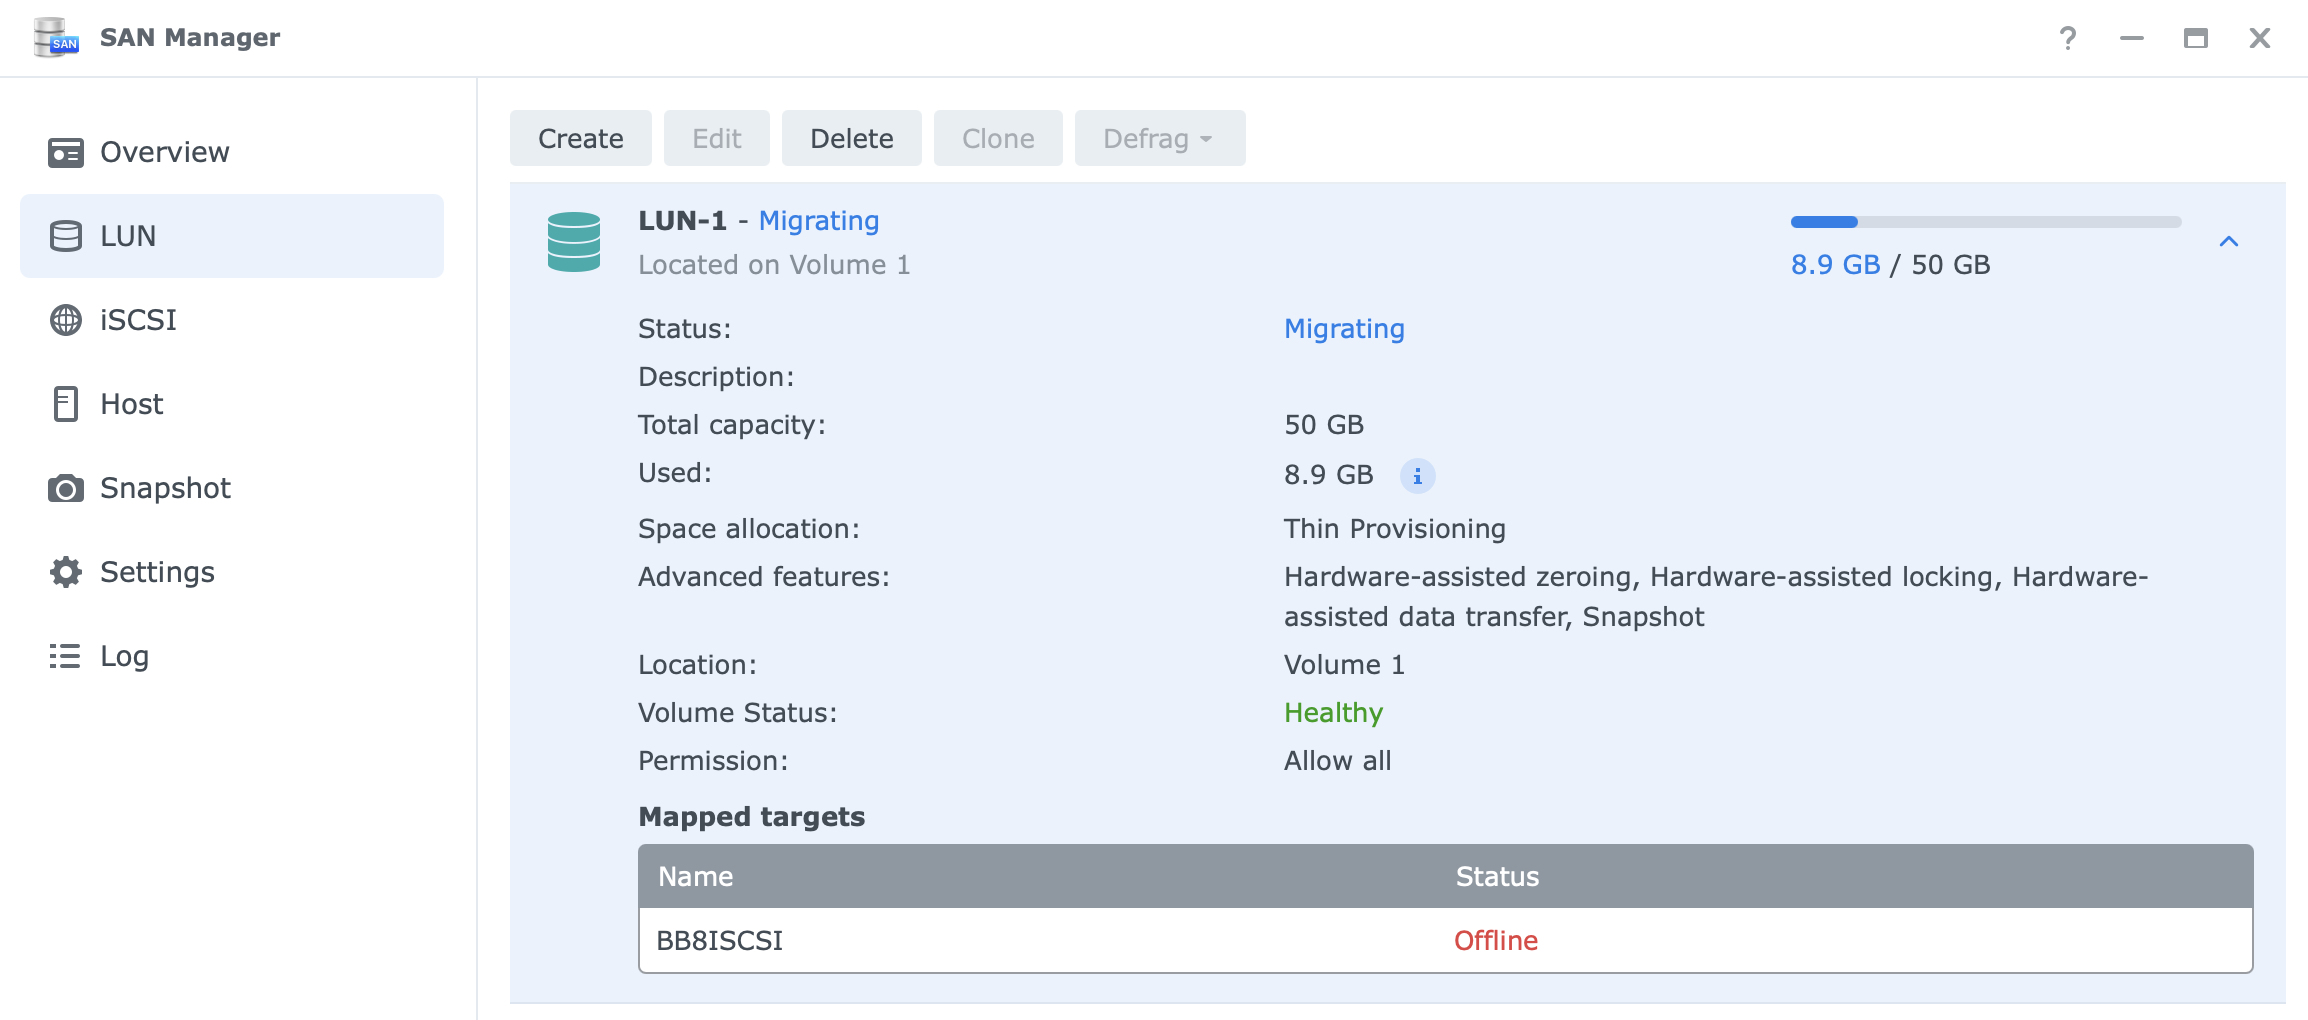
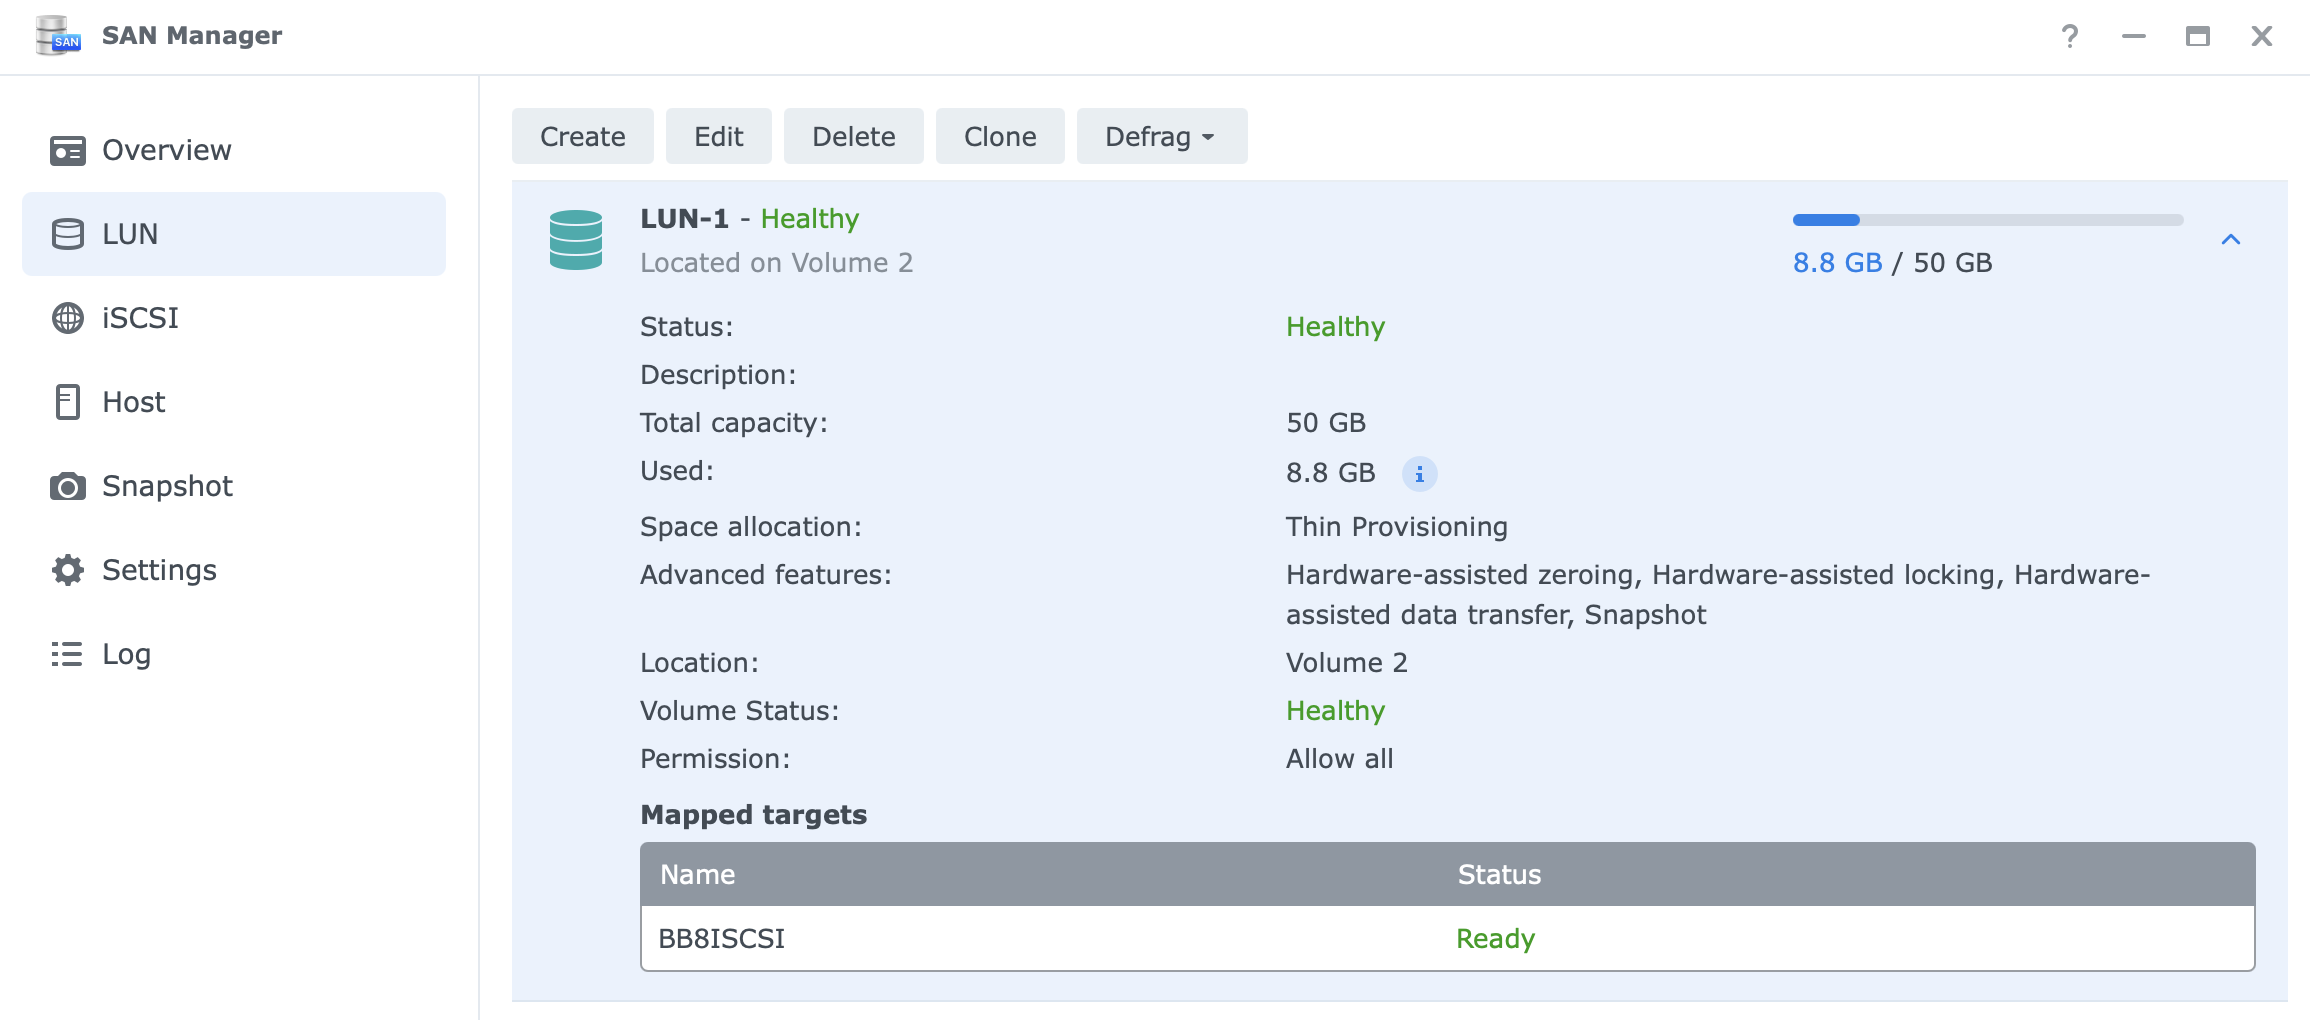
Depending on the size of the LUN and data occupied it will take some time, so be patient.
Snapshots and restore in case of disaster
Before I did warn about backing up your data that lives on your LUN. There are several ways to do that. You can use the client-side backup software that will back up the data like any other on any other HDD connected to your PC.
Another way is to use Hyper Backup to back up the iSCSI LUNs, but there is also Snapshot and replication. I will focus on snapshots in this article as it is one part of the SAN Manager that is present.
NOTE: to use snapshot, your NAS has to support the Snapshot Replication package!
Jump over to the Snapshot section of your SAN Manager to begin the process.
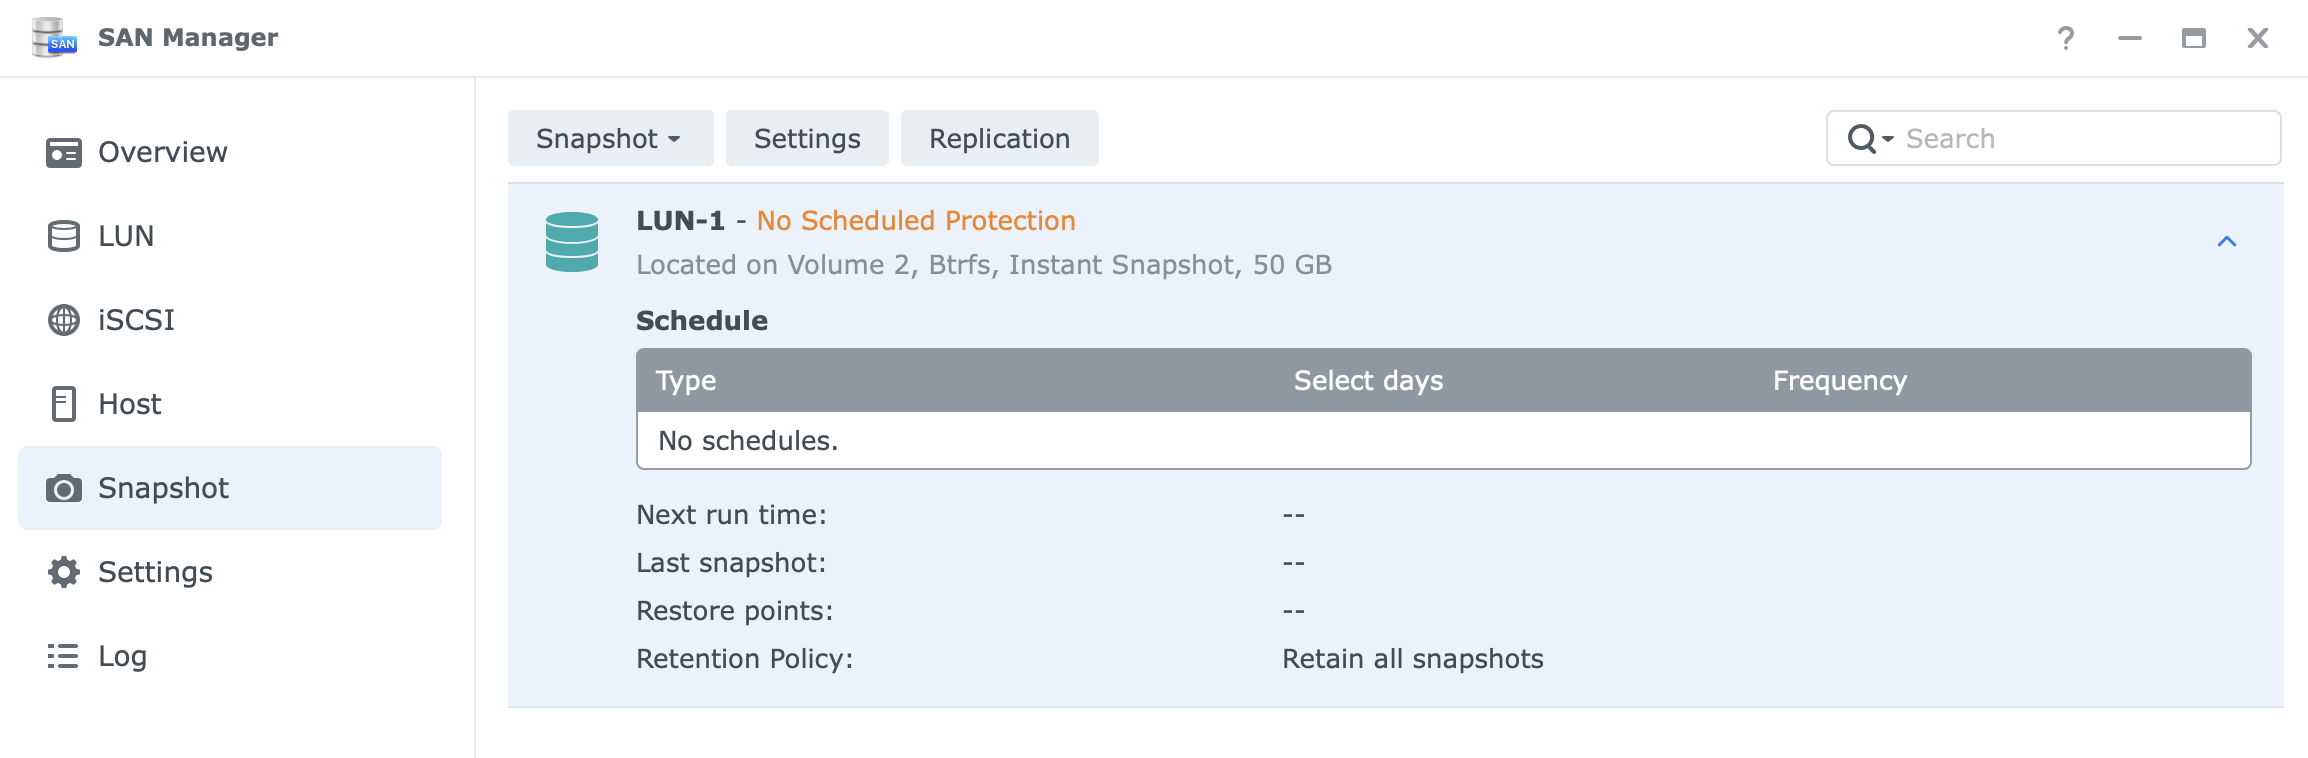
There you will see the list of all of your LUNs that you can snapshot and/or replicate. You can configure the process to be initiated manually (like in this example), or scheduled, it all comes down to your needs.
To make a snapshot (a local one) all you have to do is select the LUN from the list and from the Snapshot menu, select Take a snapshot option. That's it, done.
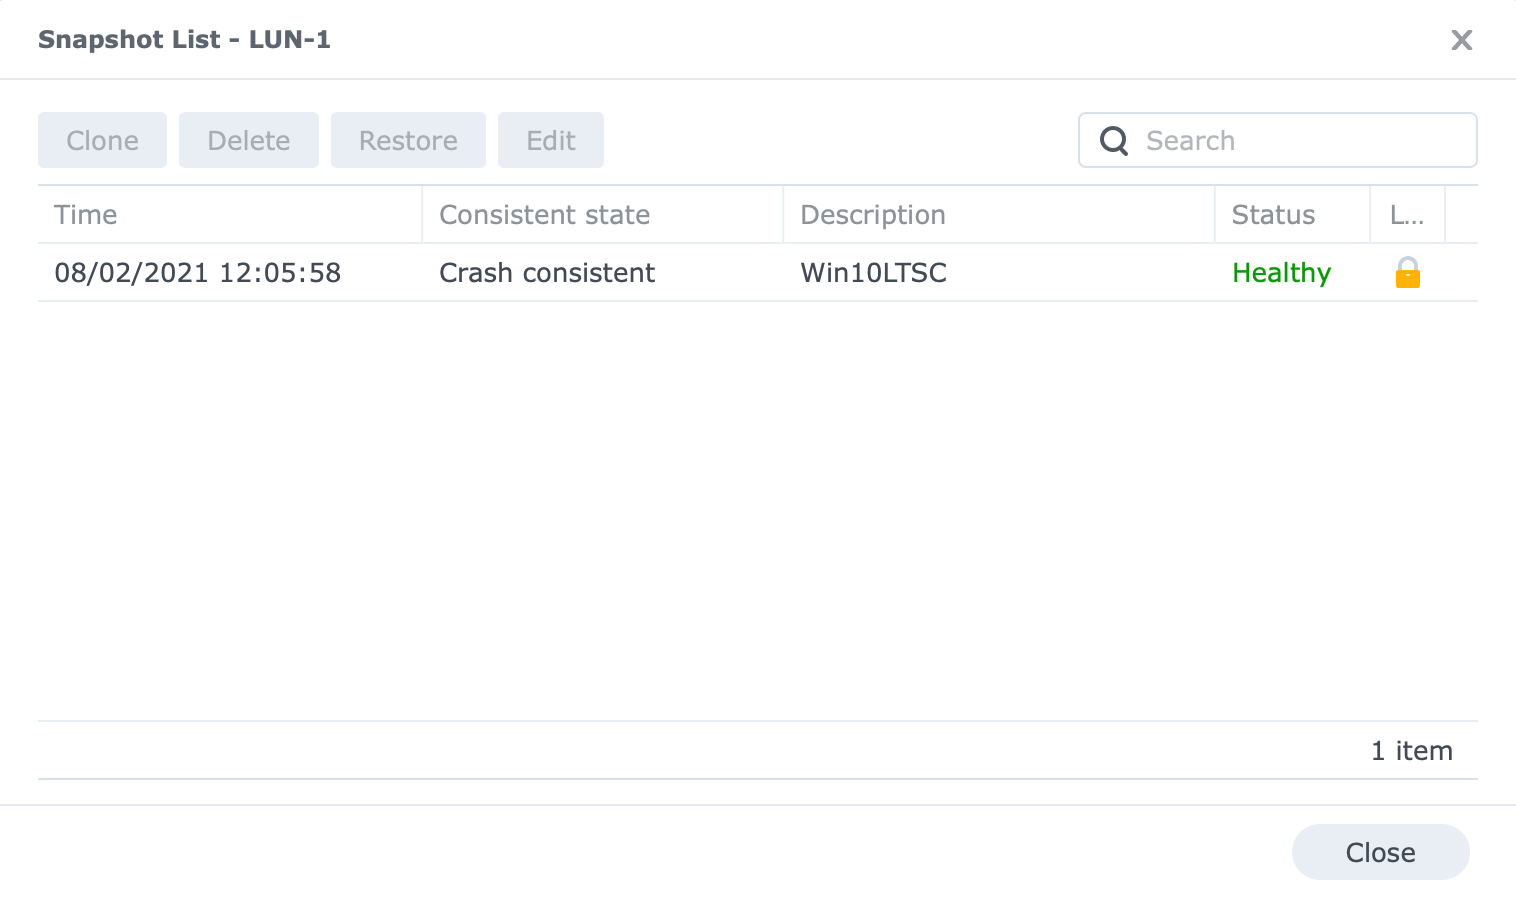
Invoking the snapshot list from the same dropdown menu, you can see all the snapshots that are present for that LUN.
Let's say you have had an accident and your LUN is corrupted, or you deleted your data and the volume is empty, encrypted by ransomware, what have you.
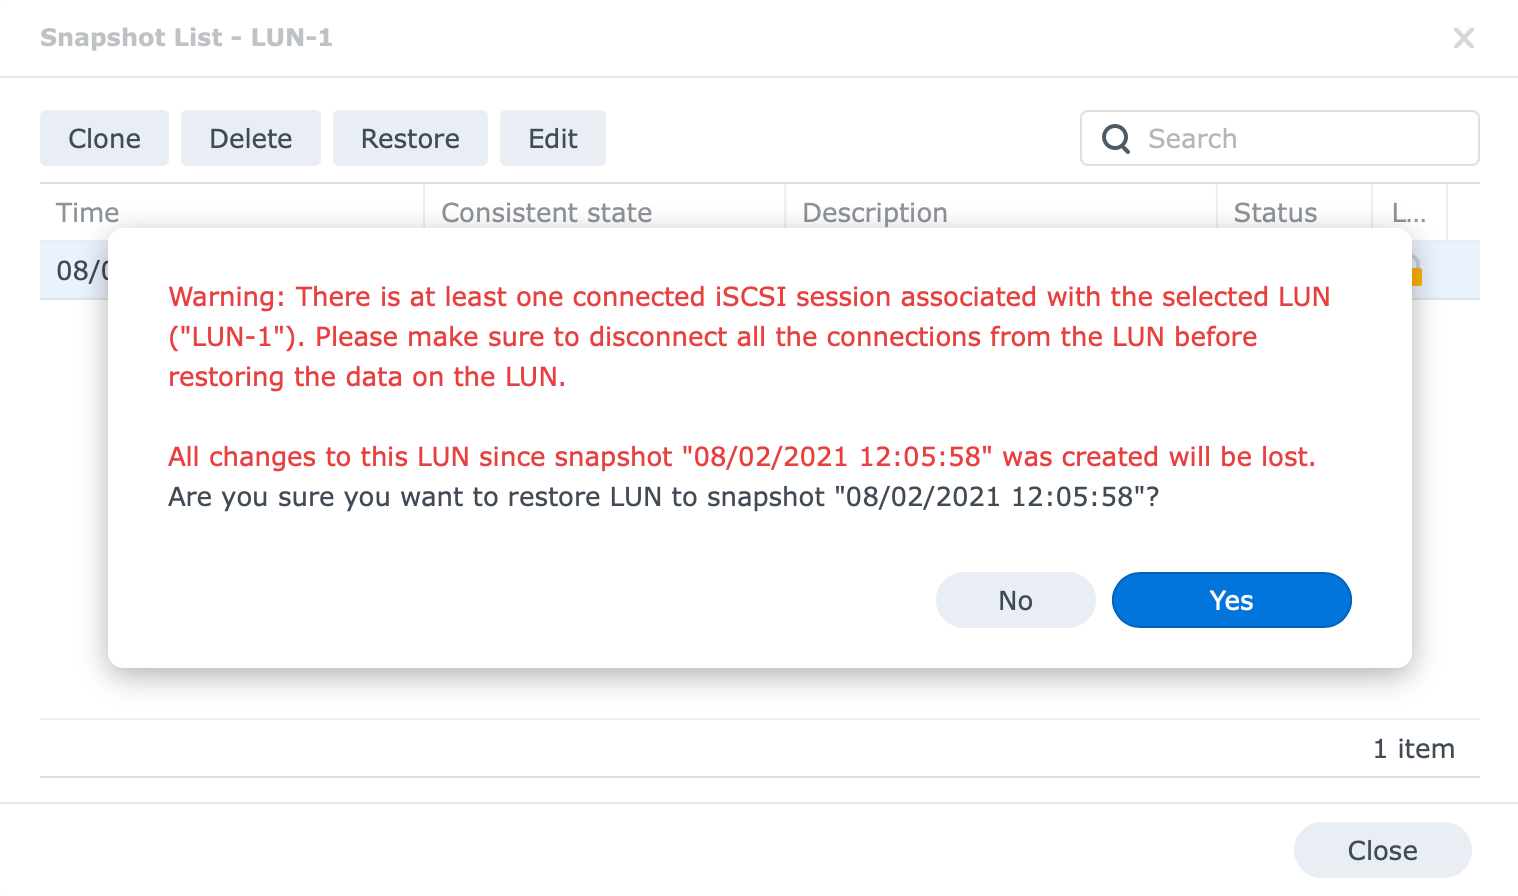
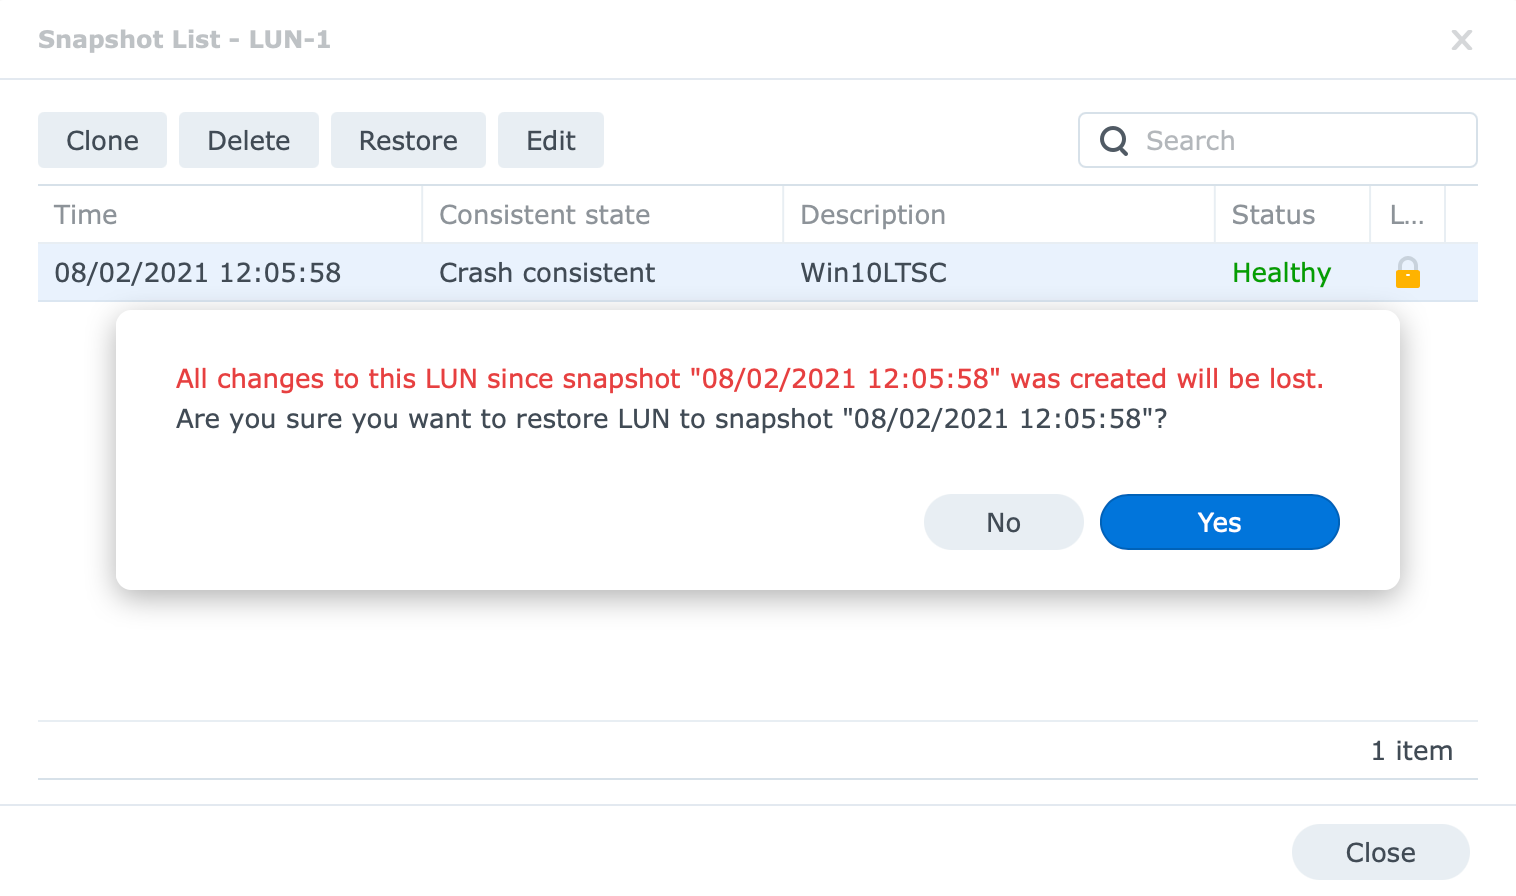
What you need to do in that case is kill the iSCSI connection from your Windows machine and restore the LUN from a snapshot.
Next, go to the Snapshot list option, select the snapshot state you want to restore from, and click Restore.
Once the process is complete and you reconnect to your iSCSI target, you should be able to see your data back, safe and sound.
Again, I can't stress enough how important it is to backup your data. In the case of LUNs same principle applies when backing up any classic shared folders. The more backups you have, the better! If you can utilize both the Snapshot Replication tool and Hyper Backup, I suggest you used them both.
Disconnect from your target and LUN
Connecting to the iSCSI LUN was easy and disconnecting from one is the same. Open up your iSCSI initiator tool on your Windows 10 client-side, located the target, and click the Disconnect button.
If you want to do a cleanup on your DSM/SAN Manager side as well, you can. You can manually delete snapshots, LUNs, and even your custom targets. Simply go to the appropriate section, select the item and delete it.
Conclusion
I do hope you have found this article helpful, especially if this is your first time using iSCSI with Synology NAS. You might be wondering what are the reasons someone would use iSCSI LUNs over a simple network share?
Well, there is a number of reason that this could work much better than a simple network share. In some cases, user's apps only work with "local" storage and not a network path, so in order to still have massive storage space but you need to present it as local, iSCSI will do the job.
Also, iSCSI is a "cheap" version of FiberChannel setup, and unlike FC it will deliver slower performance but from a cost perspective you can run it using standard network gear and cables, so in that area, it is money saved.
Another example is that you can use LUNs to separate data for specific users/teams. Unlike shared folders, LUNs can be attached to specific users and like a "sandbox" be dedicated to those users without fear of either access or deletion/corruption of data from others.
These are just a few examples, but let me know in the comments below what you think about iSCSI, do you use it, or planing on.