Portainer - Docker container management made easy

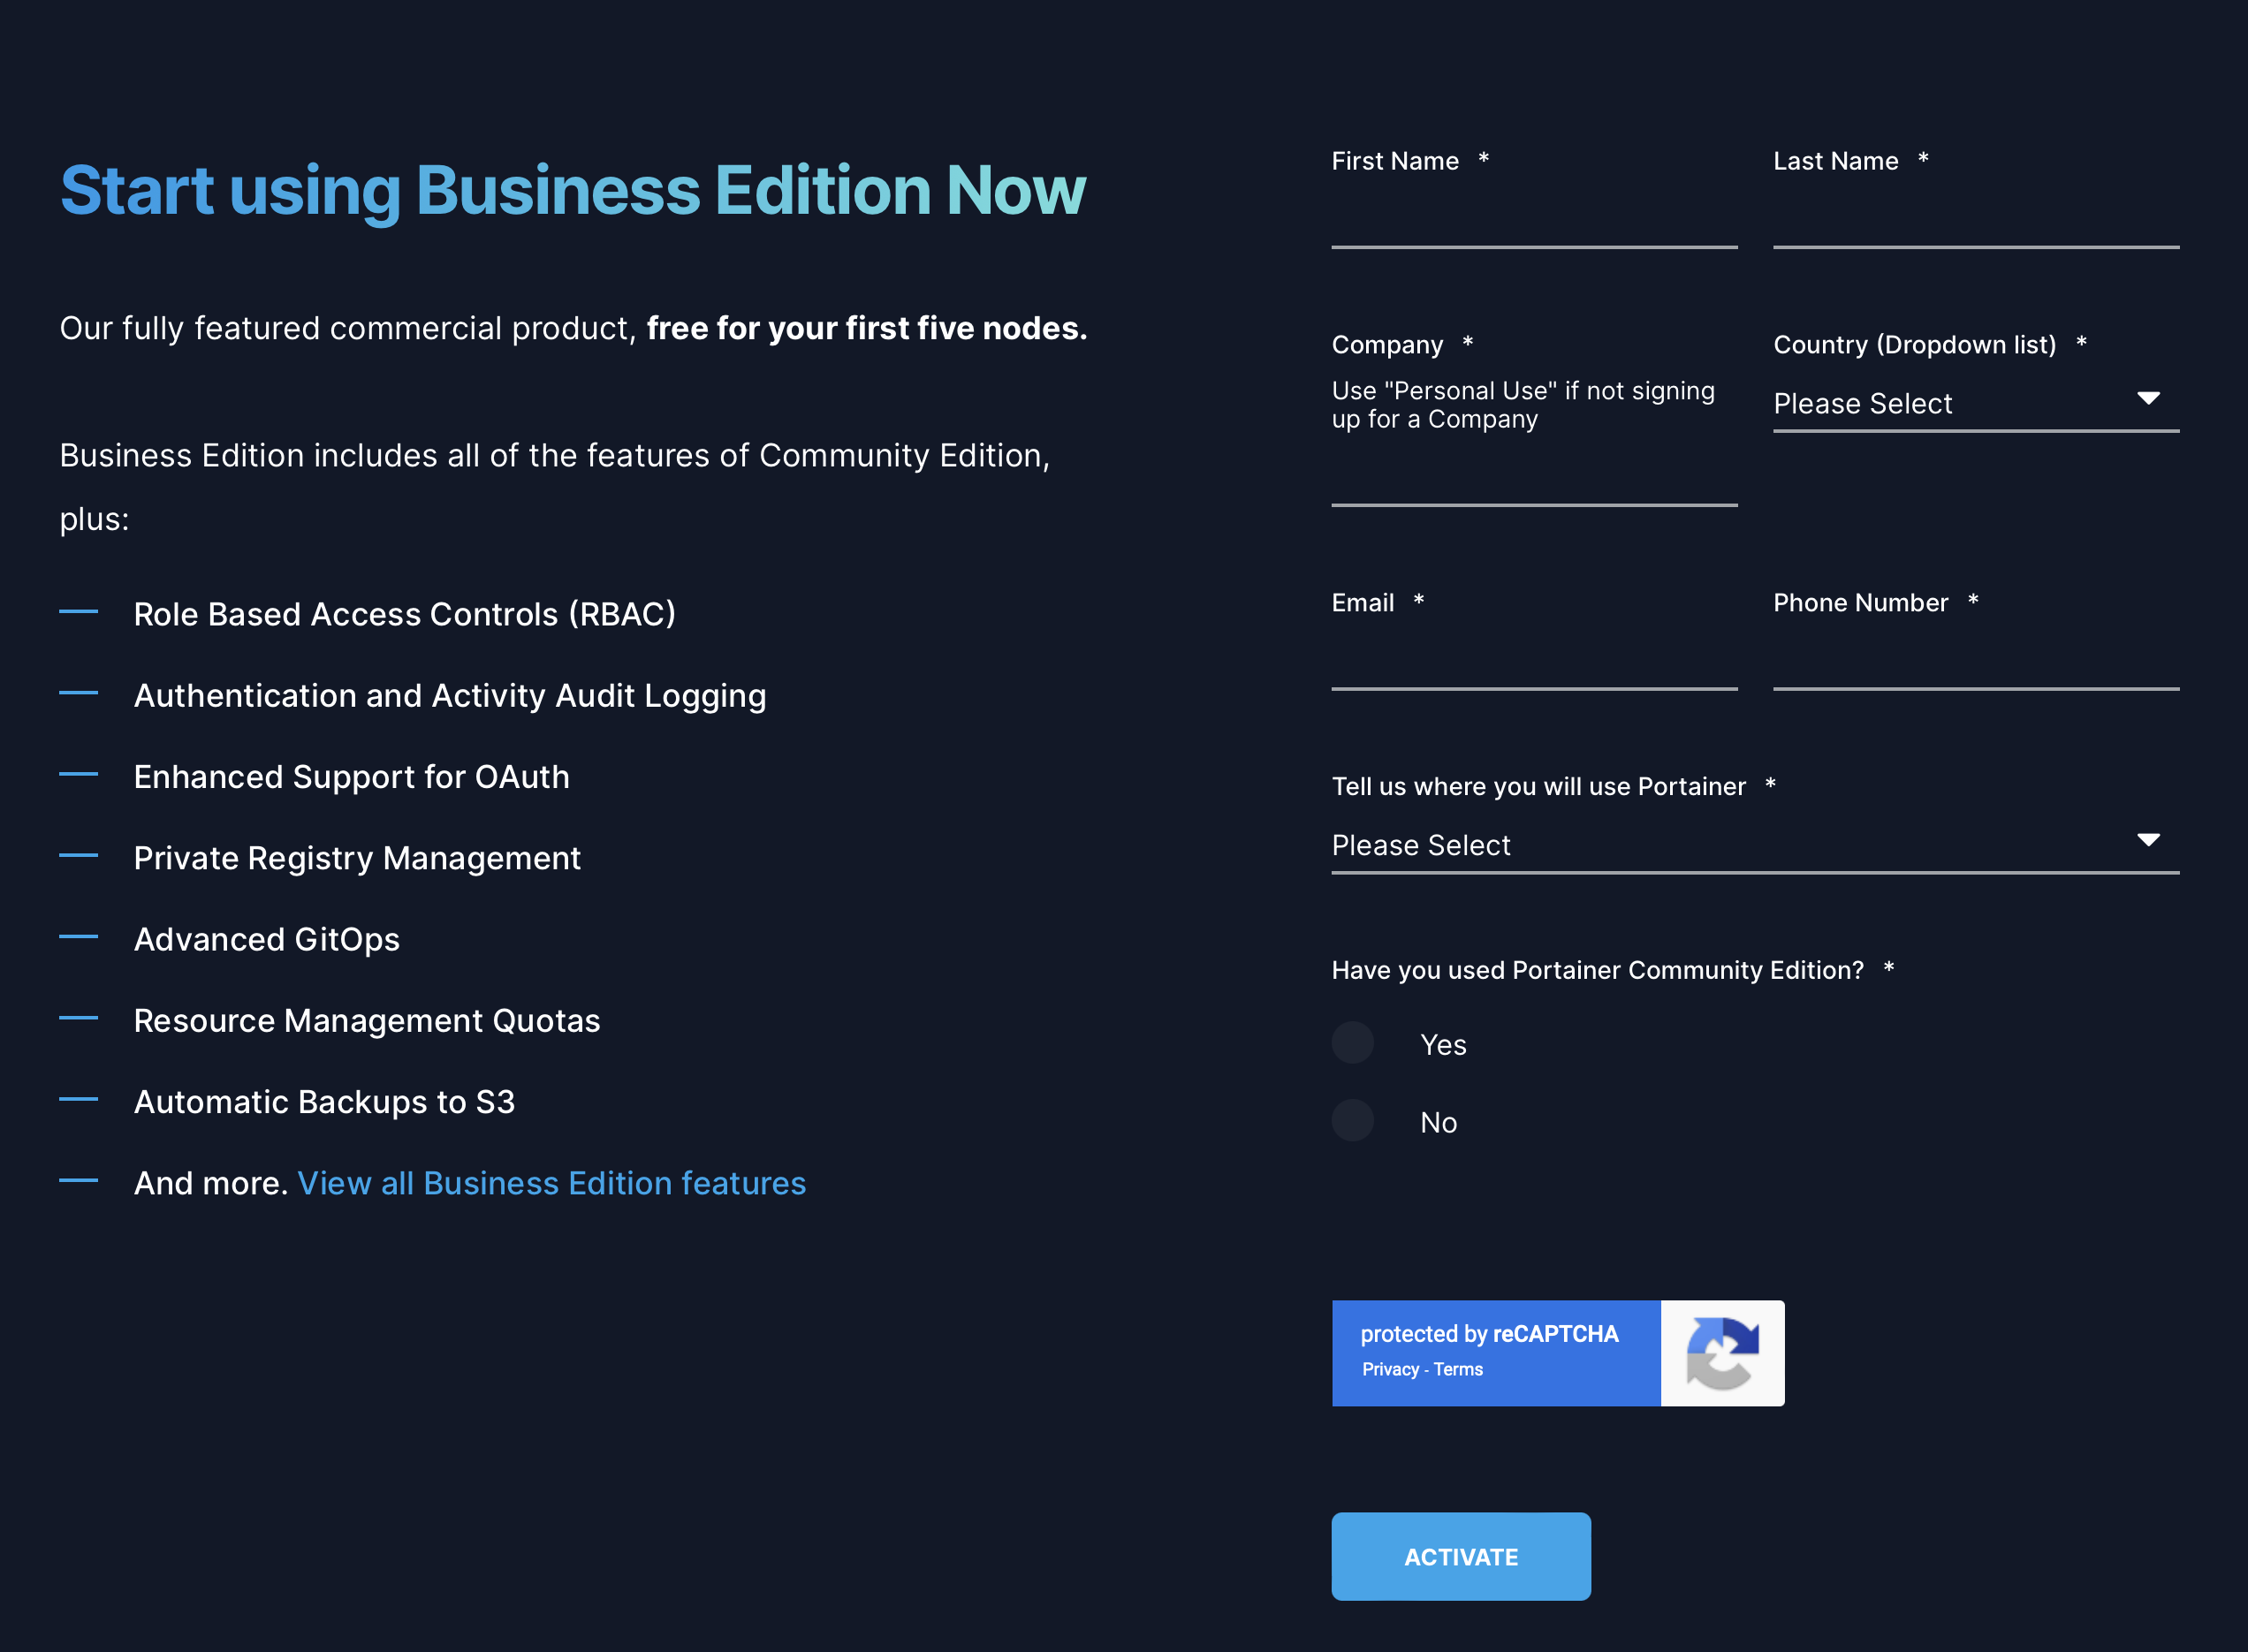
In order to run the new business edition of Portainer that allows the management of 3 Docker hosts for free, we need to run the portainer-ee Docker image as well as get the license code.
To get the code, head over to https://www.portainer.io/take-3 and fill out the form. Within a few minutes, the code will arrive on the registered email.
Now that we have the code, we can either upgrade from the community edition (portainer-ce, explained how to set up in the next part of the article), or start with the business edition using the following method.
As with any docker container running on the Synology NAS, we need to log into it using SSH and elevate it to root permissions in order to run the docker run command.
STEP01 - log into your NAS as root
Depending on your OS of choice (Linux, macOS, Win) you will have to use an SSH-capable app to log into your NAS. Also, be sure that you have enabled SSH on your Synology NAS before doing this (Control Panel > Terminal > enable SSH).
On macOS open up the Terminal app and type:
ssh your_NAS_account@yourNASip
hit return and you should be prompted for a password. After you have logged inside you need to elevate to the root account by using the following command:
sudo -i
again, you will be prompted for a password. Enter your initial user password and you will see how the command line has changed to root.
STEP02 - download (pull) the Portainer EE repo
Now we need to download the repo from the Hub:
docker pull portainer/portainer-ee:latest
STEP03 - configure and run the repo
Now we are ready to run a single command line to start Portainer on your NAS:
docker run -d --name=portainer_ee --restart always -v /volume/docker/portainer_ee/data:/data -v /var/run/docker.sock:/var/run/docker.sock -p 9000:9000 --pid=host portainer/portainer-ee:latest
Now that we have Portainer up and running, go to the URL http://yourNASip:9000, create an account and start running multiple hosts!
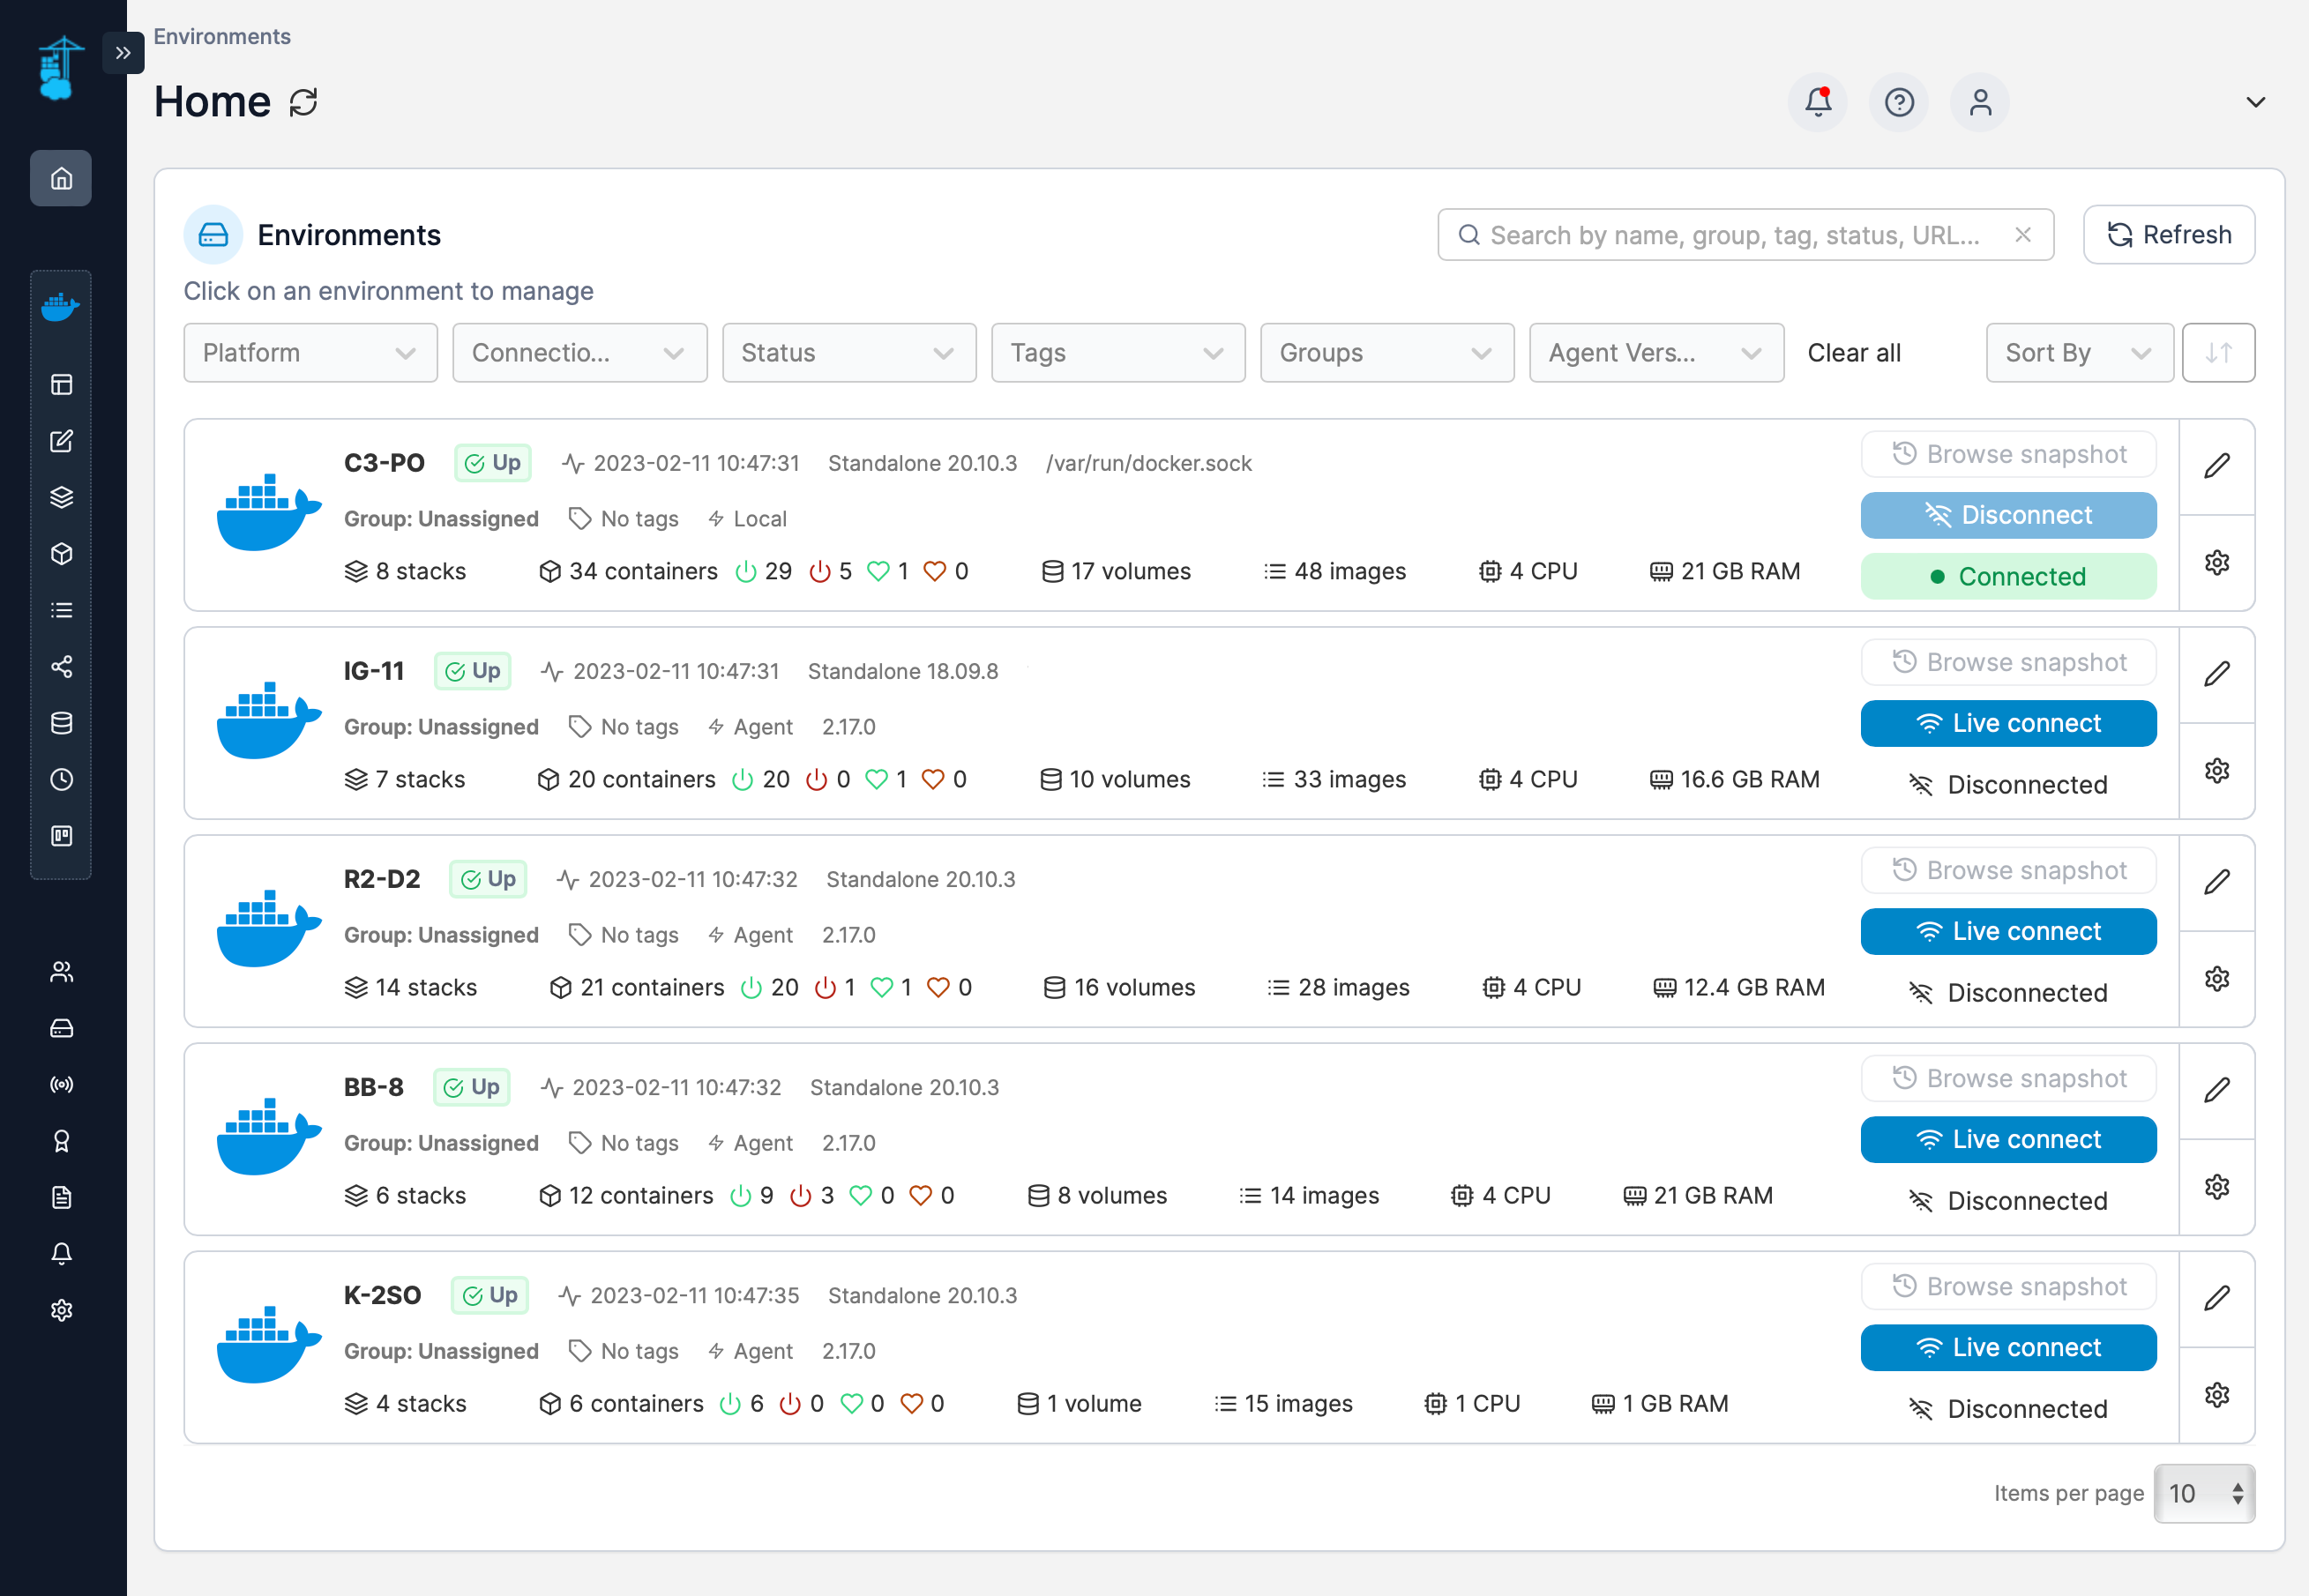
Under the Environments section there will be options to add new Docker hosts in case there is a need to connect multiple ones to this single Portainer instance.
This short article will be about Docker management. I meant to write it up sooner but always pushed it back because everything can be done using the command line. If you are into Docker or just starting, you will know (or soon find out) that it is a command-line-based platform. There is nothing you can't do with Docker this way but sometimes you might want to have a nice UI that will help you navigate more easily, do more, and have an overview of your container's usage and multiple hosts. This is where Portainer.io comes in.
I use Docker daily across all my NAS devices and using Synology as a brand has its problems when it comes to Docker. The most obvious one is that it's Docker UI that is not up to the task when it comes to working with more complex container setups.
Maybe you have noticed that most of my Docker articles revolve around using the command line deploy method. The reason is that not everyone visiting here is using Synology as their Docker host, and on top of this, you can apply these Docker containers to any host you do use.
However, saying this at some point I started to use Portainer for several reasons:
- Multiple host control under one UI
- Overview of unused repos and the option to delete them with ease
- Faster deployment of a complex instance using stacks (docker-compose)
- CPU/RAM utilization overview per container (apart from my Grafana dashboard)
- Ability to run any container with any switch, or variable settings using a UI
There are just a few reasons why I like Portainer. So with all that said let's see how to deploy a Portainer container on your Docker host to control that same host and any other potential host using an agent repo (image).
Configure and start Portainer on your Docker host
For this example, we will use an official Portainer 2.0 CE version of Portainer.
STEP01 - log into your NAS as root
Depending on your OS of choice (Linux, macOS, Win) you will have to use an SSH-capable app to log into your NAS. Also, be sure that you have enabled SSH on your Synology NAS before doing this (Control Panel > Terminal > enable SSH).
On macOS open up the Terminal app and type:
ssh your_NAS_account@yourNASip
hit return and you should be prompted for a password. After you have logged inside you need to elevate to the root account by using the following command:
sudo -i
again, you will be prompted for a password. Enter your initial user password and you will see how the command line has changed to root.
STEP02 - download (pull) the Portainer 2.0 CE repo
Now we need to download the repo from the Hub:
docker pull portainer/portainer-ce:latest
STEP03 - configure and run the repo
Now we are ready to run a single command line to start Portainer on your NAS:
docker run -d --name=portainer_ce --restart always -v /volume/docker/portainer_ce/data:/data -v /var/run/docker.sock:/var/run/docker.sock -p 9000:9000 --pid=host portainer/portainer-ce:latest
Just a few pointers on this command.
Portainer will maintain its "database" and configuration inside its /data folder so we are mapping that folder to a destination of your choice. In this case, the destination is a folder on location /volume1/docker/portainer_ce/data.
On top of this one of the most important parameters is docker.sock. docker. sock is the UNIX socket that the Docker daemon is listening to, so be sure to map it or Portainer will not be able to connect to your Docker host and maintain the whole environment.
You are welcome to change the port as well, the default web UI port is 9000 but you can configure your own. If you do change it, make sure to just change the left value, local port number, and not the right-hand side (container side). So one example could be:
-p 9500:9000
Once you have done all the changes, run the command line and that's it. Easy right?
STEP04 - configure your Portainer account and connect to your host
One final thing to do is to log into your Portainer UI and connect to your Docker host.
Open your browser and go to the following URL:
http://youNASip:9000
If you have used a different port be sure to use the correct port. This will open up a welcome wizard to create your admin account to log in.
Once you have done that you need to configure Portainer to attach to your Docker host.
You will be presented with the following screen after you have logged in:
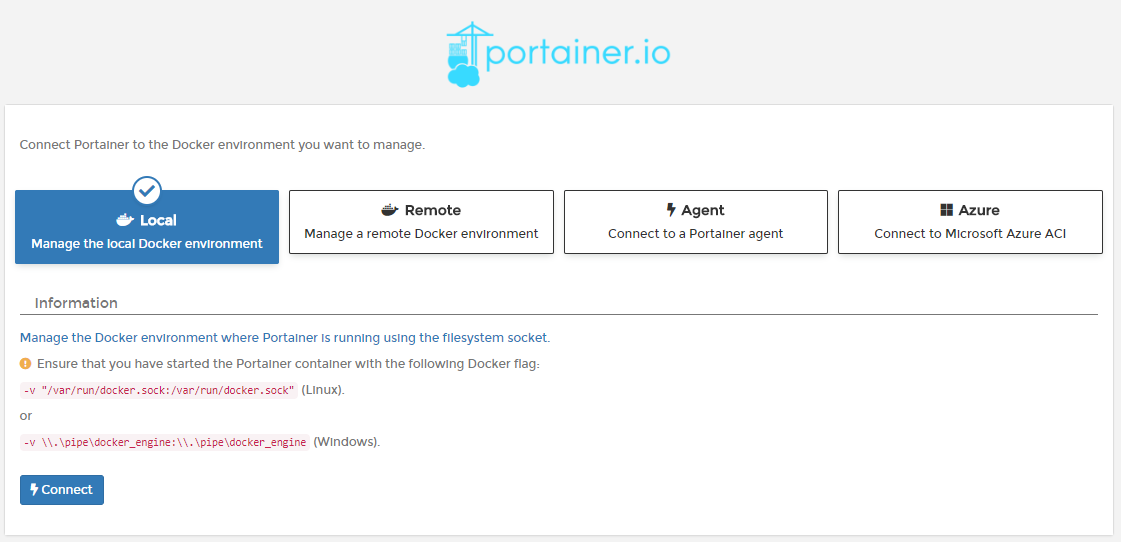
Select Local and click Connect. You can note that Portianer is telling you that you should have docker.sock mapped in order to work.
If everything is set you will get a similar image like this.
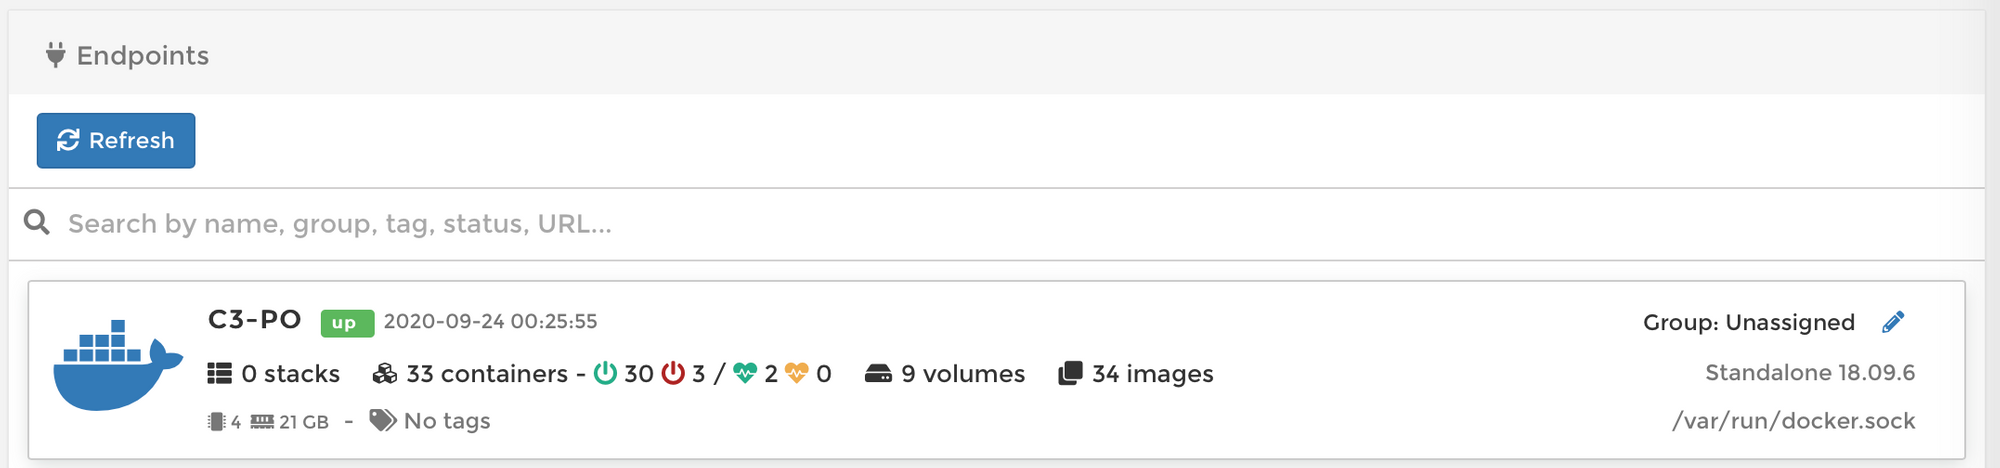
If you can see the green "up" icon you are good to go. Well done!
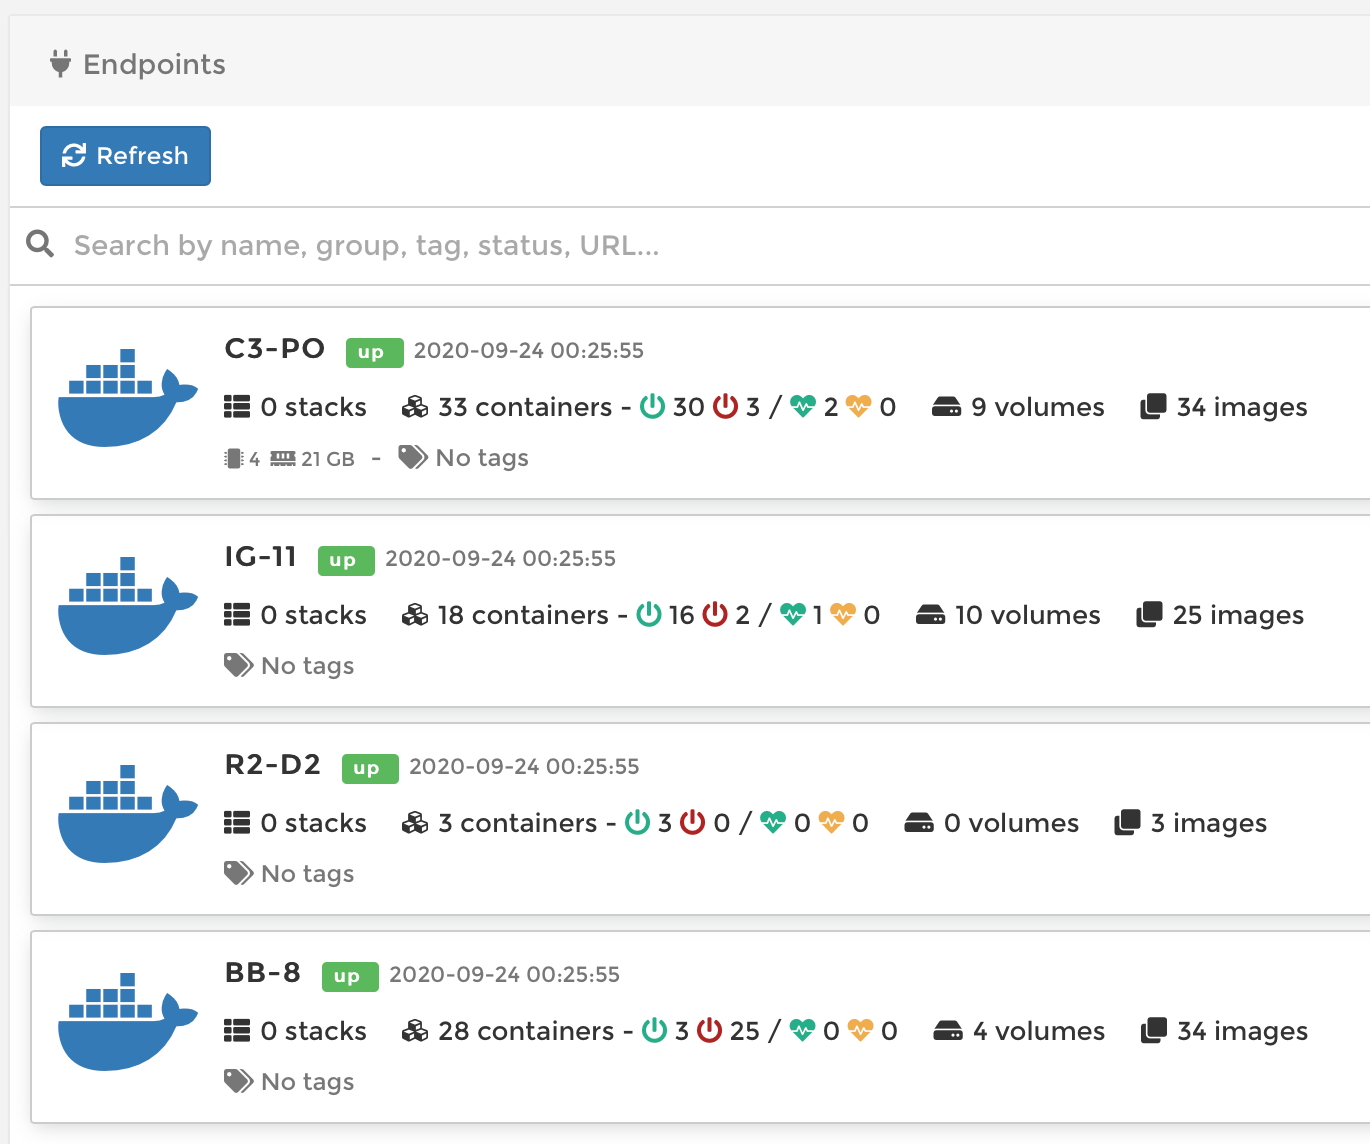
Later on, you can connect multiple Docker hosts to a single Portainer up using a Portainer agent (another article), and the end result might look like this:
Add a Docker host to your Portainer using an agent
If you do have multiple Docker hosts you can connect them to your new Portainer instance using a Docker agent.
STEP01 - download and configure the Portainer agent
docker pull portainer/agent:latest
After this run the following command to start up your agent
docker run -d --name=portainer_agent --restart always -v /var/run/docker.sock:/var/run/docker.sock -p 9001:9001 --pid=host portainer/agent
STEP02 - add Docker agent host to Portainer
Now, log into your Portainer and use the menu on the left side, and select Endpoints.
Click on the blue "+ Add endpoint" button, and you will land again on the same page that you had when you initially configured Portainer in step 04.
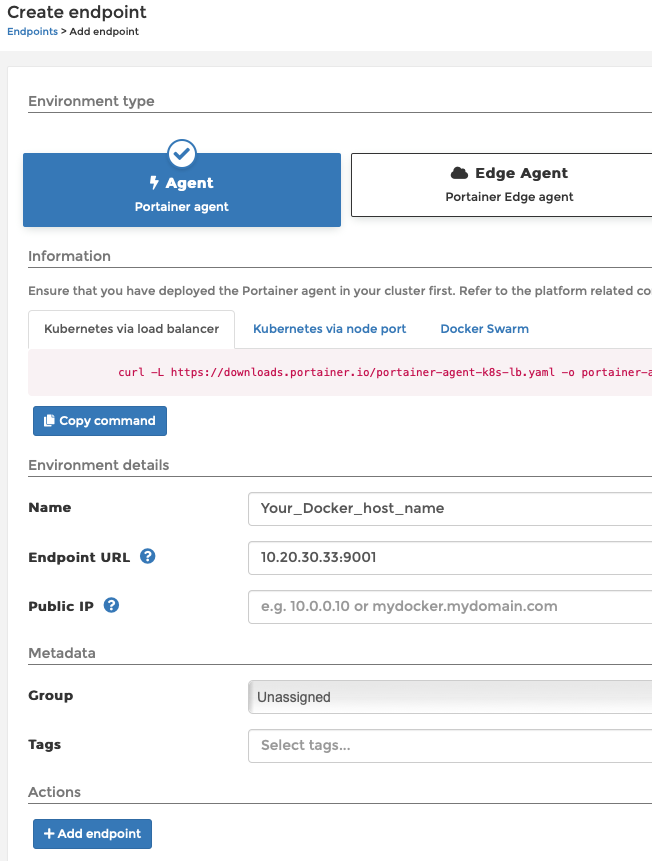
Enter your Docker hostname and its Endpoint URL by entering its LAN IP address and port, as presented in the image as an example.
Finally, click again Add endpoint and you are done!
Recap
There you have it. A nice clean web UI to use for all your Docker needs. I did not go too much into detail regarding its options because this will be a topic for some other article. Also, I might refer to this article from now on, from time to time.
As always, if you have any questions, let me know in the comment section.