Pushover - notifications for all your needs

Once you start self-hosting your apps and services you will want to be on top of things. This includes being notified if there are any problems or simply knowing when a task has been completed.
In my case, all my Synology NAS services as well as some Docker apps that I run, are sending me notifications using the Pushover service. The main reason is that I have all my notifications in a single app, I can store as many of them as I want, and I don't have to abuse my email for getting those same notifications. Also, it's practical to have them just pop up on my watch or mobile device.
This article will be about setting up Pushover with your Synology NAS, as well as using it with some popular open-source platforms.
Configure Pushover with your Synology NAS
To make this work, there are two ways to do it. The reason I will present both is that sometimes, one might not work for you, and the other will. I haven't looked into that much but just saying.
The result for both cases will be a push notification even though one method will use the push notification settings and the other SMS (yes, SMS).
In any case, these are all some sort of hacks if you will, but as I said, you will still get a classic push notification and not an email or a text message.
Make sure to have a mobile Pushover app installed on your device and follow along.
Option 1 - email gateway
In case you are using a system or app that doesn't support Pushover API you can use their email gateway option.
STEP01 - create an email alias
After you have created an account with Pushover, as soon as you land on their main page you will see several categories. One of those will be Your E-mail Aliases (Create an E-mail Alias).
Click on the Create an E-mail Alias and on the next page just click the button on the bottom, Create E-mail Alias. This will generate an email alias that will look something like this:
[email protected]
STEP02 - configure DSM to use Pushover email alias
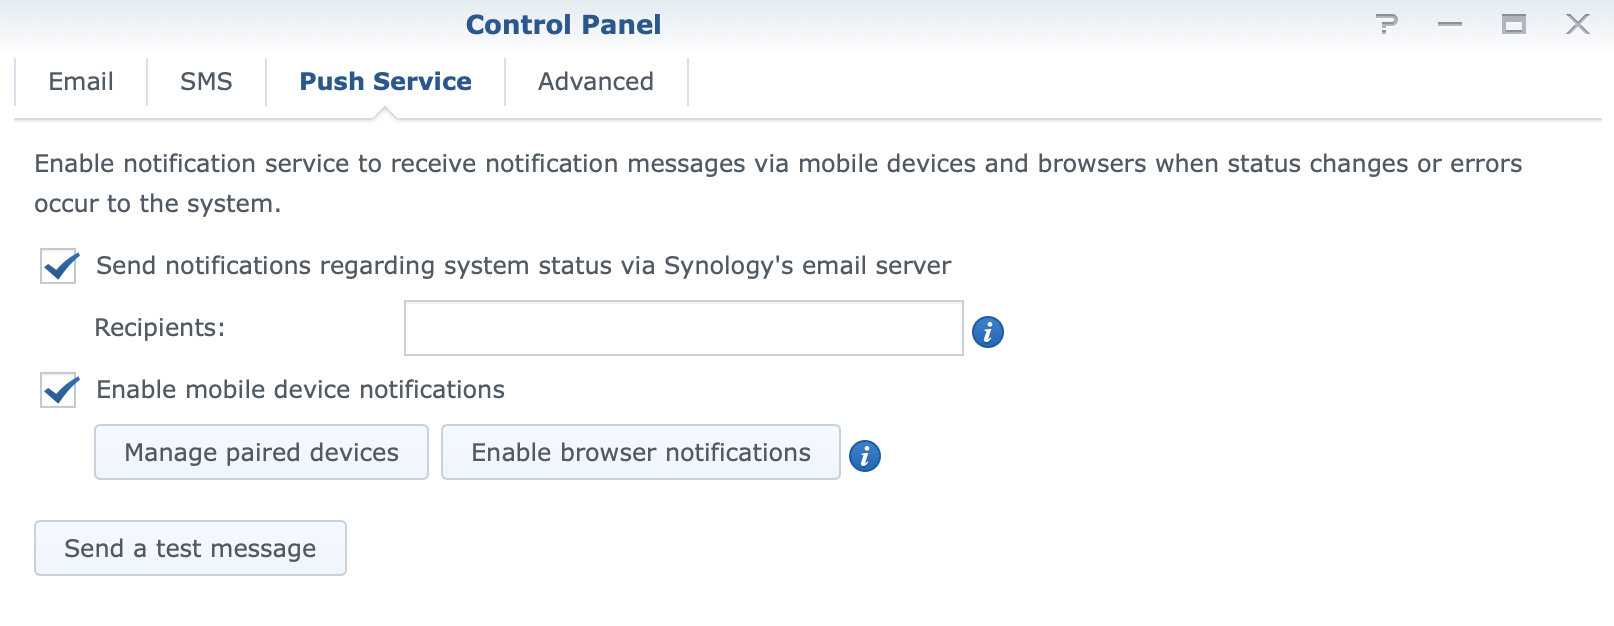
Now open up Control Panel > Notifications on your NAS and switch over to the Push Service tab.
Enter the alias email as the recipient value:
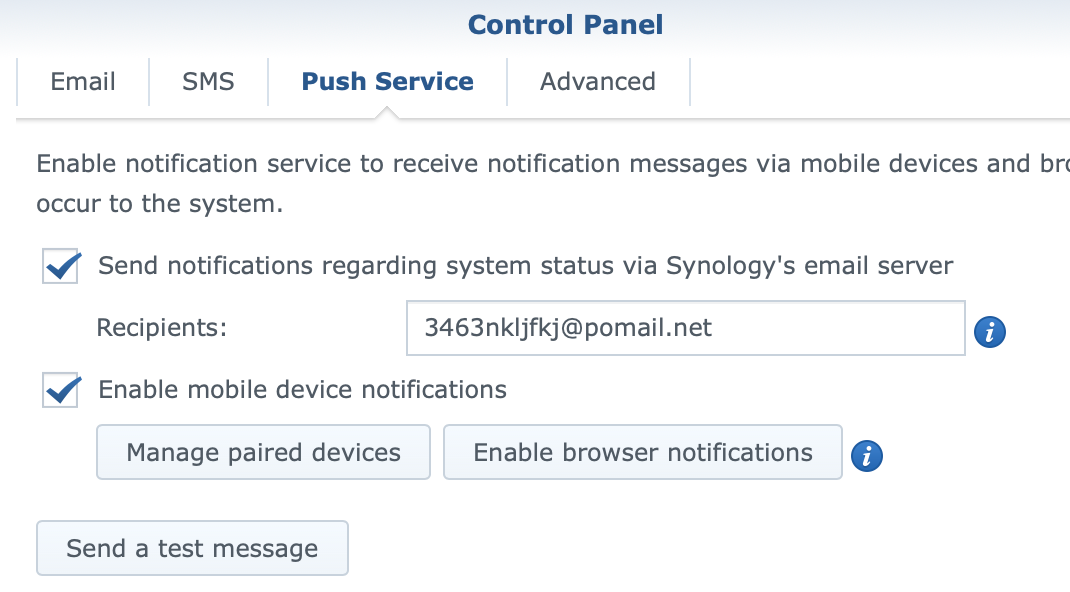
Click Apply on the bottom and then Send a test message button to see if the configuration has taken place.
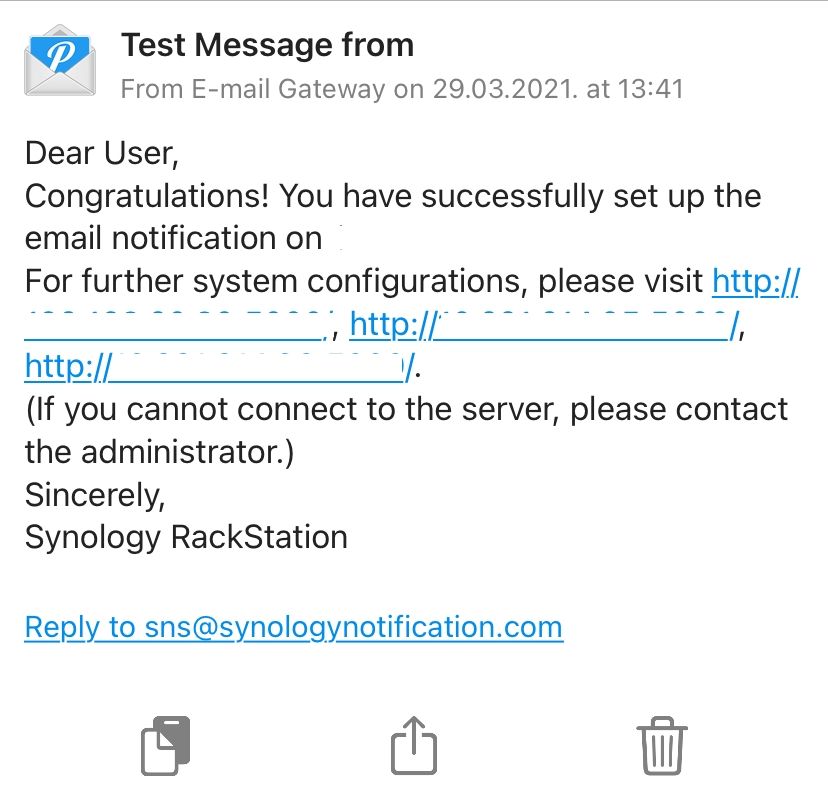
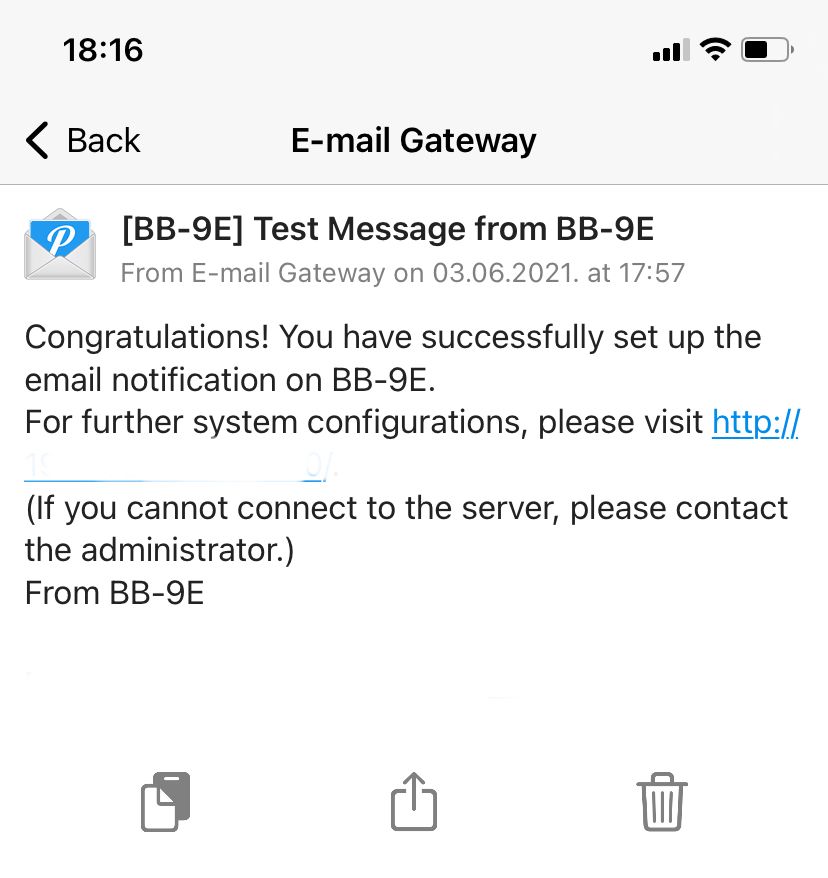
You should get a notification on your Pushover app, but also you will have a link telling you to visit it to confirm this notification (this is a one-time action). Once you have done that, you will get a notification about a successful configuration similar to this one:
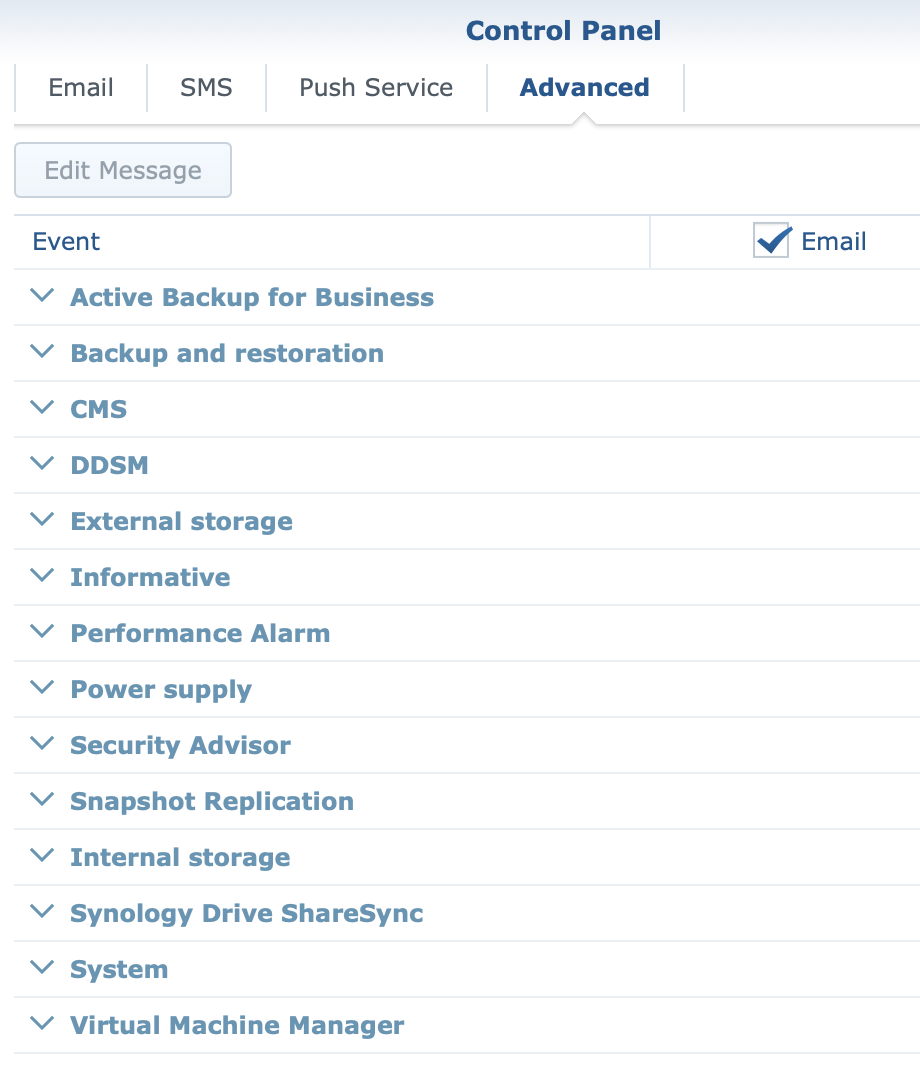
Once you have configured this, be sure to switch over to the Advanced tab and select all the Email categories that you want to receive:
Option 1A - email gateway using 3rd party outgoing SMTP
Considering that Push Service tab in the Notification section has been changed in DSM 7, the usual easy option to simply use Pushover personal alias email will no longer work.
If you still want to use the Pushover email alias method you can do that in DSM7 as well.
STEP01 - create an email alias
After you have created an account with Pushover, as soon as you land on their main page you will see several categories. One of those will be Your E-mail Aliases (Create an E-mail Alias).
Click on the Create an E-mail Alias and on the next page just click the button on the bottom, Create E-mail Alias. This will generate an email alias that will look something like this:
[email protected]
STEP02 - configure DSM to use Pushover email alias
Now open up Control Panel > Notifications on your NAS and switch over to the Email tab.
Enter the alias email as the recipient value:
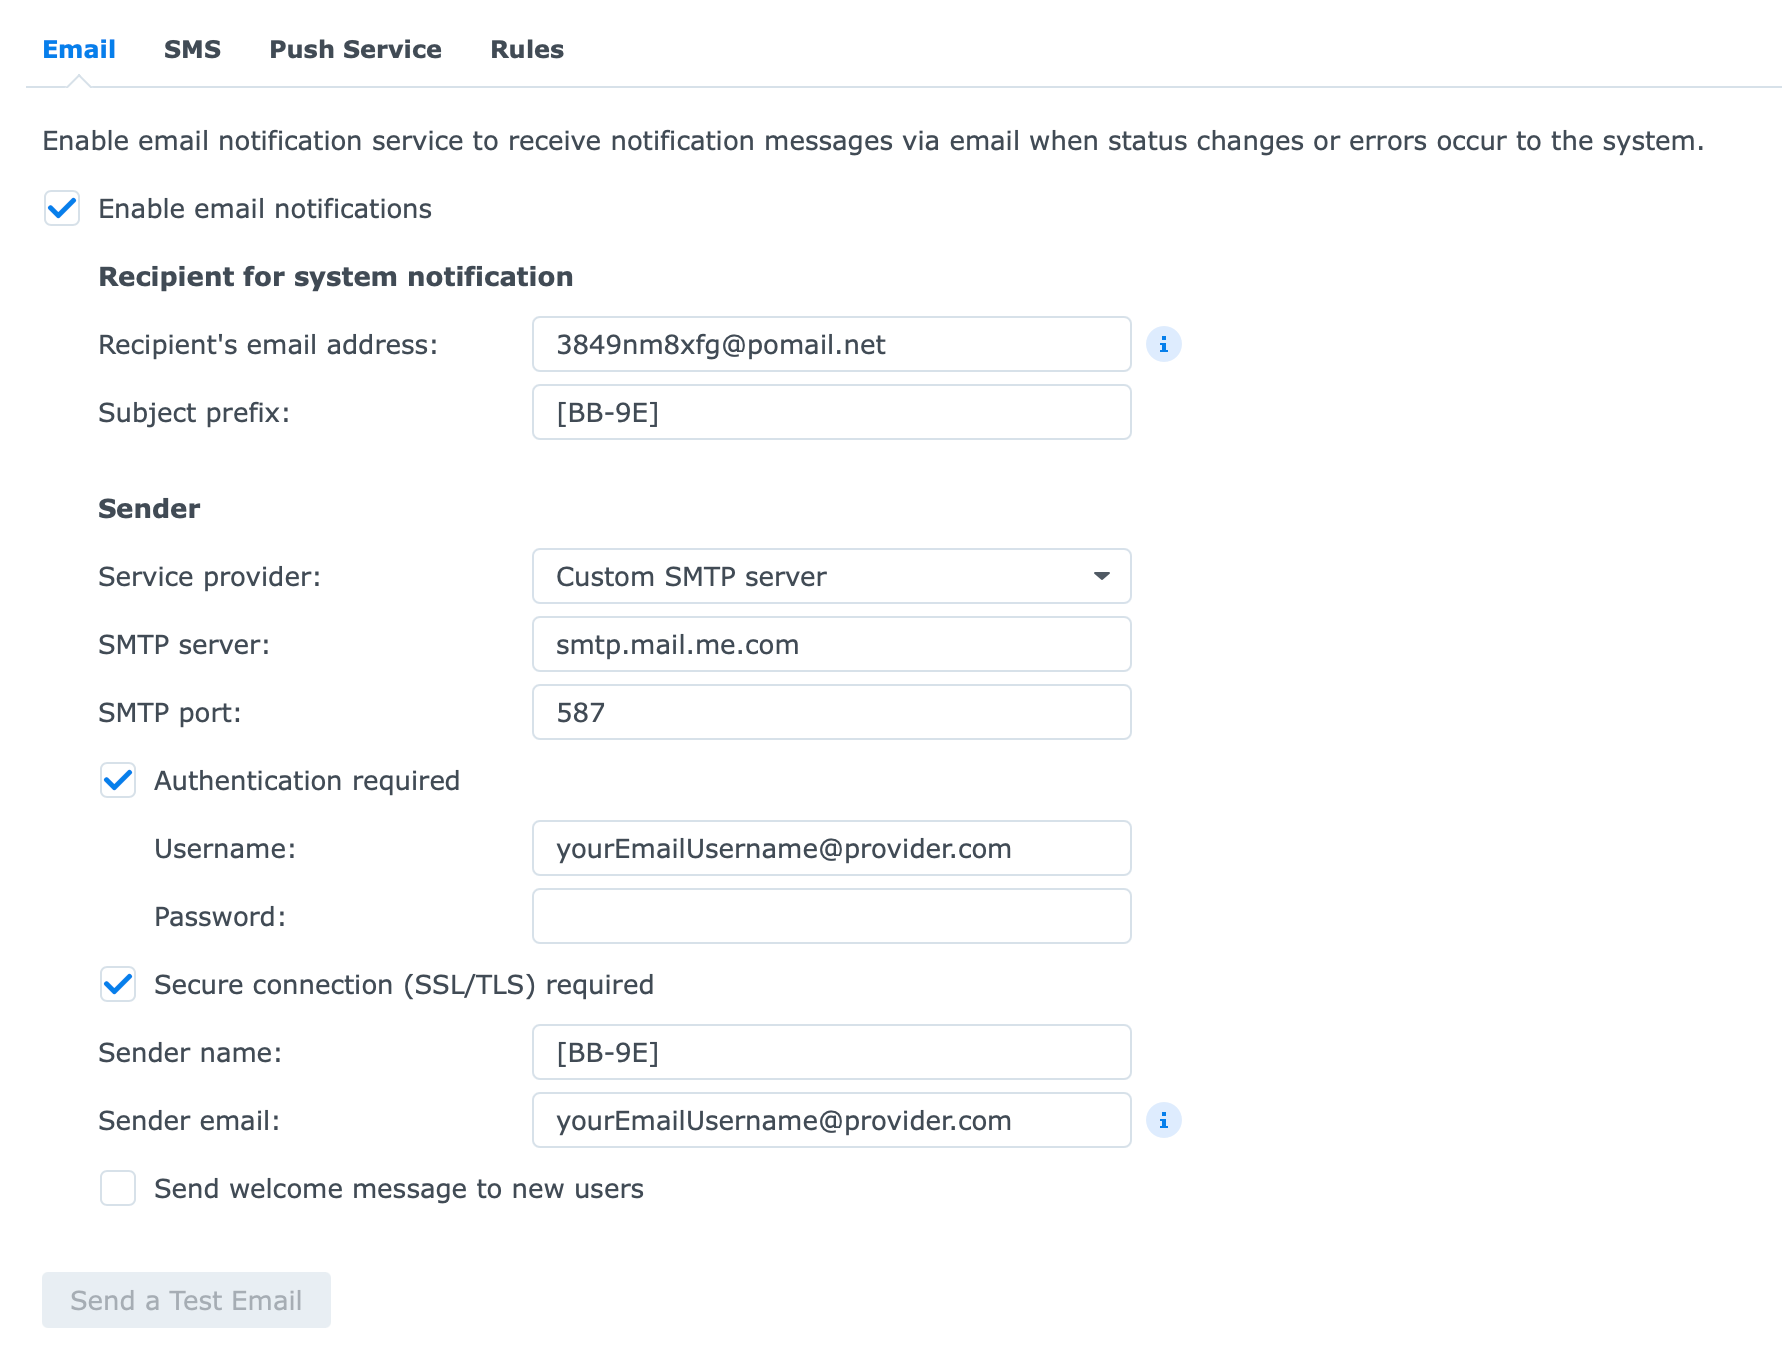
Click Apply on the bottom and then Send a test message button to see if the configuration has taken place.
You should get a notification on your Pushover app, but also you will have a link telling you to visit it to confirm this notification (this is a one-time action). Once you have done that, you will get a notification about a successful configuration similar to this one:
Once you have configured this, be sure to switch over to the Advanced tab and select all the Email categories that you want to receive.
Option 2 - SMS workaround method
This trick has been around for a while. Considering that Pushover can't be configured out-of-the-box as an SMS provider, we will make a custom one and call upon Pushover API that will convert all DSM notifications and push them towards our Pushover account/device.
STEP01 - create an SMS Pushover agent
Go to DSM Control Panel > Notifications and switch over to the SMS tab. Click the Add SMS service provider button to begin the wizard.
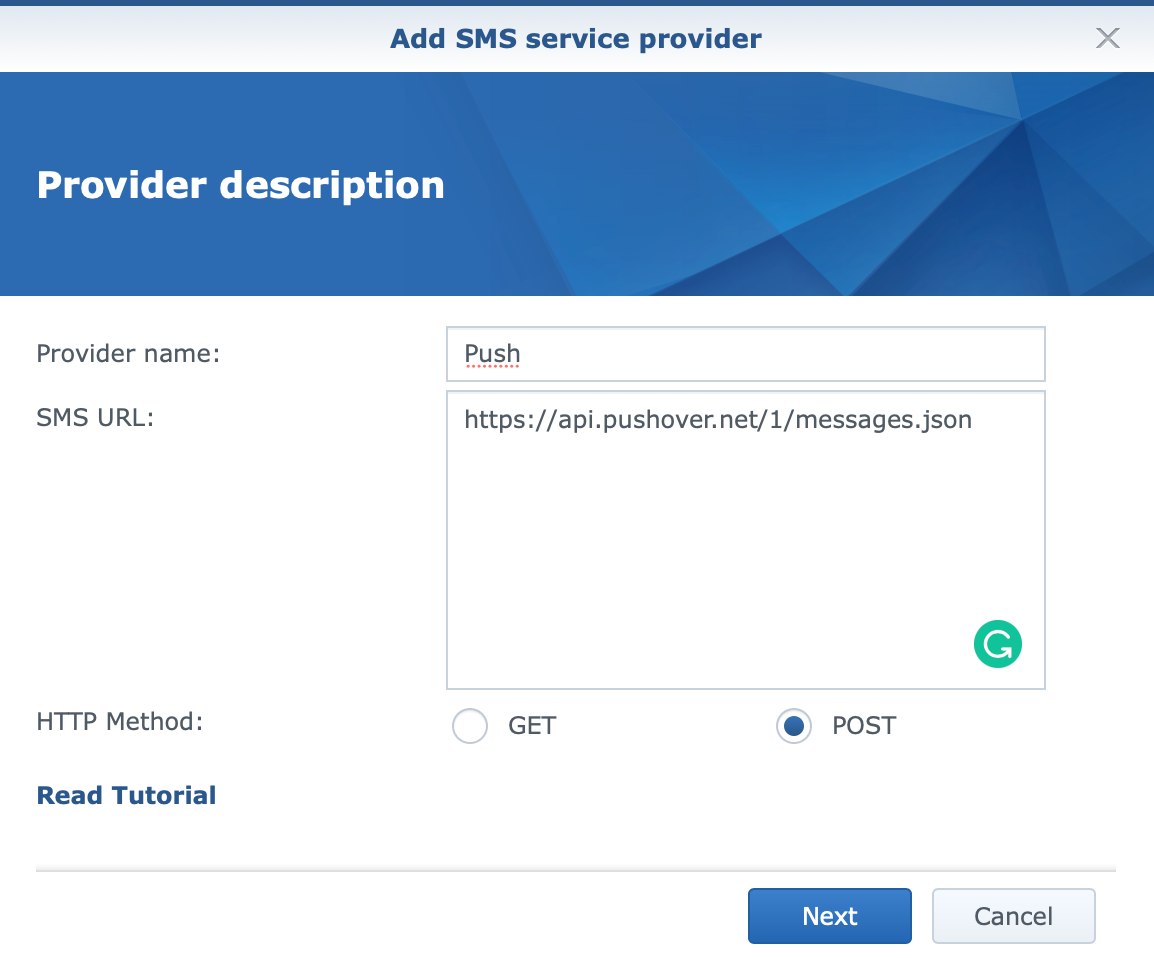
In the first step, enter the Provider name, SMS URL, and the HTTP method. For this case, it will be configured as you can see on the image. Use https://api.pushover.net/1/messages.json as the URL value and click Next.
On the Edit HTTP request header page, leave everything blank and click Next.
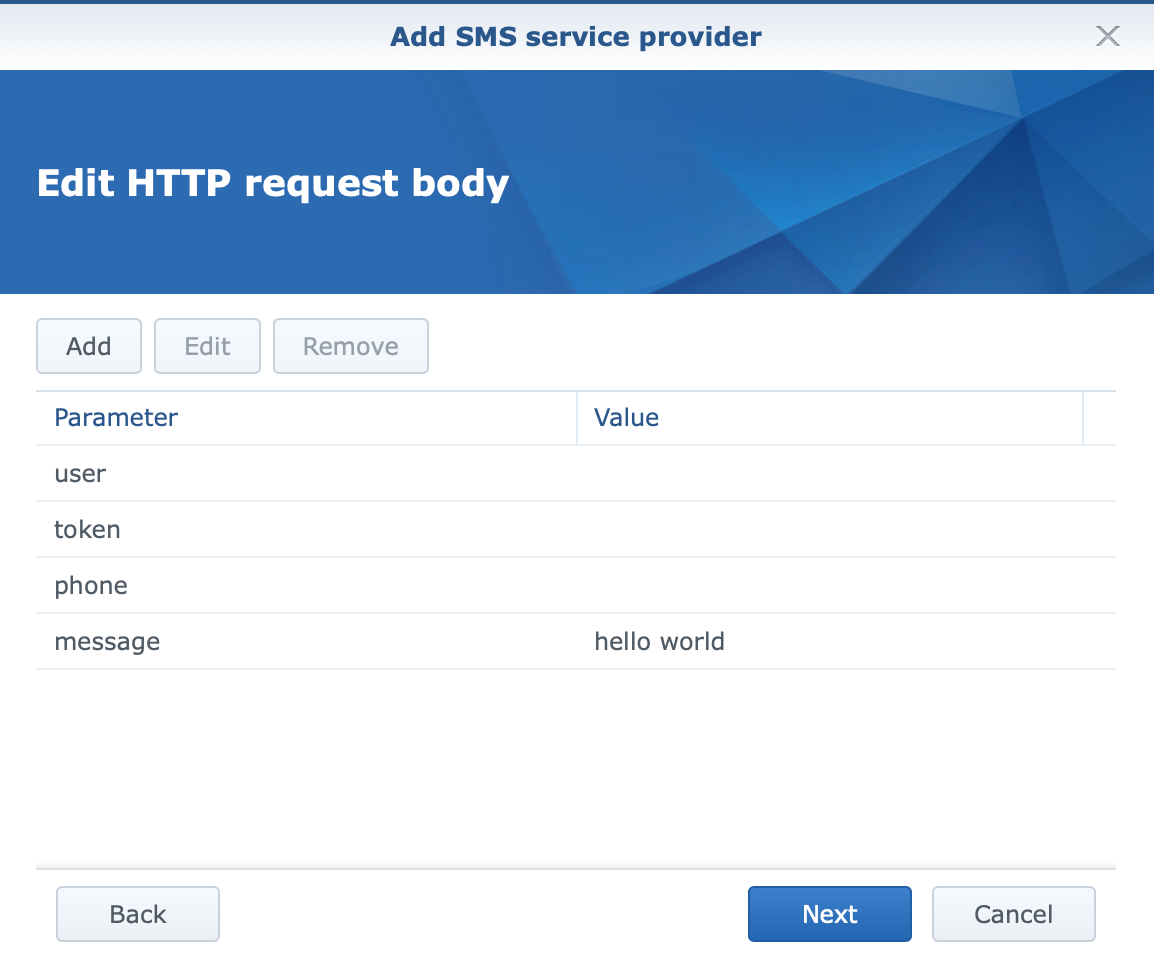
The third step is the Edit HTTP request body and here we need to configure four (4) parameters.
user
token
phone
message=hello world
So only the message parameter needs to have a value of hello world.
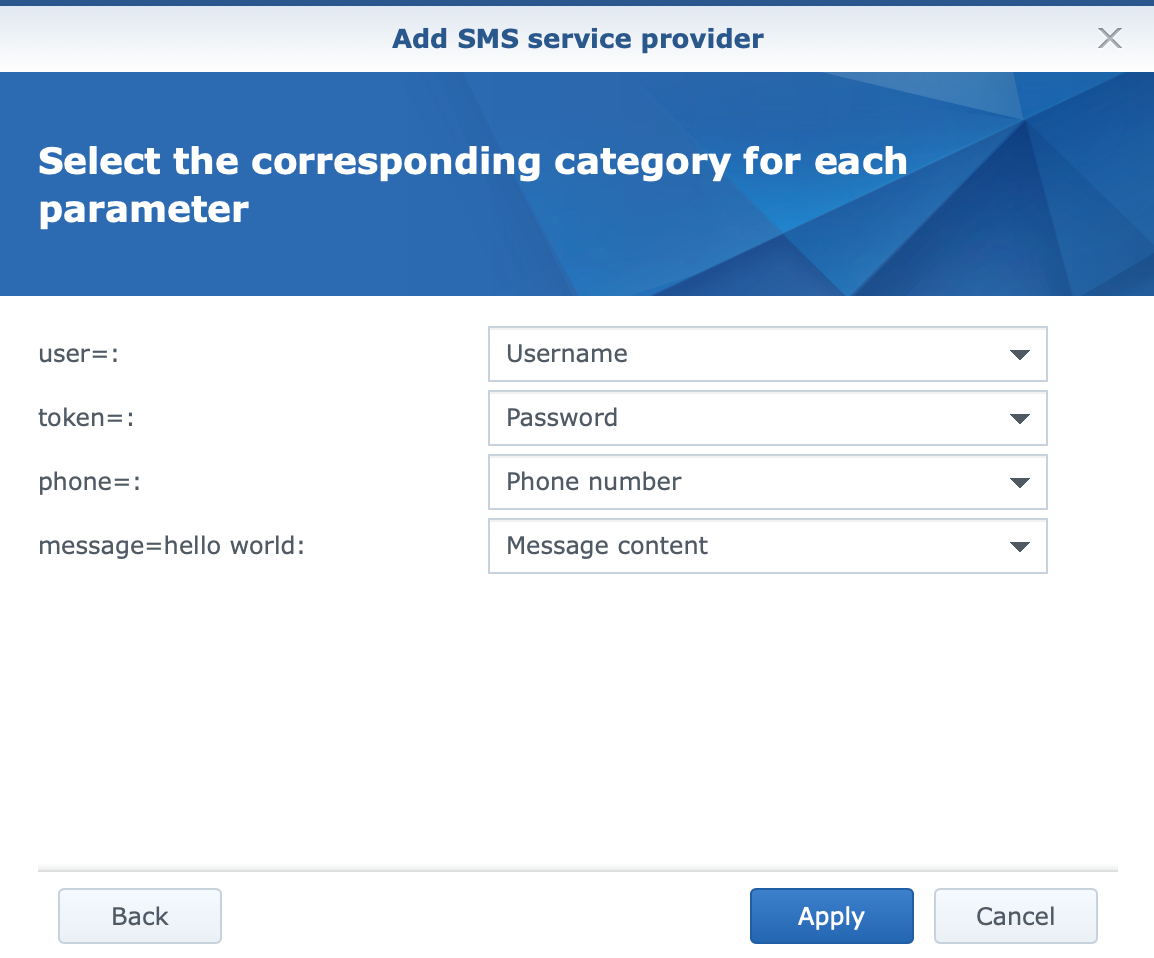
On the following page we need to map the parameters with the dropdown categories:
Finally, click Apply and you will return to the main SMS configuration panel.
STEP02 - Configure Pushover SMS provider
Now we just need to configure the provider with your Pushover parameters (User Key and Application token).
First, we need to go to the Pushover site and create the application token. At the bottom of the Pushover site, you will have Your Applications (Create an Application/API Token).
Click the Create an Application/API Token link to start making the new app token.
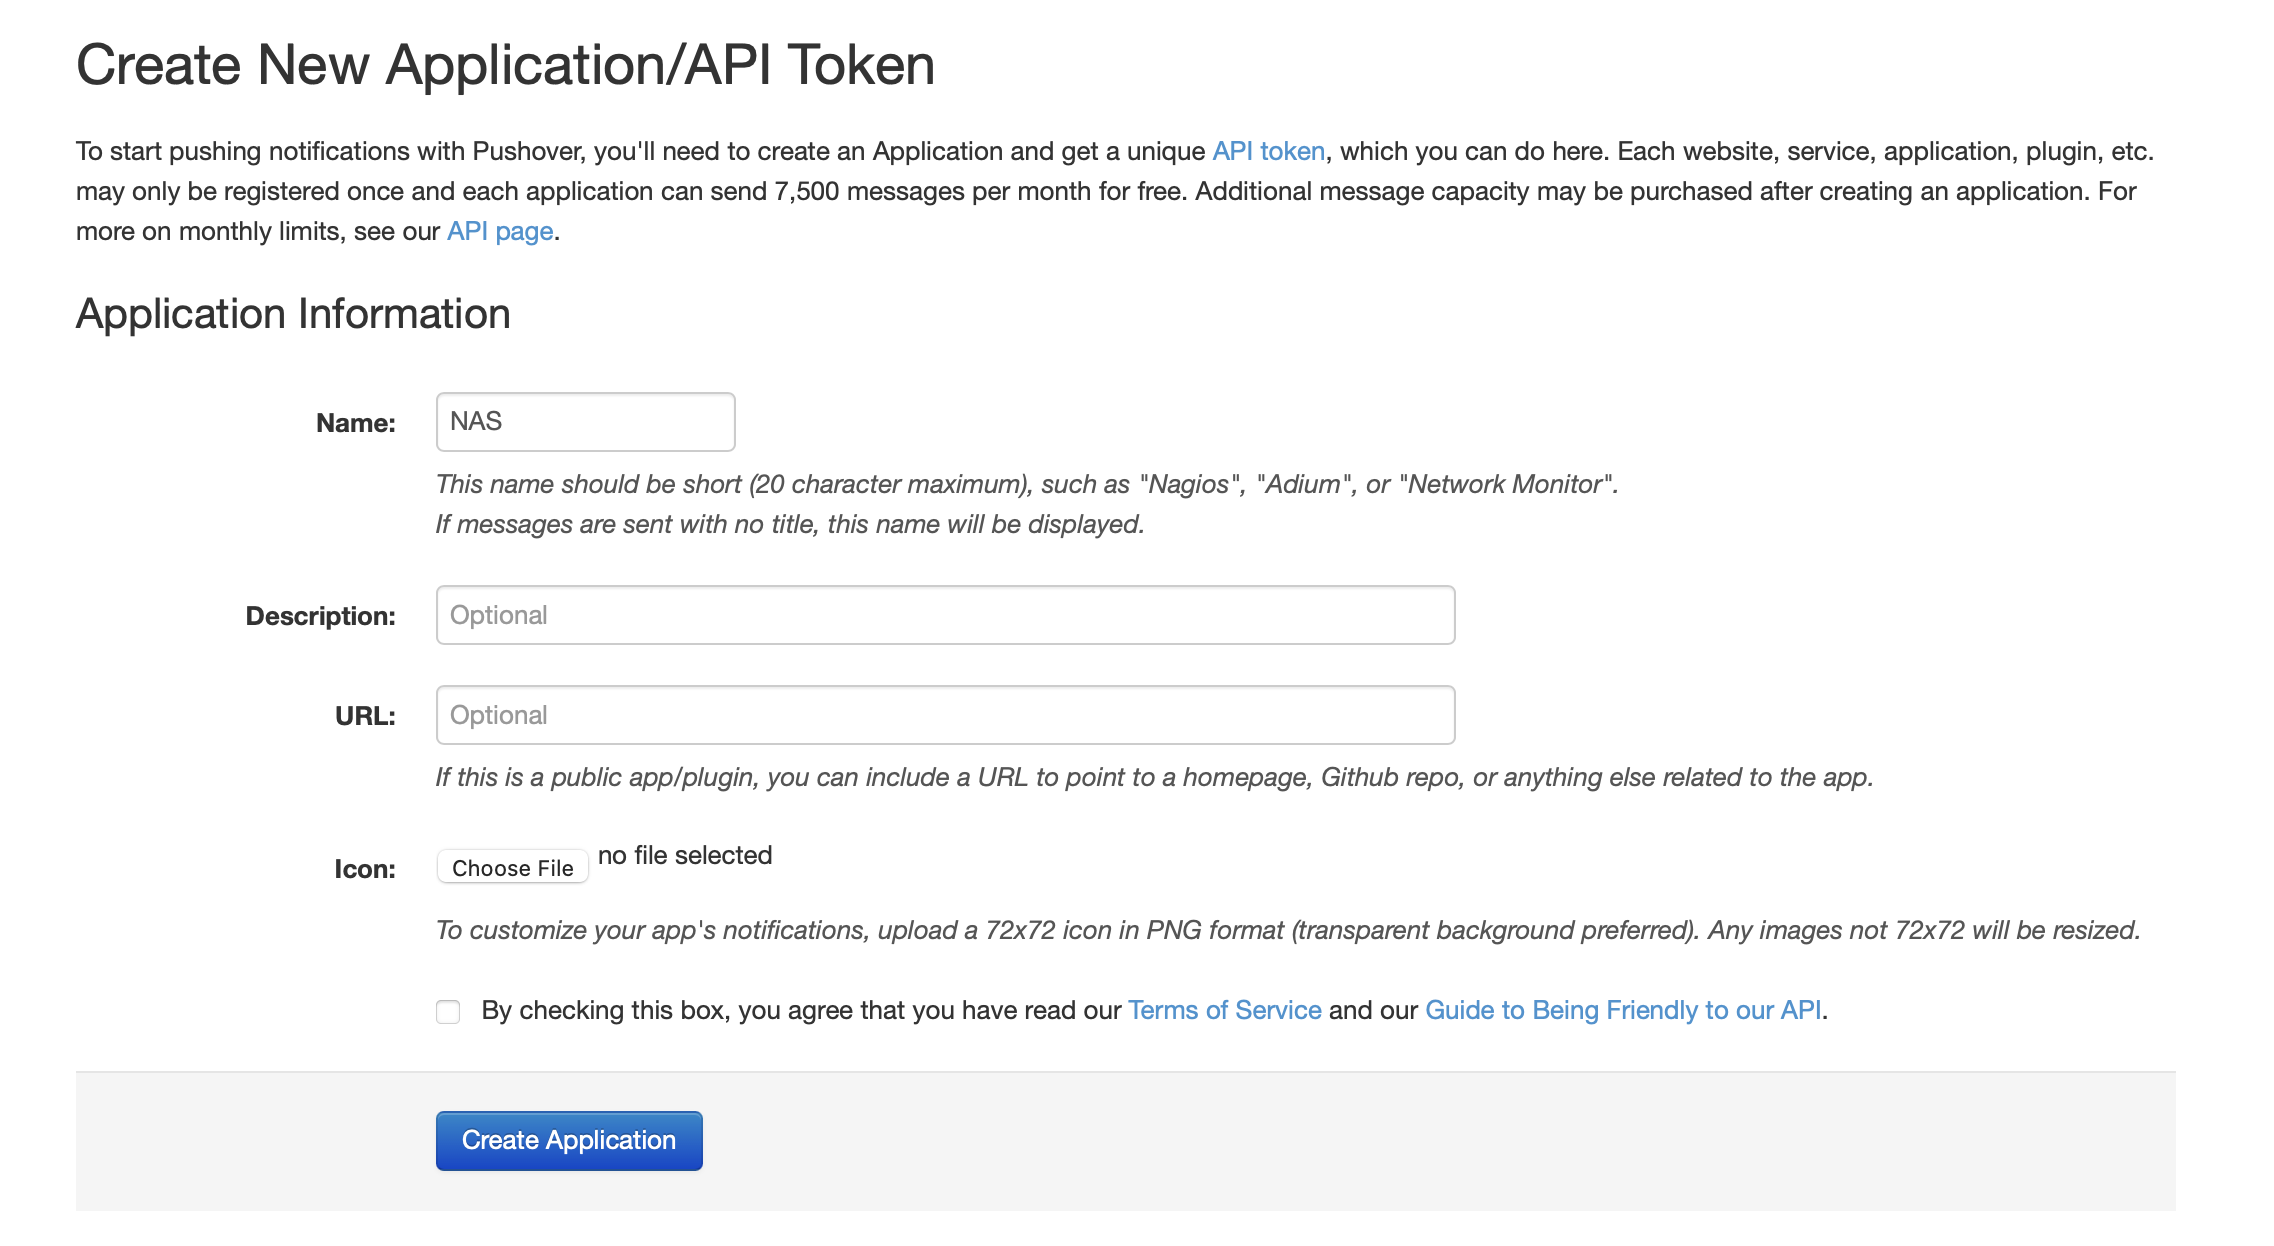
Enter the Name that you want and if you want click the Icon to insert an icon that you want to represent your notifications. I encourage you to do it as it will be a nice addition to your push list to make it stand out. Finally, click the Create Application button to complete the process.
Now clicking on your new app, you will be presented with the detail page about this app that includes the application token parameter. This is the parameter that we will use now to configure our SMS provider.
Alongside this token, you also need your user key that you can find on the main page of Pushover in the upper right corner. With these two parameters, you are now ready to configure the provider.
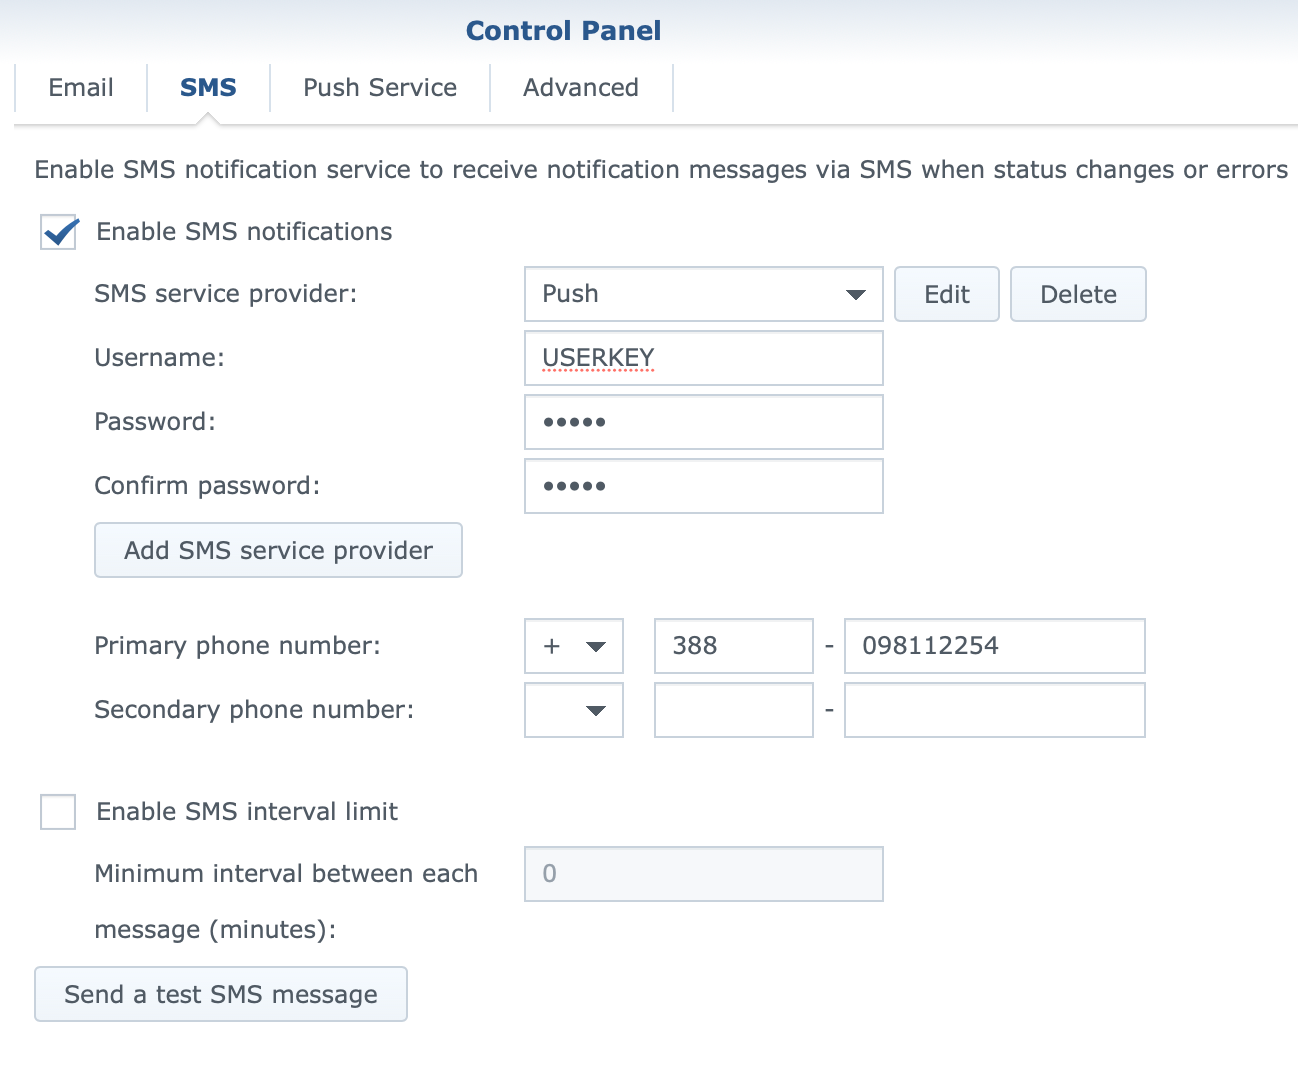
The username value needs to be your Pushover user key while the password value is your application token.
The phone number needs to be configured but it will not be used, so you can enter anything you want. Finally, click Apply and then Send a test SMS message button.
You should be getting a notification similar to this:

That's it, all done. As you can see the process is not that complicated and you will end up using multiple applications in your Pushover configuration for each custom app or NAS that you want to be configured in this manner.
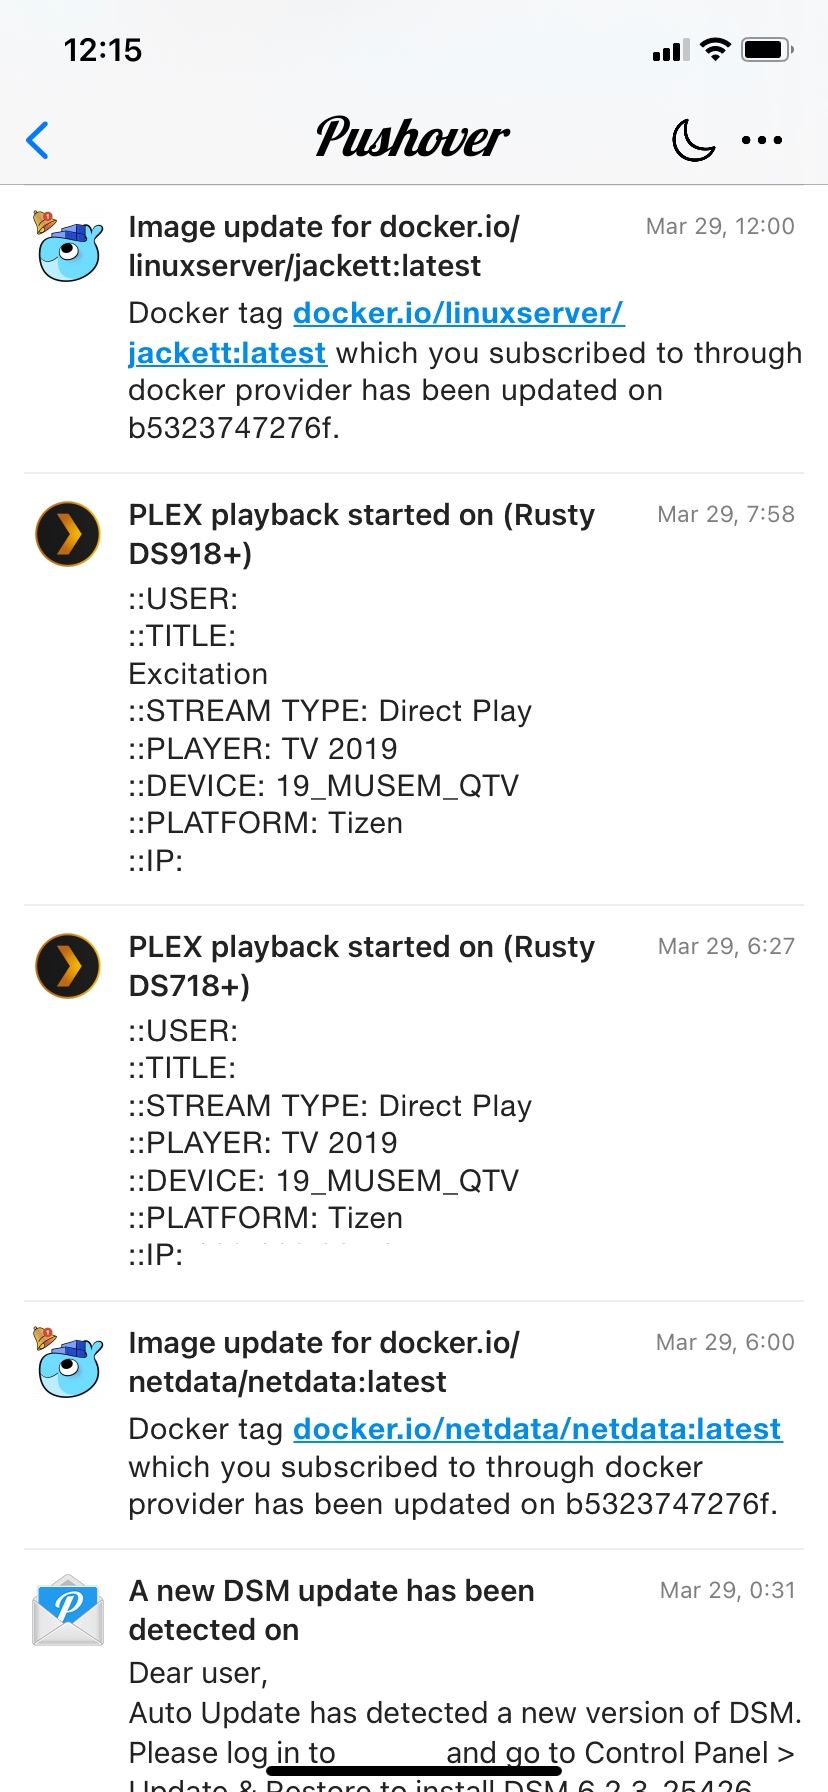
In the end, once you configure Pushover with multiple services you will get something similar to this:
UPDATE - Pushover command line test
In case you are having some problems testing Pushover from your NAS (using the notification interface), you could try and use the command line. In the following section, there are steps that you need in order to get more info on what is happening with the process.
To make this work, you will need to SSH into your NAS. Using ssh user@nasipaddress you will get on a command line prompt.
After that, enter the following command:
curl --data "token=YOURPUSHOVERAPPTOKEN&user=YOURPUSHOVERCLIENTTOKEN&device=NAMEOFTHEDEVICE&title=TESTPUSHOVER&message=TEST" https://api.pushover.net/1/messages.json
token = this is your Pushover app token value
user = this is your Pushover user token value
device = you can enter anything you want here to simulate the name of your device
title = enter anything as the title of the push notification
message = enter your message
As a return, you should get code 1 (success), and a notification on your registered device. In case you get anything other than 1, (like 0) you should get more information on what the problem is, and hopefully, it will help you to troubleshoot it.
Conclusion
Using Pushover has been very beneficial for me, and their uptime has been great. In the last 6y that I have used it, I'm not sure that there were more than 1-2 times that the services had some issues, and if there where it was due to some DDoS attacks that made some notifications come in a bit late.
Apart from that, it does work great.
Also, will just mention some apps and services that I use this platform with, just so you can get the idea:
Plex (via Tautulli) - streaming notifications
Sonarr and Radarr - new media content
Grafana - high CPU usage
DIUN - new Docker image notifications
DSM NAS notifications - System, HyperBackup, Snapshots, etc...
What do you use for your notification platform? Are you still on good old email? Let me down in the comment section or ask if you have any questions.