STORJ - NAS as a DCS node


To exit your node gracefully, follow these steps. Keep in mind that once the process starts it can't be undone! So be sure that you want to do this!
TL;DR, there are two commands that you need at this point. One to initiate the process and another to follow the status.
Connect to the container bash prompt and enter the following command ./storagenode exit-satellite --identity-dir /app/identity. This command will start the process and list all the satellites the node is connected to. Enter the names of the satellites that the node should be terminated with and that's it.
Once the process starts, use the following command to monitor the progress ./storagenode exit-status --identity-dir /app/identity
The table output will be similar to this:
Domain Name                        Node ID  Percent Complete  Successful  Completion Receipt
us2.storj.io:7777                  12tRQrM  0.05%             N           N/A
saltlake.tardigrade.io:7777        1wFTAgs  0.00%             N           N/A
ap1.storj.io:7777                  121RTSD  0.00%             N           N/A
us1.storj.io:7777                  12EayRS  0.00%             N           N/A
eu1.storj.io:7777                  12L9ZFw  0.00%             N           N/A
europe-north-1.tardigrade.io:7777  12rfG3s  0.00%             N           N/A
Now simply wait for the progress to reach 100% on all satellites, and shutdown the node.
Crypto talk is everywhere around us. If you are not open to mine for some BTC or ETH using oversized GPUs but do have some spare HDD space, maybe this article is for you.
For those of us that have NAS devices running 24/7 and have a few TB of space to spare here and there, why not put that space (and some bandwidth) up for use? Enter STORJ.io.
Storj DCS is a decentralized storage platform that will pay you for your services in crypto. In this article let's see how you can make big bucks (just kidding!) while sleeping and let your NAS do all the hard work.
From start to finish you will have to follow some steps to get it all going, but nothing too complicated. Also, make sure to double-check their documentation that is very well written and precise.
STEP01 - Setup your wallet
Before you go into this venture you will need a wallet. STOREj will pay you in ETH tokens so make sure to have one ready. MEW will do just fine but others are supported.
STEP02 - Register your NAS as a node
This is the main step, and you start with the following process:
- Get your auth token
- Generate node identity
- Configure port forwarding (and DDNS unless you have a static public IP)
- Set up the node via Docker
Get your auth token
Run the following set of commands:
curl -L https://github.com/storj/storj/releases/latest/download/identity_linux_amd64.zip -o identity_linux_amd64.zip
unzip -o identity_linux_amd64.zip
chmod +x identity
sudo mv identity /volume1/storej/identity
Generate node identity
Move into the identity subfolder from the previous step and run the following
./identity create storagenode
Now you need to authorize your identity with your STORJ token
./identity authorize storagenode <your STORJ token >
Configure port forward and DDNS (if needed)
Make sure your location has port 28967 open on your router so your NAS/node can communicate with the rest of the collective. Use DDNS address as a variable as a compose ADDRESS value or your static public IP
The final step will depend on what platform you want to run the node. In this case, we will use Docker compose file to create the node.
STEP03 - Create STORJ node via Docker
The following is a docker-compose file that will generate the node for you:
version: "3.5"

services:
  storej:
    image: storjlabs/storagenode:latest
    network_mode: "bridge"
    container_name: storej
    ports:
      - "28967:28967"
      - "28967:28967/udp"
      - "127.0.0.1:14002:14002"
    volumes:
      - type: bind
        source: /volume1/storej/app/identity
        target: /app/identity
      - type: bind
        source: /volume1/storej/app/config
        target: /app/config
    environment:
      - WALLET="1xxxxxxxxxxxxxxxxxxxxxxxxxxxxxxxxxxxxxxxxx"
      - EMAIL="youremailaddress"
      - ADDRESS="yourDDNSaddress:28967"
      - STORAGE="2TB"
    restart: always
app/config one has the following folder structure created before you start the container/storage/blobs
/storage/temp
/storage/garbage
/storage/trash
So whatever local NAS location you have selected for the app/config location, be sure that the root of that folder has the previous folder structure ready.
Log into your STORJ UI
Now that you have your node up and running you can log into your container using the 14002 port and your NAS IP address to get to the STORJ node UI.
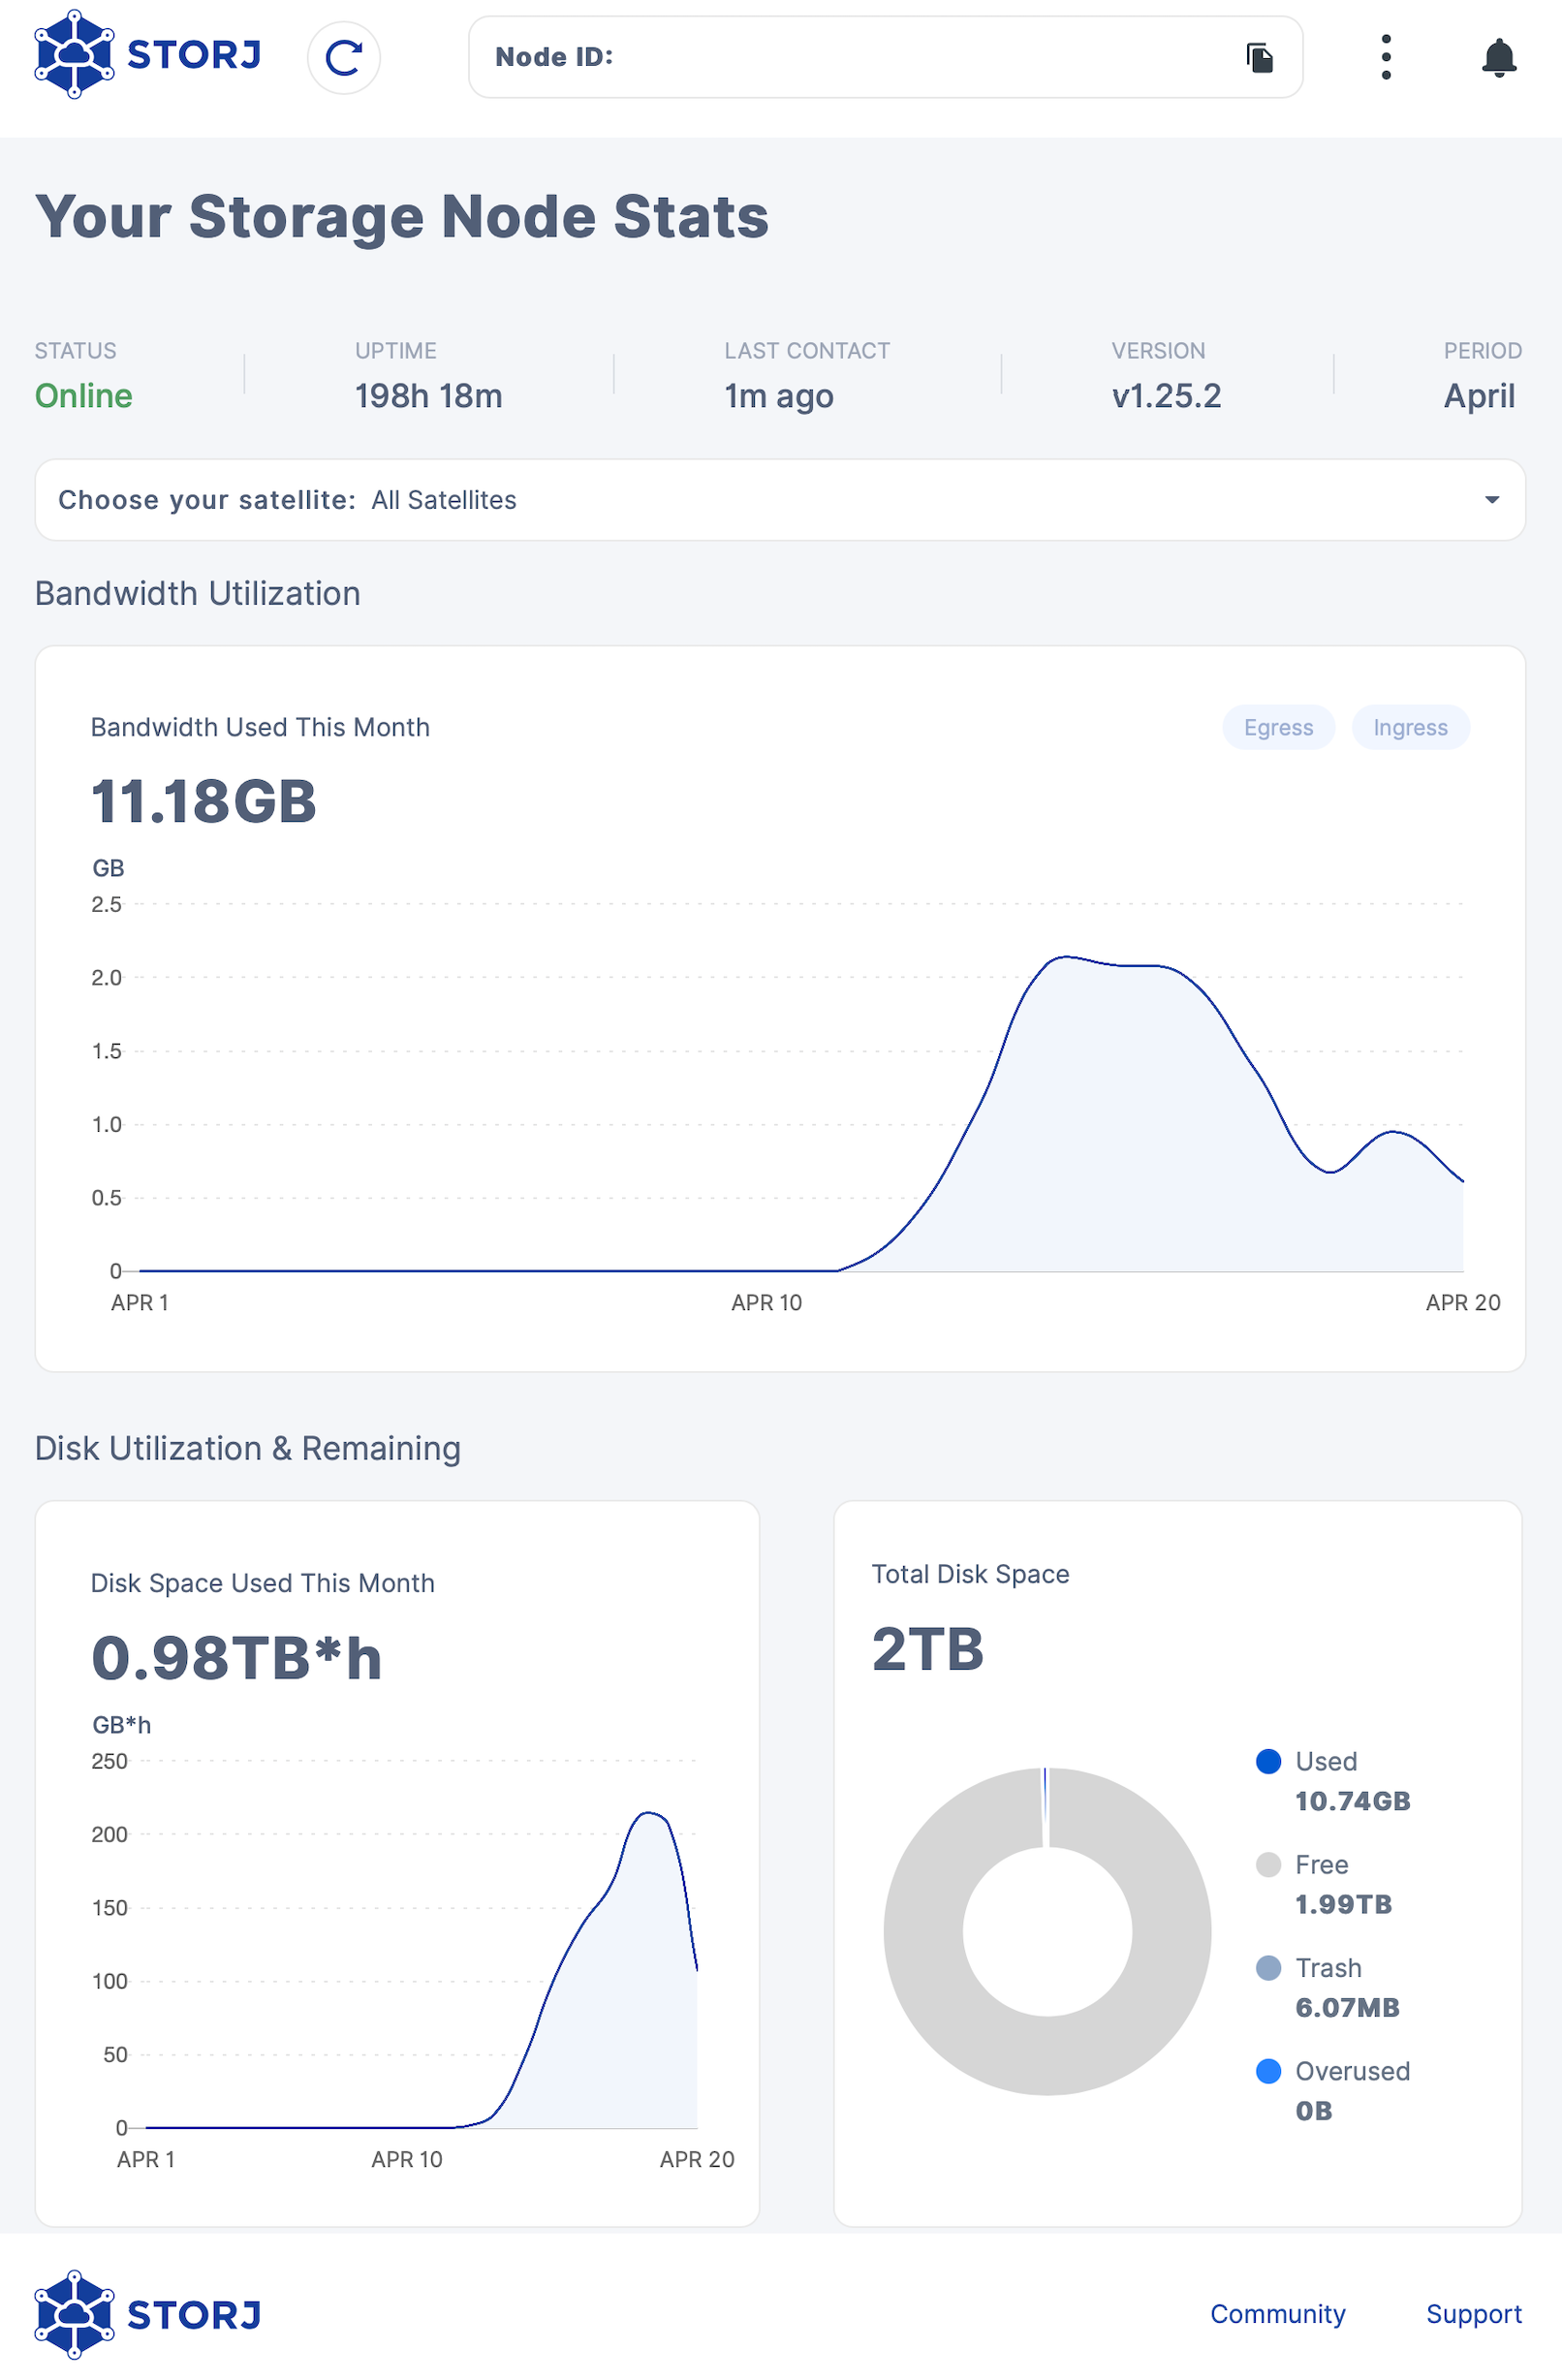
Now just sit back and let the encrypted decentralized data fill up your storage.