Synology DP7400 review

Back in June of this year, Synology presented a new line of products during the Computex expo, known as Data Protection.
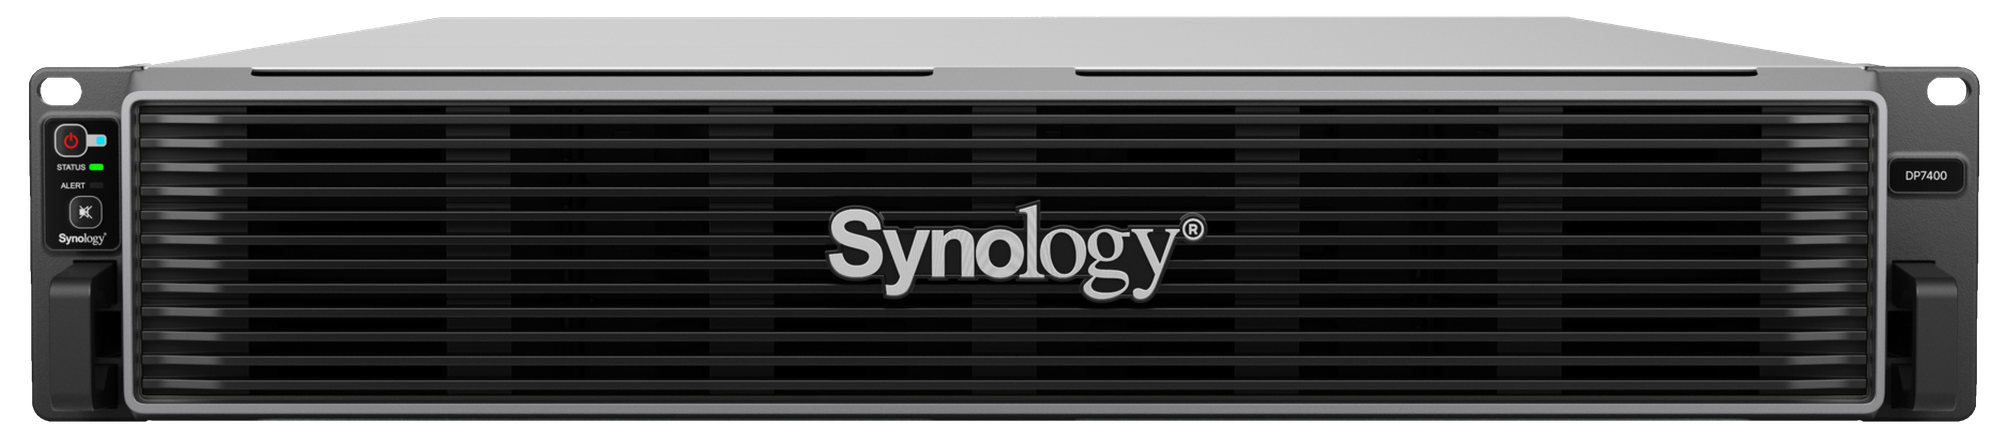
Specifically, one of the first models from this line was the DP7400 model. A 12-bay AMD EPYC pure backup appliance running the newest and latest custom Synology OS called APM, ActiveProtect Manager.
Pre-configure hardware for backup purpose with dedicated operating system for backup, recovery, instant restore, replication, and deduplication.
Blackvoid was fortunate enough to get the very first DP7400 in Europe for testing, thanks to the efforts of both Taiwan HQ and Synology Germany, and this article series will go over all the HW and SW elements of this device and its platform.
Presently the DP line comes in a single rack-based version and two desktop ones. For now, we will focus on this DP7400 to see what it offers and who the intended audience is for this particular model.
Table of Contents
: Introduction
: Price and licensing model
: Unboxing and specifications
: First setup
: Introduction
First, let's take a few moments to discuss the whole idea behind the Data Protection product line and its naming convention before we get into the actual intro on the DP7400 unit.
So why create a completely new product line when the company already has a vast variety of rack-based devices ranging from four up to sixty bays (with no expansions)?
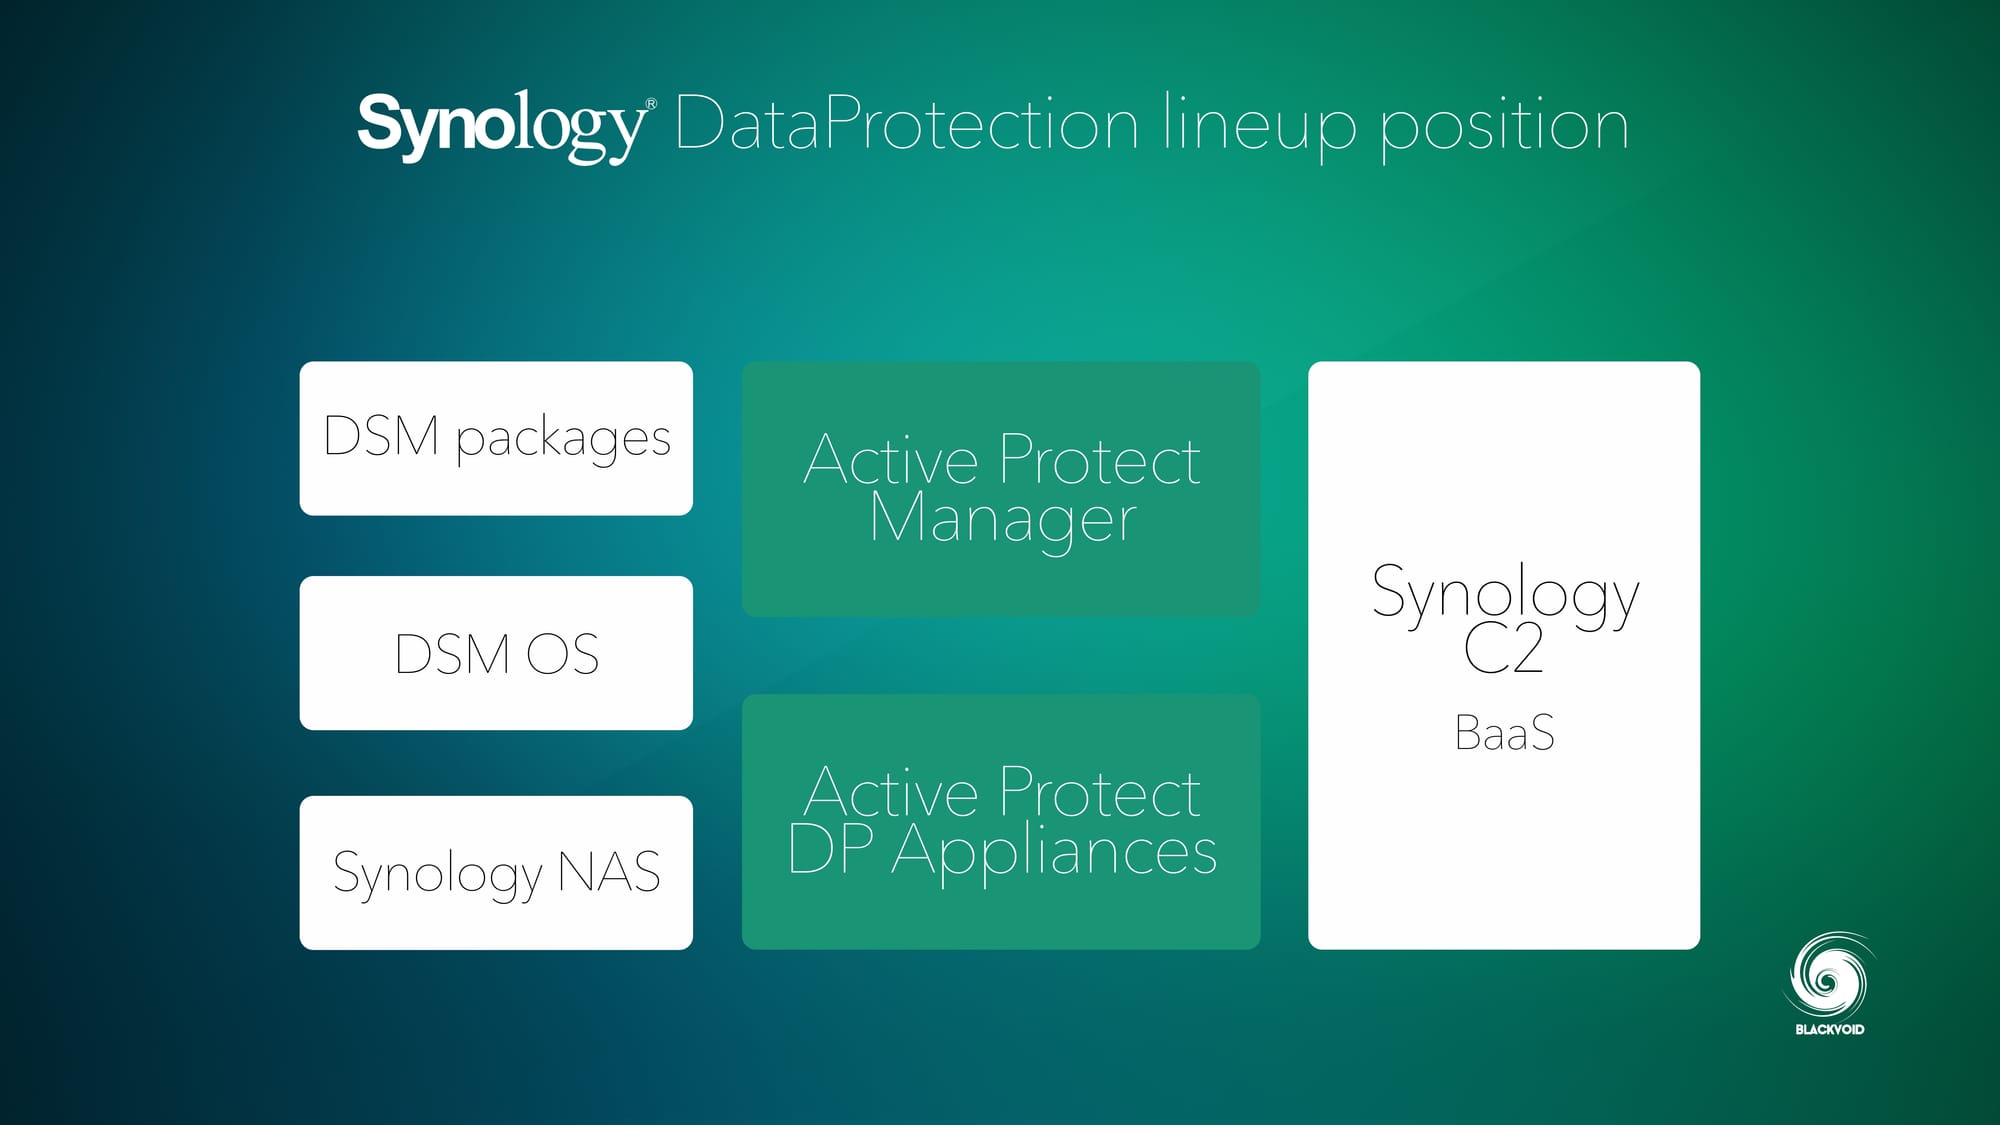
All of the current models in Synology's portfolio are DSM-driven NAS devices that can be customized to do any number of tasks. Pure backup to virtualization, containerization, multimedia, and any other service that a Linux-based machine can do.
With a clear vision to go more business or enterprise-oriented forward, Synology has decided to build a more appliance-like backup device, pulling the best of both SW and HW. With a rock-solid hardware foundation and a completely new operating system, the ActiveProtect Manager (based on their award-winning Active Backup software), Synology managed to create an even faster, dedicated, turn-key backup solution.
ActiveProtect appliance is designed for all business which streamlines the data protection process for an entire organization, from deployment to recovery, through a unified and intuitive management interface, no matter where the backup tasks occur
Some key highlights would be:
Simplified management: easy procurement, with initial setup completed in 10 minutes*, automatic protection mechanism combined with on-demand expansion cluster architecture, truly simplifying management on a single platform
High Performance: Reliable software and hardware integration with source-side deduplication technology, saving 99% of duplicate data transmission, significantly improving backup speed, and saving 70% of storage costs.
Reliable recoverability: Synology's native immutable storage technology, combined with data verification and automatic repair, provides one-stop management of off-site backup copies, ensuring high reliability of data restoration
* 10 minutes after assembly into the rack, and the installation of all the drives
The conclusion is that with DataProtection devices, Synology is looking to give the customer an appliance specifically designed for backup, pre-sized and configured with all necessary capacity, CPU, SSDs, memory, and network ports. Meaning, that assembly of a custom (DIY) setup with various parts will not be needed, and with that minimizing compatibility issues down to zero.
: Price and licensing model
Finally, we come to the price and licensing for the whole DP lineup. While there was a lot of debate about what approach to take, Synology landed on the following.
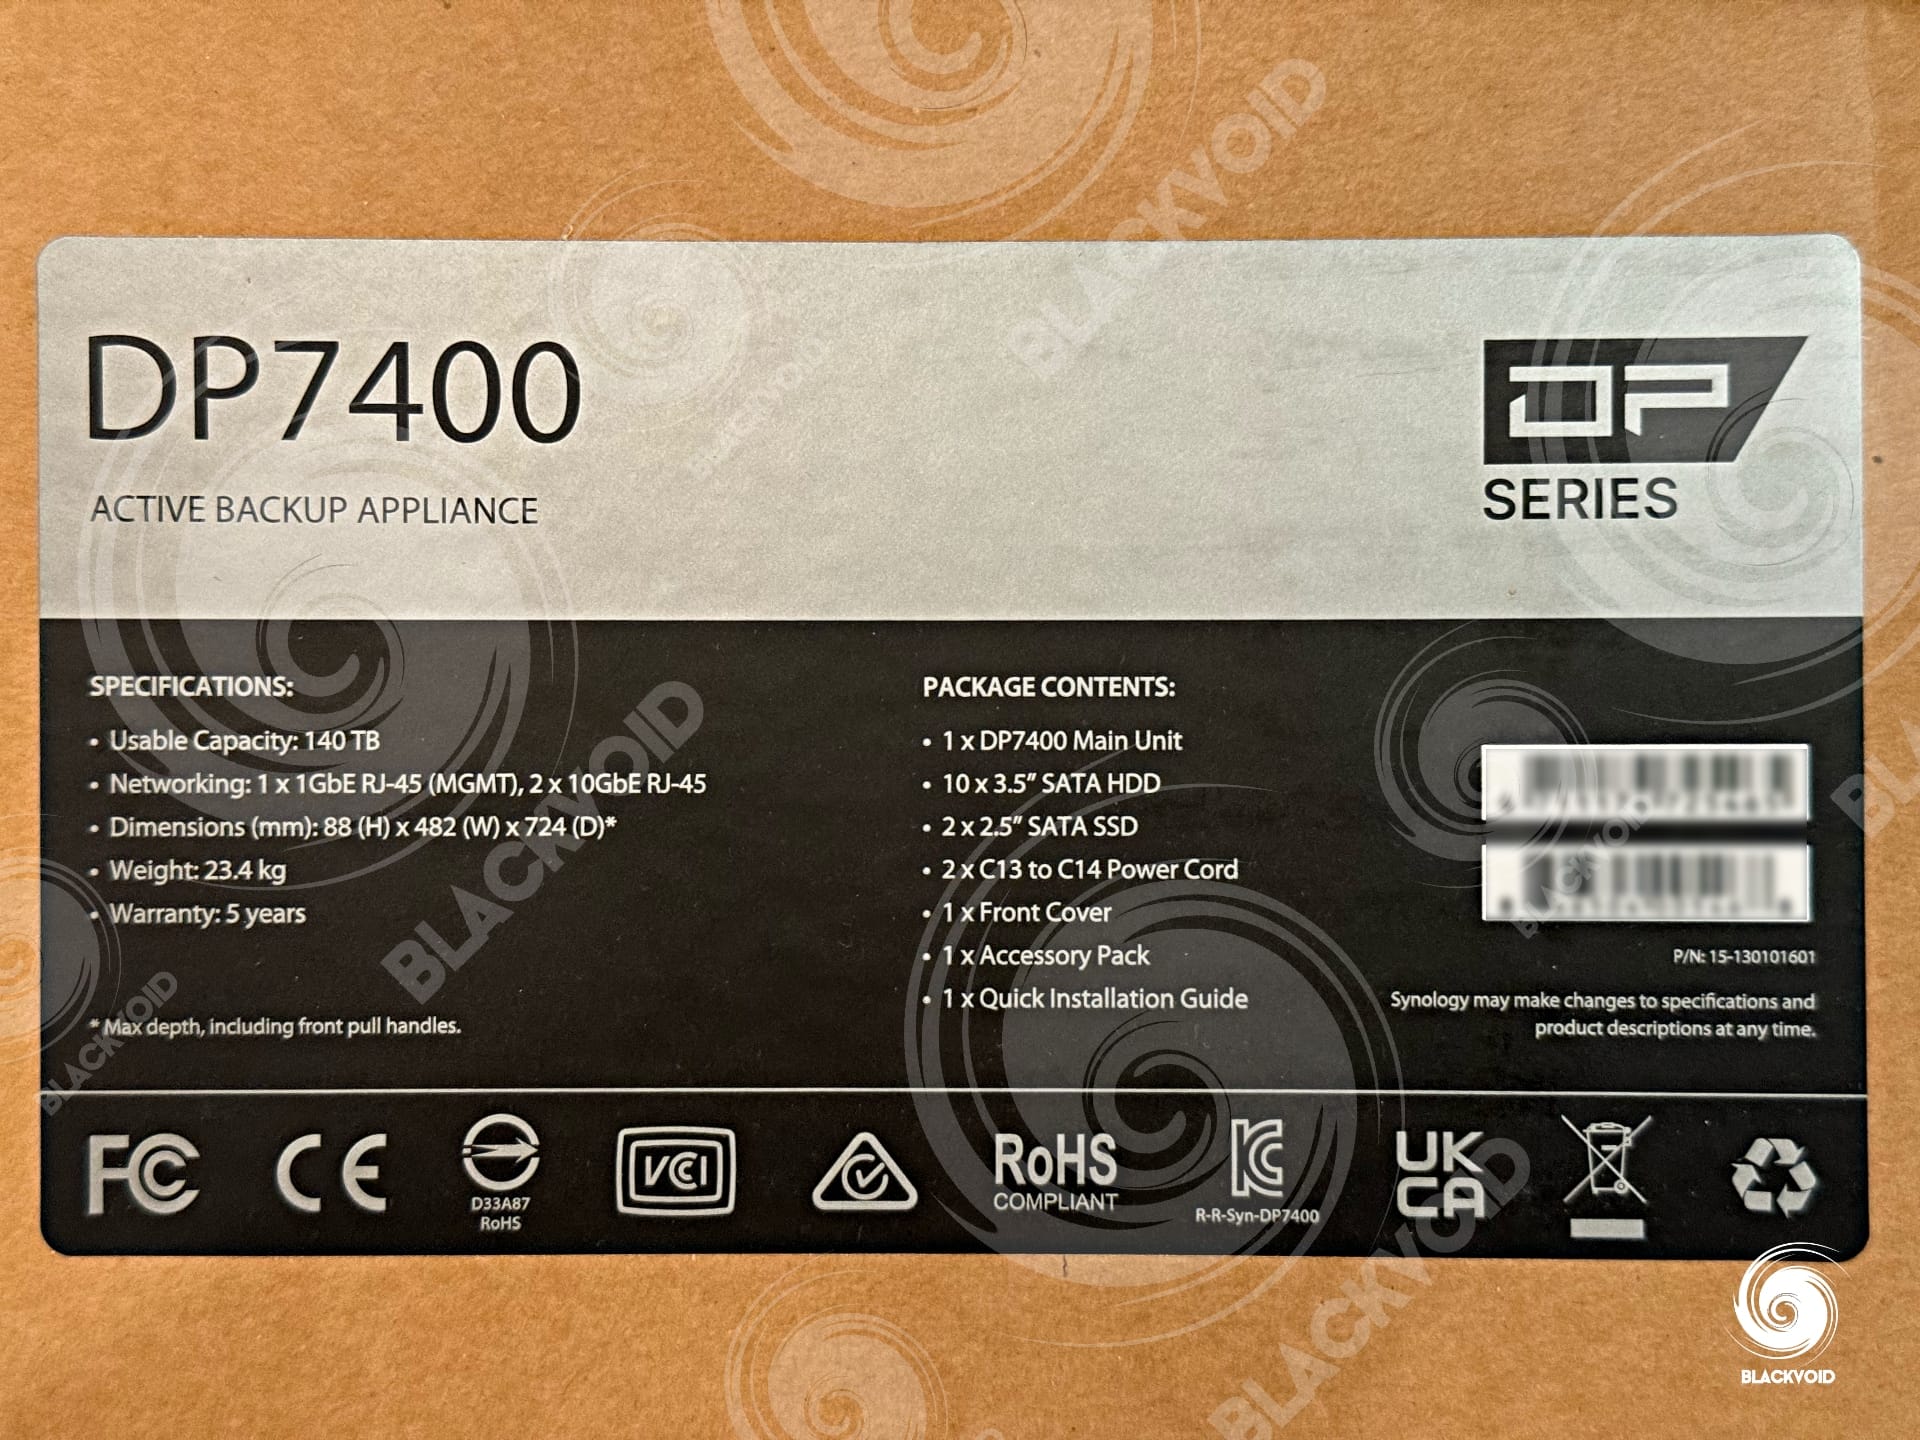
The suggested retail price for this DP7400 with specifications that are listed at the top of the article, is €39.999,00.
On top of this, there is also a licensing model for any additional cluster node (another DP unit). The price for it is €1.800,00 for 3 years (each node).
One thing important to note here is that the additional licenses will only apply to the third (3rd) additional node (and any other after that) in the cluster.

So, for the first three devices in a single cluster, we only pay for the actual appliance. This being a business/enterprise-driven platform, the pricing comes as no surprise, but it is more than an average Synology XS+ setup.
For a simple comparison, the Synology SA6400 as it sits is about €10-11.000 alone (running the same basic 12-core CPU and 12 bays). The DP7400 has almost the same amount of money in drives and RAM, bringing the price up to about €20.000 in hardware alone. So 50% of the suggested price is bare metal. The rest is, of course, the APM software platform, and profit.
While these prices are simply suggested, it is best to consult with either Synology or any reseller partner and look into specific needs, and finally the exact pricing. For that, it might be useful to use the following link.
Get in contact with Synology and discuss the whole DP platform as well as the pricing
: Unboxing and specifications
In the past rack models were always packed the same way, and that is no different in the case of the DP series. A double-packed card box with plenty of foam protection and in the middle, the device itself.
But this time around, this being a prepopulated device, unboxing revealed that the drives are not prepopulated but presented as part of the package and need to be installed by the user.
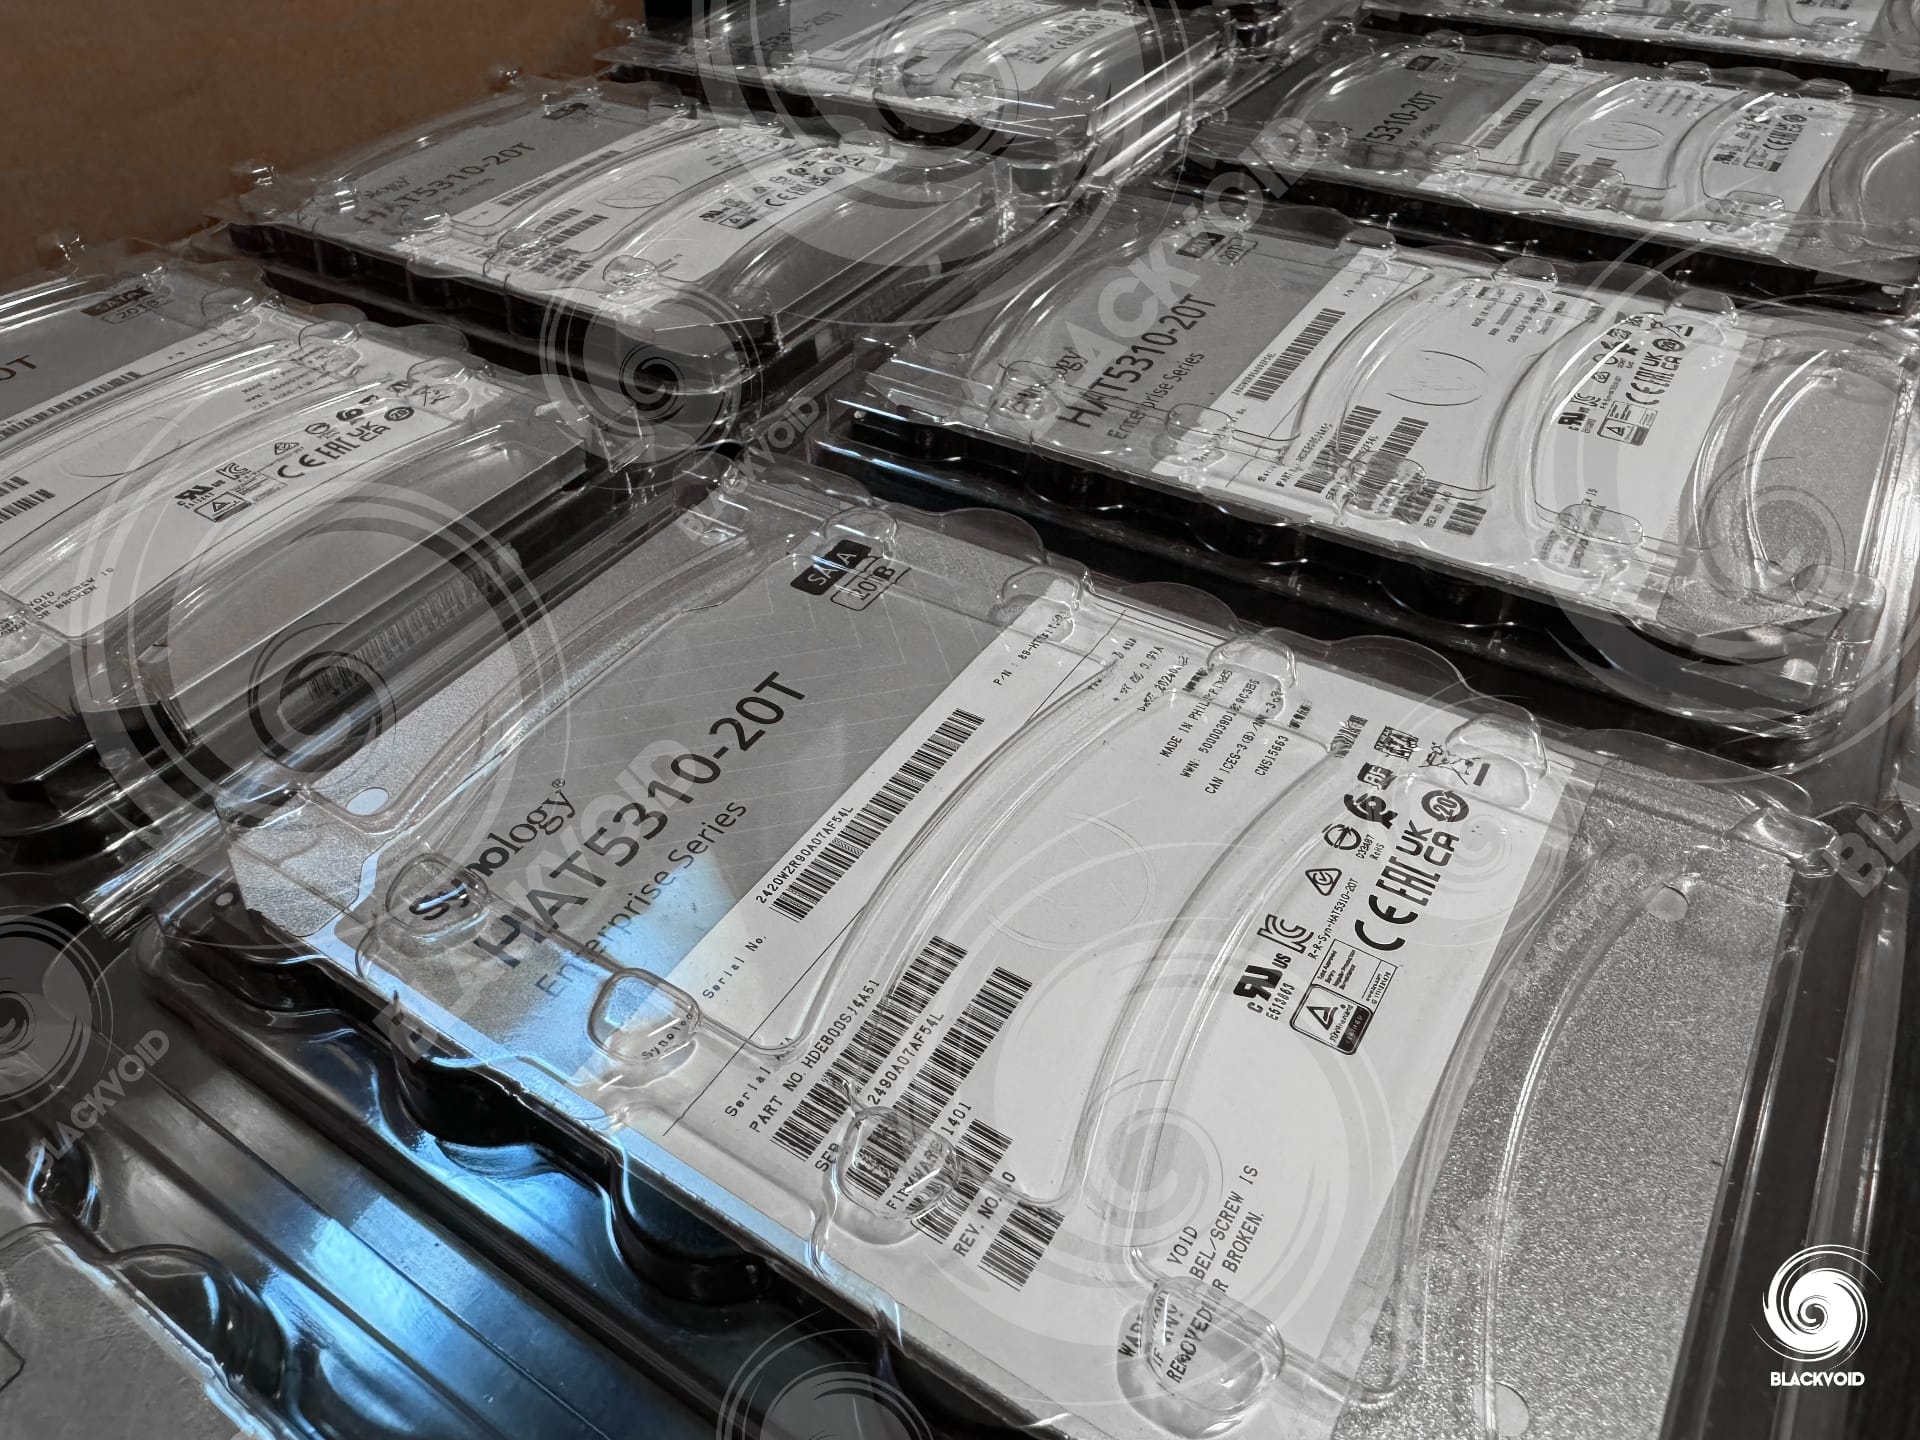
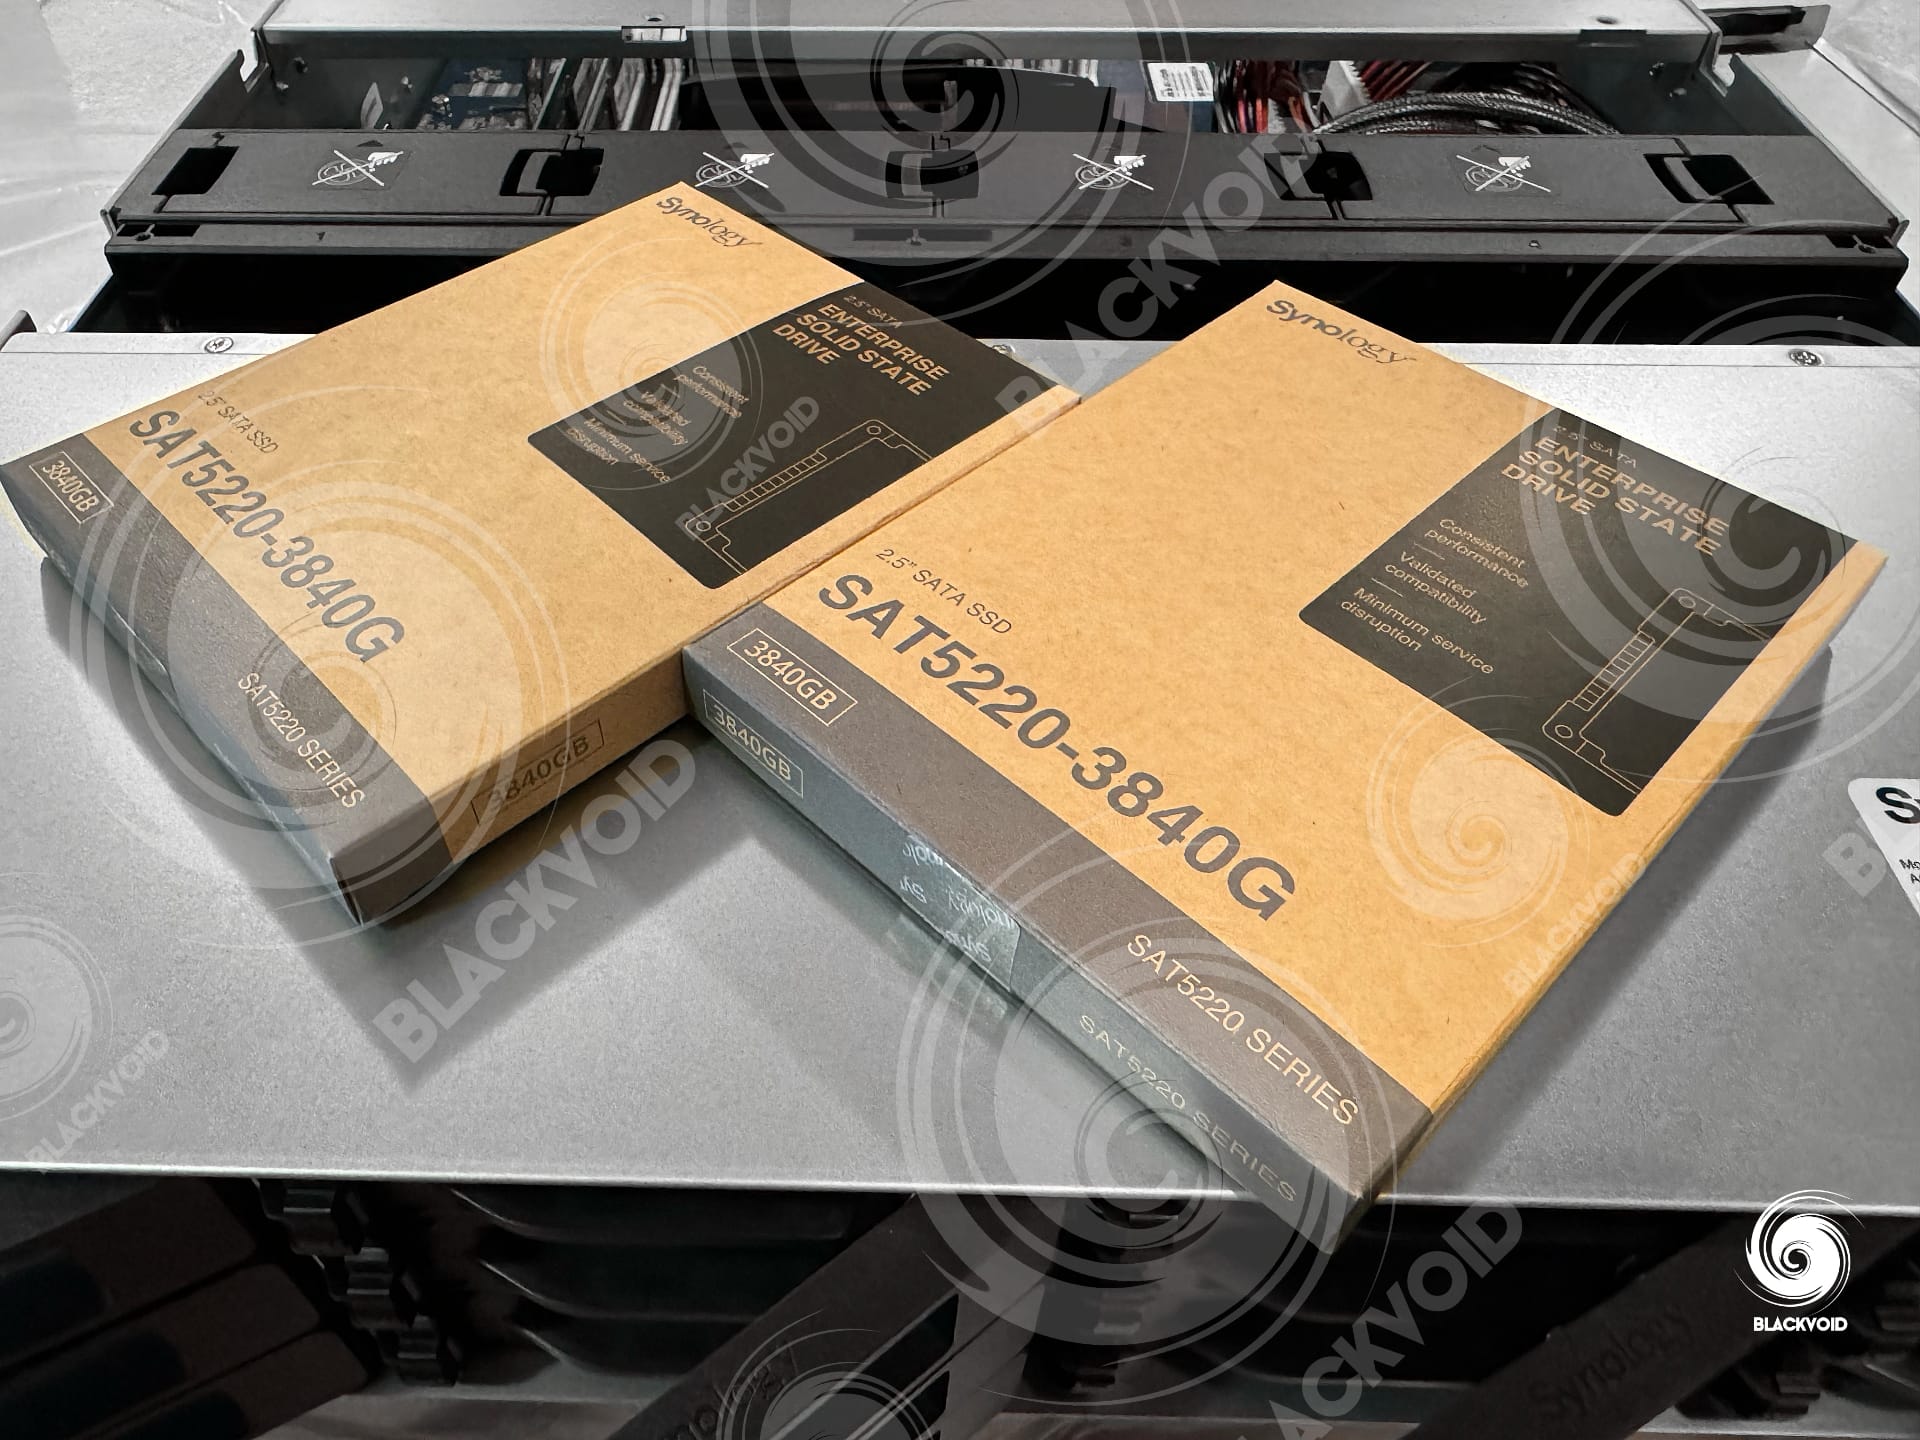
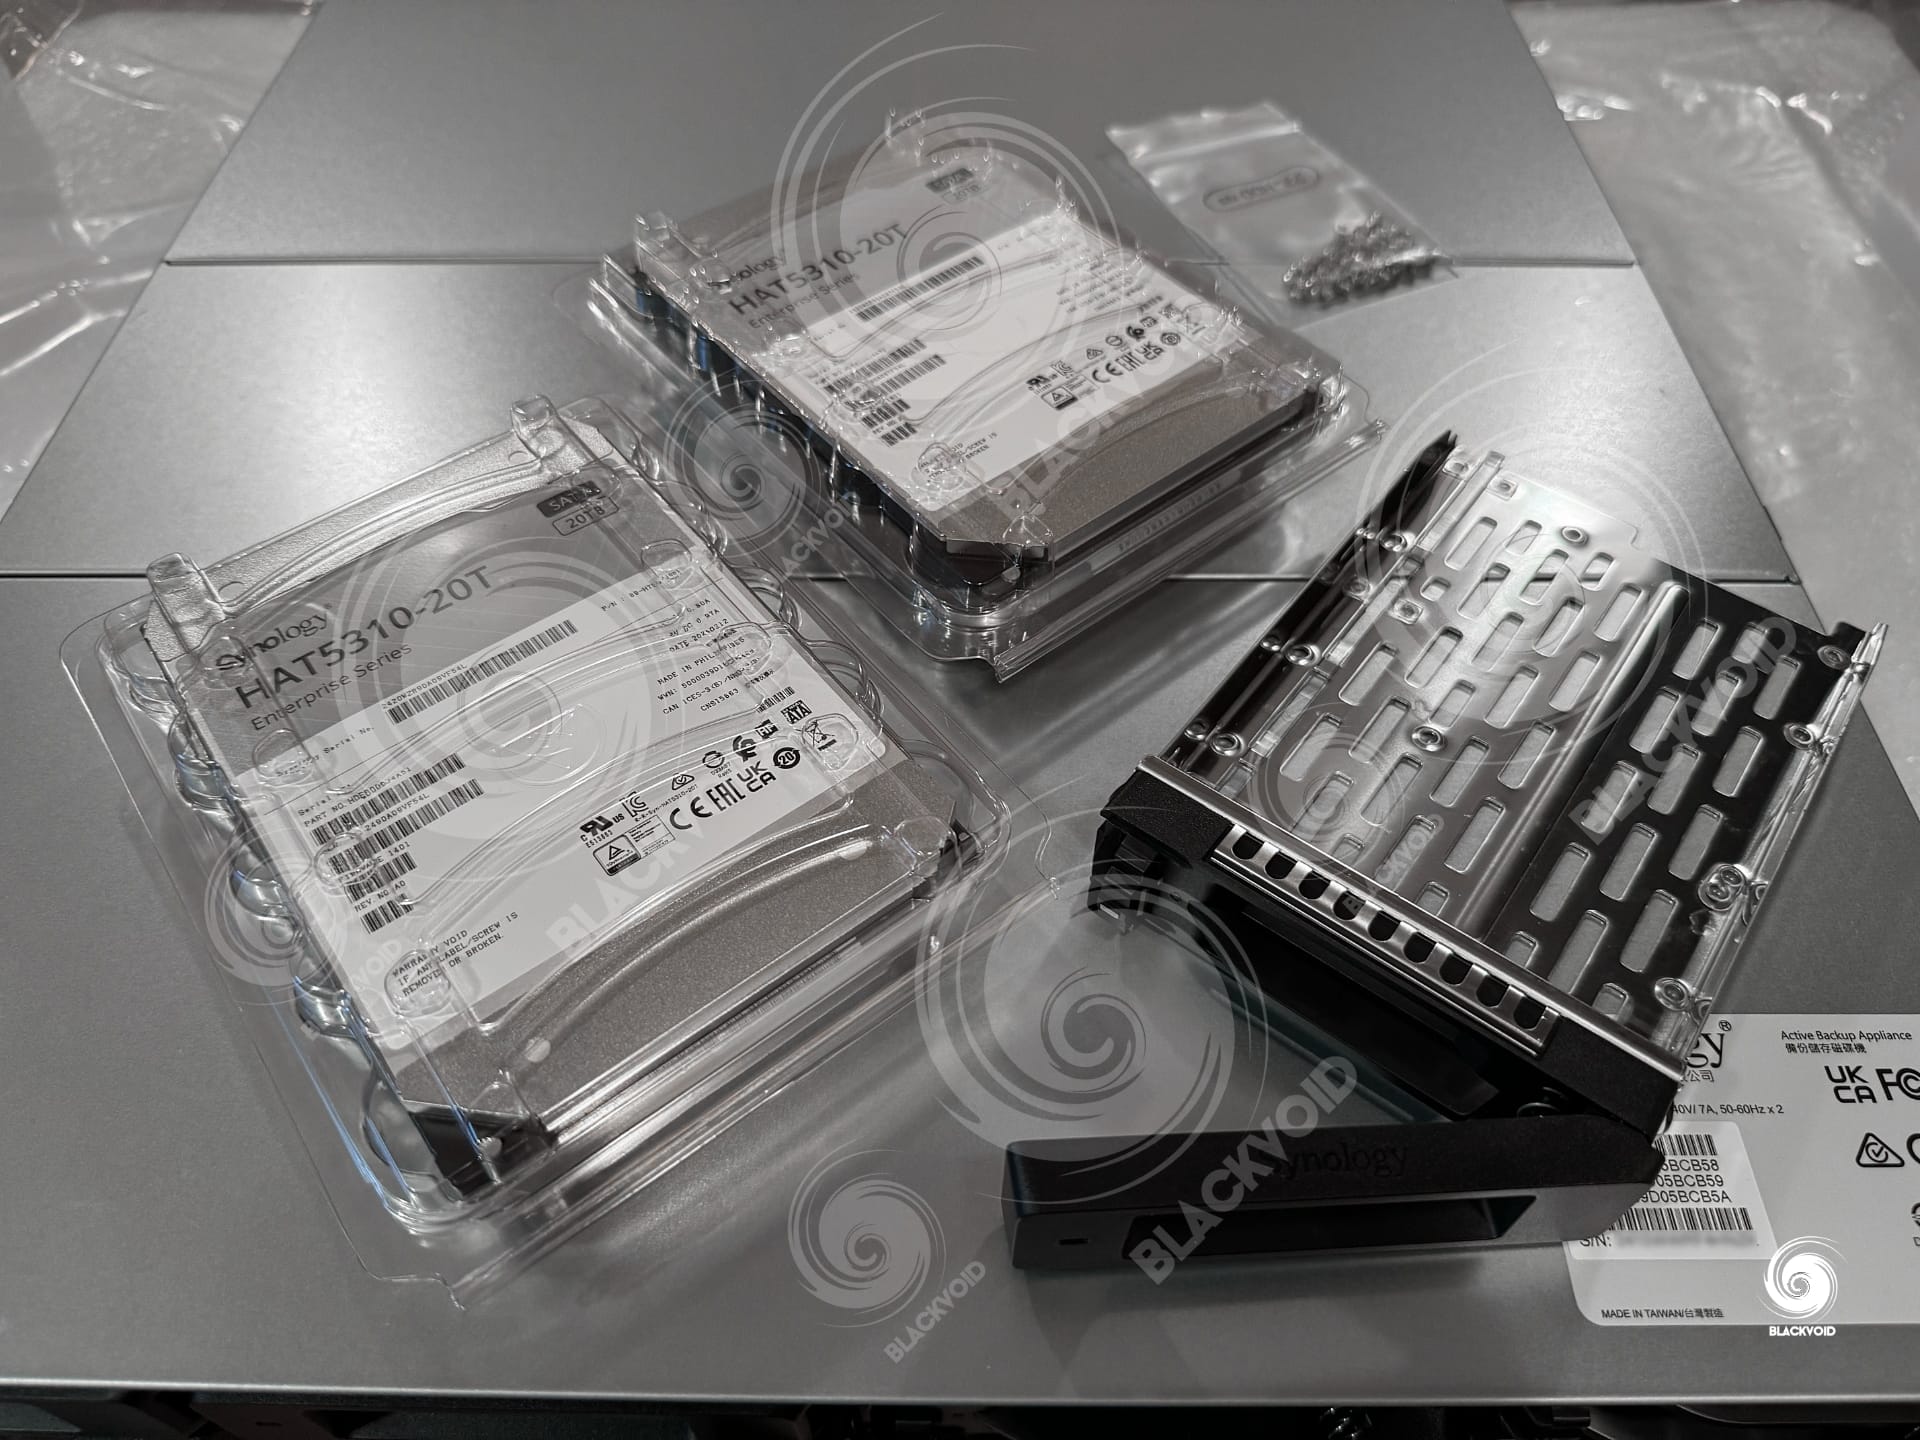
The test unit that we got in for testing was packed with ten HAT5310 20TB, as well as a pair of SAT5220 4TB drives.
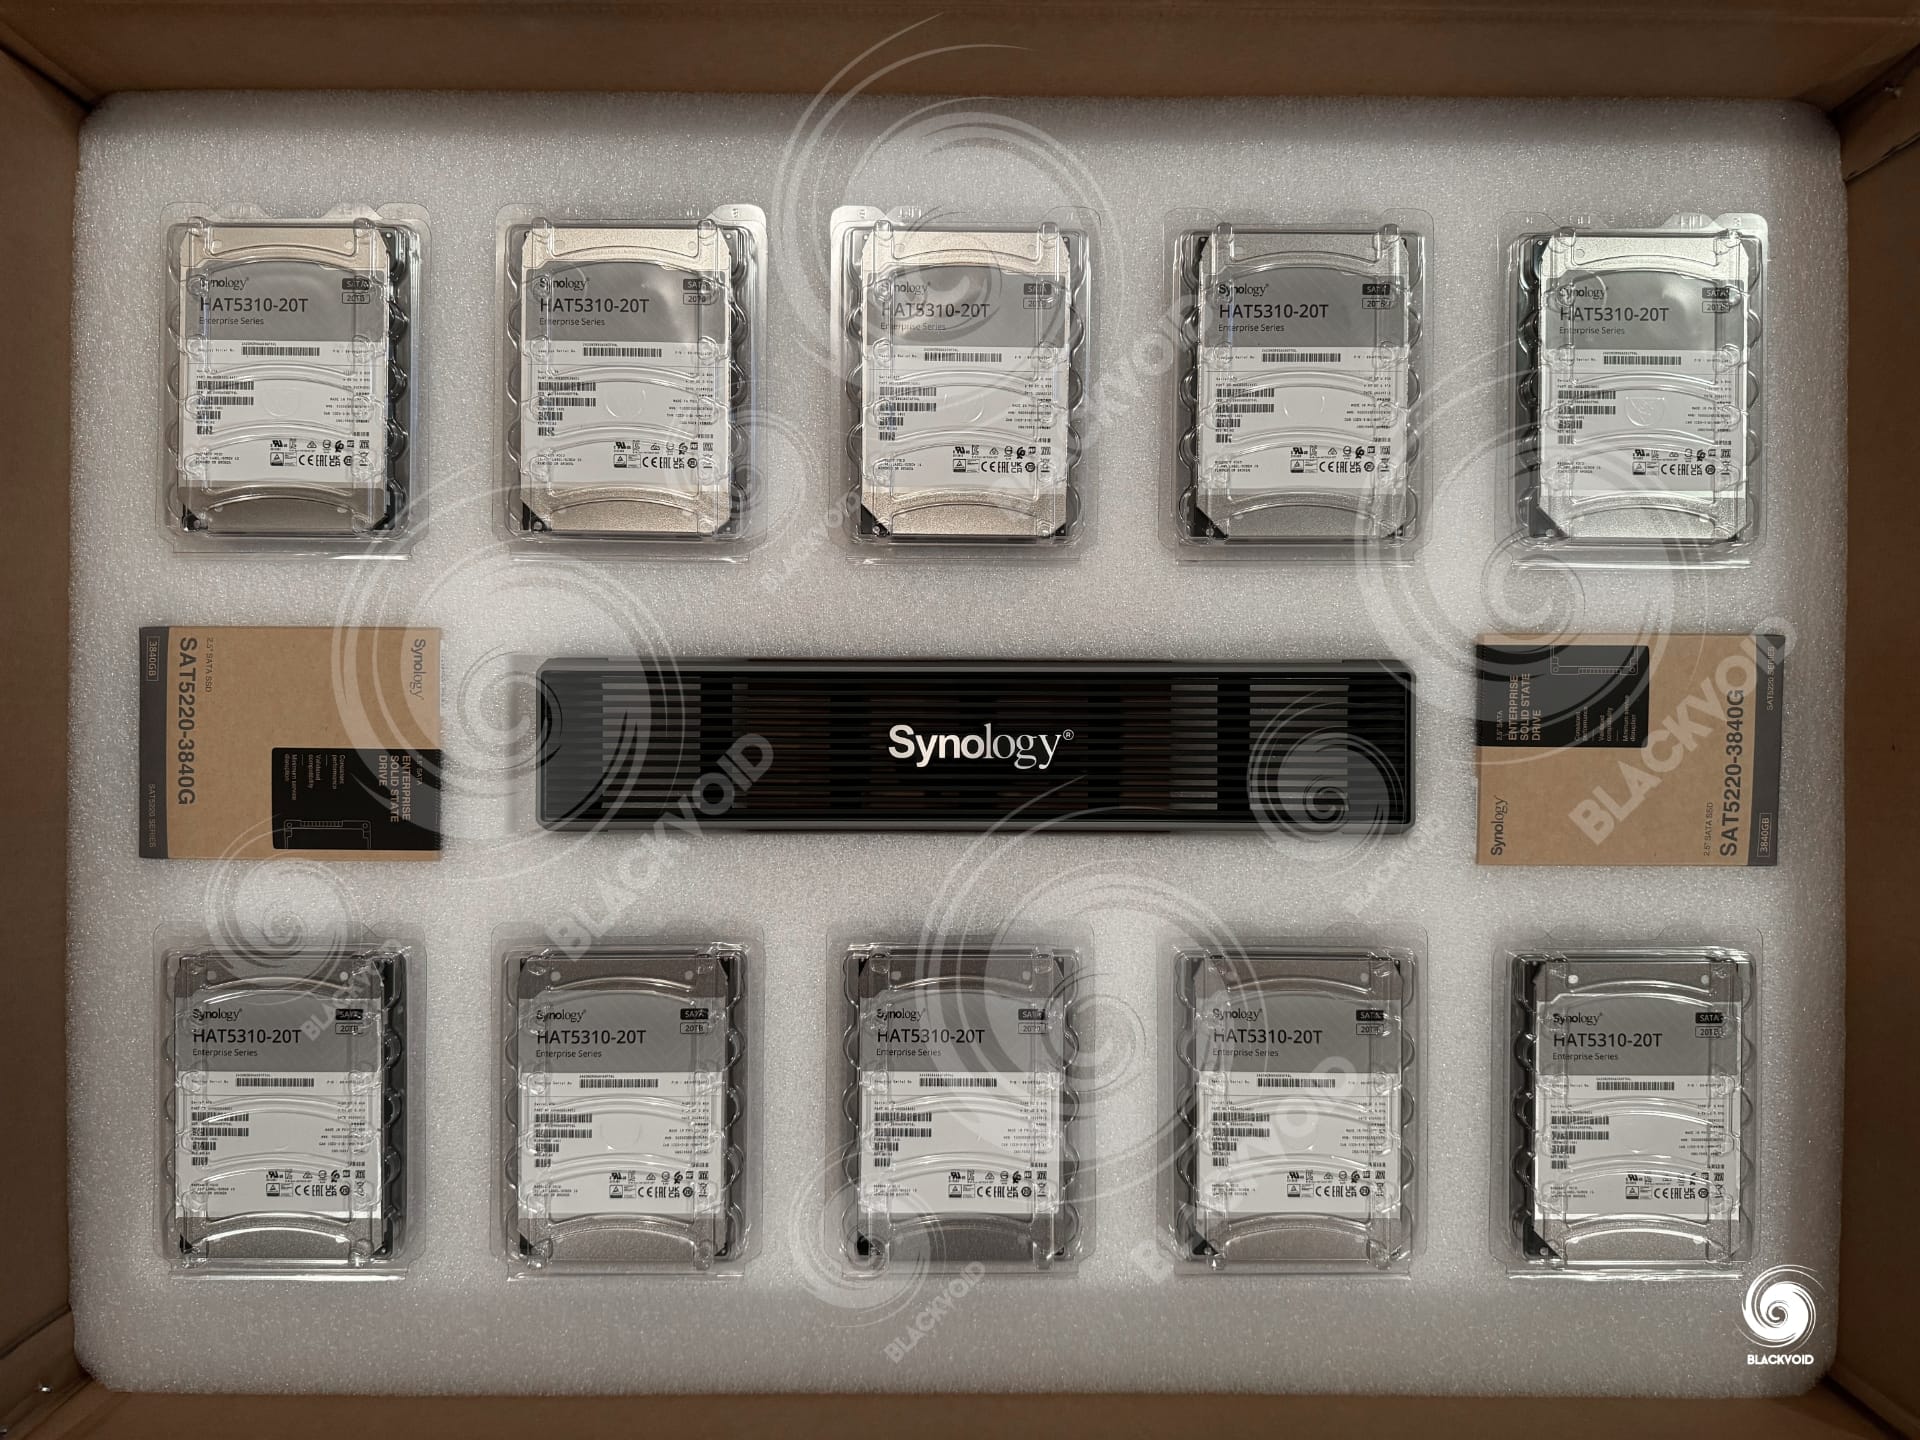
In the middle of the package was also a 2U Synology branded decorative mask that can be applied once the drives are installed. If you suffer from any type of OCD, you probably won't apply it as it makes the DP unit stick out from the default edge of the rack, especially if you have no other device like that. Still, it is good to know that it is optional.
The hardware setup of the DP unit as said, will depend, but the maxed-out version would have the following specifications:
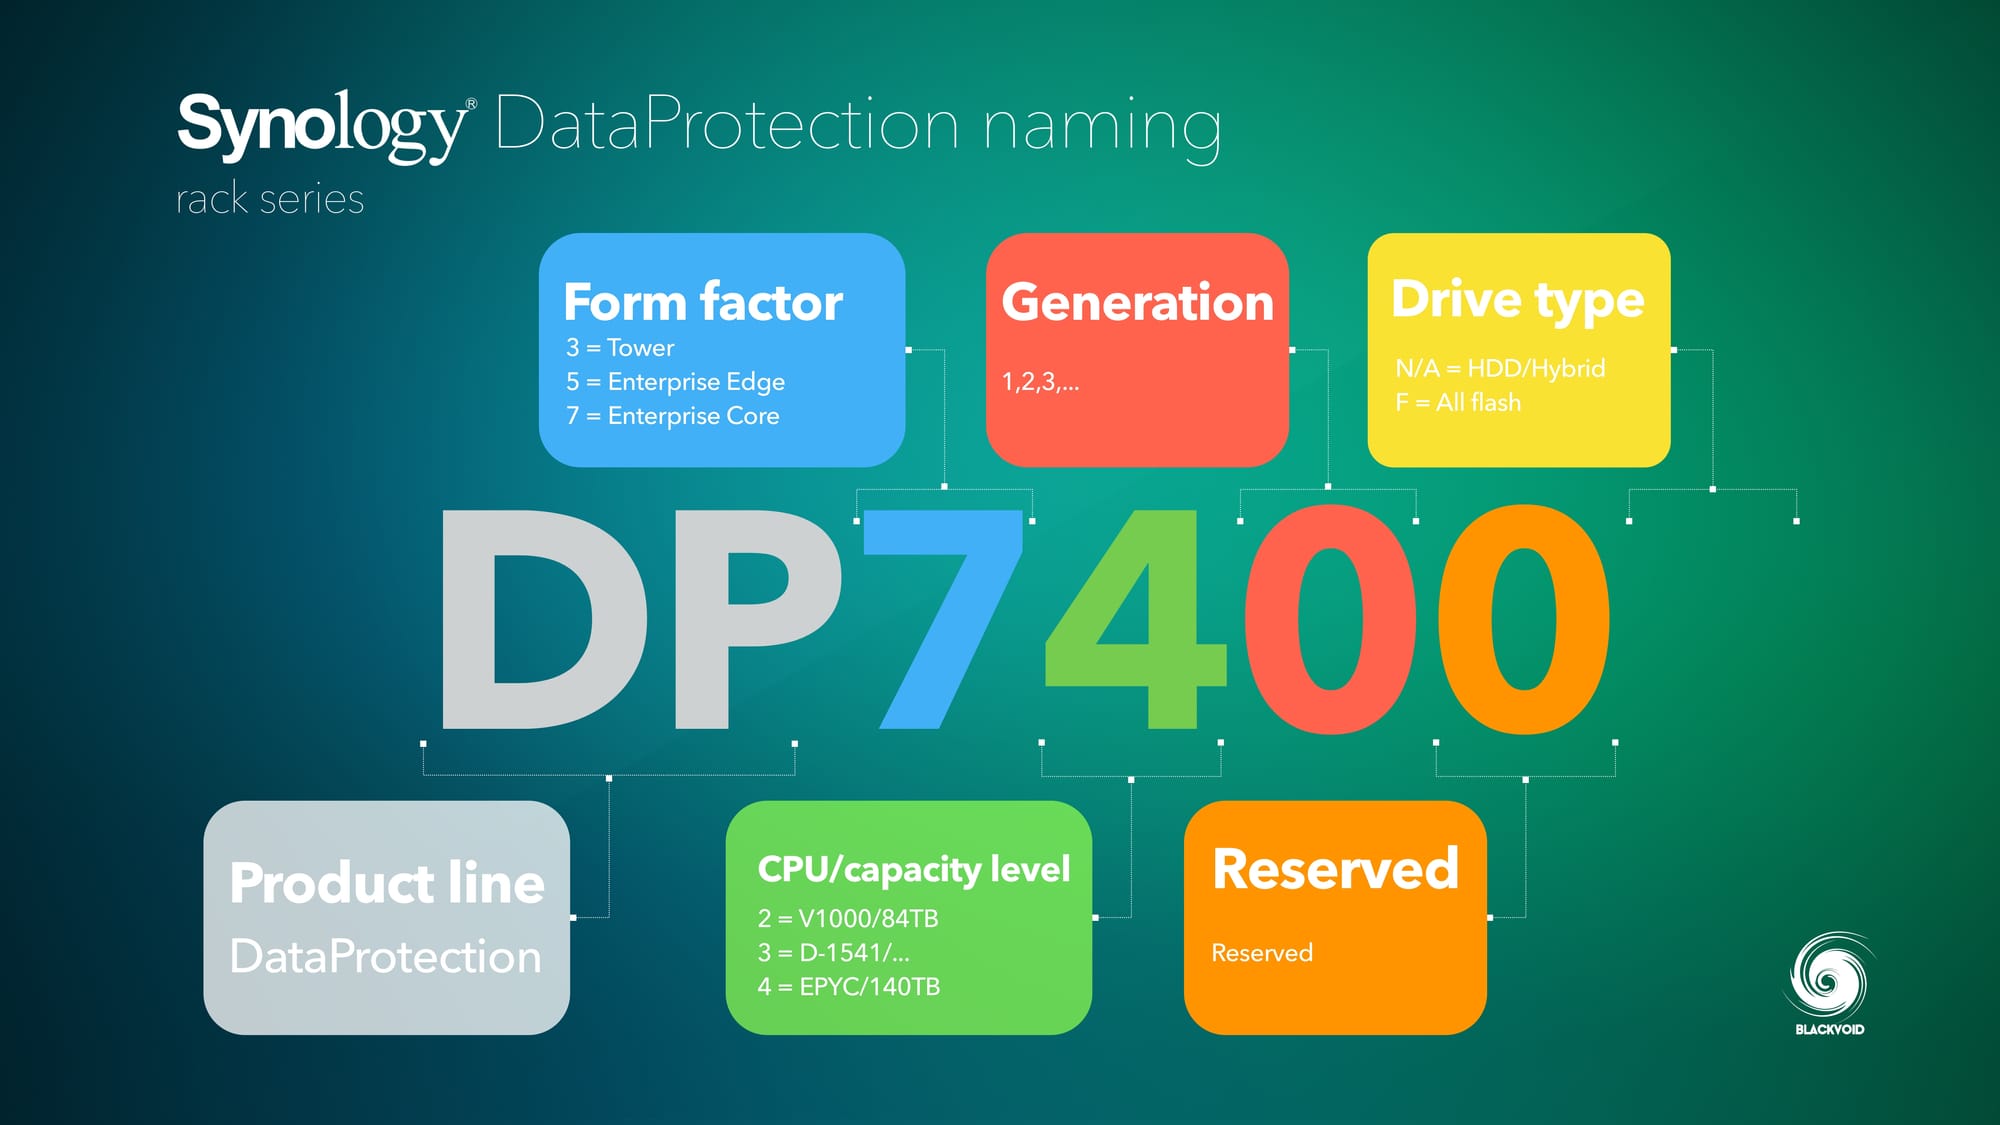
As indicated by the naming image above, the 2U DP models will come with either AMD or Intel CPUs dictating the unit's name. So the AMD v1000 series will be DP7200, Intel D-1541 DP7300, and AMD EPYC the DP7400.
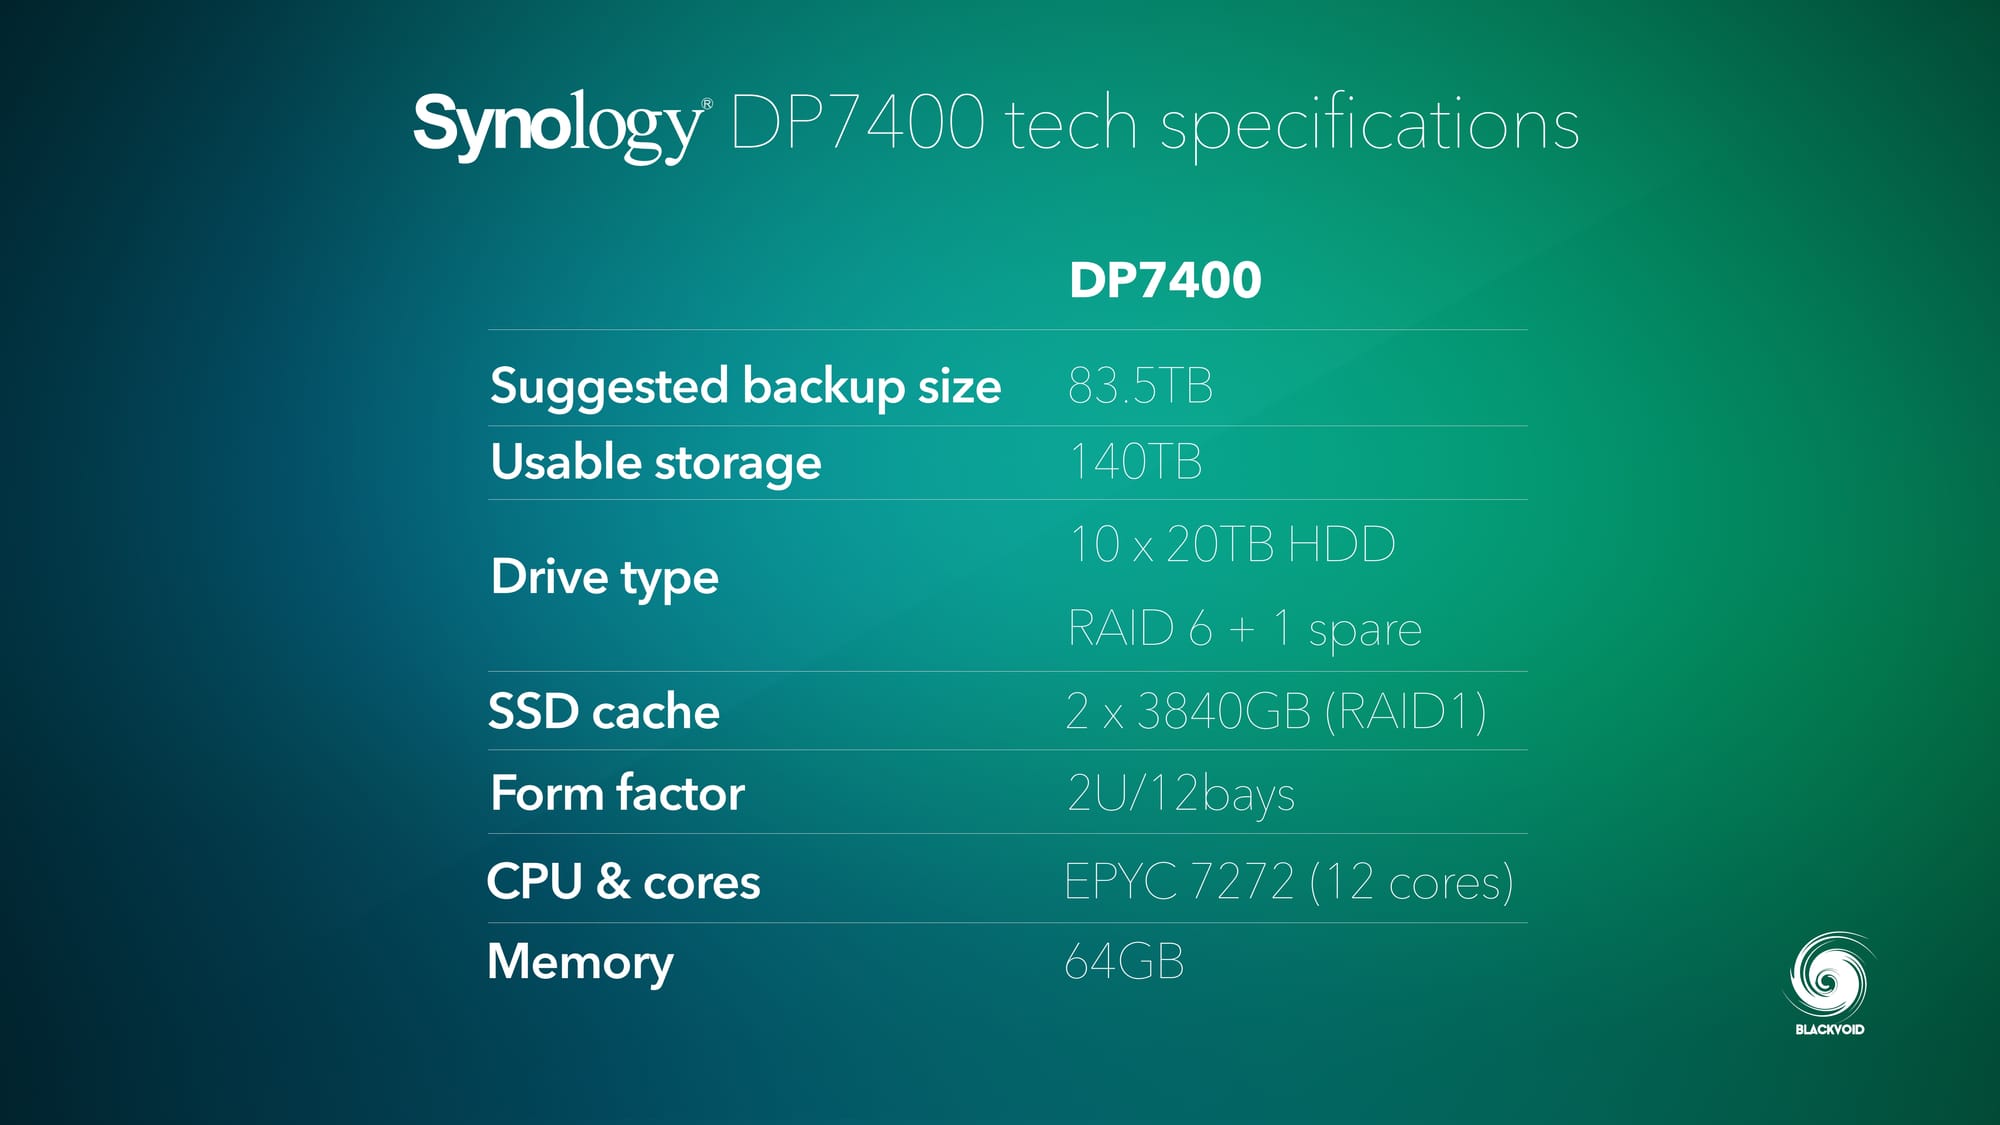
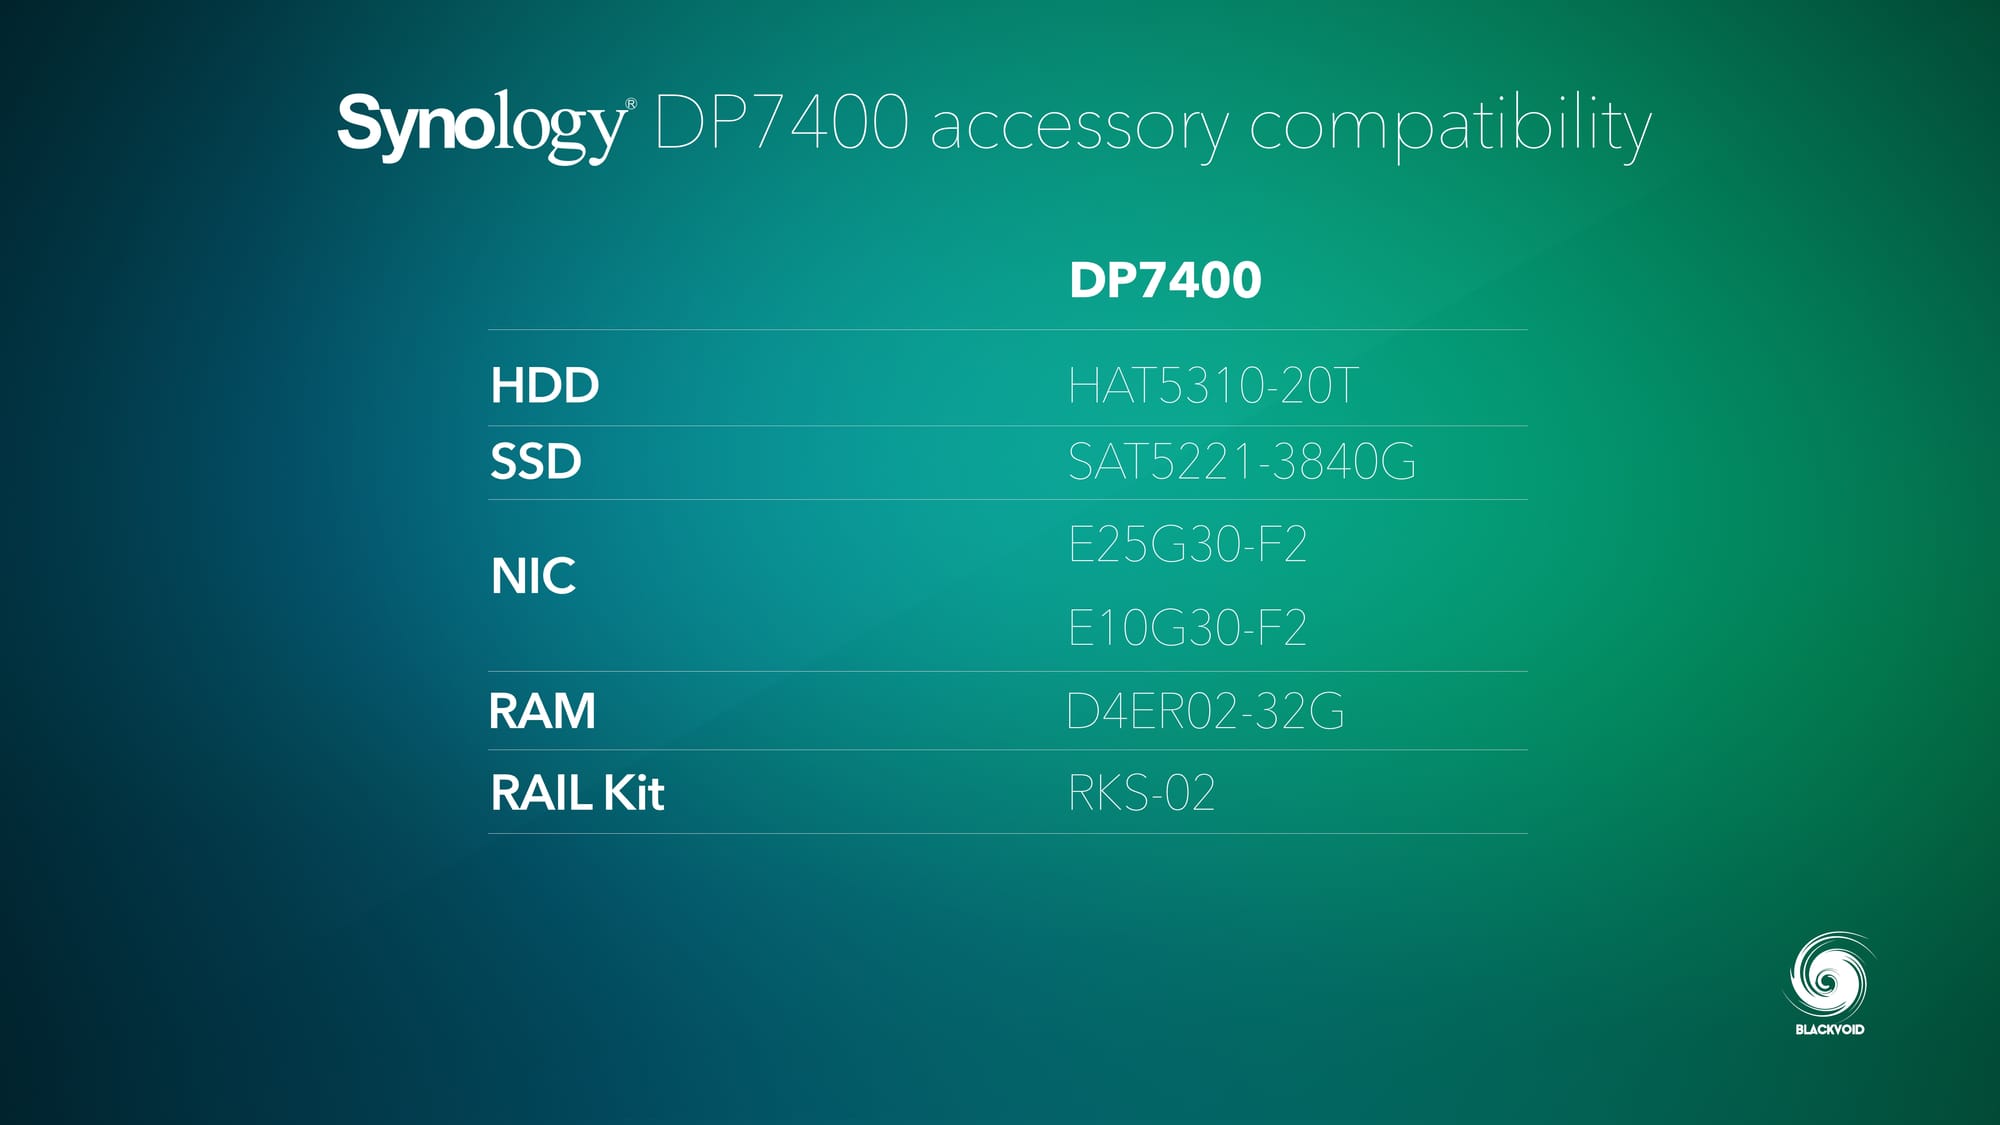
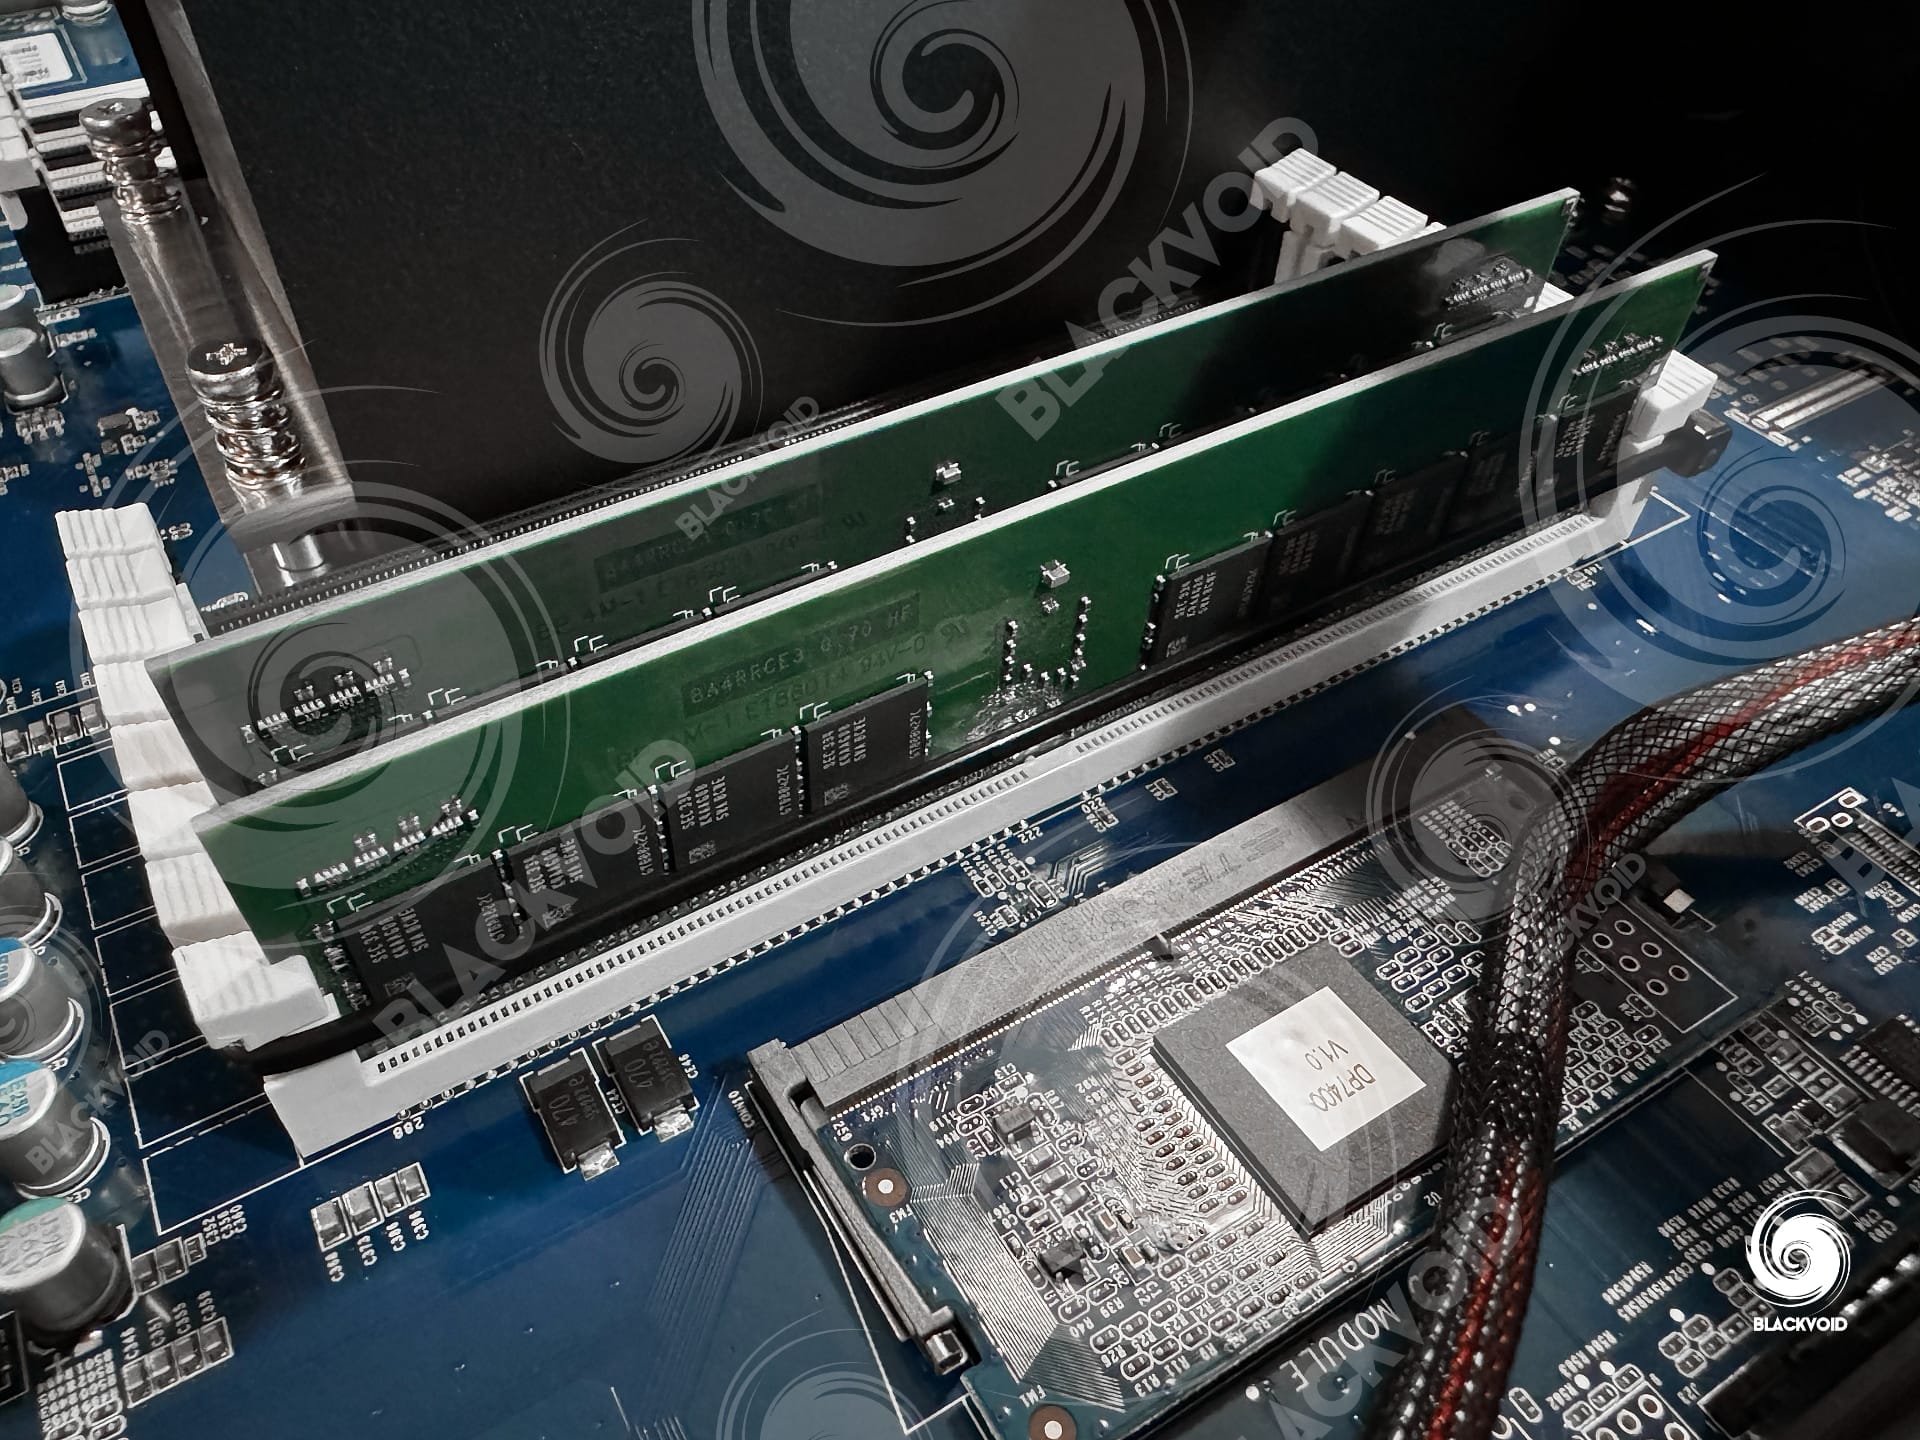
The exact CPU in DP7400 is a 12-core AMD EPYC 7272 backed up with 64GB of ECC memory (2x32GB D4ER02-32).

Each of the two modules is around 640€ similar to the R01 series, and at the time of this testing, still not present on Synology's Store site. It is the same memory that will probably be part of the DP, SA, HD, and FS lineups.
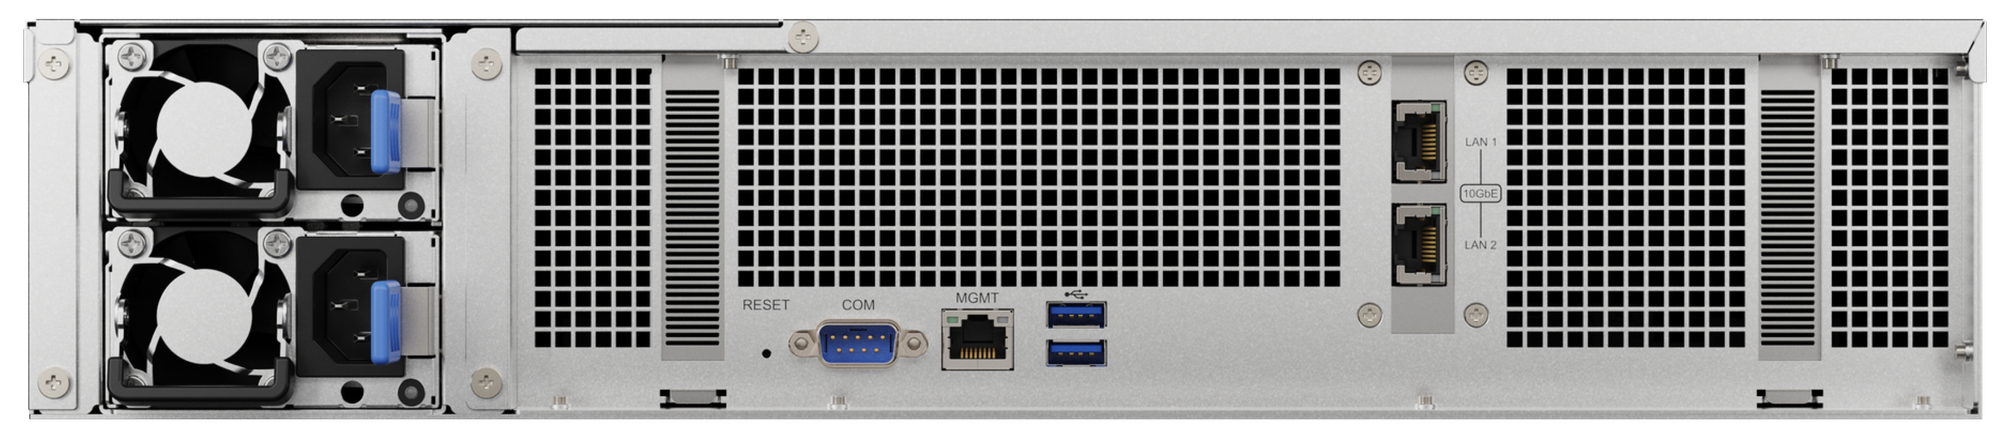
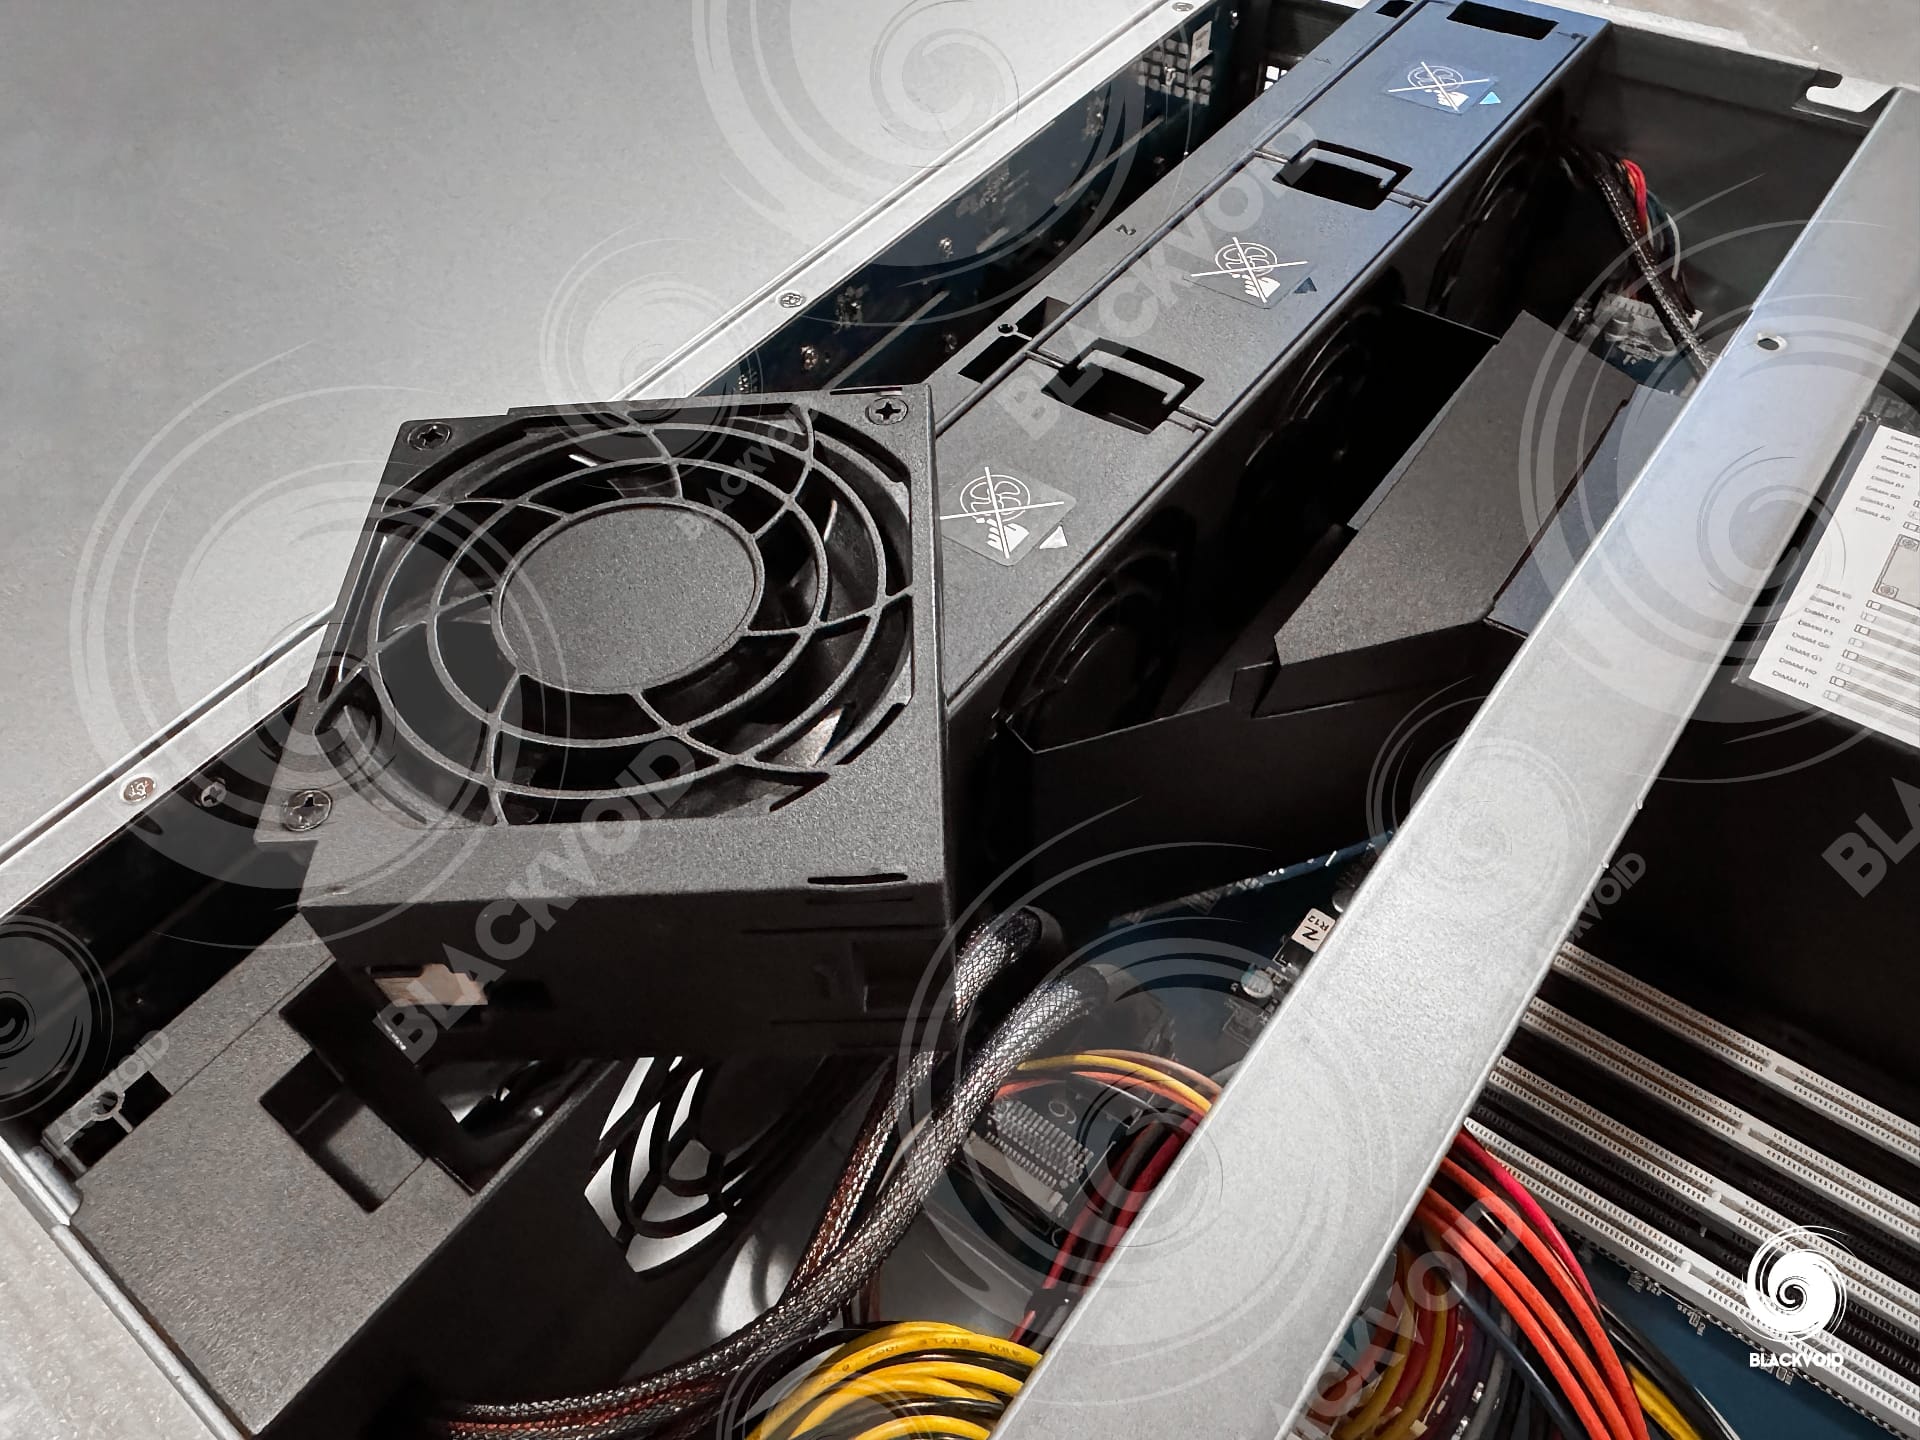
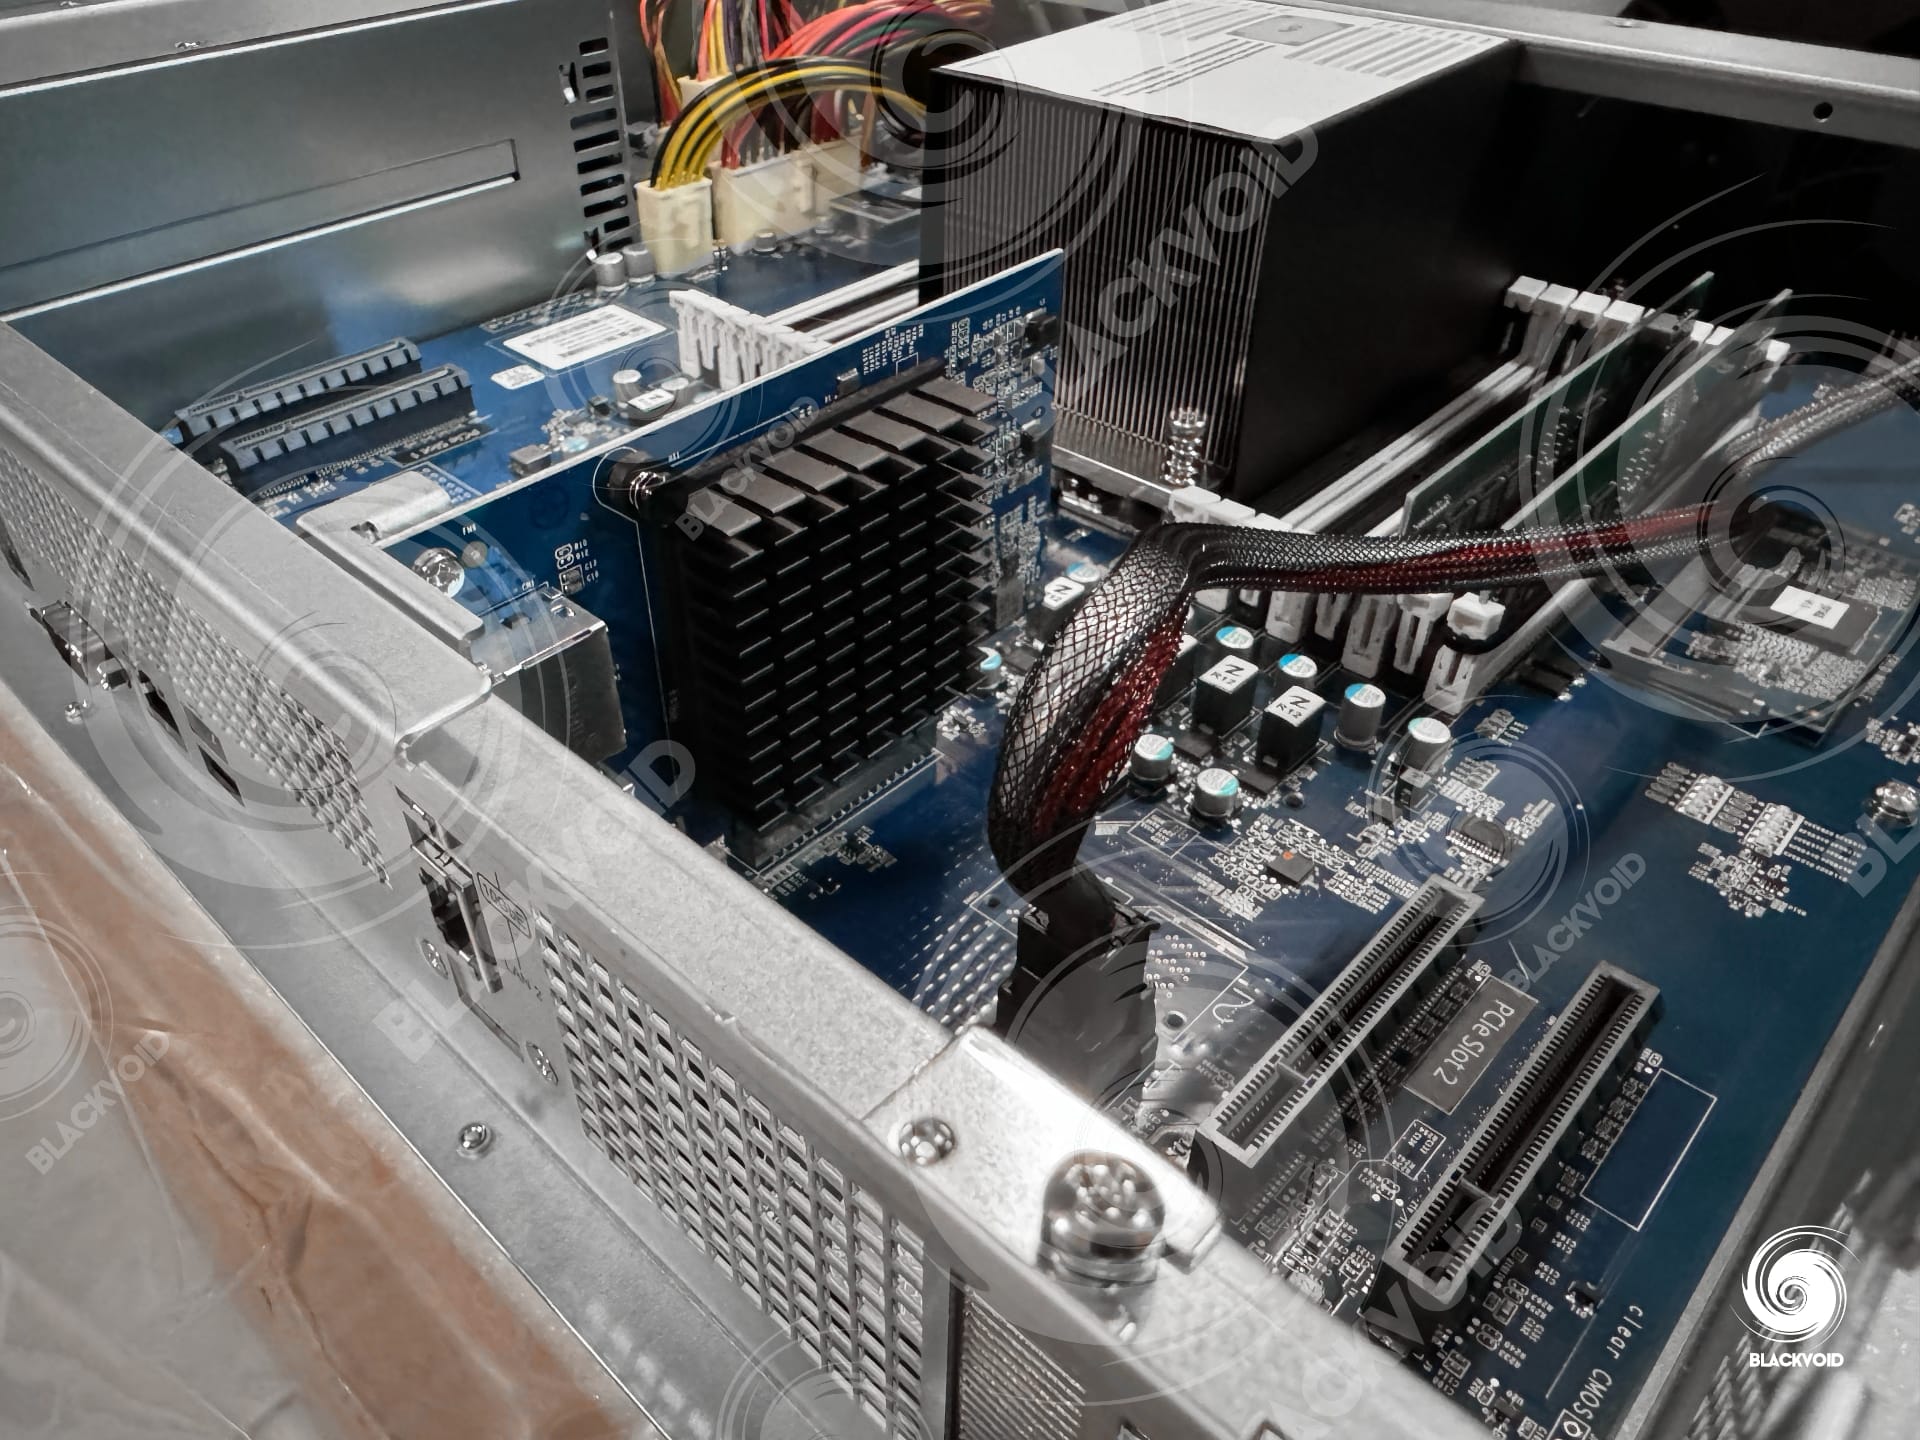
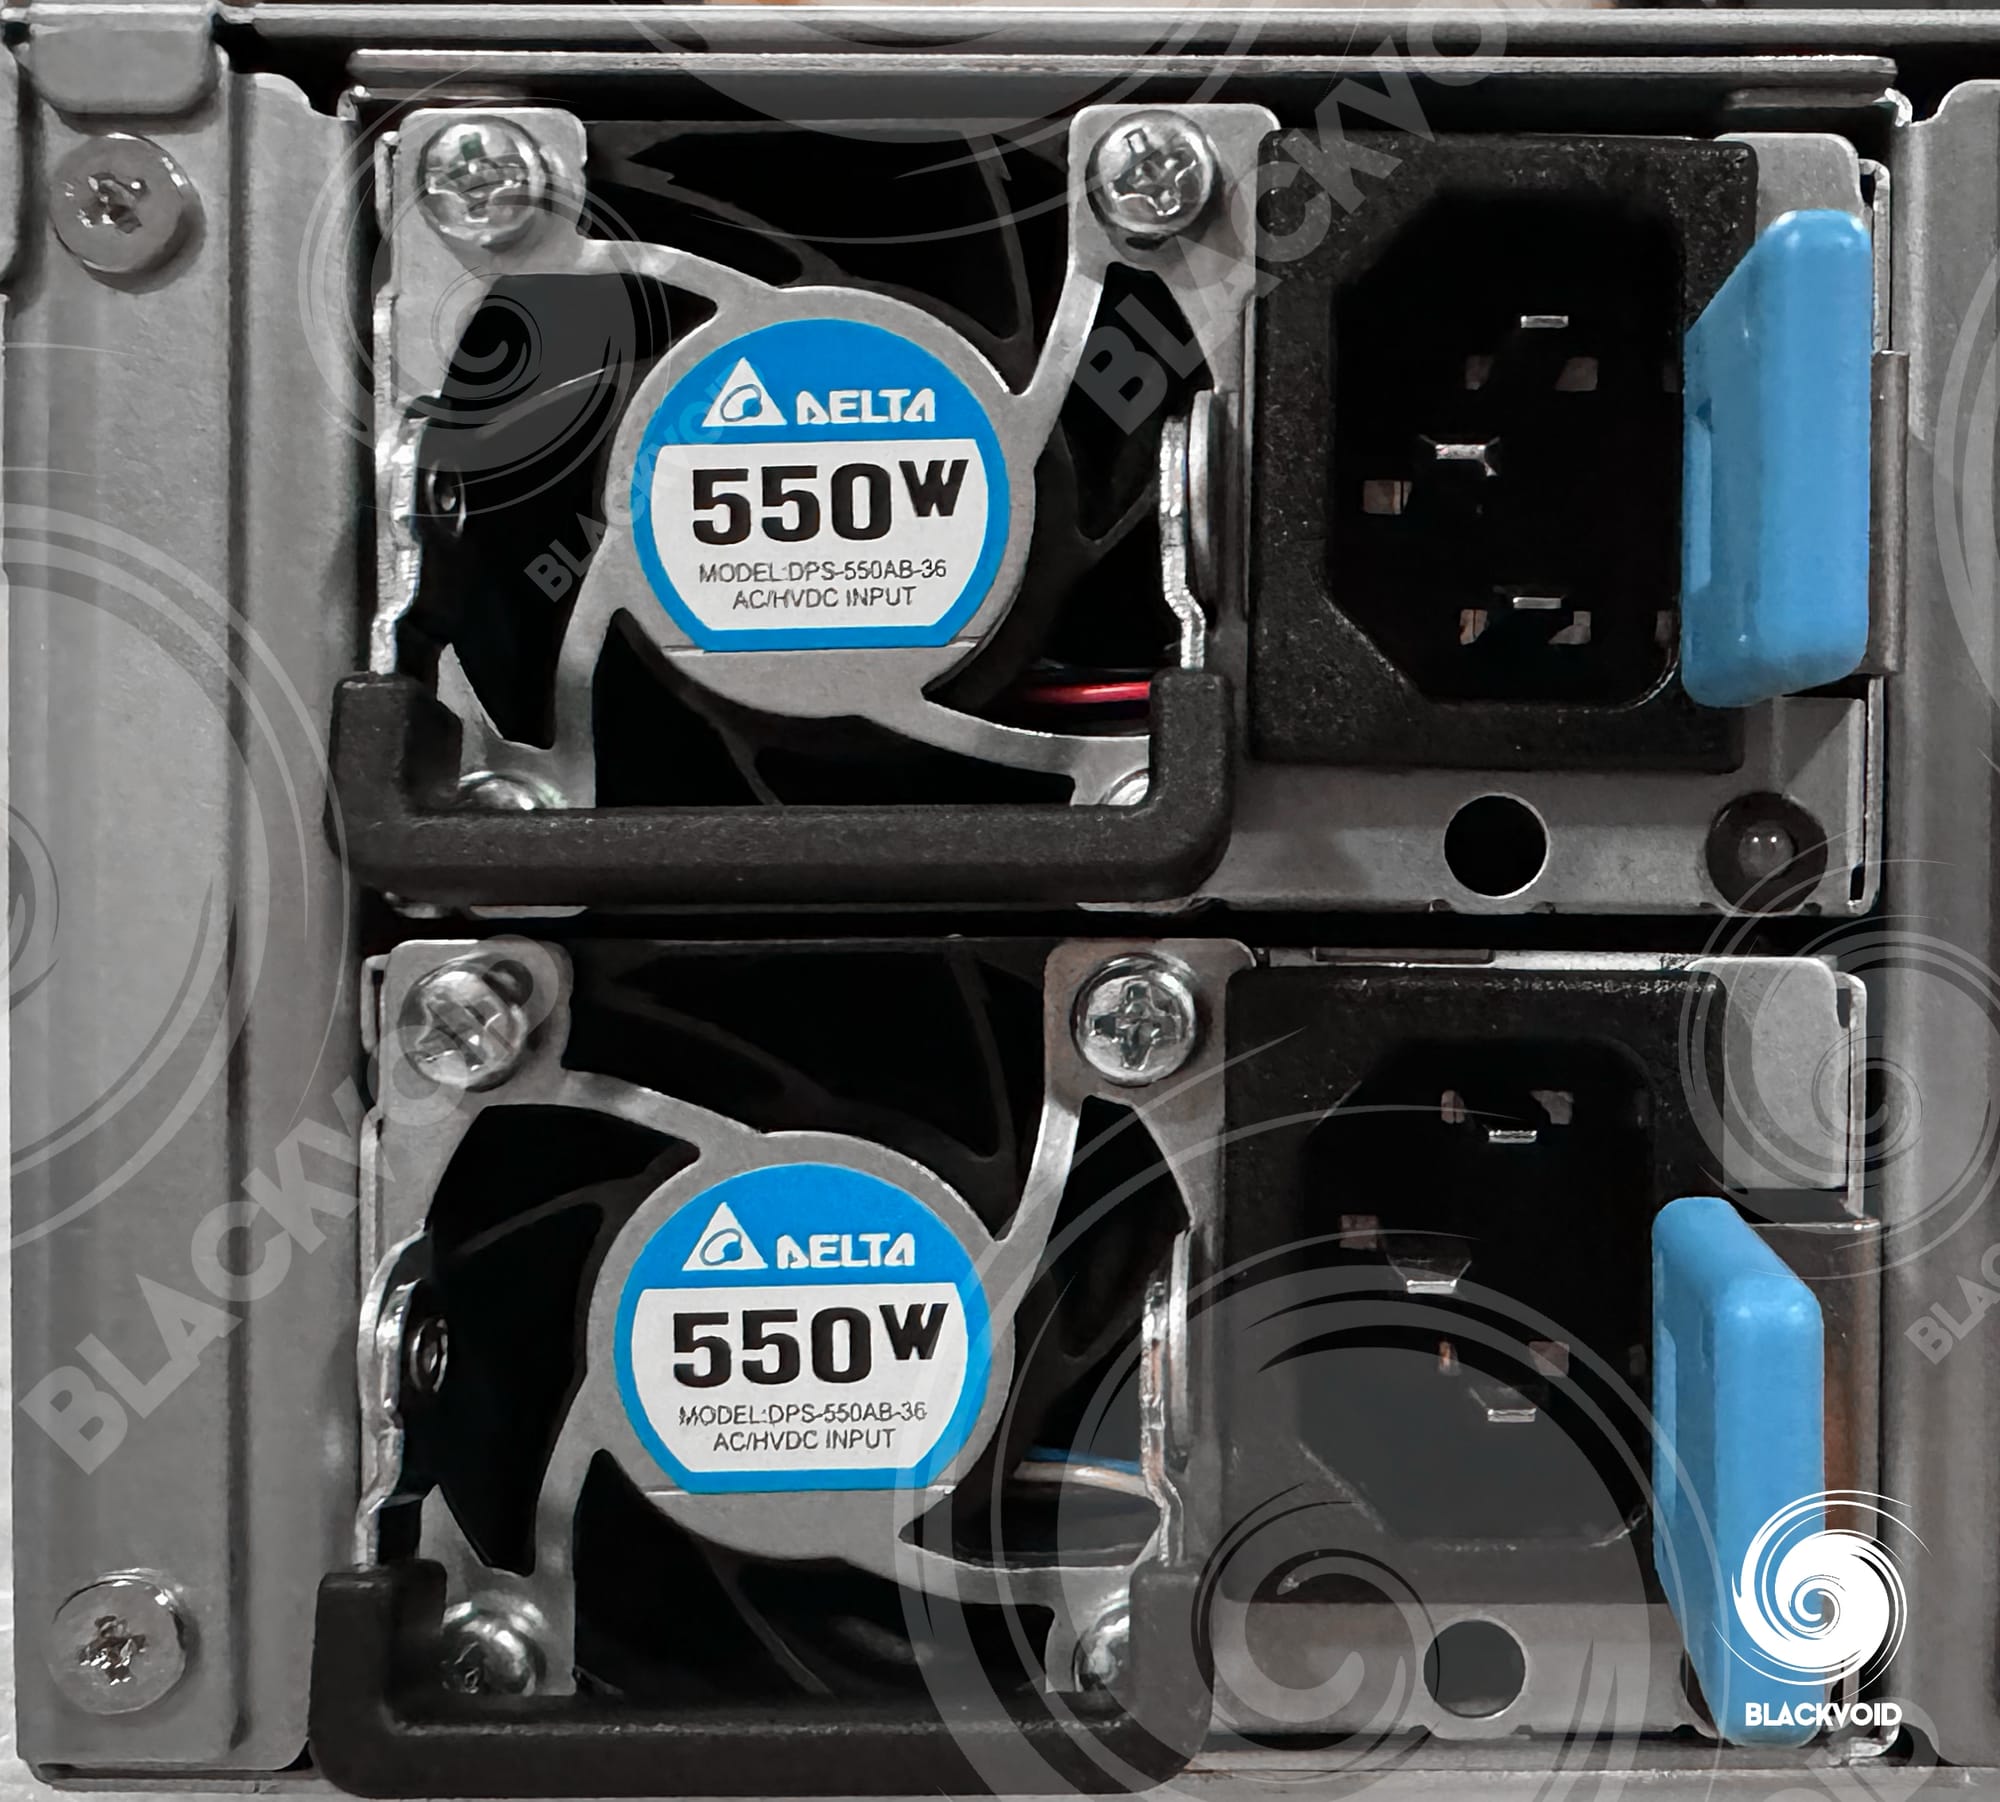
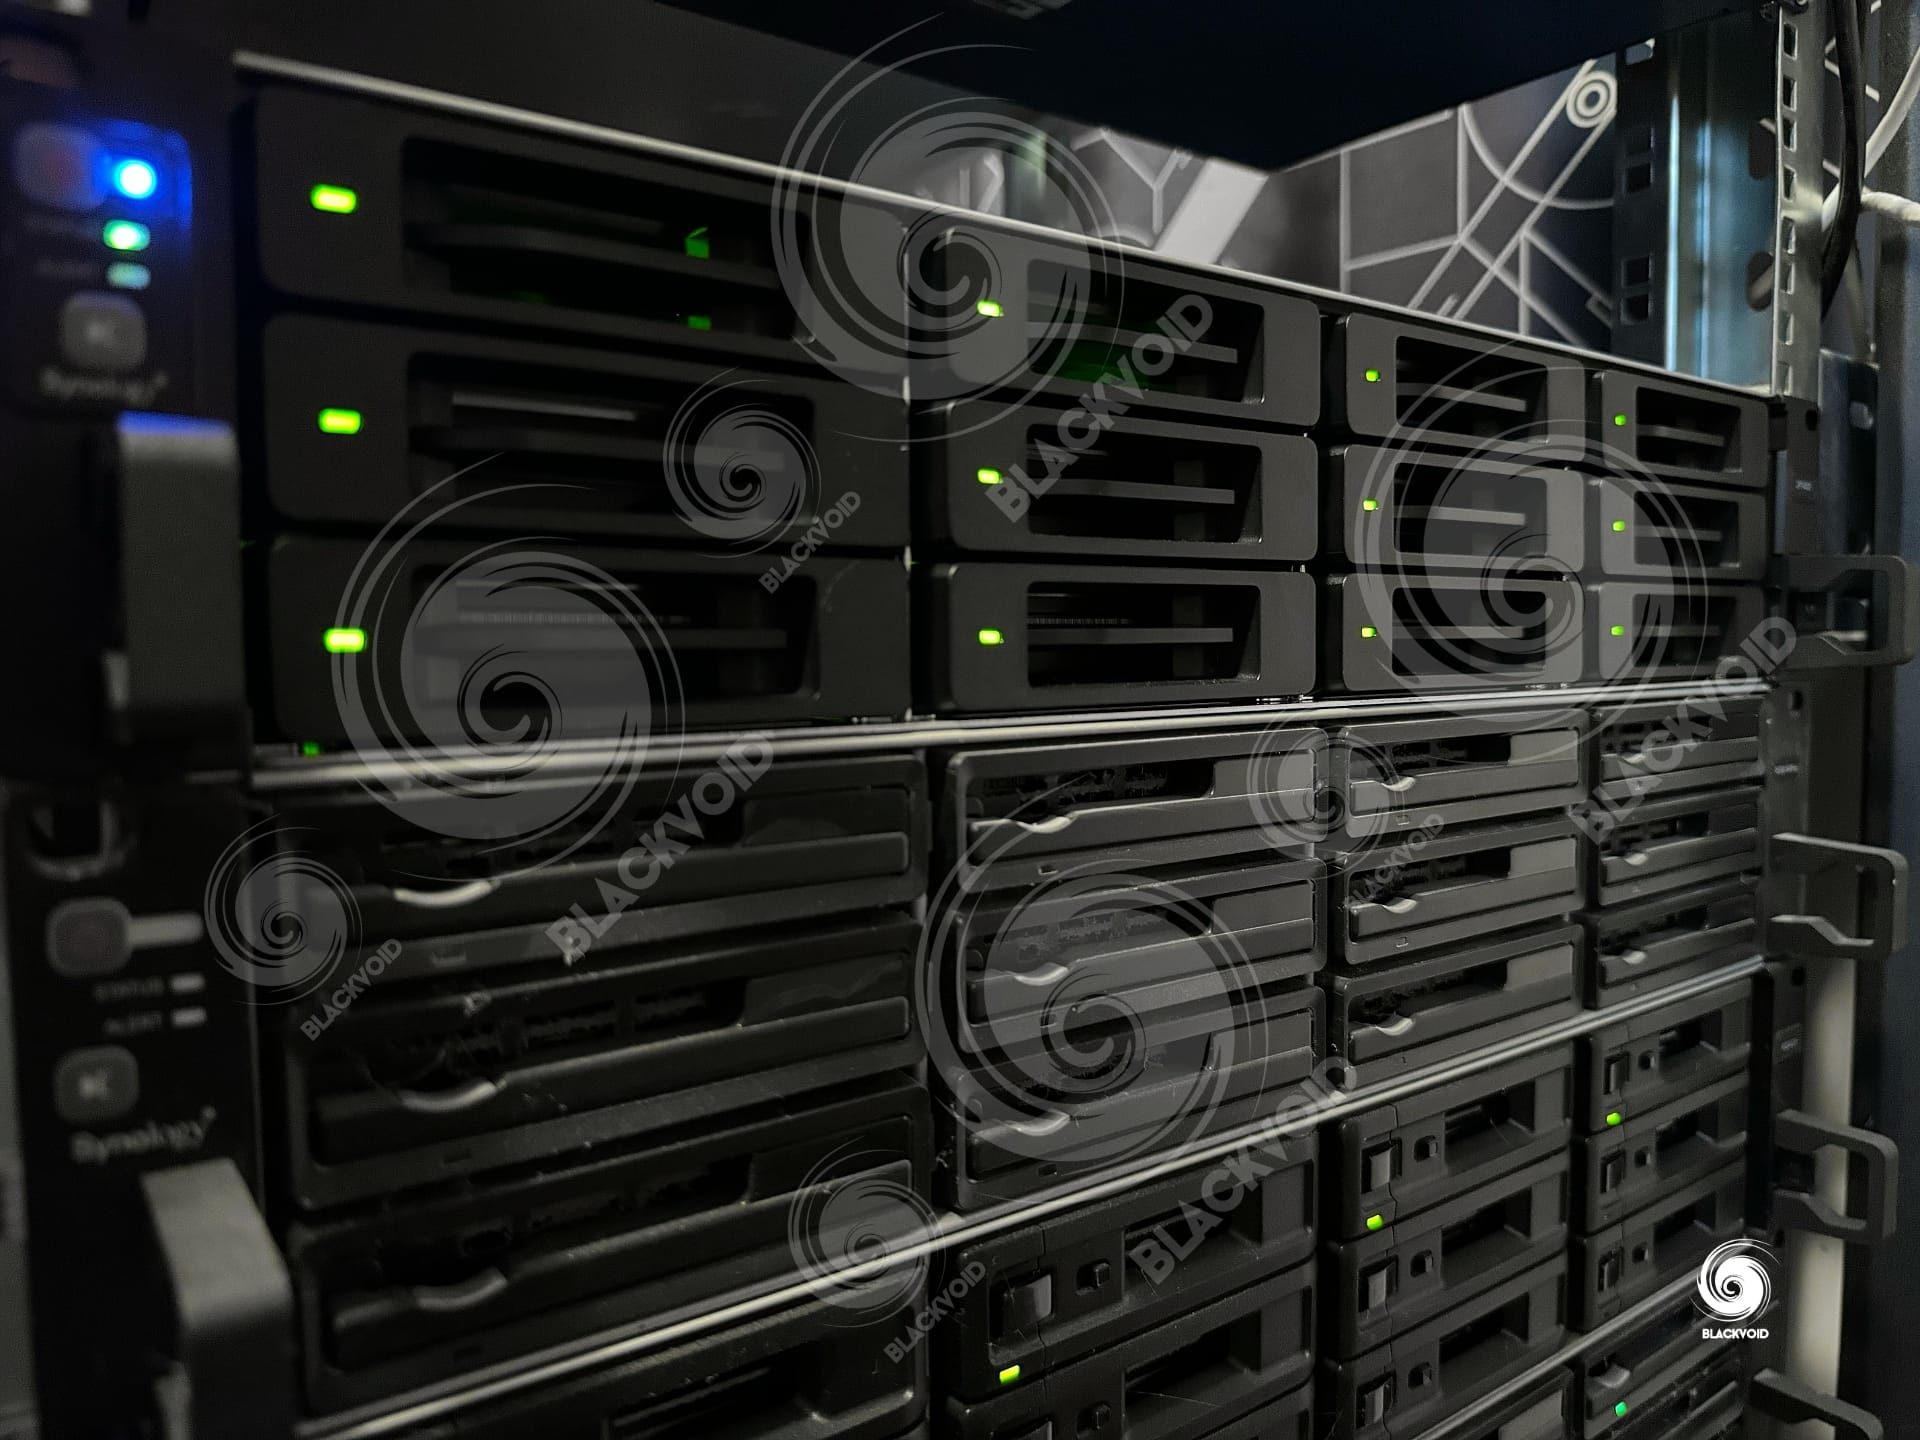
Going into the belly of the beast we will see a very familiar and somewhat minimalistic setup. Starting from left to right we have the HDD bays, followed by four 80 mm intake modular 3-pin vents. From there the motherboard takes full real estate of the case with only a dual 550W power supply in the lower right corner.
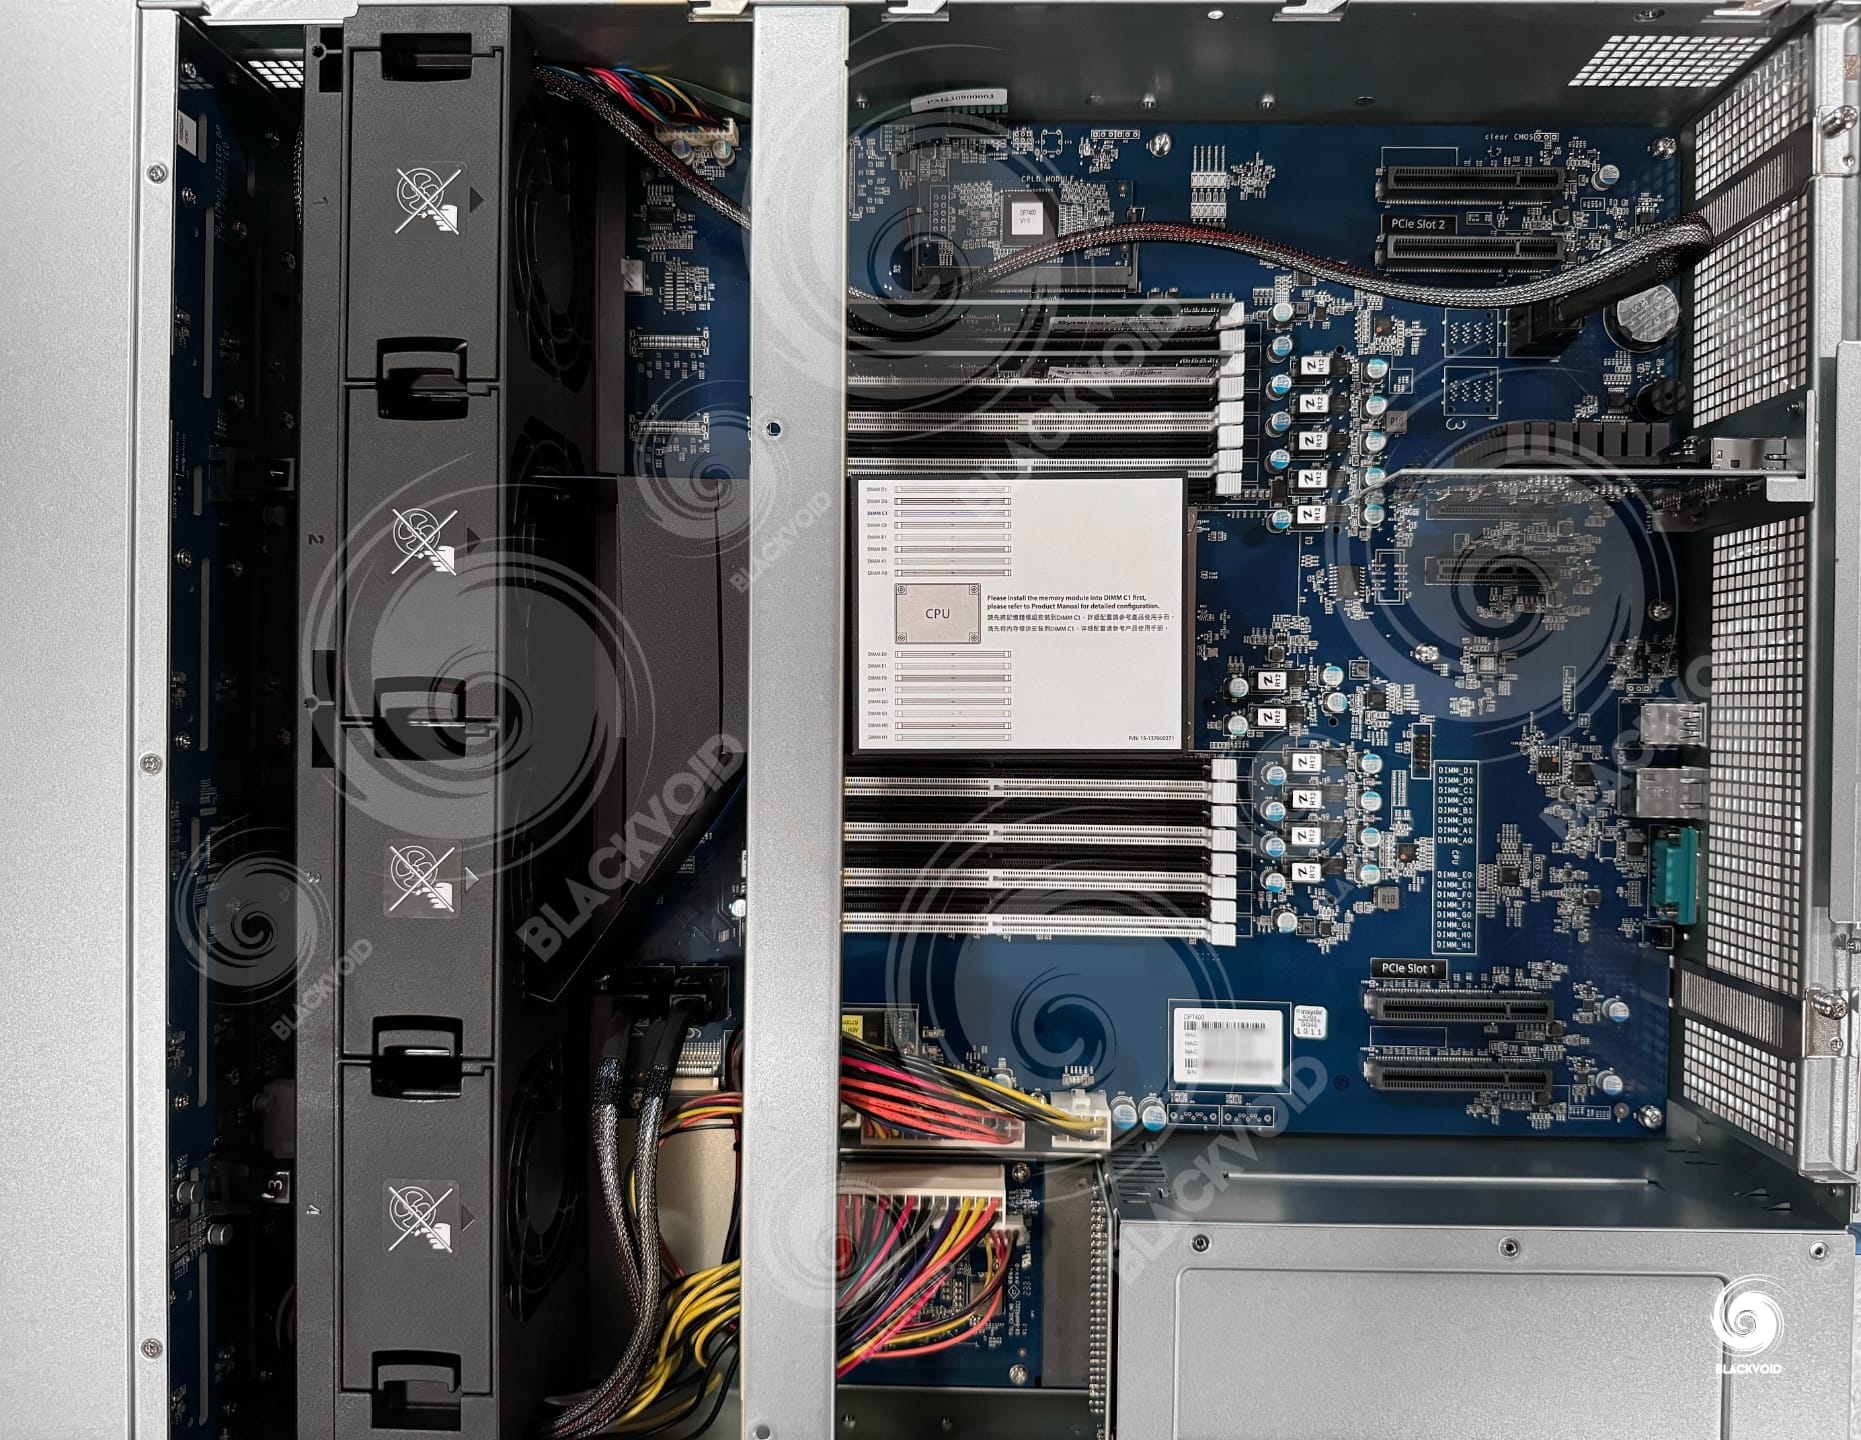
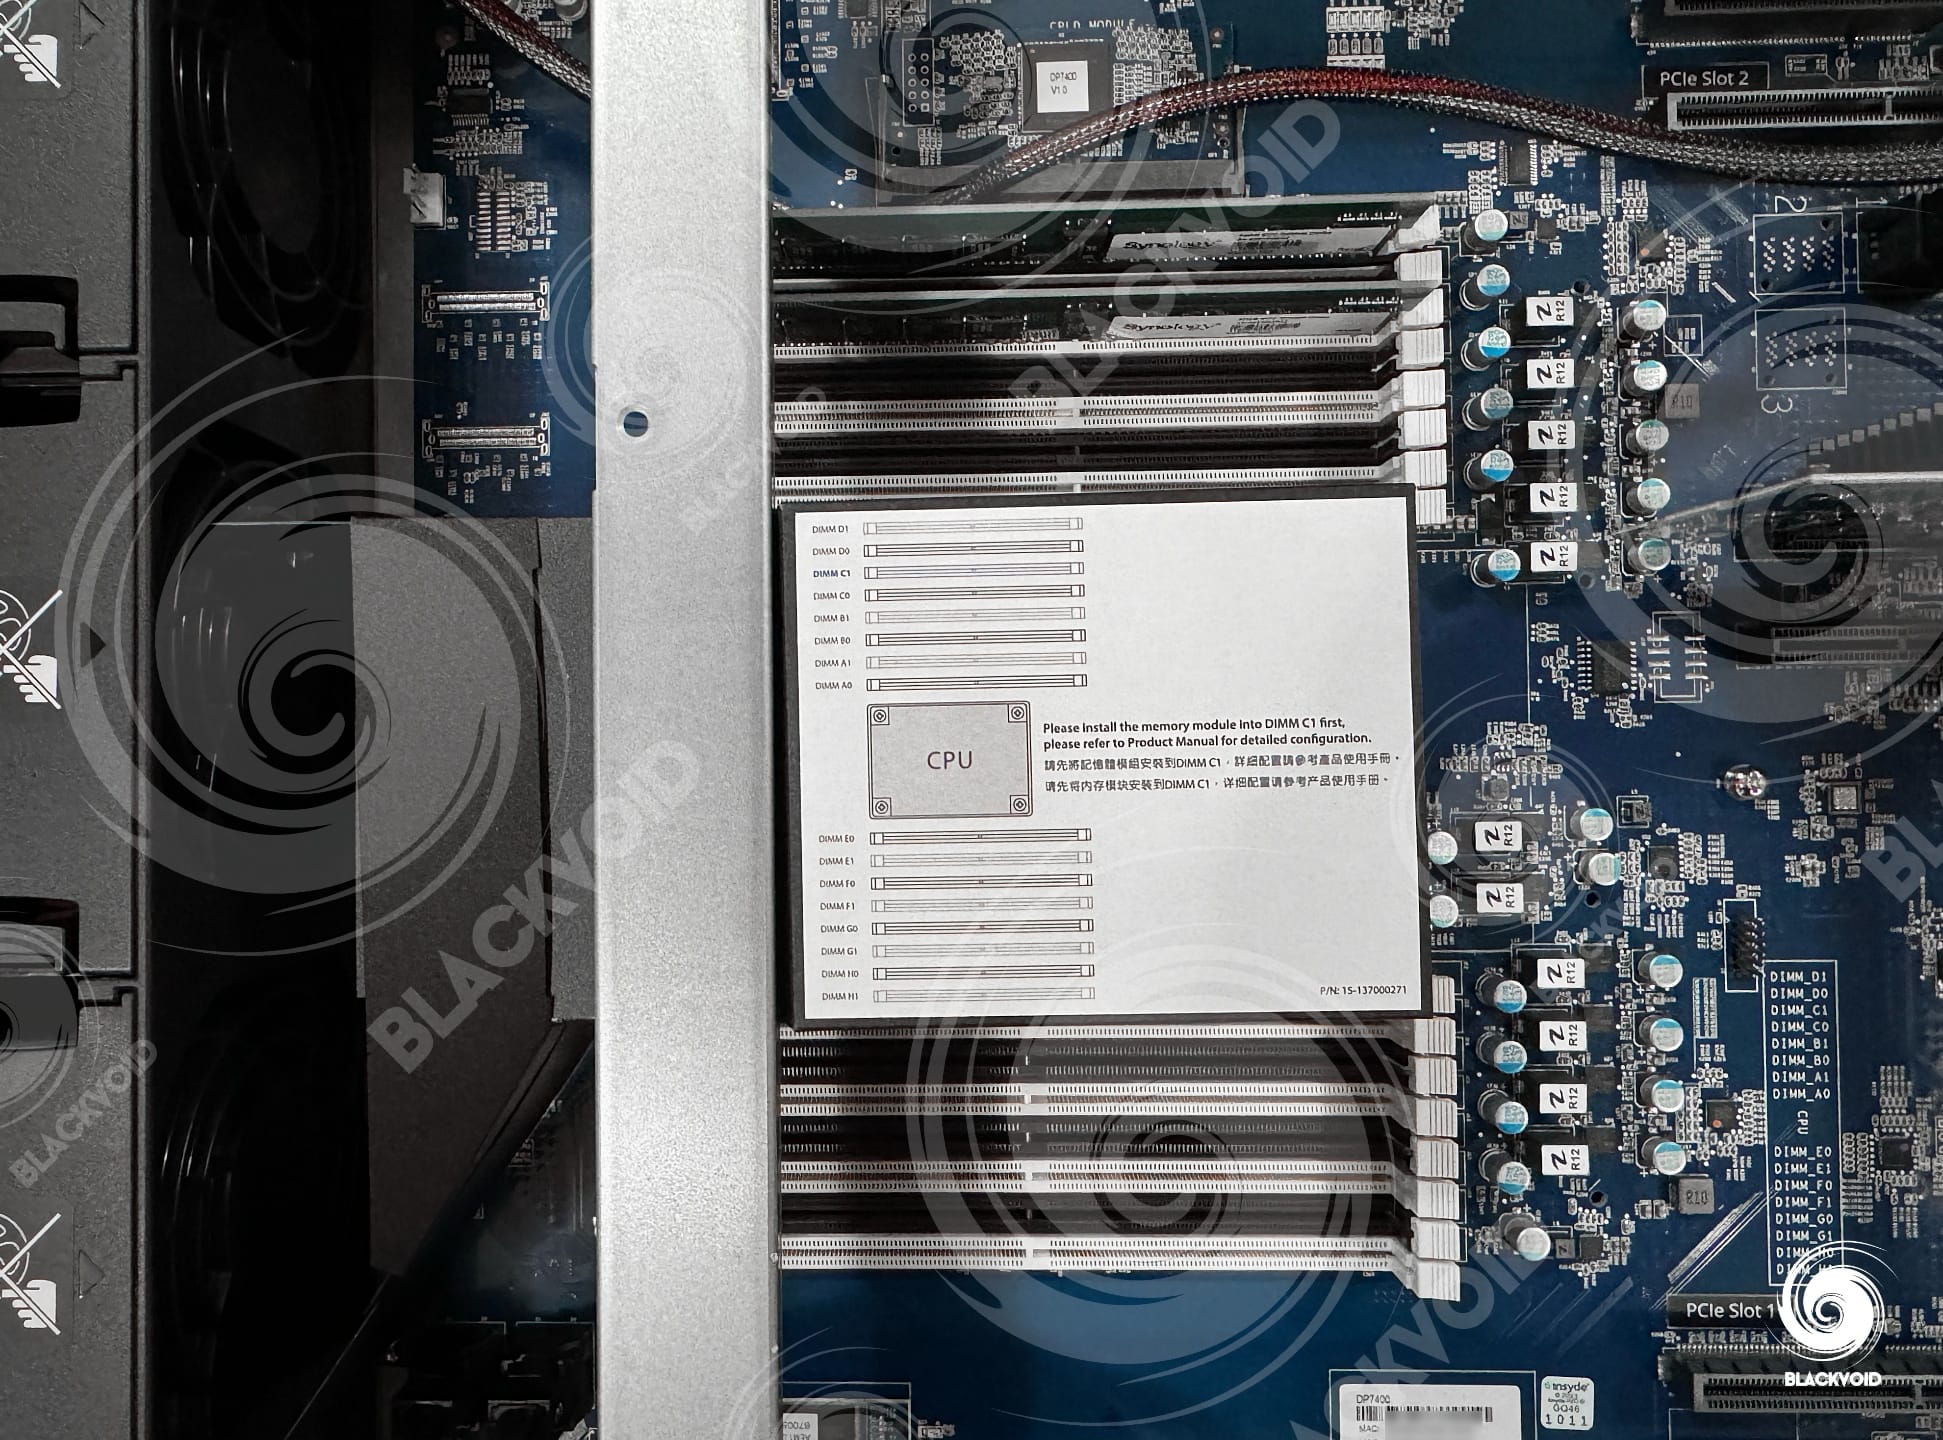
The majority of the motherboard is occupied with the CPU, its cooler, and tunnel as well as a total of 16 memory slots divided into two groups for a total of 512GB or ECC memory.
Speaking of memory, we will see a note and schema on top of the CPU cooler on how and where the modules need to be installed for the DP to boot up. Luckily there is no need to move the DIMM around as the indicated D01 and C01 slots are already occupied with each of the 32GB sticks.
Just adjacent to the RAM along the edge there is a CPLD module (Complex Programmable Logic Device) with a simple "DP7400 v1.0" sticker on it. It is hard to say what the exact role of the module is, but it is probably for any number of tasks. From control logic for data transfers, power management distribution, security features, and more.
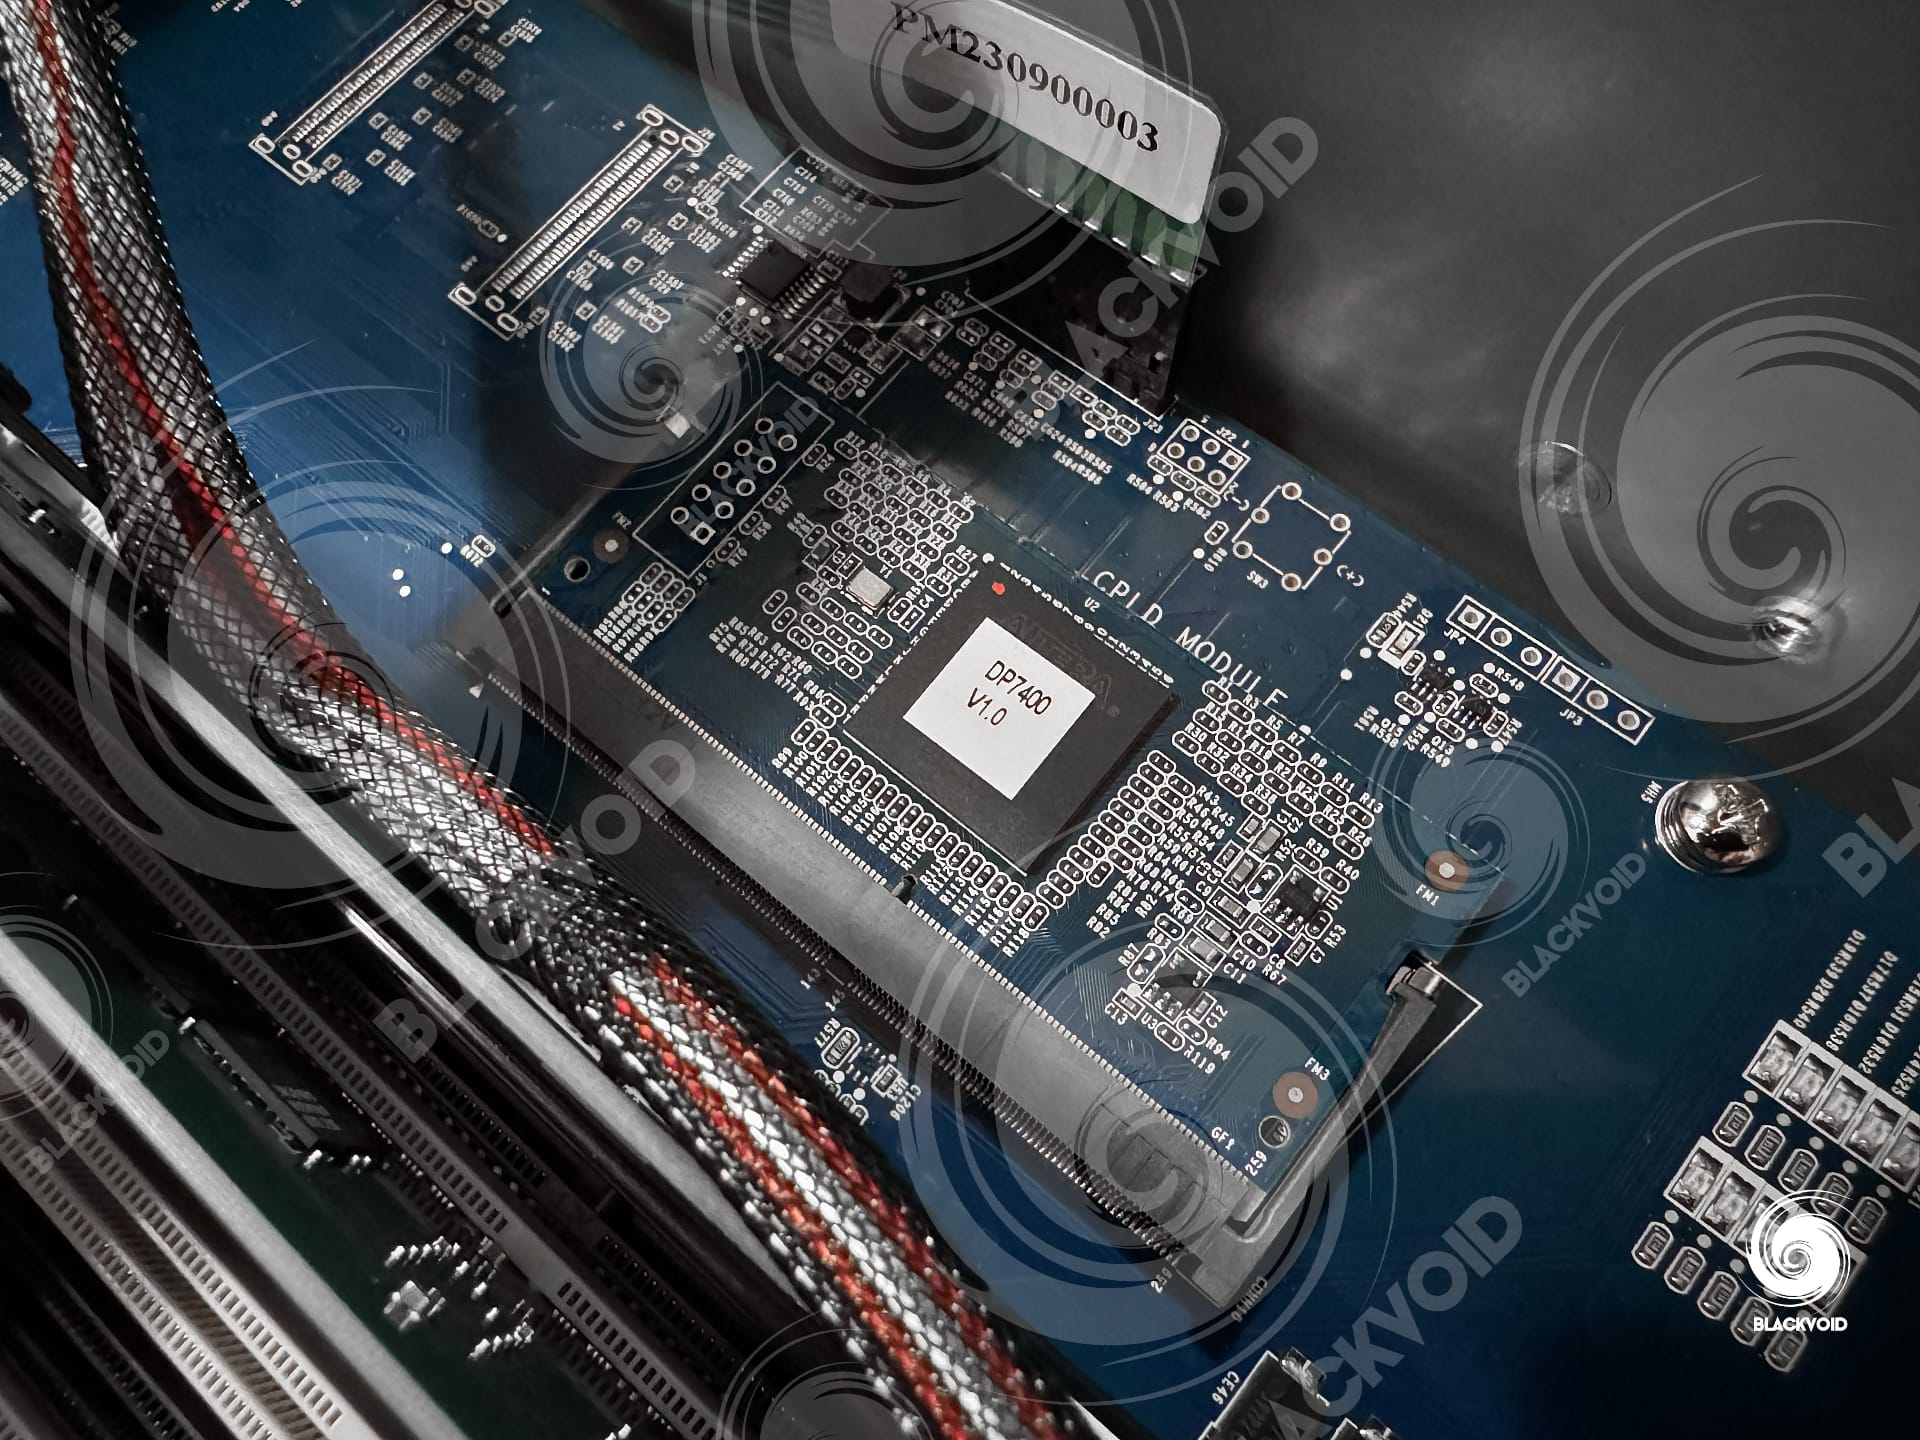
The motherboard also has two Gen3 x8 slots (x8 link) for expansion needs. Anything from NVMe drives, as well as 10 or 25G network cards, and more.
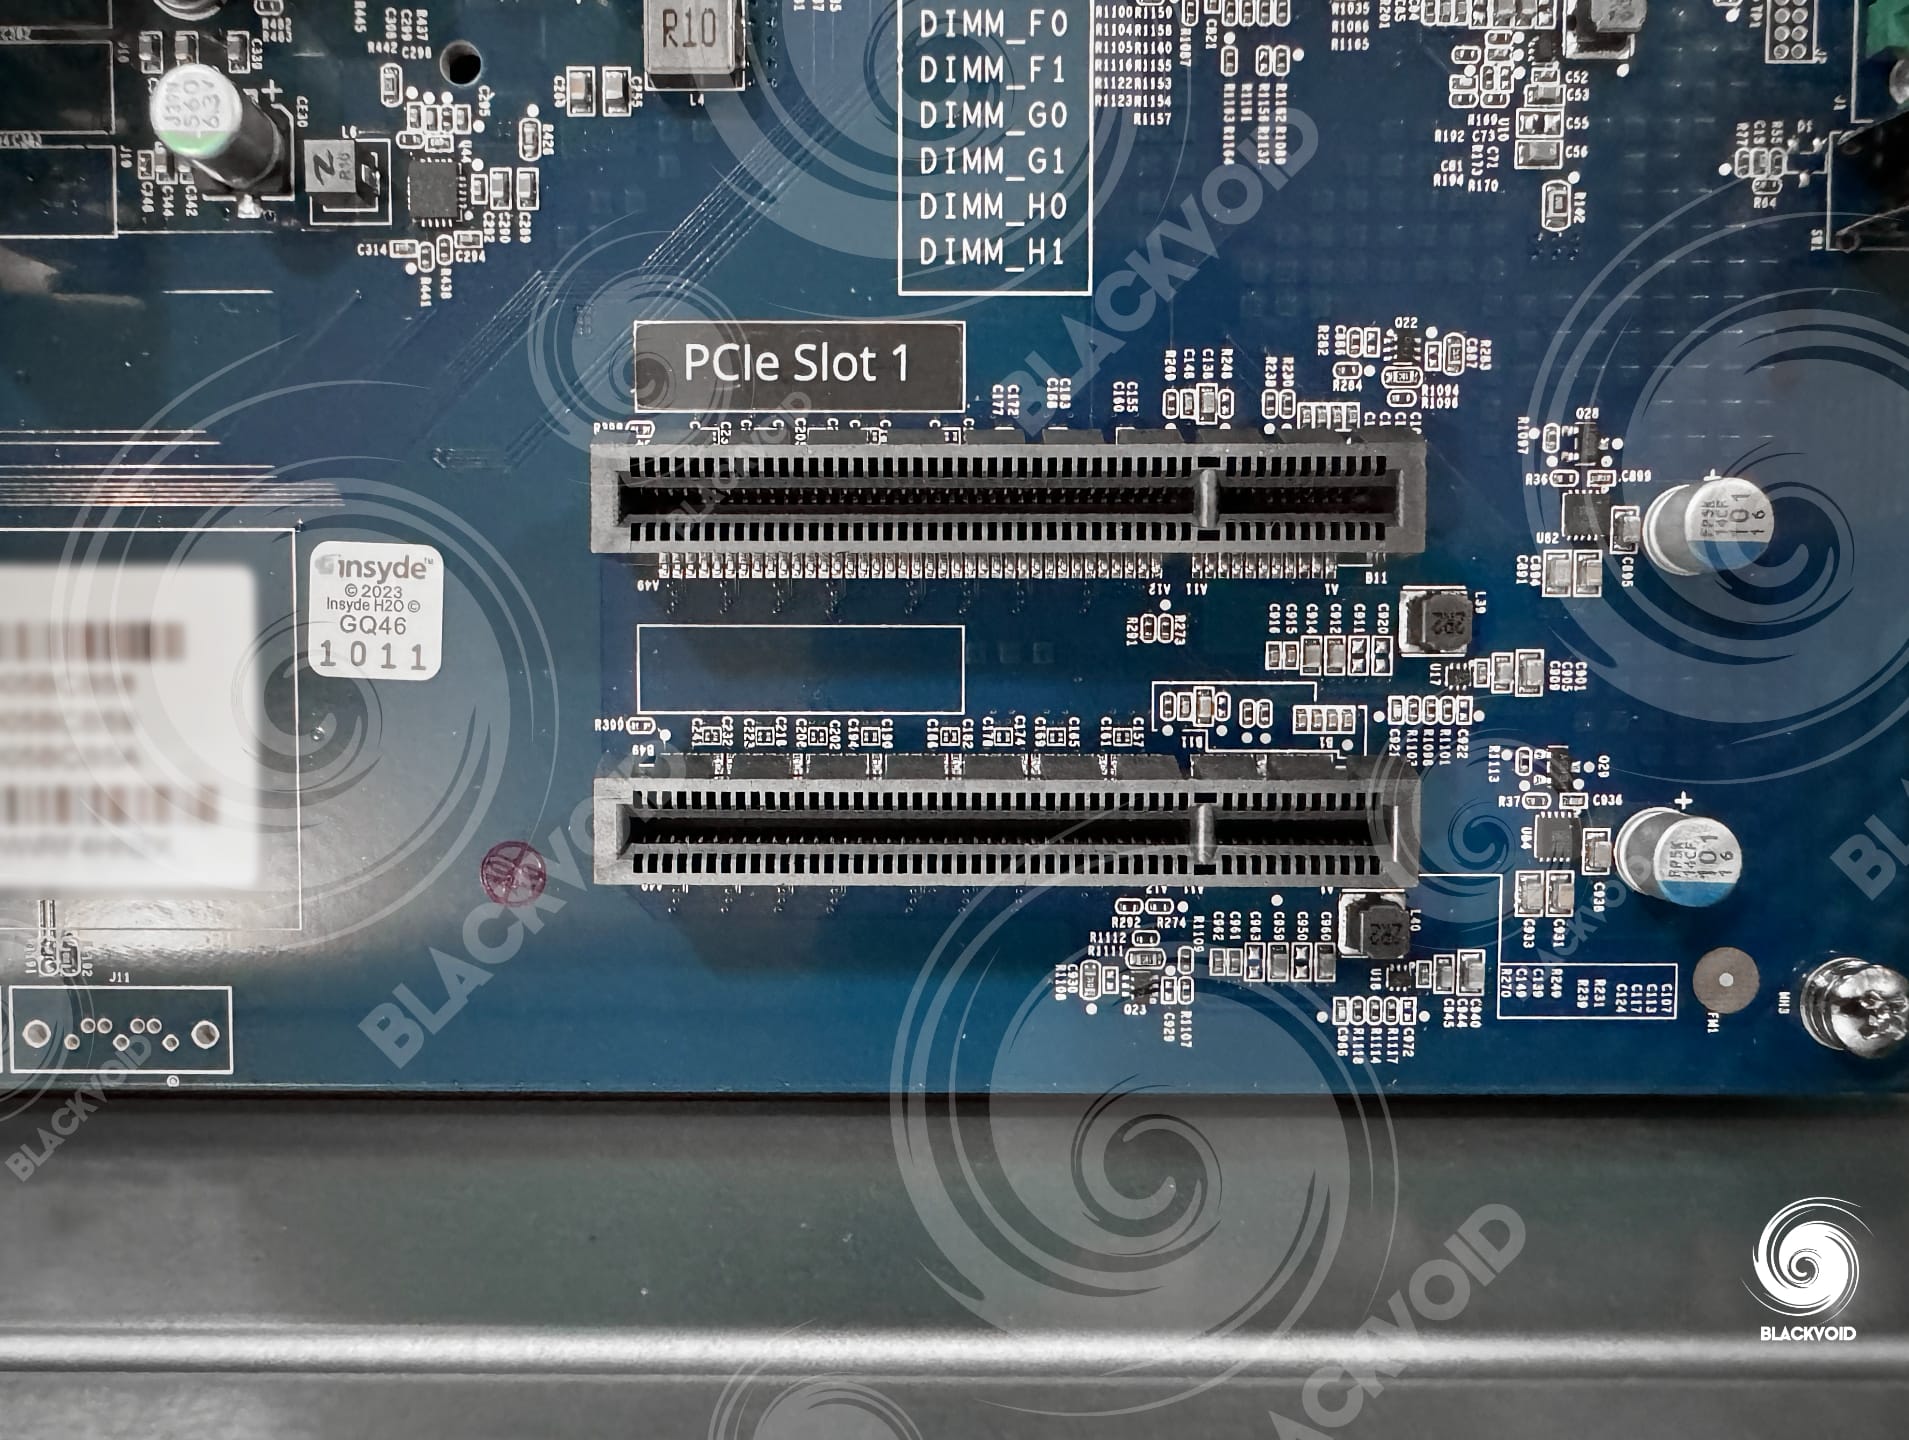
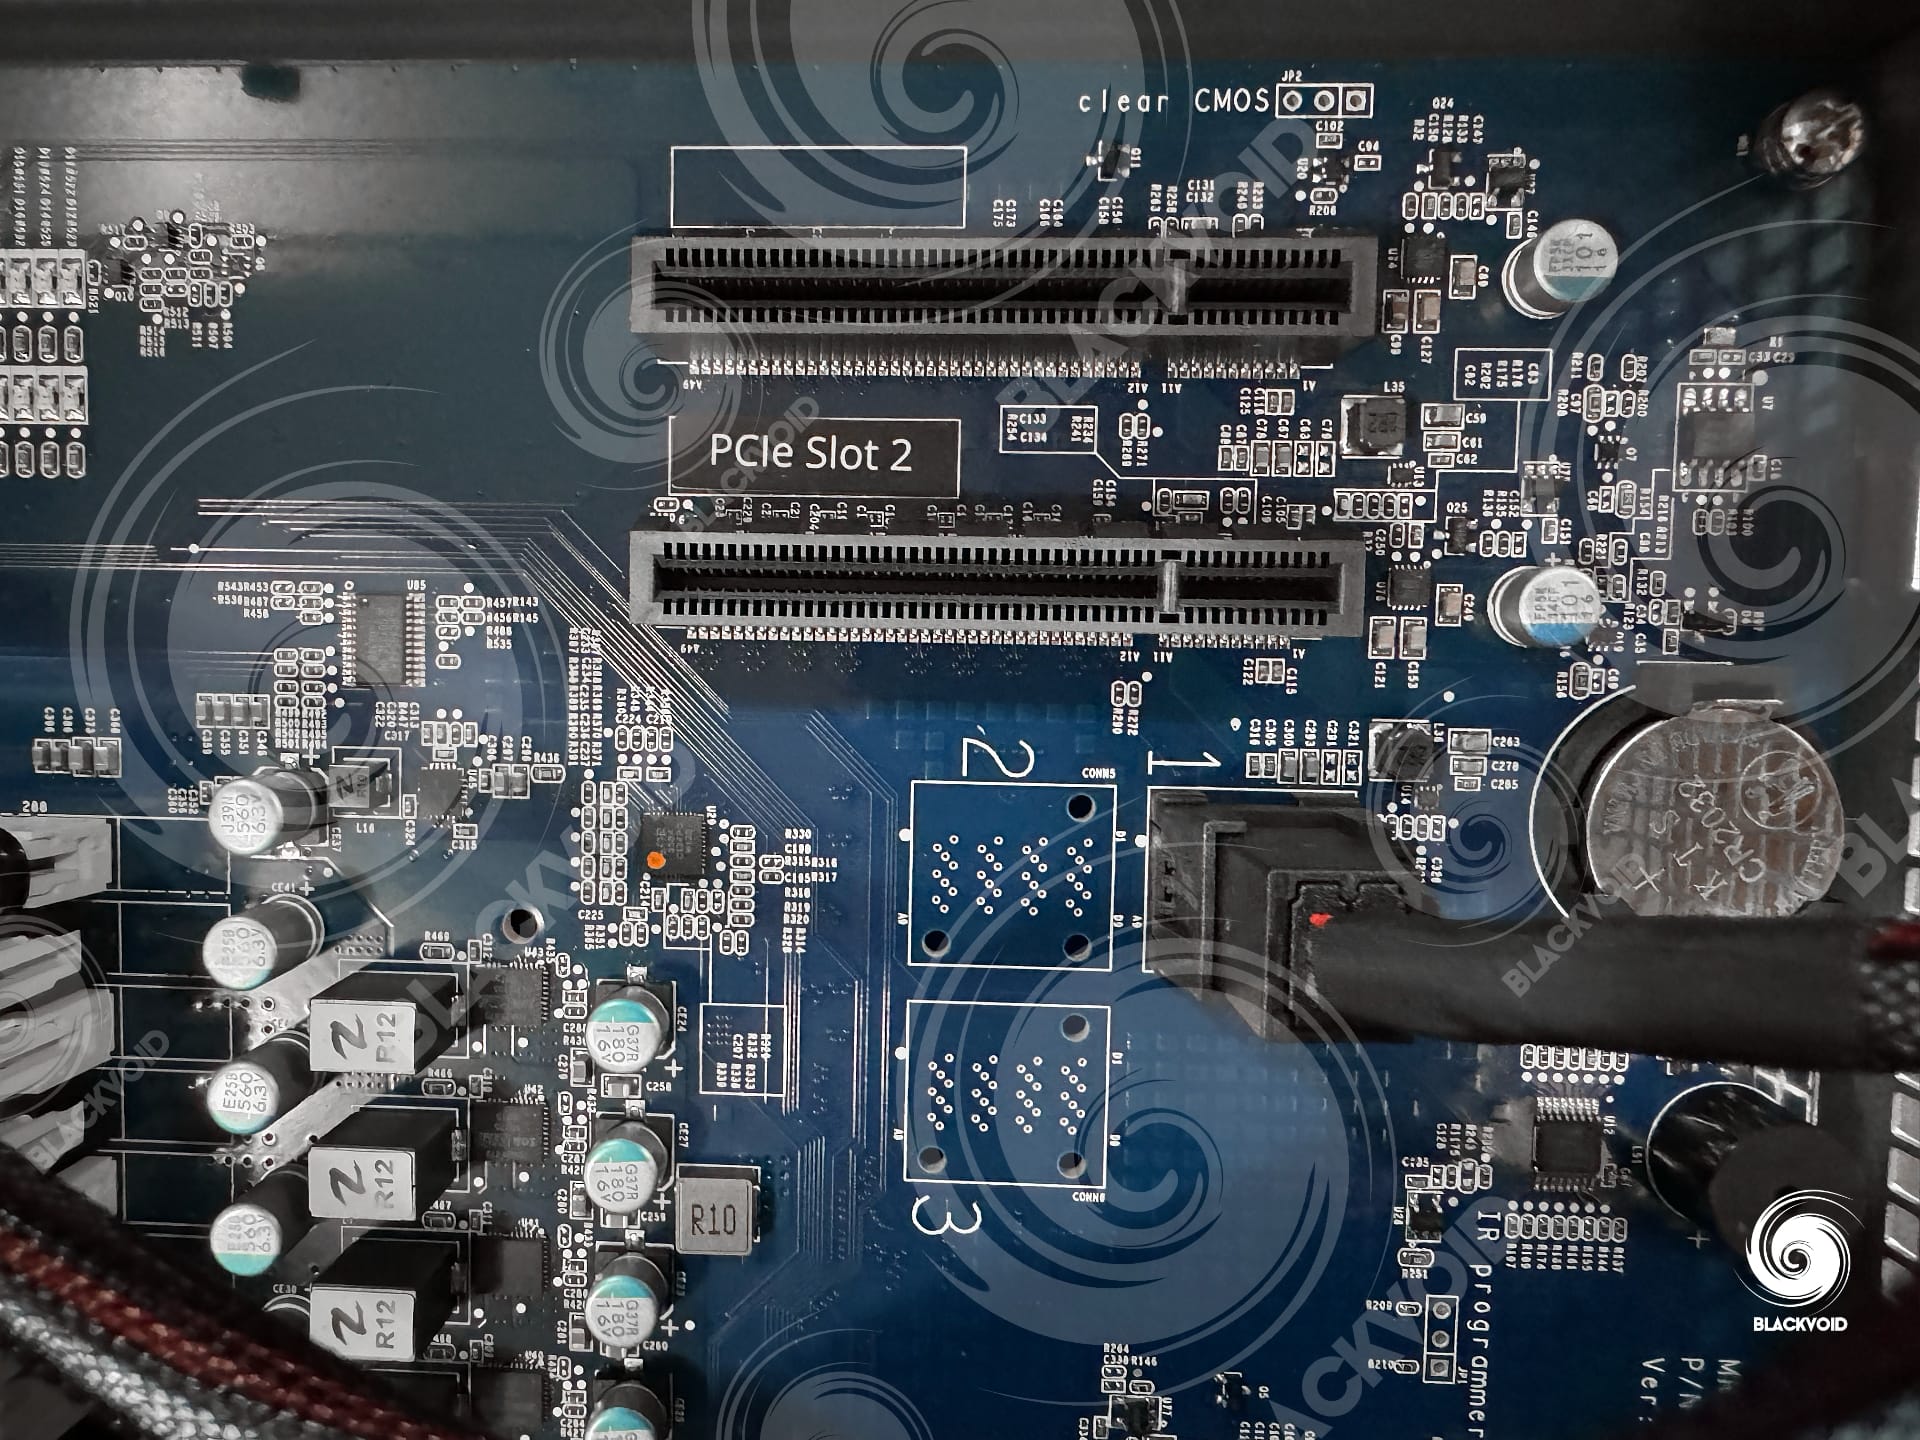
Two Gen3 x8 expansion ports
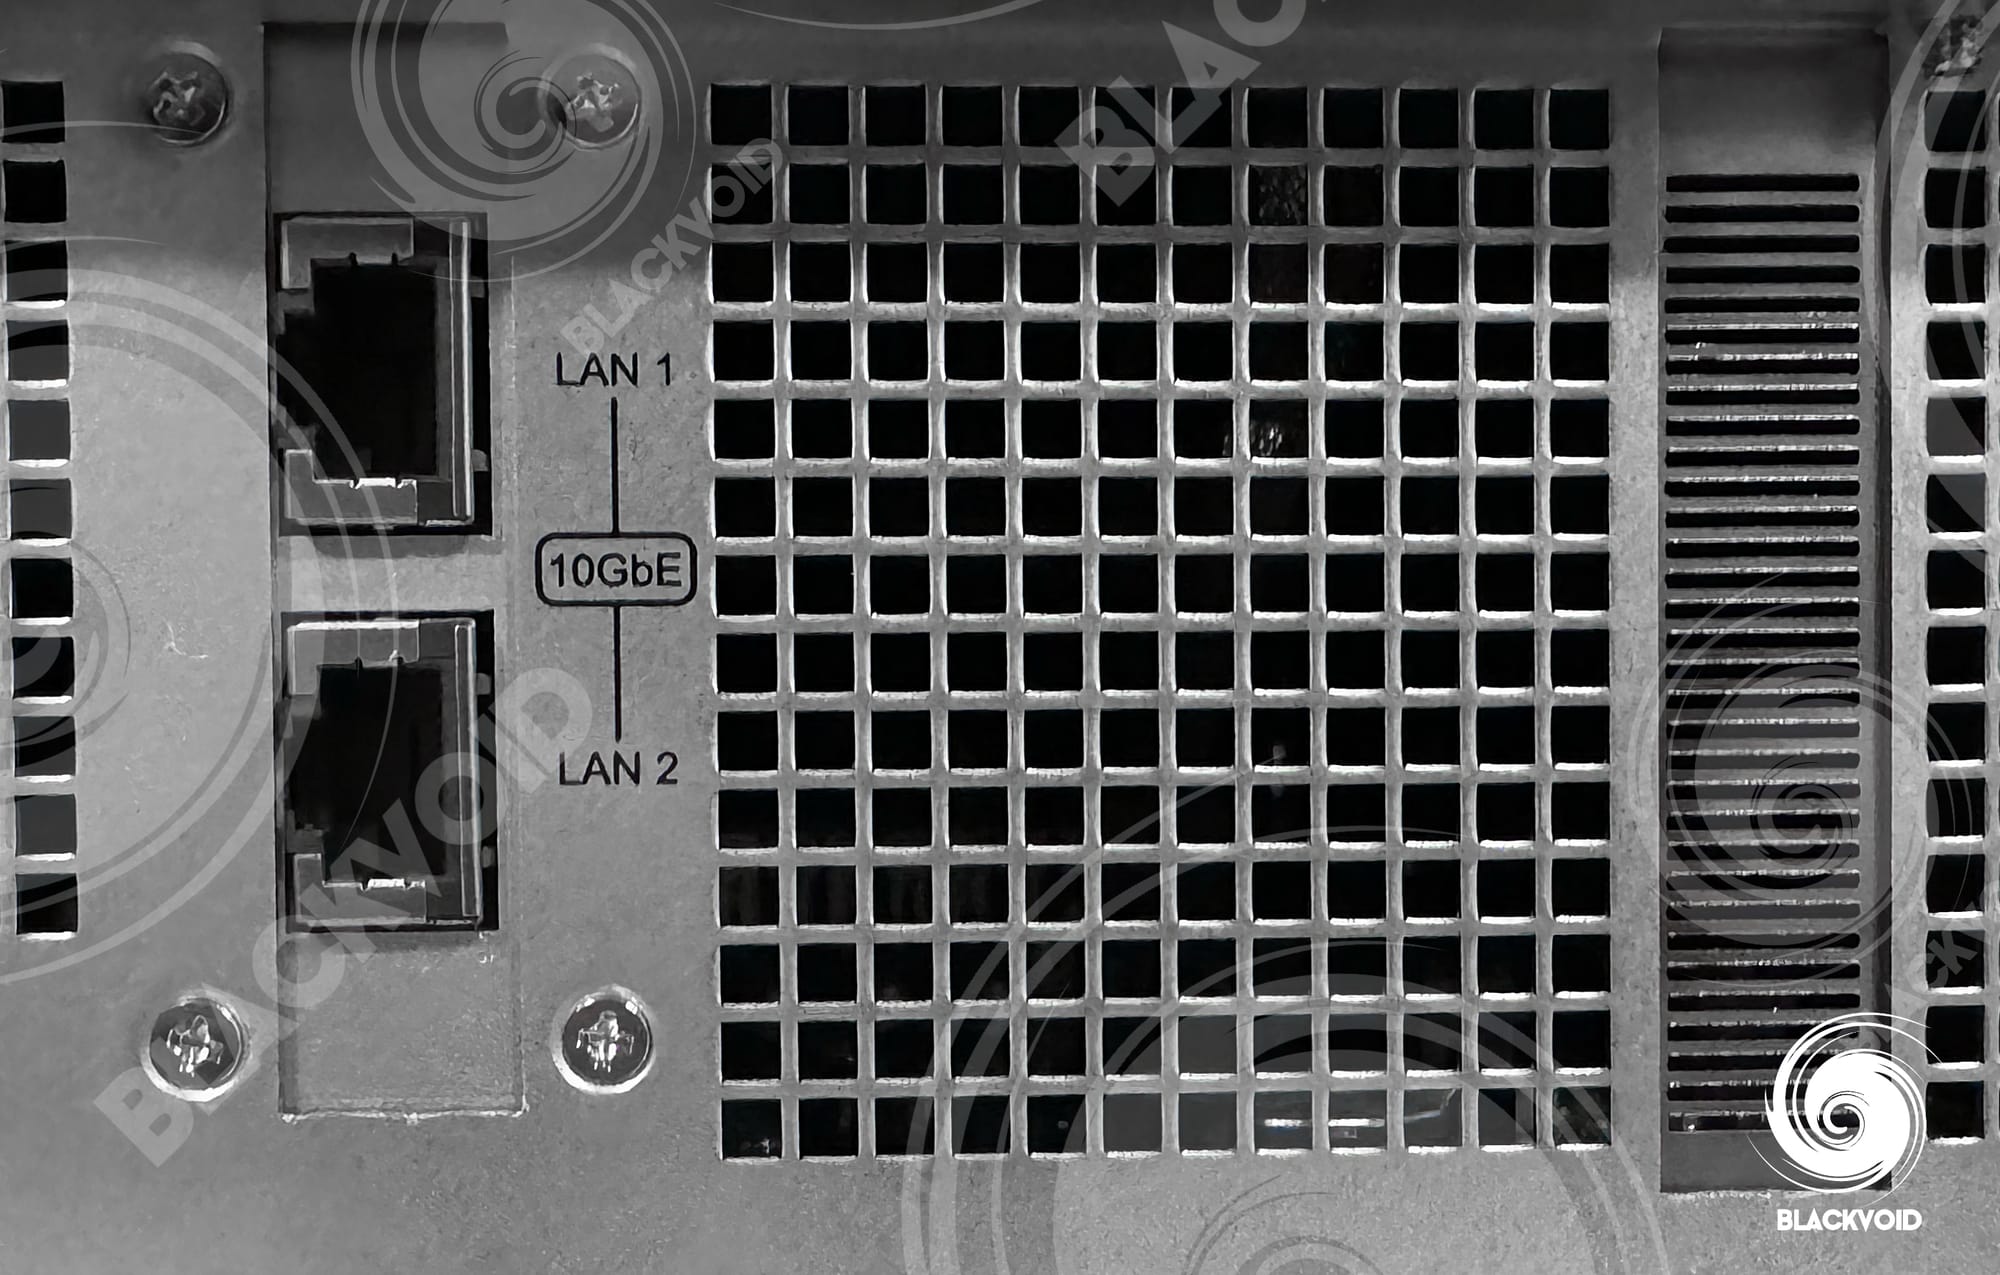
One last visible thing inside the case is the dual-10 G network card in the middle. Alongside it is the 1G network port attached to the motherboard directly that is usable only as an OOB (out-of-band) management port.
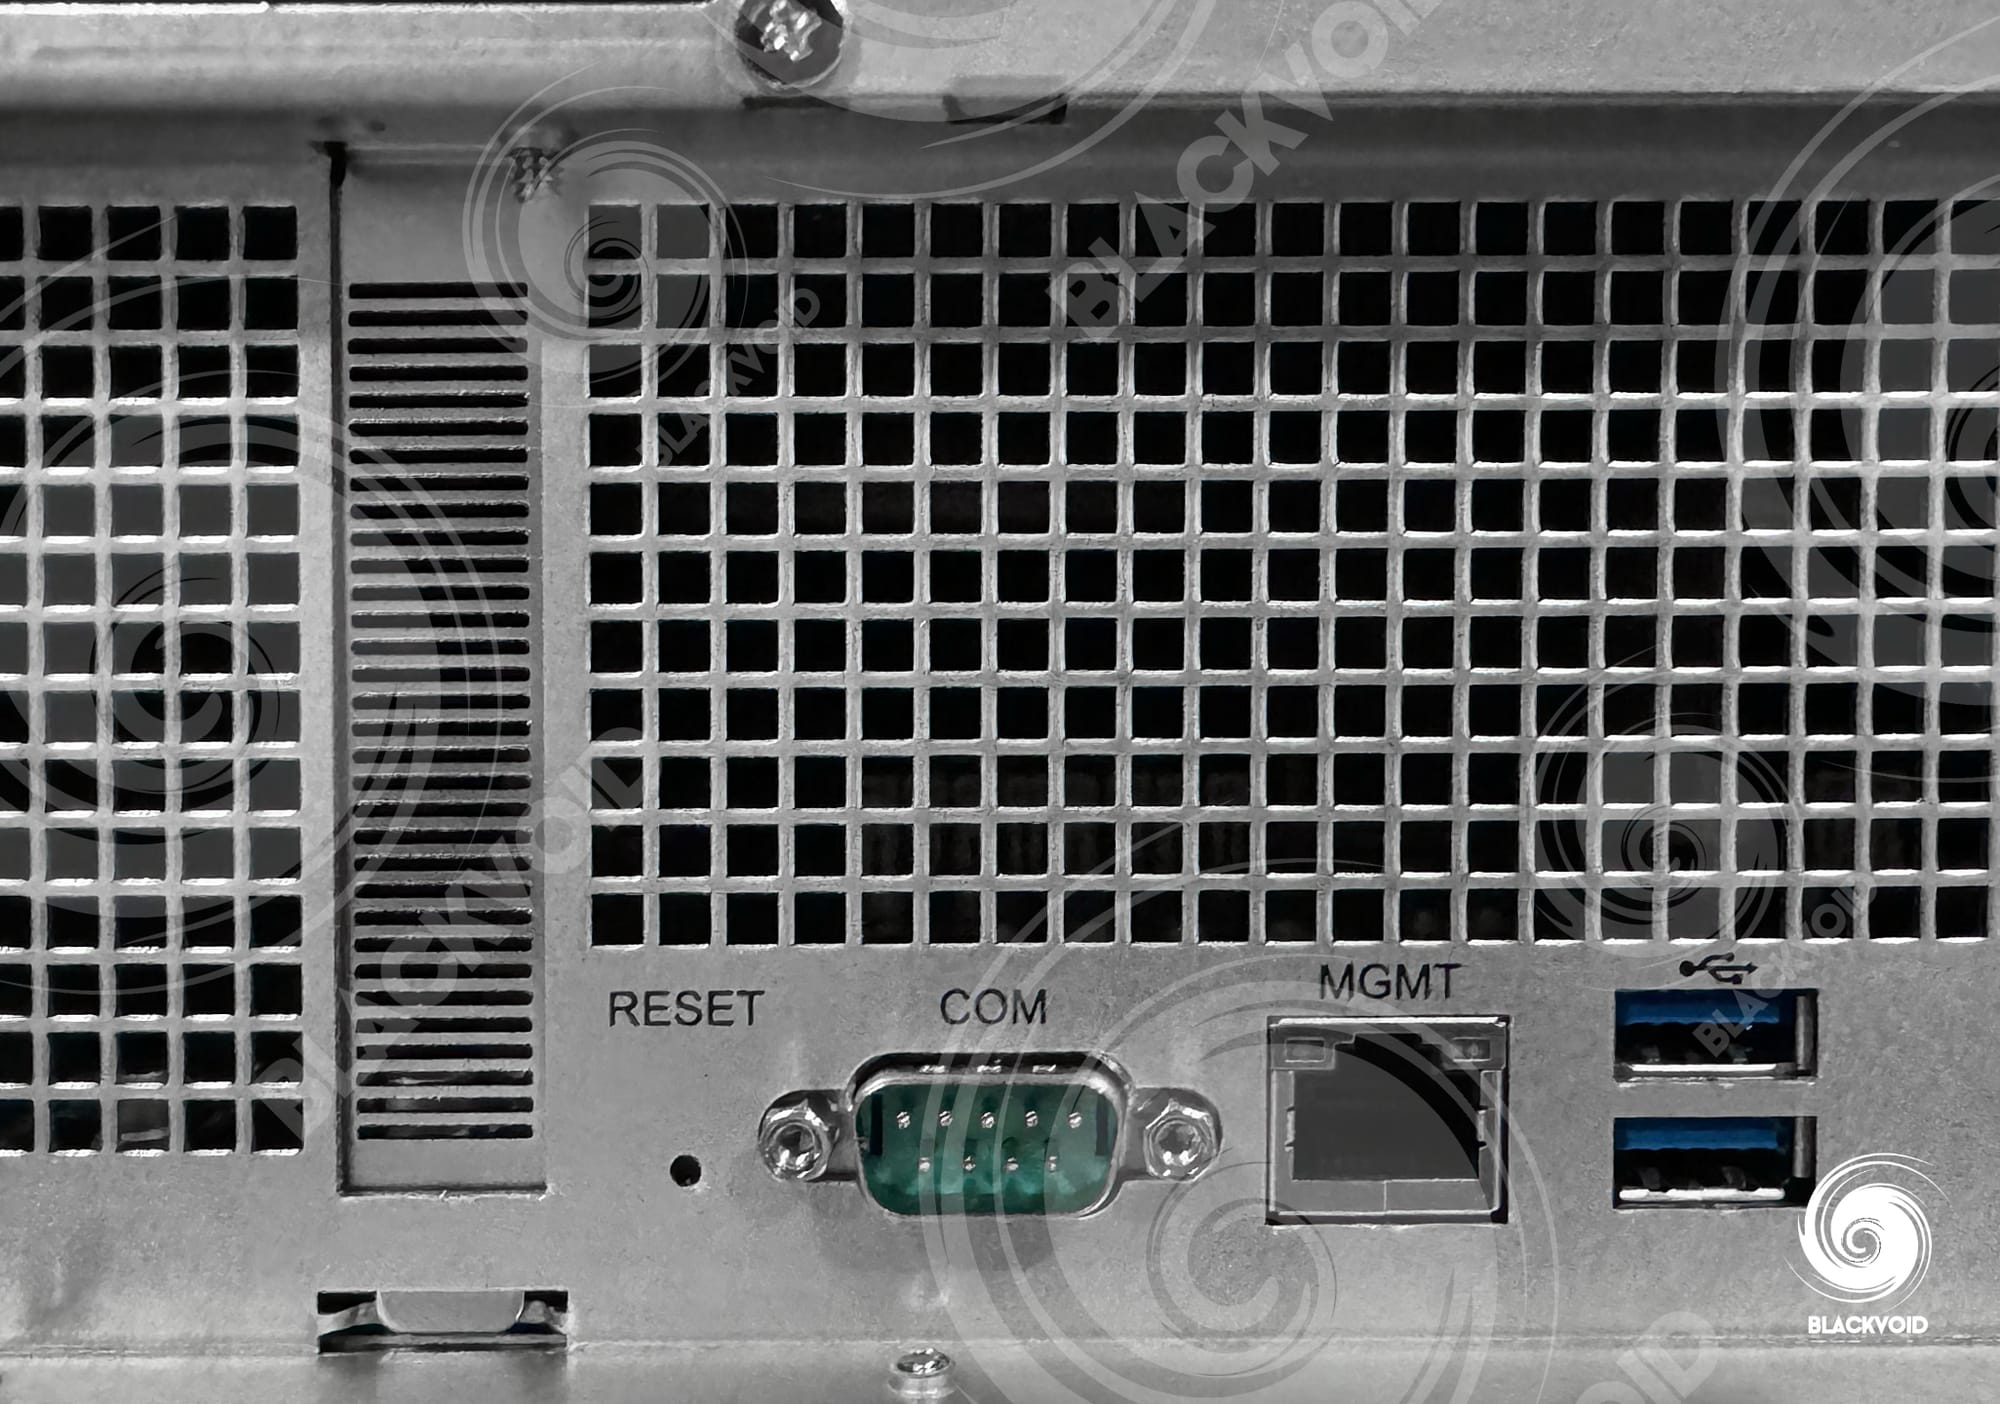
The back of the unit is meshed from left to right for much-needed airflow apart from the sections that are occupied by ports or future utilized ports via PCIe cards. From left to right we have the dual 550W power supply, followed by a COM port, one 1G management RJ54 port, and two USB 3.2 Gen 1 (max of 5G transfer speeds) ports for direct external device attachment. The middle and far right side is occupied by the dual-10G as mentioned above network ports and PCIe slot 2 protection mask.
While Synology is advertising the DP lineup as a 10-minute deployment setup, it is important to note that it will take more than that to assemble and install the drives as well as the unit itself, let alone install it and get it up and running. To be fair, once the unit boots up, it will be that much time until we can start with backup tasks, but including the manual labor and all the things before that, it would be fair to say we are looking at closer to 20-30 min from unpacking to the first backup.
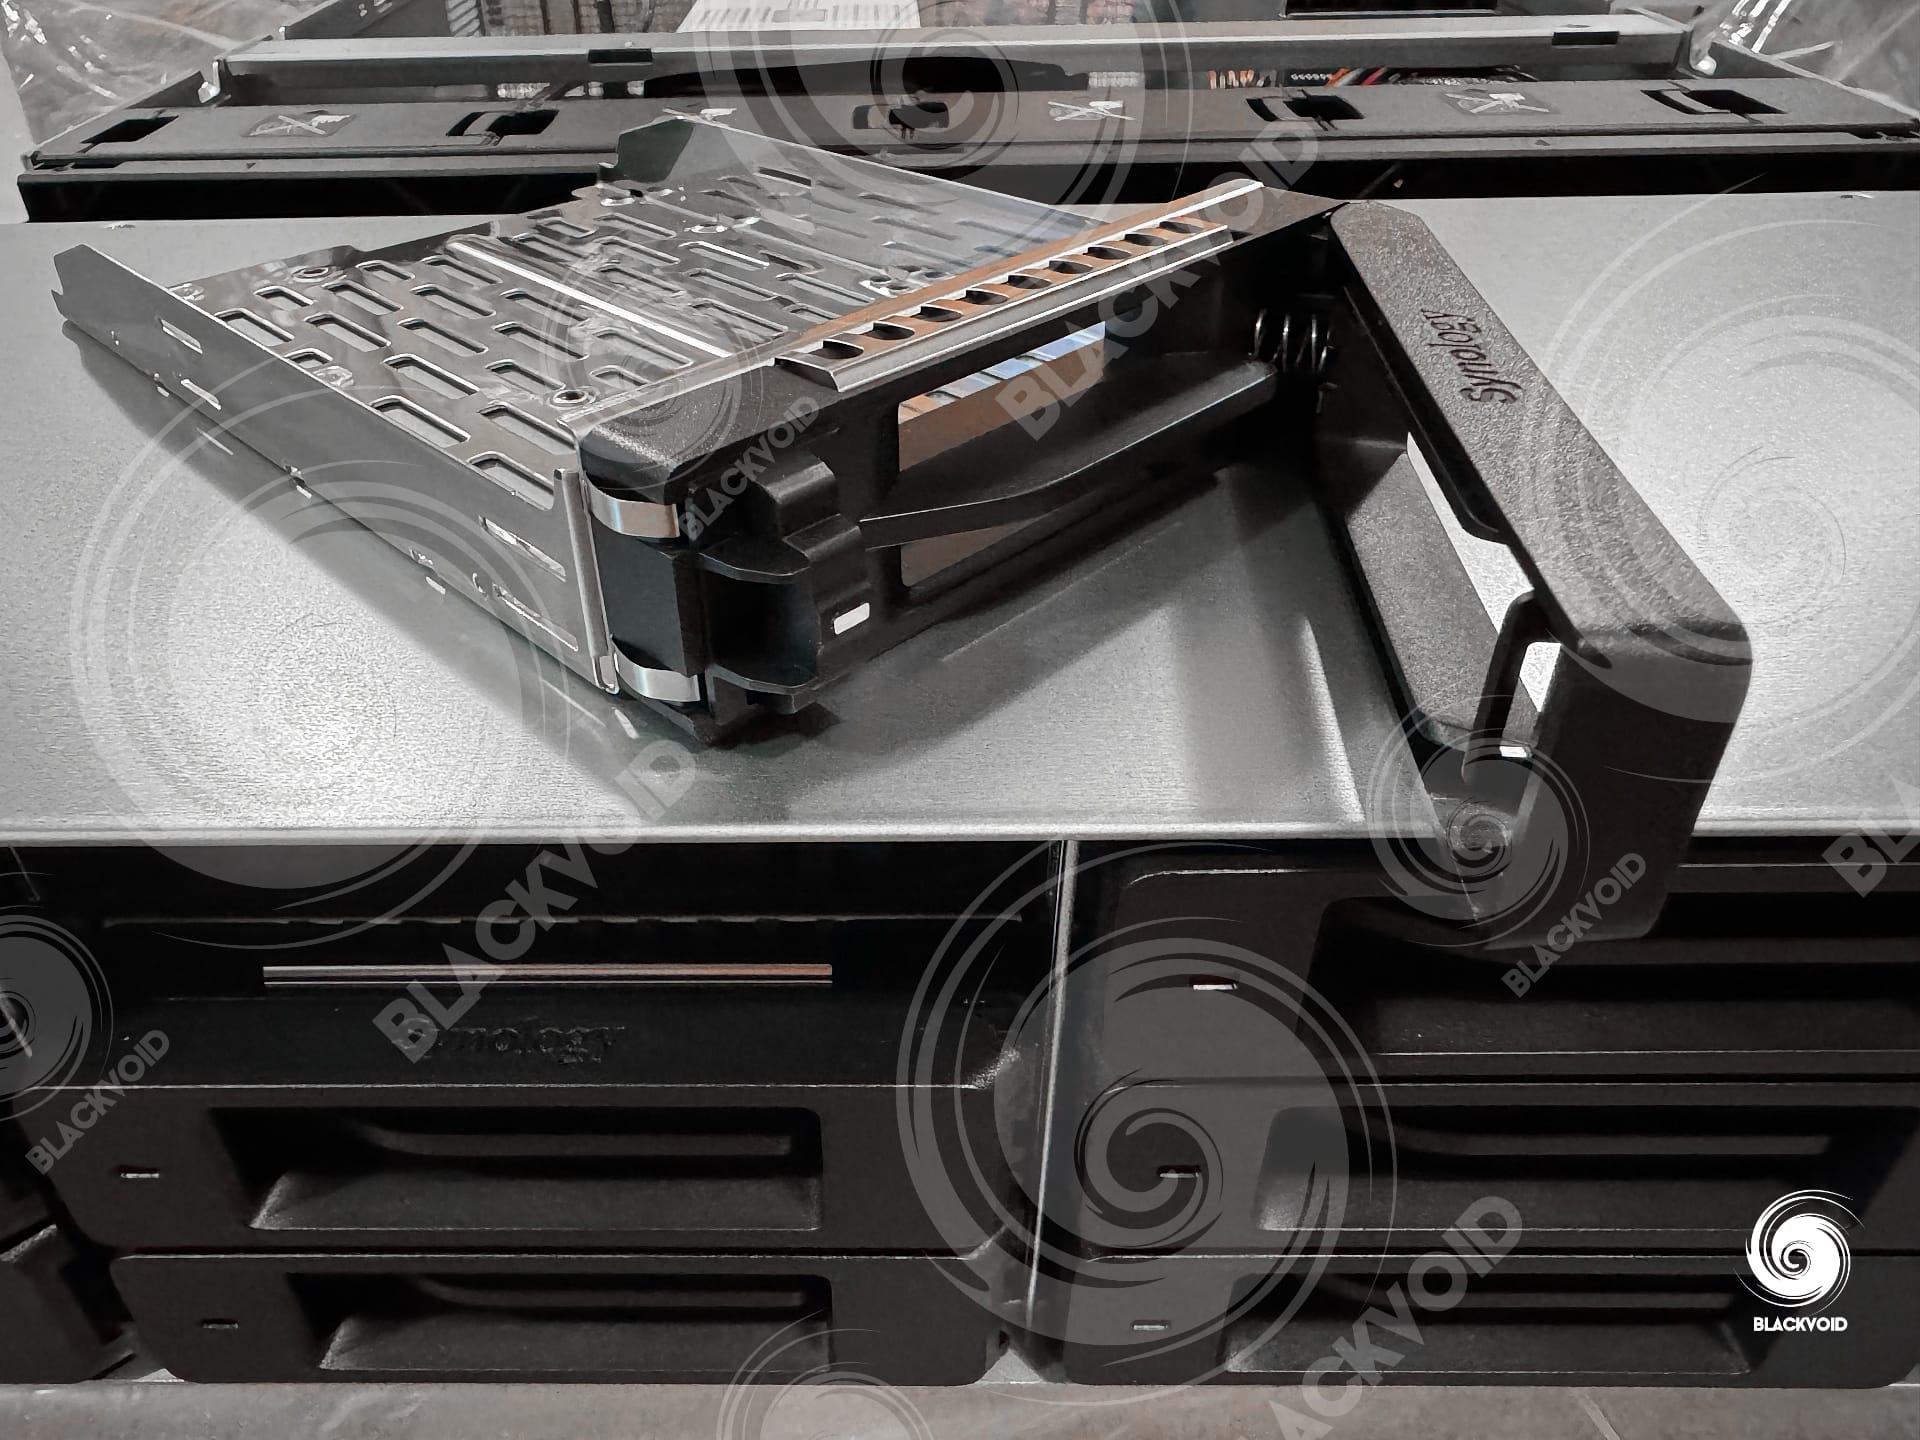
The DP7400 uses Synology's type 10 3.5" disk tray that can accommodate both 2.5" and 3.5" SATA drives. Just like previous generations of these rack trays, we are required to screw in the drives from the bottom. The package includes both types of screws for 2.5" and 3.5" disks.
The DP7400 is compatible with Synology RKS-02 rail kit (sold separately) as any other rack model from their lineup, so installing it in the rack will not be difficult. While it can be done by one person, the total weight of the unit with drives is just shy of 30 KG. Inserting it in the rails will take some strength and precision, so if possible, call another person to aid you just to make your life easier.
Once all the drives are installed, be sure to a) connect both power supplies, b) the management network as well as c) a minimum of one out of two 10G data network ports, and fire up the unit.
Just a quick remark on the noise level. Compared to a regular non-power redundant rack model, like the RS2423+ for example, the DP7400 will make significantly more noise. The two 550W power supplies have their own small vents that are loud, but also the four intake vents from the front side will contribute to the overall noise level. The PSU vents are taking a large part of the blame, as this is similar to any power-redundant model, be it the DP, RS, or SA for example. A fully loaded RS unit that has a standard single large 500W PSU and the same four intake vents is already much less noisy than this model. Still, do not plan to keep any Synology rack models inside any living area, including this DP lineup, as you will quickly realize that was a mistake.
With ten 7200 RPM drives inside it, we are unable to hear any disk activity due to the noise level as expected. The only thing the F series (all-flash) of this lineup will bring is less power consumption and less heat.
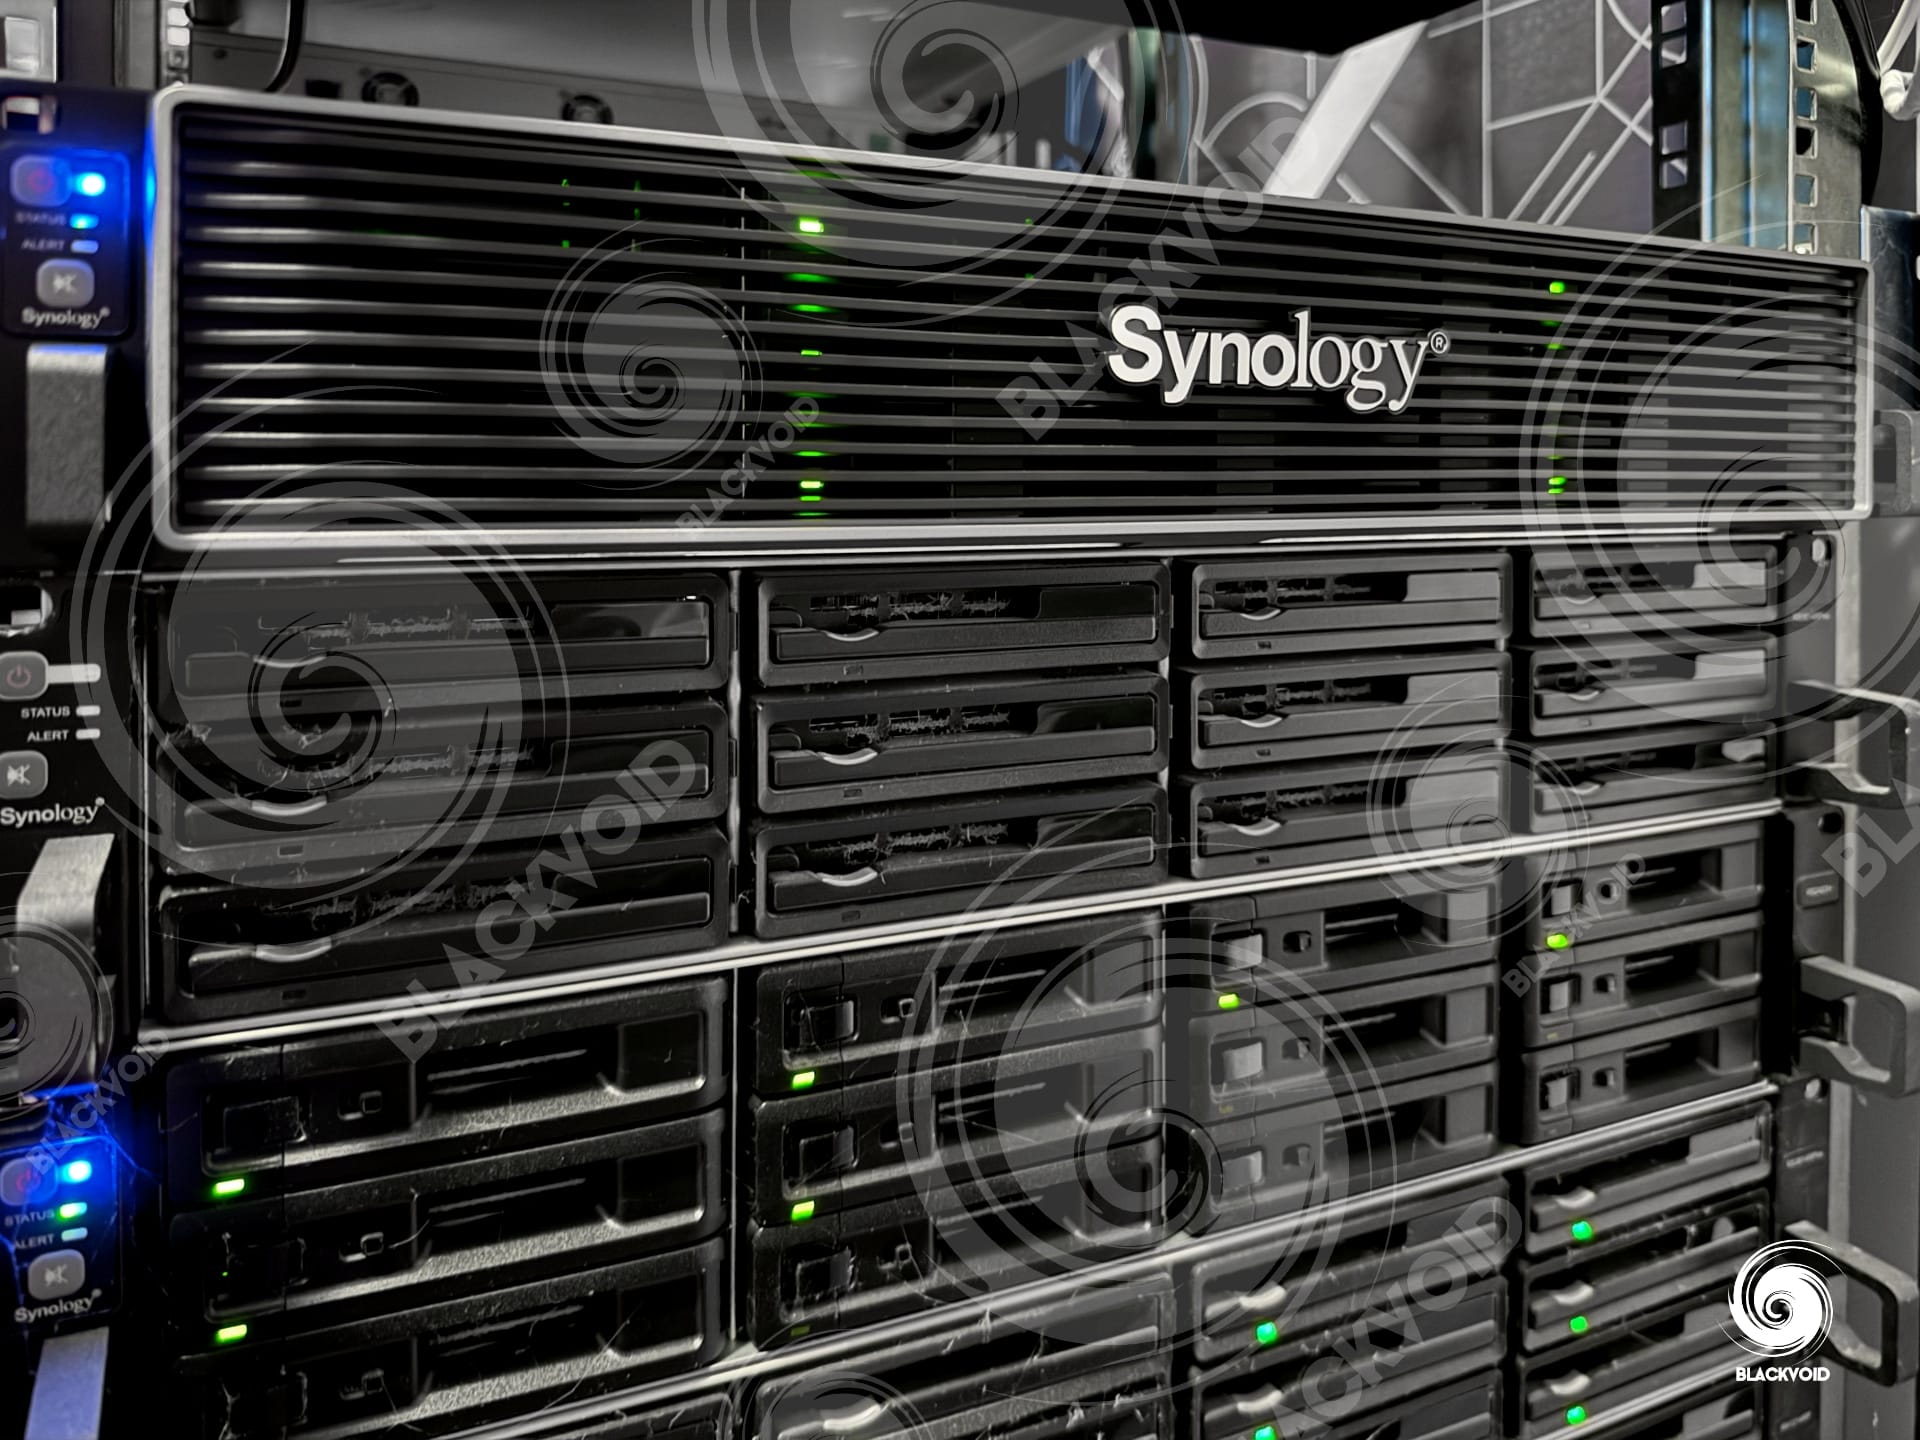
From an HW standpoint, the DP unit doesn't deviate too much from your average RS or SA unit with its familiar design, internal setup, and backside layout. What is new are the type 10 drive bays and a decorative mask that is a nice cosmetic and protective touch, but again, completely optional. The real difference will be what lies ahead.
The unit is unpacked, installed, and ready to be configured. Next, let's see how to install and configure the new ActiveProtect Manager operating system that will control and drive this new backup appliance.
: First setup
For anyone familiar with the DSM setup process, the same applies in this case as well. Some slight changes will be visible in the images that follow in regards to configuration, but other than that, let's see if we can make the advertised "10-minute" start-to-finish mark.
Once the device is detected on the network via the Synology Assistant desktop app, or find.synology.com (or any other network tool for that matter), we can connect to the web UI and begin the installation.
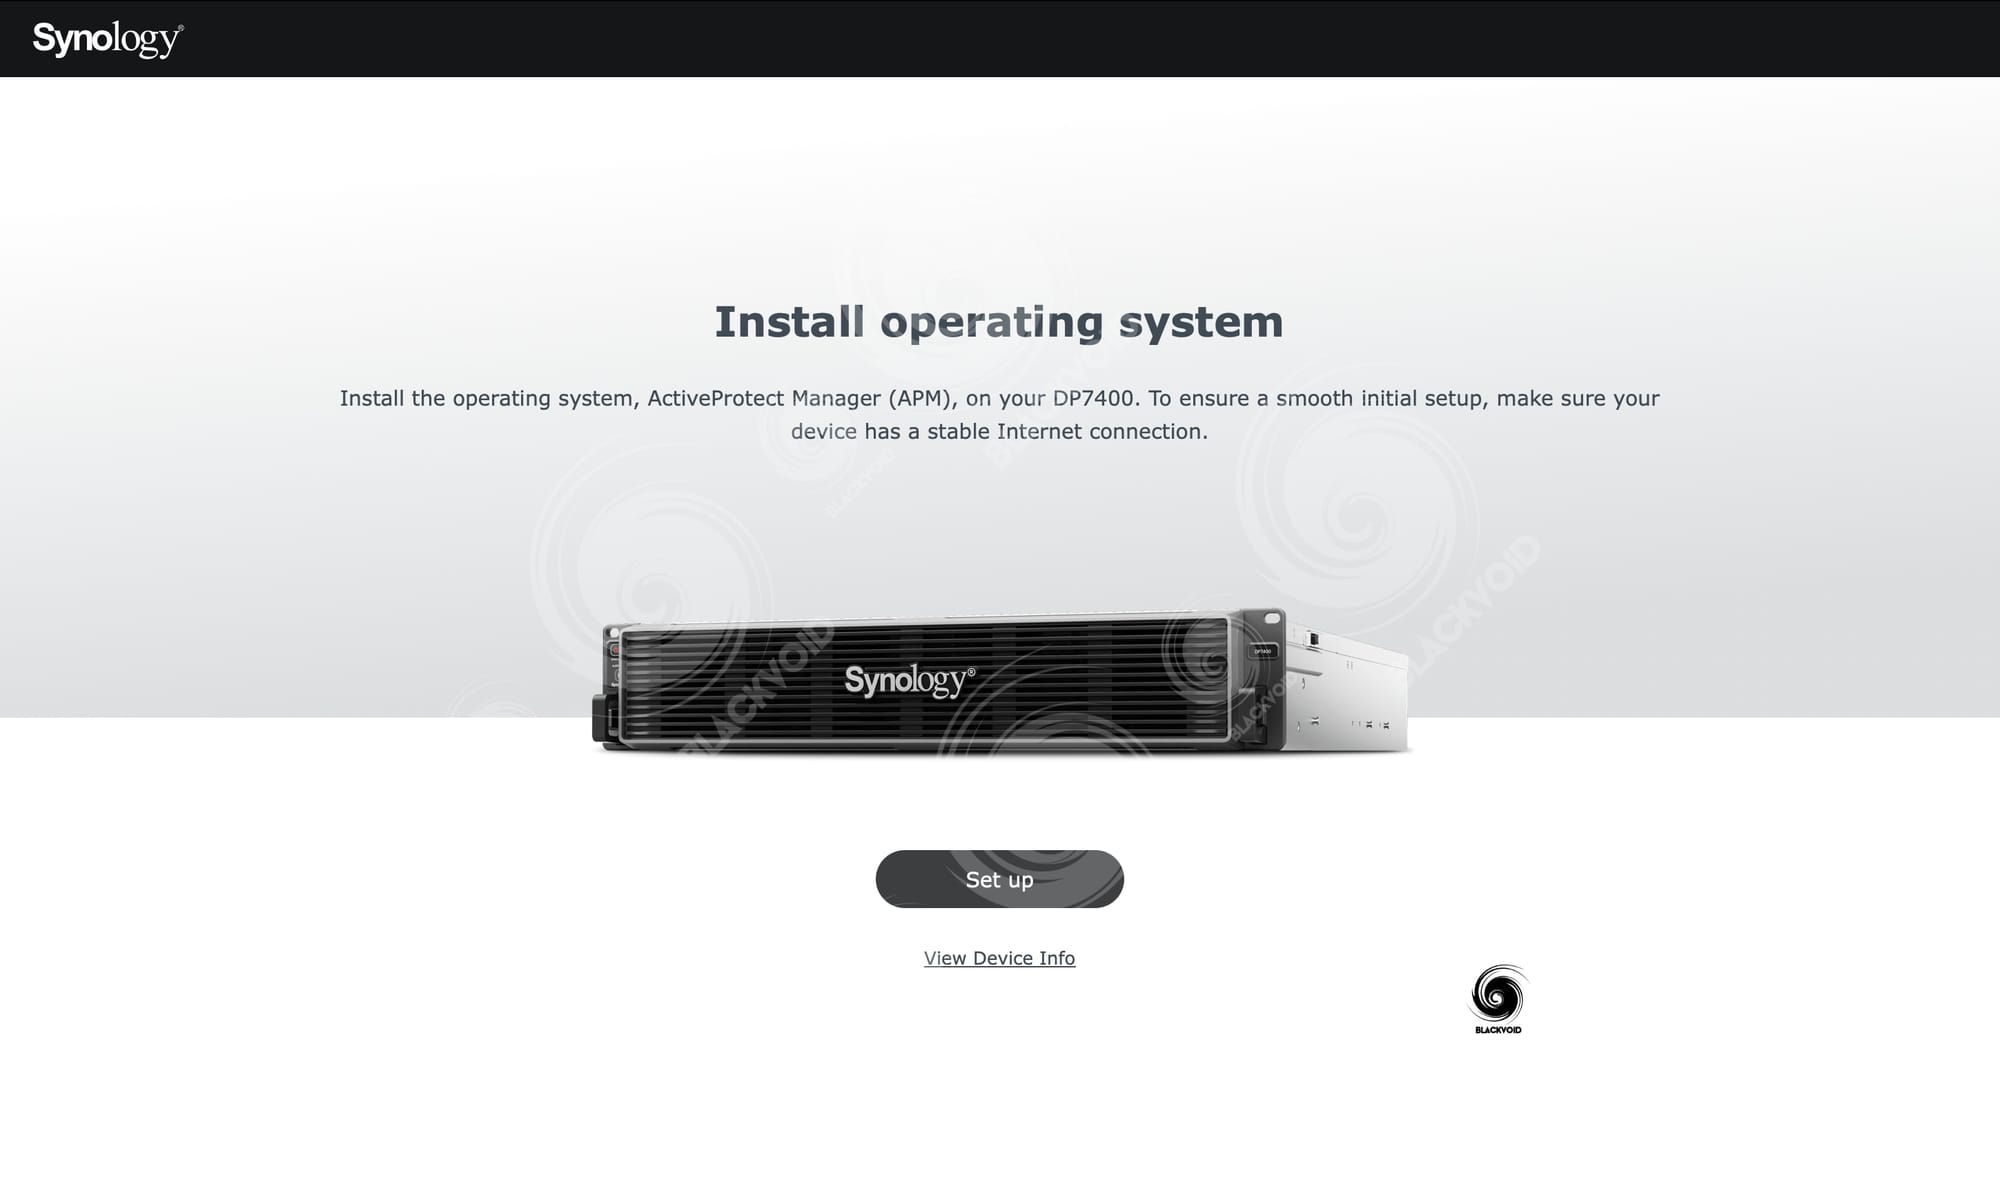
The main difference that will be visible right away is the fact that the color palette is different. Moving away from the usual "bluish" screen, the APM has a more "pro" vibe to it with a mix of white, black, and grey colors. Nothing major, but from a personal point of view, I like the change and it does sit well with the design of their rack units, to be honest. Still, the next few steps will be the common ones that are part of any Synology NAS DSM installation.

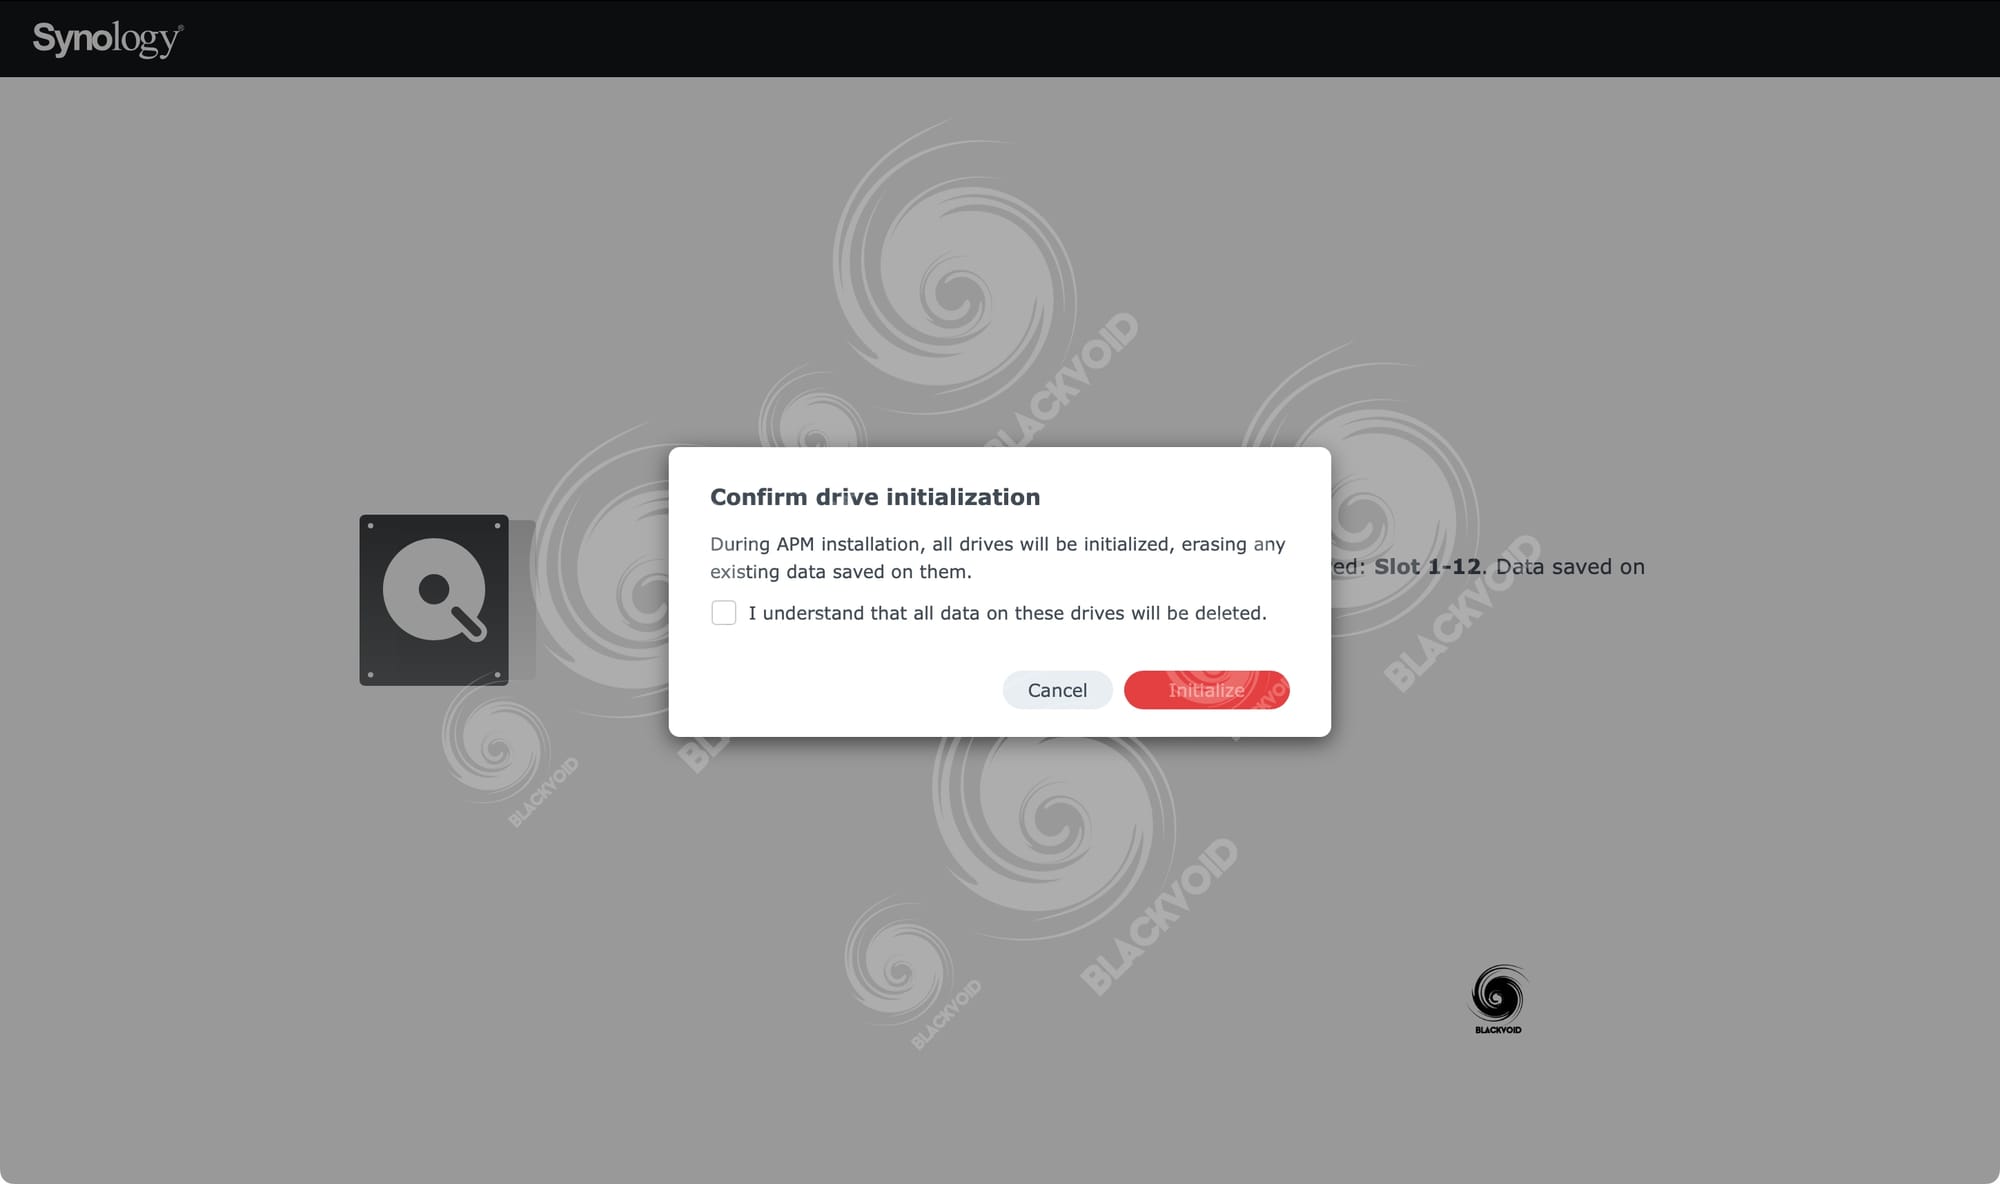
Unlike with a NAS setup, the DataProtection will configure the drives automatically in the most compatible array possible depending on the number and type of drives. So with ten 20TB drives and two SSDs, we will get a RAID6 array with a hot-spare, while the SSDs are configured as read/write cache. So that gives us 140TB (+/-) of usable space.
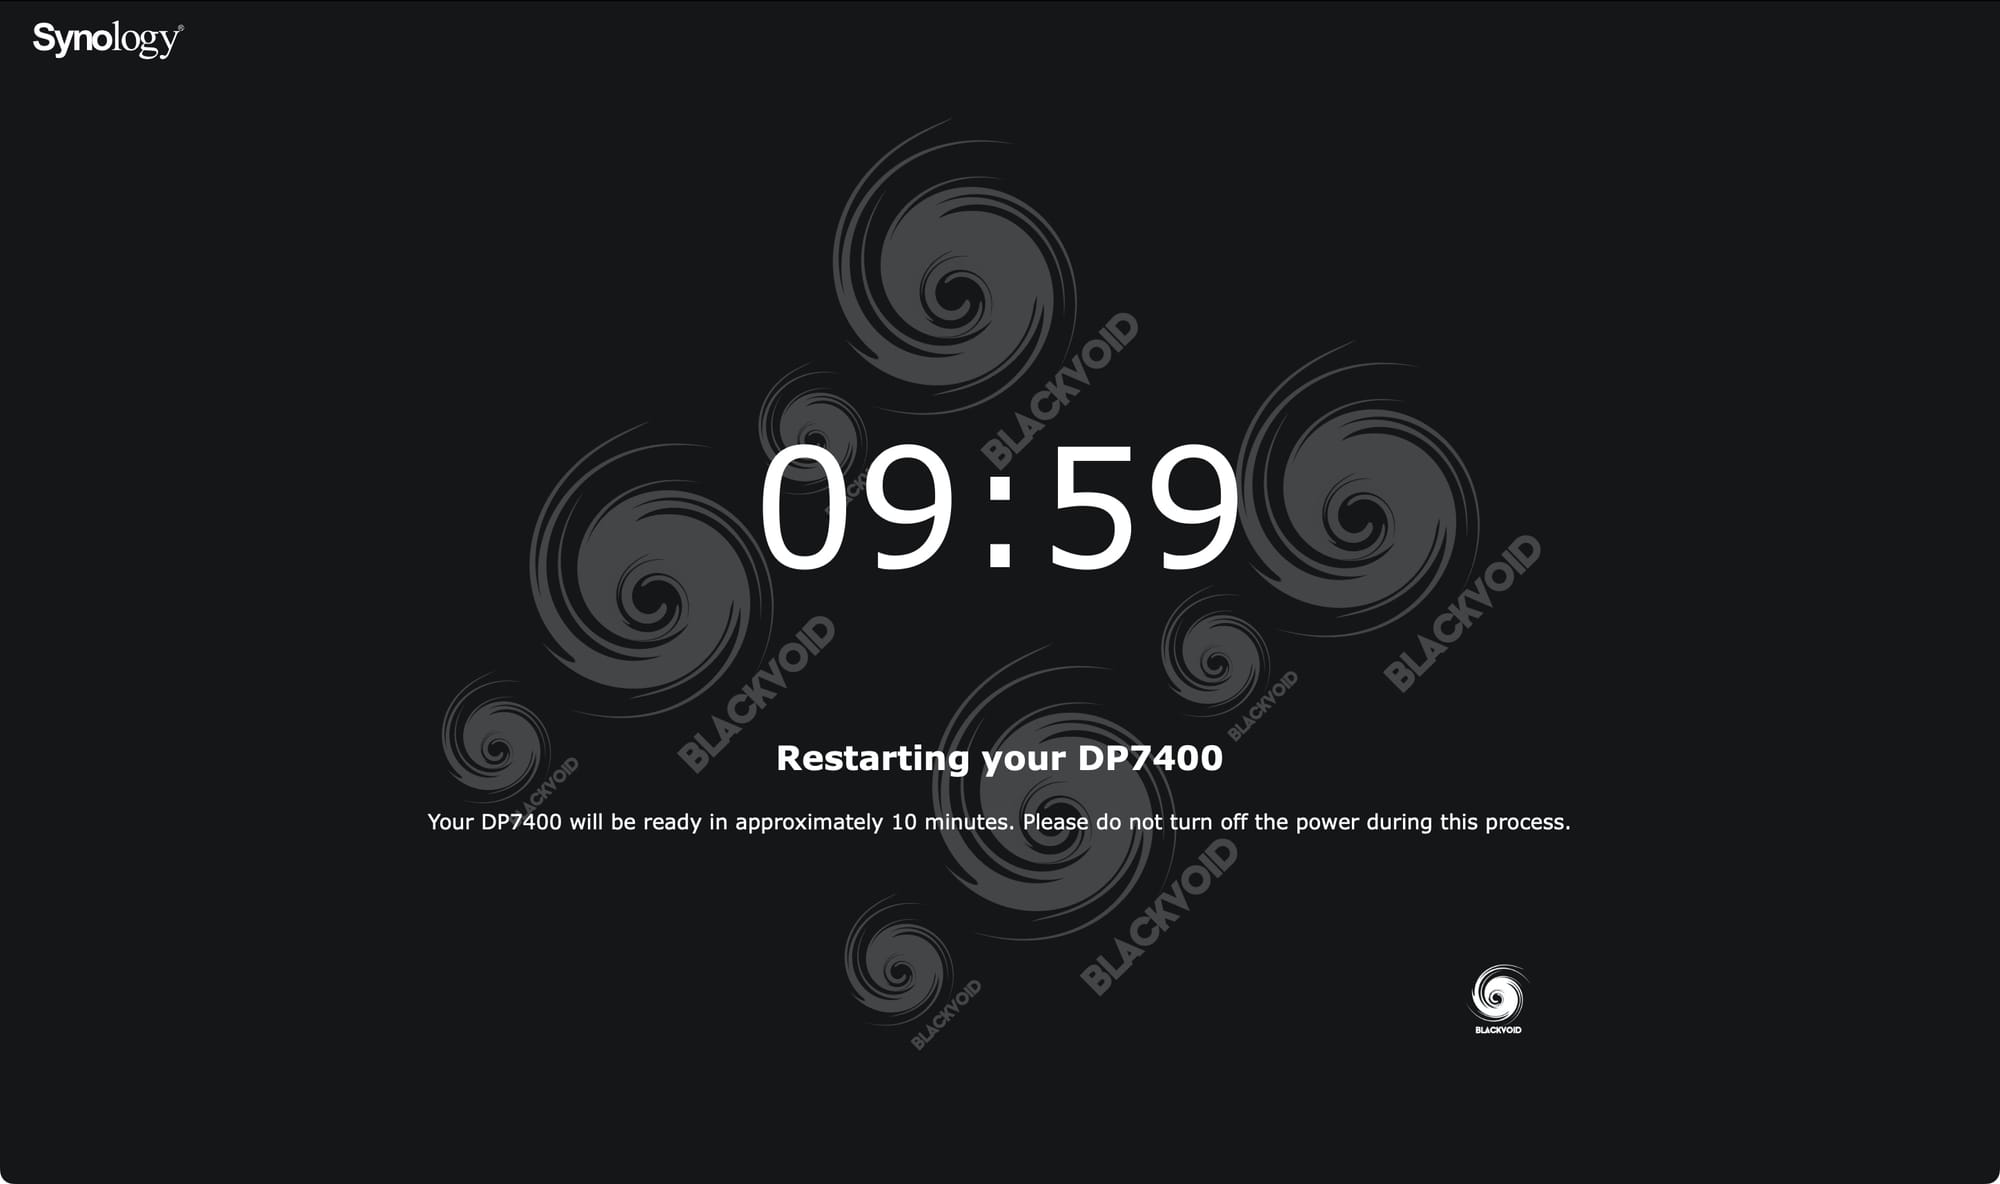
The installation was done very quickly, as well as the reboot that didn't take 10 minutes. After that, we are asked to create the default admin account, but this is where the familiar setup of the DSM ends and we get into stage two of the APM.
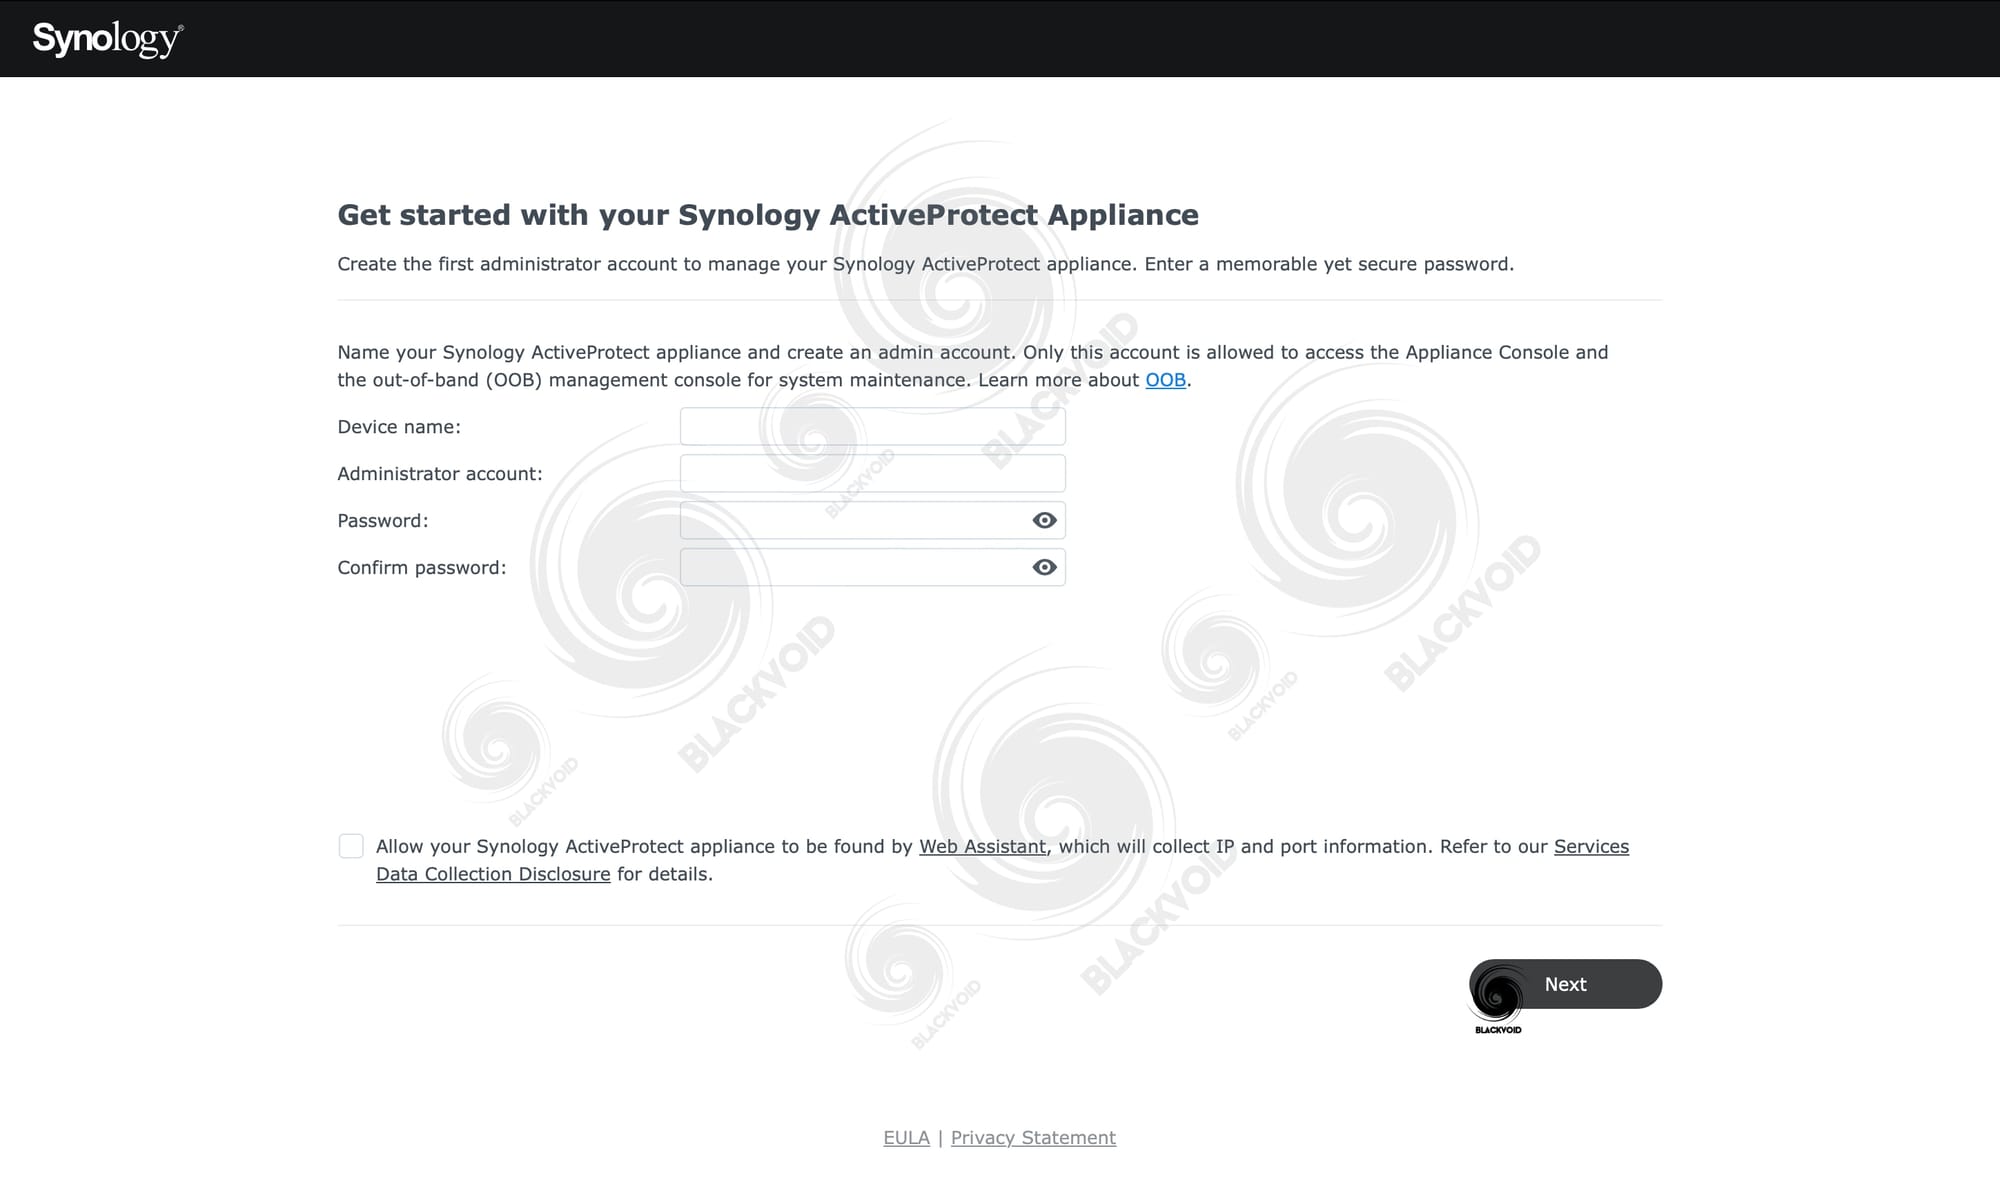
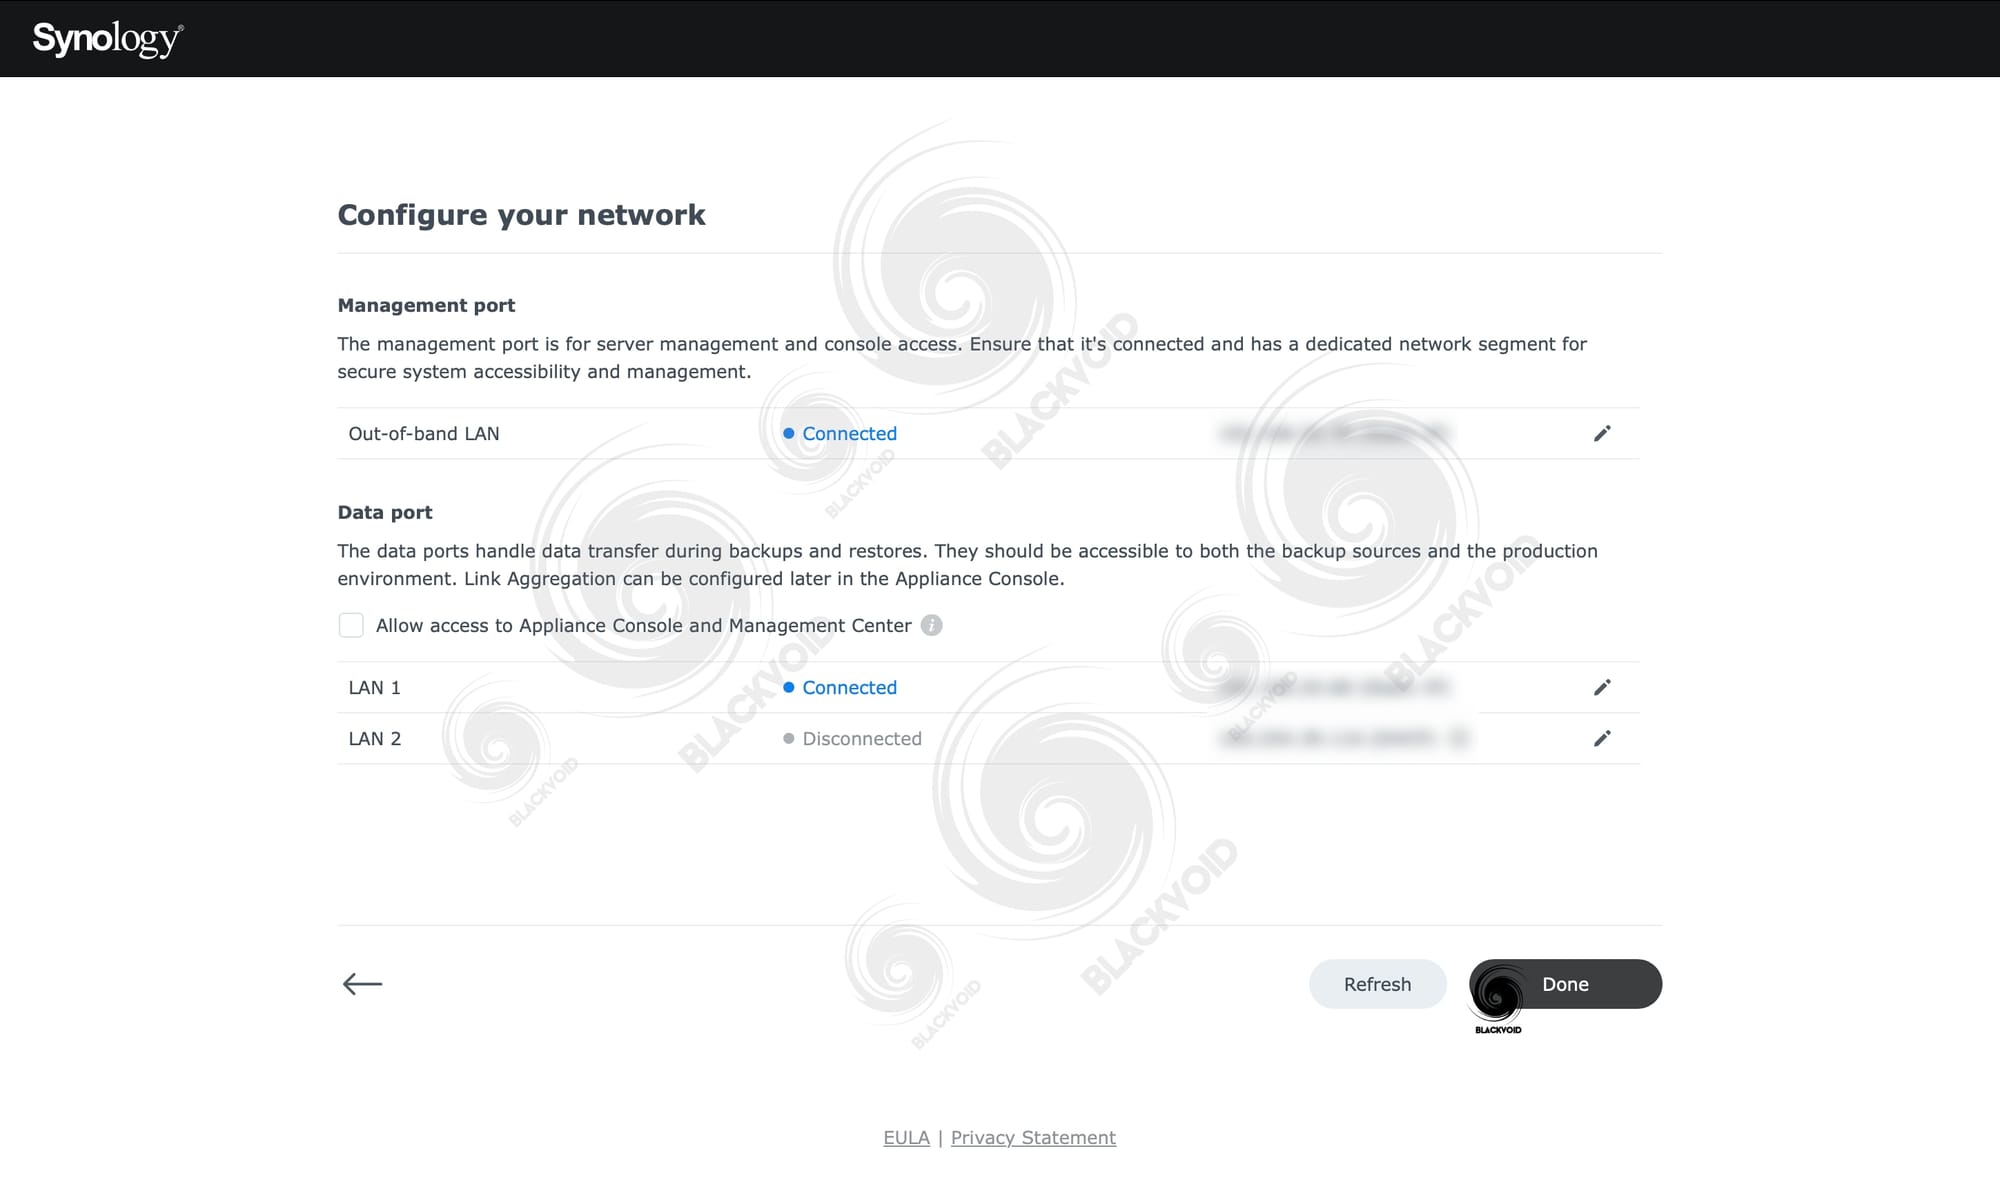
The DP7400, as noted before, has by default three network adapters. One OOB management port (1G), and dual 10G for data. We will be able to configure static (or DHCP) IP address settings during the setup, as well as select whether we want the 10G data port to be used for application console and management center access (more on those later on).
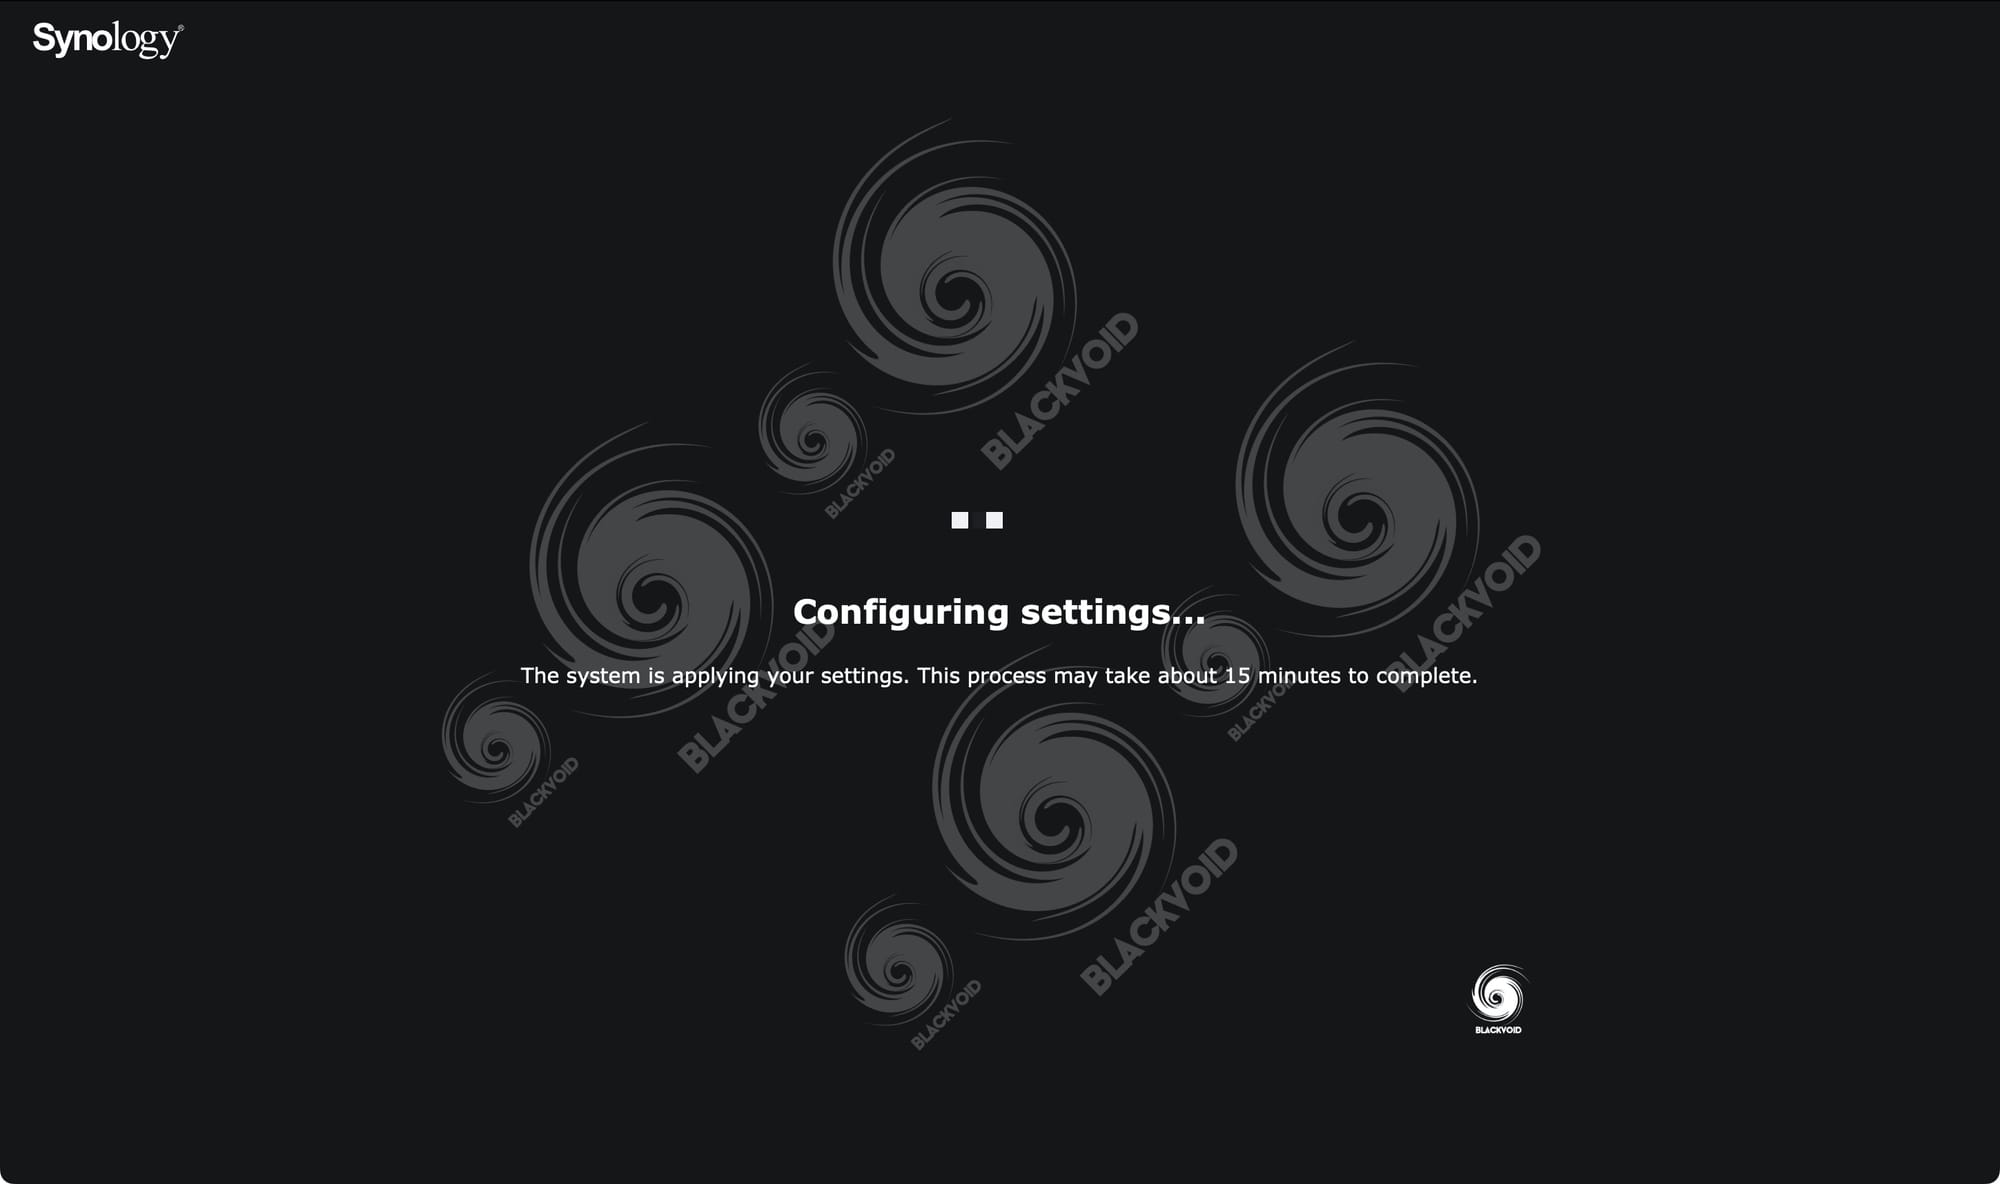
While the step might indicate another 15-minute configuration, again it was shorter and completed in about 7 minutes. After this, the ActiveProtect Manager installation and configuration process is complete, and DP7400 is ready to be used.

Going back on the whole install process and the fact that you indeed can be up and running in a matter of ten minutes or so from the time the device is ready and waiting on the network, the testing has confirmed this firsthand. With an already familiar turn-key installation process, the APM only interrupts it with a few network settings that need to be configured up front, but apart from that, no objection to APM so far.
With this being just the end of part one, it is maybe not expected to do a conclusion, but we can share a few just to wrap up.
With the presentation of the DP models and the new APM, Synology is moving forward with its idea to create a more clean, controlled, and business-oriented backup product. A product built on their tested hardware design, and a well-known Active Backup suite of products that will allow IT personnel to deploy a quick, robust, and stable backup platform catering to many on-prem and cloud needs regardless of the business case. ActiveProtect will also allow for a faster recovery in day-to-day case errors that will help users quickly fix mistakes without the need to even contact support.
With such a closed environment, there will be no room for mistakes or situations in which anyone can make too many customizations while providing the tools, both manual and automatic, to stay on top of all the backup and recovery needs in case of a ransomware attack or full-blown disaster recovery.

Going forward, part two will focus on the ActiveProtect Manager and all available features that it offers, starting with the overall Management Center overview, as well as Application Console, and Recovery Portal web interfaces.
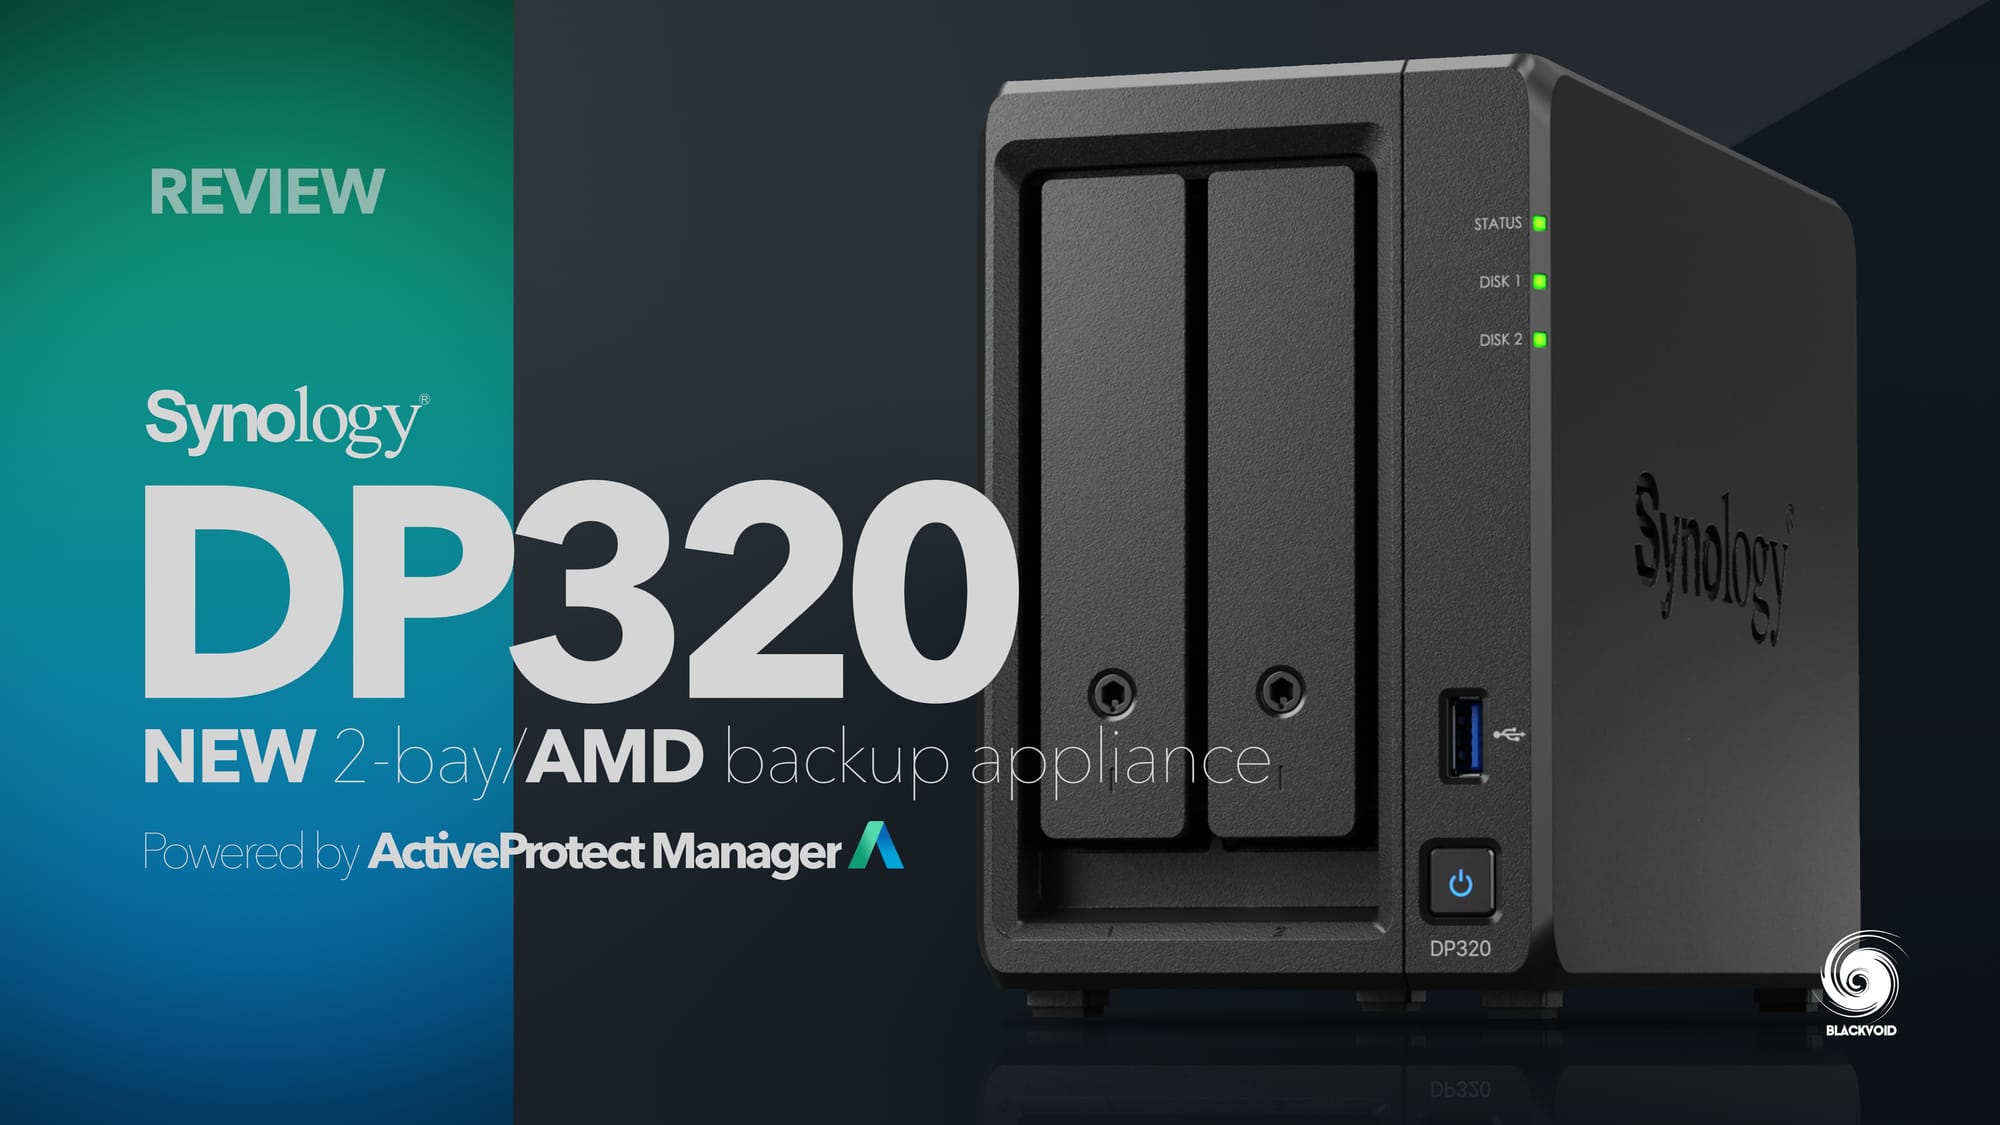
If the DP7400 is too large for your needs, you might find the smallest member of the lineup to be a better fit. Consider the DP320, a compact two-bay model from the DataProtection lineup.