VPN Plus Server - Site-to-Site

Nowadays, security is a top priority for almost everyone, especially businesses. Running your own services, or storing data but still being able to get to it all while away from your network is a common question.
How to get to my data safely over the Internet?
There are ways that you can get to your data while you are away from your local network by publishing the services over revers proxy for example. The "problem" there is that you have to harden those services as best as possible or limit access if you want to increase security. Also, you have to allow access to those resources on your router in order to be able to access them in the first place, and that means, you are not the only one that can do that.
But what about when you have multiple locations that you want to have secure, remote access to but still have them configured in such a manner that the apps and services (including devices) are not exposed to the rest of the world?
Enter site-to-site VPN. Now let's be clear, this is nothing groundbreaking new even in the Synology world, but it is also not so common unless you actually need it.
VPN Plus Server
When we talk about site-to-site VPN connections in the Synology eco-system, then you will have to have certain prerequisites in place in order to configure it.
So what is a site-to-site VPN to begin with?
Well, site-to-site VPN is a way to connect multiple sites (homes, business locations, etc), over the Internet but in such a way that the communication between sites remains "local". By local here I mean that all services, devices, and apps, talk to each other by using their local IP addresses or their local domain names.
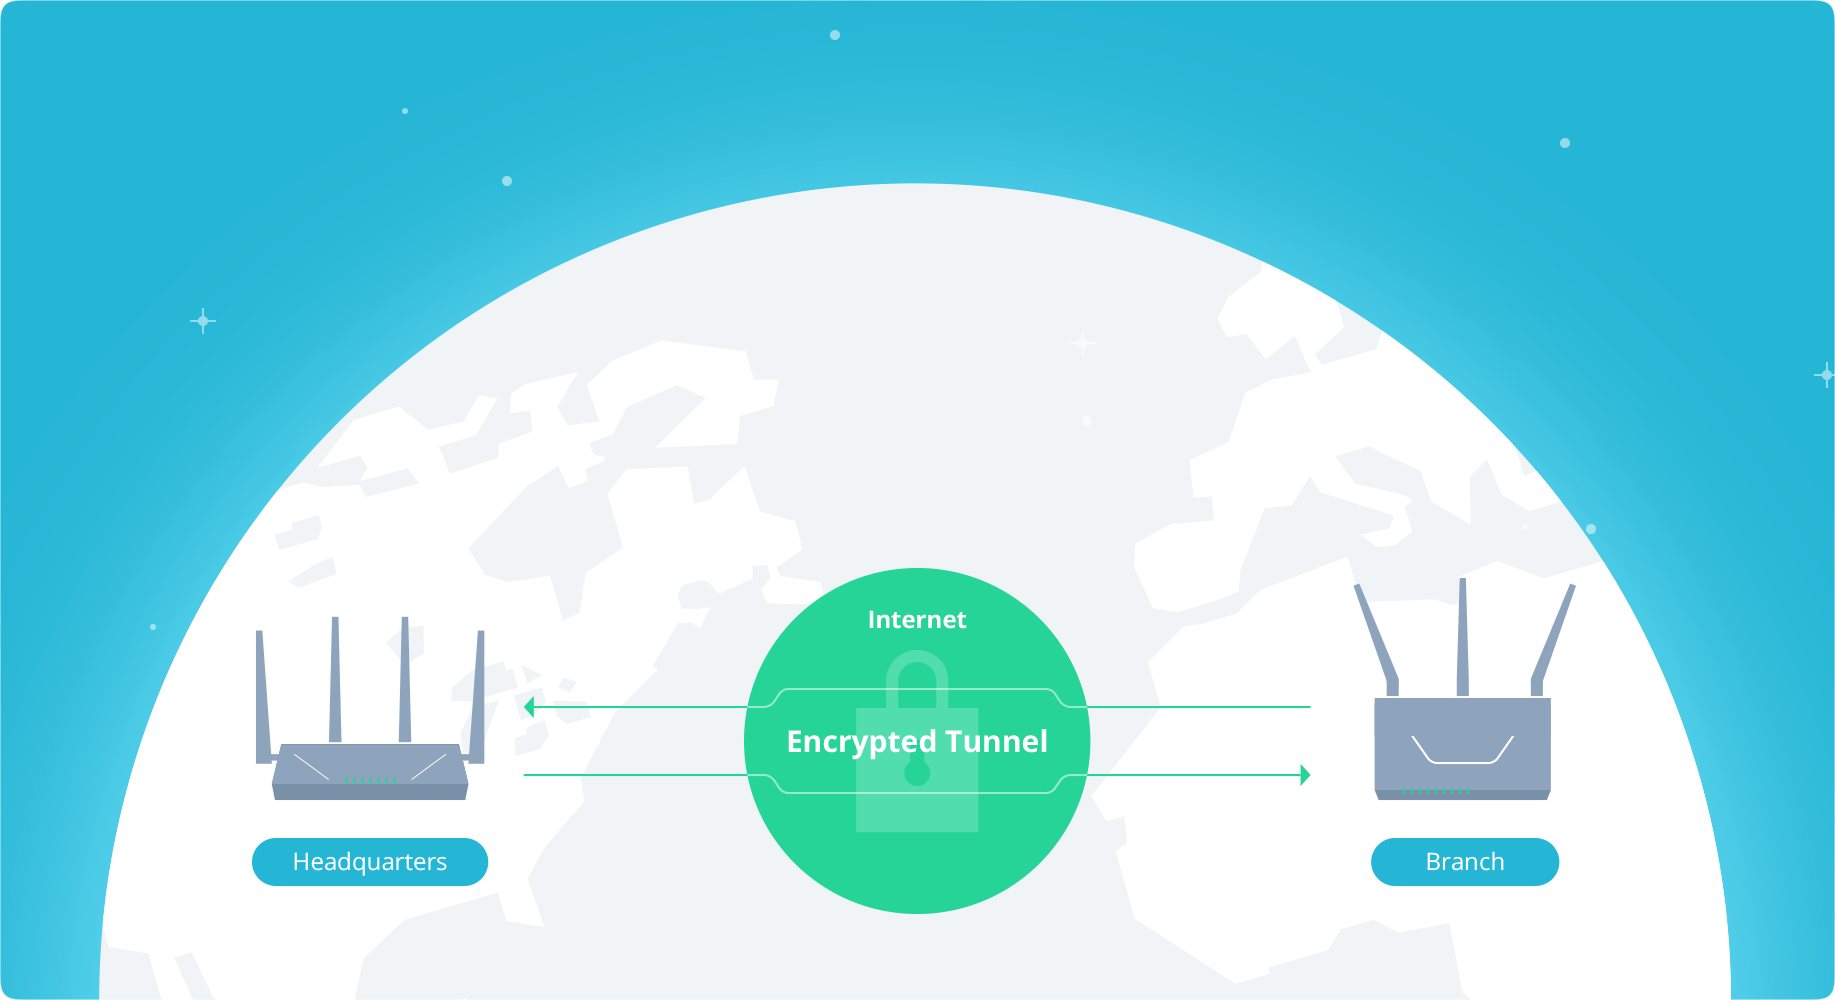
Communication remains inside a site-to-site VPN "tunnel", so it is going over the Internet, but it is encrypted and all local subnets (more on this later), are talking to each other, well locally.
Why would I bother with this?
If it's not clear from the previous paragraph, you can use this setup in order to create a large local network over MAN/WAN layout so you do not have to expose each location to the Internet. This way you are minimizing attack vectors, and simplifying internal communication while increasing security.
What do I need to get this to work?
As mentioned before there are certain prerequisites.
- Compatible site-to-site VPN router (it doesn't have to be Synology)
- Public static IP address or a public FQDN name
- Separate local subnets on each location
- Licenses*
Considering that I am talking here about the VPN Plus Server solution it is clear that I will be focusing on Synology router products, as well their OS, Synology Router Manager (SRM).
In order to get this configured you will need a Synology router (but not mandatory) that has site-to-site VPN functionality. Luckily, all Synology routers to date (all four of them), are compatible with the latest version of SRM that supports the beforementioned VPN Plus Server package.
When it comes to site-to-site functionality there are limitations in terms that not all models support the same amount of concurrent connections. So, depending on your needs be sure to check the data below for the appropriate model if you plan on using the Synology router.
| Model | Max connections |
|---|---|
| RT6600ax | 20 |
| RT2600ac | 10 |
| MR2200ac | 4 |
| RT1900ac | 4 |
Depending on your ISP options and your contract, you will have a public static or dynamic IP address. What this means is that you will be able to configure your site-to-site setup by using your static IP address, or if you are running a dynamic one (changes every 24/h or so), you will have to use some sort of public dynamic DNS (DDNS) service that will give you a public name and associate it with your current public IP address.
This will be necessary if you don't want to change your configuration every time your public IP address is changed. There are many DDNS services, and Synology also provides one for free, so you can configure one as needed.
The third point above mentions local network subnets. Each location you want to connect to will have to have a unique local subnet so there is no overlap and collisions. As an example, if one location is running 10.30.50.0/24 then any other location will have to be configured to 10.30.55.0/24, or 192.168.10.0/24 it really doesn't matter, as long as they are different and unique.
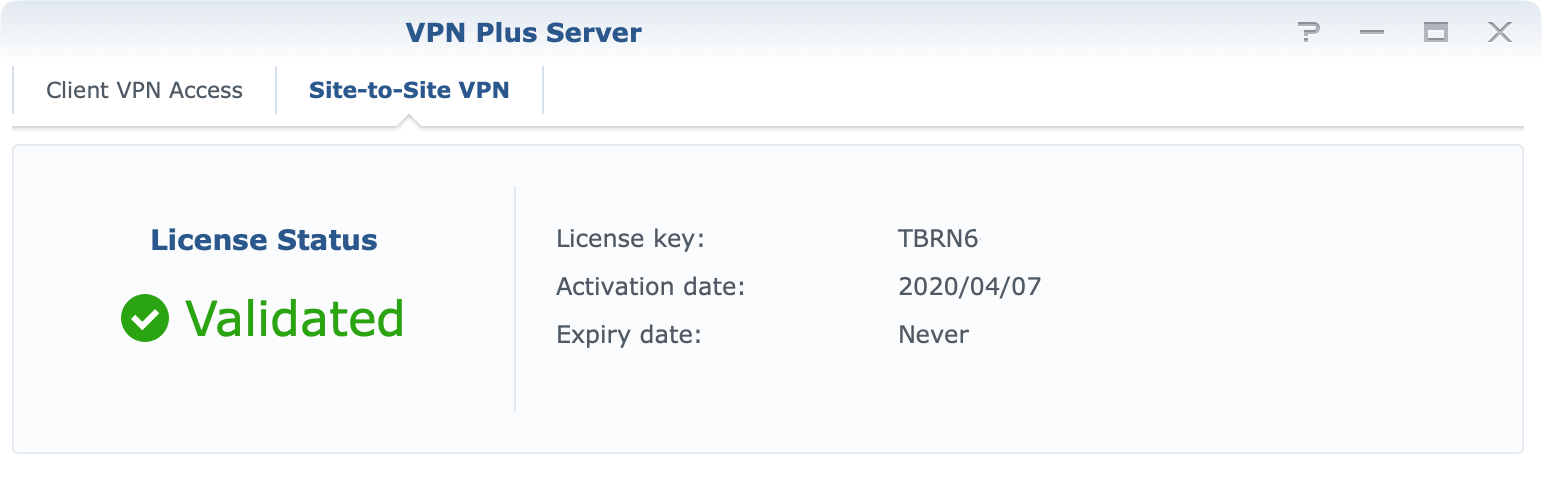
Finally, licenses. Site-to-site VPN in SRM requires a valid license in order to work. Considering that you can buy licenses it is not a problem to get them configured in the end, but if anything good has come out of the COVID-19 situation is that all Synology licenses are free forever. This was announced in September of 2021 by Synology.
Under the new program, new and existing owners of Synology's RT1900ac, RT2600ac, and MR2200ac wireless routers can activate perpetual Client VPN Access and Site-to-Site VPN licenses at no additional cost, forever.
How to configure a site-to-site VPN?
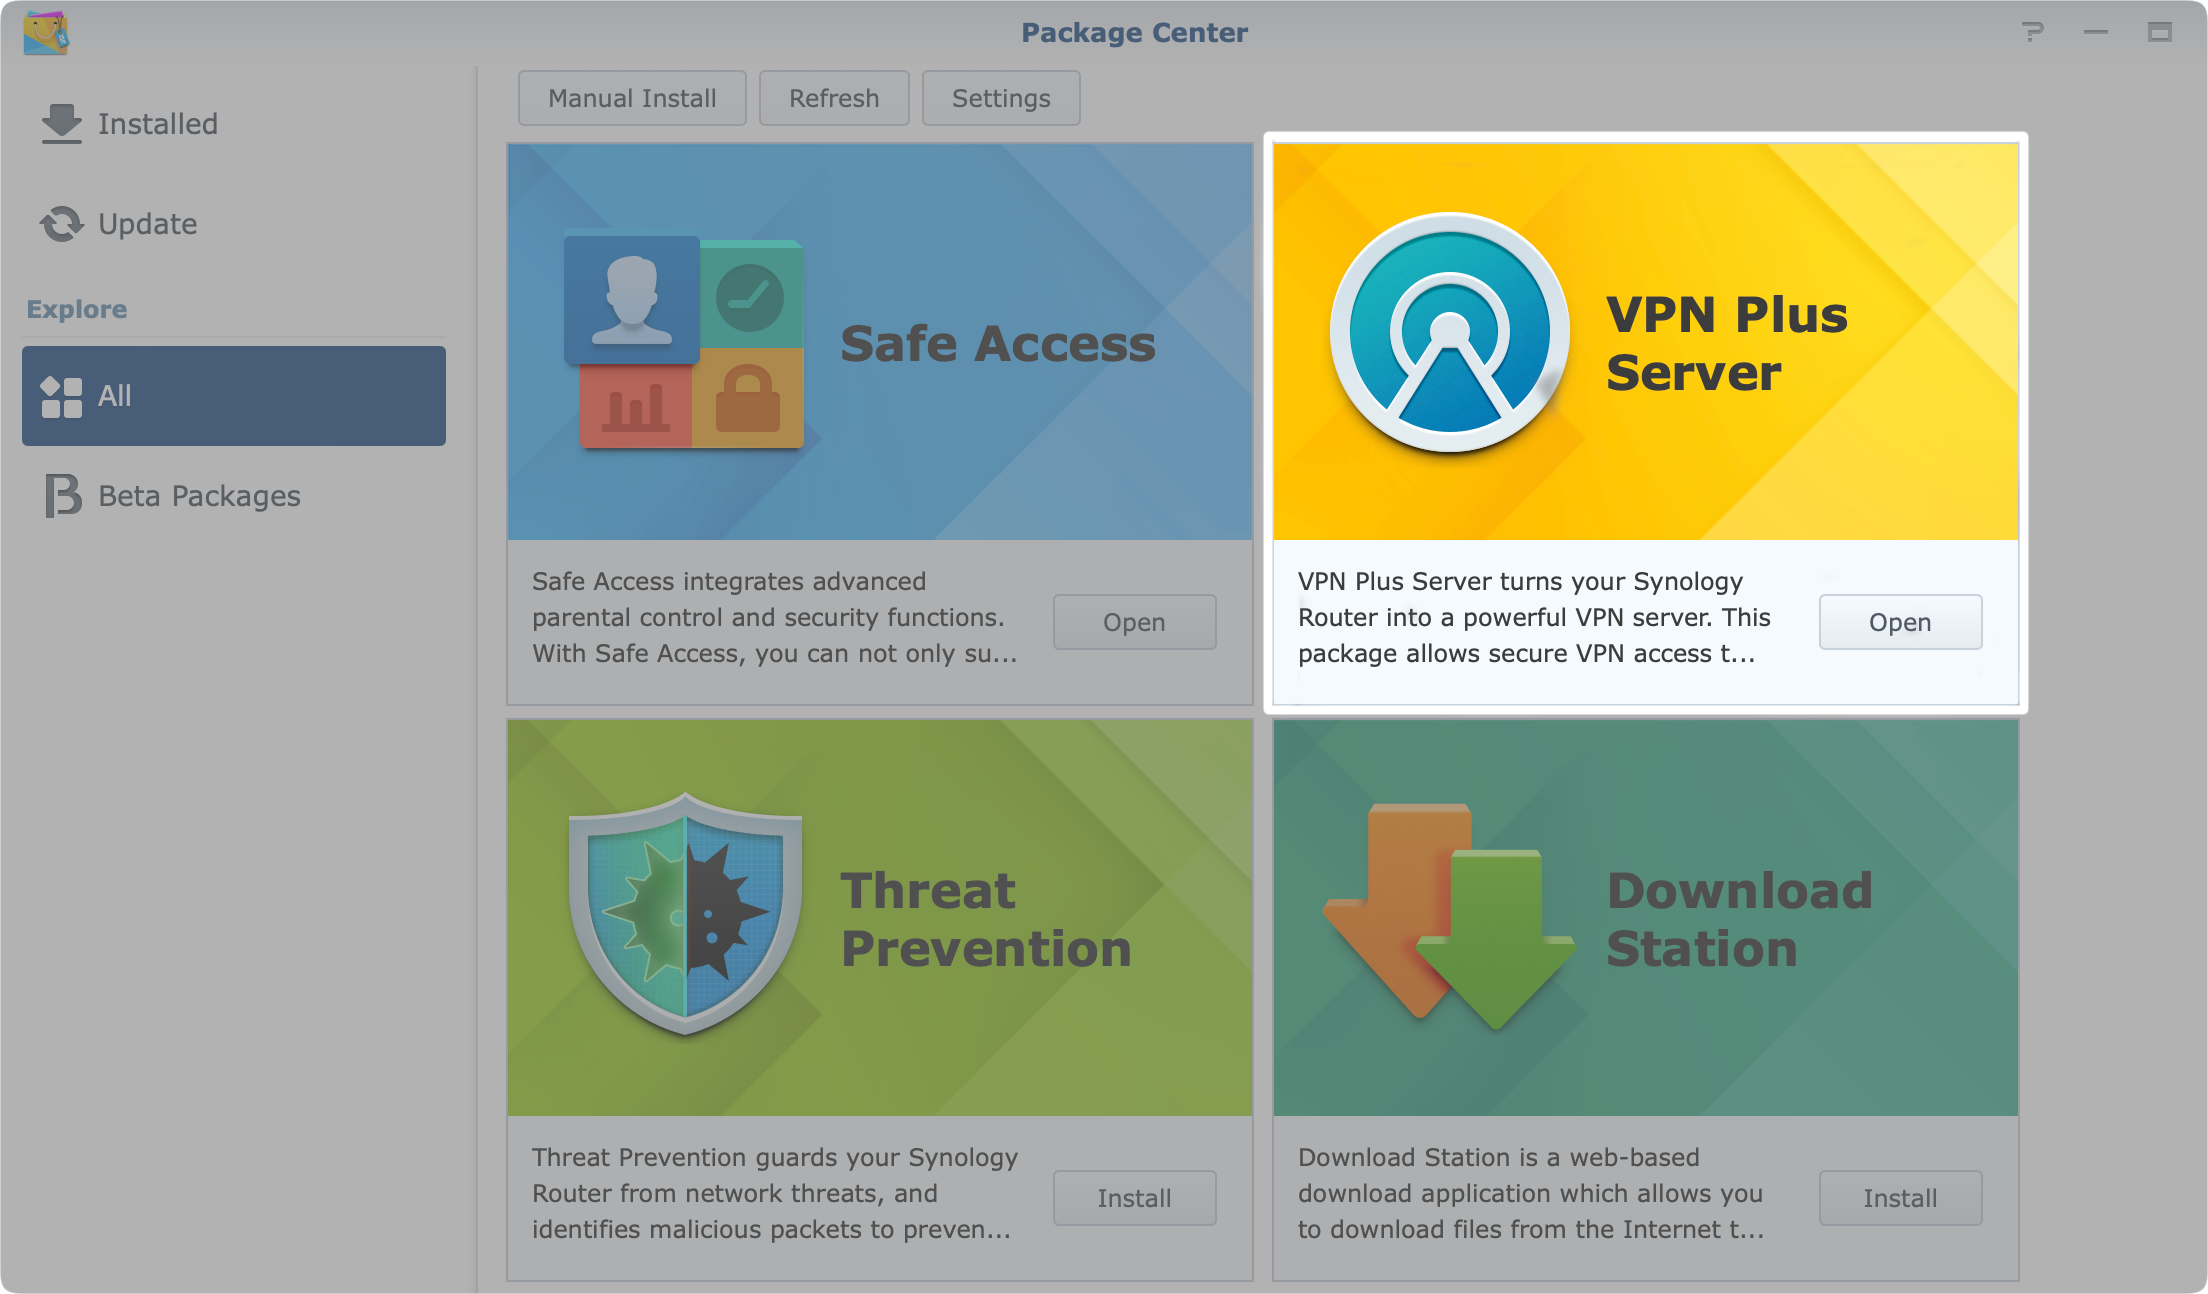
The first thing that needs to be done is that you have to install VPN Plus Server package from the Package Center.
Once completed, open the application and move into the Site-to-site VPN section in the left-hand side menu.
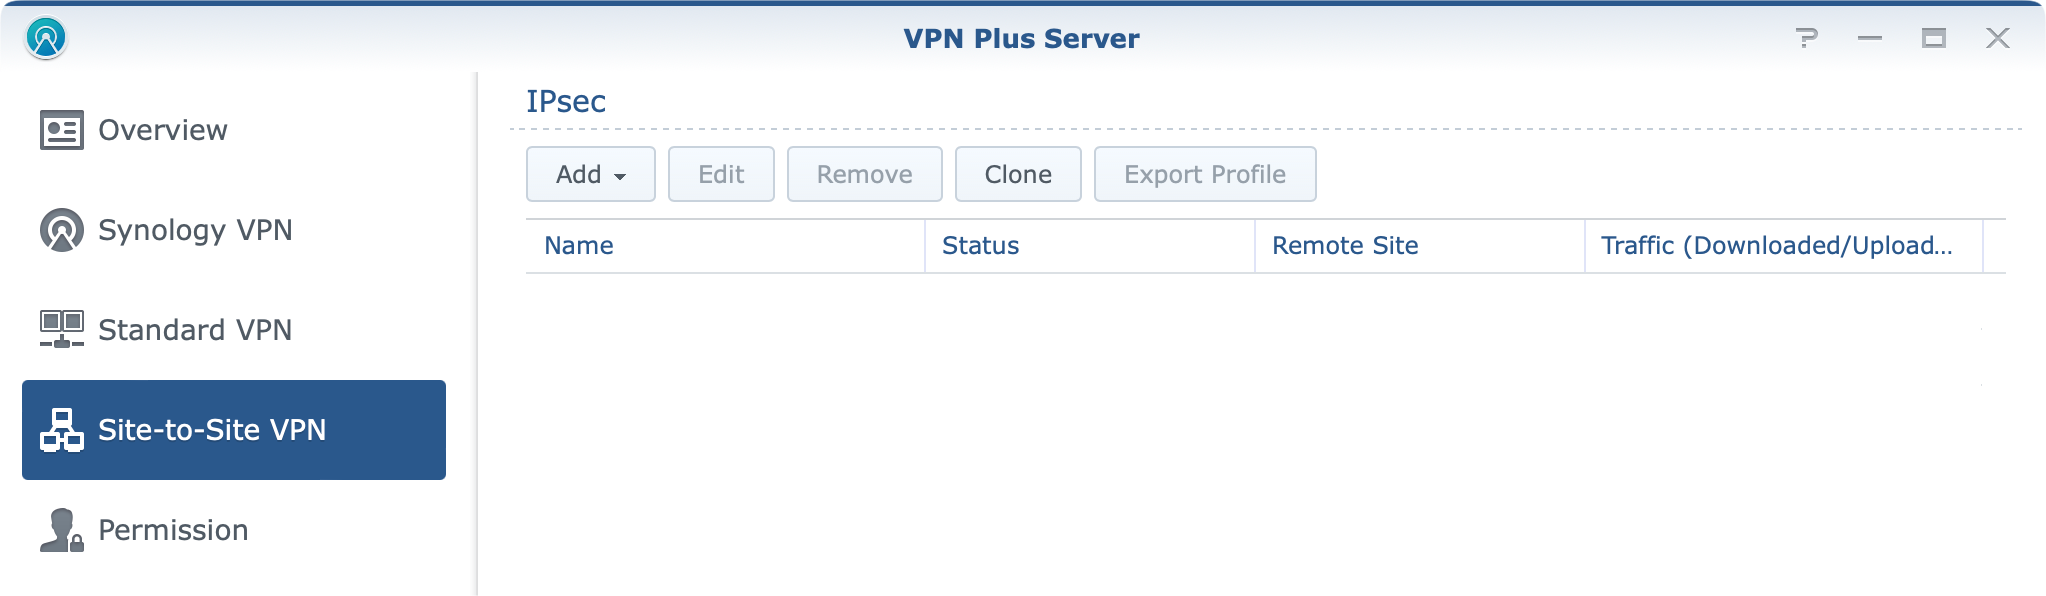
Now, from the Add dropdown menu, select either Manually or Import profile option. Depending on if you are doing it from scratch or maybe migrating and connecting your 2nd or 3rd location, you could then simply export and import your existing IPSec configuration.
In case you are doing a manual configuration for the first time, it should be configured similar to this.
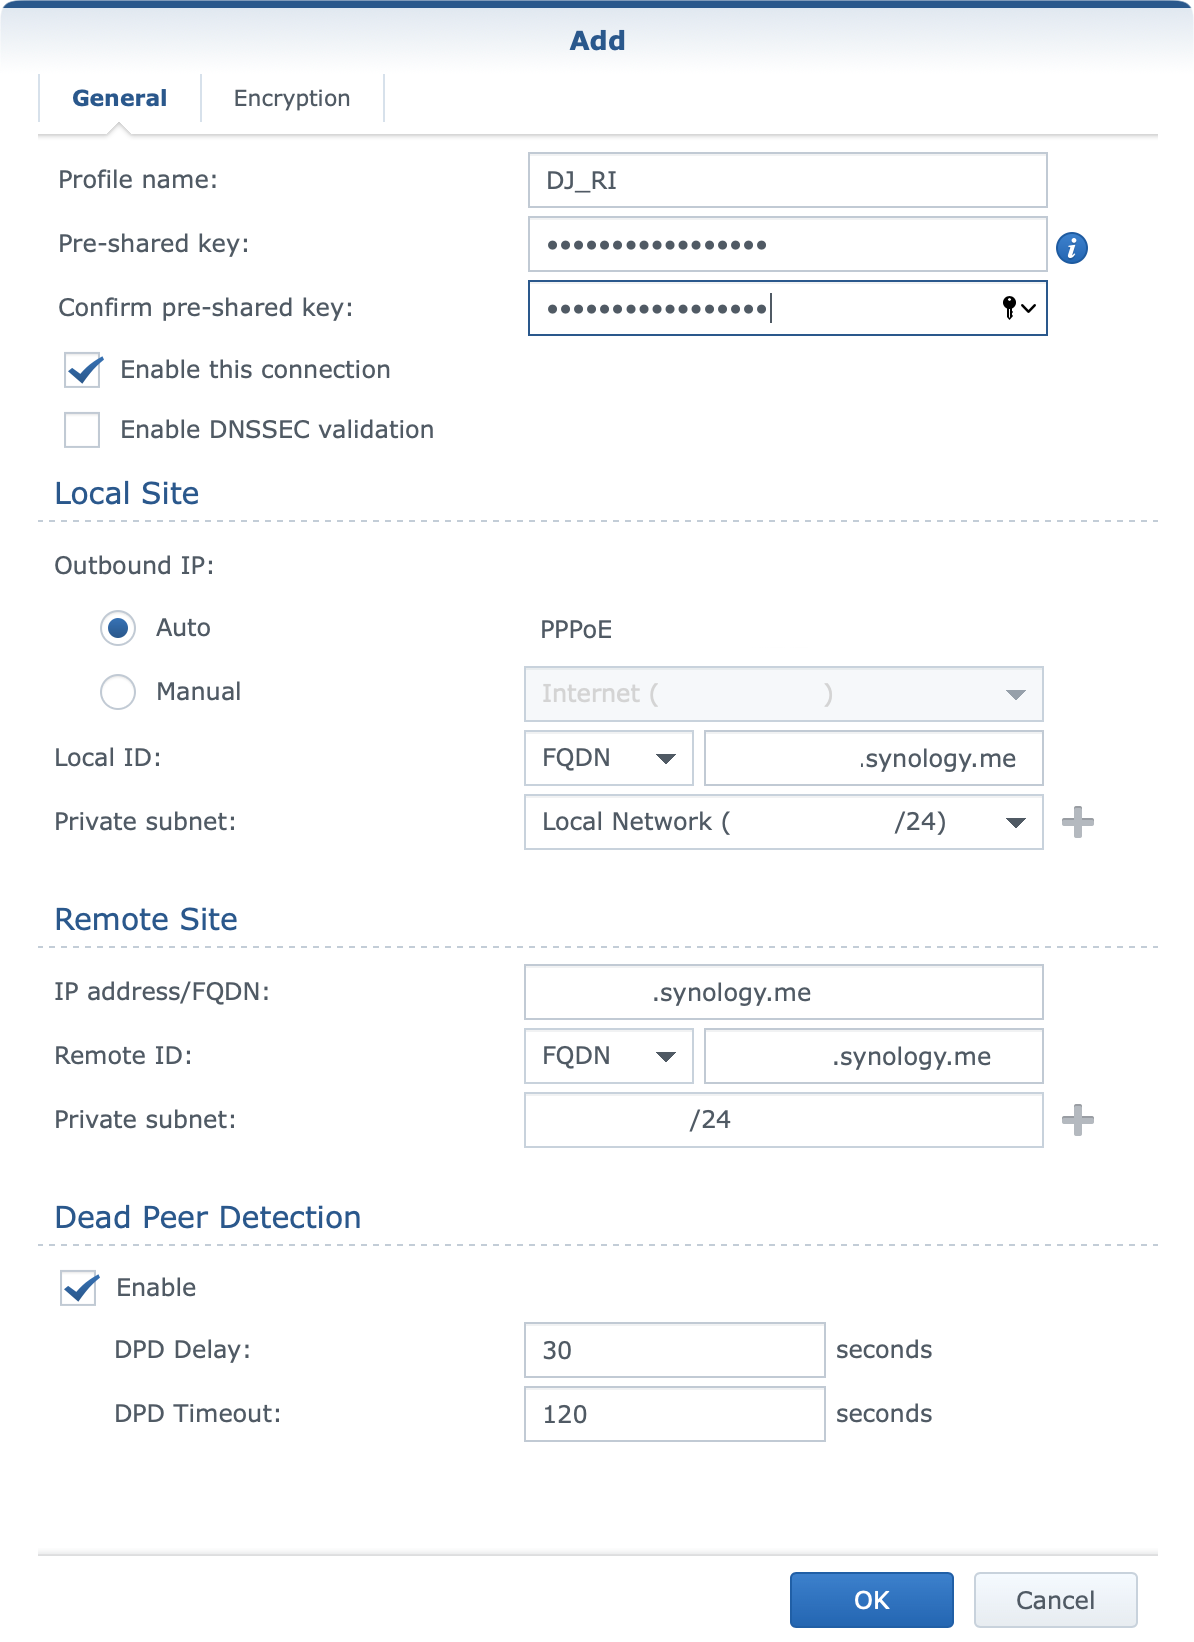
Let's explain a bit what needs to be configured here and how.
You will configure a profile name of your choice as this will be visible at the end inside your VPN Plus Server site-to-site section. Give any descriptive name that you want. Alongside that, enter a unique pre-shared key also of your choosing.
Obviously, you will activate enable this connection setting if you want this point to start connecting to other locations. Regarding enable DNSSEC validation option you can try and turn it on, but if you are unable to get a successful connection, try and turn it off, and see if that will help.
Moving on into the Local Site section there are some options here that need your attention.
The first element is the outbound IP setting. If you are running a PPPoE connection from the same router, and use it to get your public address then you can leave it as it is. In any other case (secondary adapter for example), you will choose the manual option instead and select your connection that will be declared as your "public" outgoing interface.
The local ID setting in this case can be whatever you want because this is your local end and it is not important to be exact here. I have decided to enter my public FQDN address just to keep it different from my remote site parameter.
The most important element here is the private subnet. Here you will enter the local LAN subnet that you want to visible to any other point that will be included in this configuration. So if you want access to your LAN from your remote locations, enter your LAN subnet or select it from the dropdown menu.
Next, we need to configure the remote site options.
Similar to the local settings, you will need to enter the IP address/FQDN value in either format. If you are running a public static IP address you can use that or use any public domain name (using a DDNS name for example) instead.
For the remote ID again, you can enter any descriptive value you want, and finally the private subnet. This again is important as this is the value of the remote network subnet you want access to. Once again, as stated before, all subnets need to be unique in this case.
Once you have completed the general section on the second tab called encryption be sure to configure settings that fit your needs. These settings also need to be identical on all sites.
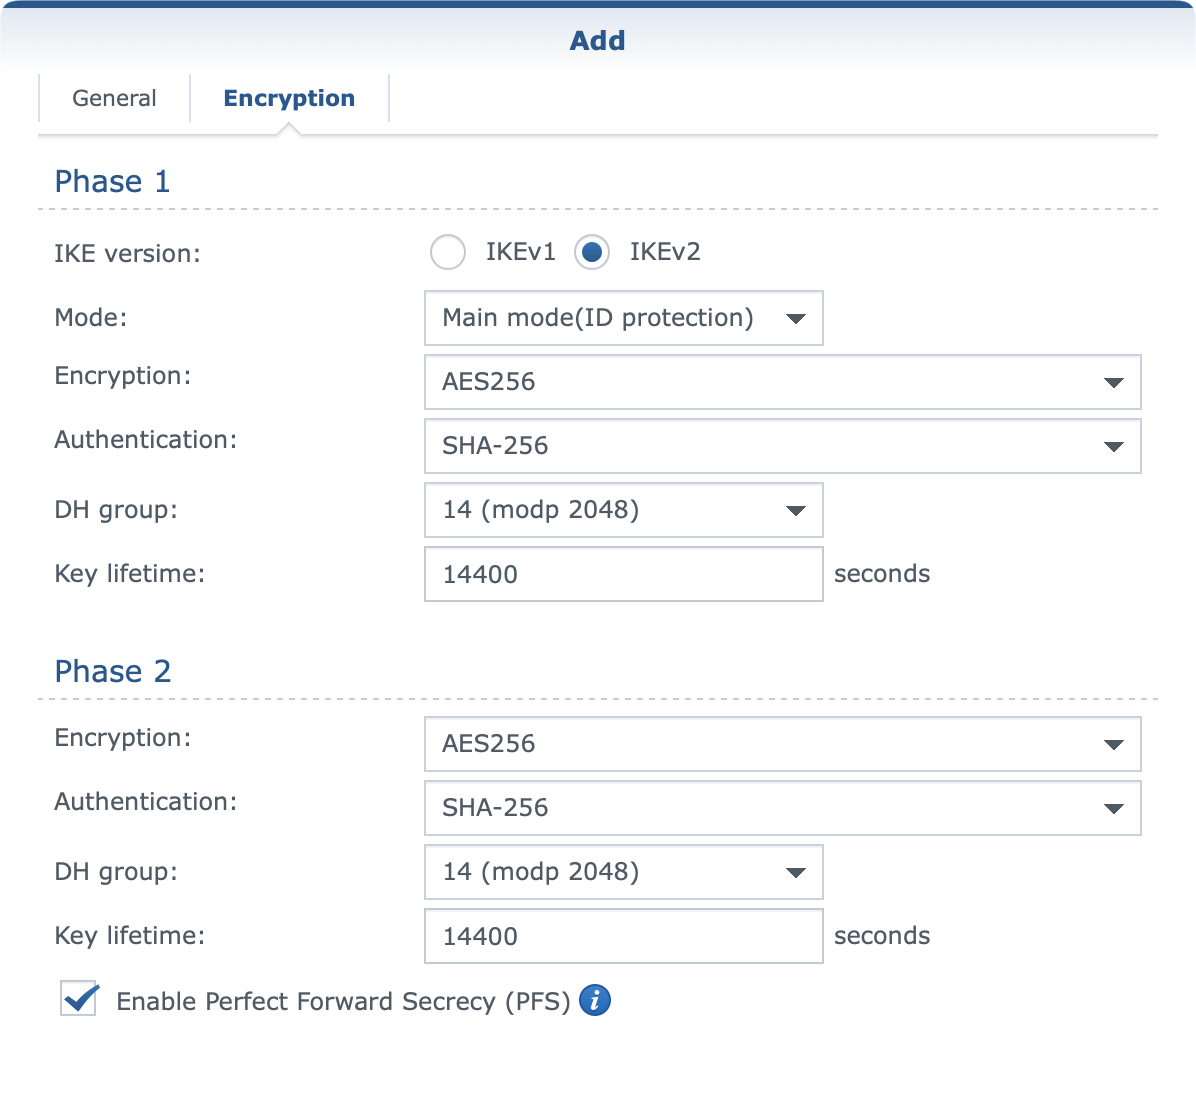
When you are all set and done, click OK on the bottom and then move on to configuring all the remaining sites that will be included in this configuration in the same manner.
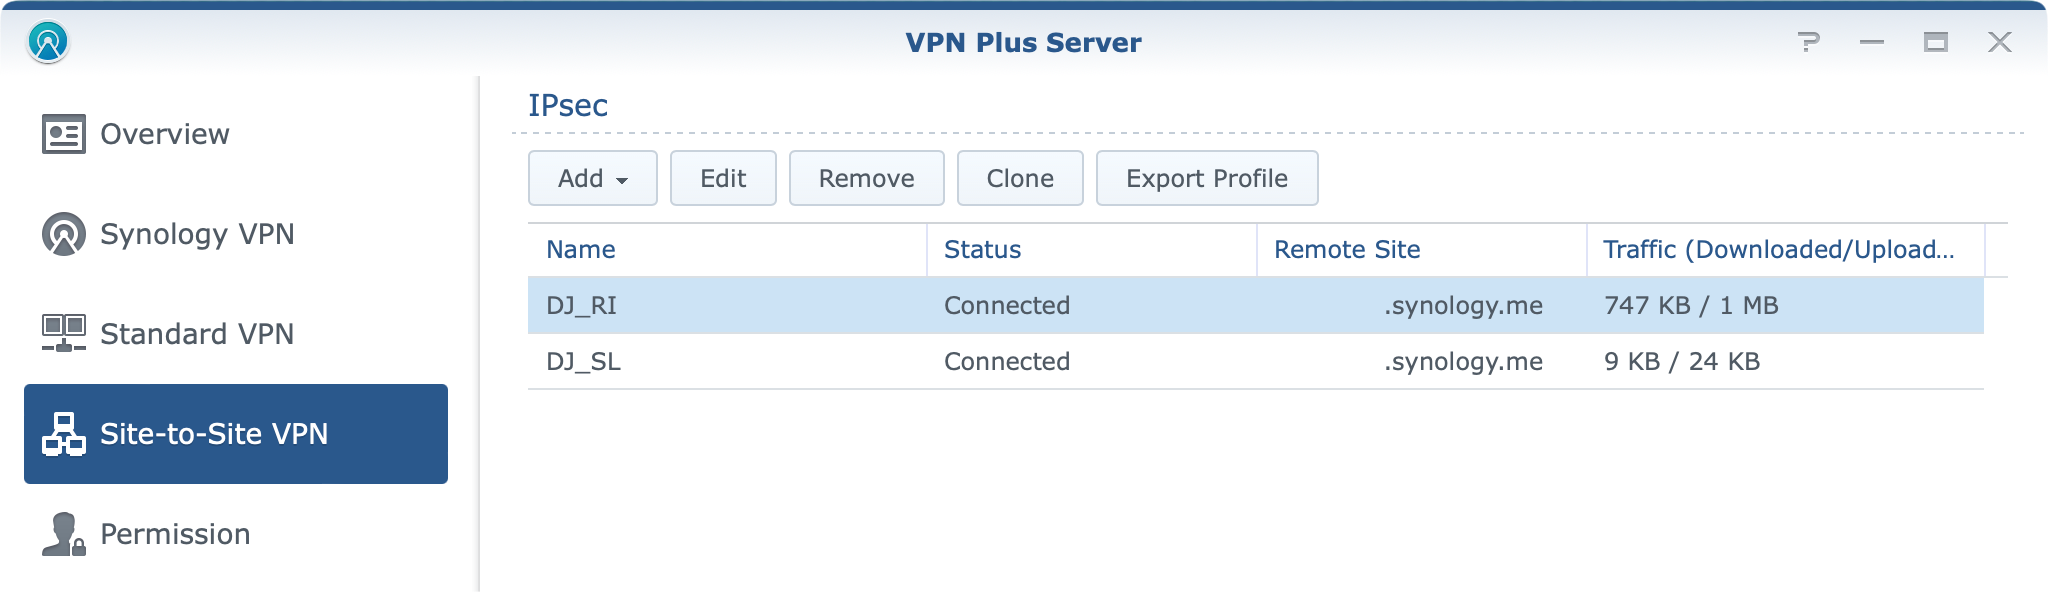
If all goes well, you should get the connected status up and running in no time. Unfortunately, the VPN Plus Server package has no log entries that would help you in case you do have any problems other than listing your status as connecting in case there is an issue.
Testing the site-to-site setup
Now that you are up and running, out of the box you should be able to ping your locations, and devices and access remote apps and services using their local domain names or IPs. But, what about speed?
Some typical usage scenarios, in this case, are file transfers and backups, right? Well in my test cases I noticed that no more than 5MB/s transfer could have been achieved in any case regardless of having more than enough bandwidth on either side.
While testing Hyper Backup the transfer was consistent and the tunnel was stable all the time. In fact no problem whatsoever regarding tunnel stability that I could notice.
While the VPN Plus Server app does have an overview section it does not provide any data at all regarding site-to-site VPN connection. This means that you will have to find some other means of monitoring your real-time transfers.
In my case, I use a GIT stack (Grafana-InfluxDB-Telegraf) to track network interface speeds, so I was able to capture transfers in real-time as they were happening.
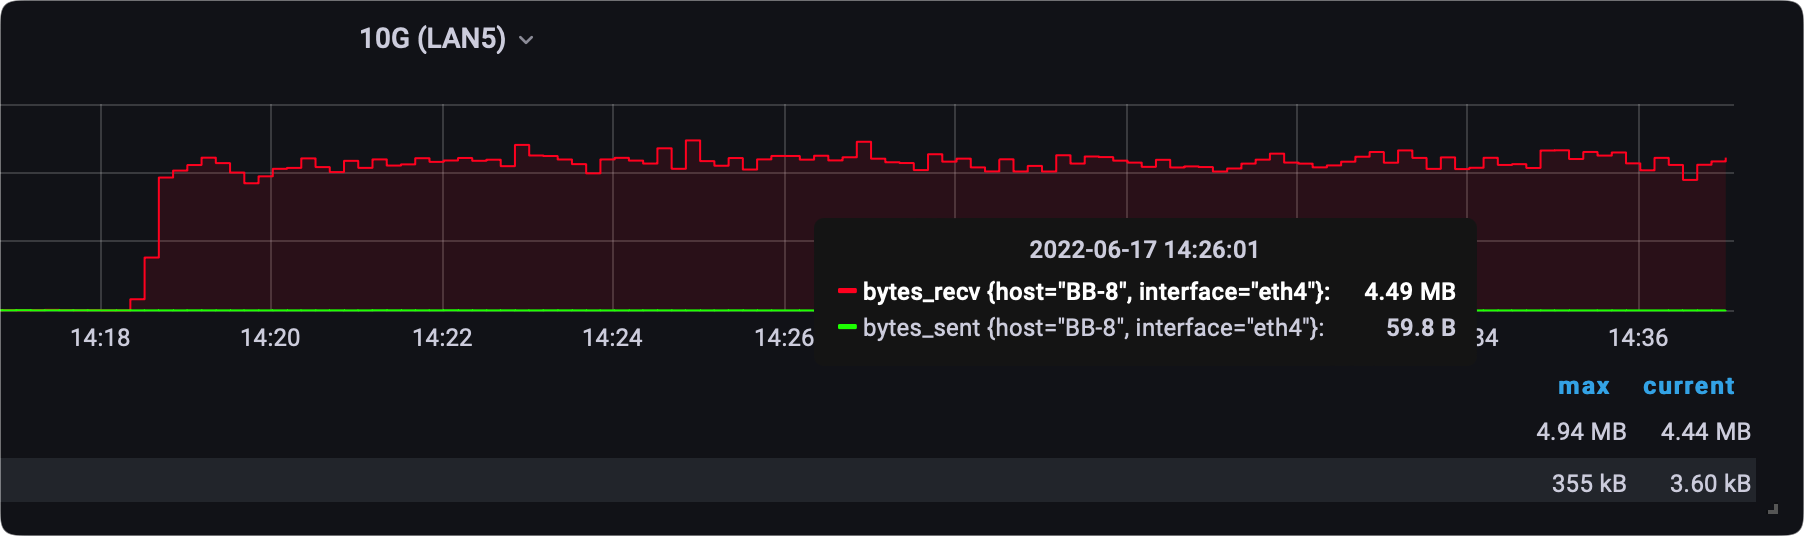
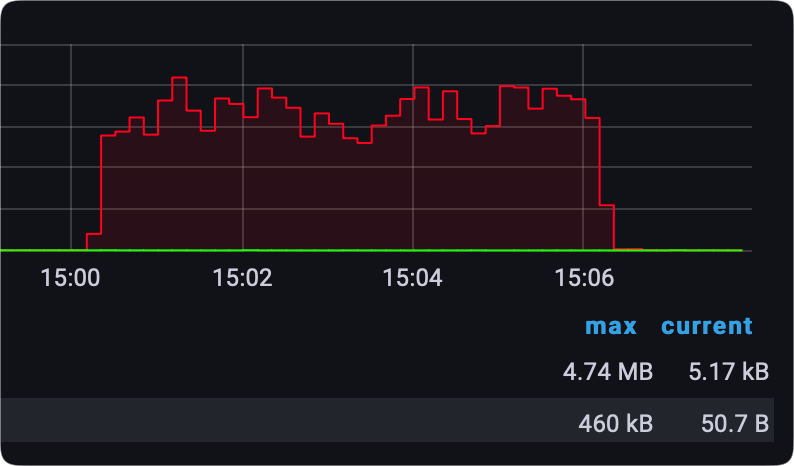
It was surprising to see that an SMB transfer of a single large file was having less consistent speeds than a Hyper Backup task, but it is what it is.
As said, the tunnel stability is rock solid, and I haven't noticed any problems in terms of reconnects (other than when the location needs to reconnect after 24h because of the ISP policy), and latency will of course vary depending on the connection and distance.
Location A <> B
PING xxx.xxx.xxx.xxx (xxx.xxx.xxx.xxx): 56 data bytes
64 bytes from xxx.xxx.xxx.xxx: icmp_seq=0 ttl=253 time=19.676 ms
64 bytes from xxx.xxx.xxx.xxx: icmp_seq=1 ttl=253 time=18.307 ms
64 bytes from xxx.xxx.xxx.xxx: icmp_seq=2 ttl=253 time=19.849 ms
64 bytes from xxx.xxx.xxx.xxx: icmp_seq=3 ttl=253 time=14.491 ms
64 bytes from xxx.xxx.xxx.xxx: icmp_seq=4 ttl=253 time=14.748 ms
64 bytes from xxx.xxx.xxx.xxx: icmp_seq=5 ttl=253 time=16.121 ms
64 bytes from xxx.xxx.xxx.xxx: icmp_seq=6 ttl=253 time=13.169 ms
64 bytes from xxx.xxx.xxx.xxx: icmp_seq=7 ttl=253 time=27.066 ms
64 bytes from xxx.xxx.xxx.xxx: icmp_seq=8 ttl=253 time=21.450 ms
64 bytes from xxx.xxx.xxx.xxx: icmp_seq=9 ttl=253 time=26.980 ms
Location A <> C
PING xxx.xxx.xxx.xxx (xxx.xxx.xxx.xxx): 56 data bytes
64 bytes from xxx.xxx.xxx.xxx: icmp_seq=0 ttl=62 time=76.130 ms
64 bytes from xxx.xxx.xxx.xxx: icmp_seq=1 ttl=62 time=62.809 ms
64 bytes from xxx.xxx.xxx.xxx: icmp_seq=2 ttl=62 time=70.996 ms
64 bytes from xxx.xxx.xxx.xxx: icmp_seq=3 ttl=62 time=69.432 ms
64 bytes from xxx.xxx.xxx.xxx: icmp_seq=4 ttl=62 time=67.917 ms
64 bytes from xxx.xxx.xxx.xxx: icmp_seq=5 ttl=62 time=65.169 ms
64 bytes from xxx.xxx.xxx.xxx: icmp_seq=6 ttl=62 time=64.421 ms
64 bytes from xxx.xxx.xxx.xxx: icmp_seq=7 ttl=62 time=69.815 ms
64 bytes from xxx.xxx.xxx.xxx: icmp_seq=8 ttl=62 time=128.287 ms
64 bytes from xxx.xxx.xxx.xxx: icmp_seq=9 ttl=62 time=204.359 ms
Logs and reports
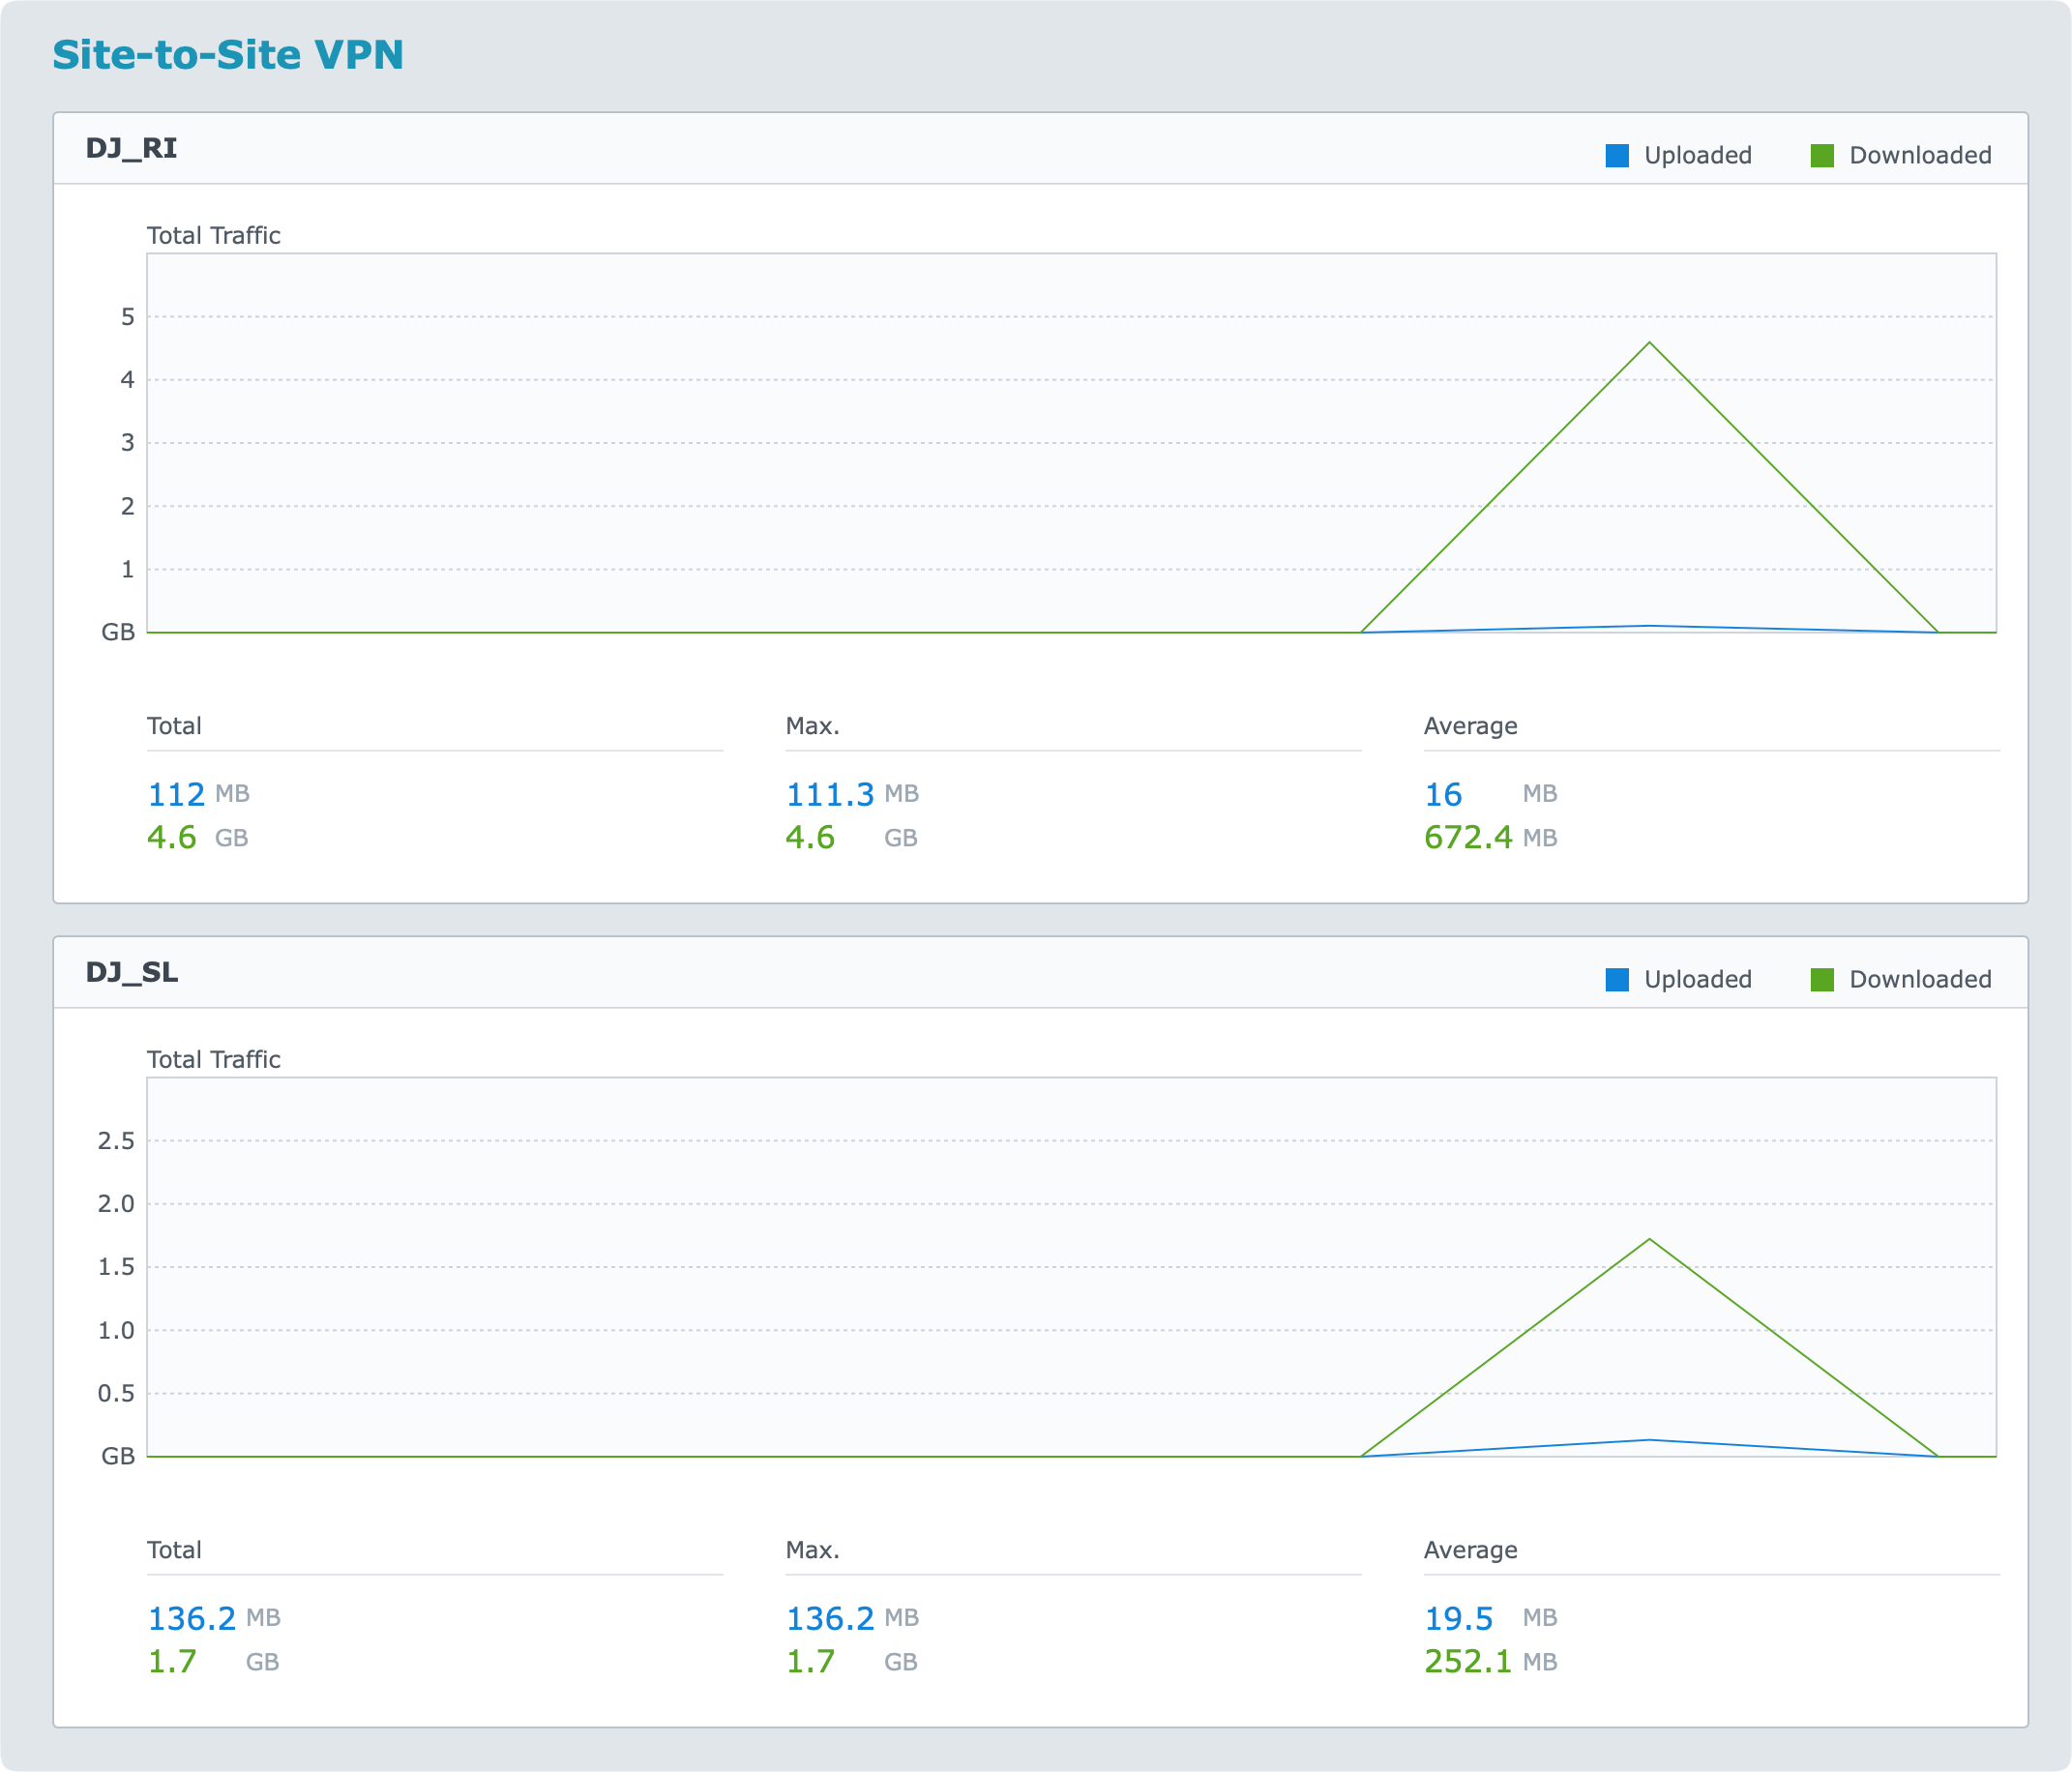
If I had to pick just one thing that I don't like about the VPN Plus Server it would have to be logging and monitoring. Now while the package does have a log section it is very poor in terms of details when it comes to site-to-site. Also, the real-time overview of traffic, speeds, and connections are non-existing.
The only thing you can do to get some sense of traffic happening is to run daily/weekly or monthly reports.
So, if you want real-time information you will have to capture that data on your router, or by some other platform that will capture SNMP data for example.
All in all, not difficult to configure, completely free if you are running a Synology router, and stable. Speed could be a bit better but your results might vary as well, so best to configure it and test it out. Also, site-to-site VPN is meant to be secure, not mainly fast, so can't really complain.
Leave me a comment below if you have anything to add on the subject, or if you have any questions, suggestions, or critics.