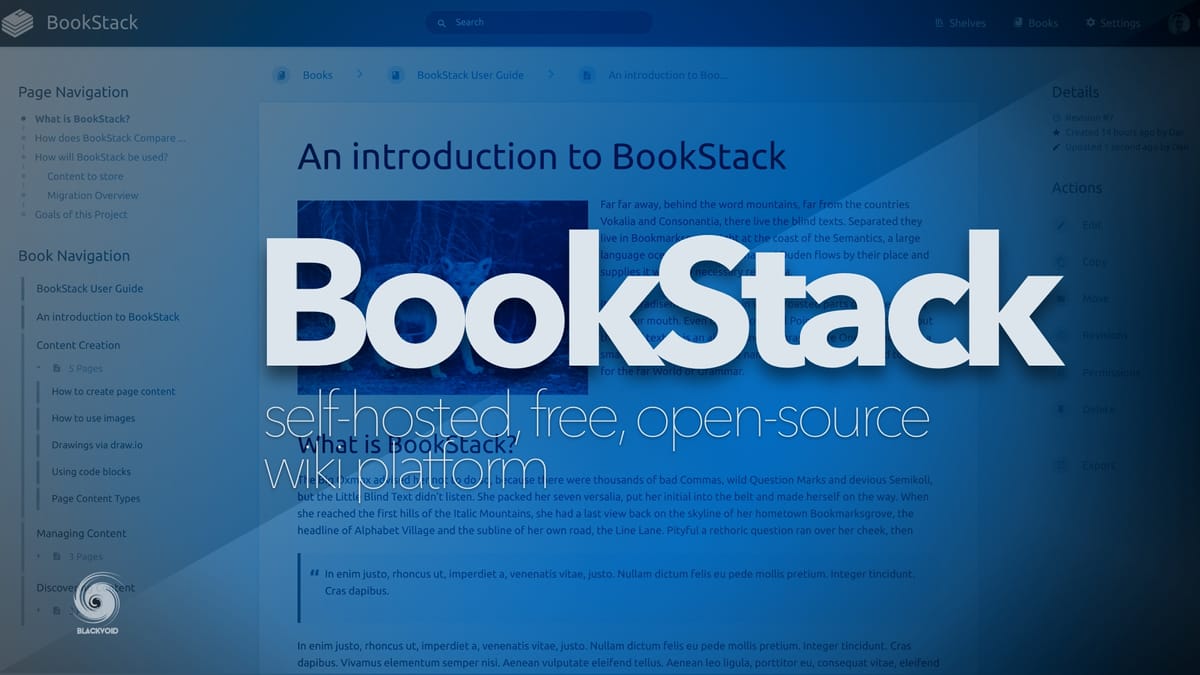
BookStack - self-hosted wiki platform

Another long overdue post. A while back I have been looking for a self-hosted wiki platform for my needs. Wanted a simple, yet powerful platform that will allow me to keep track of all my docker-compose scripts, know-how, and more.
There is a TON of software out there, but I have settled on BookStack. This platform has been around since 2015 as a product of one man, Dan Brown.
The reason I didn't write about this solution before was that I wasn't sure if I will continue to use it, and if it will remain in constant development or not. Well since April, BookStack has moved outside of the beta stream, and to top it off, Dan will be quitting his current job (end of September) to focus on the platform for at least 6 months before looking for a new role.
Another reason for this post is that just a few days ago, the MFA feature was implemented (2FA) that allows you to further protect your account.
This article will be a short presentation of some cool features that BookStack has to offer as well as a guide on how to run your own solution using Docker and reverse proxy (also using Docker).
TL;DR: if you want to skip the BookStack feature, and examples part, and jump to the Docker setup, feel free to scroll down to the BookStack Docker compose heading
What's BookStack all about?
As I said in the intro I was really looking for a simple, stable wiki platform that has several things that I wanted.
- To be stable
- Multi-user setup
- Permission administration and delegation
- Content export
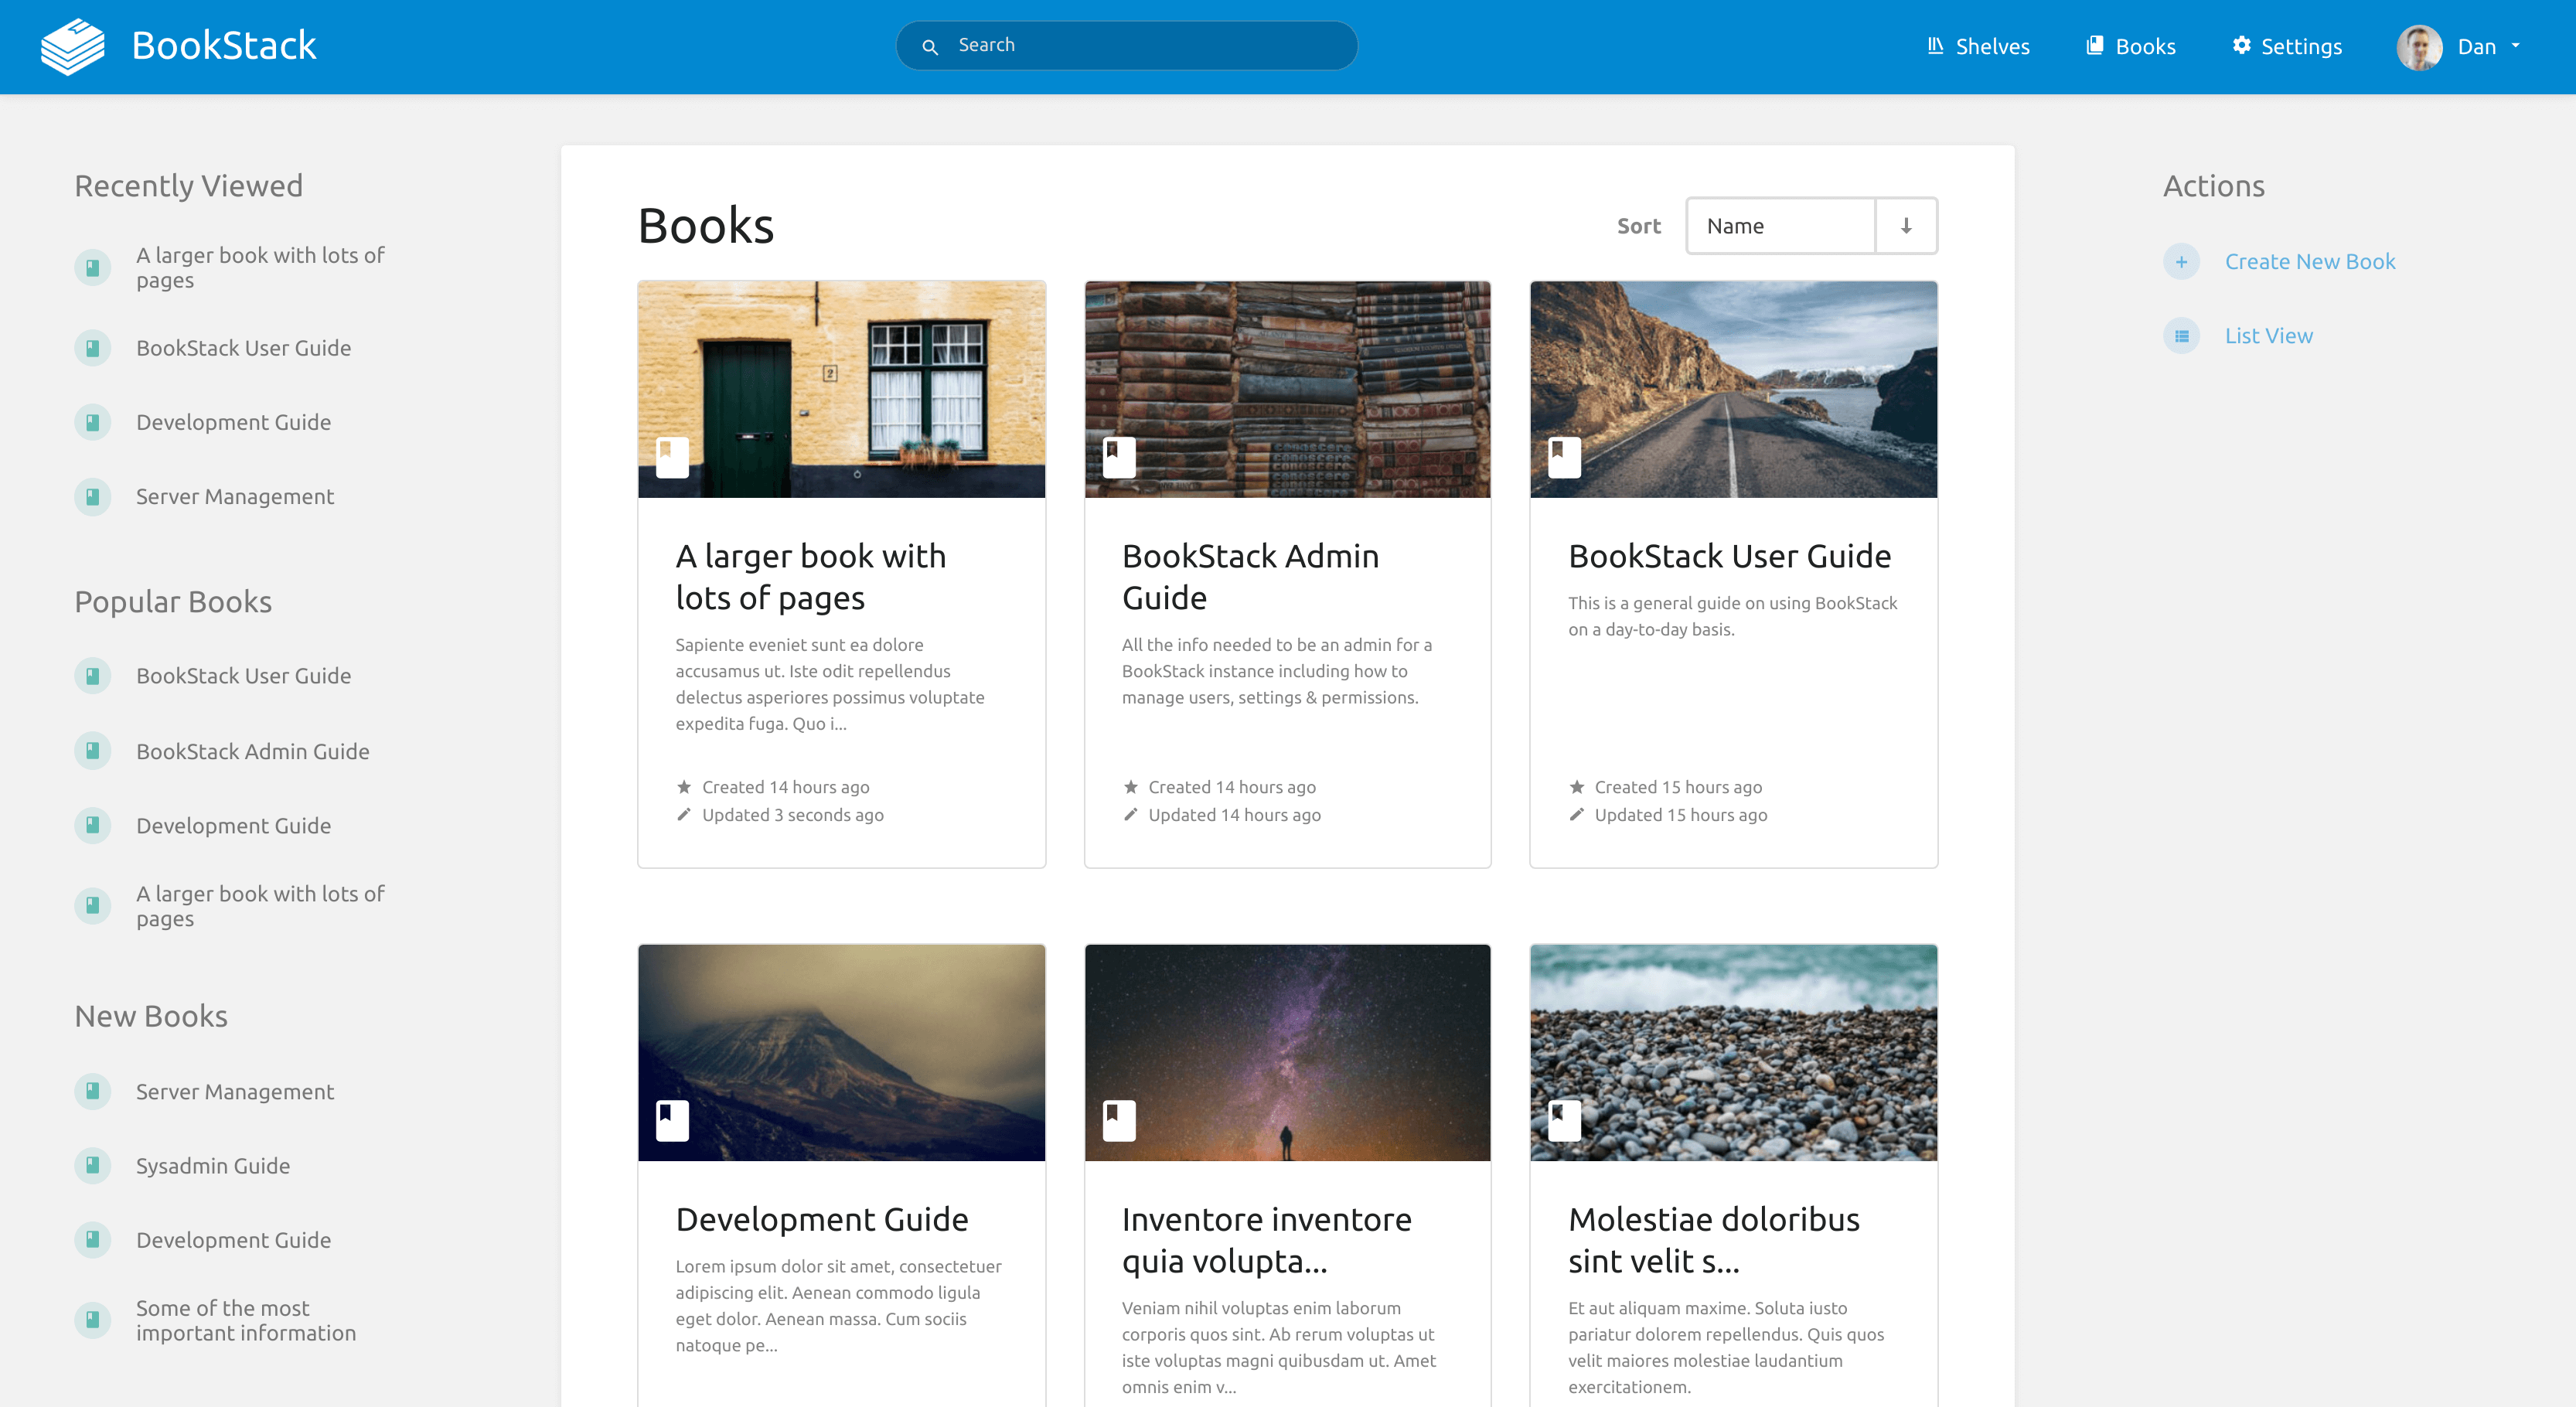
- Some way of keeping things organized (shelves, books, chapters, etc)
- Tag support
- Super fast search
- Easy to deploy and not complex (not too many components)
...
Ok, so not the shortest list, but the reason for all those things was mainly that I don't want to move to a new platform 6 months later. Once you start running with a particular solution and get content inside it, it is not that easy to migrate, and I really don't want that to happen.
At the moment, I am certain that will not happen (or at least not any time soon), so here we are.
BookStack is a light, open-source, and free wiki solution that you can self-host on your own hardware. Just like many other apps and services this one can run inside a Docker container that is maintained by linuxserver team.
It requires MySQL database as its backend platform, and no other 3rd party elements are needed (like outside authentification mechanism).

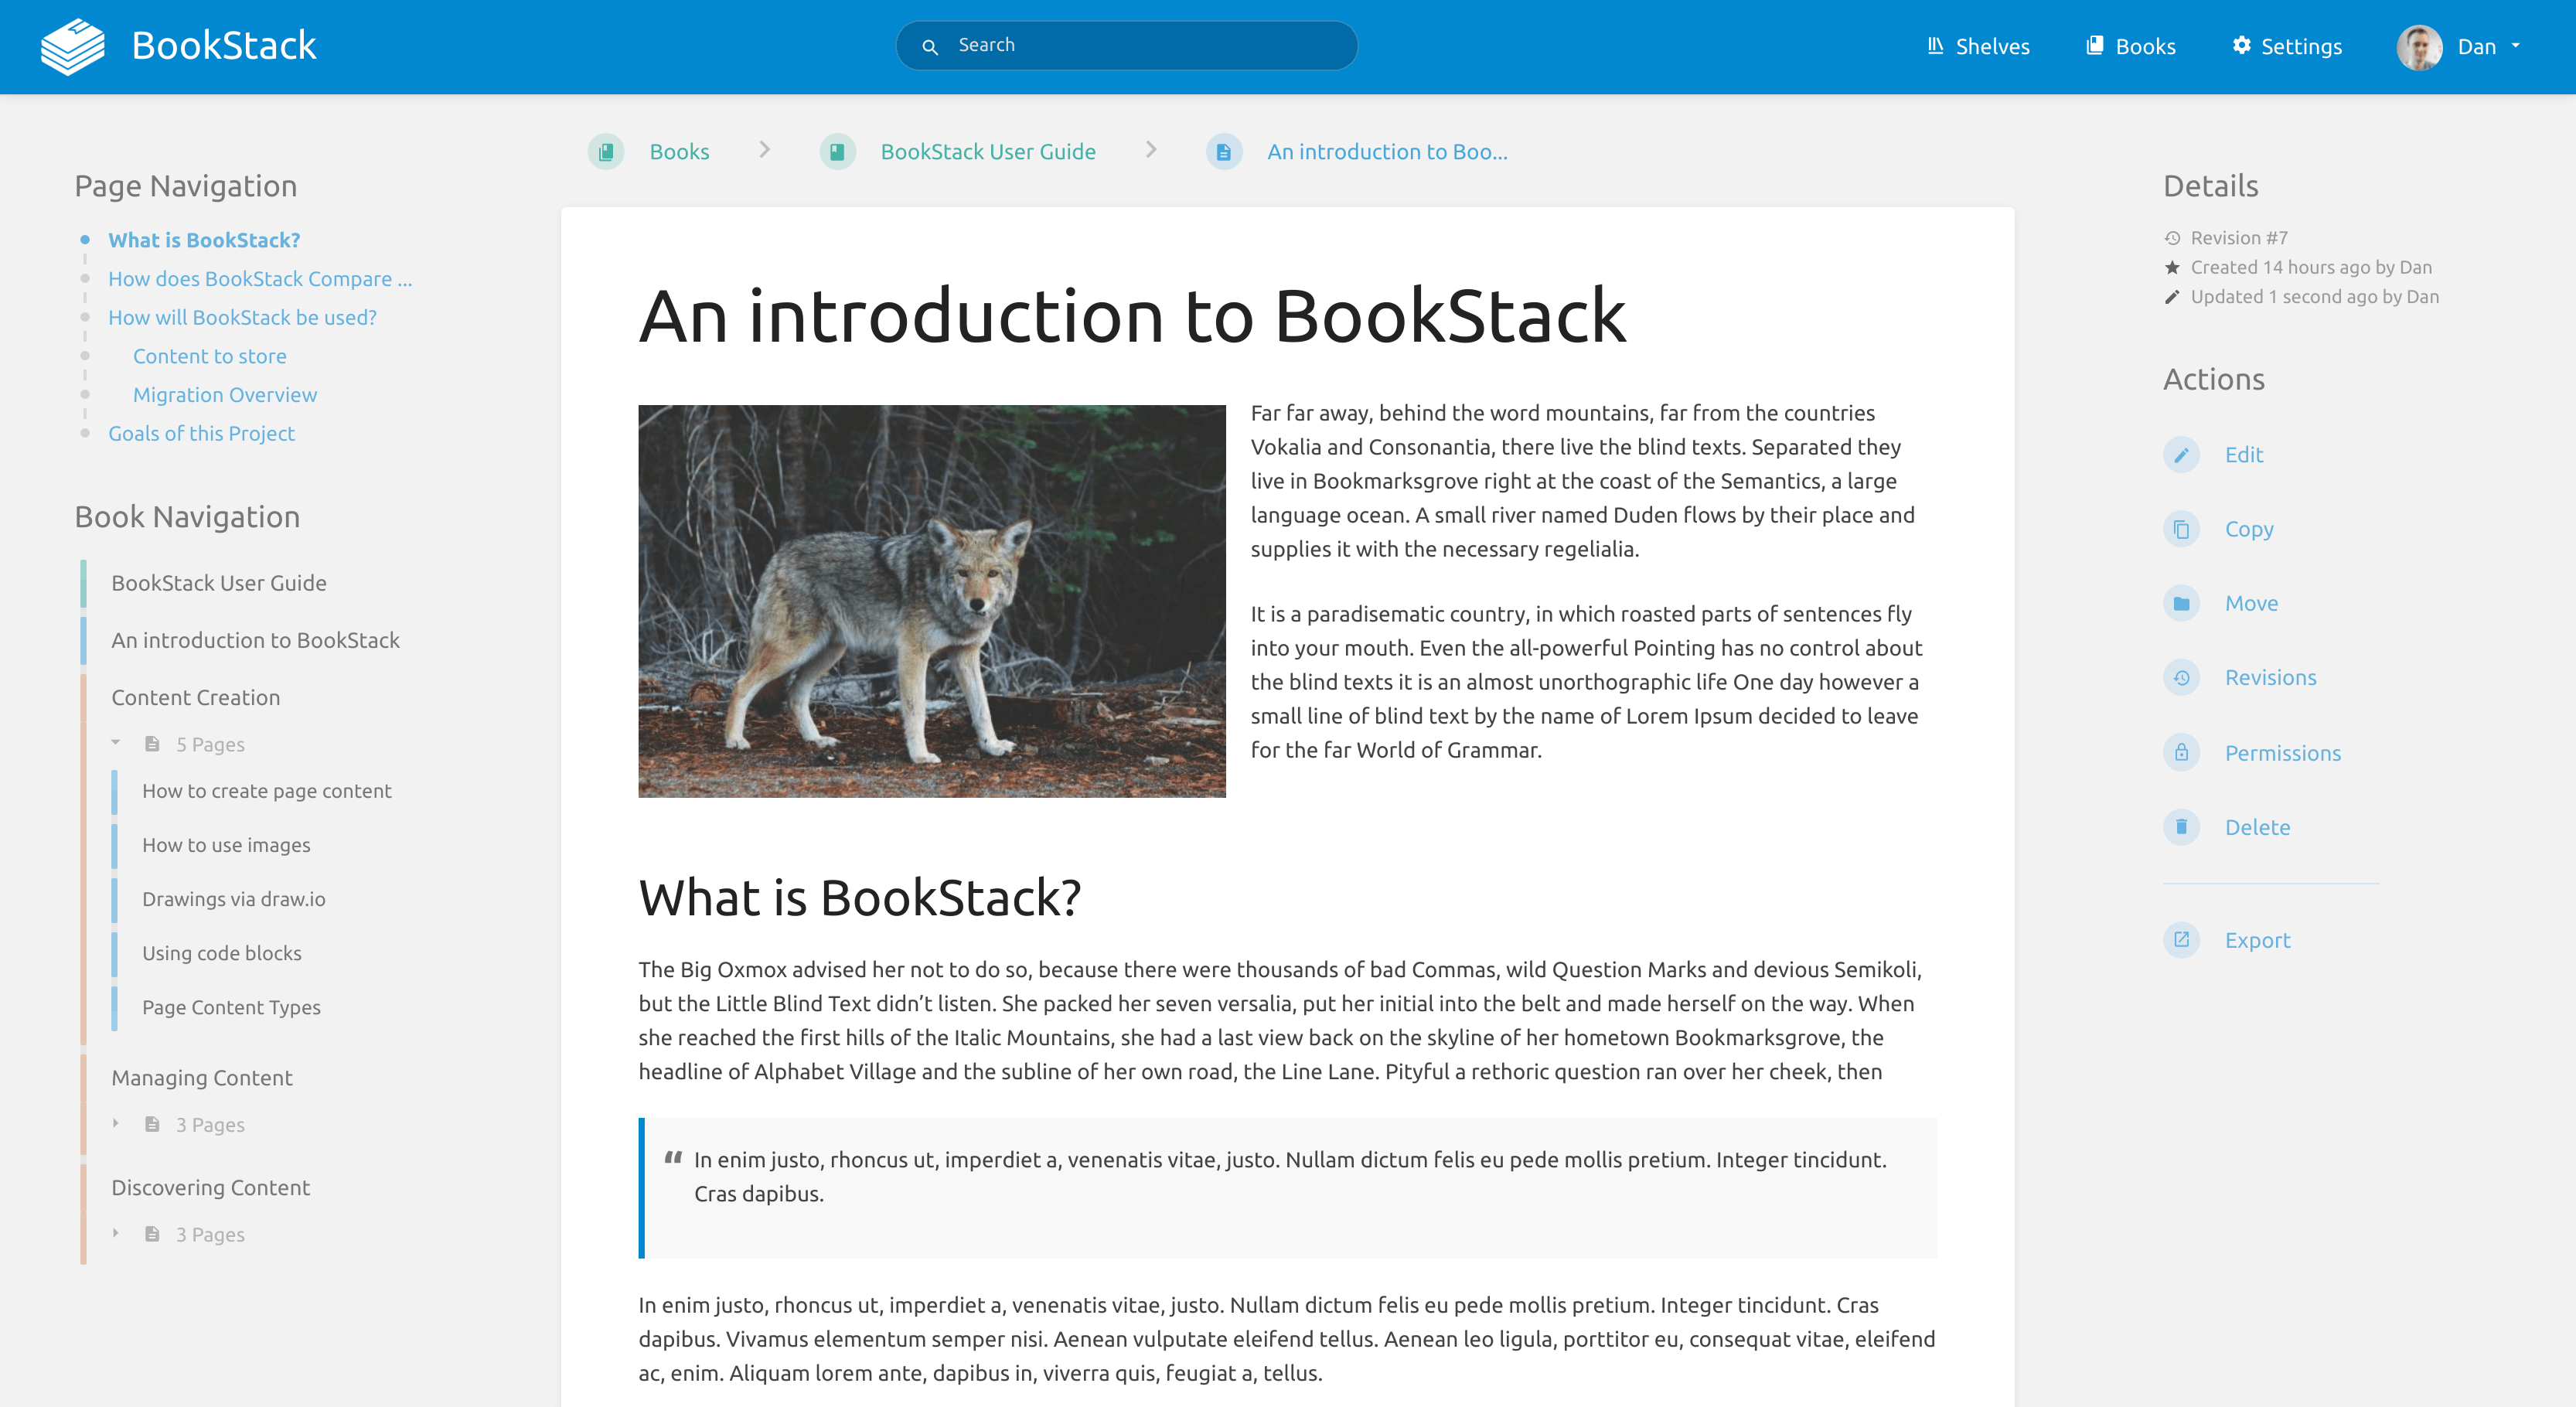
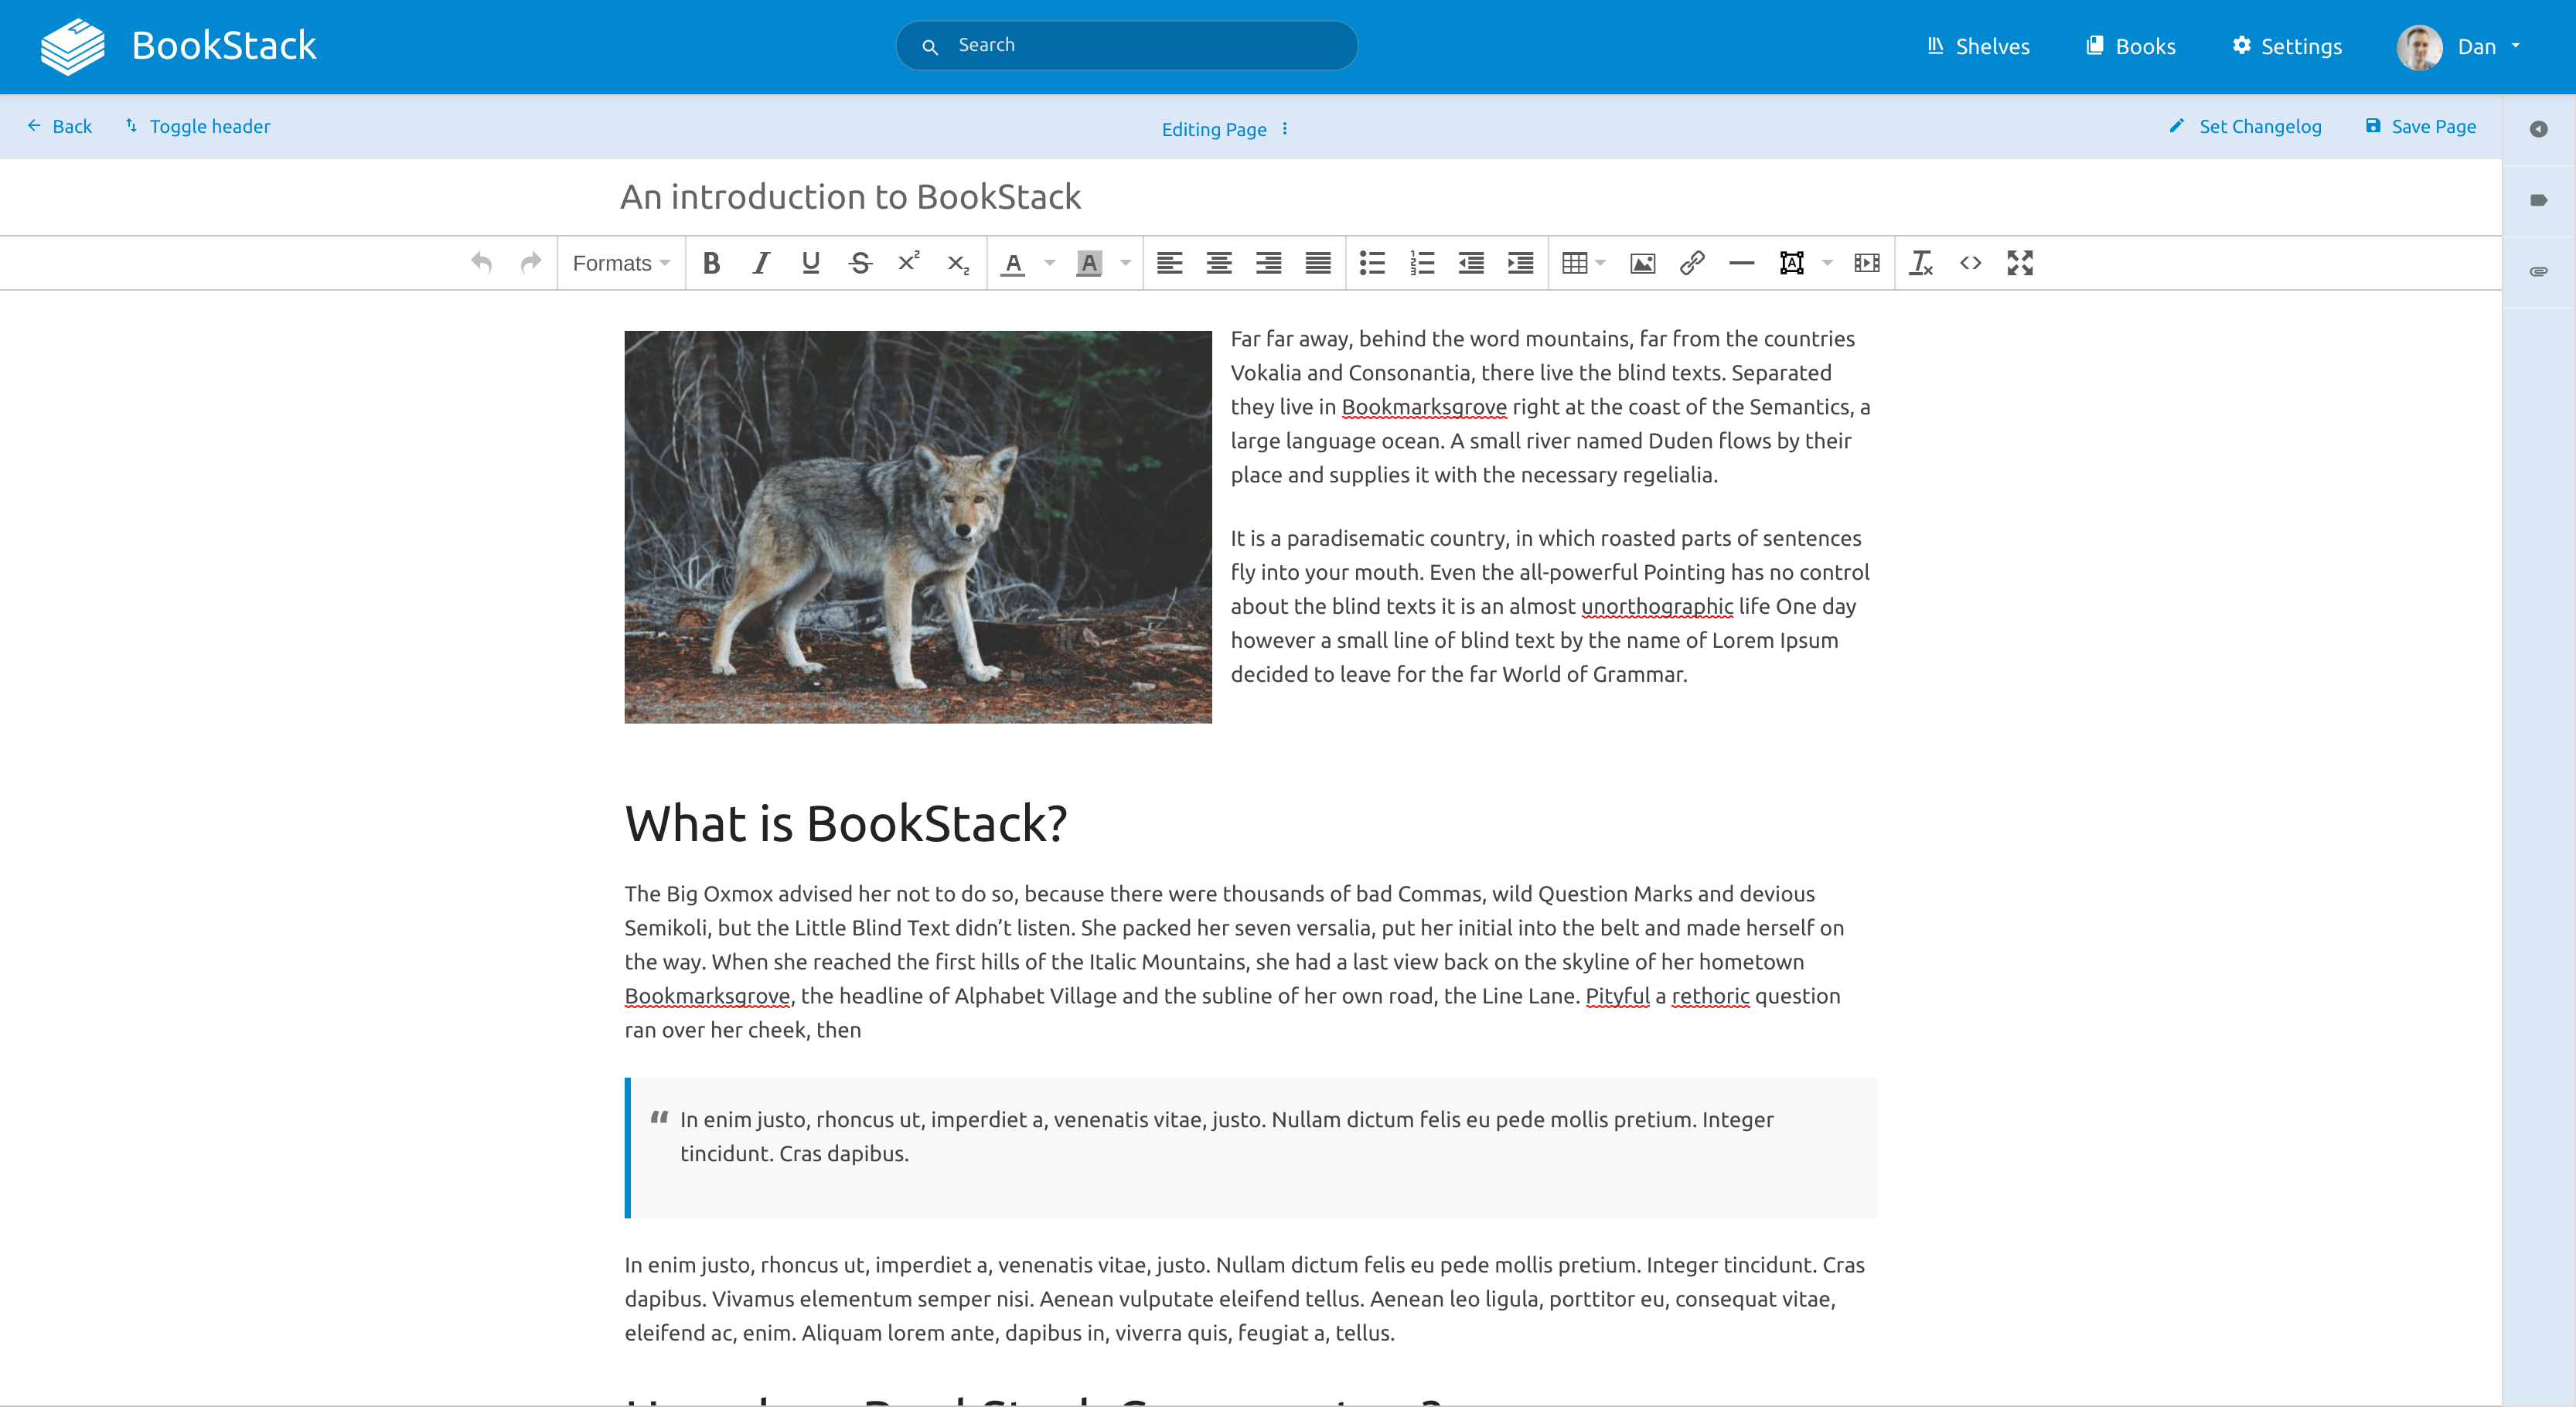
The app itself uses PHP with the Laravel framework. The organization of the platform is based on books, chapters, and pages (hence the name), and in my mind, it makes perfect sense. There are also shelves, to begin with, so you will have a feel like walking into a library.
BookStack uses a WYSIWYG interface for editing along with a supported markdown editor if that is your cup of tea (I love using markdown and this is one of the reasons why I love it).
The best thing for me is a quick global search feature. It really works great. No need to locate the book or chapter and then start searching pages for something. No, I just type in what I am looking for at the top (well centered on the main navigation bar), and boom, there it all is.
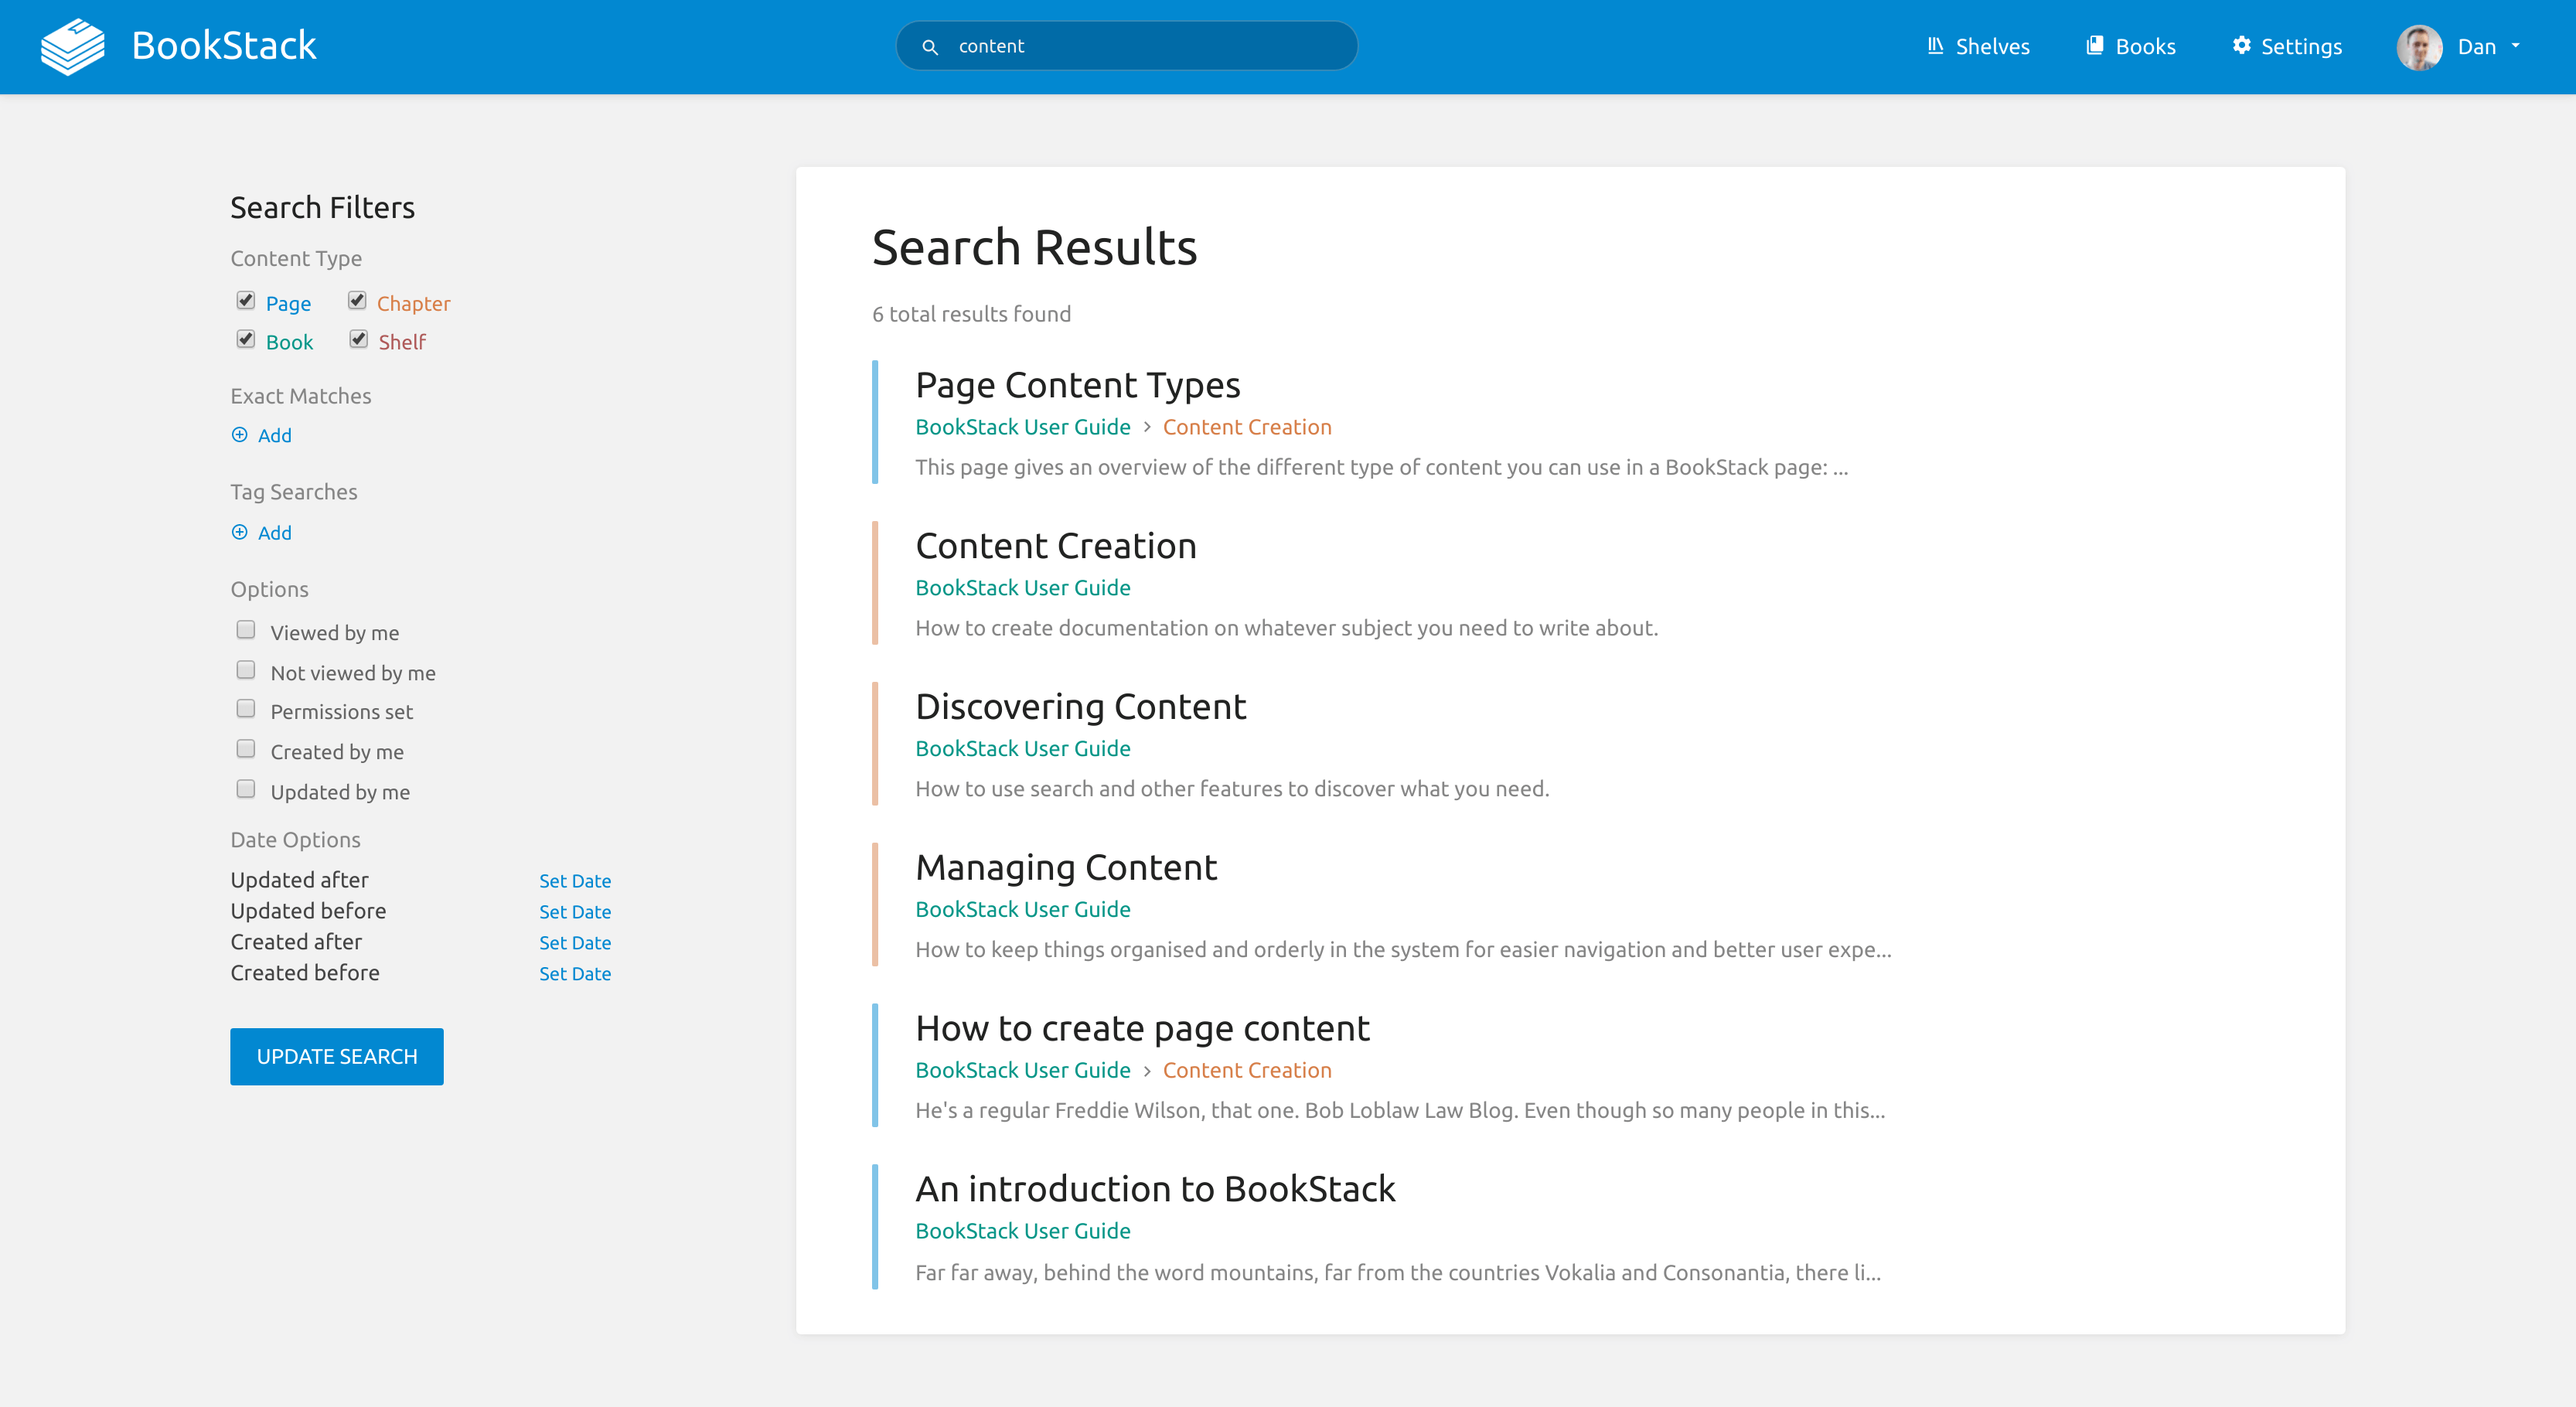
Searching your wiki IMHO is the most important element that needs to work fast and well, and this platform delivers on that.
There are many other features, and all the ones that I listed on top that are important to me, do exist in BookStack. Configuring multiple users (and allowing registration, password reset, etc), commenting, versioning and version restore, permissions, and more, are all there.
You can configure and use it over reverse proxy as well, in case you want to publish it outside your LAN, and to better secure your access to it, version 21.08 introduced MFA (2FA) that you can (optional) activate for your account.
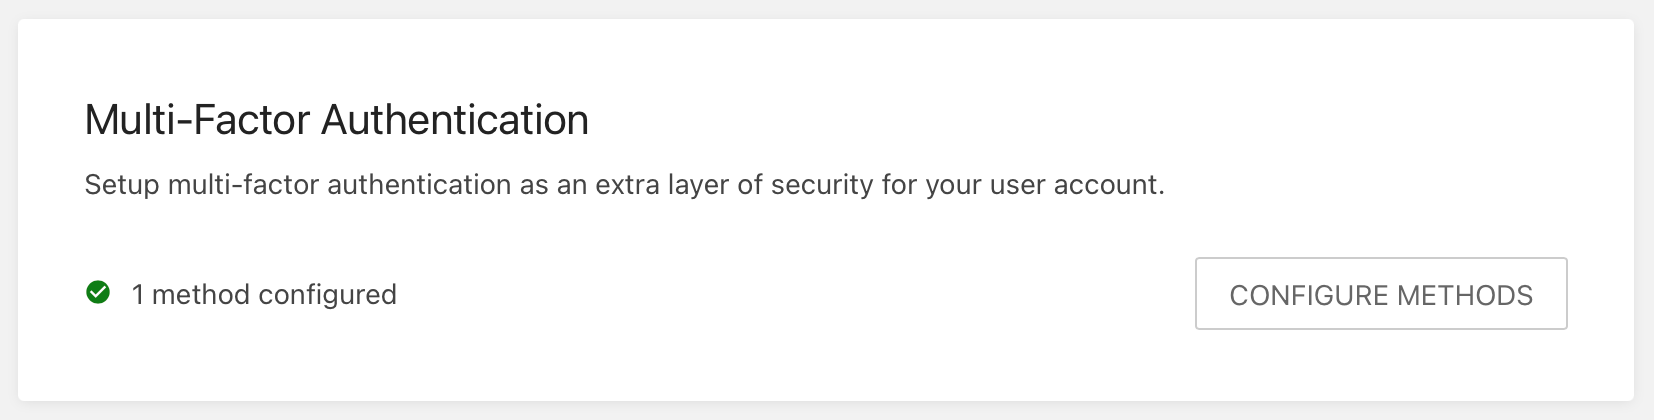
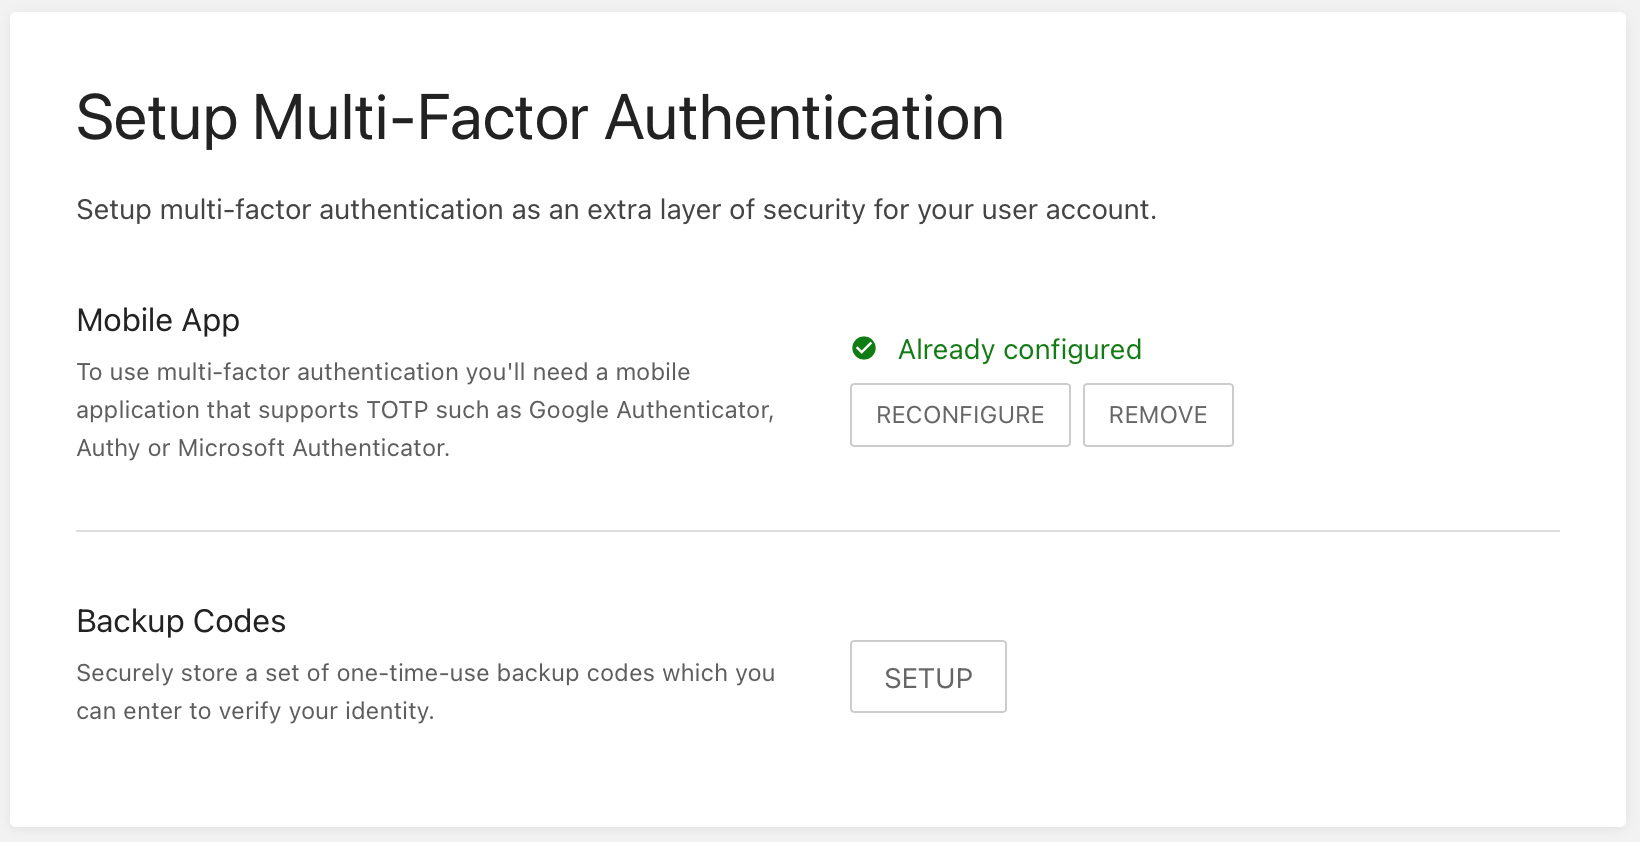
Personally, I have added 2FA on my accounts using Bitwarden password manager (that you can also self-host), so if you want to find out how to get one running yourself be sure to check out my Bitwarden docker section.
I could go on and on for a while, but you can get the look and feel for the app itself, by testing it on BookStack demo page, here: https://demo.bookstackapp.com/ as well as get all the details in the official documentation.
If there is one thing that I would like to see in the future, is the official mobile app. Don't get me wrong, this web app is mobile optimized (as much as it can be), so you will get things done, but a proper mobile app would be a great addition.
BookStack Docker compose (with a database container as a single stack)
In order to run this solution in Docker, you will need two (2) containers. One for the app itself, and another for the database element.
Considering this is a multi-container platform, I will show how to run it using the Portainer platform using their "stack" feature (docker-compose method).
If you are unfamiliar with Portainer or don't have it running for your Docker needs, be sure to check out some Portainer articles before starting with this deployment.
Once you have Portainer up and running, select a new stack option, give it a name, and paste it the following compose:
version: "2"
services:
  bookstack:
    image: ghcr.io/linuxserver/bookstack
    container_name: bookstack
    environment:
      - PUID=1000
      - PGID=1000
      - APP_URL=https://yourpublicname.com
      - DB_HOST=bookstack_db
      - DB_USER=bookstack
      - DB_PASS=<yourdbpass>
      - DB_DATABASE=bookstackapp
      - MAIL_DRIVER=smtp

      # Host, Port & Encryption mechanism to use
      - MAIL_HOST=smtp.gmail.com
      - MAIL_PORT=587
      - MAIL_ENCRYPTION=tls

      # Authentication details for your SMTP service
      - [email protected]
      - MAIL_PASSWORD=<mailpass>

      # The "from" email address for outgoing email
      - [email protected]

      # The "from" name used for outgoing email
      - MAIL_FROM_NAME=My wiki
    volumes:
      - /path/to/data:/config
    ports:
      - 80:80
    restart: unless-stopped
    depends_on:
      - bookstack_db
  bookstack_db:
    image: ghcr.io/linuxserver/mariadb
    container_name: bookstack_db
    environment:
      - PUID=1000
      - PGID=1000
      - MYSQL_ROOT_PASSWORD=<yourdbpass>
      - TZ=Europe/London
      - MYSQL_DATABASE=bookstackapp
      - MYSQL_USER=bookstack
      - MYSQL_PASSWORD=<yourdbpass>
    volumes:
      - /path/to/data:/config
    restart: unless-stopped`
As you can see from the compose file there are two (2) services running. bookstack, and bookstack_db.
Bookstack_db will configure MariaDB platform with the information that you enter (database name, username, and password), and the bookstack container is the main app container that will use that database to connect to it and start up the app.
I have added elements for mail communication and configuration, as you will need those if you plan on opening your platform to the Internet and giving your users the option to register as well as change their passwords.
Do pay attention that in that case, you will need to configure or use an already configured reverse proxy, but for more info on that, consult the following nginx proxy manager article.
Also if you will be using BookStack over reverse proxy, you must use the APP_URL variable. Input your full URL as its value. Like https://wiki.mydomain.com.
BookStack docker-compose (as a single container to be attached to an external database)
In case you already have a MariaDB or MySQL database running (and not necessarily as a docker container) you can connect your BookStack instance to it.
You need a configured database running with a user account that has read/write permissions on it.
Similar to the example above, you can run the following stack to have only BookStack as a single container that will connect to your database instance.
version: "3.5"
services:
  bookstack:
    image: ghcr.io/linuxserver/bookstack
    container_name: bookstack
    environment:
      - PUID=1000
      - PGID=1000
      - APP_URL=https://yourpublicname.com
      - STORAGE_TYPE=local_secure
      - DB_HOST=IPADDRESS:PORT
      - DB_USER=<databseuser>
      - DB_PASS=<databasepassword>
      - DB_DATABASE=<databasename>
      - MAIL_DRIVER=smtp

      # Host, Port & Encryption mechanism to use
      - MAIL_HOST=smtp.gmail.com
      - MAIL_PORT=587
      - MAIL_ENCRYPTION=tls

      # Authentication details for your SMTP service
      - [email protected]
      - MAIL_PASSWORD=emailpassword

      # The "from" email address for outgoing email
      - [email protected]

      # The "from" name used for outgoing email
      - MAIL_FROM_NAME=My wiki
    volumes:
      - /path/to/data:/config
    ports:
      - 80:80
    restart: unless-stopped
Considering there are DB_**** variables that need correct values, be sure to edit them in order for your BookStack instance to connect to it.
DB_HOST=IPADDRESS:PORT
DB_USER=<databseuser>
DB_PASS=<databasepassword>
DB_DATABASE=<databasename>
If your SQL instance (docker container or not) is running, then just enter the IP address of the device that is running on as well as the port number. If it's your NAS you can for example enter 10.20.30.55:3308 or any other port number that you have your SQL instance running on.
Username, password, and DB name need to be entered as well.
That will do it. Now you can have your BookStack instance running inside a container, and your SQL inside a separate one may be on a completely different device. Having multiple SQL instances just for a single purpose is not very resource-friendly, so running a single DB instance that hosts multiple DB's for multiple apps, is a welcome solution.
Outbound webhooks
With the new 21.12 version, there were half a dozen changes but one of the two big ones is webhooks support. Specifically, outbound webhooks.
What this means is that you can push changes that are happening in your Bookstack environment to a compatible platform. For example, every time you update your page, create a new one, or comment on it, you can get a push notification inside your destination app.
A quick example would be to send changes to my Rocket Chat platform that I use. There, users can then get notifications in a specific channel about changes made.
First, you need to configure an incoming webhook inside your destination app, so that you can get a generated webhook endpoint URL that you will use inside your Bookstack instance.
RocketChat outgoing webhook
Open your Rocket Chat Administration page and go to Integrations. Then, under the incoming tab click the +New button to start configuring.
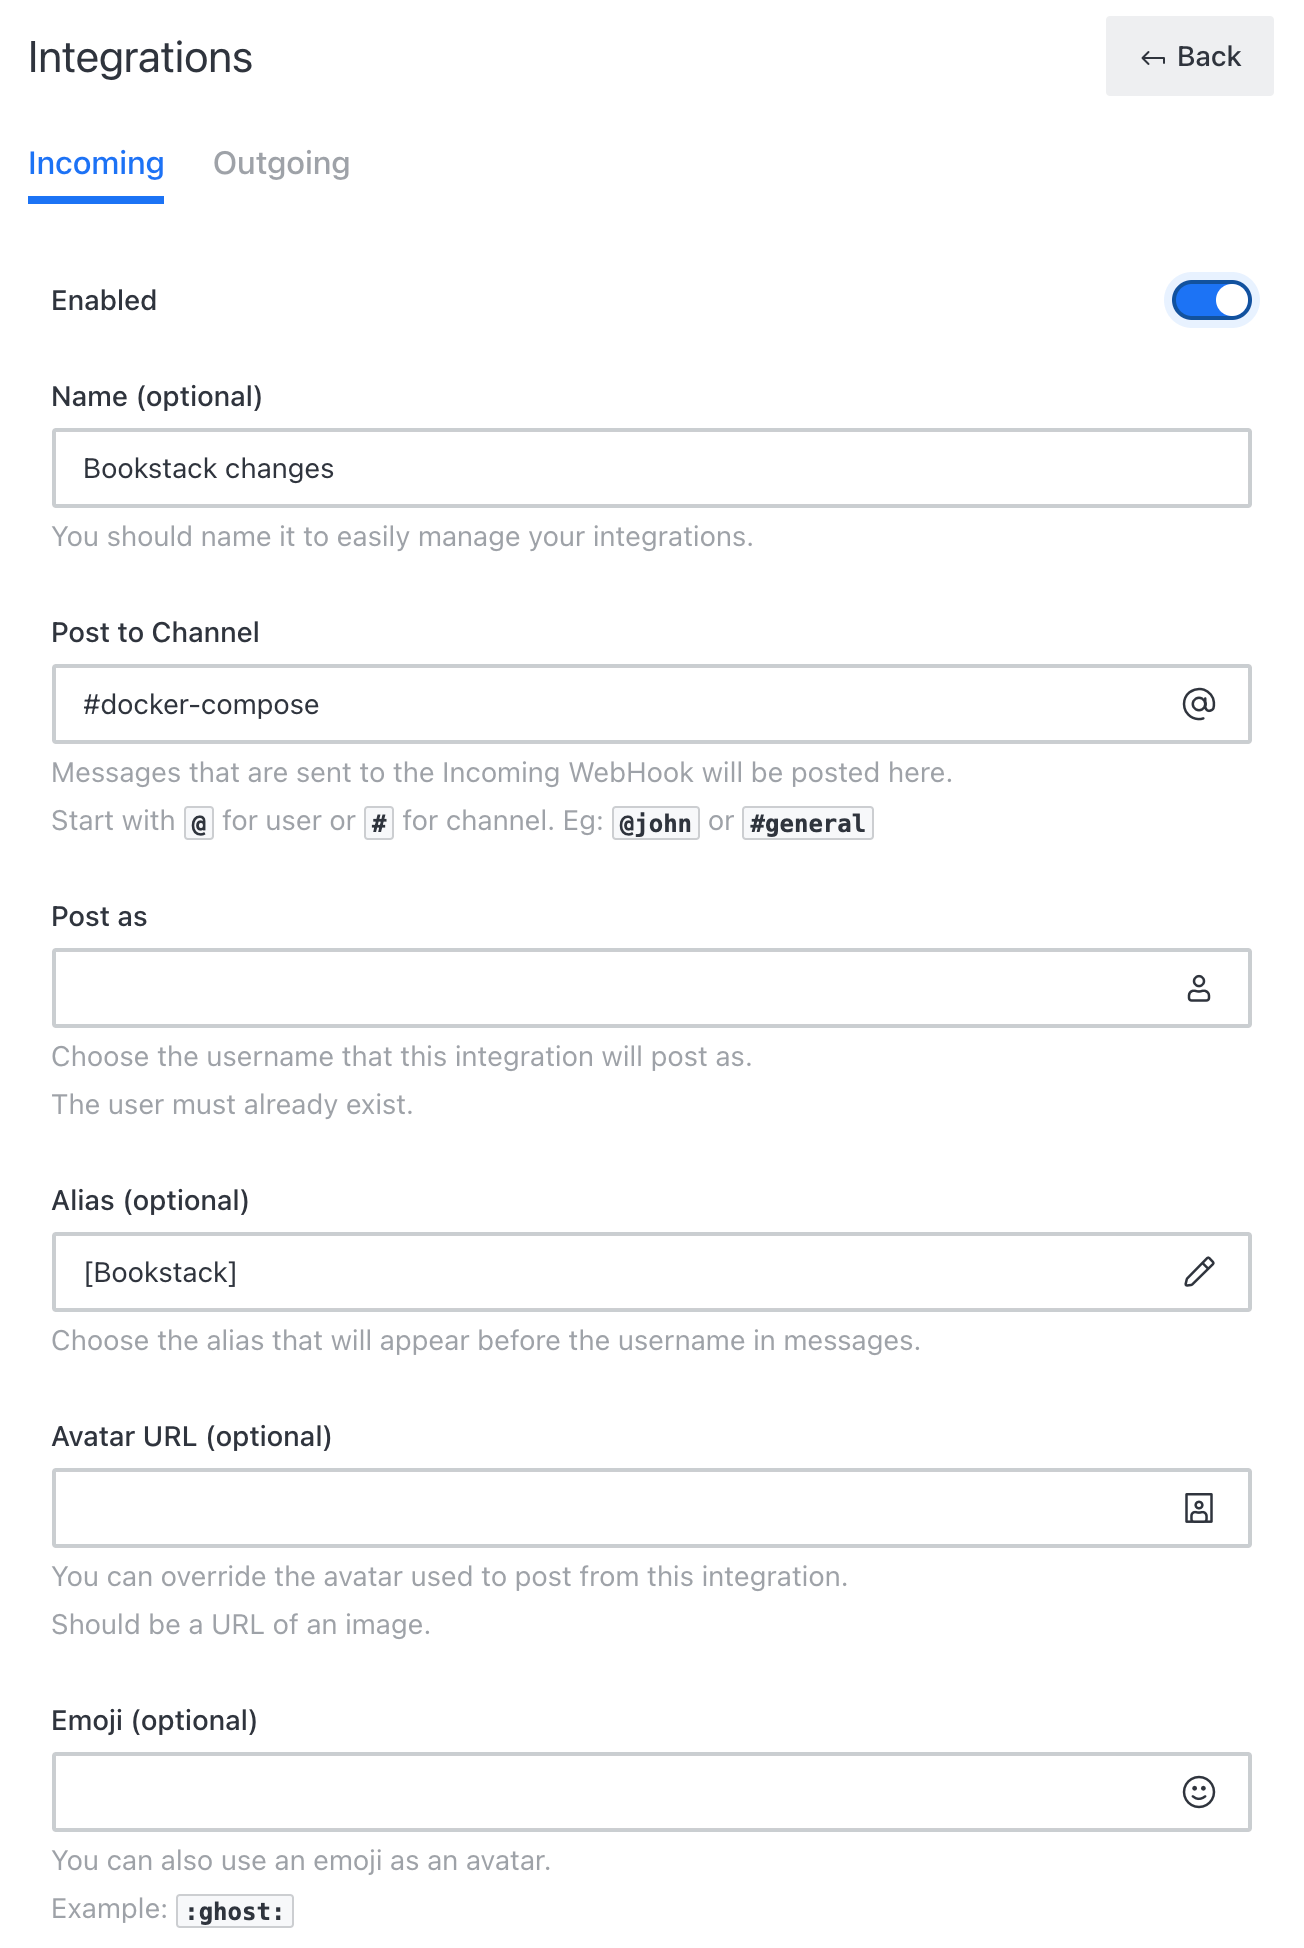
Make sure to populate Post to Channel, and Post as fields, everything else is optional.
On the bottom, click Save once you are done. After you have done all that, Rocket chat will generate the webhook endpoint in the Webhook URL in this same configuration window.
Copy it to your clipboard and move it to the Bookstack app.
Bookstack webhook configuration
Inside Bookstack go to the Settings page and then open up webhooks.
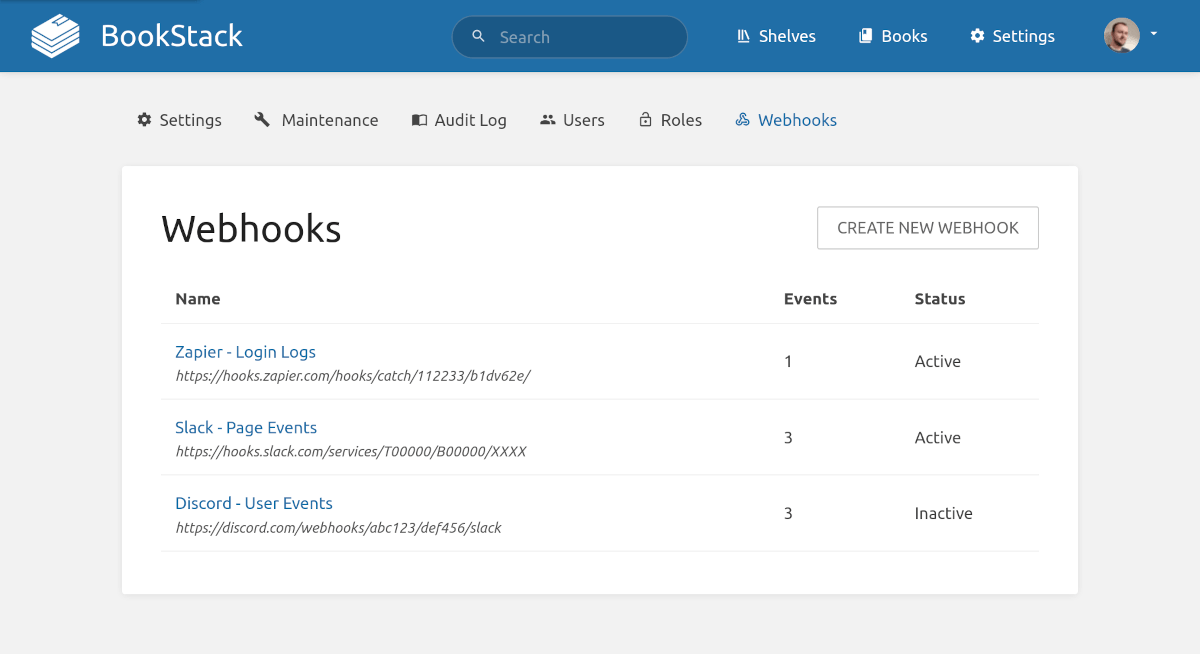
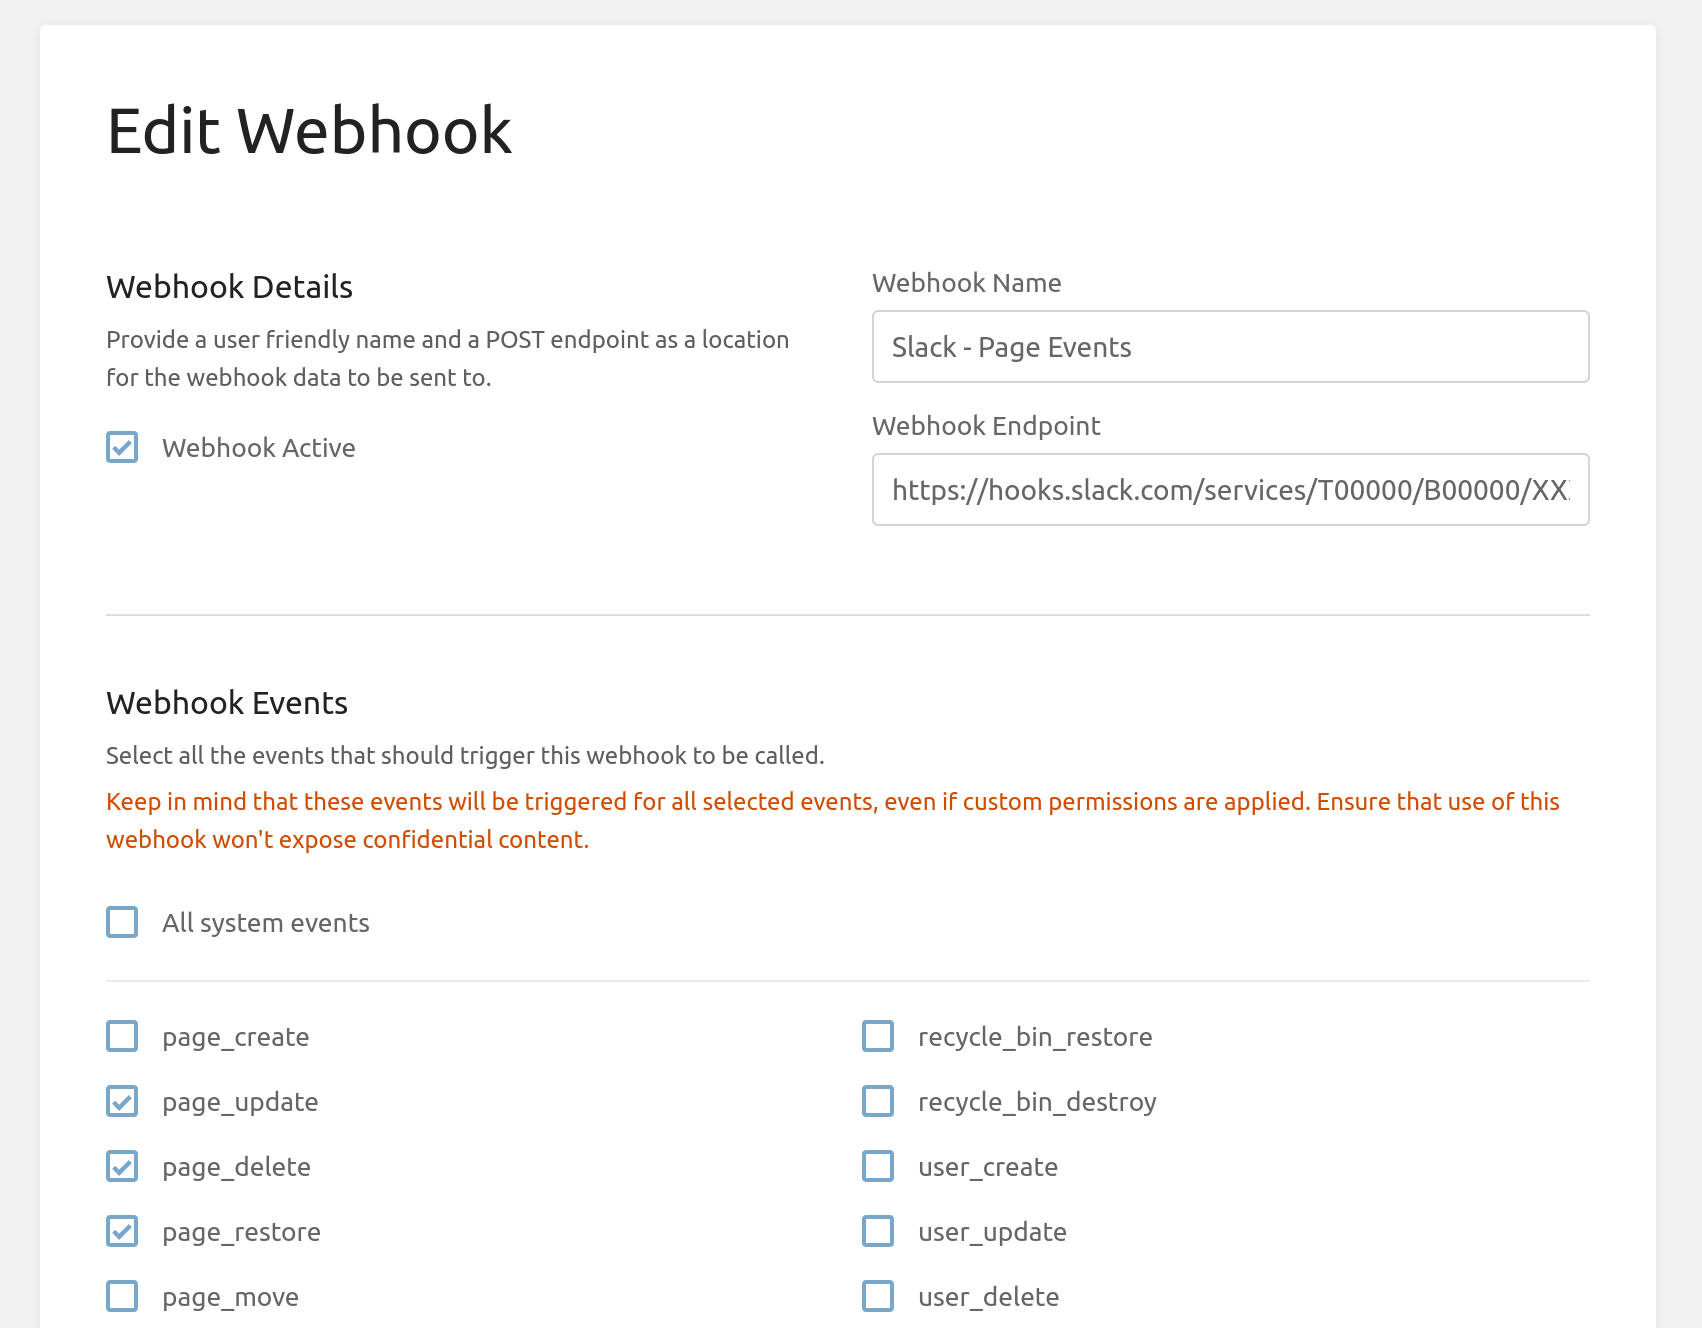
Click Create new webhook and enter its name and past in the webhook endpoint URL that you have generated inside Rocket chat. Finally, select all the events that you want to be triggered when a specific action is performed.
When you are done, save your webhook and test it out.
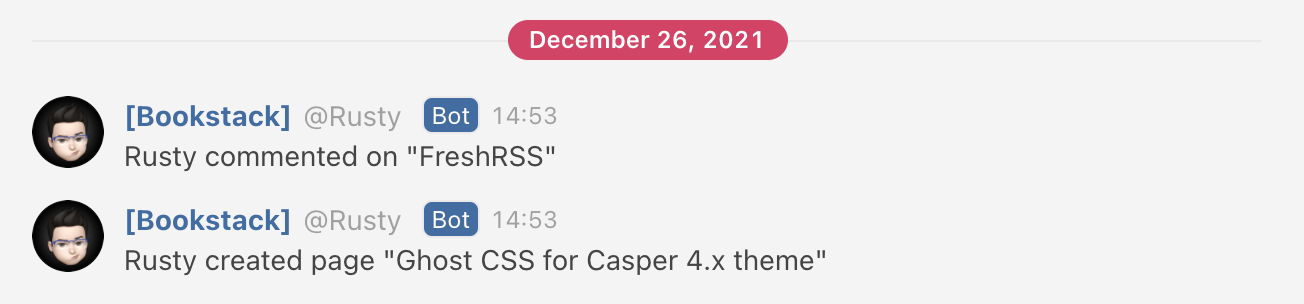
In the image above you can see a few examples of how the end results look like. It would be nice to have some more details as the end result but it will depend on the action itself.
All in all, a great addition to a great platform, and finally have comment notifications if nothing else ;).
Conclusion
Hope you will find this solution helpful as I have and I do hope that its development will continue forward. Feel free to comment on this, ask questions, or give suggestions.