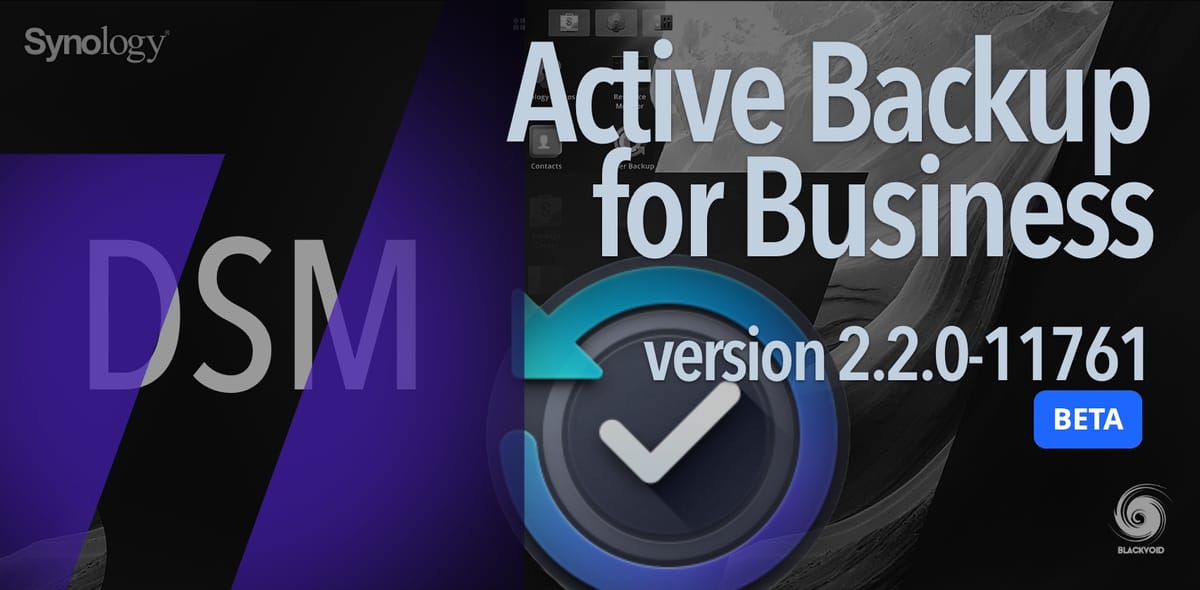
DSM 7 - Active Backup for Business v2.2.0-11761 (BETA)


Also, restoring that backup as a virtual machine inside ESXi v7, and Synology Virtual Machine Manager, was successful.
Since Active Backup for Business version 2.2.0-1761, Synology has added two new features.
Enable data transfer compression
Enable data transfer encryption
UPDATE: 26/02/2021 - Added update info on Linux backup over the Internet in the Add Linux machine and create backup/restore operations section.
In October of 2019, I have written a general article on the Active Backup for Business Synology package. If you are interested in how it works and what it is, be sure to check that article first.
In this one I would like to focus on the current (still in beta) ABB version that works with DSM7, specifically on the Linux distro support and how it performs.
Do keep in mind that this version has just arrived with the DSM7 public beta version. Saying this, do not, use DSM or any of the apps on your main (or only) NAS devices that are your main production devices.
My initial article was a pure Windows-based one considering that there was still no Linux client compatibility at that time (apart from an rsync method).
Let's see how Linux distros will work with this current 2.2 version. First, this is the current version changelog:
Compatibility and Installation
- Updated to be compatible with DSM 7.0 Beta.
What’s New
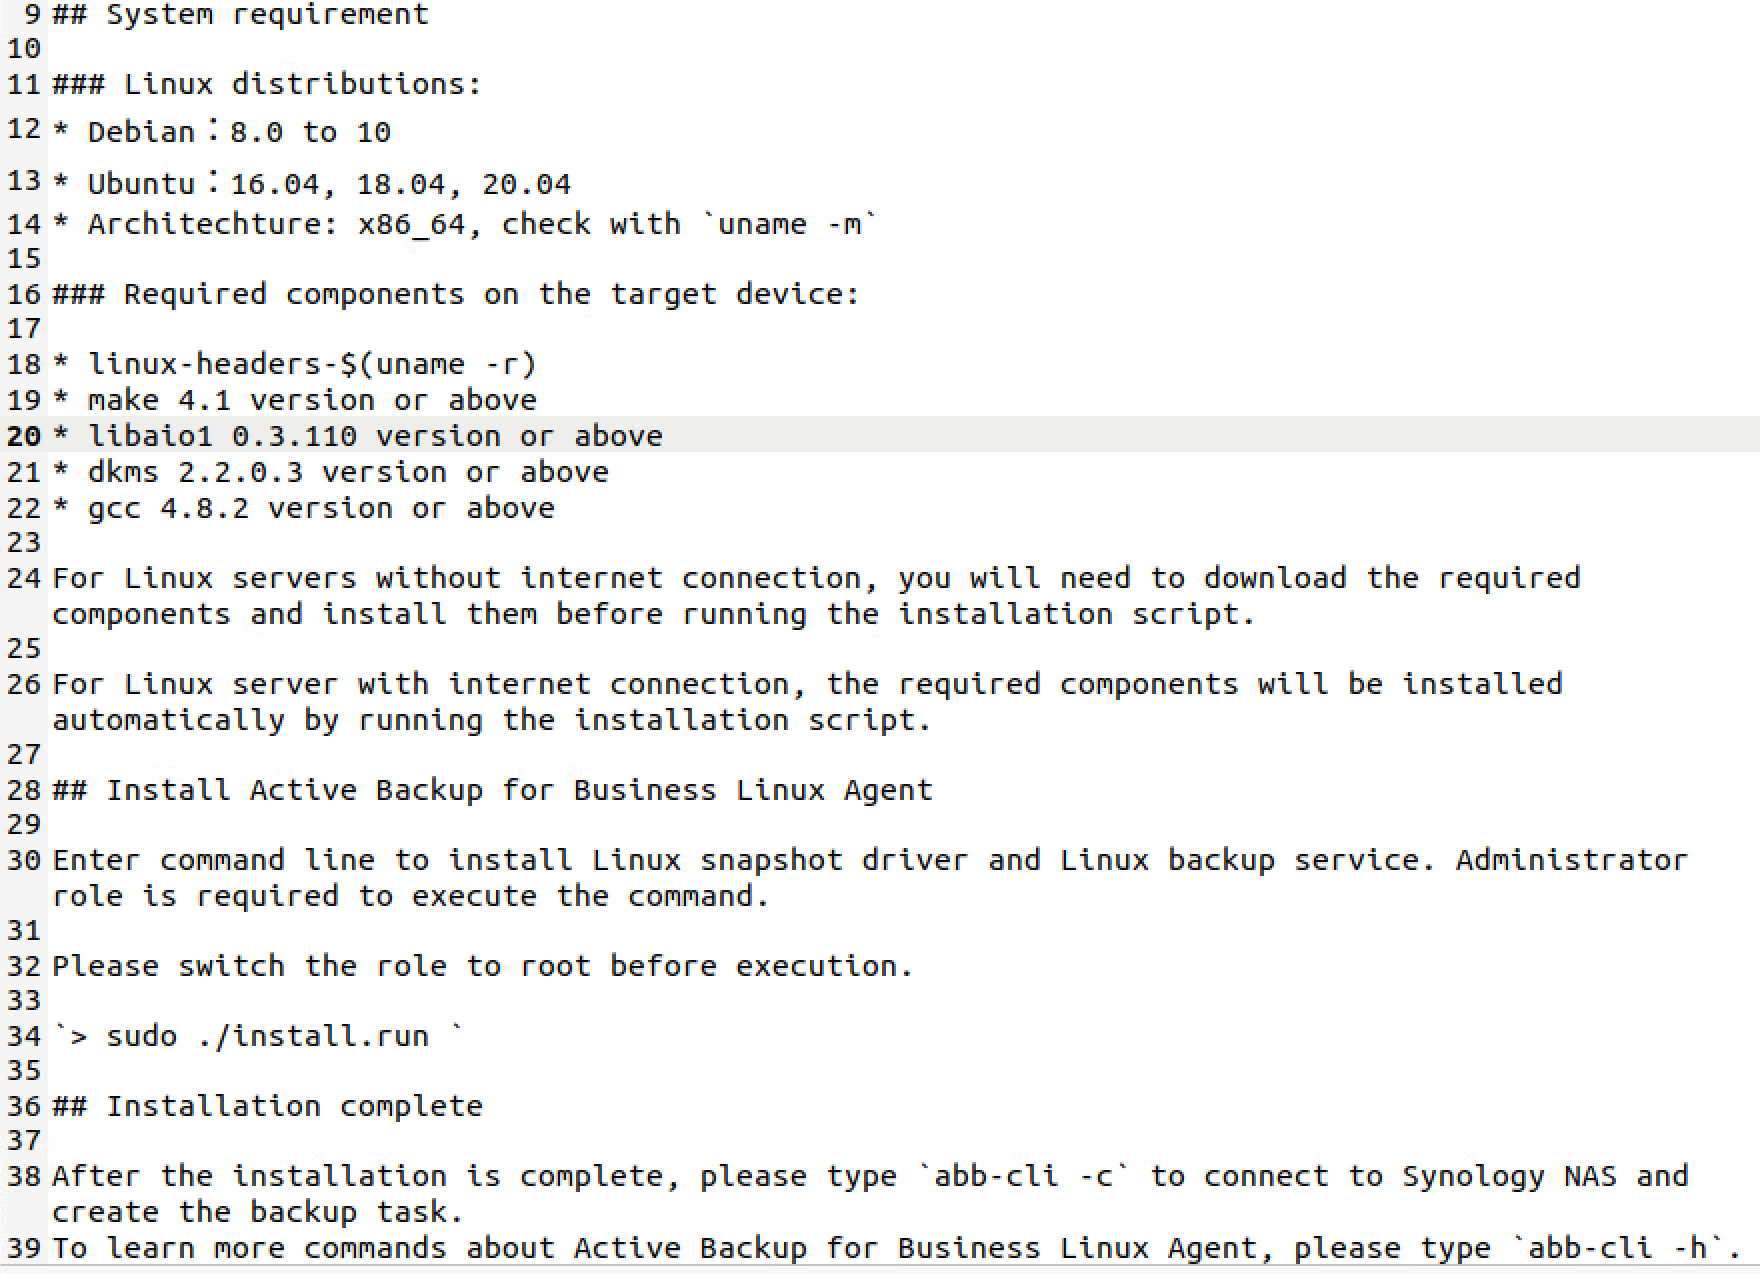
Supports backing up and restoring Linux physical servers of the following distributions:
- CentOS: 6.10, 7.8, 8.1
- RHEL: 6.10, 7.8, 8.1
- Ubuntu: 16.04, 18.04, 20.04
- Fedora: 30, 31, 32
- Debian: 8.0 to 10
- Added support for VMware vSphere 7.0.0.
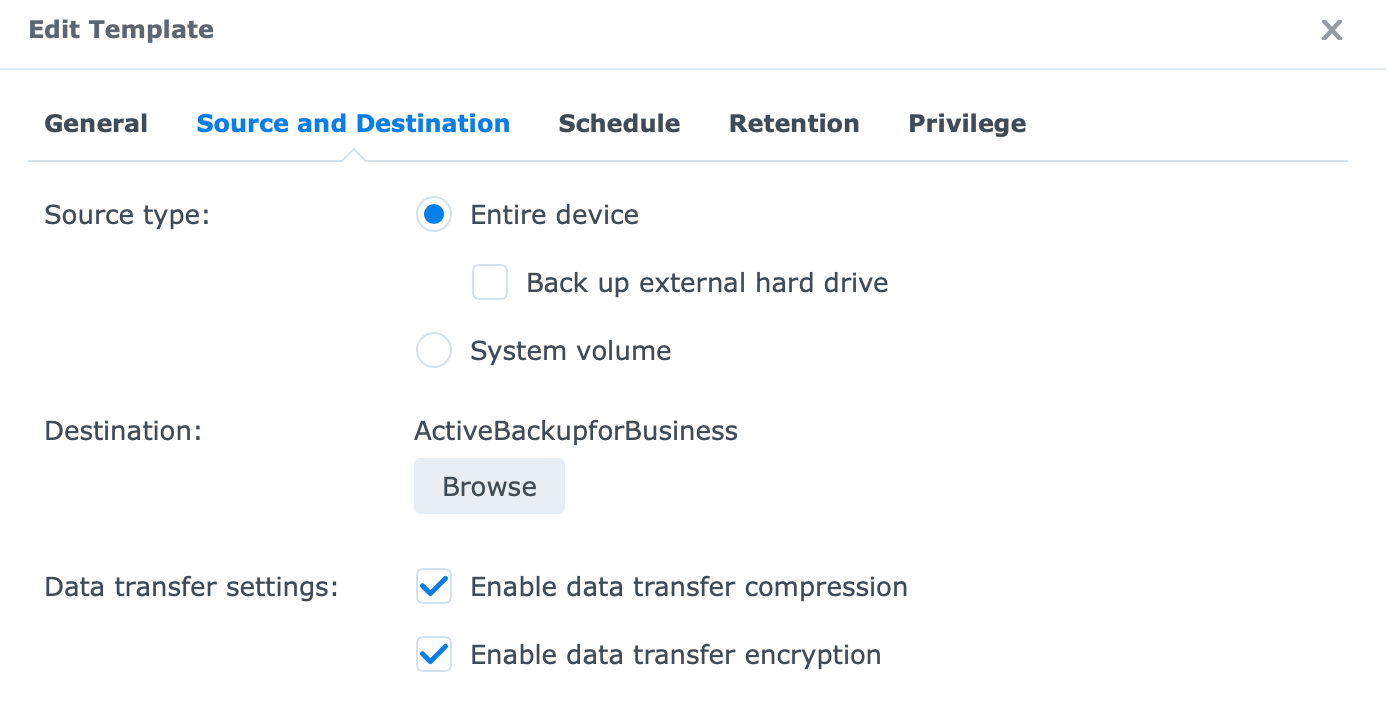
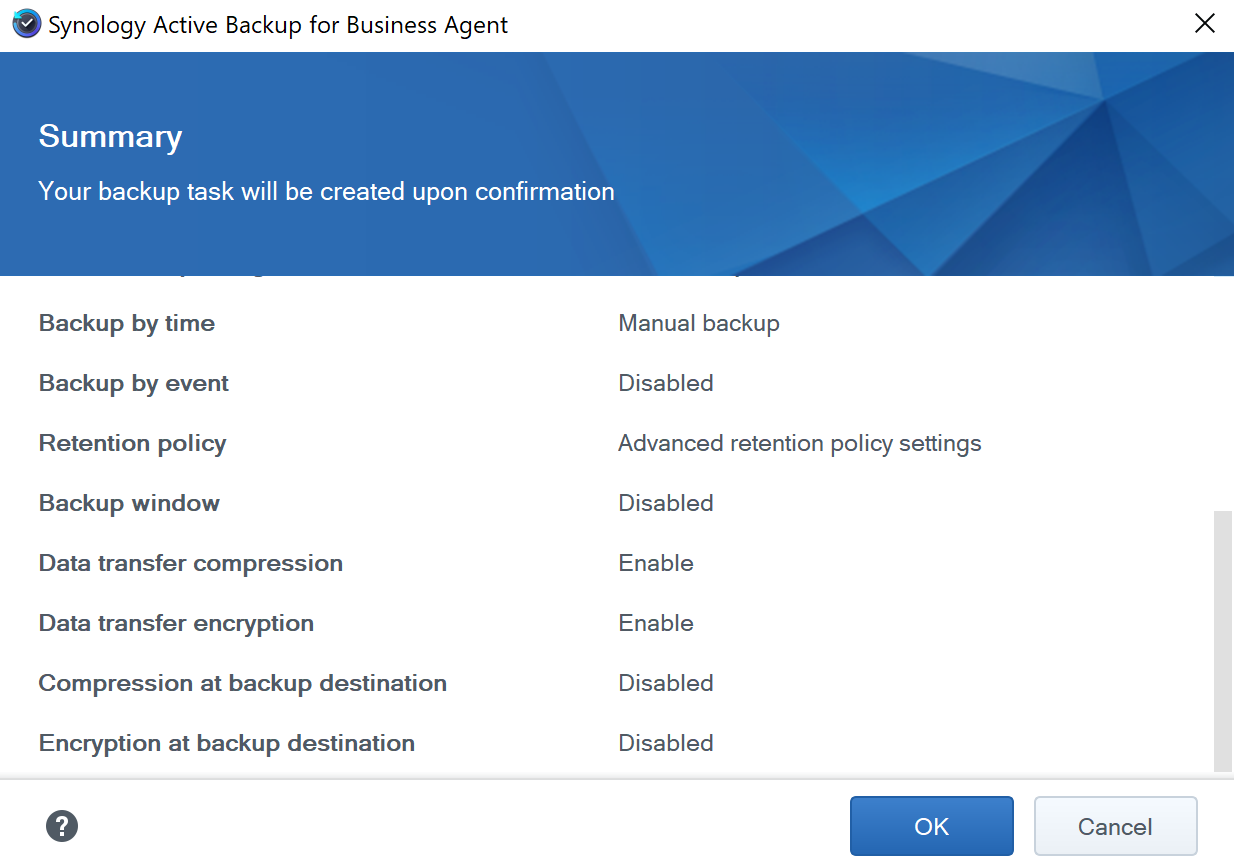
- Added support for compression and encryption settings for personal computers, physical servers, and virtual machines at the backup destination.
- Supports migrating instantly restored virtual machines on Virtual Machine Manager to VMware vSphere or Microsoft Hyper-V.
Users can now back up a maximum of 50 devices (personal computers, physical servers, and virtual machines) concurrently. The actual number varies by RAM capacity:
- Less than 8 GB: 10
- Between 8 GB and 32 GB: 30
- More than 32 GB: 50
- Supports customizing pre/post scripts for physical server backups.
- Supports removing data when the storage is deleted.
- Added support for backup reports in PDF format to be attached in emails.
- Supports deleting reports.
- Supports automatically checking if the required services on VMware vSphere/Microsoft Hyper-V are properly configured when adding a hypervisor or creating a backup task.
- Supports skipping duplicated pagefile.sys, hiberfil.sys, and swapfiles.sys files when backing up personal computers and physical servers.
- Scheduled backup tasks for physical servers/personal computers will be canceled when the devices are disconnected for over an hour after tasks start.
- Displays tasks that have been restored within the last 48 hours in "Restore Status."
Supports instant restore to Hyper-V for backup tasks with compression or encryption at backup destination enabled.
Applied models:
- FS-series: FS6400, FS3600, FS3400, FS1018, FS2017
- SA-series: SA3600, SA3400, SA3200D
- 21-series: DS1621xs+, DS1621+
- 20-series: RS820RP+, RS820+, DS1520+, DS920+, DS720+, DS620slim, DS420+, DS220+
- 19-series: RS1619xs+, DS2419+, DS1819+, DS1019+
- 18-series: RS3618xs, RS2818RP+, RS2418RP+, RS2418+, DS3018xs, DS1618+, DS918+, DS718+, DS418play, DS218+
- 17-series: RS18017xs+, RS4017xs+, RS3617RPxs, RS3617xs+, DS3617xs
Limitations
- Backup tasks that have enabled compression or encryption at backup destinations can't apply the following settings:
- Instant restore to Virtual Machine Manager
- Instant restore to VMware (for virtual machines on VMware vSphere 7.0.1)
- Backup verification
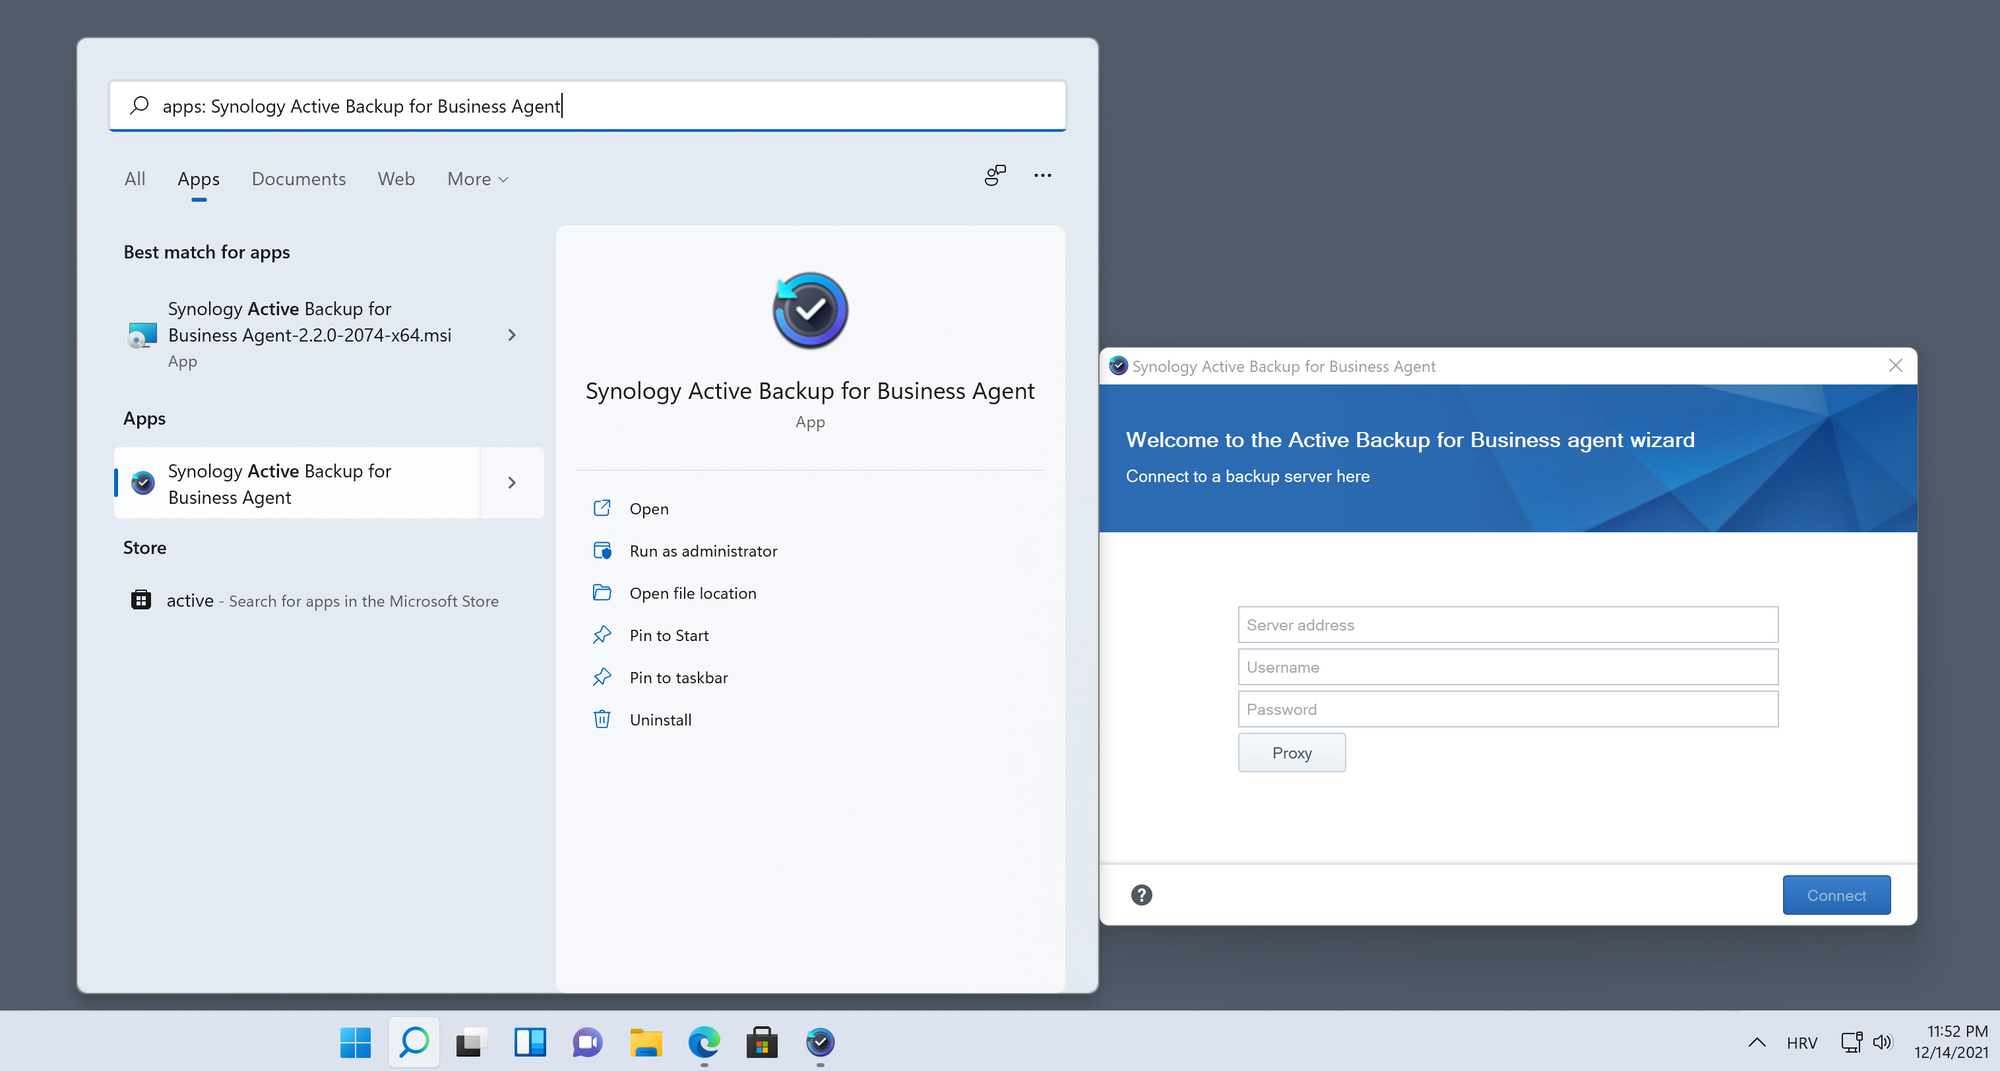
Installing ABB
Just like any other package, ABB can be installed from the Package center. Presented with a new icon and color palette you can't miss it, not to mention that it is the first icon in the list as well.
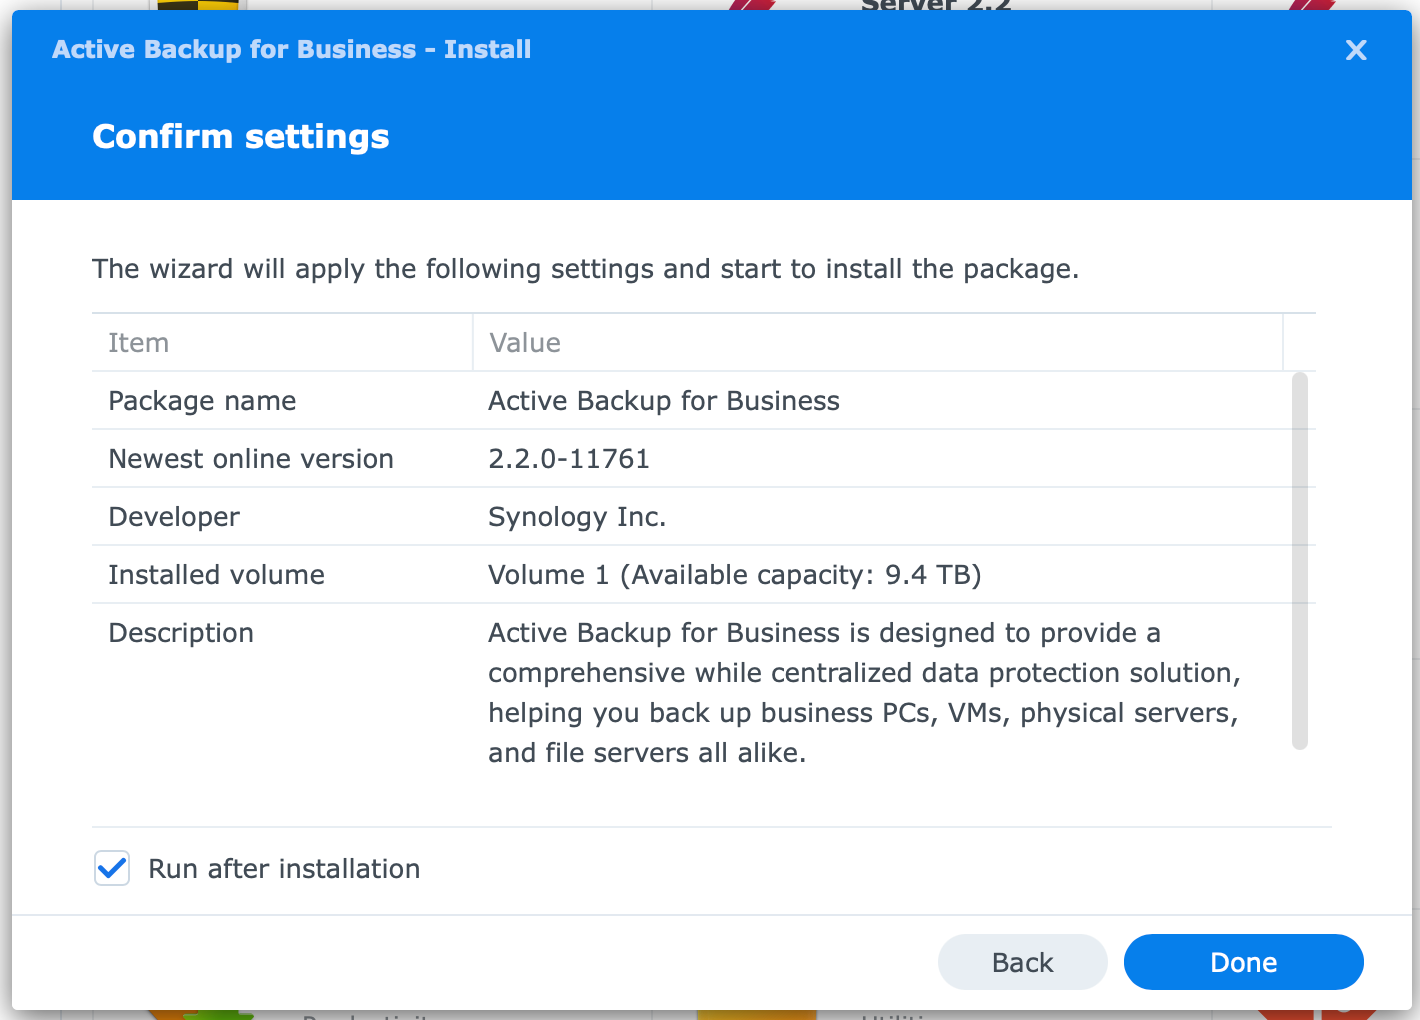

ABB new (old) UI
The interface in the new version of ABB is new in terms of the color palette. The sections, submenus, and options are the same (for the most part on the main screen).
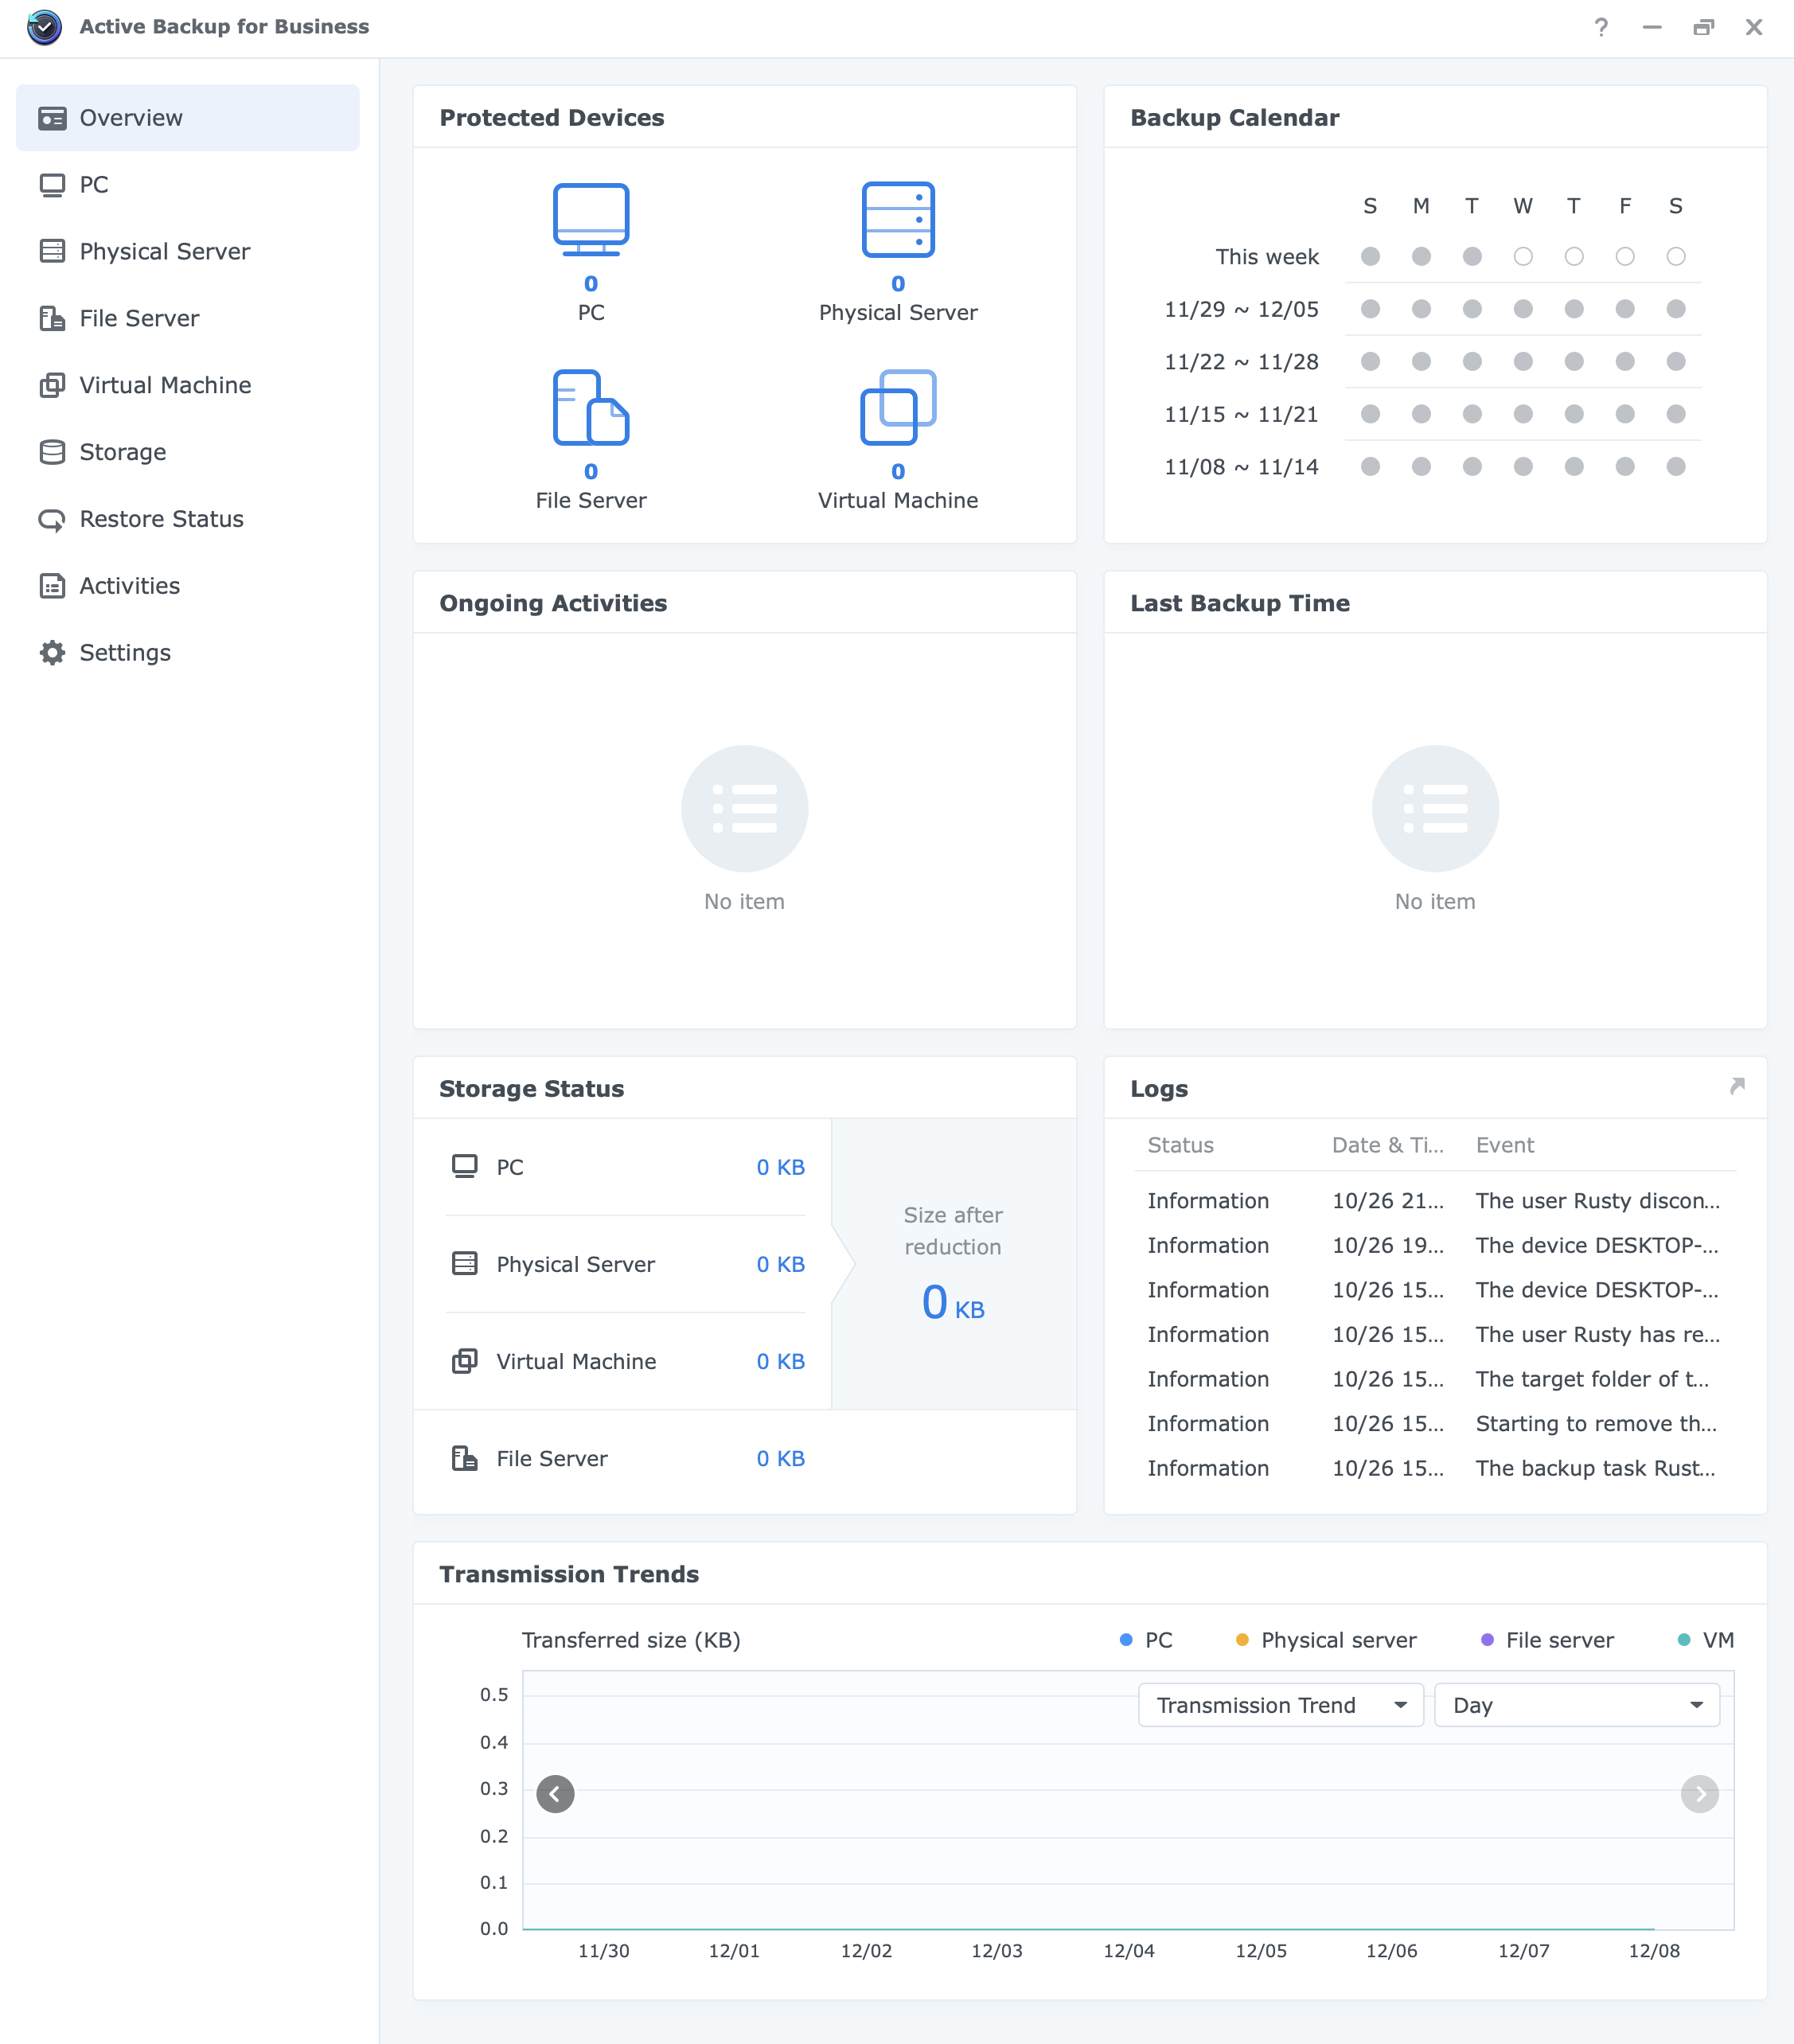
Apart from the color, like any other app, ABB is also using a new font type and icons.
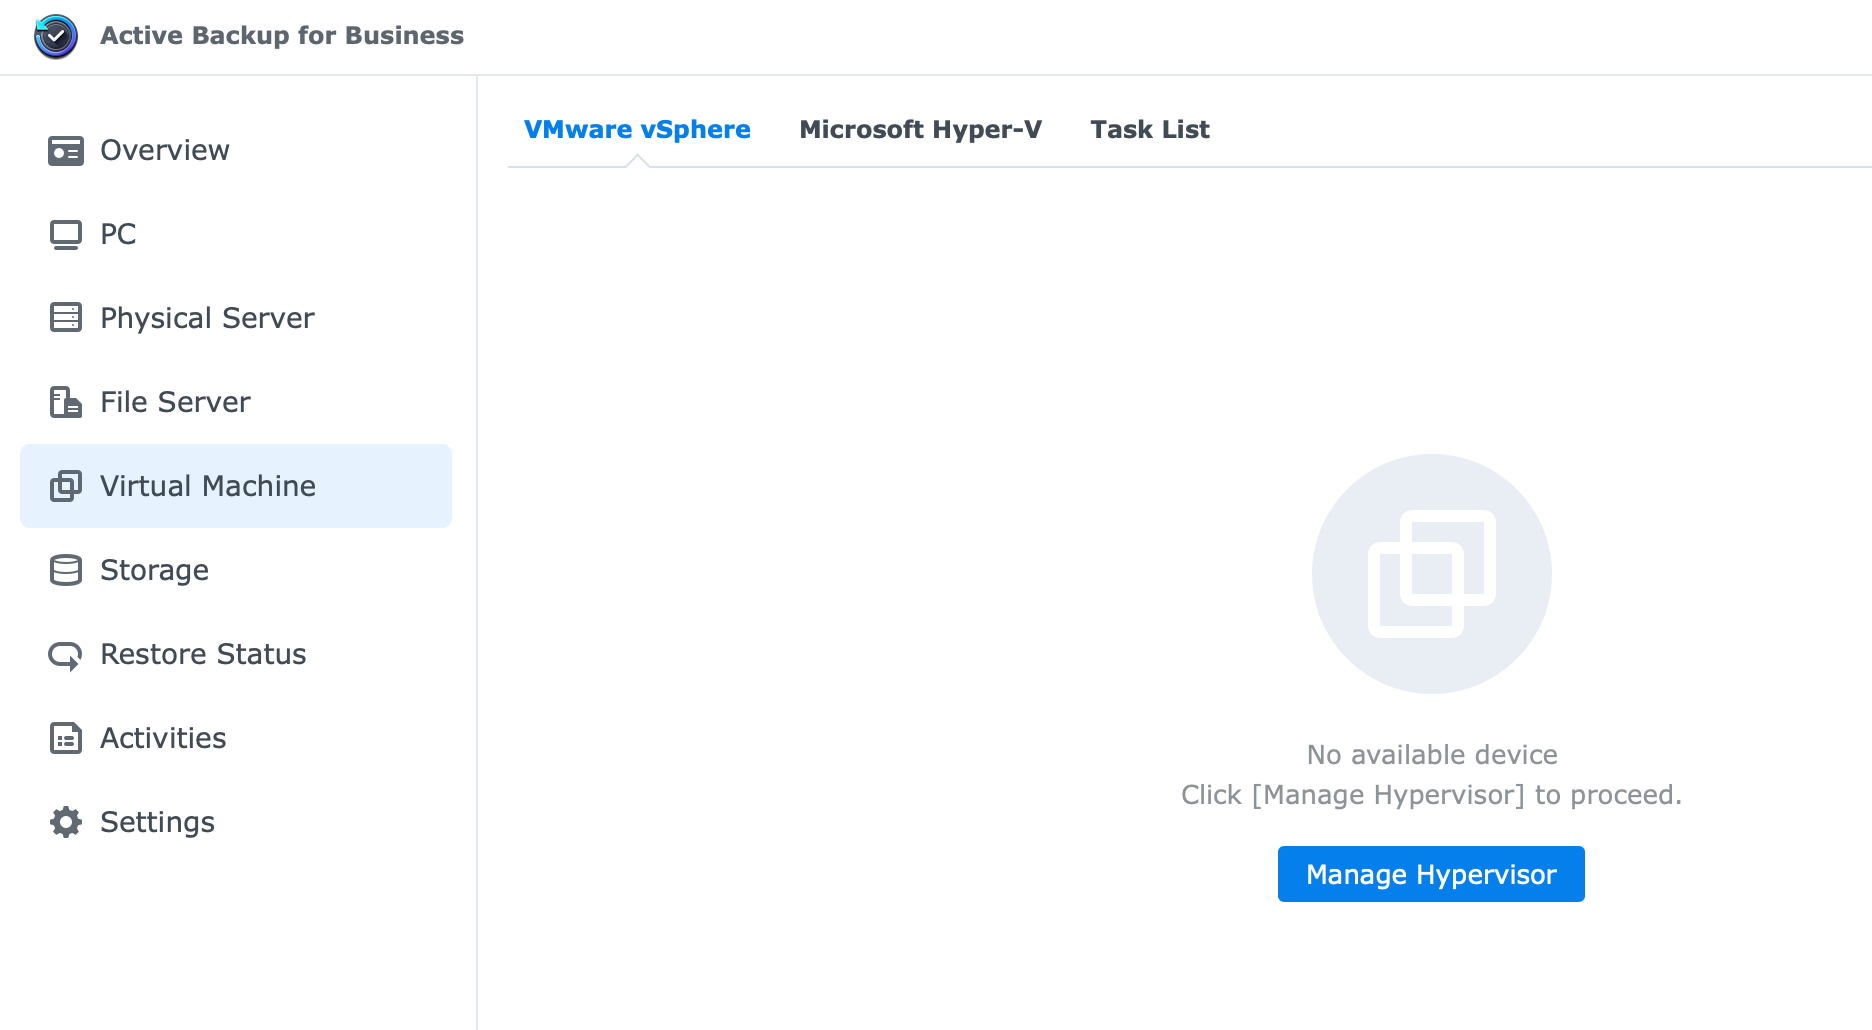
Connecting to VMware vSphere v7
Apart from supporting Linux based distros, ABB now supports vSphere v7 by VMWare, so let's see how to get them connected.
Presuming you have a running ESXi v7 instance, connecting it to your ABB is simple.
Go to Virtual Machine section and the first tab will be VMware vSphere, there you should click the Manage Hypervisor button to start the wizard.

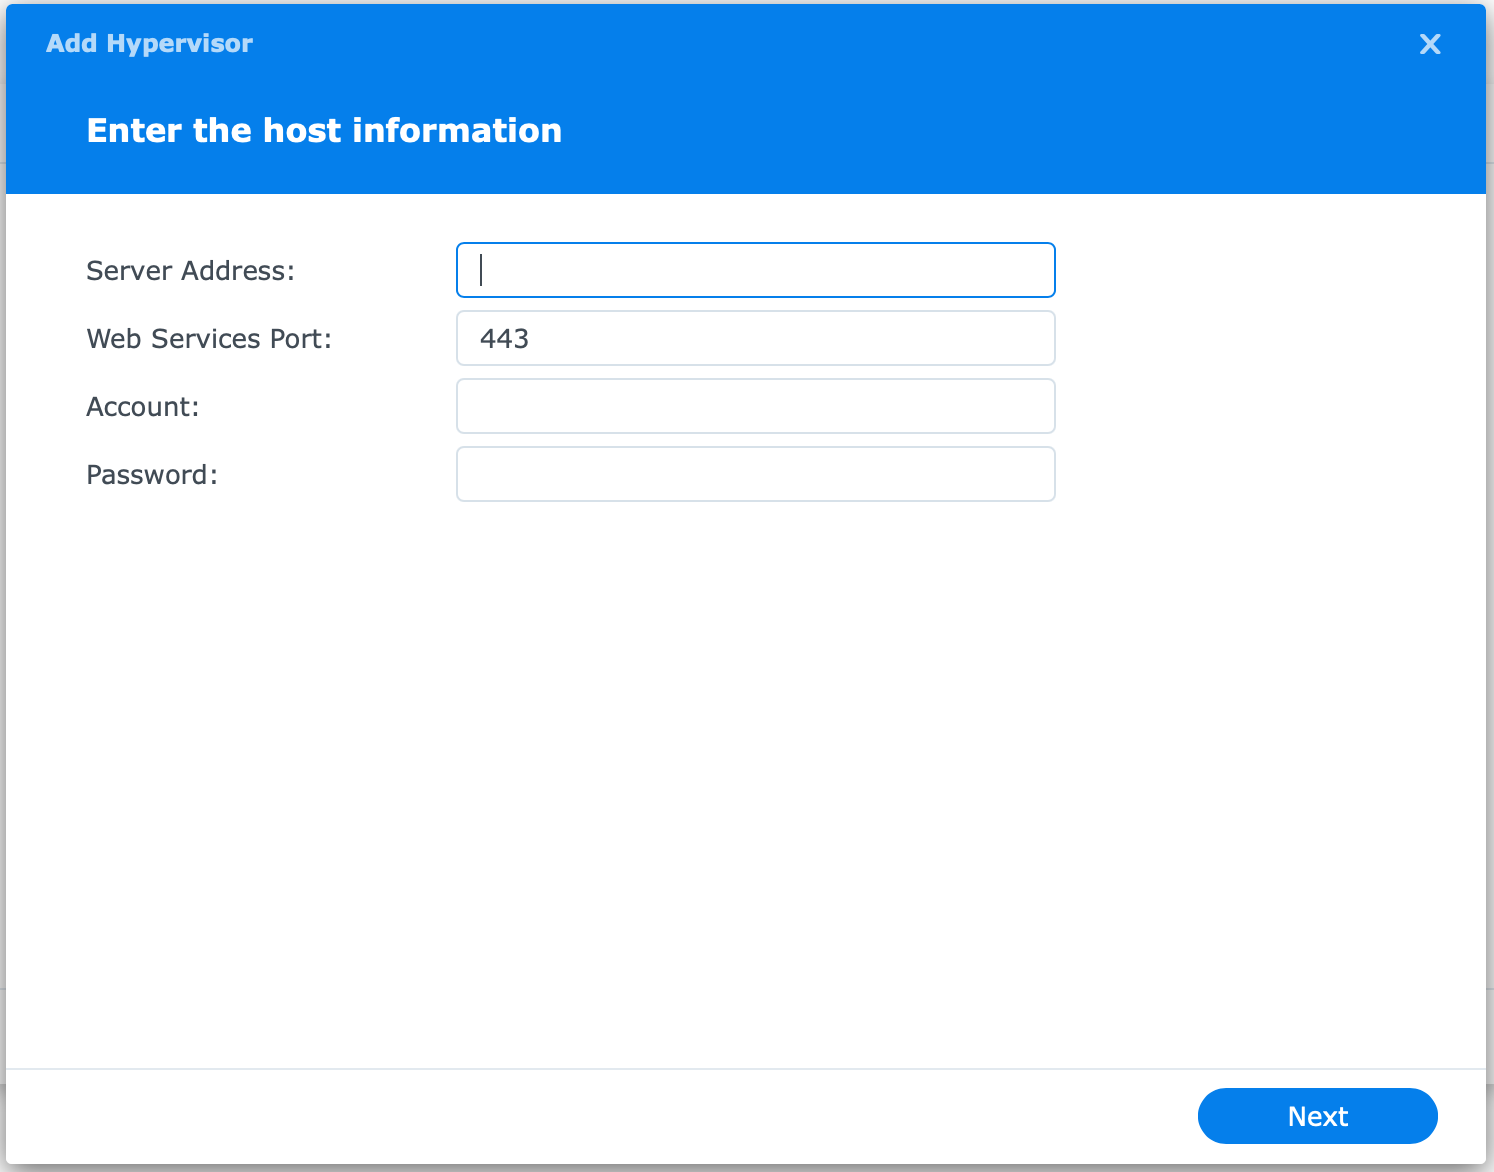
Make sure to enter your ESXi IP address, port and account to connect to it.
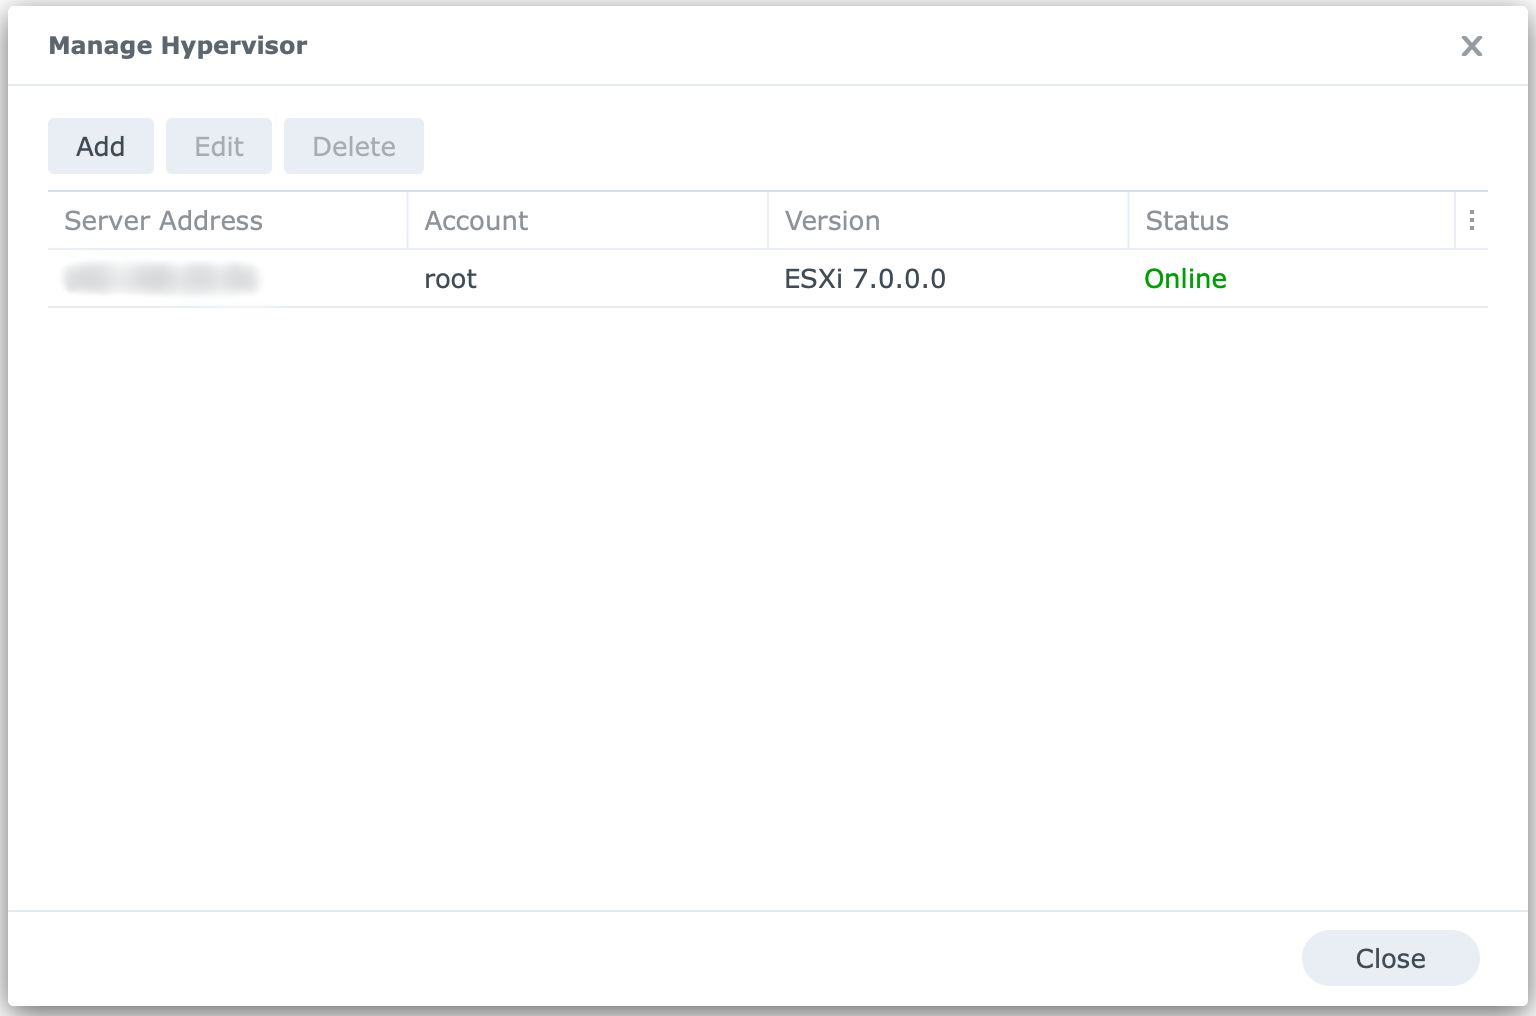
After you have conncted to your hypervisor it will list all the VM that it can detect
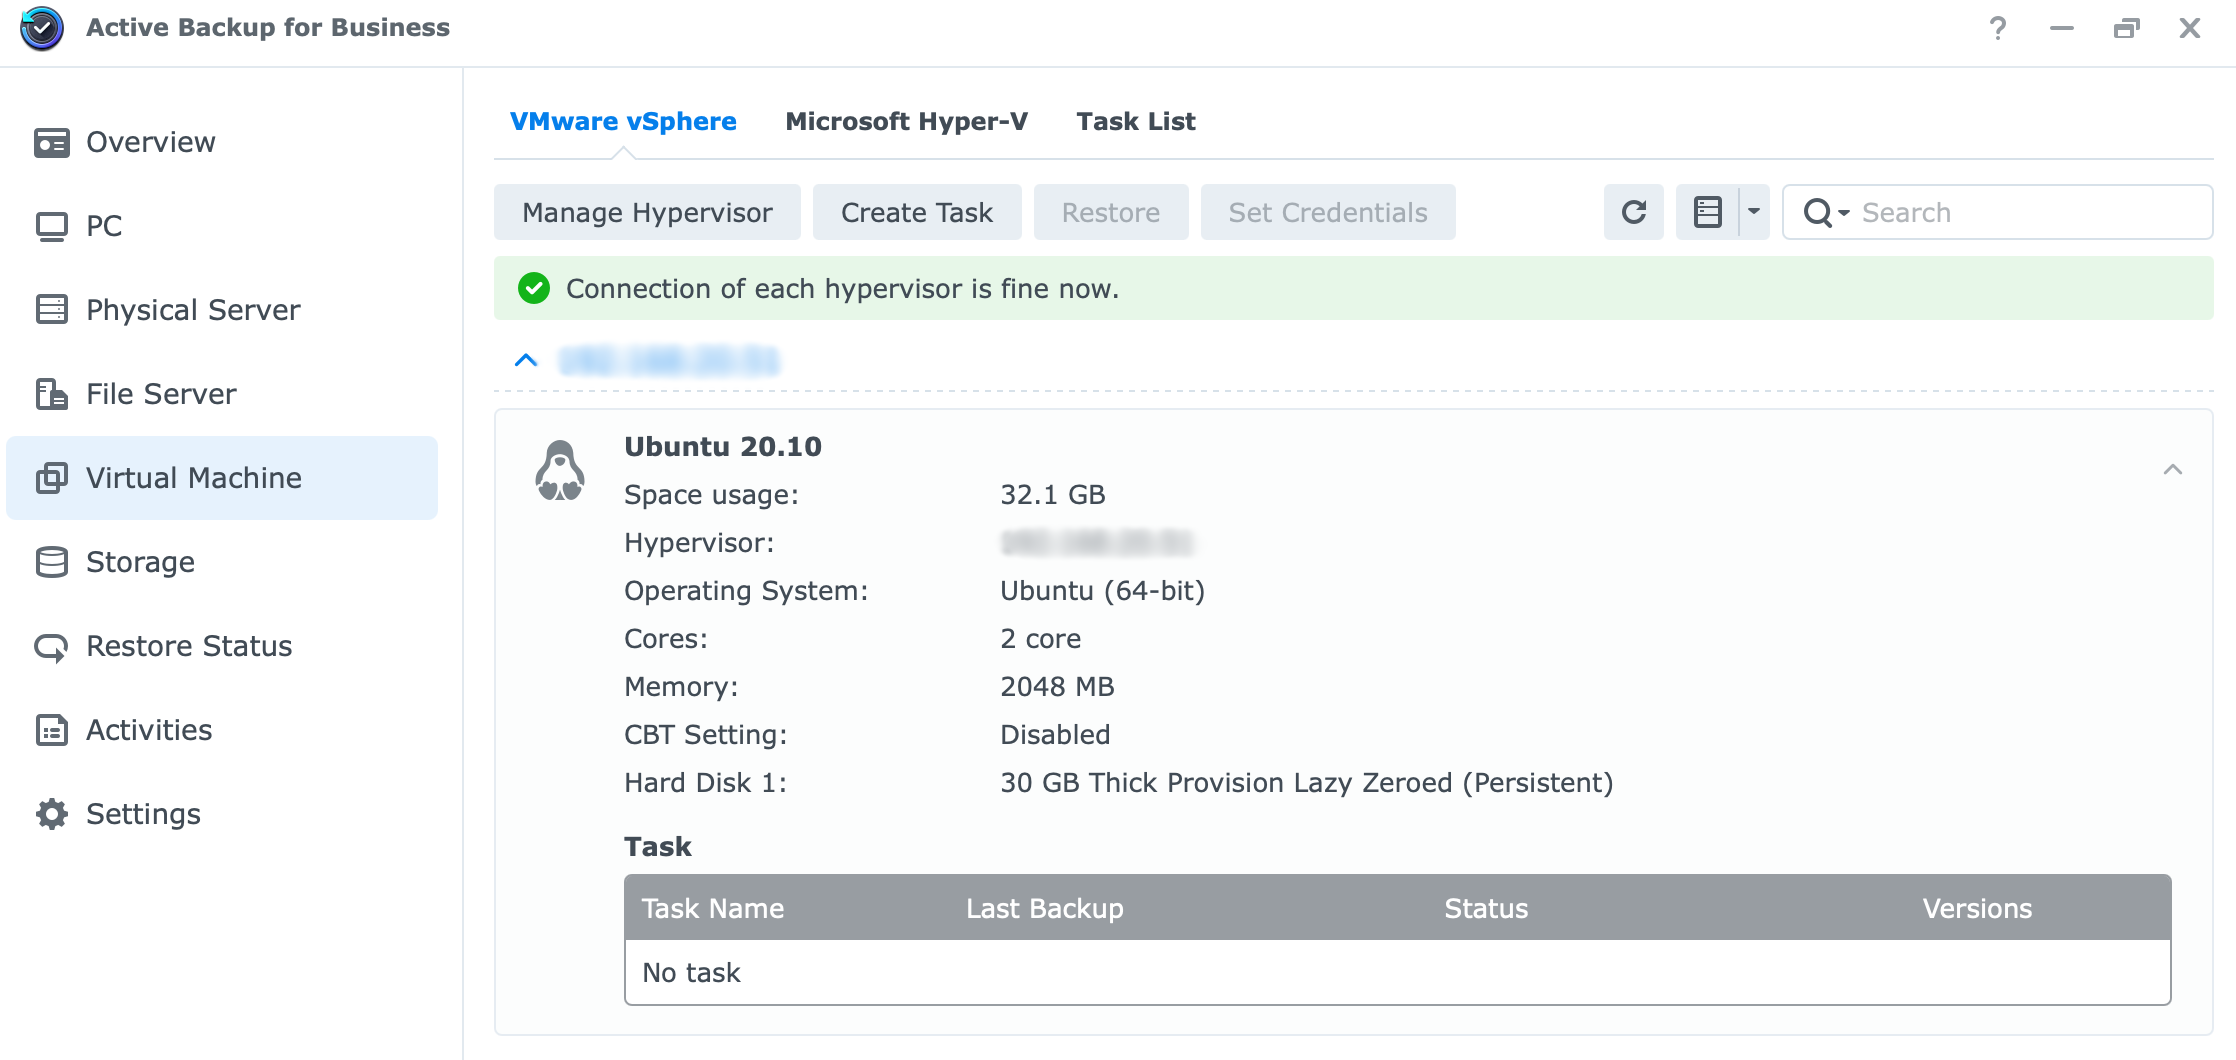
That's it. You are connected to your ESXi v7 host and now you can start doing tasks with any VM listed there.
Add Linux machine and create backup/restore operations
NOTE: 26/02/2021 - Keep in mind that the following steps will work for a LOCAL backup process only at this time. If you try and enter FQDN of your ABB server and try and backup over the Internet, this will not work! It will work for Windows clients, but at the moment it will not work for Linux (Ubunutu clients)
Now, most users might be interested in support for bare metal Linux distro support. My test will include a virtual machine as a demo but the same will apply to a bare metal one.
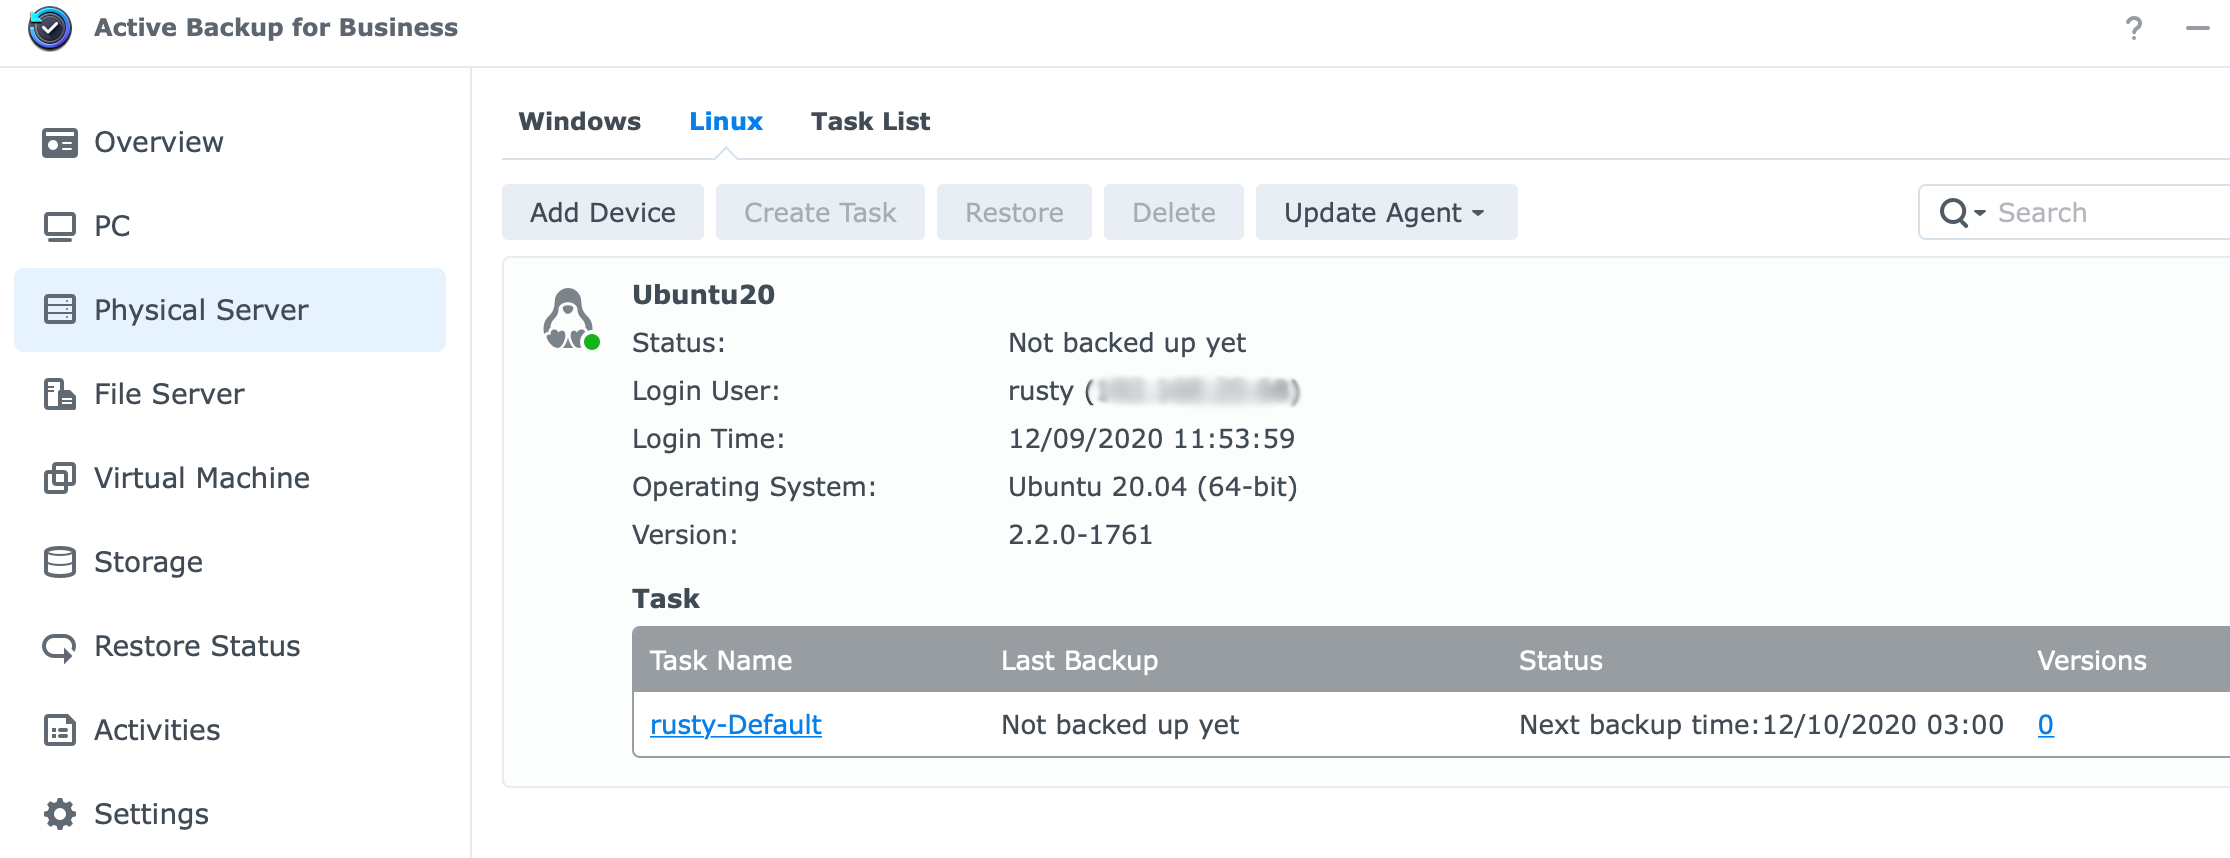
Start by going to Physical server section in the main window and click the Linux tab. If you don't have any machines already added, click the Add device button to start the wizard.
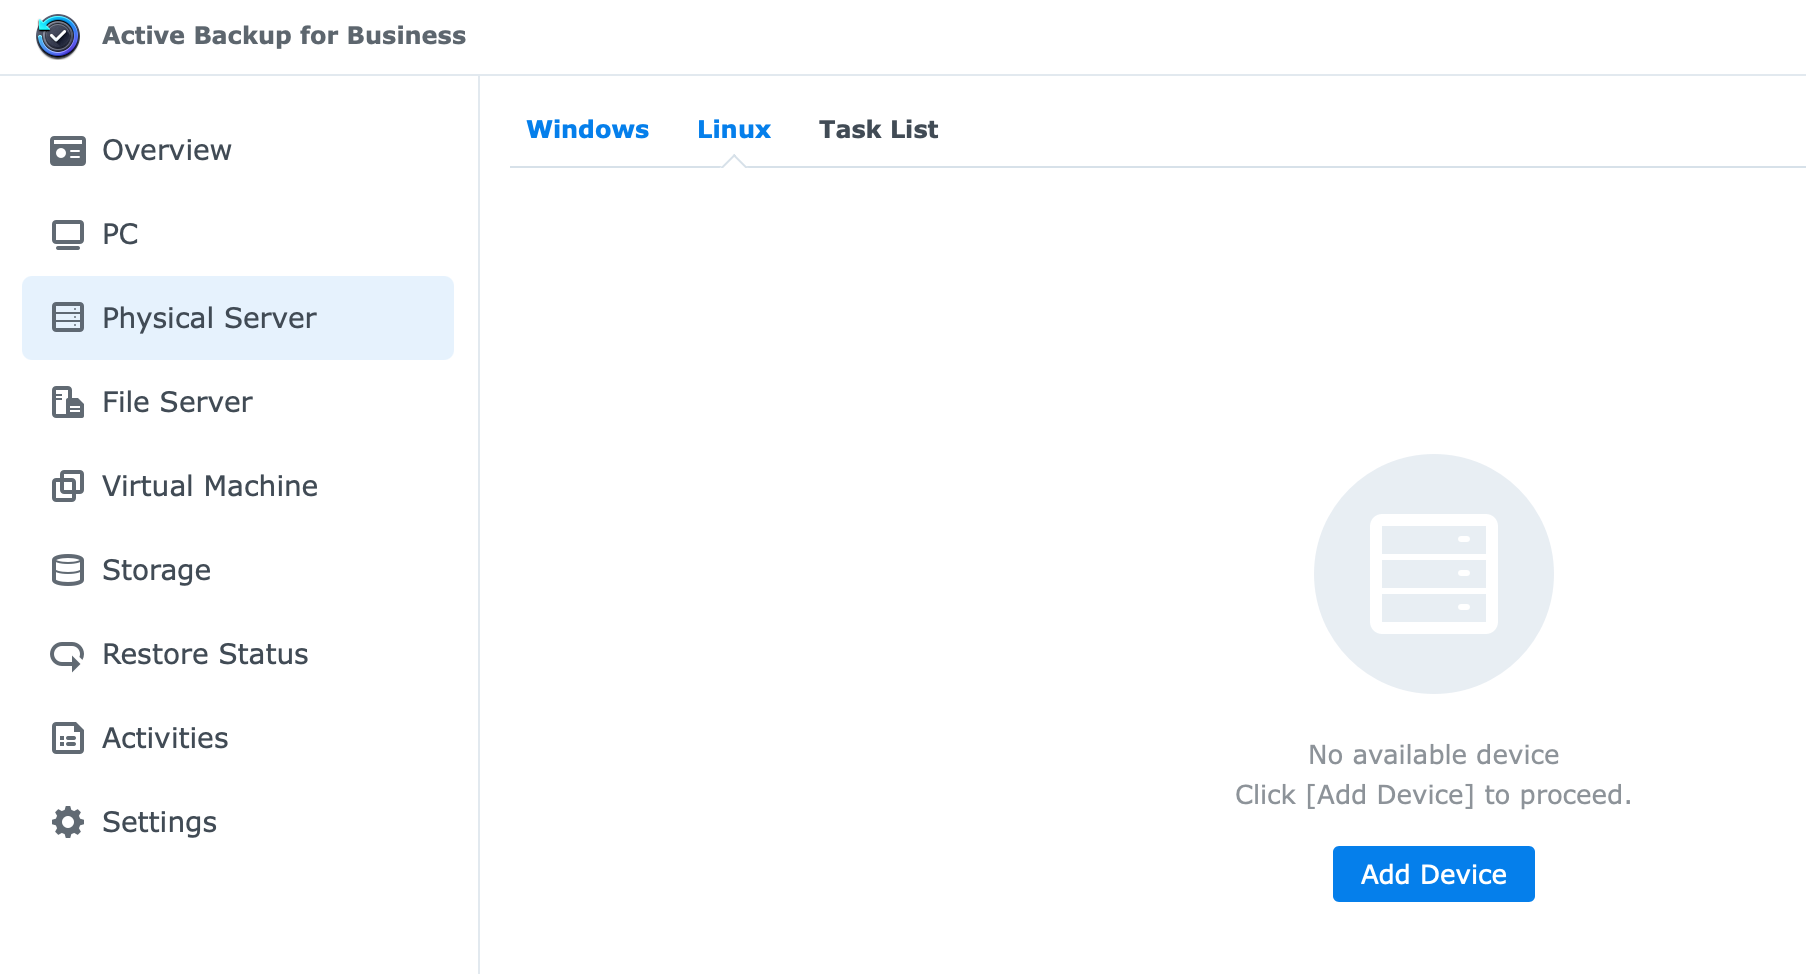
As you can see two wizard steps need to be completed and ready to get things going.
Pay attention to the steps needed to complete and get a Linux machine into your ABB console (detail steps following). As an example, I have used Ubuntu 20.10 distro (you will see that it is not on the list in the changelog, but this version also works just fine).
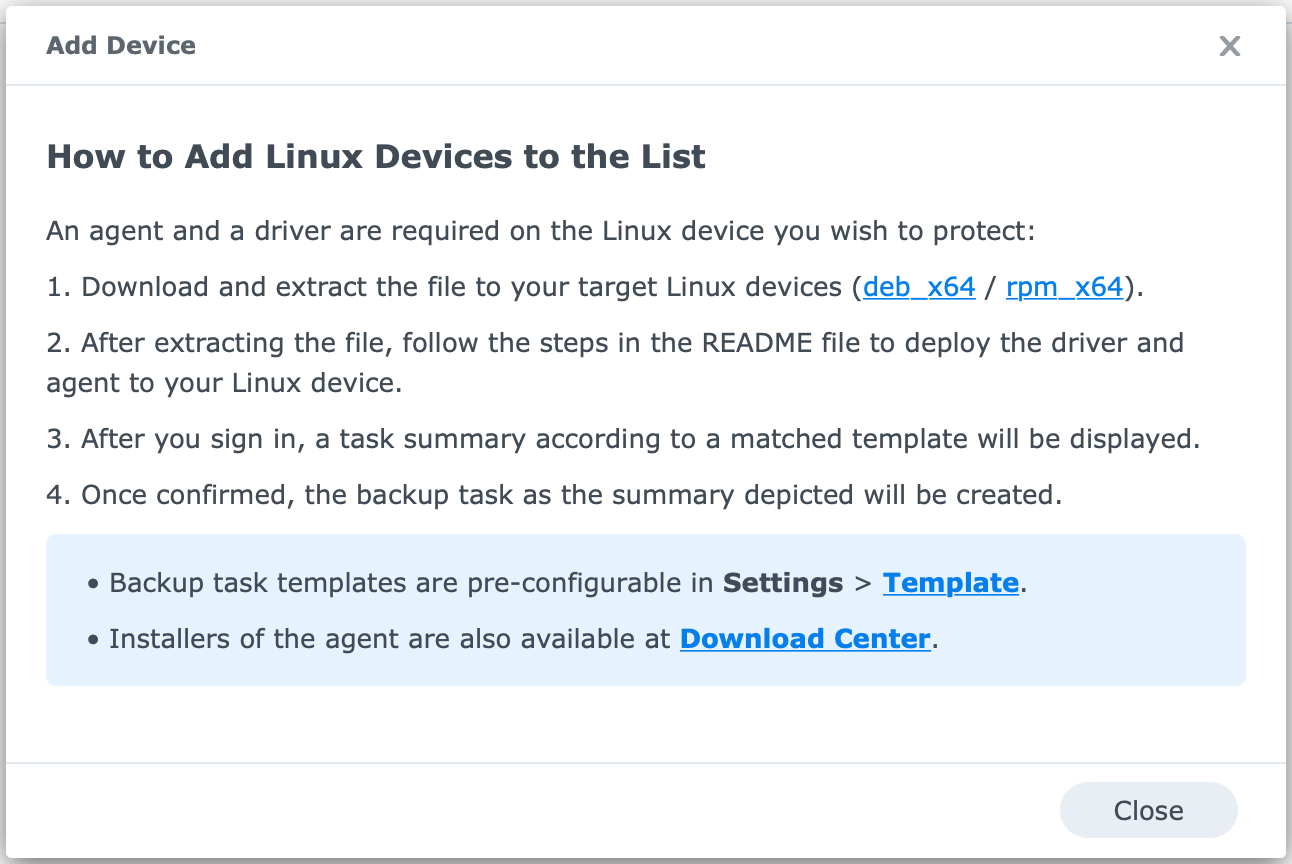
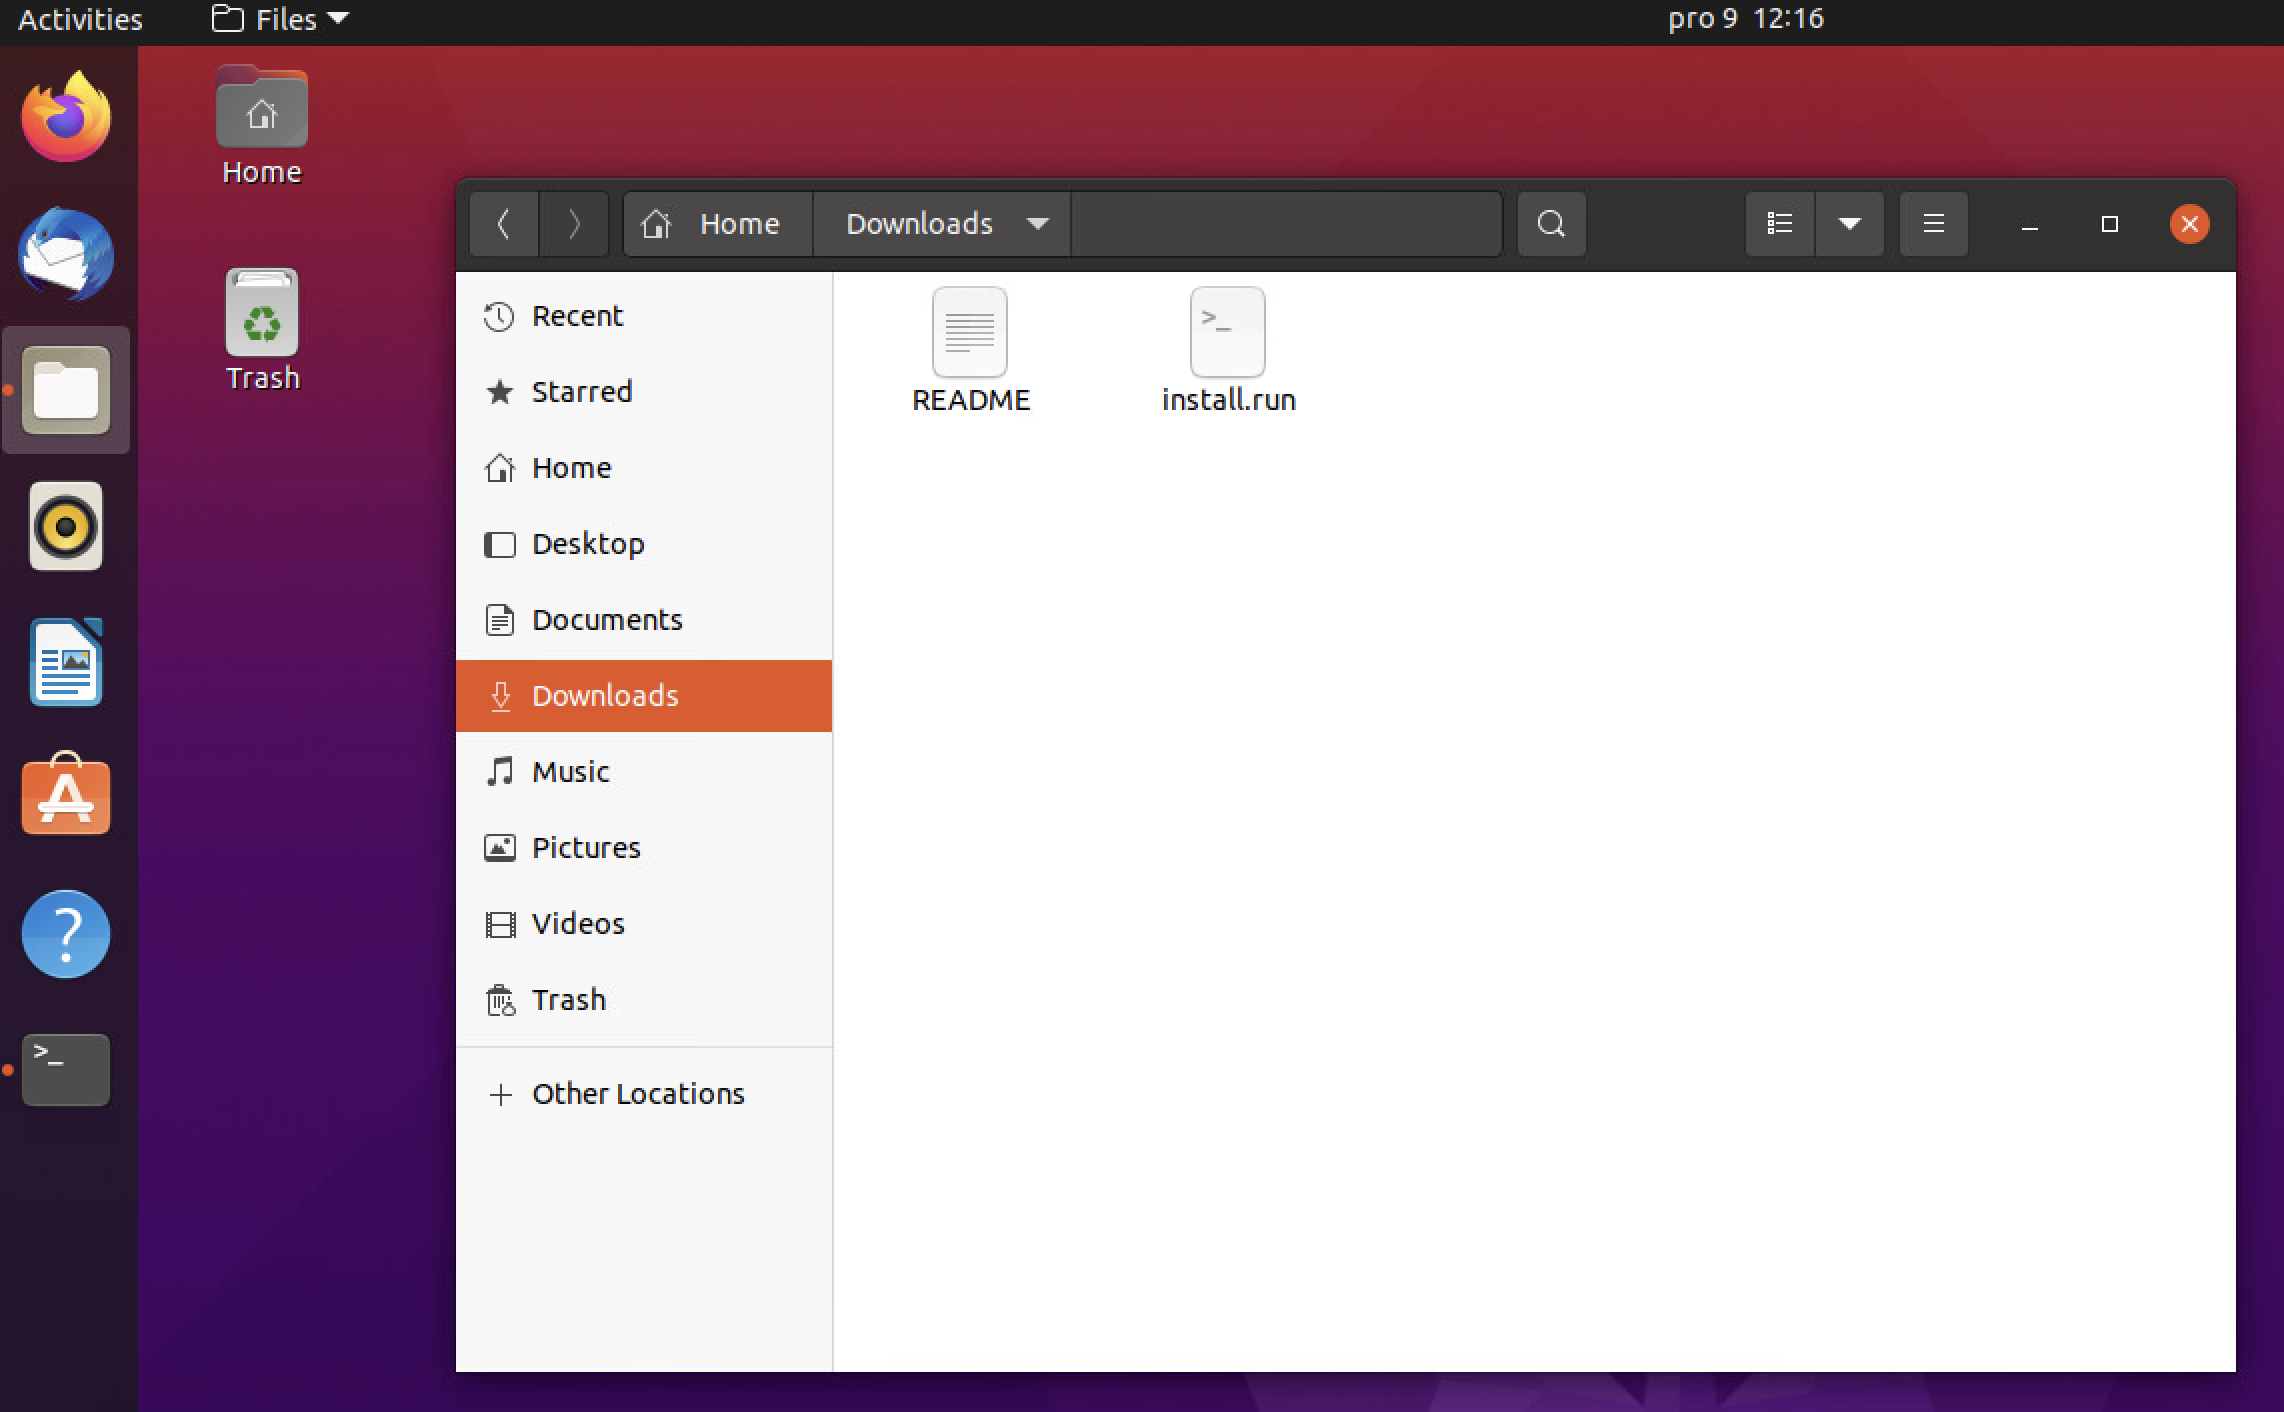
STEP01 - Download and extract the installation
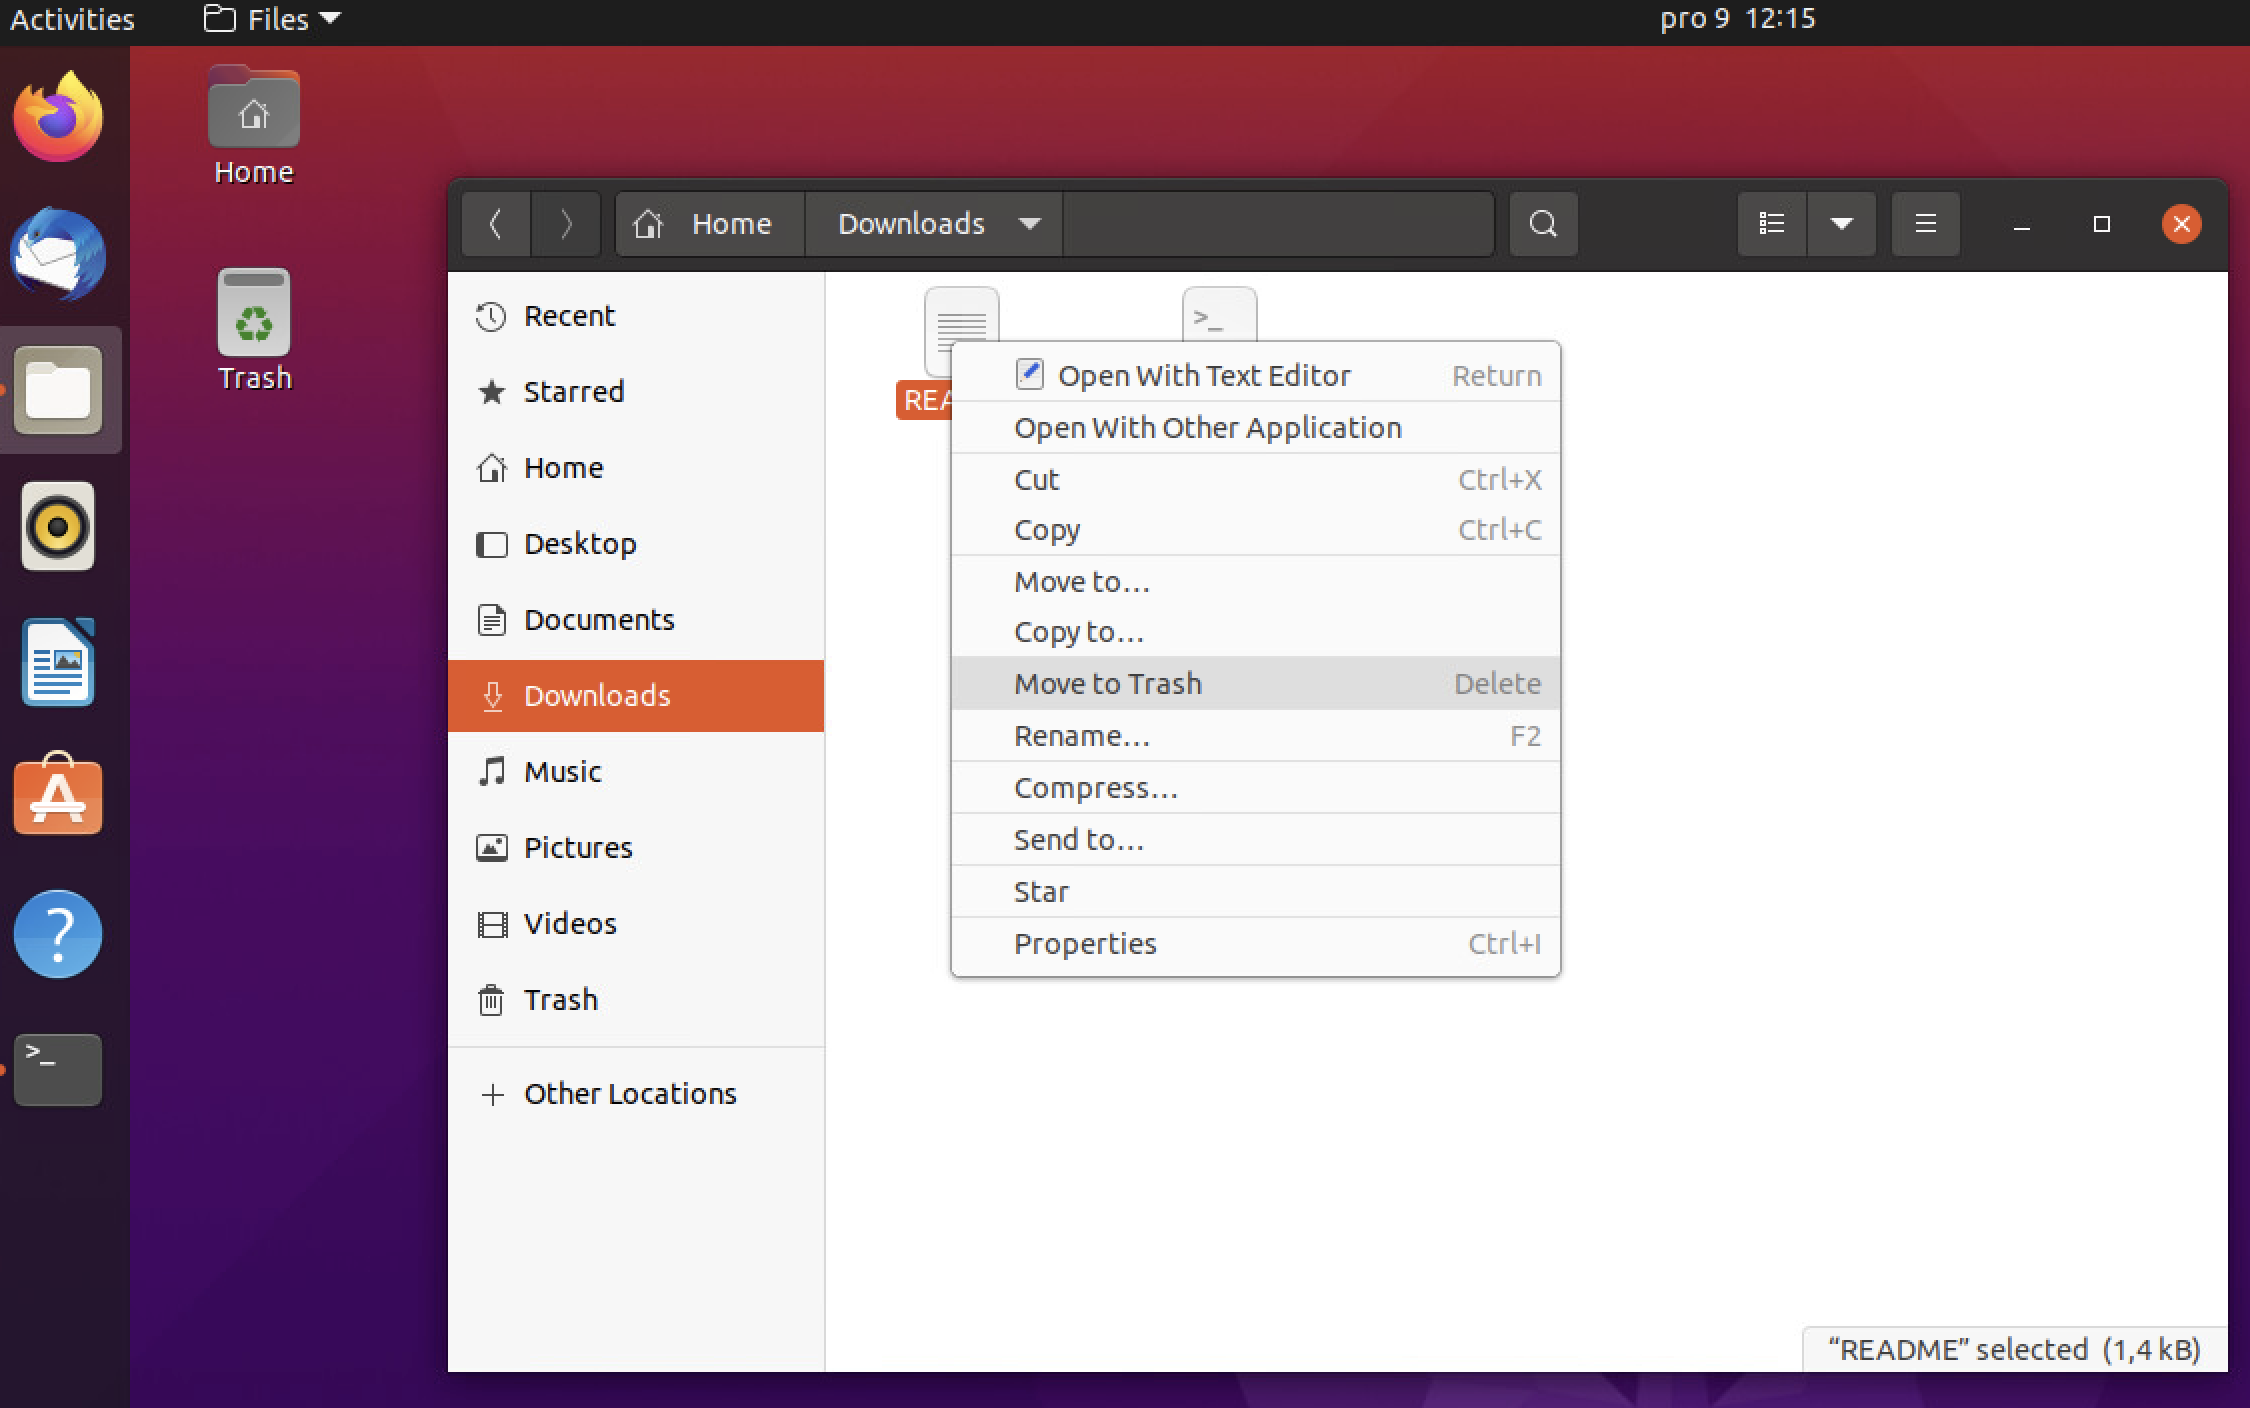
In the image above you can see the option to download the DEB or RPM version of the installation, so choose what fits your needs best. After you have extracted it, you will see two files: read.me and install.run.
Position yourself in the folder where you extracted the files and start the installation with the following command:
sudo ./install.ru
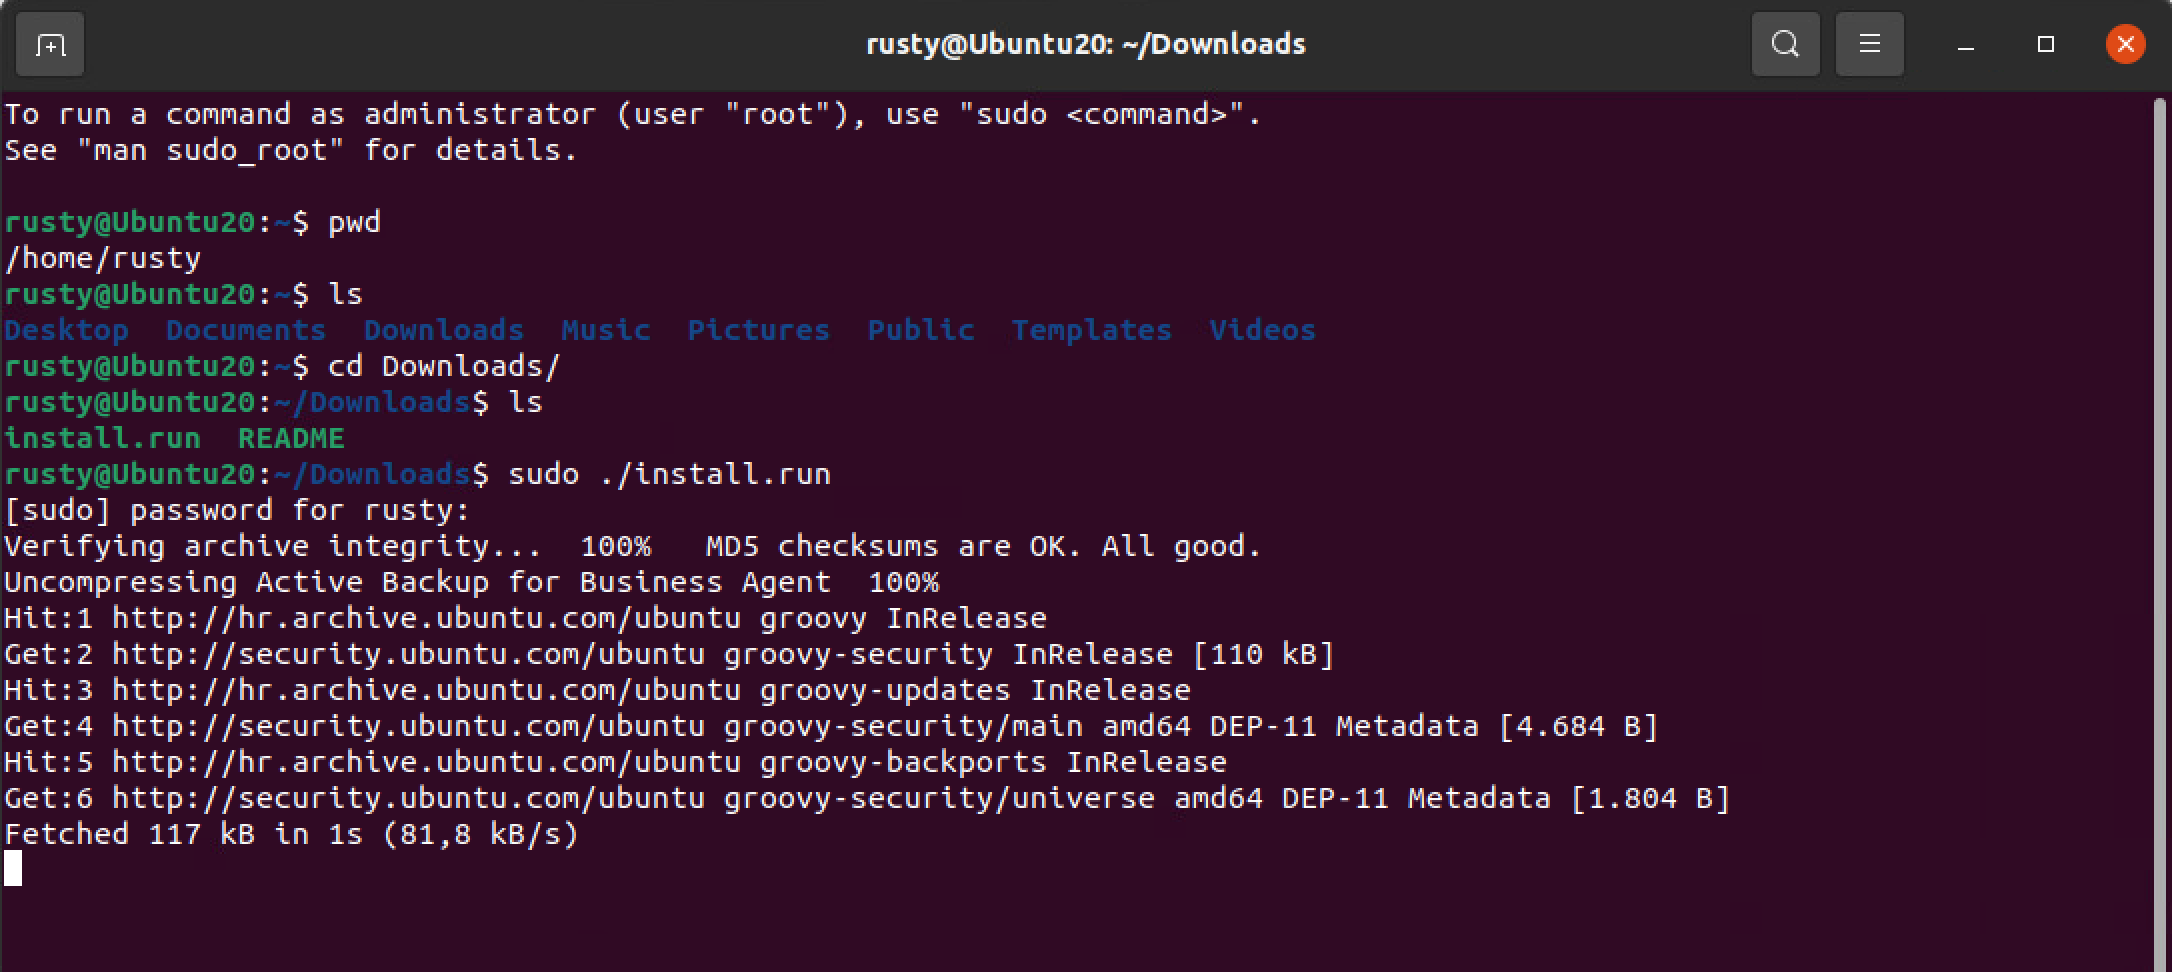
As described in the read.me some components will need to be installed as part of the ABB linux client install.
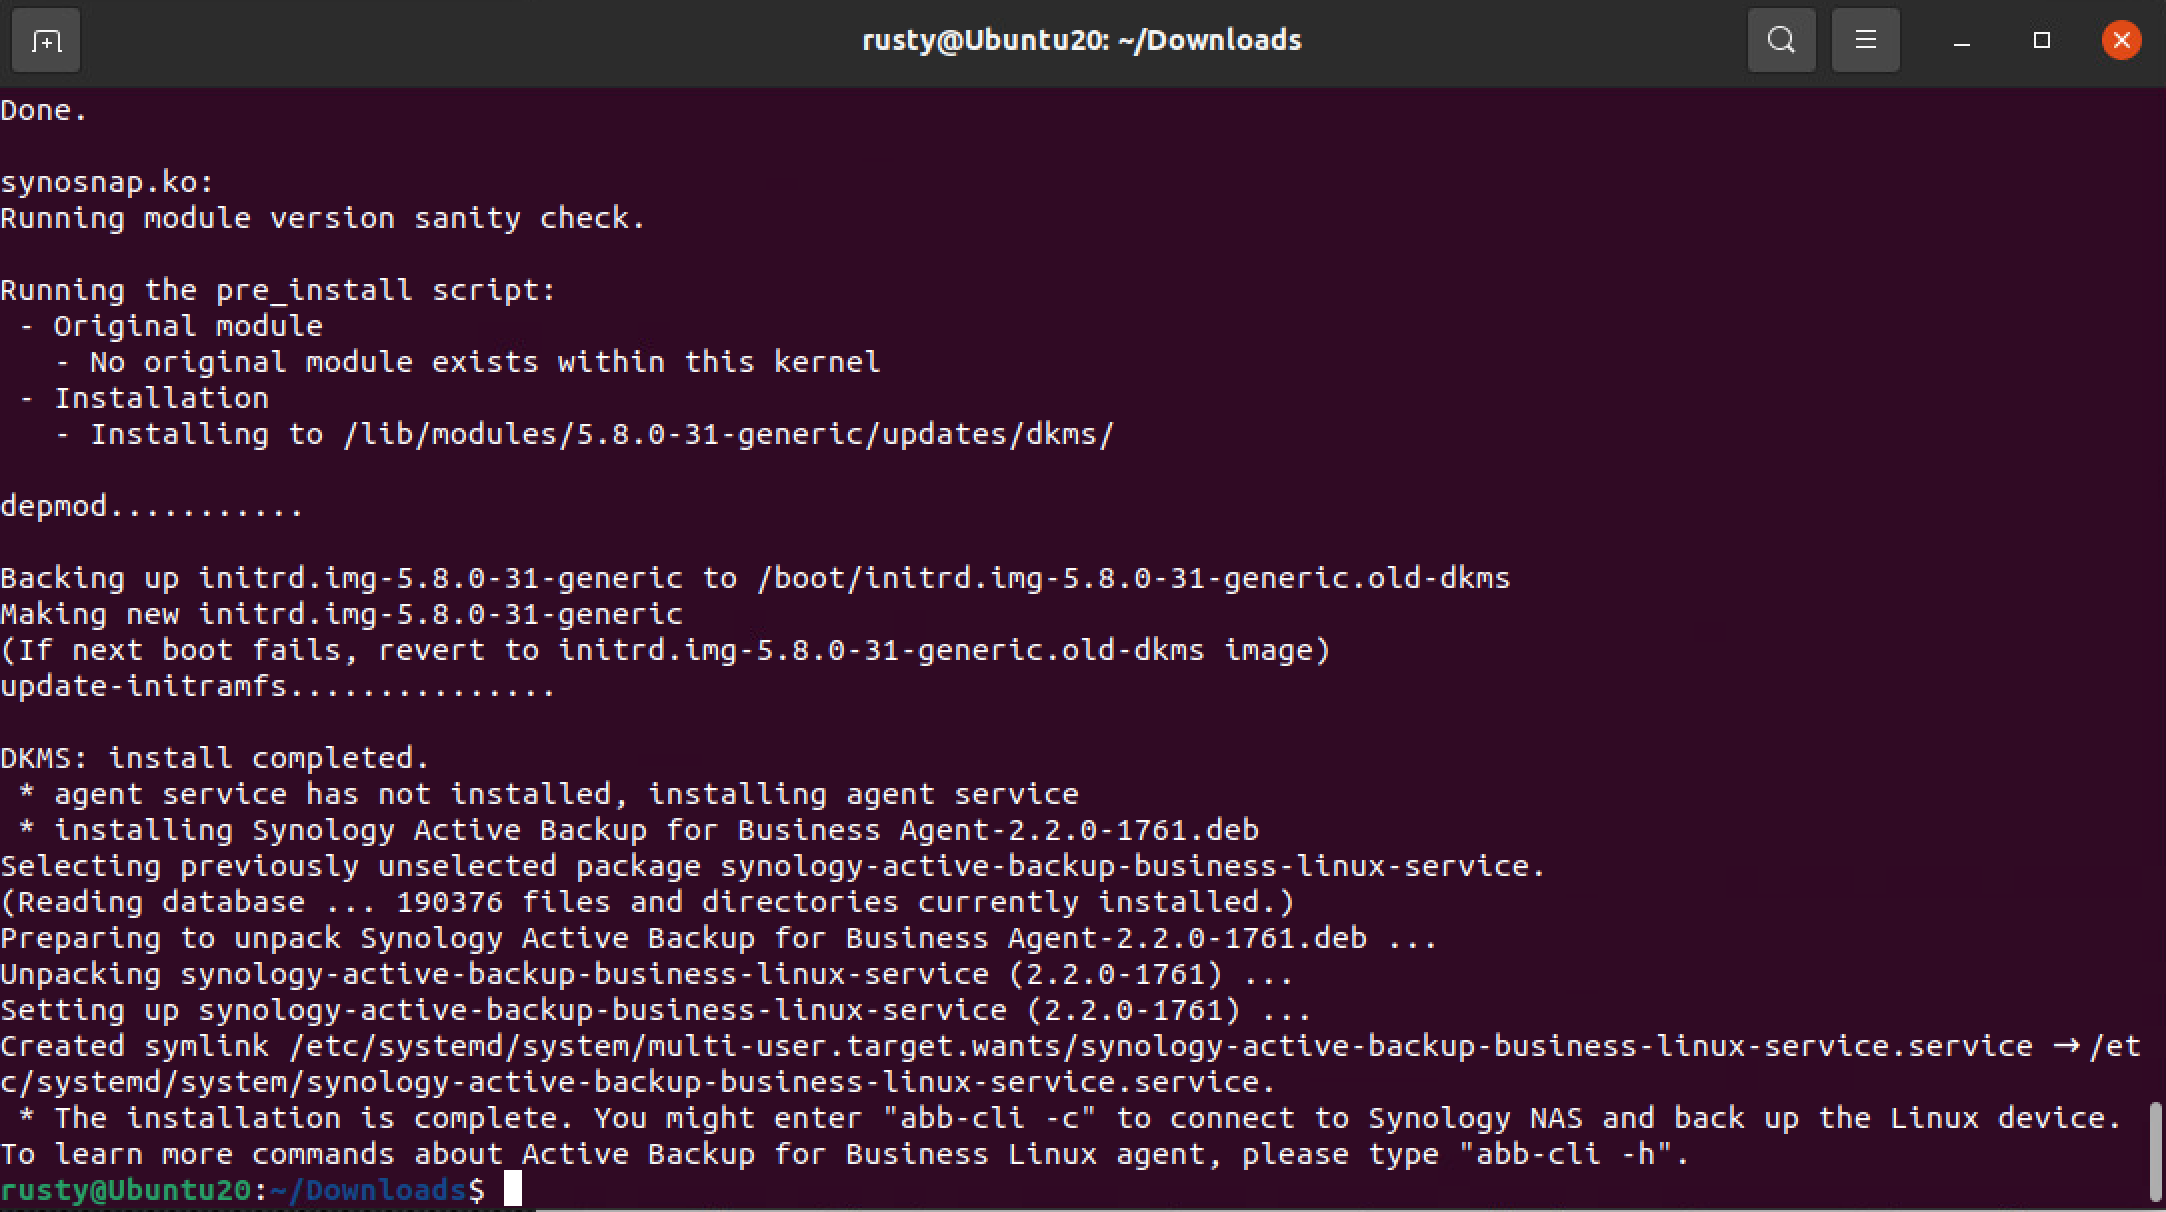
Install process should complete in a matter of minutes even with all the downloads happening. As instructed, now you need to connect your machine using the ABB to your server-side (NAS).
STEP02 - Connection to your ABB instance
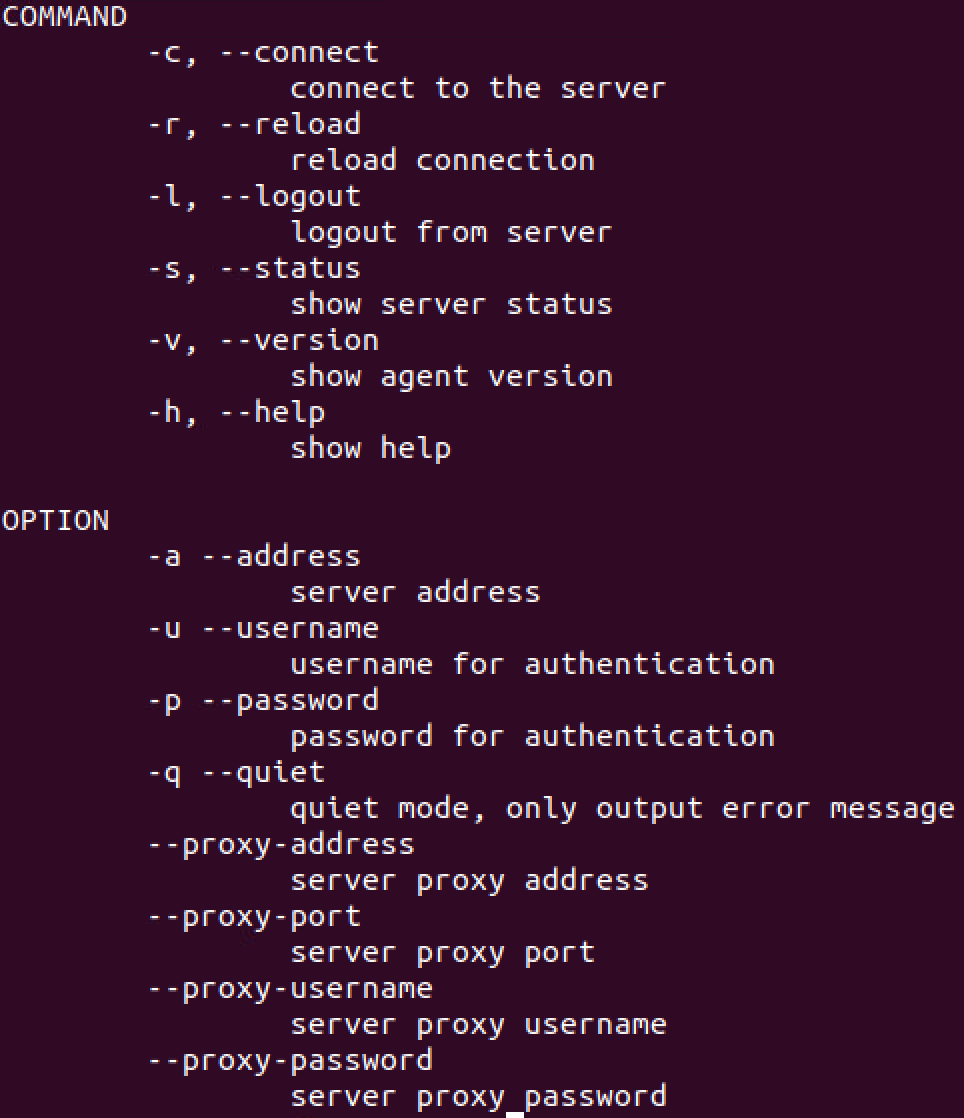
As you figured by now, the Linux ABB client is a command-line based unlike the Windows one. No matter it's straightforward.
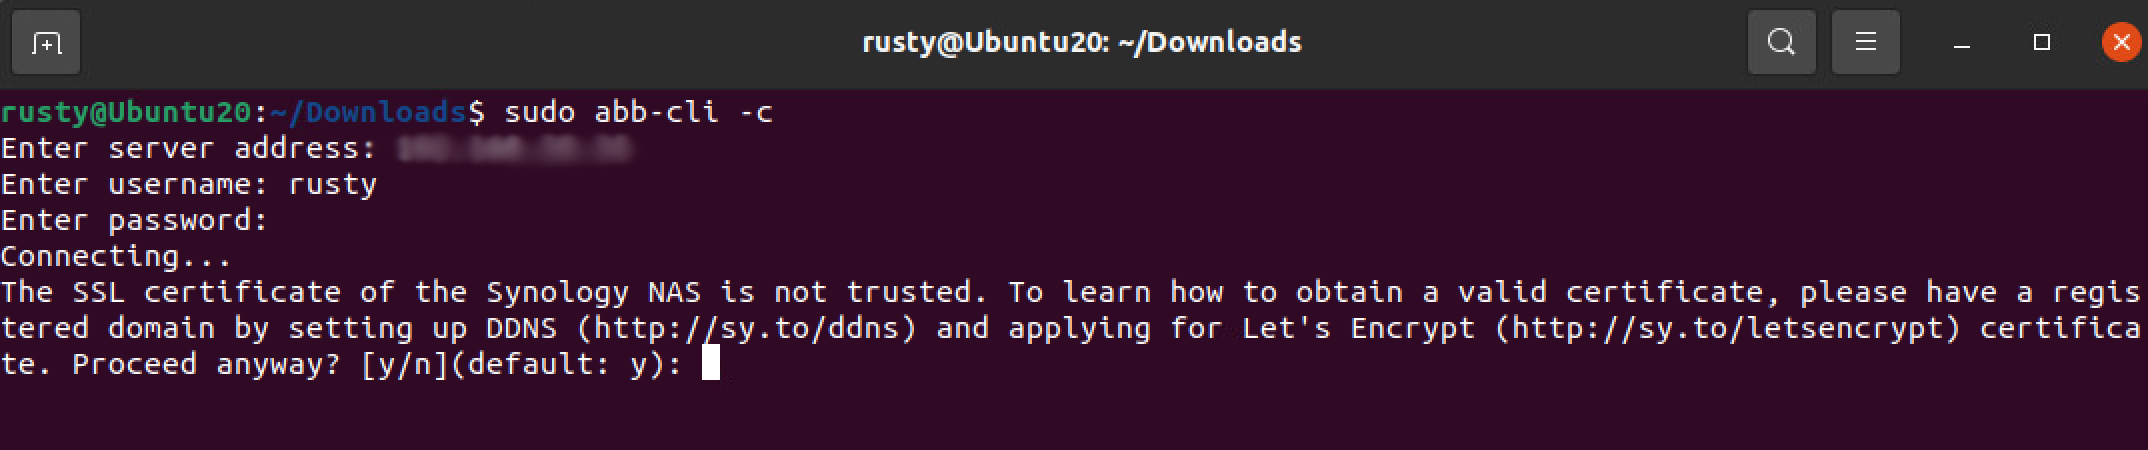
Start by running this command:
sudo abb-cli -c
This will initiate the connect command and as you your ABB server IP, username, and password, as well as to confirm any certificate exceptions that might happen.
After that, a confirmation screen will appear with details of your task that it will pick up from the Settings > Templates section of your ABB instance (Linux template).
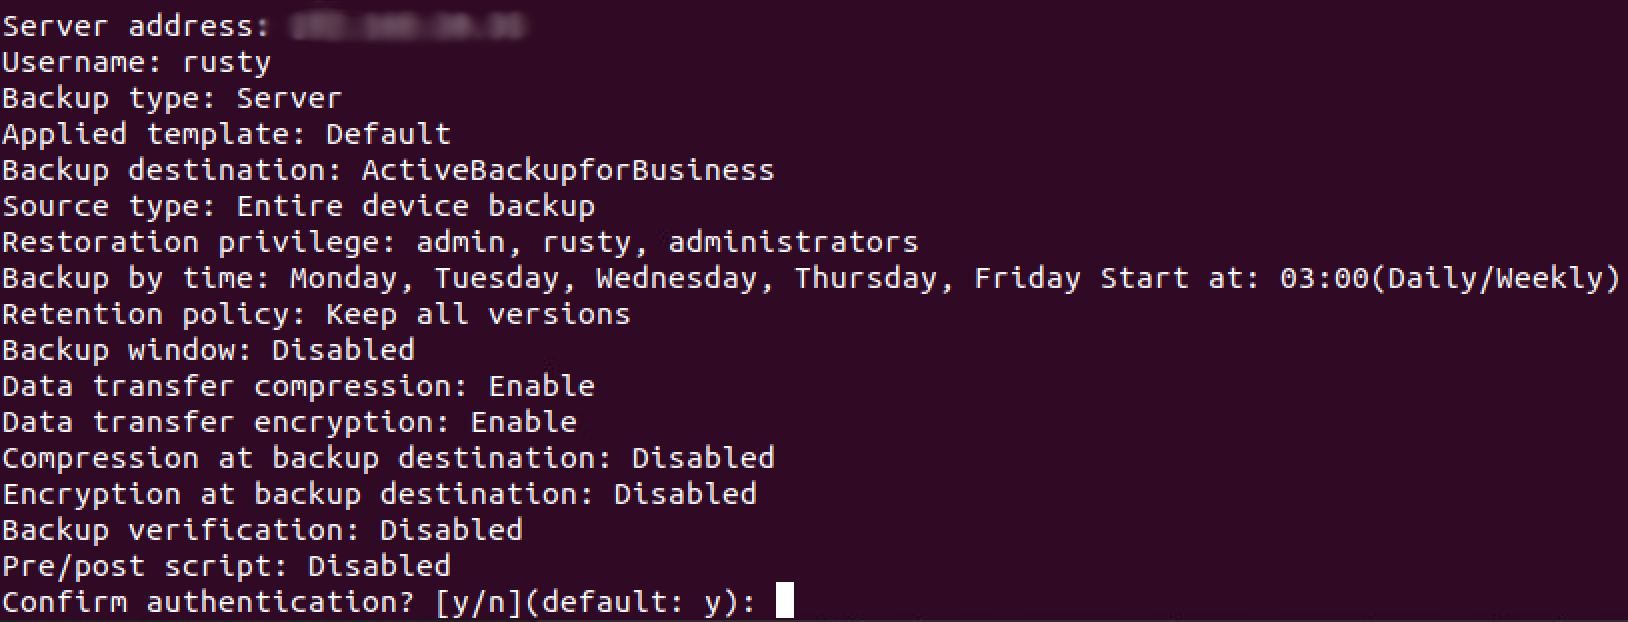
As soon as you confirm the settings, the task will be registered on your Linux machine and it will show up in your ABB Linux section.
In order to connect using some additional settings (if needed) you can use the following commands:
Running the backup (linux)
Now that we have the machine on the list we can monitor it, and perform backup/restore operations with it.
To run a manual backup (outside a schedule for example), simply go to the Task list tab, locate the task that you want to run, and clicking the Backup button.
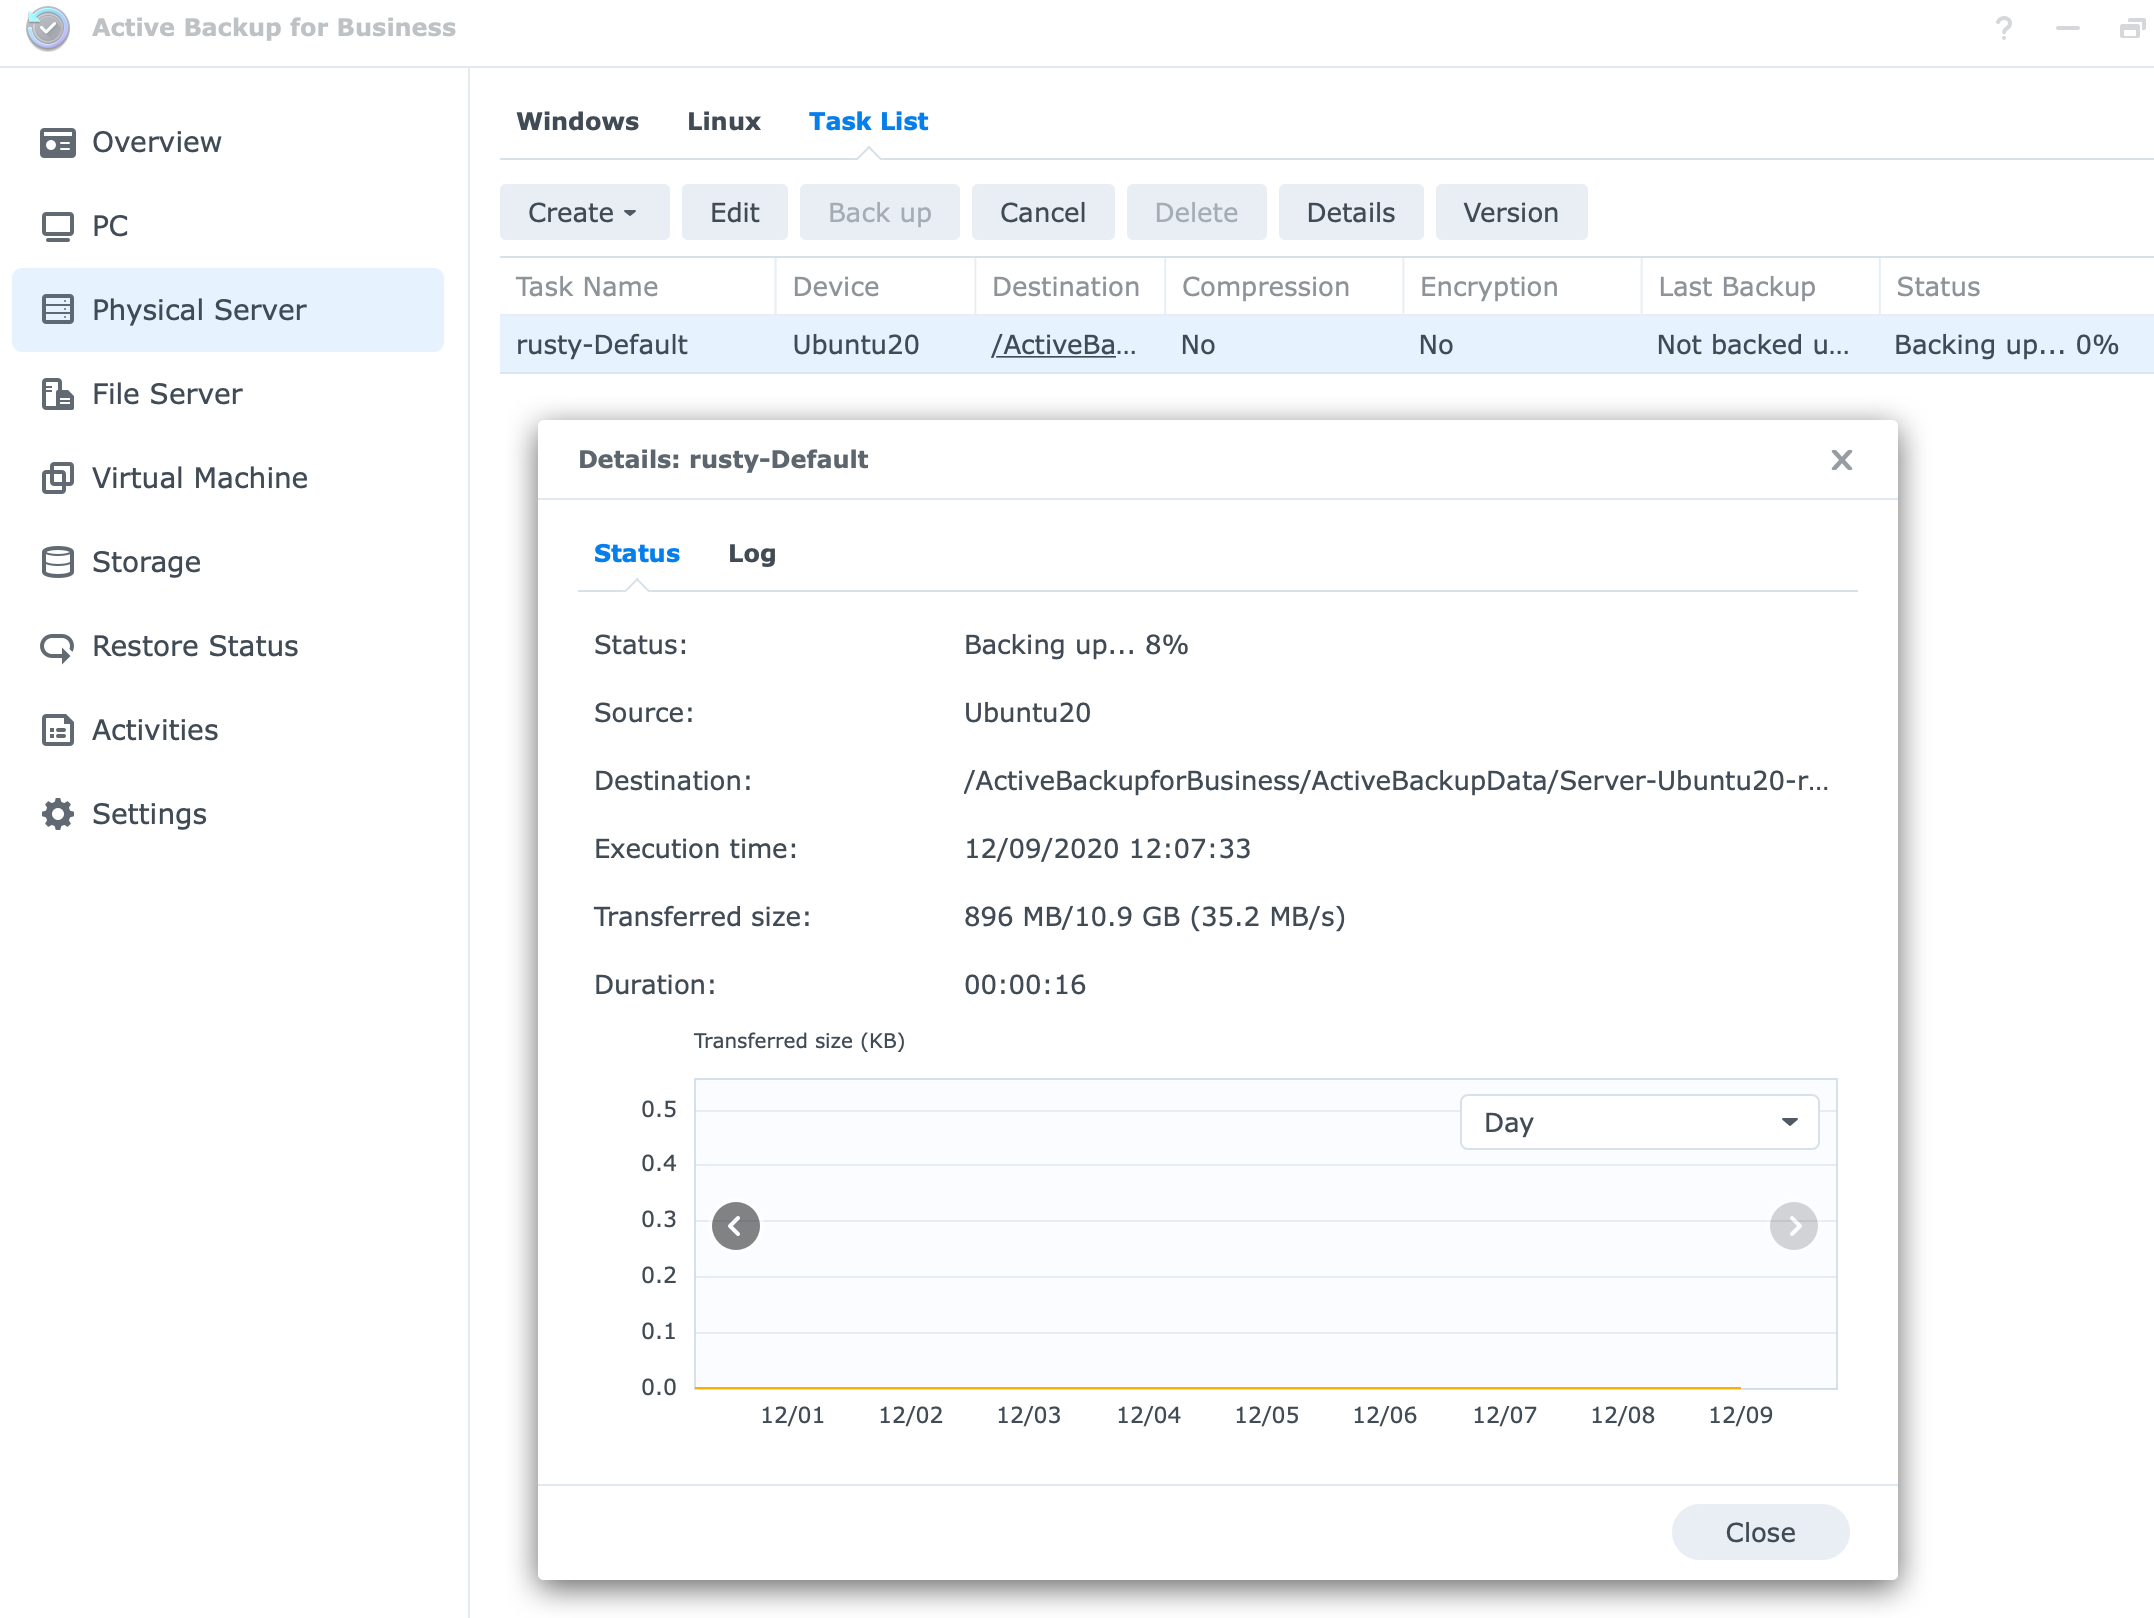
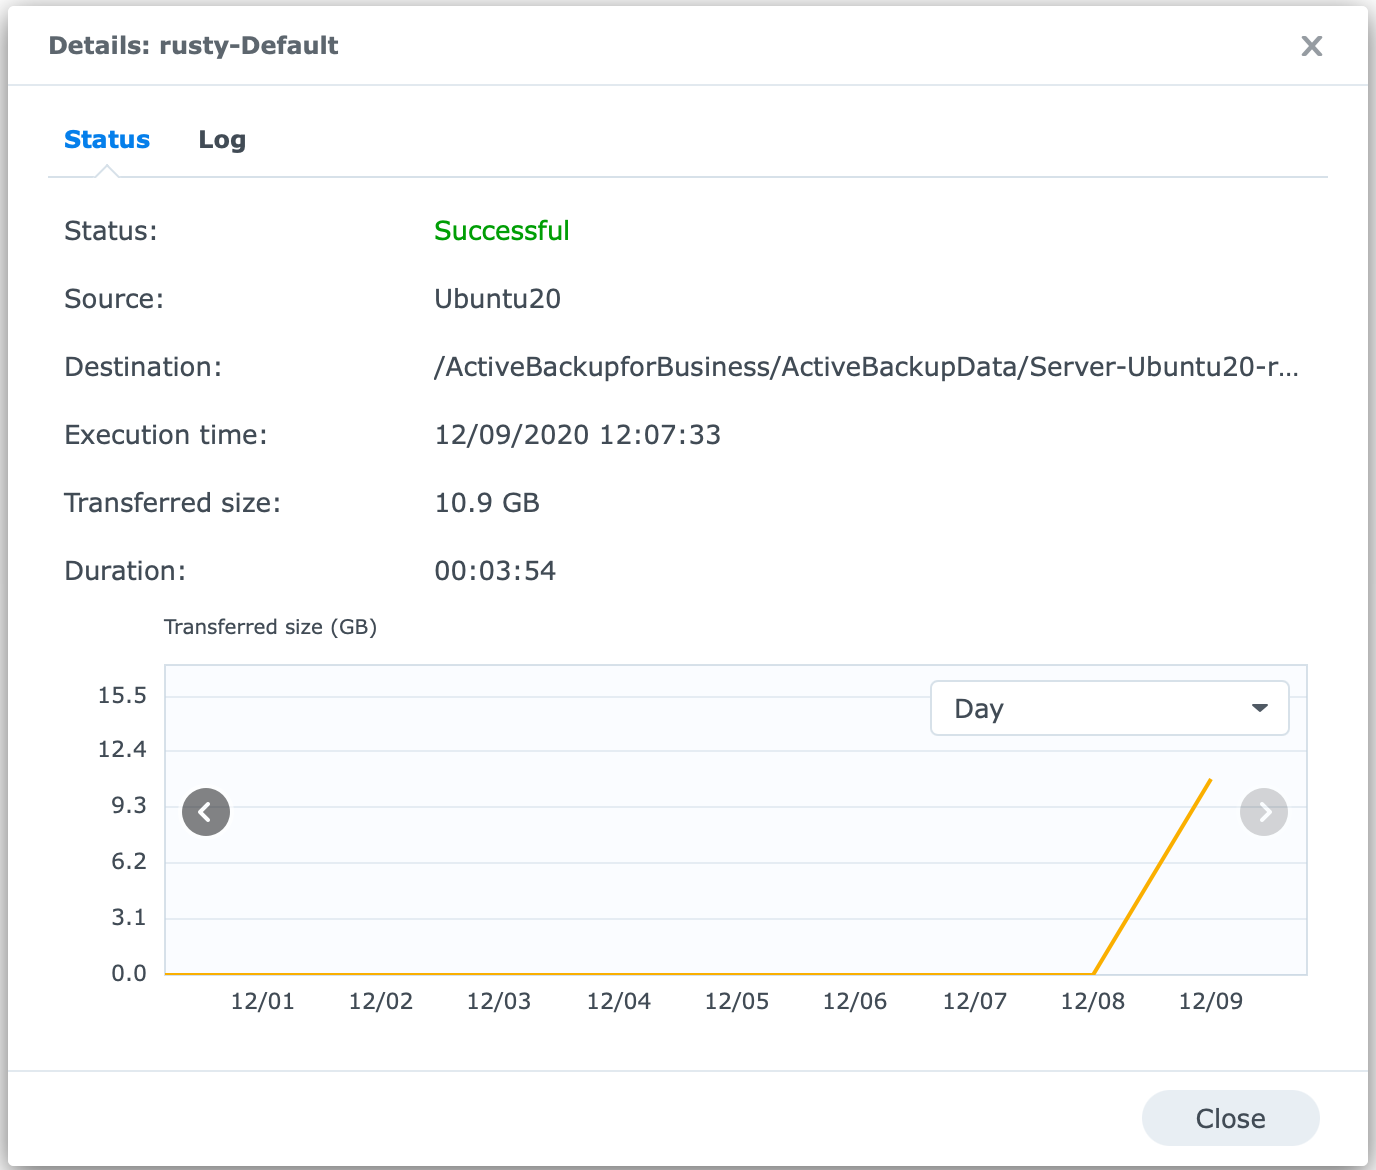
Using the Details button, you can see more information about the current task in real-time as well as over time stats about the amount of data transferred for a particular backup job.
Restore content using the ABB User portal
As we can see the process of backup is simple as expected and the same as it is with Windows based machines.
To get to your data you can use the User portal via the DSM menu page. Depending on your DSM user you will have access to single or multiple backup tasks.
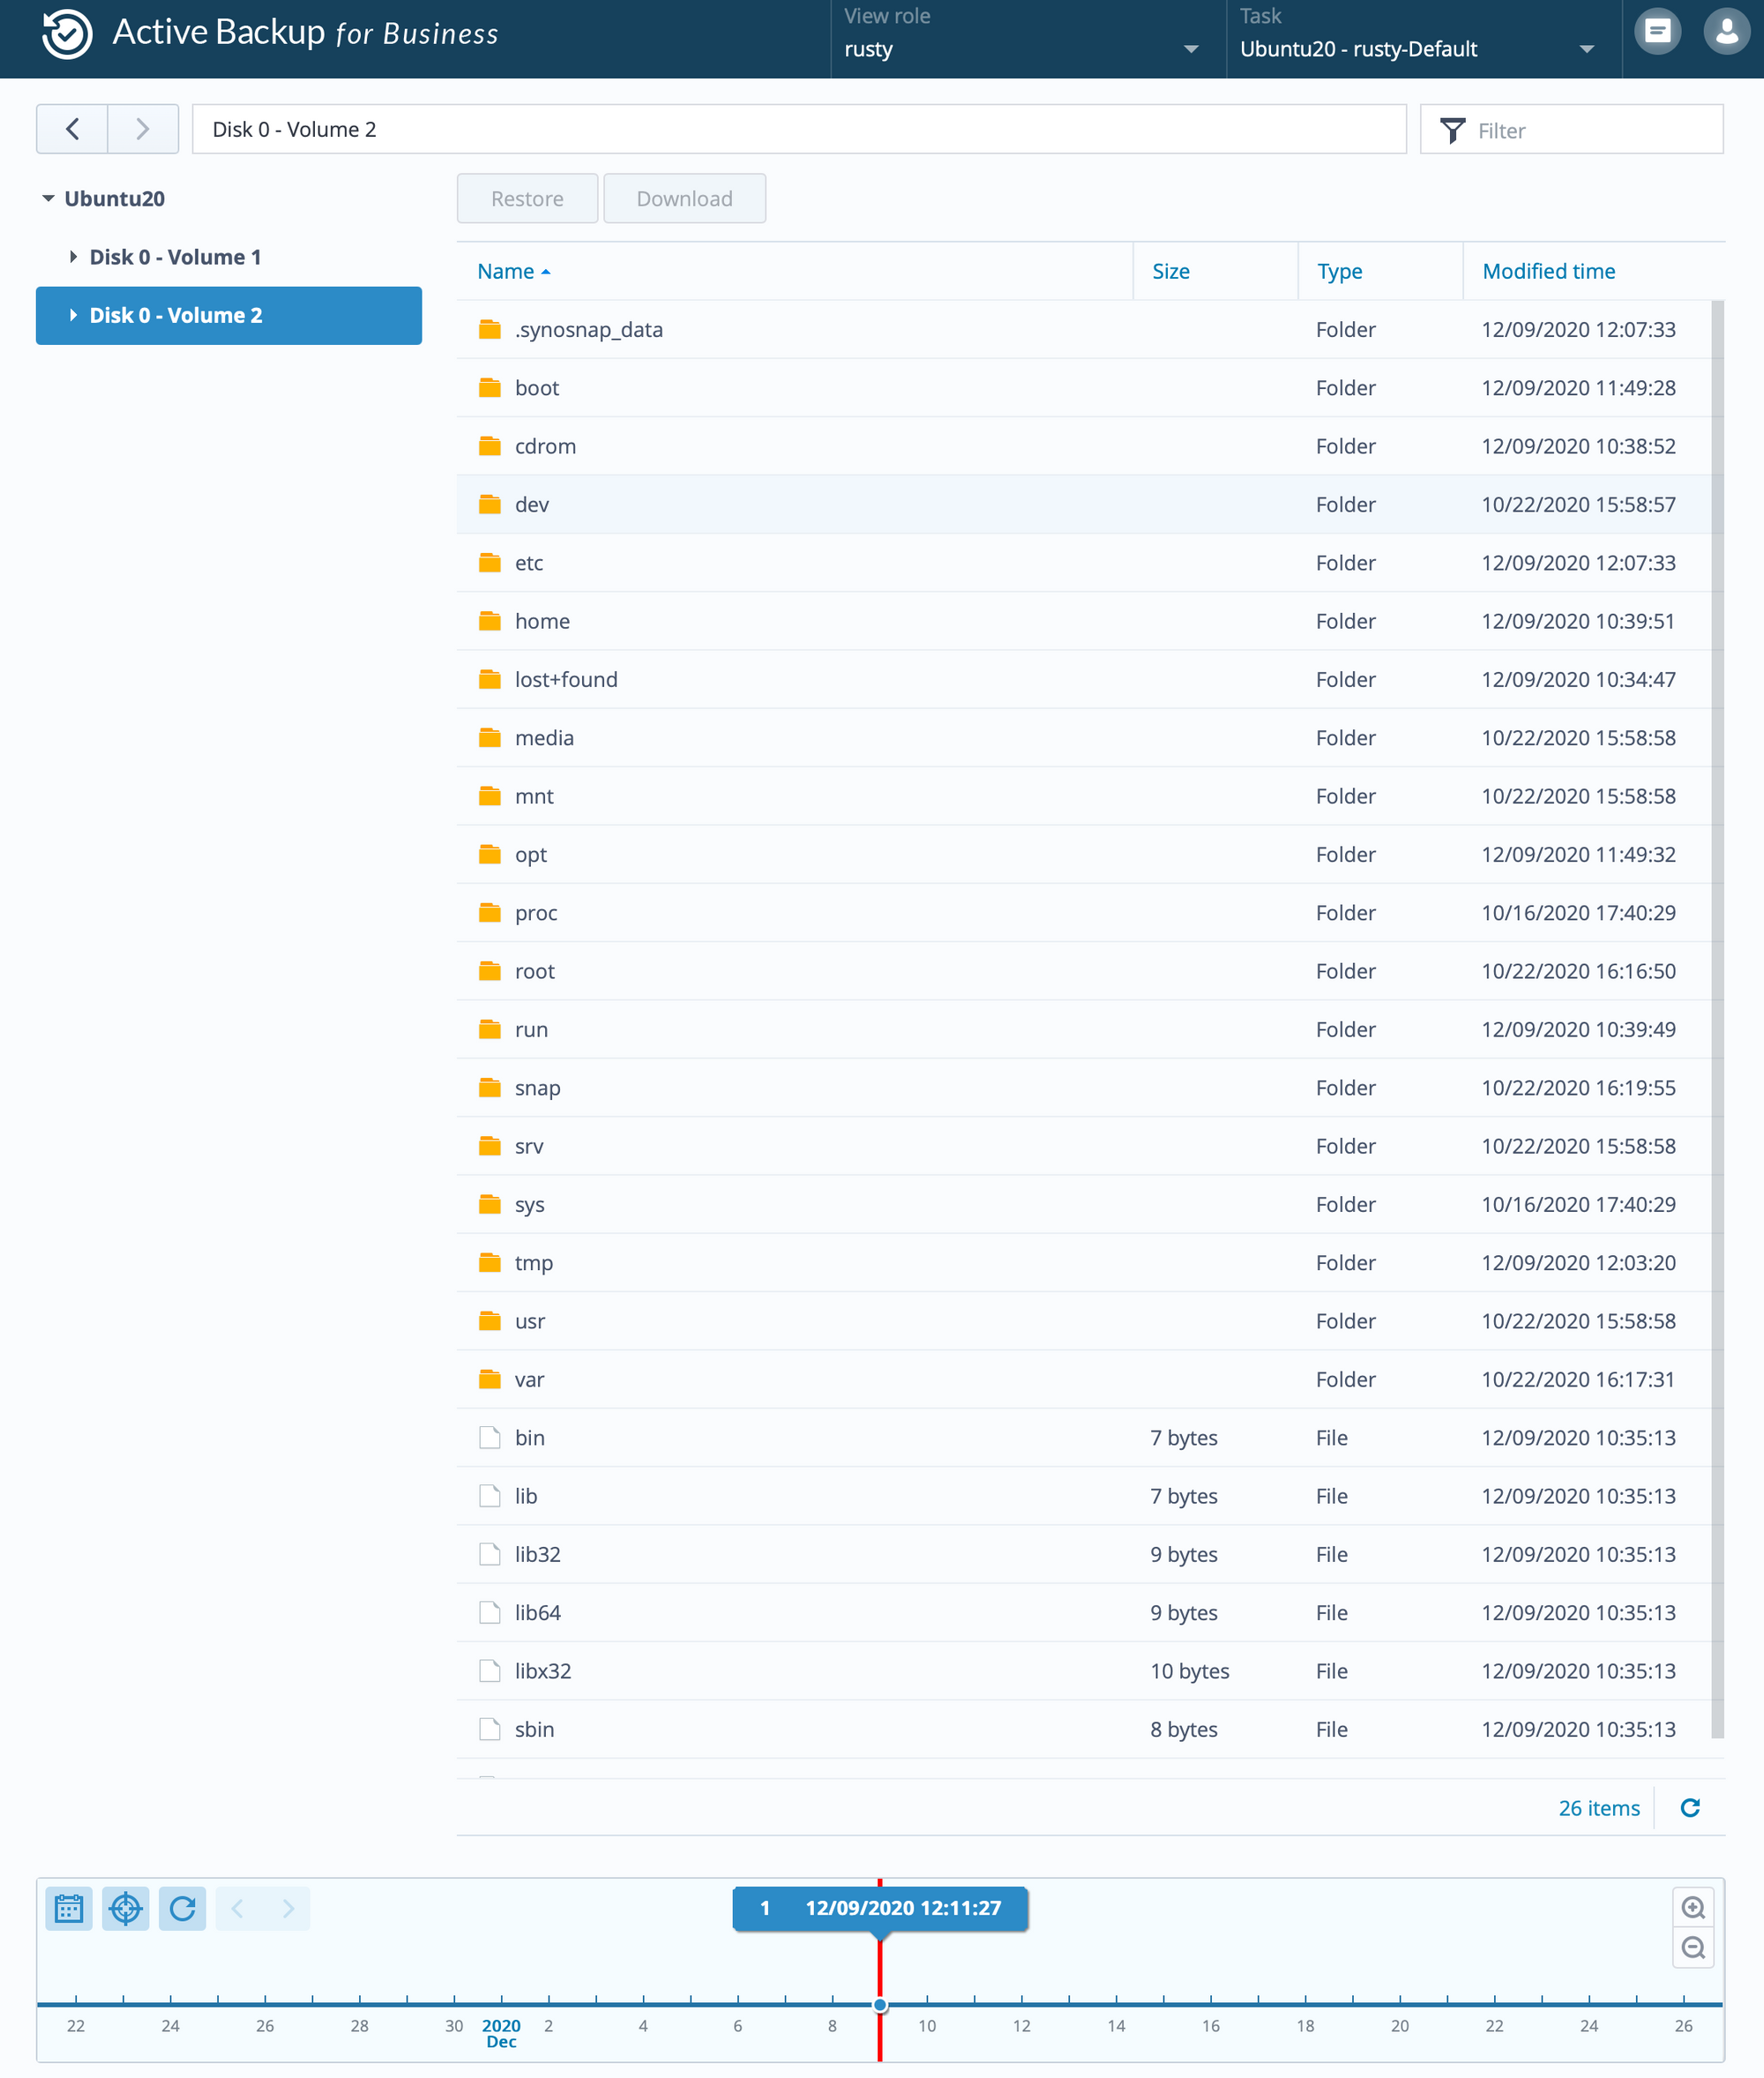
As expected, you can travel back and forth in time until you find the data or version you are looking for. The next few images will simulate a deletion of a single file as well as its restoration using the portal.

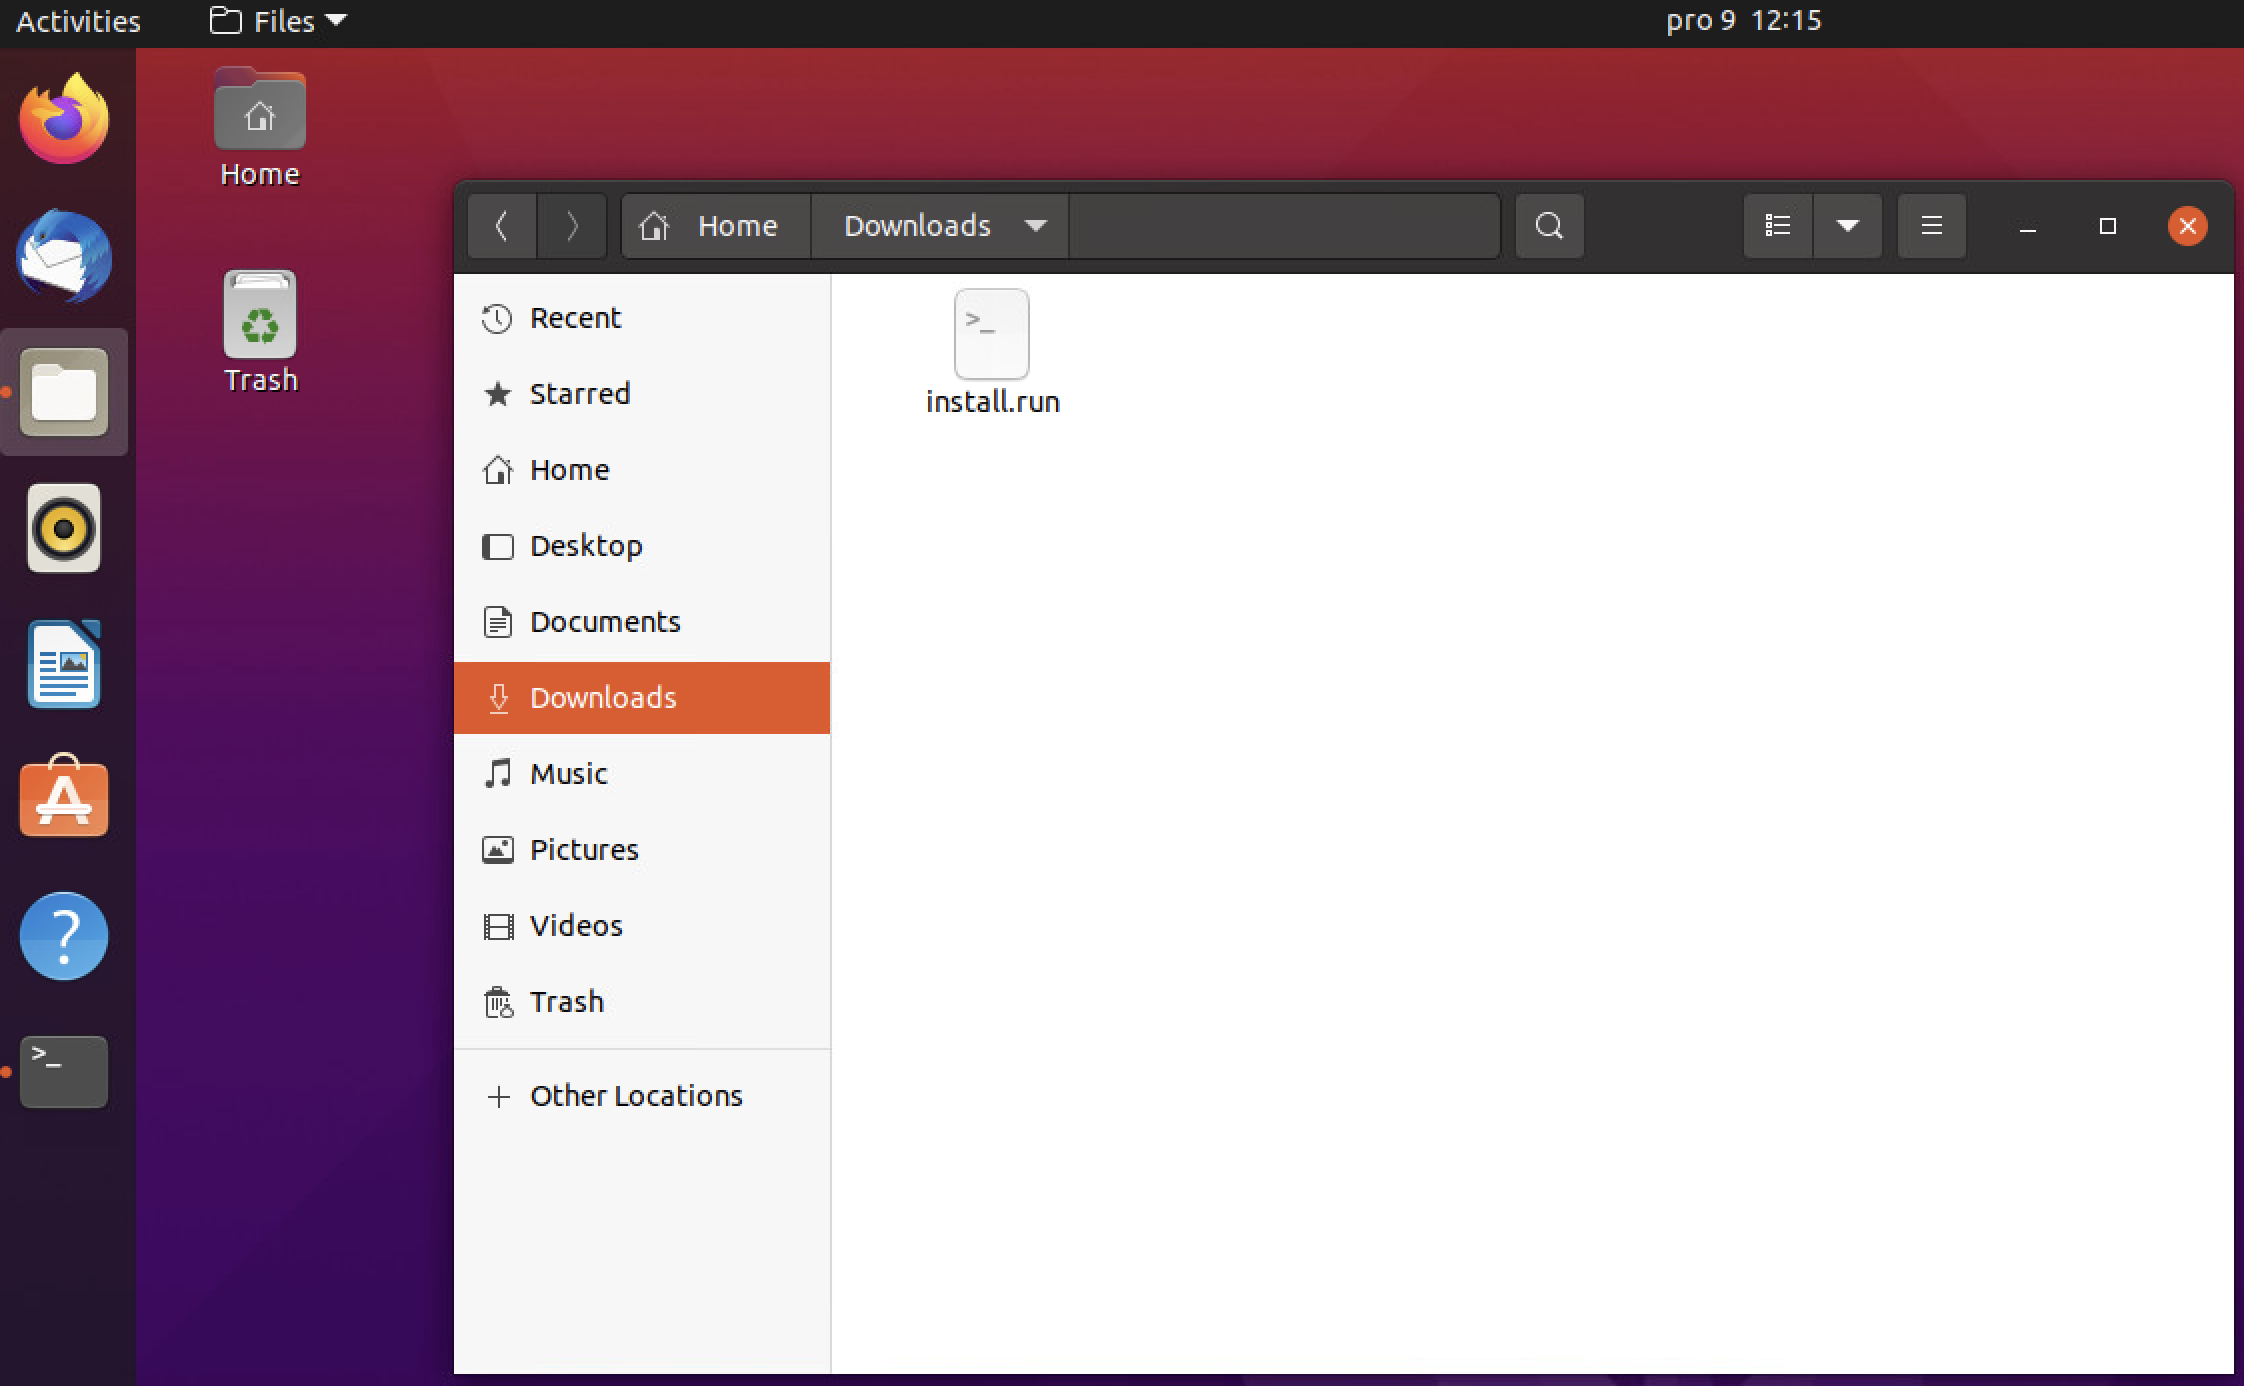
We can now use the portal interface to locate the file and restore it.
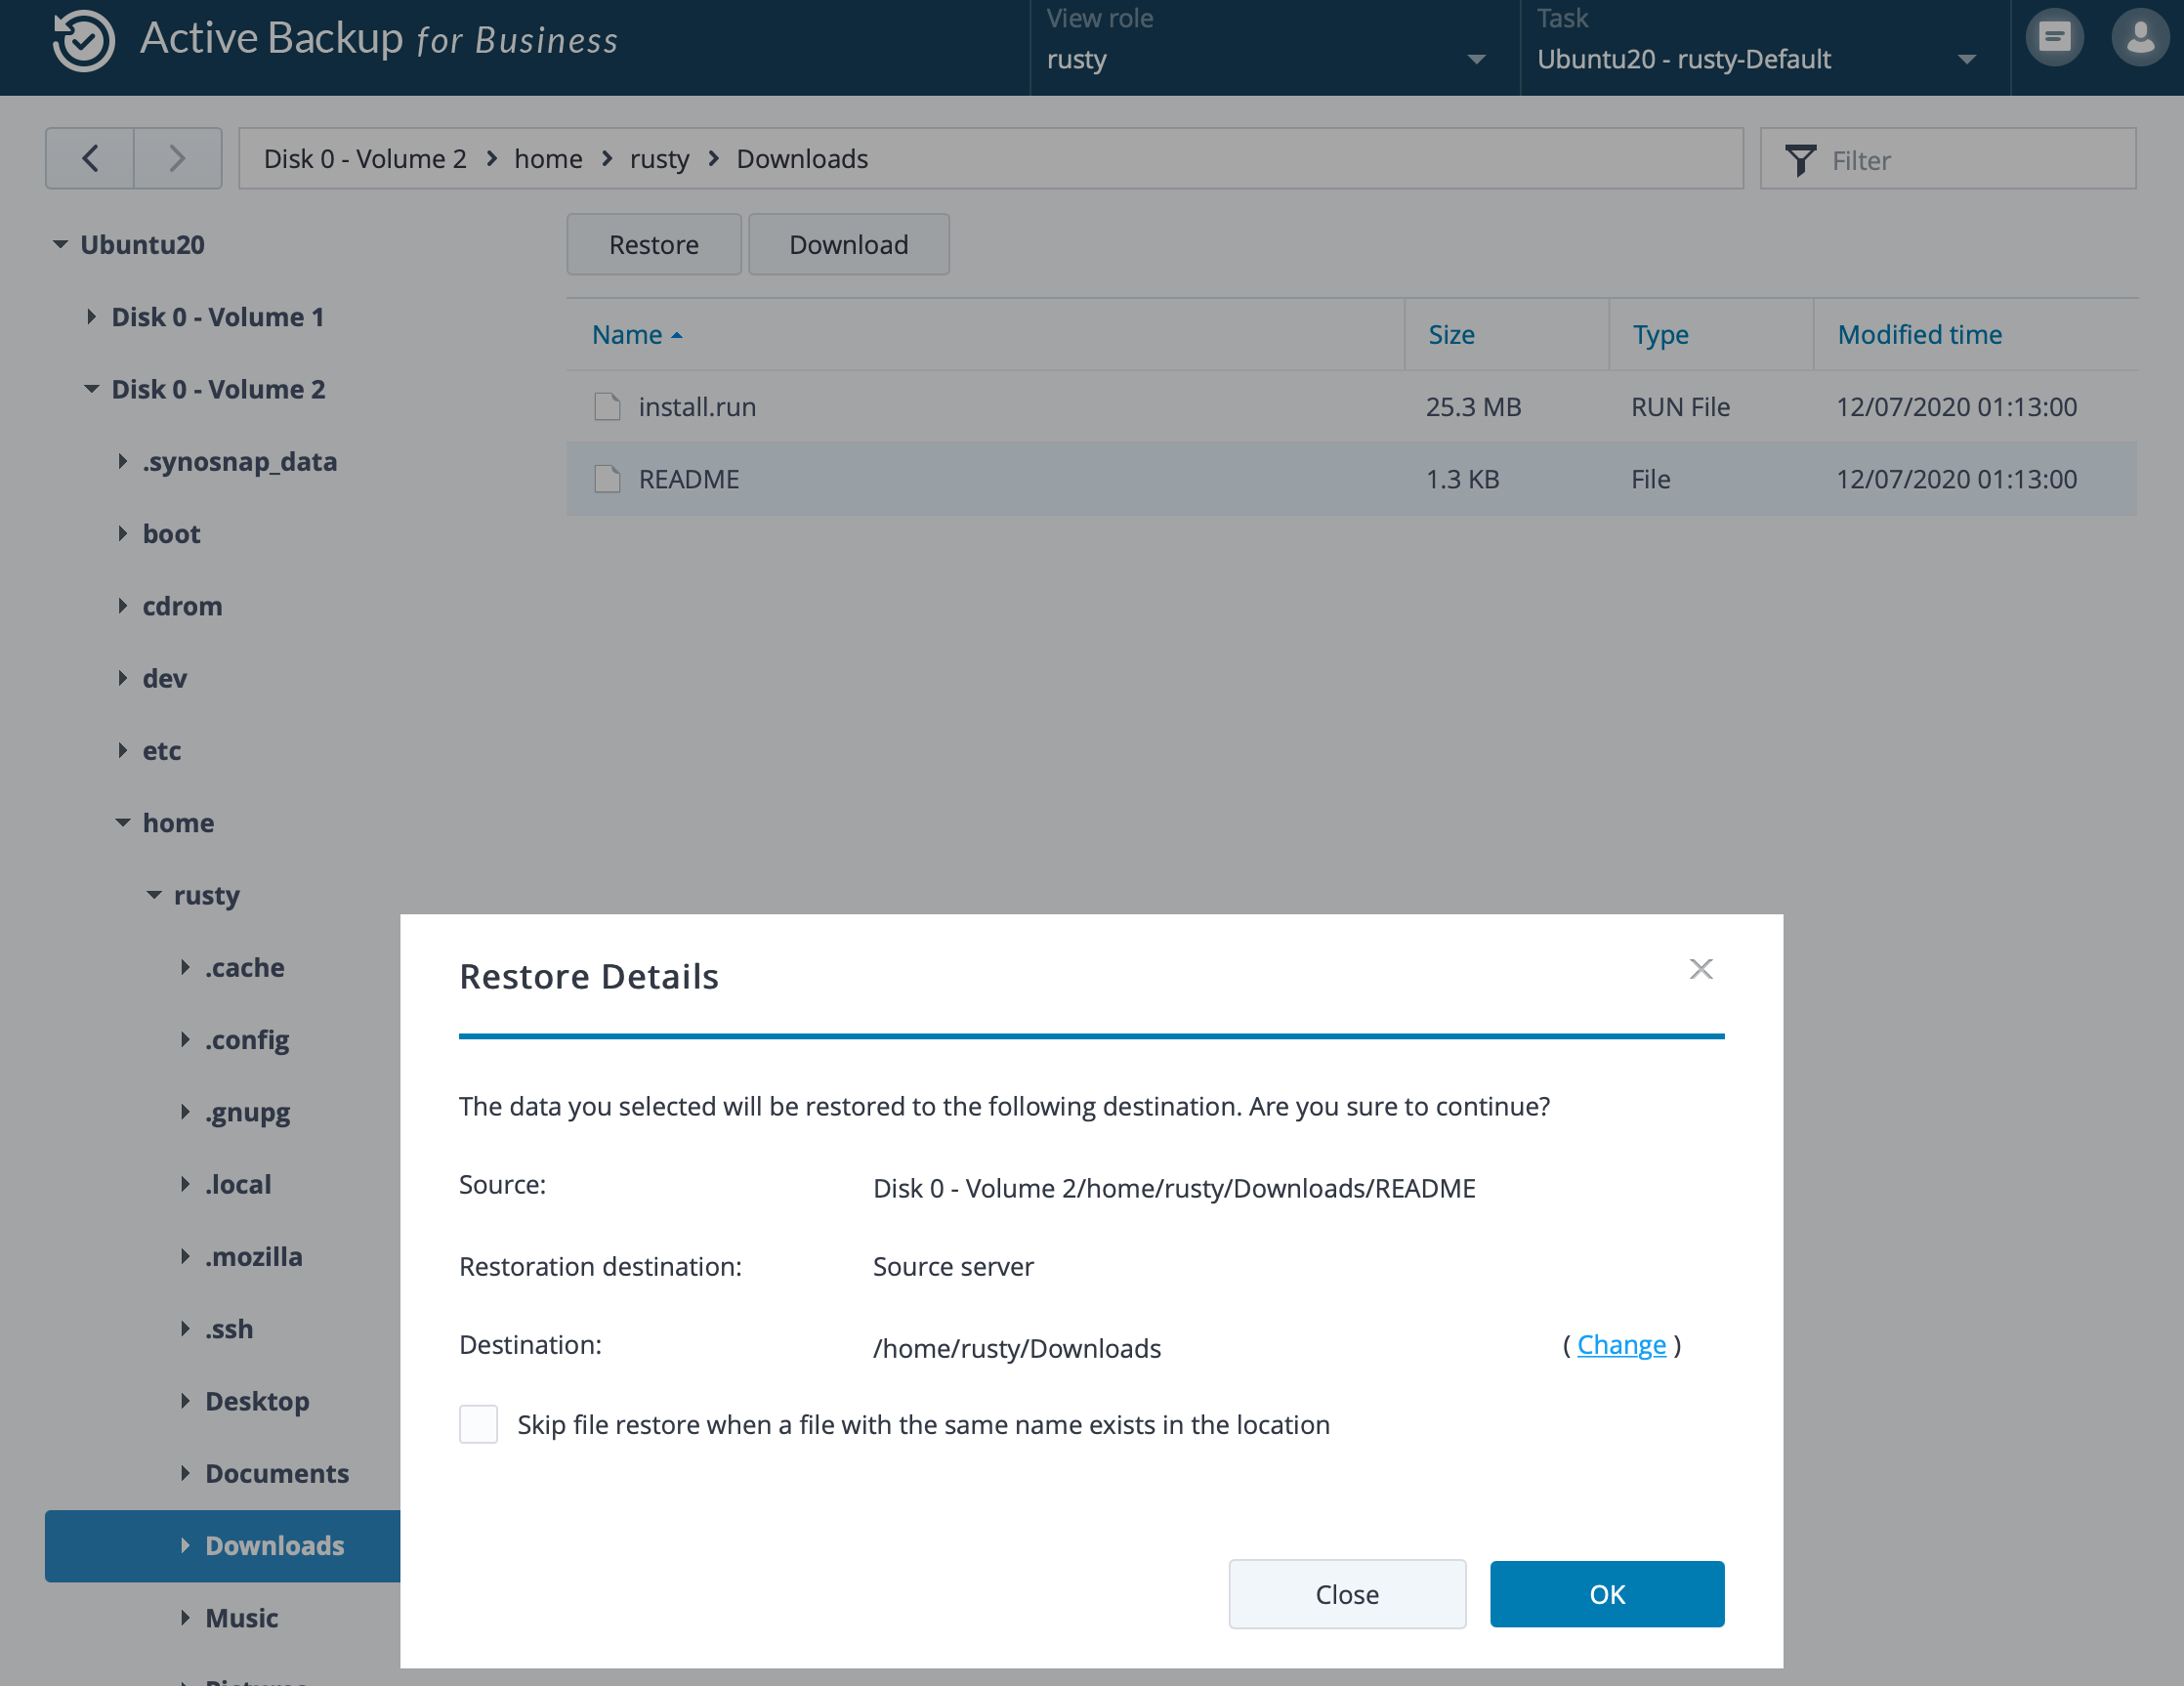
Simply select the file and click the Restore button. Confirm it, and you are done.
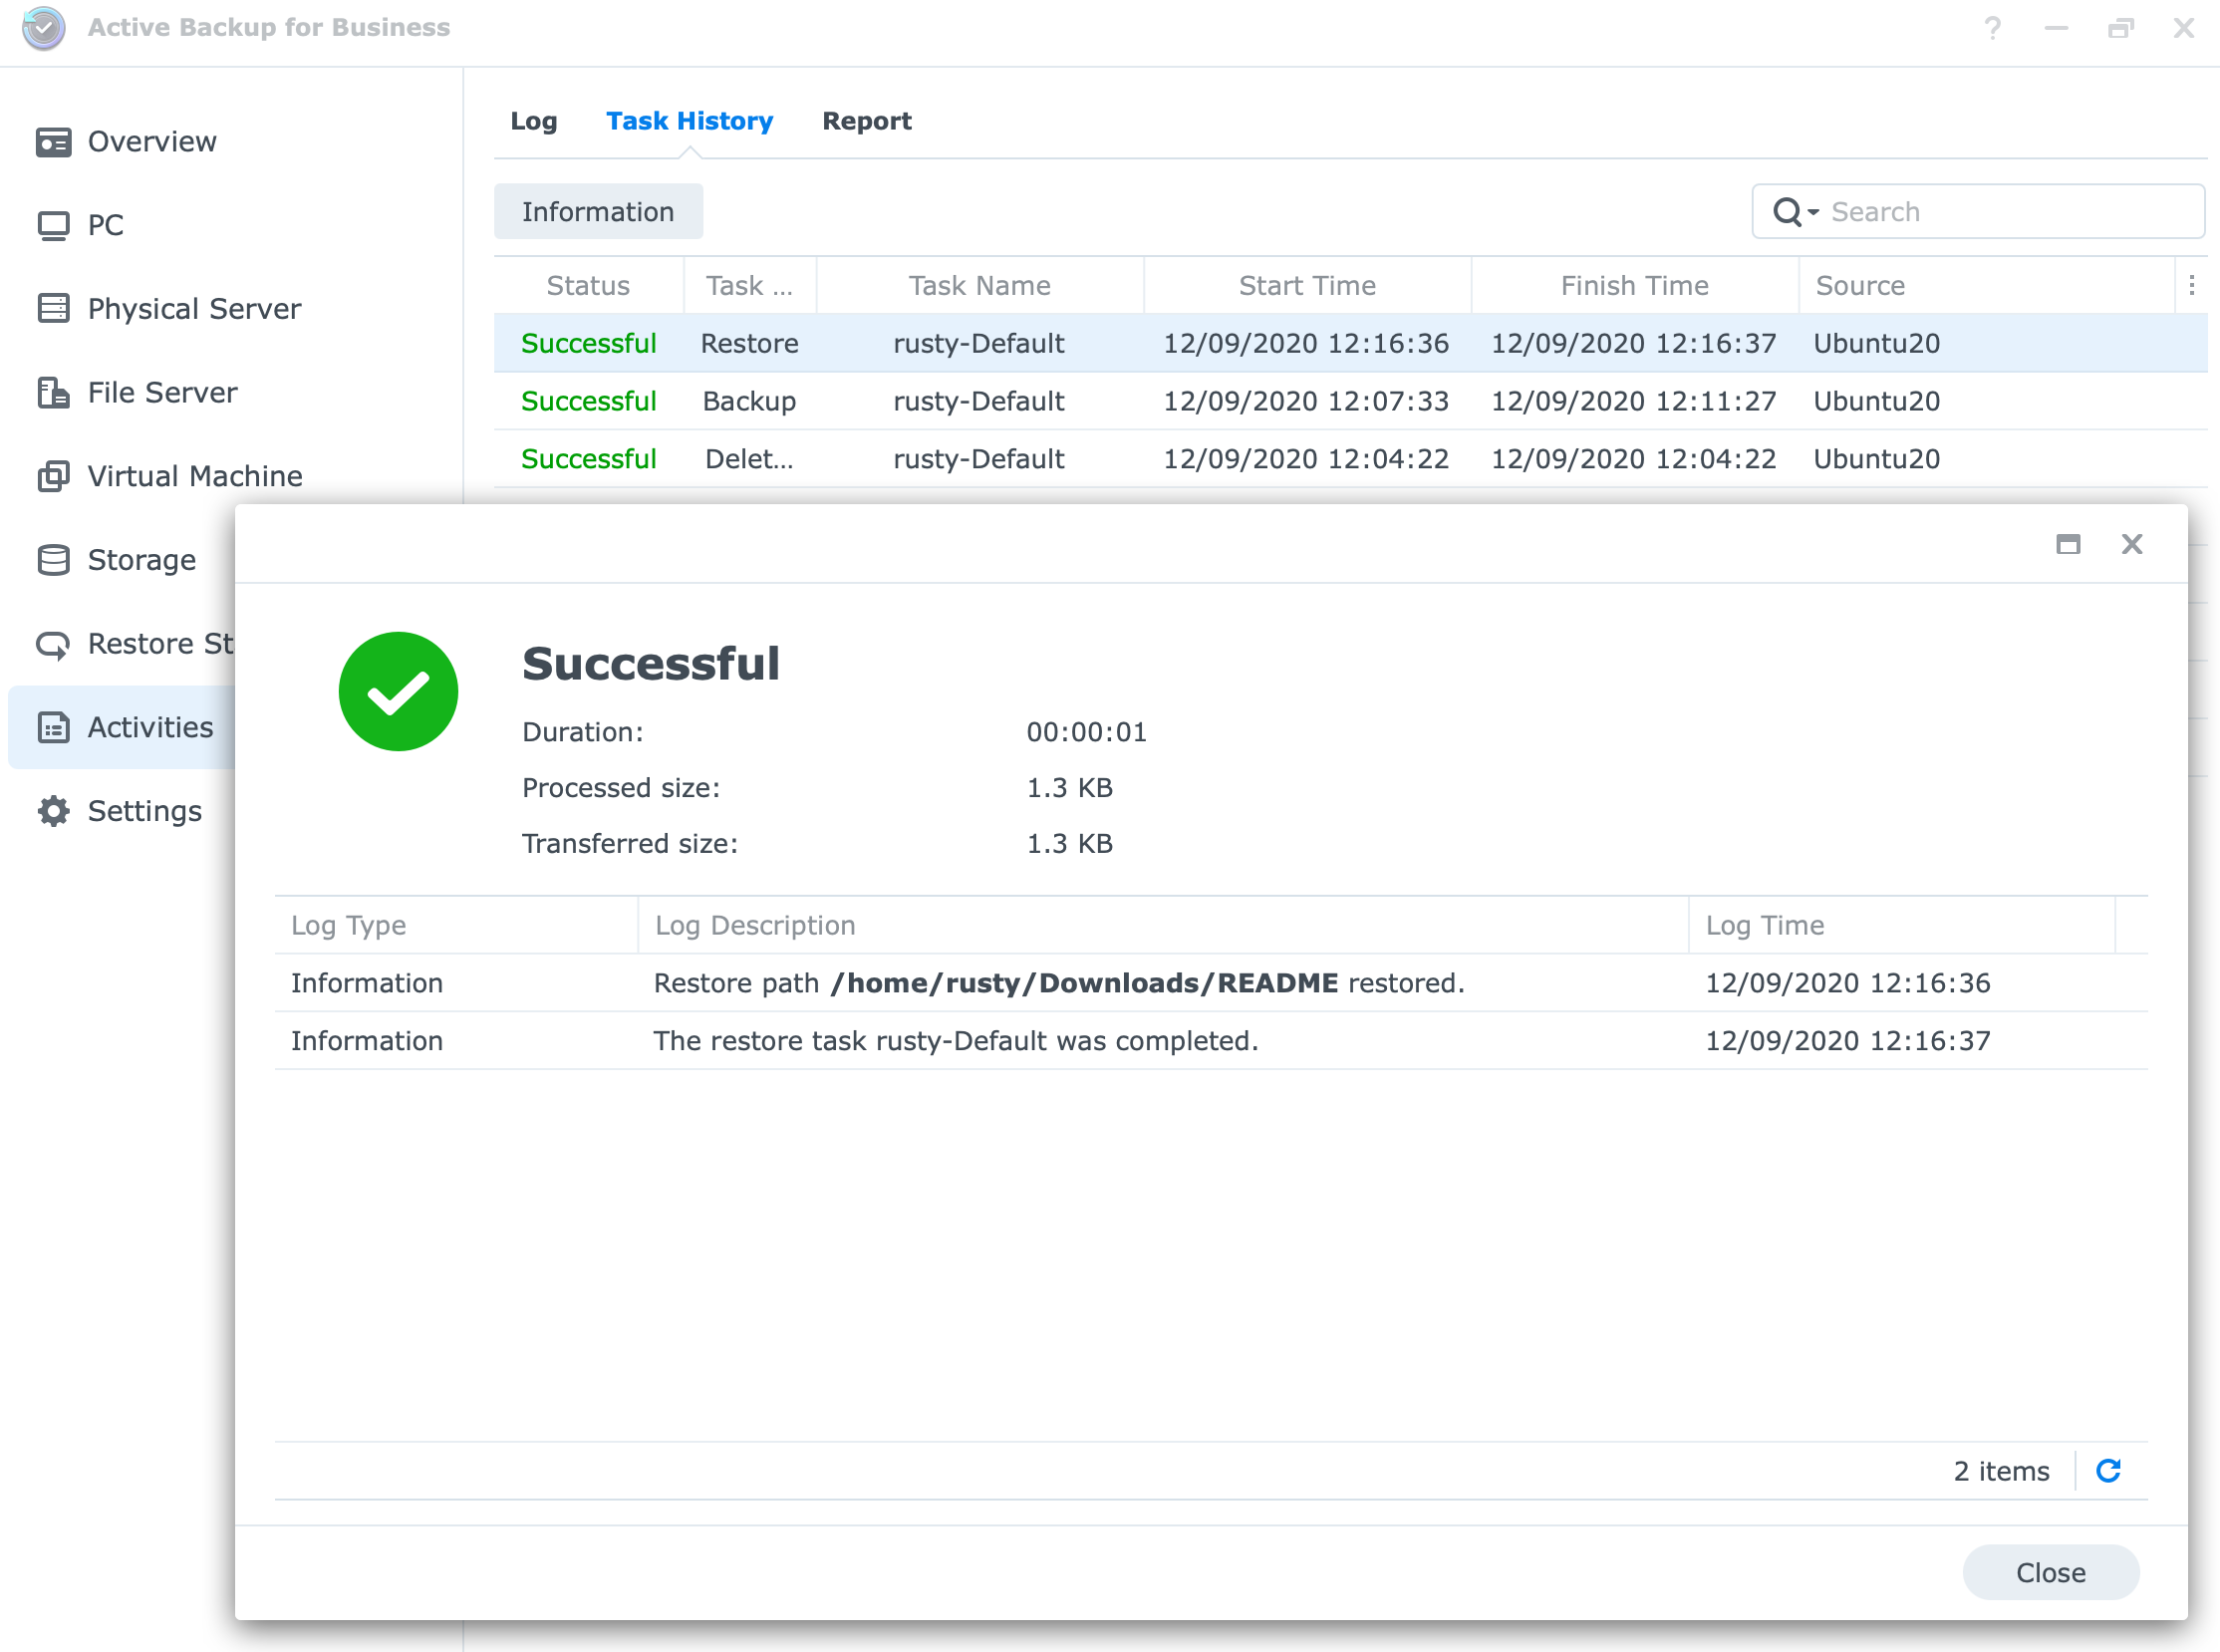
As we can see under Task history the restore process was successful and registered. So back up, and restore functions work just fine. Let's move to another scenario.
Physical to virtual restore
Now let's just imagine a possible problem that could happen. Let's say your regularly backed up Linux machine has a hardware problem that makes it currently unavailable.
If you need to use it and continue working with it you might think that you are in trouble, but not necessarily.
If we combine the previous ESXi hypervisor we have the option to turn that physical machine into a virtual one and access it for example via a remote desktop app from almost any device that still works.
Let's see how that will work.
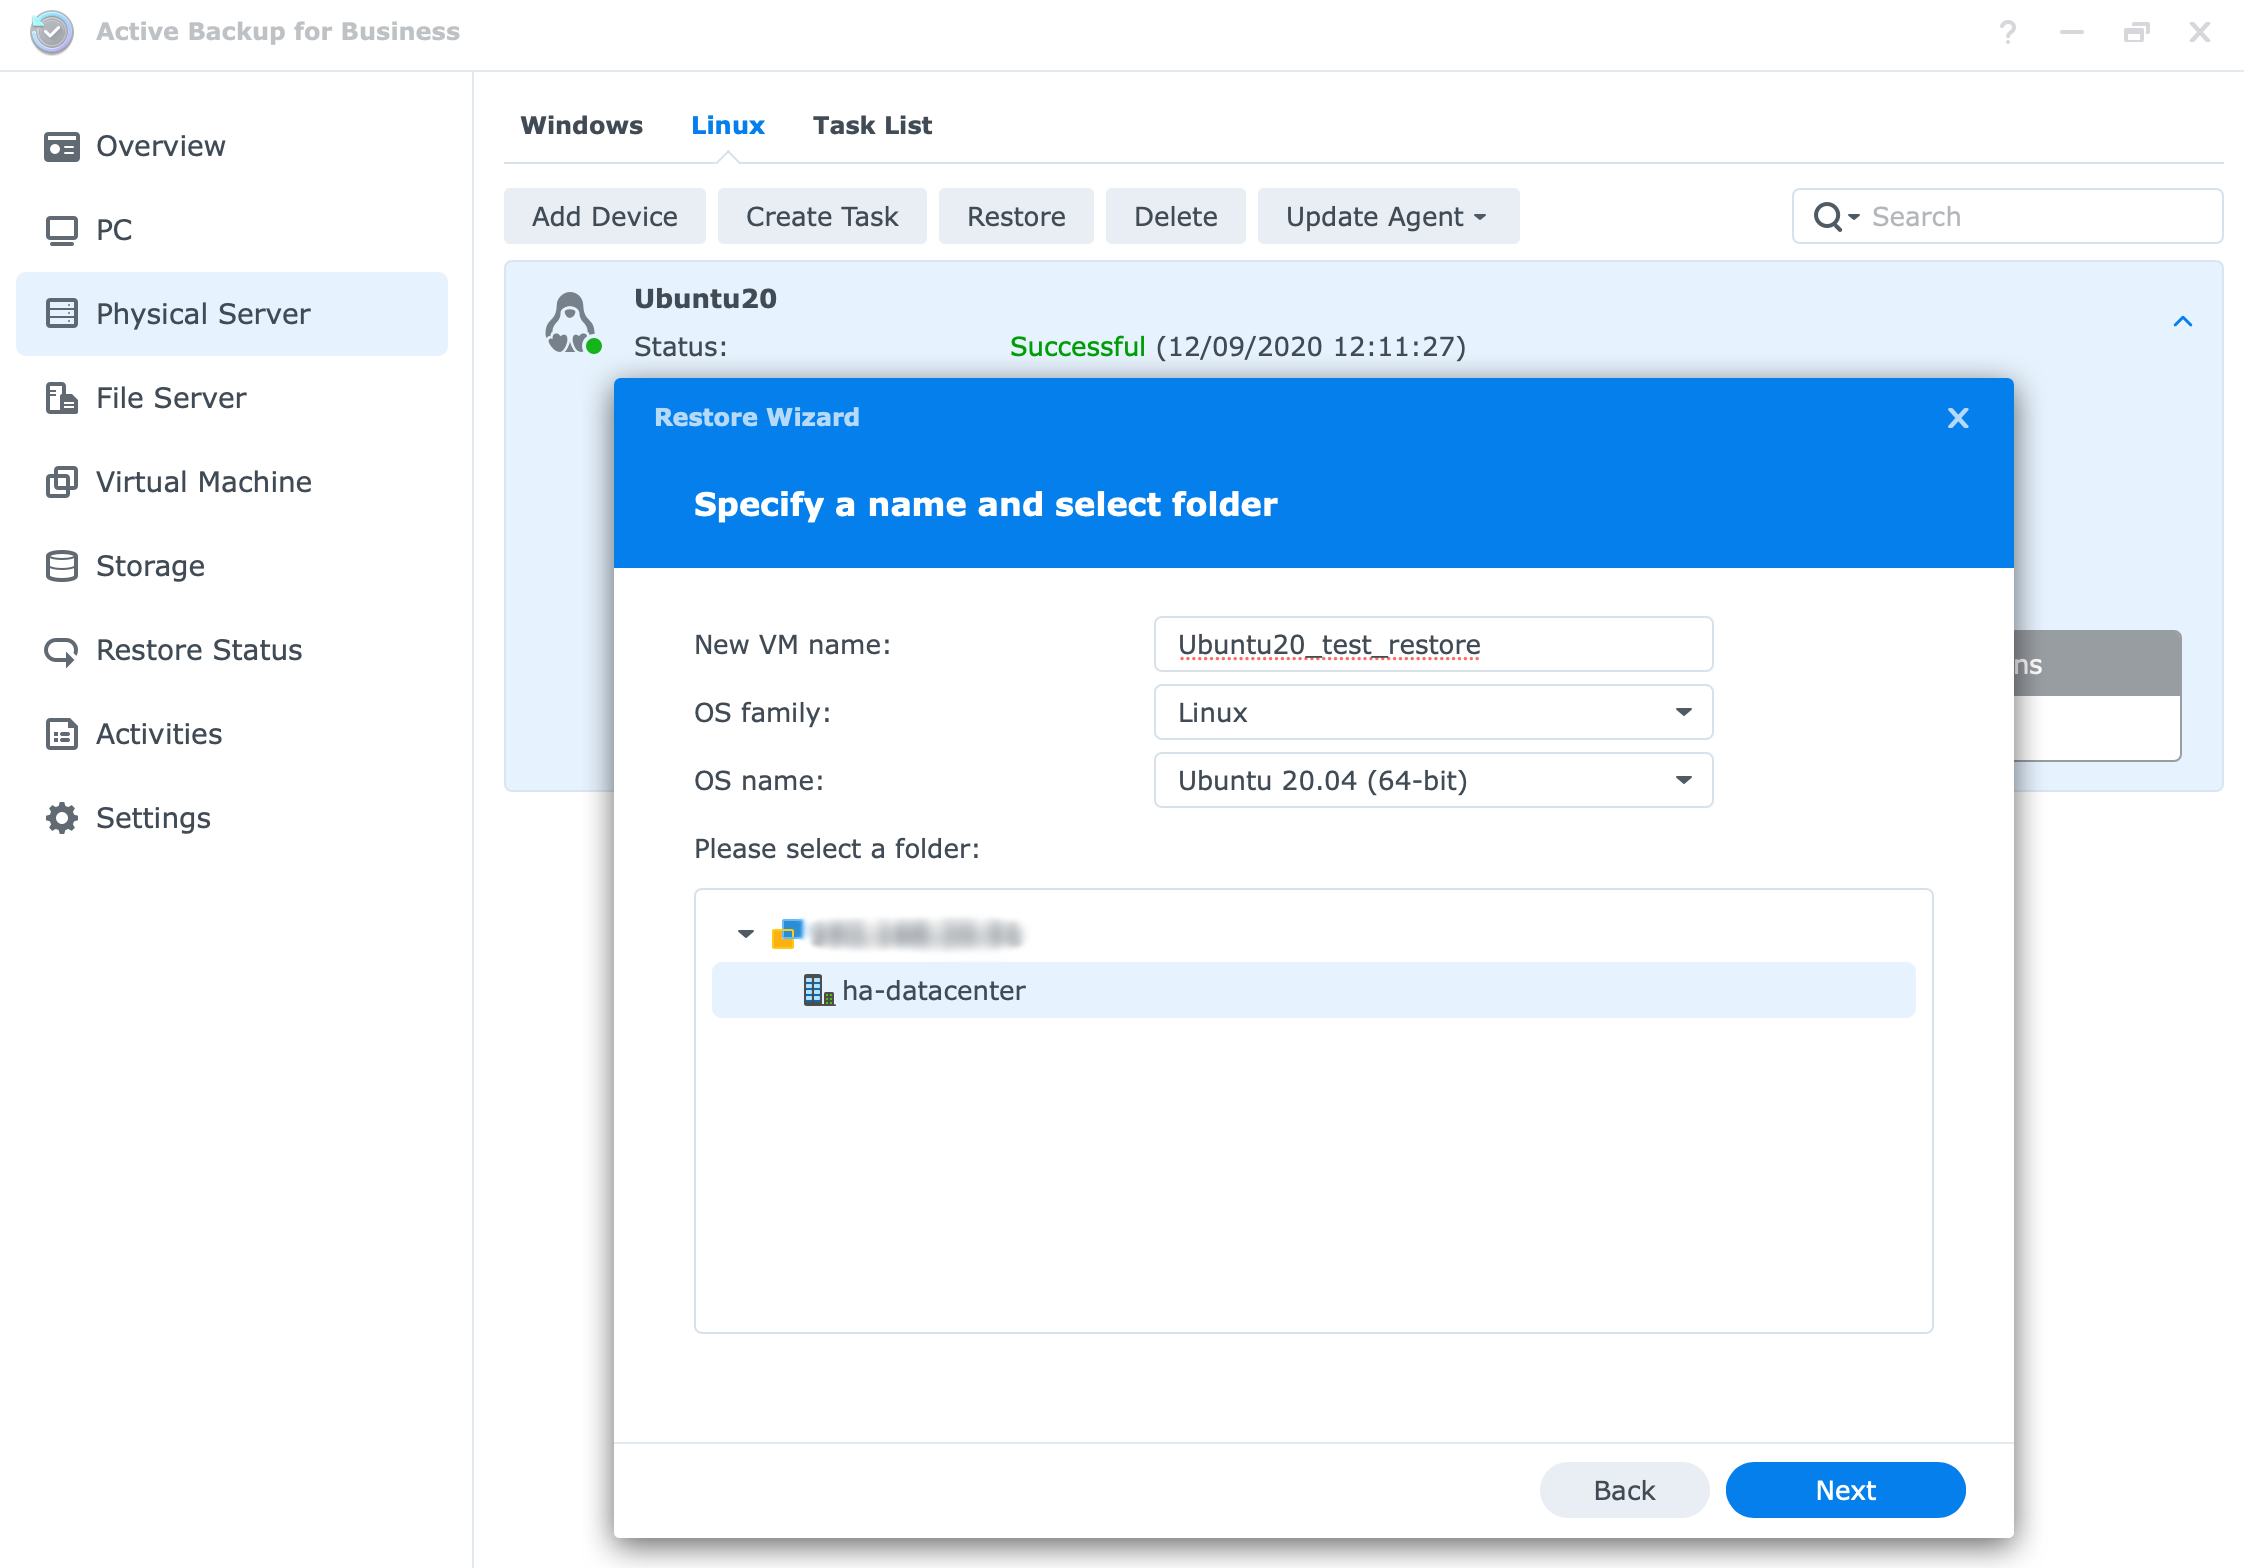
Restore your machine back up to a virtual machine (VMWare)
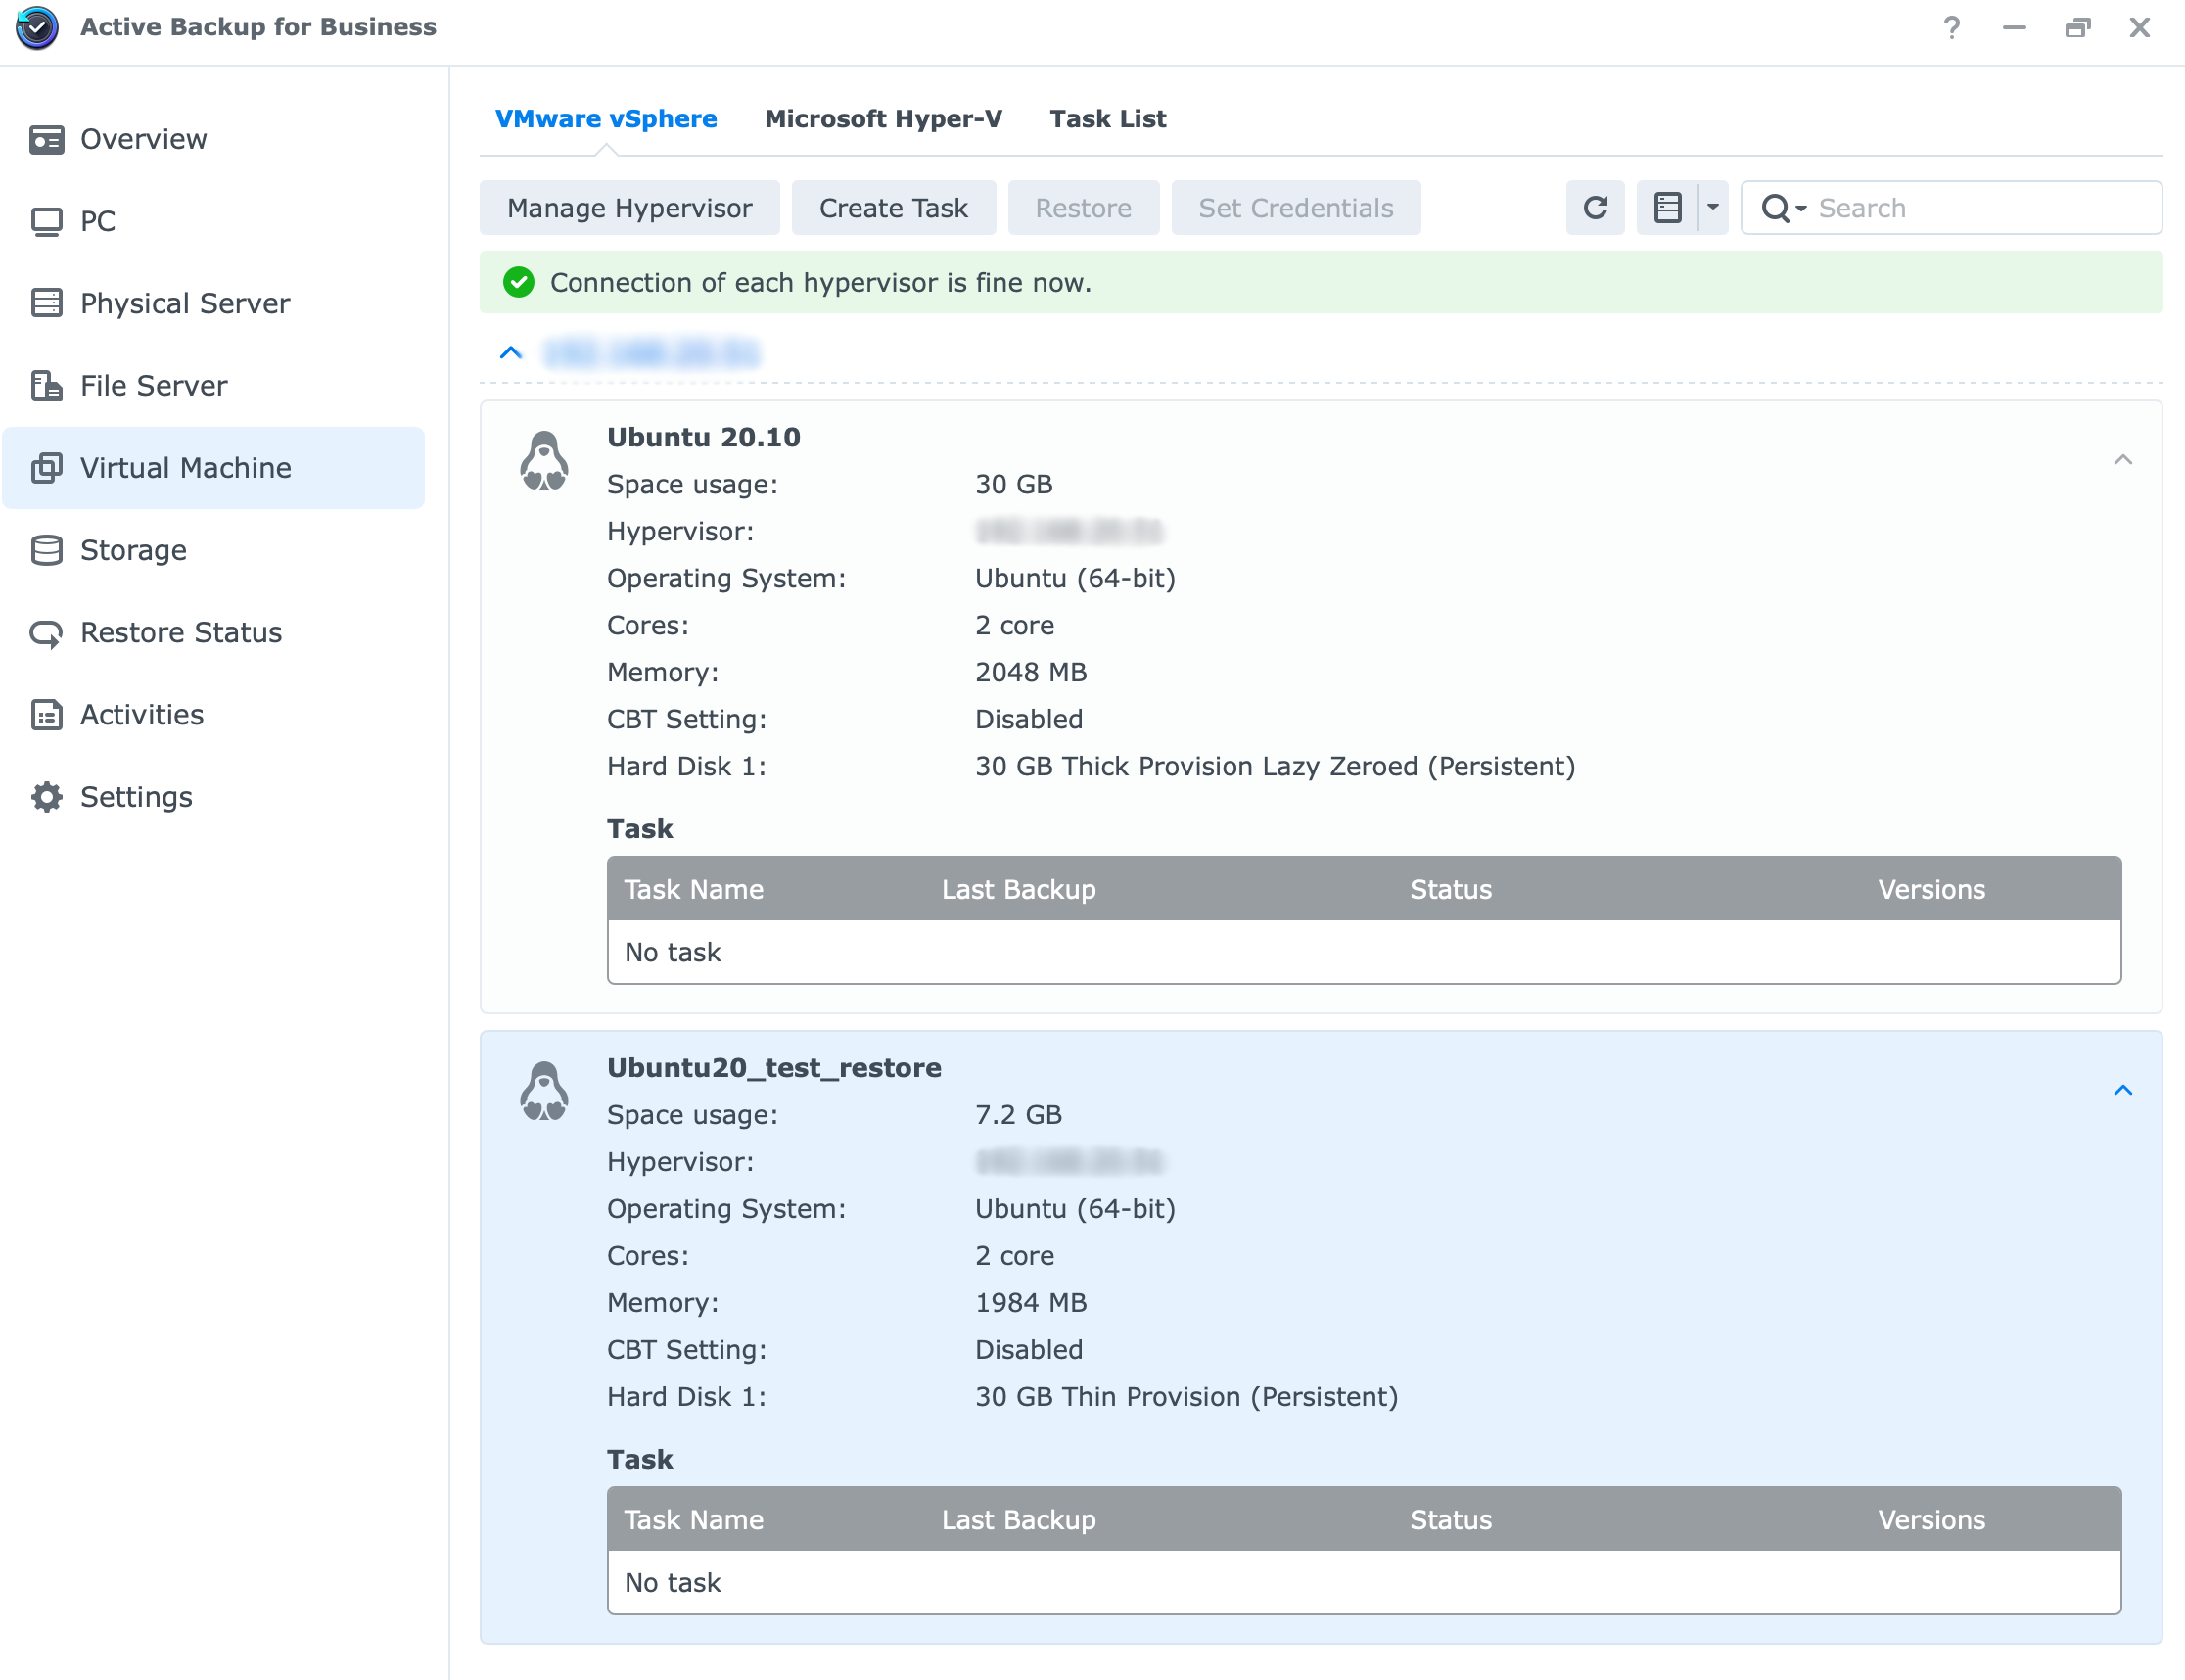
You will have three hypervisors as your options:
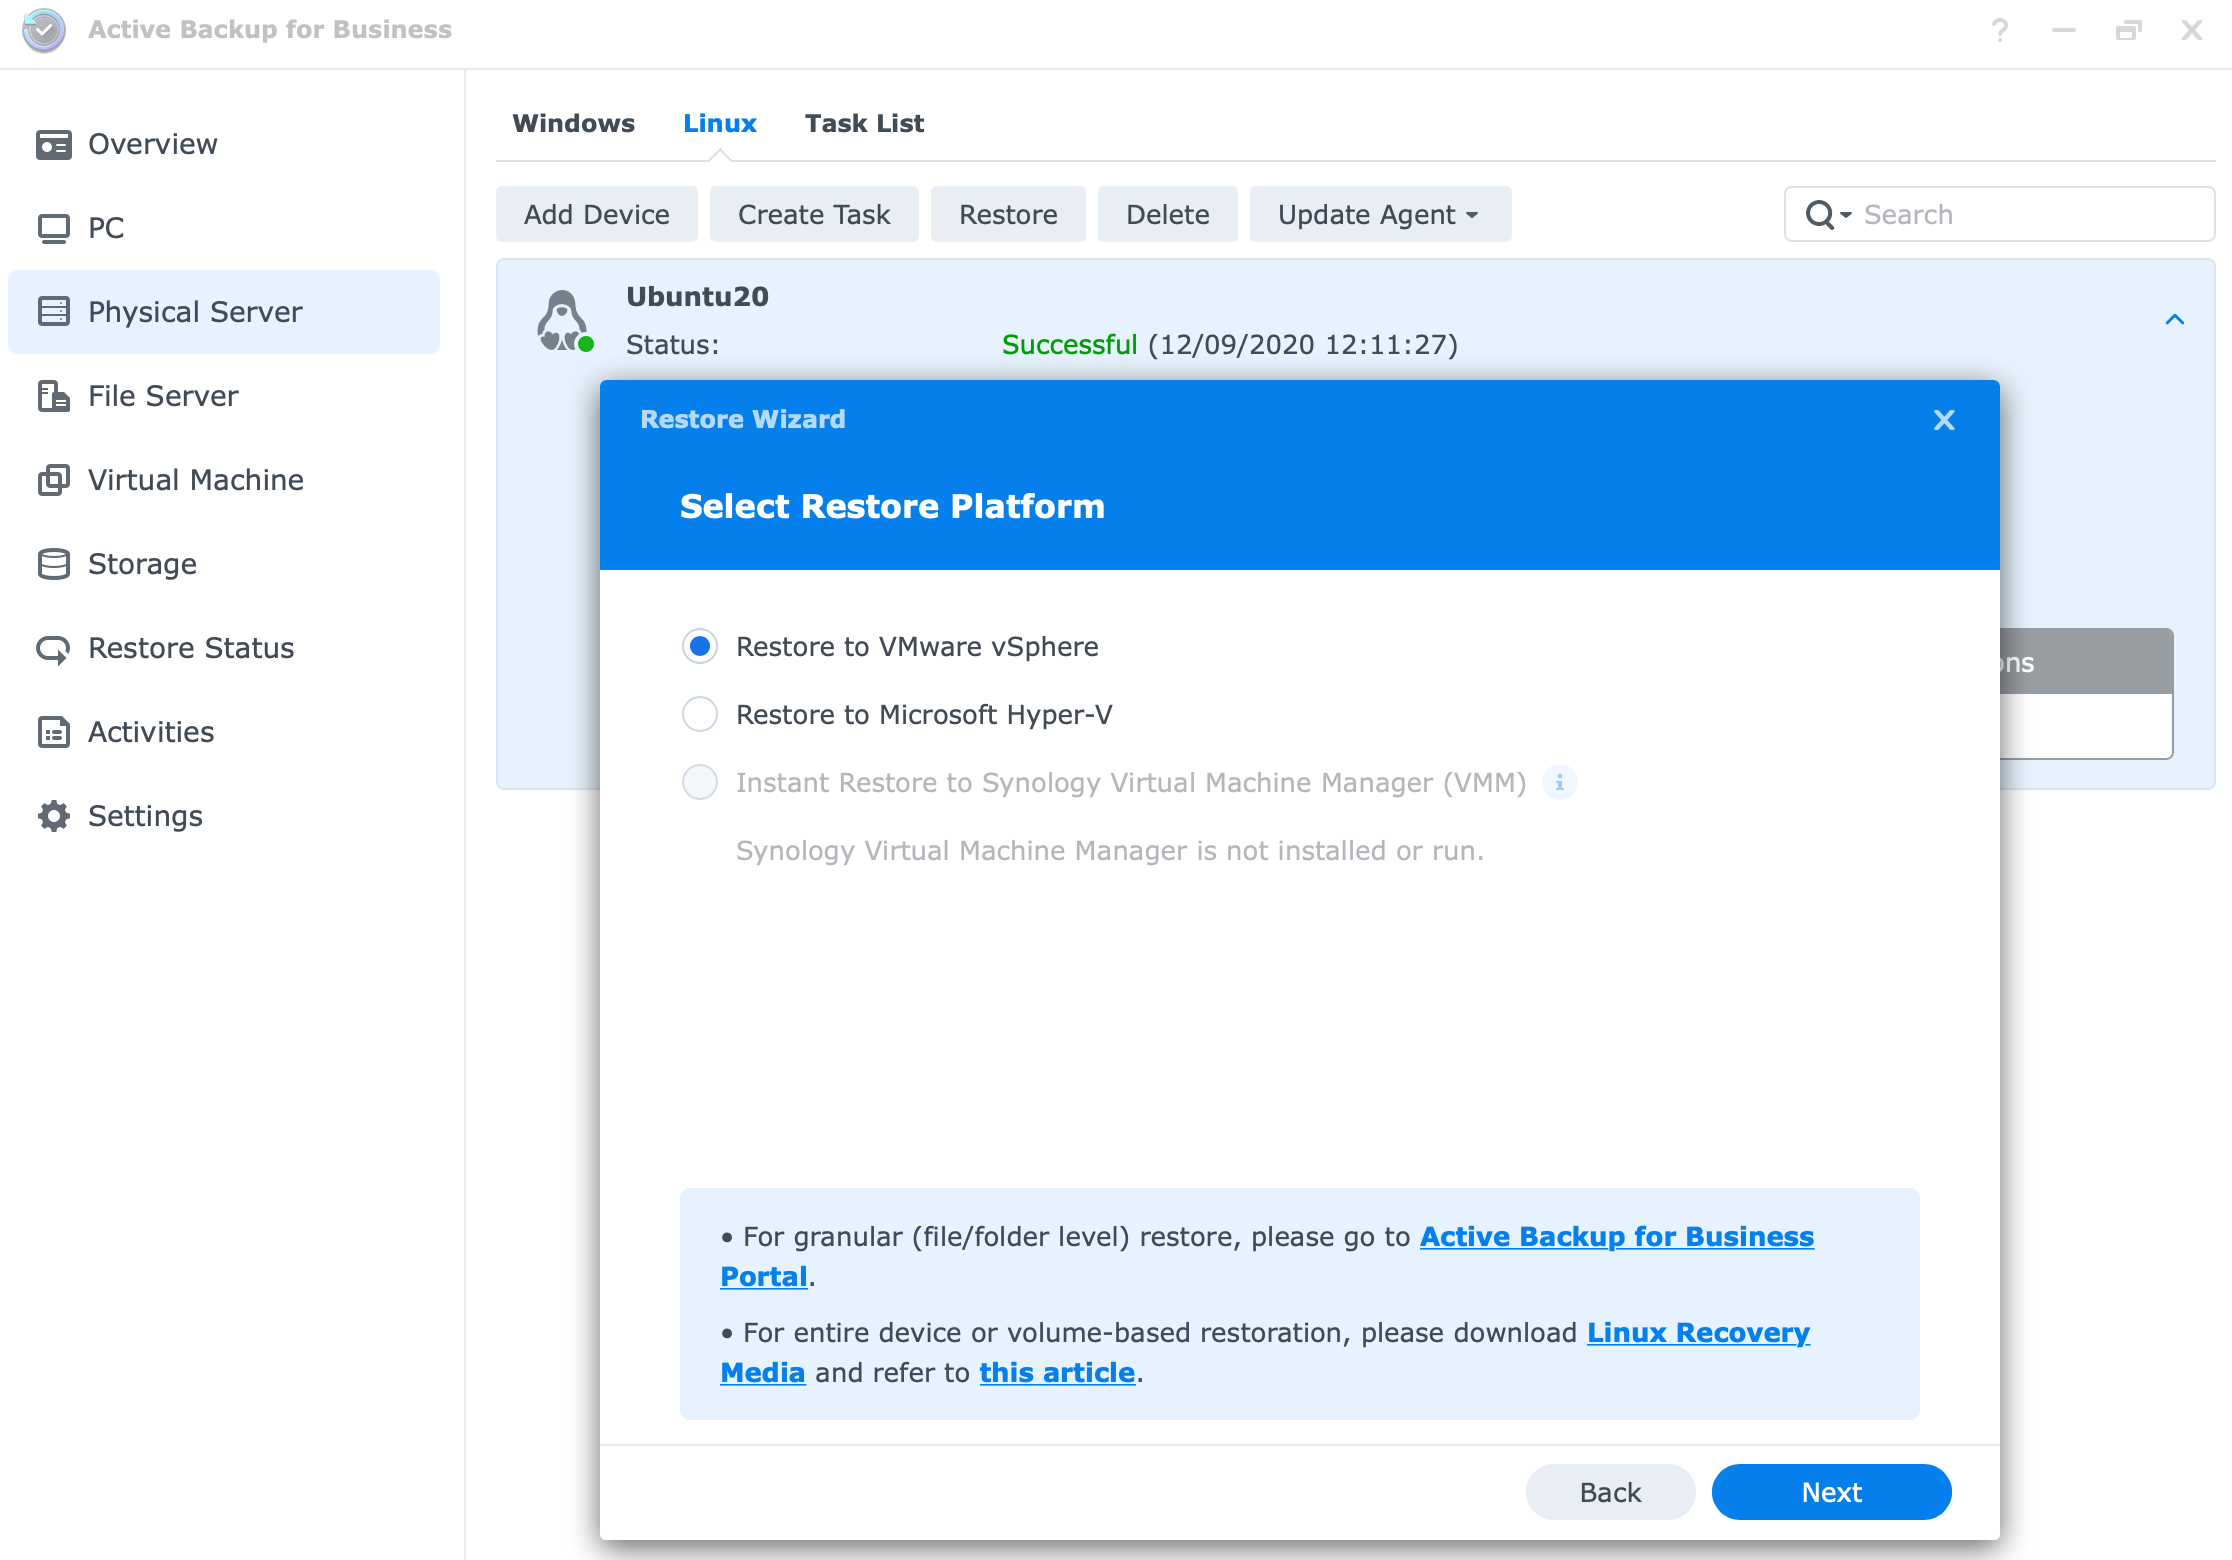
In my case, Synology VMM was not installed and ABB detected it, so the last option is dimmed.
For this example let's try and restore to a previously configured ESXi v7 instance that our ABB is connected to.
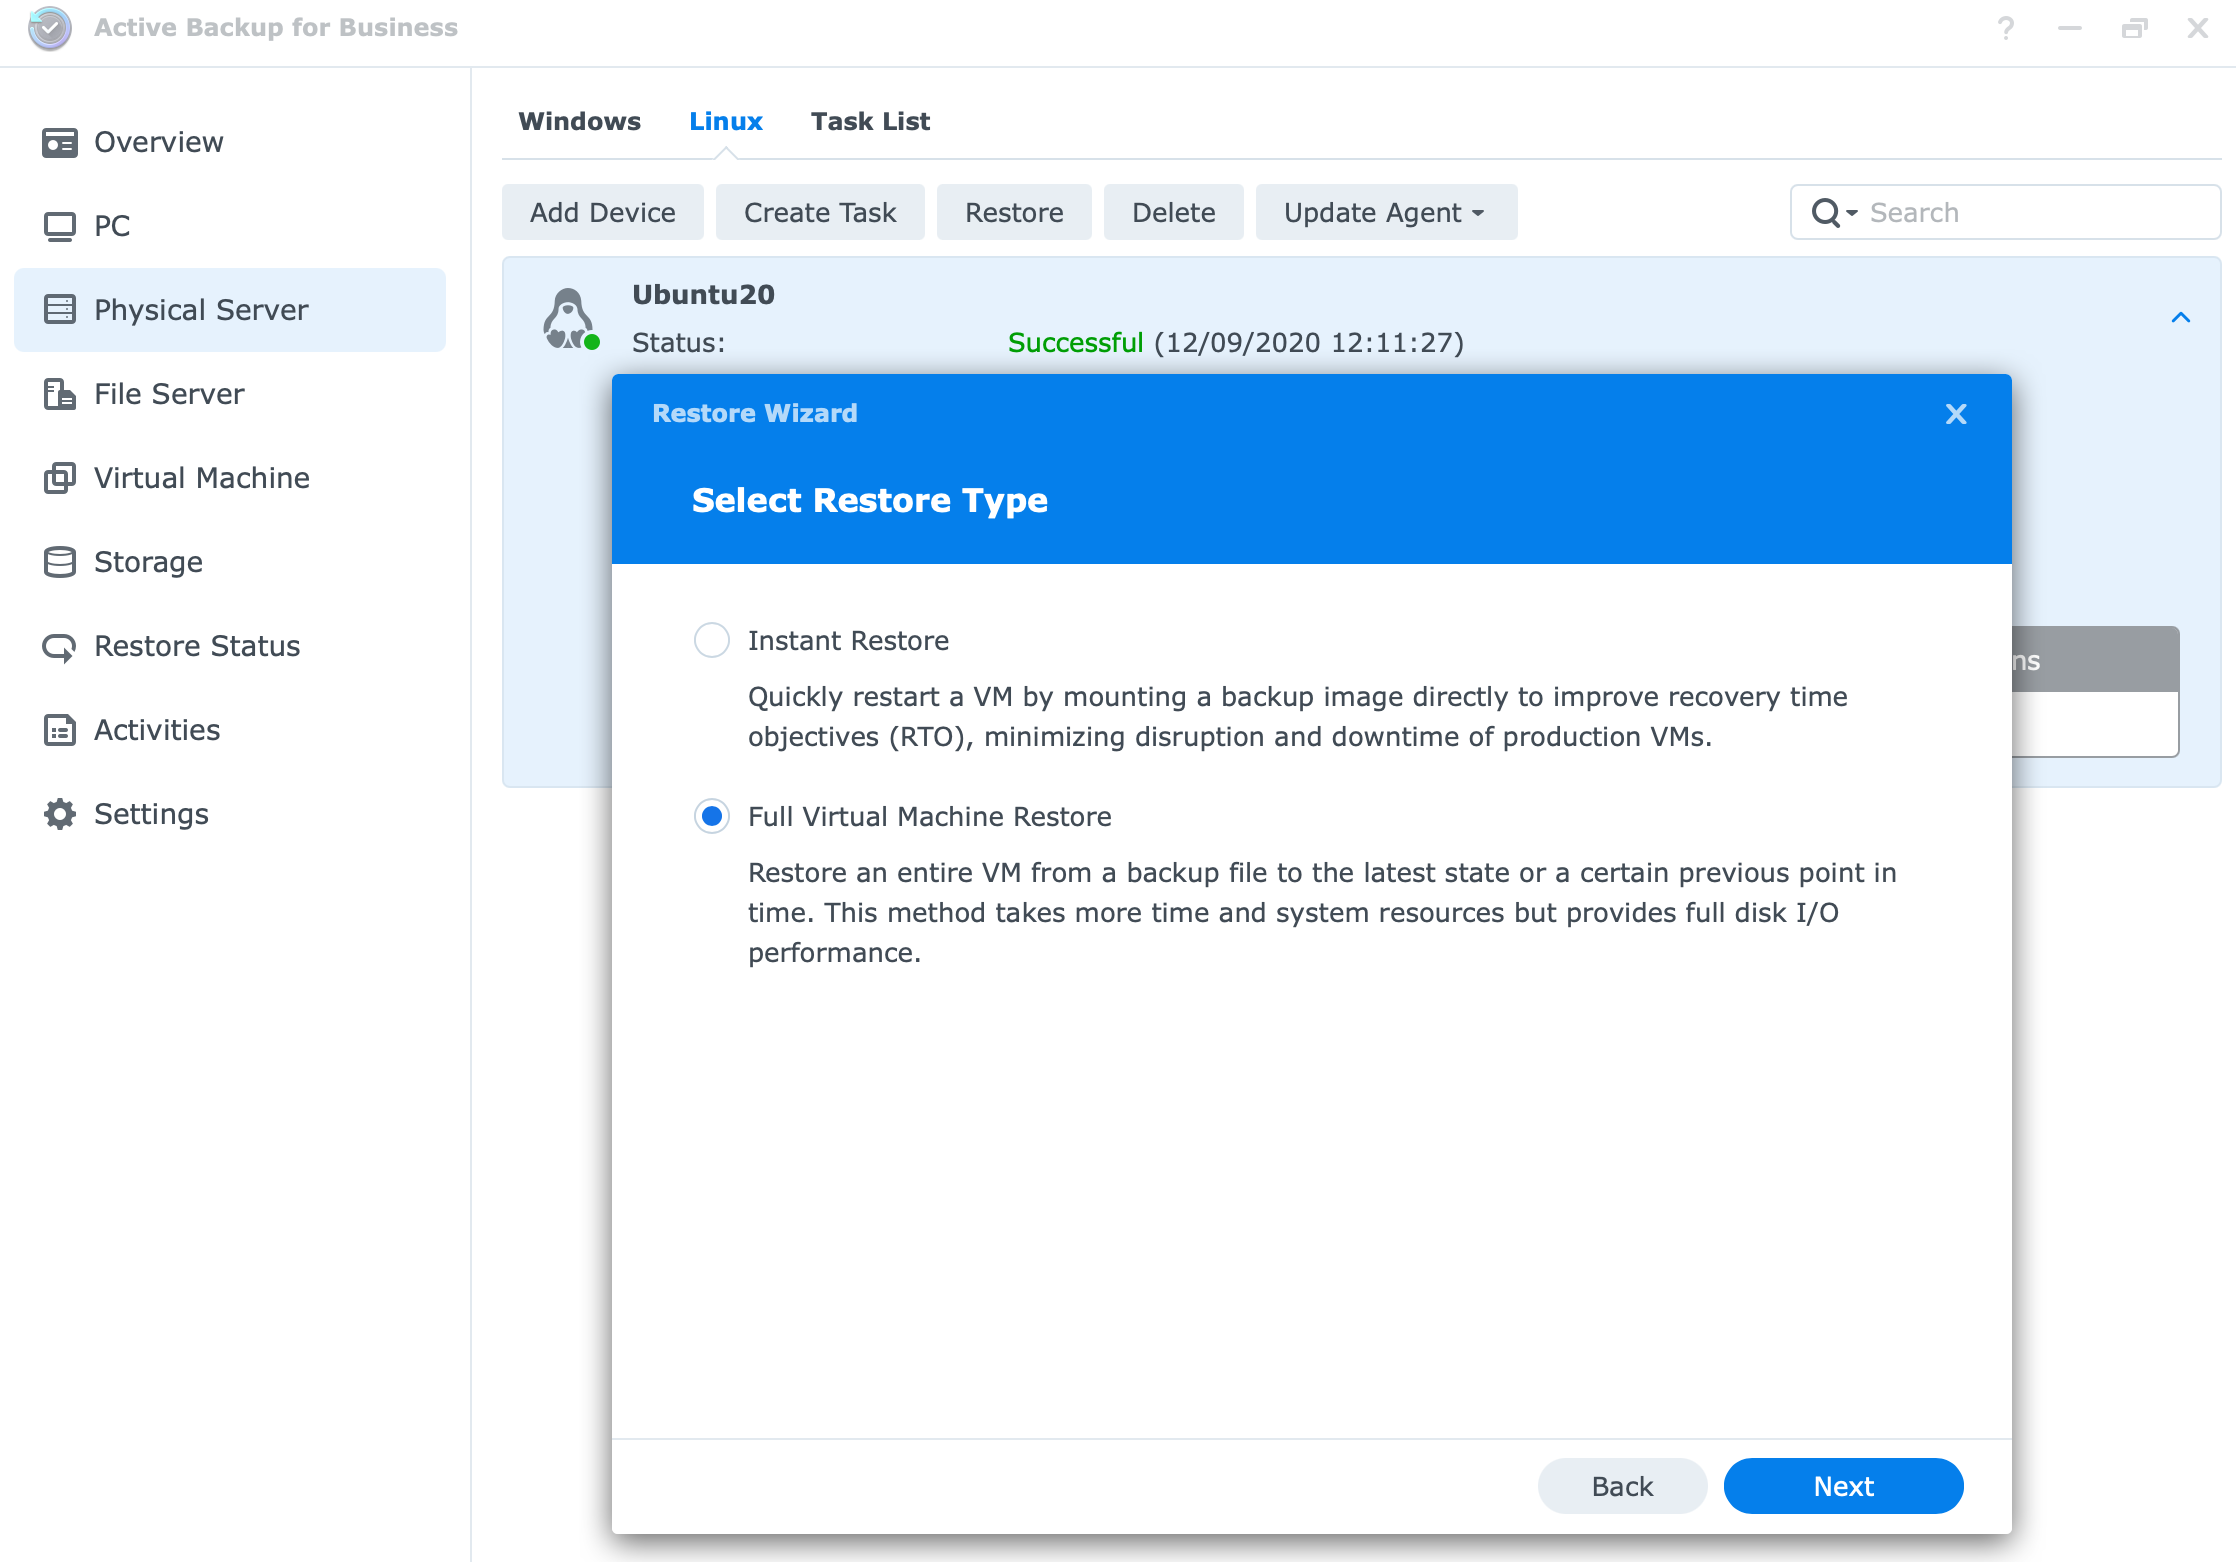
Select if you want to do a quick full restore. In my case, this is a small VM so full restore will be fine.

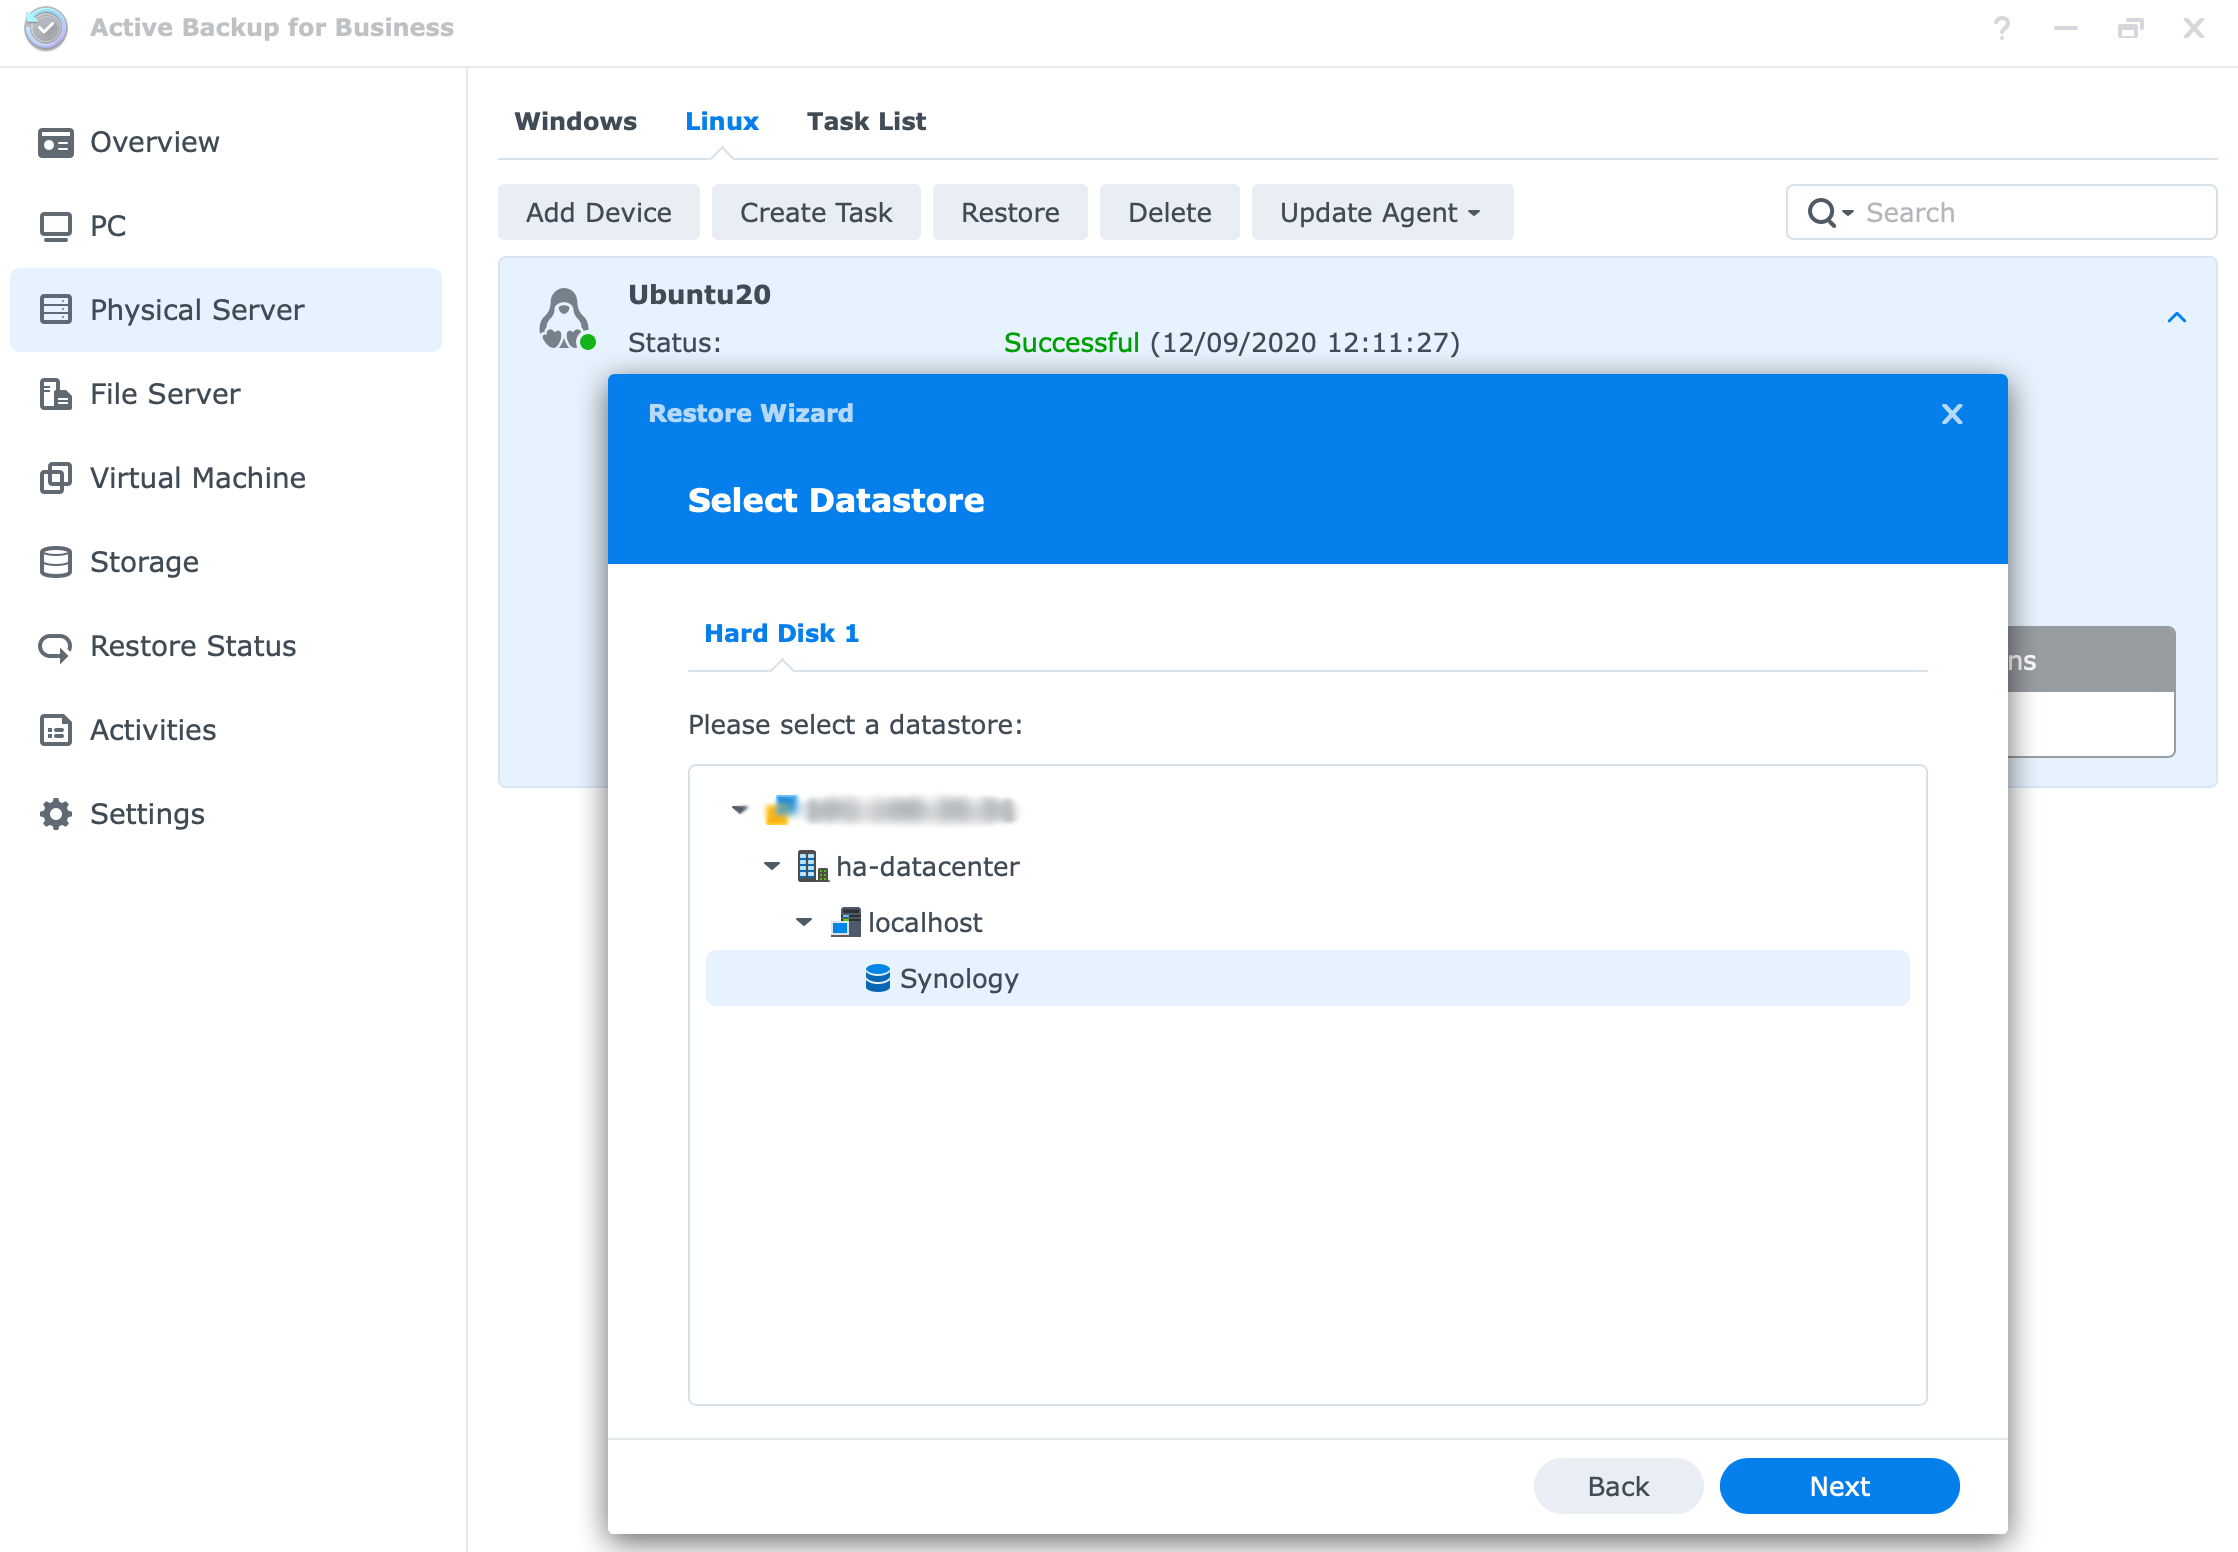

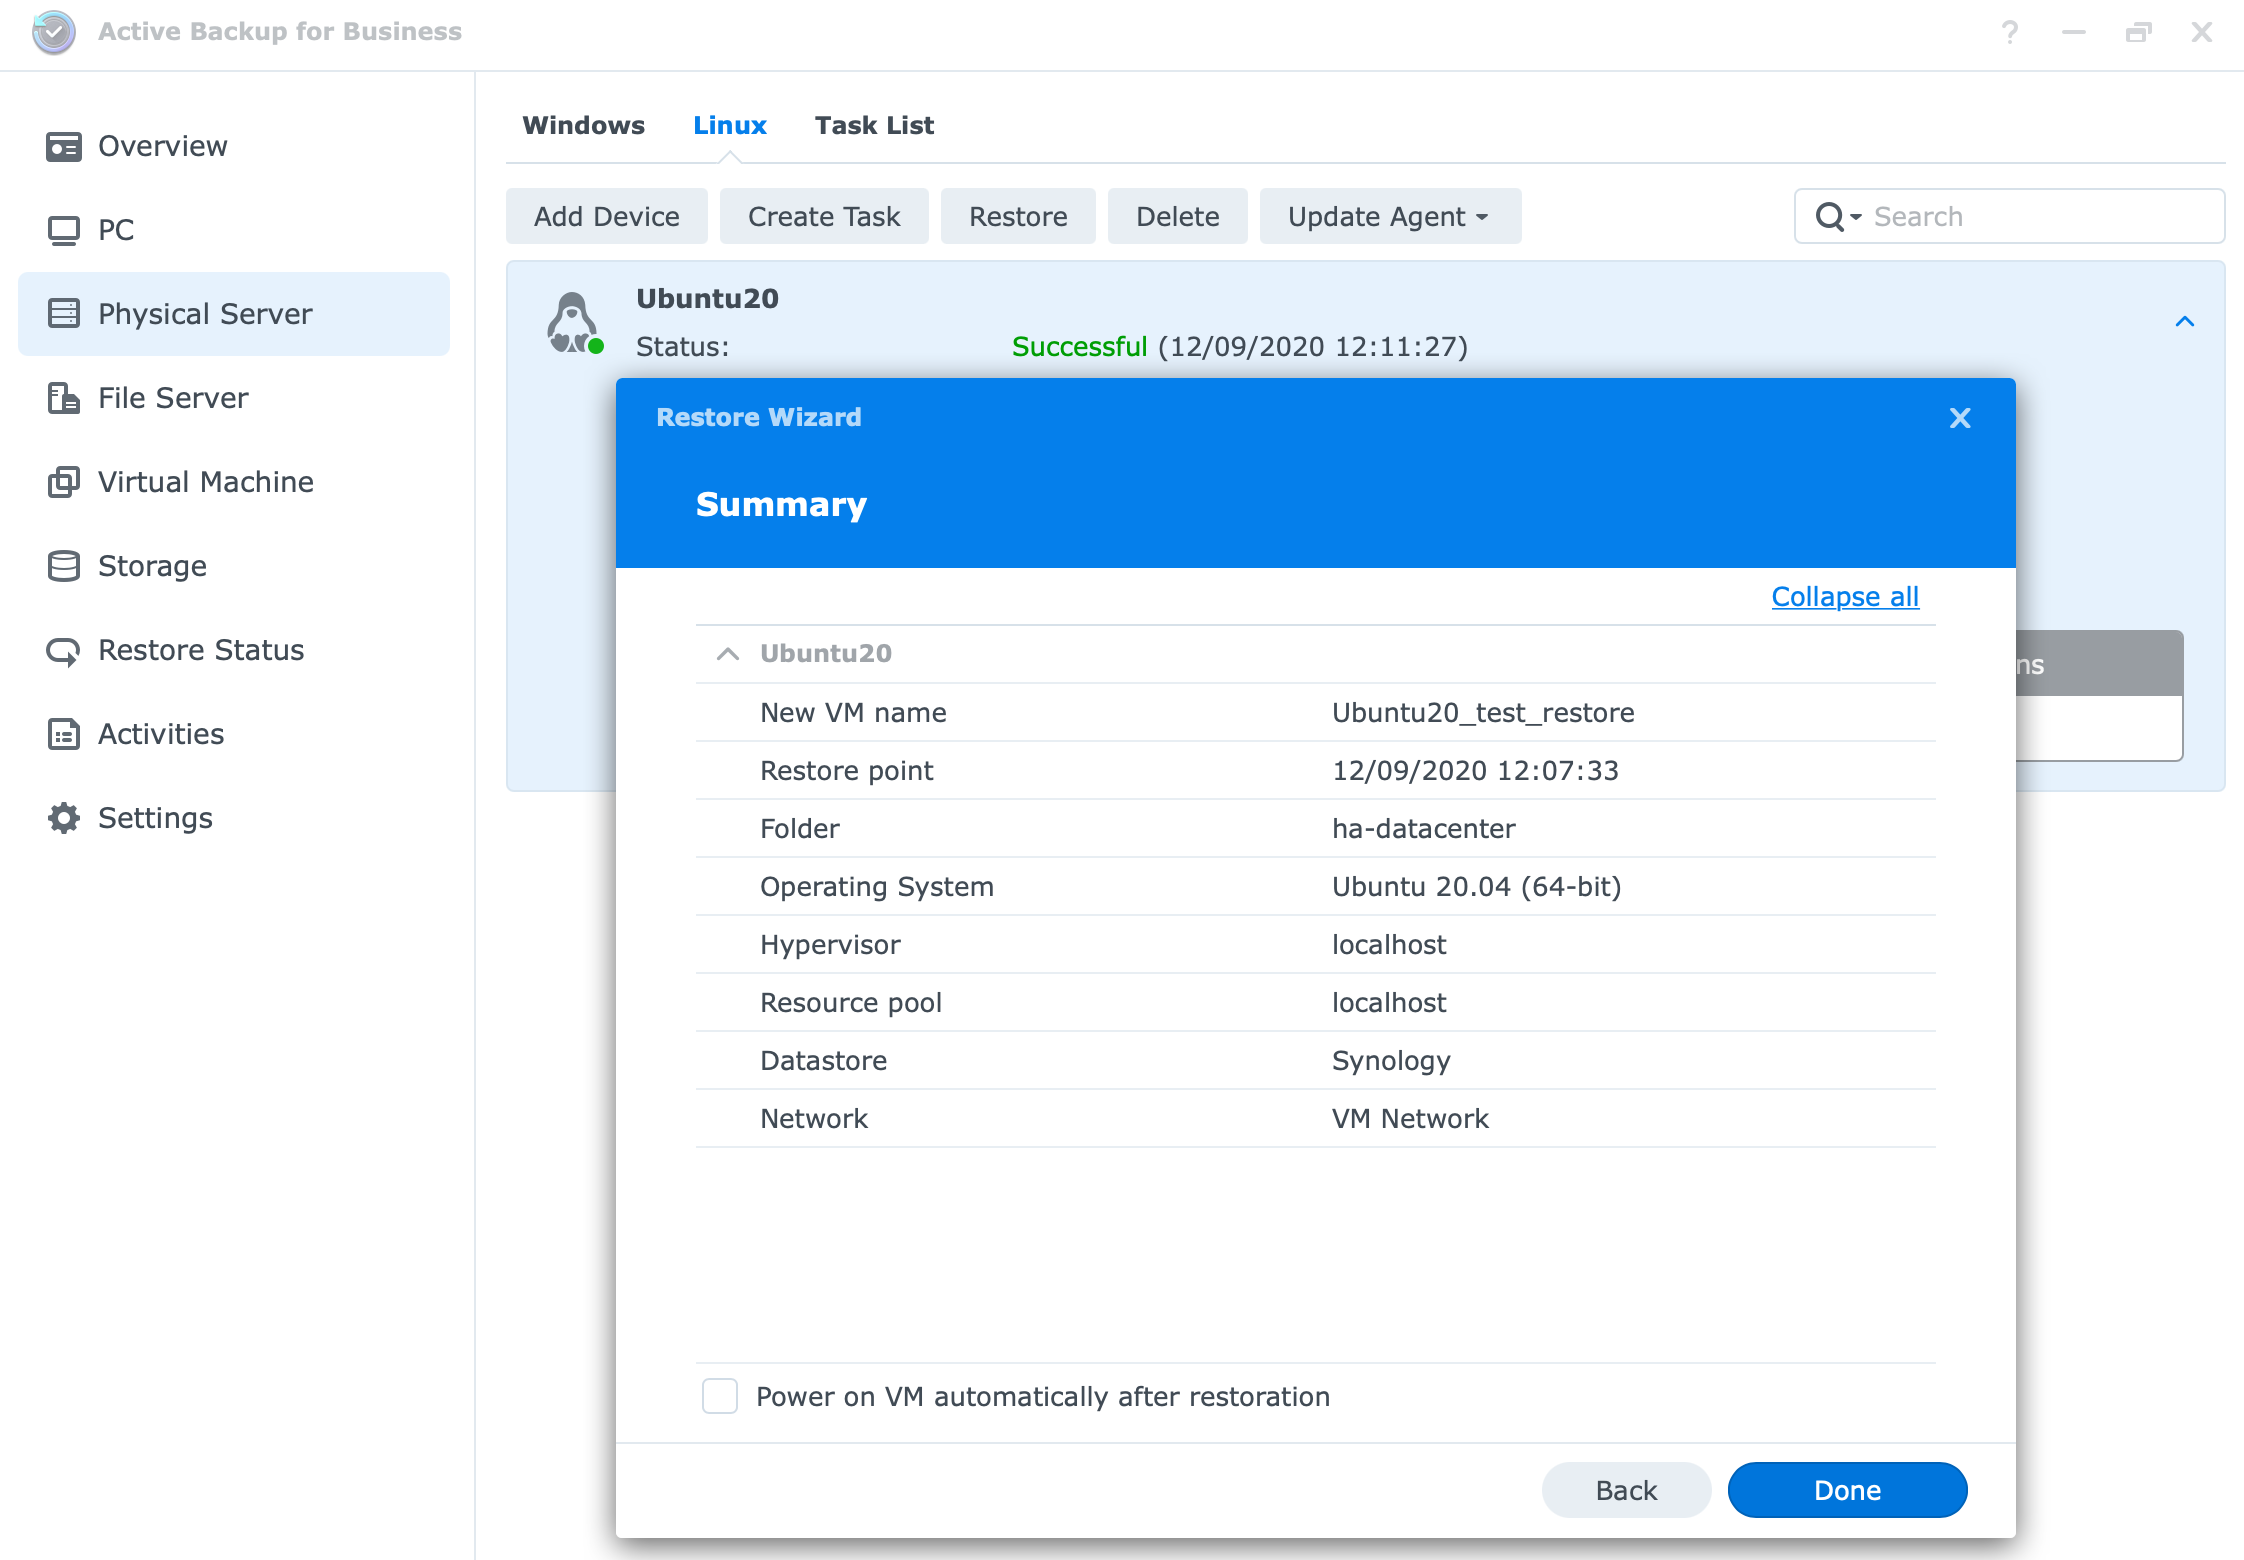
After this, the process will start and you can follow the progress in the Restore status section
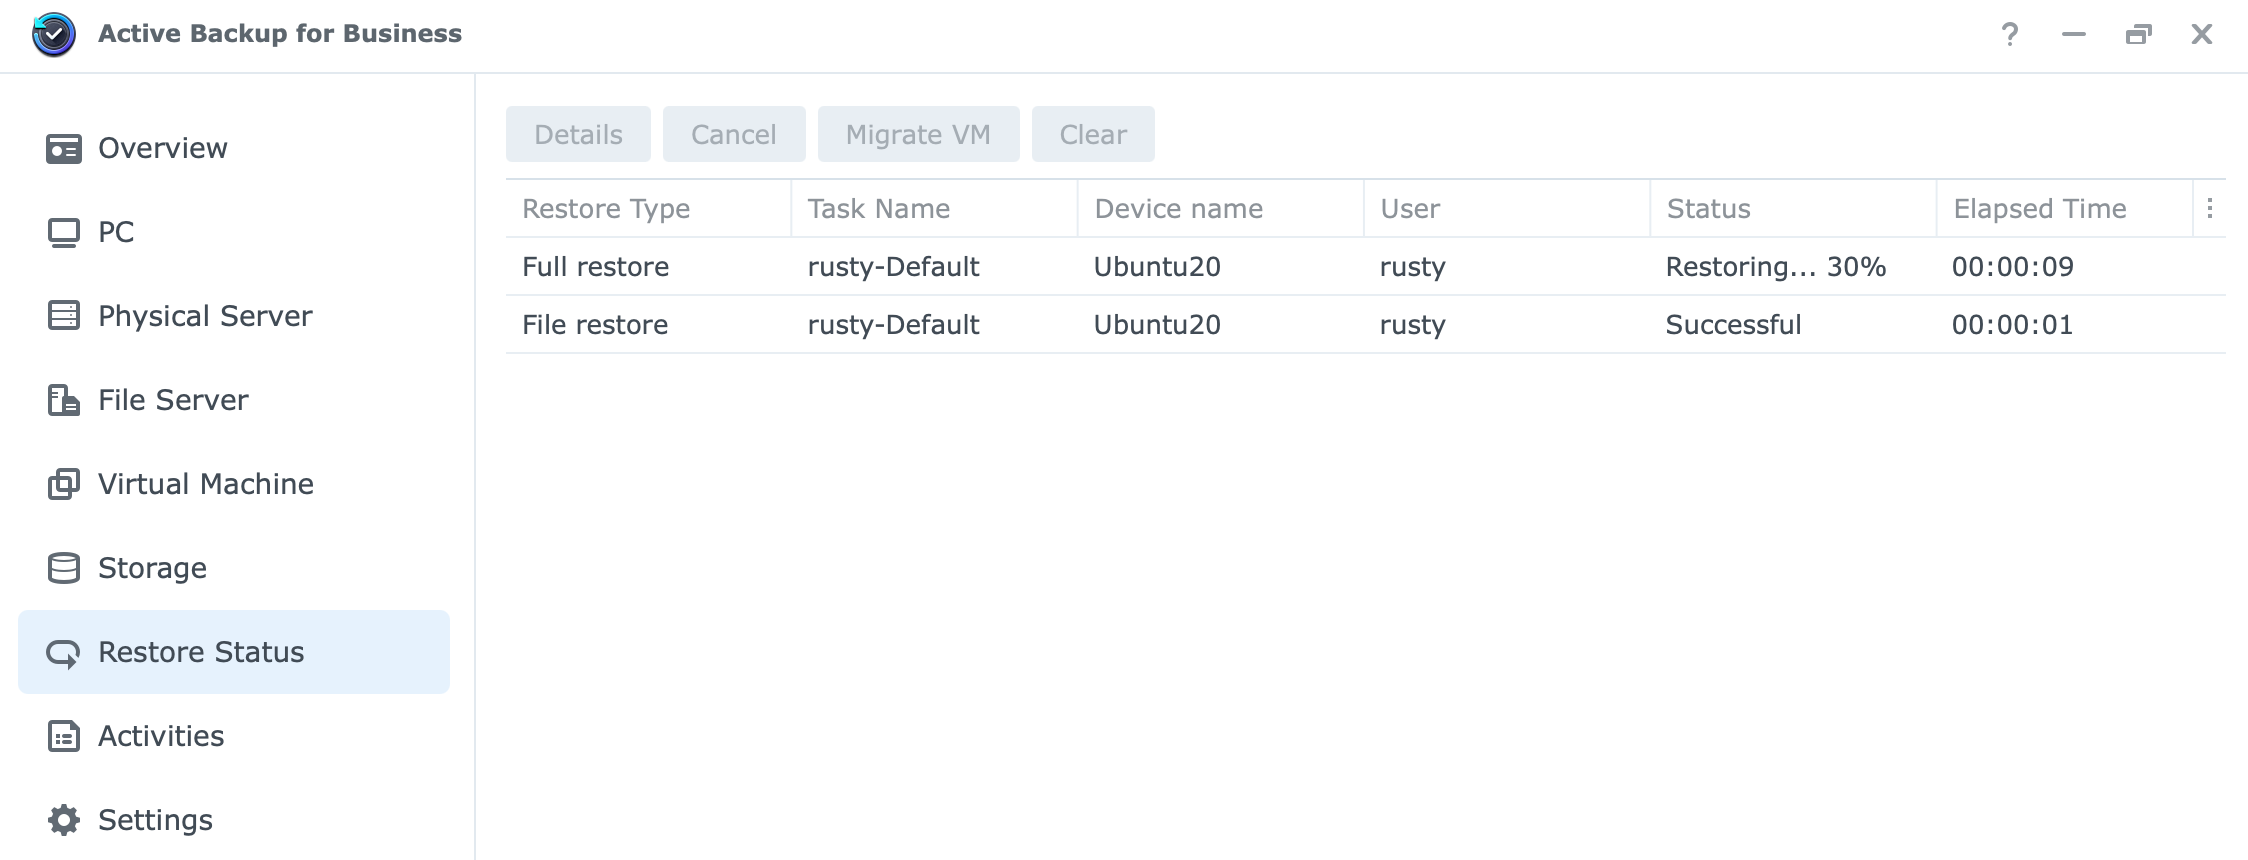
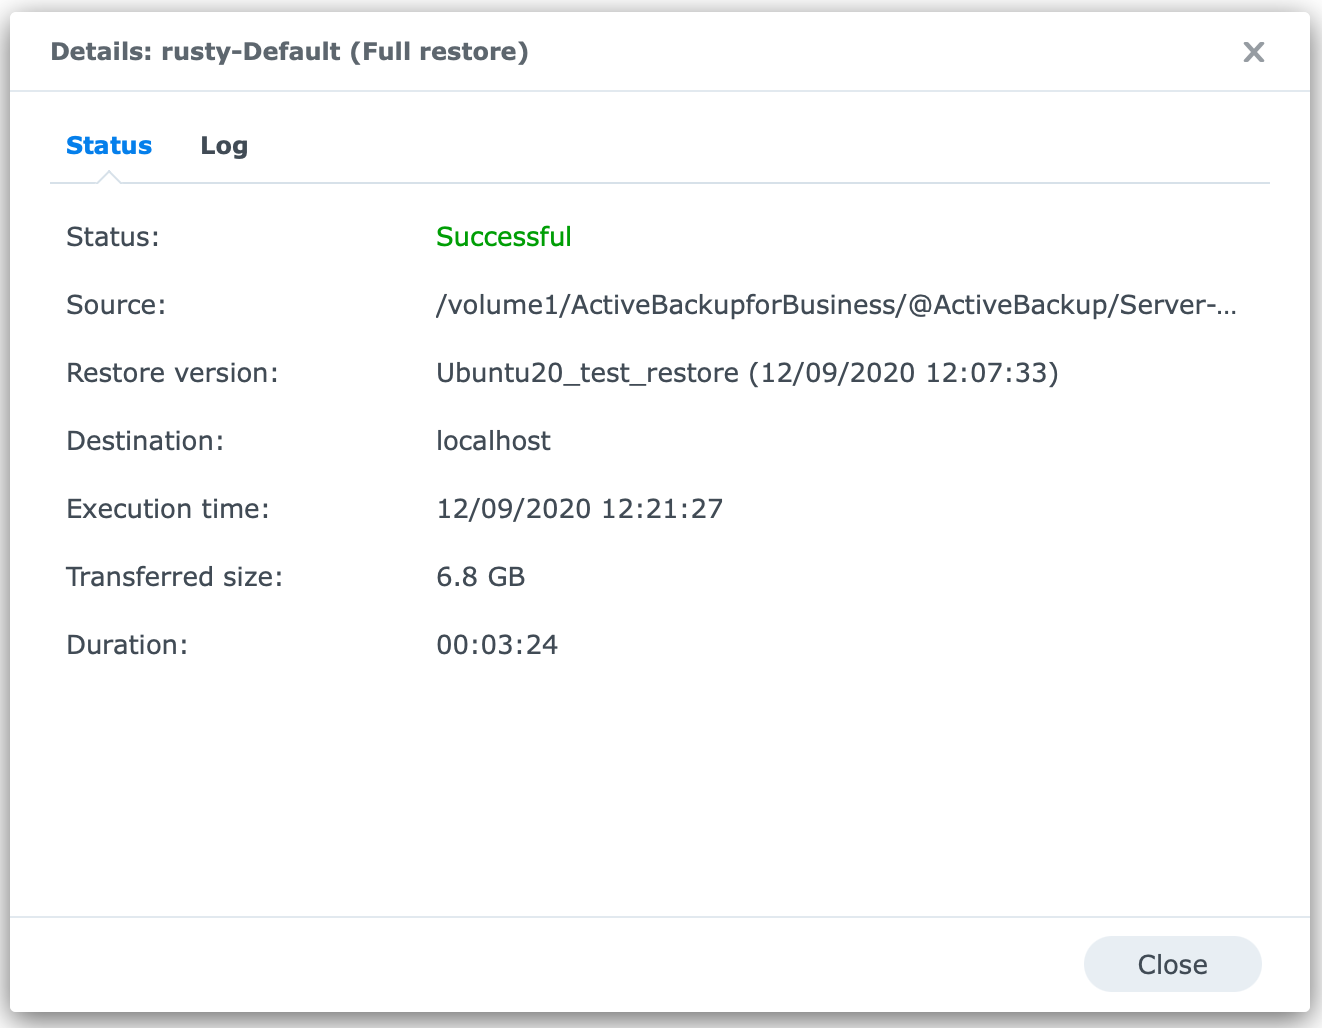
Once the process is complete you can access the machine using your ESXi to power it up and continue your work.
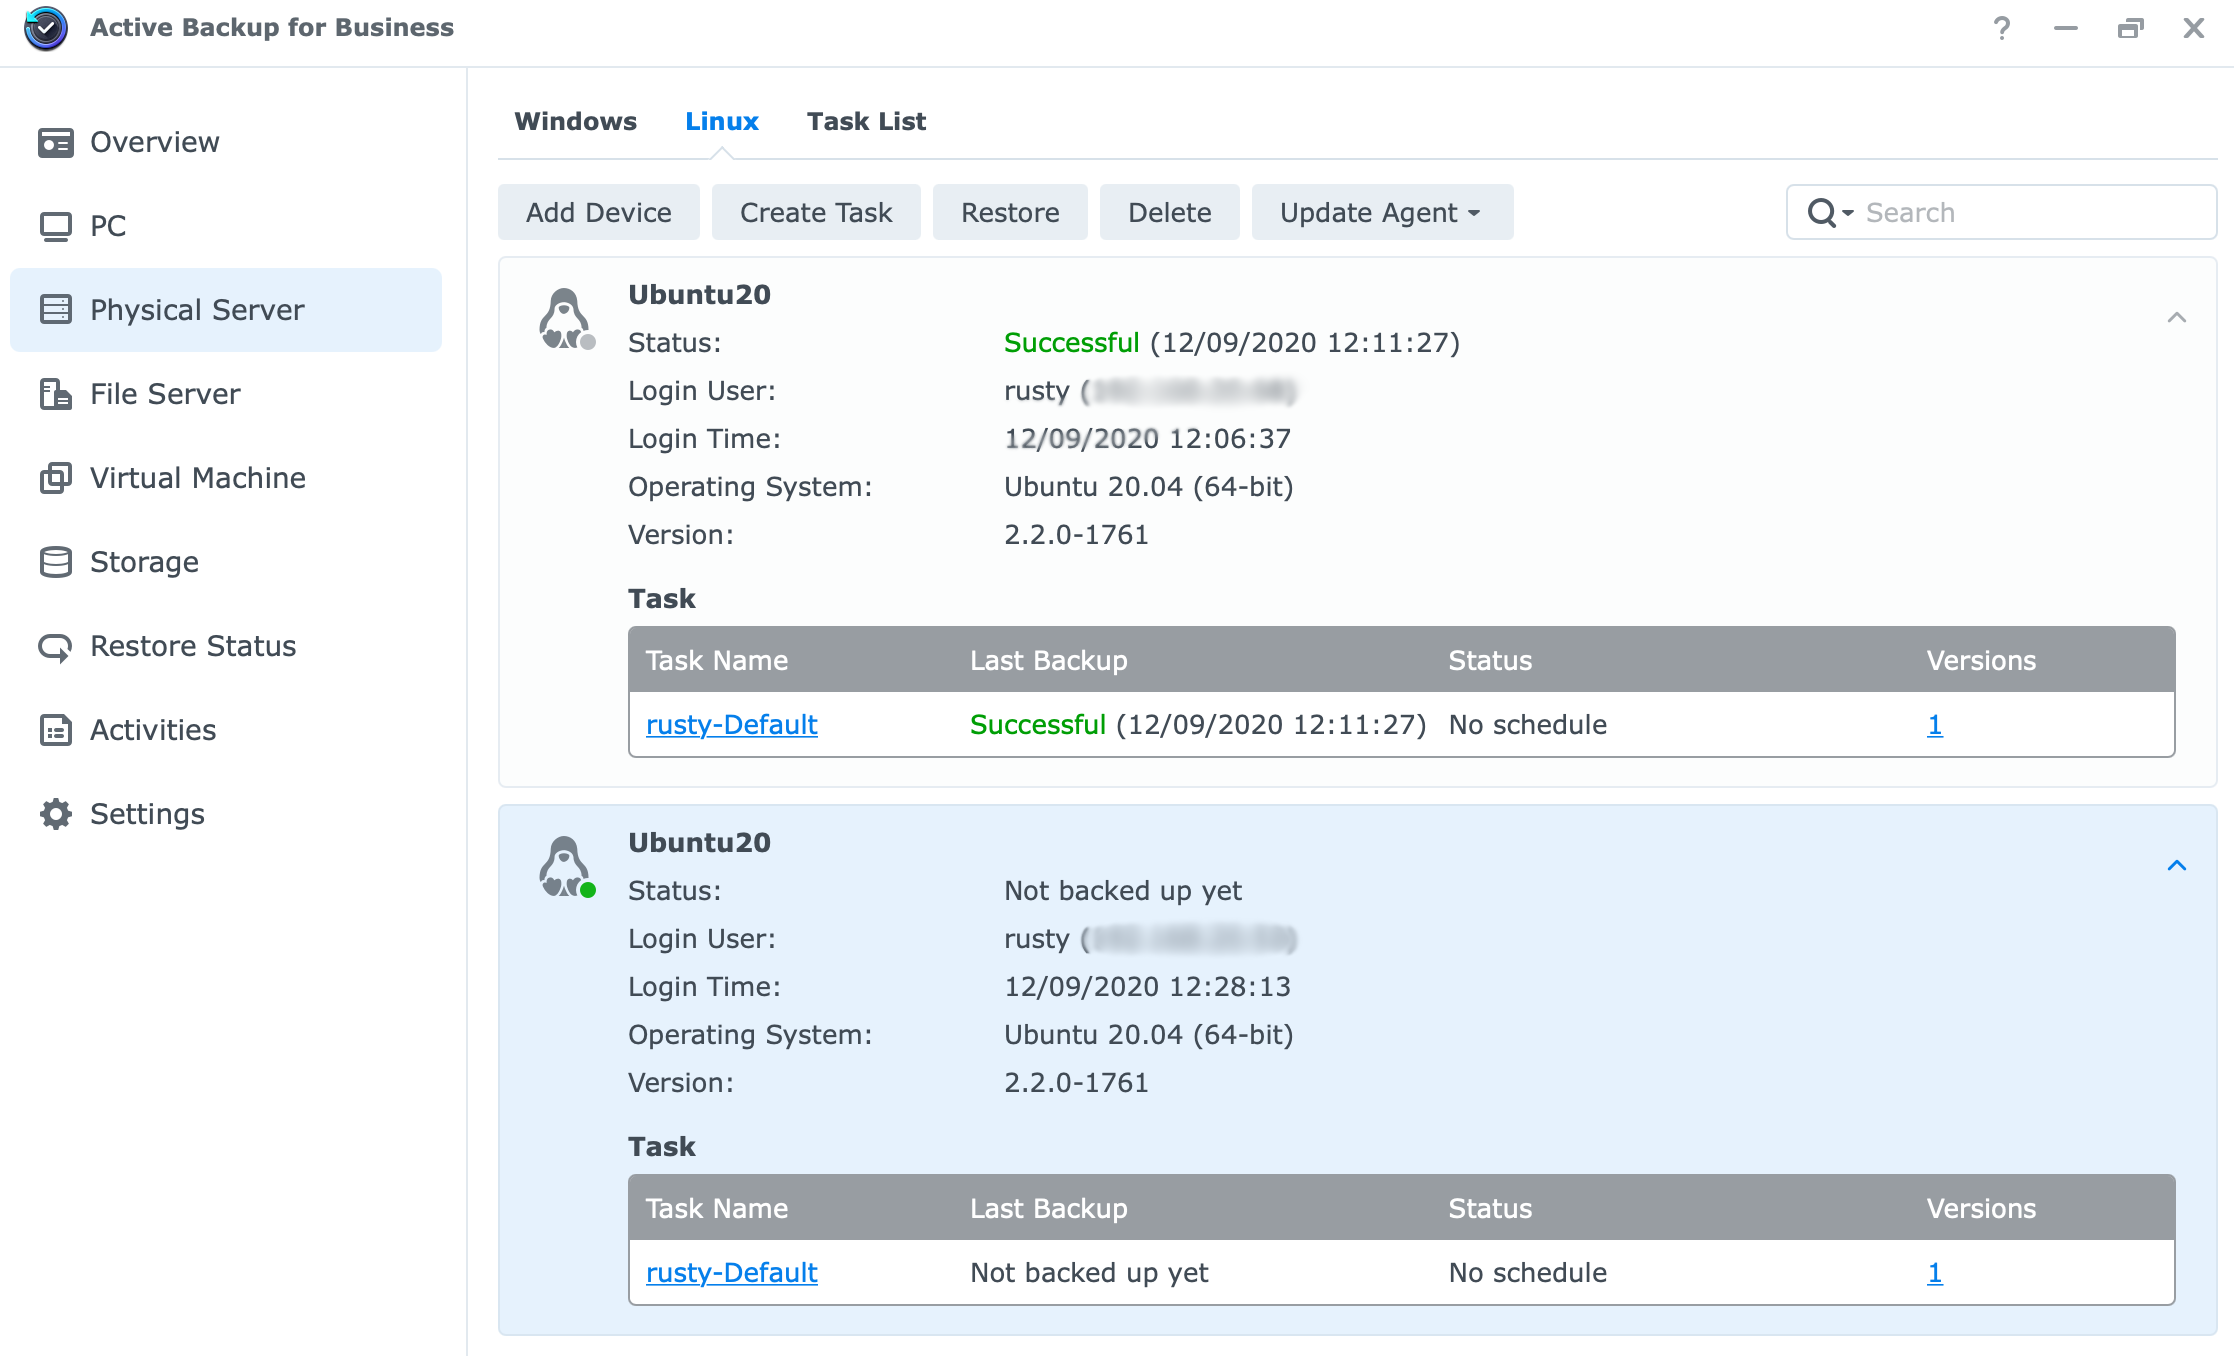
As soon as the process is completed, inside your ABB console, we will see that we have got another machine in the physical server section. Why if this is a virtual machine now? Well, considering it is running with the ABB command-line client, it registered as a "regular" machine as well.
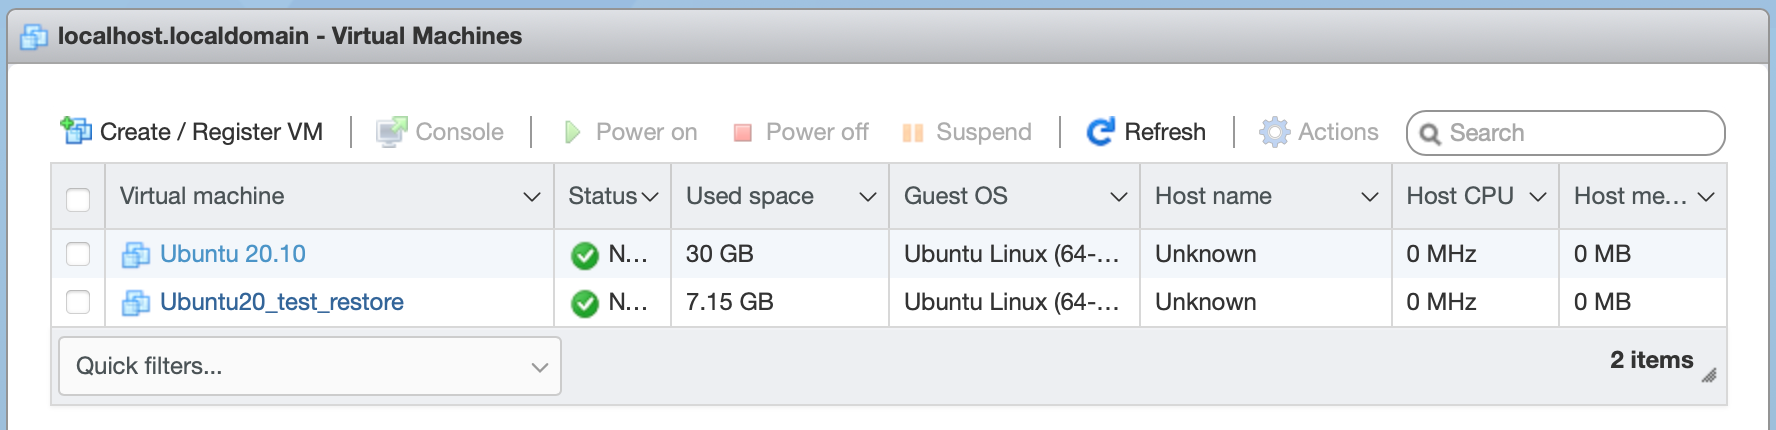
But, not to worry, the same machine has registered inside the Virtual machine section as well.
Once we start the machine, we will see that it is the same one, running under a different IP address and VM name, but the content, apps, and everything else, is the same and unchanged.
Unlike my initial article where I focused on bare metal restore, this time I have decided to show that a Linux machine can also be turned into a working virtual one if you need to at any time or simply want to.
Conclusion
Synology has delivered on their promise from 1,5y ago when they first announced that ABB will be getting Linux support in 2020. Well, COVID-19, did mess up a lot in the world, so support from macOS backup is yet to come, and I don't think it will be in the next 6 months or even when DSM7 hits "gold" status.
However, the main thing is that ABB is now covering a lot more modern OS options, support for new hypervisor versions, and will eventually support macOS as well, we just have to be a bit more patient.
macOS support will be a great alternative to native Time Machine backup and if there will be a bare-metal restore option, that will be just a cherry on the top, but one step at a time.
Let me know in the comments what your impressions of the ABB tool overall are, and if you have any questions or suggestions, please do share them.