DSM 7 - Directory Server - add macOS 11 (Big Sur) Mac to Synology Active Directory

When you say Active Directory in 99% of the time, one name comes to mind, Microsoft. I'm sure that people reading this article are here for a reason, and are aware of the mentioned name, and what it means. In case you are not here is the TL;DR version (from Wikipedia):
A server running Active Directory Domain Service (AD DS) role is called a domain controller. It authenticates and authorizes all users and computers in a Windows domain type network—assigning and enforcing security policies for all computers and installing or updating software. For example, when a user logs into a computer that is part of a Windows domain, Active Directory checks the submitted password and determines whether the user is a system administrator or a normal user.[4] Also, it allows management and storage of information, provides authentication and authorization mechanisms, and establishes a framework to deploy other related services
While back I tried adding a Mac to a Windows AD... didn't end well but I learned a few things.
Now, running an AD role is not new in the Synology world of services, it has been around for a while. So this means that you can run your NAS as a full-fledged AD server for your needs.
In this article, I would like to see how well and fast you can get it up and running on your NAS (that has never been an AD server before), as well as see how hard or easy it is to add a macOS client (in this case it will be a virtual Mac) to that same domain.
Bear in mind that this article is based on the beta version of the Synology Directory Server package (current version: 4.10.18-0274) and macOS 11.1.
Getting Synology Directory Server up and running
If you are running DSM 7 or an older version the process will be the same, but all the images and steps here will be covering the DSM 7 version of this package.
First, we need to set a few things upfront on your NAS before you can install the Directory server package:
- Static IP address for your NAS
- DNS server package - this will be installed automatically if it's missing
Setting static IP address should be done no matter if you are using your NAS as a simple file share or running some more "enterprise" oriented services like an AD server in this case. Using Control Panel > Network > Interface be sure to set your LAN IP address to static, and not dynamic (DHCP). Last thing you want to your central AD server "traveling" around your network.
The second point (DNS server) can be done while running the installation of the AD package because DSM will detect if the DNS package is missing and install it for you, but just wanted to point out that it is something that needs to be done.
The reason for DNS is the creation of a forward lookup zone for your domain as well as any subdomain A host, and SRV records that are needed for AD to function normally. Don't worry, all this will be done by the wizard so you don't have to worry about it.
Once you have installed both packages using the Package Center you are good to go and configure your domain.

Domain creation
Open up Synology Directory Server (no need to configure anything in DNS, it will be done automatically) and you should be greeted with a wizard-like below:
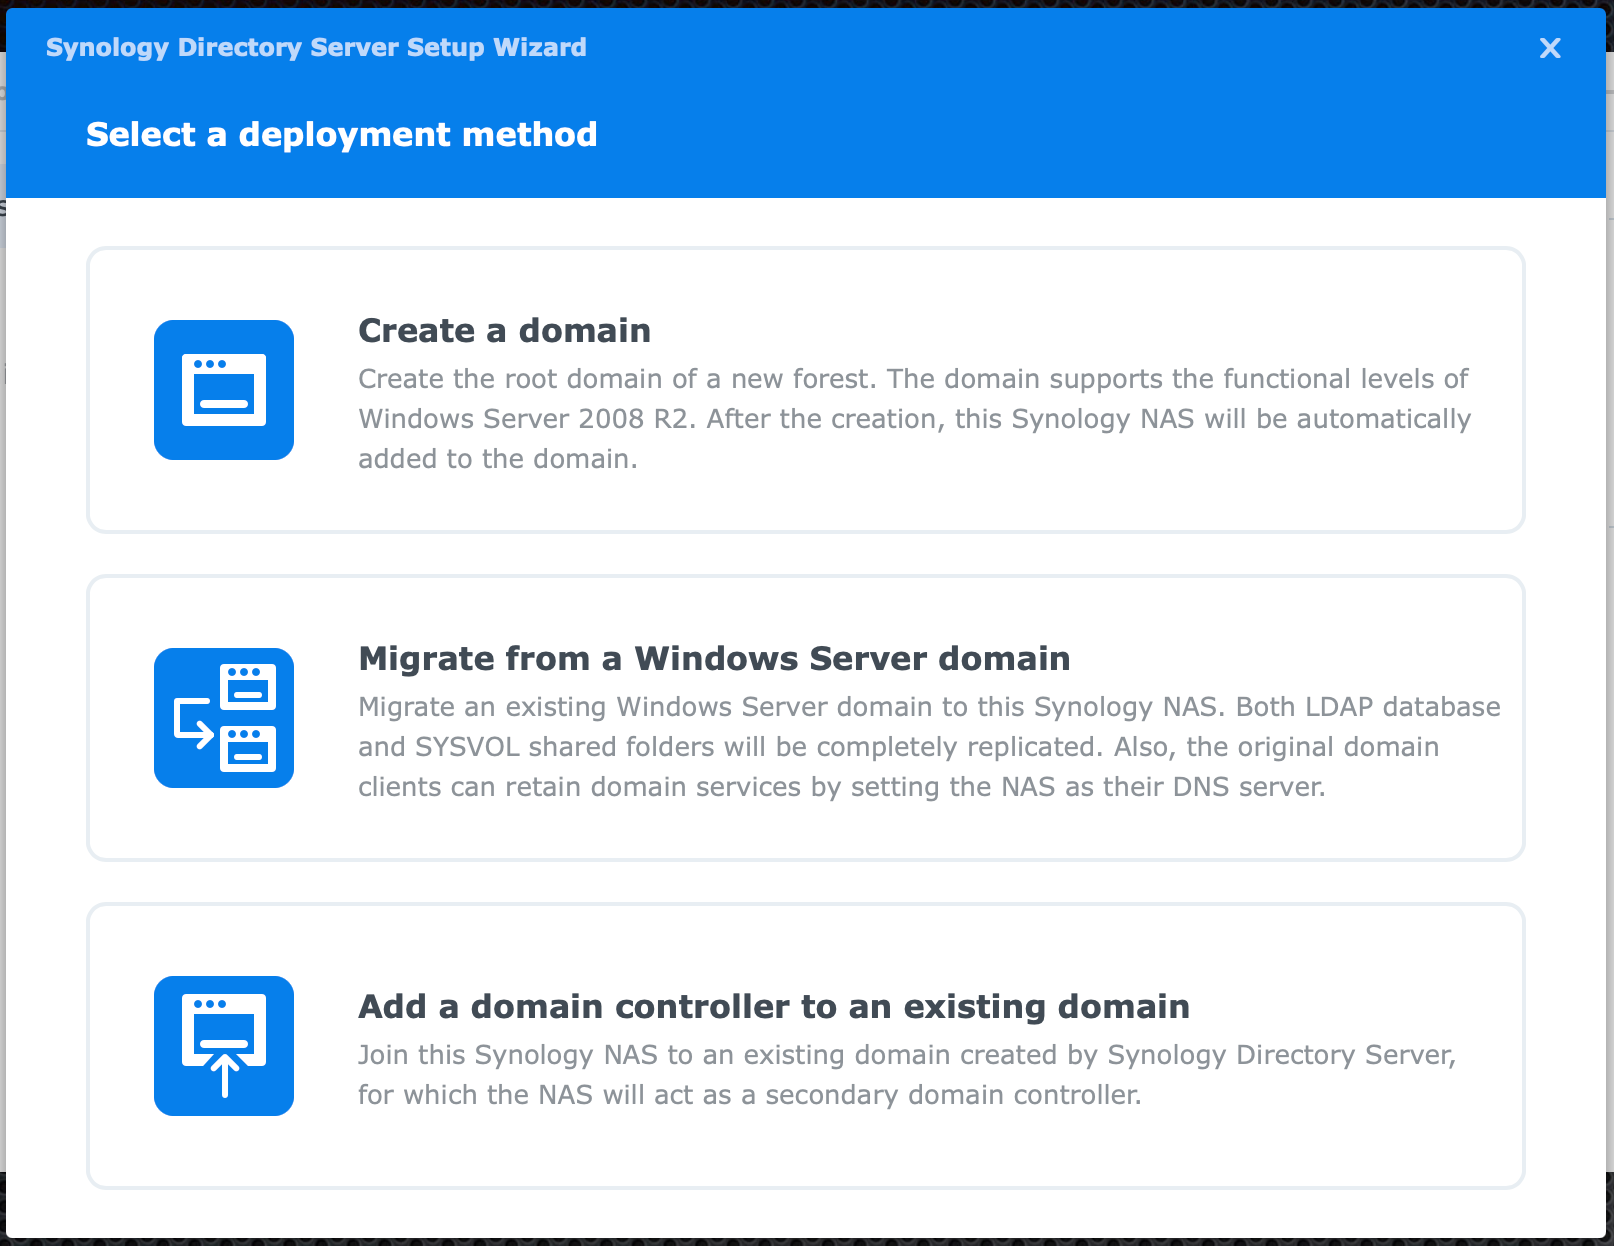
For this scenario, as I said before, I will be creating a fresh domain so options two and three are not part of this article. Select the first option and follow the wizard.

This step is the most important one. Selecting the name.
Be sure NOT to use a popular .local root name because if you are adding macOS clients to the mix, you will have a lot of trouble getting around that, so save yourself some time and nerves and just pick something else. In my case, I went with .home, but you can type anything that you feel right for your internal domain name.
Another thing to mention here is that the administrator account that will be created (as well as its password) is NOT the same one as your DSM admin account. This administrator account is part of your domain and as such will be used for all administrative tasks that need to be done.
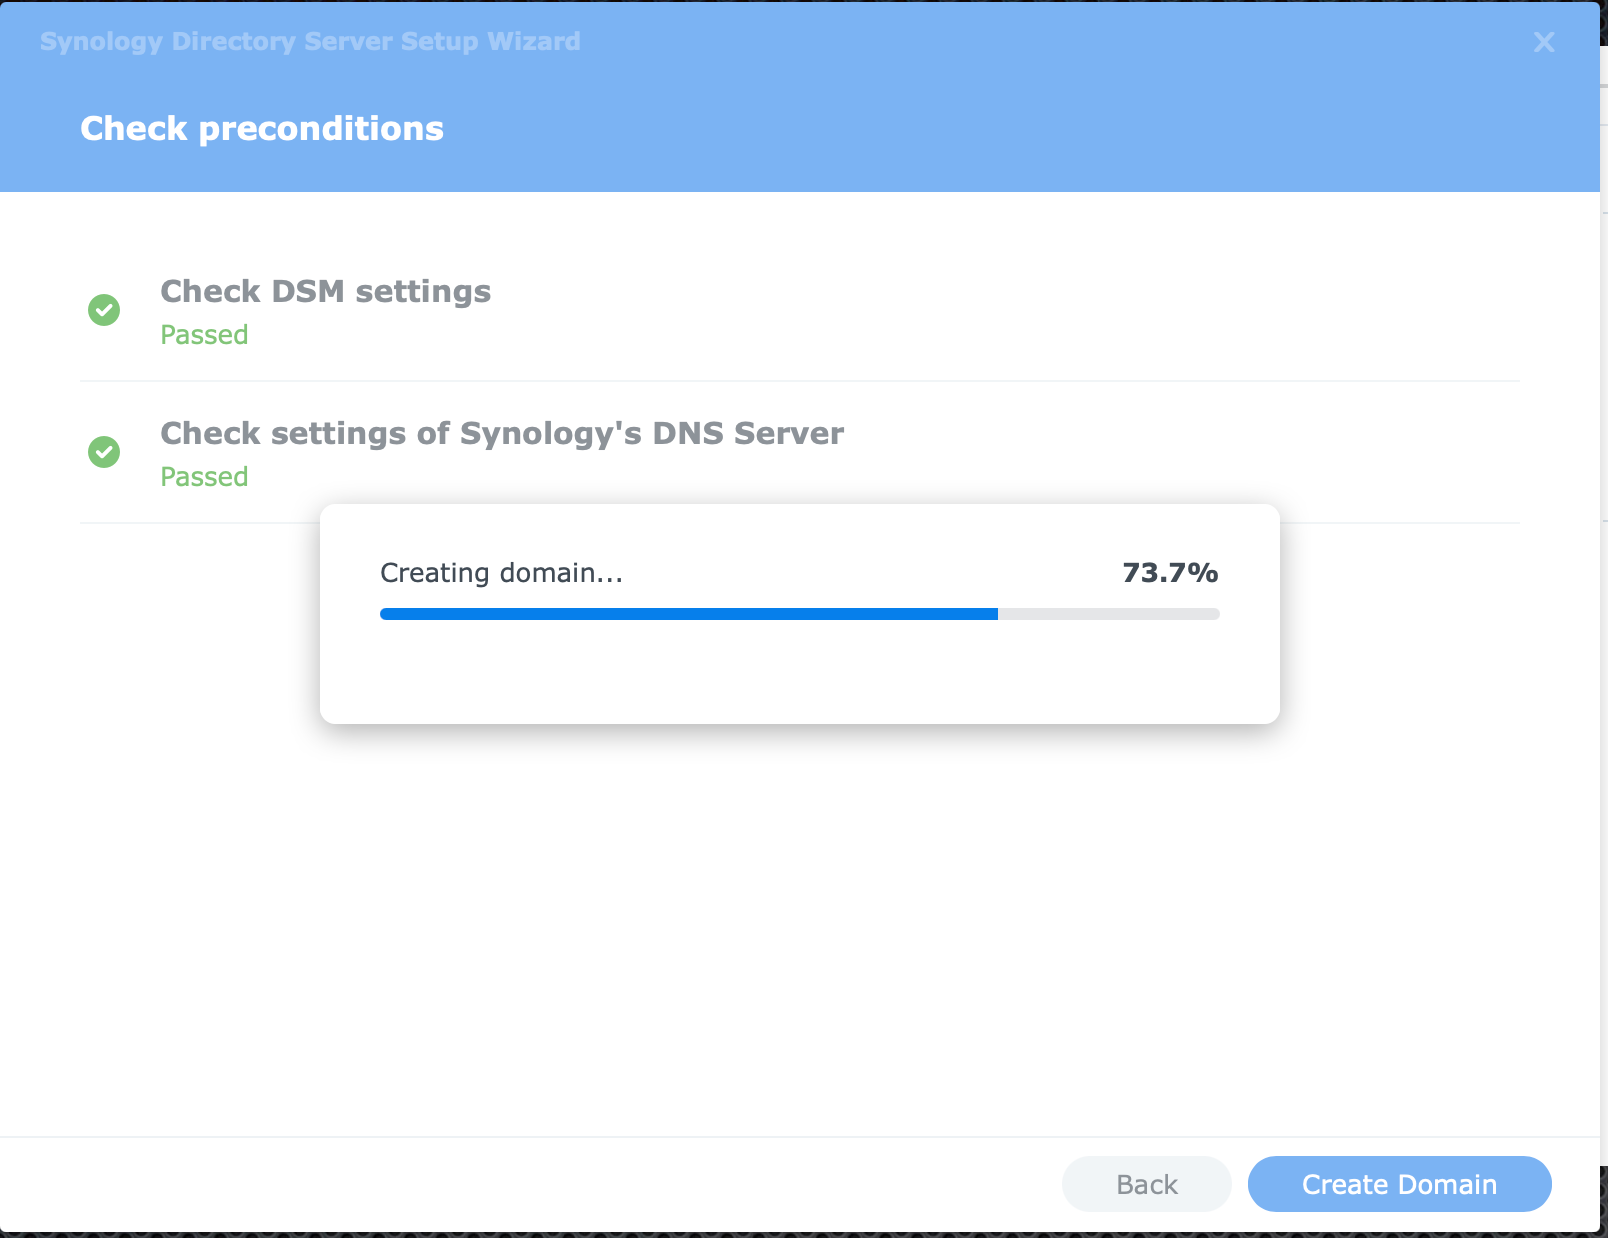
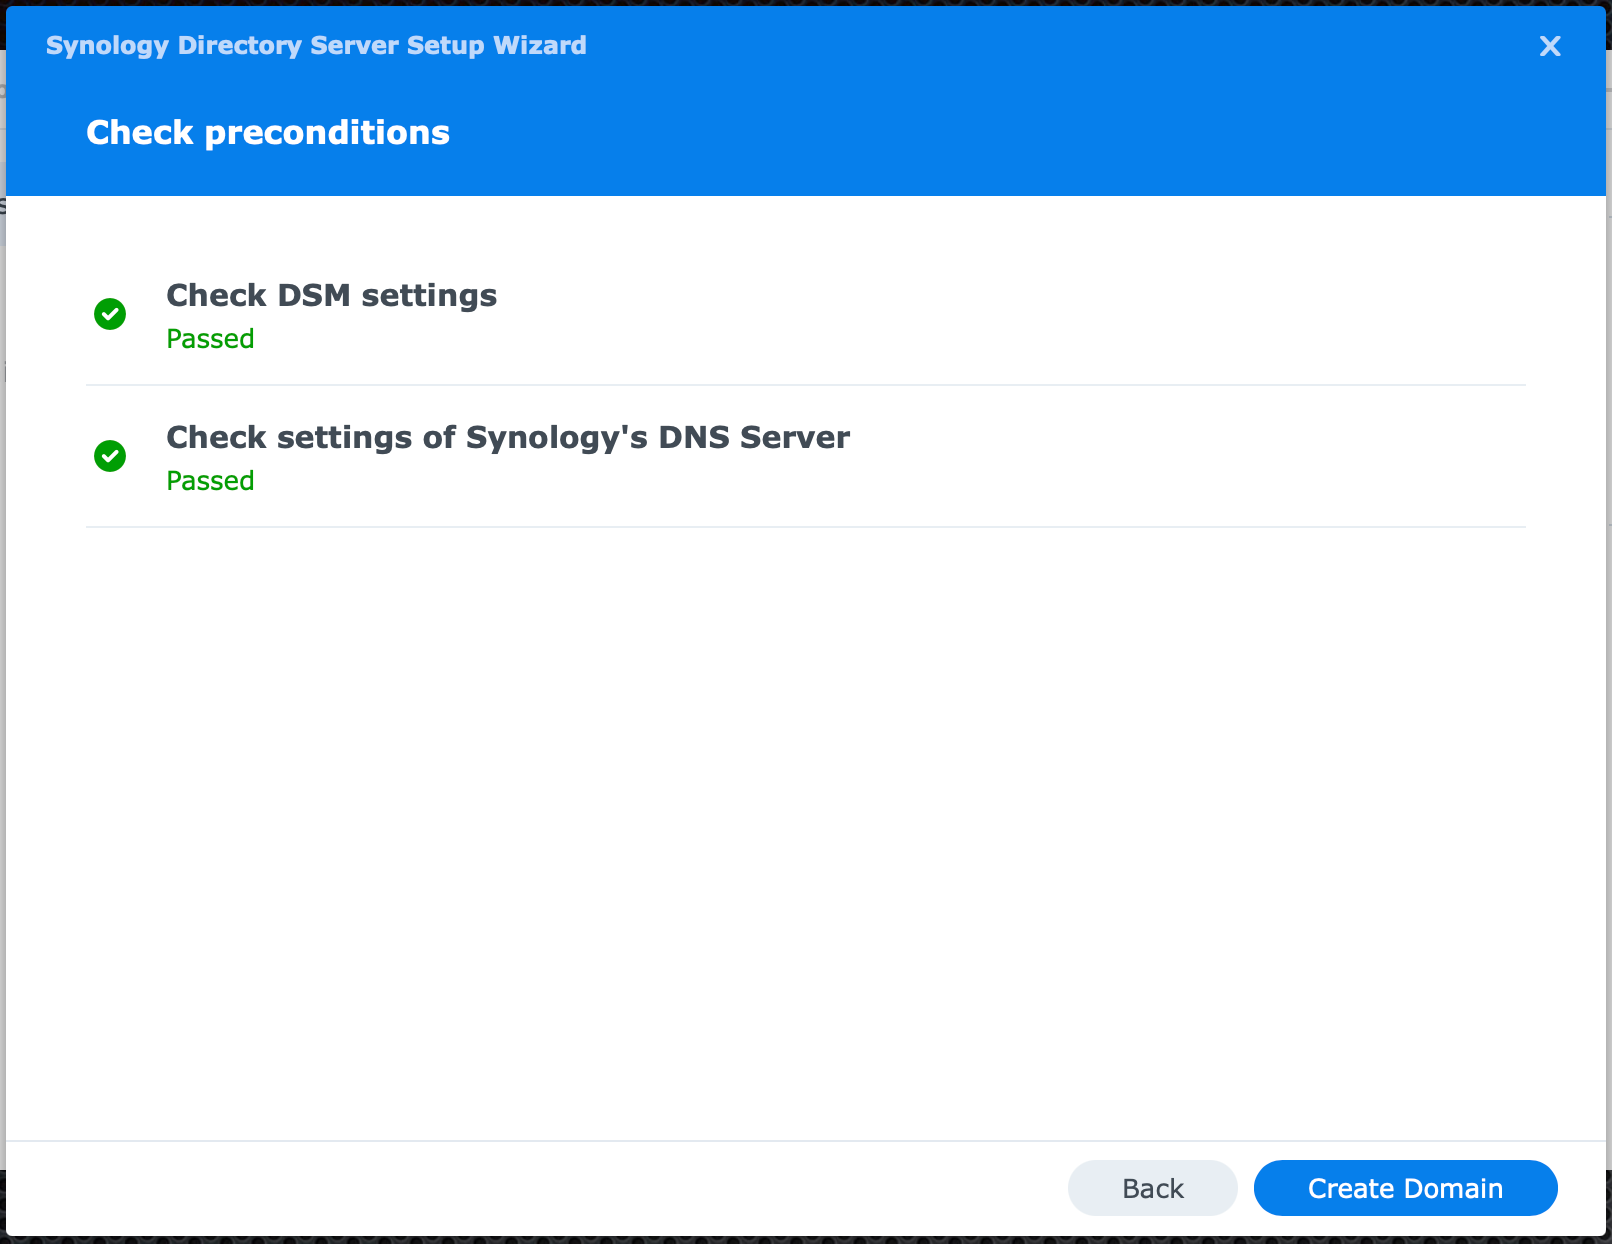
Finally, when the process is complete, you will get a summary of the changes that were done. Specifically, the ones listed in this popup:
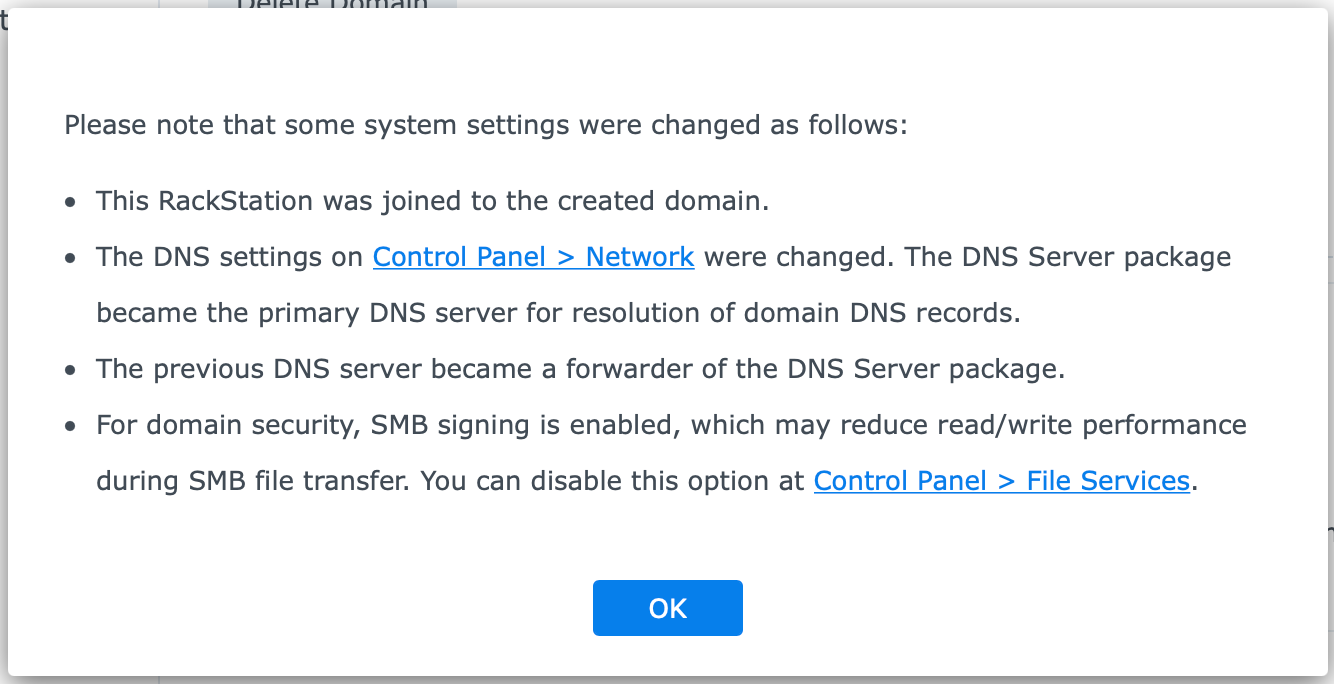
So what do these changes mean? Well, as a PDC (primary domain controller), your NAS LAN IP, also became the primary DNS address (normal for AD domain setup), and SMB security was raised by applying secure signing that will have a performance impact as a result. You can change these settings, but it is nice that DSM has warned us.
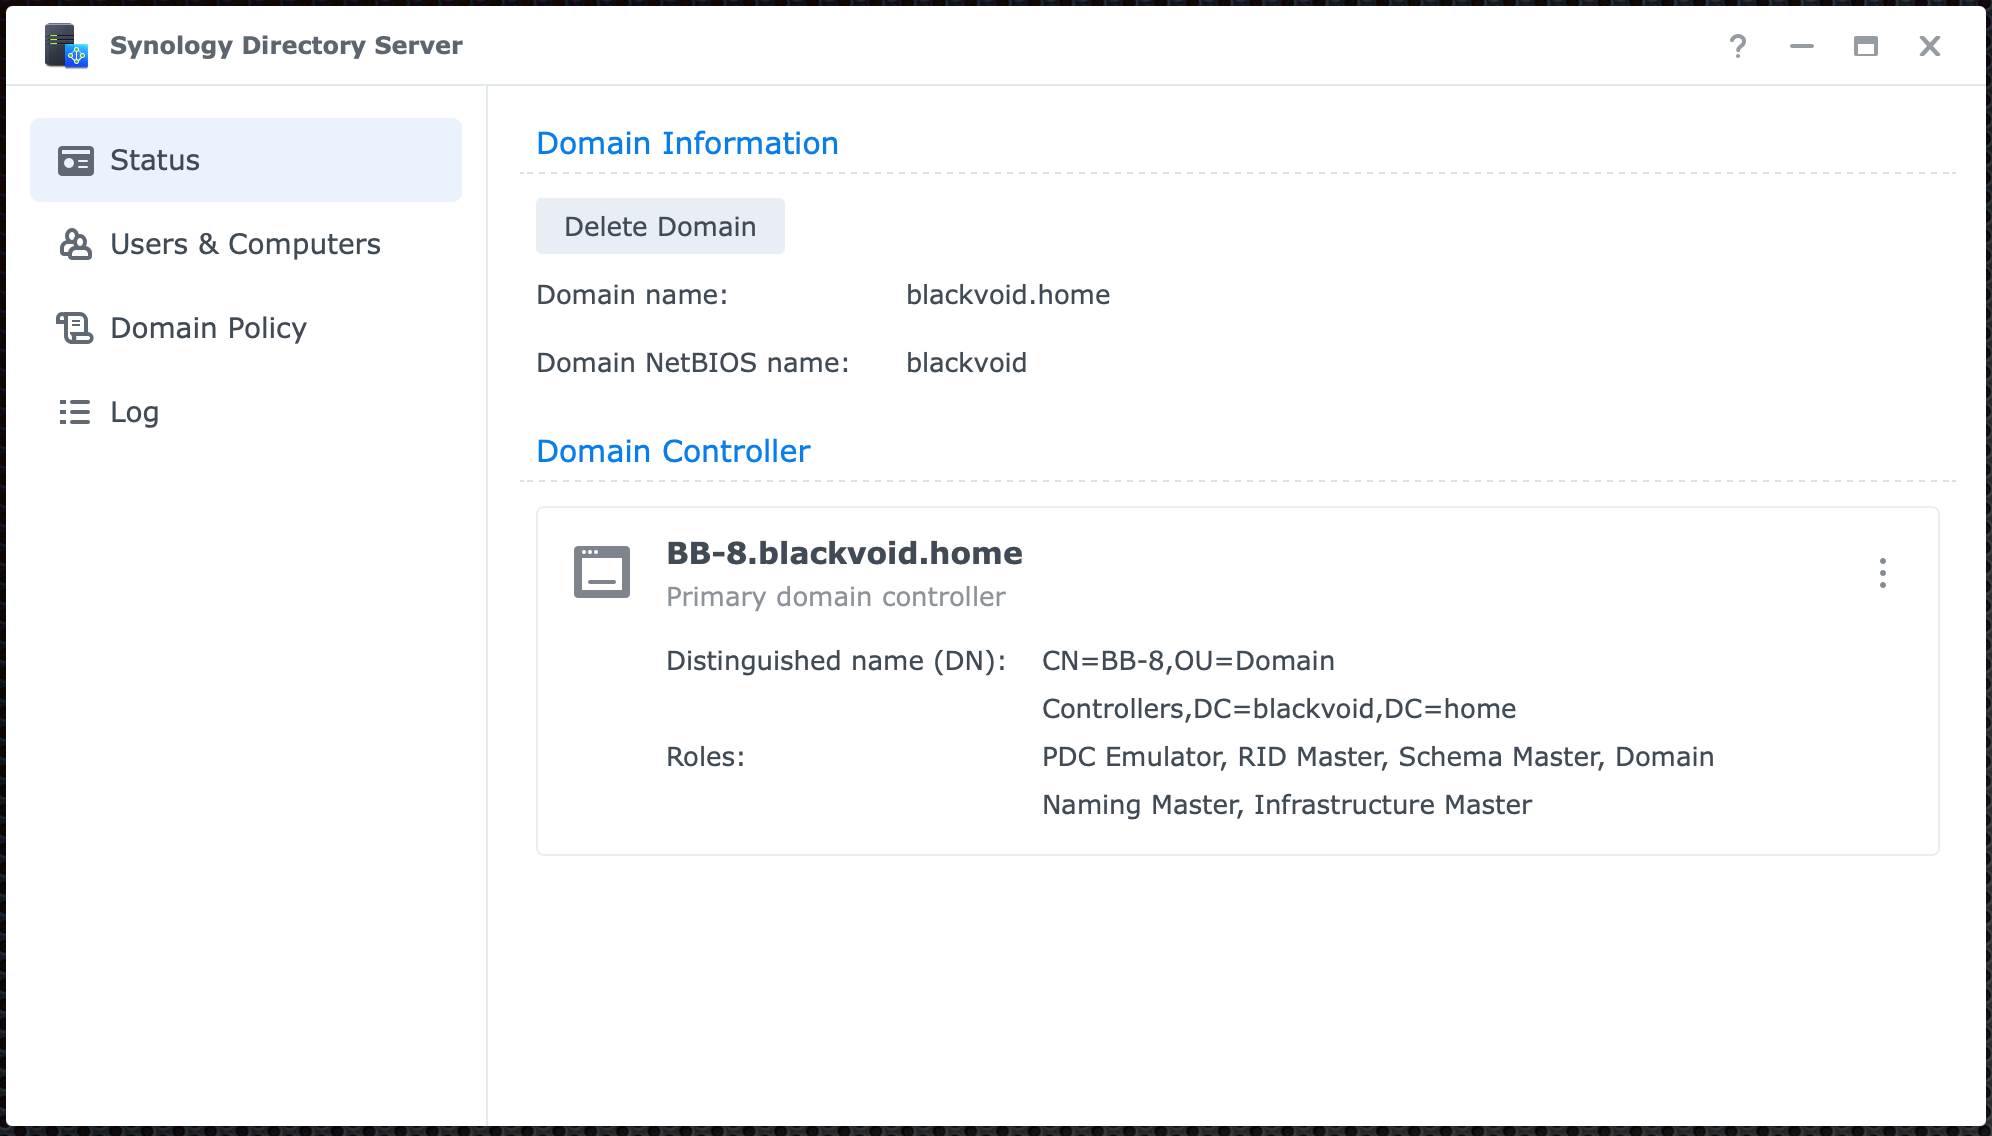
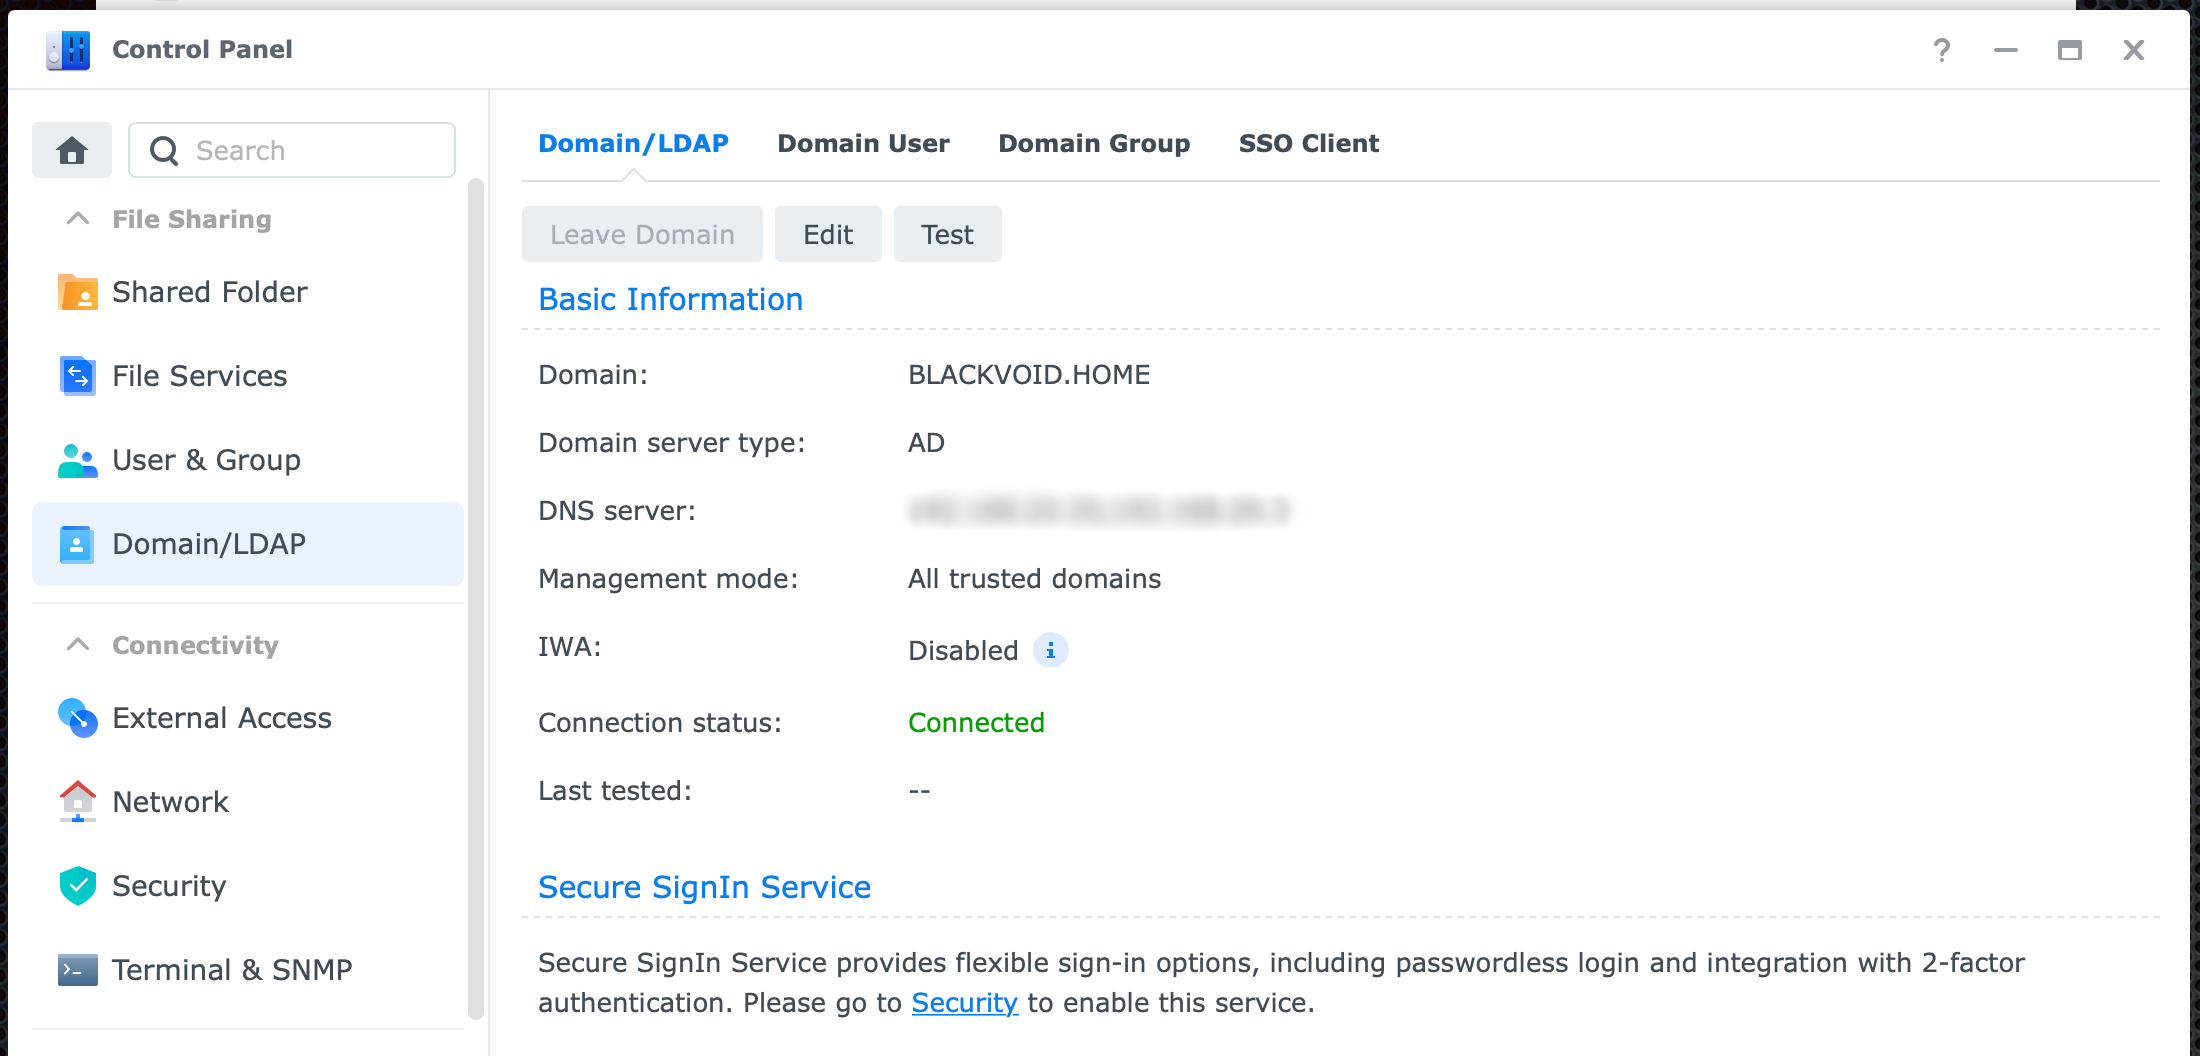
Using Directory server you can see your domain details and options, but also you can see that your NAS is part of a domain using the Control Panel:
Add Mac computer to the domain
Just as before, we will need to do at least one thing before we can add our Mac computer to the domain, reconfigure local DNS settings.
This means that you will need to go to System Preferences > Network and select your LAN interface (LAN or WIFI). Now using the Advanced button, open up the configuration for your Mac interface and jump to the second tab, DNS.
There you will need to use the '+' sign in the lower-left corner to add a new DNS record. Be sure to enter your NAS LAN IP address and move it to the top of the list.
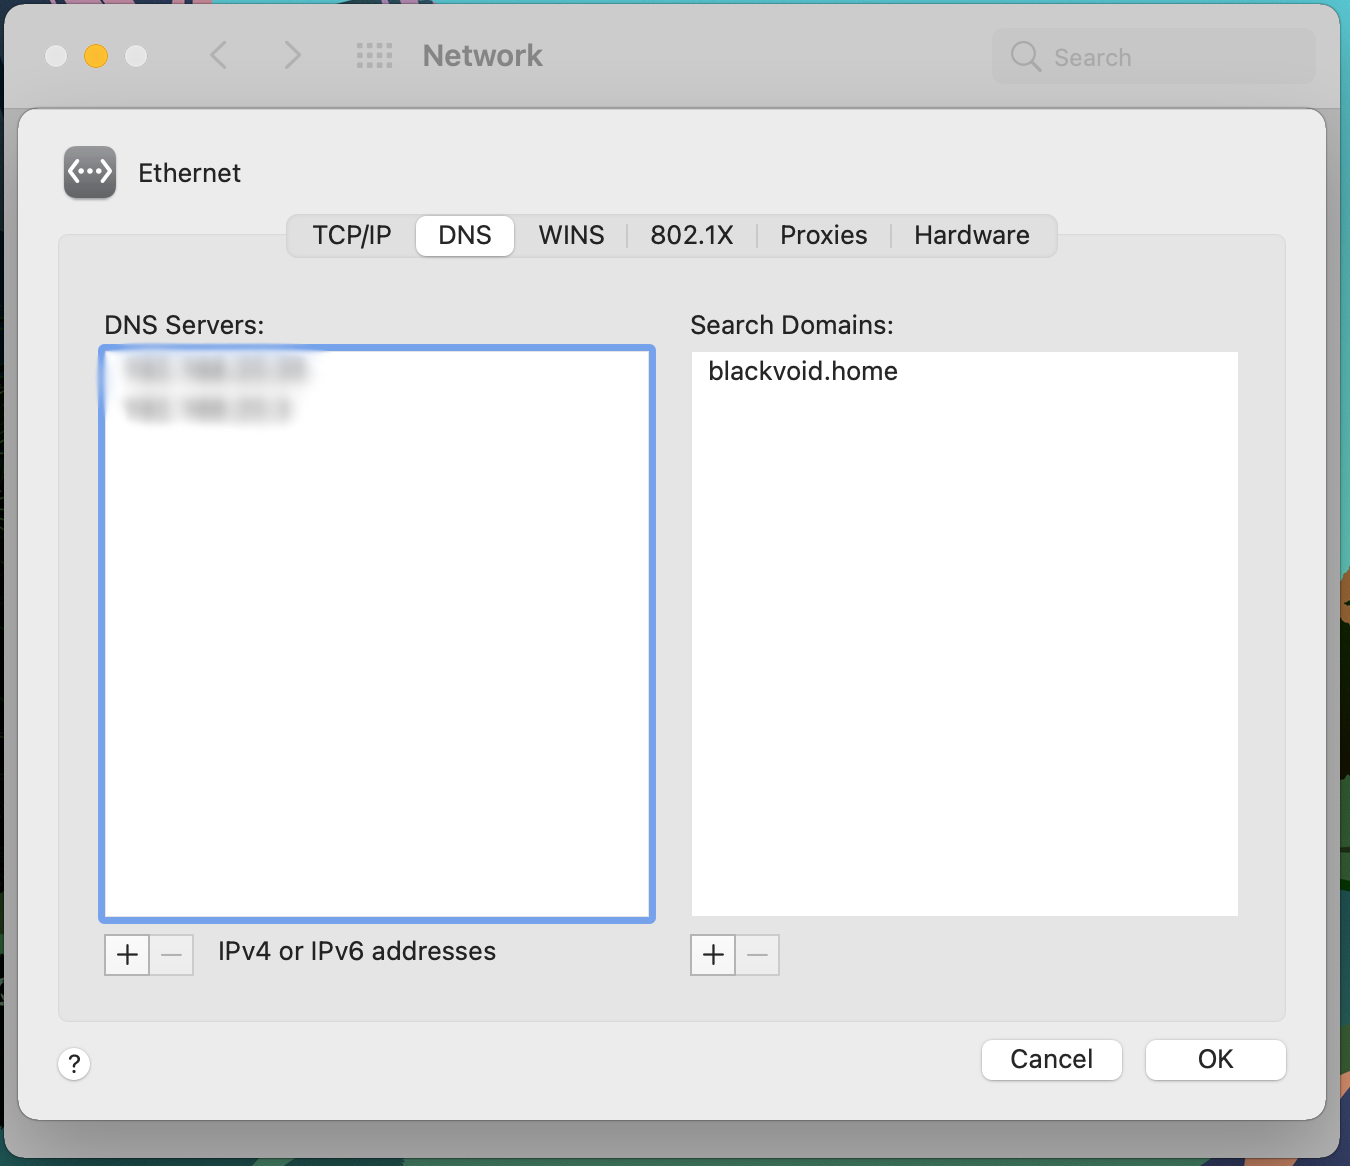
On the right-hand side, you can configure using the same process, your search domains (this is optional) by adding your domain name to the list. Once done, click OK and Apply to close the dialog box and apply the configuration.
So now that we have our macOS client ready to send any DNS requests to our domain controller (NAS), we can begin adding it to the domain.
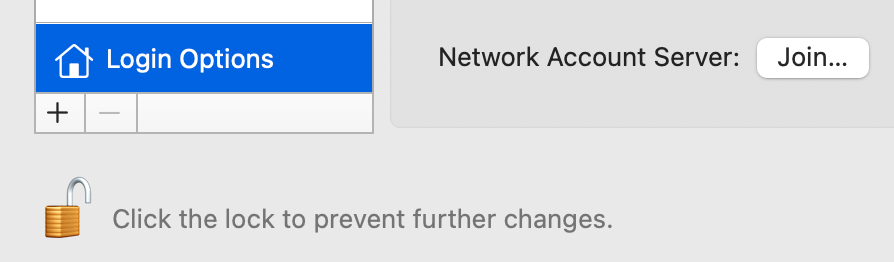
Go back to your System Preferences, and then into Users & Groups. Once there click the Login Options button on the bottom left corner.
NOTE: If you can't access any Login options, then first click the Lock icon on the bottom, authenticate with your local Mac account.
Now, click the Network Account Server option by using the Join... button
This will open a quick join dialog box, but we will not use that one. Instead, use the Open Directory Utility... button
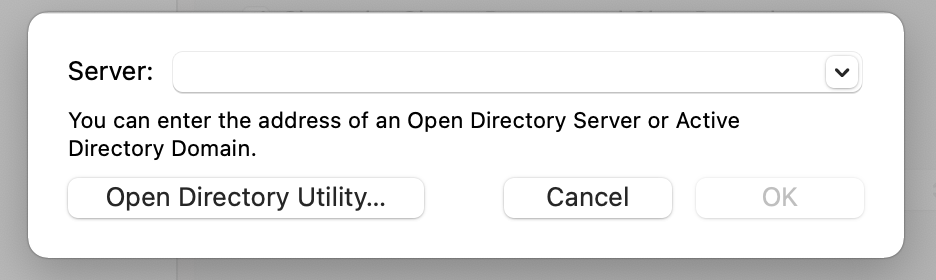
This will bring forward another macOS application called Directory Utility. You might be wondering if you could have skipped to this app in the first place, and the answer is yes you could, but I wanted to show the long way around and how you can identify that your Mac is or is not a member of the domain (more on that later on).
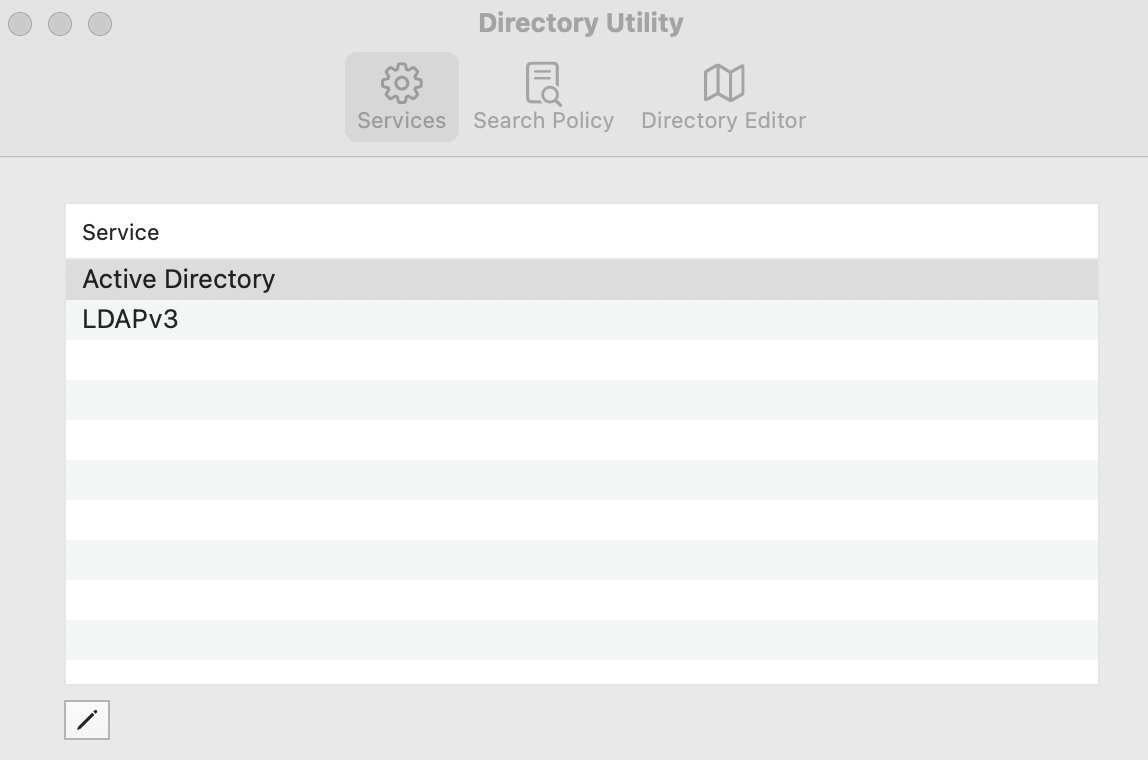
As before, use the lock icon on the bottom to unlock the settings, and then select the Active Directory option followed by clicking on the pencil symbol on the bottom.
Expand the dialog box that jumped before you and enter the following:
- enter Active Directory domain name > your domain name that you defined
- enter/alter your Computer ID name
- switch to the Administrative tab and enter your NAS IP address in the 'Prefer this domain server' box
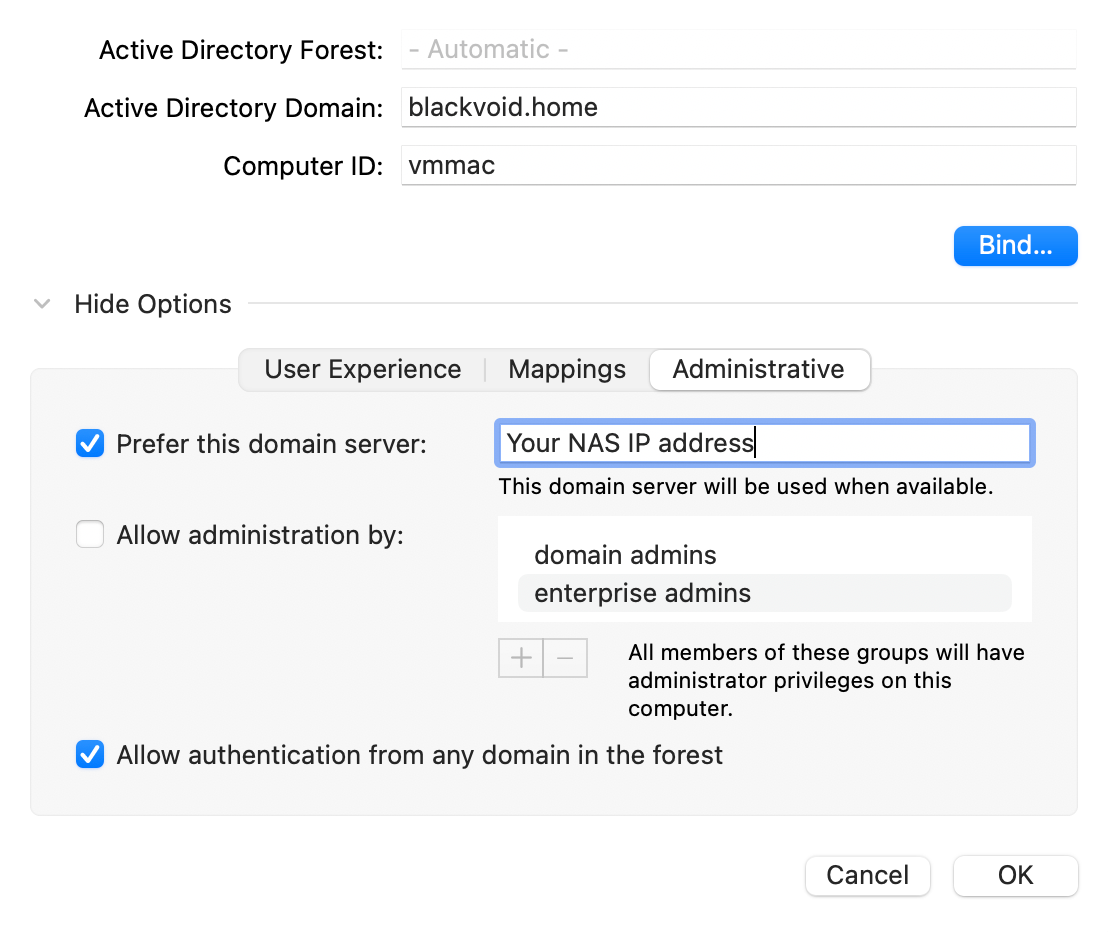
Finally, click the Bind... button to complete the process. You will need to authenticate with your domain administrator password (that you set up in Directory server wizard) as well as your local macOS password so be sure to read carefully what credentials will be asked of you.
This process shouldn't take more than 30 sec or so to complete, and once its done, your dialog box should look like this:
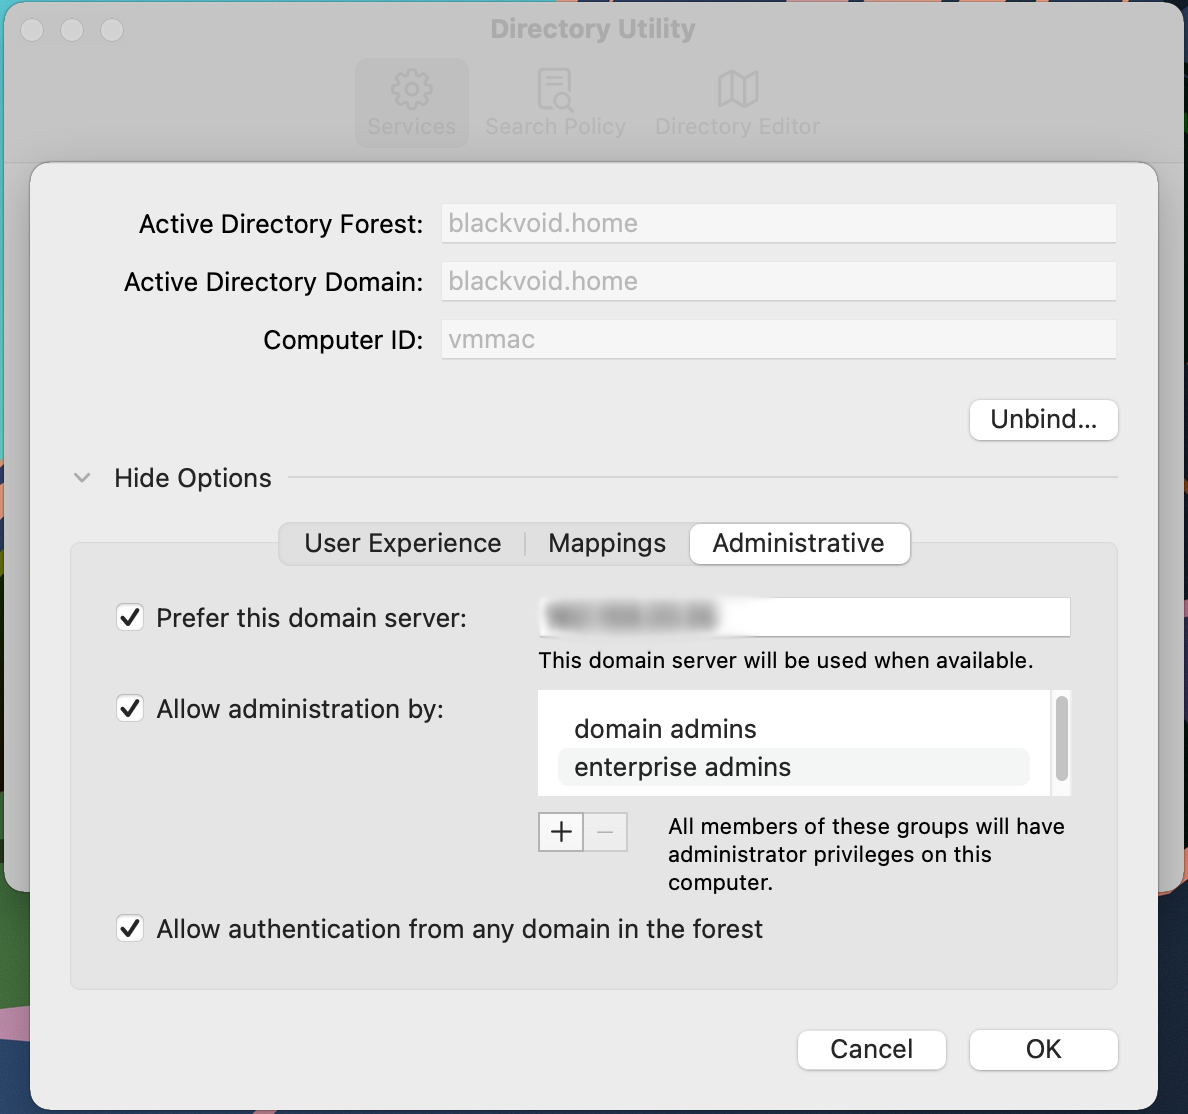
Not much to see but you will notice that the Bind button has changed to Unbind... and the top fields are dimmed.
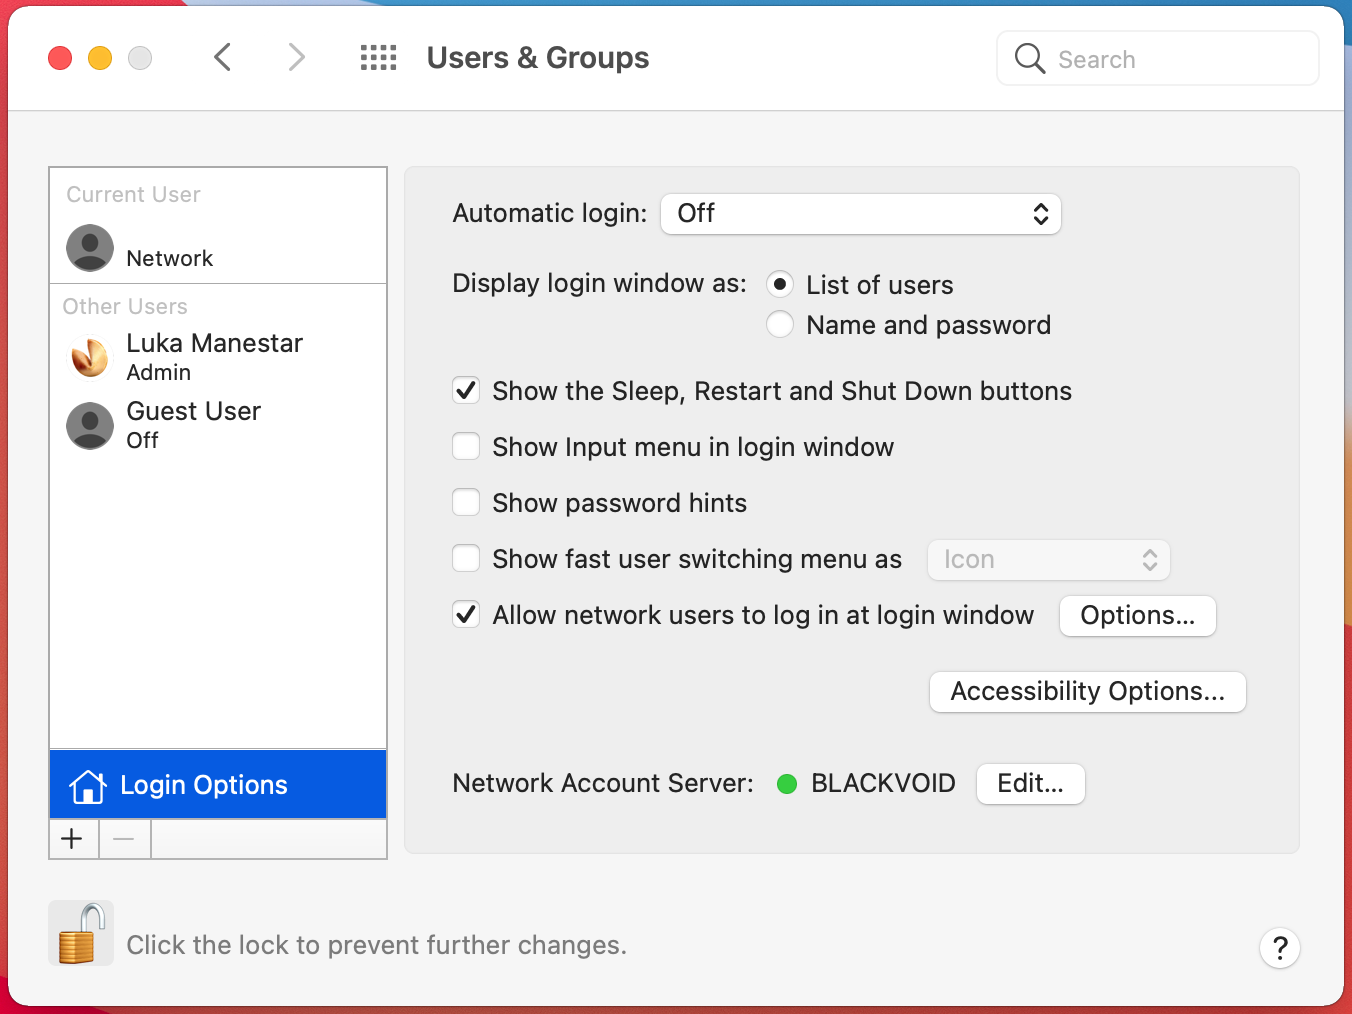
Another way to confirm this from the macOS side is to open back Users & Groups module inside Preferences and make sure that you have a "green" light next to the Network Account Server:
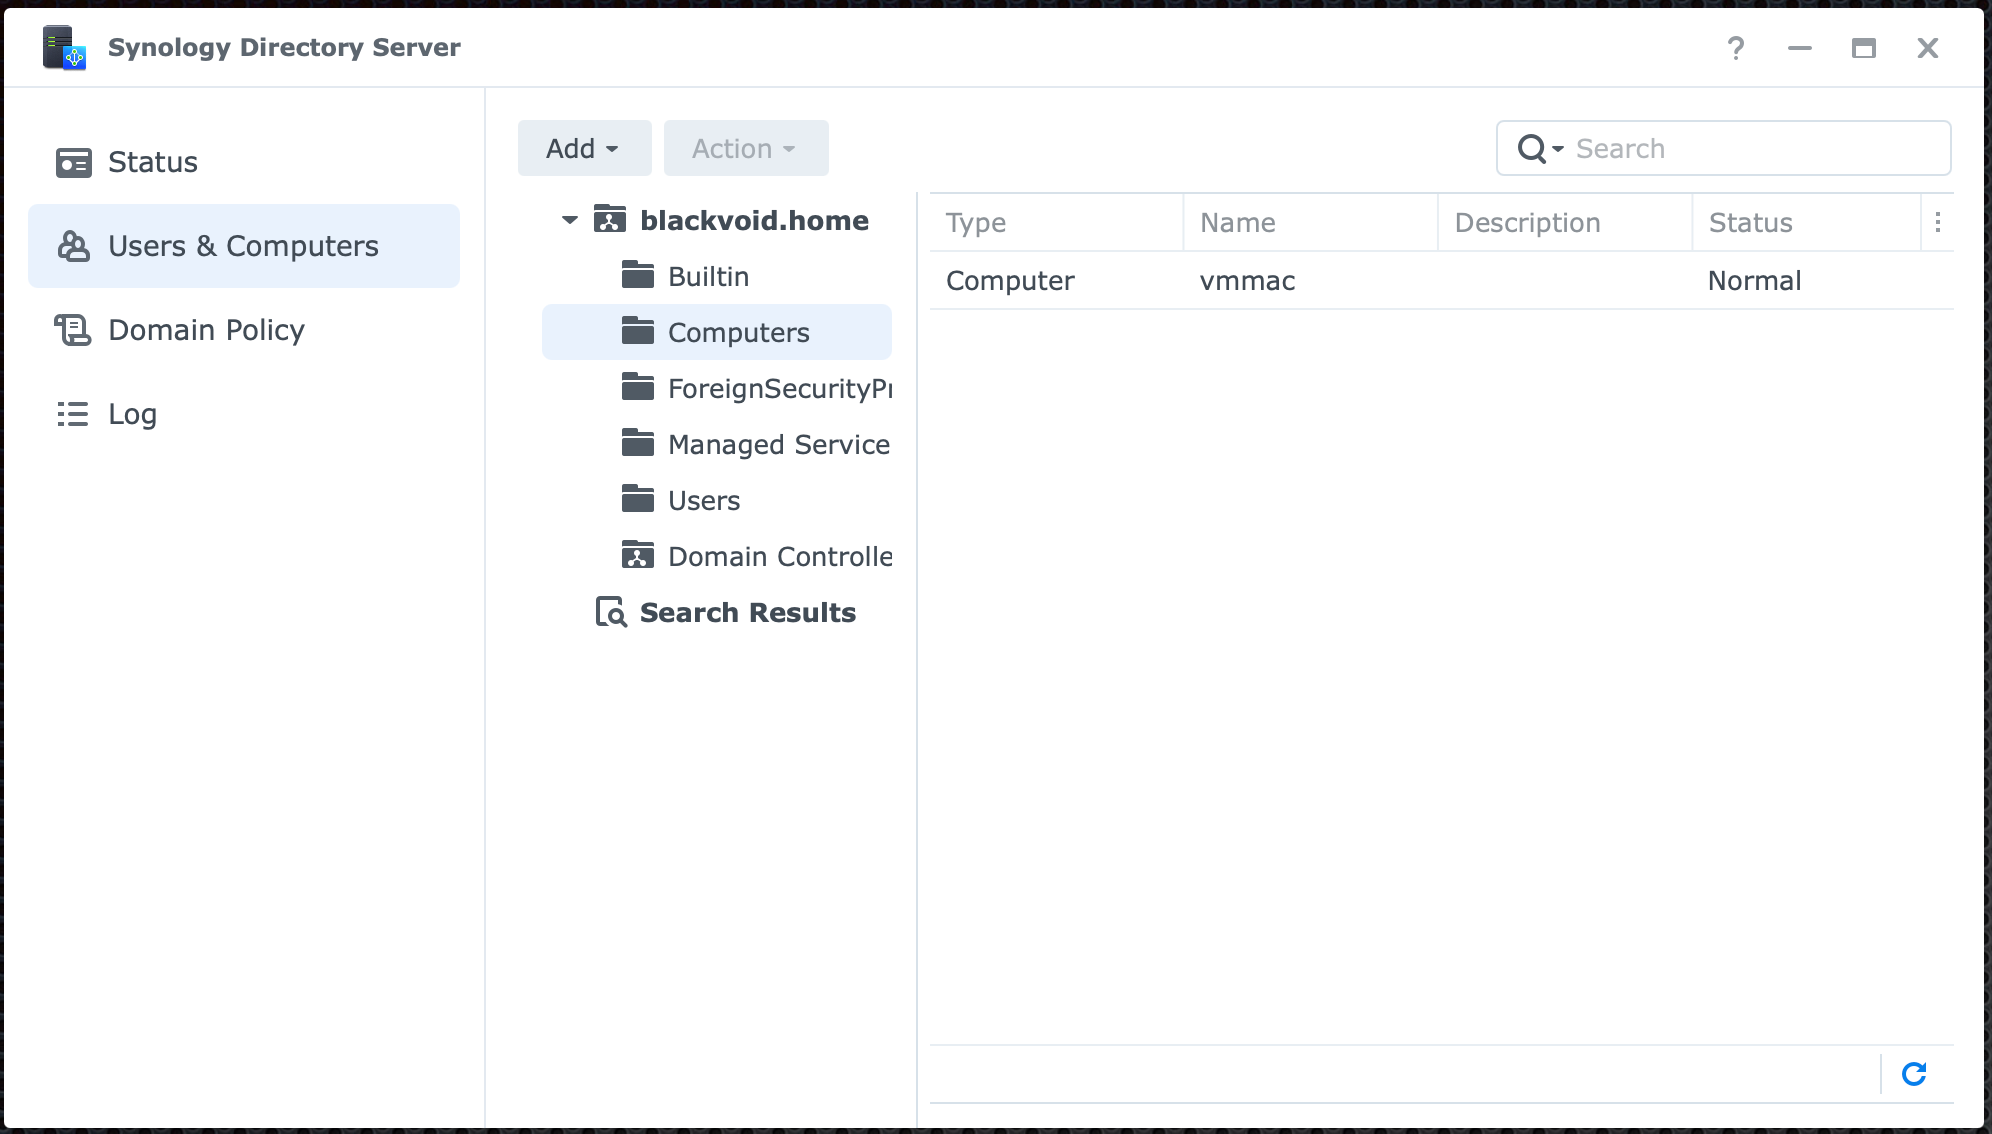
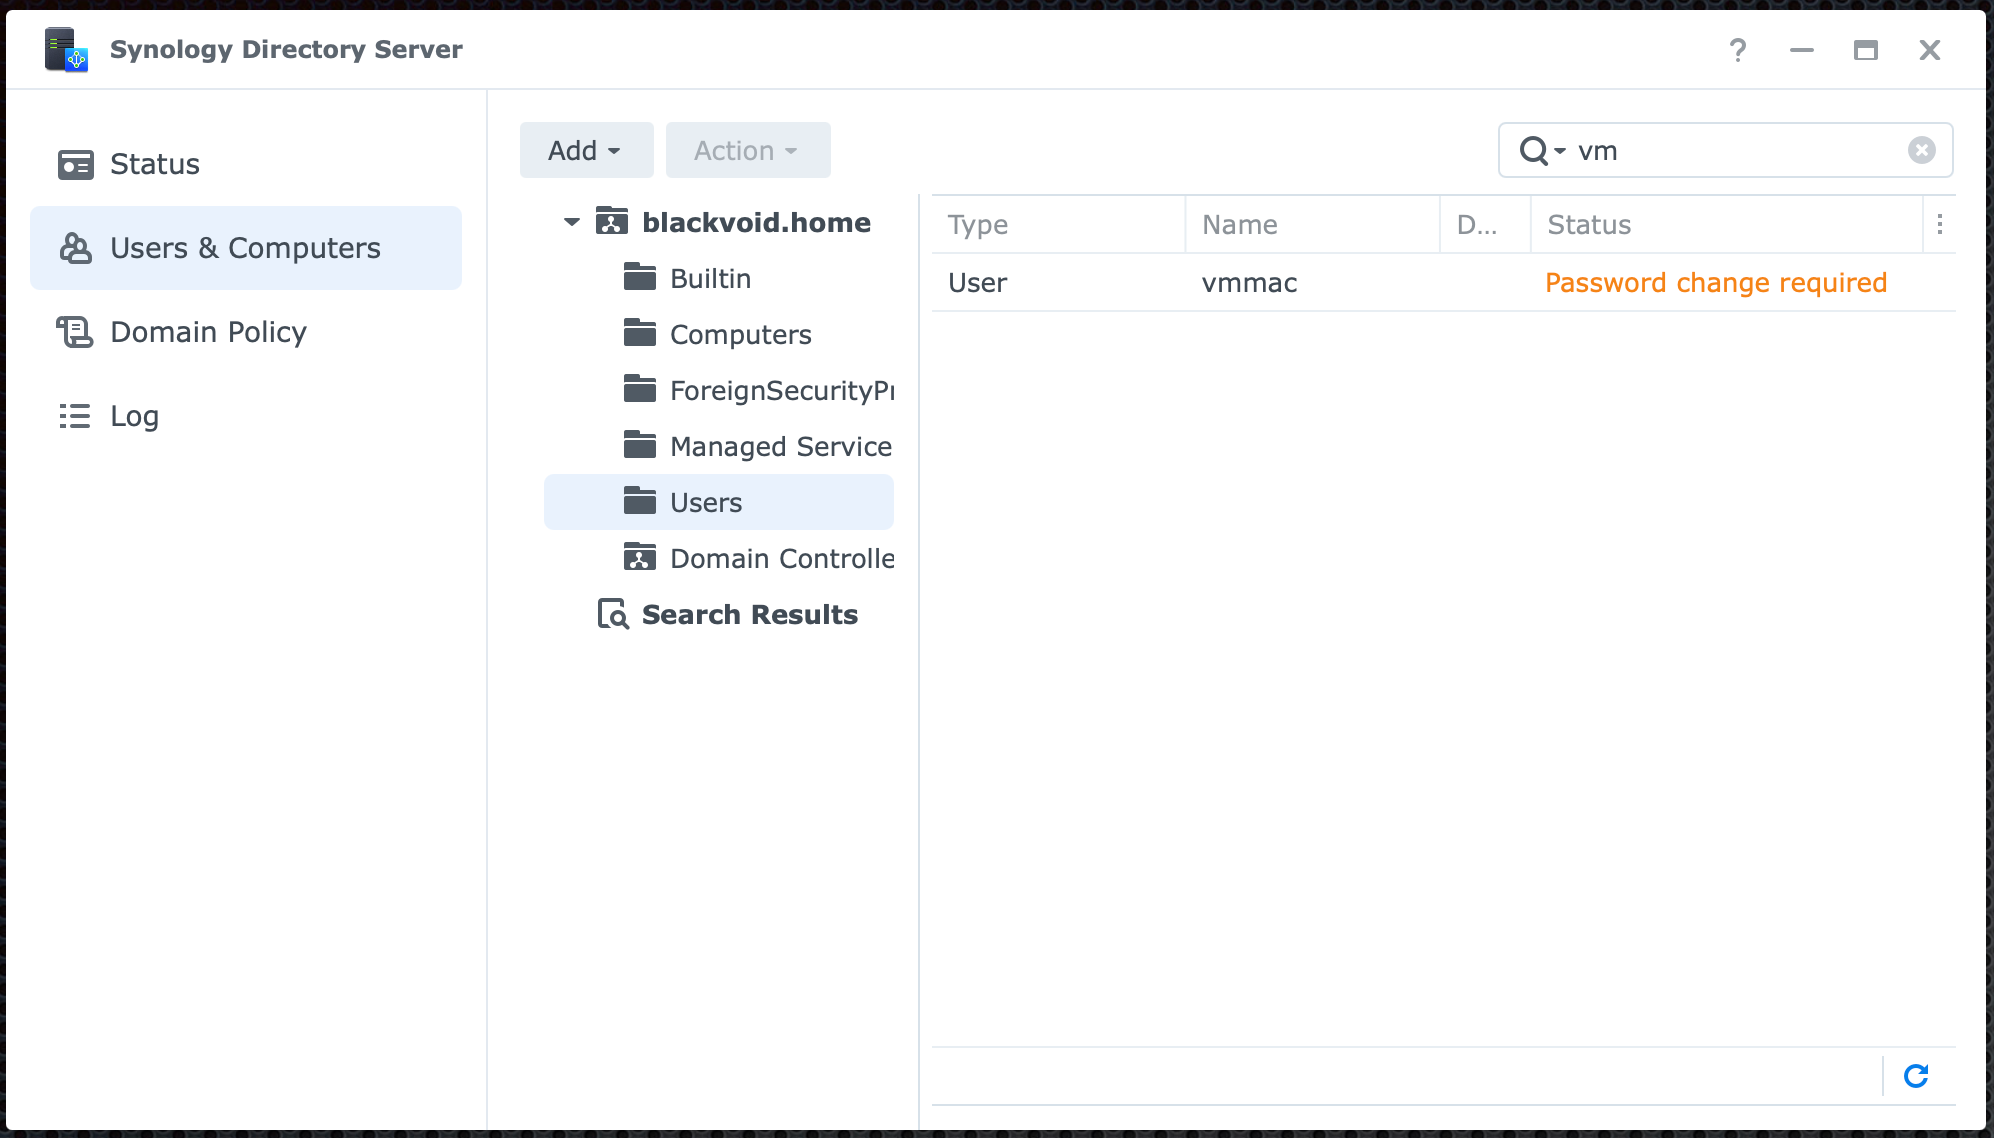
Finally, you can verify this from DSM side as well by opening the Users & Computers section in your Directory Server console:
Well done! All that is left to do now is create a domain account that you will use your Mac with and you are off to the races.
Create an account and log into your domain
Considering that the Mac is now part of the domain, you can log into it using the local macOS account or the domain account.
Open the Directory Server console in DSM, and go to the Users and Computers section. Click the Add button to start the process.
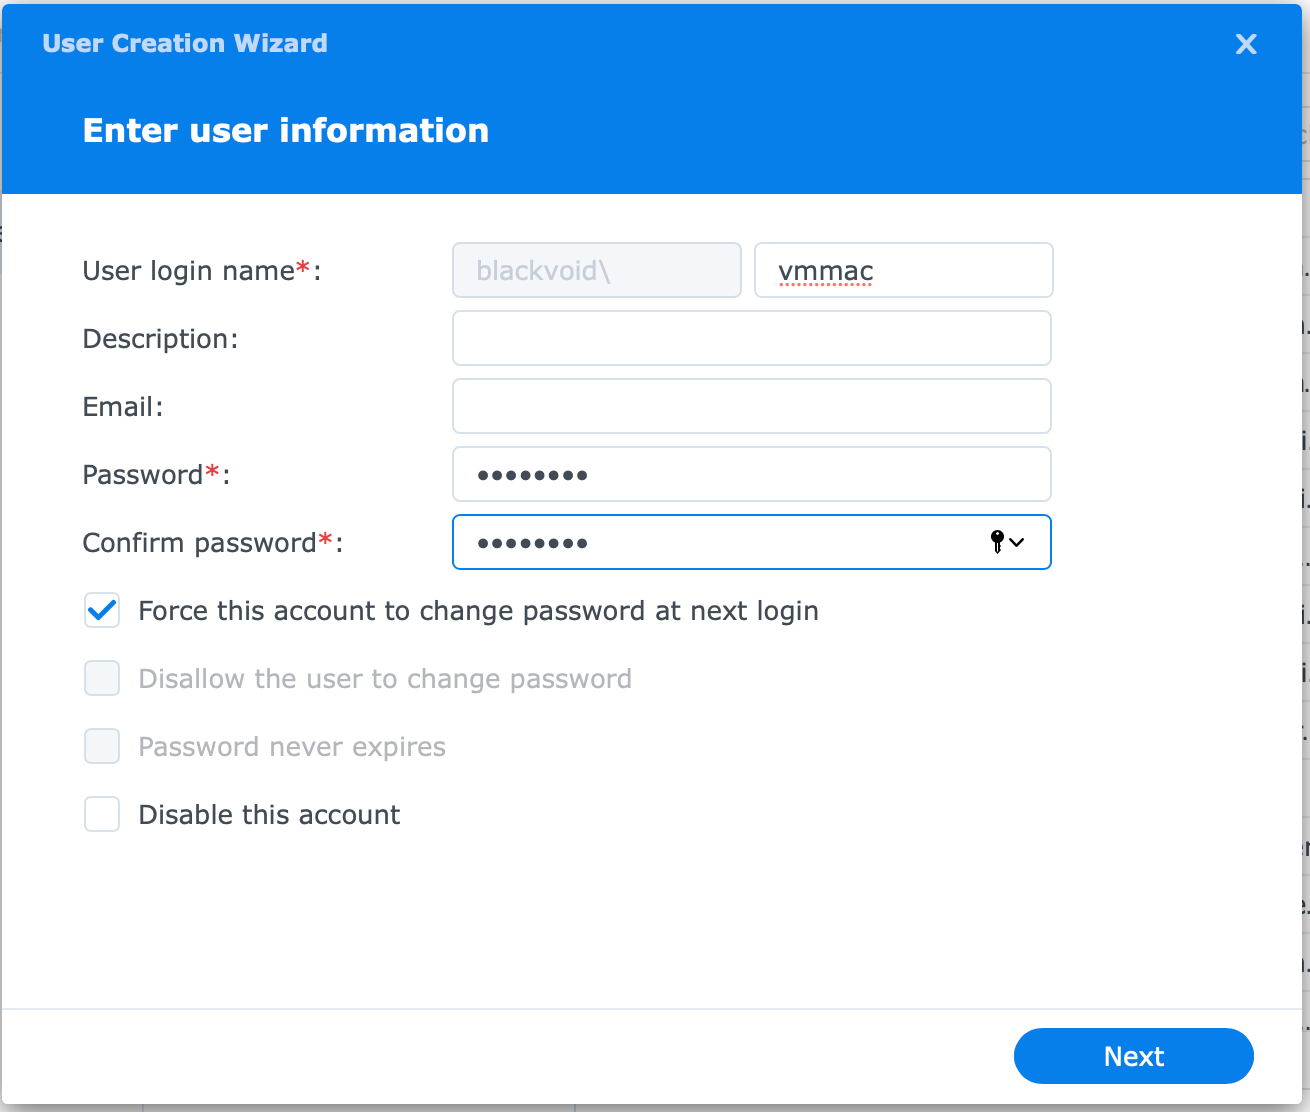
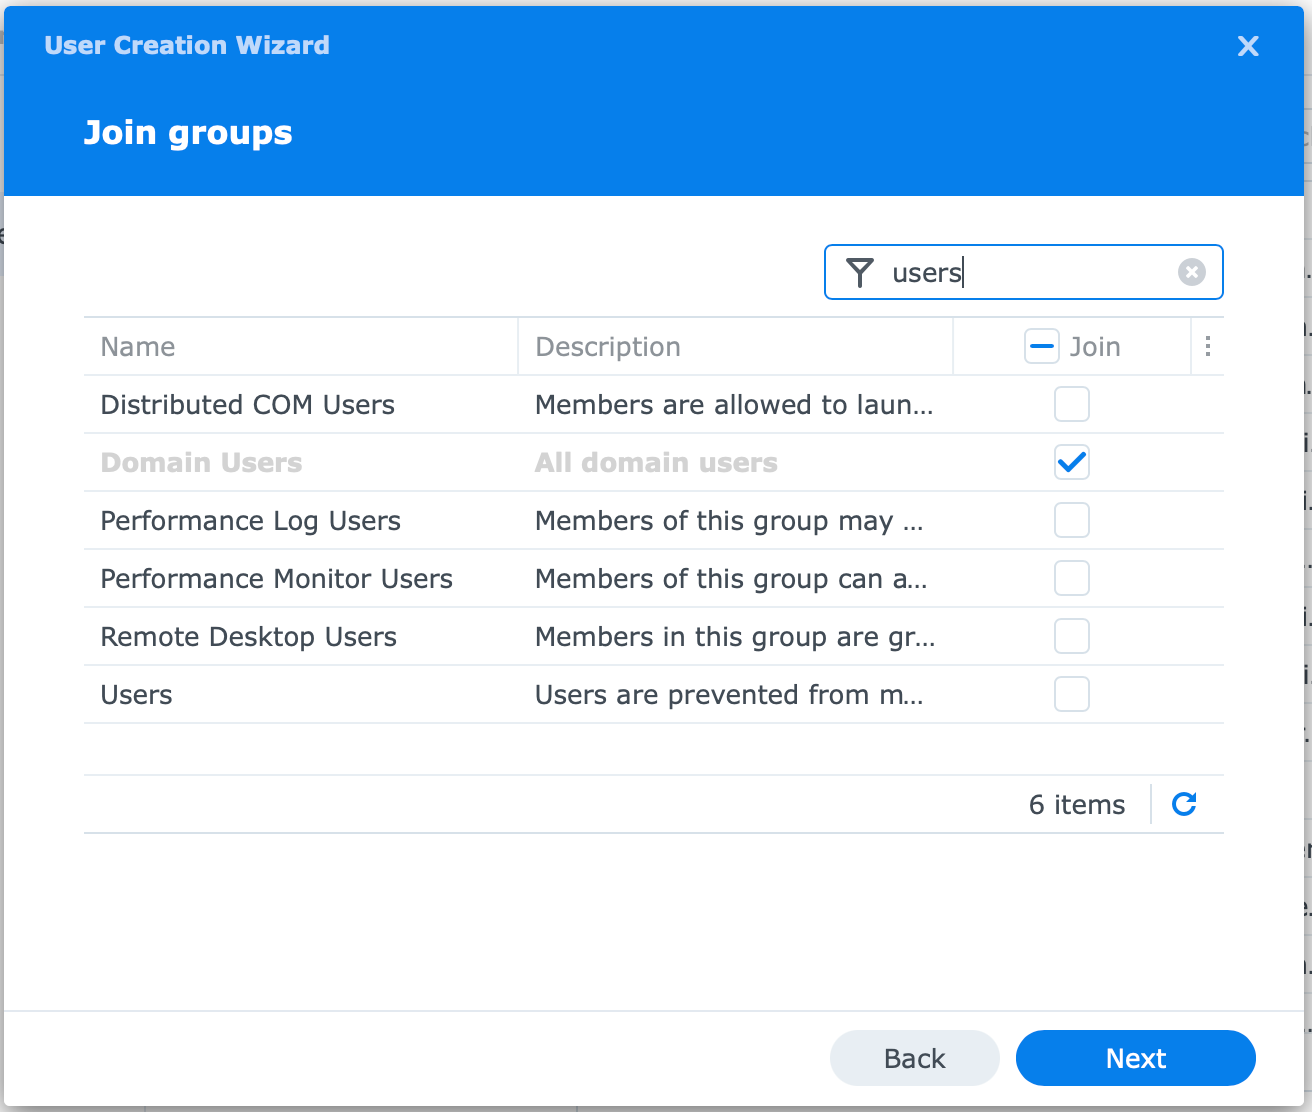
After a few steps, you are done. You can confirm this by using the User and Groups section.
Log into your domain using a Mac computer
So the only thing needed now is to log into your Mac using your domain credentials. To do that, click the Other... login profile icon on your macOS login screen and enter your domain user account and password.
If there is a request to change your password before using your new account, you will have to do that on the login screen.
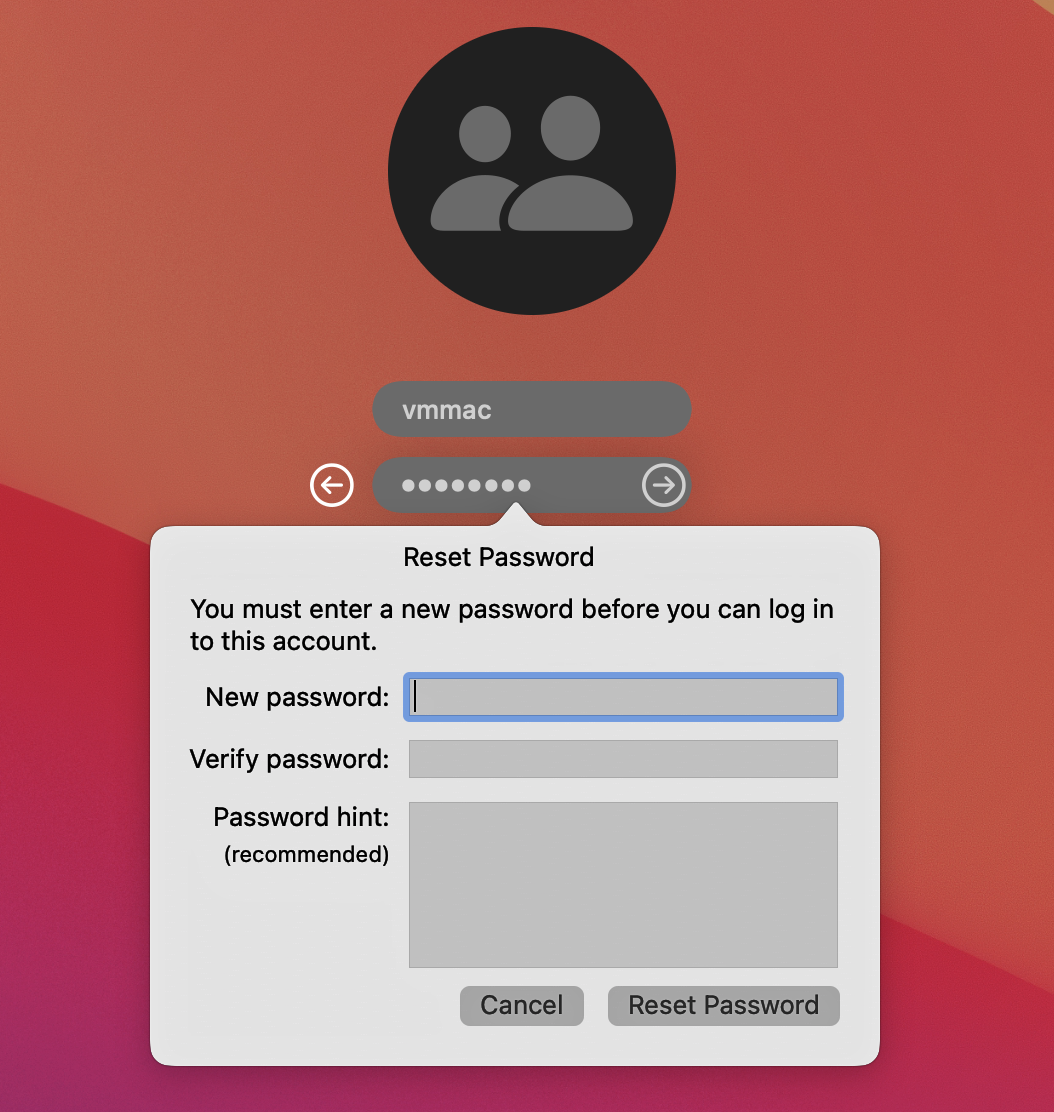
After the new password has been set, you will be logged into the OS. Simple and quick!
Who said that running your AD requires Microsoft server setup and Windows clients? Pff.
Domain user home profile location
Ok, finally, and this is optional, we can configure home folders for the Mac client to be saved on the NAS itself. Meaning that a certain Mac profile destination can be by default configured to live on the NAS side.
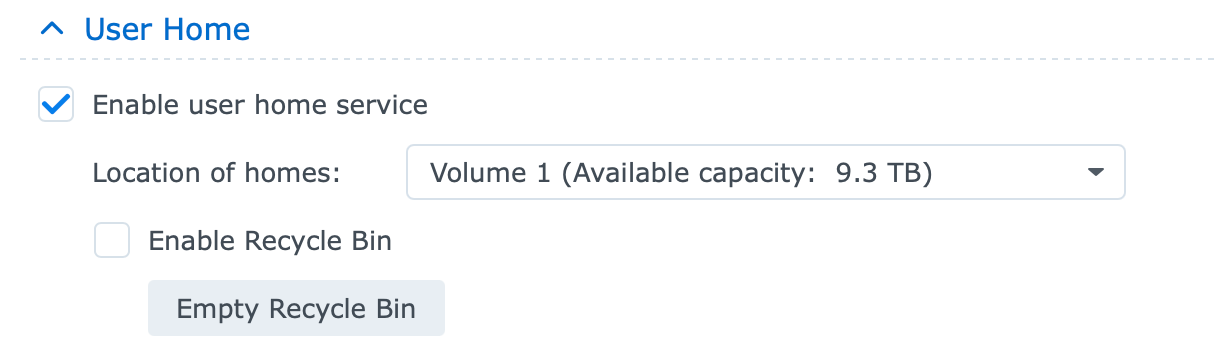
To configure this we need to do several things. First, we need to activate home services on the NAS and configure the Domain users option to save domain profiles inside the NAS homes shared folder.
To do that, first, we need to go to Control Panel > User & Group > Advanced (tab). On the bottom, there is a section called User Home. Activate it.
Next we go to Control Panel > Domain/LDAP > Domain user (tab).
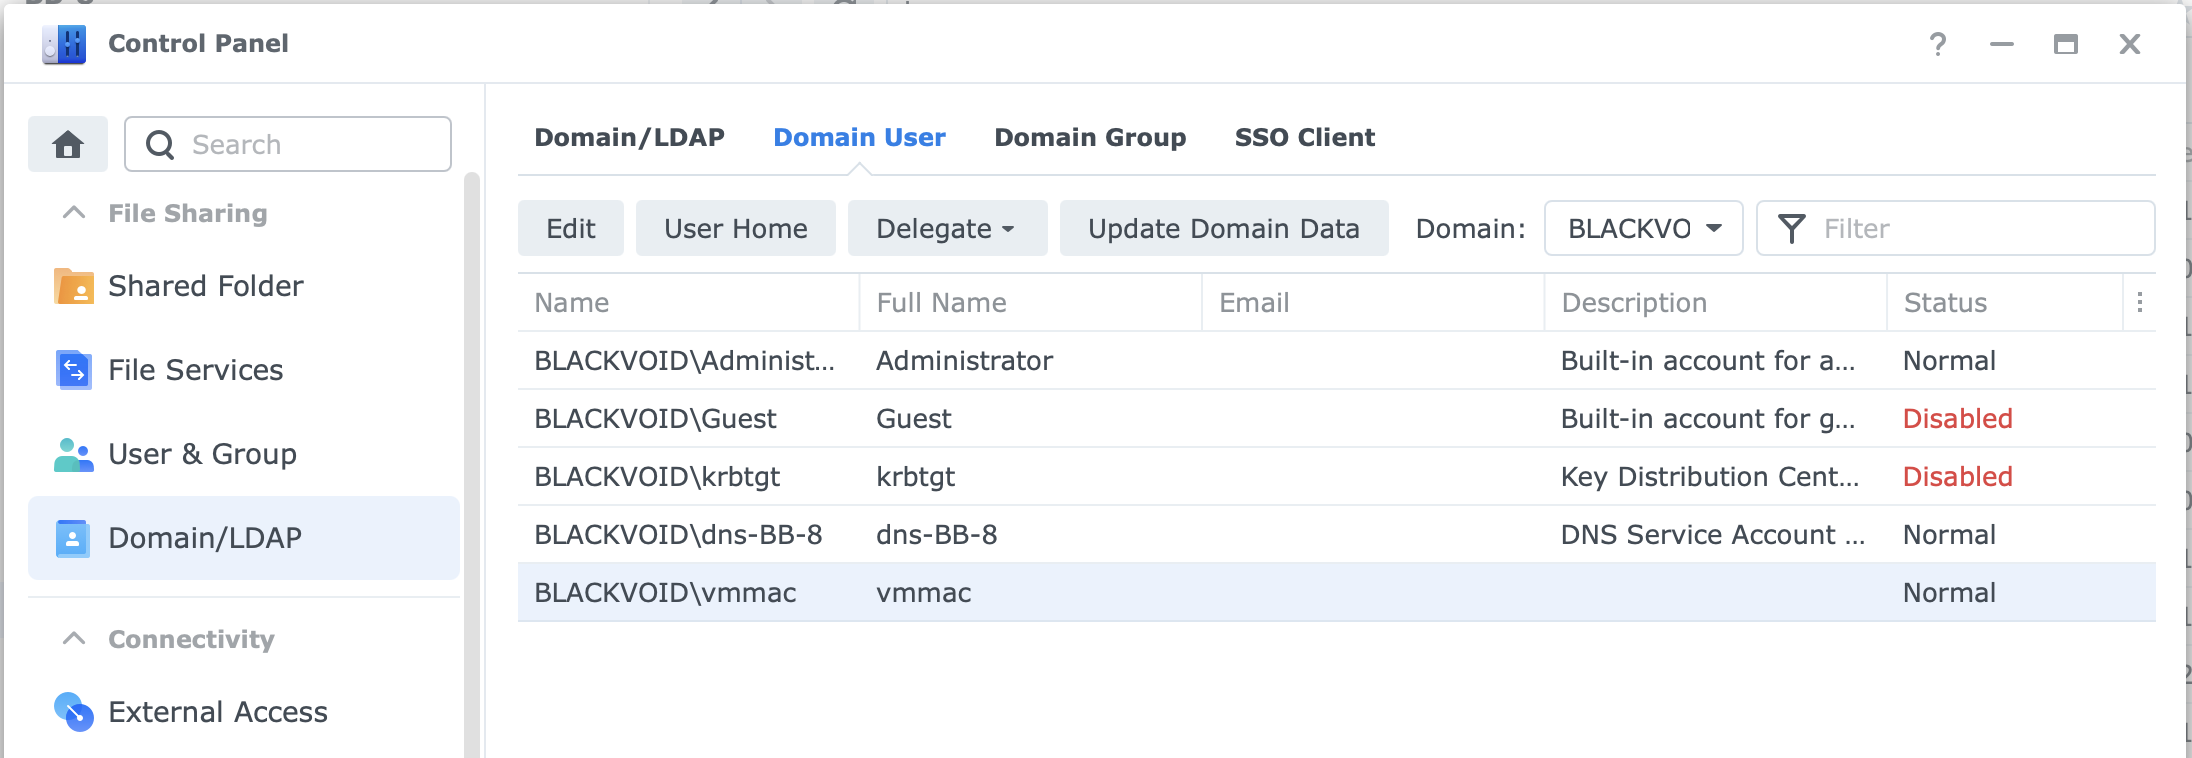
Once there, click the Update domain data button to get the latest list of all domain users in the list (if they are missing), and then click the User Home button to open up the following dialog:

Now that we have done this, be sure to go to your new domain user settings, inside Directory Server > Users & Groups, and on the Profile, tab configure the home directory local path to your NAS network IP address followed by the home folder name (you can use any name that you want apart from home). Example below:
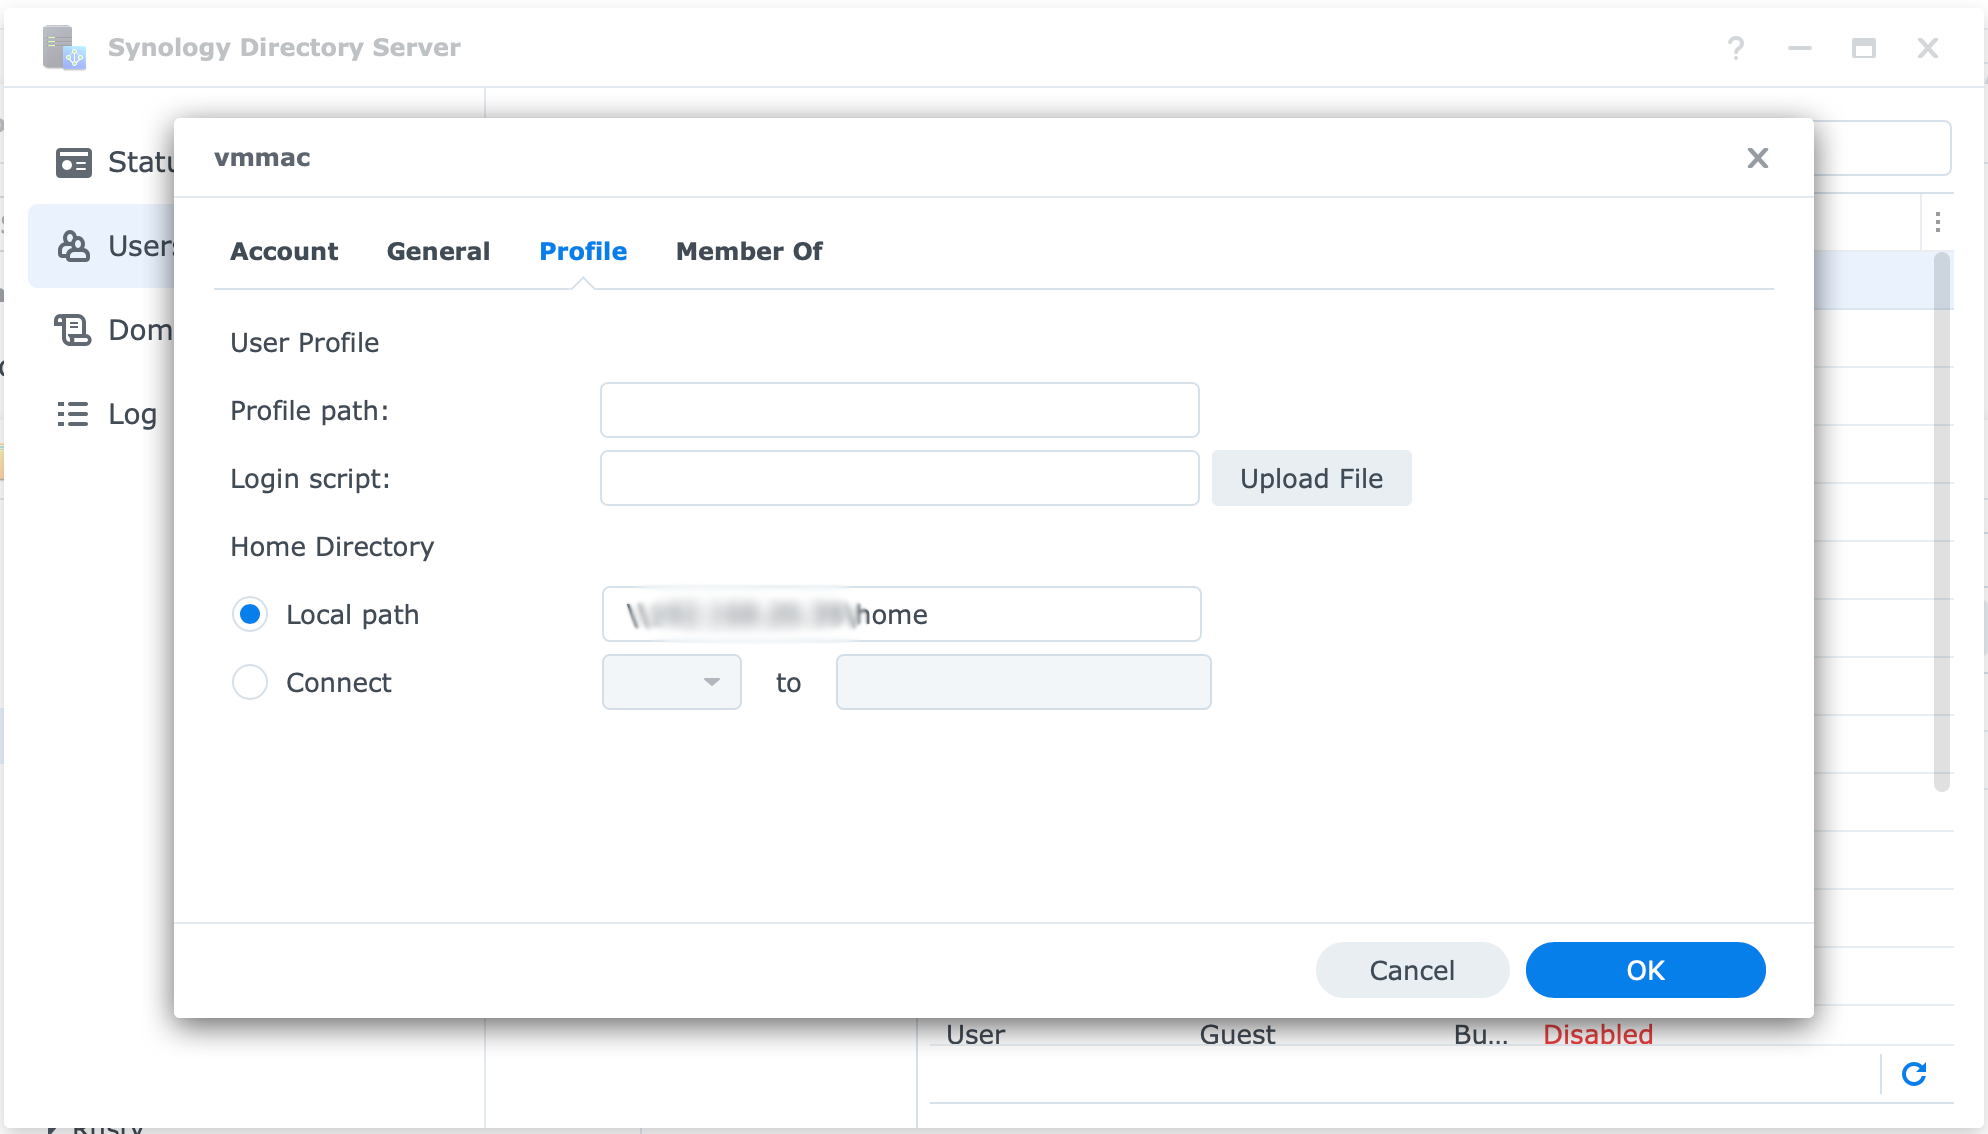
The format needs to be the following:
\\nas_ip_address\home
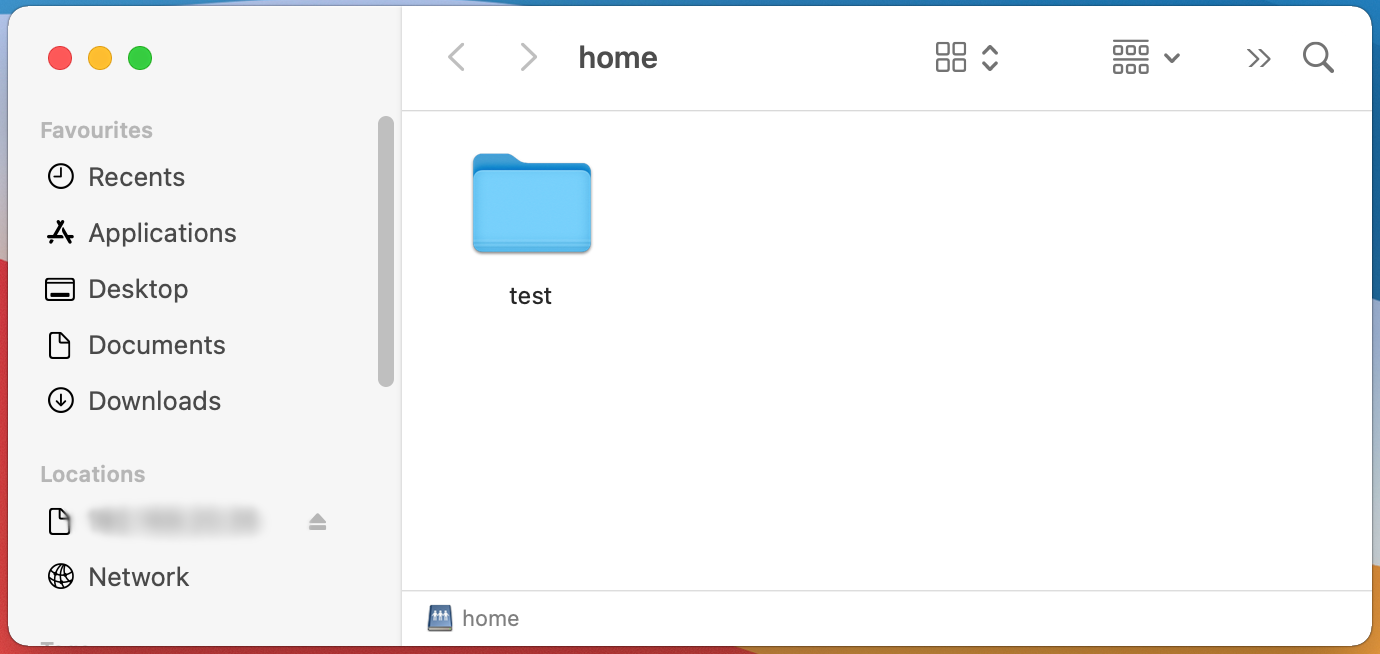
Now, as soon as you log into you Mac computer the profile will be created in on your NAS homes shared folder:

Any content that is in the root of this folder will be of course visible on your Mac side as well.
Conclusion
I have to say that using AD services on the Synology side (if you don't have the need to use the entire fleet of options that exist on the Windows side), was an easy experience. No problems at all, and the good thing is that in the new version we get the option to have multiple AD servers, so if you do decide to use this for your business case, now you have have a high avaliablity option when it comes to running your own domain.
Of course you will need a separate NAS for that as well, but still, a great addition.
Let me know in the comments if you have any questions, suggestion or problems.