Matomo - self-hosted web analytics platform


In case you are on the hunt for some self-hosted web analytics platform and refuse to use Google analytics, then keep reading.
Matomo (formerly Piwik until 2018), is an open-source analytics platform that you can use to have access to several web apps, all inside a nice and informative web UI. In this article, I will discuss how to set up Matomo inside Docker along with a DB backend that it needs (MySQL), and see how to configure it to capture data.
Matomo is very lightweight and can work with most web, and CMS platforms that are used around the world today.
One example would be Microsoft's Sharepoint (considering their internal analytics is next to none). I will have a follow-up article on setting it up as well. Another is Ghost, a platform that I run this site on.
So let's see what you need to get Motomo up and running as well as how to connect your site to it.
SQL docker container
STEP01 - Deploy MYSQL and phpMyAdmin repo (Portainer)
There are two ways we can do this. Using Docker compose file via Portainer, or running it via the command line. I will show both methods.
Once you logged into your Portainer instance and selected the host you want SQL to run on, select the Stacks menu and paste in the next block:
version: '3.5'

services:
   db:
      image: mysql:latest
      container_name: mysql
      restart: always
      volumes:
          - "/volume1/docker/mysql:/var/lib/mysql"
      ports:
          - '3306:3306'
      environment:
        MYSQL_ROOT_PASSWORD: changeYourPassword

   app:
      depends_on:
       - db
      image: phpmyadmin/phpmyadmin
      container_name: phpmyadmin
      restart: always
      ports:
       - '8080:80'
      environment:
        PMA_HOST: db
What this will do is create a stack that will run two separate apps in the end. SQL and phpMyAdmin to administer that same SQL instance.
To make that happen, once the stack is running, open your browser and just connect to the following URL:
http://yourNASIP:8080
Why 8080? If you look at the compose file you will see that phpMyAdmin is configured to run on port 8080 (locally) so that's the port we will use to connect to it.
STEP01 (alt) - Deploy MYSQL and phpMyAdmin repo (CLI)
Alternatively, log into your NAS via SSH (Terminal macOS app, or PUTTY on Windows for example) and elevate your access to root using the sudo -i command.
ssh yourNASuser@yourNASipAddress
Enter your password and then elevate to root with this command:
sudo -i
hit return and re-enter your password and you should be logged in as root.
Now download the MYSQL repo using this command line:
docker pull mysql:latest
Prepare a local folder on your NAS to host MYSQL data files. For example in `/volume1/docker/mysql`.
Run the following command to start MYSQL container:
docker run -d \
--name some-mysql \
-v /volume1/docker/mysql:/var/lib/mysql \
-e MYSQL_ROOT_PASSWORD=changeYourPassword \
-p 3306:3306 \
mysql:latest
This should give you MYSQL instance running on your NAS on port 3306 (or any other if you have changed the left value in the port section.
Next, we need a web UI to administer the MySQL instance. This will be done using the phpMyadmin container just as we did in compose example.
docker pull phpmyadmin/phpmyadmin:latest
and now configure it and run it against your MYSQL instance:
docker run -d \
--name phpmyadmin \
-p 8080:80 \ change the left value to a custom port if you wish/need to
-e PMA_PORT=same port as your MYSQL instance \ (3306 for example)
-e PMA_HOST=yourNASIP \
phpmyadmin/phpmyadmin:latest
Now open your web browser and to http://yourNASIP:port and you should land on your phpMyadmin page.
Regardless of what method you have chosen, you now have a SQL and SQL admin site up and running. Time to configure Matomo DB.
On the phpMyAdmin site, login as root with the password that you have defined for your MYSQL container. From here you have a functional MYSQL instance that you can use.
STEP02 - Configure Matomo MYSQL database
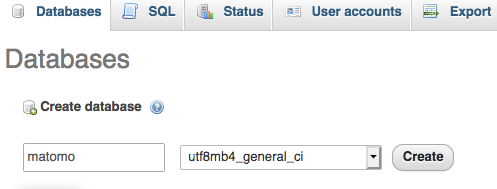
Log into your phpMyAdmin and create a new database for Matomo. Chose the name you want, but be sure to use utf8mb4_general_ci collation for the DB!
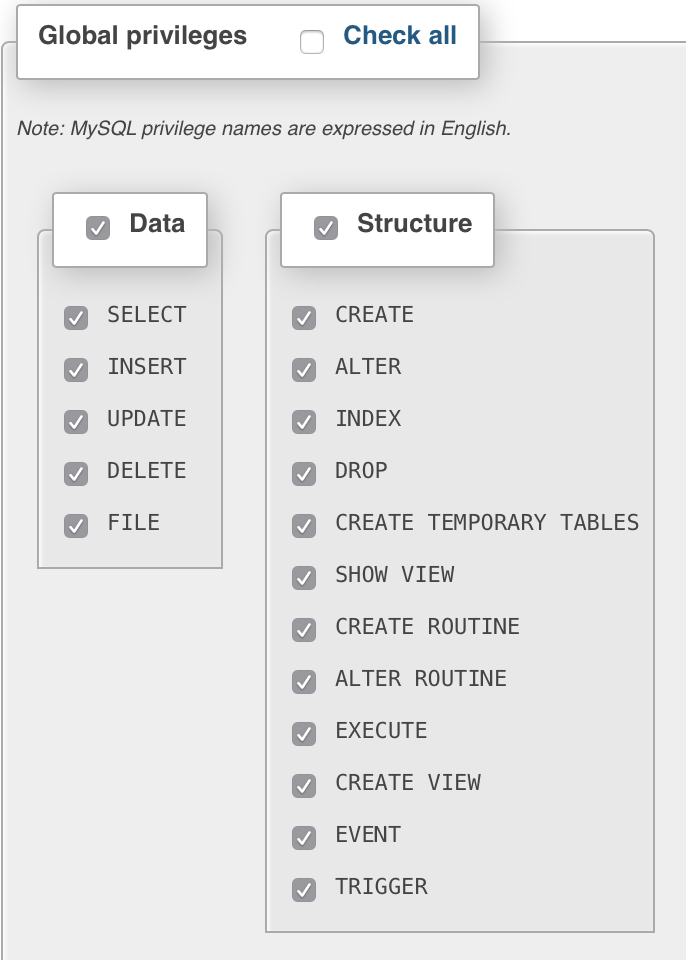
Next, we need an account and permission on our DB. Switch to the Privileges tab and on the bottom, select Add user account.
Set your username, password, and host (you can leave % to mark any host) as well as grant privileges on the bottom.
Once all that is done, click the Go button on the bottom right and you are done with the SQL side of things.
Matomo docker container
Now we are ready to start up Matomo container, and again with Portainer stack option create one using the compose below:
version: "3.5"

services:
  matomo:
    image: matomo:latest
    container_name: matomo
    volumes:
      - "/volume1/docker/matomo:/var/www/html"
    ports:
      - "8081:80"
    environment:
      - MATOMO_DATABASE_ADAPTER=mysql
      - MATOMO_DATABASE_TABLES_PREFIX=matomo_
      - MATOMO_DATABASE_USERNAME=enterMatomoUserThatYouCreated
      - MATOMO_DATABASE_PASSWORD=enterMatomoPasswordThatYouCreated
      - MATOMO_DATABASE_DBNAME=matomo
      - MATOMO_DATABASE_HOST=yourNASIP
      - MATOMO_DATABASE_PORT=SQLContainerPort(3306 in this example)
    restart: always
Could we put SQL and Matomo in a single compose file? Sure we can but I wanted to have them separate in this case so you can have the option to use only the SQL compose element if you only need that part, as well as if there is already a running SQL instance that you can use to connect Matomo instance to it.
Once you get the Matomo container up and running, you can connect to the UI and finish the configuration.
Start by going to the http://yourNASIP:8081 URL and follow the wizard.
Now that you have it all up and running you can then continue forward and make sure you have your Matomo instance running over HTTPS. I would suggest running it via reverse proxy. For more info on that, you can check this article if you don't have a separate reverse proxy already up and running and you want to use the one running on your NAS.
How to configure Matomo with your website (s)
Once you have your Matomo instance up and running you will want to connect it to your website(s).
To start, log into Matmomo and go to the gear icon in the upper right-hand side called Administration.

Next in the left side menu, go to Websites > Manage, and start filling out the form needed to configure the first site that you want to track.
There are several ways you can connect your site with Matomo, but the preferred way is using the Javascript code that will be auto-generated for you in that same window. In case you missed it, you can use the same Website > Manage or Website > Tracking code sections to get to your site code.
An example of the code is like this:
<!-- Matomo -->
<script type="text/javascript">
  var _paq = window._paq = window._paq || [];
  /* tracker methods like "setCustomDimension" should be called before "trackPageView" */
  _paq.push(['trackPageView']);
  _paq.push(['enableLinkTracking']);
  (function() {
    var u="https://yourMatomoPublicURL/";
    _paq.push(['setTrackerUrl', u+'matomo.php']);
    _paq.push(['setSiteId', '1']);
    var d=document, g=d.createElement('script'), s=d.getElementsByTagName('script')[0];
    g.type='text/javascript'; g.async=true; g.src=u+'matomo.js'; s.parentNode.insertBefore(g,s);
  })();
</script>
<!-- End Matomo Code -->
You will notice that the URL in this code needs to match your public HTTPS URL of your Matomo site. Another important element here is setSiteId that will have a starting value of 1 and increase incrementally by one for each new site that you add.
The rest of the code is generic and will be the same for all your sites. This code needs to be placed inside the <head> section of your site, preferably just before the closing </head> tag.
That's it. You are now ready to start collecting info, and as soon as you visit the site you will start seeing visitors in your Matomo instance.
How does it work?
Once you connect your site to your Matomo instance, you will get similar output in your visitor's log.
Notice that Matomo DOES NOT track your public IP address, just part of it as well as location (country), device, and its OS. Also, you will notice what your visitors were looking at, how long and the flow of pages being clicked.
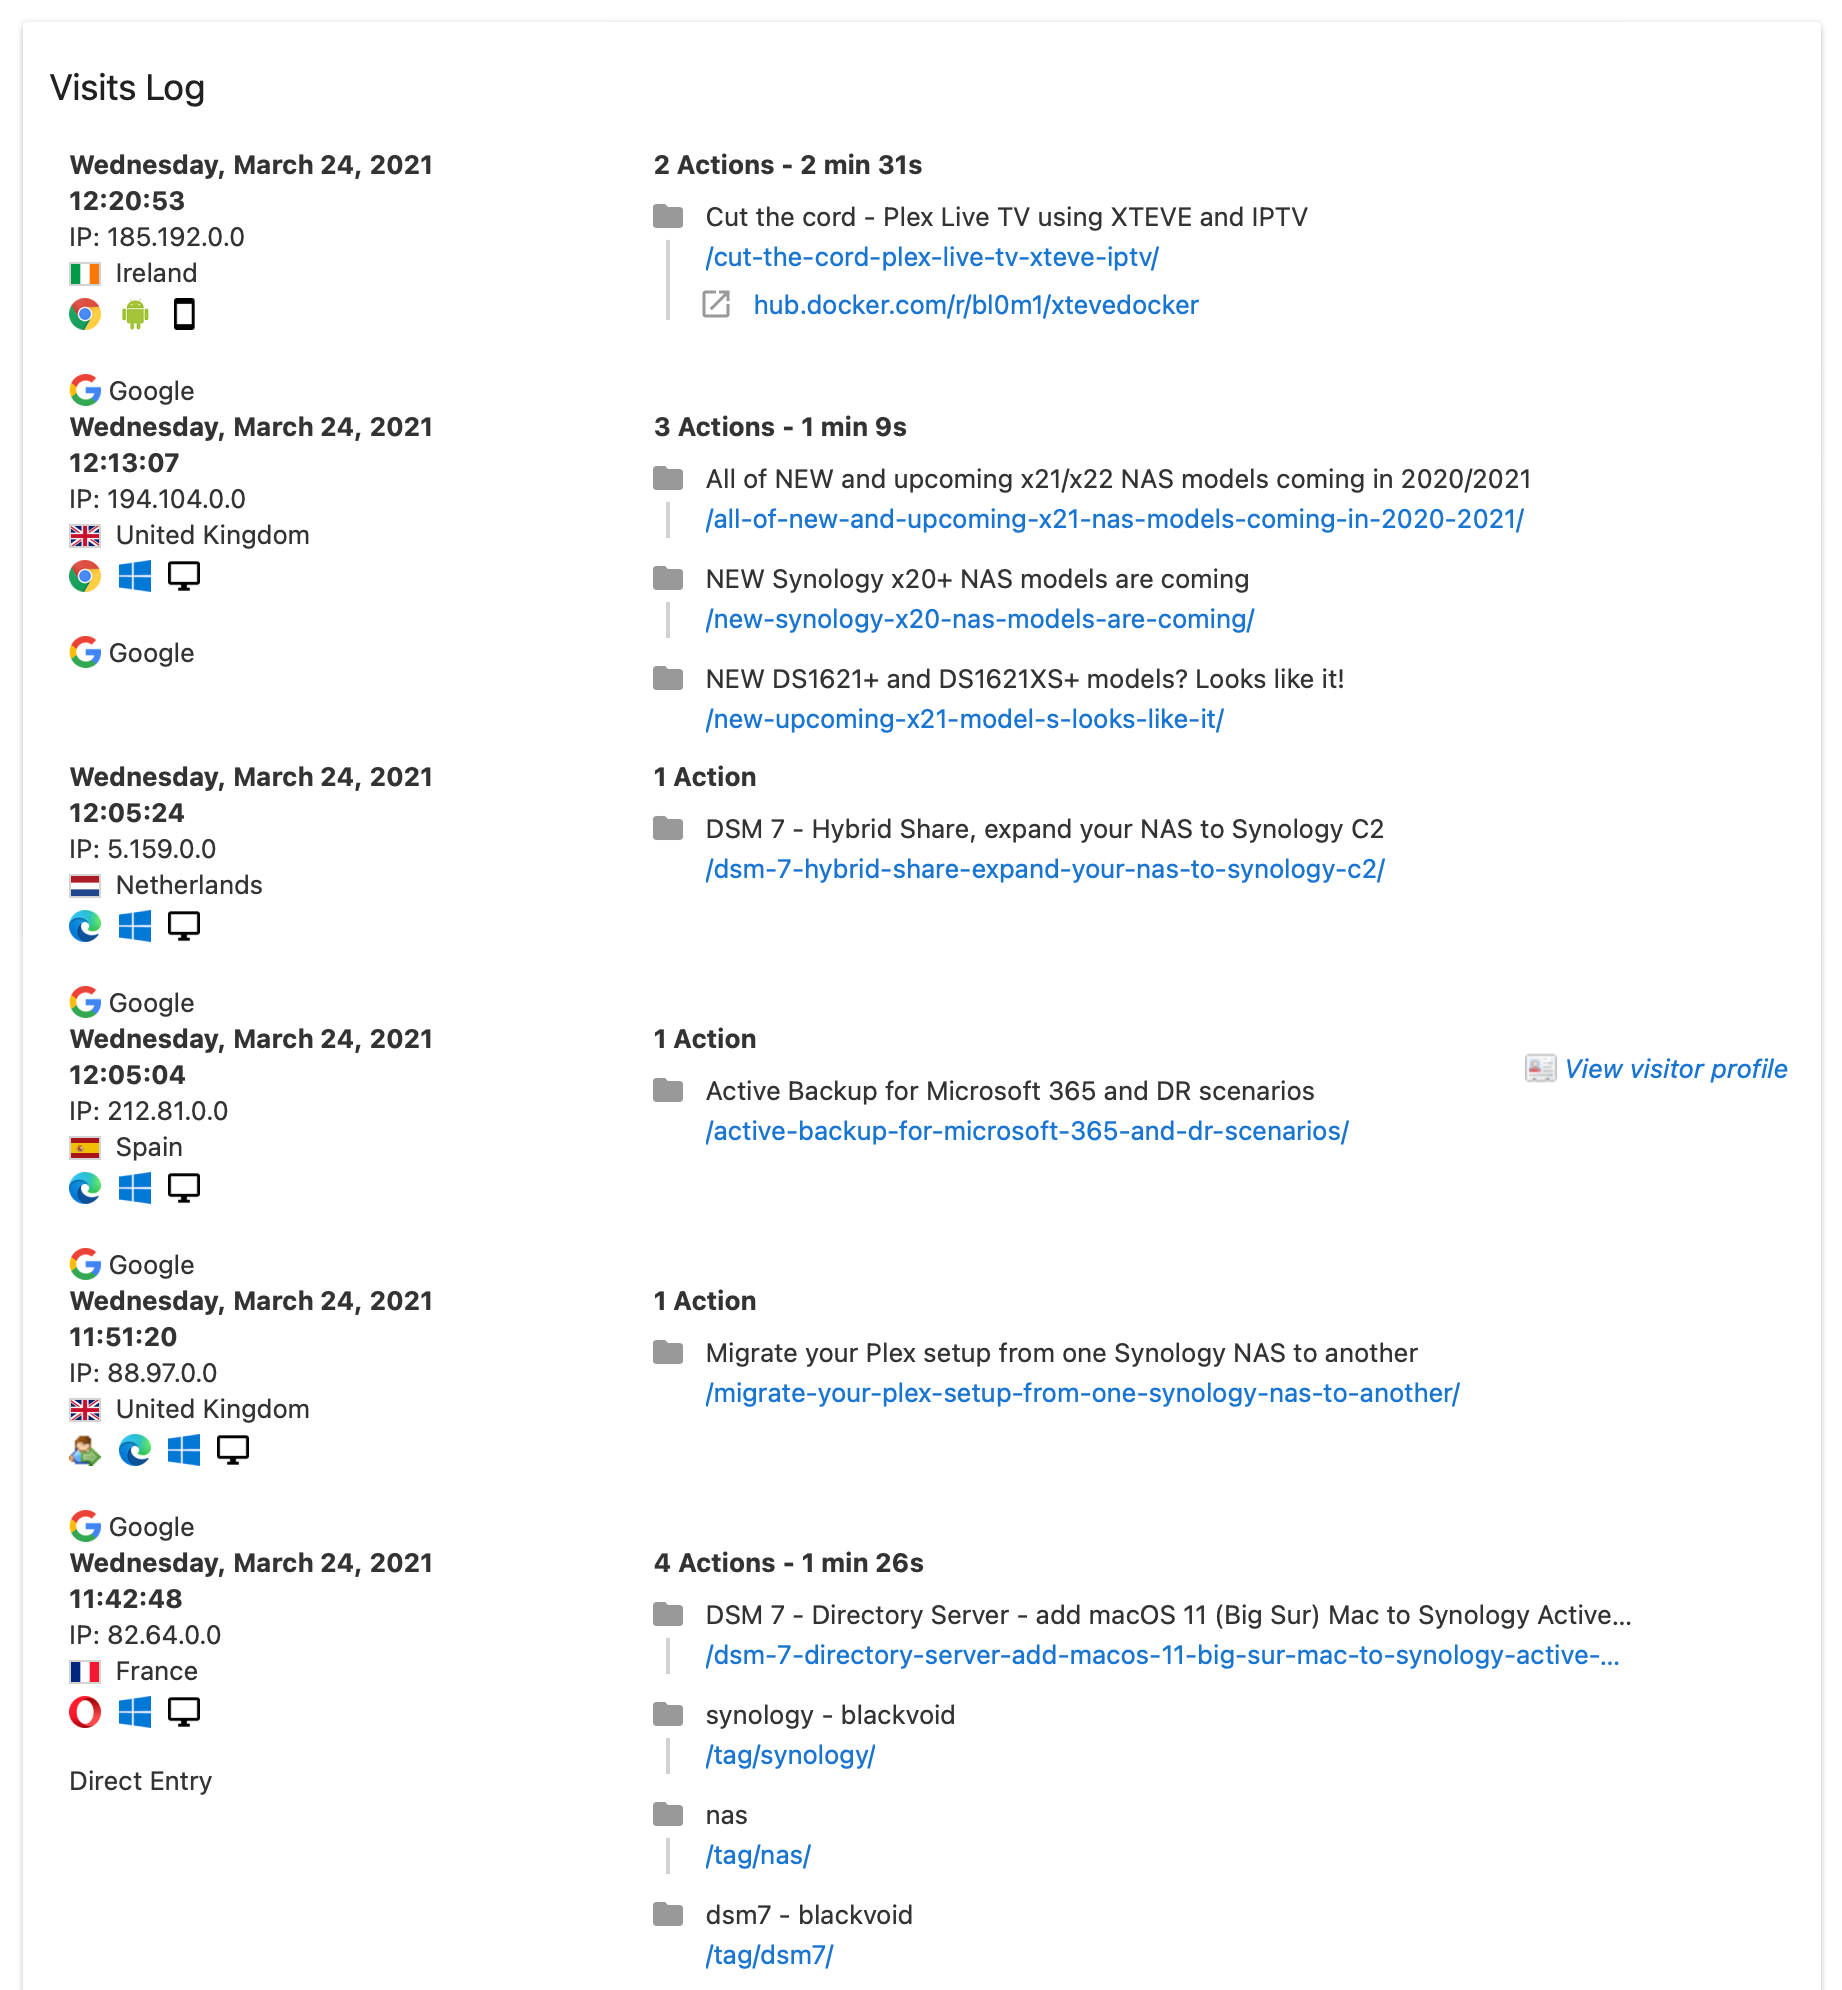
On top of this, no visitors are tracked by name but rather Matomo will build an anonymous profile, based on location, device, and other "markers" that can distinctively describe your visitor for future reference.
So for example, if you look into a profile, you will notice how that person visited your site, at what time, and what content was viewed.
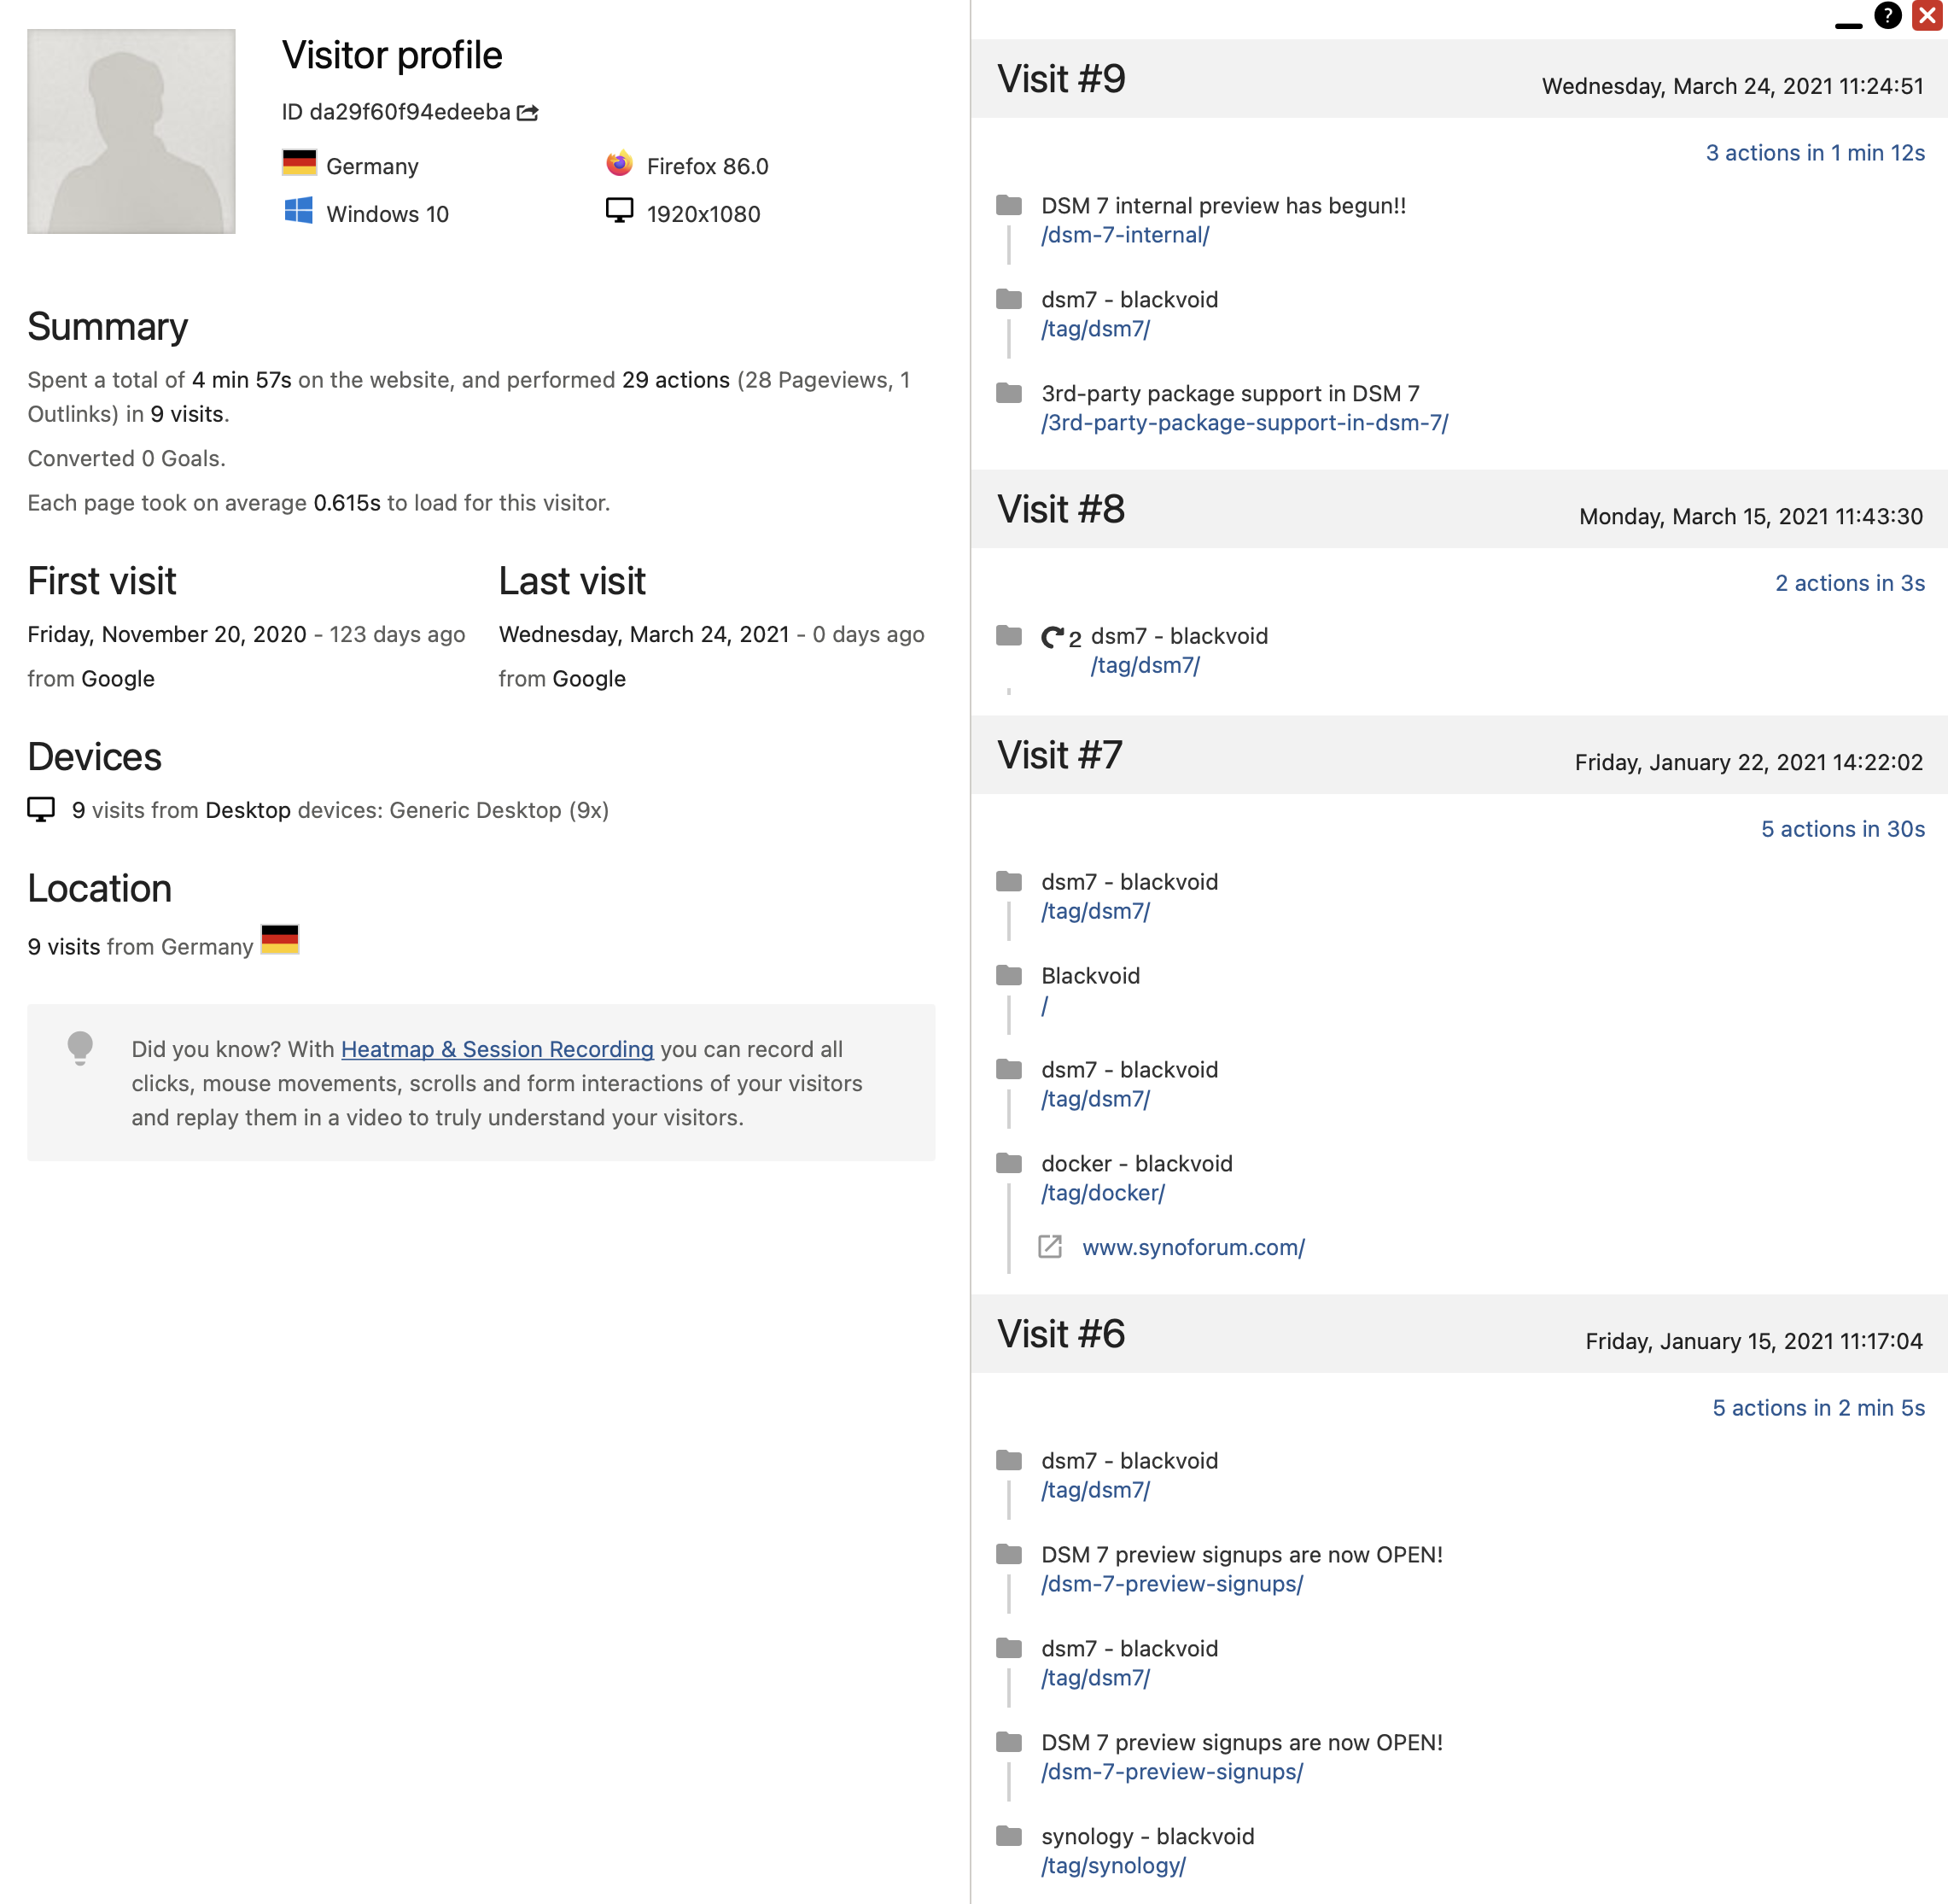
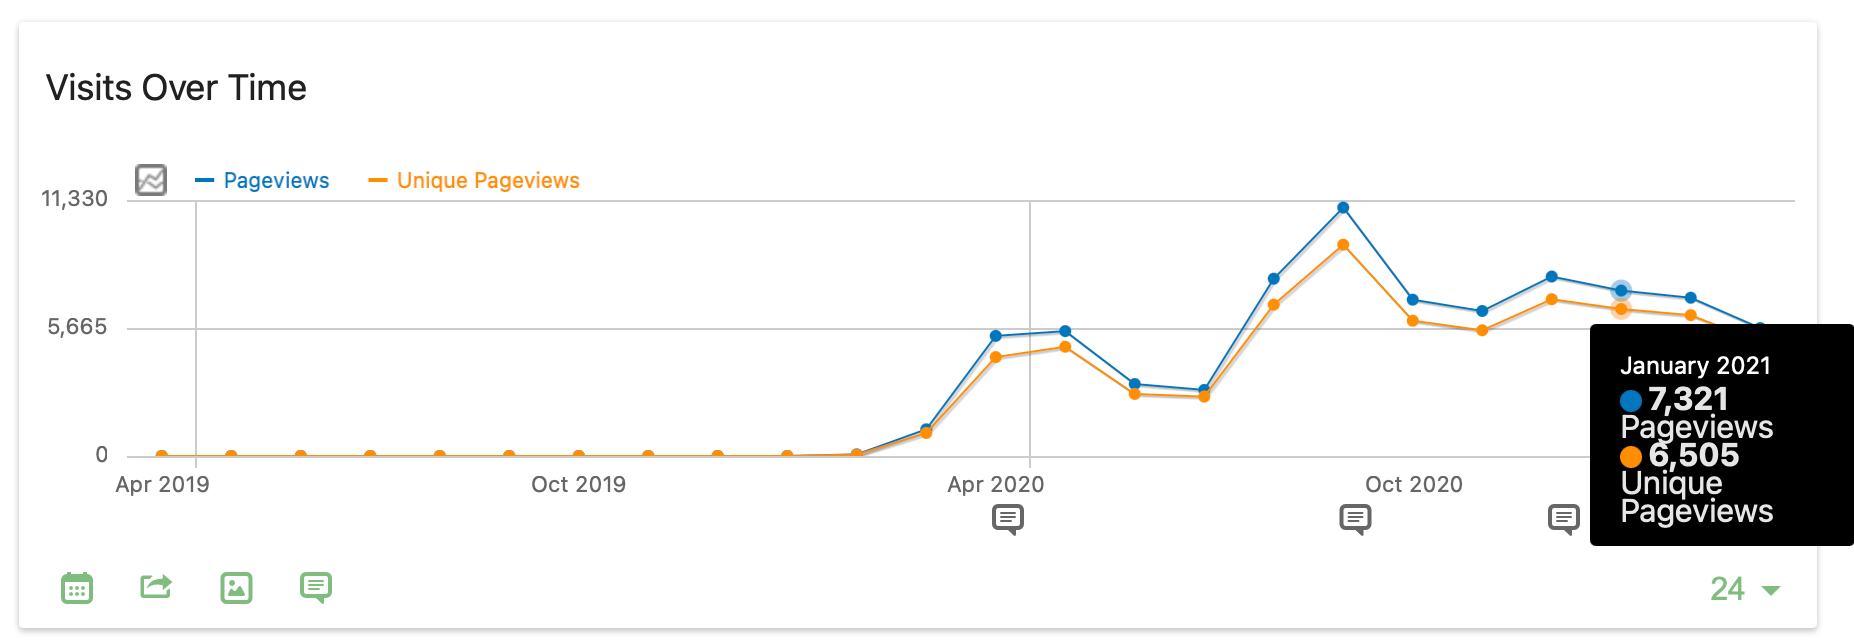
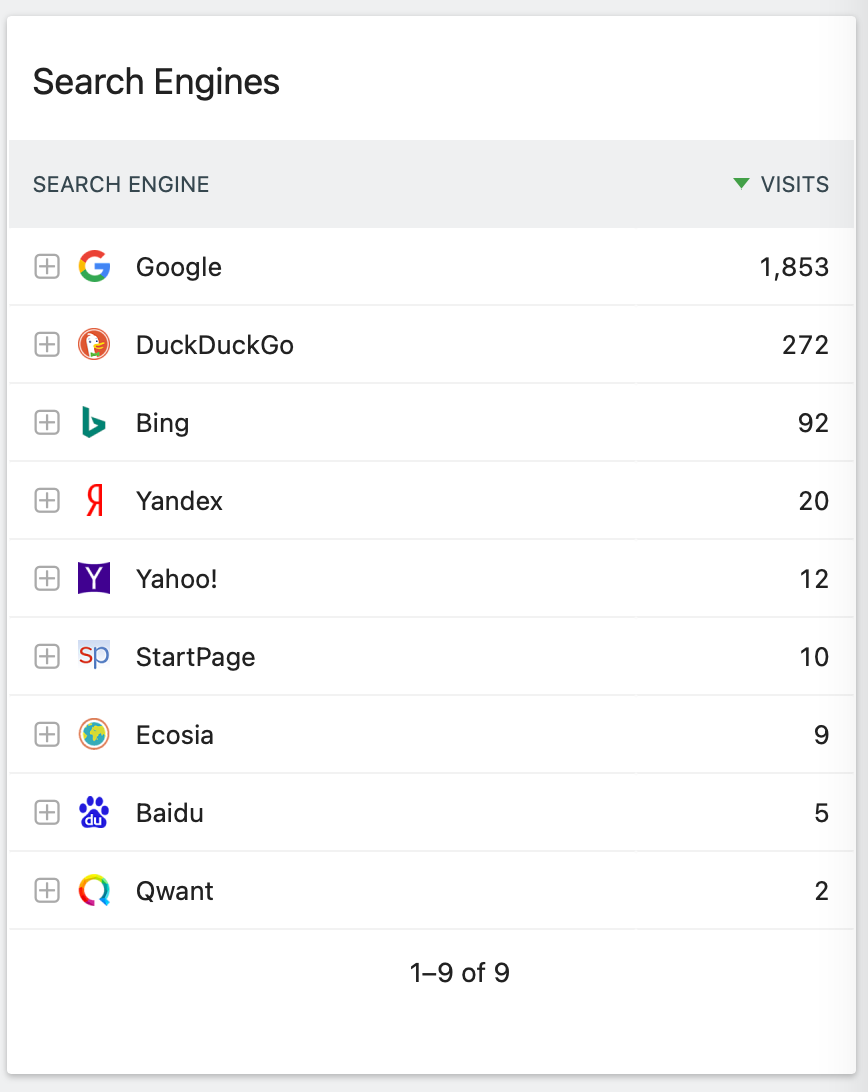
Matomo can also present data over time using various widgets like visits over time, visitors over time, time of day visits, search engines results, etc.
Manual Matomo update
In case your Matomo instance fails to detect new versions using its built-in mechanism, there is a manual method that you can use to push your instance towards a new version.
Before this, note that Matomo deployed via Docker will not update as any other regular Docker container. Pulling the new image and creating a new container will be only half the story. You still need to update it using its web UI.
The official info on the manual process can be found here, but in the case of a docker deployment, there are things that need to be done a bit differently than stated.
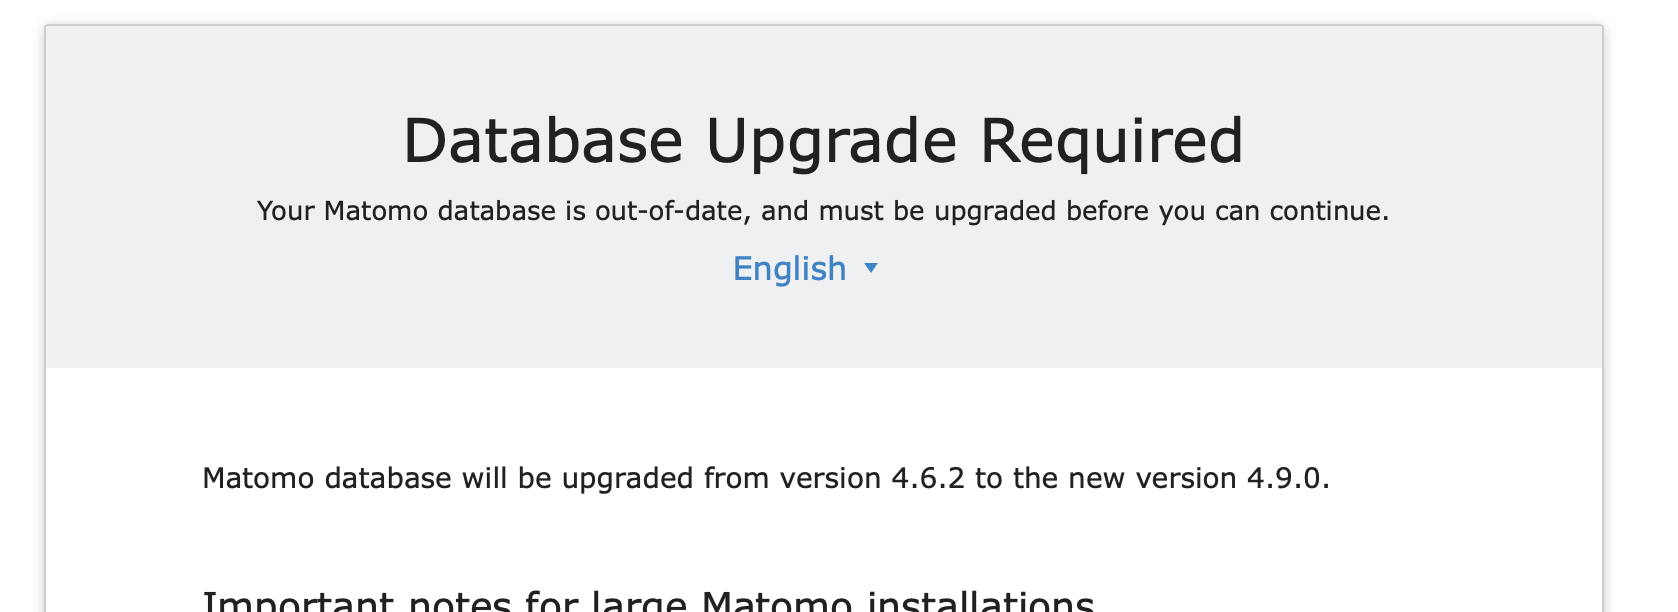
wget or unzip running!config.ini.php file inside the config folder. That folder is part of the volume path that you have configured /var/www/html.So the idea is to download the zip, unpack it and overwrite all the files inside your /var/www/html path. After that, restore your previously backed up config.ini.php file to its original location and refresh your Matomo UI instance.
You should be greeted with a screen telling you that you need to update your instance. Follow the wizard and complete it.
Conclusion
In the end, you will have a great anonymous analytic platform that will help you keep track of your sites without the use of any invasive tracking methods for your visitors will for sure increase confidence for your visitors, and also keep all this metadata on your infrastructure as oppose in some "cloud" provider.

Are you using any analytic platform yourself?