Rocket.Chat - Omnichannel feature

In its current version, Rocket.Chat has evolved a great deal in the past years. I use RC daily for various needs and in this article, I would like to focus on one of their feature that was there from the beginning, Live Chat, or as it is called today, Omnichannel.
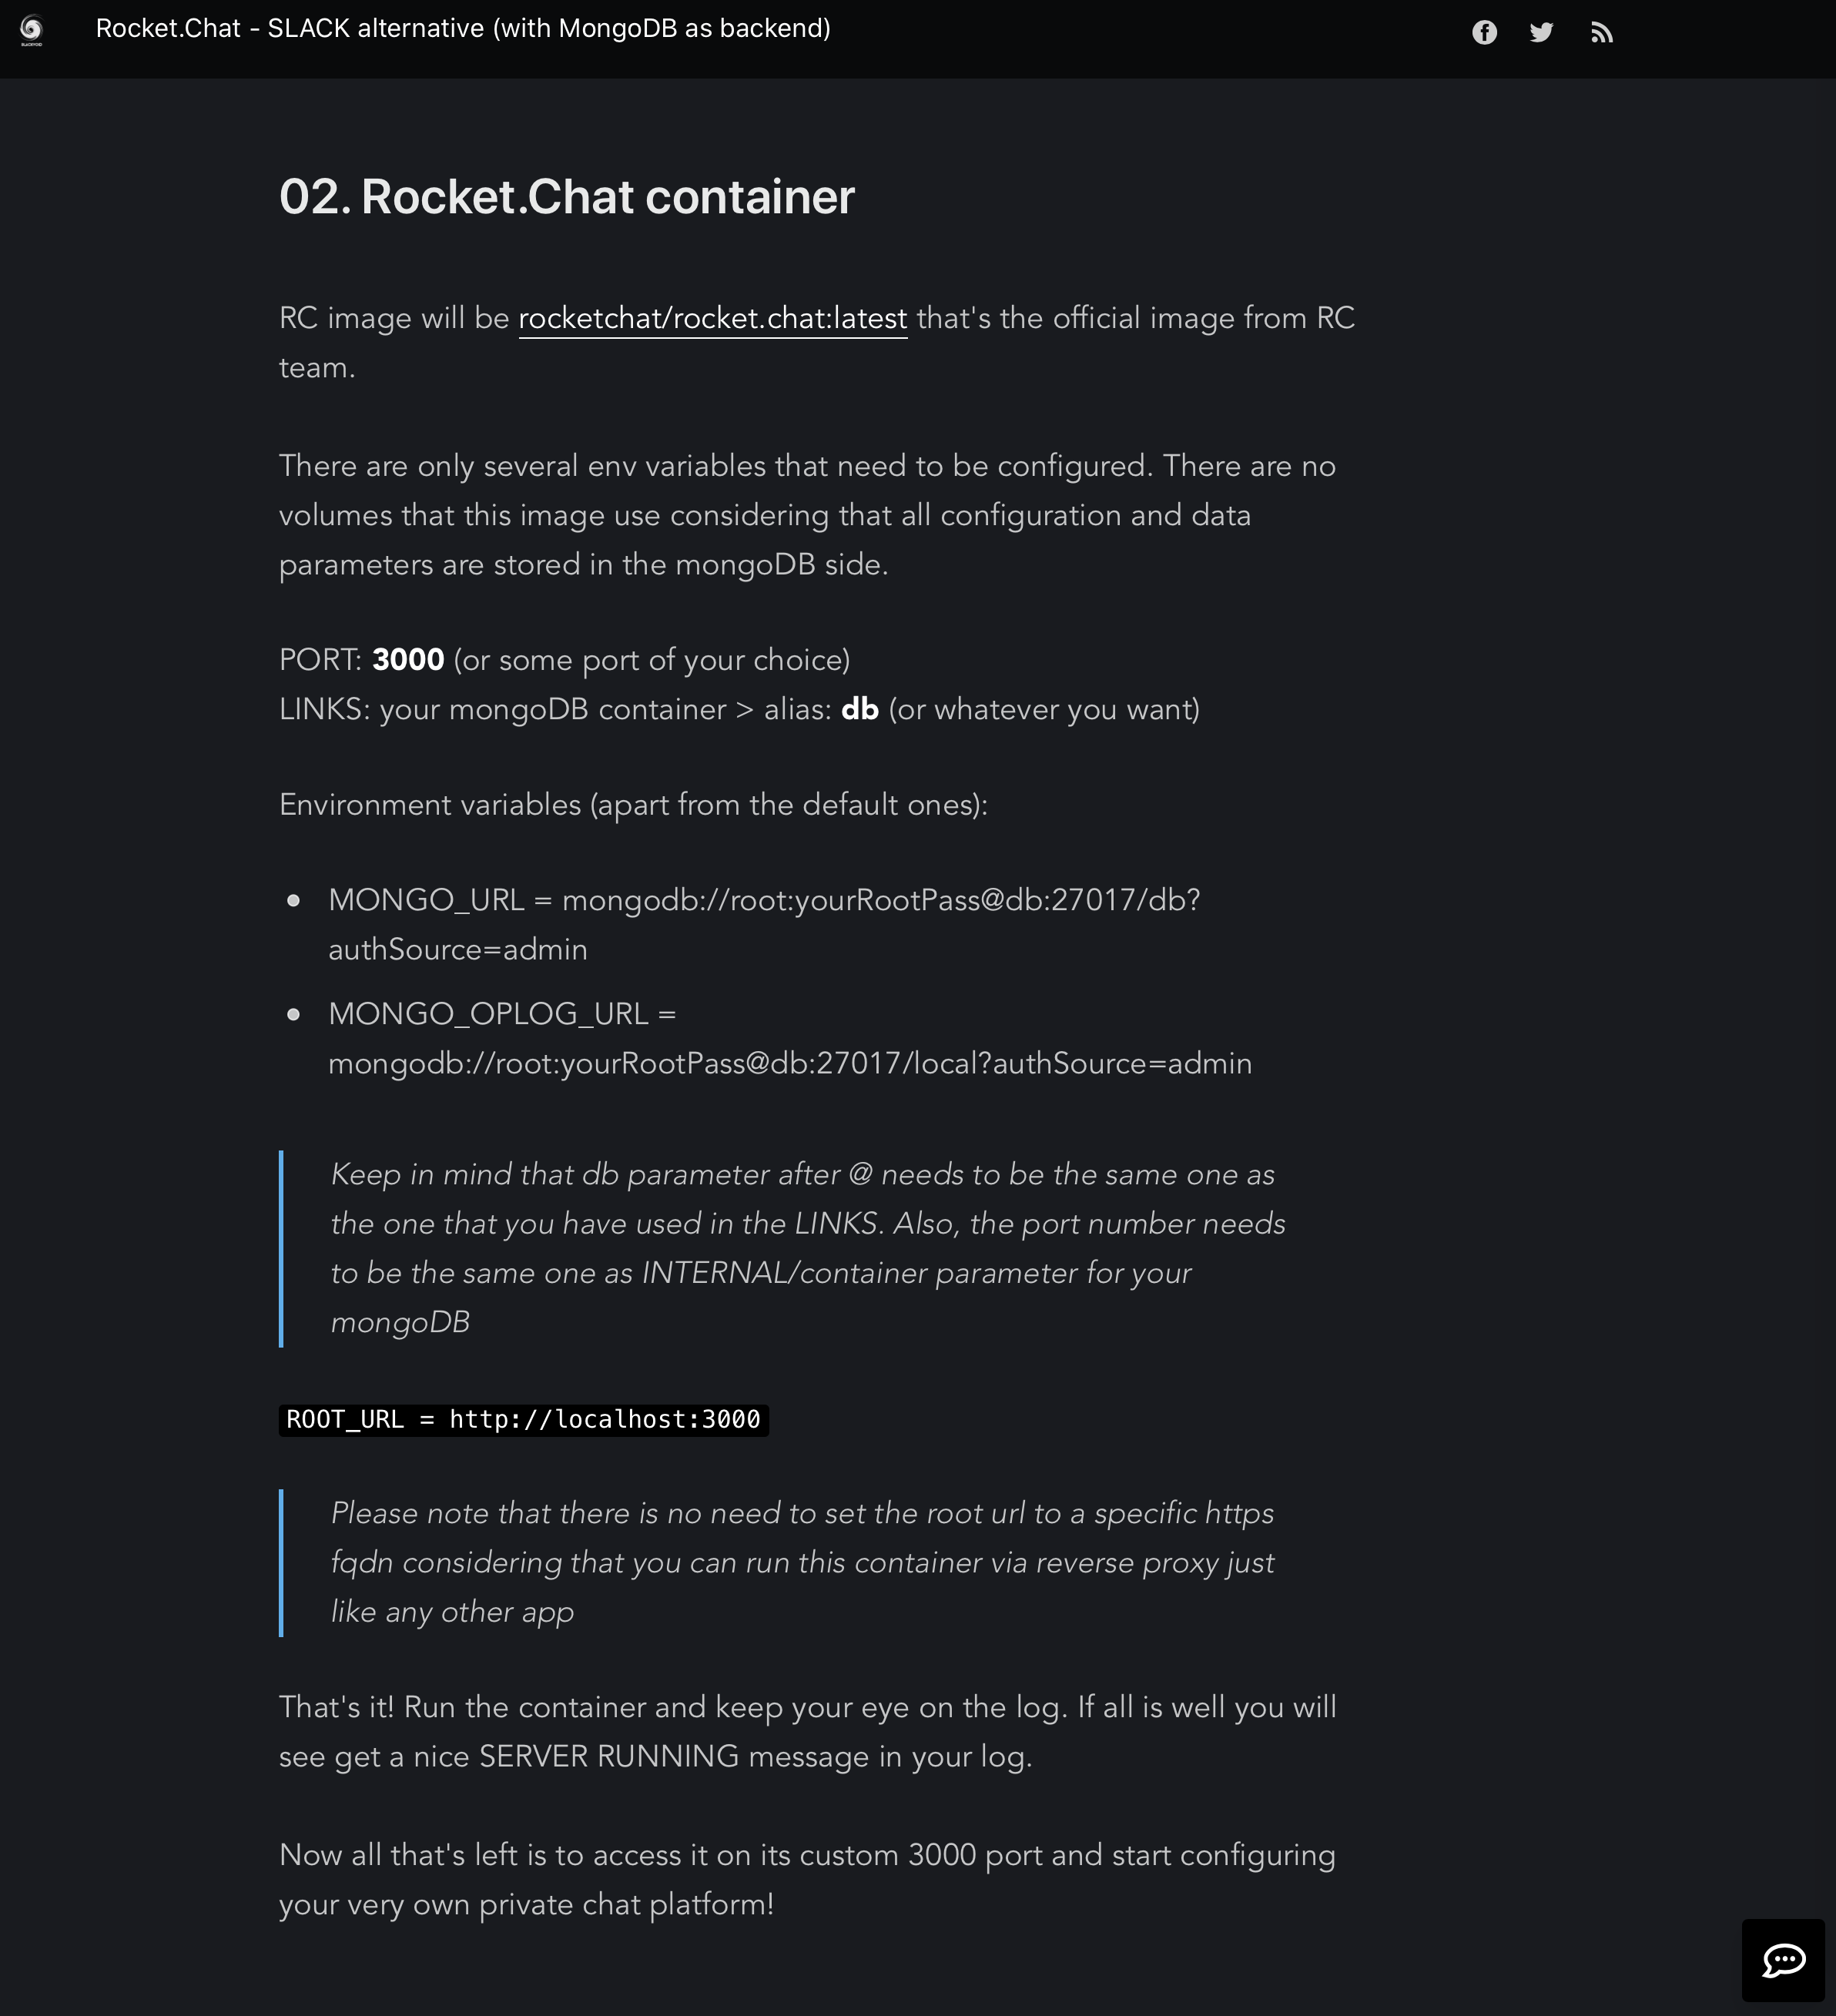
If you are unaware of what Rocket chat is here is a quick explanation. RC is a SLACK or Microsoft Teams alternative platform, that is open source and free to host (if you want to) that allows you to run your private collaboration platform.
Offering chat, audio, video, file & desktop sharing are just a few features that this solution has to offer. If you would like to be able to test it out for yourself, you can check my other article here, and see how to get up and running using Docker and RC official image.
More than just chat
As I said before, RC is a chat platform, but it is also much more than that. If you need to run a team of people using email is the last thing you want to use today. Channel-based communication is a much more flexible solution. You have all your correspondence in one place, files, and on top of that, you can support your customers or outside users without them even needing to register to your chat platform.
Let's see how that can be done.
Once you get your RC instance up and running, the fun part begins. Configuration. Luckily running a Live chat feature (omnichannel from this point forward) is not that complicated.
So what are we talking about here? Well, Live Chat is an option that will allow you to expose your RC instance inside a web-based widget and allow your site visitors to engage with you directly in case they need assistance, or simply that they have some questions.
You have seen this solution many times. It's the "chat" icon, usually in the bottom right-hand corner. Clicking on it and entering your name will initiate a chat with a support member (agent). This is exactly what RC Omnichannel feature offers.
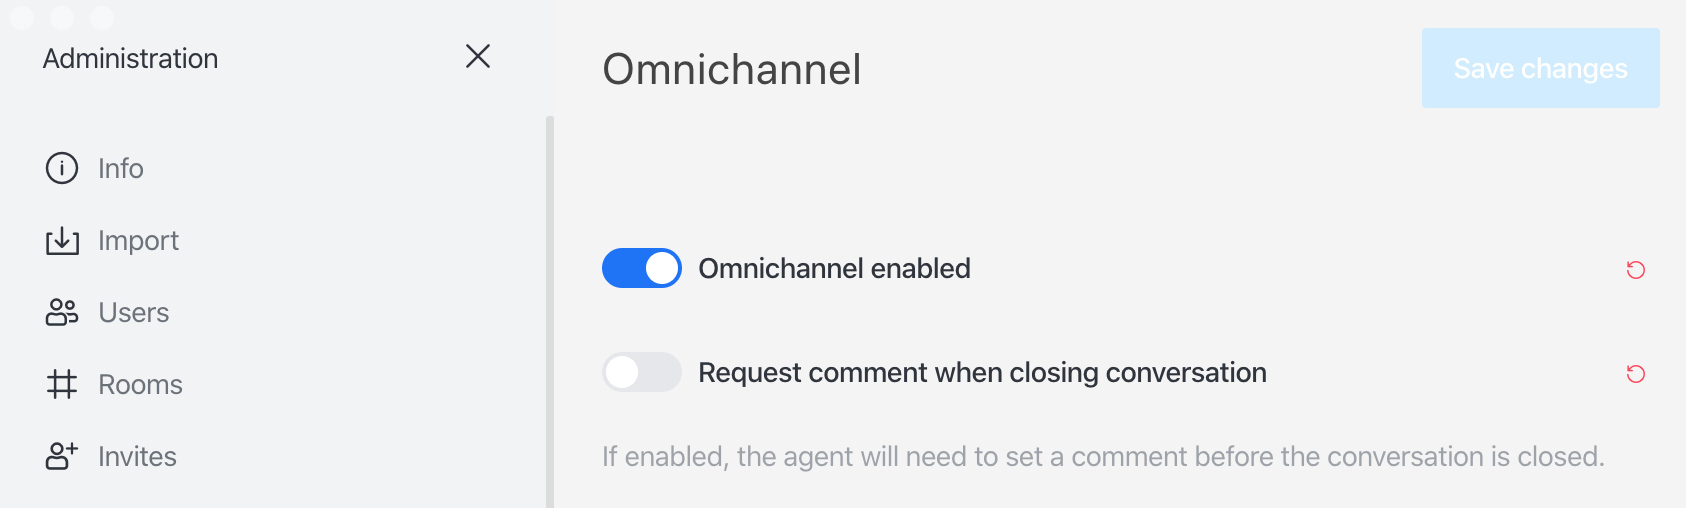
STEP 01 - activate Omnichannel support
To have this up and running you simply need a functional RC instance and then go to the Administration > Settings > Omnichannel. Activate Omnichannel enabled switch and you are done! Well not quite yet, but you got the first step done. Save changes and go back to your main RC window.
STEP 02 - widget installation and configuration
Now that we have activated Omnichannel support, your main RC window will look something like this:
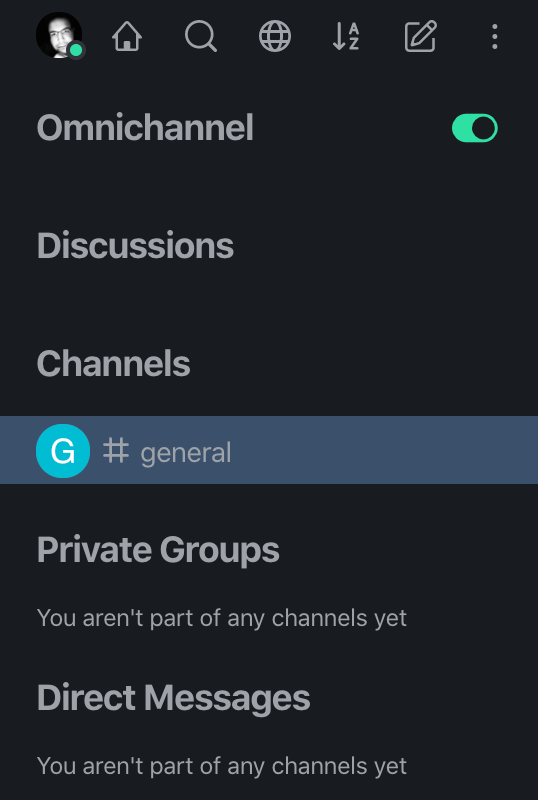
Here you will see the Omnichannel section and an on/off switch. Now, this option is there so that you can quickly turn the live chat option on or off. If it is on, your web users will be able to start the chat session. If it is not, you can configure that your visitors can send you an email so that you always have a way of communicating with them.
Considering that now we have Omnichannel up and running we need to configure it on your website (s) and see what options there are to help you engage your audience.
Open the menu dropdown window (that you use for Administration) to reveal Omnichannel settings as well.

To install the widget, go to Livechat Installation menu, and there you will get a script code that you need to paste inside your website. The suggested location is before the last </body> tab (closing body tag), but depending on your platform of choice you might be able to place it in the footer section as well (like with this Ghost blog platform).
<!-- Start of Rocket.Chat Livechat Script -->
<script type="text/javascript">
(function(w, d, s, u) {
	w.RocketChat = function(c) { w.RocketChat._.push(c) }; w.RocketChat._ = []; w.RocketChat.url = u;
	var h = d.getElementsByTagName(s)[0], j = d.createElement(s);
	j.async = true; j.src = 'https://your.public.domain/livechat/rocketchat-livechat.min.js?_=201903270000';
	h.parentNode.insertBefore(j, h);
})(window, document, 'script', 'https://your.public.domain/livechat');
</script>
<!-- End of Rocket.Chat Livechat Script -->
This is the code section that you need to place inside your website where you want your widget to appear. After you save the configuration and reload your site, the widget should load up.
Now that was easy, right? After this, all that is left is to configure your Omnichannel depending on your needs. Working hours, number of agents, number of active sessions, email notifications, and the overall look of the widget.
All this can be configured in the Omnichannel settings. There are too many options to show so I will focus on a few of them.
Let's see what our widget looks like when it is loaded up.
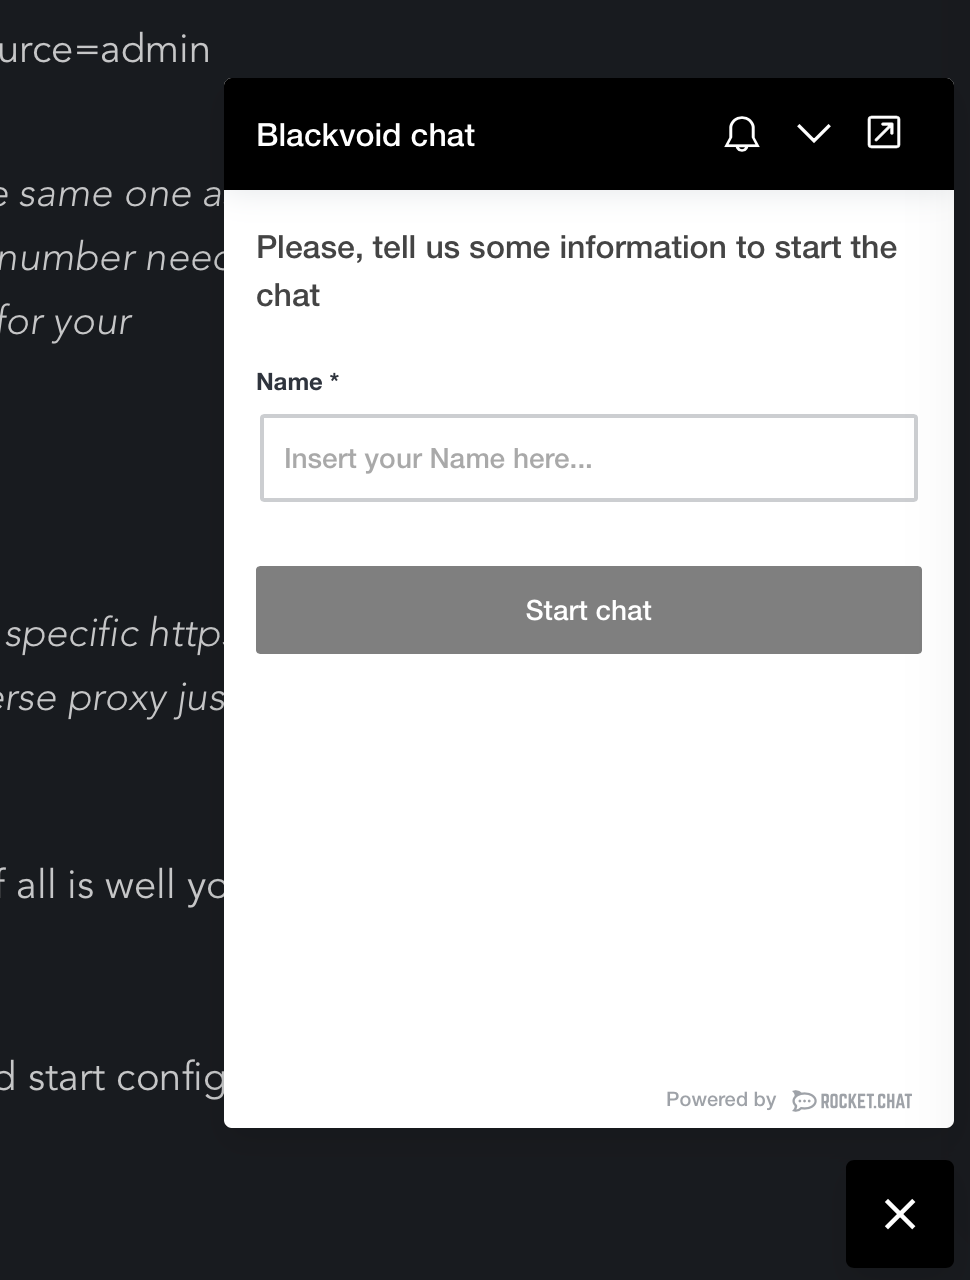
So in the image above you can see some modifications that have been done. Color to match the site, and title, and I have decided to not ask users for their email but just a name or alias before the chat can be initiated.
I can't get the widget to show up?!
So far we have seen that getting this off the ground is nothing special. There is one thing that might prevent you to get this up and running. Even after you "install" the code on your page you still might get into trouble showing it up.
The reason for this could be that the cross-site loading might be configured that will not allow you to configure this setting onto a site under a different domain name.
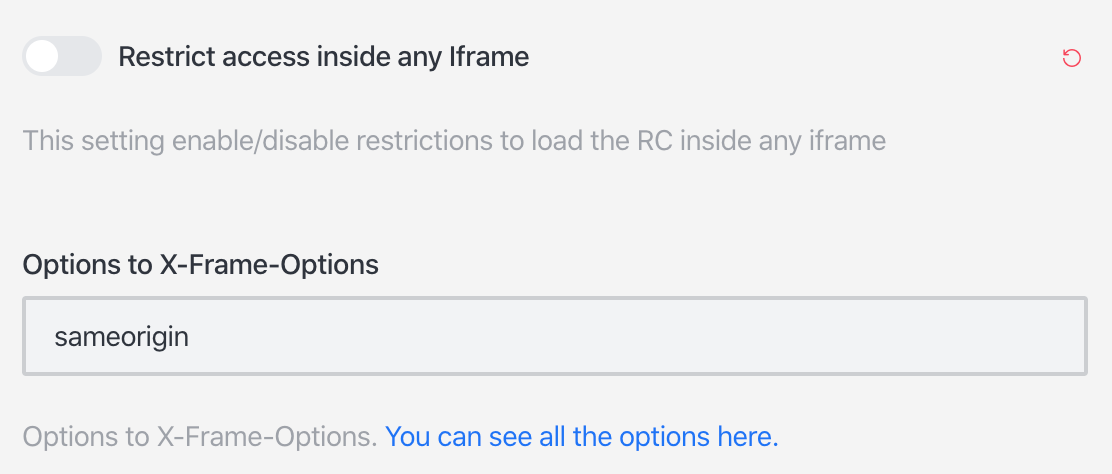
So for example let's say that this omnichannel is running inside your rocket chat instance under a URL https://omni.mydomain.com, and your website that you want this to be visible is https://www.mydomain.com. You will get in trouble here because by default RC instance has enabled restriction to load up RC inside an iFrame (using X-Frame-Option).
To get this fixed and in the end to allow running your widget as it should go to your RC instance and in Administration > Settings > General look for Restrict access inside an iframe option. Disable it, and try reloading your site again.
In case that will not fix your problem, be sure to open up your browser console view and see what errors you are getting while loading up your site. Also, be sure that you have placed the script in the appropriate location.
STEP 03 - start chatting
Now that you have done the initial configuration, depending on your needs, you can create departments, configure specific RC users to them, define work hours, triggers (actions that will happen in specific cases), or simply start using it. Let's see what a chat looks like from the visitor and support side at the same time.
Once you enter your name and click start chat your message will be flagged inside the RC platform and an agent can begin talking to you.
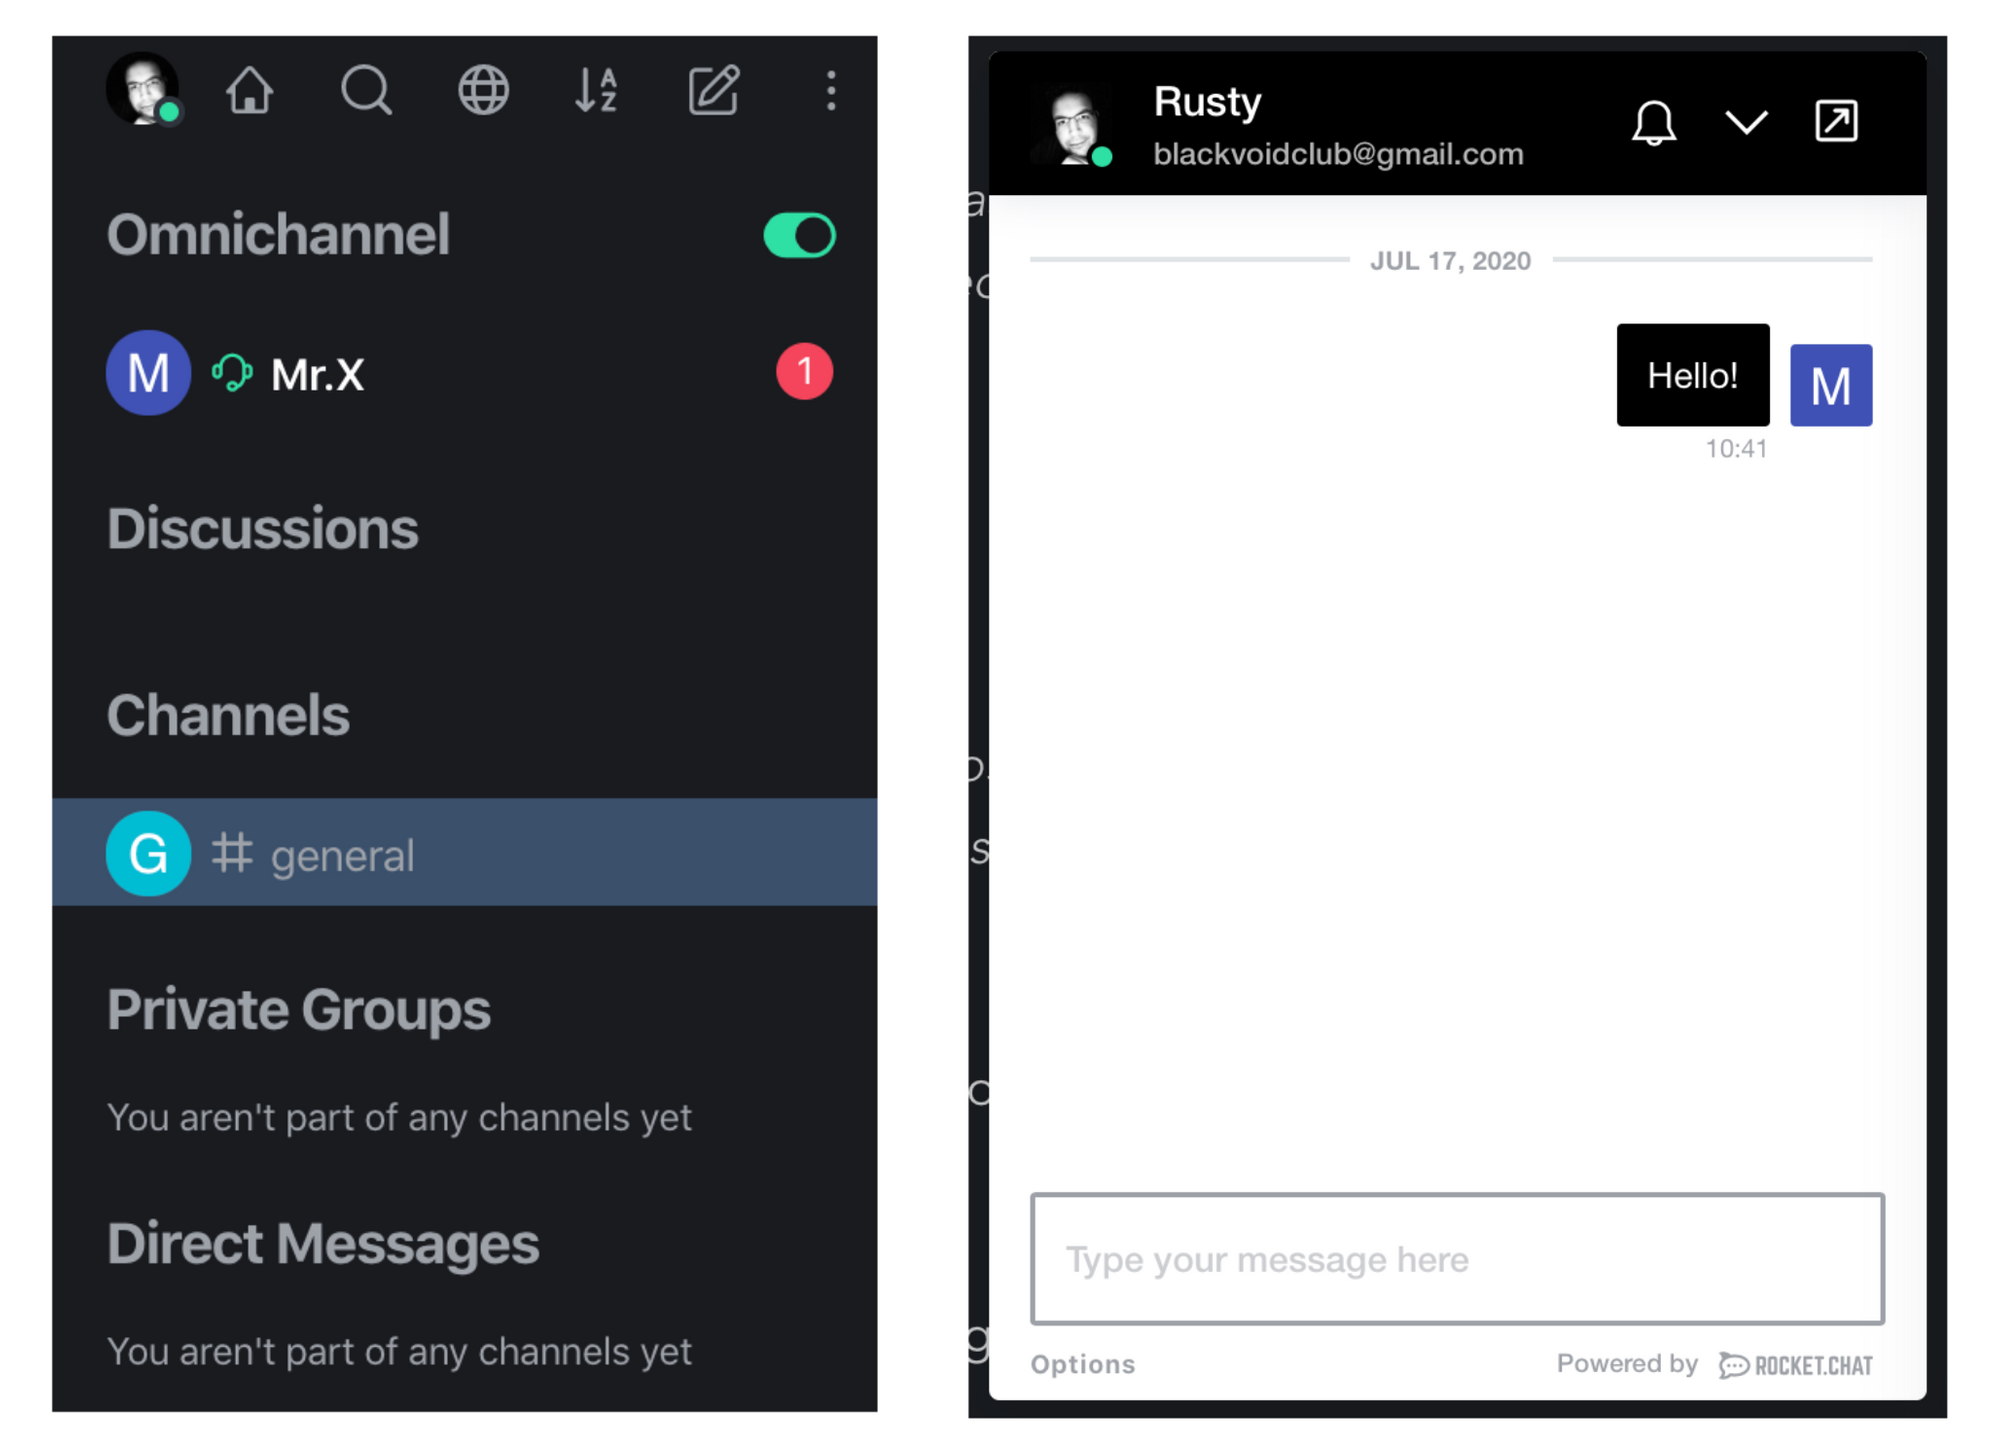
As we can see from the image above, as soon as the visitor has typed a message, the message is converted into a conversation inside RC and was assigned to the first free agent.
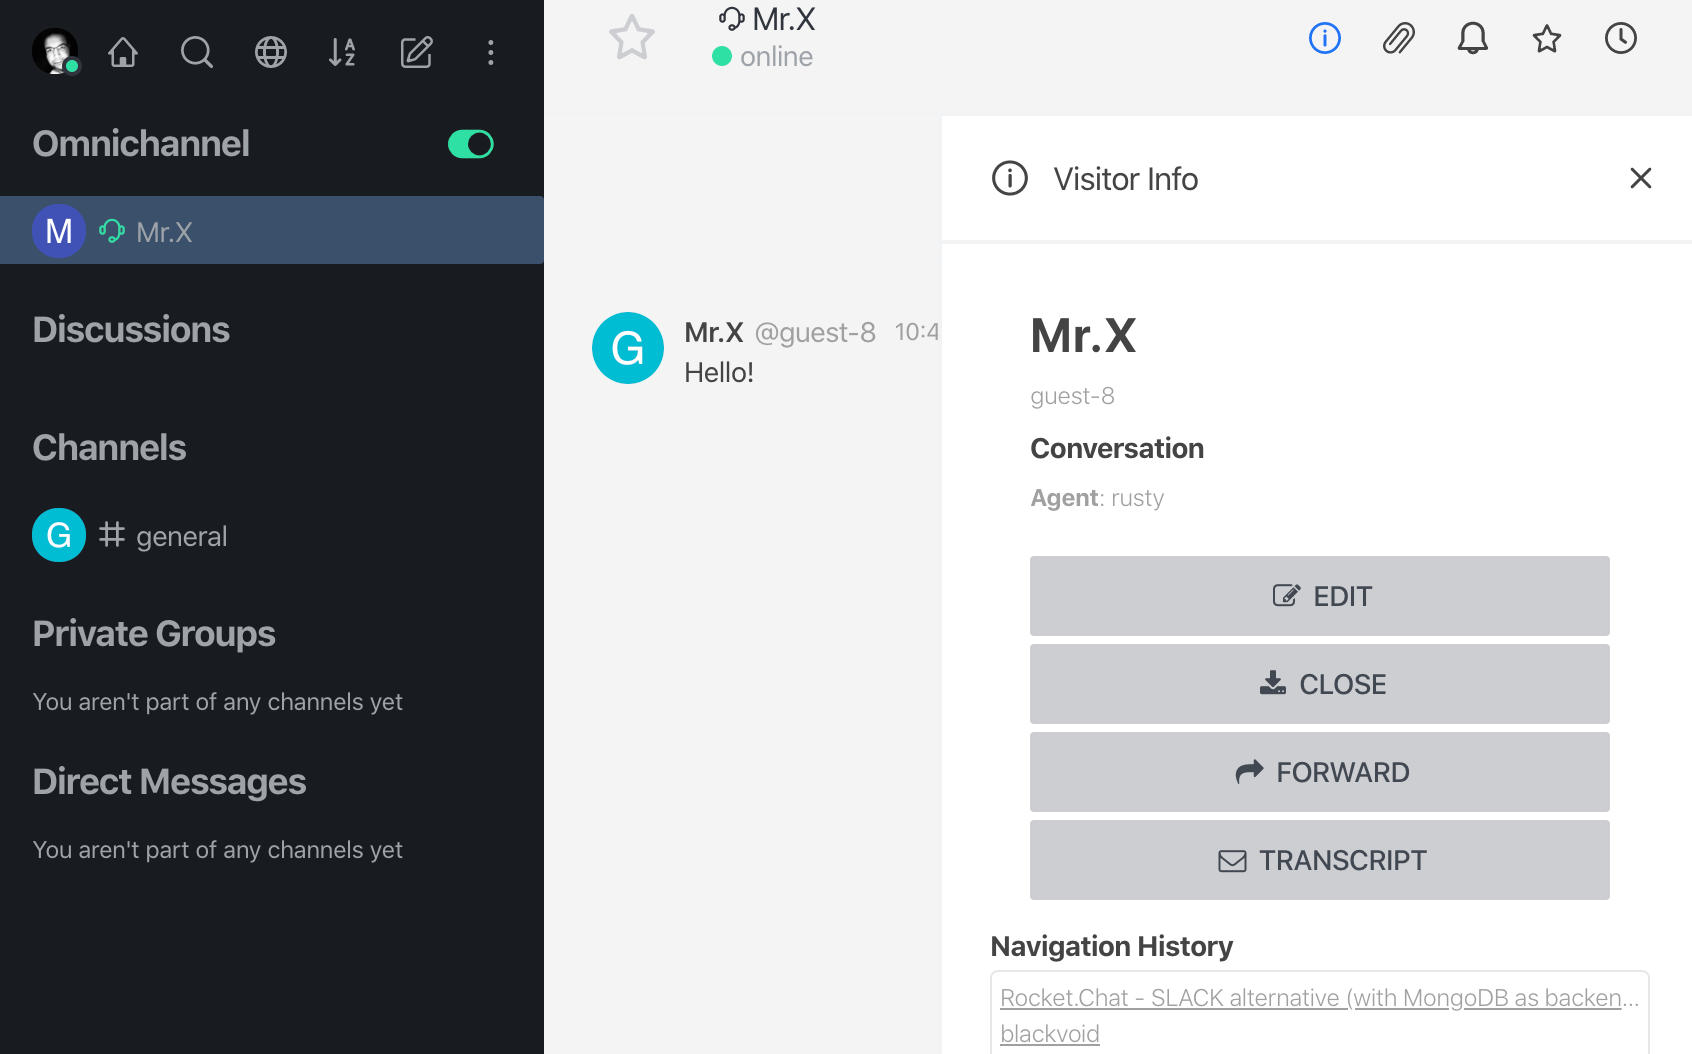
The agent side has several options when first clicking the conversation. Make edits, close the chat, forward it to a different department/agent or send the transcript to the visitor (only if the email option is activated on the Omnichannel registration form).
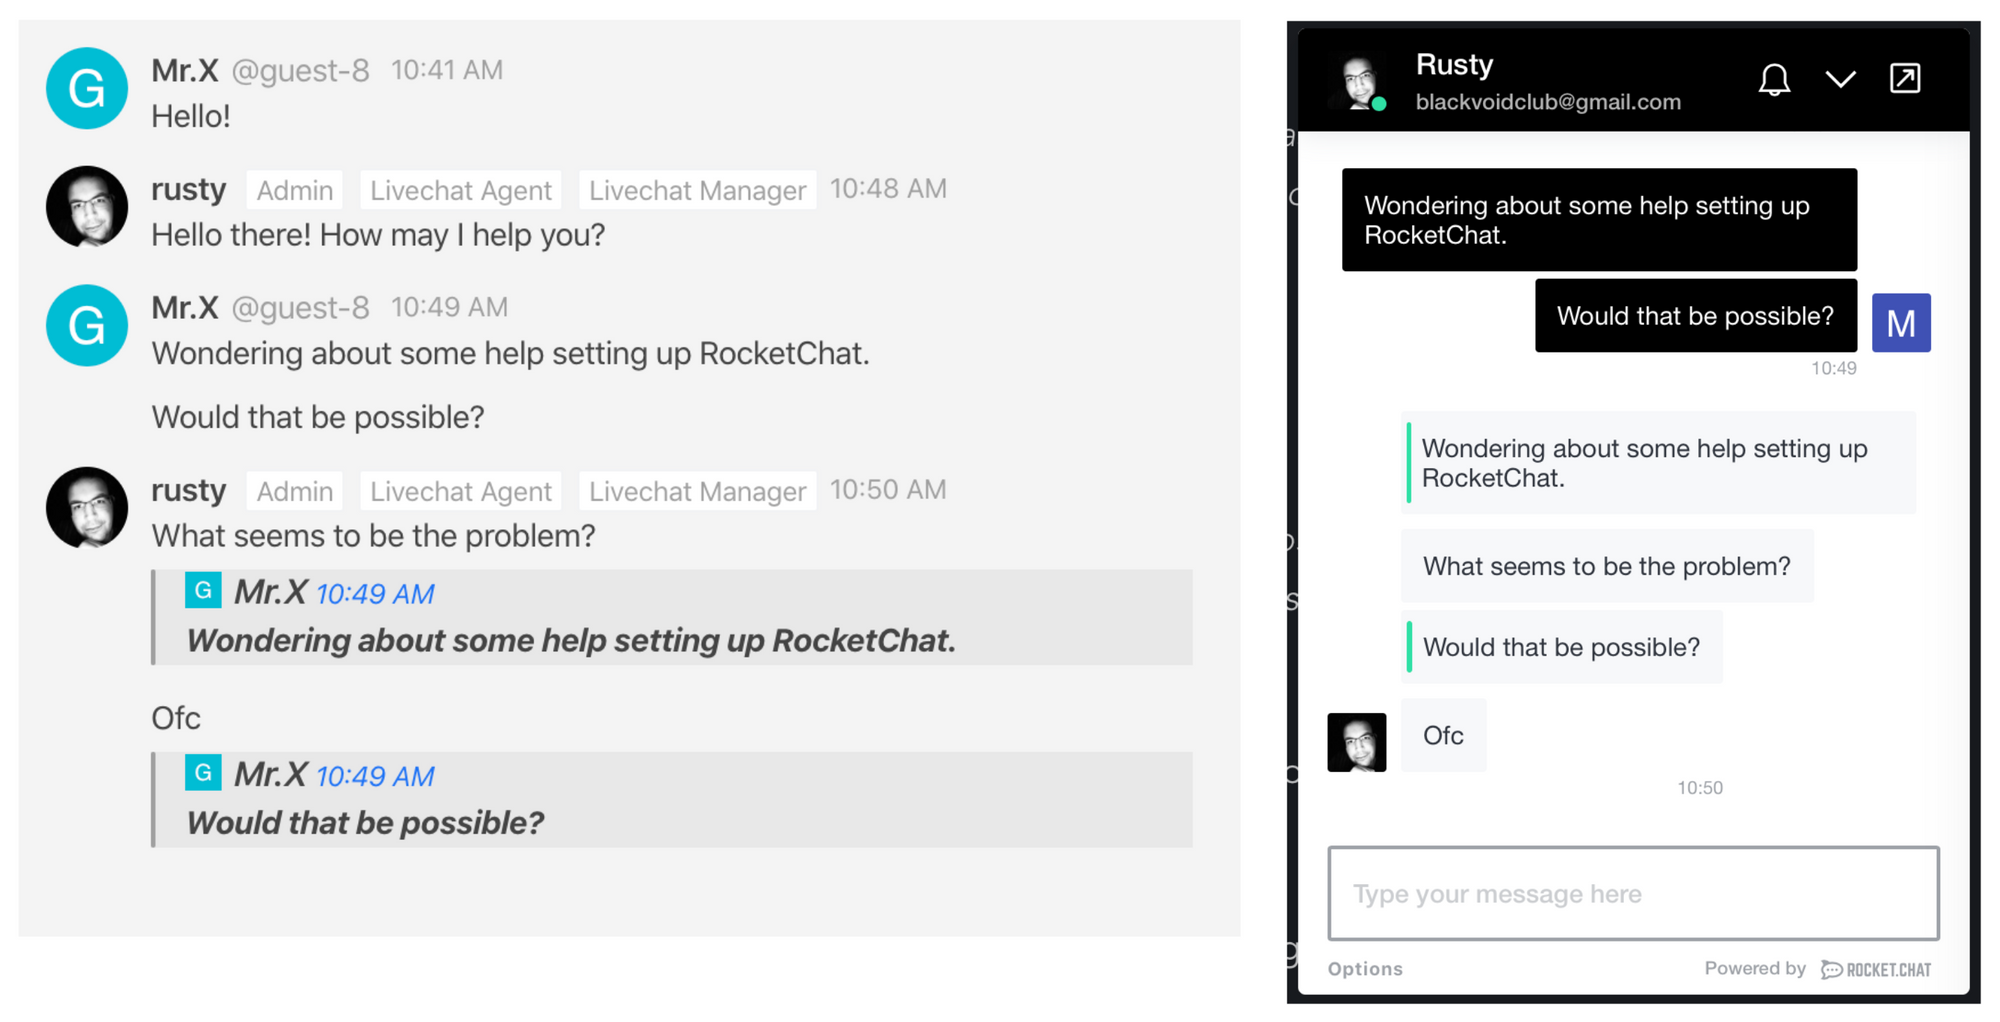
The image above also shows that on the agent side you can quote visitor's entries. This is not possible from the visitor's side, but then again having a one-way option is better than none.
You can send files and even engage in an audio/video conference call (if enabled on the RC server-side), in case you want to offer that kind of assistance.
While the chat is active let's see what other options we can see regarding Omnichannel features.
Omnichannel analytics and monitoring
If you go back to the Omnichannel settings there you will see 2 categories, Real-time monitoring and Analytics.
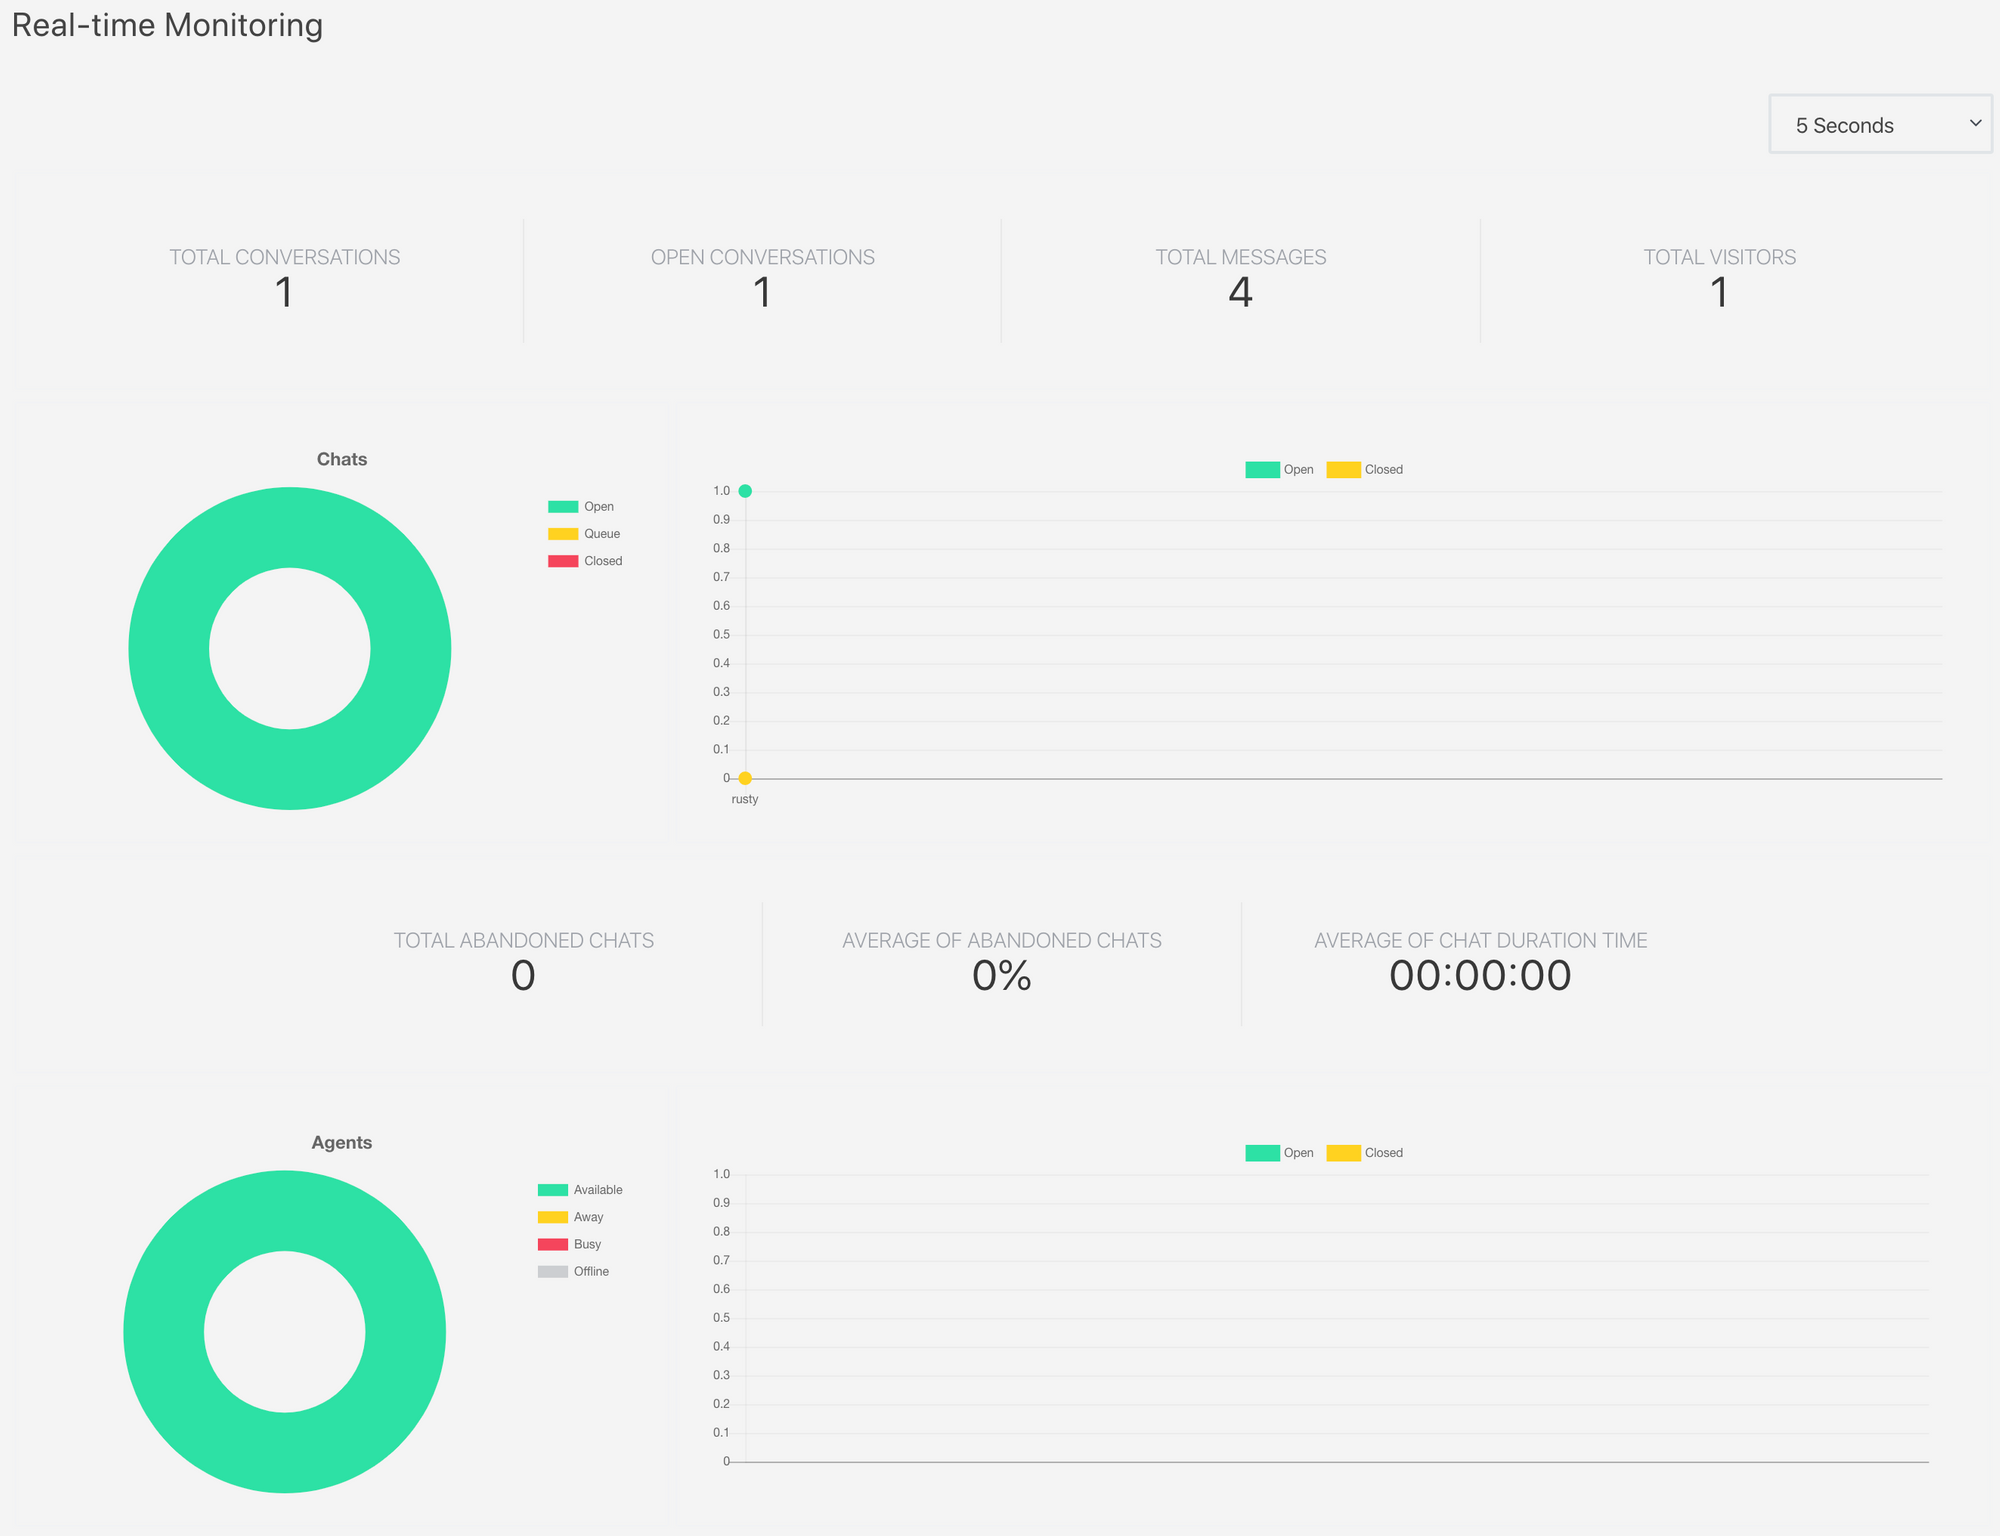
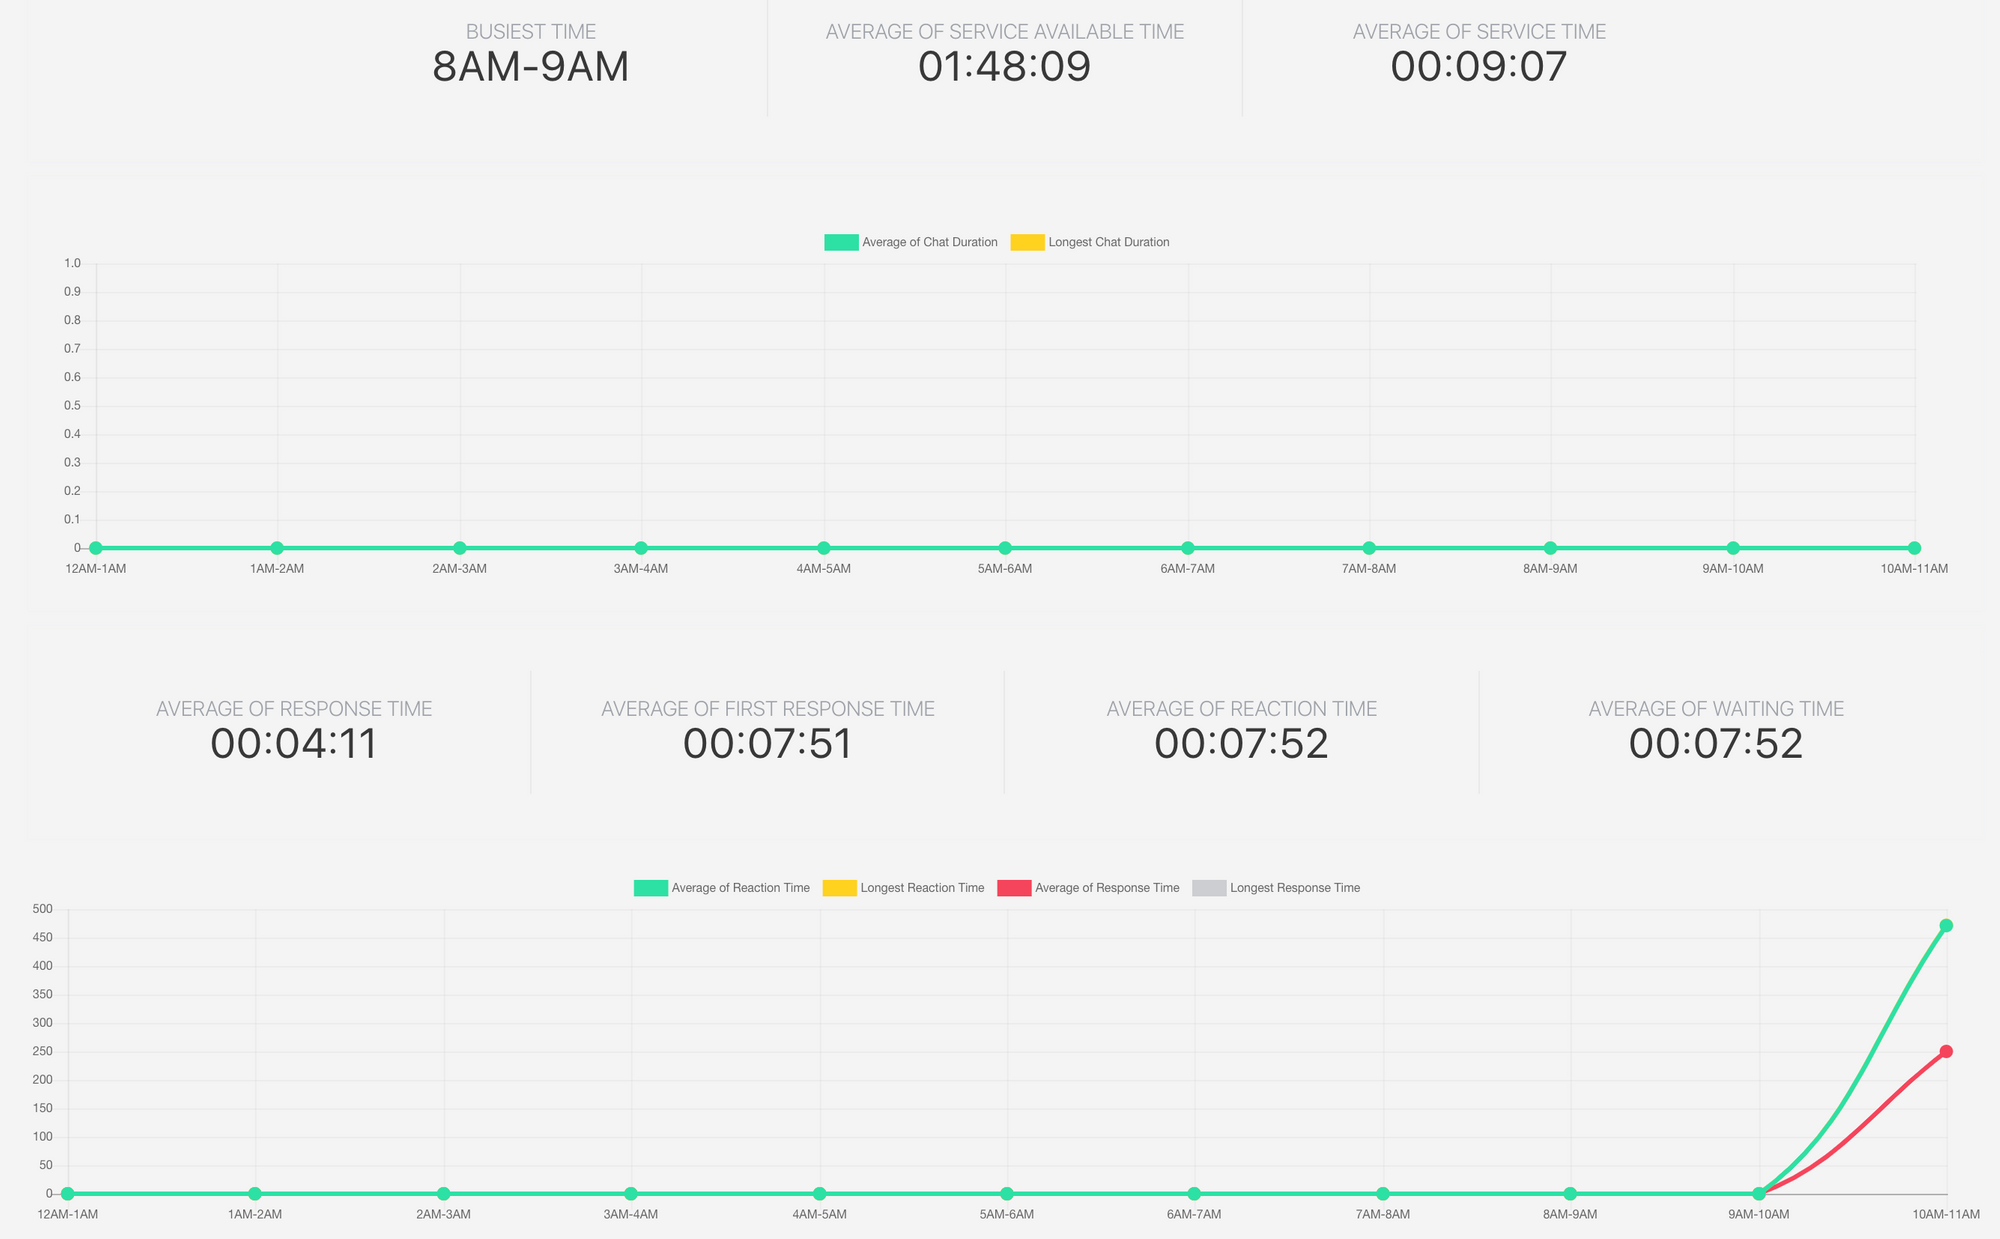
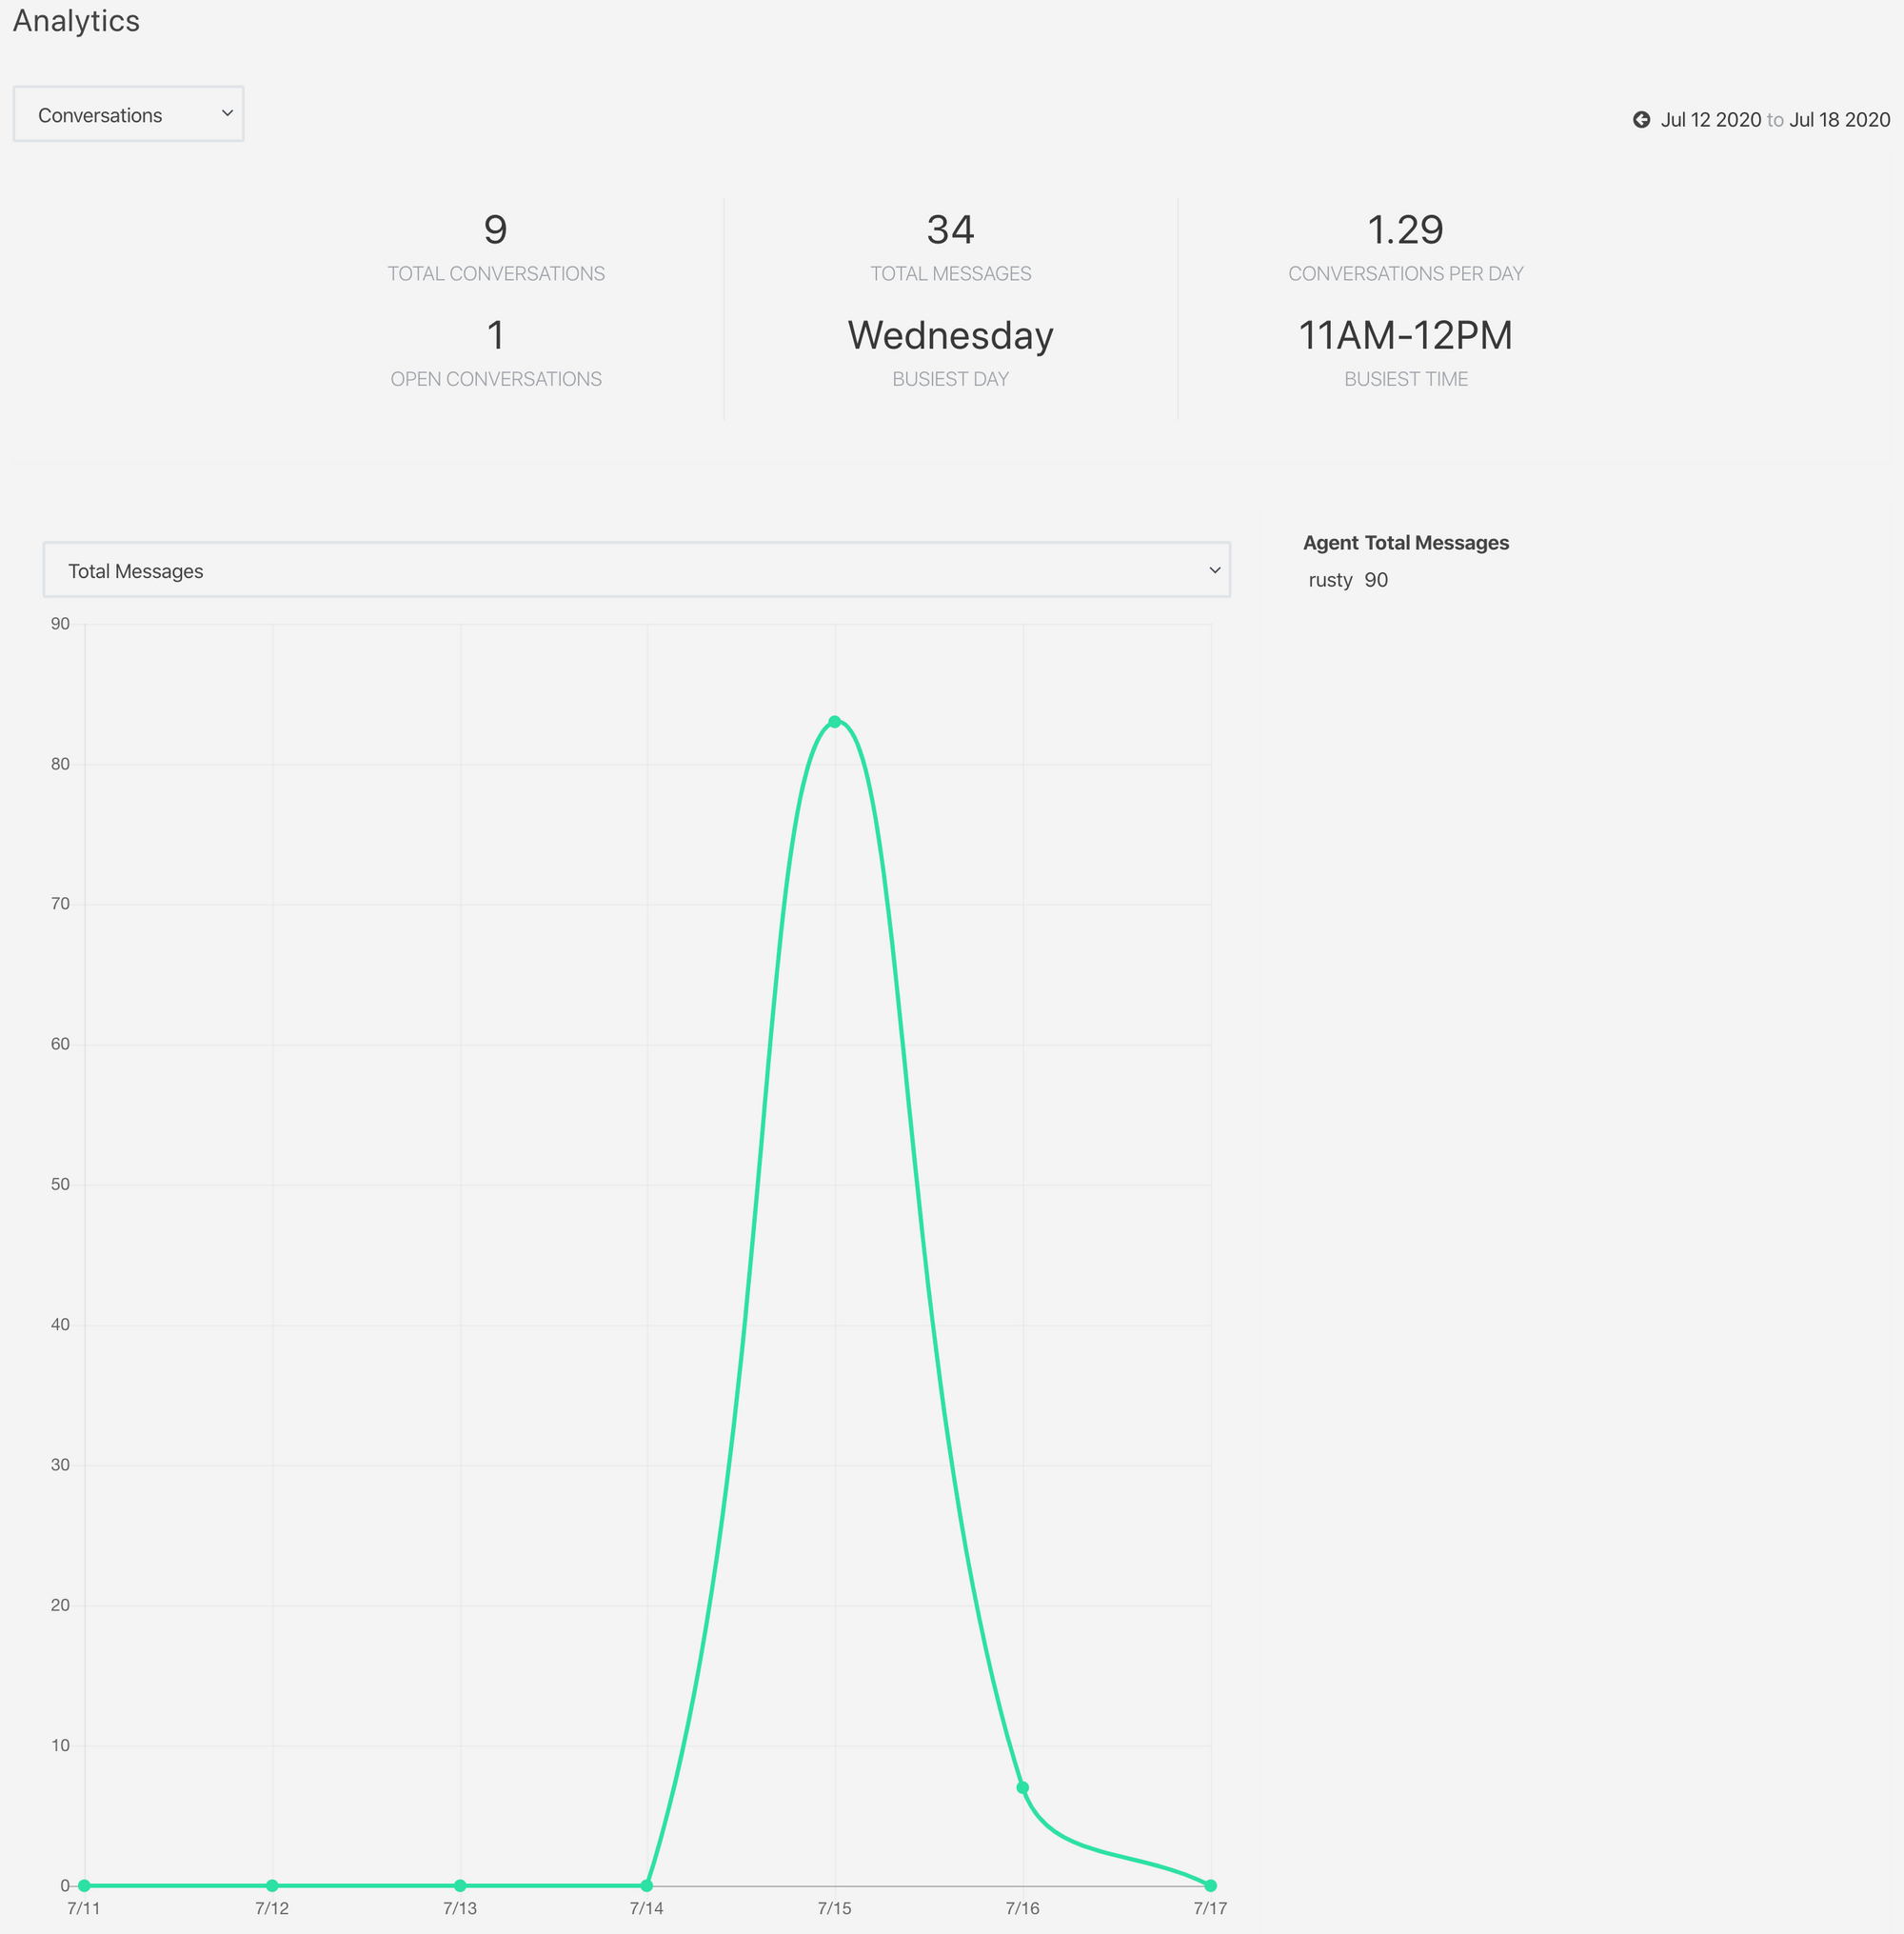
Very informative panels that will give you much detail into your Omnichannel situation and how your overall support is working, or not.
As I said before, you can also turn off your Omnichannel support if you choose to, and your visitors will see the widget icon but instead of a live chat, they will have the option to send an email. This way you will not lose any visitor that wants to get certain help or information.
Also worth mentioning is that you can access all of the chats that were initiated over Omnichannel using the settings menu Current chats. This will show you a table of all current or past chats, and clicking on any of them will open up the entire transcript.
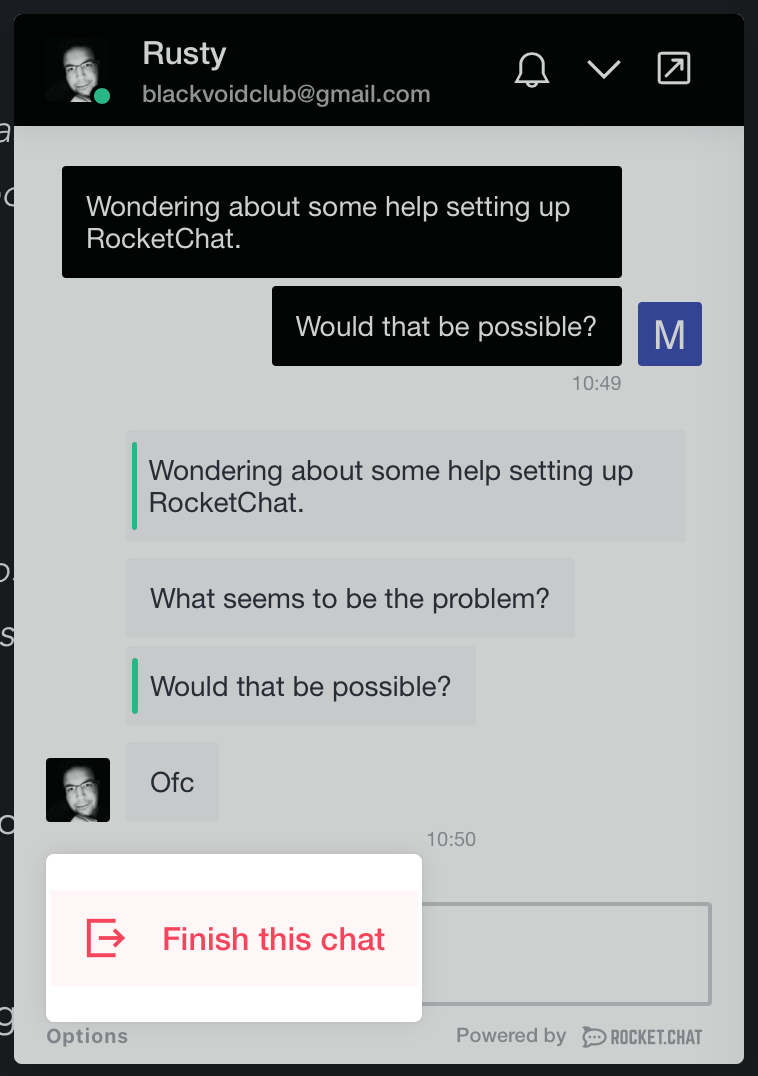
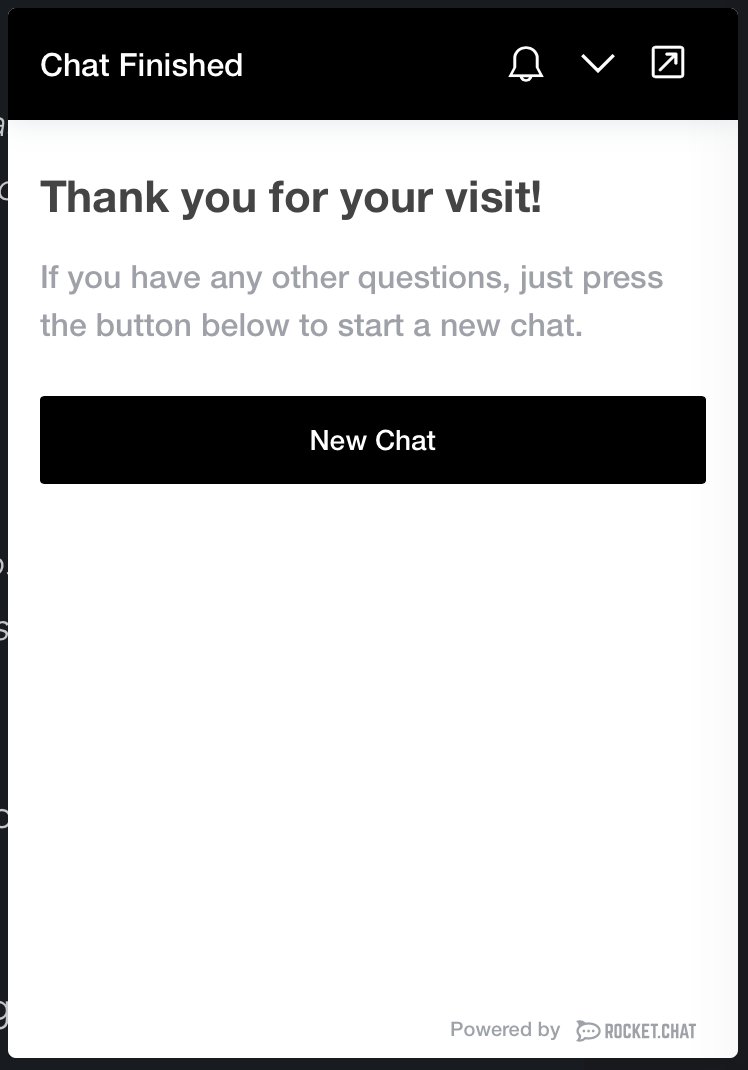
In the end, both parties can initiate the end of the conversation. On the visitor side, this is not so intuitive, considering it is "hiding" in the Options link in the bottom left corner of the chat. Agent side can use the menu option (shown on the previous images) and close the chat.
So, all in all, a very good addition to an already great chat platform. Considering that RC is in constant and active development, you can be sure that each version has some fixes or improvements on the Omnichannel front.
As always, you are welcome to comment in the comment section below, or if you have any questions, use the chat widget!


