Synology 101 - Hyper Backup to a remote Synology NAS

This will be a quick (DSM 7) tutorial to show how you can use two remote NAS devices and perform a Hyper Backup over the Internet while maintaining the security of your data both in transit and at the final destination.
Example scenario - "Backing up to a friend's NAS device"
As an example, let's say you own a NAS but you want to have an offsite backup as well. One thing you could do is use Synology's C2 platform, but in case you want to backup a large quantity of data (5+TB) it might turn out to be expensive.
Another thing you could do in a situation like that is to backup to a friend's or family's remote NAS (and they can back up to yours). This will be beneficial for both parties as you will, all have a place to backup your data, it will be on a Synology-compatible device, and you can encrypt it all the way so that there is no fear of your friend looking at your private content.
Setup
Now to make this work there are several things that need to be done at the destination location first. If you place yourself in the role of the user backing up to a location, you will have to just input the destination, username/password, and choose what to back up.
The destination side is what needs to be configured so that the user from that side can also be safe that you do not have access to anything other than the folder for your backup. On top of this, there are permissions to be set, user to be created, and port(s) that need to be open for all of this to work.
Because of this, the tutorial will start with the destination (target) side first, and then we will finish up with setting up the task from the source NAS as well.
Configuration of the DESTINATION NAS side
This will consist of four (4) main elements:
- Setting up a user
- Configuring a destination folder and permissions
- DDNS/static IP accessible NAS
- Opening and forwarding Hyper Backup ports
Setting up a user
As usual, any apps or services that you want to use with any Synology NAS, need to have an associated DSM account that has valid permissions to do so.
Open up Control Panel > Users & Group and under the User tab click the Create button to start the wizard.
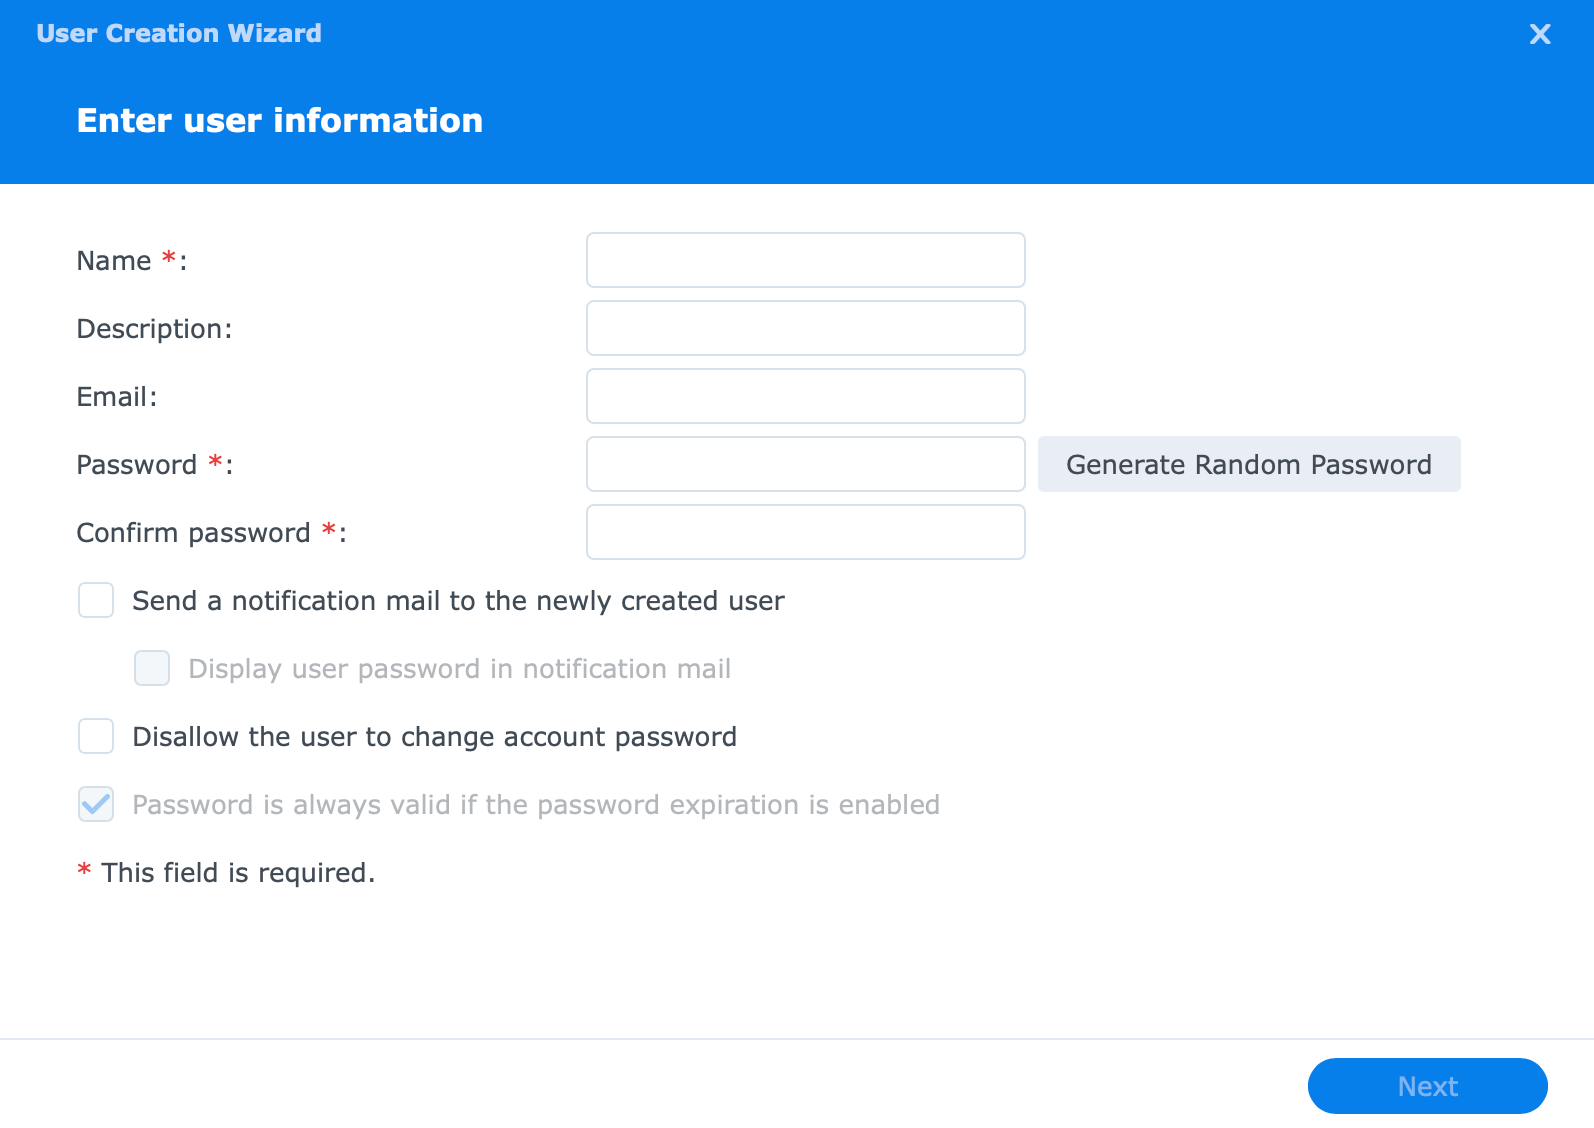
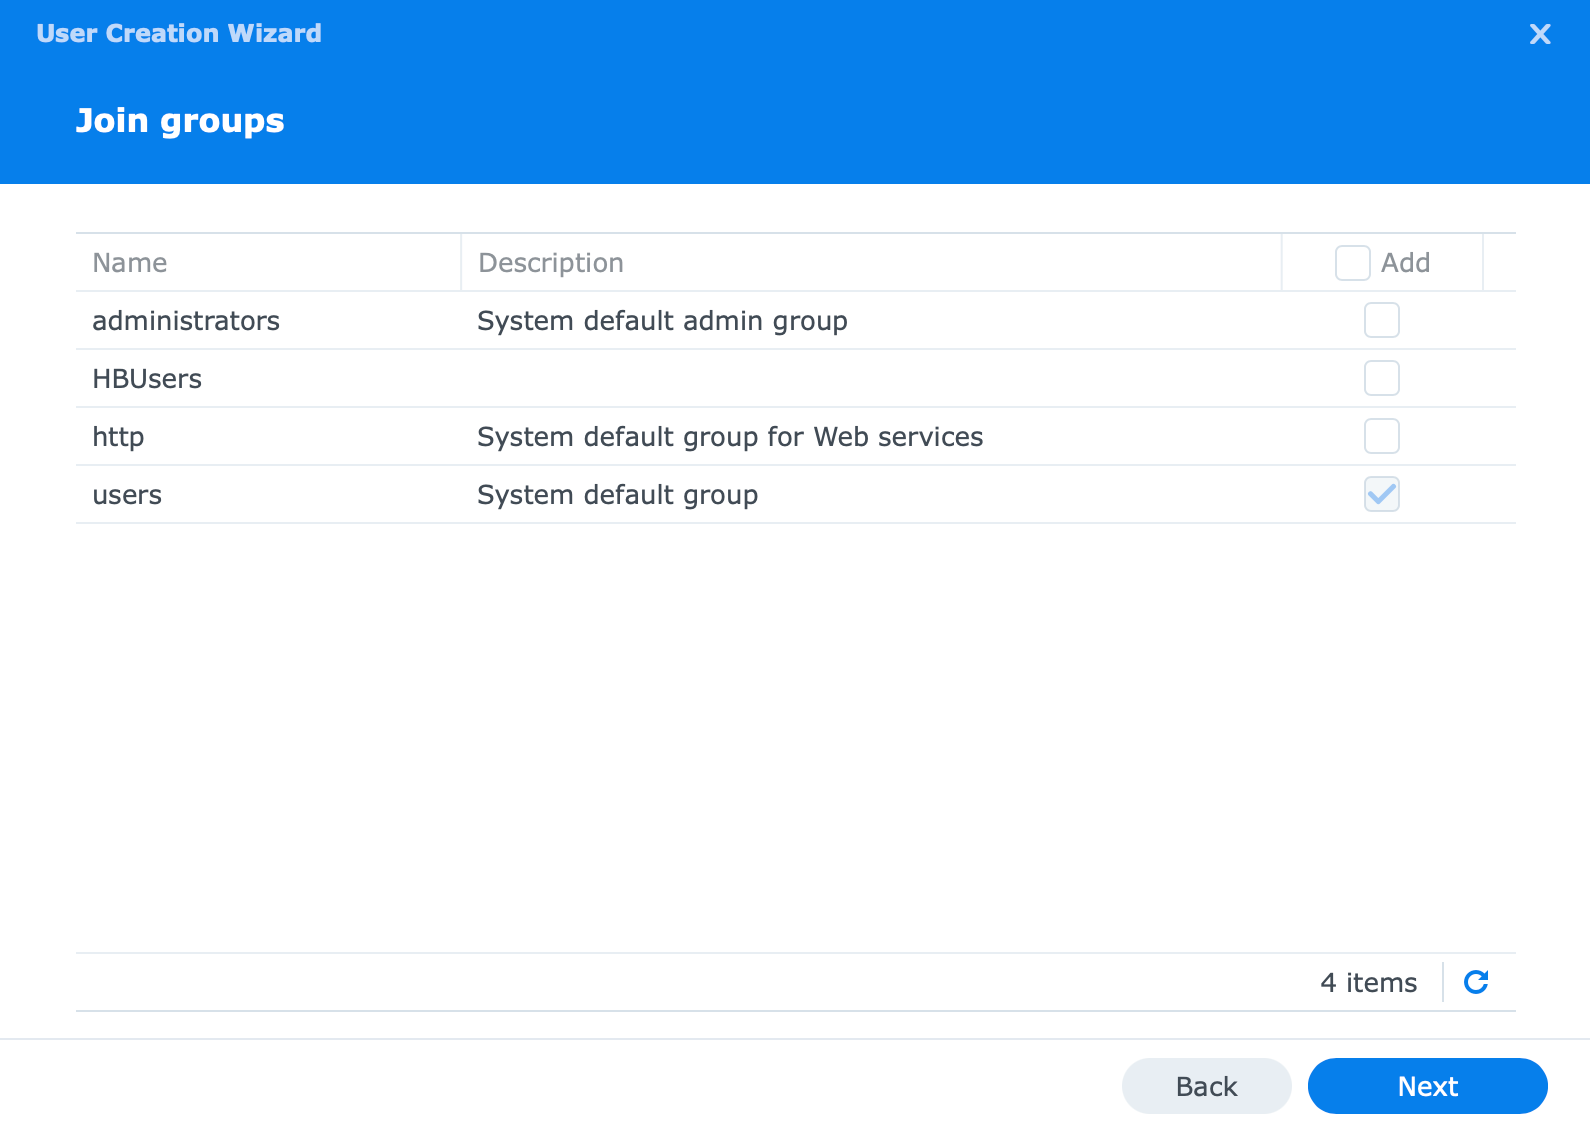
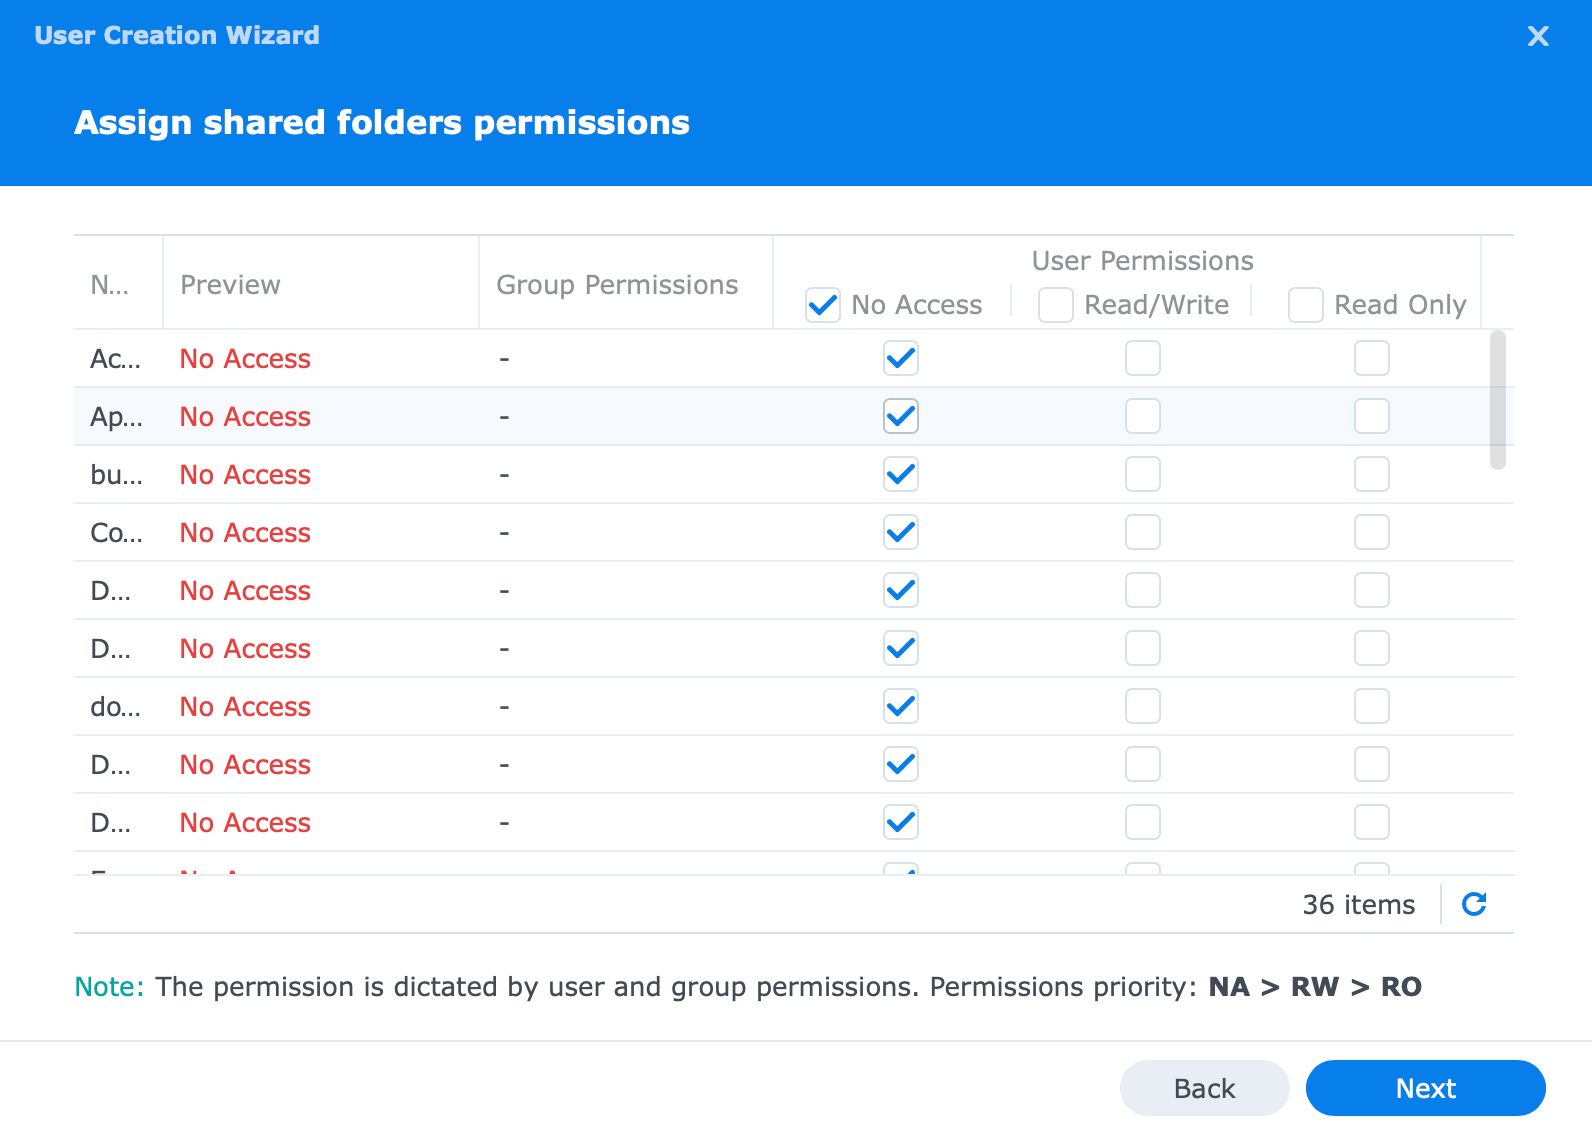
Enter the user's information (the password of the user can be changed later on from the client-side so at the moment give it a temporary password), and be sure to set it as part of the users group (not administrator), as well as to terminate all permissions for any existing folder on the destination NAS.
Next, you will get to the quota section, but you can skip that for now as we will configure that in the next major step.
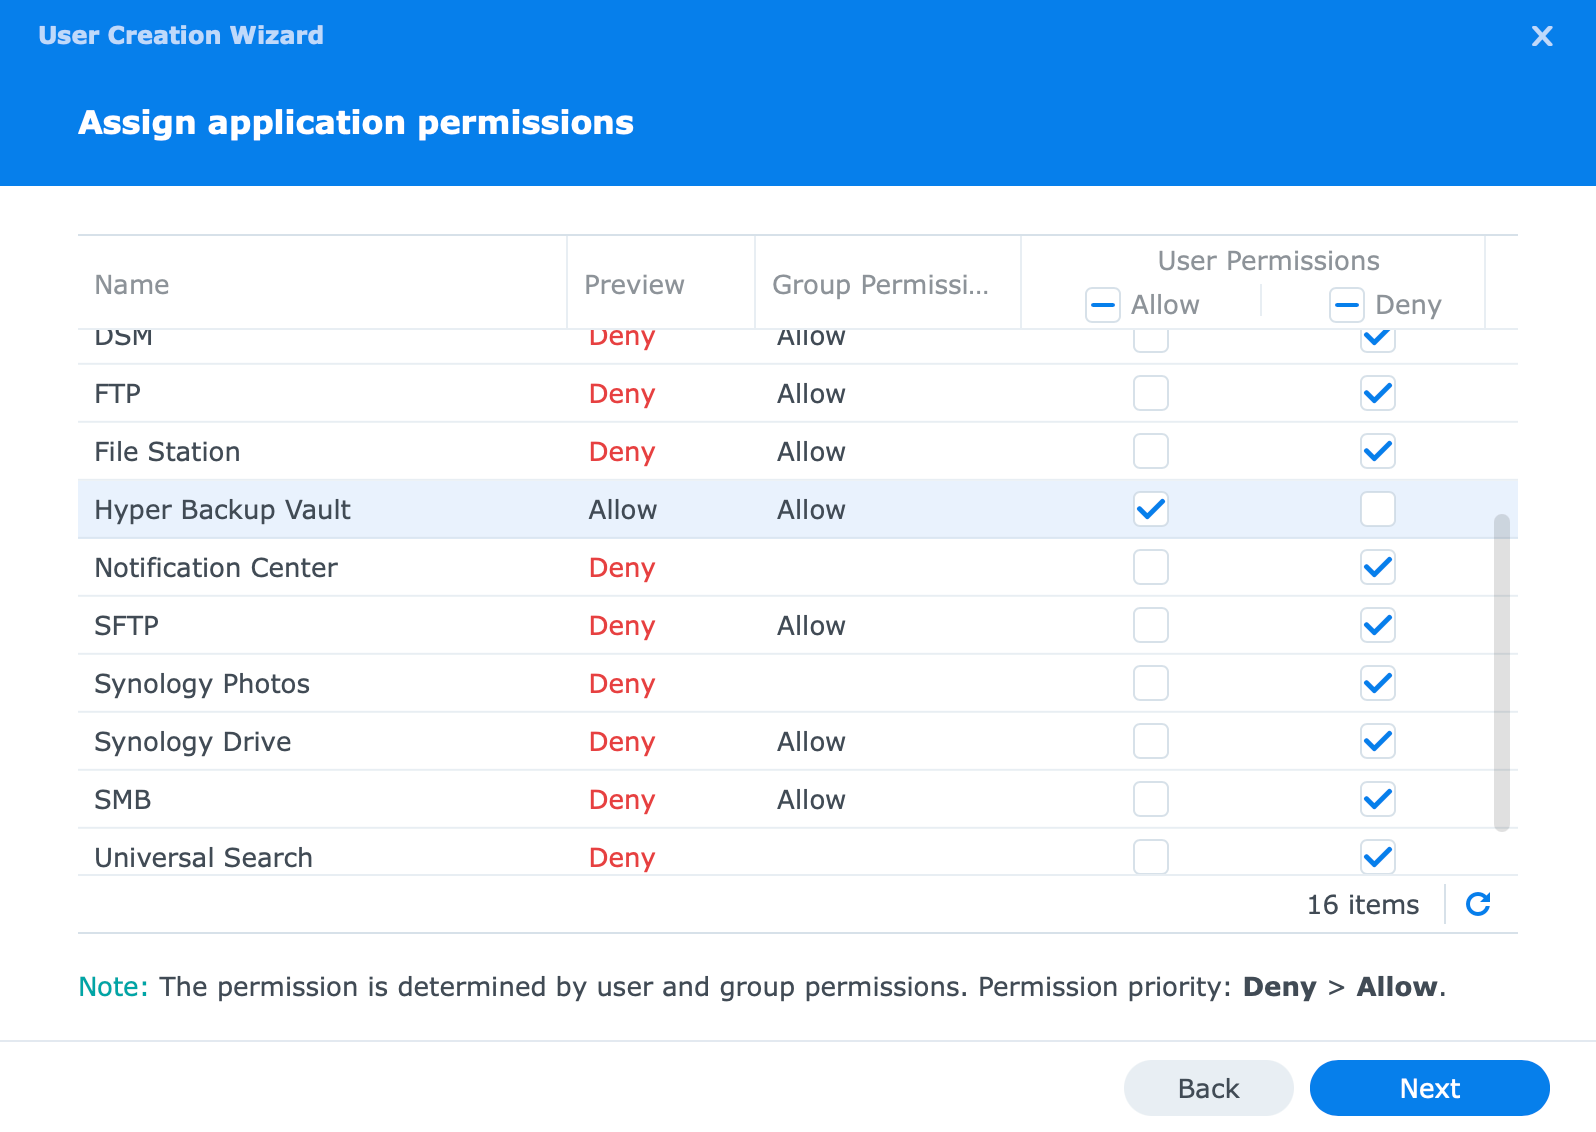
What remains here as an important element is Application permission. Be sure to allow this account Hyper Backup Vault app permissions and deny the rest.
Once you finish with the wizard you have a configured user account that you can then share with the person who will use this account your NAS and the target device.
Configuring a destination folder and permissions
Next, you need to configure the folder on your target NAS that will be used as a destination folder once the Hyper Backup task is initiated from the source side.
Again, go to Control Panel > Shared Folder and click the Create button to start the wizard.
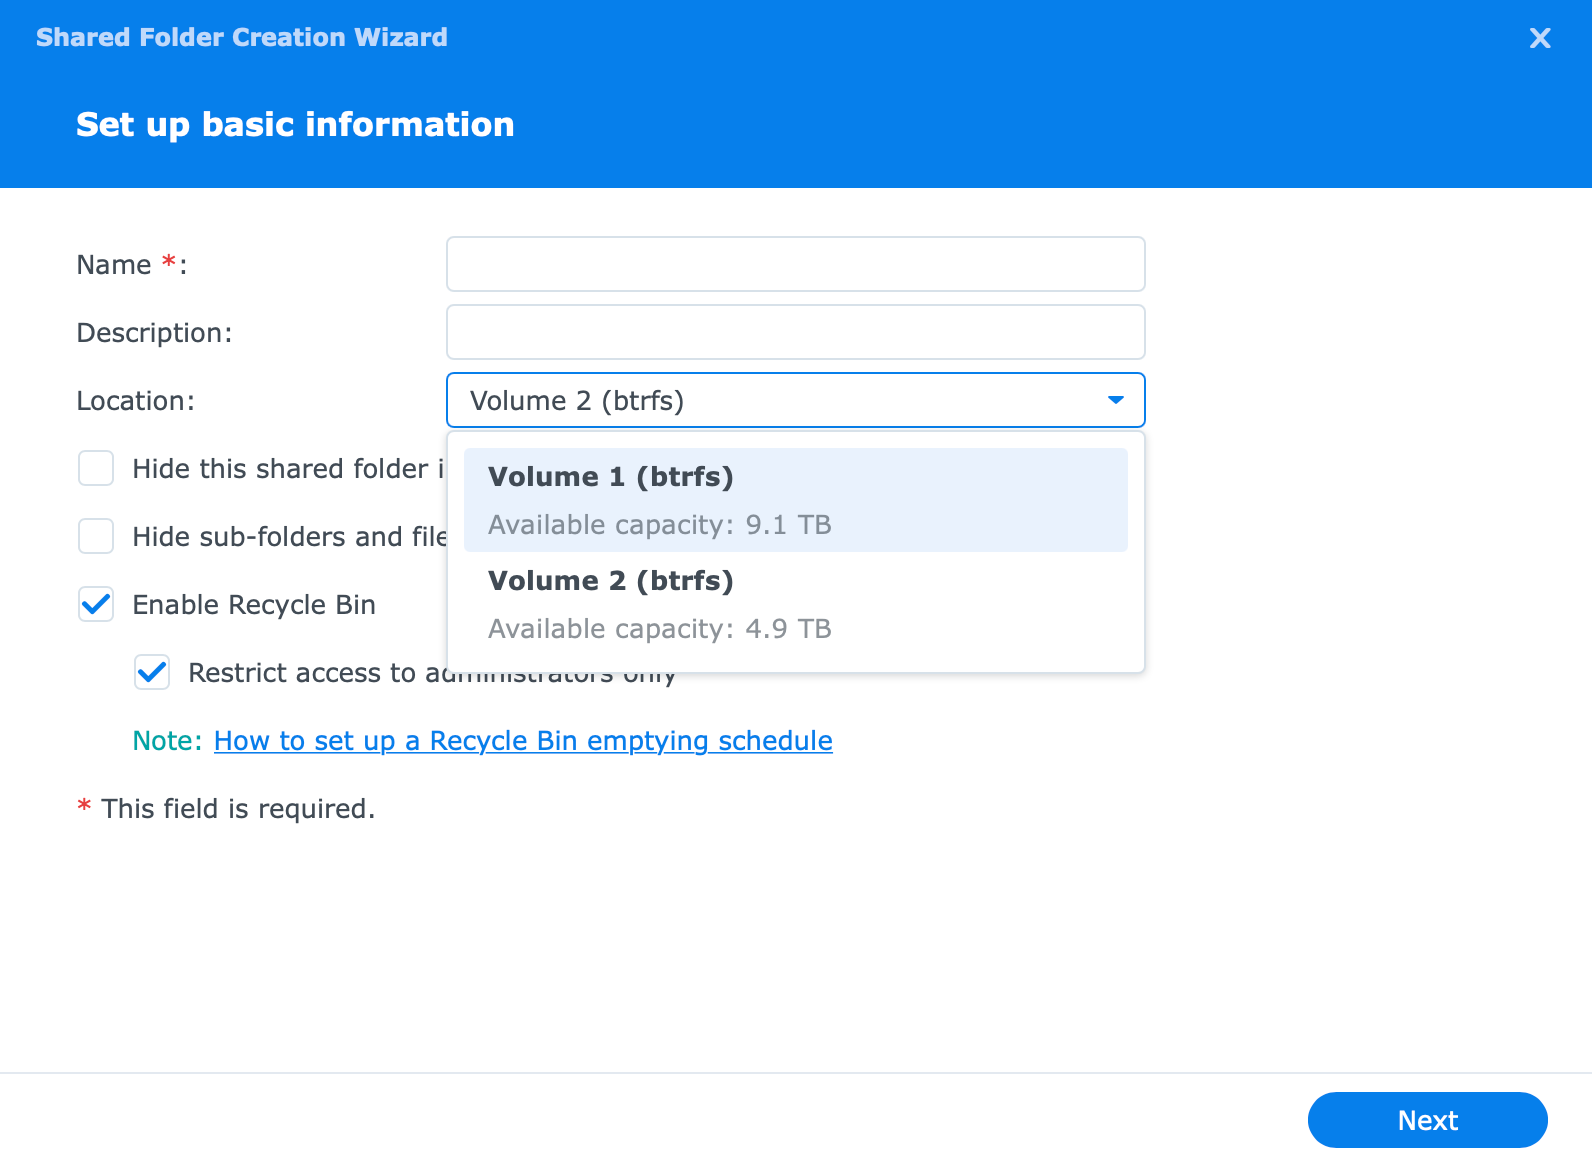
Be sure to give it a unique name and select the destination (volume) of your choice. If you have multiple volumes at your disposal, this is the place you will decide what volume will house the folder.
In the next step, you will have the option to select (or not) the encryption method. You can of course do it, but IMHO, it is not needed. The reason for this is that the client will configure this on their end anyway (as they should) for the task itself, and if you set encryption on the destination side (in this case) you will have to mount this folder and make sure it is mounted when the backup needs to initiate.
Now, as I said, it is something that you can do, but it is up to you if you want to bother with an additional layer of encryption, considering the content will be encrypted as well.
Shared quota is also one step in this wizard that you can skip for now as we will set it manually after the folder has been created along with the permissions for our new user.
Once you reach the user permissions step, here you can check what DSM account should have access to the folder. Be sure to check the user that you have created in the previous step and give it read/write permission.
Right now we have one more thing to do (optional), and that's setting up a user quota for that created folder.
Open up User & Group panel again and go to your user account. Click the Edit button and move to the Quota tab.
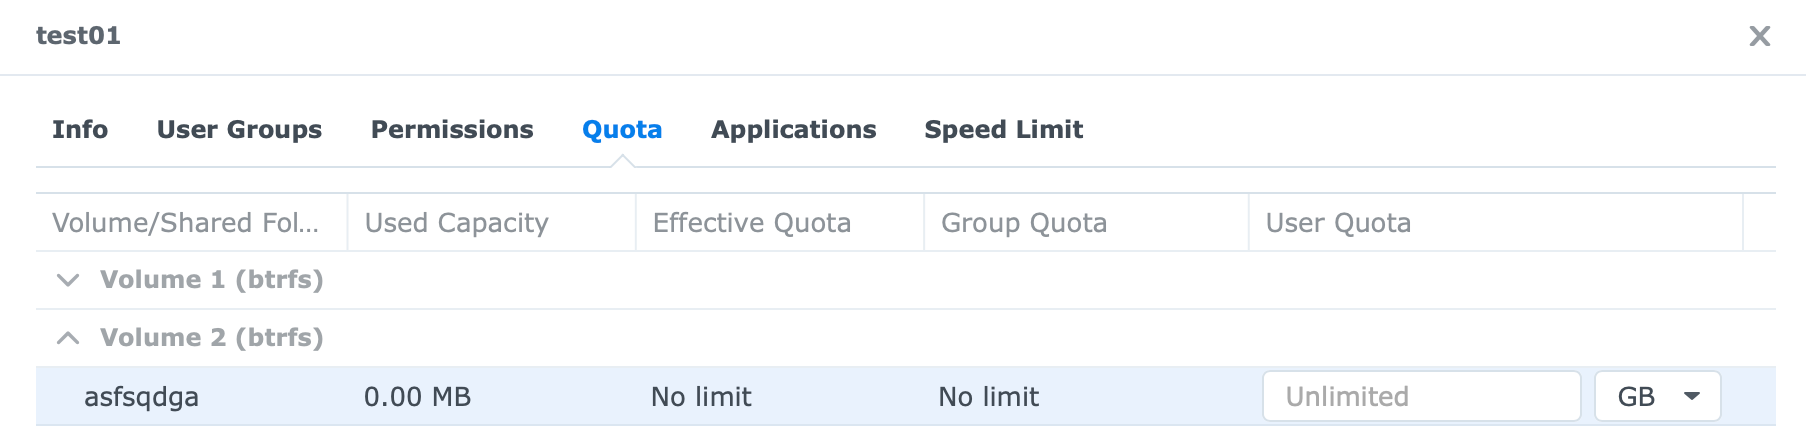
Now again, this is optional, but if you want to contain the amount of space your friend can use on your NAS, this will be the place to do it. You can always set it and alter it at a later date should you decide to do so.
DDNS accessible NAS name
In order for your NAS to be accessible over the Internet, you will need to make sure that your NAS can be reached at any point in time especially if you have a dynamic ISP address that can change from time to time.
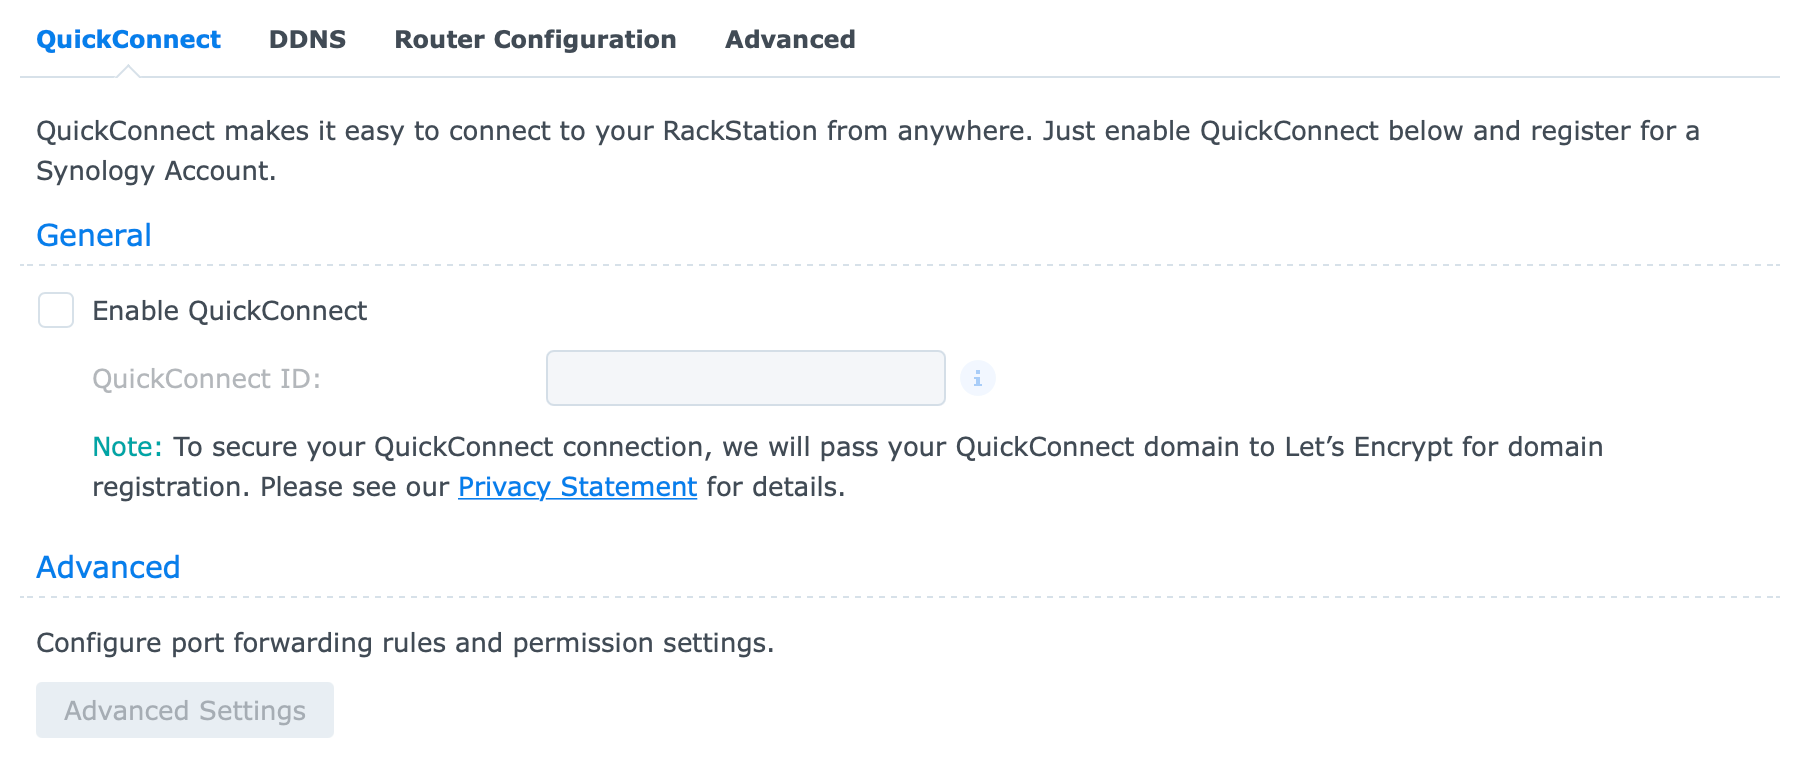
To get around this you can either configure your NAS to use a QuickConnect name or DDNS one. In any case, the result will be a public name that will link your NAS with an active public IP address.
Both can be configured in the Control Panel > External Access on their respective tabs.
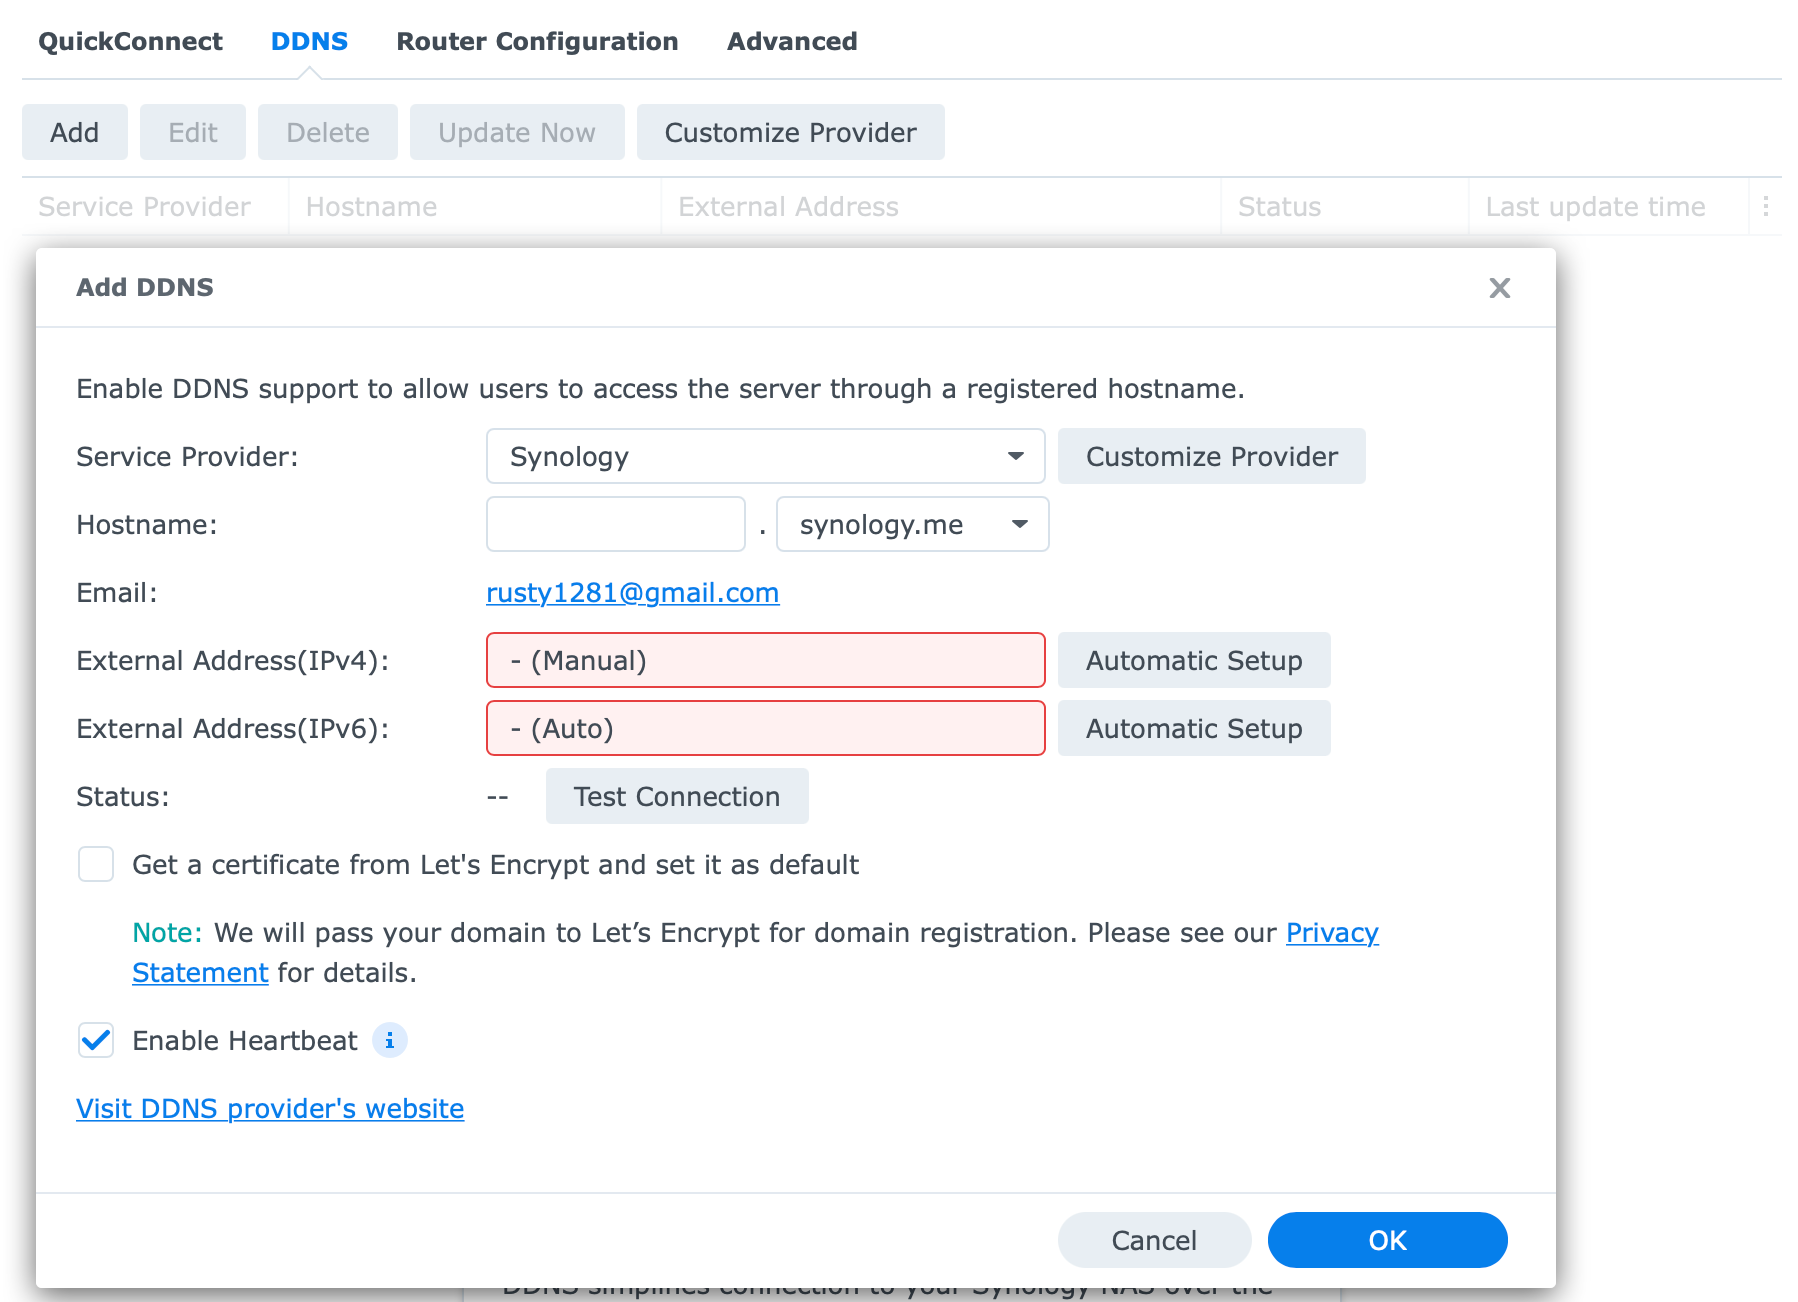
DDNS has several configuration steps involved and you should also create a Let's Encrypt certificate (there is a checkbox for it) to secure your new public domain name.
These steps will not be covered in this tutorial, so once you have your public domain up and running, continue forward with the next step.
Opening and forwarding Hyper Backup ports
Finally, we have to do one more thing. In order for your NAS to be a target for any other Hyper Backup NAS, you will need to have the Hyper Backup Vault app installed, but on top of this, you will need to open up and port forward HB port on your router.
If you check the following URL: https://kb.synology.com/en-global/DSM/tutorial/What_network_ports_are_used_by_Synology_services you will see the list of all the ports that DSM and apps/services use. This is useful in a situation like this as you can see that Hyper Backup and the Vault app have specific ports in use.
Hyper Backup (destination) | 6281 (multi-version backup), 22 (if encrypted over SSH), 873 (remote data copy) | TCP |
Hyper Backup Vault, DSM 5.2 Archiving Backup | 6281 | TCP |
As you can see from the table above, you need to open up and forward port 6281/tcp toward your NAS IP address in order to allow remote backups to have a successful connection.
Depending on your router model and OS, this will be different for everyone, but if you are using Synology router(s) and SRM, this is what it looks like.
Open up Network Center > Port forwarding and click the Create button to make a new rule.
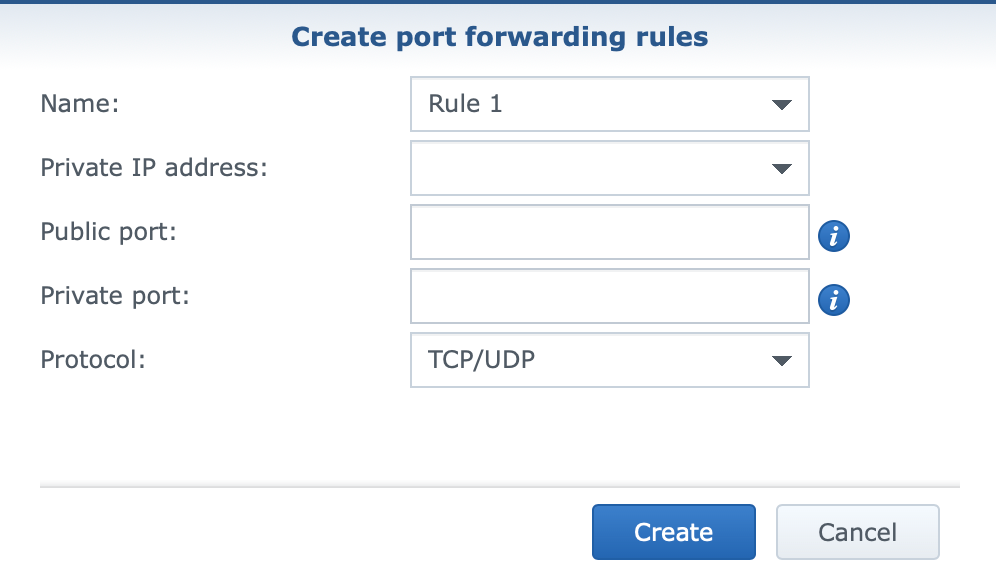
Give your rule a name, IP address of your NAS and configure both public and private ports to value 6281. Finally, select TCP from the protocol menu, and click Create.
That's it! SRM will also create a firewall rule automatically for you to allow this traffic.
Configuration of the SOURCE NAS side
Now that you have prepared everything on the destination side of things, you are ready to initiate a backup task from your source NAS.
For this, you will need:
- public IP address, or DDNS public name
- username and password for the destination/target NAS
Creating a backup task
Open up the Hyper Backup application and create a new task by selecting Remote NAS device.

Next, fill in the data needed in the following step. Enter the Server name or IP address by populating it with either a public IP address or the DDNS name.
Use the Log in to fill in the credentials and after that select the folder from the Shared Folder drop menu.
If all has been configured correctly, you should see only one folder. The Directory value can be anything you want as that is the name of the folder inside which all the data will be backed up.
This means you can make multiple backup tasks using the same root shared folder, as all of them can be organized with the subfolder/directory parameter.
In the next step select your root folders or subfolders that contain the data you want to back up and move along to the next step.
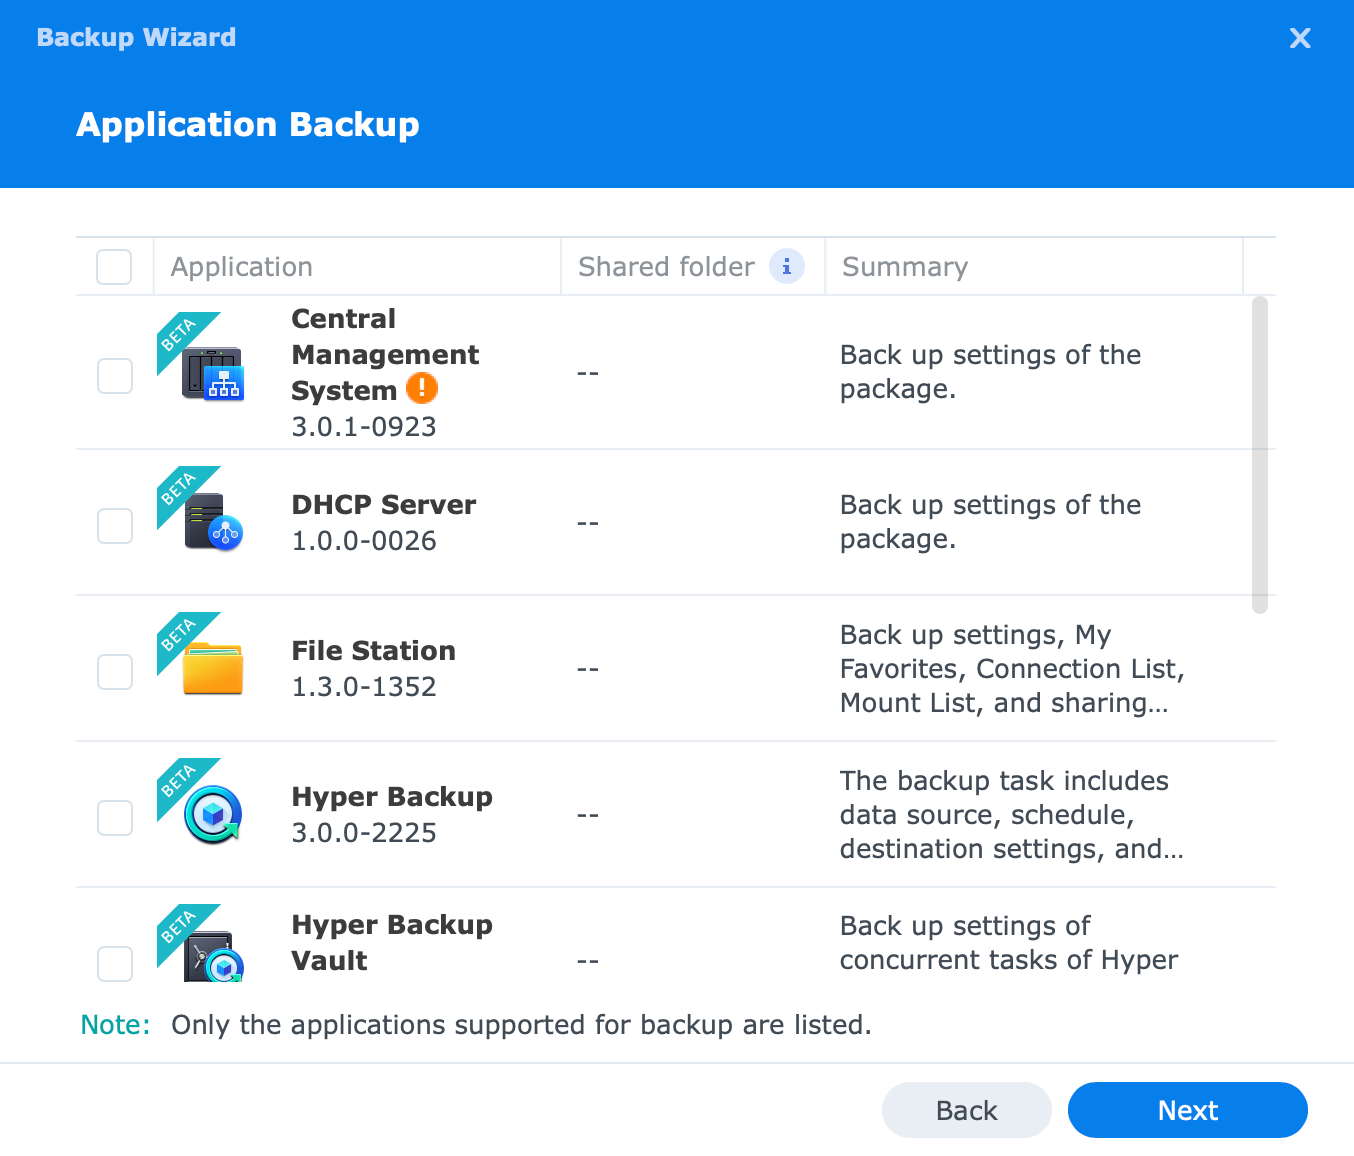
With Hyper Backup tasks you also have the option to backup certain Synology apps and their configurations. This is an optional step but you can make your selection if you want.
Finally, the last step is configuring various settings. Here you will have the option to choose if you want any notifications on the matter, configure a specific schedule, and integrity check of your backed-up data.
The most important element here is the very last checkbox, Enable client-side encryption. You DO NOT want to forget to check this!

With this checkbox active, HyperBackup will create a local file (****.key) that will download to your computer as soon as you finish the wizard. This file will be the client-side key that you will need to access the data from your backup.
One last option you will have is backup rotations. Another optional step but if you want to have multiple versions of your backup with specific points in time (multiple versions of the same file that has changed over time), make sure to configure this to fit your needs.

Once you have all in place, start the backup, and you are done!
How can I be sure that no one but me has access to the backups?
Well in a scenario like this, the person controlling the NAS can see the folder with the backups inside it, but if those backups are encrypted from the source side, they are useless without the key.
So even if someone wants to take a look inside, they can't, as they will be greeted with this type of screen:

As you can see from the image above, Hyper Backup Vault has detected that you requested access to the encrypted data, and it's asking for the encryption key to unlock it.
On top of this, you can see that nothing in the background is visible, no data structure, time of backups, restore points, nothing.
Conclusion
So even if you are running this kind of scenario with your family or close friends, you can be sure that nothing or no one will access your data. It is always a good practice to have your data encrypted regardless of how "close" you are with the destination side, just so you can be sure that you're the only one who can actually read the data in the first place.
The benefit of running this Hyper Backup setup is that even if your NAS is destroyed, you do not have to fear how will you access your data. Hyper Backup has all the major desktop client versions, so accessing your data will require a working PC, a desktop client, your encryption key, and a working backup with your data.
This means that you can get to your data from anywhere as long as you have access to it, not just from your source NAS.

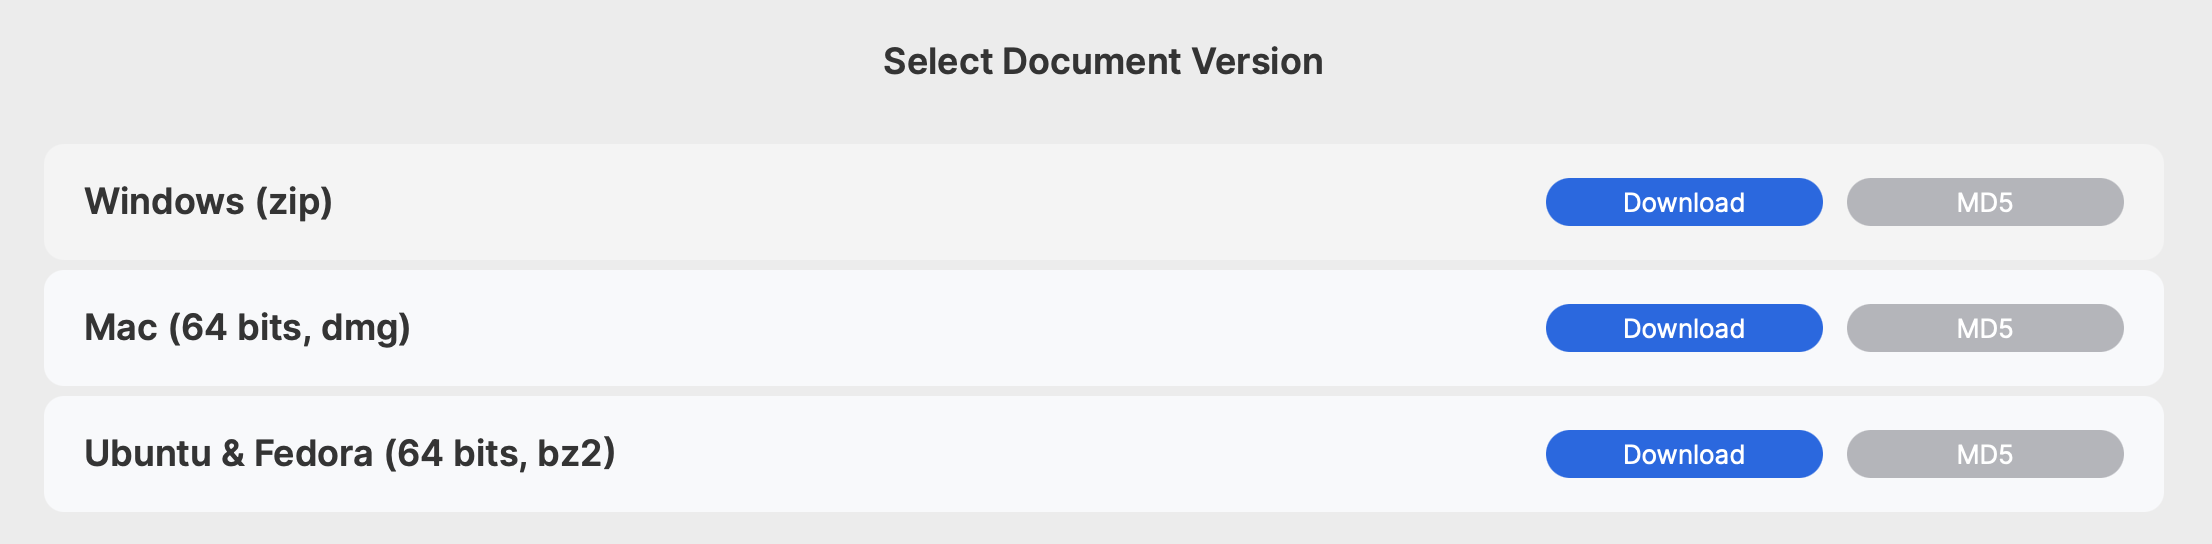
Desktop clients can be downloaded from the Synology Download Center site. Select your NAS model and jump to the Desktop Utilities tab. There you will find the Synology Hyper Backup Explorer app.
Just worth mentioning (what I did at the beginning) that this same process is identical if you chose Synology C2 as your backup destination. You can get to your data anytime, and from anywhere using the same desktop application. It is worth looking into it if you have no option to use a remote NAS, as well as if you don't need a massive amount of data backed up. Something to consider for sure.
As always, I hope this was informative and helpful, and you are welcome to comment on the matter in the section below as well as ask any questions or suggestions that you might have.


