Active Backup for Microsoft 365 and DR scenarios

A little over a year ago I wrote about Synology's Active Backup tool, Active Backup for Business. Their lineup of AB packages includes a total of three options. Microsoft/Office 365, Gdrive, and Business.
In this article, which was a while on the back burner, I will focus on Active Backup for Microsoft 365 (also known as Office 365 up until a while ago). With more and more users and businesses focusing on their work using the "cloud" providers such as Microsoft with their Office 365, and the COVID-19 pushing more and more people from on-premise to their homes, it is no wonder that O365 packages are becoming more interesting.
However, saying this, are you aware that O365 does not include a backup strategy? Some models do include some sort of versioning that could imply some sort of backup, but a good old fashion, off-site backup, no.
If you want to protect your business and content generated with O365 you should also consider its backup. With Active Backup, this is a matter of minutes.
I will start with how to configure AB for the M365 task and use the User Portal to restore what's needed, and missing in case of a problem. Later on, I will focus on the disaster scenario for your Active Backup, or what to do if your NAS explodes and you have to restore Active Backup from backup (yes having a backup of a backup is a thing!).
Table of Contents
1. How to setup Activate Backup for Microsoft 365
2. How to use Active Backup with M365?
3. Active Backup for M365 - backup/disaster scenario options
- Hyper Backup with C2 - partial backup solution
- Configure Hyper Backup with C2 to backup Active Backup content
- Remove Active Backup M365 task and delete the local folder with backup content
- Restore Active Backup content from C2
- Re-link Active Backup M365 task back in your Active Backup console (after Hyper Backup C2 restore)
- Configure Snapshot Replication to backup Active Backup content
- Scenario 1 - Replication restore
- Scenario 2 - Replication failover
How to setup Active Backup for Microsoft 365?
Activation
First, you need to install the package itself, so go to Package Center and install it.
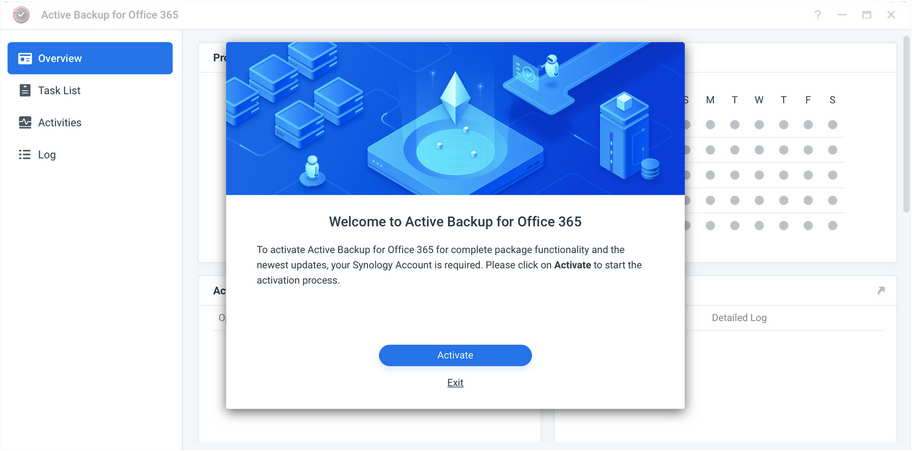
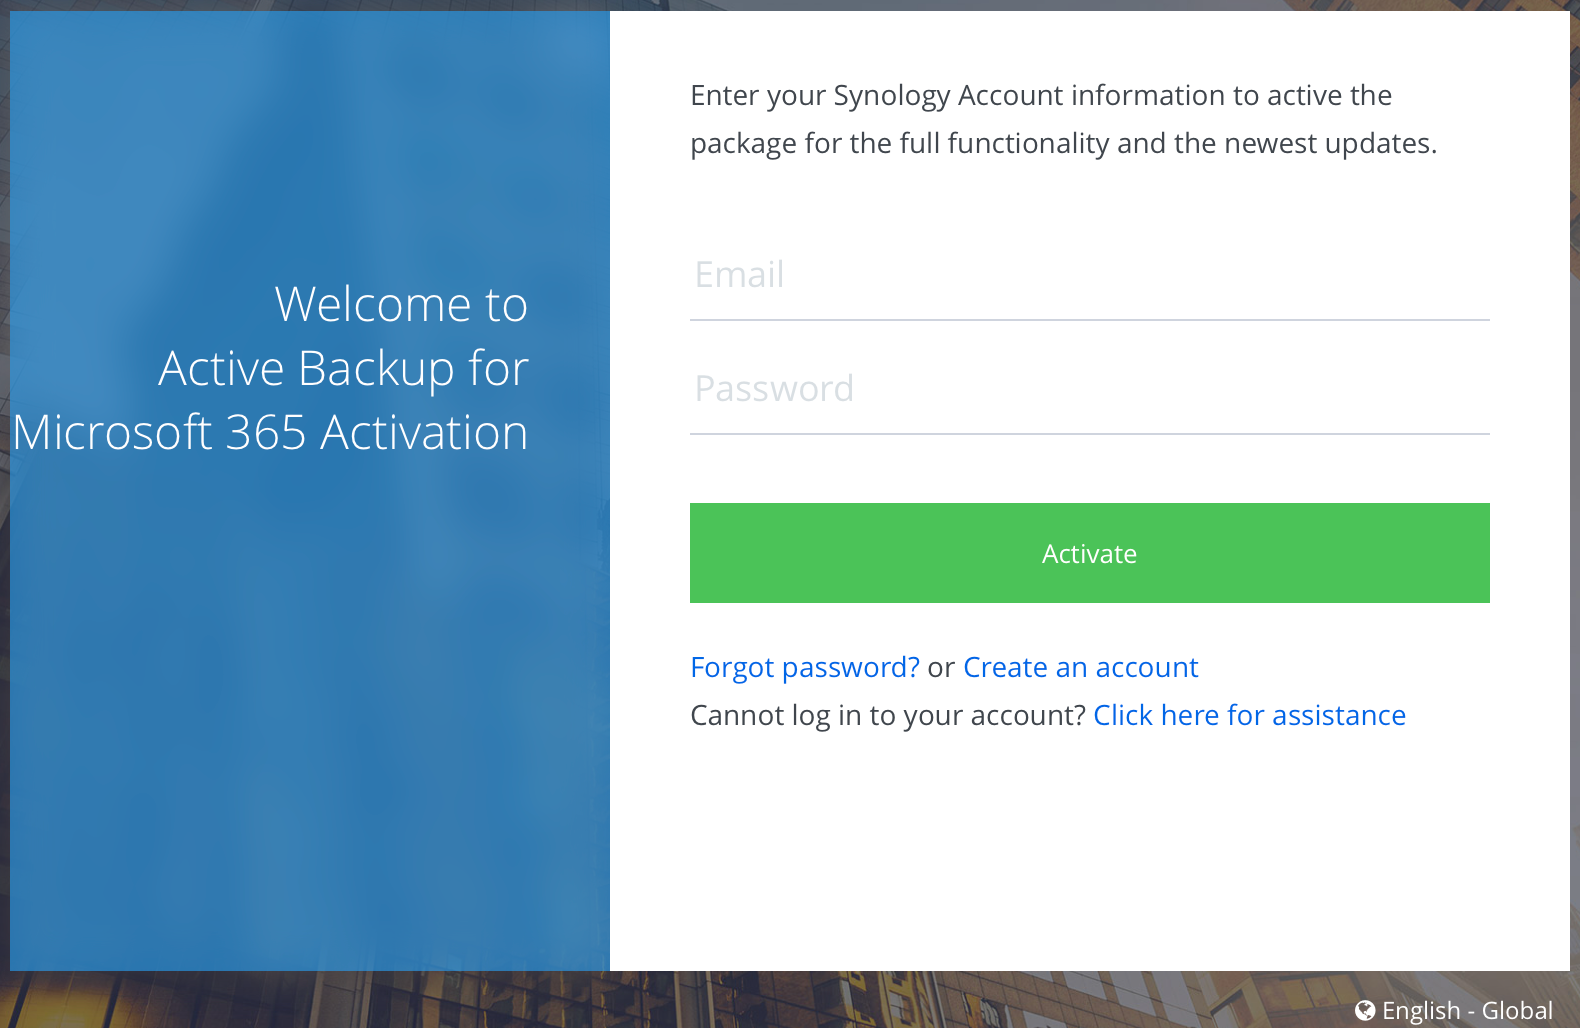
As soon as you start it you will be presented with this screen. You need to activate Active Backup on your NAS using your Synology Account. If you don't have it you can create one for free.
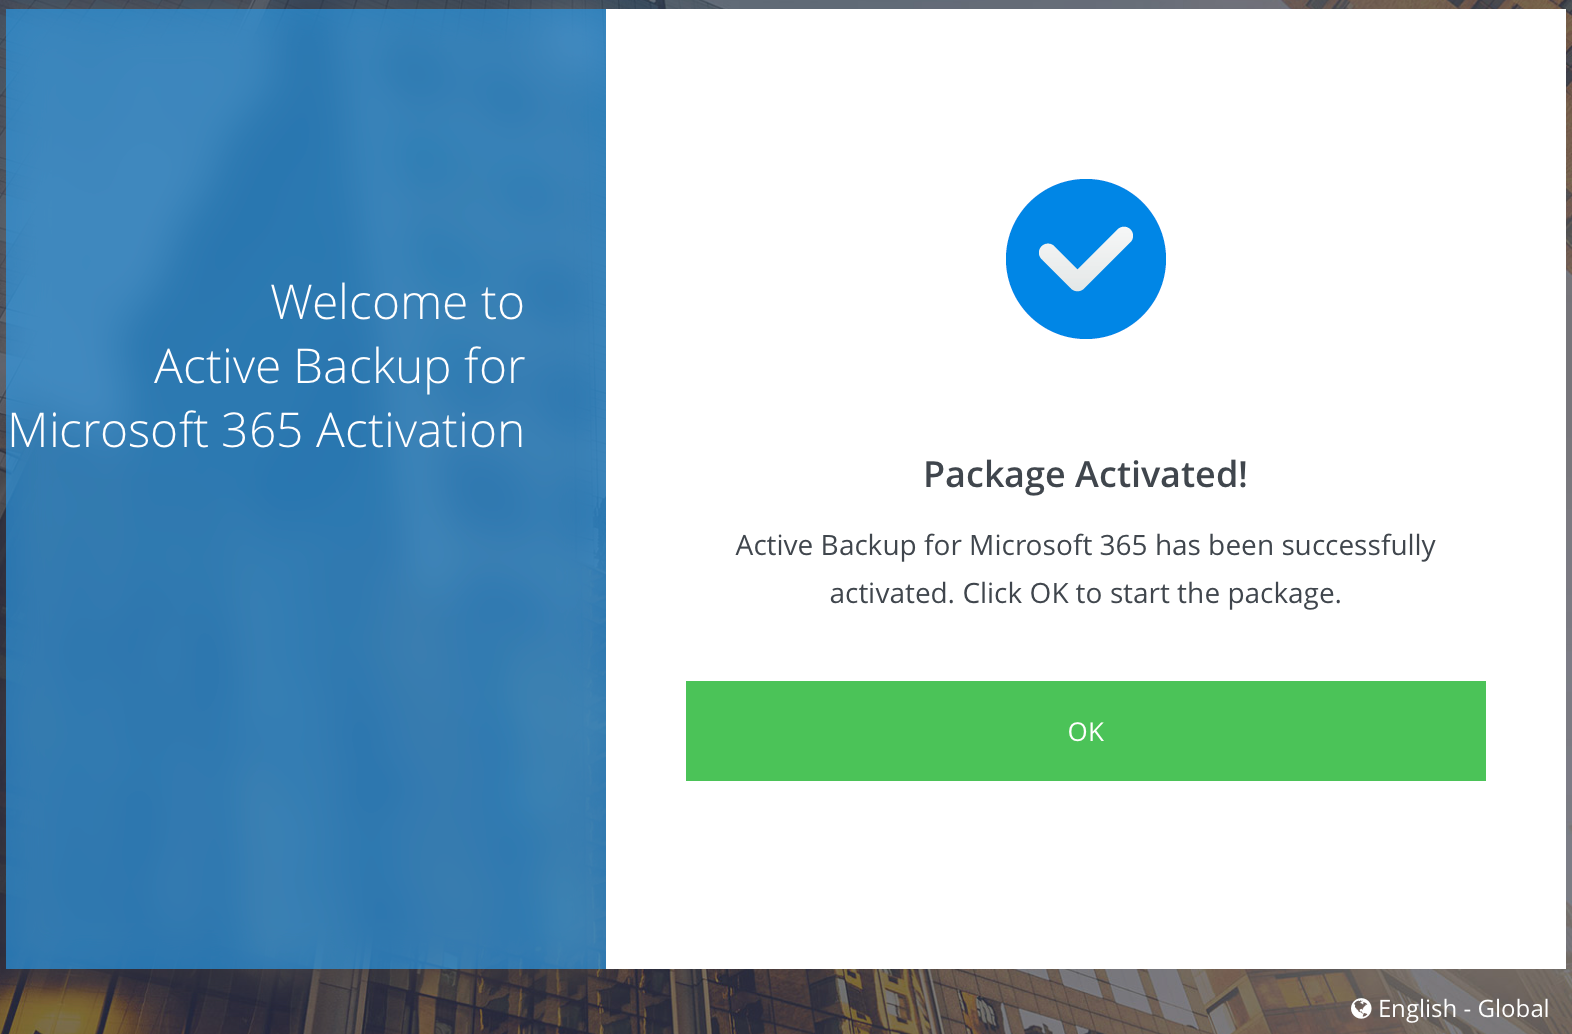
Upon activating you will be able to start making tasks for your O365 backup.
Set up your M365 task
Now that you have a functional setup, it is time to configure the task itself. Start by opening Active Backup and you will be presented with the following screen:
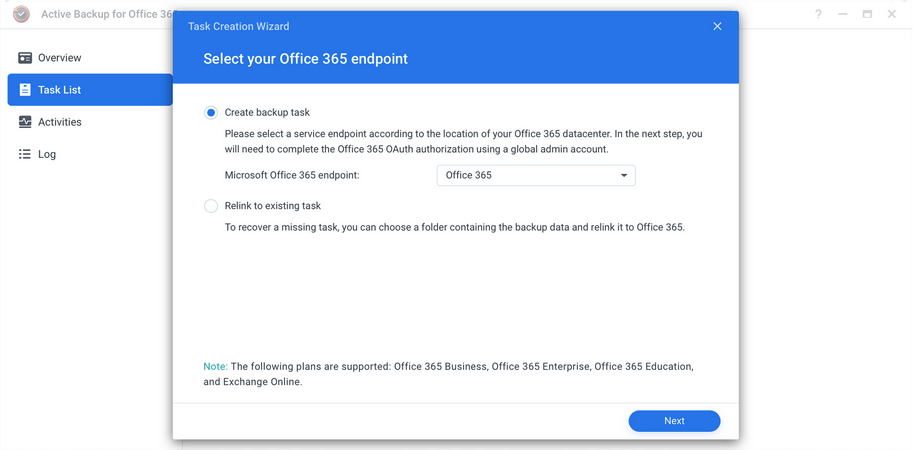
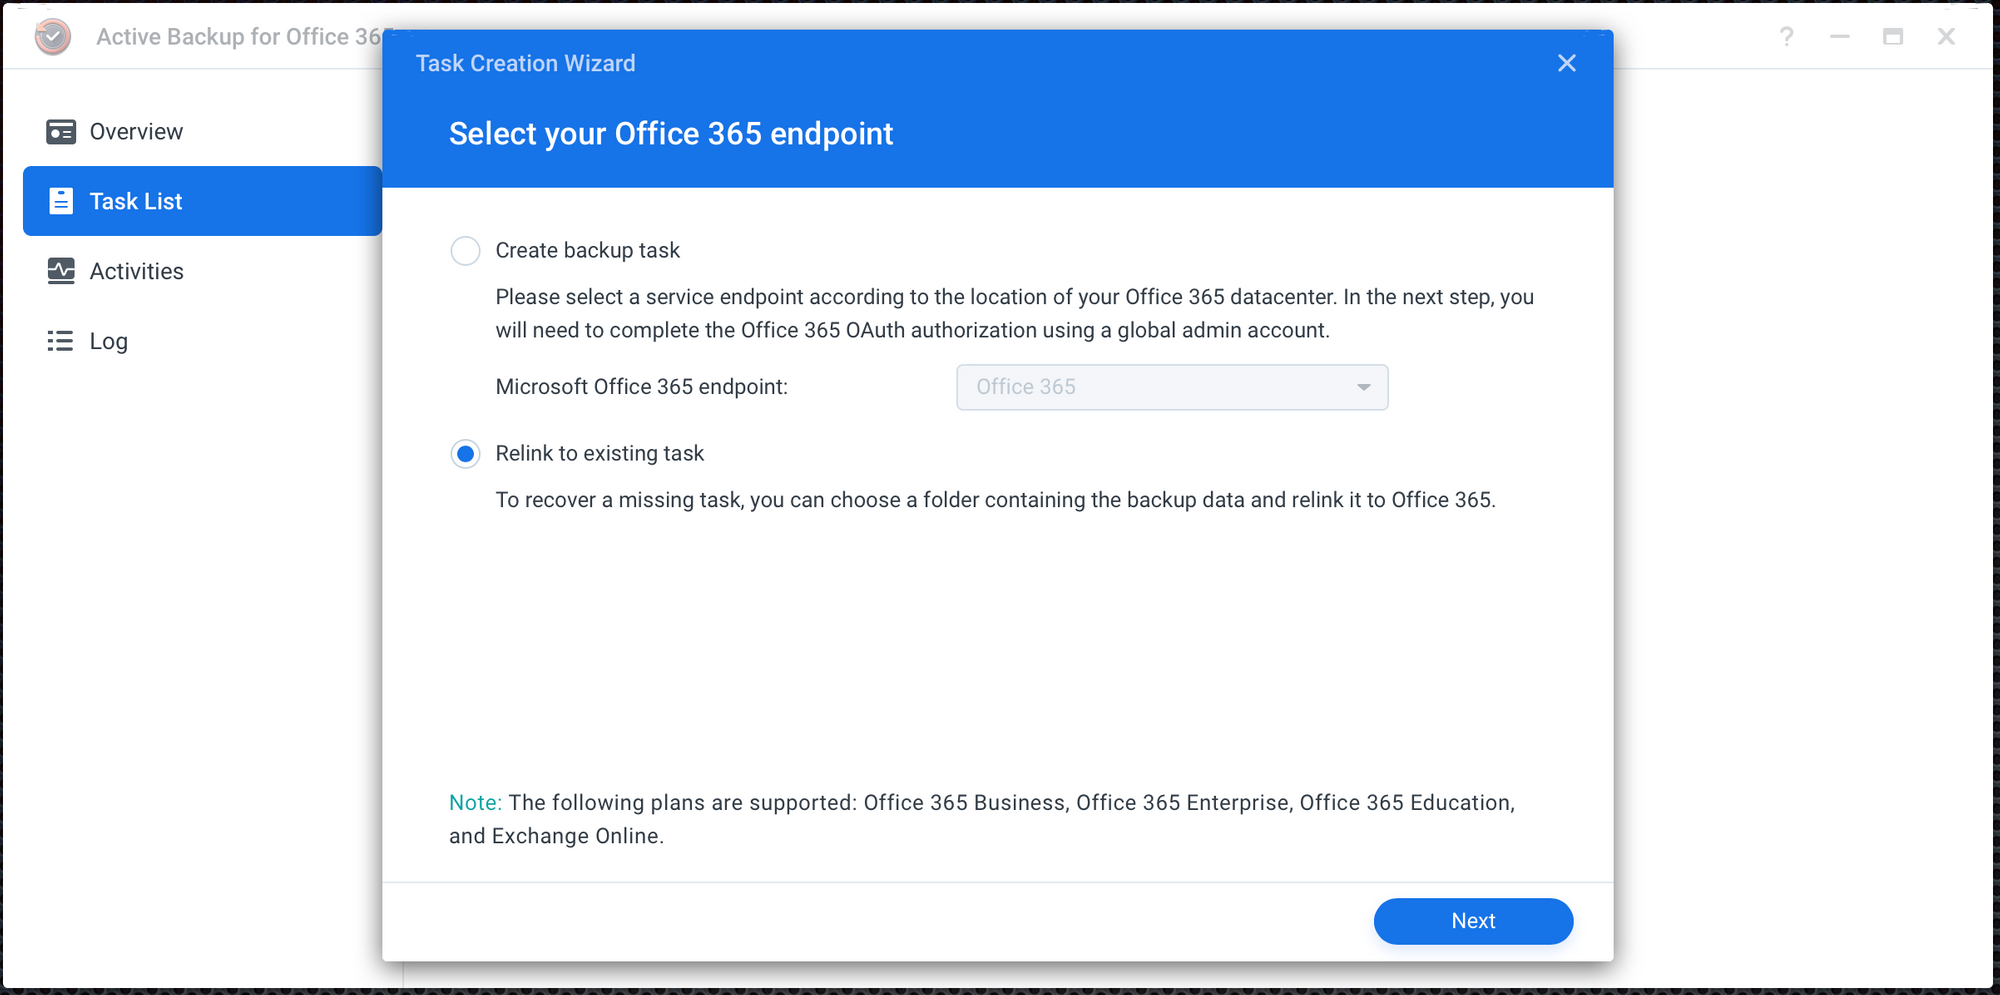
You will have two options here. To make a new task and to relink to an existing task (I will cover this later in the article).
After you click Next you will authenticate in a pop-up, to your O365 account and will be redirected back to the wizard steps.
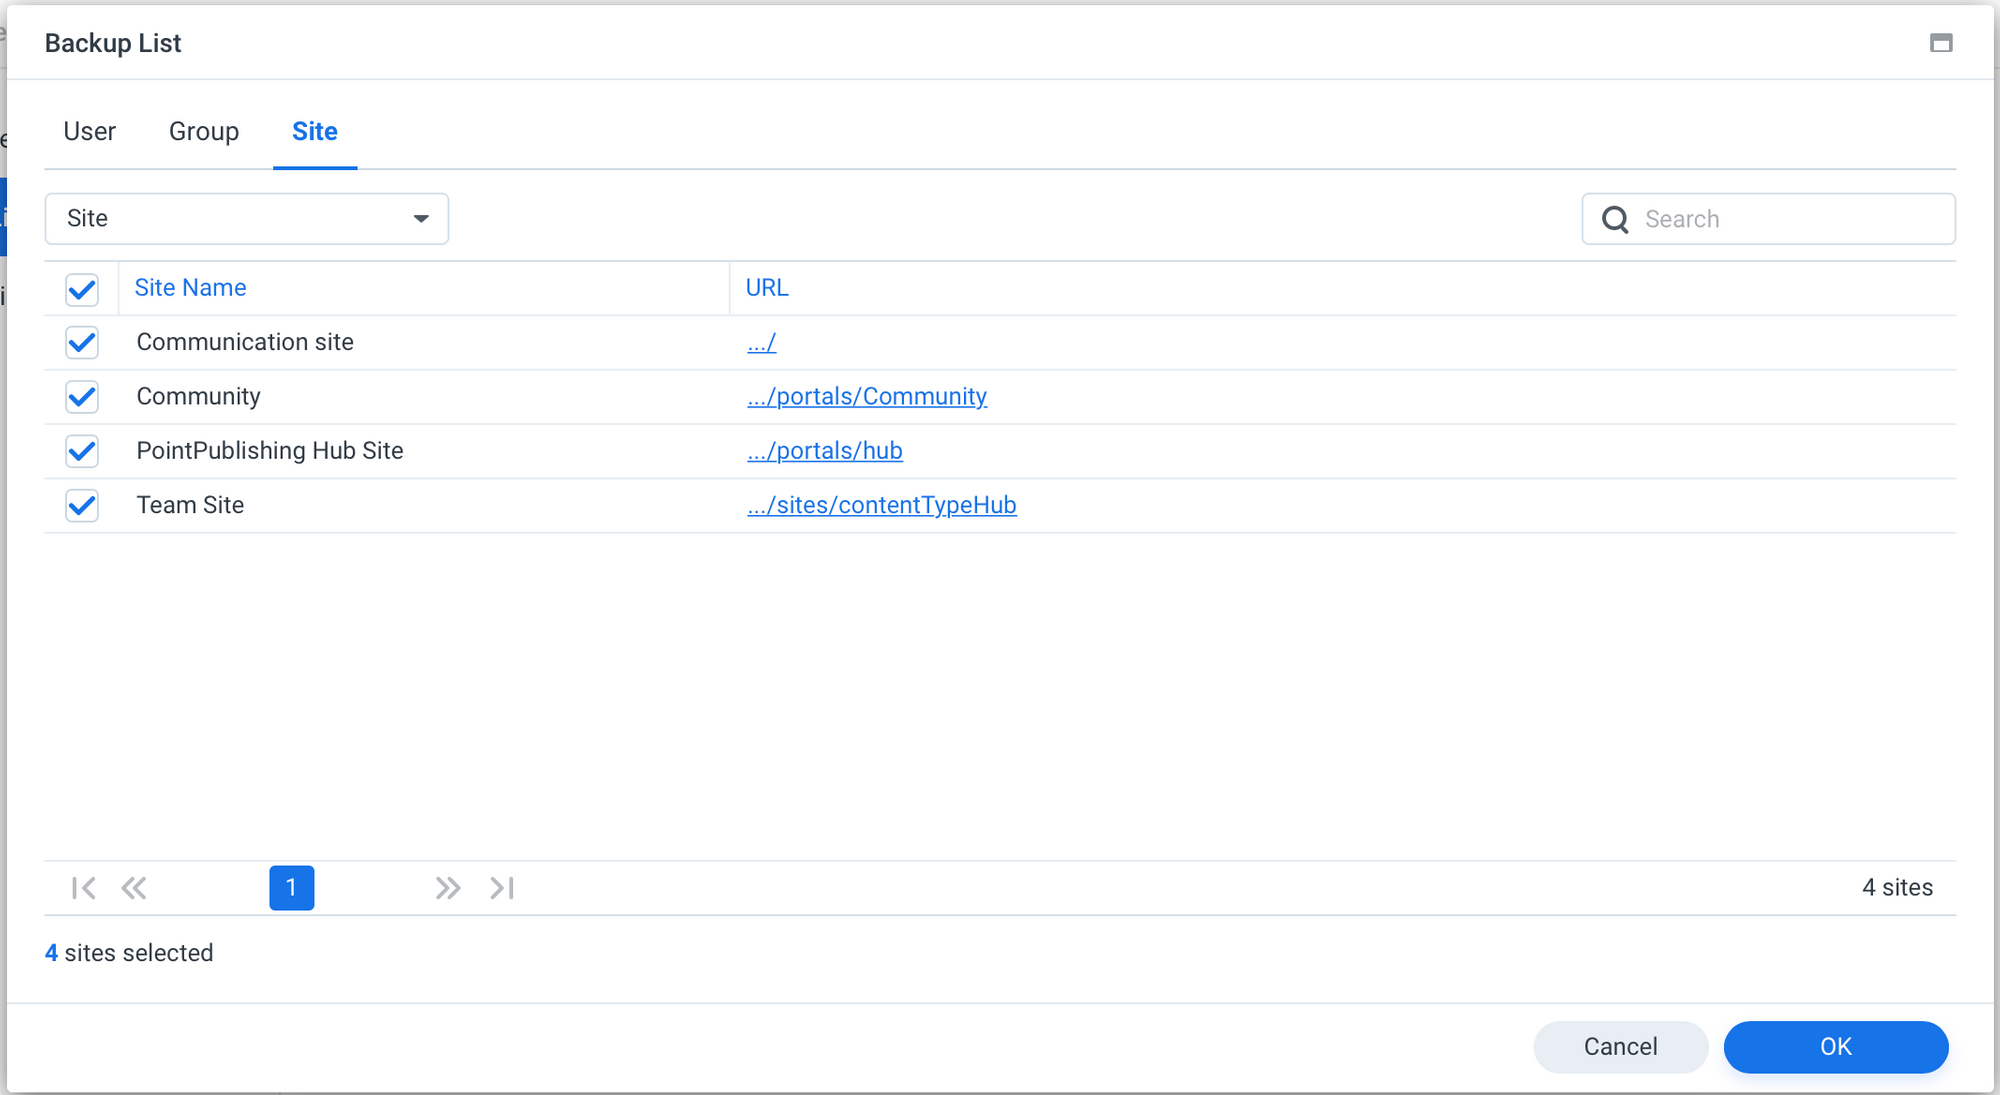
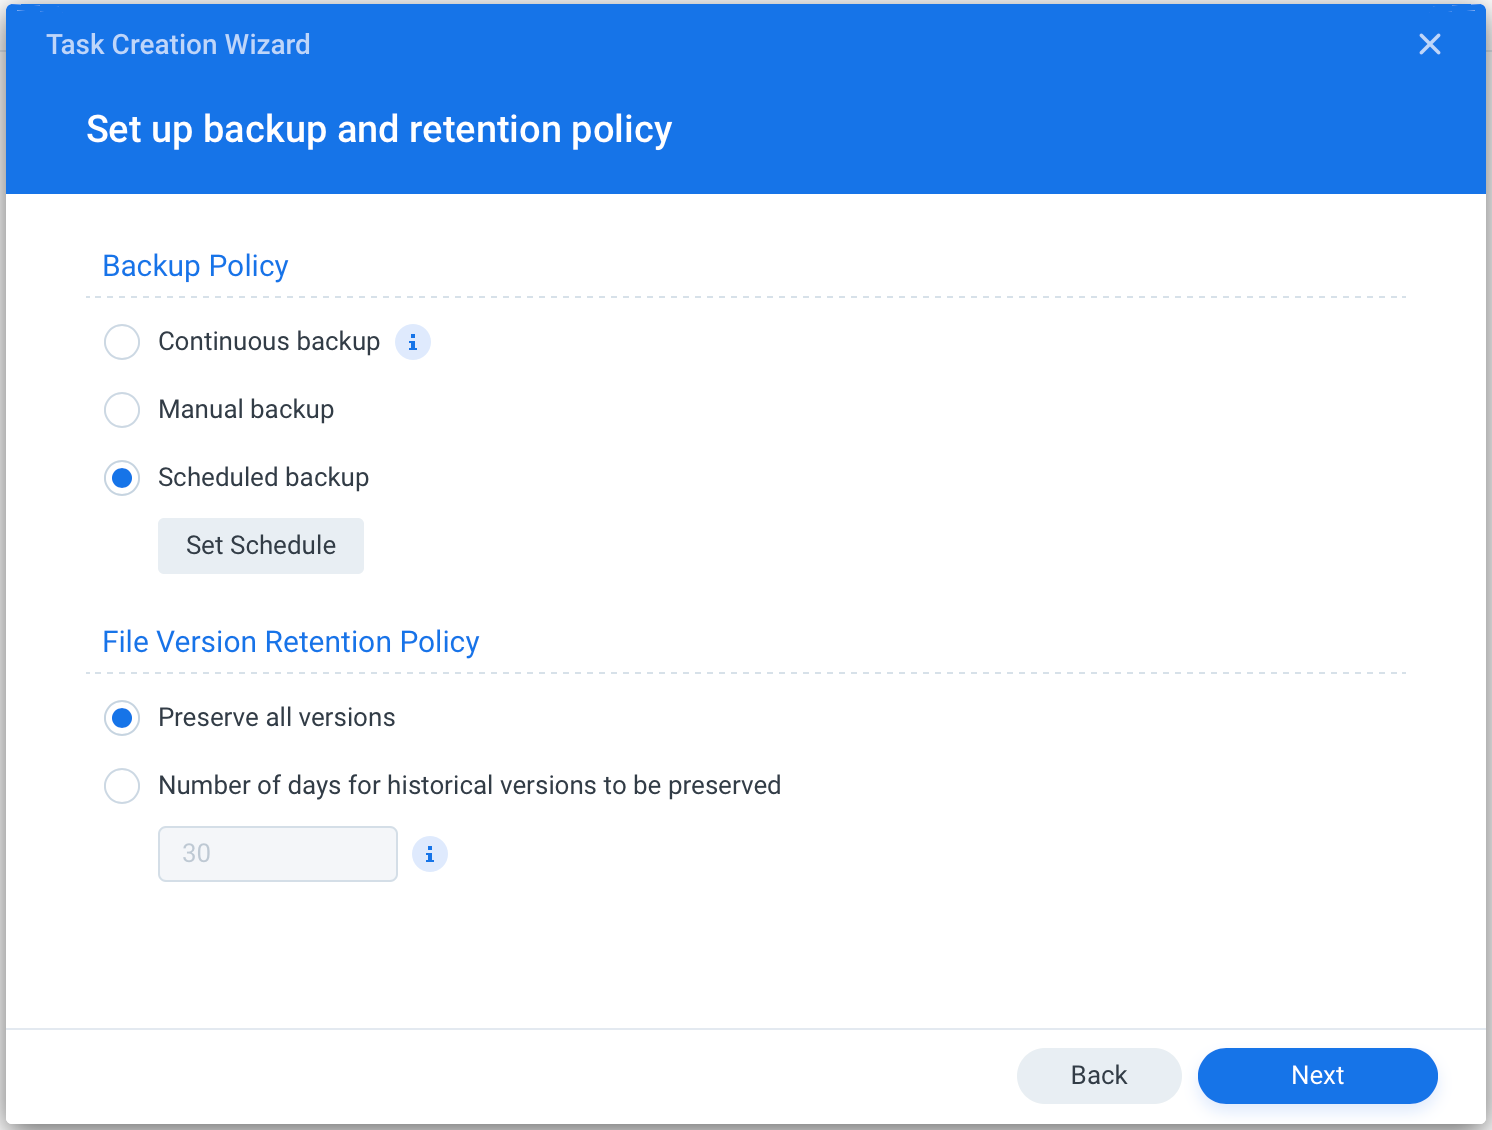
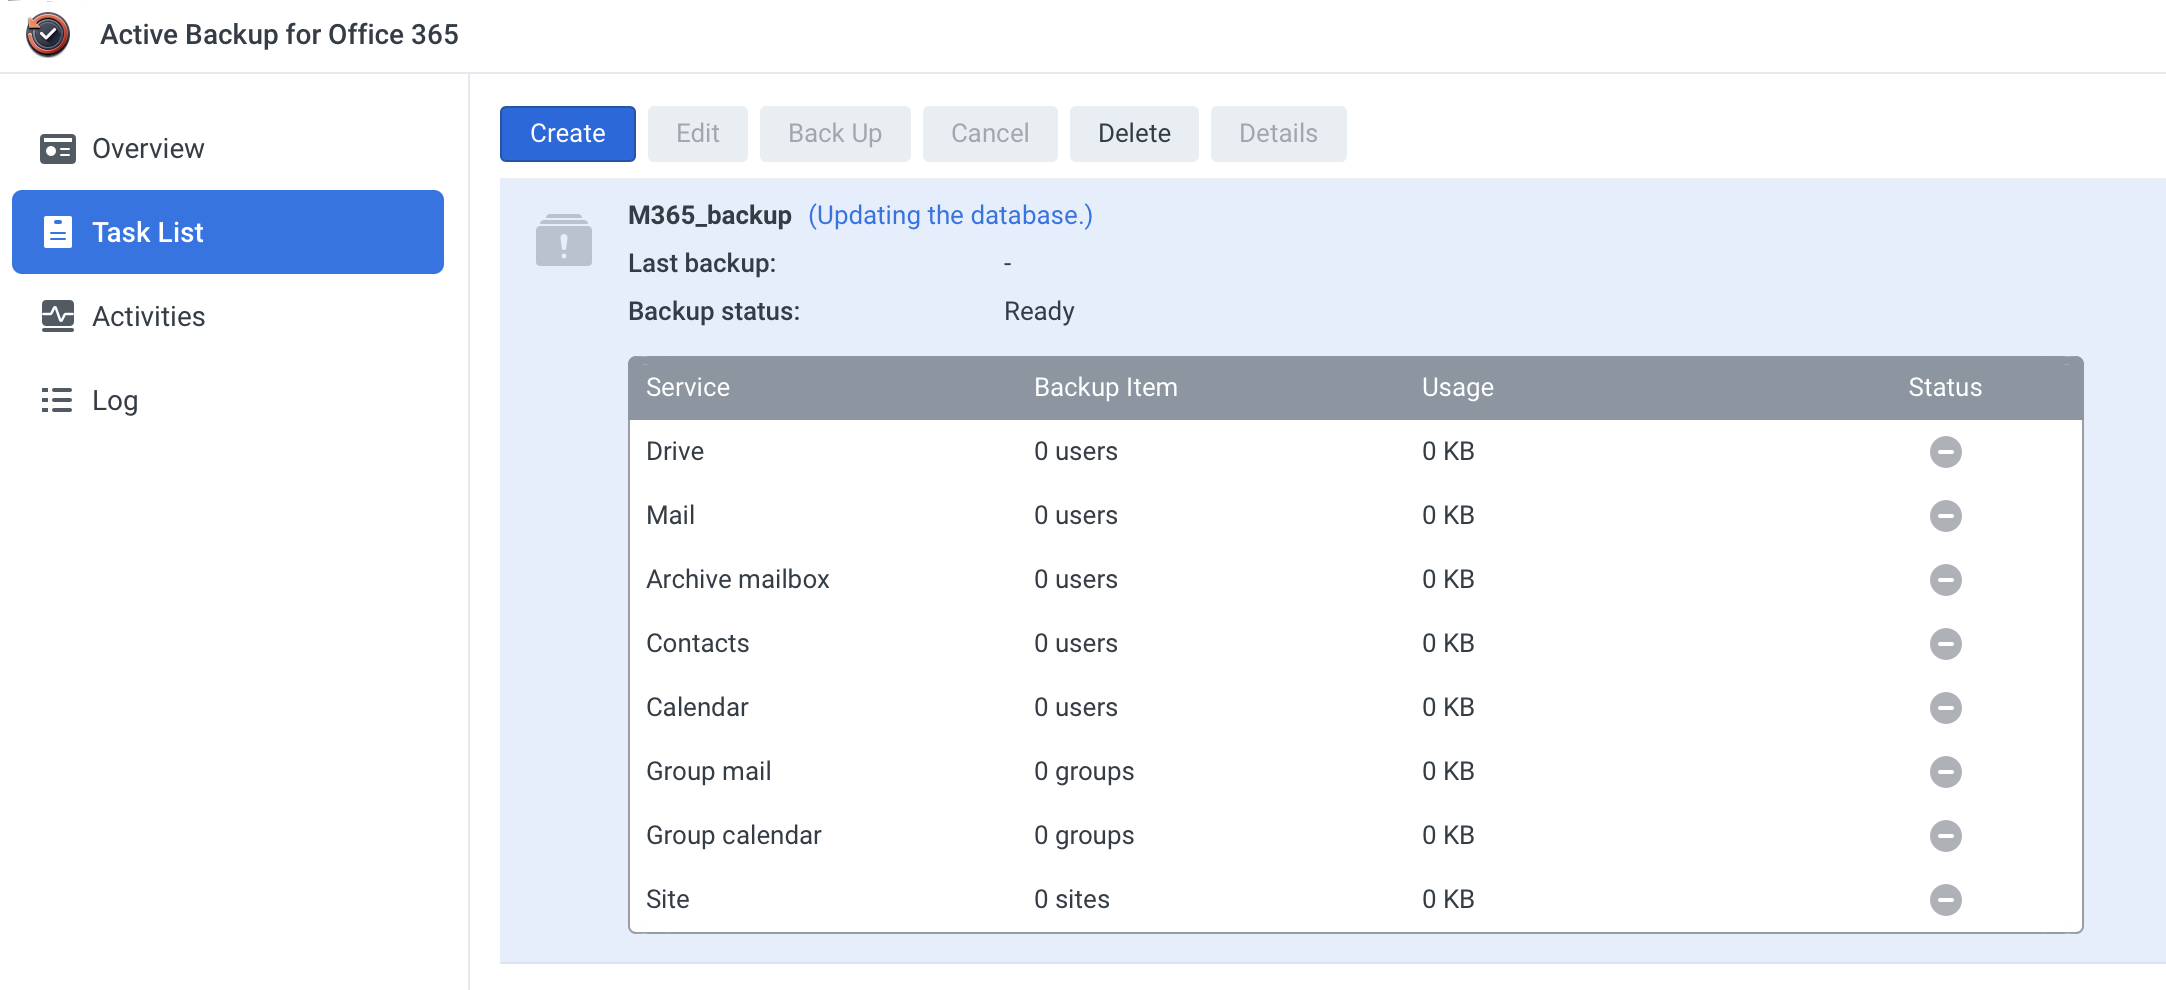
In the following step you start to configure your task by entering its name, selecting what to backup (users, Sharepoint sites, emails, etc), and also how often to do it. Finally how many versions to keep as well.
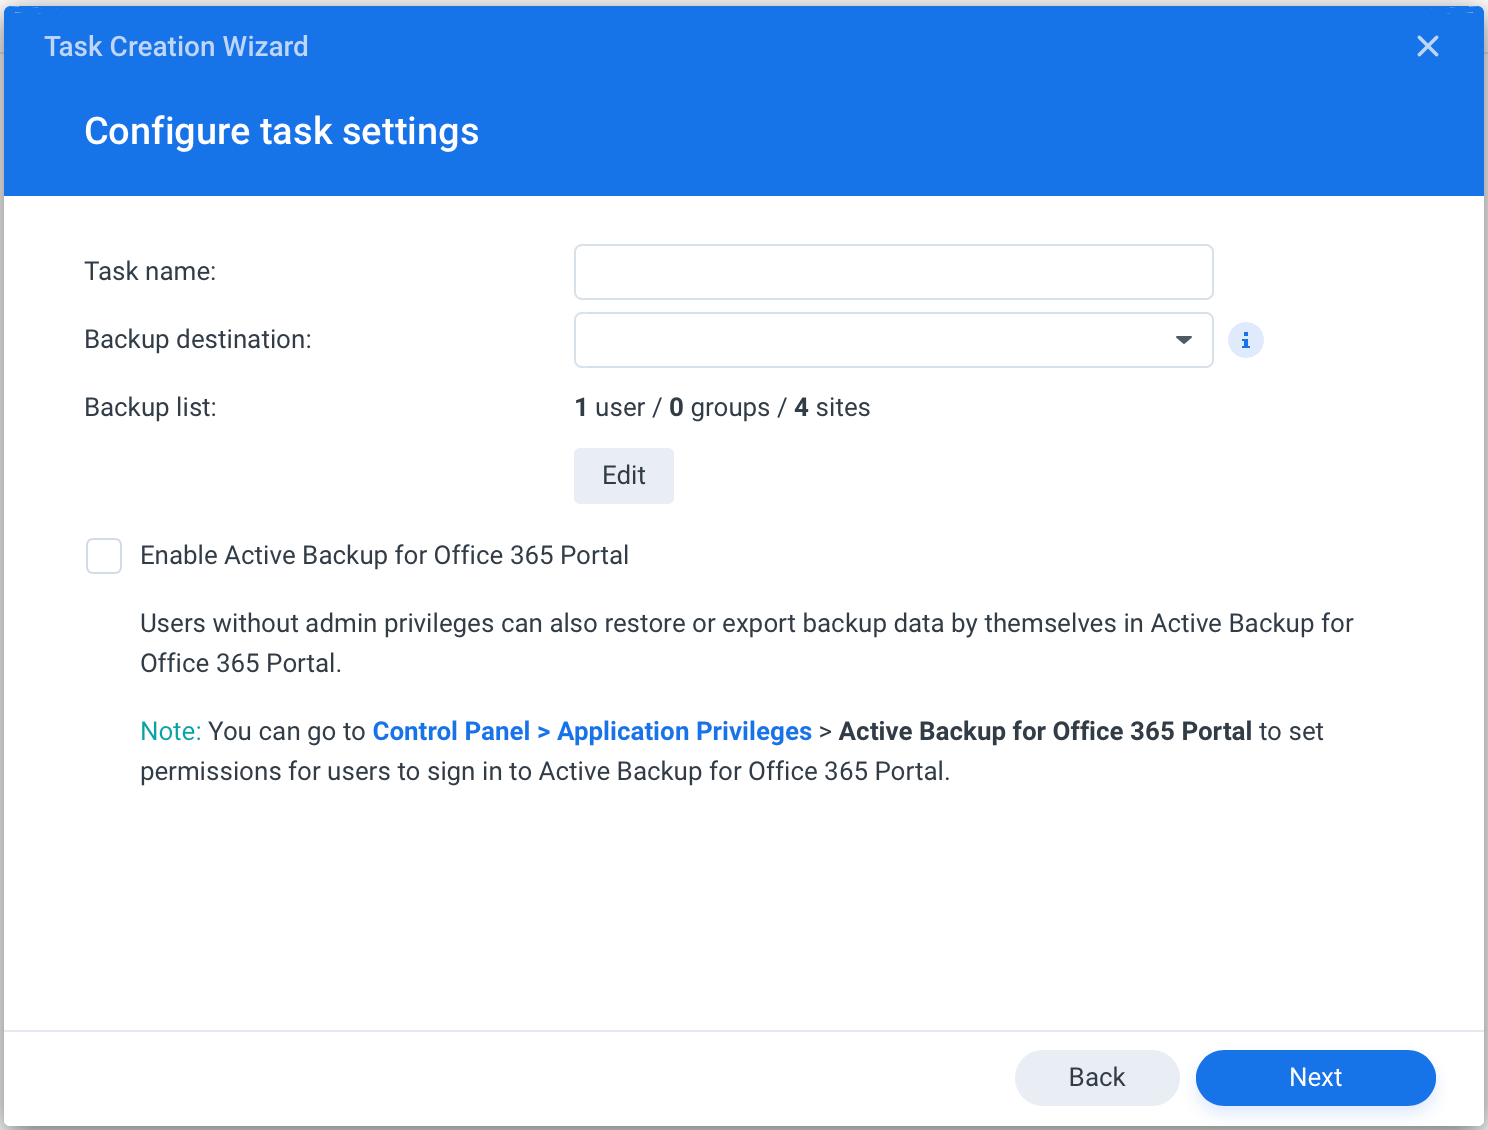
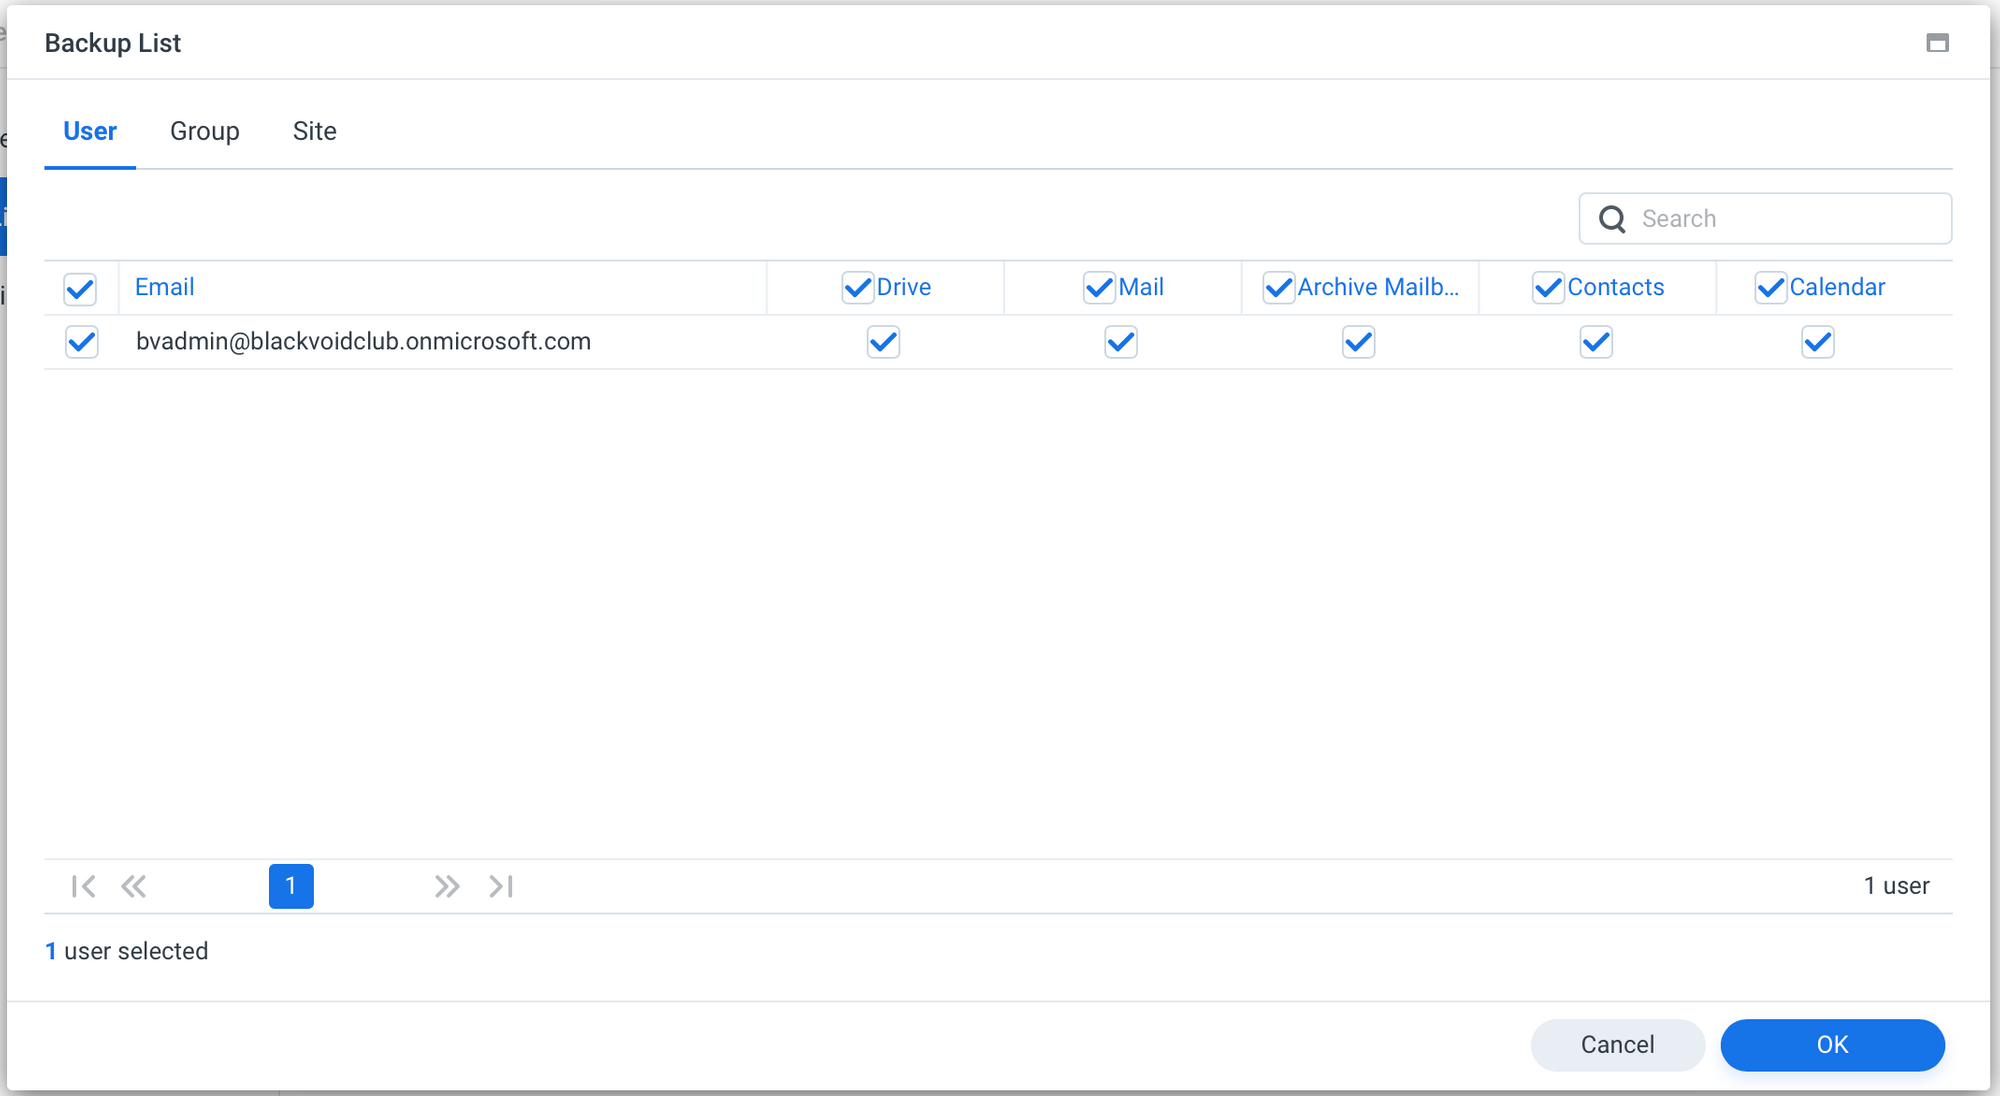
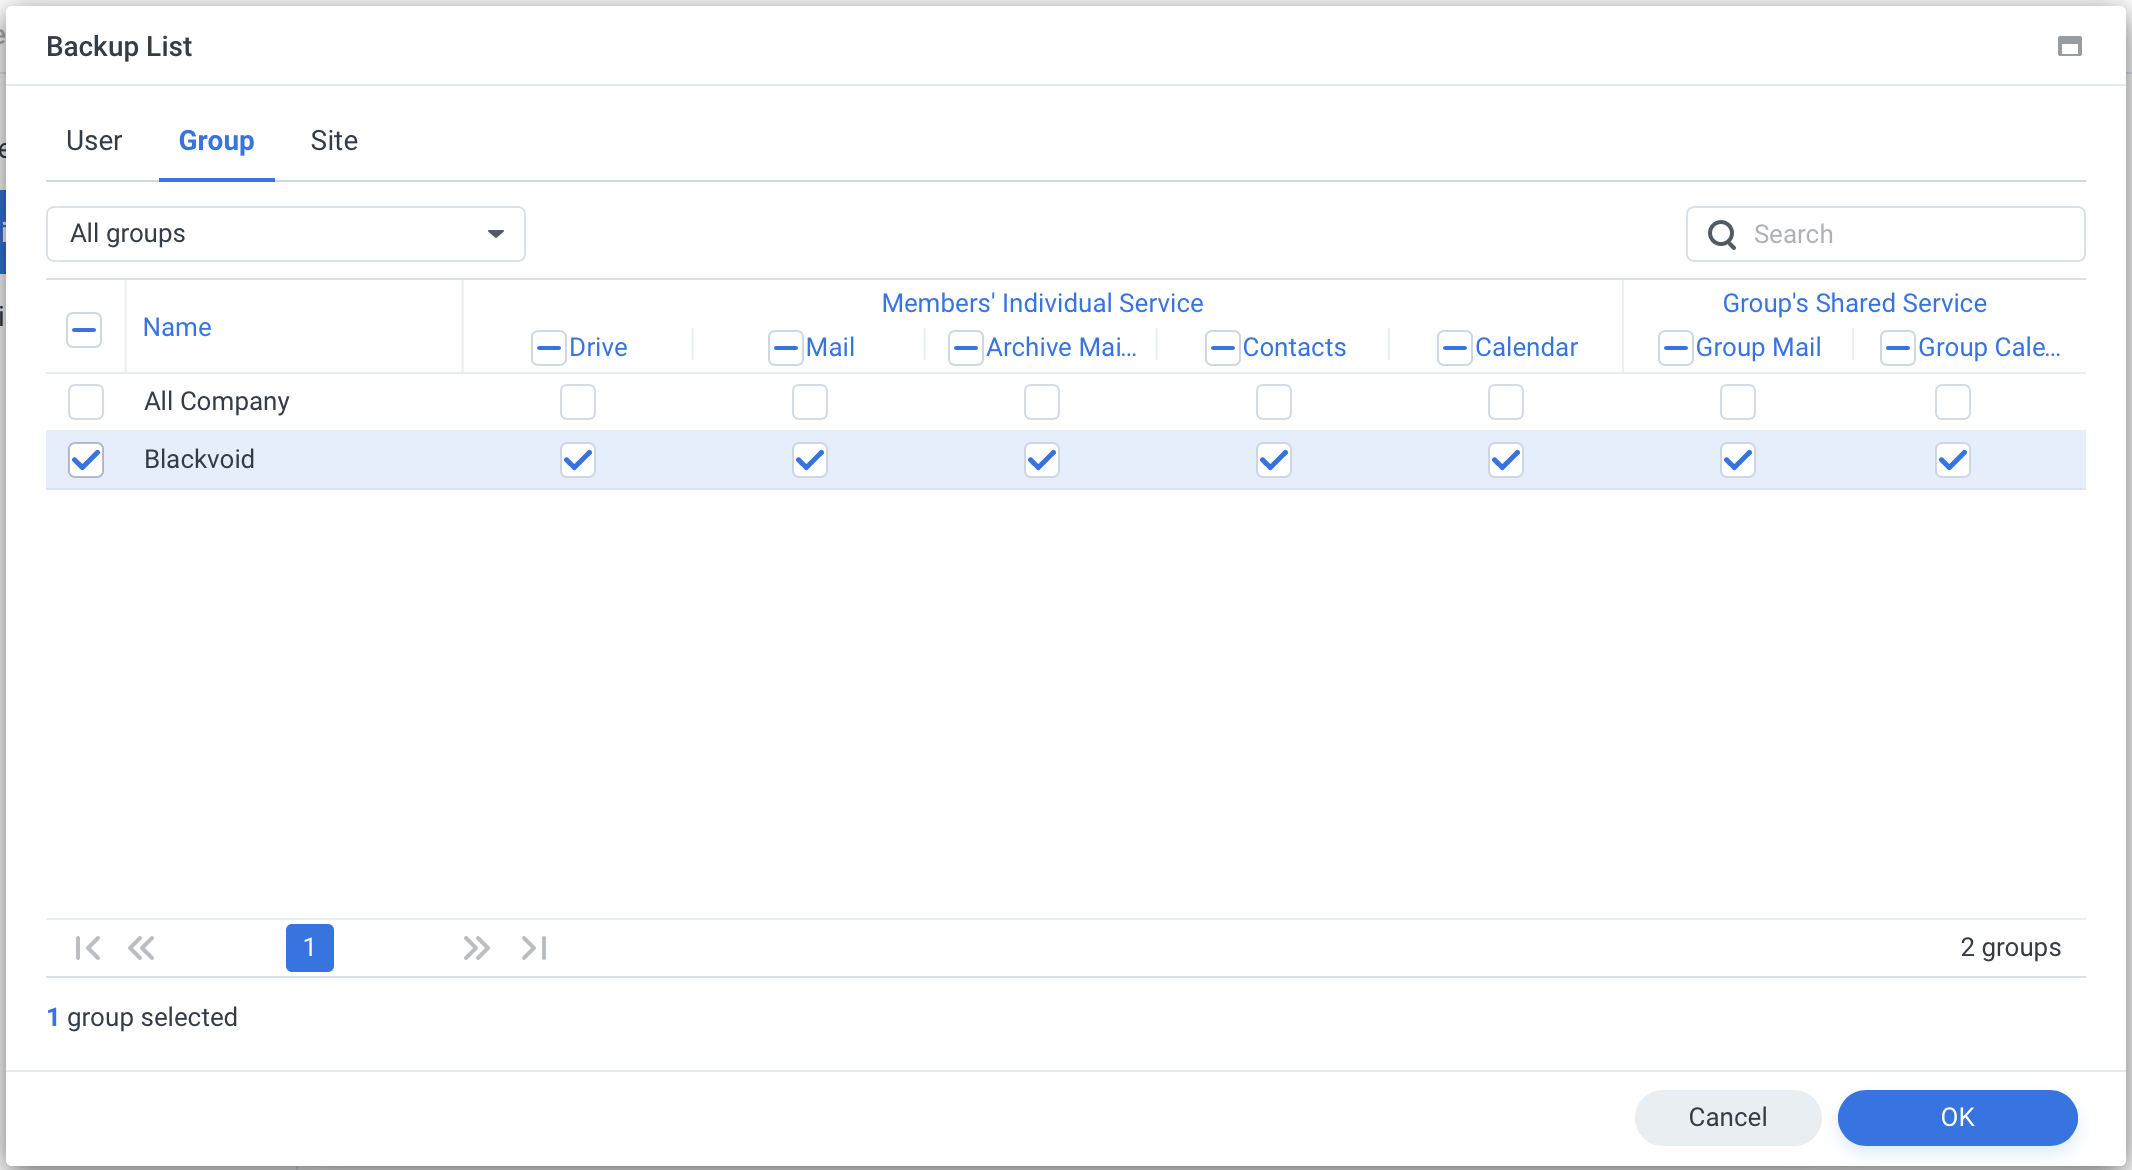
When you fine-tune your task options, finally you can select how often you want a backup to kick in and how many versions to keep.
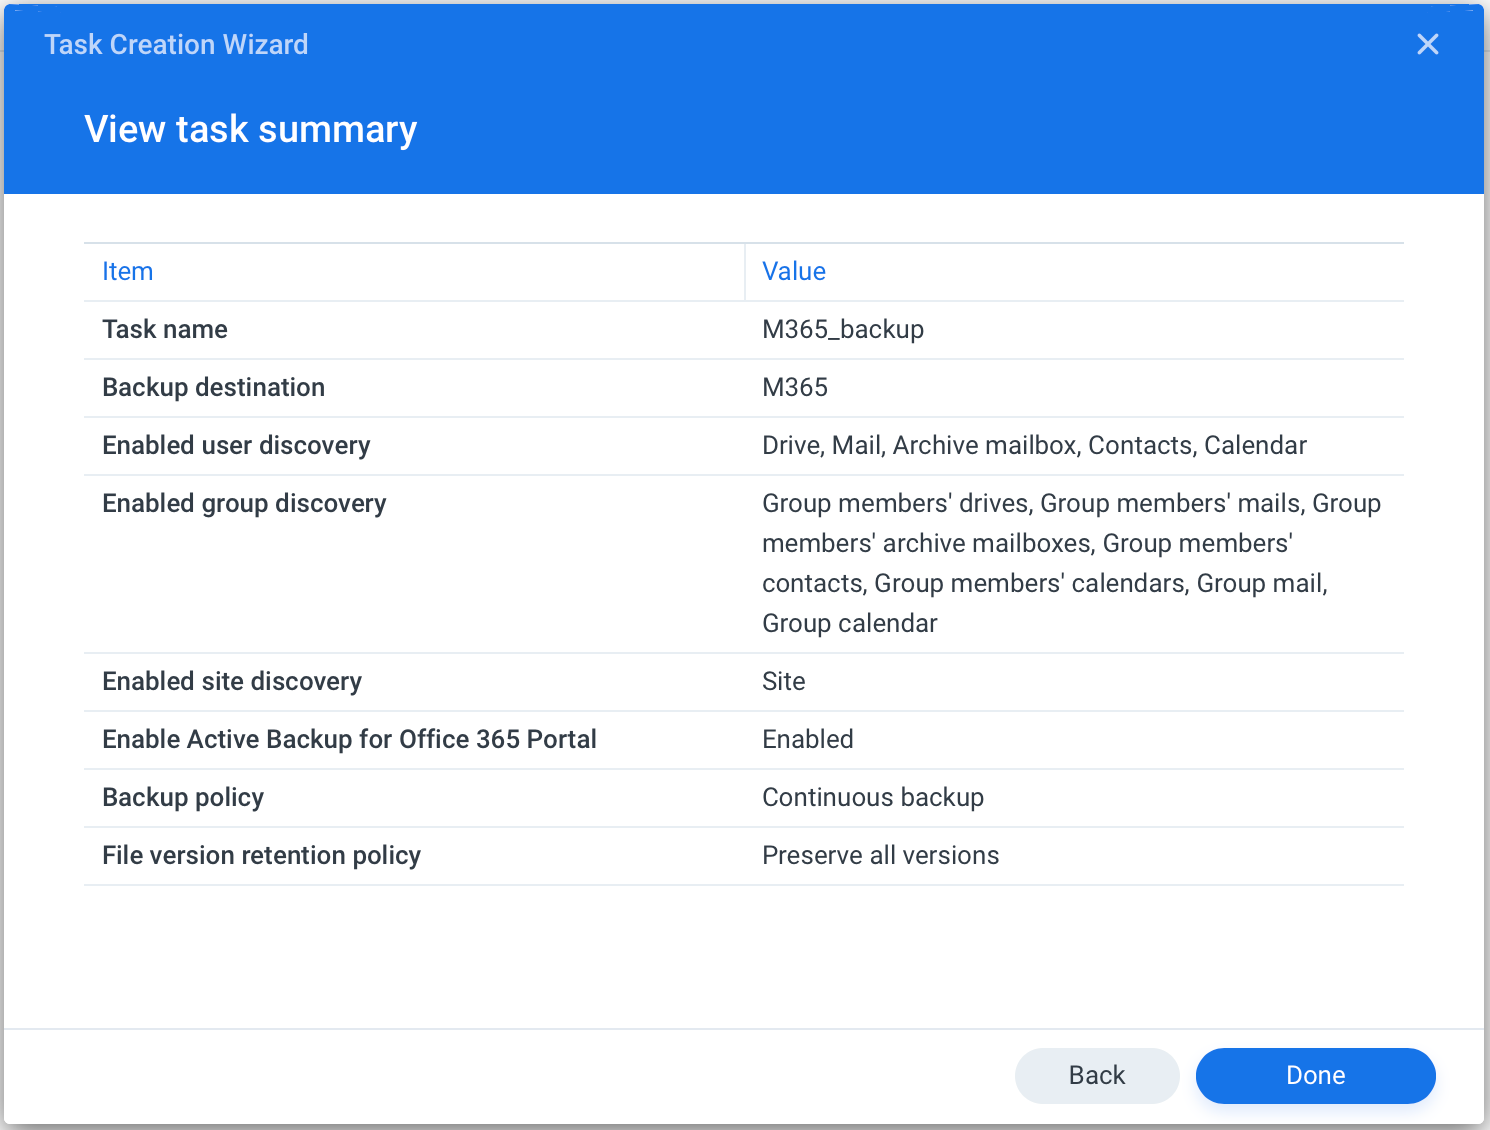
Click Done and that is it.
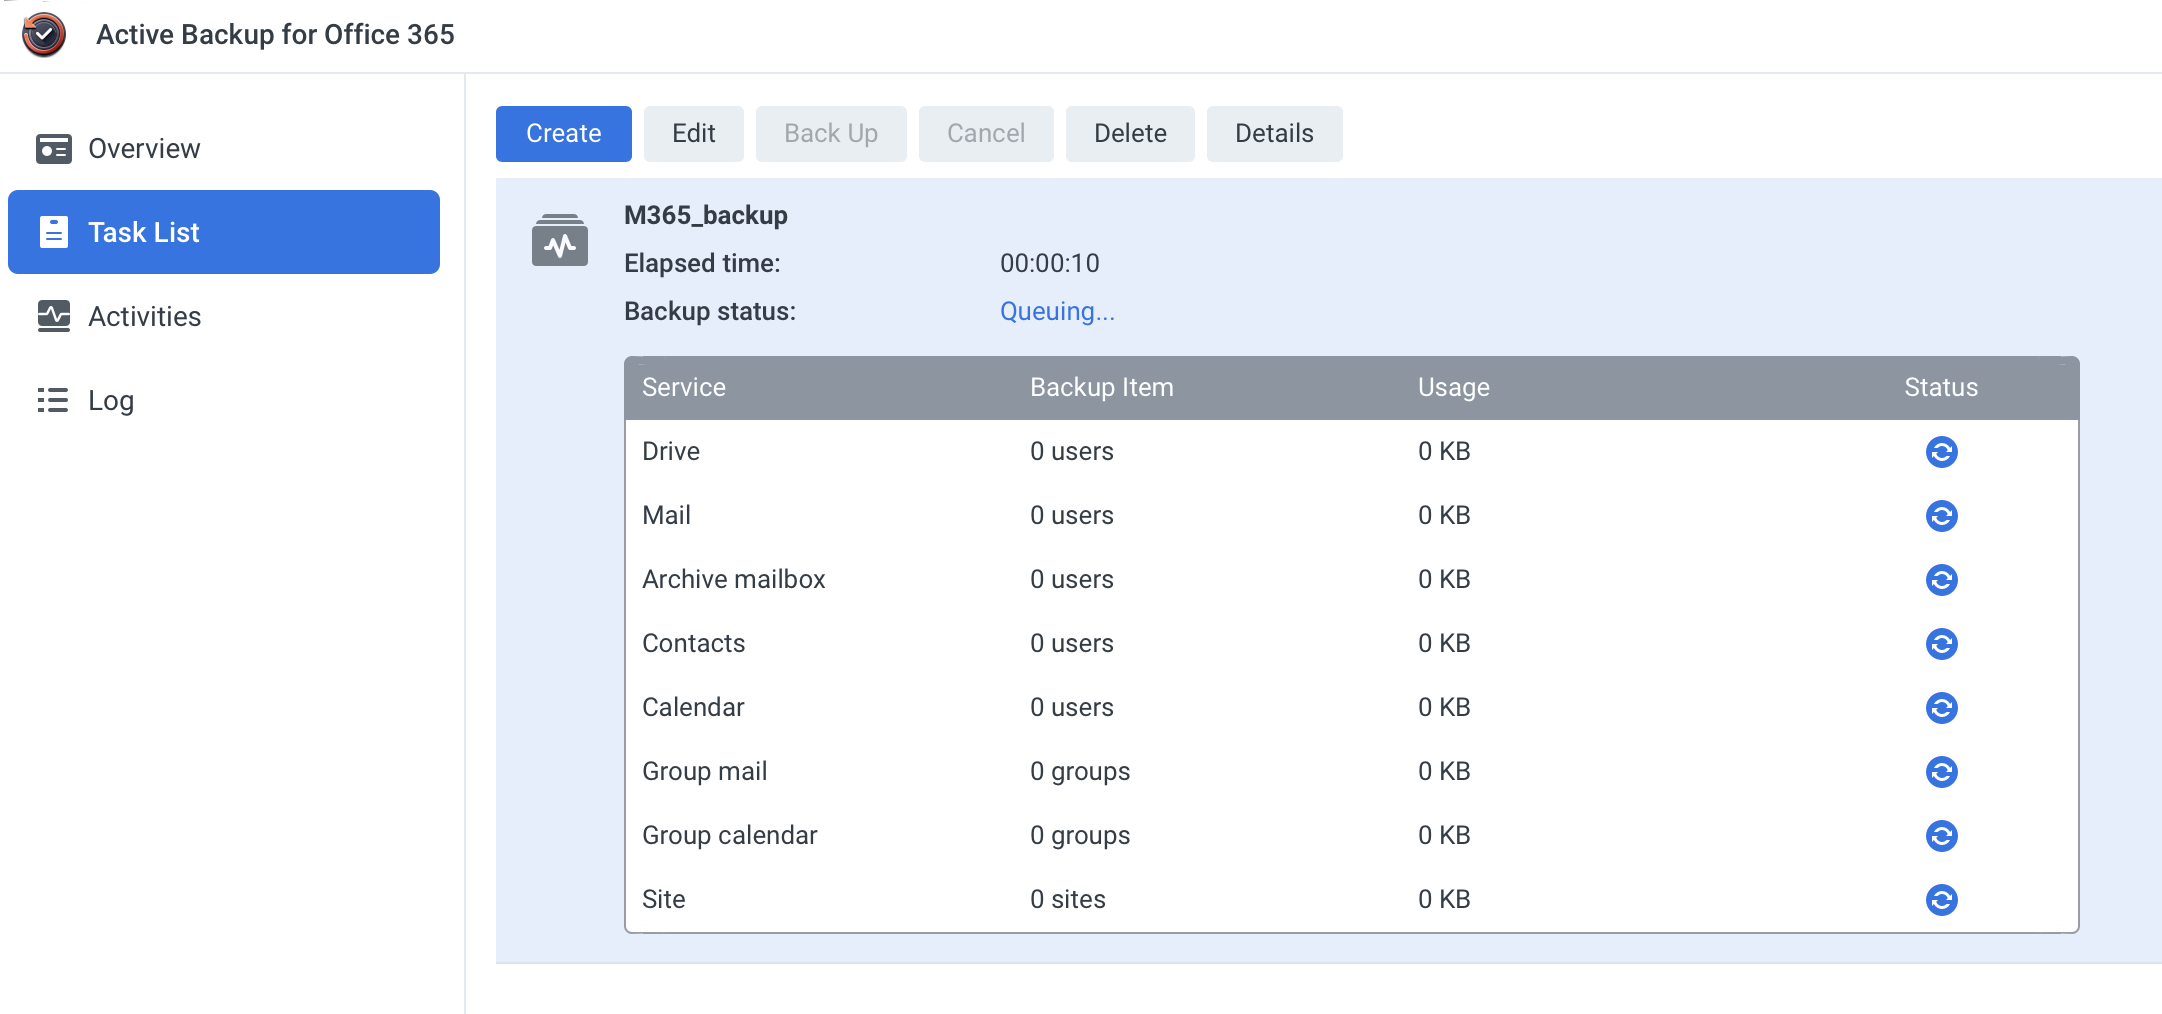
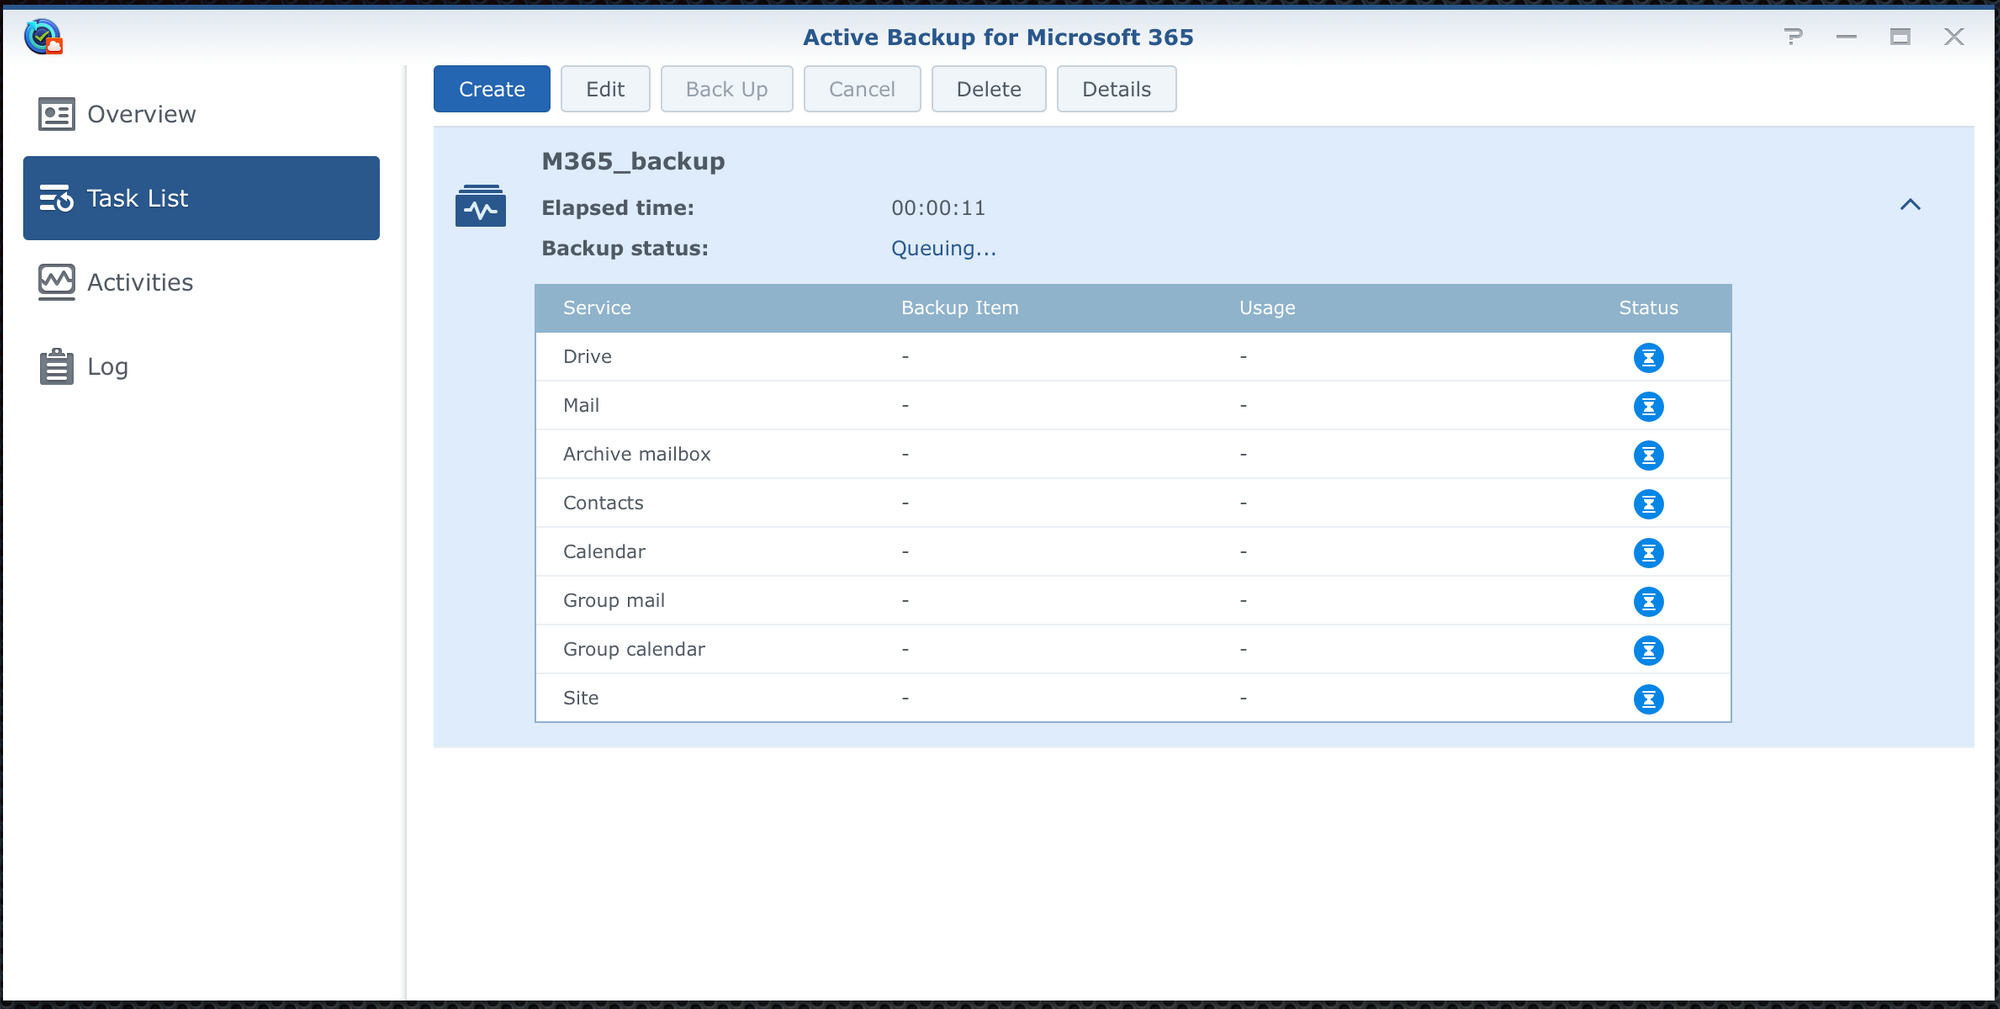
Active Backup will start to backup your site and settings right away and it could take some time for it to complete depending on how much information and content there is.
So there is nothing too it. The setup is fast, straightforward forward and you can't miss almost anything. One thing to point out here is that you can of course have multiple tasks for the same instance. Considering that you can fine-tune what to backup, when and in how many versions, you can have any number of combinations depending on your O365 size, backup needs, and any other factor that you can think of.
Next, let's see how we can control and use Active Backup from a user perspective. How to access your files, export them, and restore them if needed.
How to use Active Backup with M365?
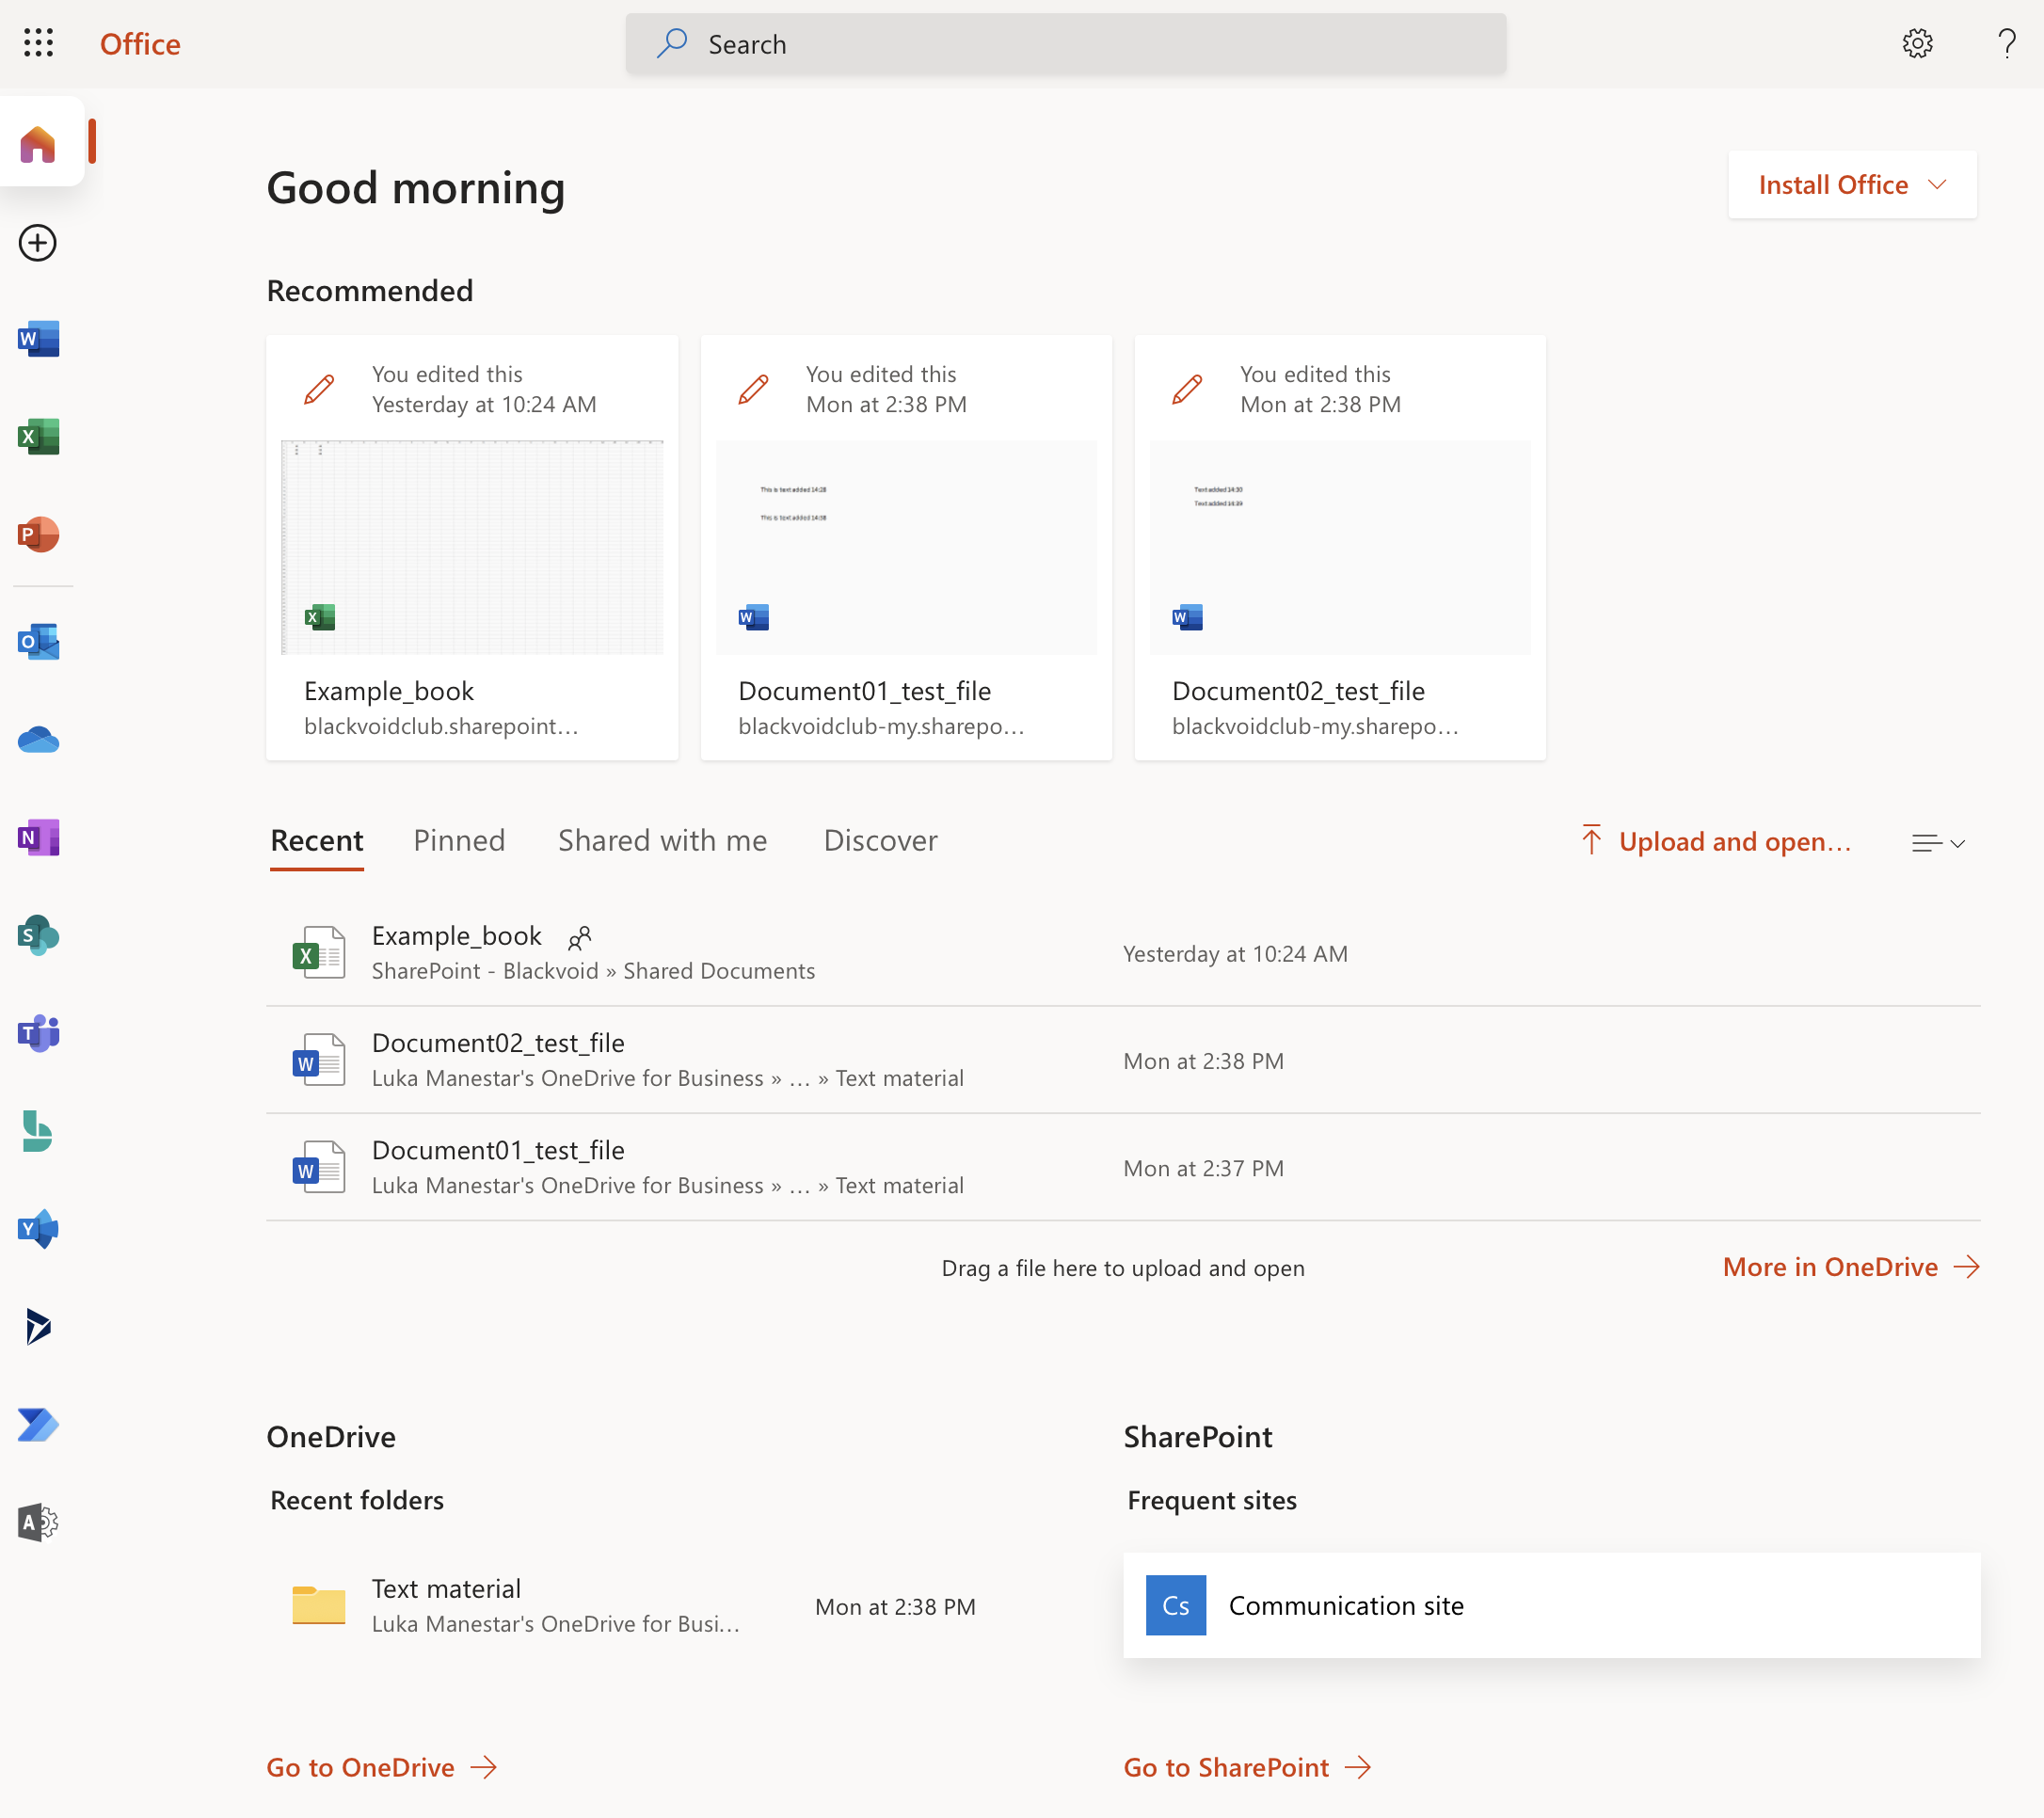
As an O365 user, you can access all your apps using the https://www.office.com URL. After login you will be presented with the following page:
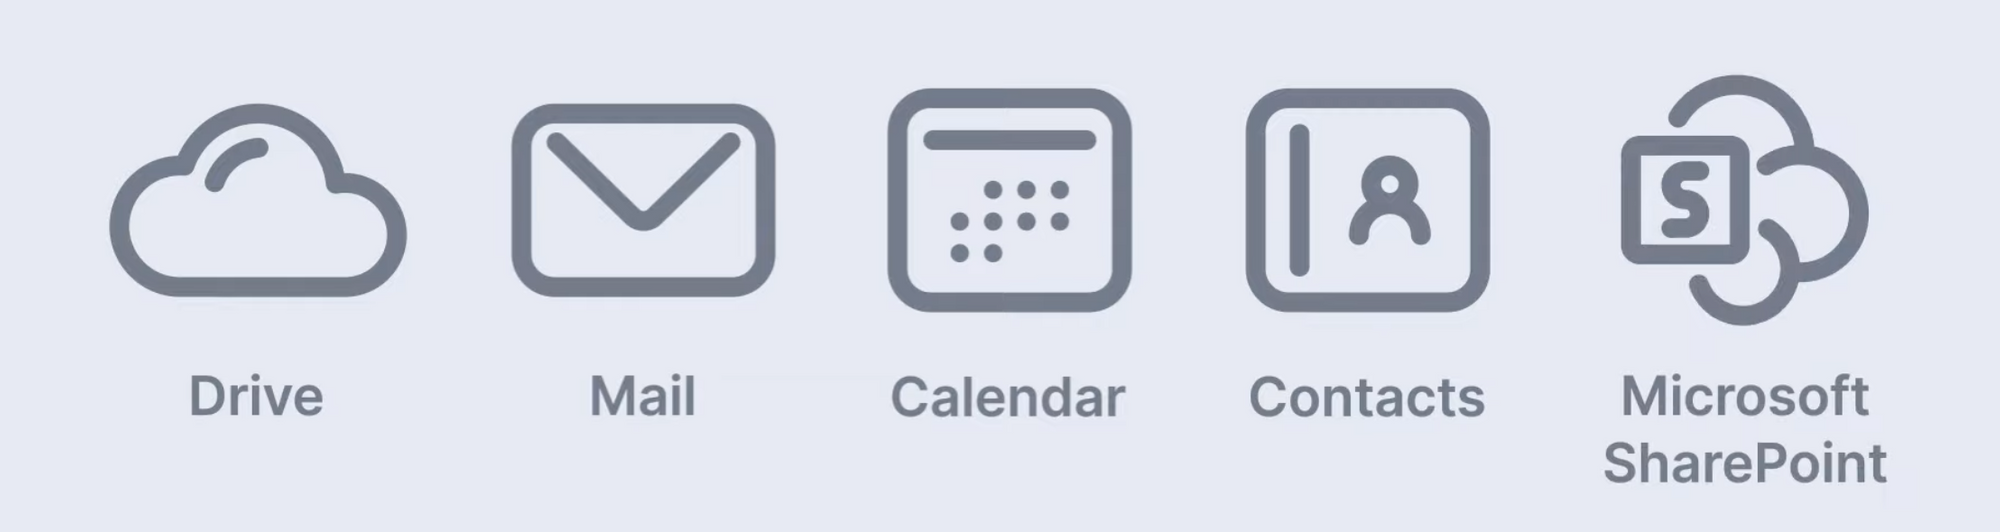
Looking at the apps that you can use with O365 the main question now is what will actually be backed up with Active Backup for M365?
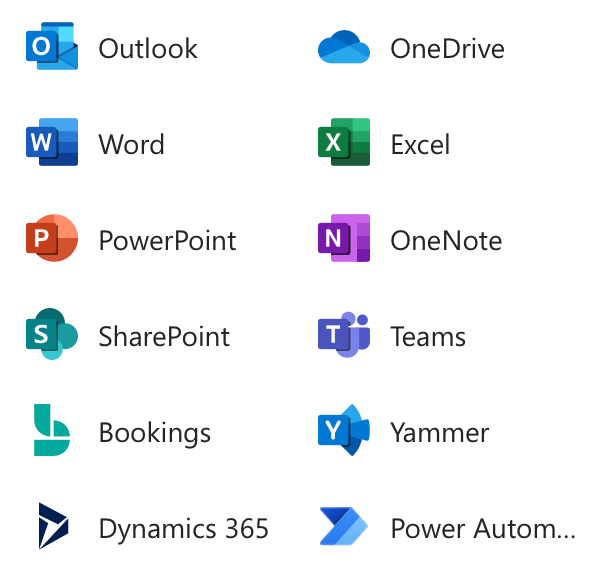
From the image above you can be sure that all the apps and their content will be backed up apart from Teams, Bookings, Yammer, etc. If any of those apps have their content saved to OneDrive or Sharepoint sites then that content will be backed up.
Also, on the list, we have some other elements missing that are actually part of some other apps, like Contacts and Calendar items (part of Outlook). So, all in all, most of the O365 content will be saved, but not all of it.
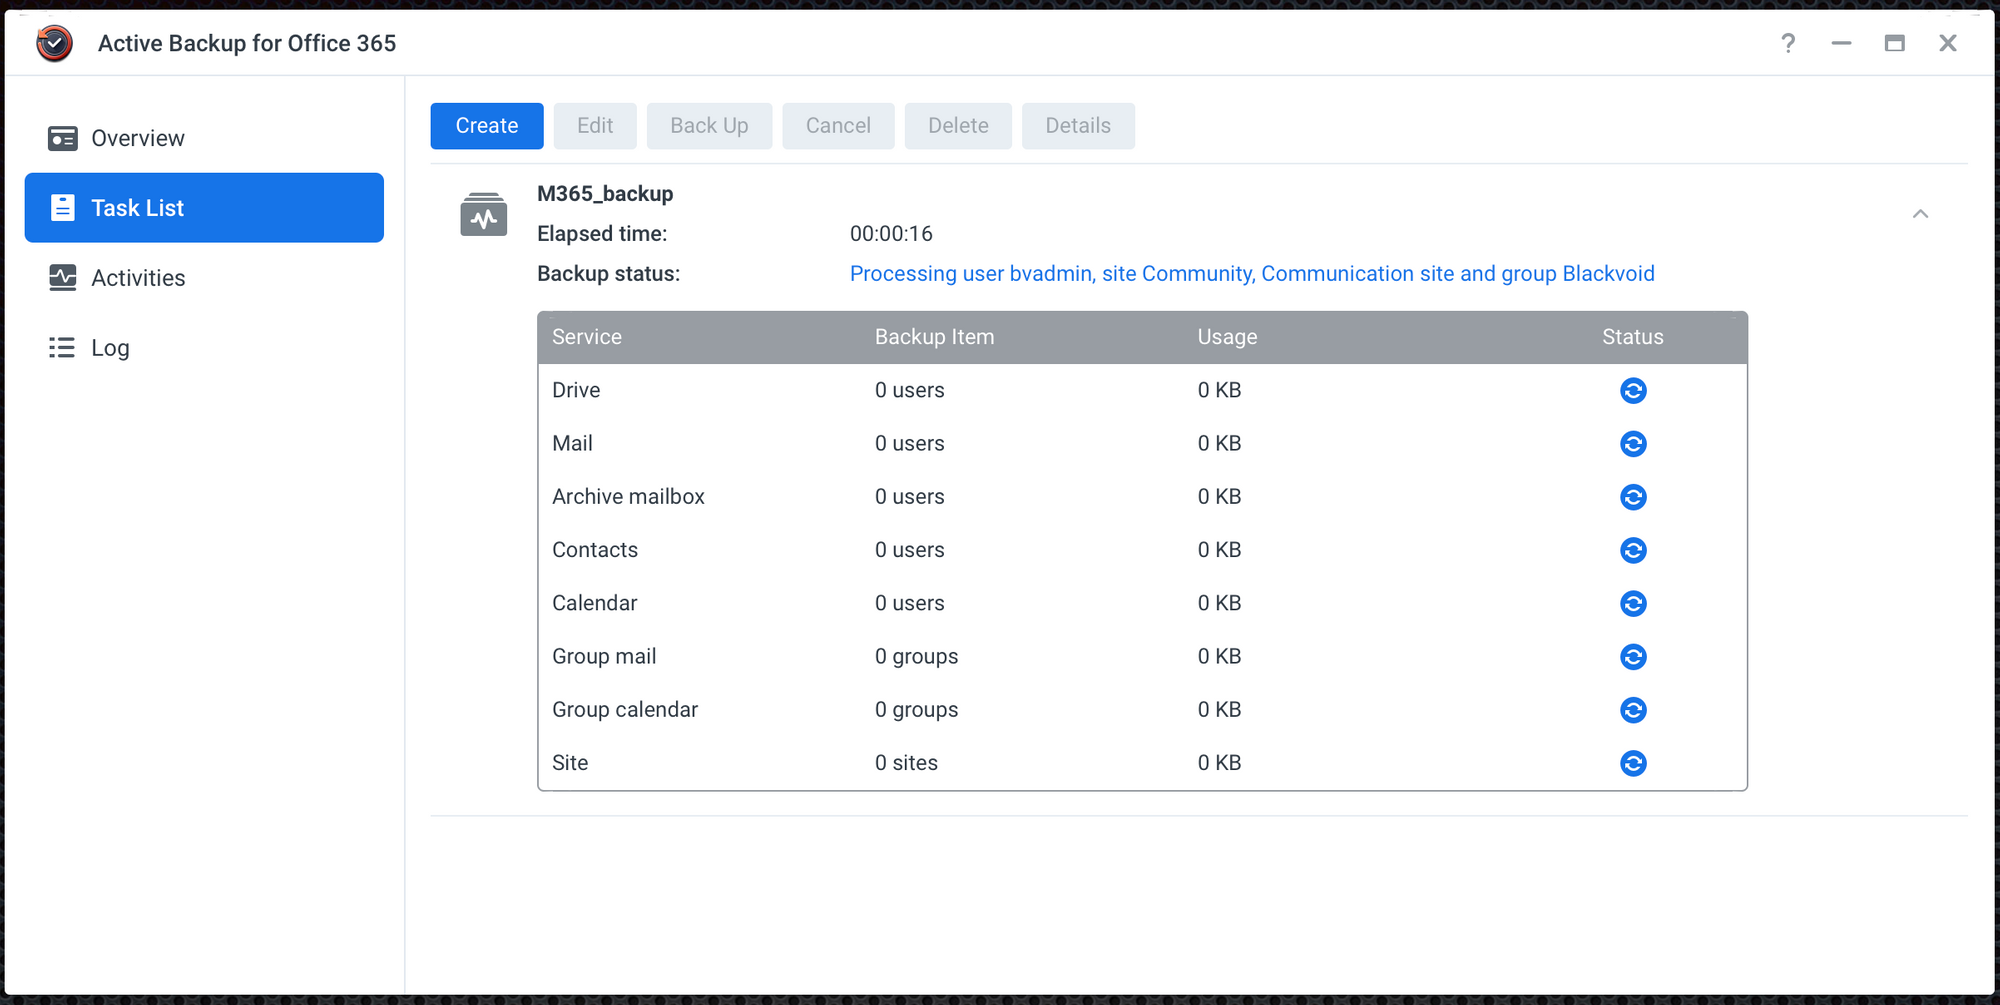
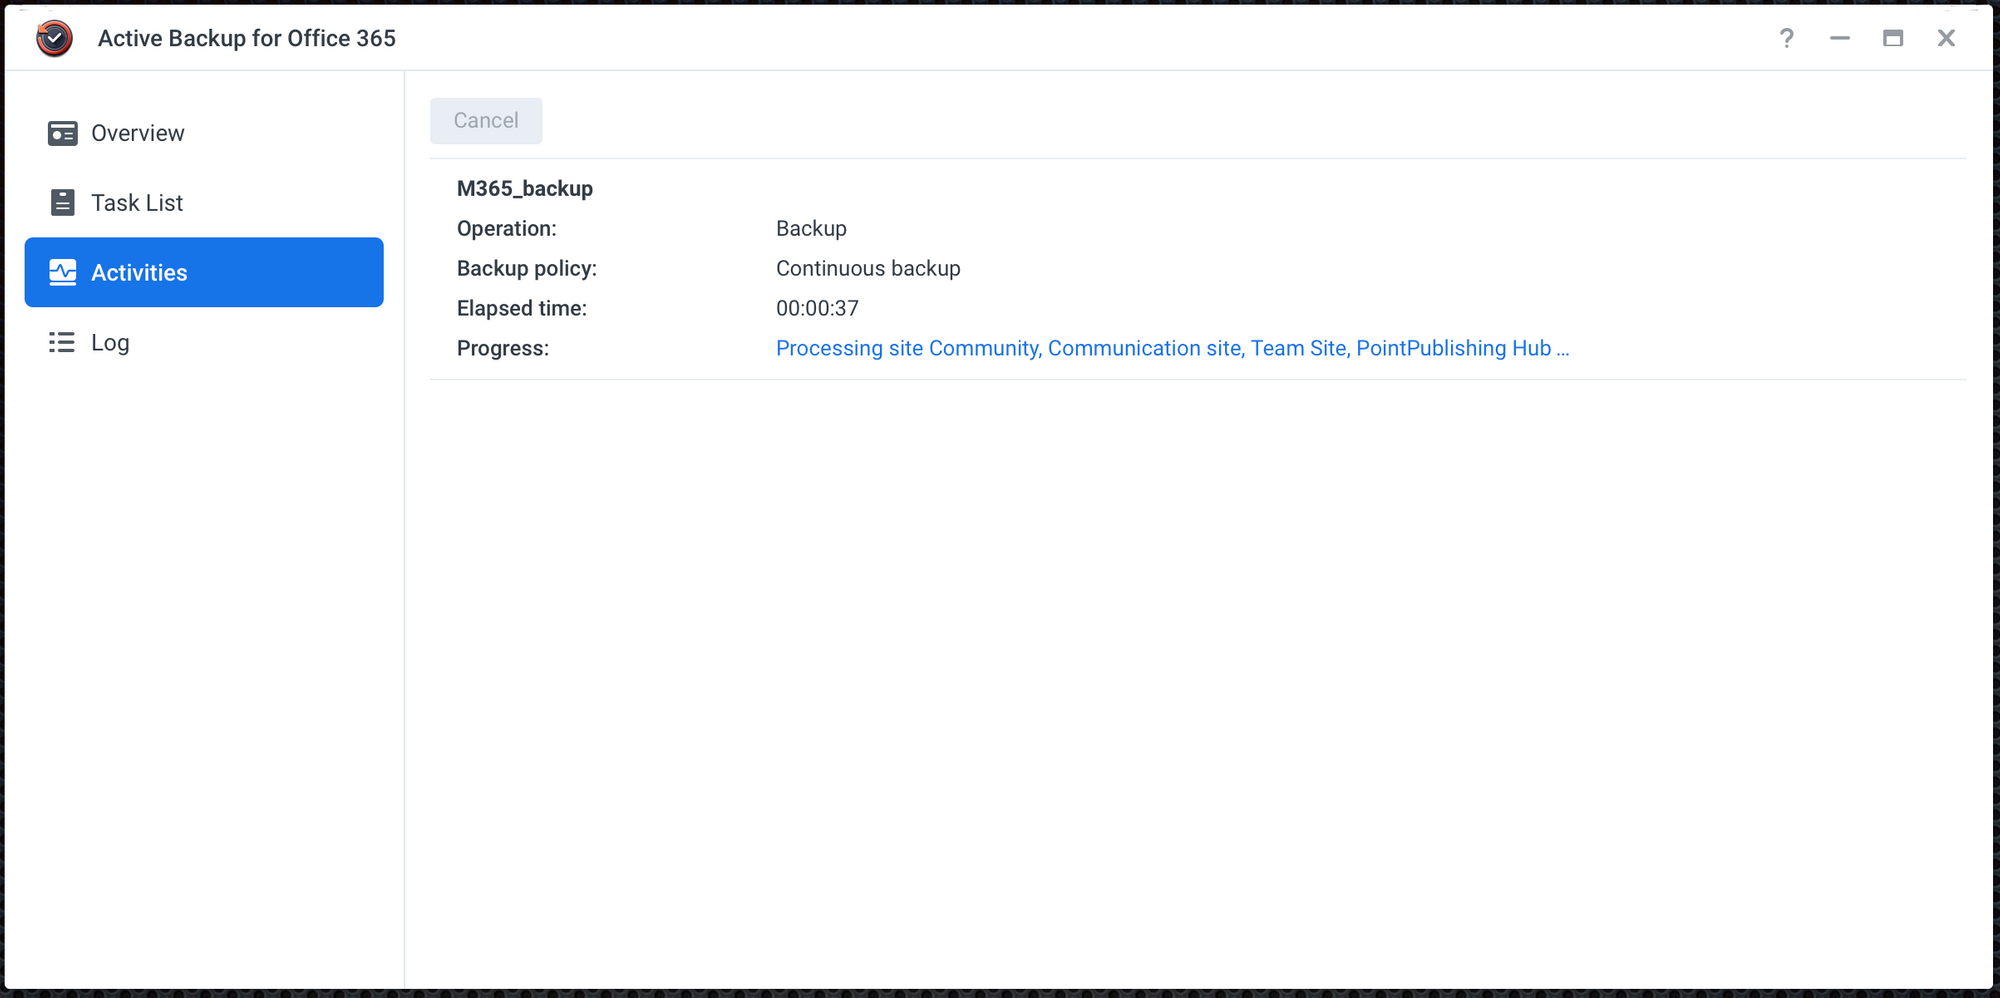
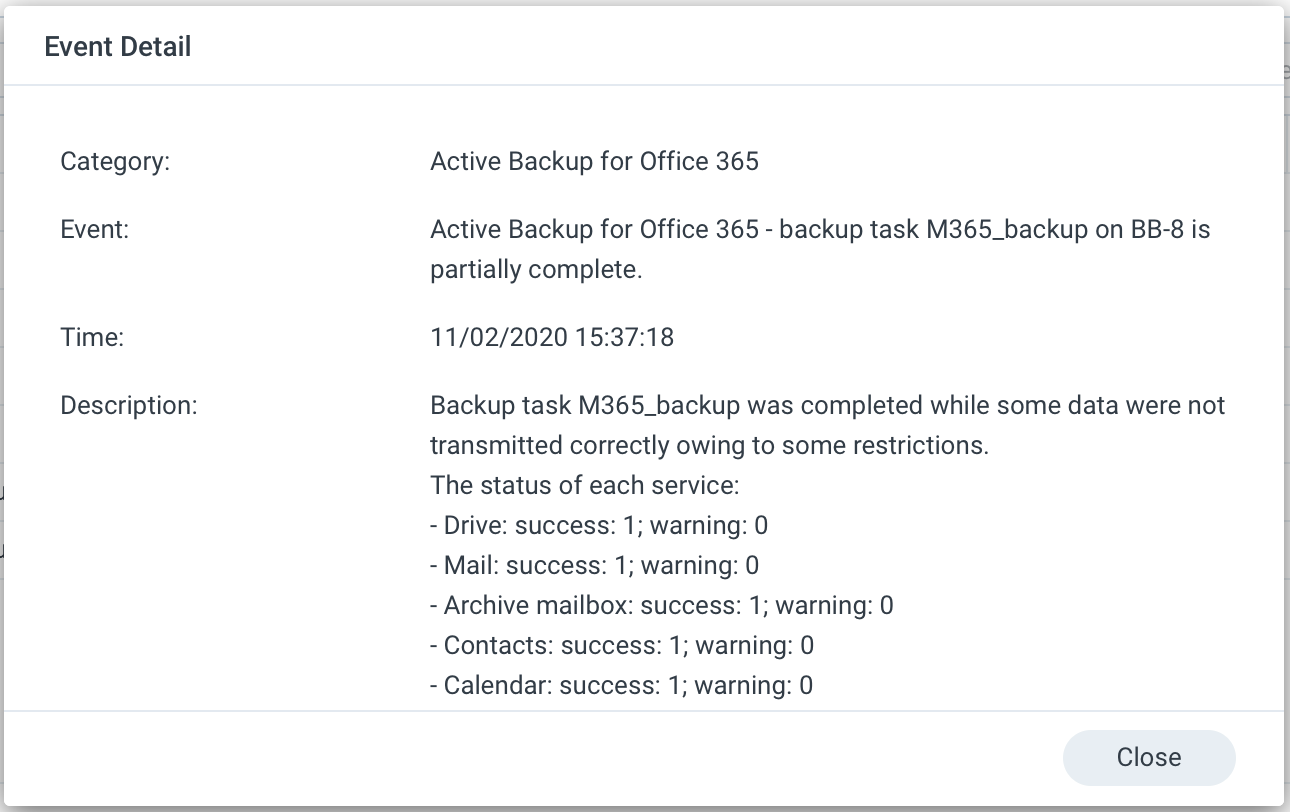
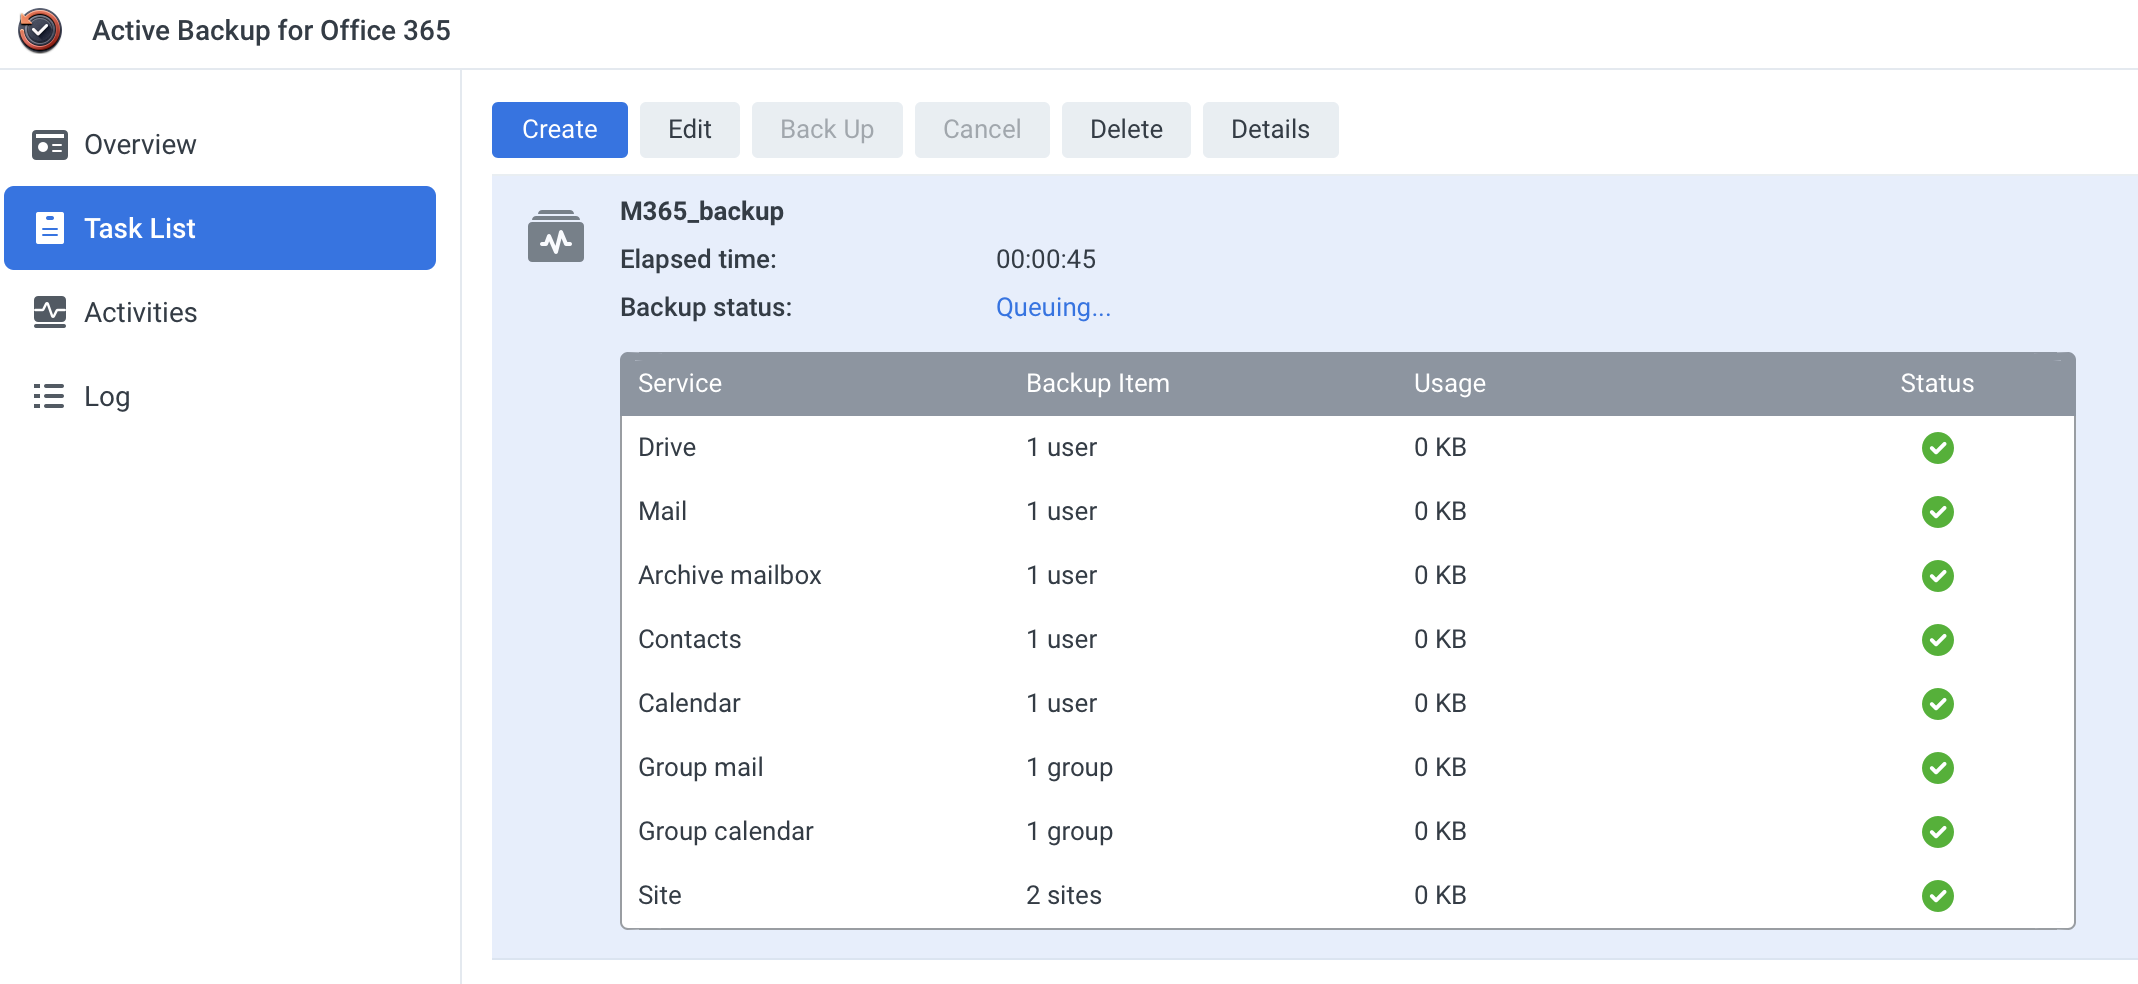
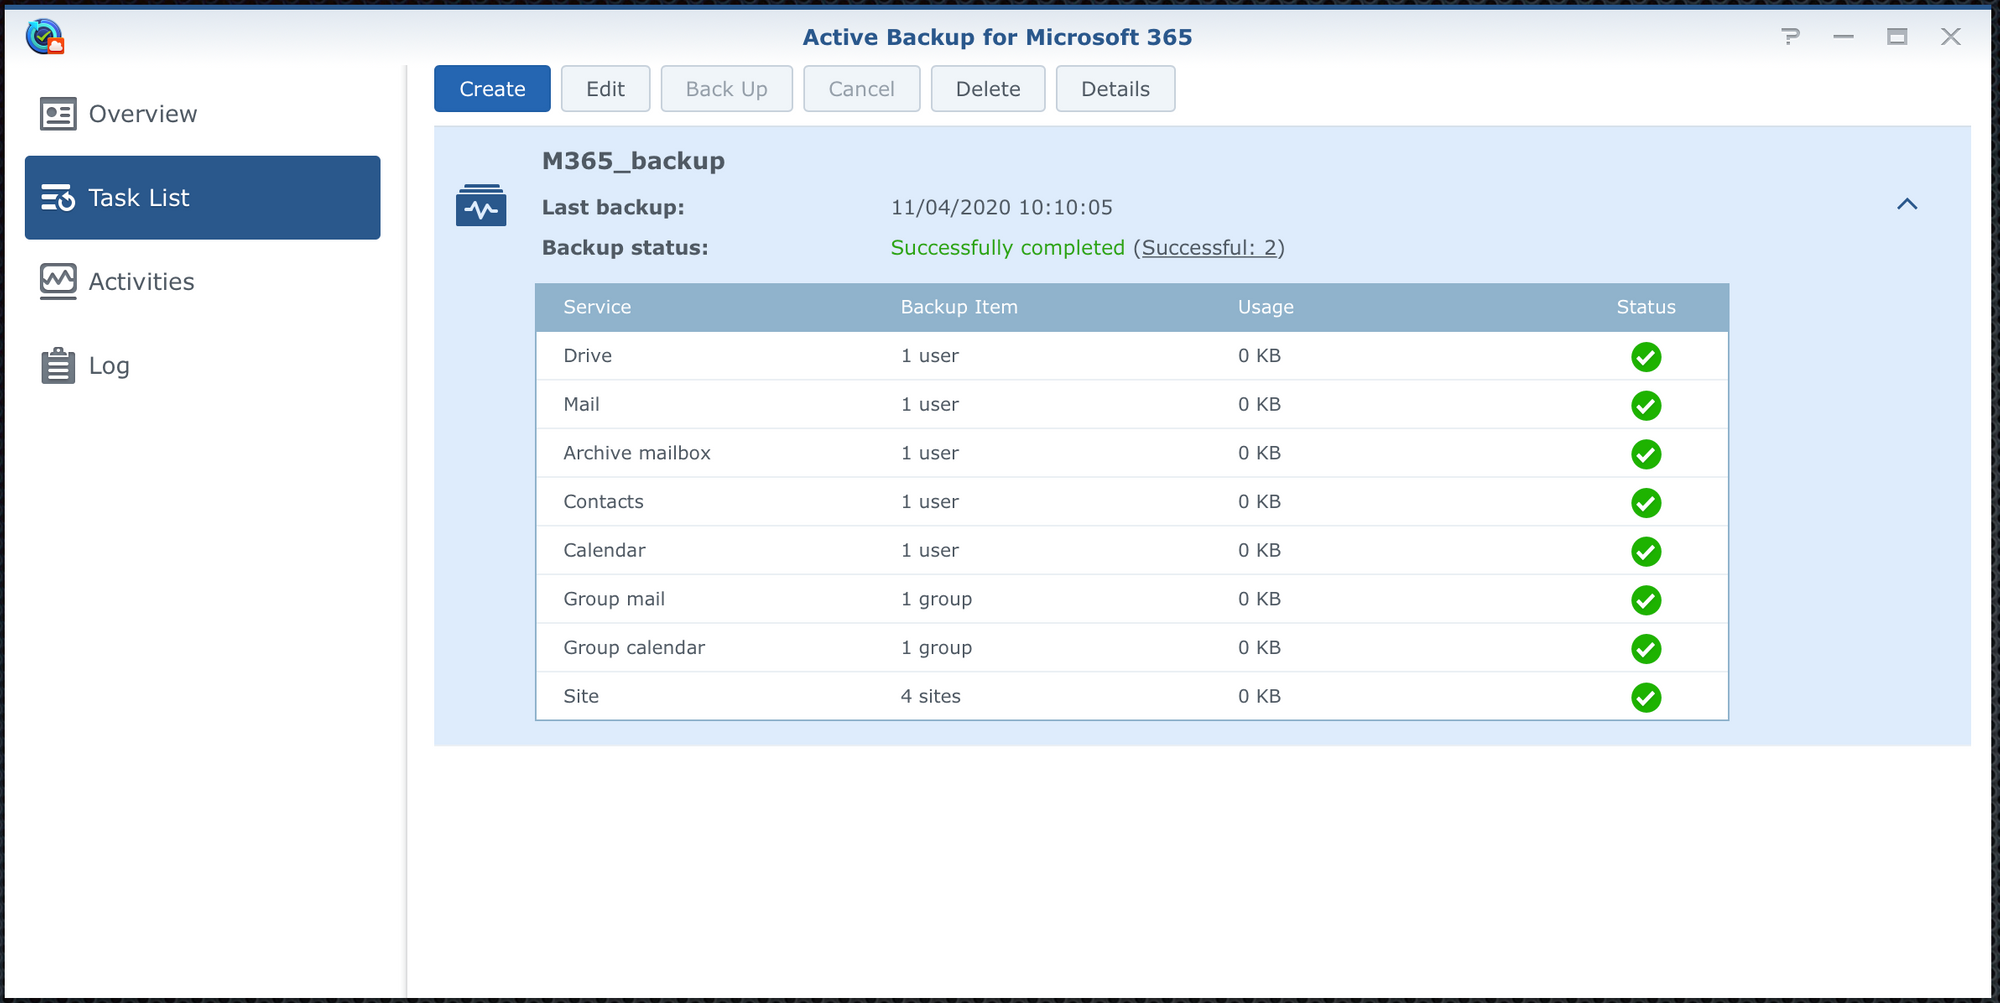
Once you start using the O365 space, Active Backup will begin backing up immediately (depending on the settings configured before) and you will see the results on your Synology NAS.
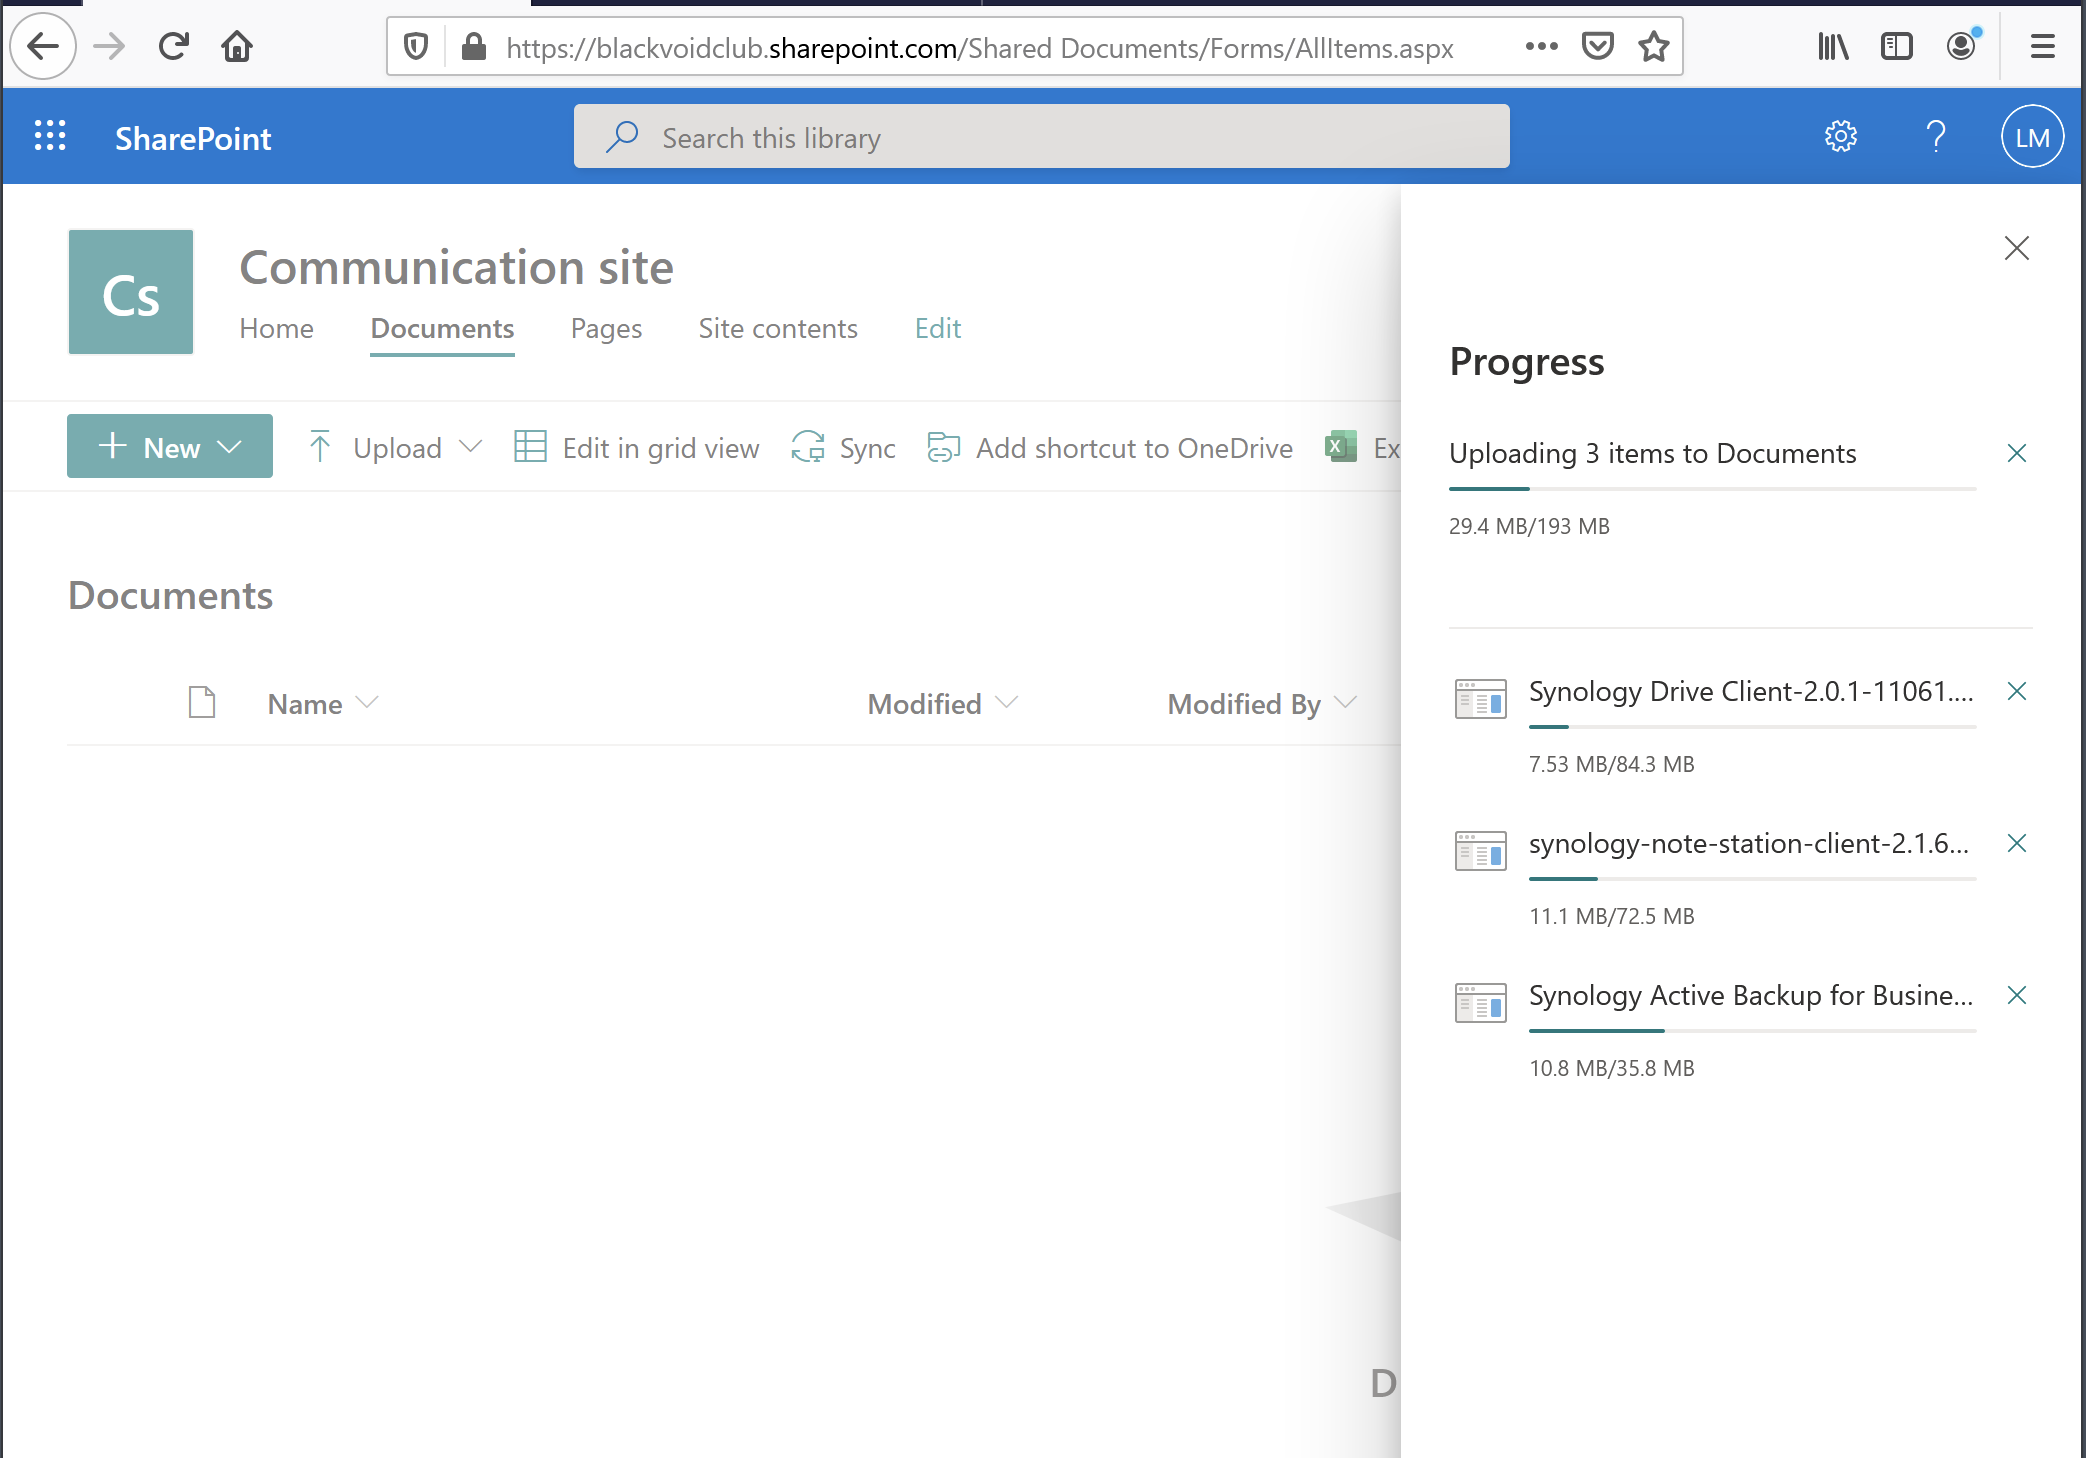
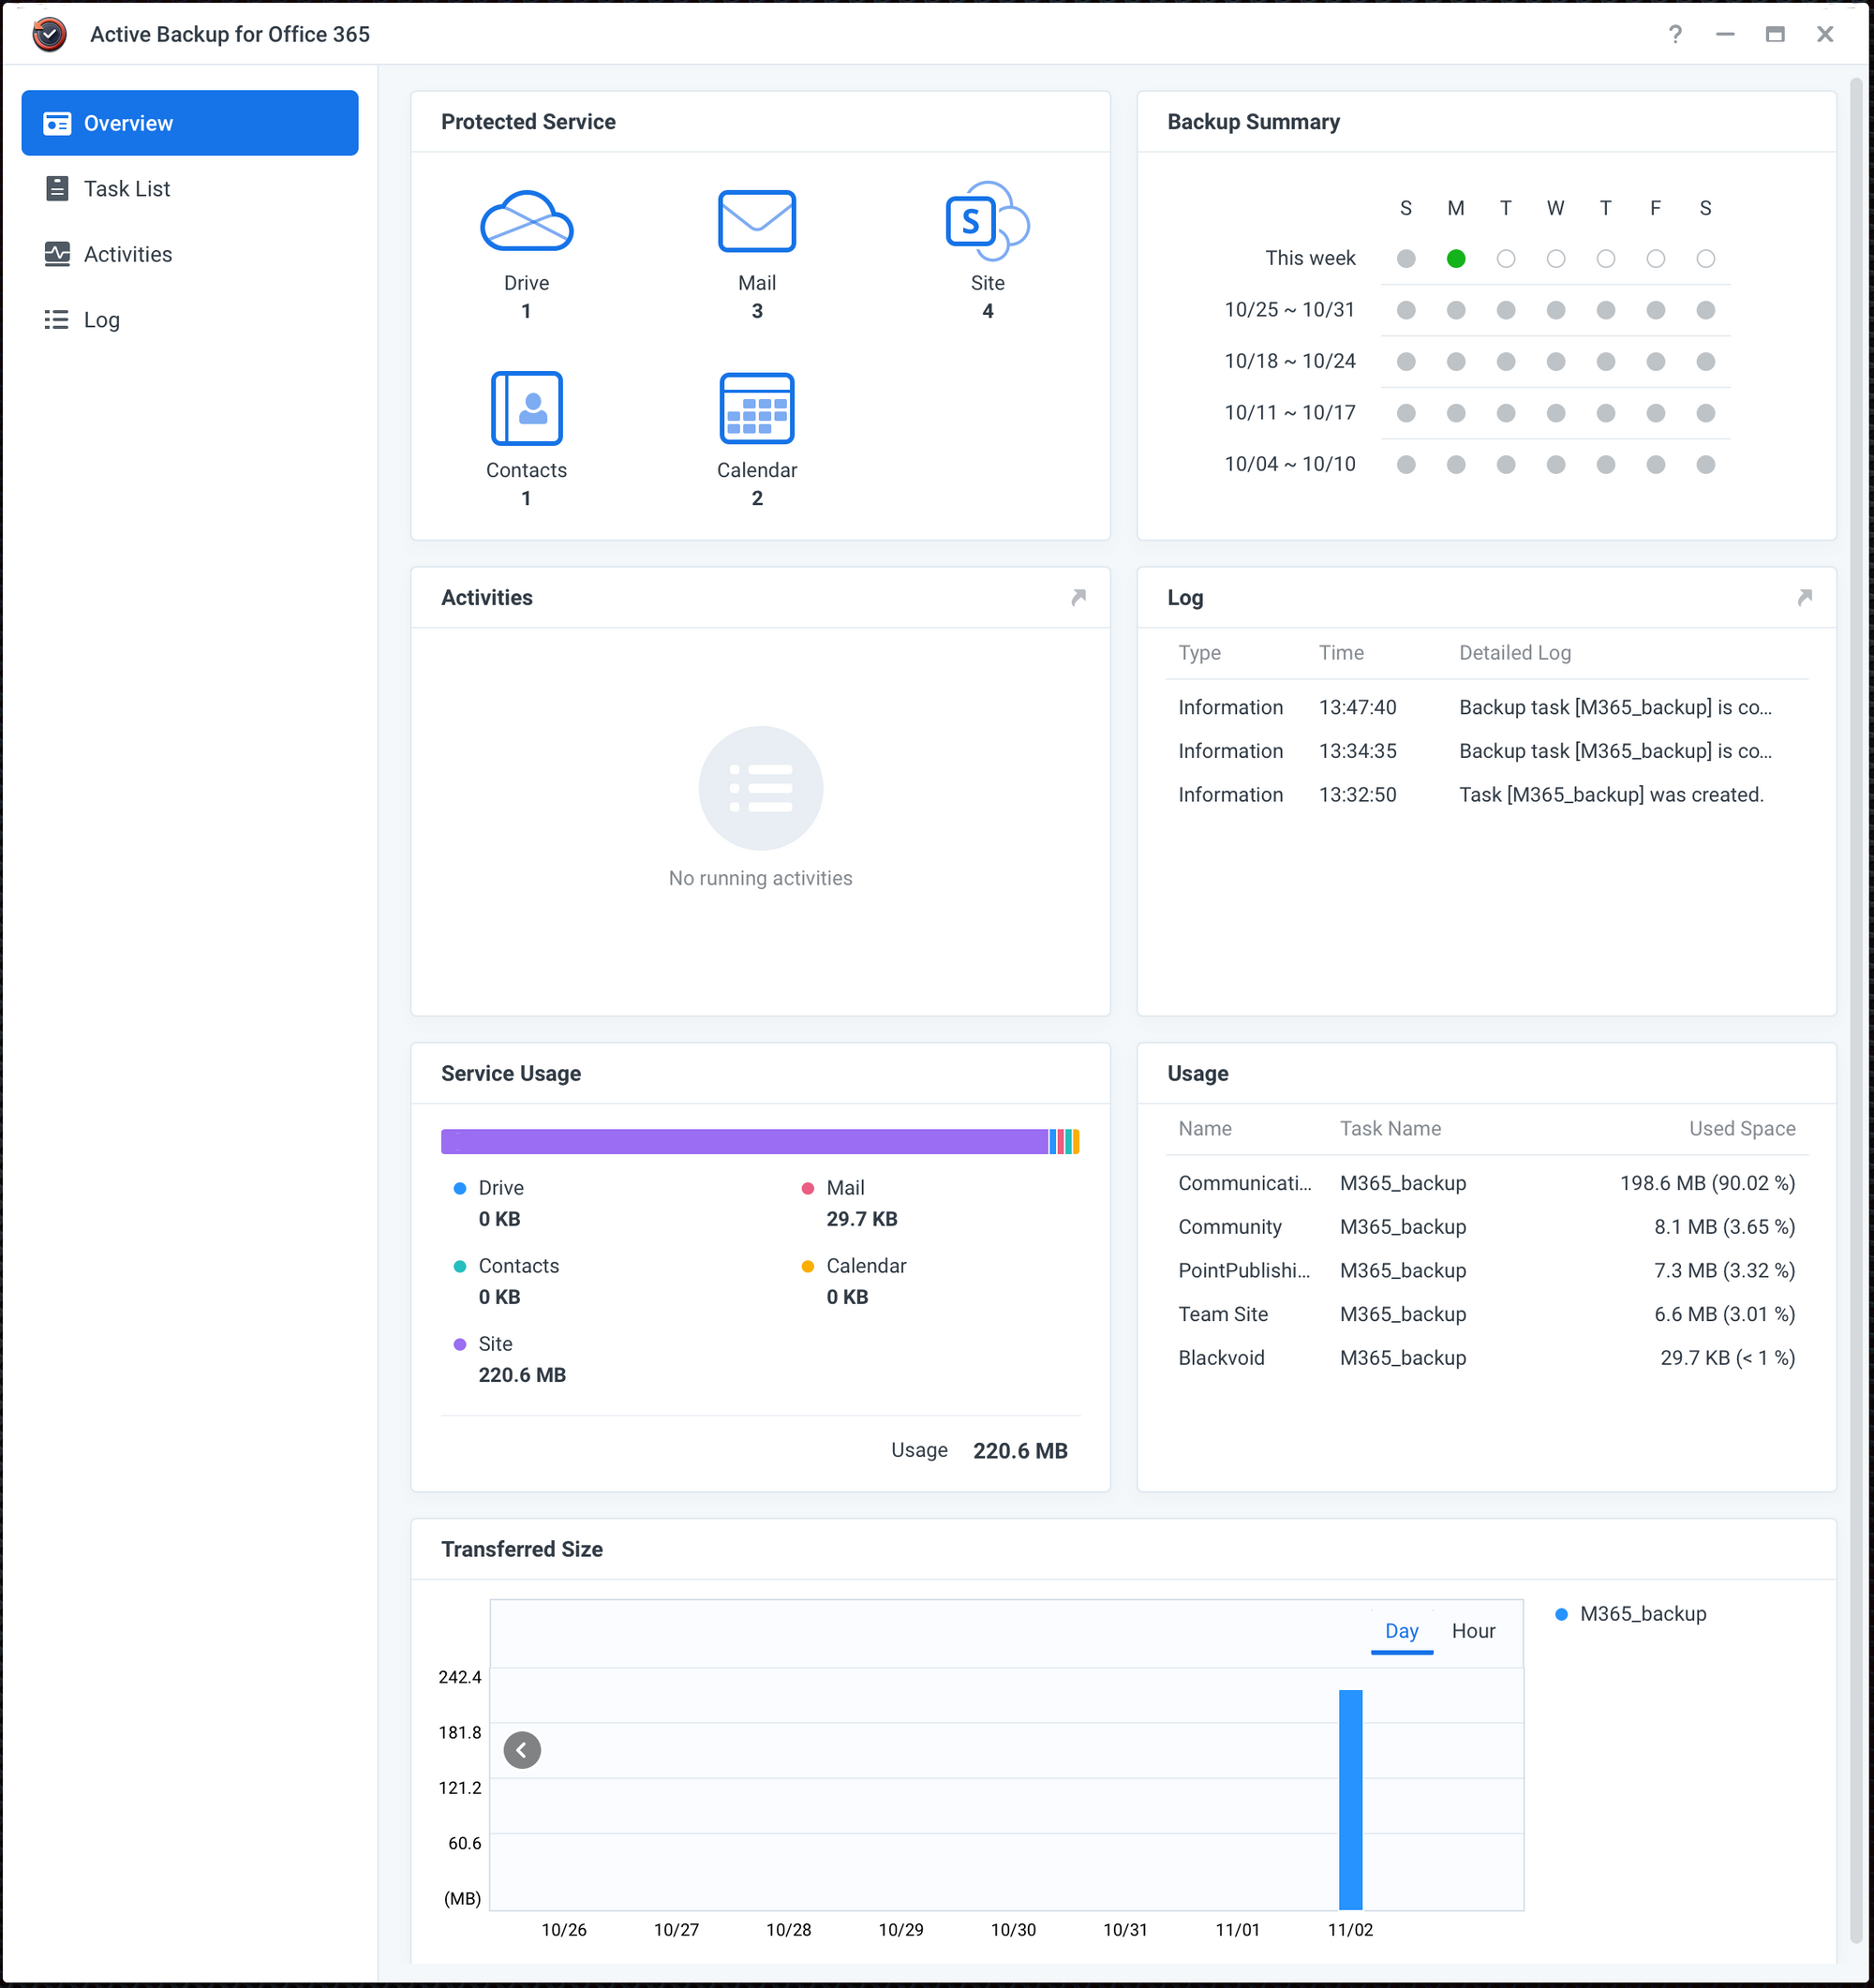
So, we can see that AB has performed a backup task and the initial SharePoint content has already been backed up.
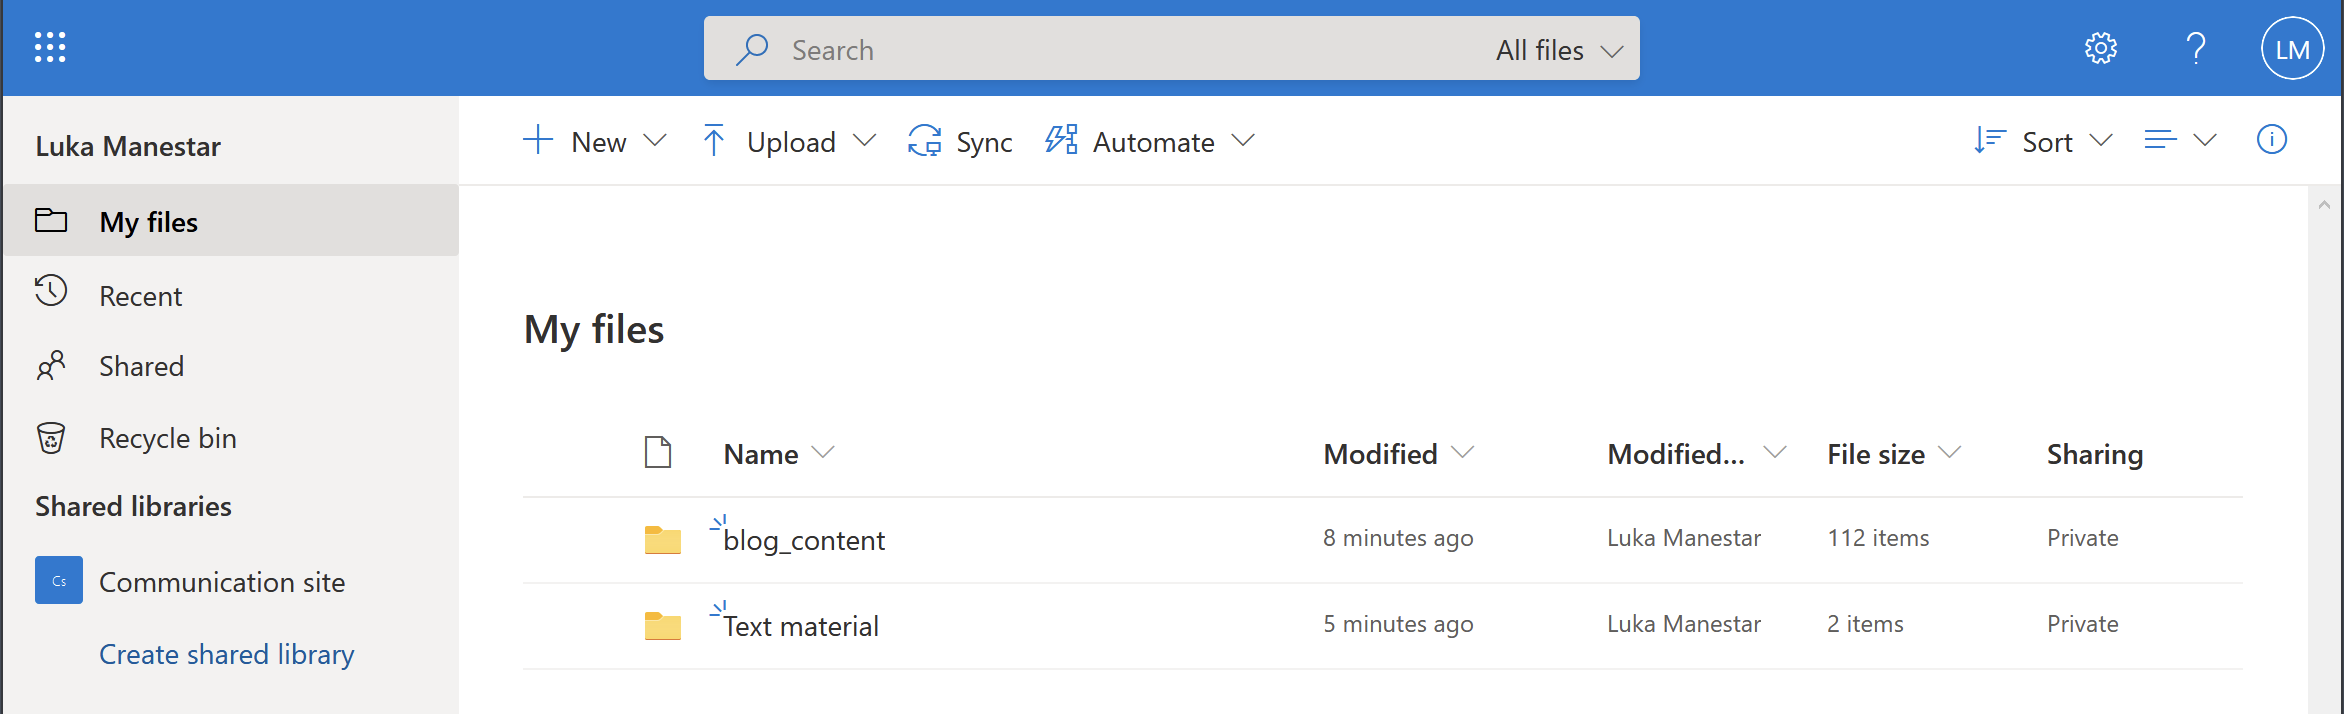
Another example would be using OneDrive or Outlook to generate some content and try and access it using the AB portal page in case you need to restore or export specific versions in time.
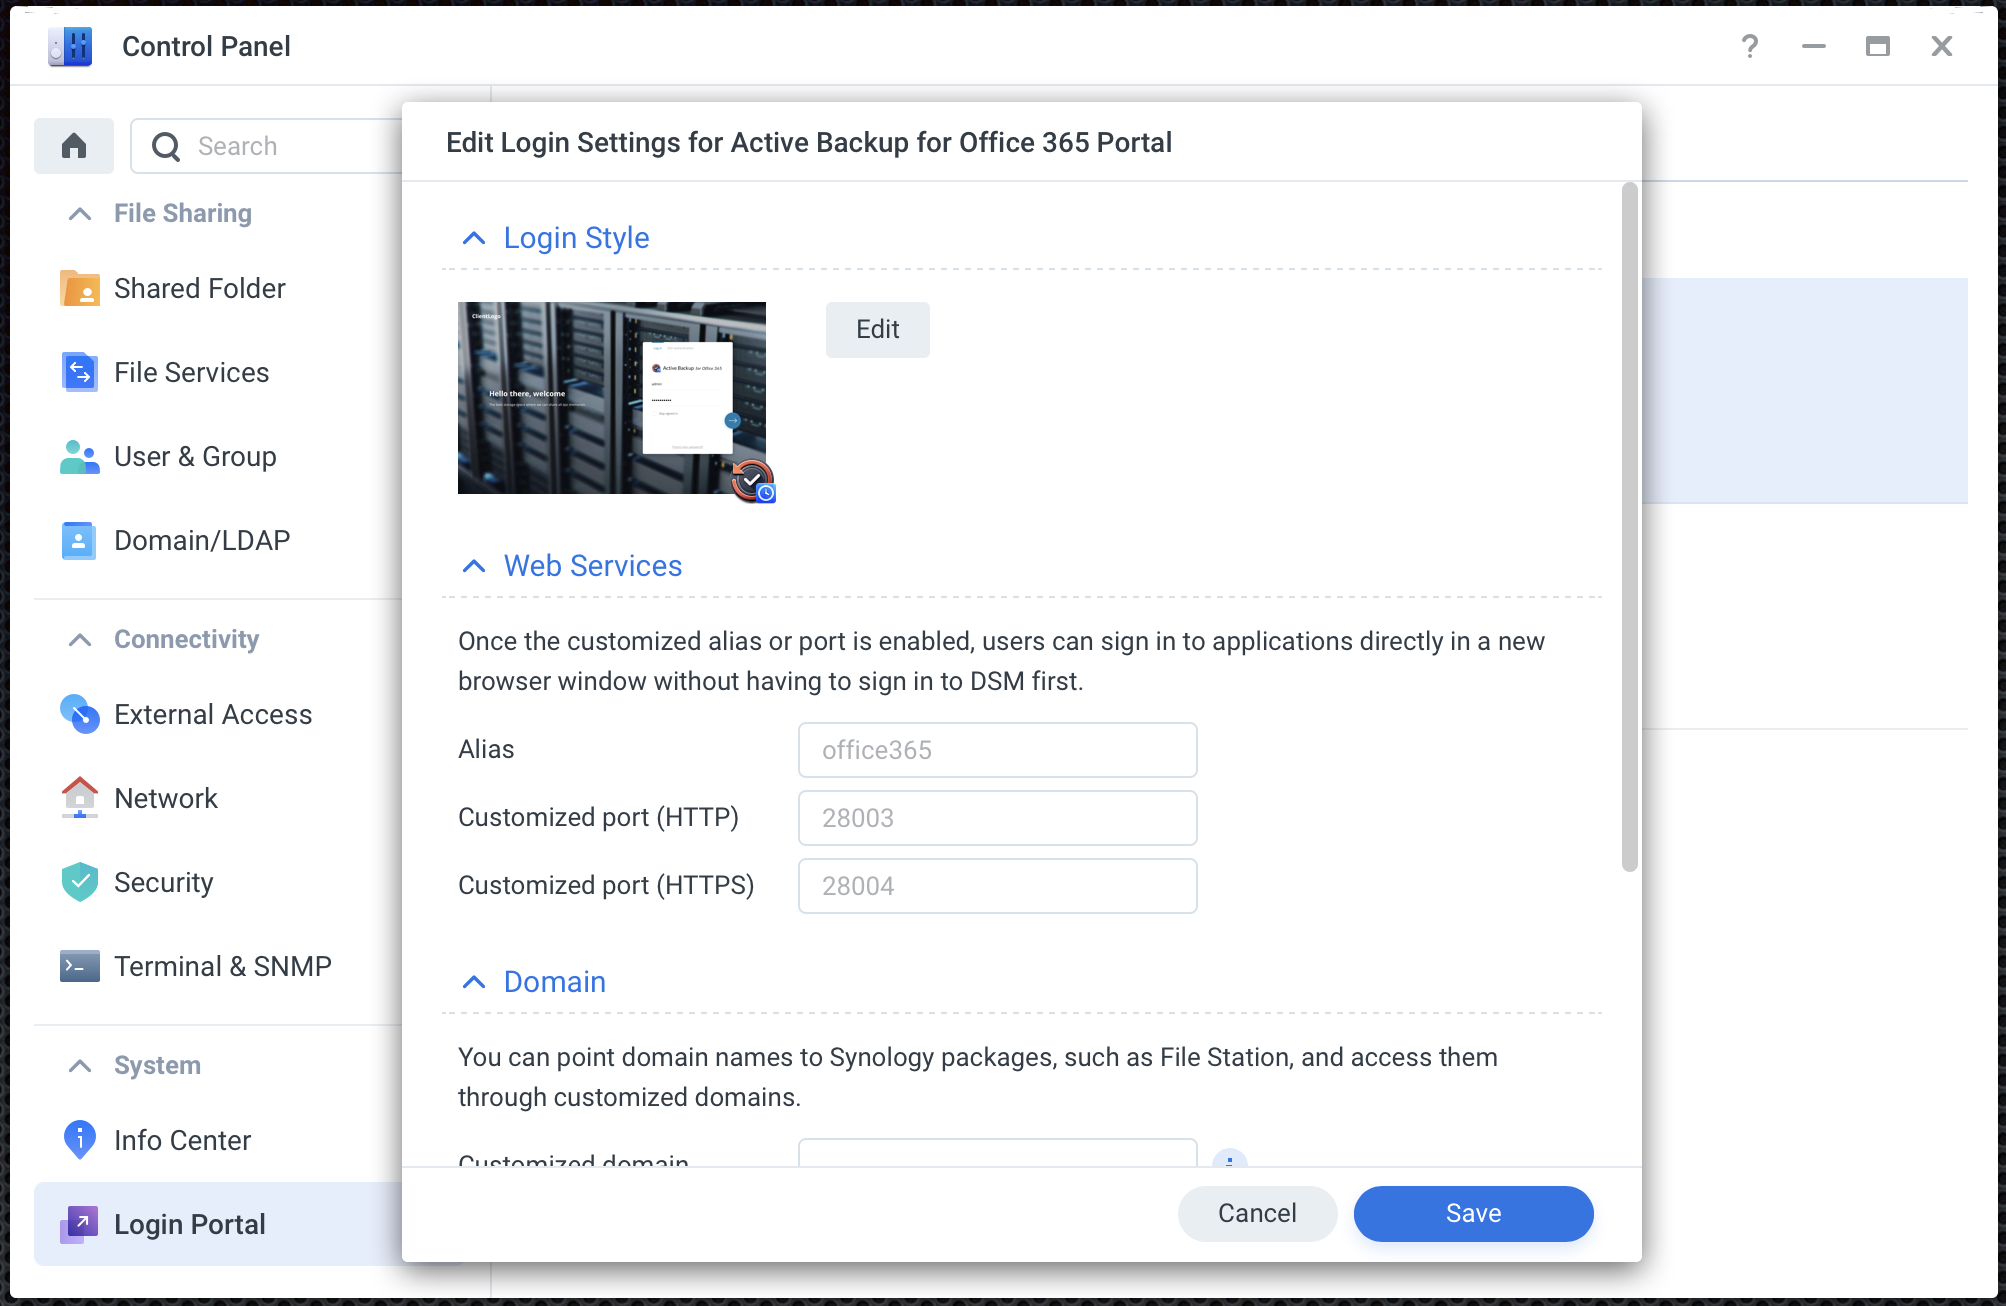
If a user wants to access some of its files from AB backup they need to open up the user portal page. That can be configured using the Control Panel > Login Portal. Here we can set up and configure a custom URL for the user portal that will be a gateway towards Active Backup for the O365 user portal.

Once that user opens the portal this is what it will look like:

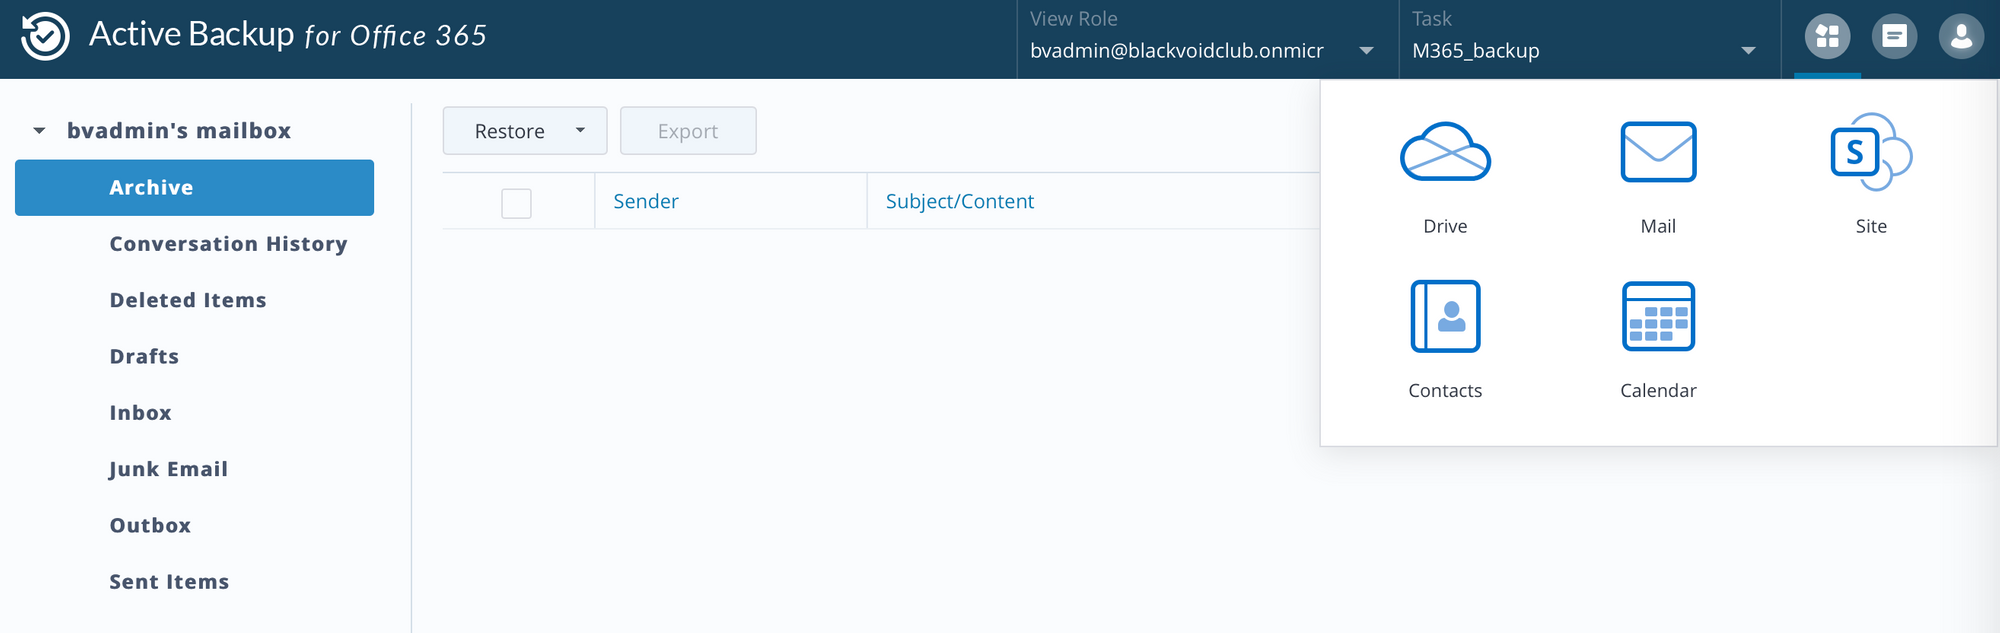
As we can see from the images above, you can get full access to your items using the portal and even restore and export them.
The export will mean that you can export them on your device that you are currently using to browse and access the portal. Restore on the other hand means that you need to restore an item from your backup, back to O365 to have access to it.
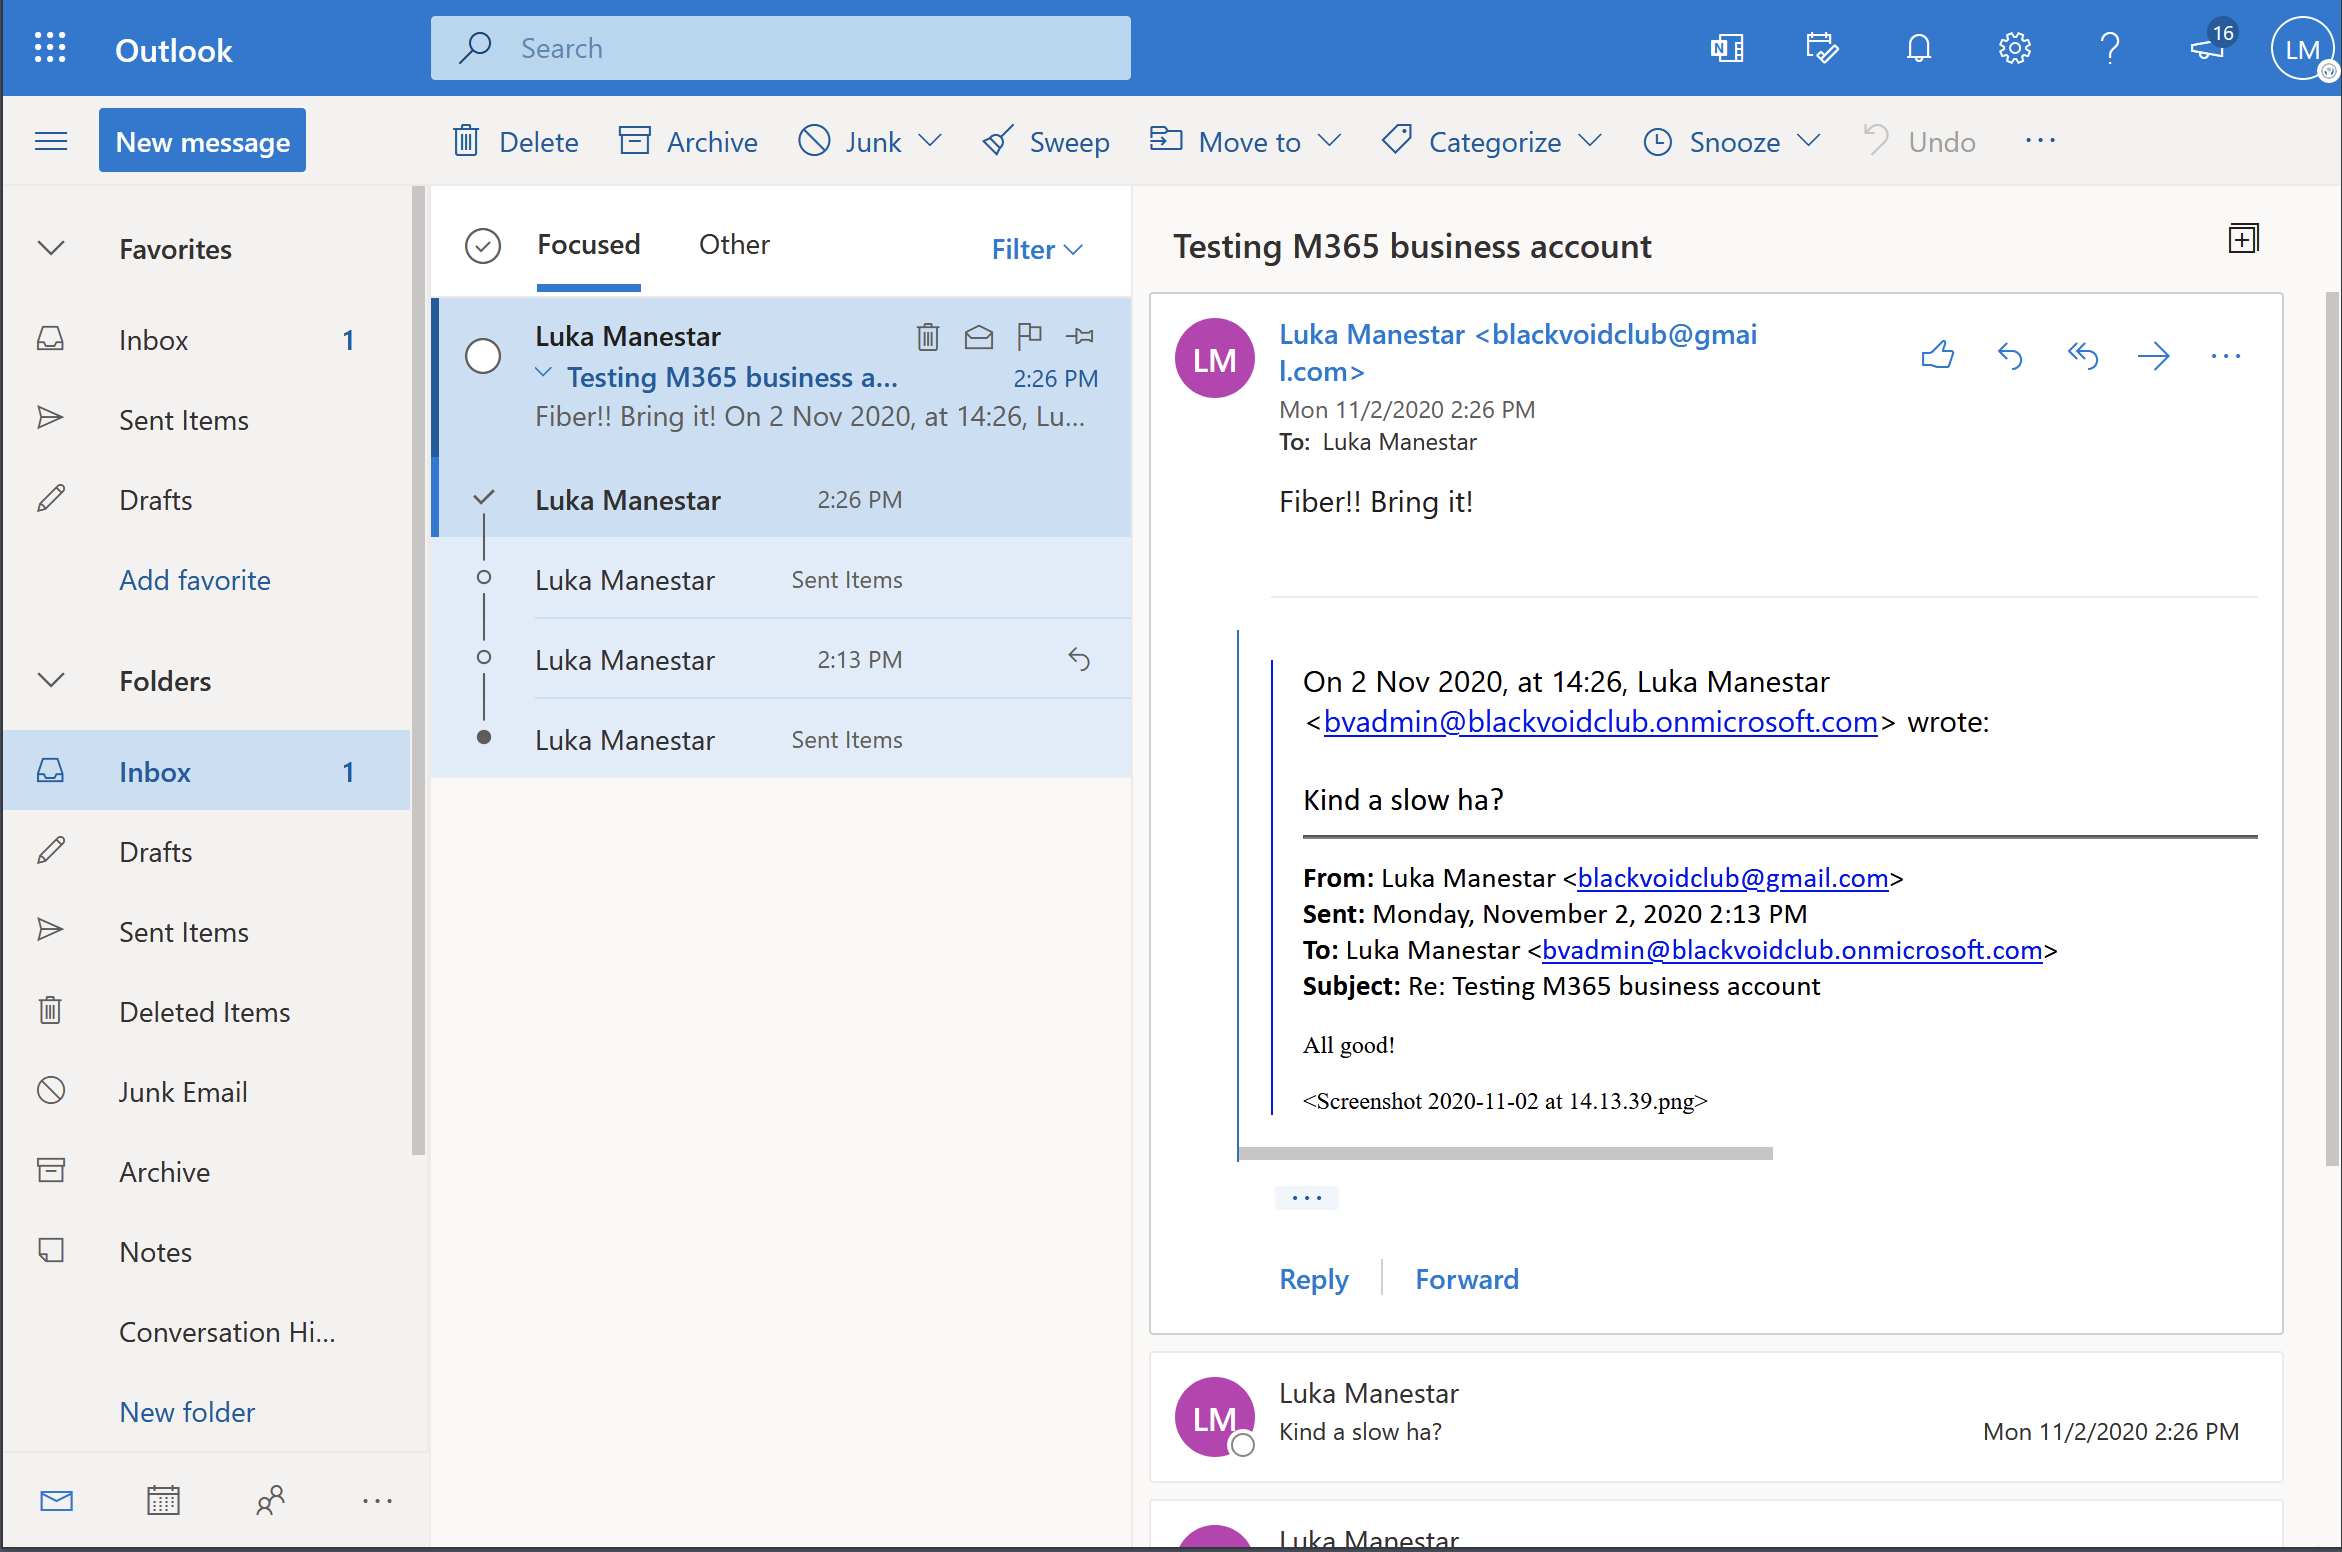
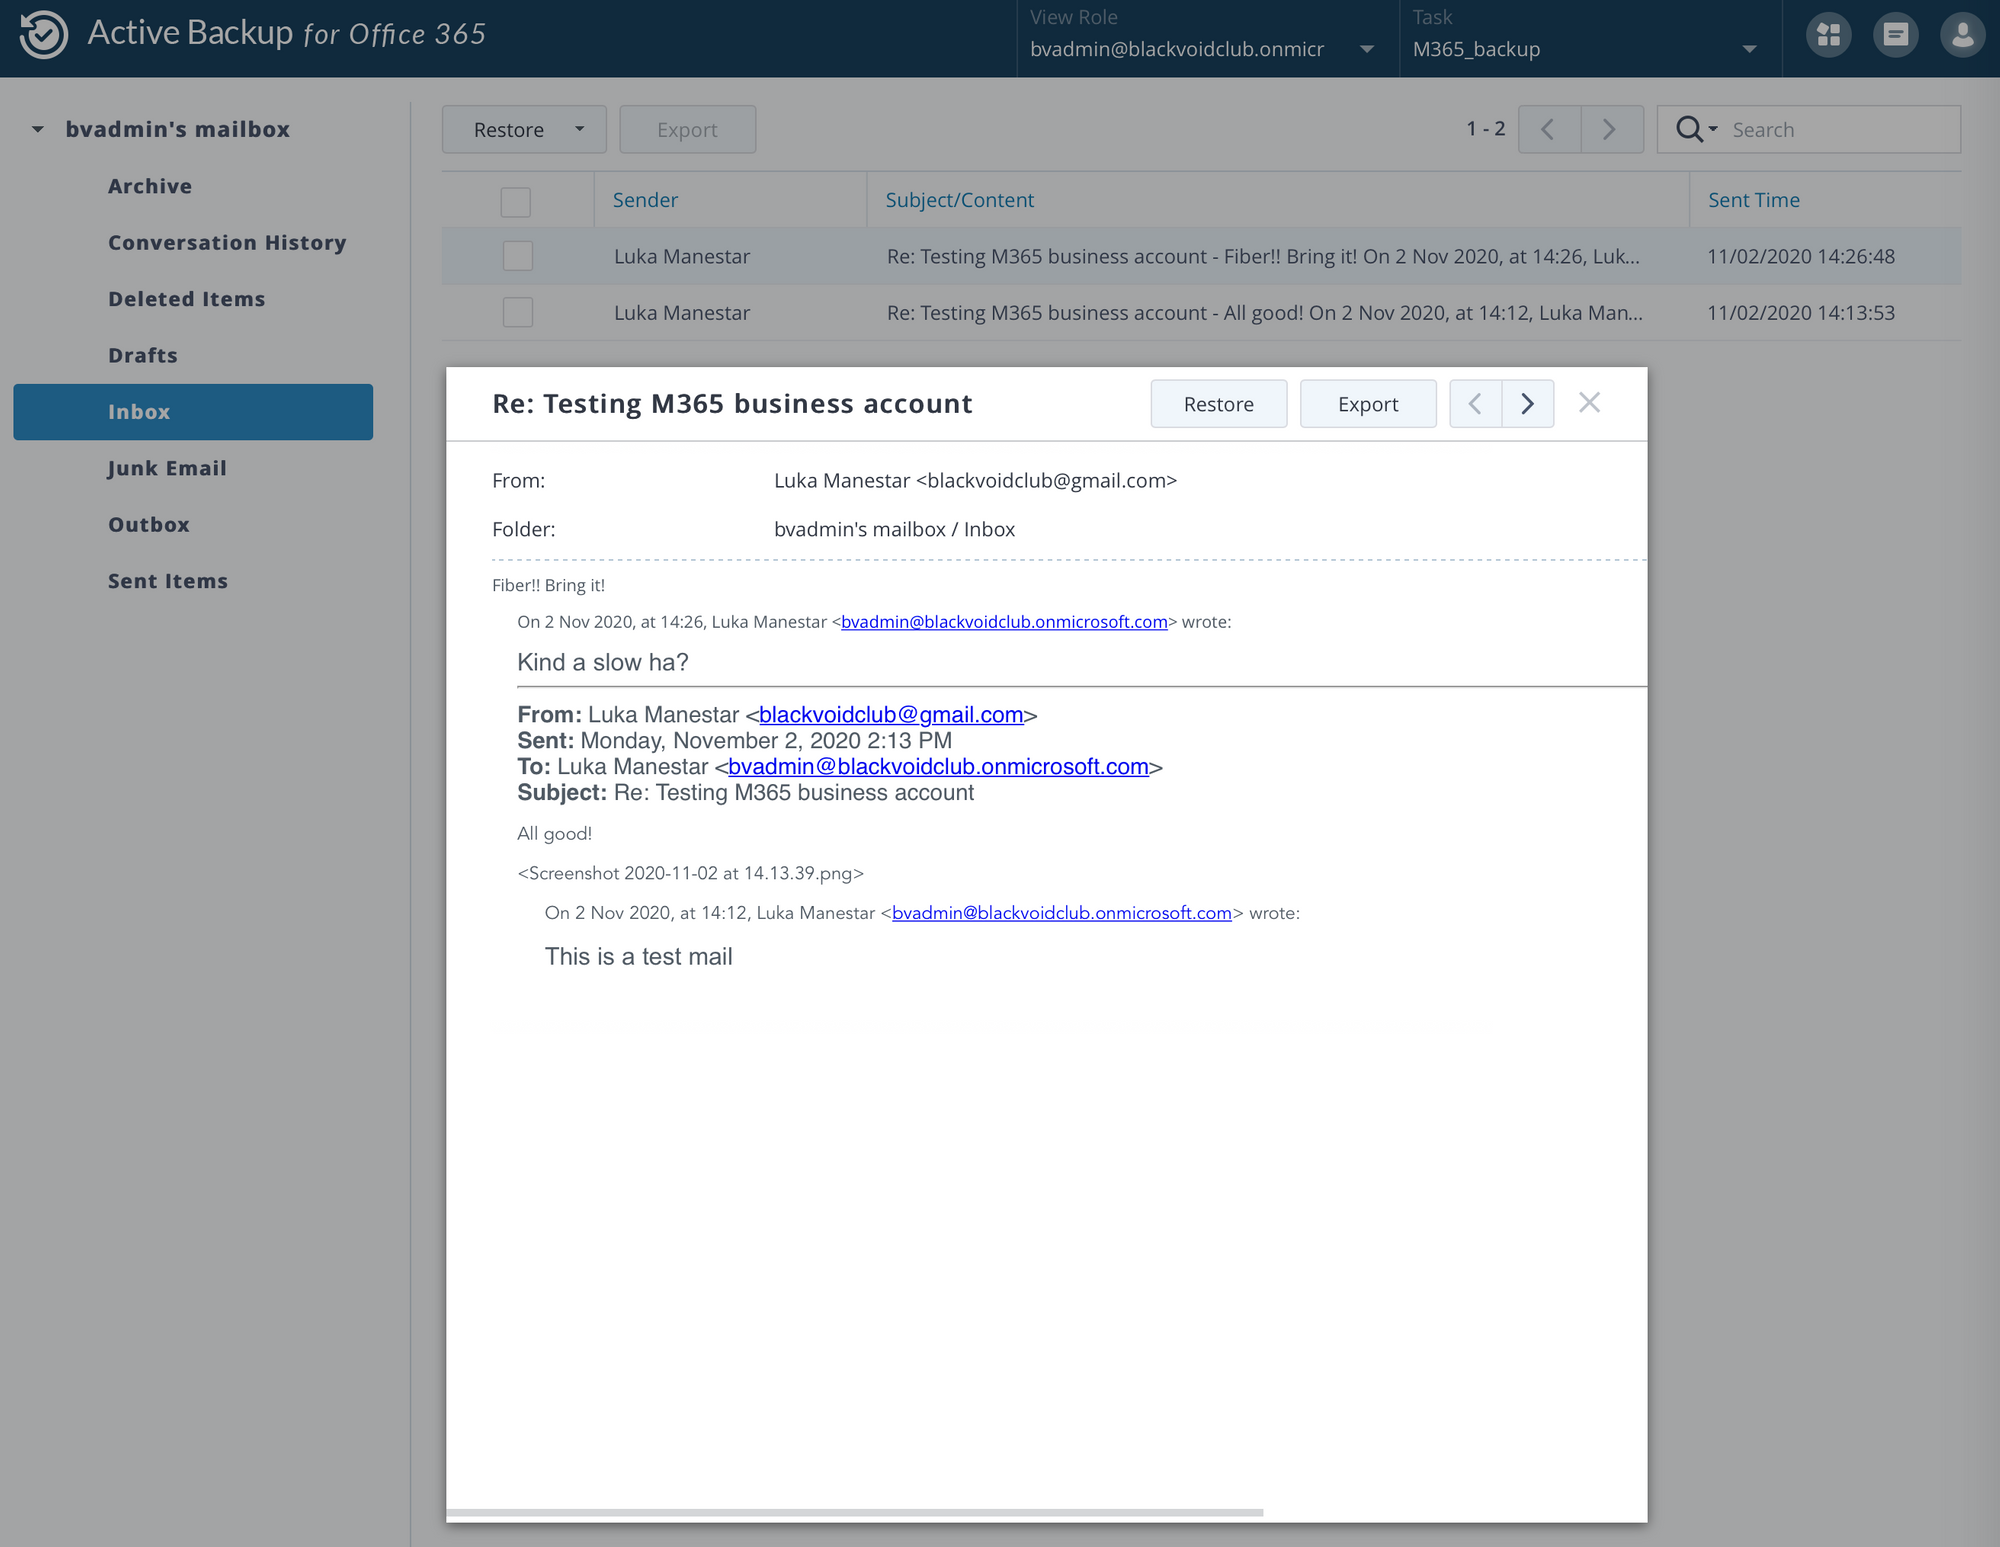
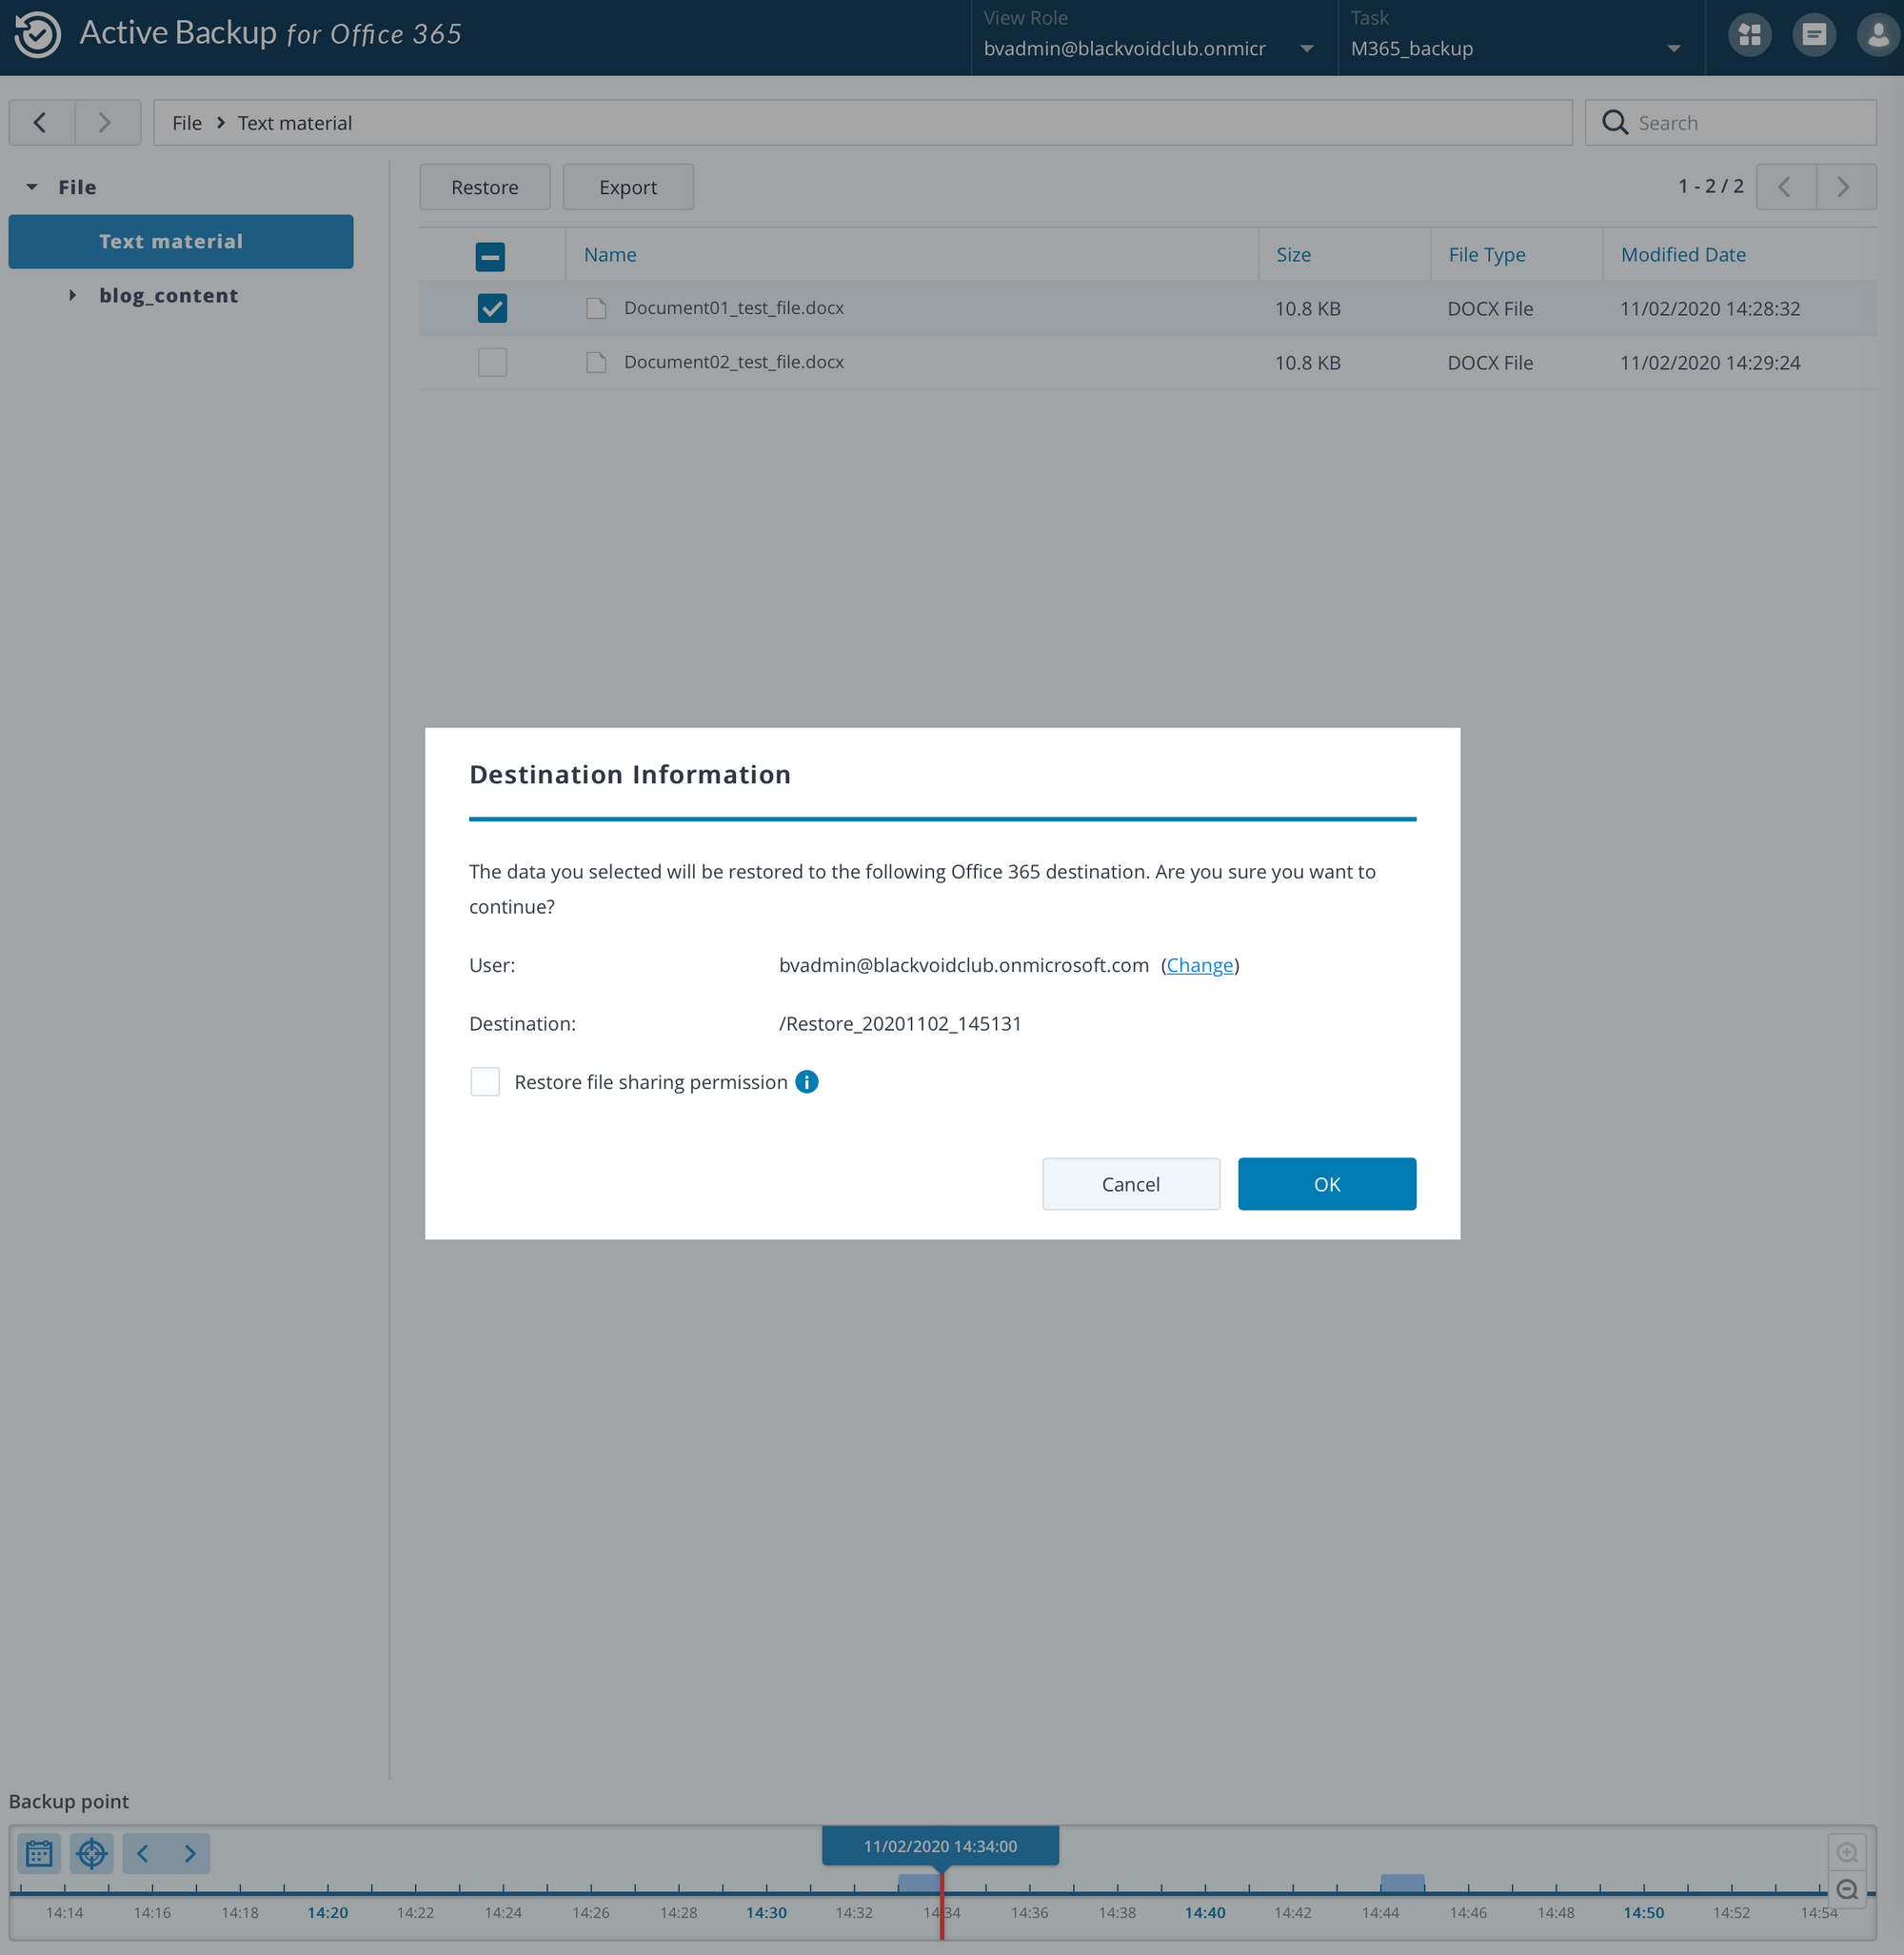
Let's see how you can restore an email in case you have to delete it from the O365 account.
Restore an M365 item using the Active Backup M365 portal
Once you log into your O365 Active Backup portal and use the app switcher to jump to the Email section, simply use the timeline on the bottom to locate the item in a folder you want (Inbox, sent, archive, etc), and once you have it located, select it and click Restore.
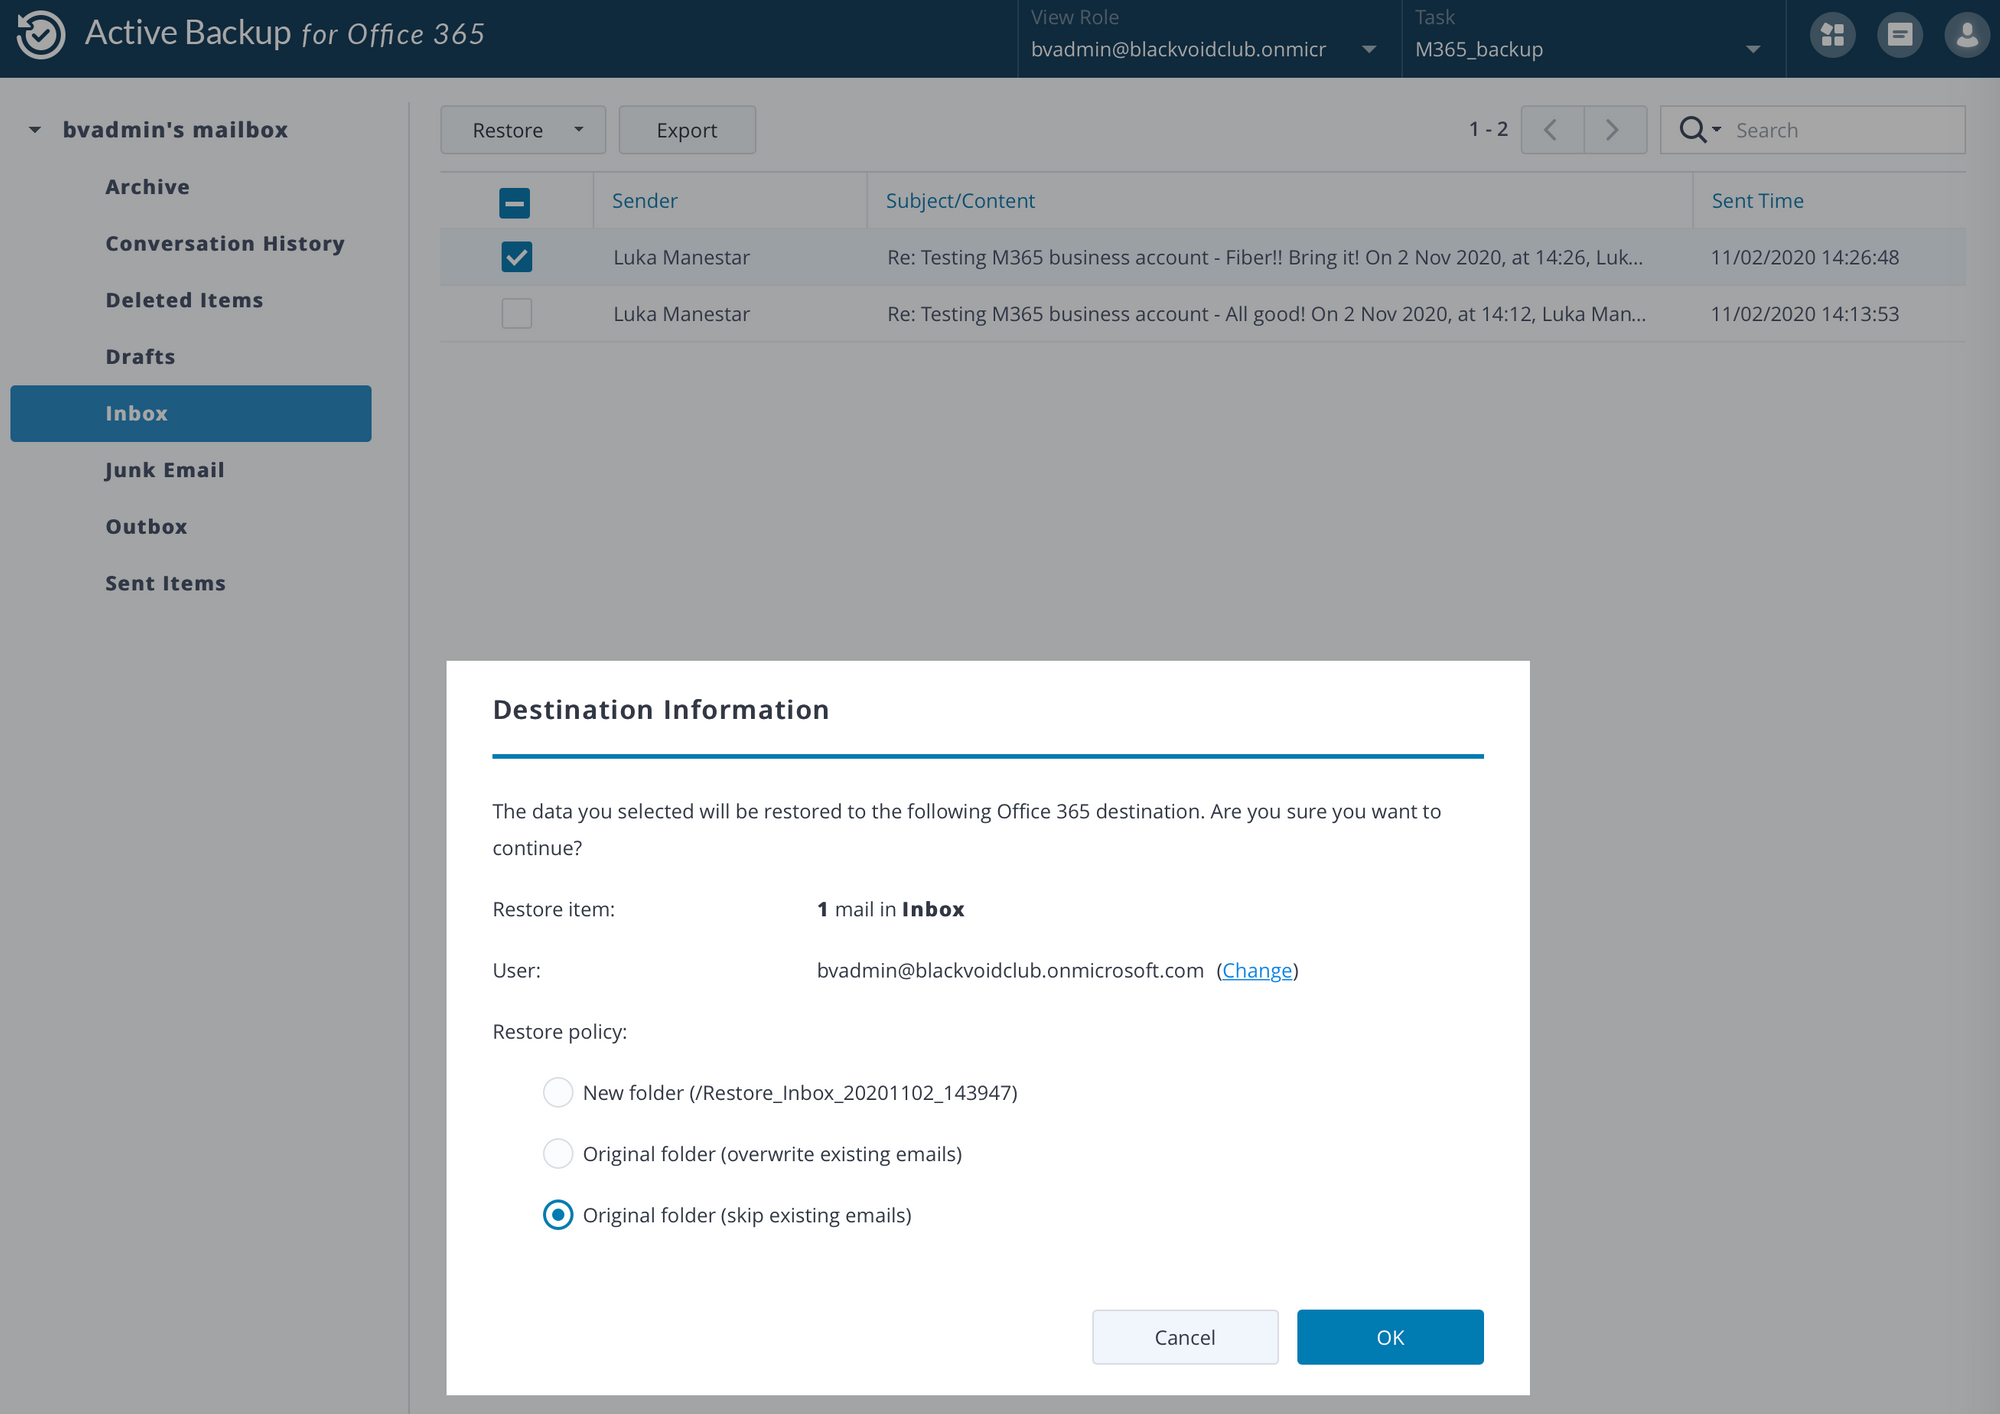
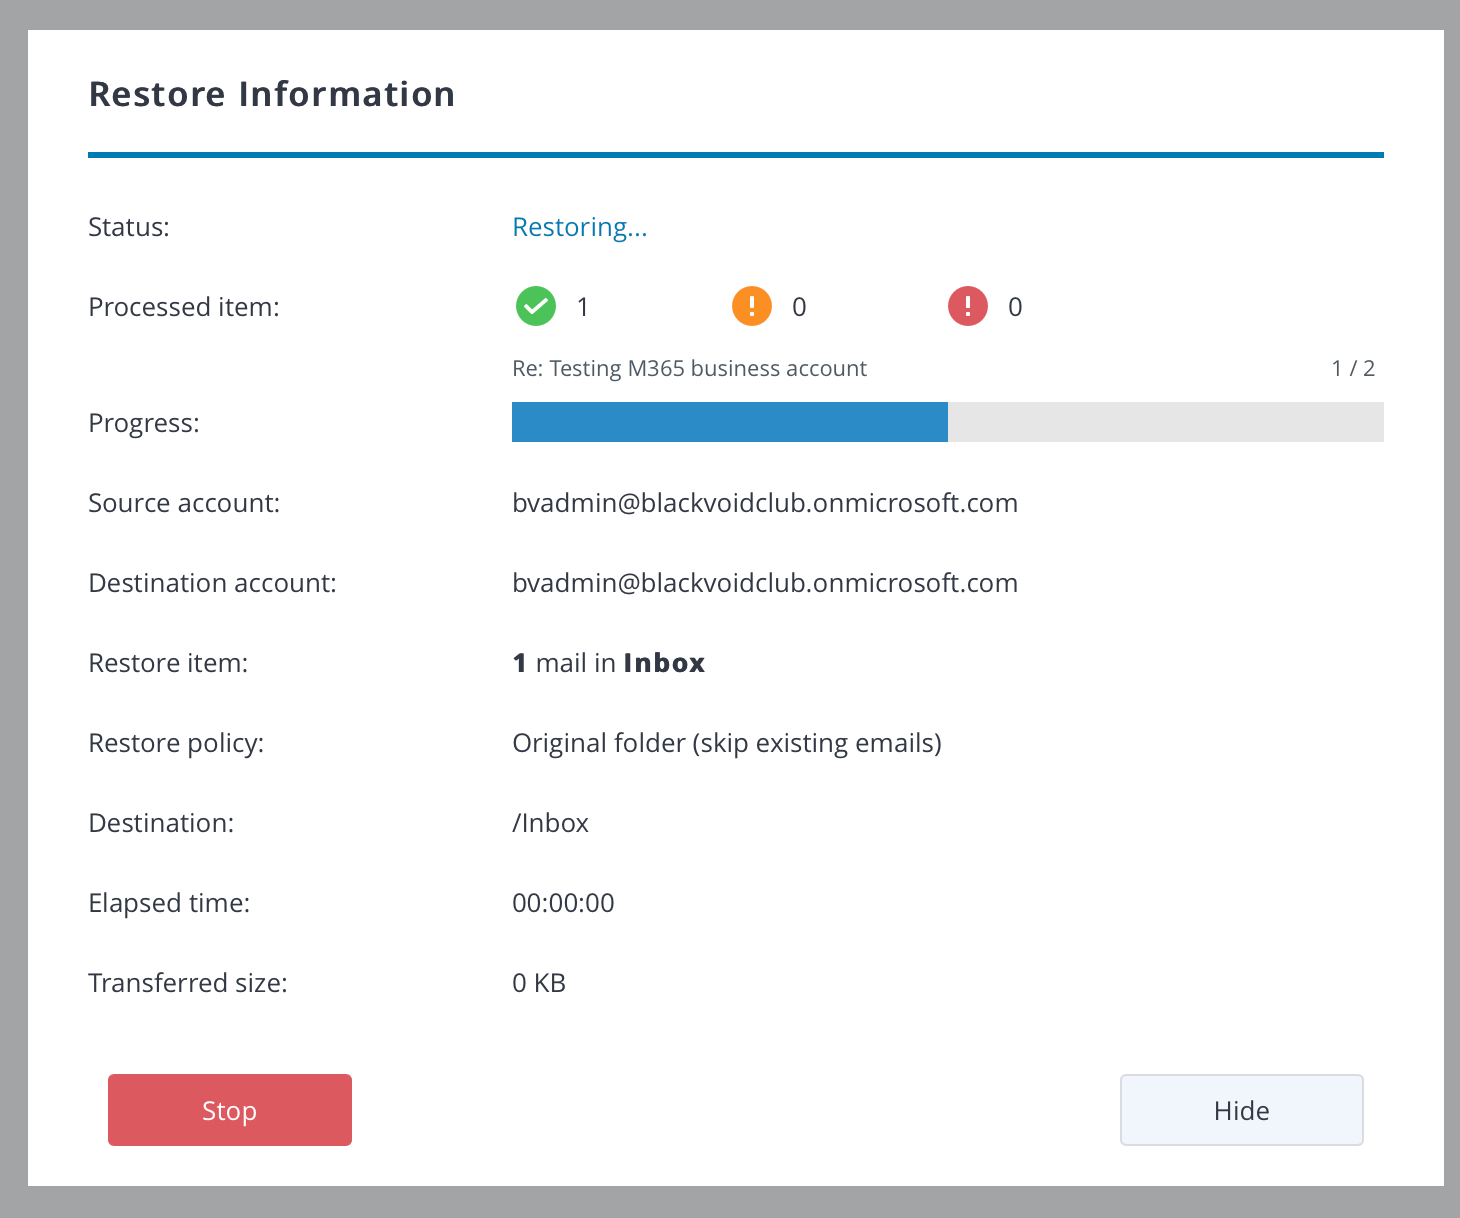
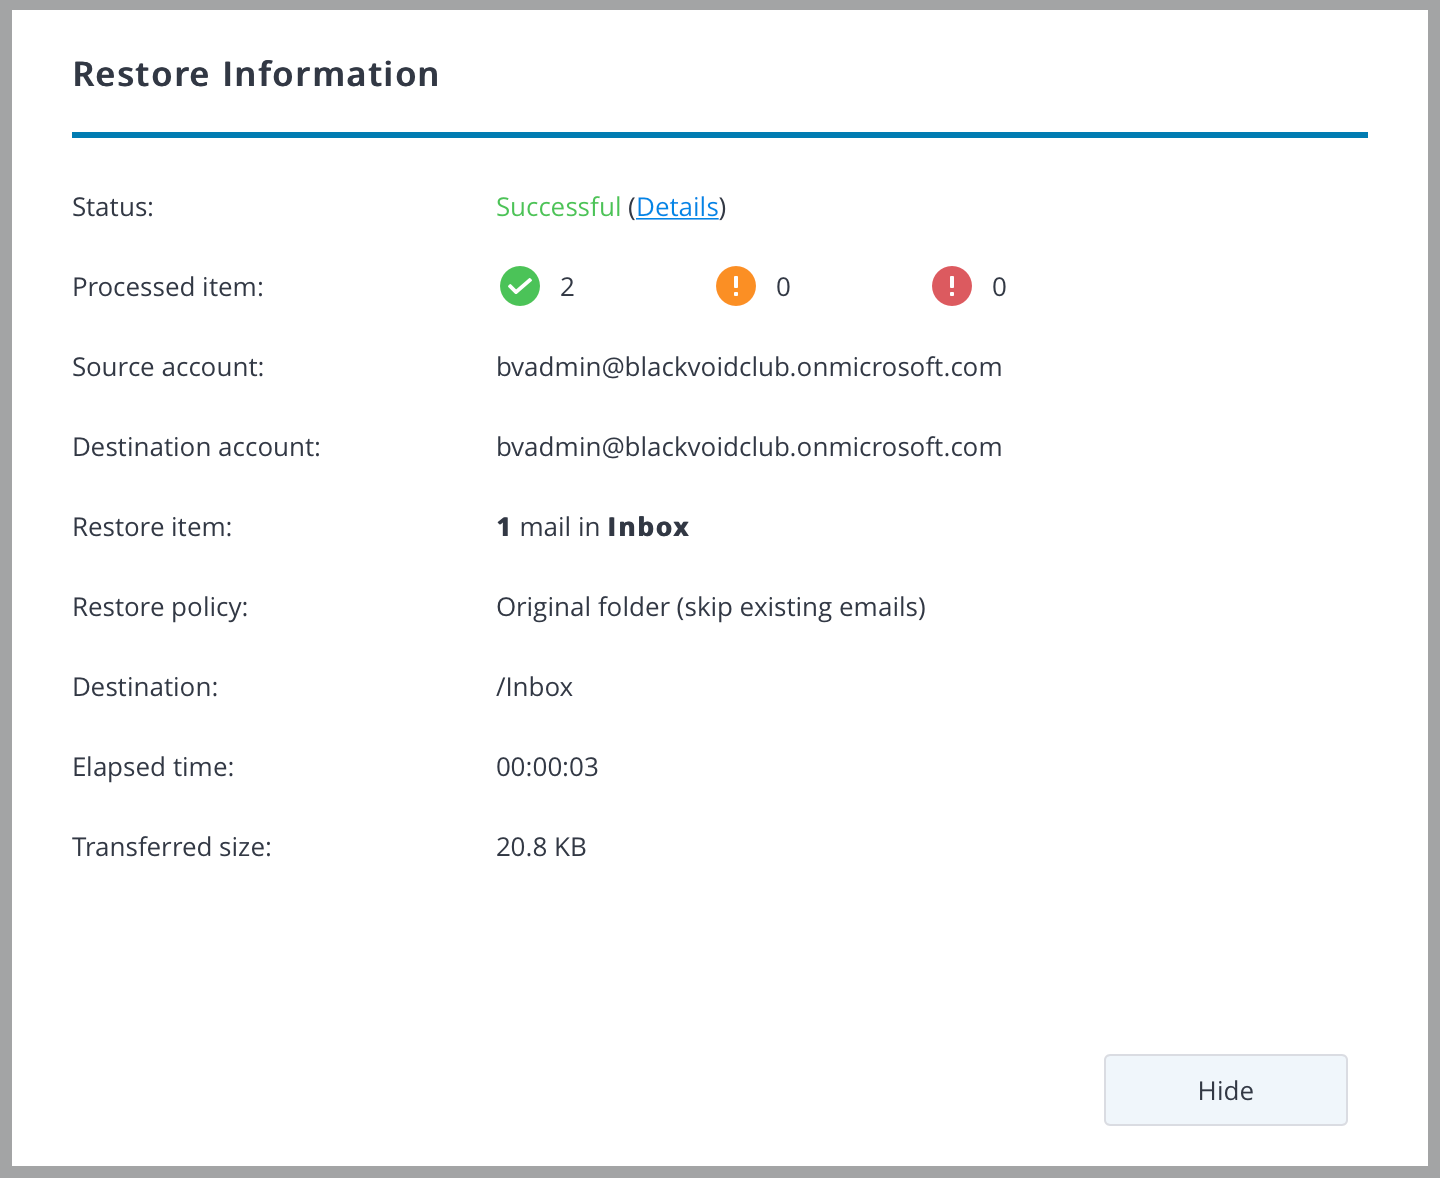
It is that simple. The item will be back in your O365 and you can continue to use the service. So far you can see how a backup solution such as Active Backup for O365 can be simple to use from a user perspective, and yet powerful when needed.
In the next image, you can see how you can access a specific version of an OneDrive file from a certain point in time if you need a version that is not the latest.
If you have your Active Backup tasked configured for multiple versions (check the beginning of the article for configuration images with retention policy), you can have access to all the changes for all of your content for a specific point in time restore. Handy right?
So a user can access all their documents, and various files as well as email items from a single portal if there will be a need to restore and fix any accidental deletions or corruption. All this without the need to bother any IT admins.
Active Backup for M365 - backup/disaster scenario options
So far we have seen how to configure Active Backup as well as how a user can use a Portal page to access the content of those backups in case of a bad situation. Also, you got the picture that having this kind of solution can come in real handy. Same as with any backup, nobody wants to mess with it, but we sure love it when we need it.
This next part is the main reason for this article. How to backup your Active Backup? Why? Well, what will you do if your Synology NAS fails? If drives fail (and they will)? What about a case that at some point you have to migrate to a new Synology NAS? Most people (admins) that administer AB and Synology NAS units will ask this question, the main reason for this article is for everyone else to see why this is needed.
There are many reasons that you need a backup solution. Depending on your needs, and the fact of how often O365 tasks are kicking in, you will need to configure your Active Backup backup procedure as well. With Synology NAS you have several ways to backup your AB setup, but at the moment only one works as intended. Other solutions are partial and while they might come in handy, you need to be aware of the potential problems and investment needed to make a working backup for these types of situations.
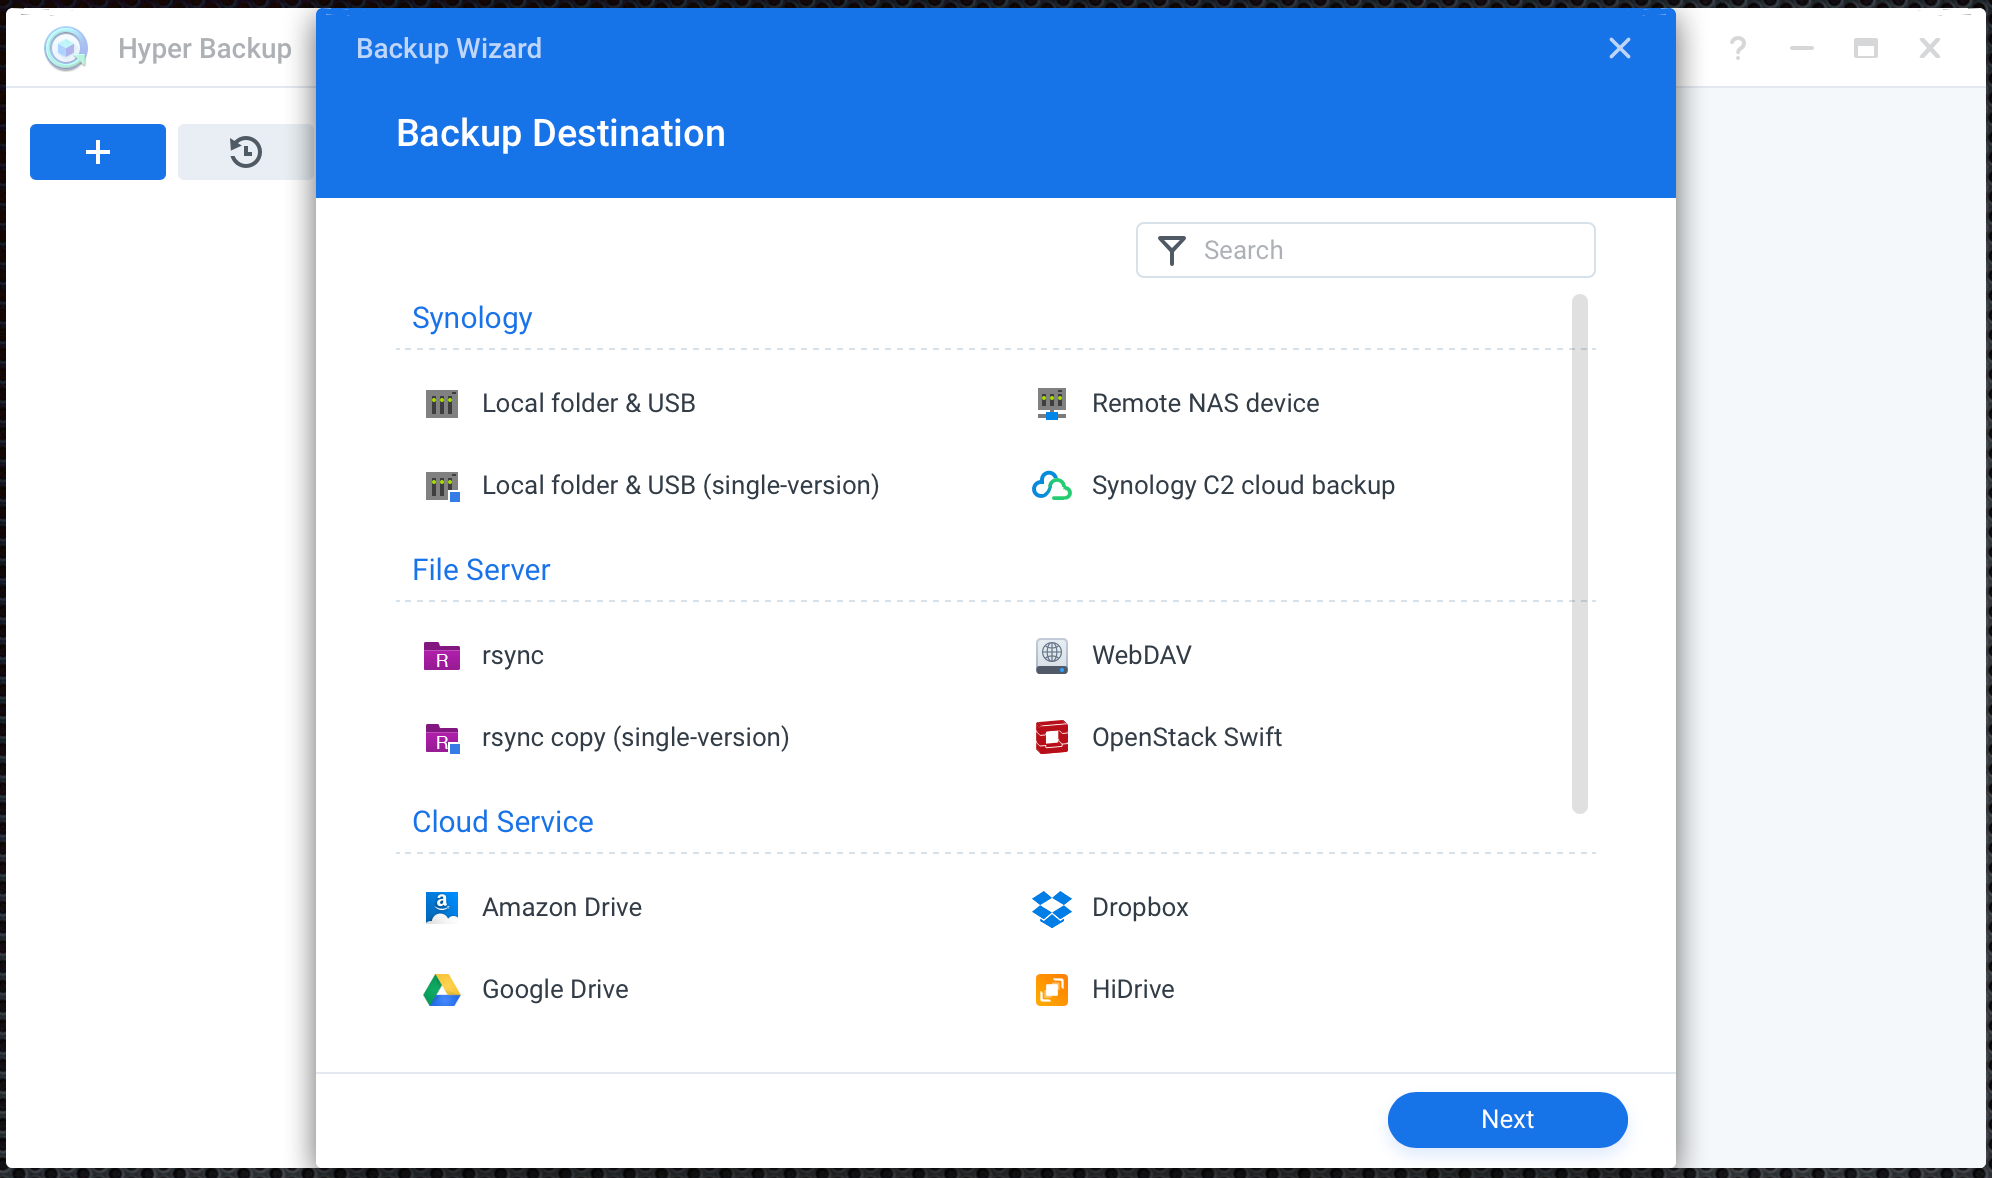
Hyper Backup with C2 - partial backup solution
Let's start with the solution that most people would think to use in a case like this. If you are unfamiliar with the Hyper Backup app and Synology C2 cloud backup platform you can get some more info on it here. In the article, you will see how you can use the HB tool along with C2 to have an offsite backup solution for your NAS.
With this in mind, and back to our main topic here, one would ask if HB+C2 combination could be a working solution for your AB backup scenario.
The short answer is, no.
Let's see how to set it up and what steps would need to do to relink your restored AB task and hopefully get a working solution.
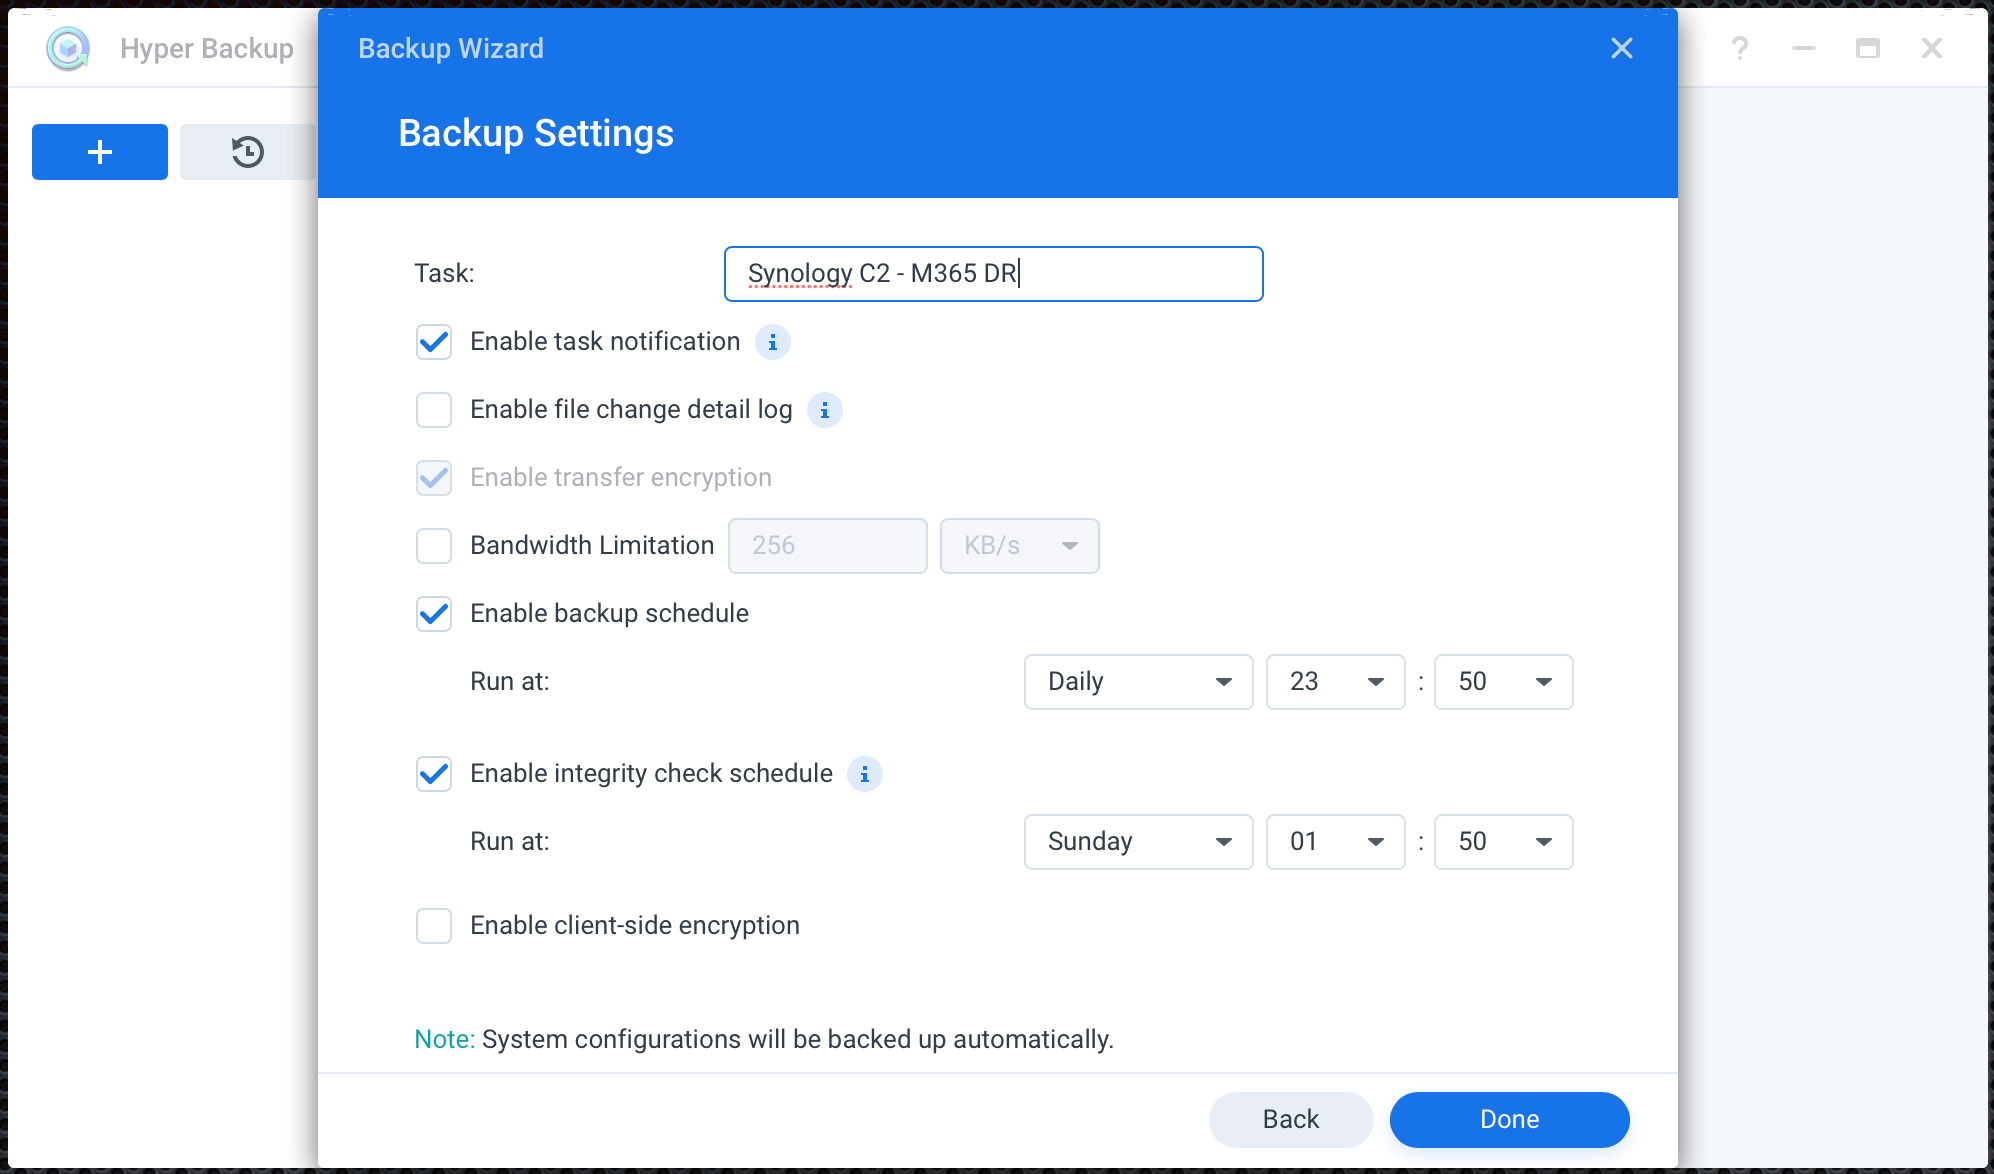
Configure Hyper Backup with C2 to backup Active Backup content
Select Synology C2 cloud backup
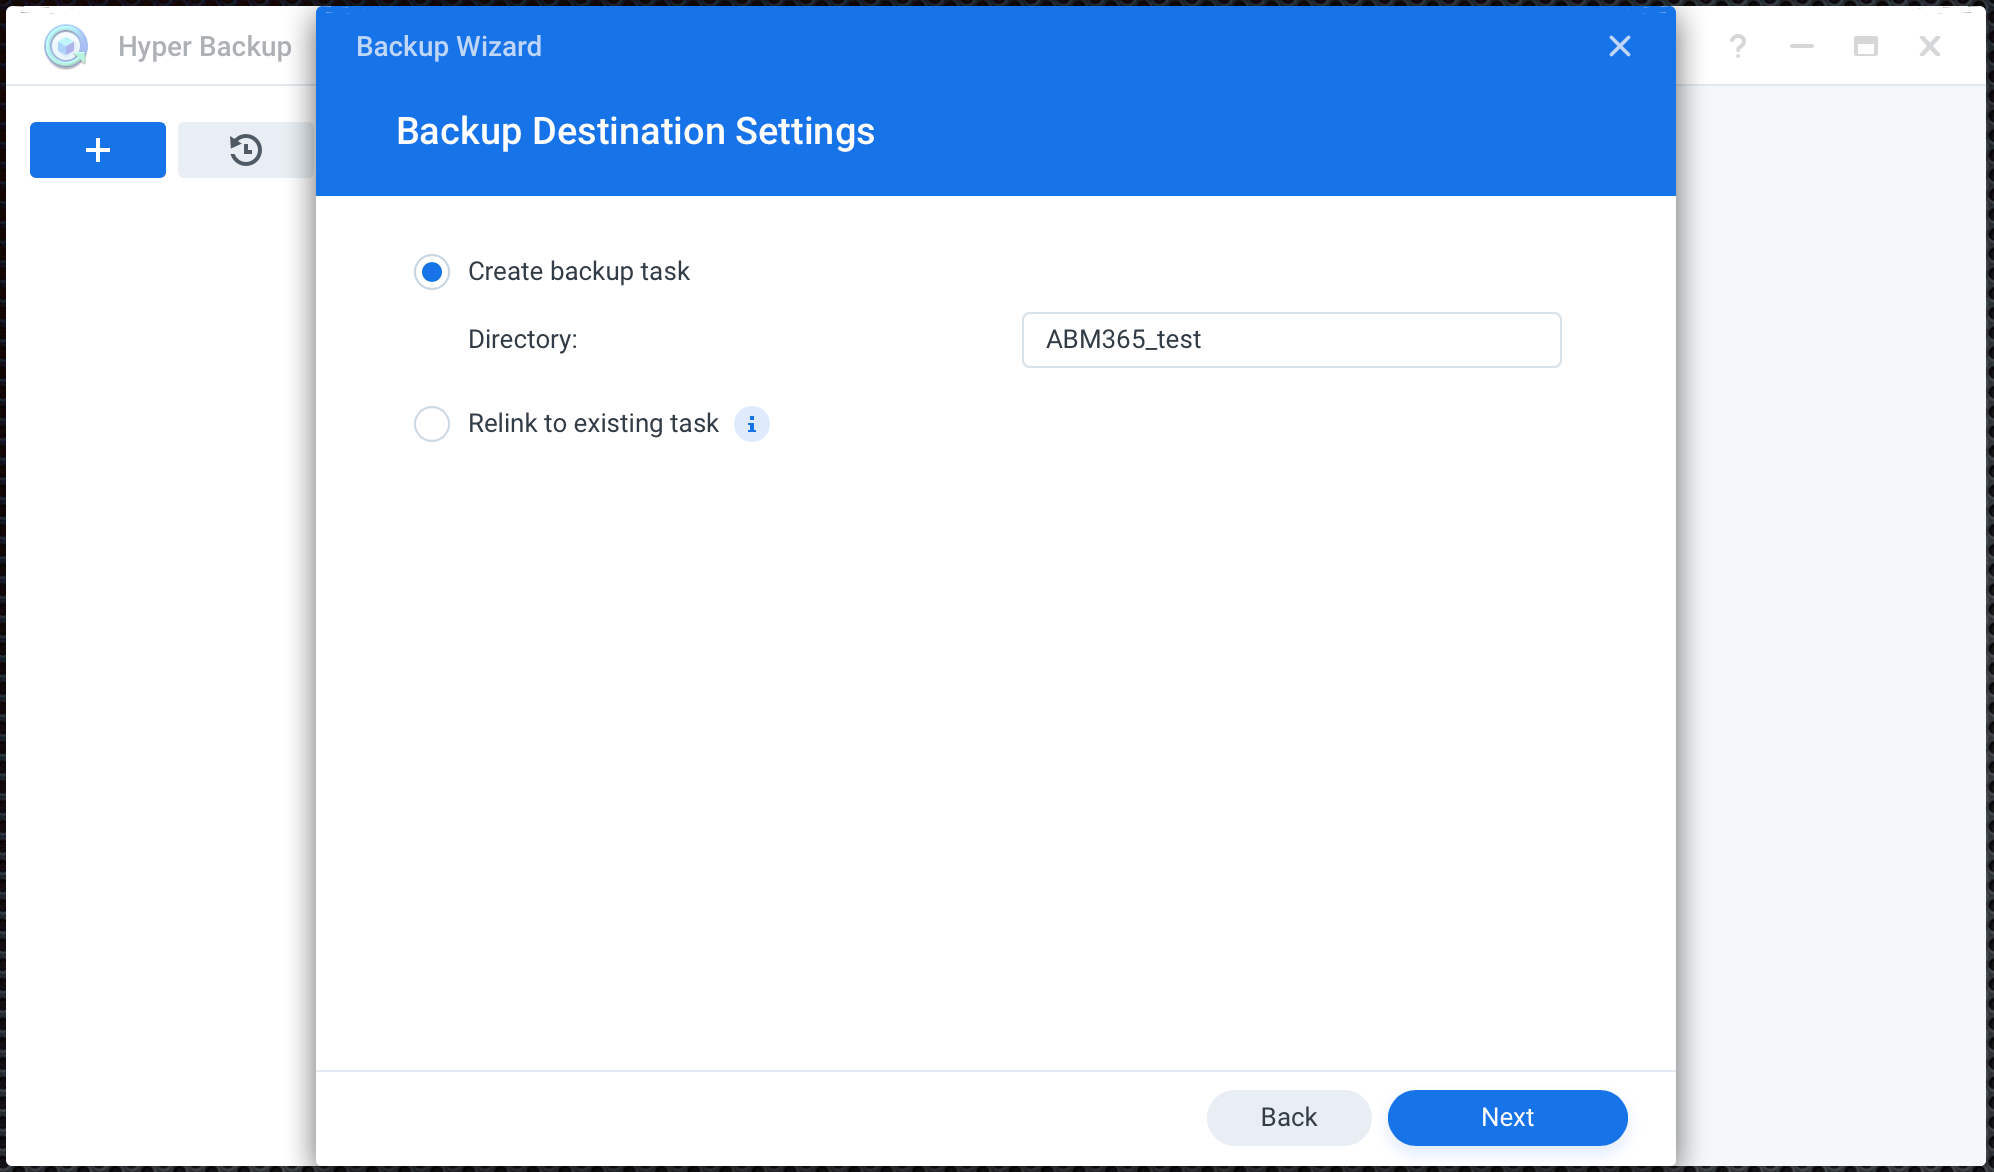
Enter the name of the folder that will be created on C2 to house your AB backup
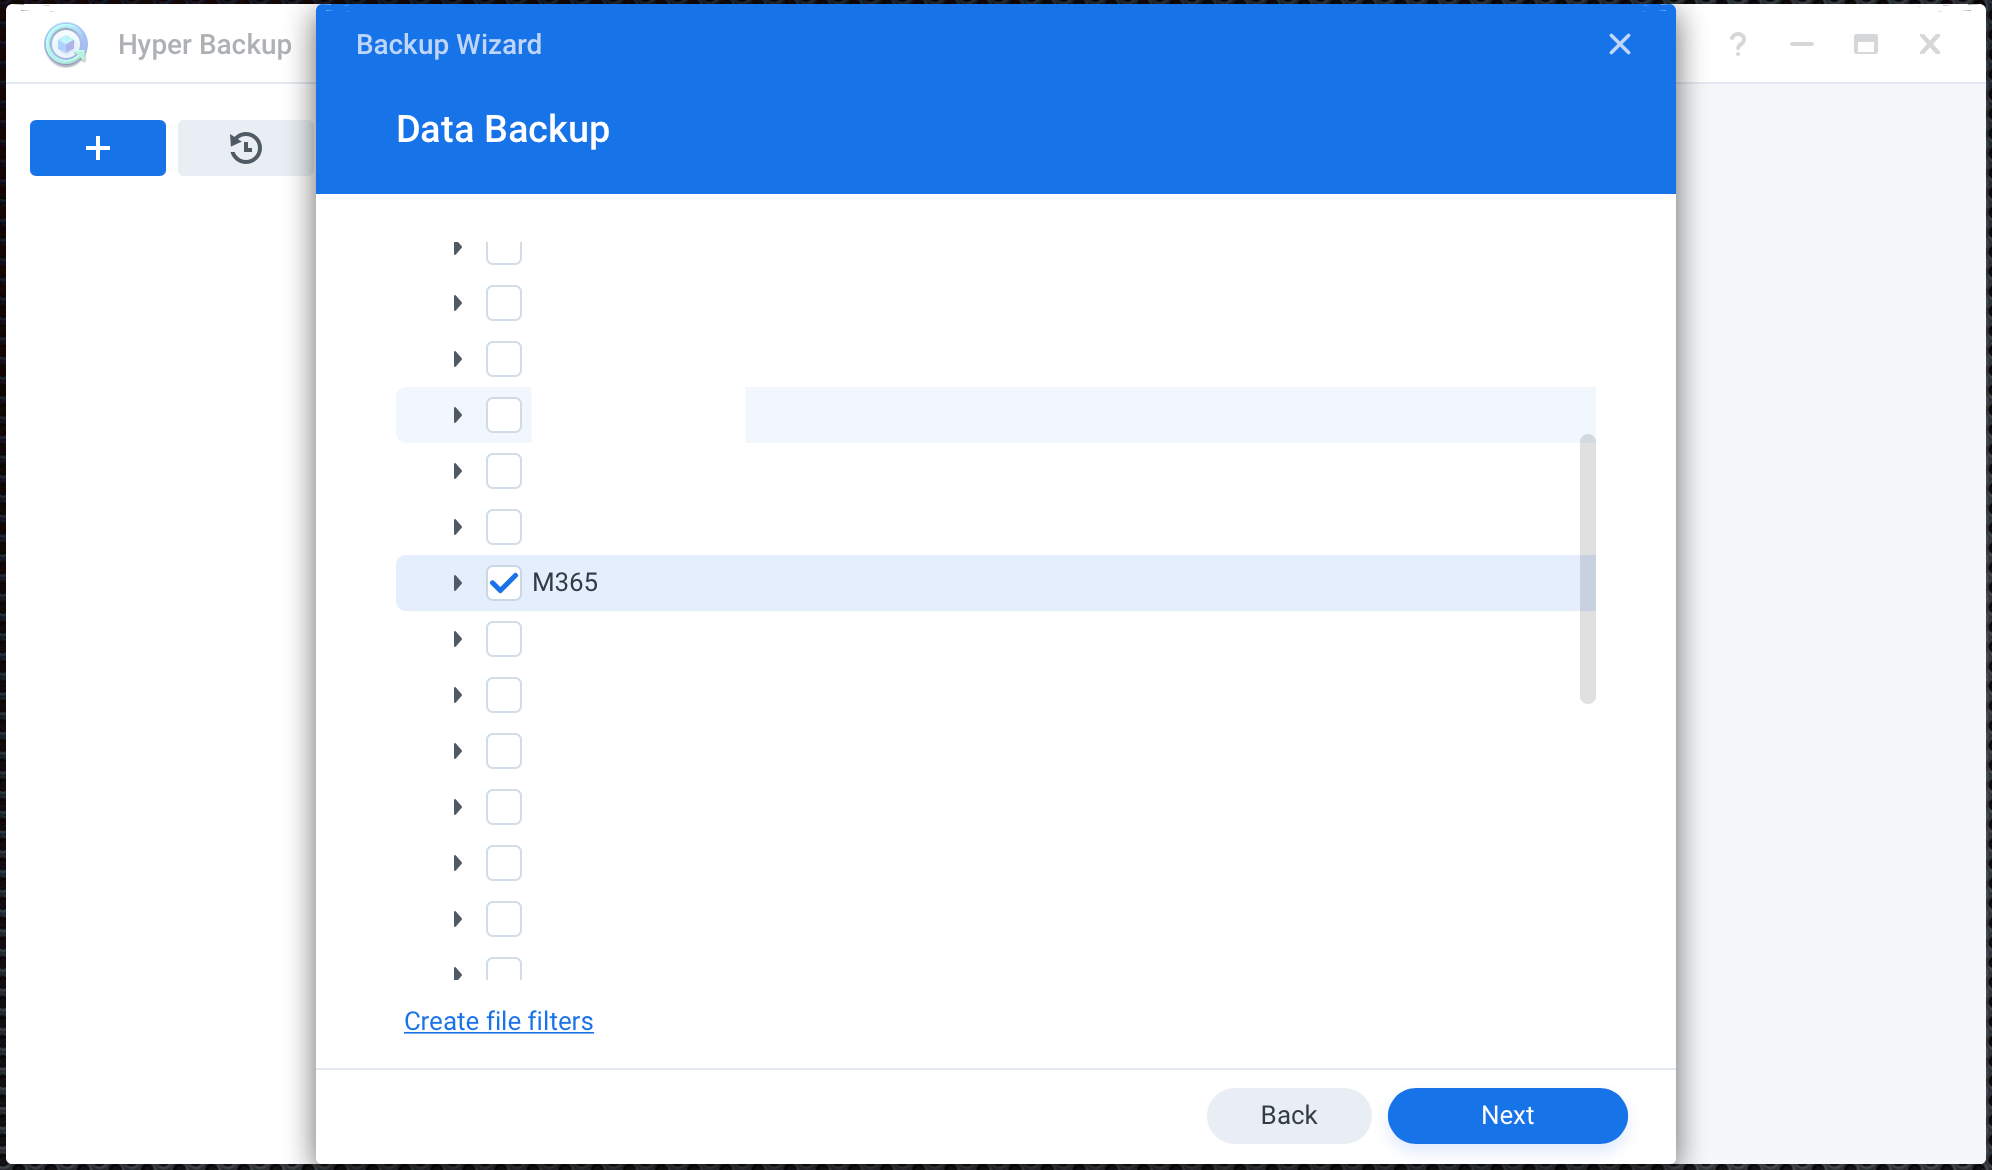
Select a local NAS folder used by AB for its backup tasks
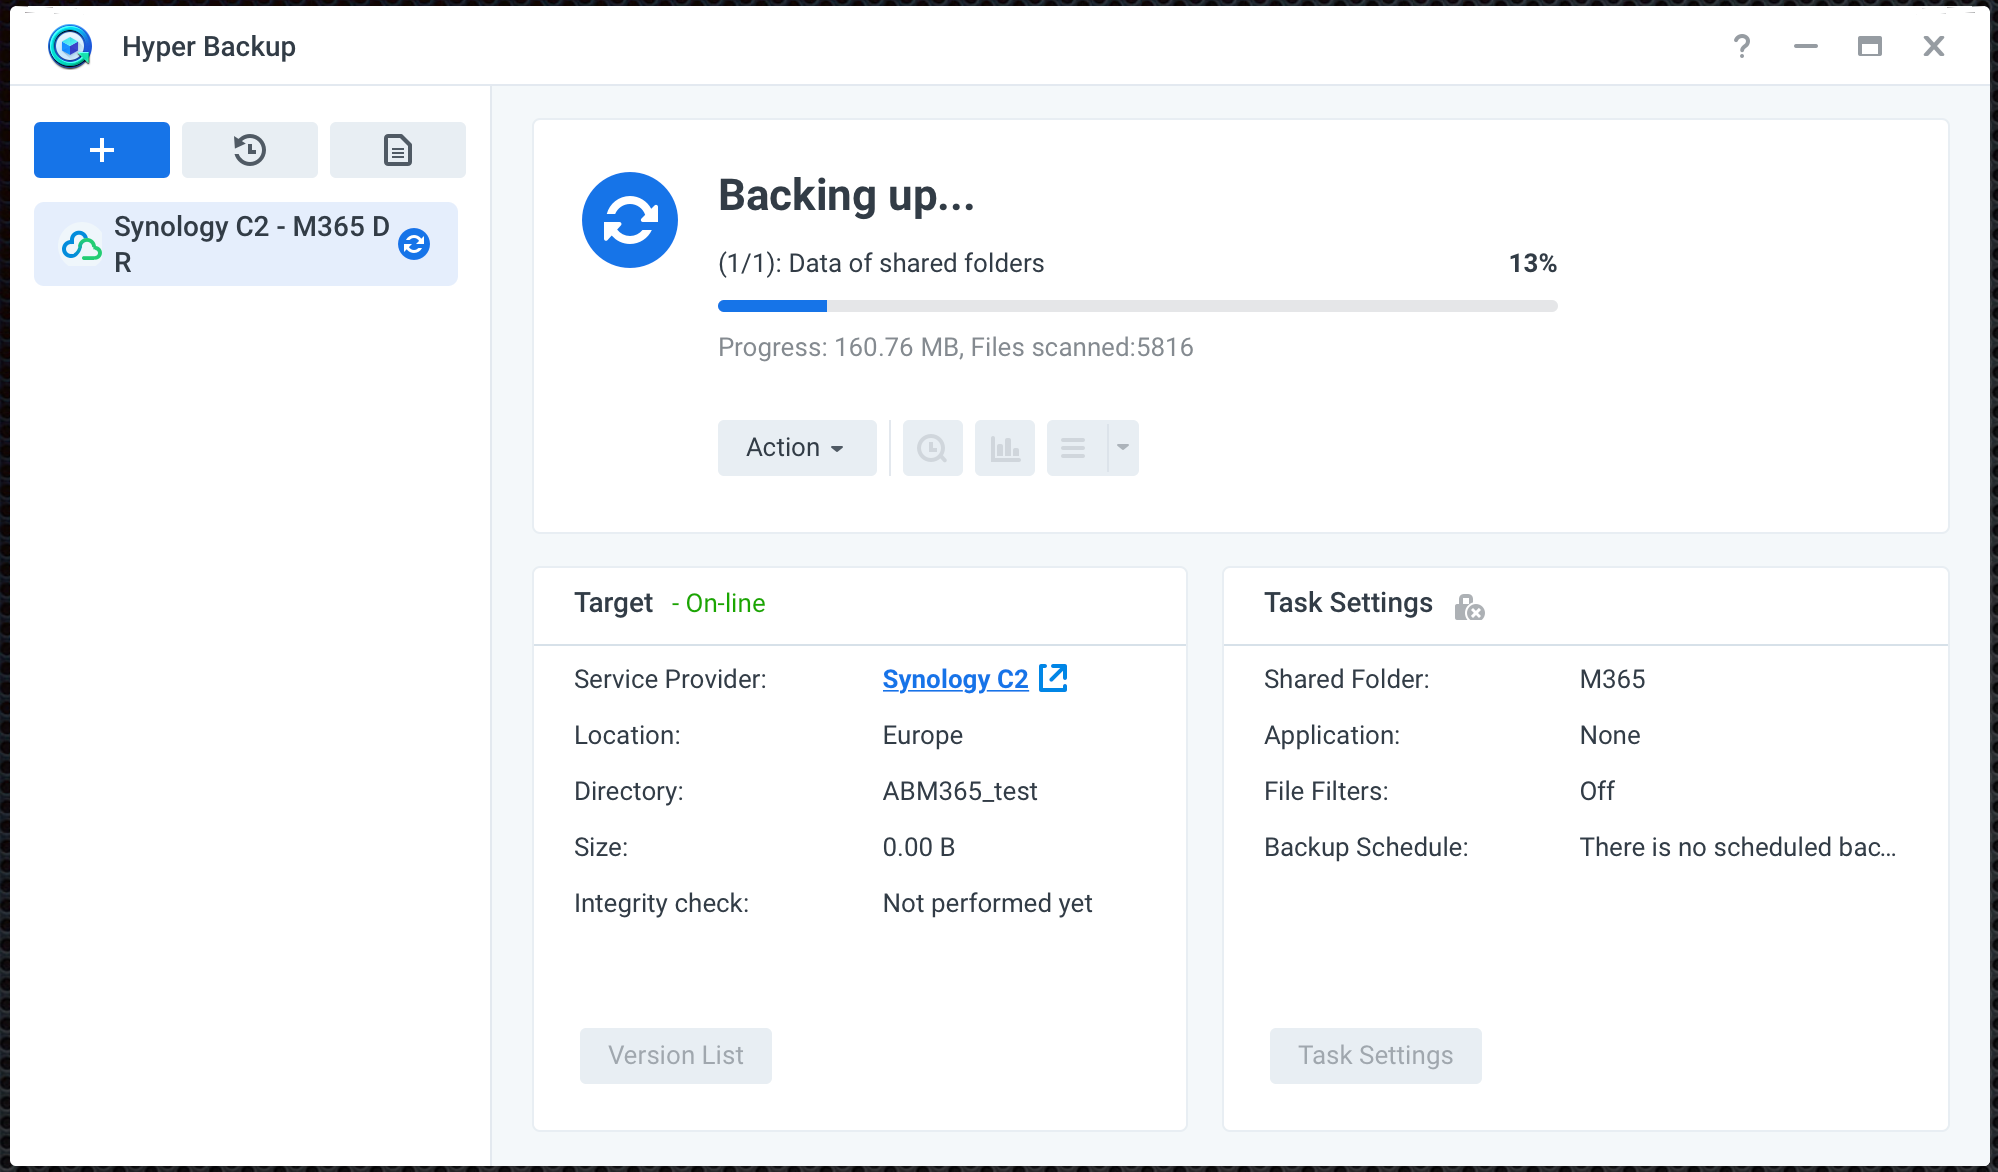
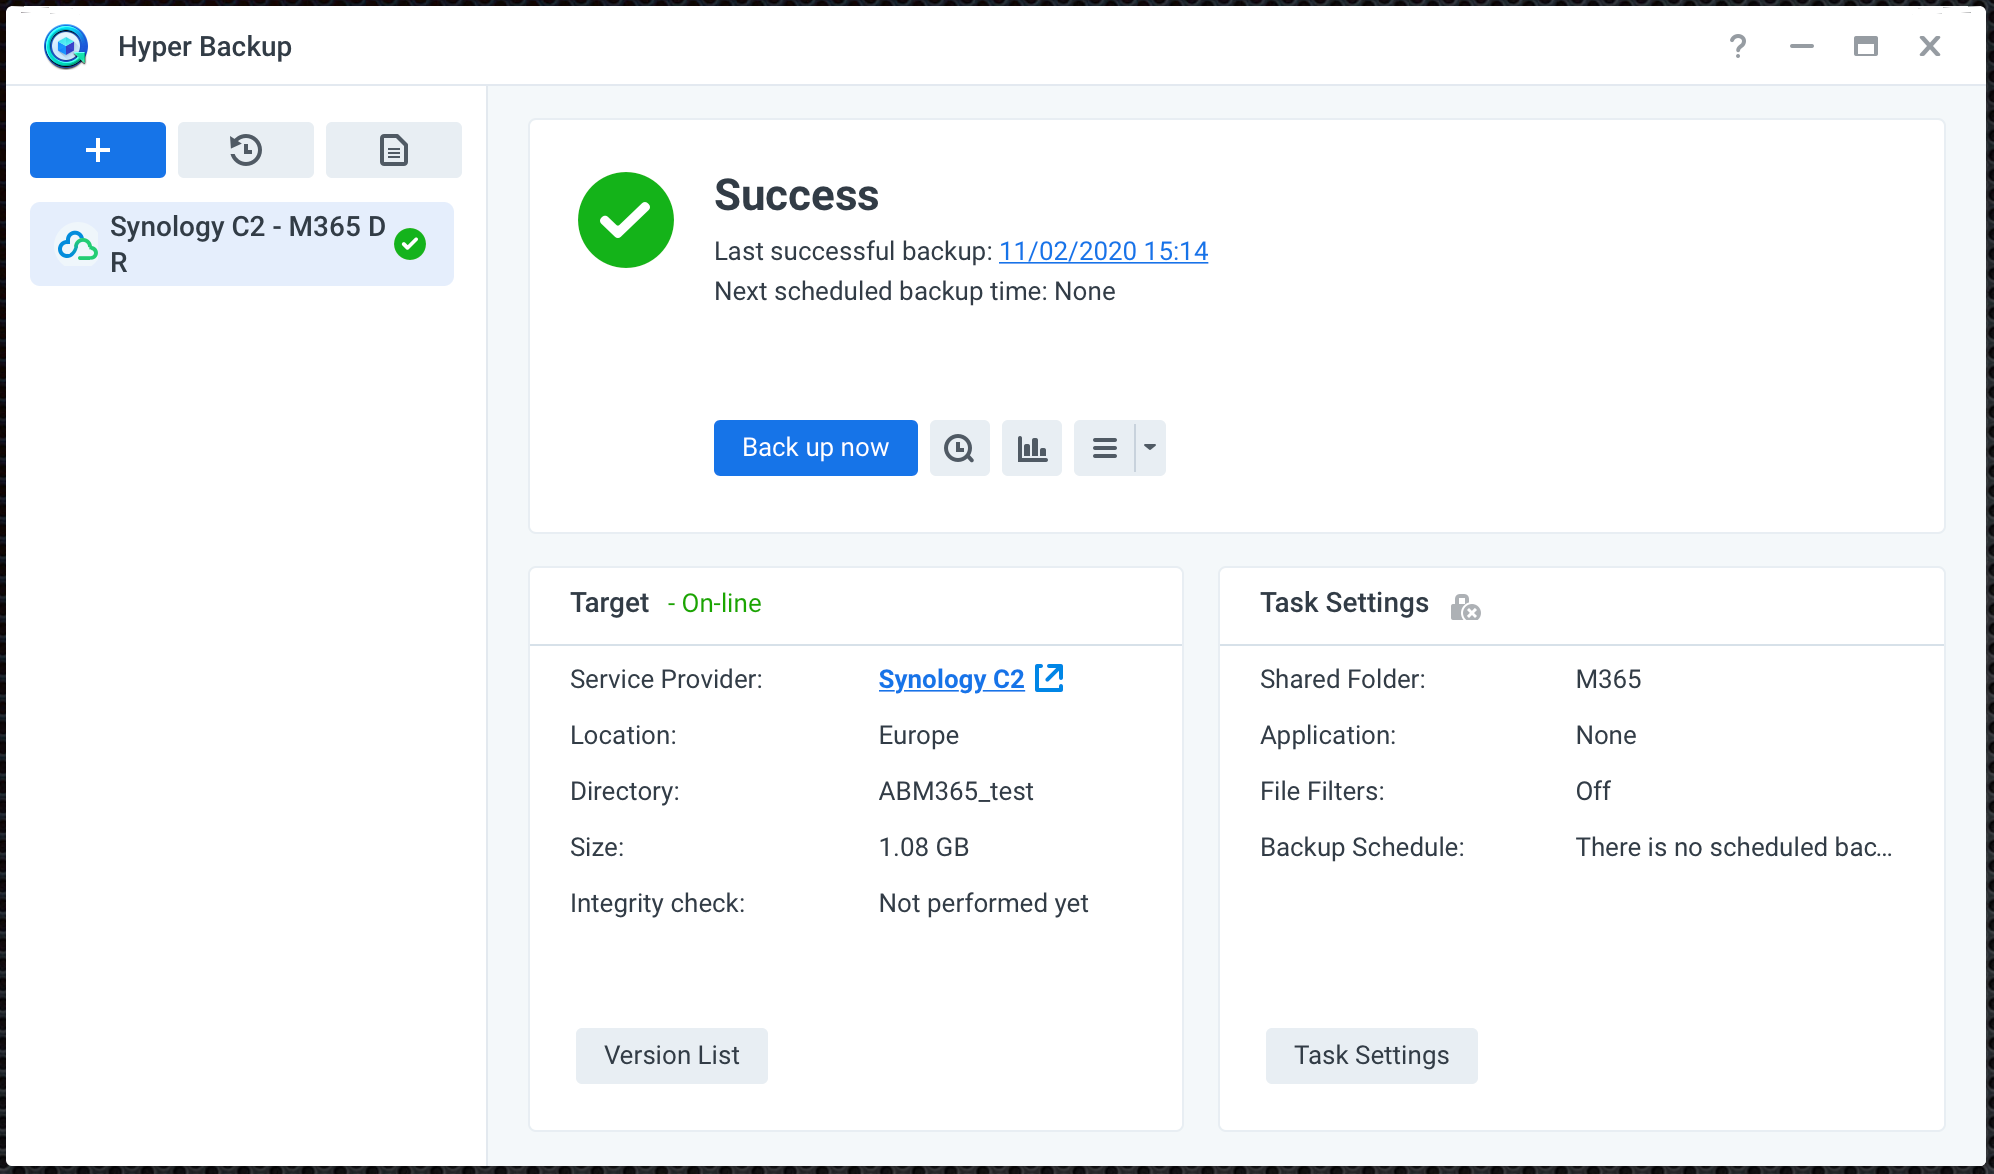
That's it. Backup complete. So now we have our AB backup in Synology C2 cloud. Let's see what would happen if you simulate a problem with the AB backup on your local NAS and how to restore and relink your backup.
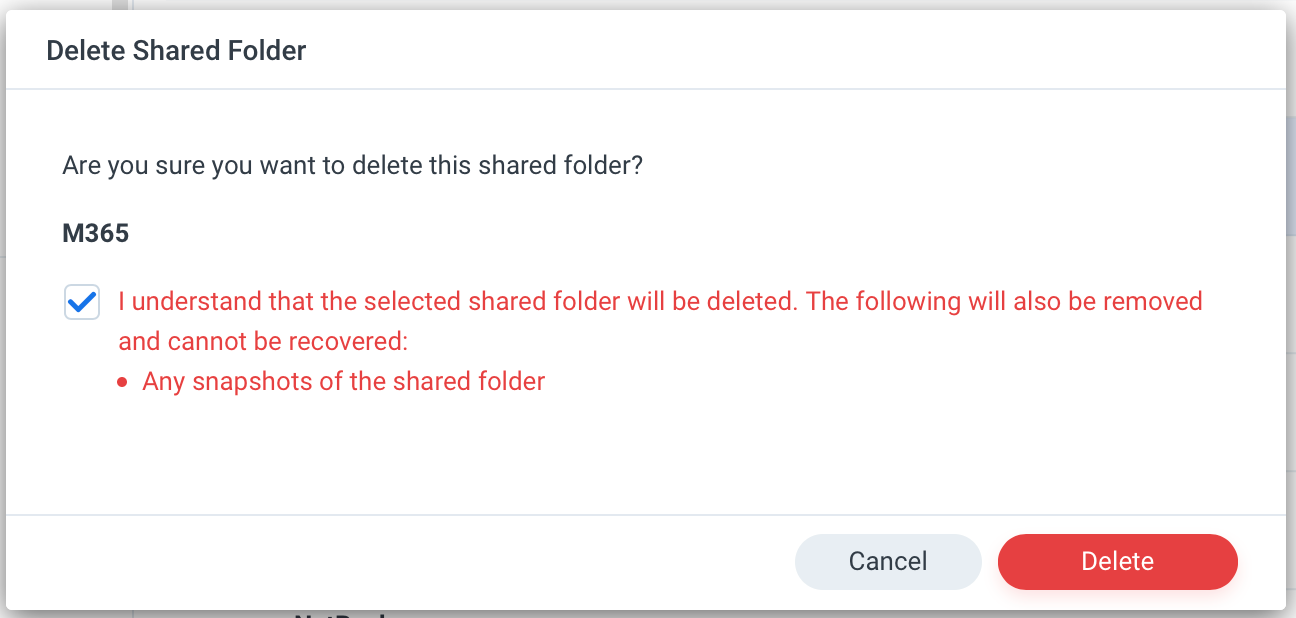
Remove Active Backup M365 task and delete the local folder with backup content
Now in this part, I will simulate a problem and accidental deletion of both AB task and the content of a shared folder where the backup lives.
Using Control Panel > Shared folders locate the folder used for AB backups and delete it.
Restore Active Backup content from C2
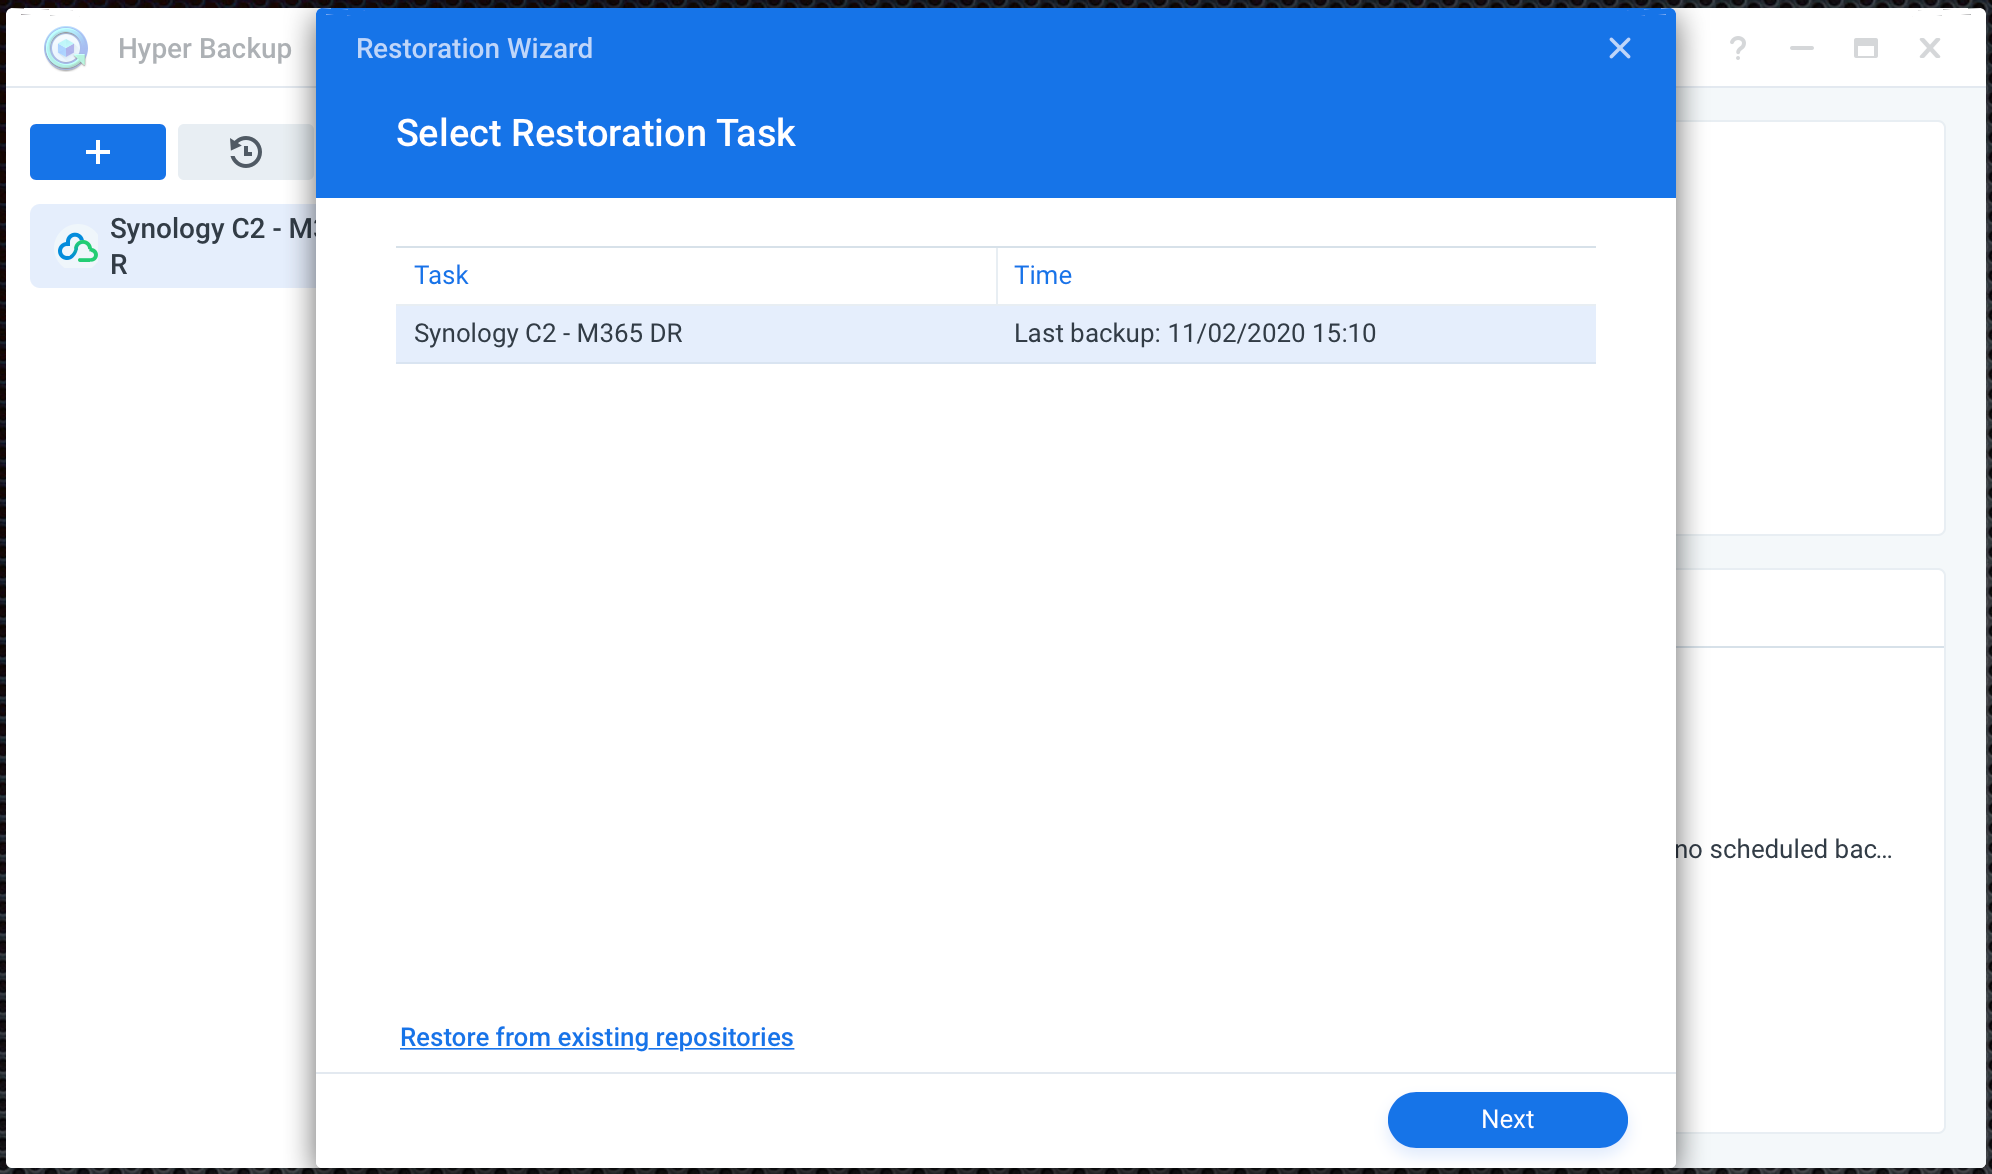
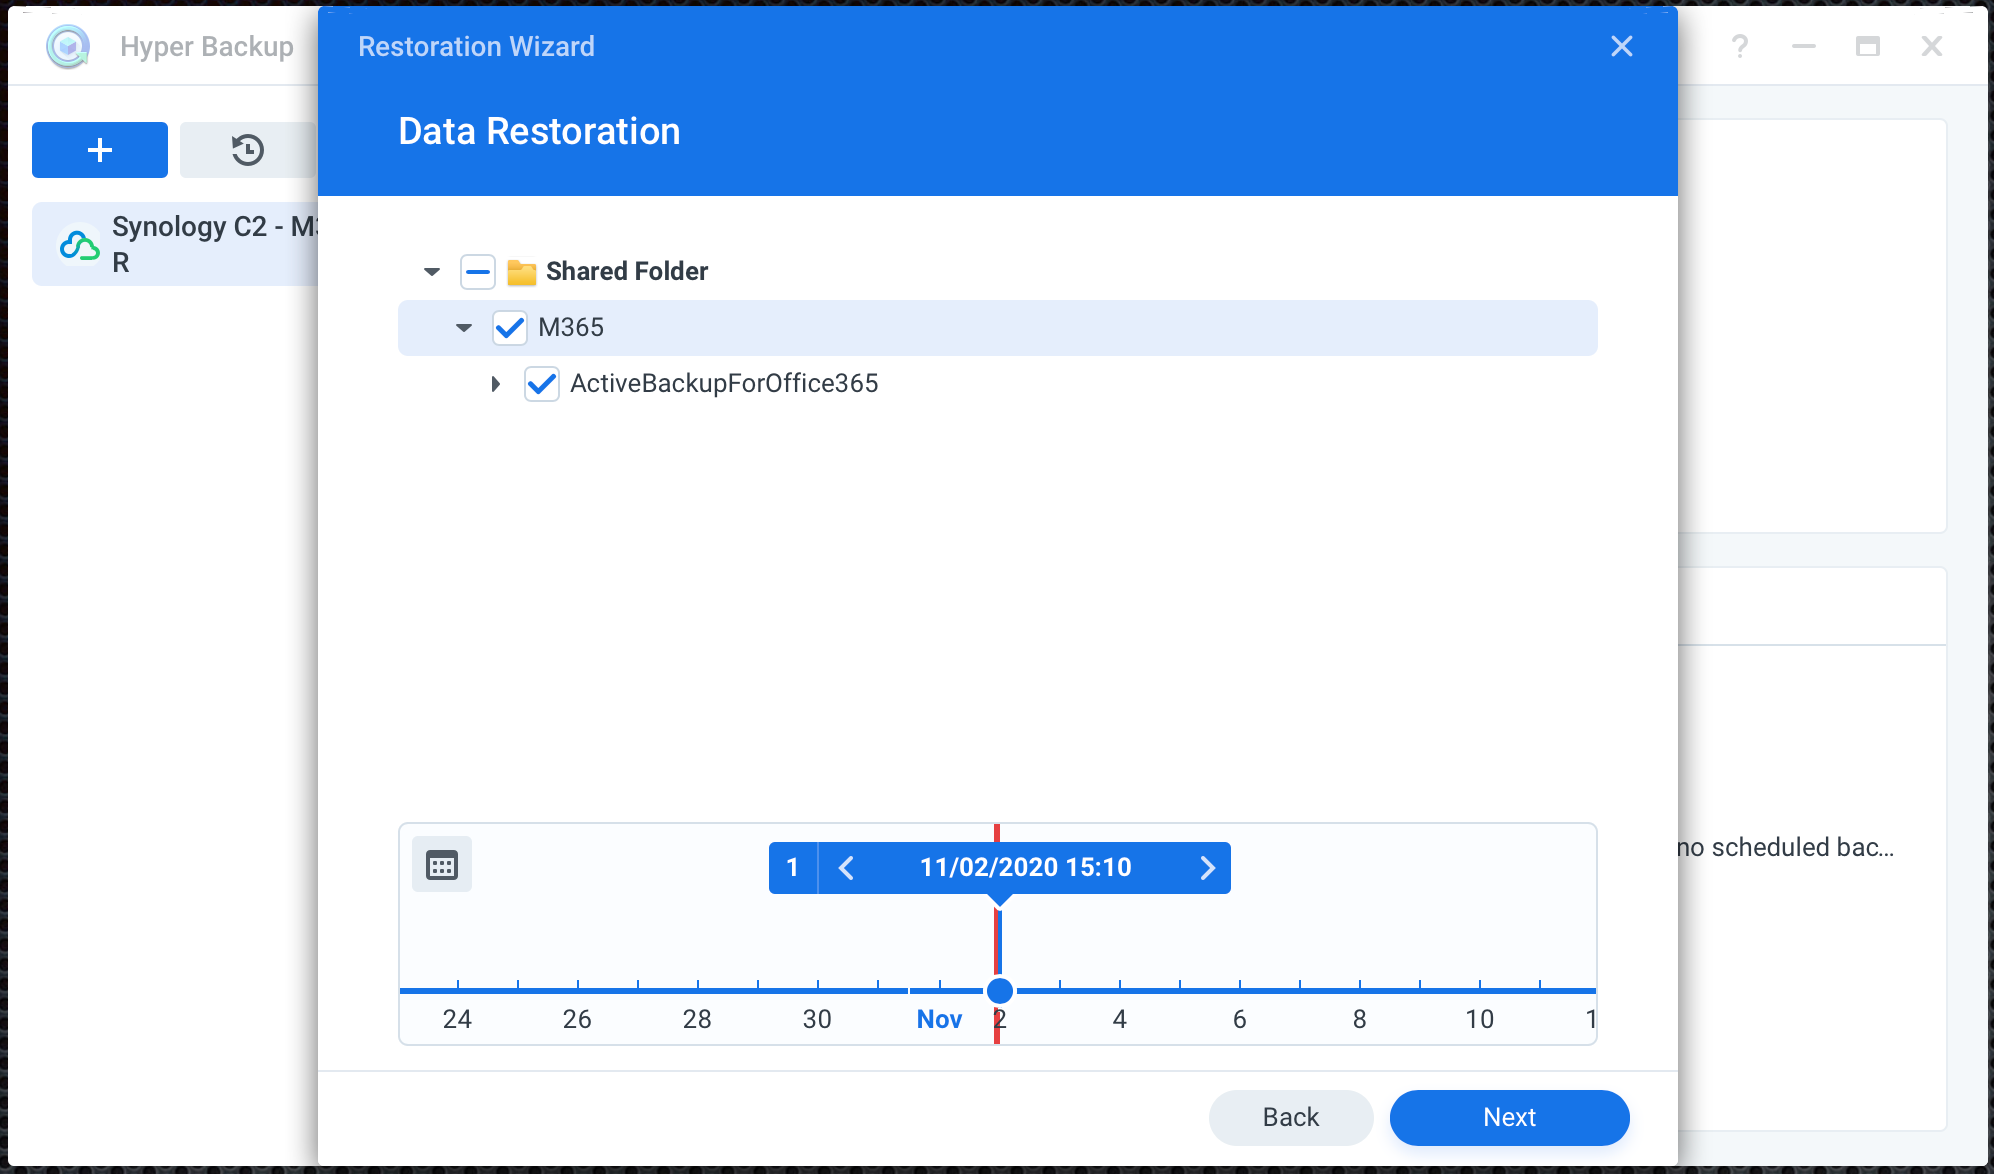
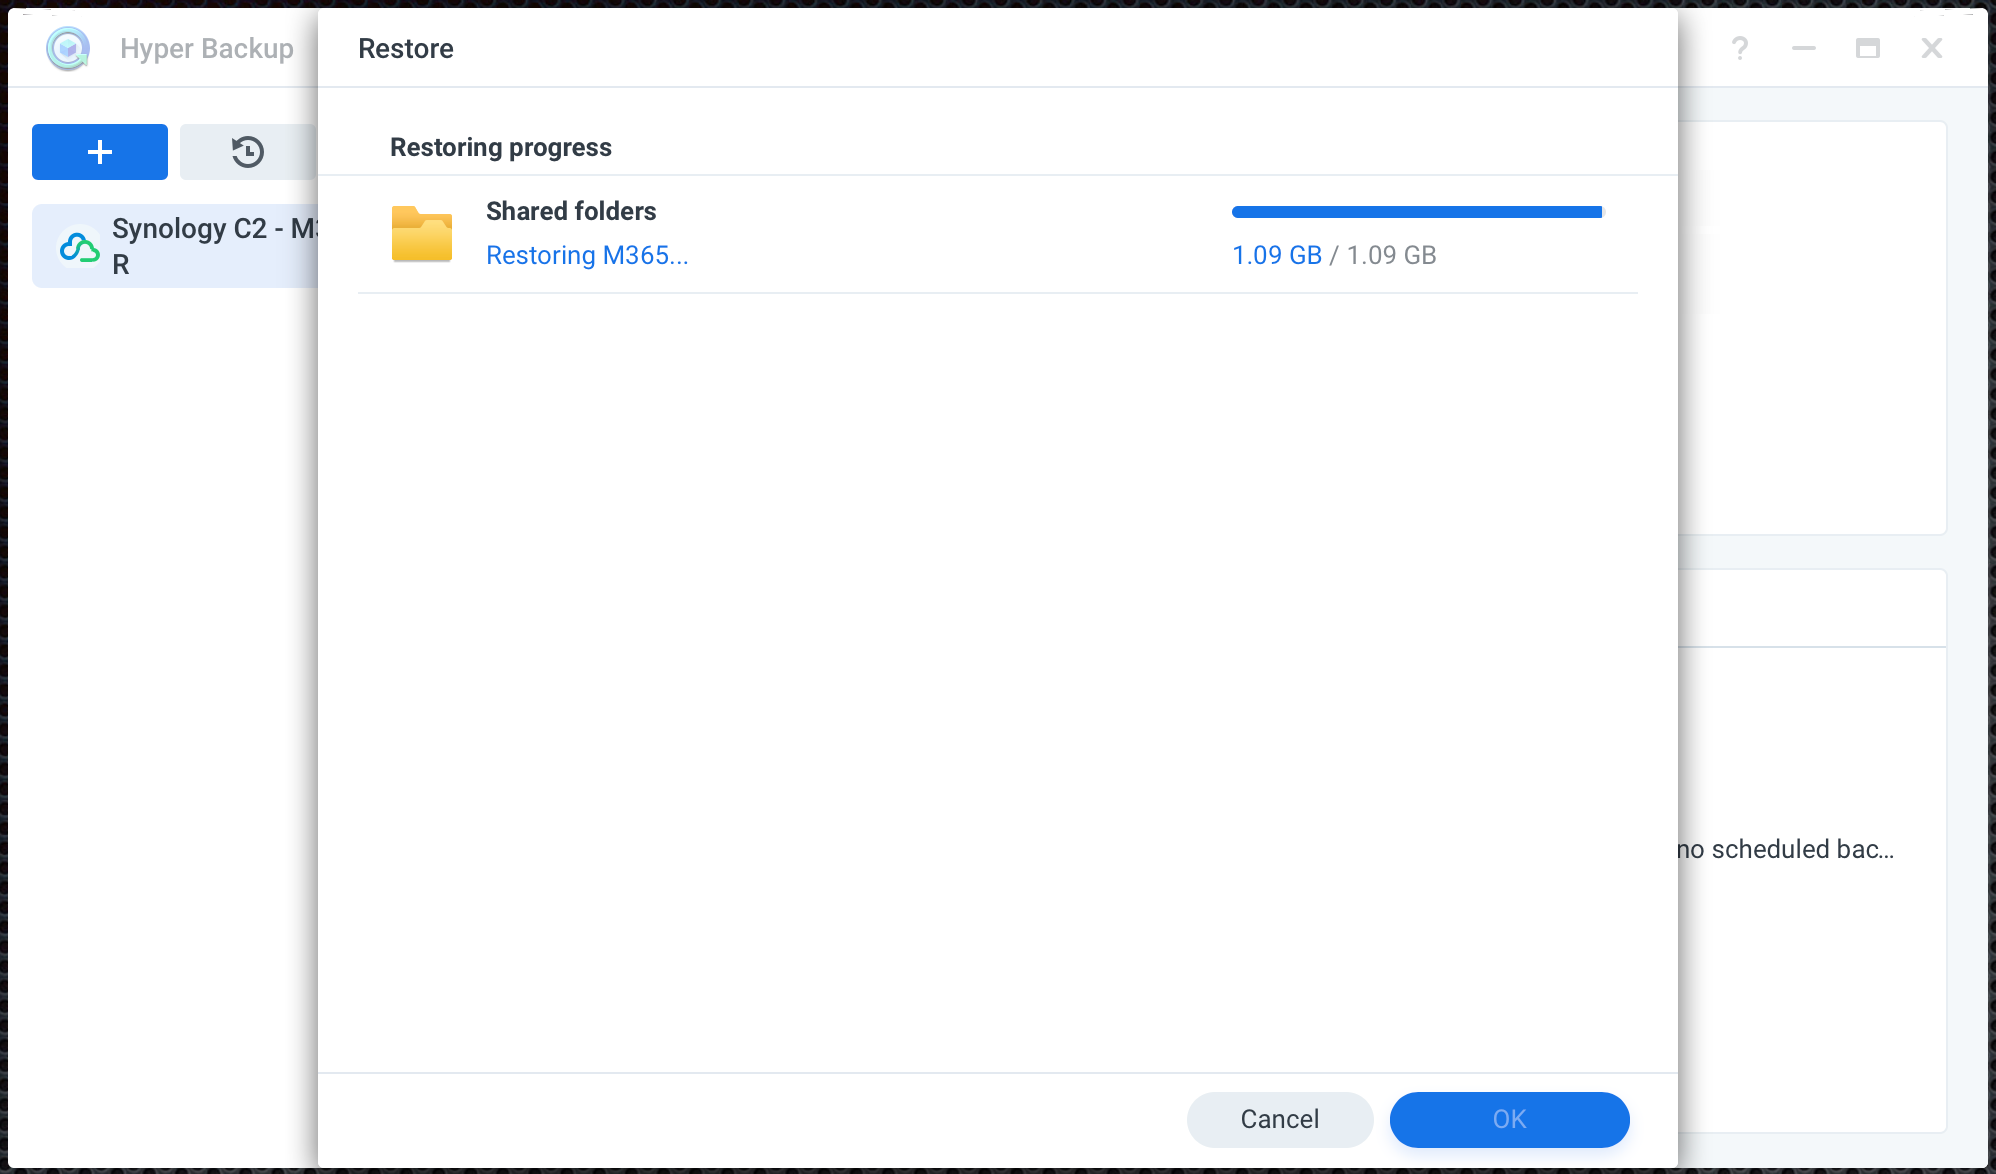
Now again, using Hyper Backup I will restore the content from C2 back to the NAS and attempt to relink.
Open Hyper Backup and use the Restore button once you have selected the task. Now just follow the wizard to restore the content.
Re-link Active Backup M365 task back in your Active Backup console (after Hyper Backup C2 restore)
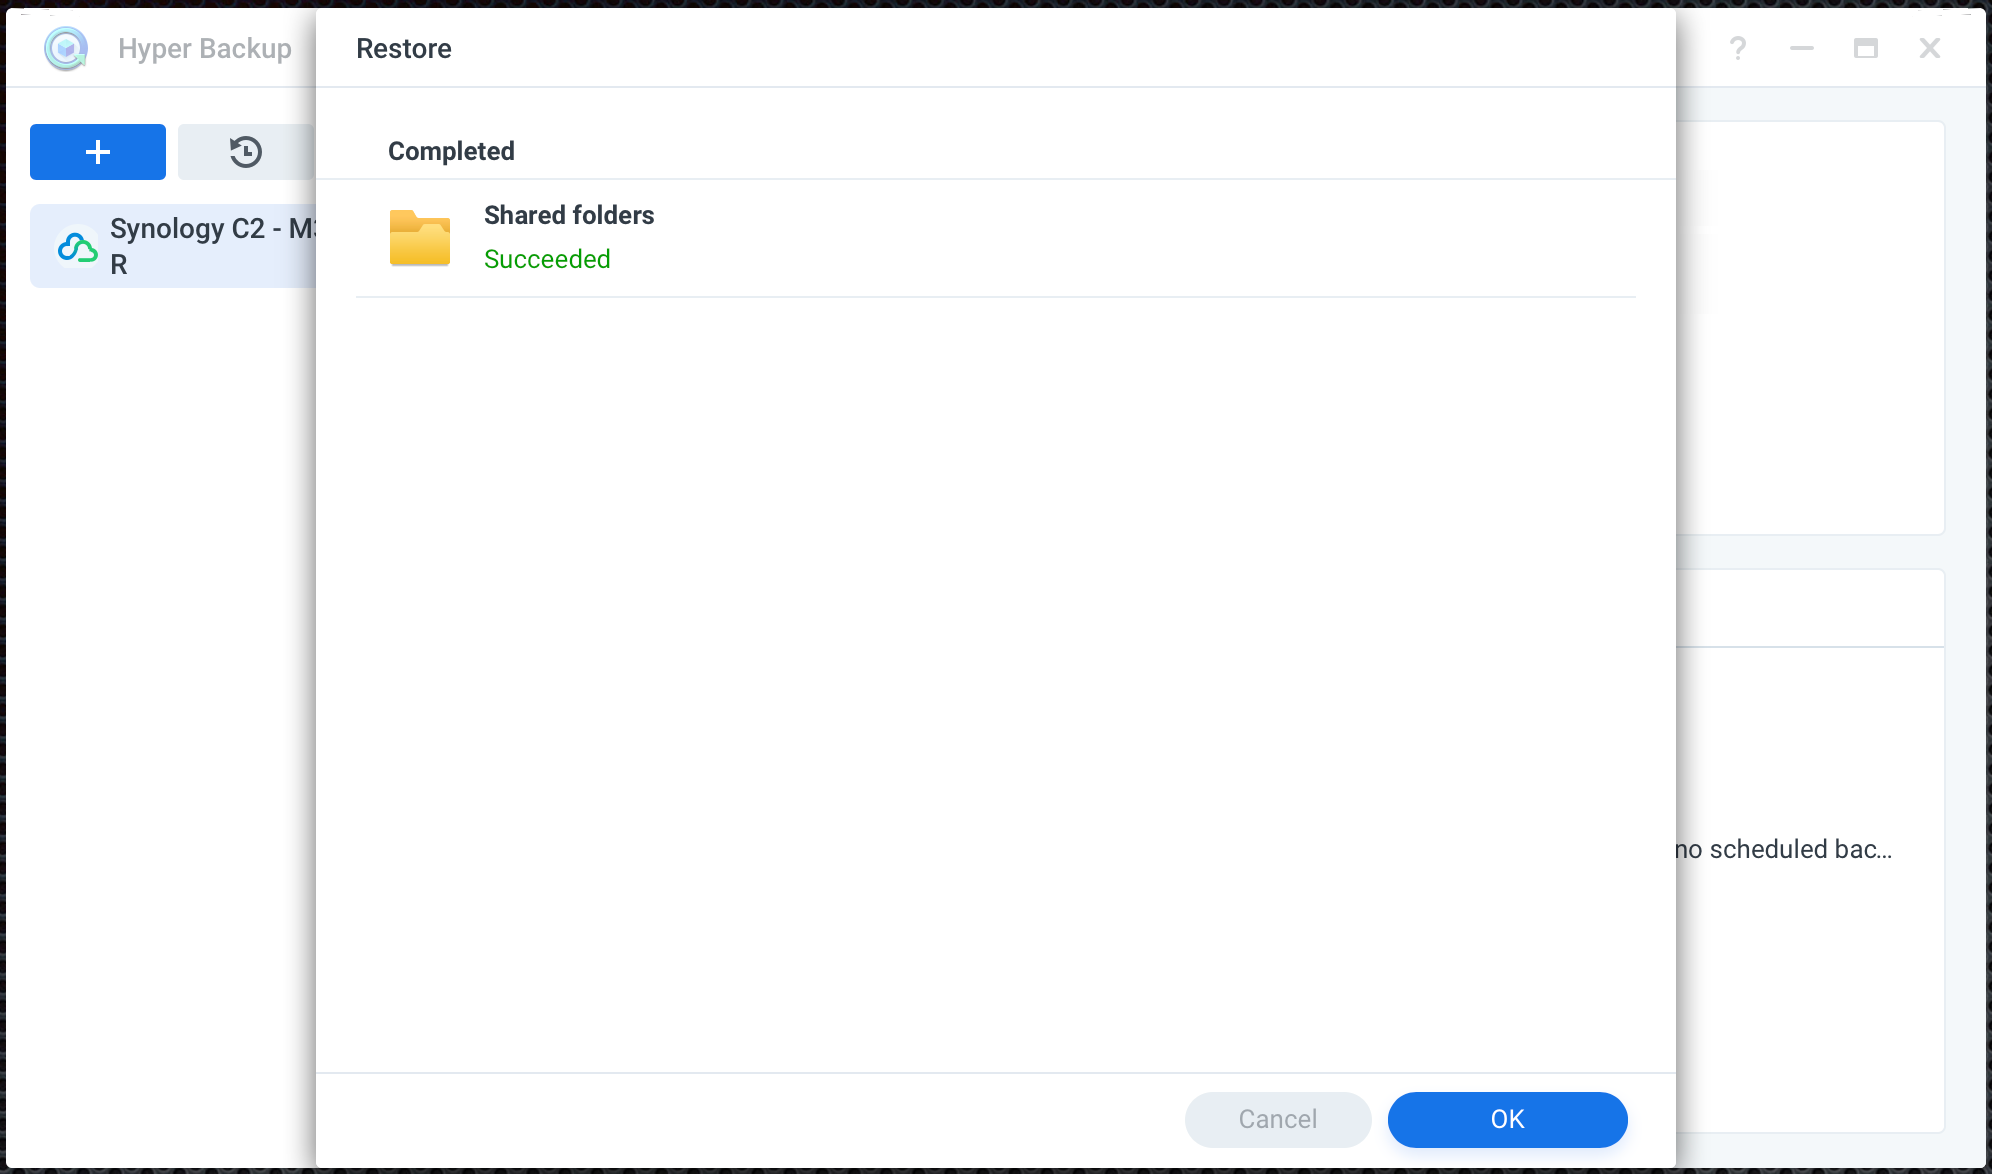
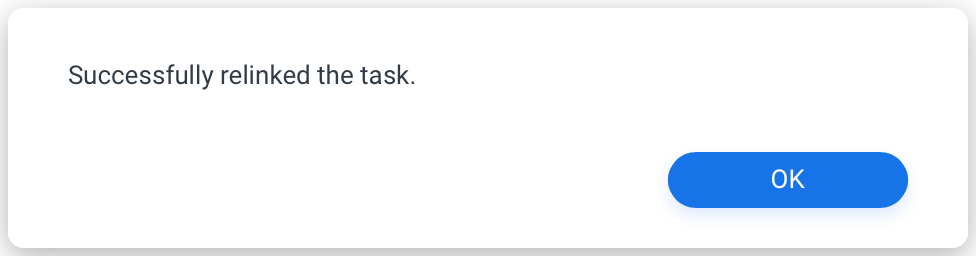
Now that we have the backup content back on our NAS it is time to see how to relink it and what use do we have from it.
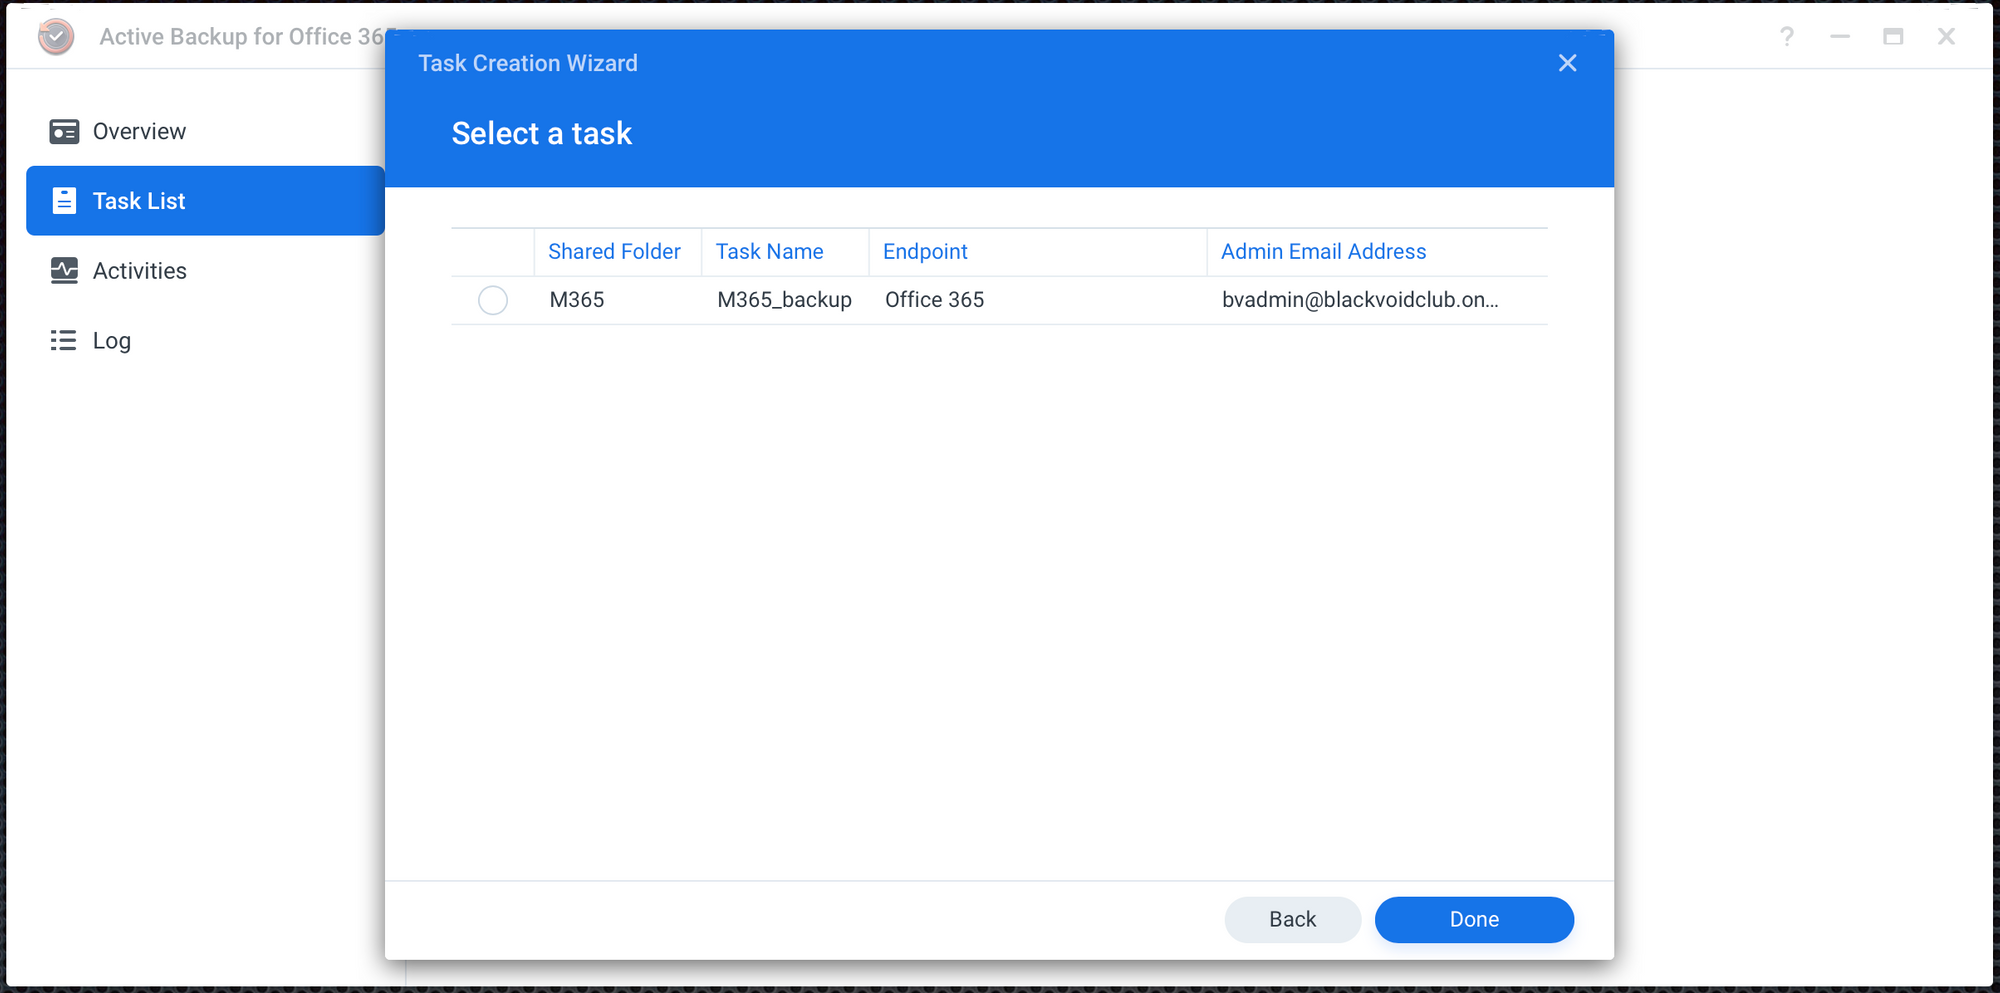
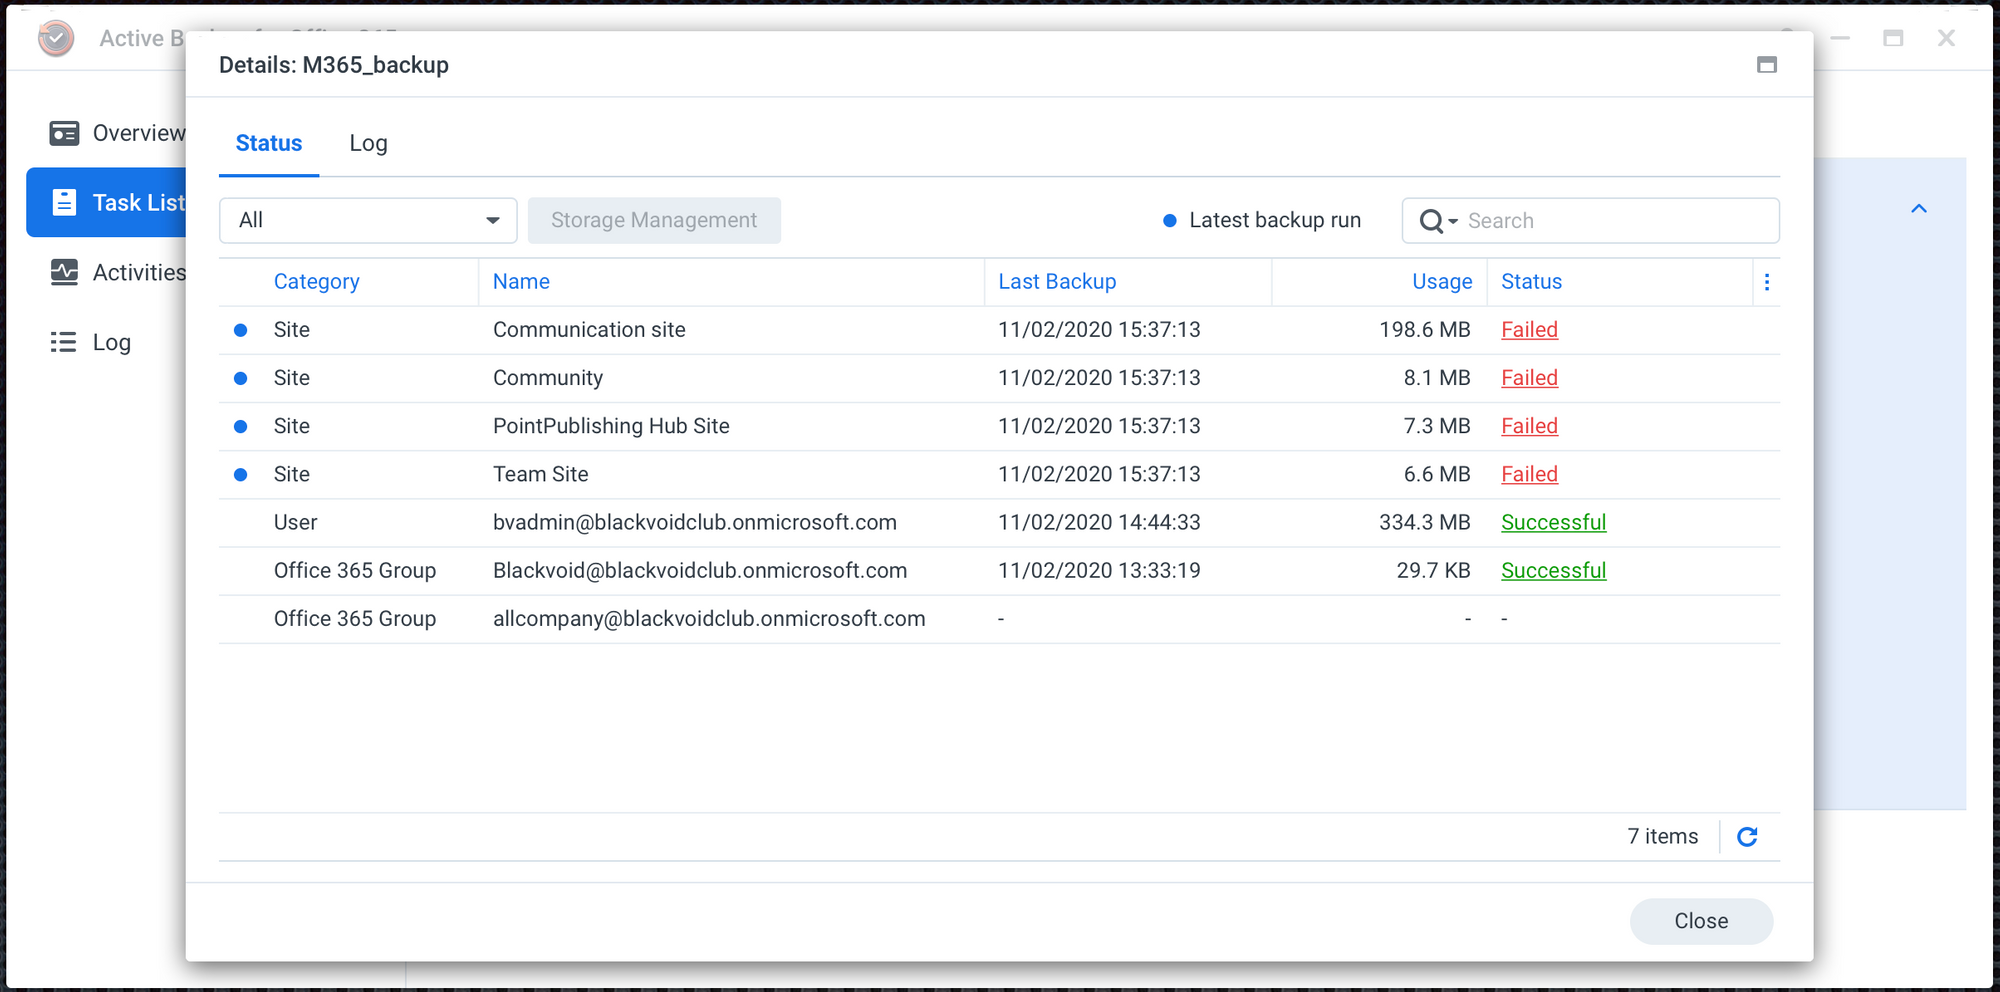
As we can see from the images above, the restoration was partial. The main problem is linking to the SharePoint content. The truth is that most of the content will not be usable in this current backup.
If you go into AB User Portal and try and access your emails, or your data on your SharePoint sites you will find out that you can't export them or restore them to O365.
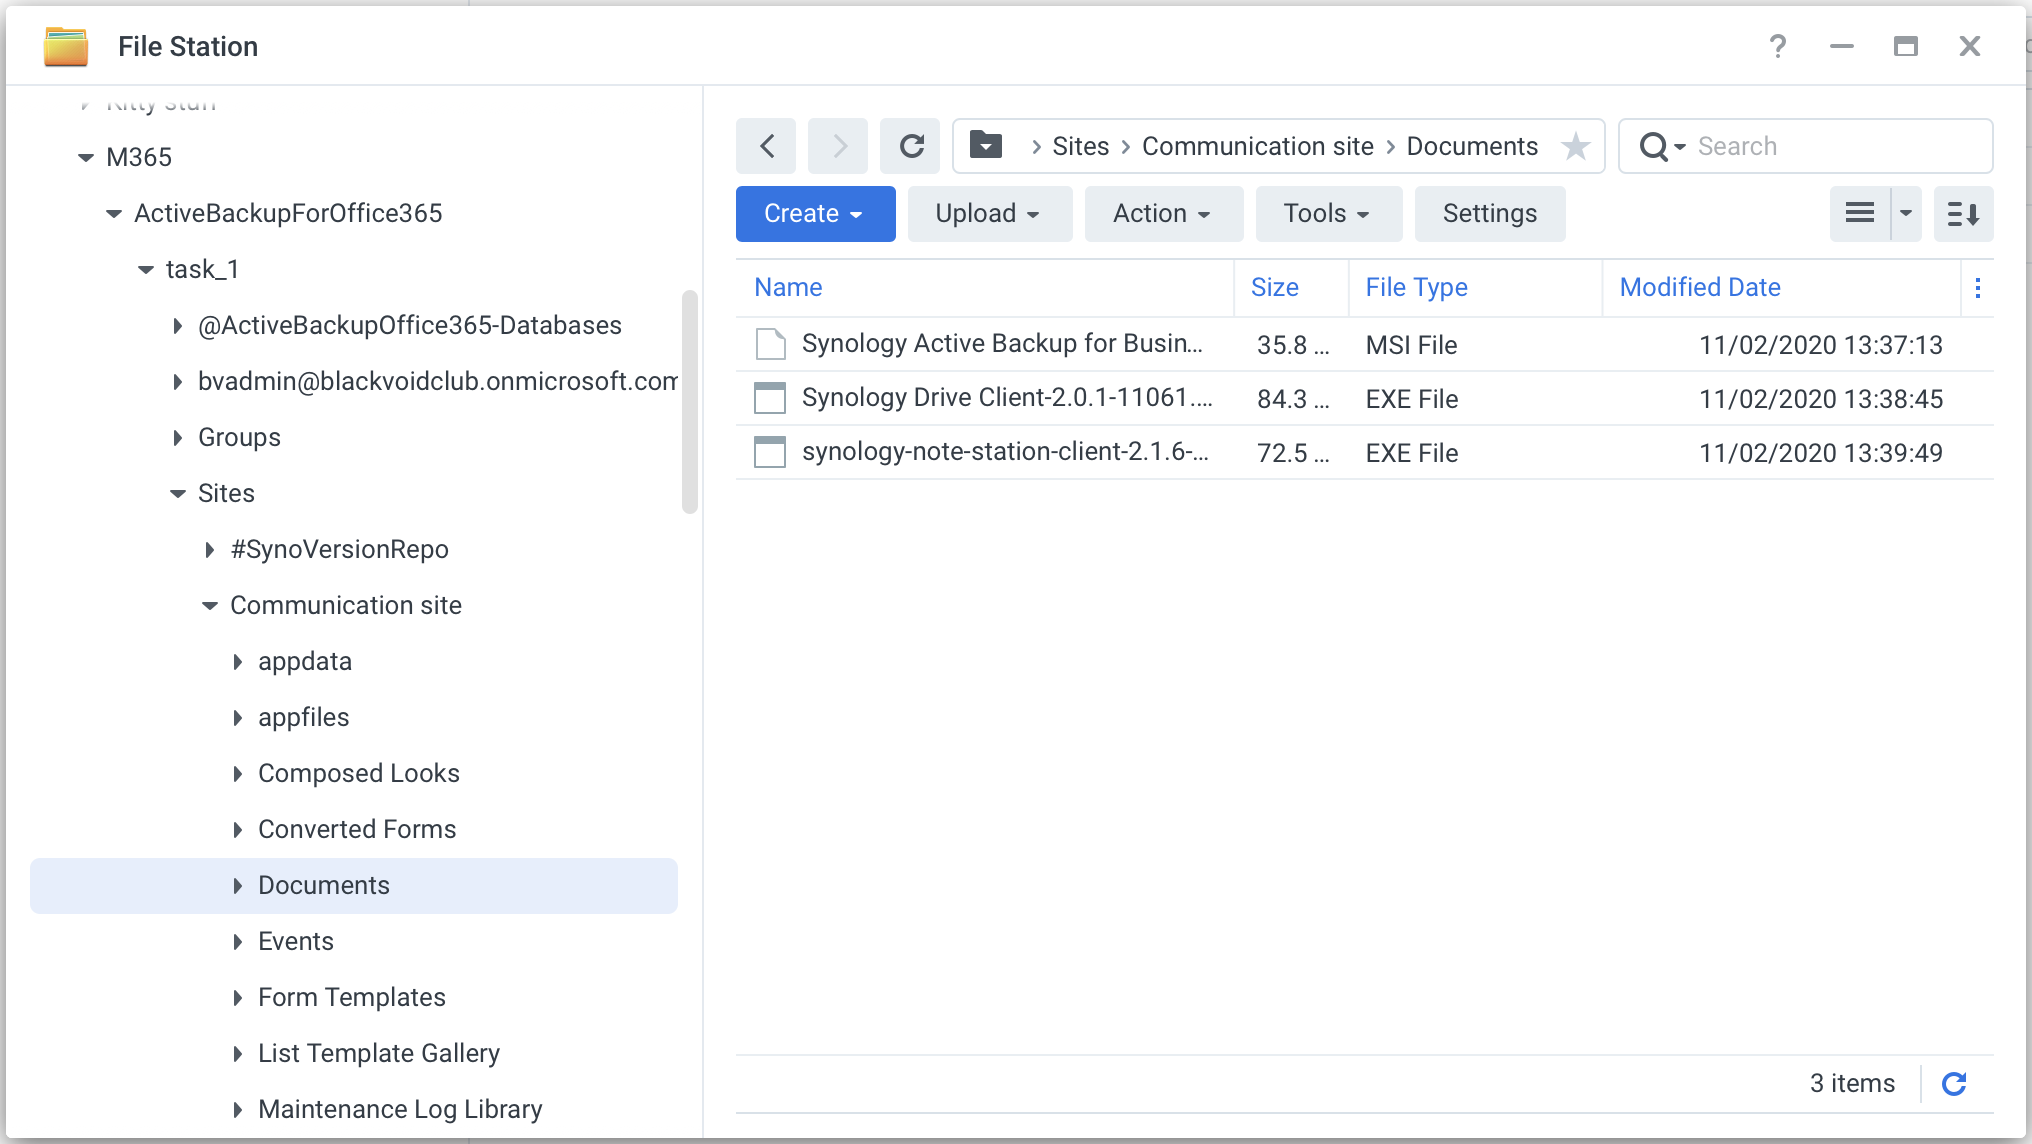
The only thing you can use is OneDrive items, they do work. Also, by browsing your SharePoint or OneDrive content using Synology File Station you will be able to access the files without any problems.
Why is this not working? This is what Synology support said on the matter:
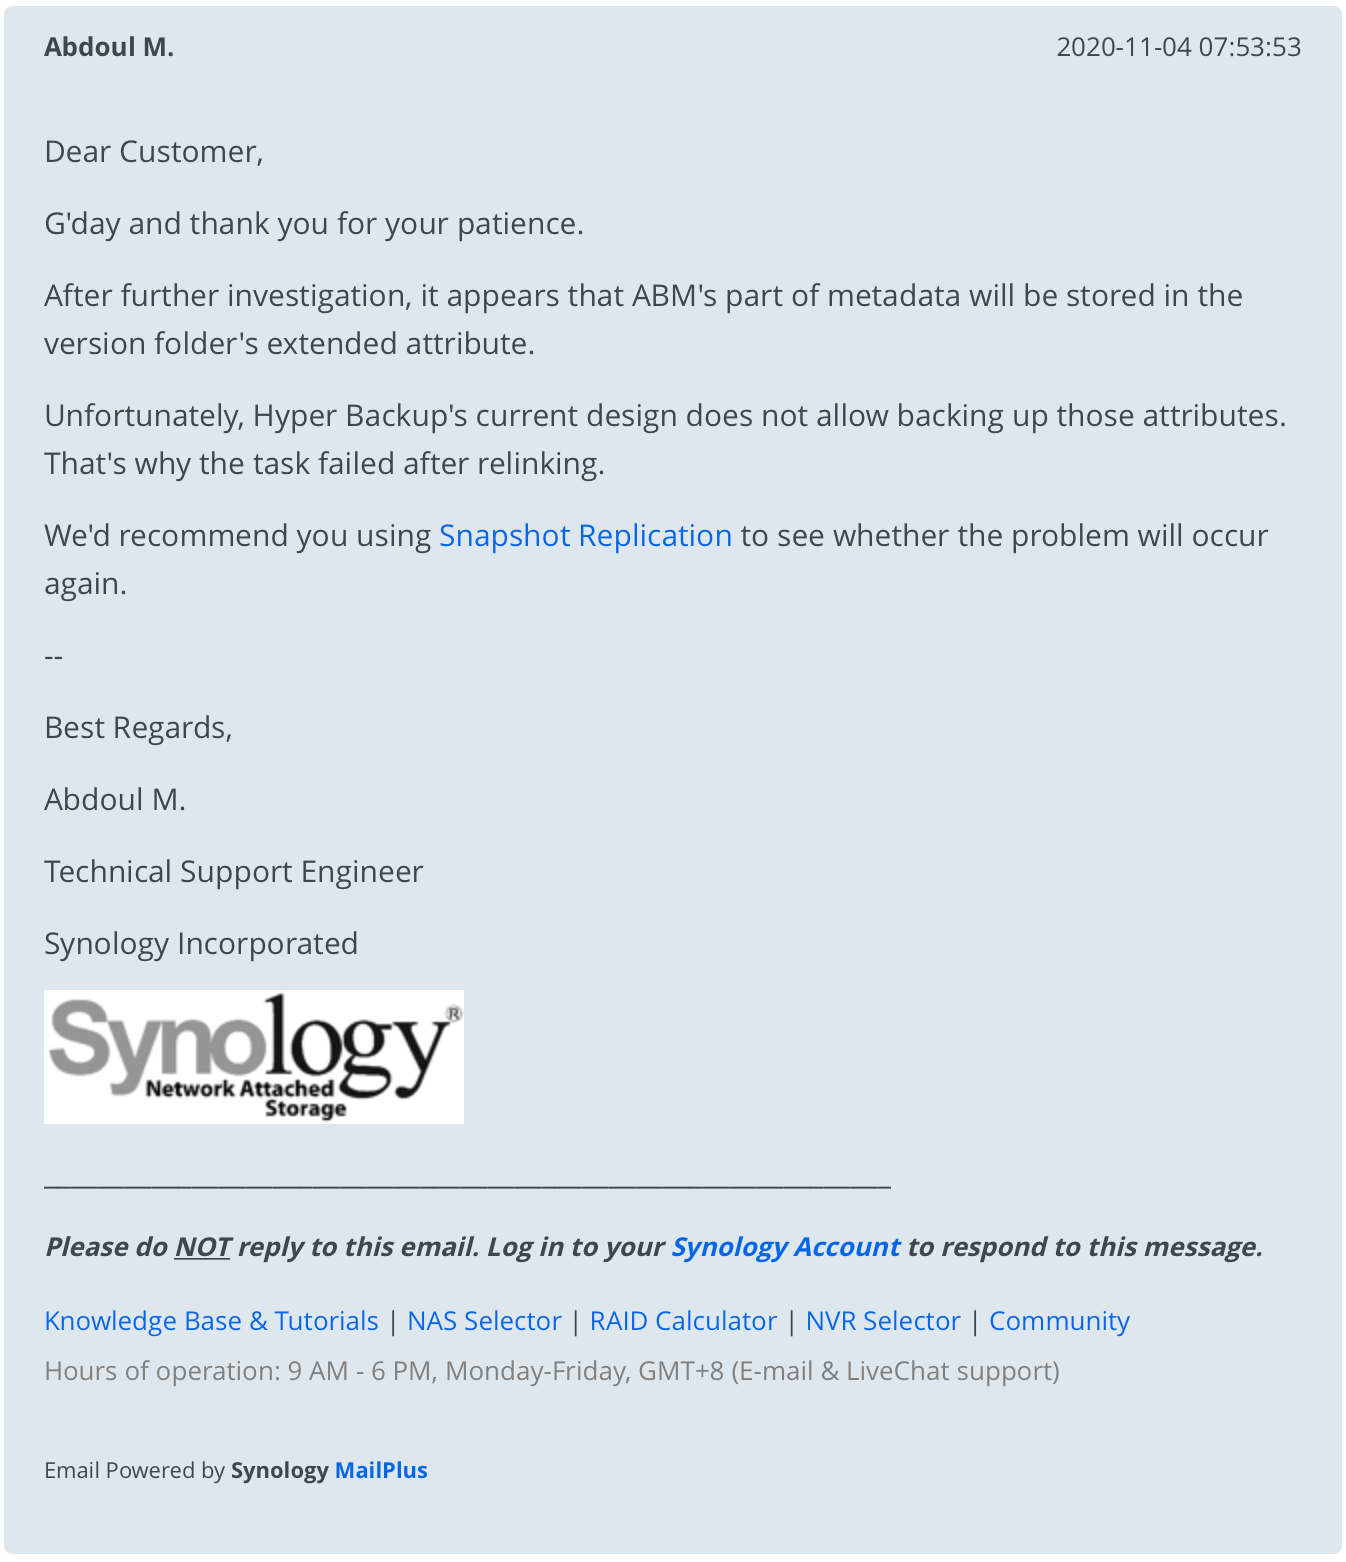
As we can see HB by current design is unable to backup needed extended attributes to make a 100% successful backup of AB. Too bad. I have sent a feature request notice, so let's hope that down the line this will be patched in.
So is this a useless option? Well for a working worry-free solution yes. But, if you do use AB to backup just your OneDrive or SharePoint content you will be in luck to have this on hand in the worst possible case. All in all, not ideal, but as long as you can get to some of your content it could be still considered a win.
Now let's see what would be a working, proper disaster case for your Active Backup backup scenario.
Configure Snapshot Replication to backup Active Backup content
Unless you are unfamiliar with Synology Snapshot and Replication tool, have a read here before you move forward.
In this case, I will use two separate Synology NAS units that both support Snapshot Replication to make a disaster case scenario. This will be a simulation of what and how to make a working replication task from the primary to the secondary unit and then use the secondary NAS as the main O365 backup destination using Active Backup.
From this point, the primary NAS will be NAS1 and the secondary NAS will be NAS2.
Considering that a lot of info and images are already in the initial Snapshot article I will just point the obvious here.
For this case, I am making a remote replication task from NAS1 to NAS2
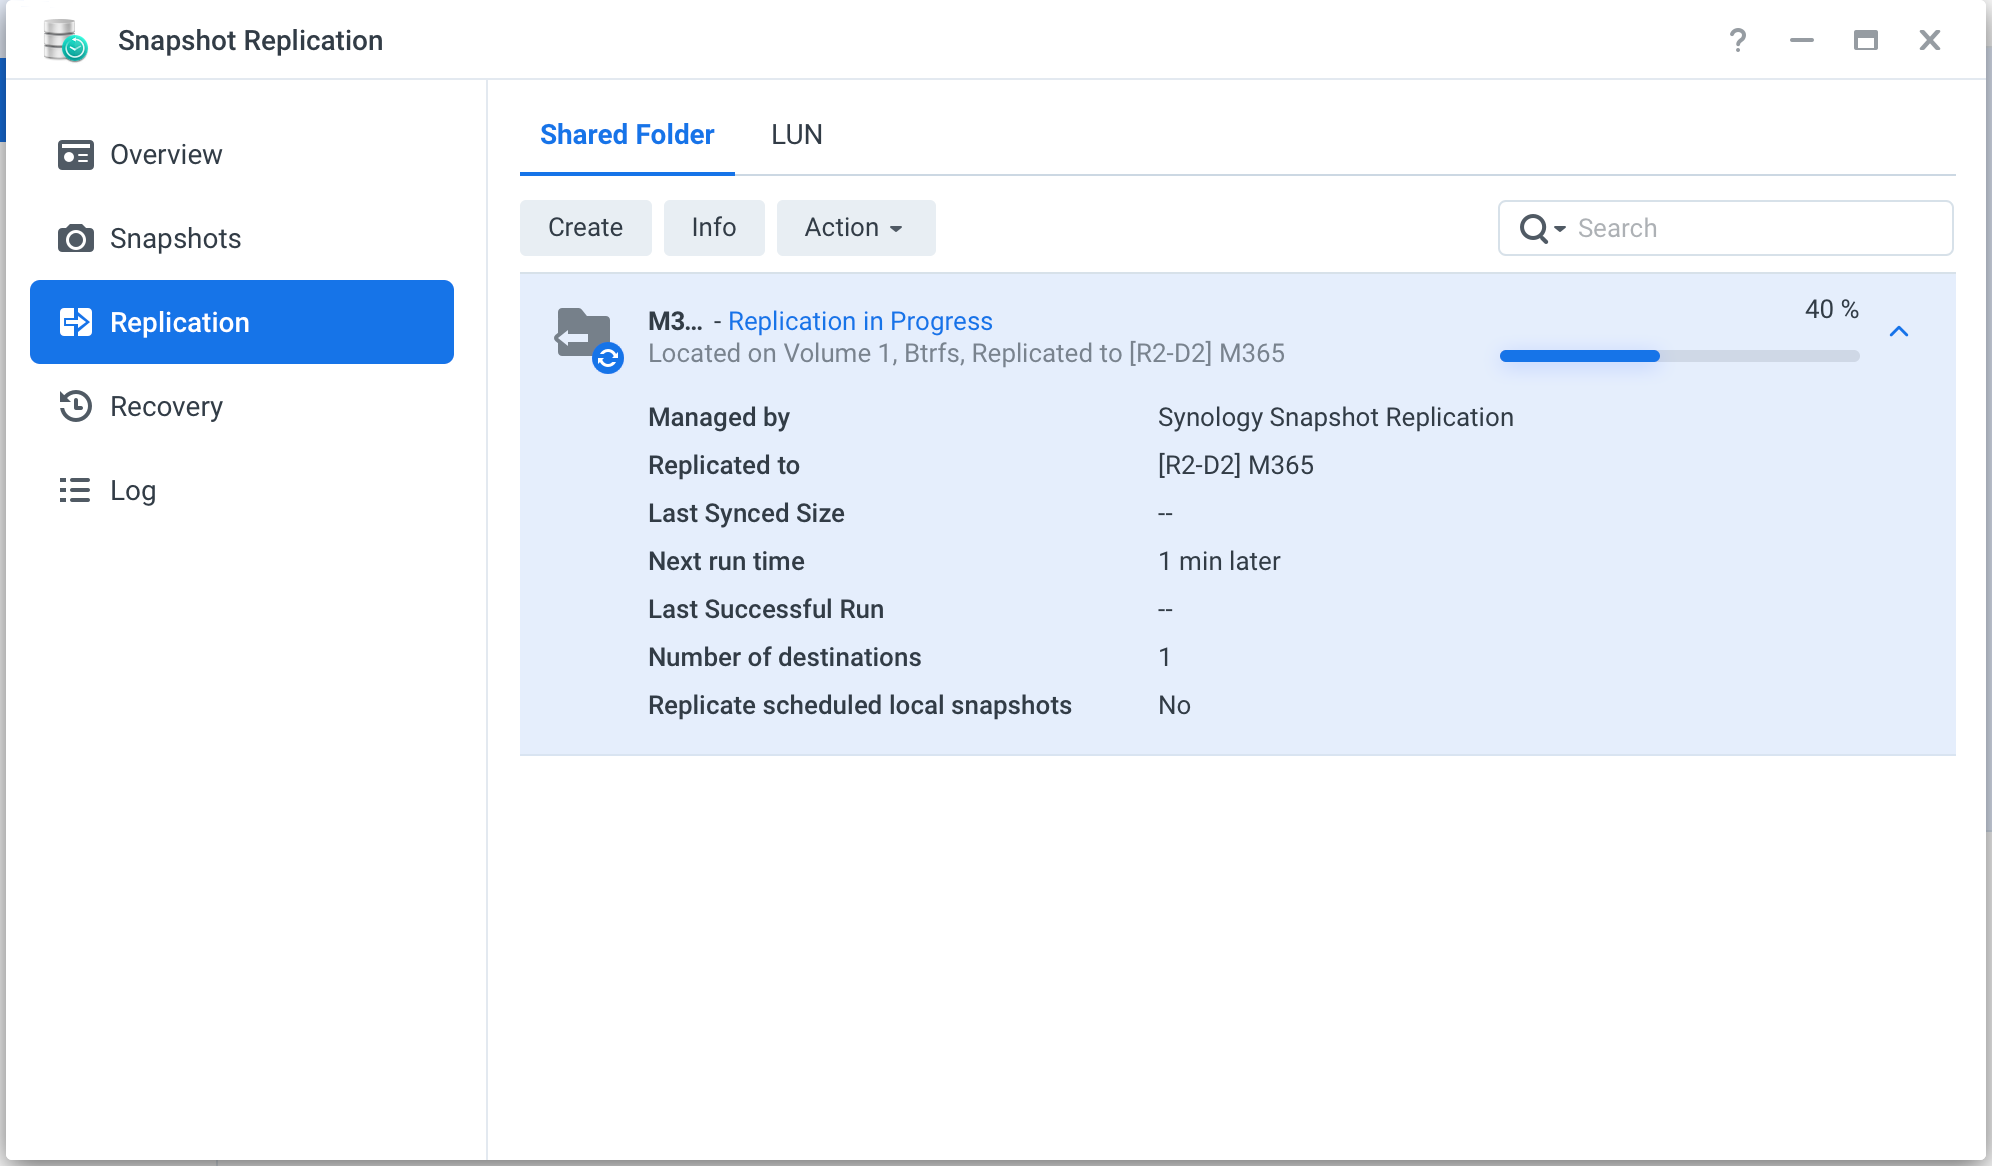
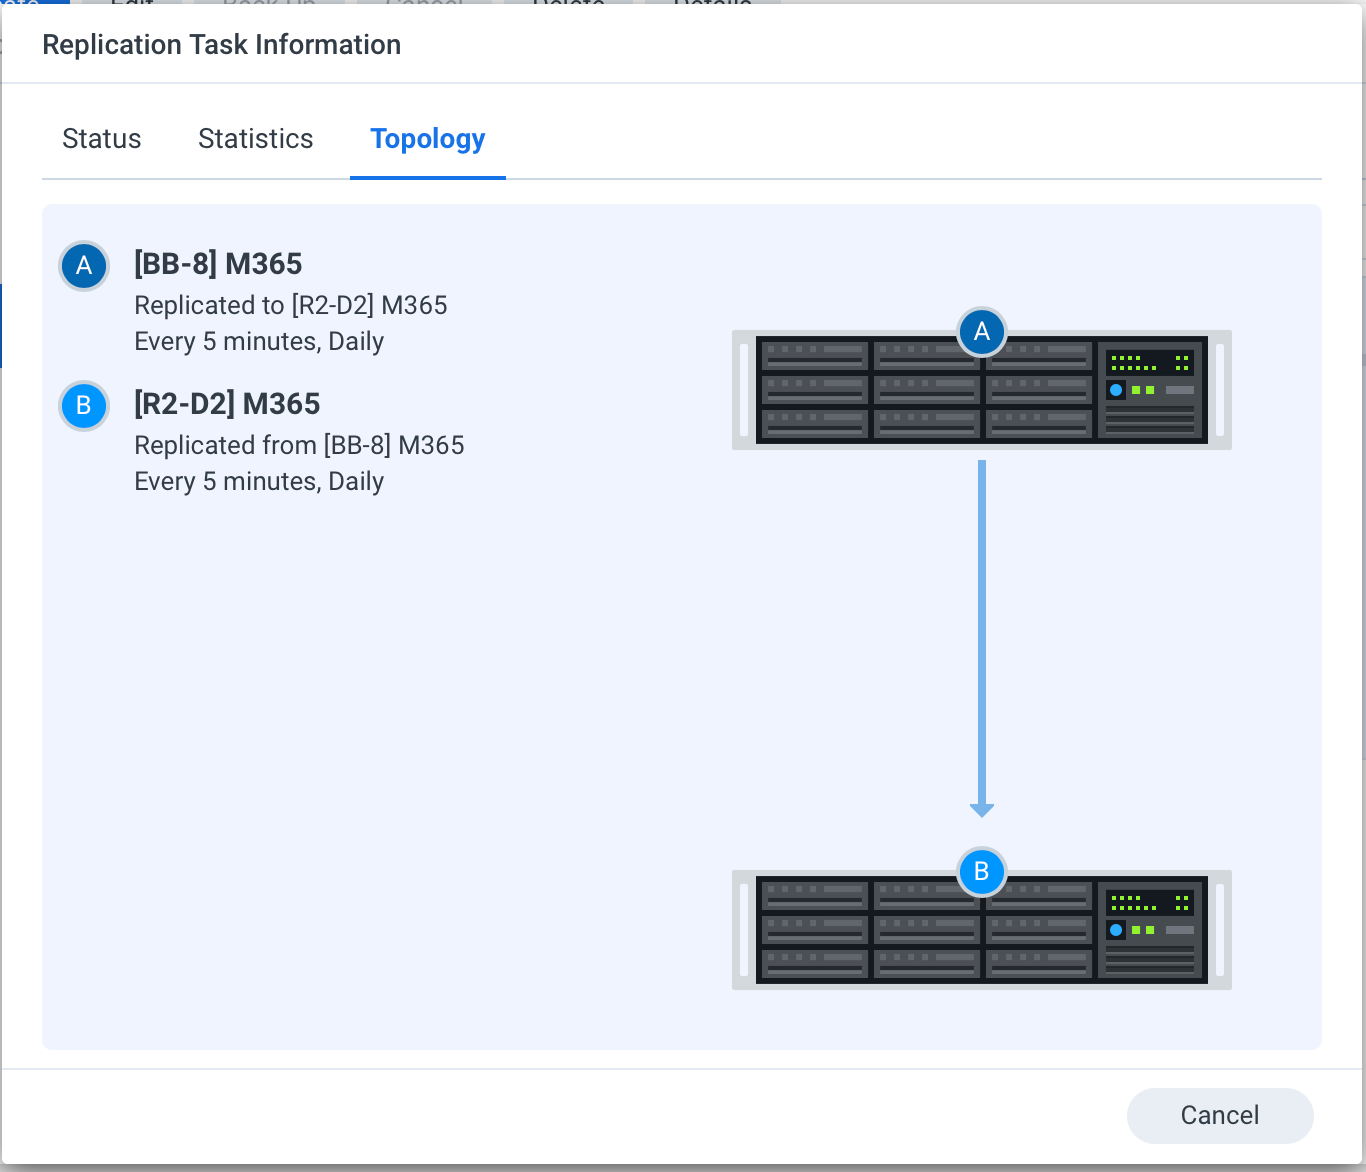
As we can see from the images, replication will be daily every 5min. So that means that the data from one NAS to the other will be no more than 5 min apart.
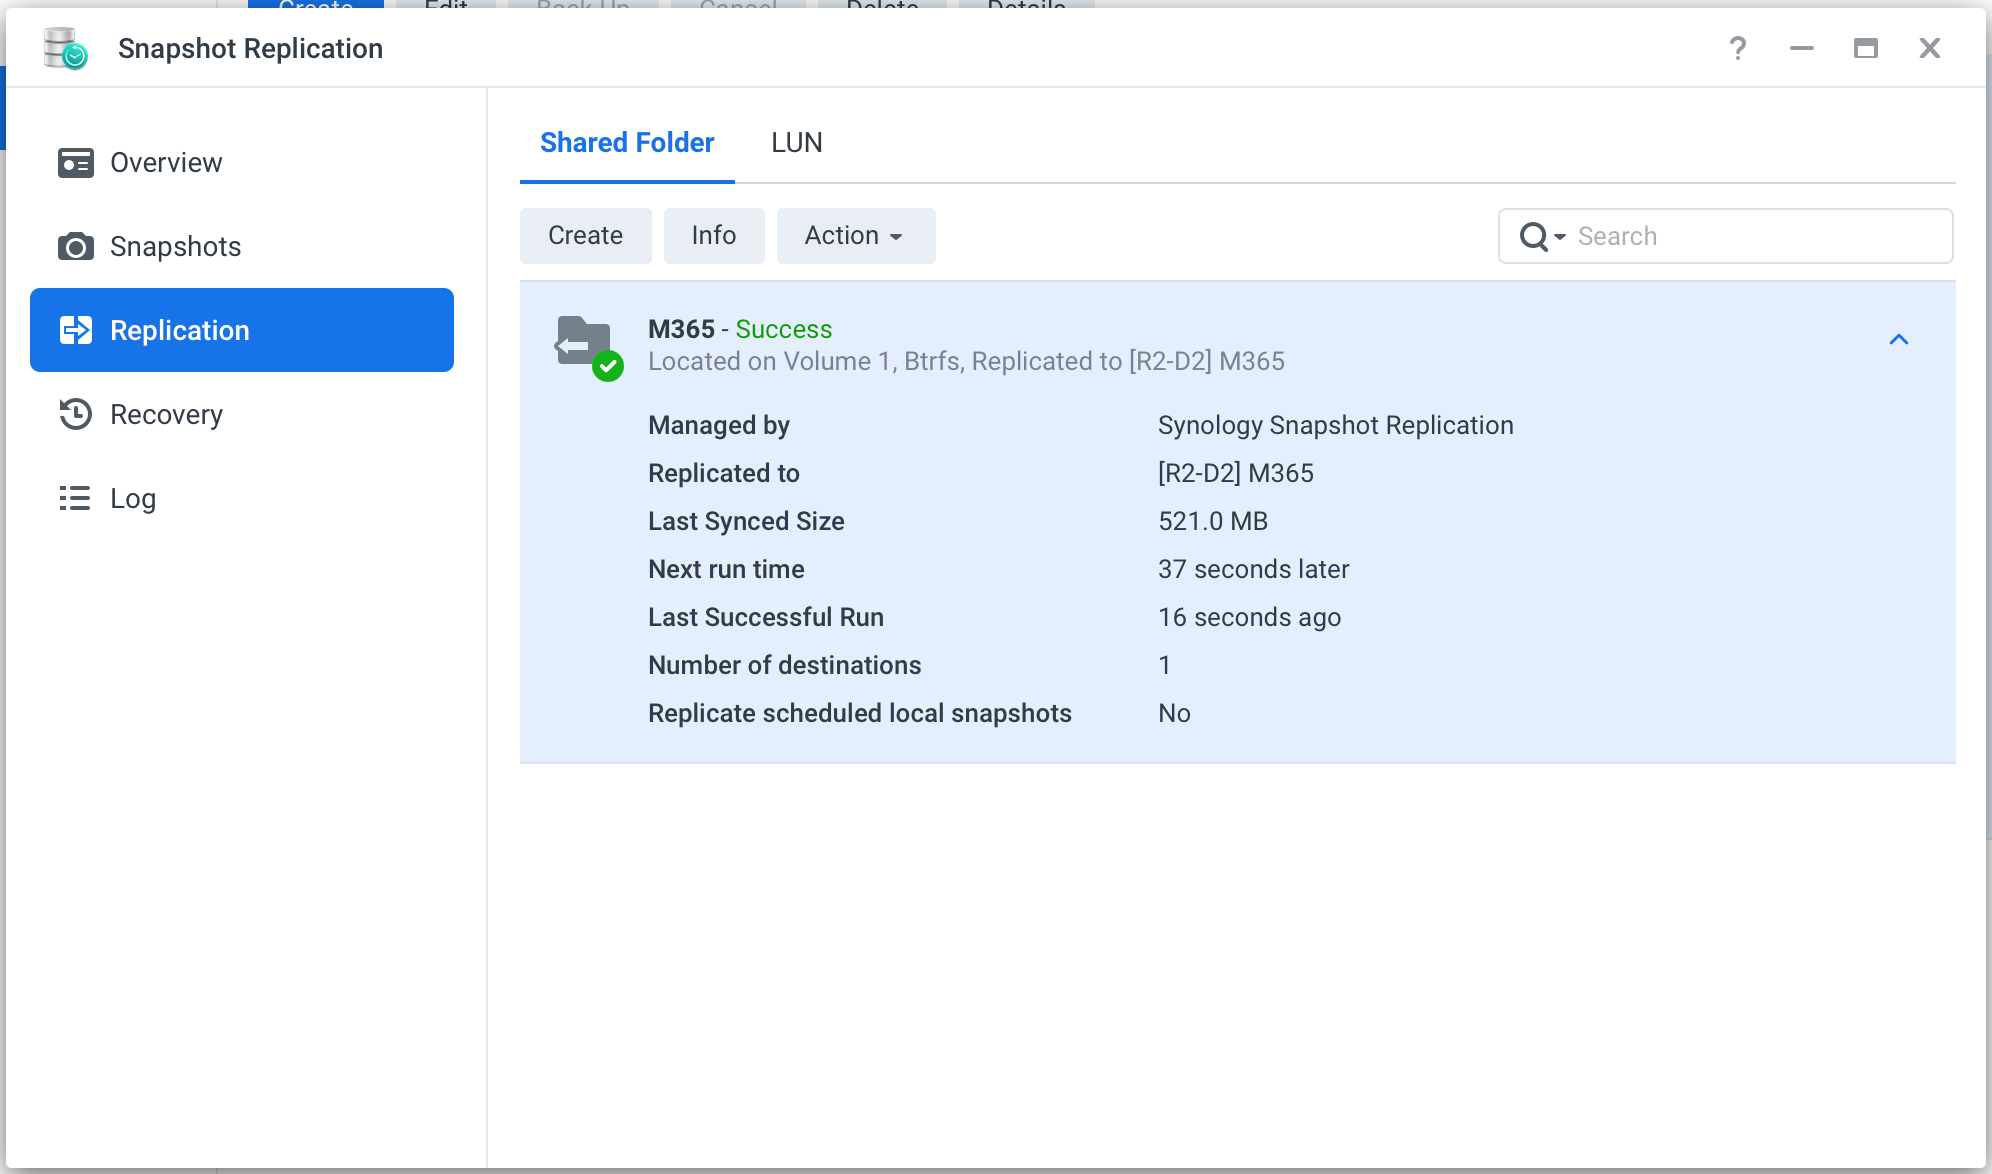
If we jump to NAS2 to see what the result is thereafter the replication is done:
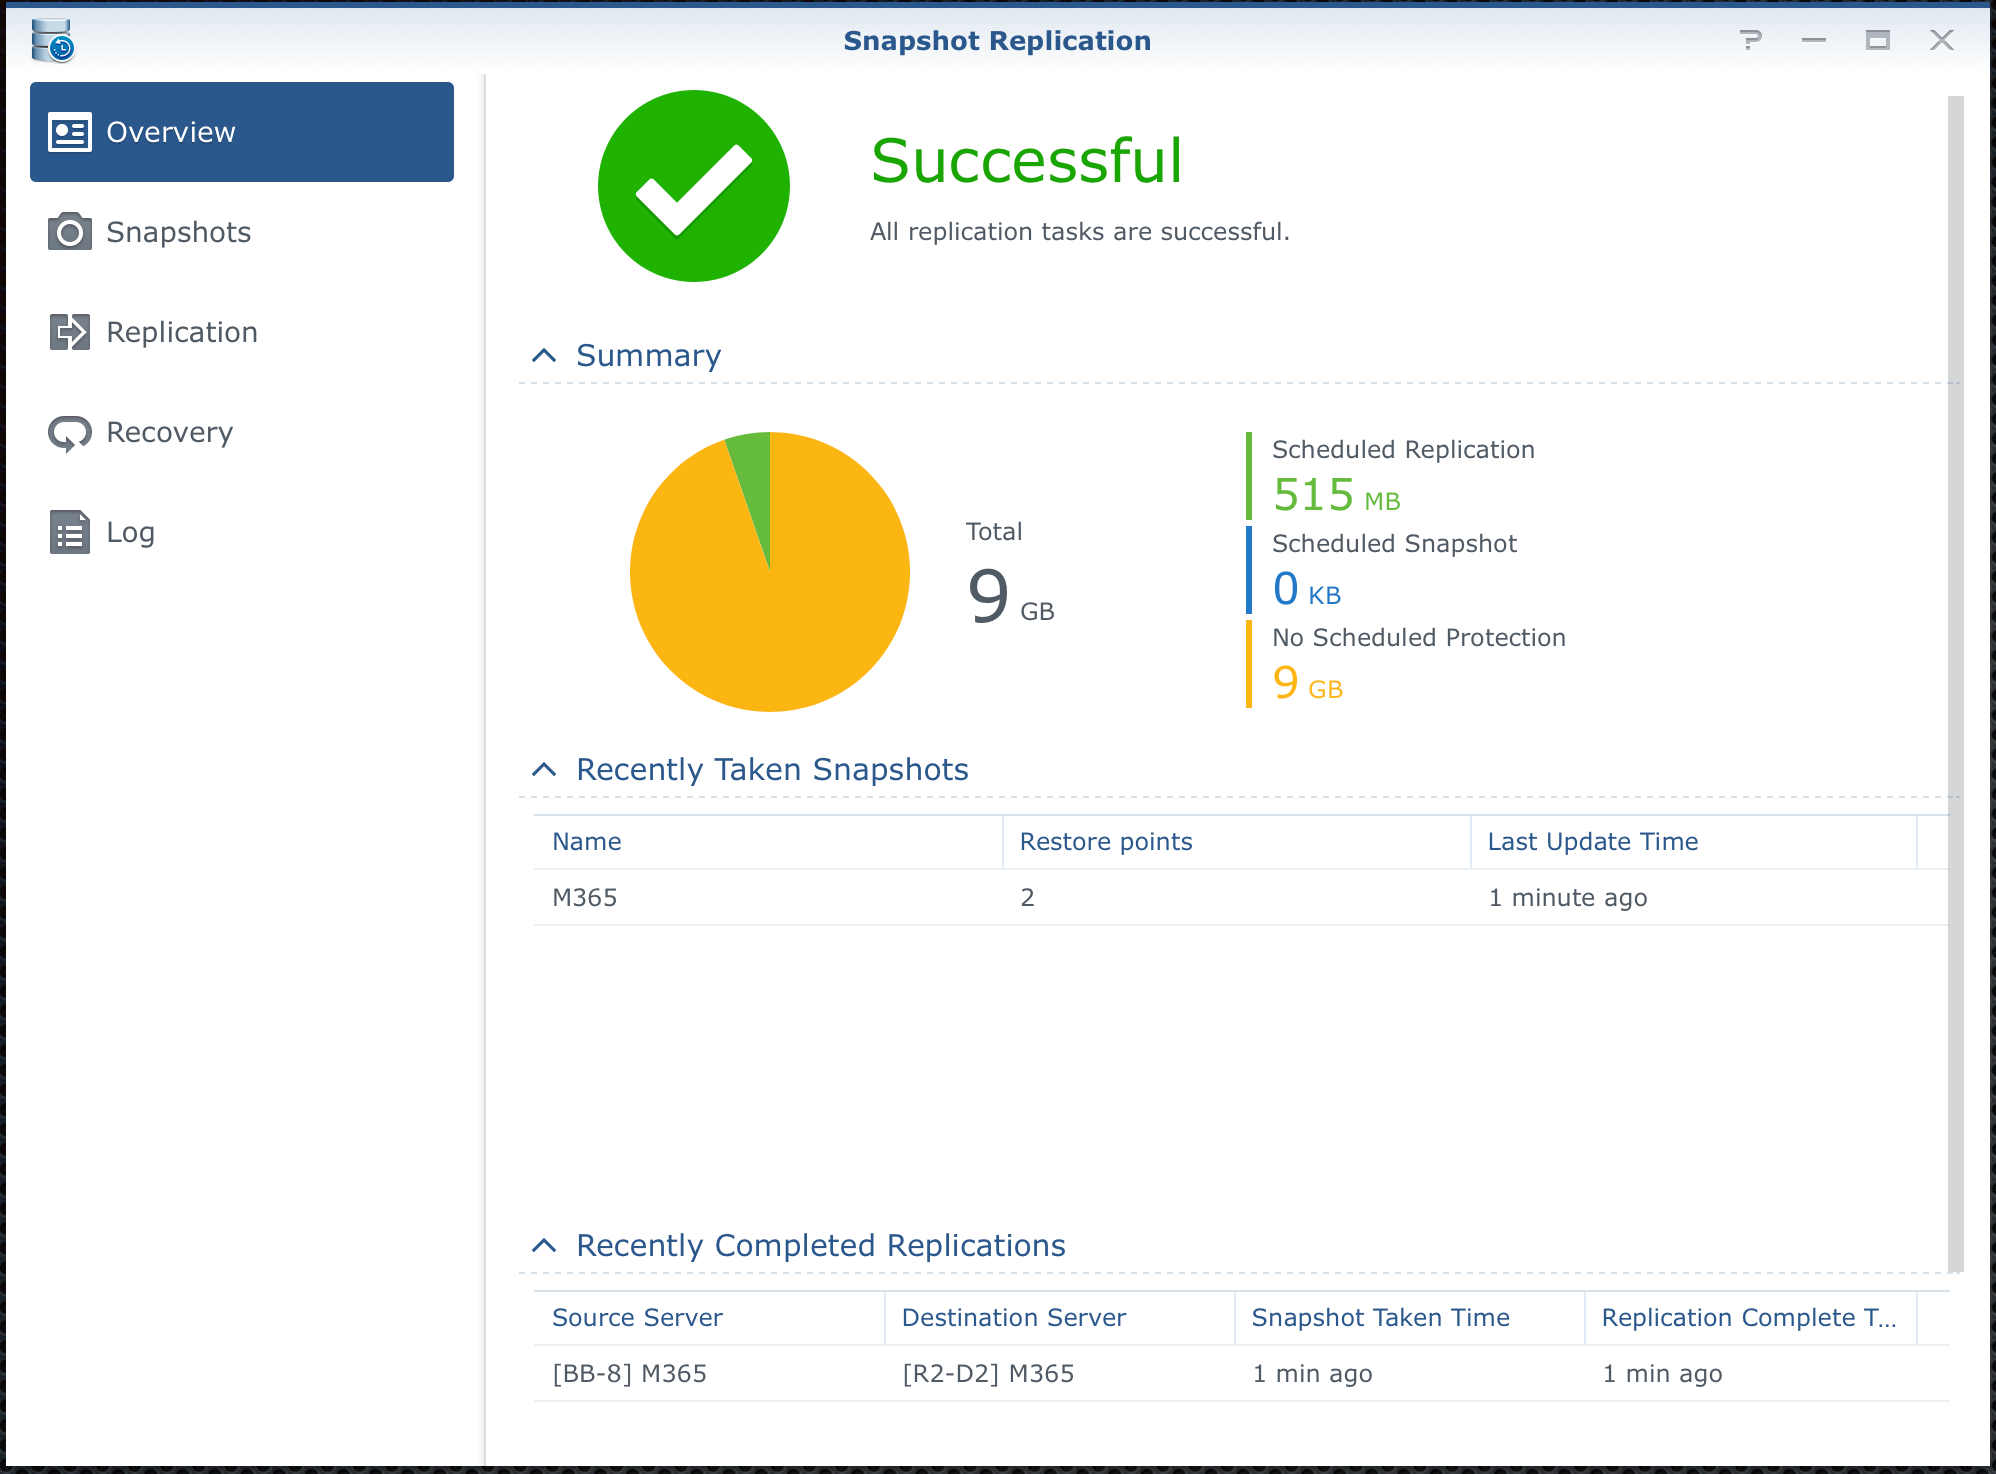
As we can see there are already two restore points from NAS1 to NAS2. Looking good.
Now let's see two different restore scenarios while using replication and if they will be successful in restoring a 100% functional Active Backup for O365 task.
- Scenario 1: restoring from a snapshot after destroying a local AB backup folder
- Scenario 2: initiating a failover from NAS1 to NAS2 in terms to continue using NAS2 as the main Active Backup for the O365 target
Scenario 1 - Replication restore
After removing the local shared folder used for Active Backup backup, we can use the replication tool to restore from any point in time that we want. I will use the latest version to get the most up to date data.
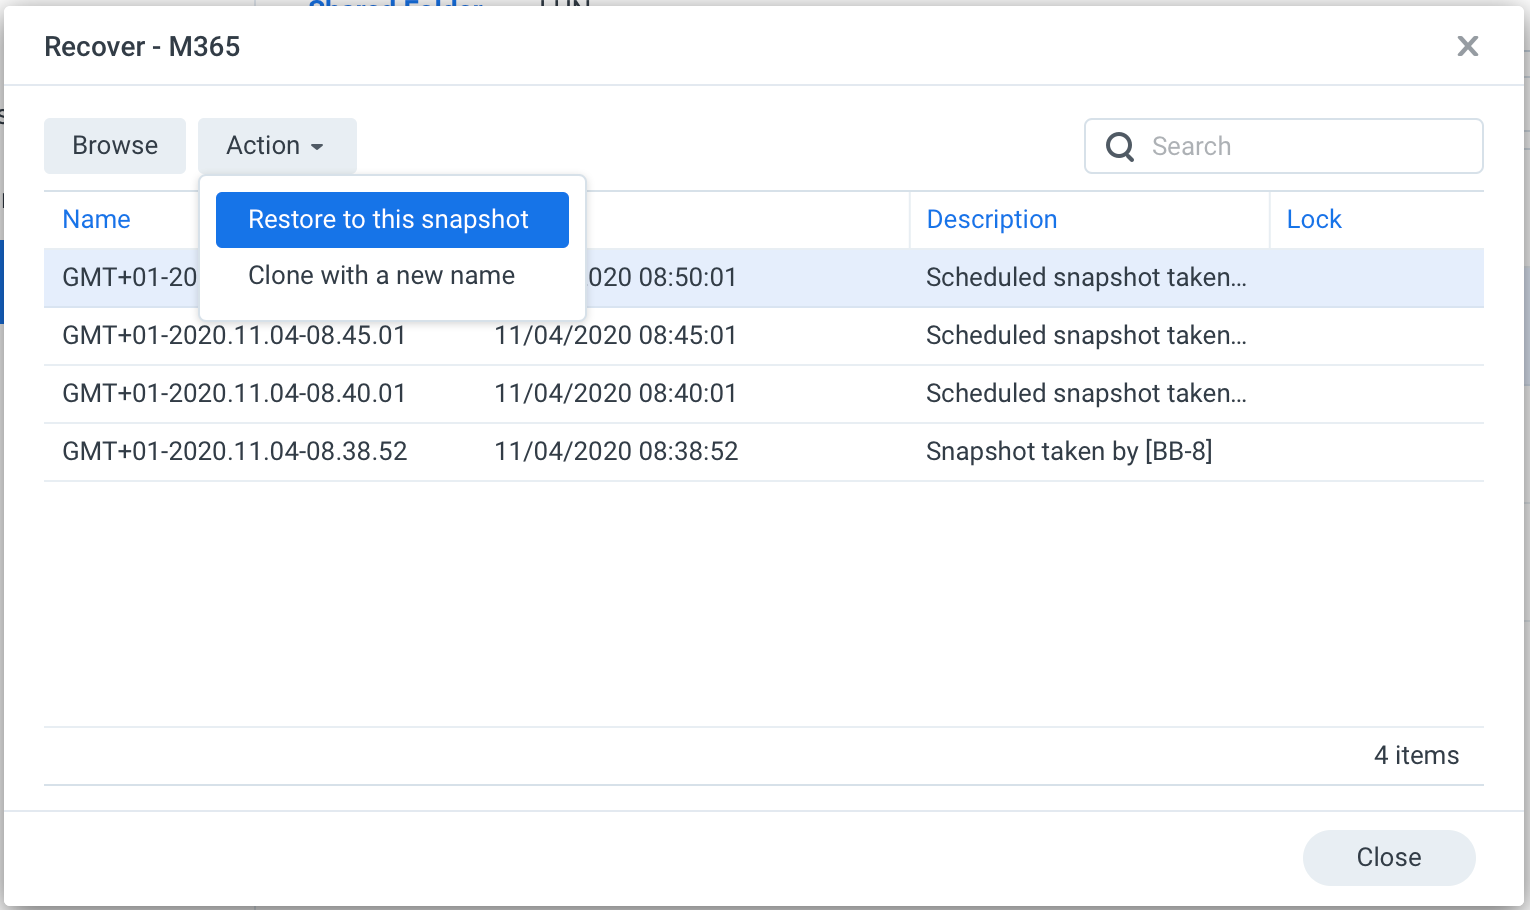
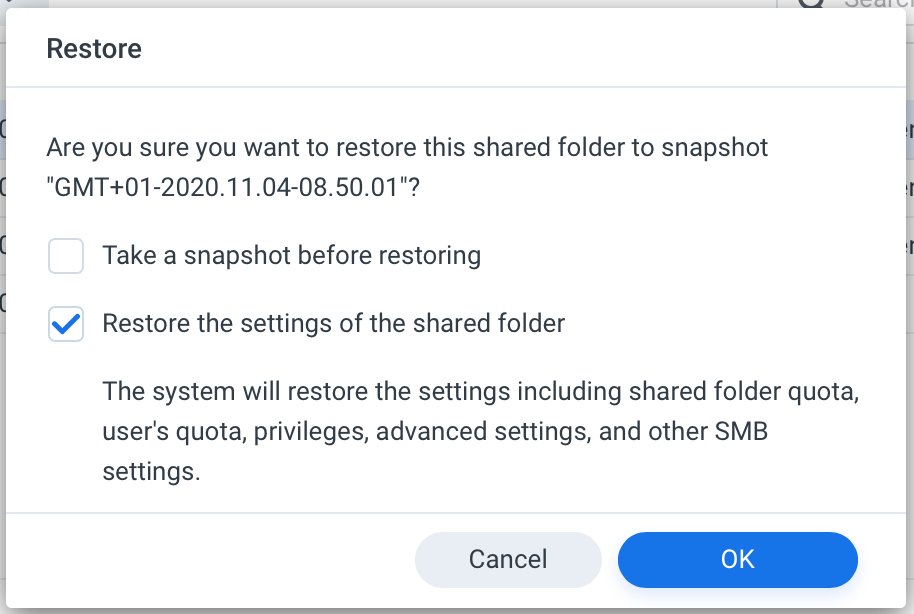
After you have restored the folder from a replica snapshot, go to the Active Backup console and relink the task again.
So looks like we are all good! Well done. Of course, you can now test restore using the portal but trust me, it works. With this test, we have confirmed that NAS2 > NAS1 replica restore works.
When would you need this? Well for example if whatever happens to the data on NAS1 you can just restore quickly from NAS2 and continue forward.
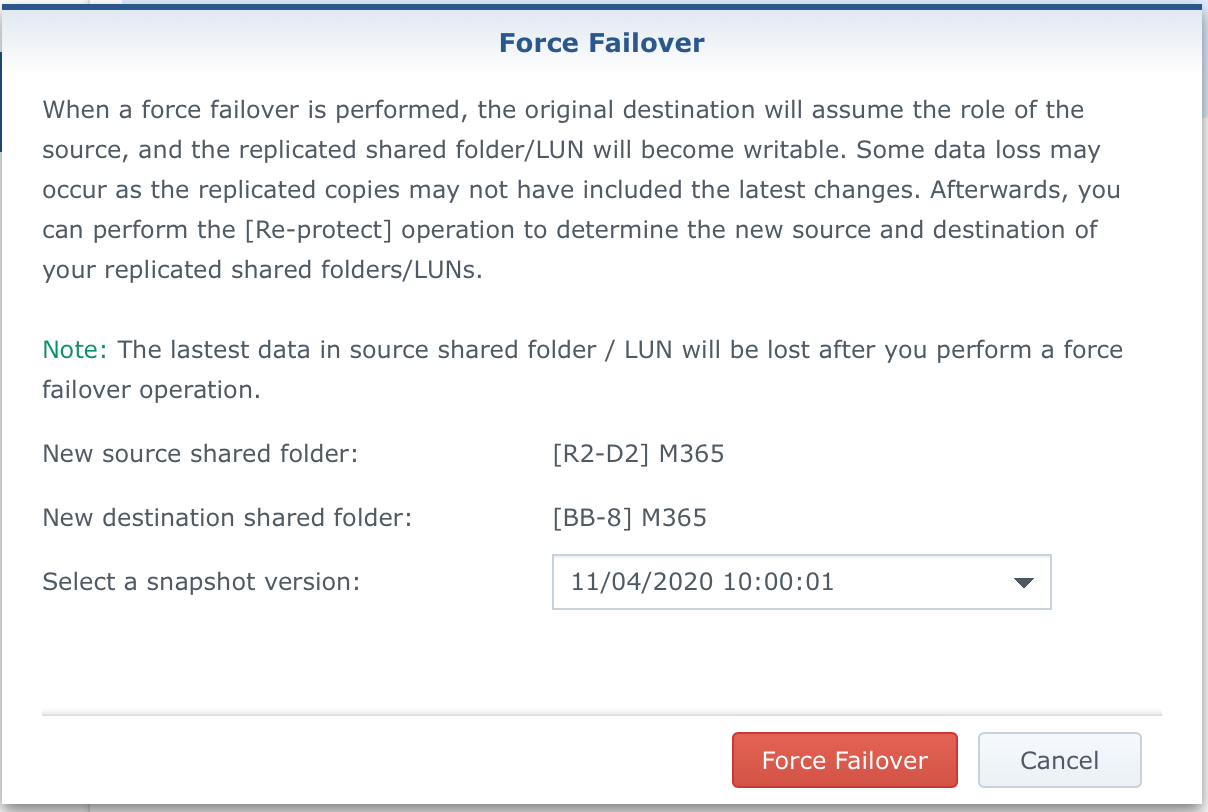
Scenario 2 - Replication failover
Finally, we will now look into a worst-case scenario. You NAS1 has exploded and your Active Backup task(s) have stopped on your primary location. Let's see how to initiate a failover to NAS2 and set it up with Active Backup to continue where NAS1 has left off.
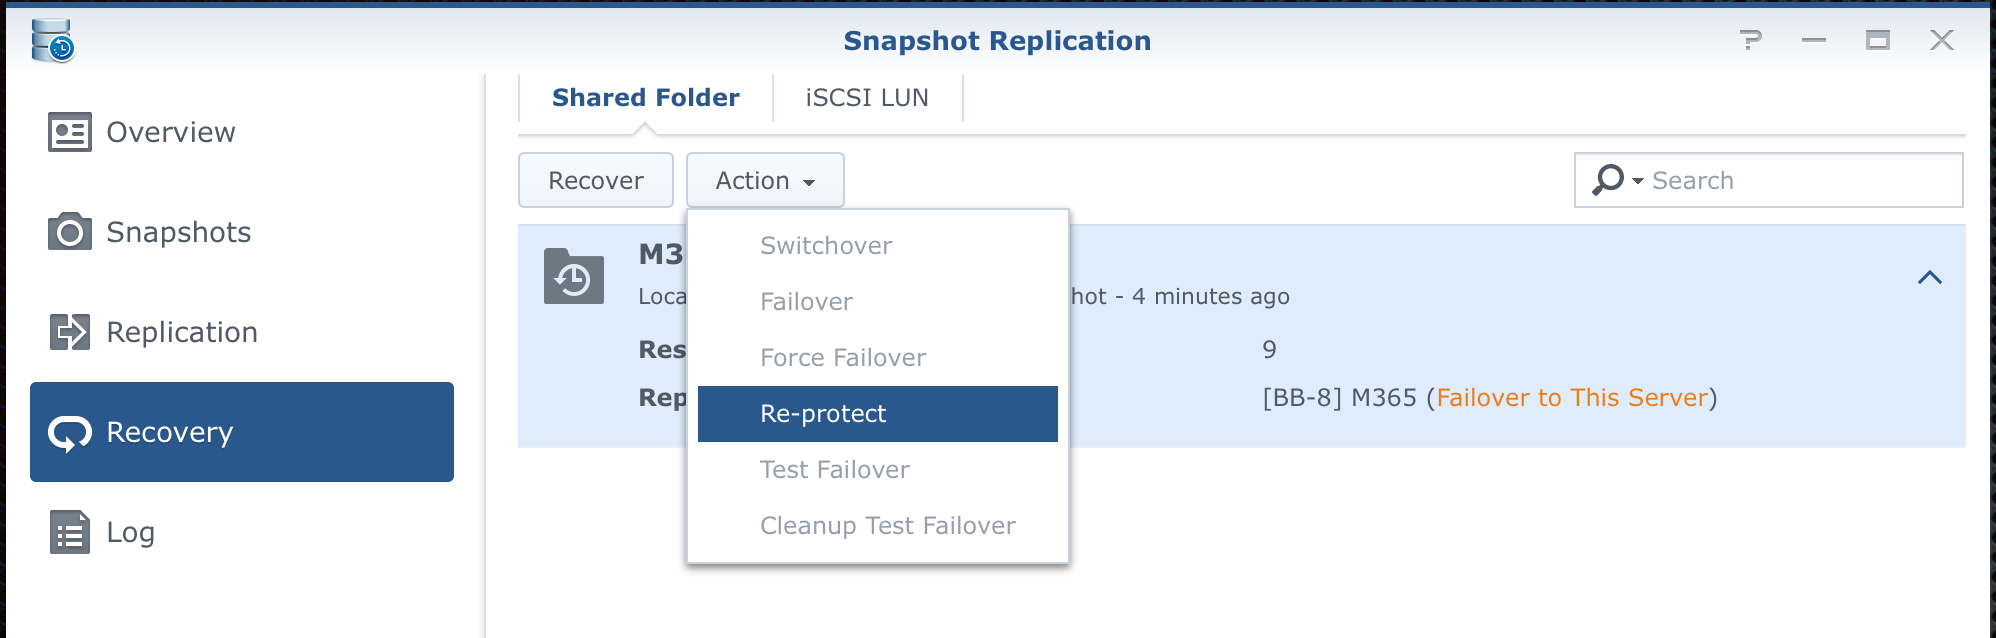
First log into your NAS2 and in the Snapshot Replication app initiate a failover from the Action menu.
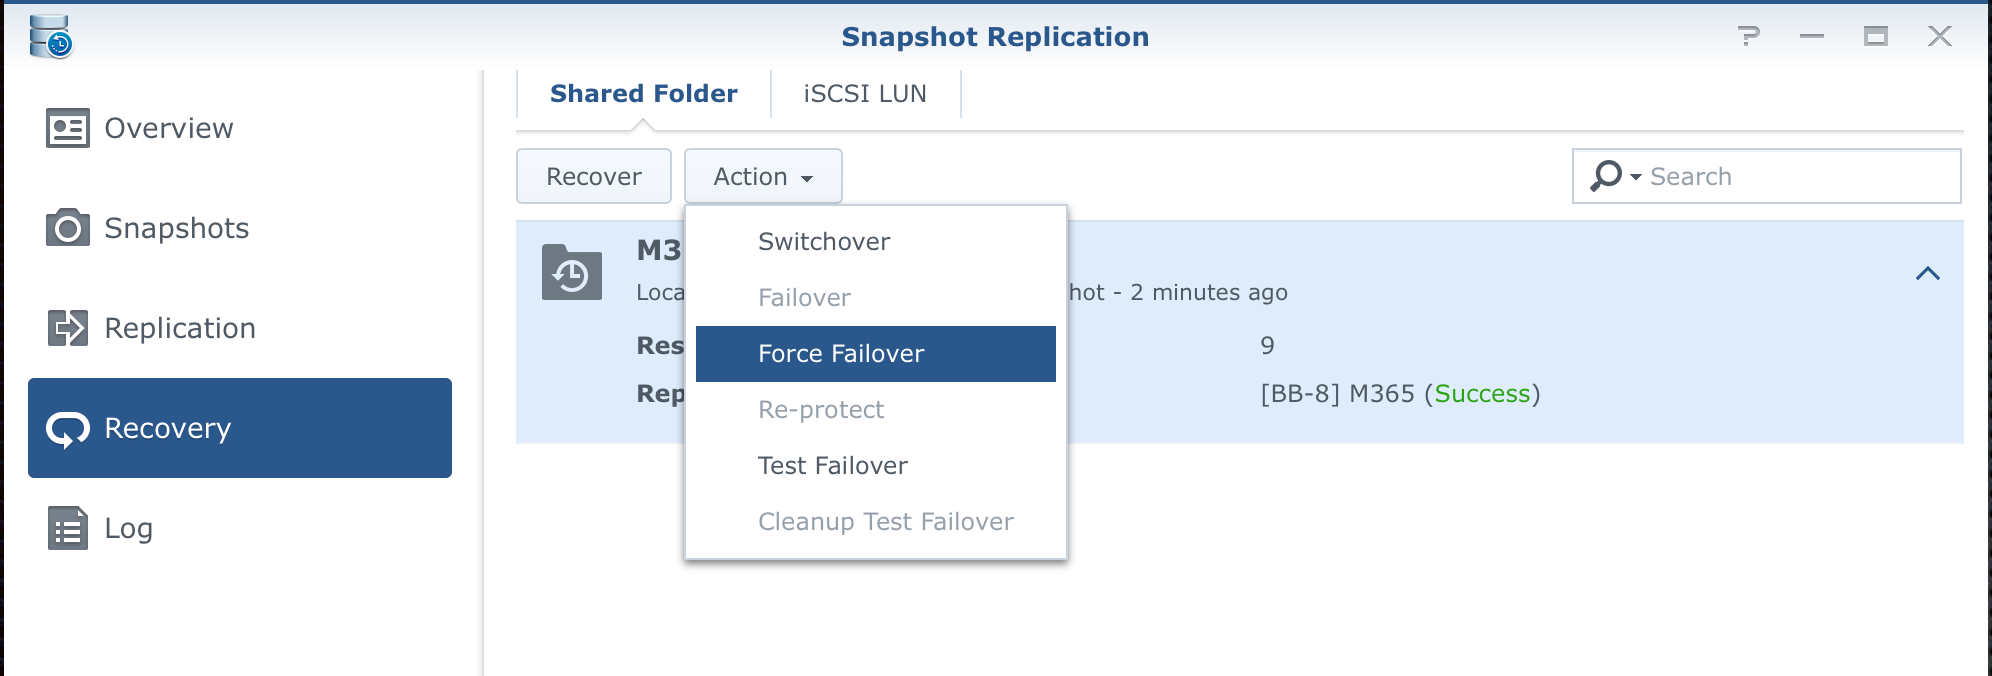
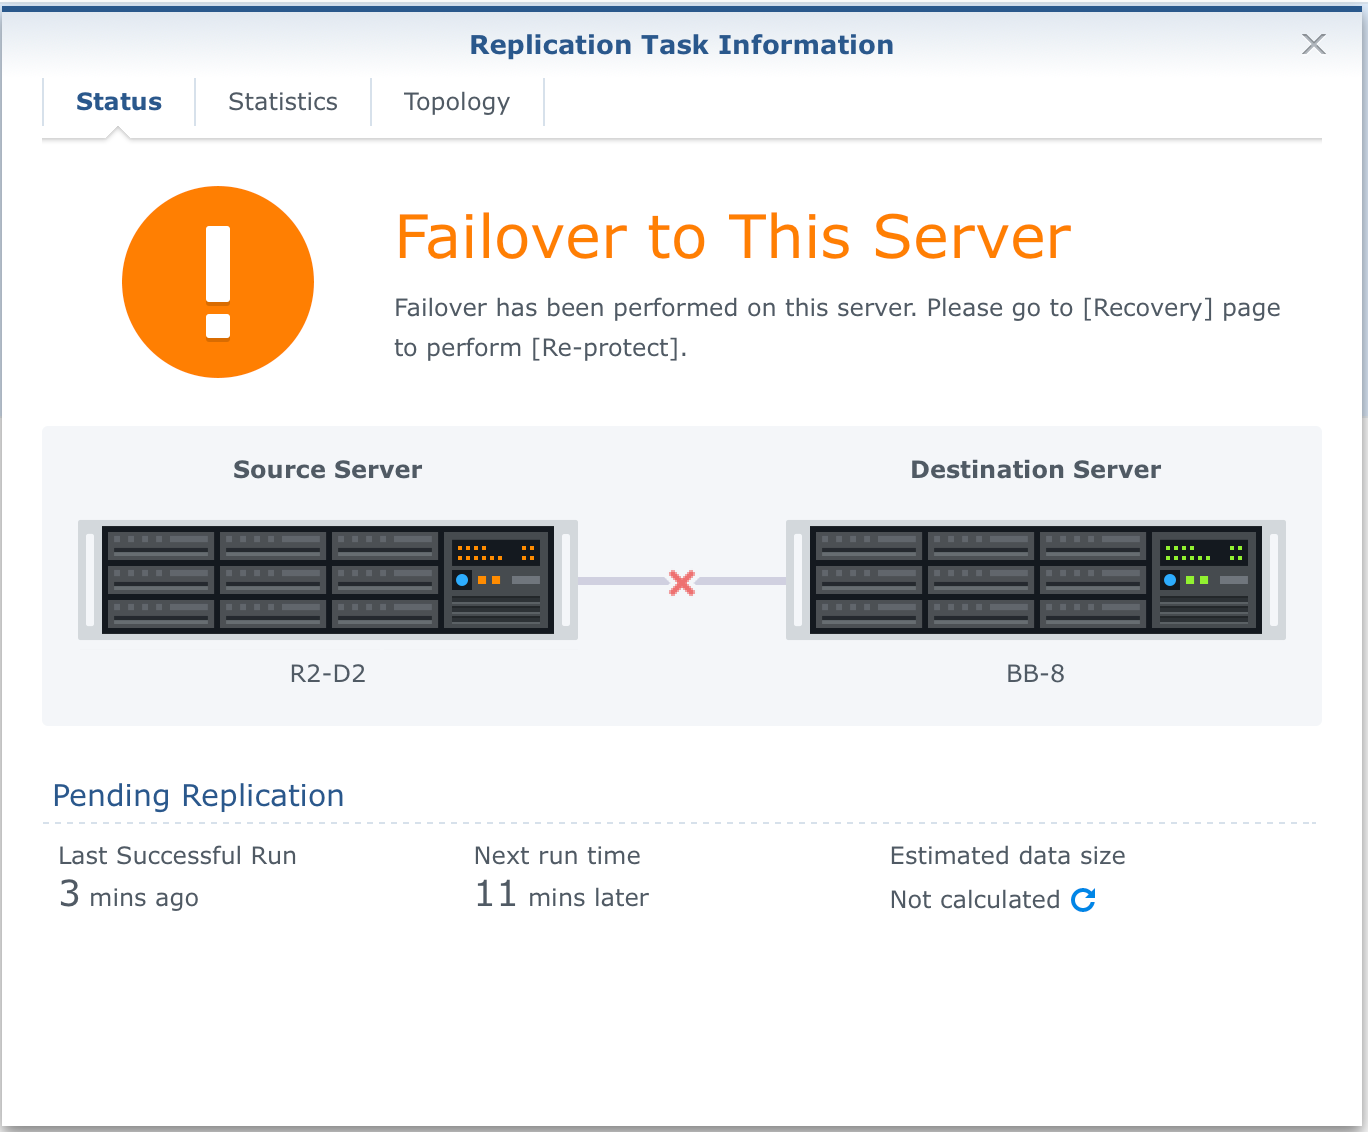
Despite the image above, failover is complete and successful. You simply need to re-protect your new destination (NAS2) to make it a new main replication point.
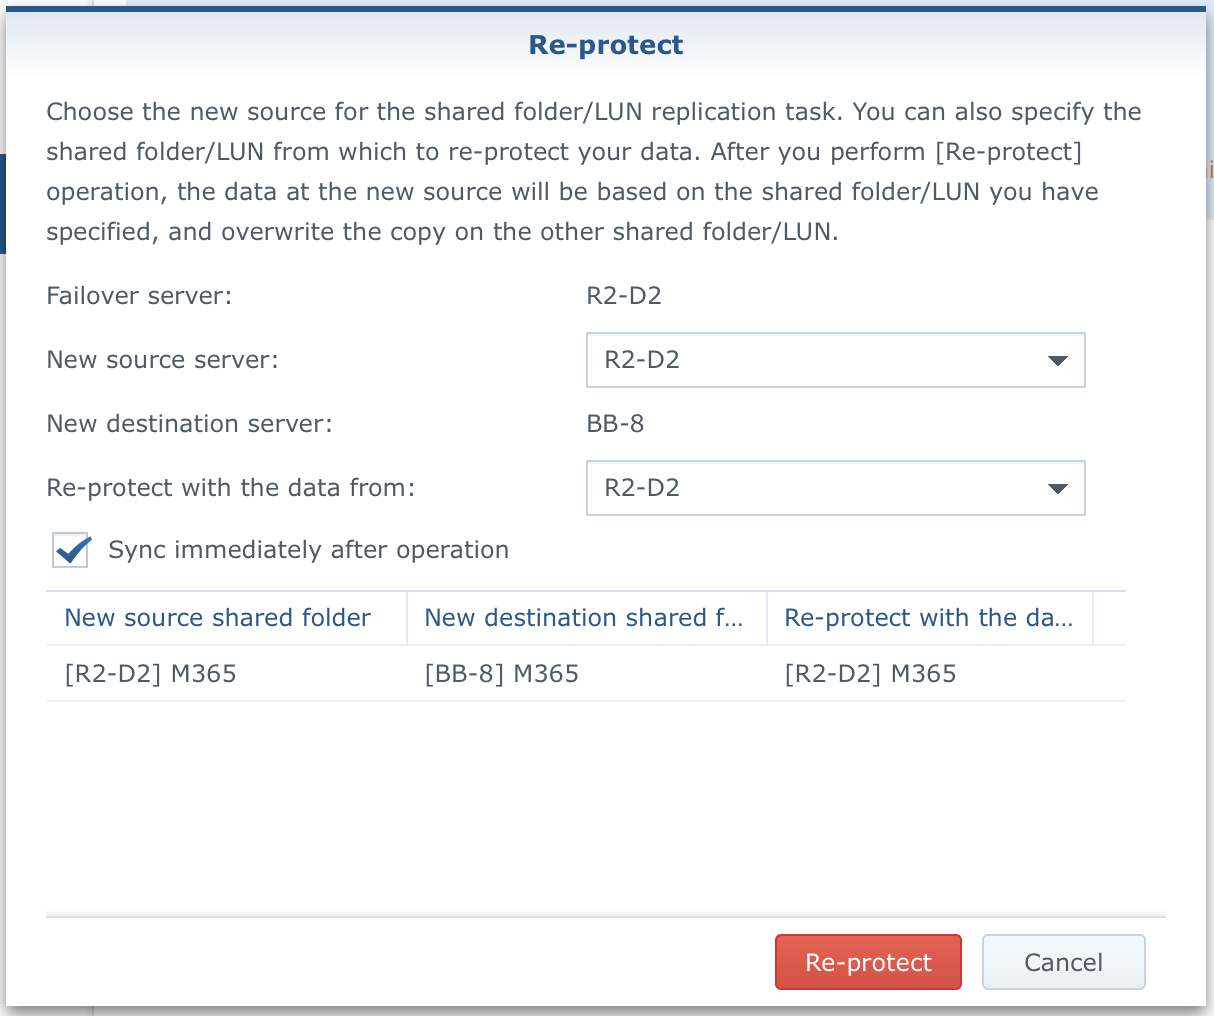
So now we have decided to use NAS2 and its snaped data as the new source NAS and source data for this replication task.
Next, we need to install Active Backup for O365 on this NAS2 location and try again to relink the data that was replicated to this location.
After re-link, Active Backup will run through its routine.

As we can see from the images above the process is identical now on the secondary (NAS2) location and Active Backup is up and running with the current content.
I have tested access using the user portal, and it all works fine. New data is also coming in without any problem at all.
Conclusion
After 3200 words, a few more to conclude this article. As we can see Active Backup for O365 is a great asset for your O365 backup needs, but it also needs to be protected and backed up.
I do hope this will be beneficial for anyone wondering how to configure and set it up as well as how to restore data and prepare for the worst-case scenario when it comes to protecting your backup.
One would argue the price of this backup (considering that you need two NAS units), but as always, depending on the worth of your data you will invest more or less into its protection.
Let me know down in the comments what you think, and as always if you have any suggestions or questions write them down. You can also get in touch with me using the *support chat option.


