PLEX, bare metal or Docker?


 philrigby
If you haven't heard of PLEX, shame on you! Kidding. Just in case if you haven't, it's a media organization and streaming platform. Already 10+ years old, it offers a way to stream and organize your movies, tv shows, music, and private videos (even retro games) and present that content on almost any device known today.

Now that we know what PLEX is, it might be a question of where to host it. Why? Well, PLEX is a client-server platform. It means that you need to have a running PLEX server that will handle the content management, and on top of that you need a PLEX client that will consume that content.
The important thing here is that as much as you can use almost any device as a PLEX client, the server-side might give you problems if you don't choose a device that is capable to play that role. What this means is that you will get into trouble if you choose a slow and weak device and expect it to do wonders.
One specific task that PLEX can do is called transcoding. That is a process of converting your audio and/or video file format into a suitable format for your PLEX client device in case the device itself is unable to "read" the media file correctly. Why is this important, well let's say you have a 1080p file and you want to stream it remotely to your mobile device in a smaller file format (720p) to save on bandwidth. In this case, your PLEX server will initiate a "transcode" process to make this happen and then push that desired file format to your PLEX client.
To make this work in real-time, and to give you a smooth experience, the PLEX server needs to have enough power (CPU power) to do this without any problems. This is one of the main reasons to choose your server platform wisely.
If you are a PLEX Pass subscriber (paid PLEX account) you have access to hardware transcoding features. That means that if you are running your PLEX server on a compatible Intel QuickSync CPU device, you can initiate transcode process without stressing your CPU that much. Just as a comparison, transcode will on average utilize 50-80% of your CPU power. But with hardware transcoding, that same process will take about 5-10% of the power.
This is especially great if your platform of choice is for example a NAS. Synology has many HW transcode capable devices in their '+' lineup: 220, 720, 920, 1015, etc.
The reason I'm saying this is that those models also support Docker features. Just as most popular platforms nowadays support Docker, PLEX has also jumped on board with this a while back.
So, the main question of this article is this. Do you install the PLEX server on the NAS directly (using Package Center) or via the Docker platform? What's better or not, in what scenario will PLEX work better in general or better yet, can it work better in Docker when it comes to HW transcode?
Just one note on this whole setup. I will use my DS918+ model as a PLEX server machine for both bare metal and Docker install. So in the end I will have two PLEX servers running on the same machine (and same CPU), but the only difference will be that one will be sandboxed as a container. Also, the source of the content will be the same (in this case, media content is on a separate NAS altogether).
Installing PLEX on NAS via Package Center (bare metal)
One simple way to get the PLEX server going on your NAS is to install it using the Package center.
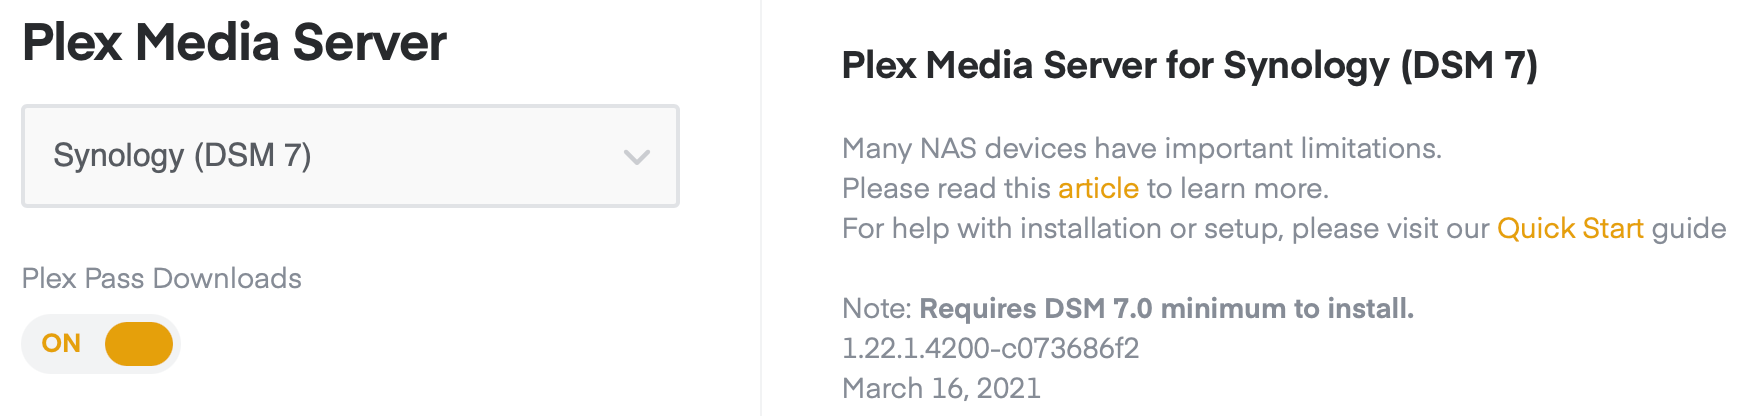
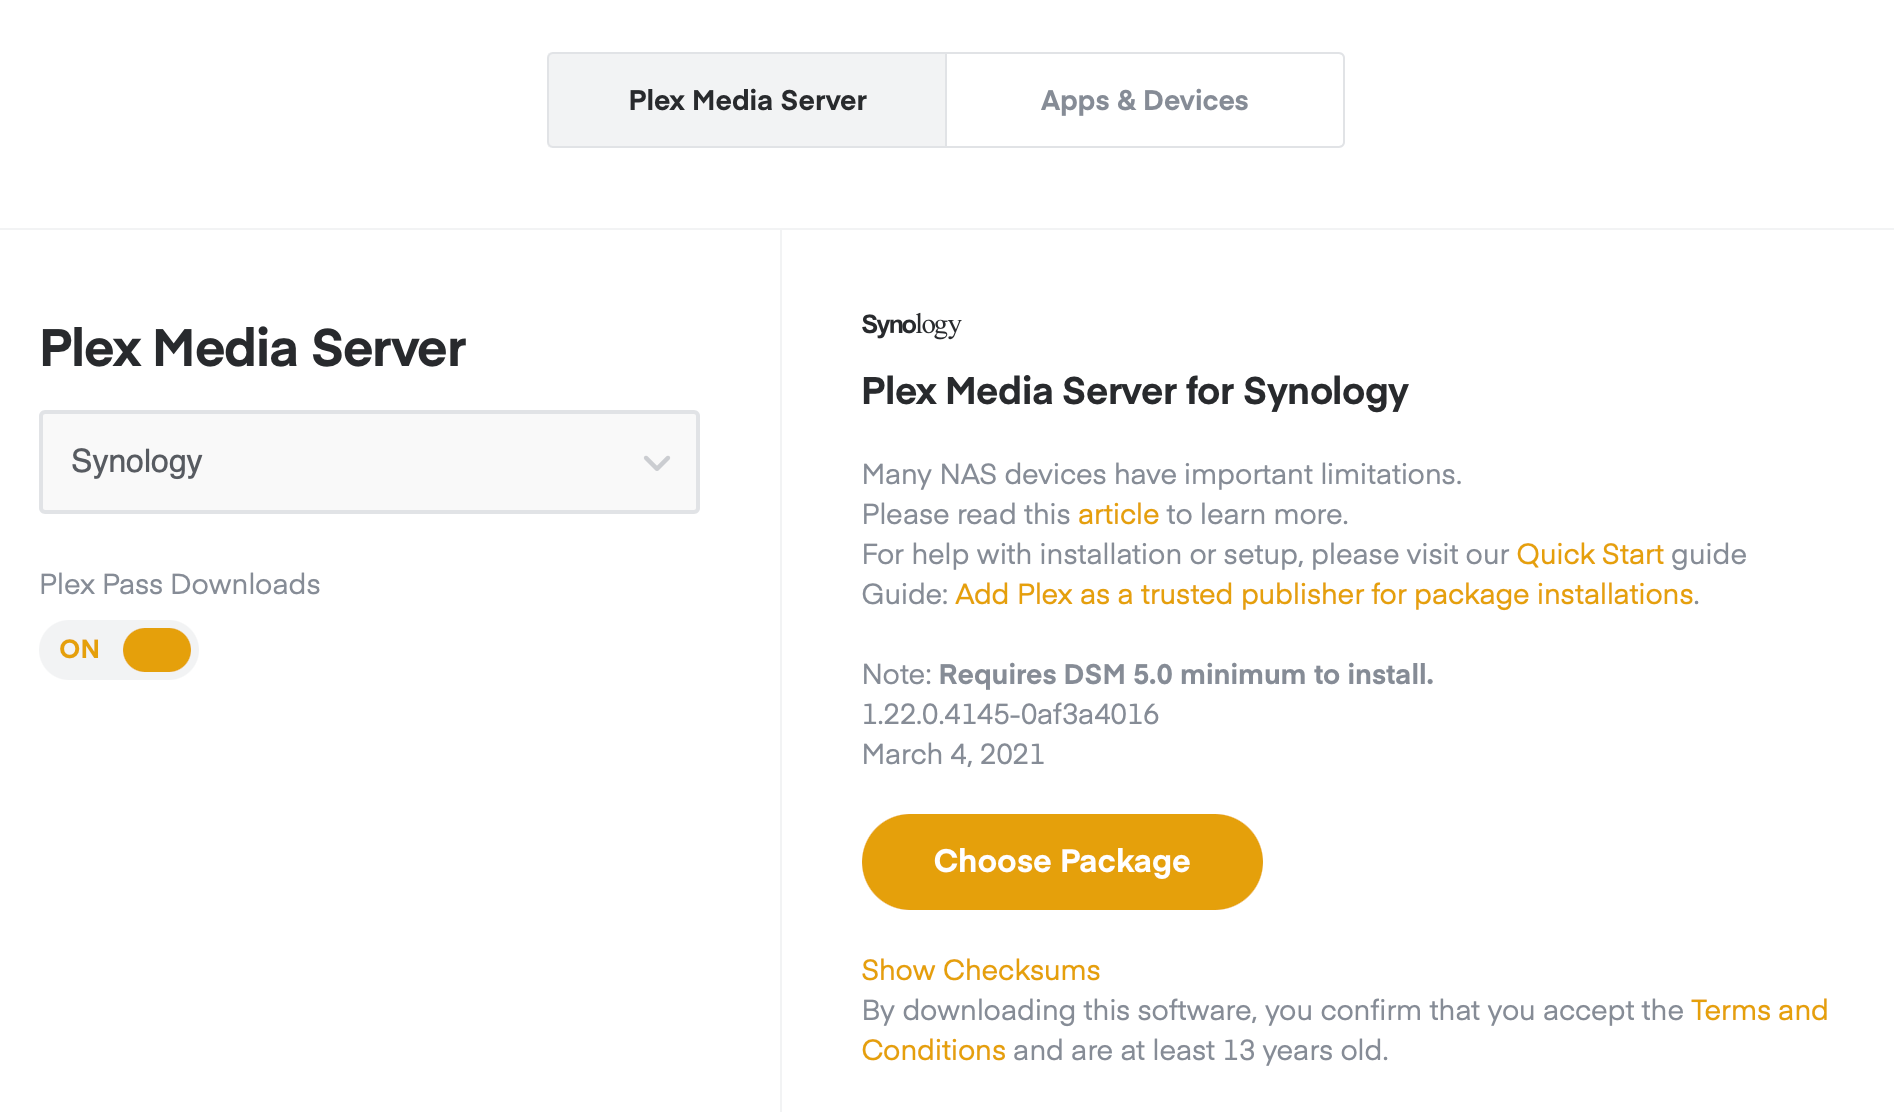
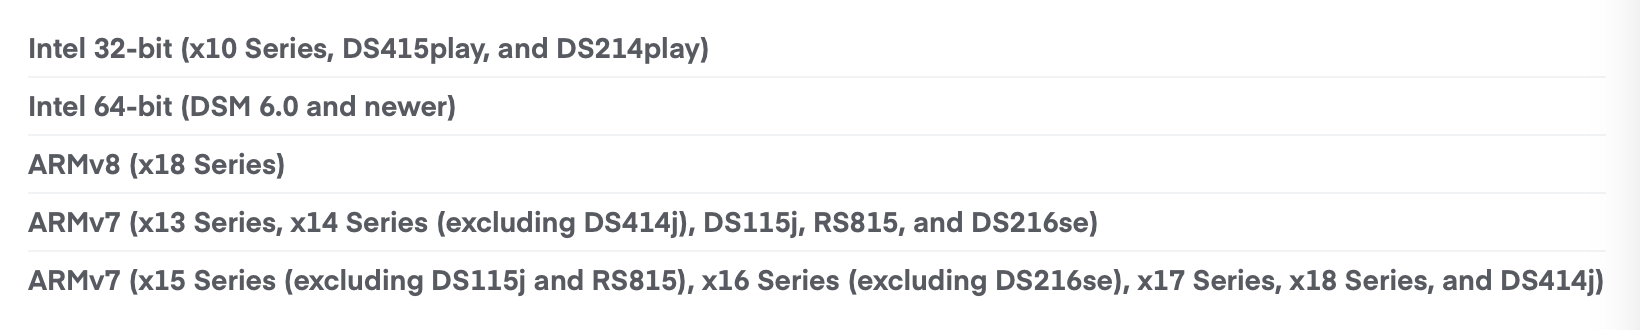
Log into plex.tv site and download the version compatible with your NAS. Be sure to know what CPU your NAS is using to know if you should download the x86/64-bit version or the ARM one (and if so, what exact install it should be).
Once you have the version, follow the process of installation and in a matter of minutes, you should have your PLEX server up and running on its default 32400 port.
Open up Package Center in DSM and use the Manual install button in the upper right-hand corner. Follow the wizard by giving it the PLEX installation file and clicking through.
This article will not focus on setting up your PLEX server regarding content so I will jump ahead and use the pre-populated examples.
Use your NAS IP address and port 32400 to get to your PLEX server UI and take it from there.

Now let's see how this process would like on the Docker platform and afterward we can activate the HW transcoding feature on both PLEX servers.
Installing PLEX on NAS via Docker
For this article, I have decided to go the other direction when it comes to running containers than what I usually do (don't worry there will be a usual method as well on the bottom of this section, STEP02b (alternative).
Usually, I run them as single docker run commands but with this image let's give docker-compose a go. To make it more user-friendly than running it via the command line, I will use Portainer to start it up.
To make this work you will have to have Portainer up and running. Follow the article to get it running and then continue forward.
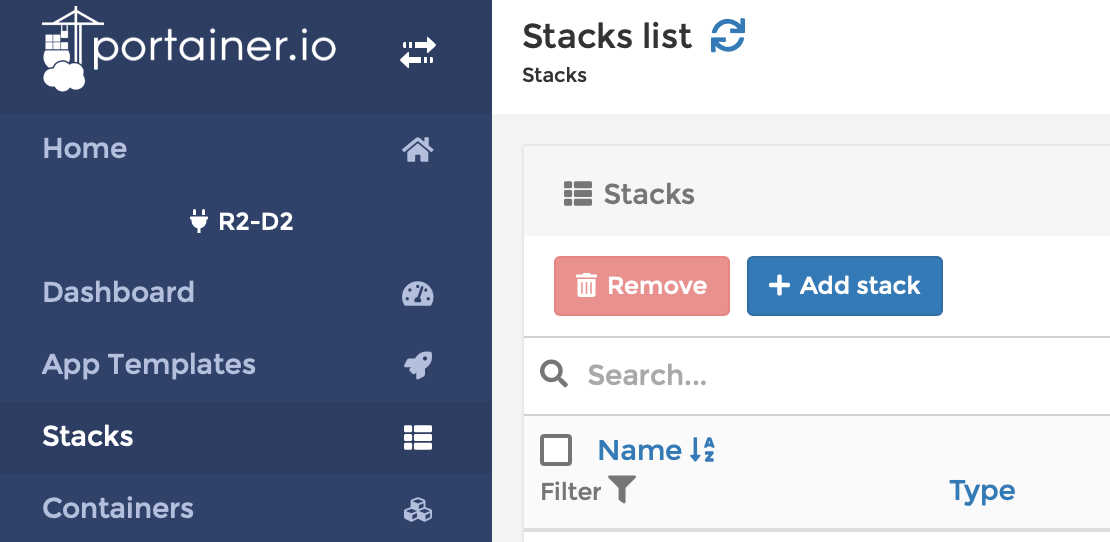
STEP01 - Docker compose way via Portainer
Log into your portainer instance, and go to the Stacks section. Then click the Add stack
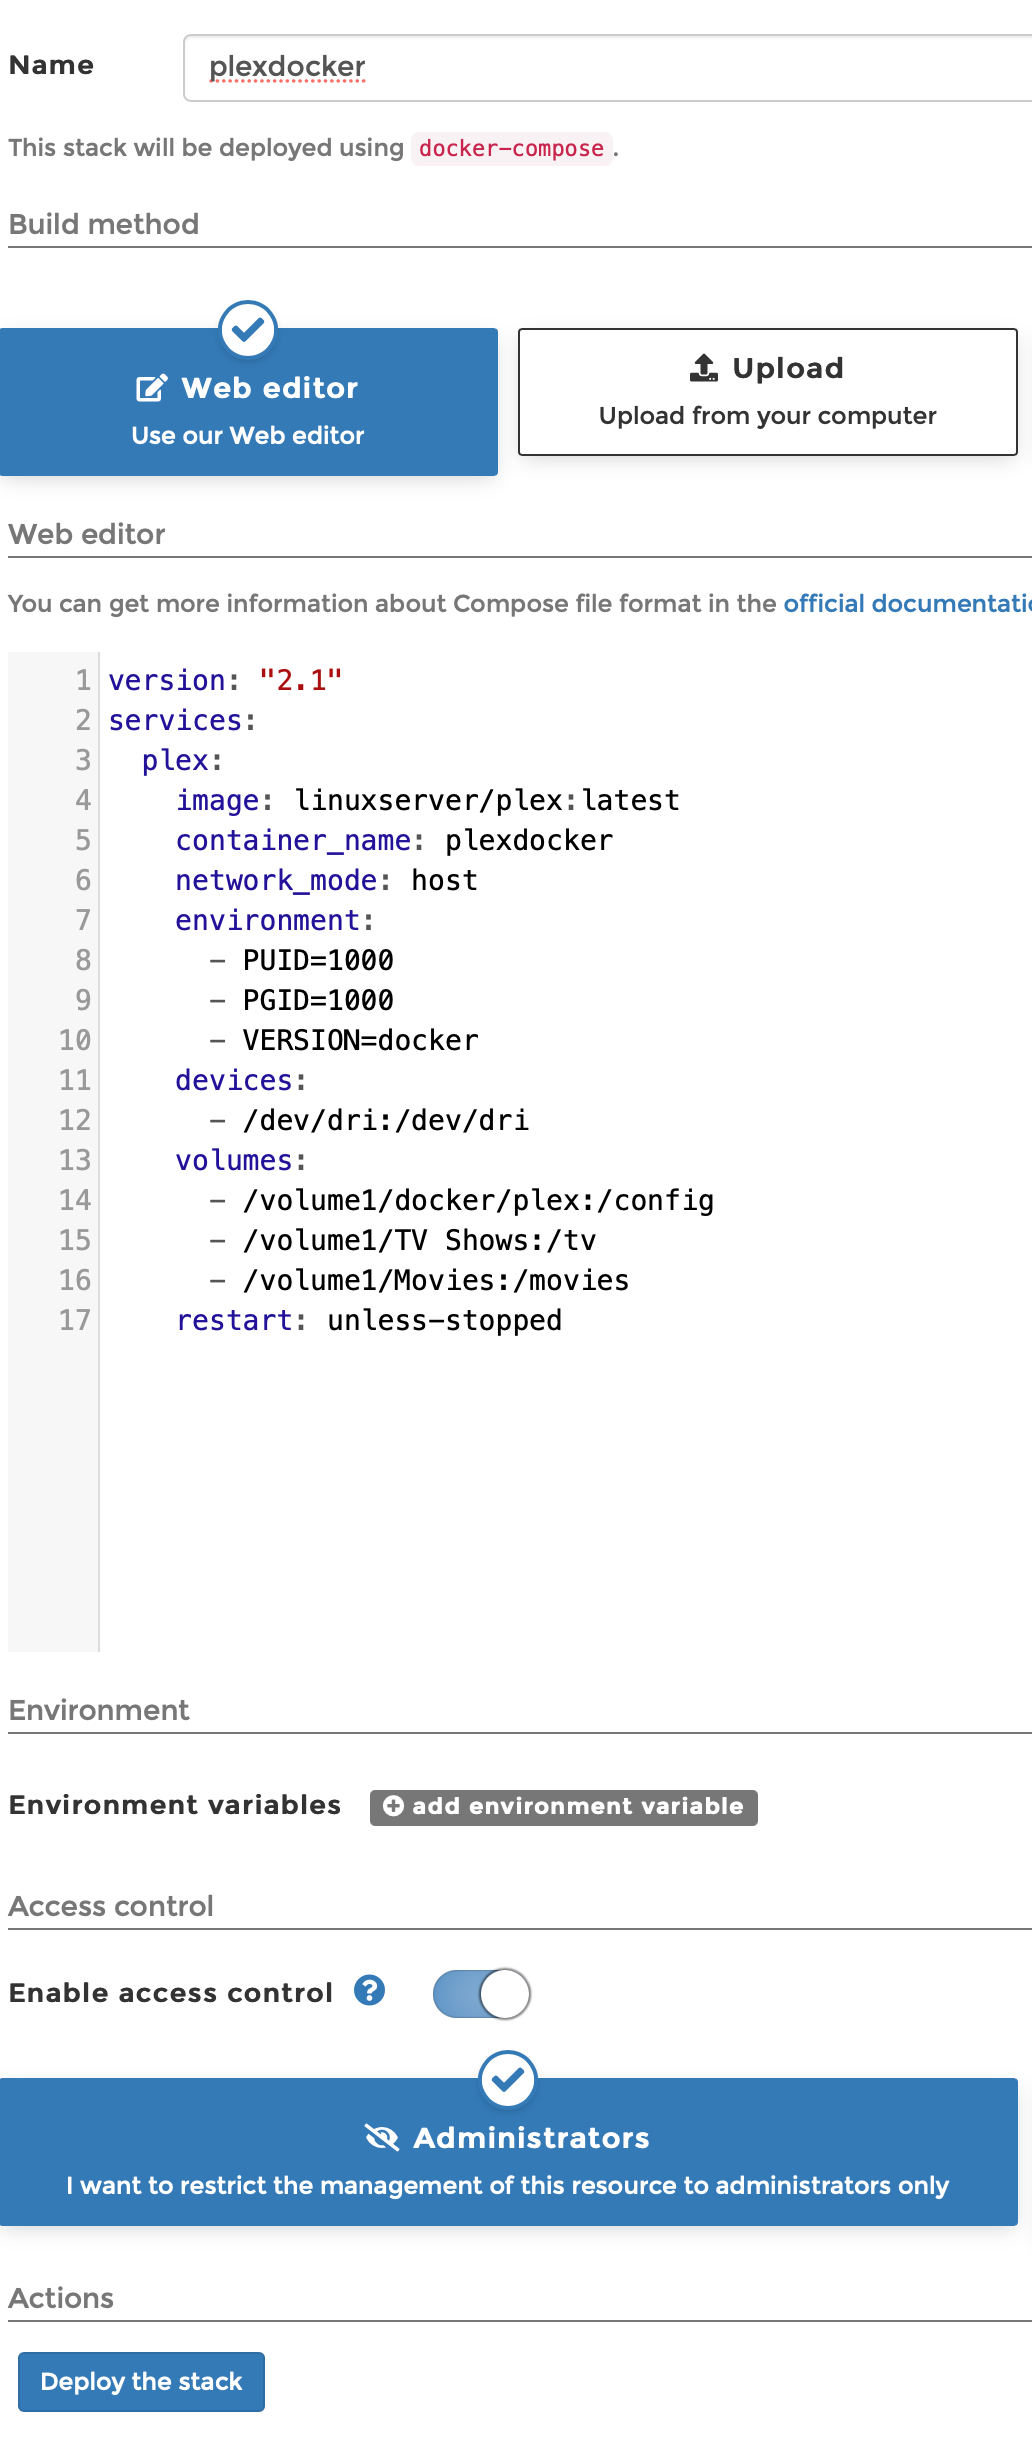
Now you will land into what's called a Web editor. Here you can paste the compose file content.
The actual compose for this instance will be the one that focuses on linuxserver/plex repository. Here is an example of it:
version: "2.1"
services:
  plex:
    image: linuxserver/plex:latest
    container_name: plexdocker
    network_mode: host
    environment:
      - PUID=1000
      - PGID=1000
      - VERSION=docker
    devices:
      - /dev/dri:/dev/dri
    volumes:
      - /volume1/docker/plex:/config
      - /volume1/TV Shows:/tv
      - /volume1/Movies:/movies
    restart: unless-stopped
STEP02 - Create a PLEX container
Now that we have the compose needed, make the changes where needed. To start with, change the PUID and PGID parameters to match the DSM account that you want this container to run under.
SSH into your NAS and run sudo -i. Enter your password once more and then run id.
This will list your current use UID and GID values (something like 1027 for the user and 100 or 101 for the group). Use those values in the above variables.
Another thing that needs to be changed is the volumes. You will need to match the left-hand side to match your local paths. On the right-hand side, you can leave as they are or add multiple movies and tv like folders if you have multiple sources.
In any event, when you are ready, paste it in the Web Editor and create the stack by clicking the blue button on the bottom, Deploy the stack. Don't forget to enter the name of the stack on the top.
Once you deploy your PLEX container, you will be able to log into it and configure it just like any other PLEX platform.
STEP02a (optional/alternative)- Running the PLEX container in bridge network setup
In case you want to run your PLEX container but in a Docker bridge network configuration (would not recommend it), then you will need to do the same steps just run the following compose:
version: "2.1"
services:
  plex:
    image: linuxserver/plex:latest
    container_name: plexdocker
    environment:
      - PUID=1000
      - PGID=1000
      - VERSION=docker
      - PLEX_CLAIM=enteryourclaimID
    ports:
      - "32400:32400"
      - "1900:1900/udp"
      - "3005:3005"
      - "5353:5353/udp"
      - "8324:8324"
      - "32410:32410/udp"
      - "32412:32412/udp"
      - "32413:32413/udp"
      - "32414:32414/udp"
      - "32469:32469"
    devices:
      - /dev/dri:/dev/dri
    volumes:
      - /volume1/docker/plex:/config
      - /volume1/TV Shows:/tv
      - /volume1/Movies:/movies
    restart: unless-stopped
Considering that you will explicitly add ports, you will create a bridge network specific for this container to make this work (this will be automatic).
In any case, you will have a PLEX server up and running.
Please note one more thing. If your PLEX account is not a PLEX Pass type then you can remove the HW transcoding element from the script:
    devices:
      - /dev/dri:/dev/dri
STEP02b (alternative) - Running PLEX container via docker run command line and not via Portainer
In case you don't want to run PLEX using docker-compose (with or without Portainer), you can also run it as a simple docker run command line by running the following:
docker run -d \
  --name=plex \
  --net=host \
  -e PUID=1000 \
  -e PGID=1000 \
  -e VERSION=docker \
  -v /path/to/library:/config \
  -v /path/to/tvseries:/tv \
  -v /path/to/movies:/movies \
  --restart unless-stopped \
  linuxserver/plex:latest
This method will run PLEX on the host network, but if you want control over ports and you want the network to be bridge then run the following docker run block:
docker run -d \
  --name=plex \
  --net=bridge \
  -e PUID=1000 \
  -e PGID=1000 \
  -e VERSION=docker \
  -e PLEX_CLAIM= `#optional` \
  -p 32400:32400 \
  -p 1900:1900/udp \
  -p 3005:3005 \
  -p 5353:5353/udp \
  -p 8324:8324 \
  -p 32410:32410/udp \
  -p 32412:32412/udp \
  -p 32413:32413/udp \
  -p 32414:32414/udp \
  -p 32469:32469
  -v /path/to/library:/config \
  -v /path/to/tvseries:/tv \
  -v /path/to/movies:/movies \
  --restart unless-stopped \
  linuxserver/plex:latest
Activate HW transcode
Now that you have your PLEX up and running you can go to the Settings > Transcoder menu, and locate the Use hardware acceleration when available check box.

That will do it for now. You have set up PLEX and told it to use HW acceleration when needed. Next, we will see how and when the HW acceleration will kick in (in the Test01 section below), and how will it perform overall. As mentioned before if you are not a PLEX Pass user, then HW transcoding will have no meaning for you.
For both tests, I will be mainly using the iOS PLEX official app with the same content being transcoded into the same format (2Mbit, 72op) using HW transcoding.
Test 01 - streaming and using HW transcode (bare metal install)
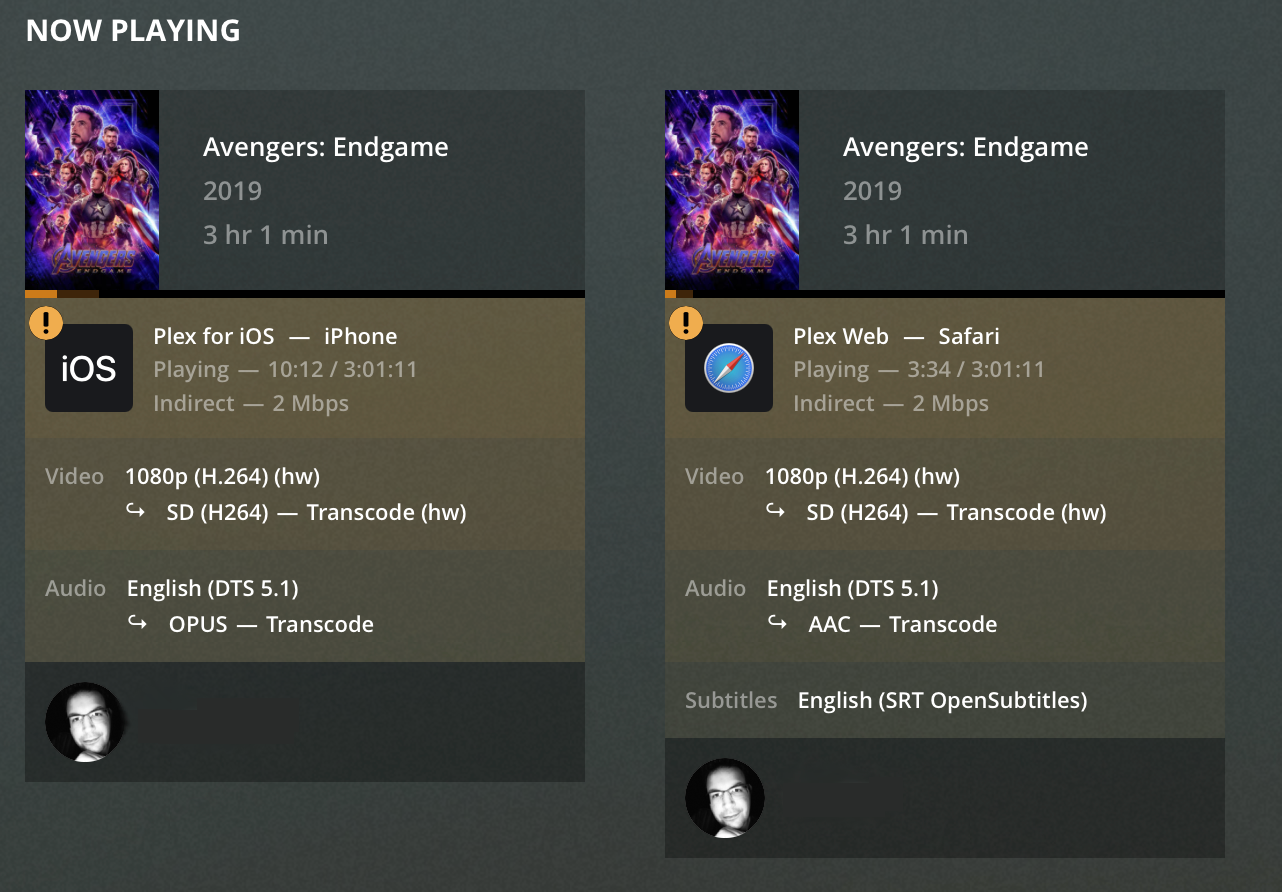
Starting the content on the iOS PLEX app and pushing it down to 720p (2Mbit) will result in the following CPU utilization on the 918+ model.
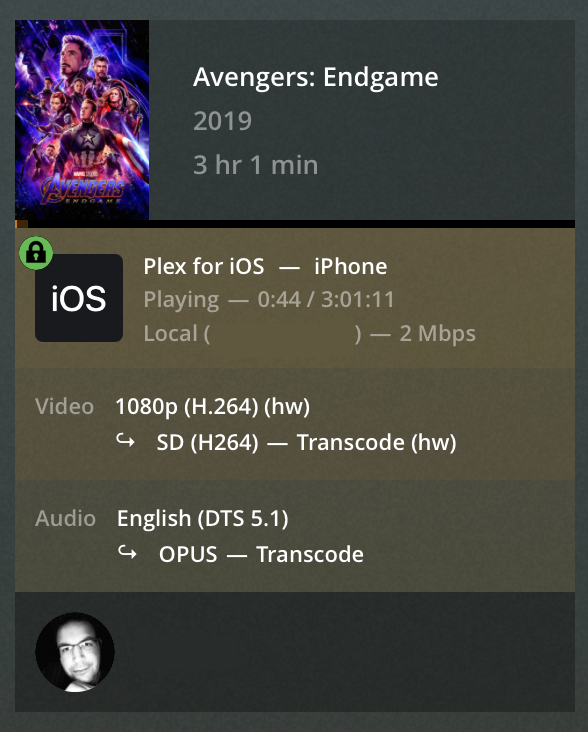
The image above clearly states that the video is being transcoded using the Intel QuickSync feature indicated by the little (hw) mark next to the Transcode label. This indicates that the video stream is being pushed from its original 1080p down to the desired bitrate using HW transcoding.
hw mark it means that the PLEX server will do a pure software transcode operation and stress your NAS quite a bit.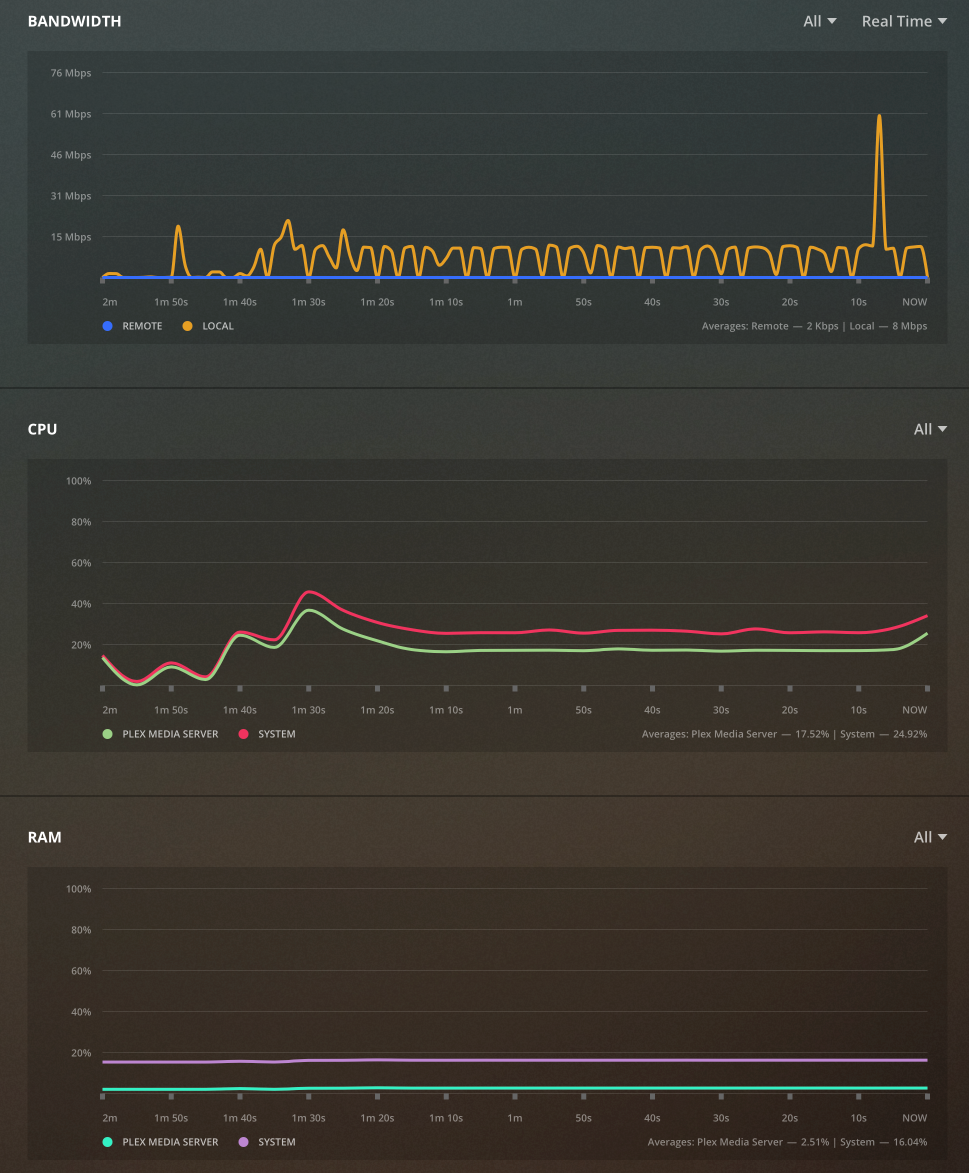
While HW transcoding is underway we can see the RAM and CPU utilization using the PLEX dashboard. With about 20% CPU utilization this NAS still has a lot of room.
The dashboard presents data for the last 2 minutes, but if we look at the CPU utilization a bit later on, we can see that the CPU will go down regarding utilization while still transcoding the video.
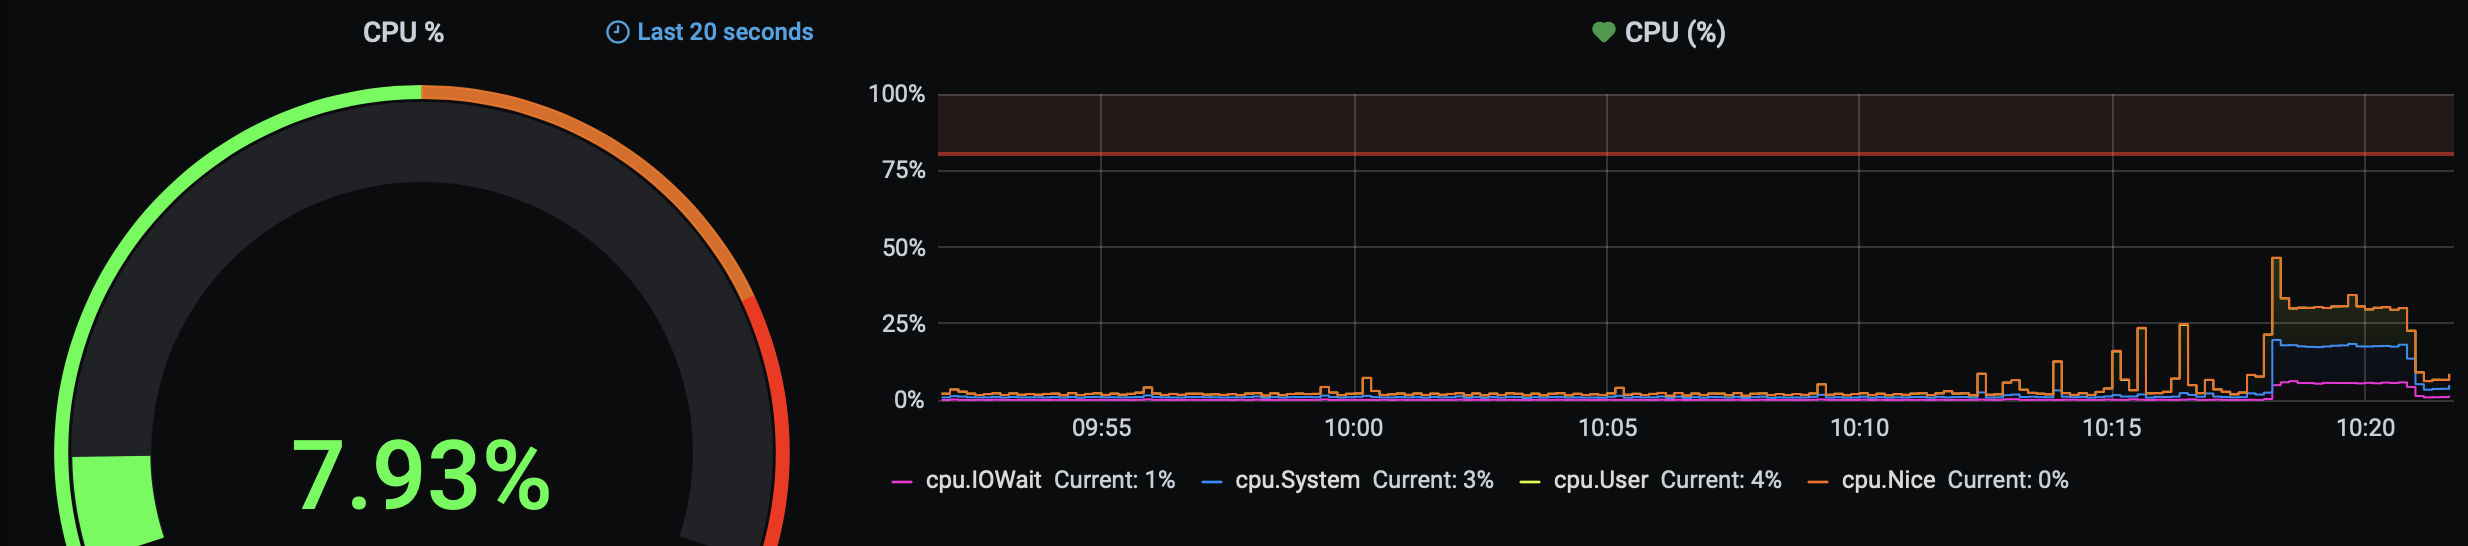
As we can see on this image, only 8% CPU utilization (and that includes the whole NAS utilization, not just PLEX) while the content is still being played after the 10:20 AM mark. The jump at about 10:18 was when the content started, and CPU from the PLEX side of things was at about 20%, but at 10:21 it was already down to 8% of total usage and maybe around 2-3% when it comes to the content itself.
What this means is that at certain points in time, PLEX will transcode a larger part of the content and then let it play, when it's coming on the next bit that needs to be transcoded, it will again "kick in" to transcode, and play the next bit.
So if we just focus on the orange color in the graph we can see that the impact of PLEX when it comes to HW transcoding is very low. Does this mean that you can transcode multiple streams at the same time? Yes, it does. It will depend on the quality of the stream you are going for but 3-4 concurrent streams are guaranteed.
Let's see how this will perform on the Docker.
Test 02 - streaming and using HW transcode (Docker install)
Same file, same client, same settings.
On top of the iOS stream, I have pushed another stream from a macOS device using the Safari web browser.
We can see that the transcoding process is again in HW mode.
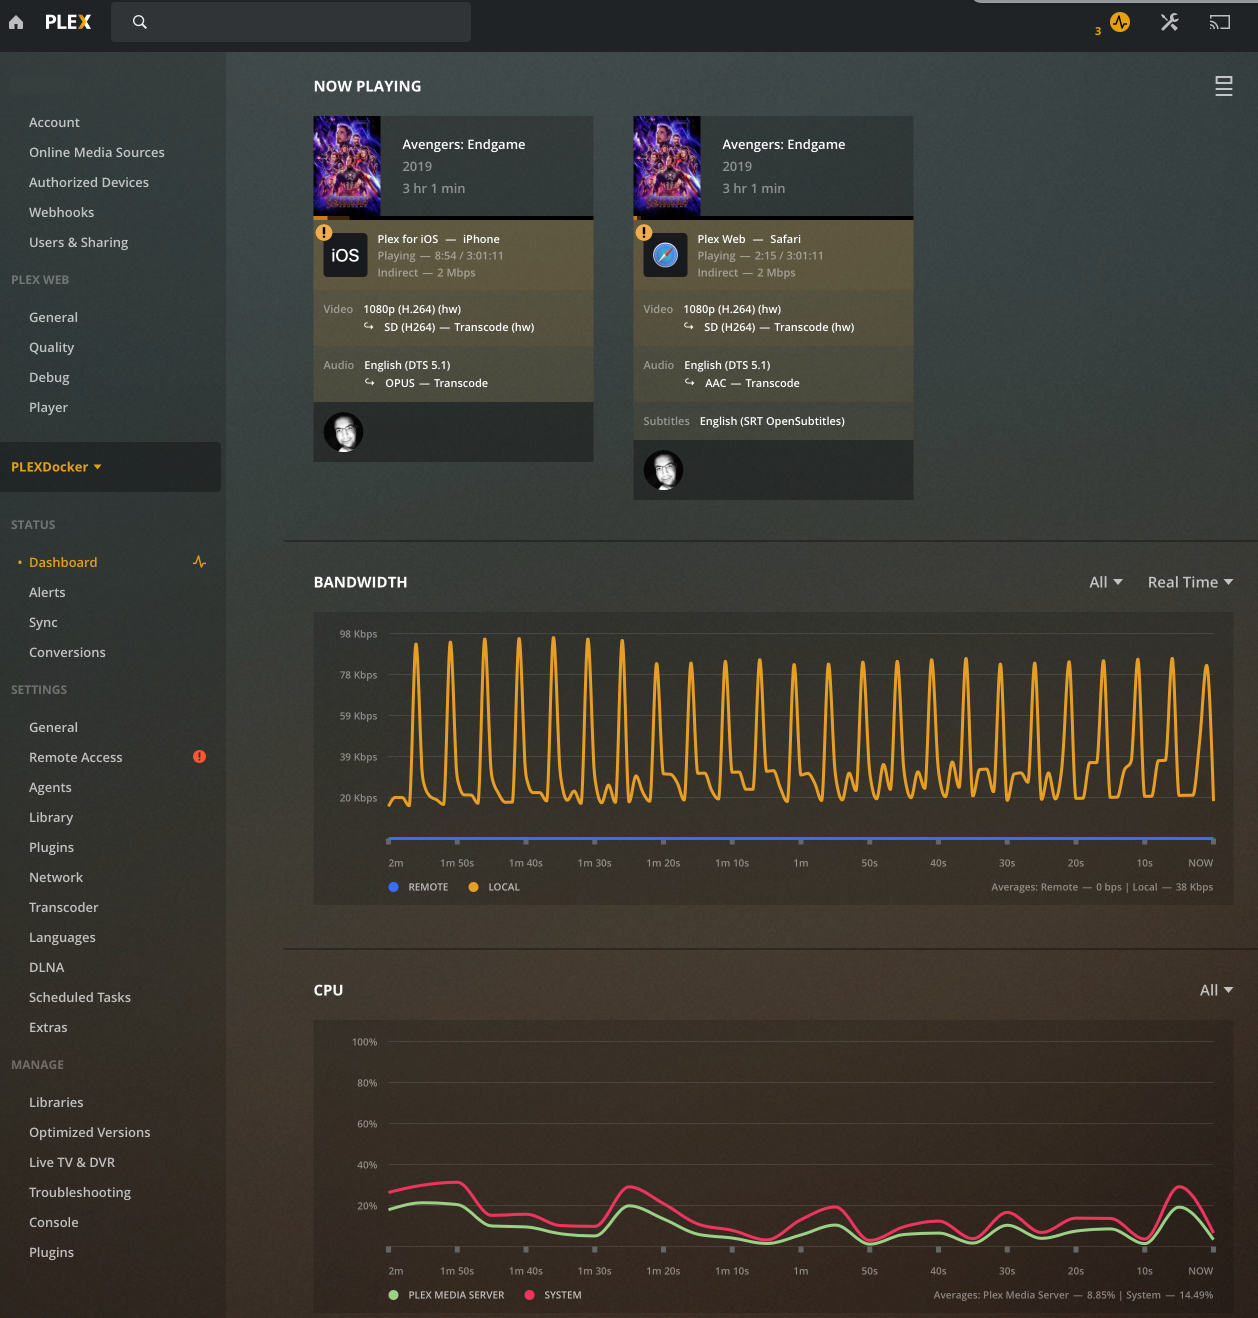
CPU utilization is about the same about 20% even with a secondary stream.
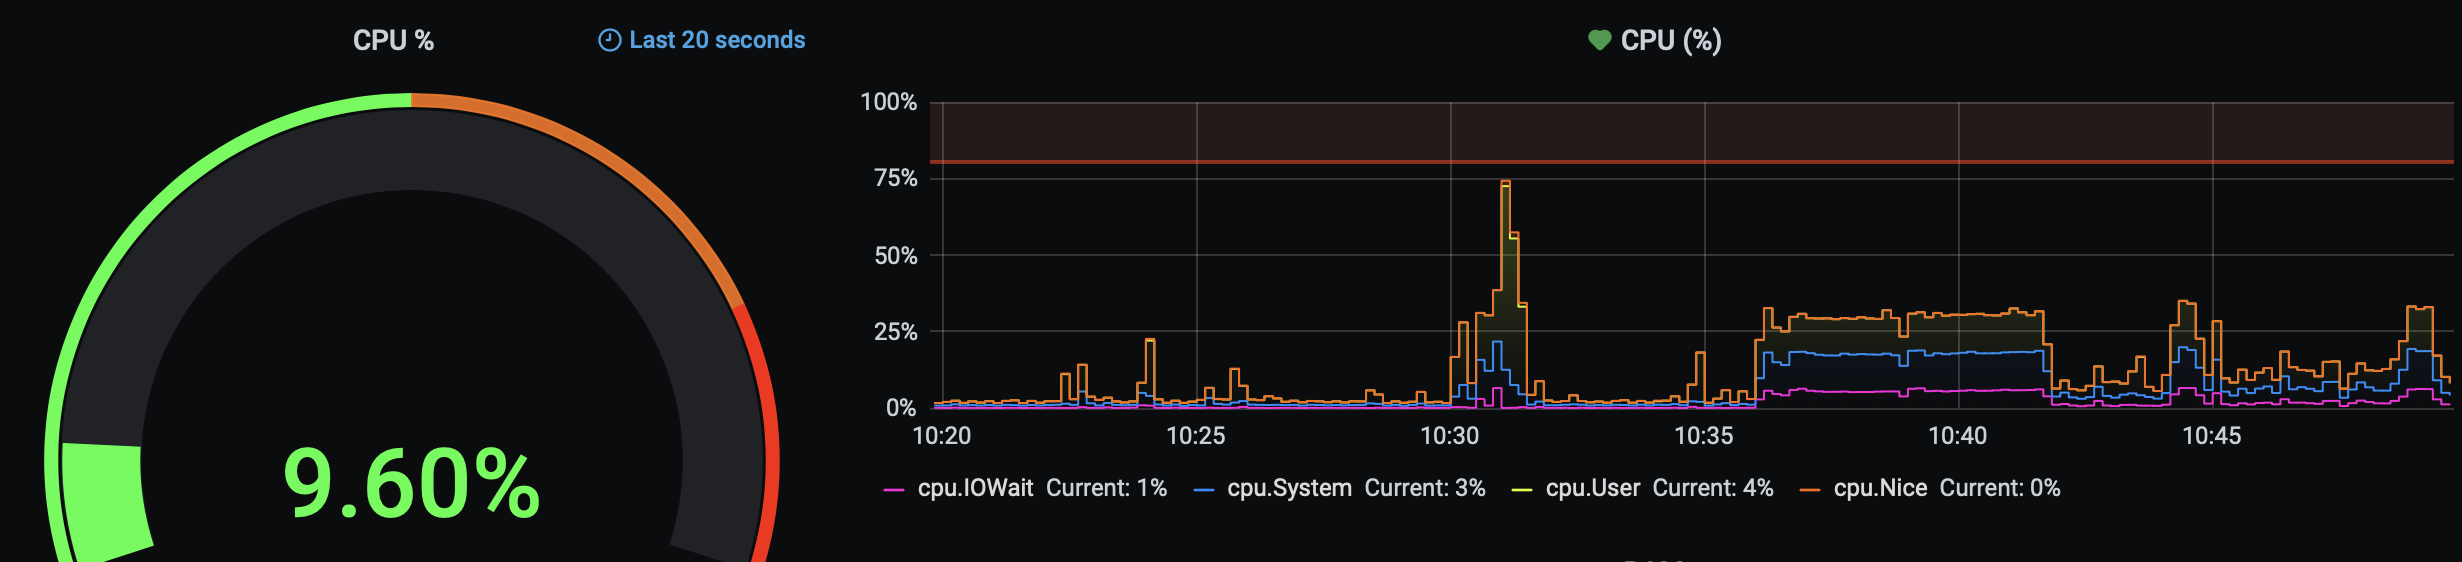
If we look at the 10:37 mark, we can see that the same thing happened as before. Bit of more CPU utilization on the start to catch up with all the HW transcode needs, and then the streaming continues with periodic spikes from about 10-20% when HW transcode again, kicks in.
As we can see, even with concurrent streams, PLEX in Docker can handle itself just as well as running on bare metal.
Conclusion
As we can see there are no major differences between running PLEX natively vs Docker on the same device.
So, what should you choose? I get asked this a lot, and as an avid fan of Docker and containers guess you know the answer. But, I have to be honest that I run it bare metal. Why? Well, I have used PLEX for a long time, over 10y now, and just got used to it that I never saw the need to put it in a container.
Can I do it? Yes, I can even transfer the existing setup into a Docker one and carry on. Still, saying all this, because you can use the plex.tv version of PLEX on your Synology there is no real need or fear of being left out regarding features.
Also, the last time I had trouble with PLEX running bare metal was, ahem, never, so that is the main reason. Lazy and it works.
If you are on the other hand determined to use it in Docker, feel free and know what there will be no problem running it just as well.
Feel free to add some comments on this topic and let me know if you have had any problems running PLEX in Docker.