Synology 101 - Part 3: Shared Folders


The most important part for most NAS users is the use of shared folders. As the name suggests shared folder will allow you to organize your data in meaningful categories that you will be able to tweak with encryption, give or deny users permissions, quotas, and more.
Most functions on your NAS will not work before you create a new shared folder, and yet there will be situations that specific folders will be created when installing a new app from the Package Center. Like most things regarding configuration, Shared Folders are located in Control Panel. You can't miss it, it's the 1st option.
Folder creation
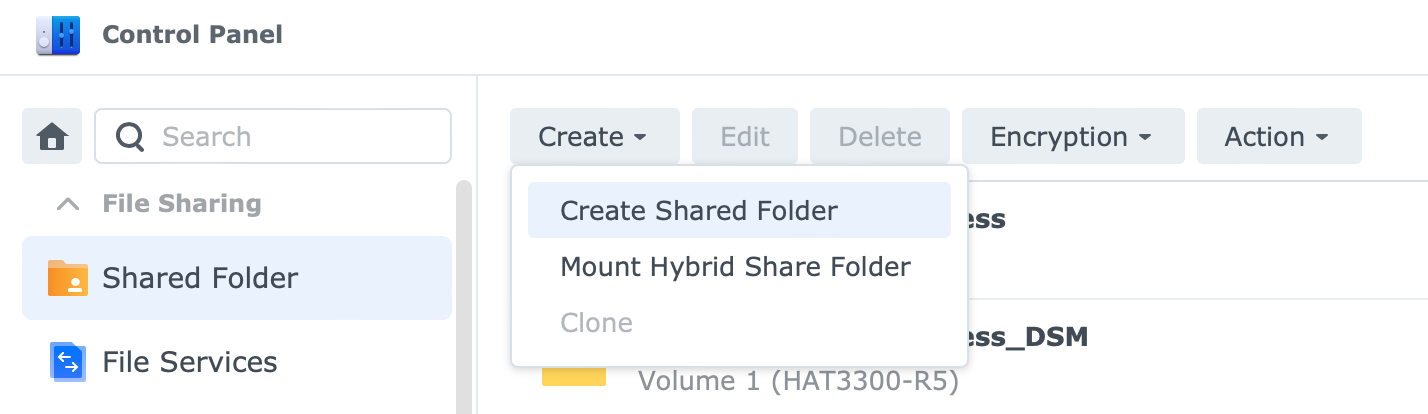
To begin with, a new folder creation, open up Control Panel > Shared Folder. Use the Create button from the Create menu to start the wizard.
There are several options that are mandatory as well as a few options that are not. As you can see from the initial step in the shared folder creation wizard, there are Name, Description, and Location parameters that you can fill in or select.
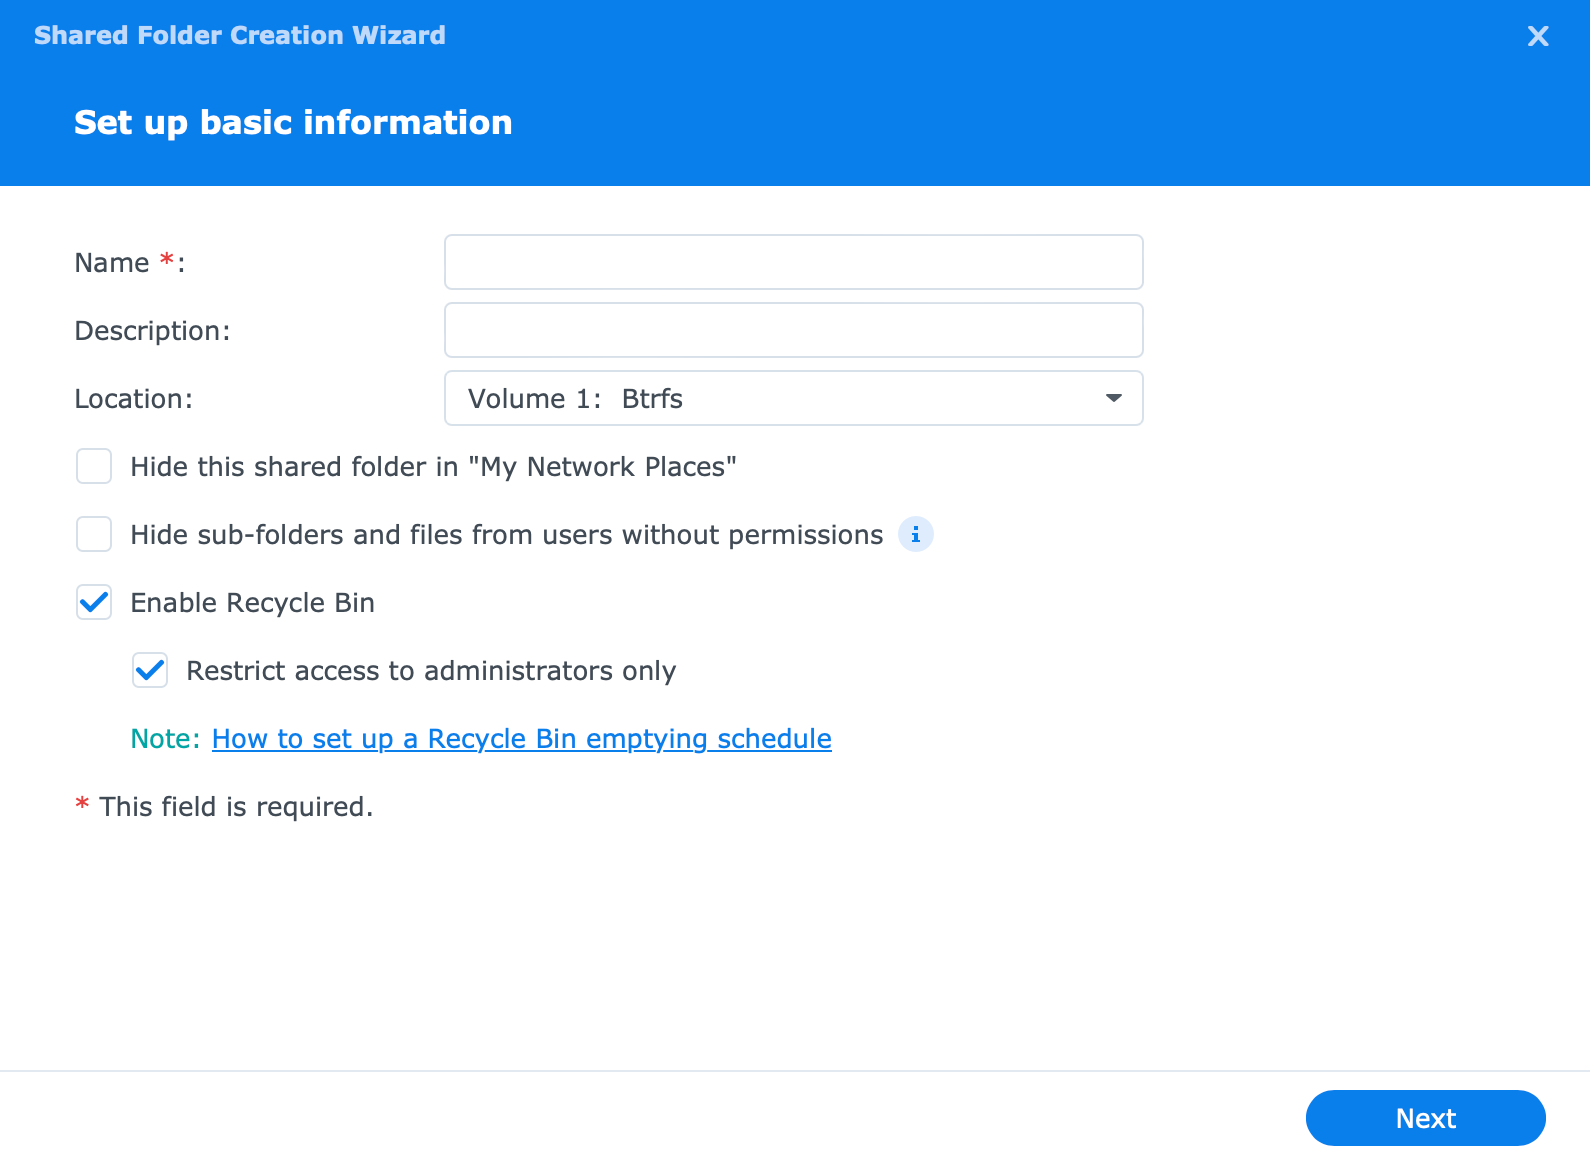
Name and Location are mandatory, but Description is not. Guessing the name value is self-explanatory but in case you have multiple volumes, you can select where your shared folder will "live". This is something that can be changed later on in case you change your mind for whatever reason.
There are several checkboxes, and none of them are mandatory but I'll talk about the Enable Recycle Bin one for a bit.
In case you wanna save your work and avoid accidental deletion you can use Recycle Bin function for each folder. This will get you out of those nasty situations where you deleted something that you shouldn't have before it's gone for good. Keep in mind that Bin will take a certain storage penalty so keeping it under control is always a good thing.
By this, I mean that you use Task Scheduler to clean all your Bins in an interval that fit your needs.
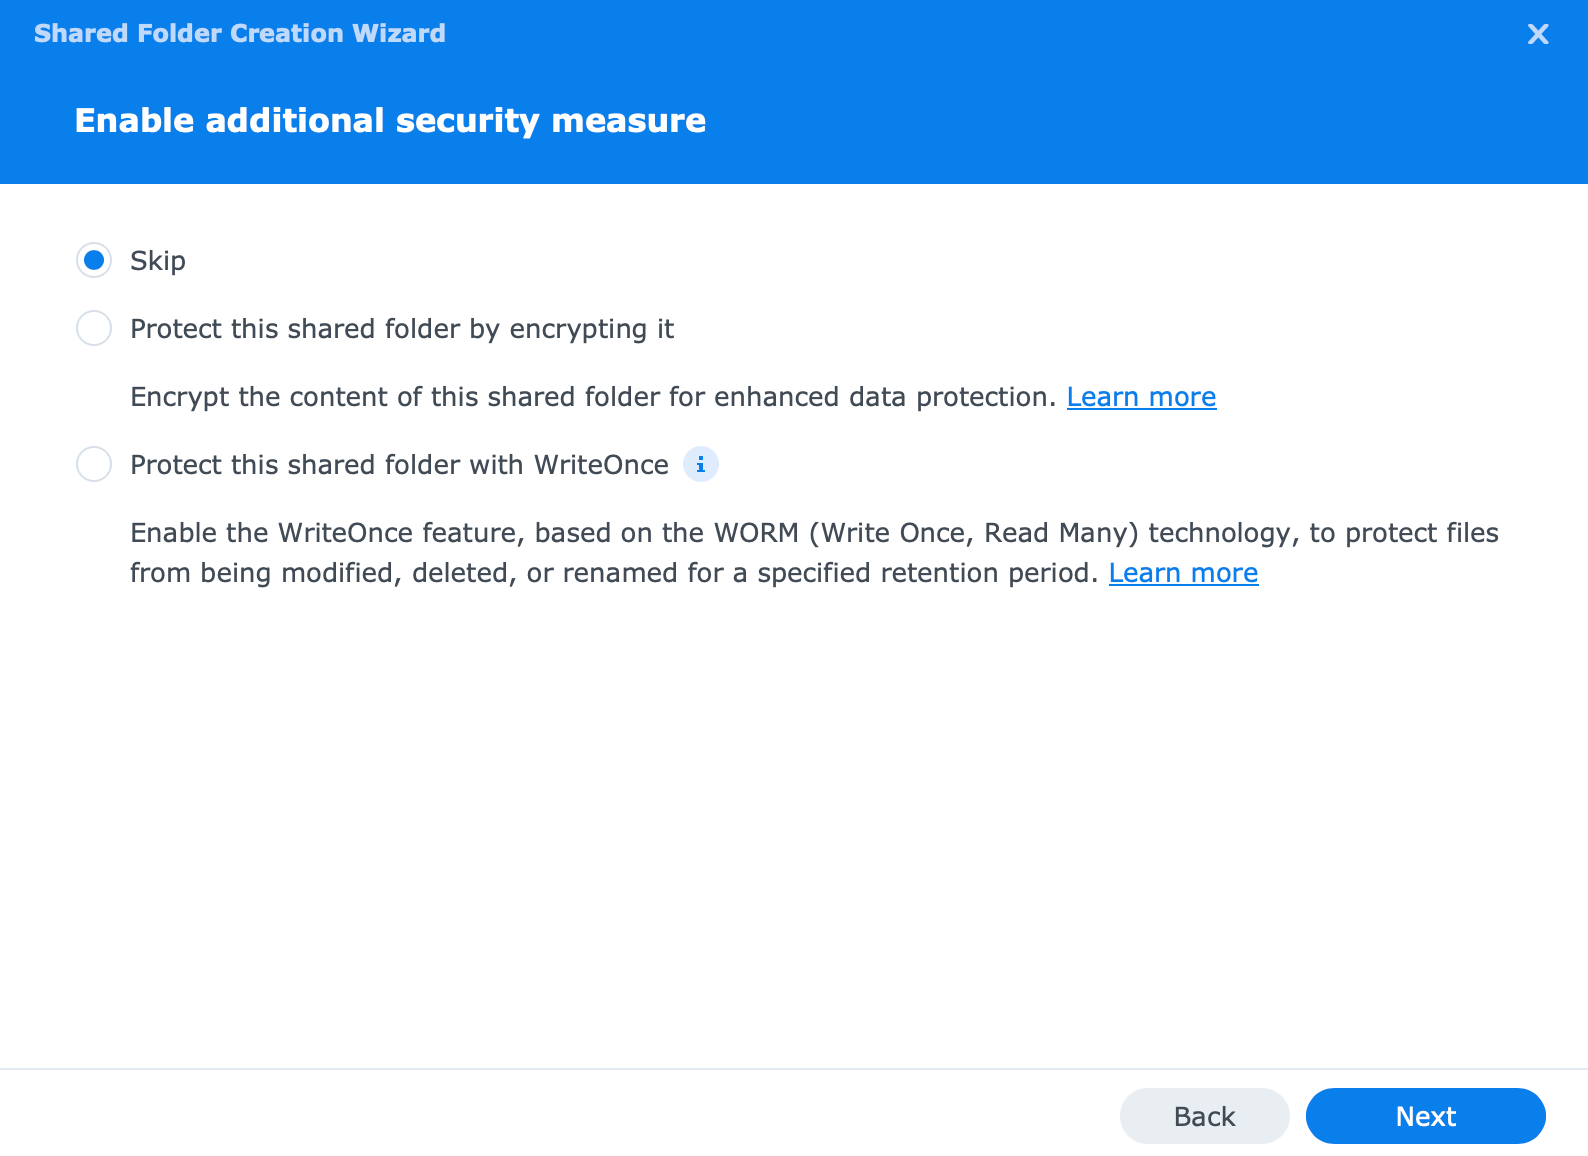
The second step is important but also optional. Encryption. Will you encrypt a certain shared folder it will depend on several things. First, does your NAS support this option, and how well and fast it can work with it (CPU power and support) as well as do your folders need to be encrypted, to begin with? When you decide on that, activate the checkbox and enter the key.
On top of encryption, the recent version of DSM 7.2 also includes the WORM feature. This is one feature that we will not be in a position to change later on so decide and understand it well before moving forward.
Details of the WORM feature can be read in this article
Regardless if you have decided to use encryption or not, the next step will offer some more optional settings. Keep in mind that some of them you will not be able to disable after you have decided to use them. Those functions are marked with a blue letter i.

One setting that is worth mentioning here is the quota. If you are creating a shared folder that you will, later on, use with some other users, or you plan on giving access to users and want to be sure that they will not go wild, set up a quota. It can be set in MB, GB and TB so choose what fits your needs.
Finally, apply your setting and that's it, you have created a new shared folder. What needs to be done now is setting up user/group permissions to that specific folder, but we have covered that in the previous article, so have a look.
In case you have decided to make any changes you can do them by using the Edit button in the Control Panel > Shared Folder list after selecting the folder you want/need to change.
Mapping remote folders
There is also one more option that you can use when it comes to working with folders. Apart from local shared folders, you can have access to remote folders via your NAS using SMB/CIFS or NFS protocol.
This is needed in some cases, and in some, it's just nice to have access to remote folders via a single machine/UI.
To begin with this process you will need to configure network traffic against your destination device that's hosting folders you want access to if those remote folders are for example in a different network subnet than your Synology NAS.
To make things a bit easier to understand let's assume that your NAS and your target device are on the same local network.
To map a remote folder use the following method:
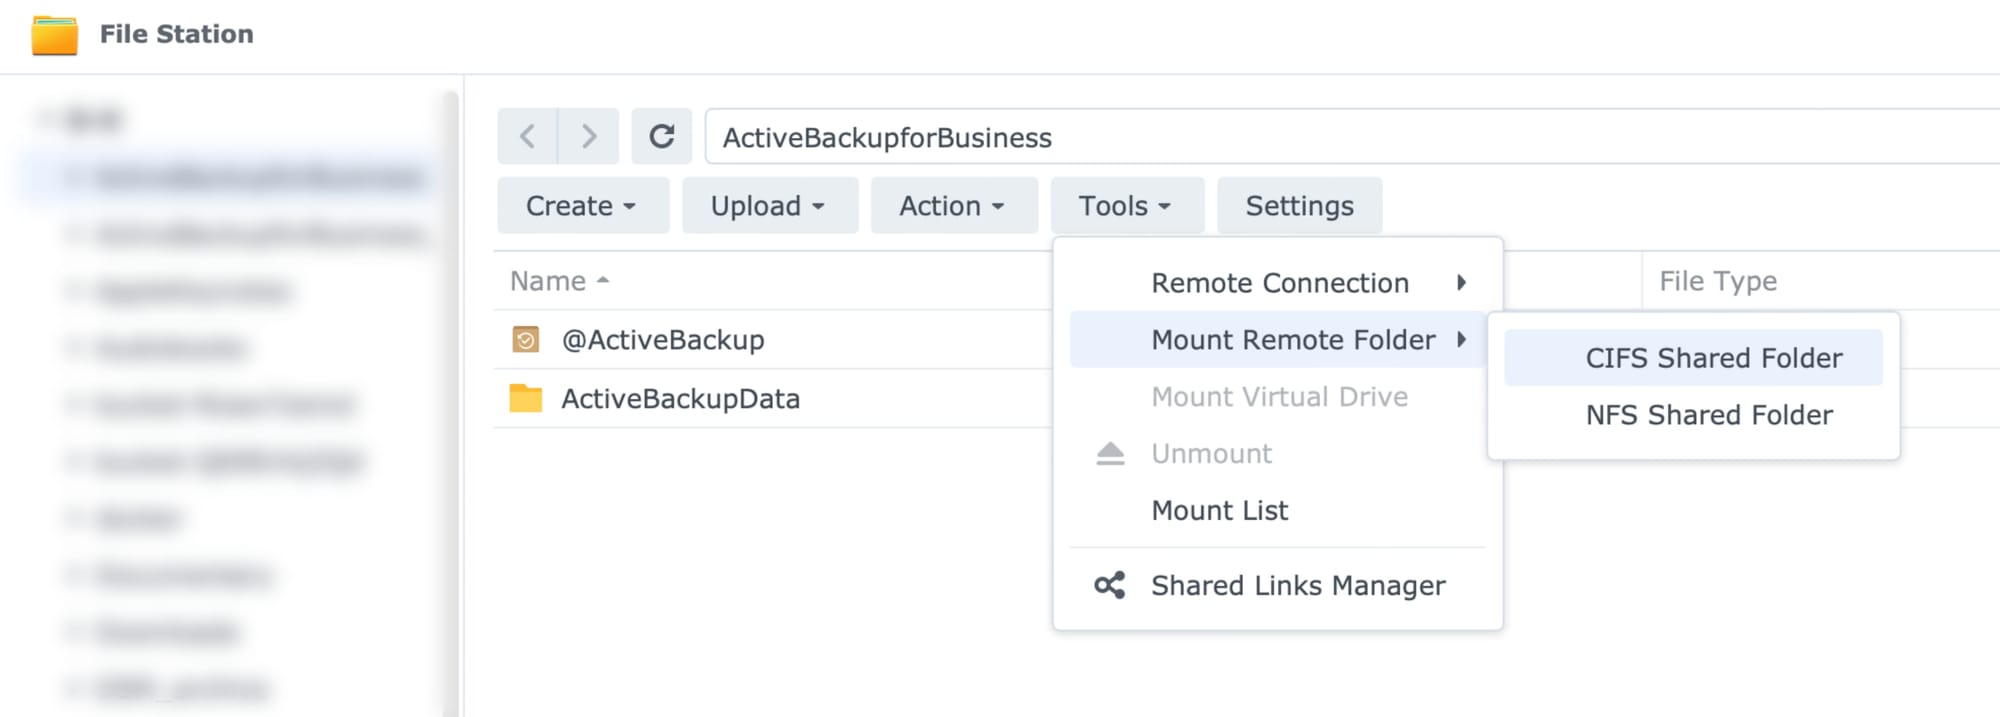
Open up File Station on your NAS and in the Tools menu open up Mount remote folder > CIFS shared folder. This will open up a dialog box that you can use to set up a remote connection to your desired folder.
The first field that needs to be entered is Folder one. Here you need to enter a destination to your desired remote folder in the form of a UNC path. For example \\192.168.5.4\SharedFolderName
Considering that accessing that folder in most cases will require an account name and password, be sure to enter those in the next 2 fields, Account name and Password. Finally, you need to select your local shared folder (or a subfolder on your NAS) that will serve as a mount point for that remote folder.

After that just click the Mount button and you should see the content of a remote folder pop up in your local folder inside File Station. Great!
Remote connection (how to connect to your DB, GDrive and other cloud providers)
Another option here is to connect to one of your providers and present its data inside File Station. Now I will talk more about connecting to third-party providers in the next module, but let's see what it means to get that data inside File Station, and how to do it.
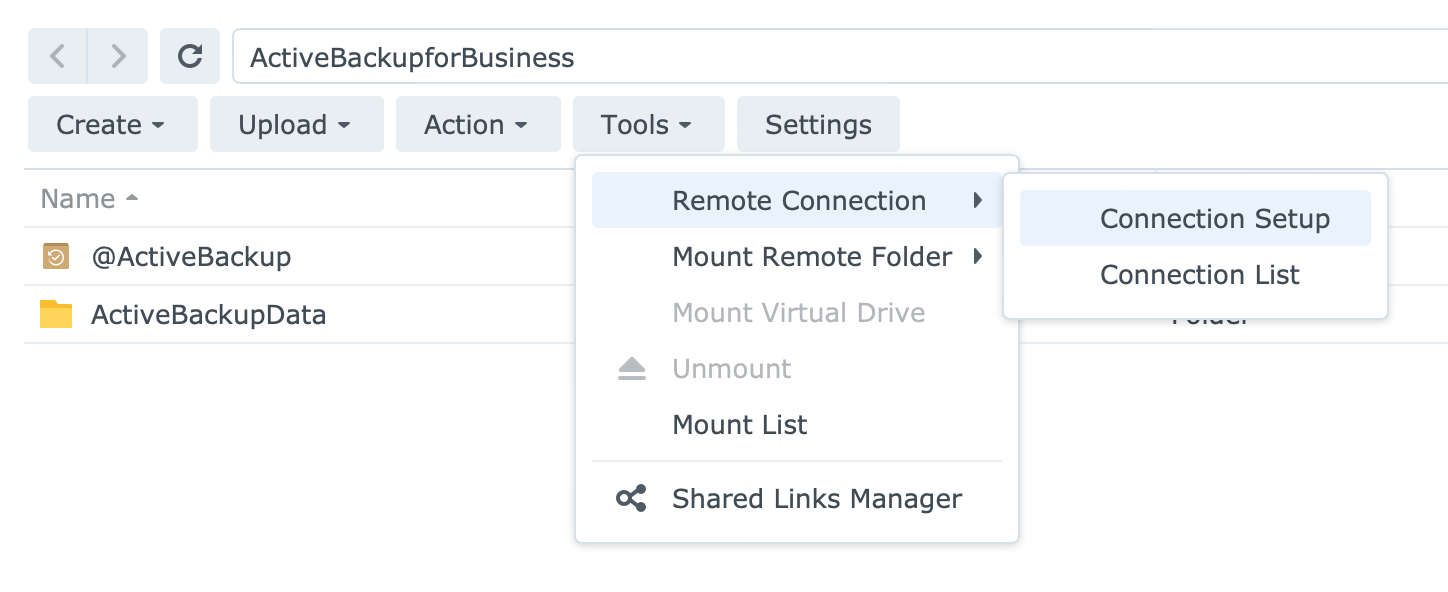
To start, you will use the same Tools menu inside File Station and then point to the Remote Connection wizard.
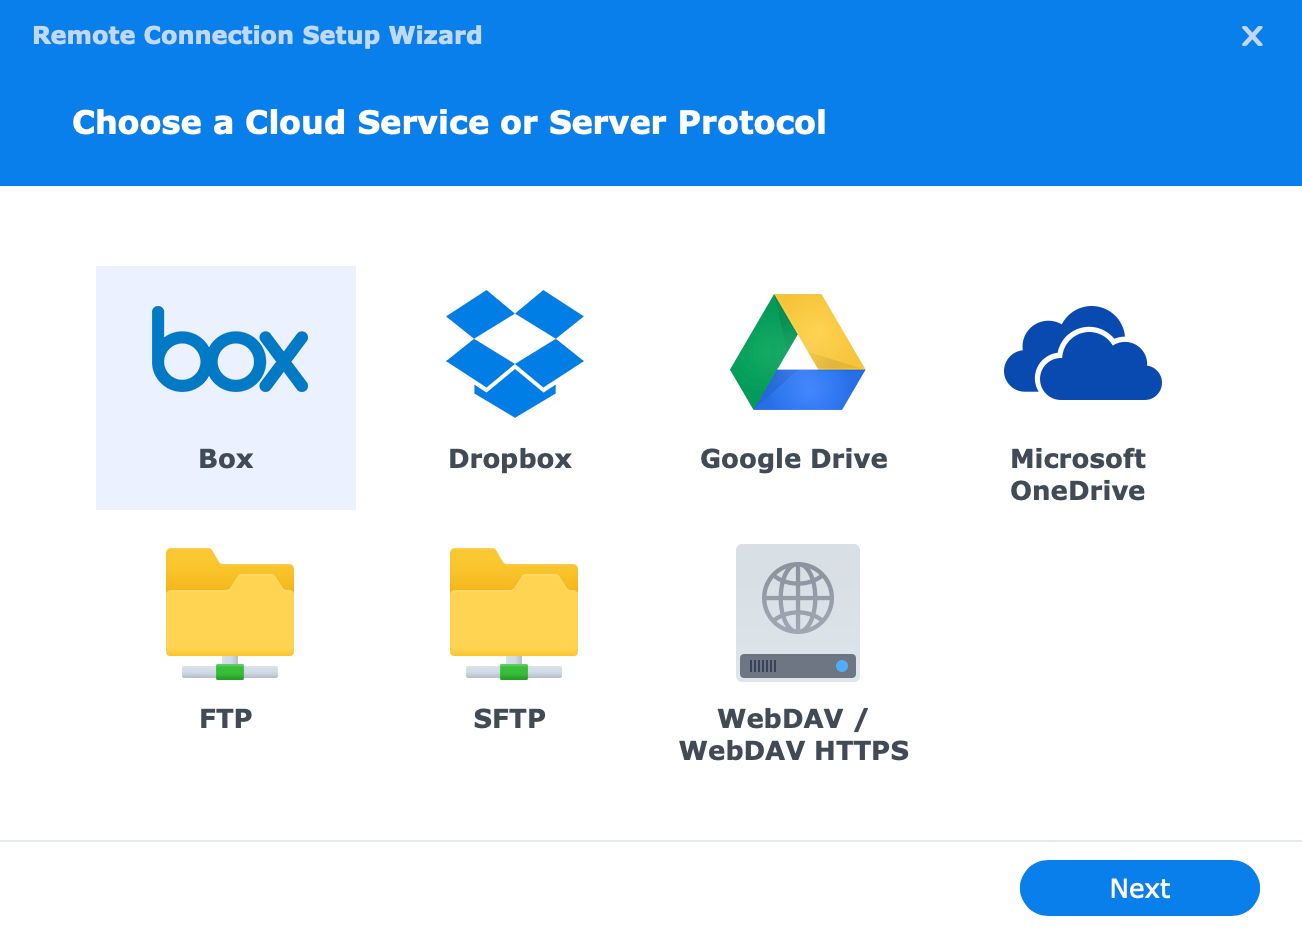
Once you are authenticated with your provider, the result will look like this:
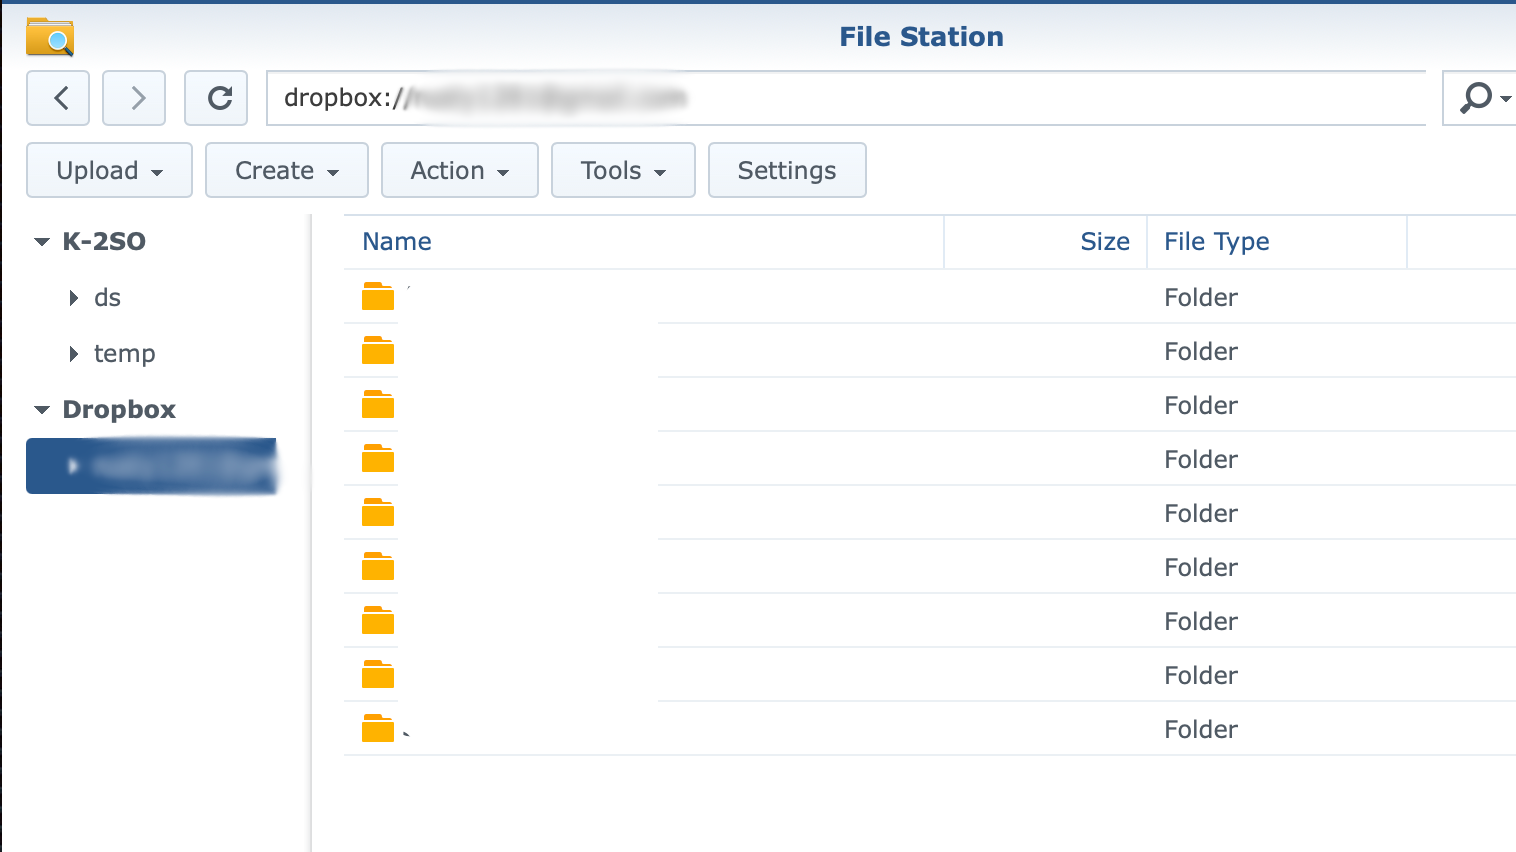
So this is a nice way to have your data accessible inside your NAS without the need to install any 3rd party tools to get this going. Does this mean you can sync data as well? Well yes and no. There are specific tools in Synology DSM that are used for that kind of scenario. This one is to access any data accessible as well as upload data to it. It is not a real-time sync option, you still have to interact with the folder/remote connection, but more on syncing later on.
So now that we know how to mount a remote folder and create local ones as well, you can begin to put content onto your NAS.
File Station - Synology file management app
As mentioned before, File Station is one of those apps that you will use most of the time when it comes to content operations on your NAS. Sure, you can use your NAS via SMB/AFP/NFS protocols to get access to your content from any device that supports those protocols (macOS, Linux, Windows, mobile OS, etc) as well as use that same process to upload the content back to your NAS.
But, the File Station app will be there to allow you remote management of files and folders, downloads, remote mount mappings, sharing, and a few more things that will come in handy especially when you are in a remote location.
Let's say you are outside your location and don't have access to the NAS but you can access it via the Internet. File Station will allow you content management via any compatible web browser.
On top of all that, most common operations like drag and drop, cut/copy/paste, and delete are also supported.
/home vs /homes
While we are on the topic of folders one of the most common questions/confusion when it comes to file and folder structure on Synology NAS is the home and homes folders. What are they and how to use them?
It all starts with the personal folder "service" which I will talk about a bit more in the next module, at the moment the main thing to remember is the following.
There are several services and apps on the NAS that utilize these folders, and you need to be aware of this.
So, in short, here it is.
Homes folder - this shared folder is only visible to administrator class users. Within this folder is the real location of each user's 'home' folder. As such the shared folder's permissions are configured to allow administrator class users to have full access to all of its contents, but any standard class user only has access to their own /homes/<username> folder, and this is via the special, virtual folder called 'home'.
Home folder - this special shared folder is managed by NAS OS (DSM) and is different for each user, administrator, and standard class. This folder is only accessible to that particular user, and no other standard user account. An administrator class user can access this folder by navigating to /homes/<username>.
So we can see each user will get its home folder that will then be used by specific apps as well. For example, installing Audio Station will create a /music folder in your user's home folder (/homes/<username>/music), the Photos app will create a /photos folder, and so on.
If you are using an admin class account, try not to mess with permissions when it comes to users' home folders because you could make a mess of it.
If you want multiple DSM users to share some data, then simply make a new root shared folder (outside of the home folder structure) and allow your users access to it. Leave the home folder as personal user space.
For now, it will be enough as the next module will be the main one when it comes to the whole series, apps, and services. Let's see what are the most common Synology apps and services that you can use with your NAS, what limitations a specific class of NAS devices has, and what should you also consider when buying a new NAS.