Synology DVA3221 & Surveillance Station 9 Review - Part 2

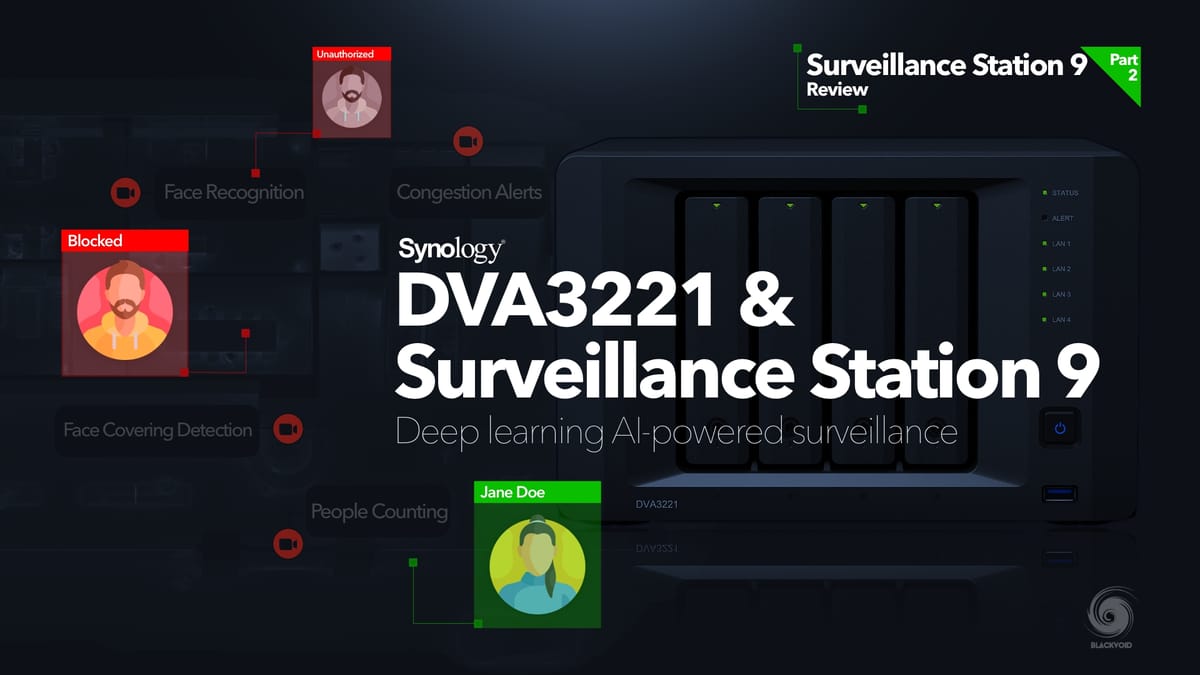
Table of Contents
: Deep Video Analytics
: Face recognition
: Smart Search
: Action Rules
: Home Mode
: Time Lapse
: Conclusion
In the first part of the review we have talked about the general setup of the DVA3221 unit and some of the general, most frequently used features. Now, we continue with some more advanced elements that are only accessible on the DVA lineup models as well as some that can be utilized on the NAS lineup models.
To start, those features will be Deep Video analytics, Face Recognition, and later on Time Lapse and very handy Home Mode.

: Deep Video Analytics
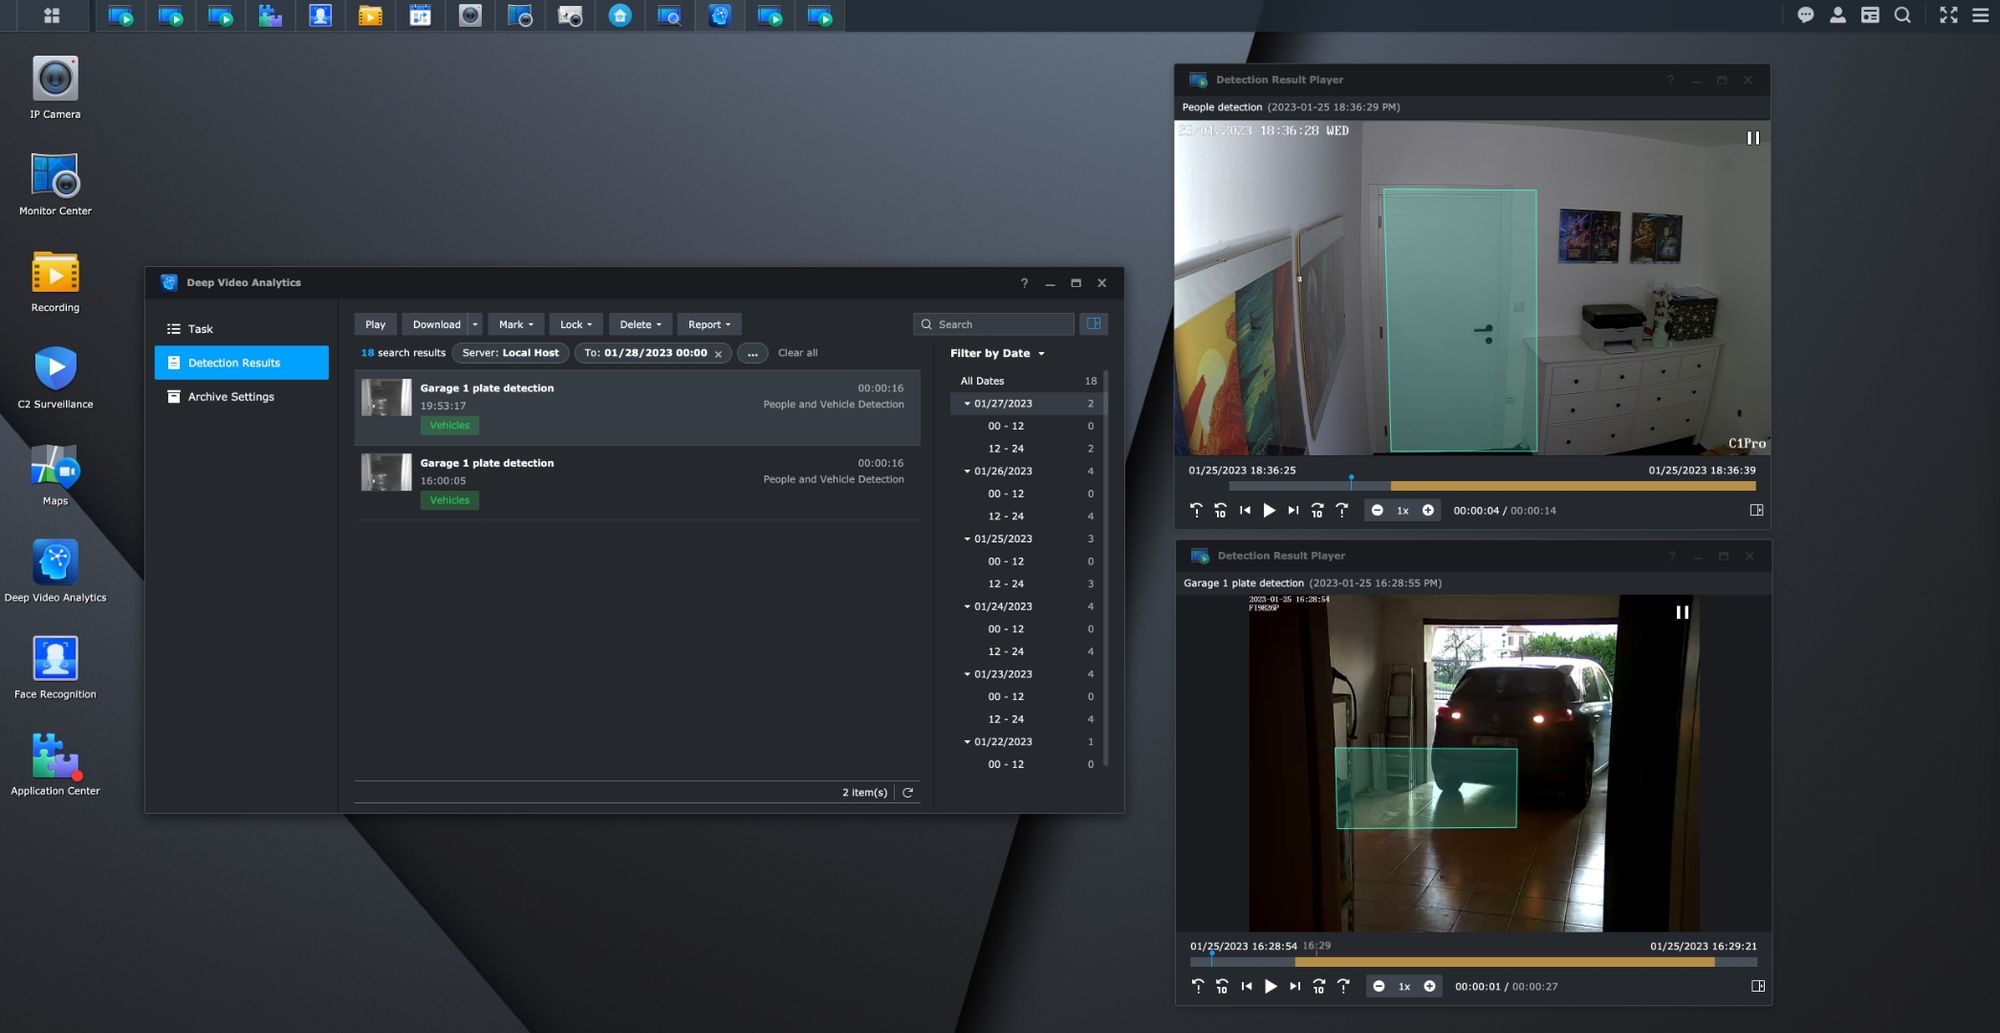
One reason anyone would get a DVA3221 or DVA1622 is because of their exclusive features. One of those is the Deep Video Analytics. This module allows for both the counting and detection of vehicles and people.
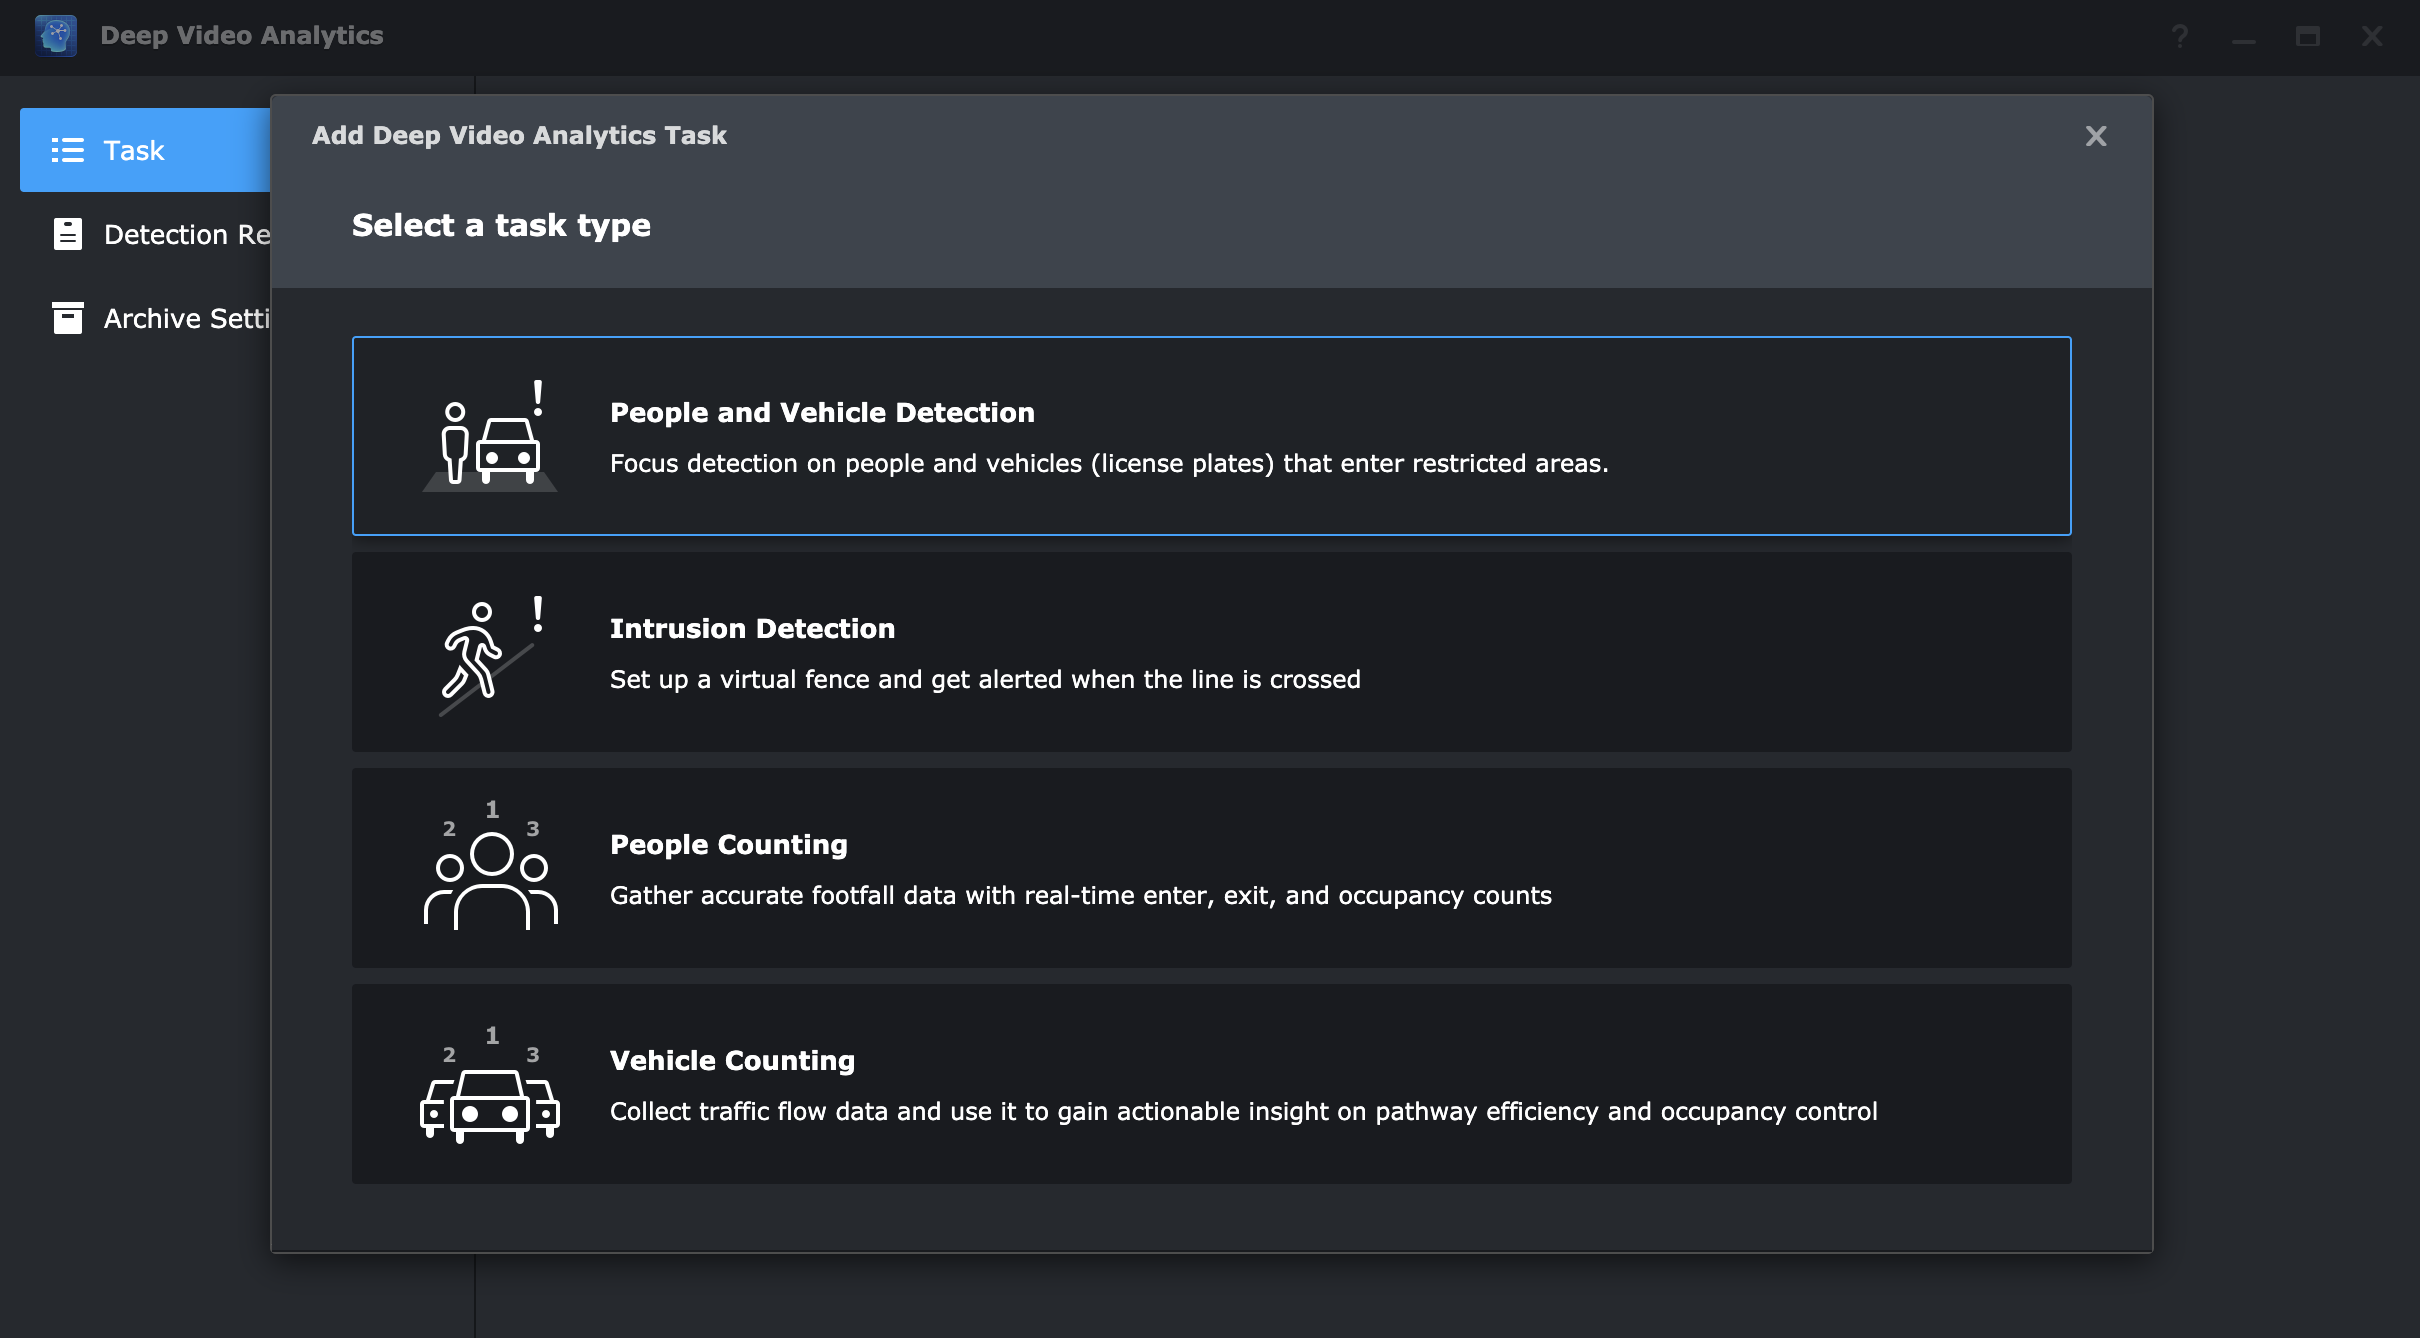
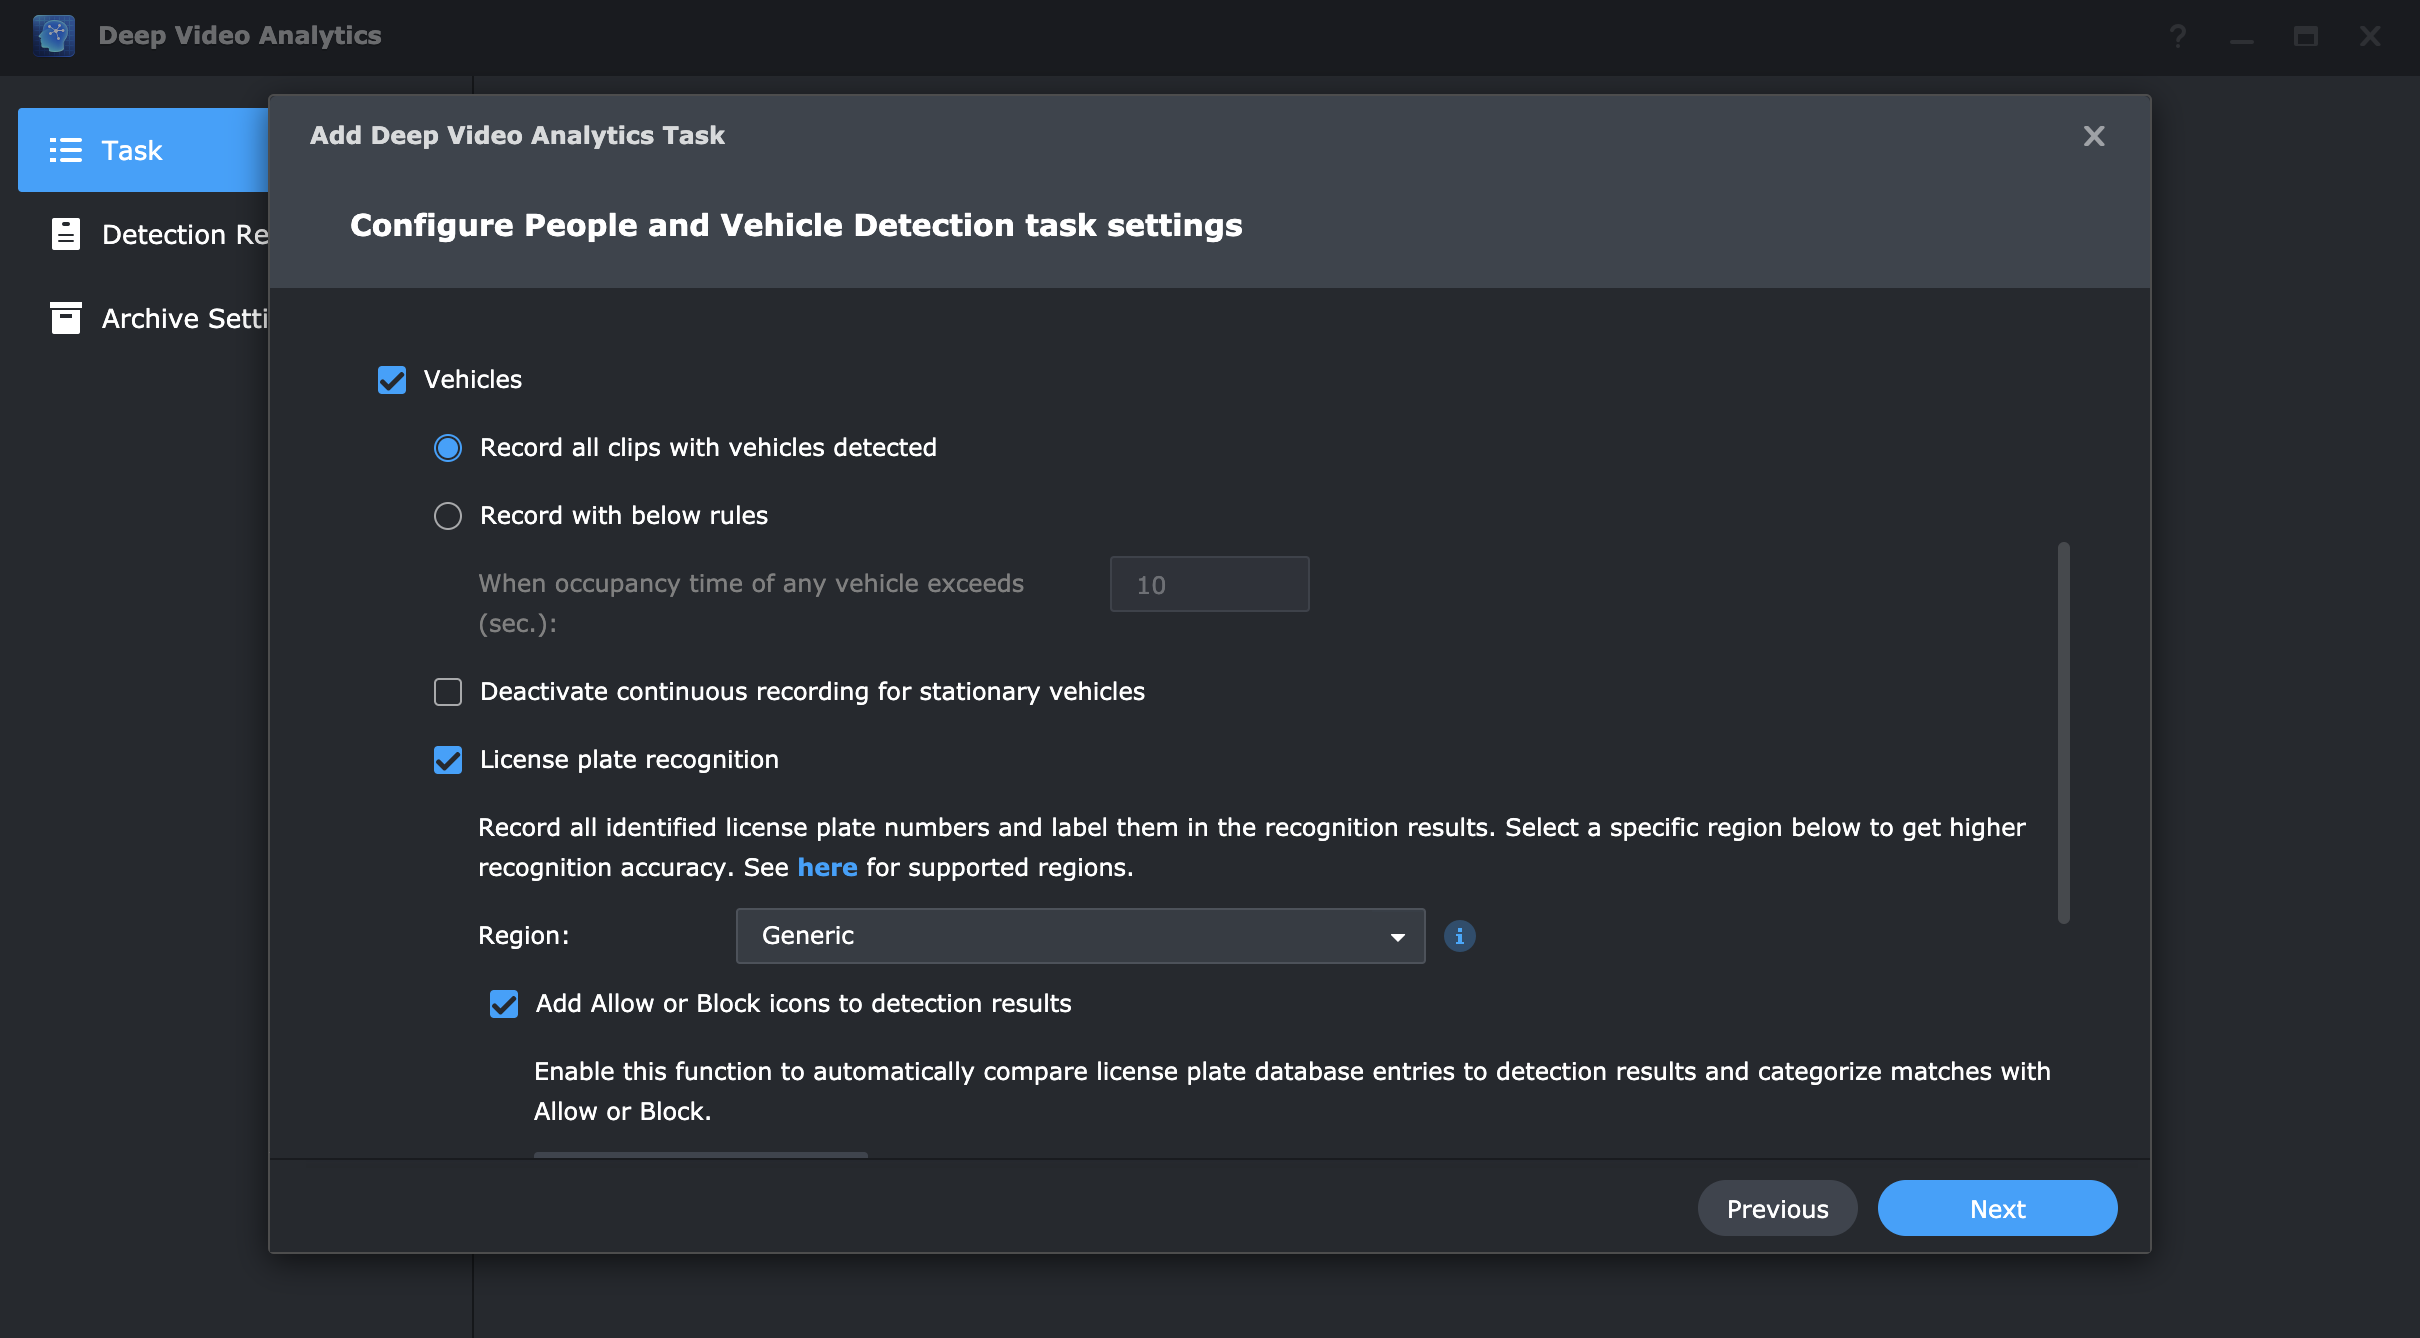
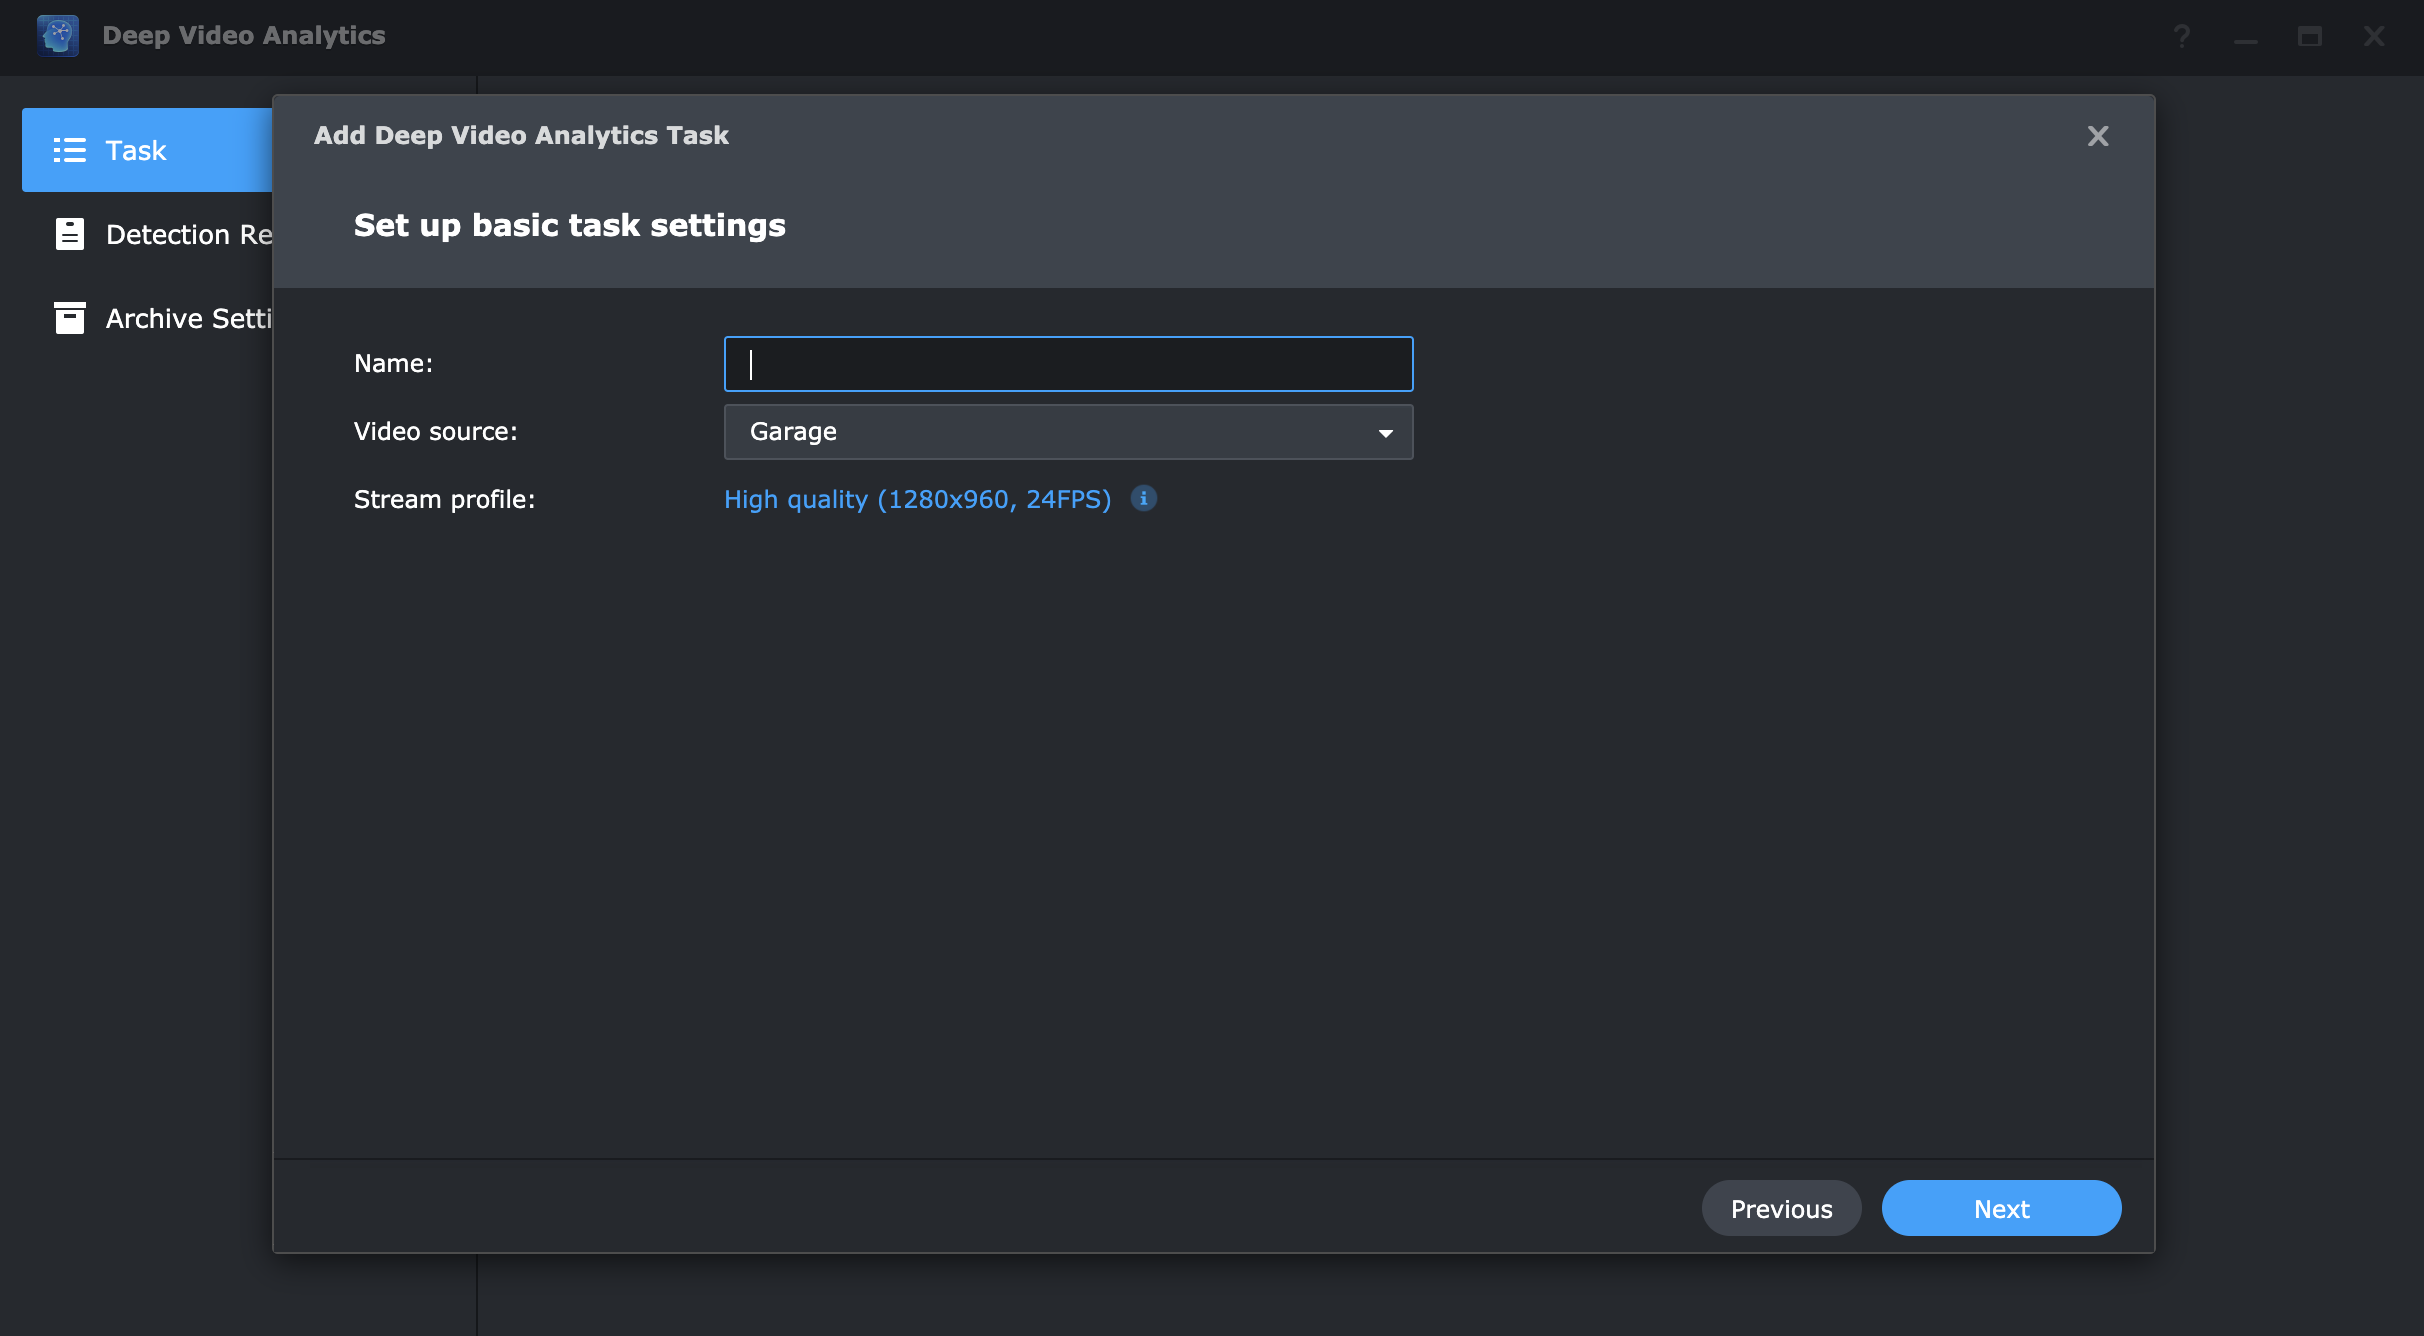
Each configuration has a unique wizard that will allow for a custom setup in terms of camera, the fact that we want to detect people and vehicles at the same time, as well as other specific parameters.
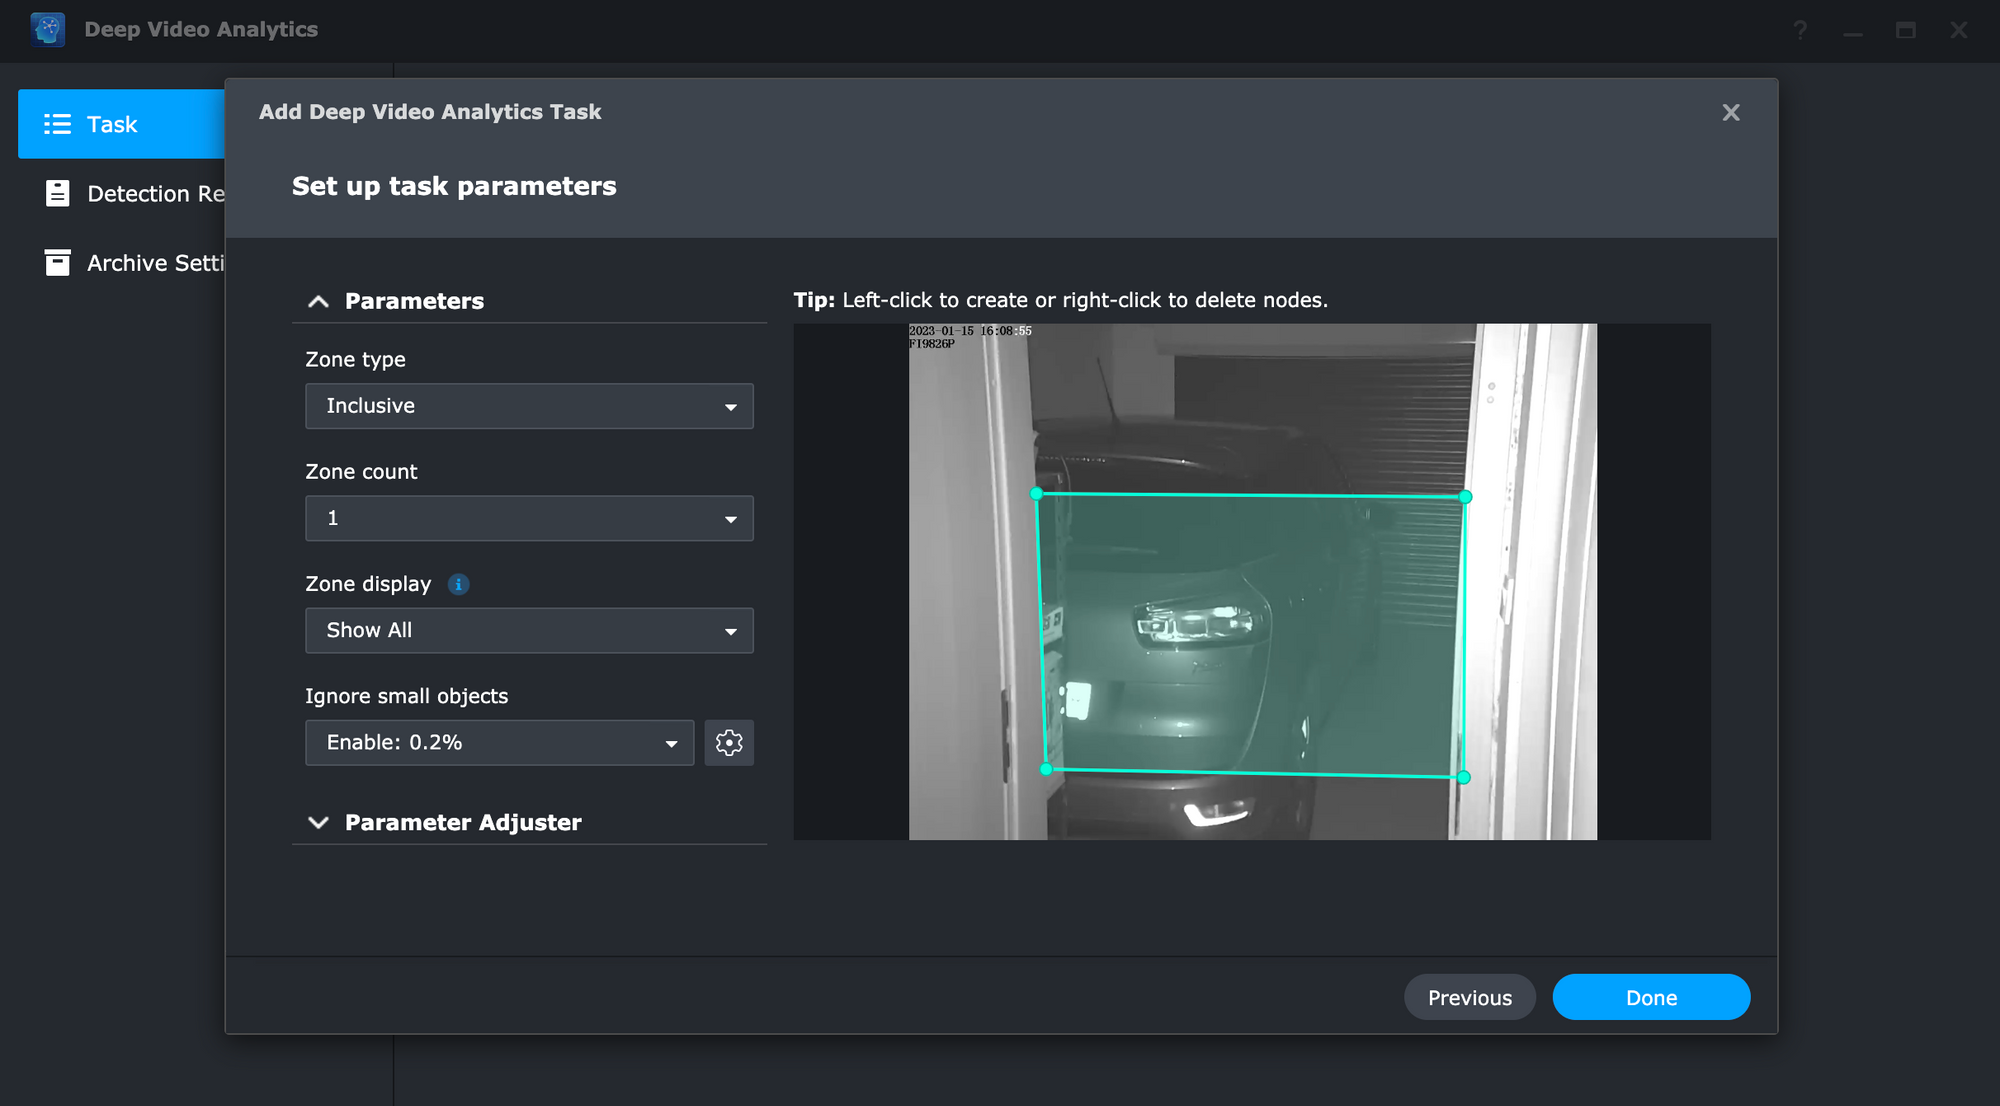
The people and vehicle detection works really well including in low-light environments with a sub-par camera. Depending on the light source, camera position, and quality we can expect better or worse results.
The reason deep analytics tasks are great is that they can further trigger various configured Action Rules (more on those later) to streamline the whole process. For example, upon license plate recognition a ramp can allow for a vehicle entrance or exit.
Similar to vehicles, people counting and detection works the same way, and with very good results on top of that.
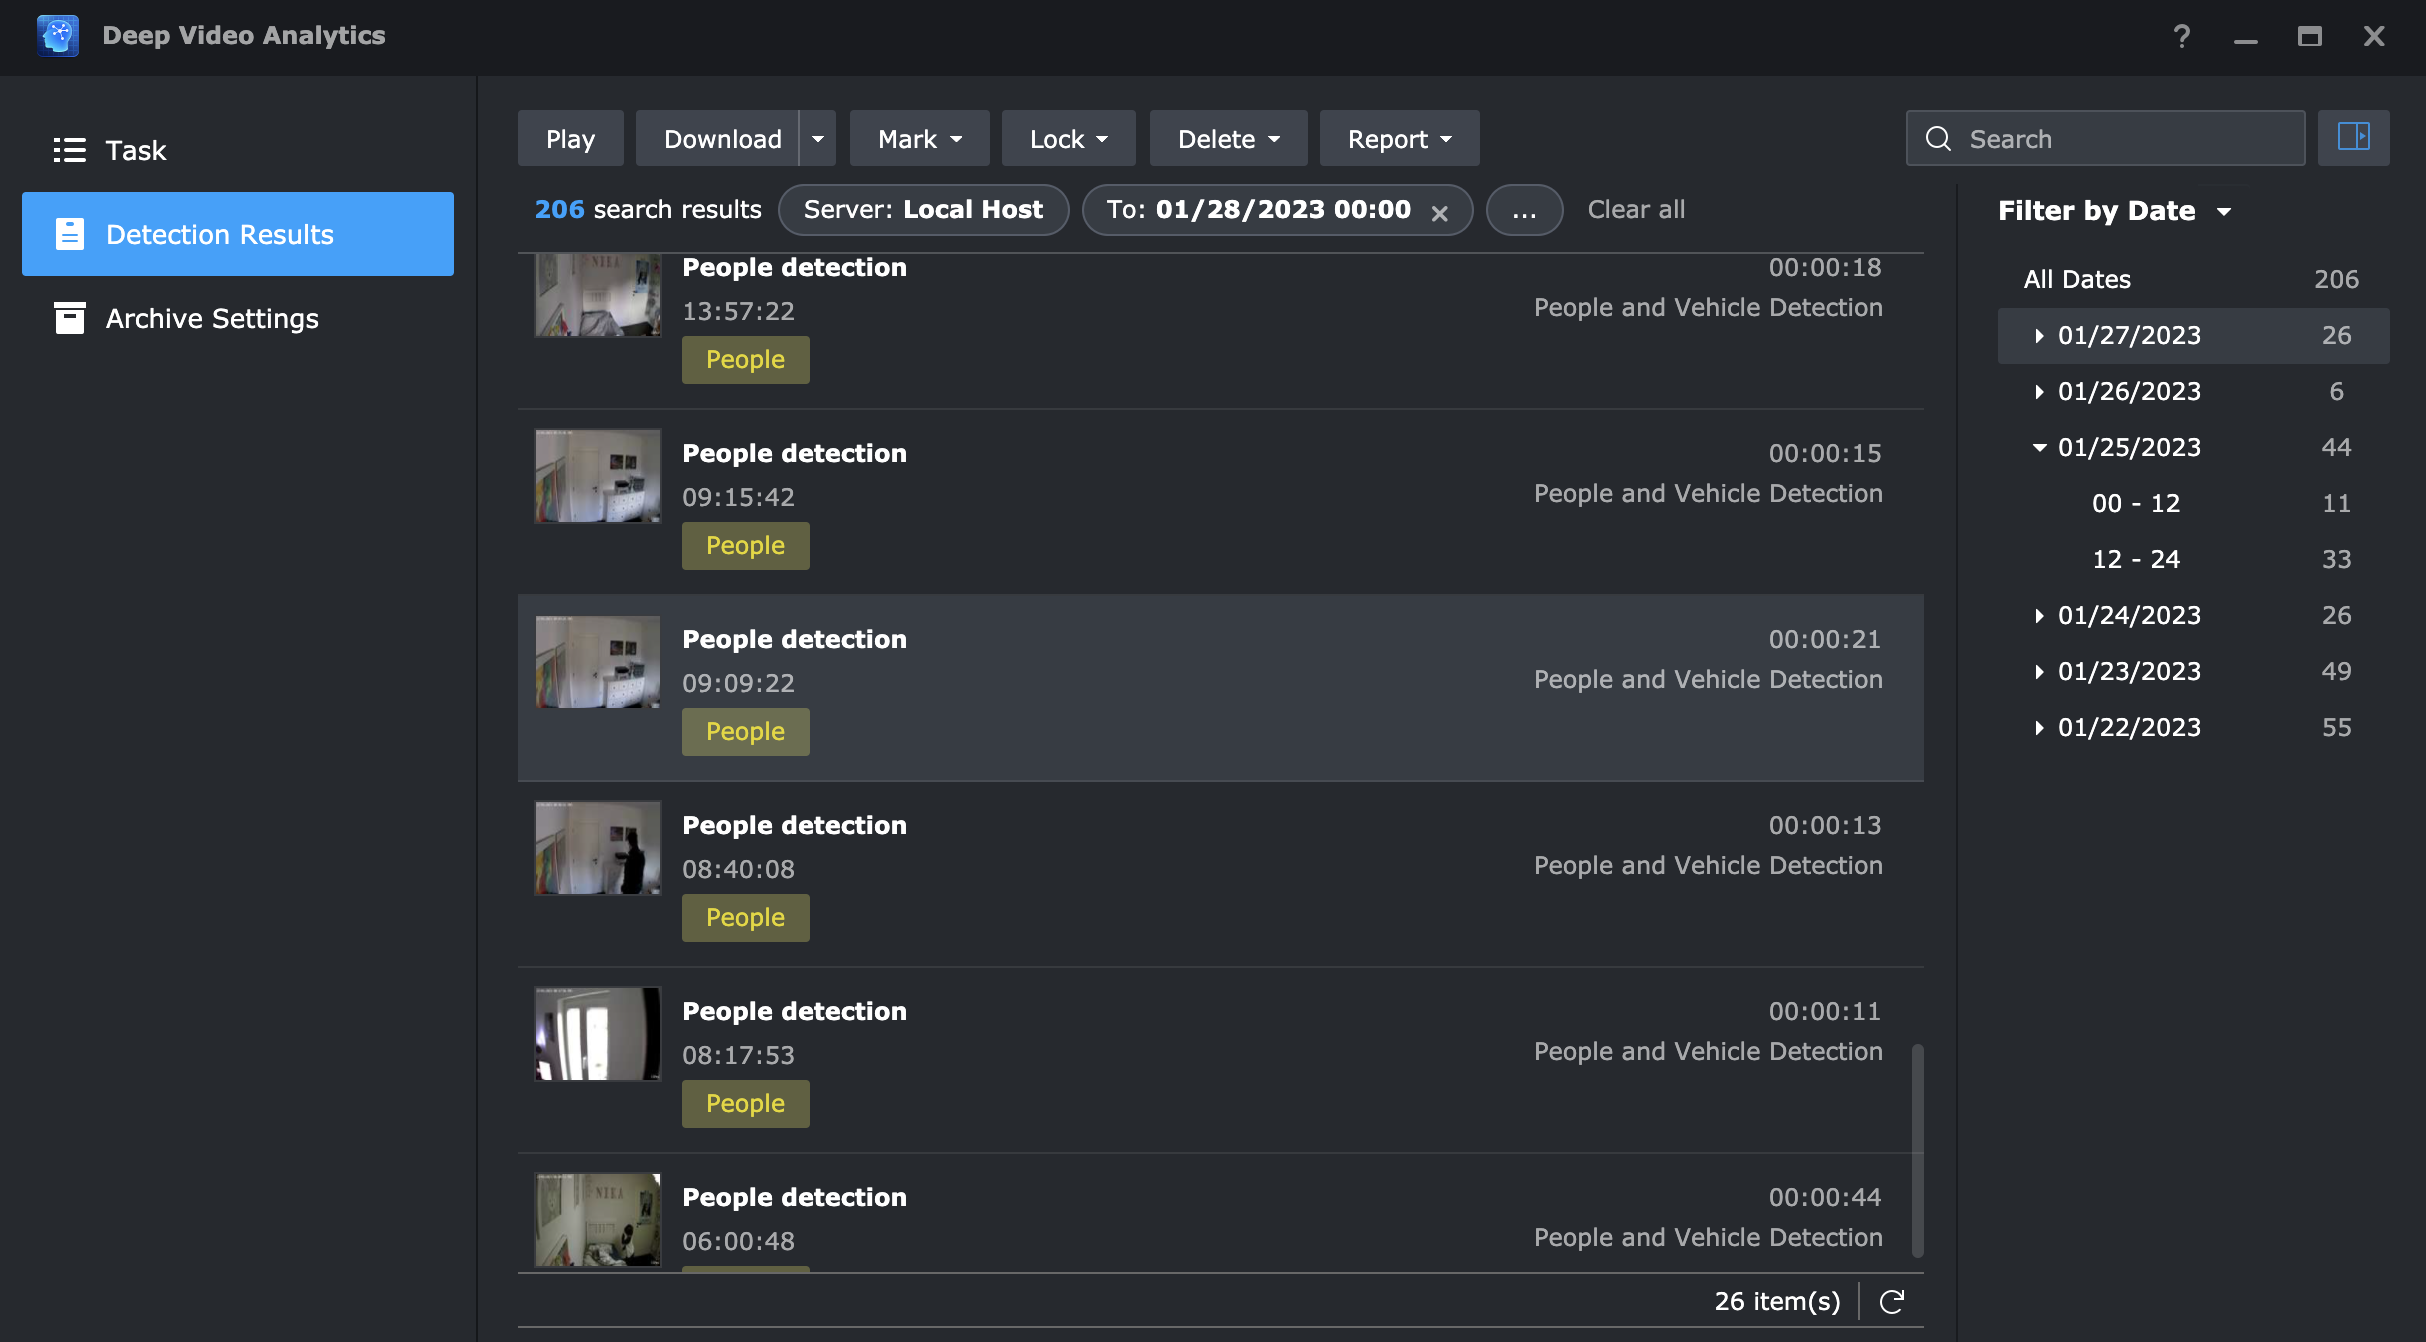
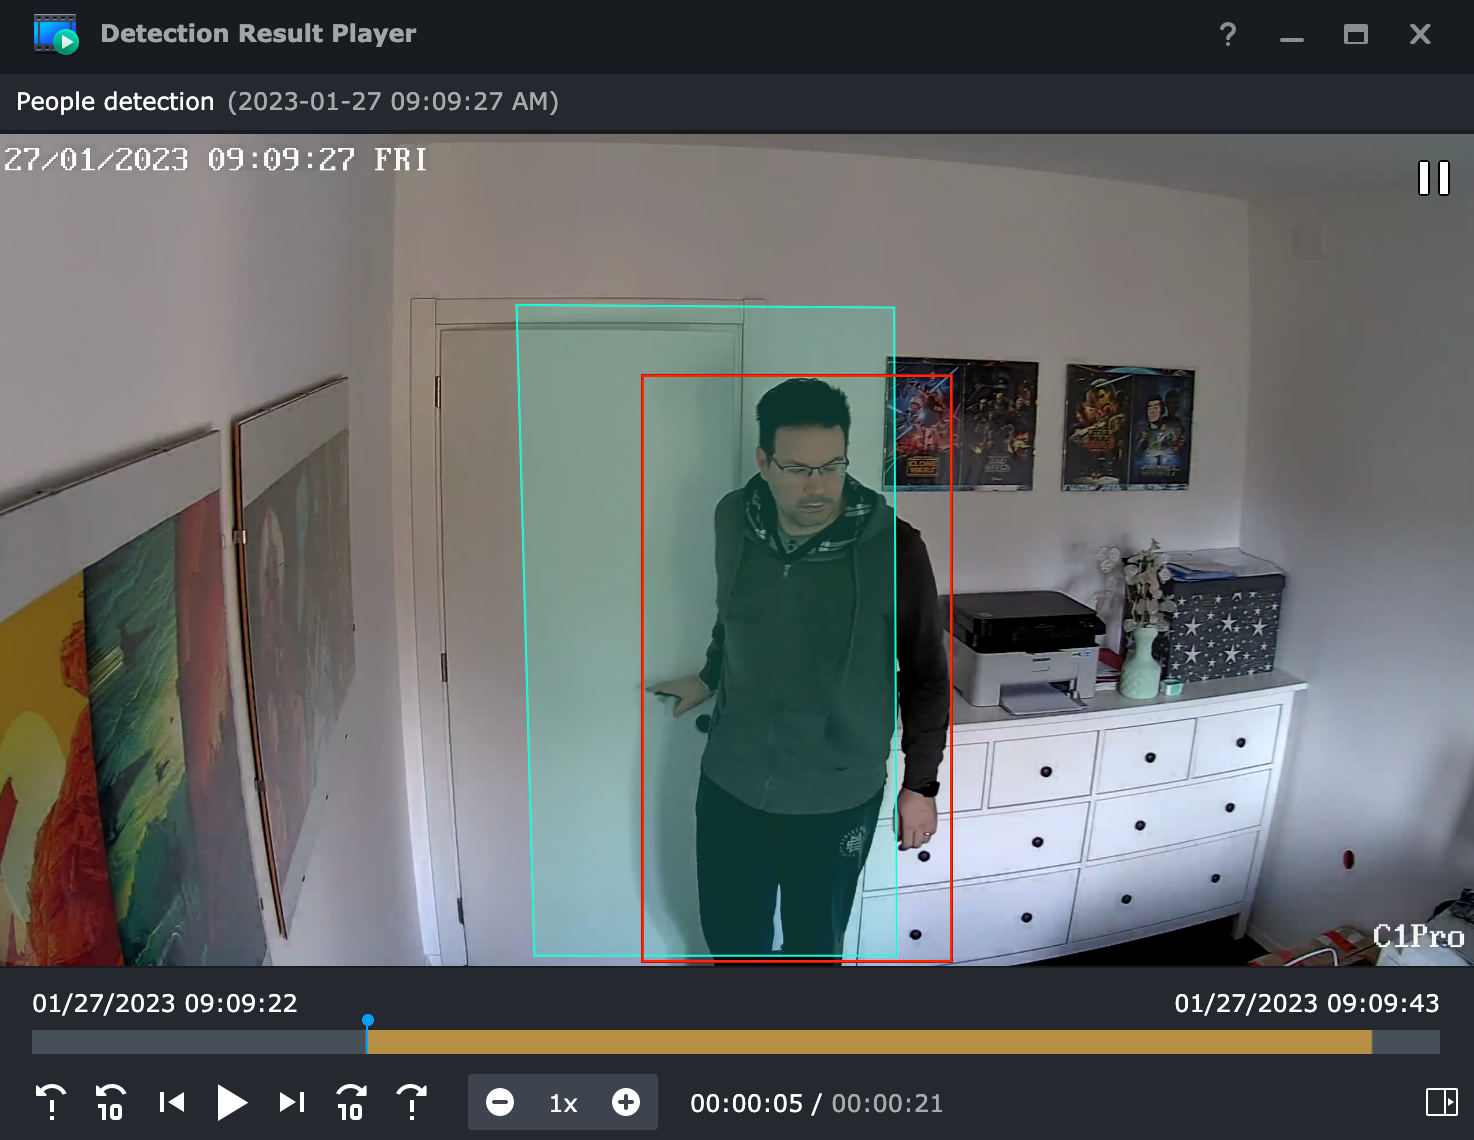
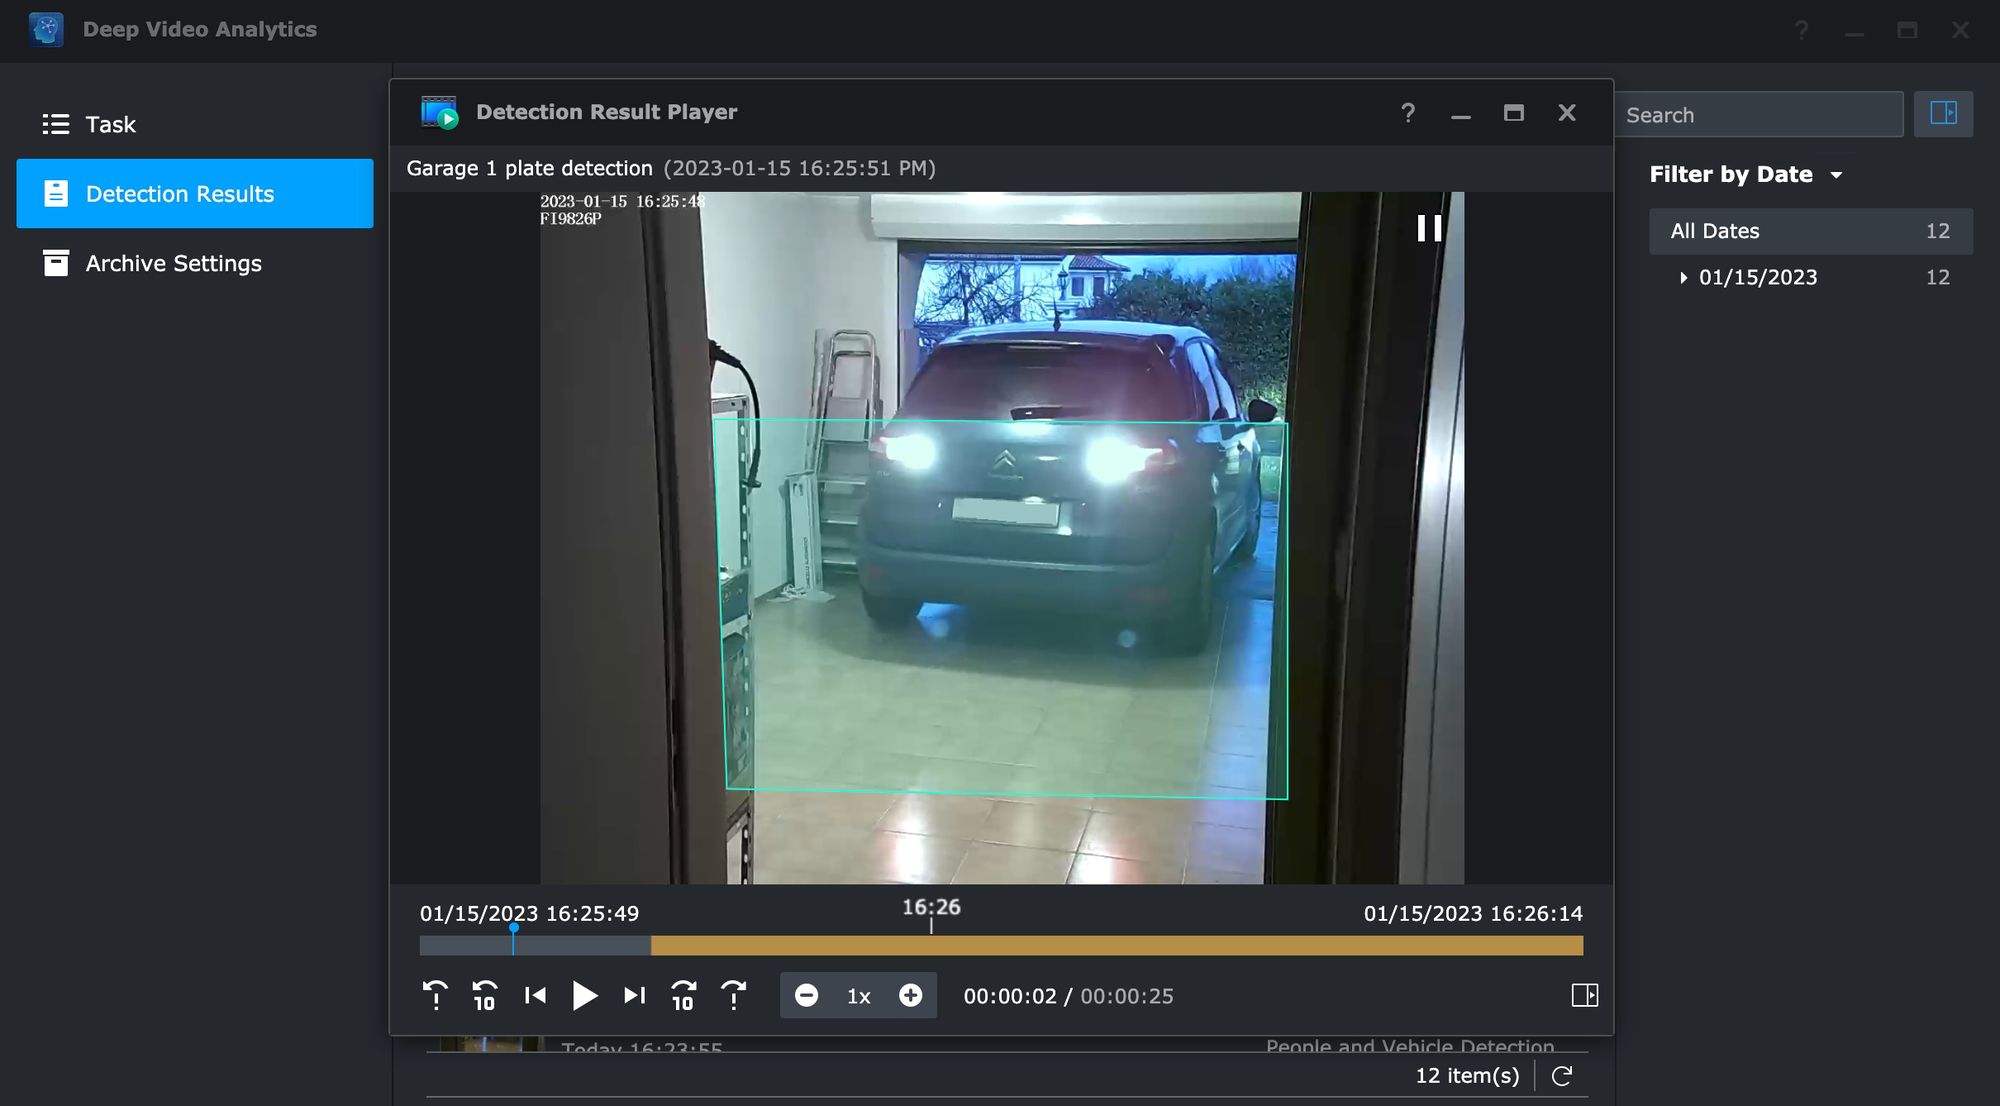
Similar to vehicle detection, people detection works very much the same way. Once we have configured the zones and other parameters, the integrated GPU will do all the heavy lifting when it comes to detection or counting. Cameras with night vision mode on in low light will also capture people moving about as well as capture their faces if detected.
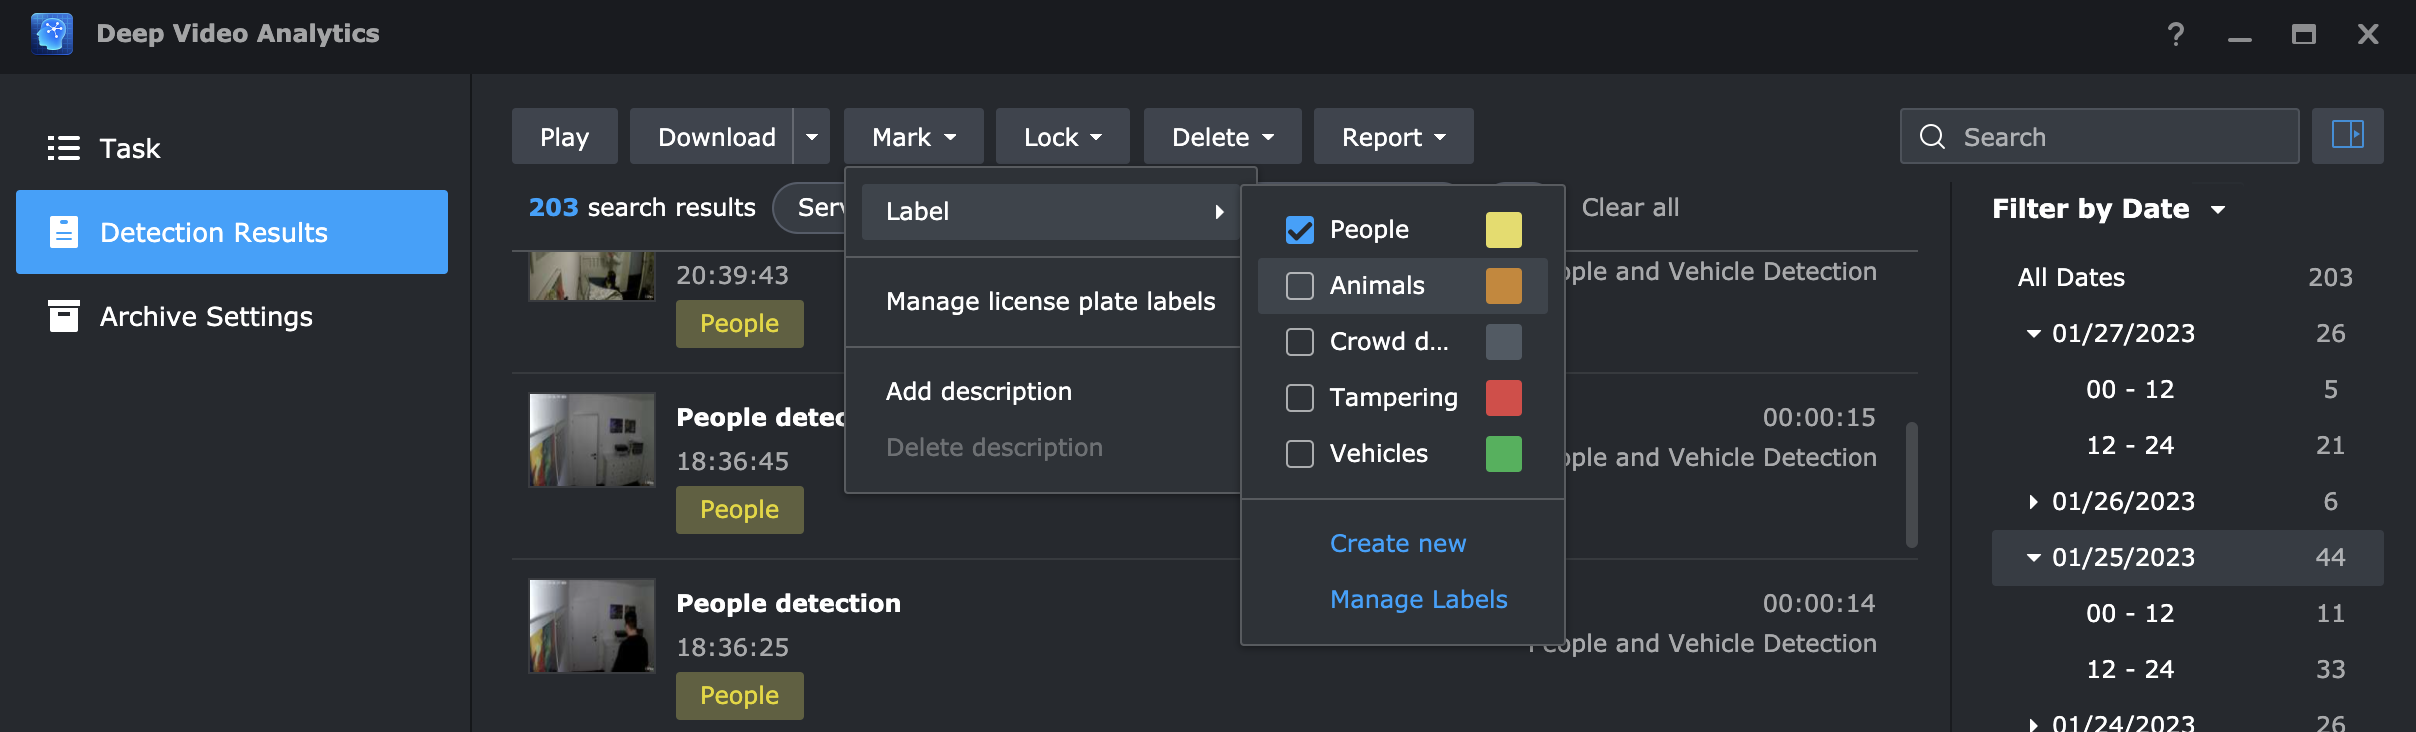
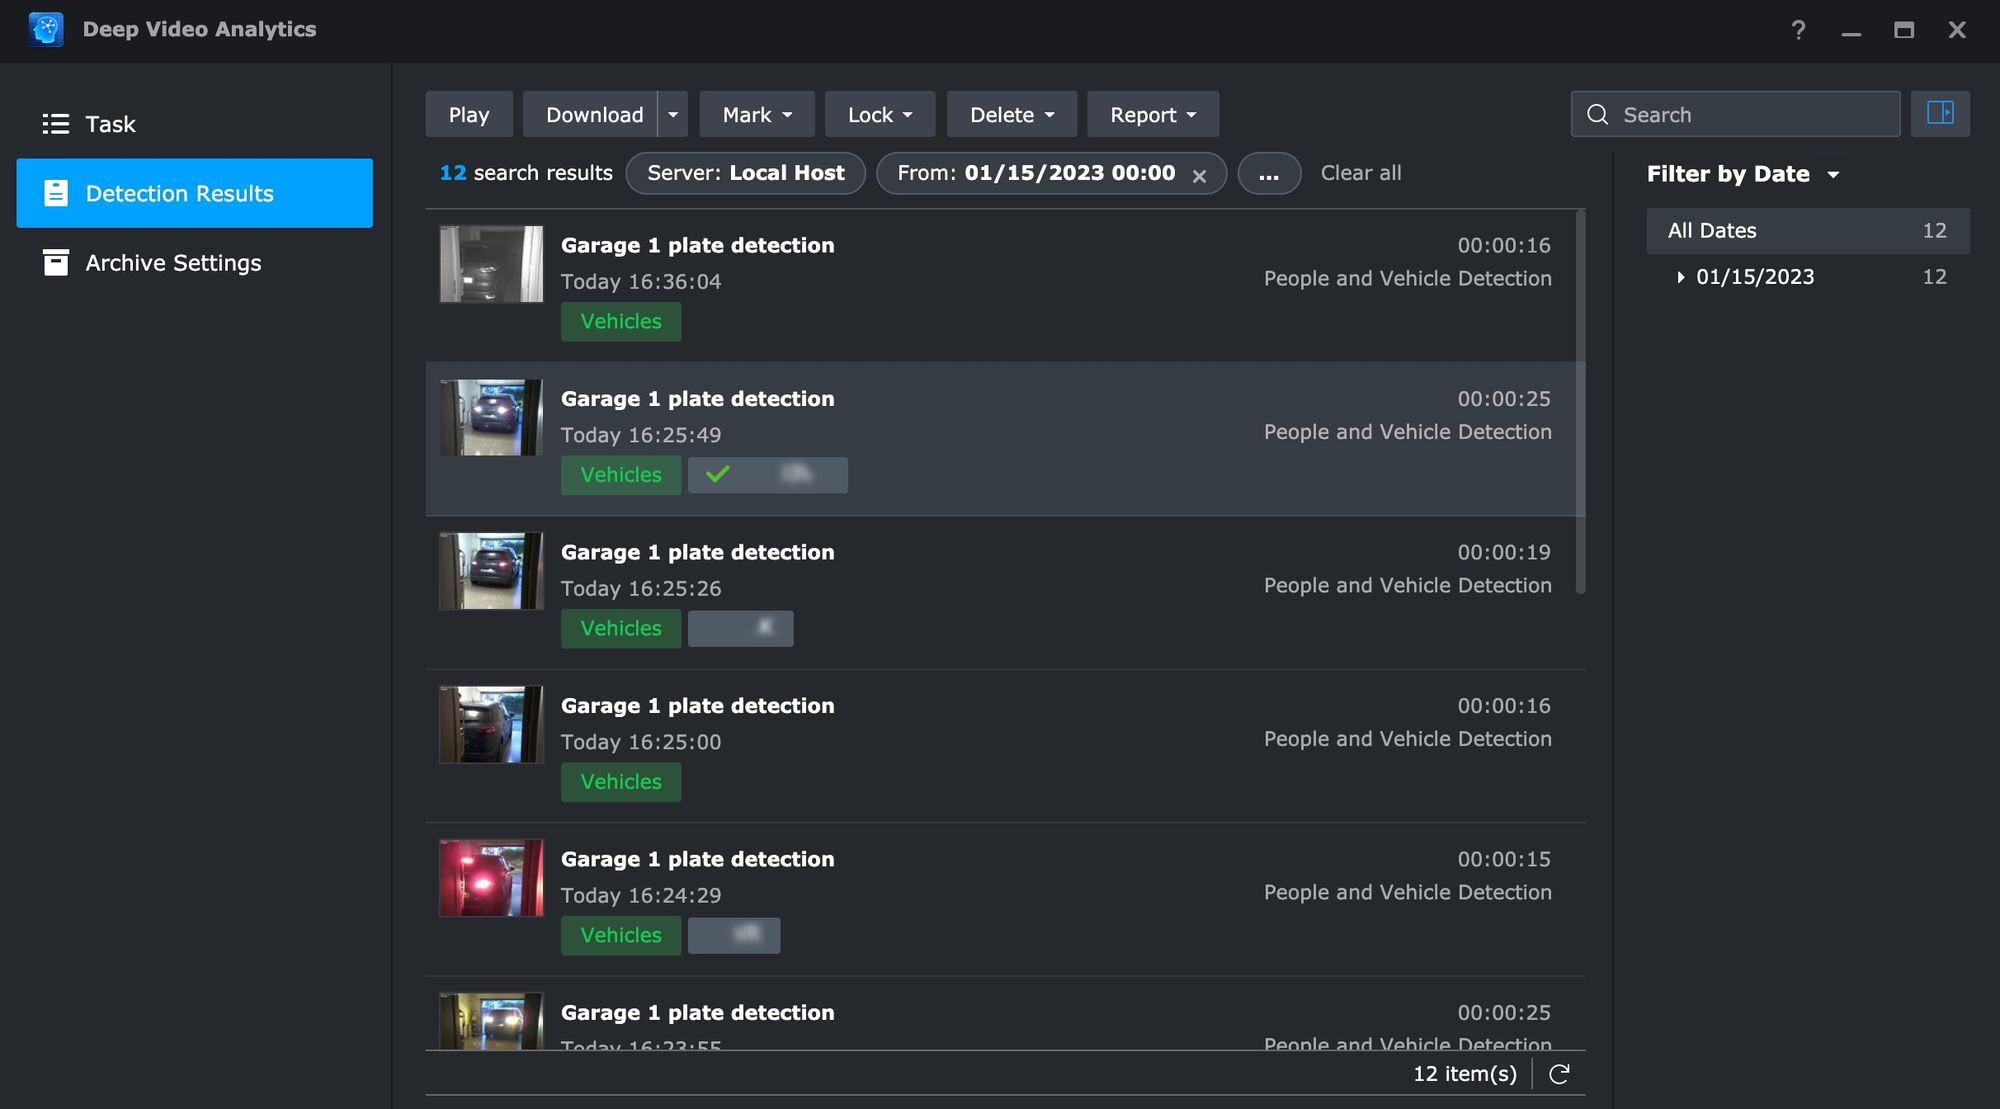
The Analytics part of this solution is feature rich and easy to use. With numerous filters to help us narrow down our search, the DVA module also offers label management, and reports to give the user a better and easier overview of the captured footage. Reports can be web-based (HTML files) or comma-separated values that can be imported into a spreadsheet. License plate reports include the actual plate number, a snapshot of the plate itself as well as the vehicle.
If I could say one thing that bothers me with this is that the downloaded footage is in MP4 format but with no "detection" overlay that can be seen using the Surveillance station player. It would be nice if there was a choice to download the footage with and without the overlay.
: Face recognition
Similar to the Deep Video Analytics module, Face Recognition is another intelligent, DVA-model-only feature. Configured as a separate task, it will allow for people's face recognition on configured cameras. Depending on the device itself, its position, environmental lighting, and so on, the results will vary. This module like the vehicle one allows for the creation of a user database based on their image profiles.
The matching percentage can be determined by the SVS admin starting with the default 80% value. Also, just like with license plate detection, action rules can be configured to follow up in case of specific detection.
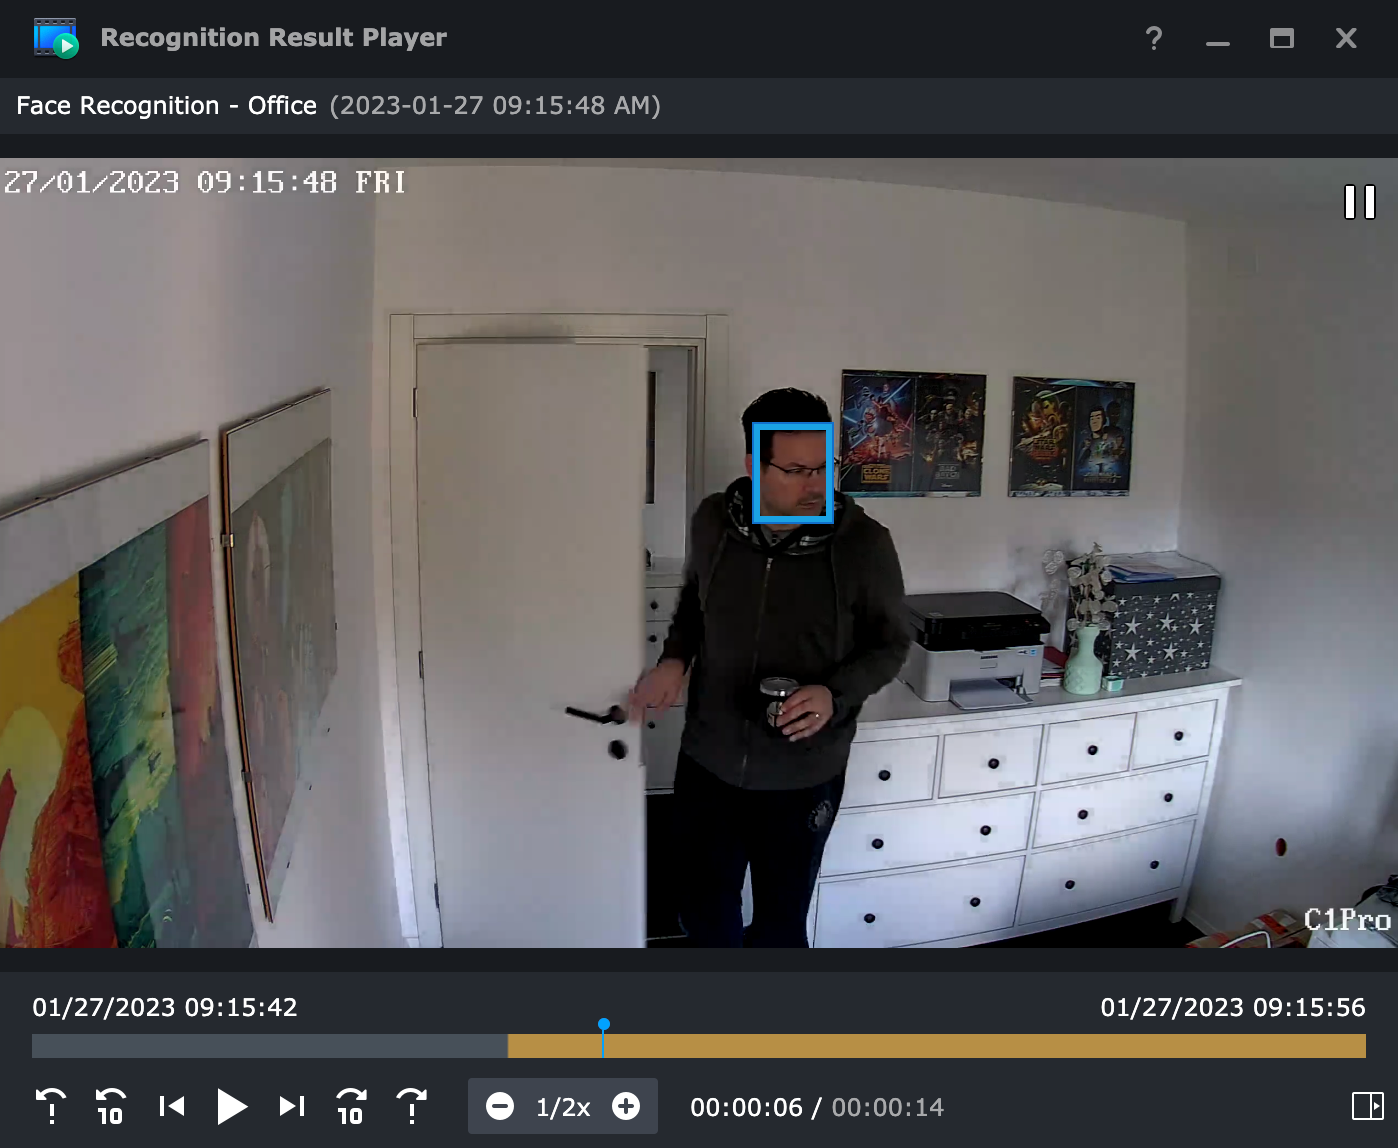
In my testing, the recognition was working really well unless it was in a completely dark room with a person moving fast. This would not be a problem for a camera with a high resolution and specifications matching that kind of scenario.
In any decent or very good lit test, the recognition was 100% successful in matching the person with the threshold set to 80%. 2K, 1440p camera was very quick in terms of face capture, with recognition happening just as the subject entered the "hot zone" even for a second.
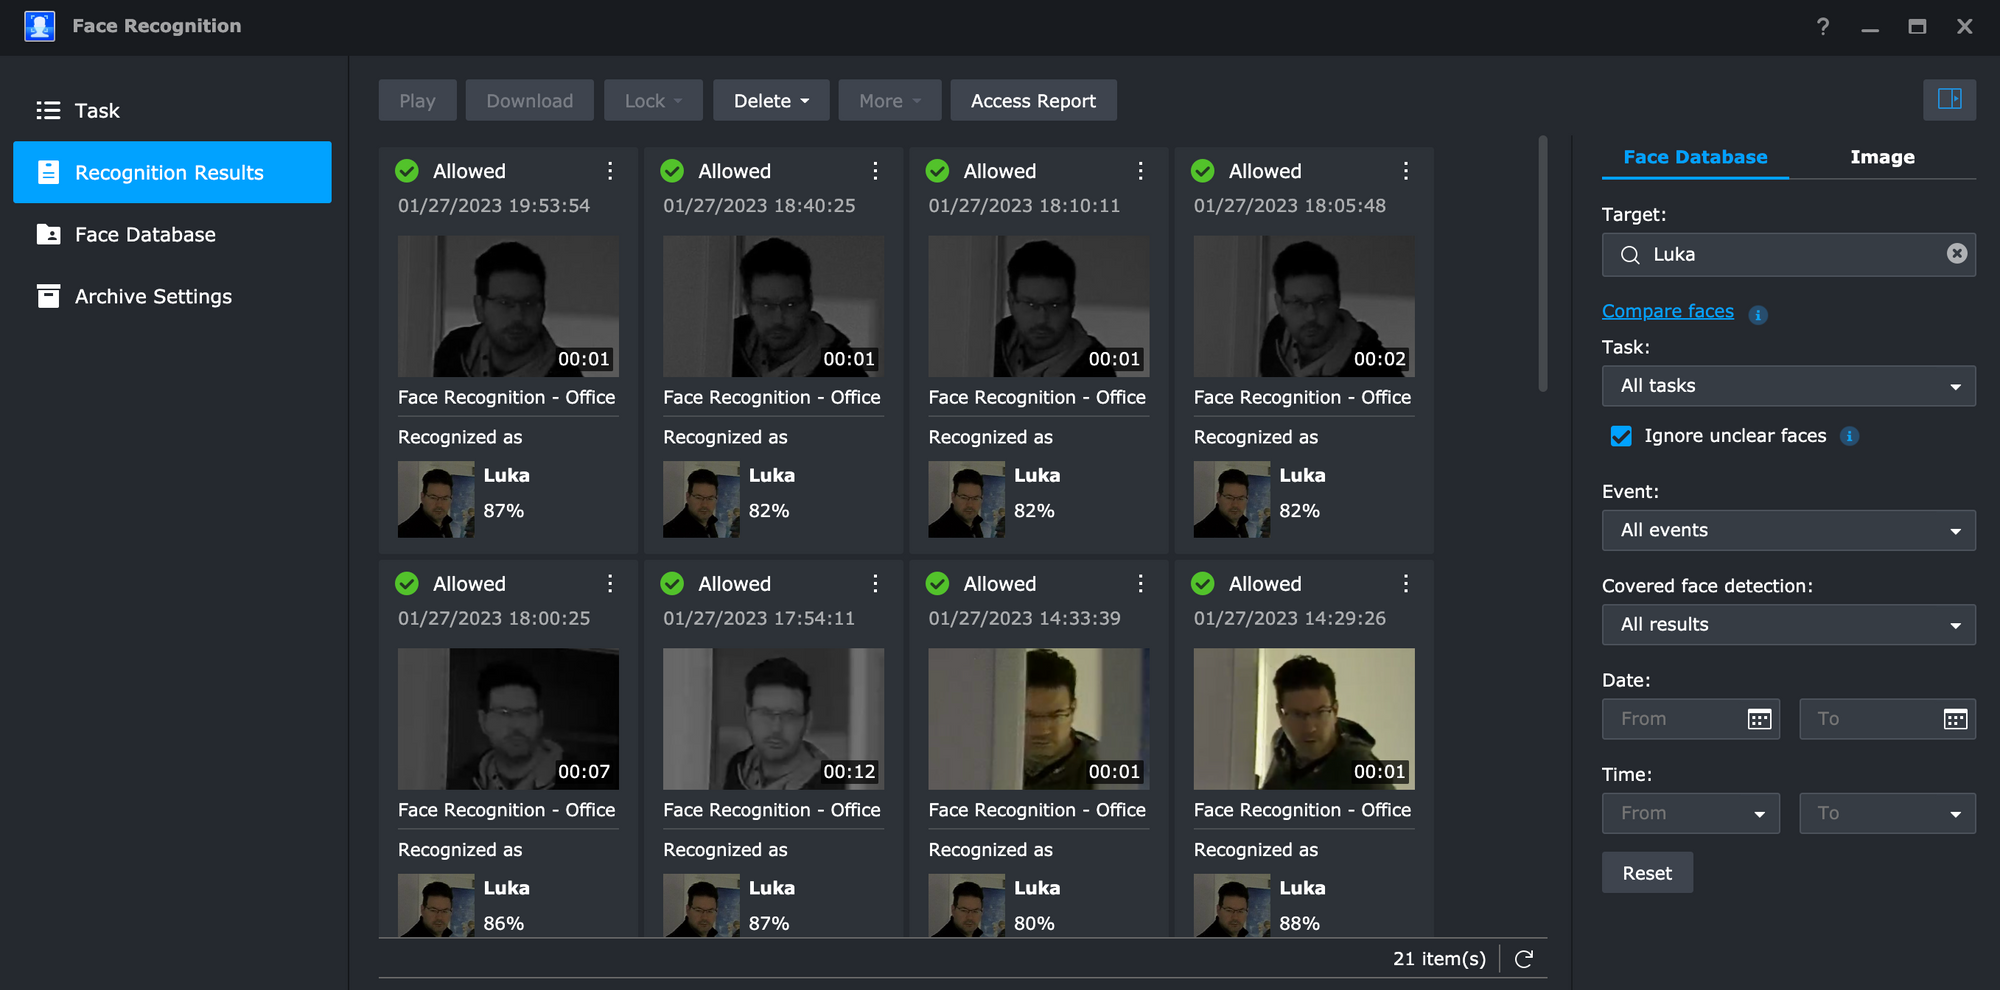
As with Deep Video Analytics, the Face Detection module allows for all sorts of filtering and searching as well as corrections in case the face has not been detected correctly. It will also allow for color detection and recognition name display so that visually any person that is recognized (or not) will be presented with their registered name in the SVS database.
The usual, playback, download, delete and lock functions are present here as well in case there is a need to extract a specific video file from the archive.
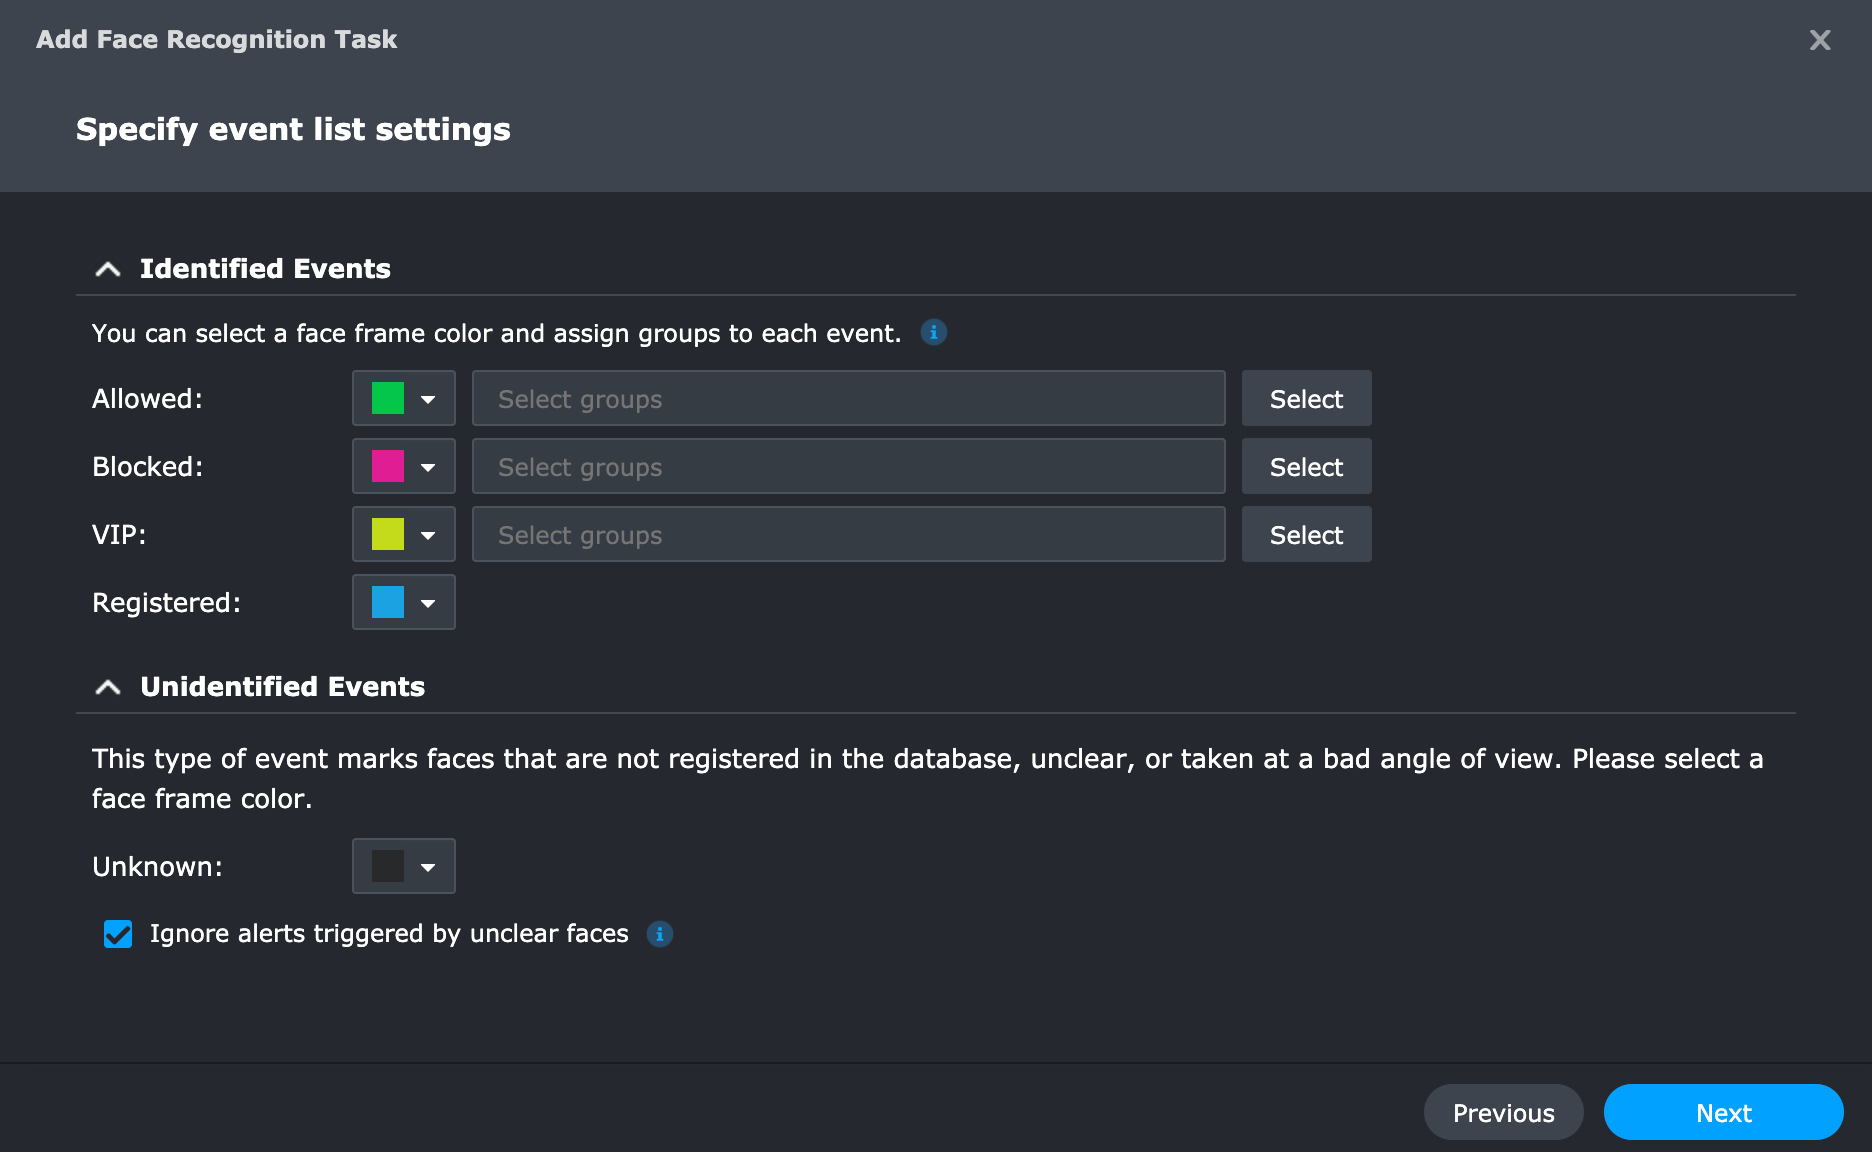
The task creation process for Face Recognition will involve a specific camera, zone selection, and an optional color assignment of a particular group, so all in all, almost identical in options as the people and vehicle creation wizard. In case there is a need to temporarily disable the task without deleting it there is an option to do it as well. The disabled task will retain all the settings and configurations, so when it is again needed it can be enabled with a push of a button.
: Smart Search
While SVS 9 has a lot of ways to trigger an event and depending on the camera it will detect the slightest change, there will be a need to go over footage and find a missing object outside of the configured "hot zone". Imagine for a moment that something has gone missing and the camera footage captured it but you are unable to find it by just looking over hours of recording.
This is where Smart Search functionally comes in handy. As one of the built-in modules, it will allow for a "smart" review of the footage allowing for detection in a fast-forward fashion of any objects missing from a specific area of the video. This way it is possible to find and detect an object without looking over hours of continuous recording in real time.
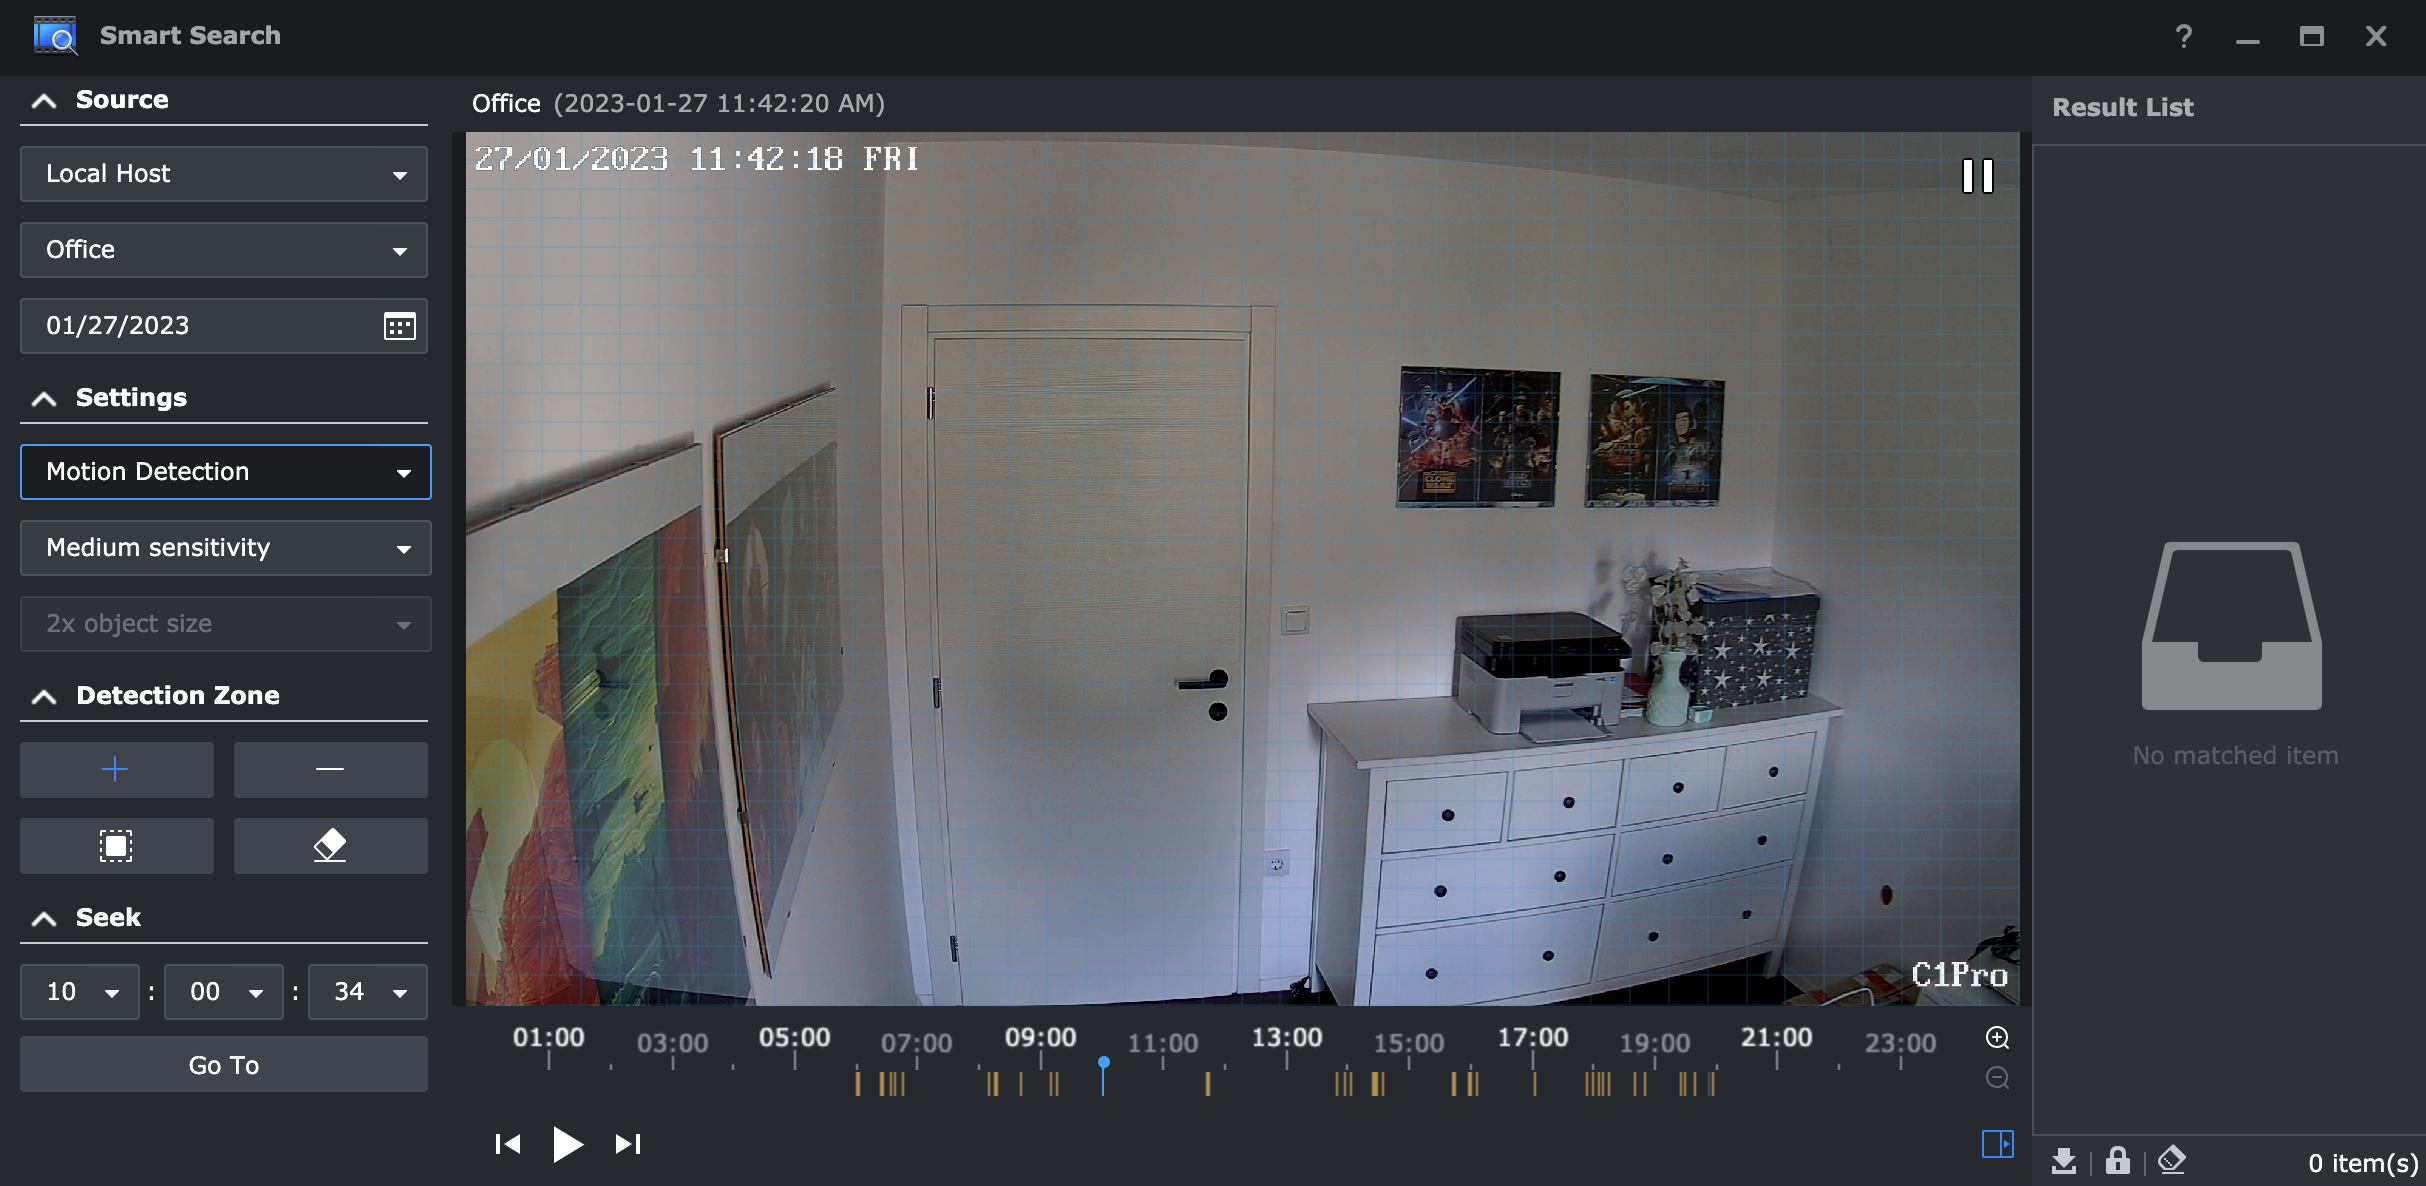
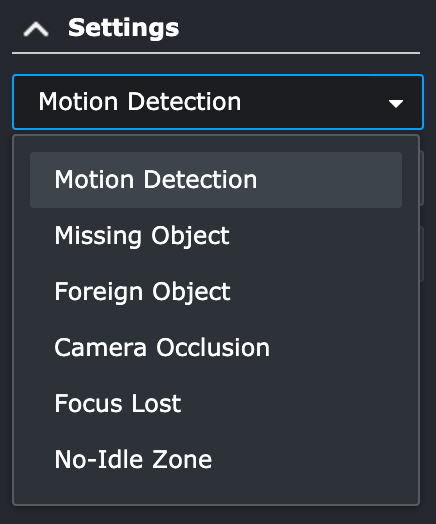
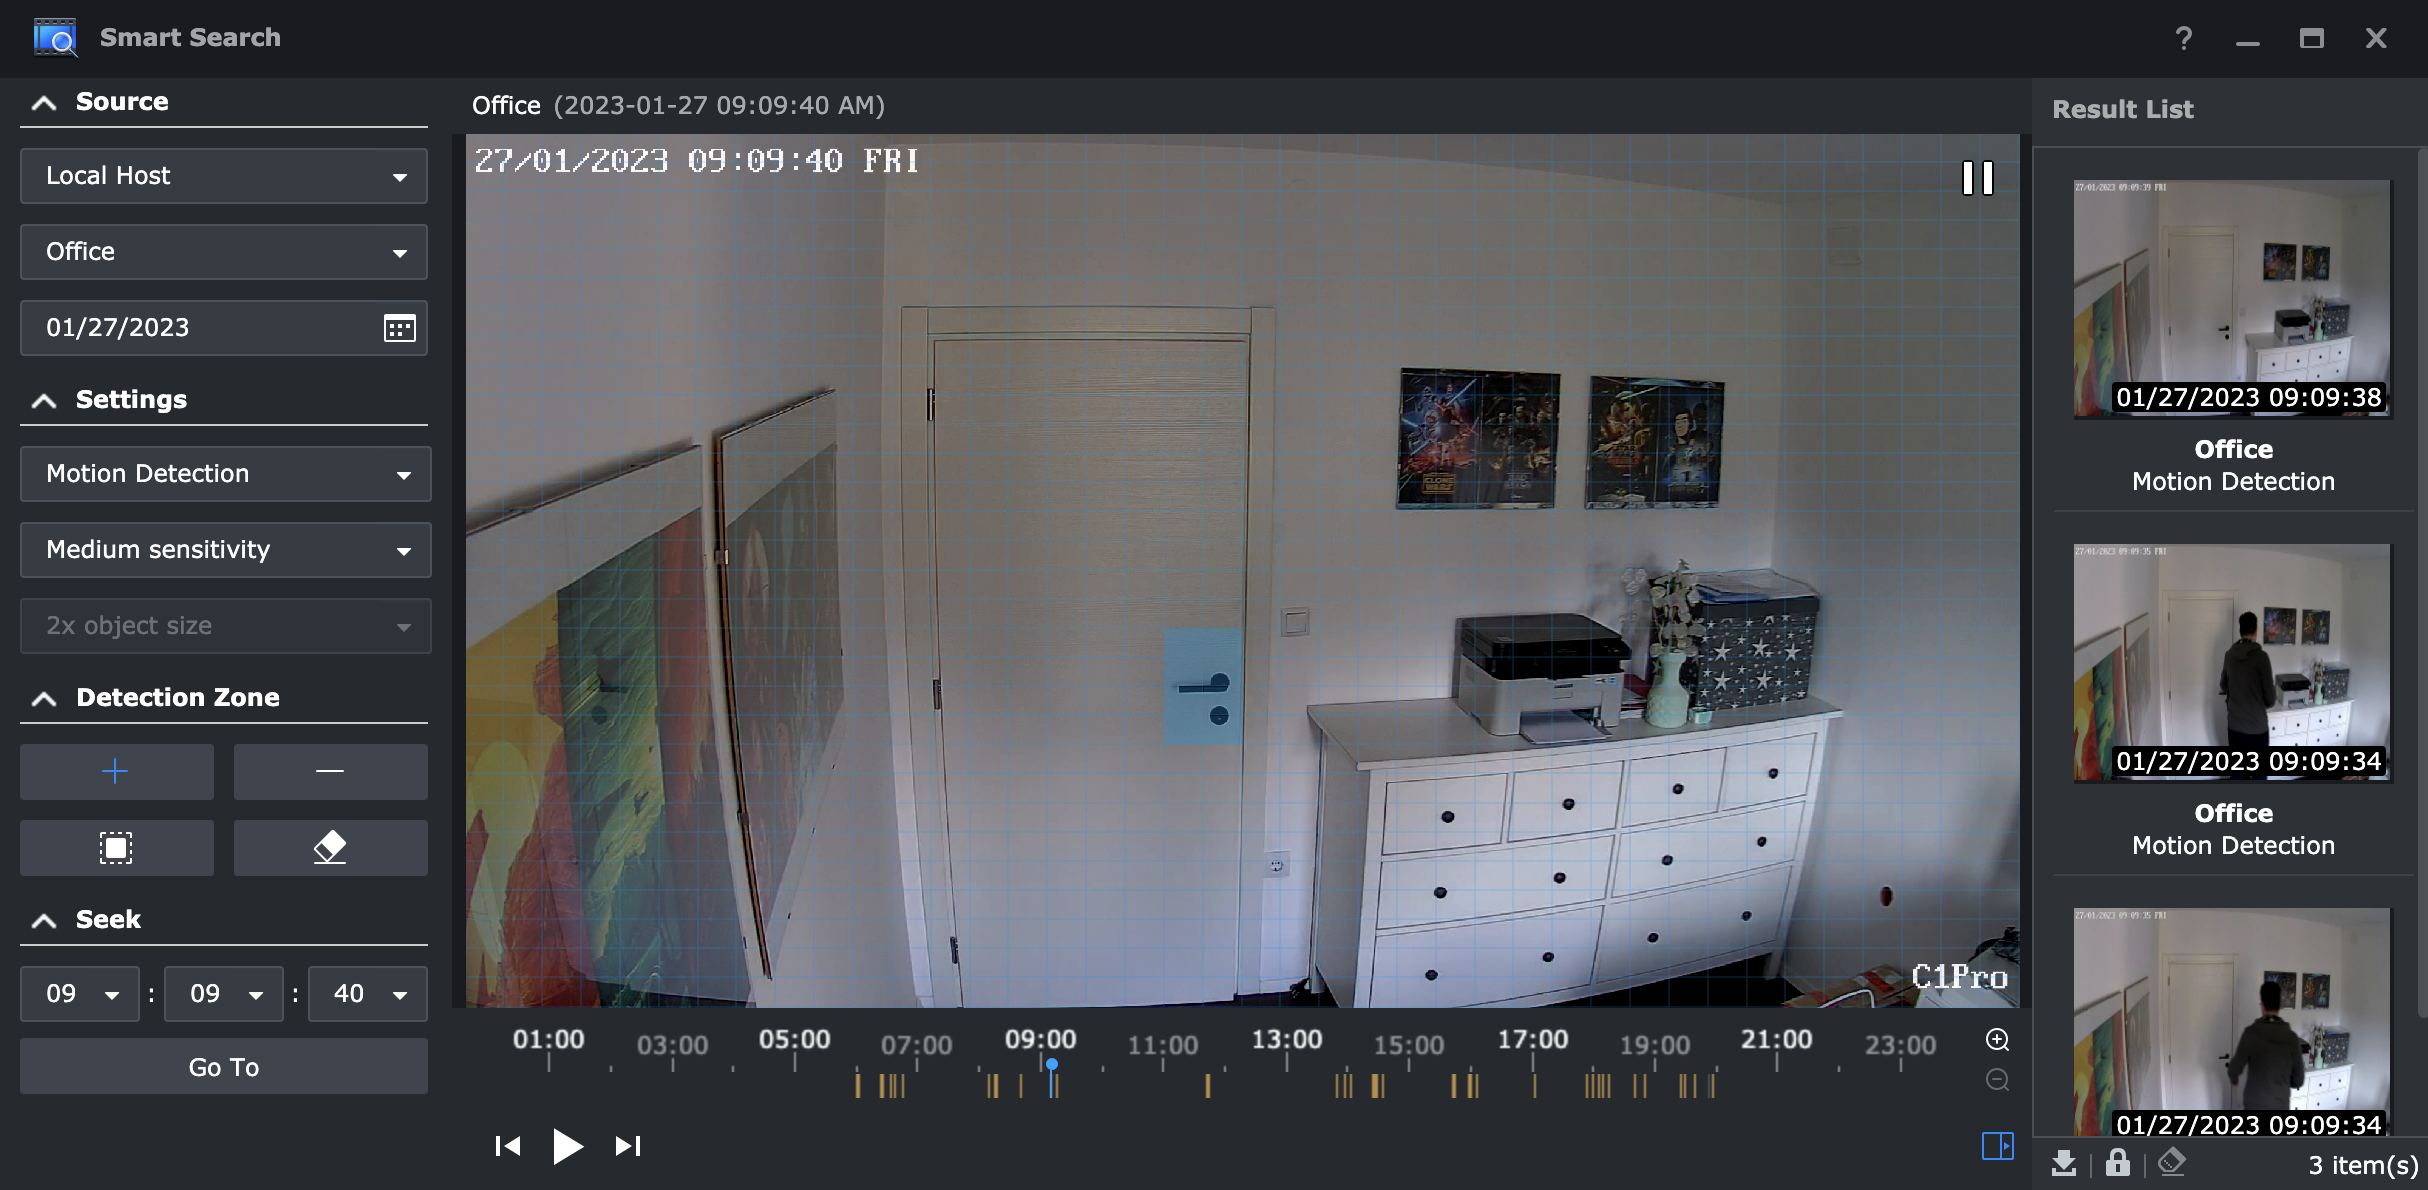
As an example presented above, we quickly got the results of three moments when the door handle movement was detected during the selected time and date. The overlay grid allows for an easy "drawing" of multiple hot zones in case there is a particular need for such a scenario. Finally, the result videos on the far right side can be downloaded, and even enhanced in terms of image quality if needed.
: Action Rules
As can be seen, there is a lot that SVS can do automatically in terms of detection and recognition. But, that is not all that it can do. With its option to integrate with various other devices (bells, doors, ramps, etc) it has become apparent that there is a need to connect SVS in some way to a certain external device or other platforms.
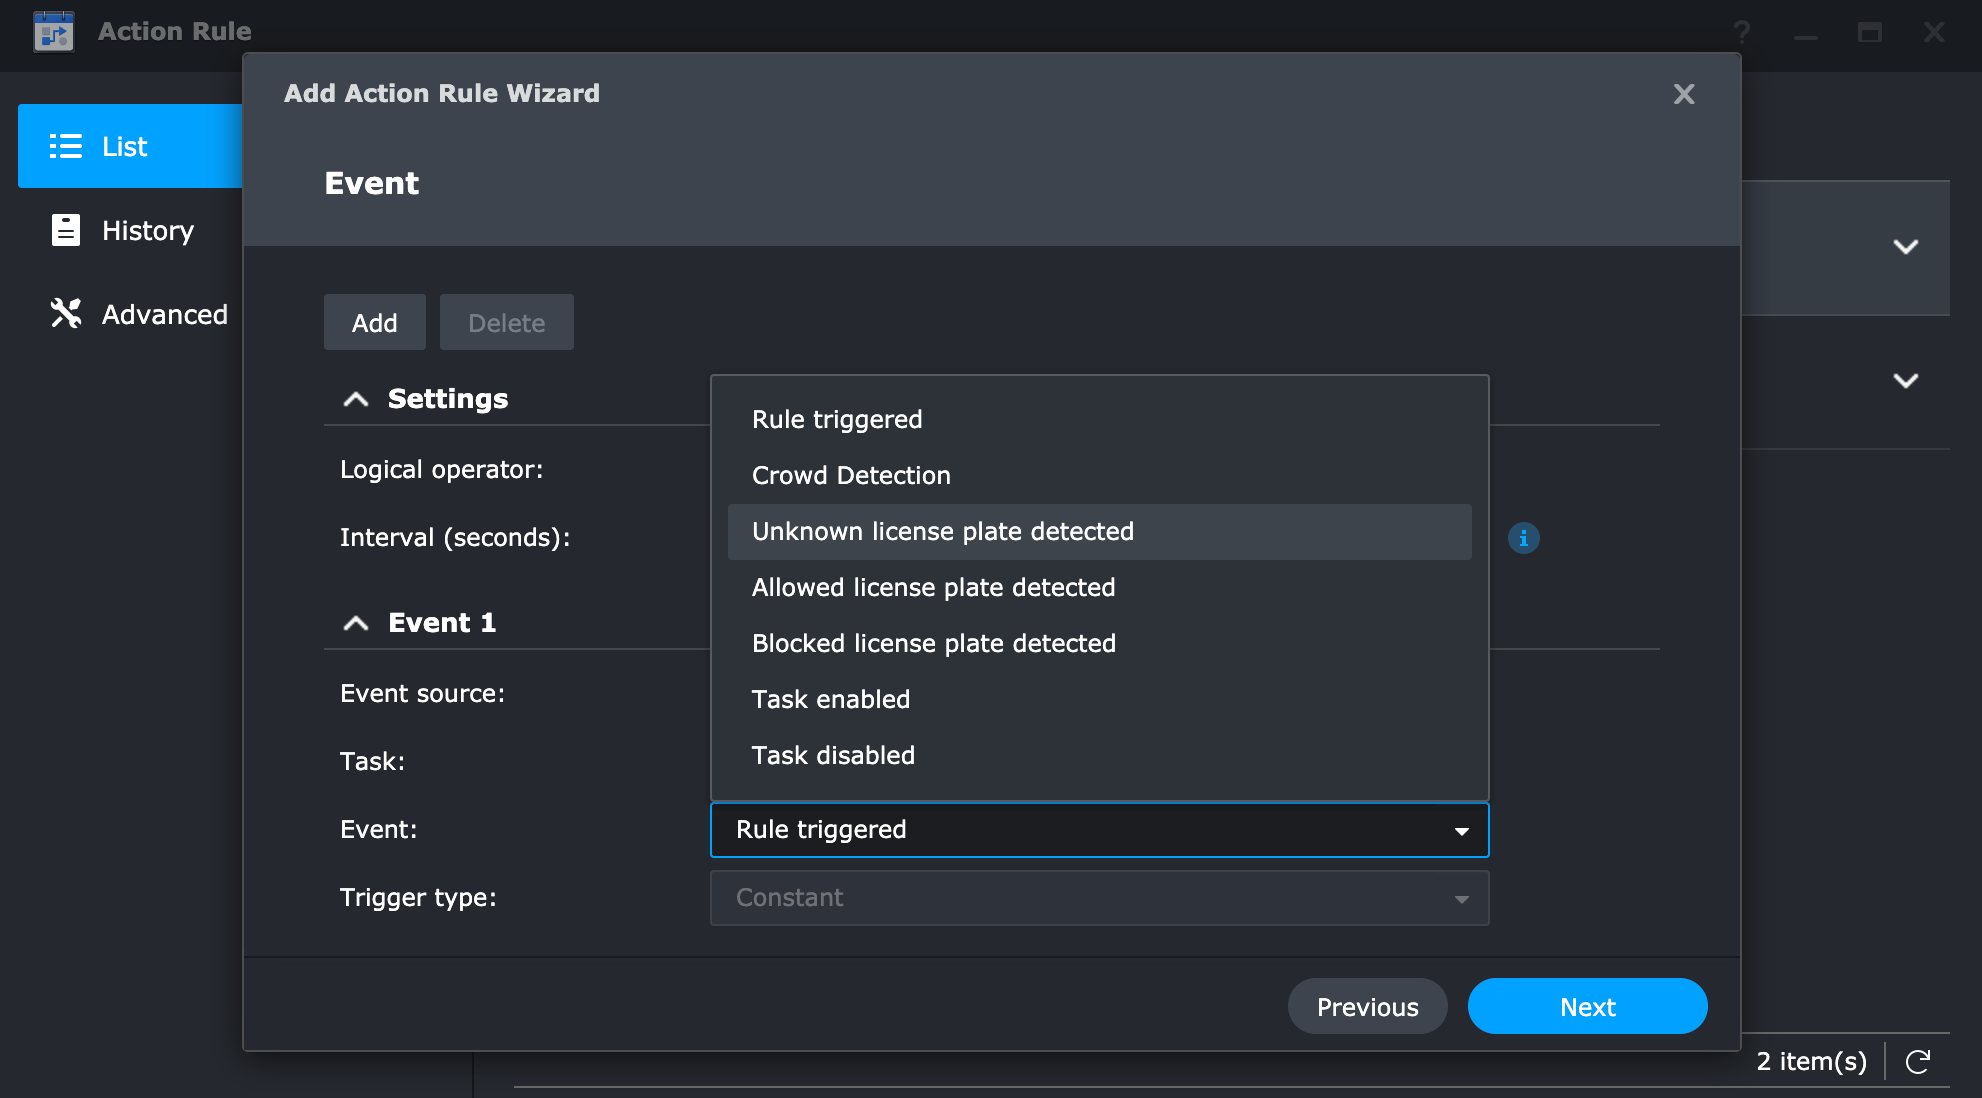
This is where Action Rules step in. A simple but powerful set of configurable rules that can be used in any number of situations. A simple example would be that upon detection, an alarm goes off, or we receive a snapshot of the situation. Another would be to get an alert sent to an outside system. Maybe we want an alert when the camera has been disabled, the fact is that there are a lot of options depending on a specific situation.
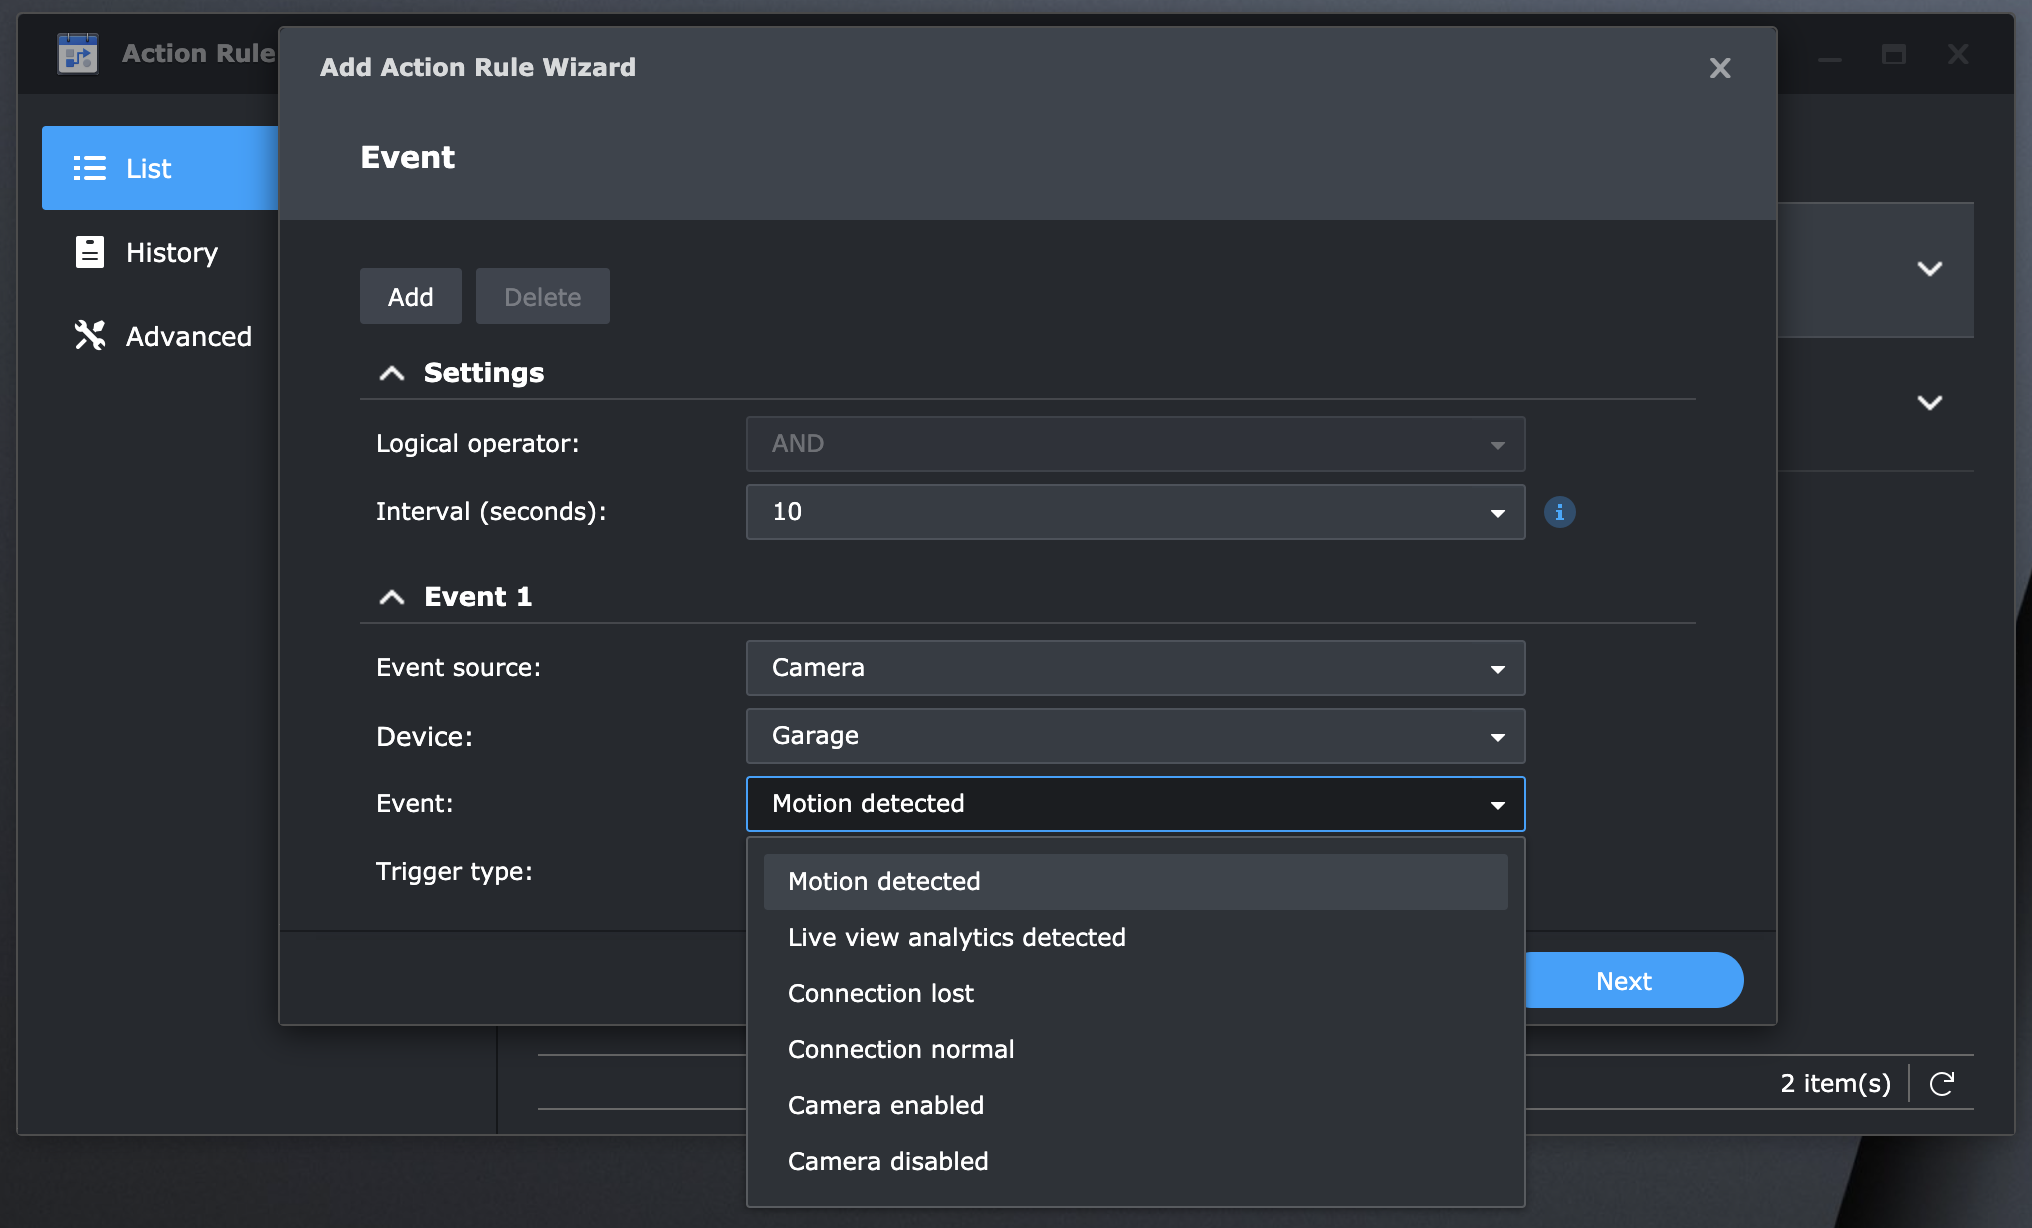
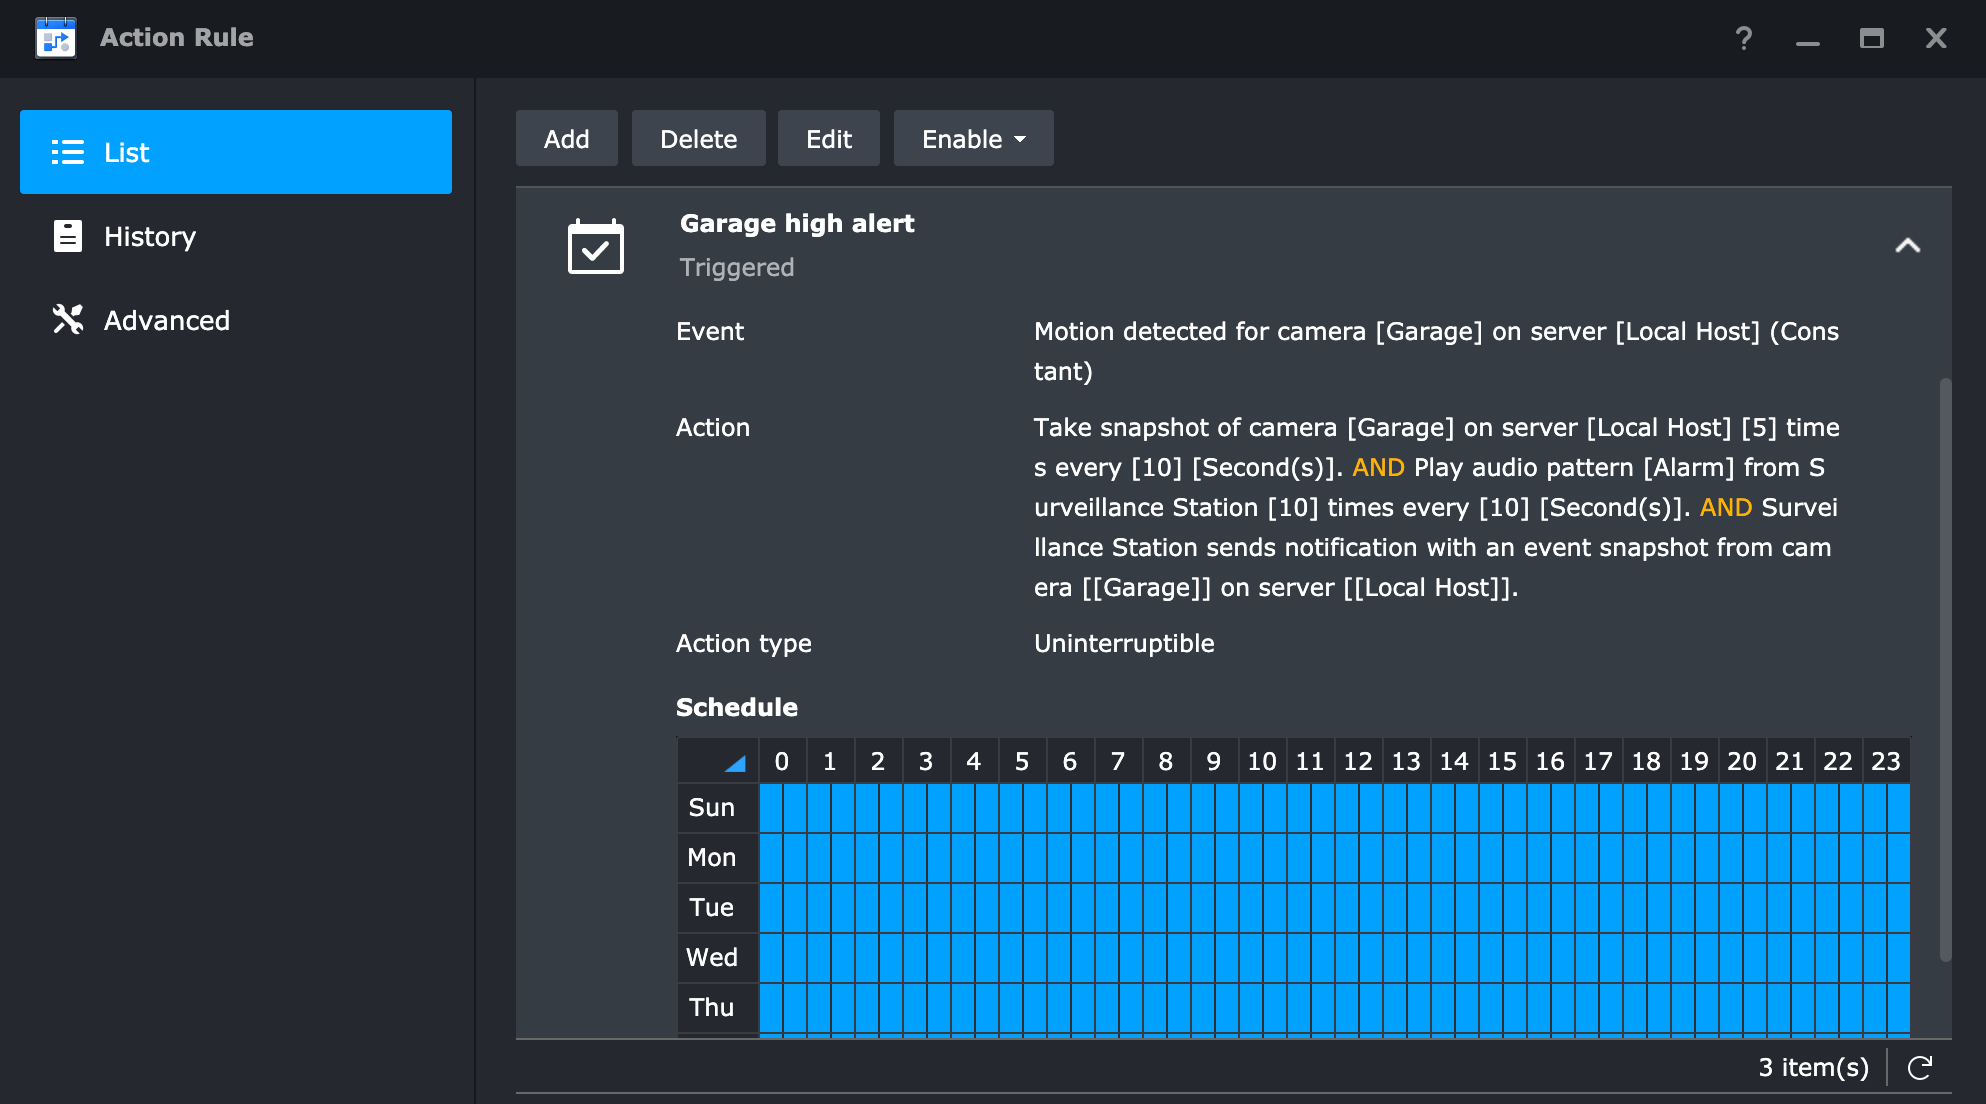
Another great thing about the rules is that we can add multiple actions and events to create a single rule that will trigger another event, send an alert, and take a snapshot all at the same time.
Face detection and Deep Video Analytics also have a built-in method that can be activated. For example, using a webhook POST method to detected unknown license plate and send it to an external system (Surveillance Station version 9.1.1-10728 needed!). In general, the mechanism works really well, and fast, and will satisfy most needs. Externally connected devices are also supported but will they work as expected will depend on actual testing, so be sure to get a proper test done before committing.
: Home Mode
Creating action rules ahead of time will also be needed if we want to use them with some other elements of the SVS platform. One example would be Home Mode.
Home Mode allows customization of recordings, notifications, stream profiles, and action rules settings to match the needs of various environments. One example would be that we want internal cameras to stop recording during certain hours, or completely as well as stop sending notifications while an event is triggered. So when we arrive home the cameras will still function in a live mode, just no recordings will occur.
There are three ways that HM can be turned on or off. One, by simply logging into SVS and flipping the switch, another by schedule, or by geofence location using the mobile DS cam app. This last method will allow for a more precise profile switch as it will detect a mobile device leaving the wifi area and arm Home mode. The same will happen when we arrive back and enter the wifi area again. At that point, the Home mode will be turned back on and all the applied settings will take control over the configured cameras.
So let's see what needs to be done in order for Home Mode to work effectively. First off, we have to understand that all the settings inside the Home Mode module are in effect when Home Mode is active. While it is turned off, the settings that are configured on the SVS level will be used.
With that in mind here is one simple example. While I am home I don't want my office camera to record motion events. In fact, I don't want it to have any recording at all. But, when I leave my house and Home Mode turns on, I want it to do motion detection records each time they happen.
To configure this we first need to edit the actual camera settings and schedule it to record motion detection all the time.
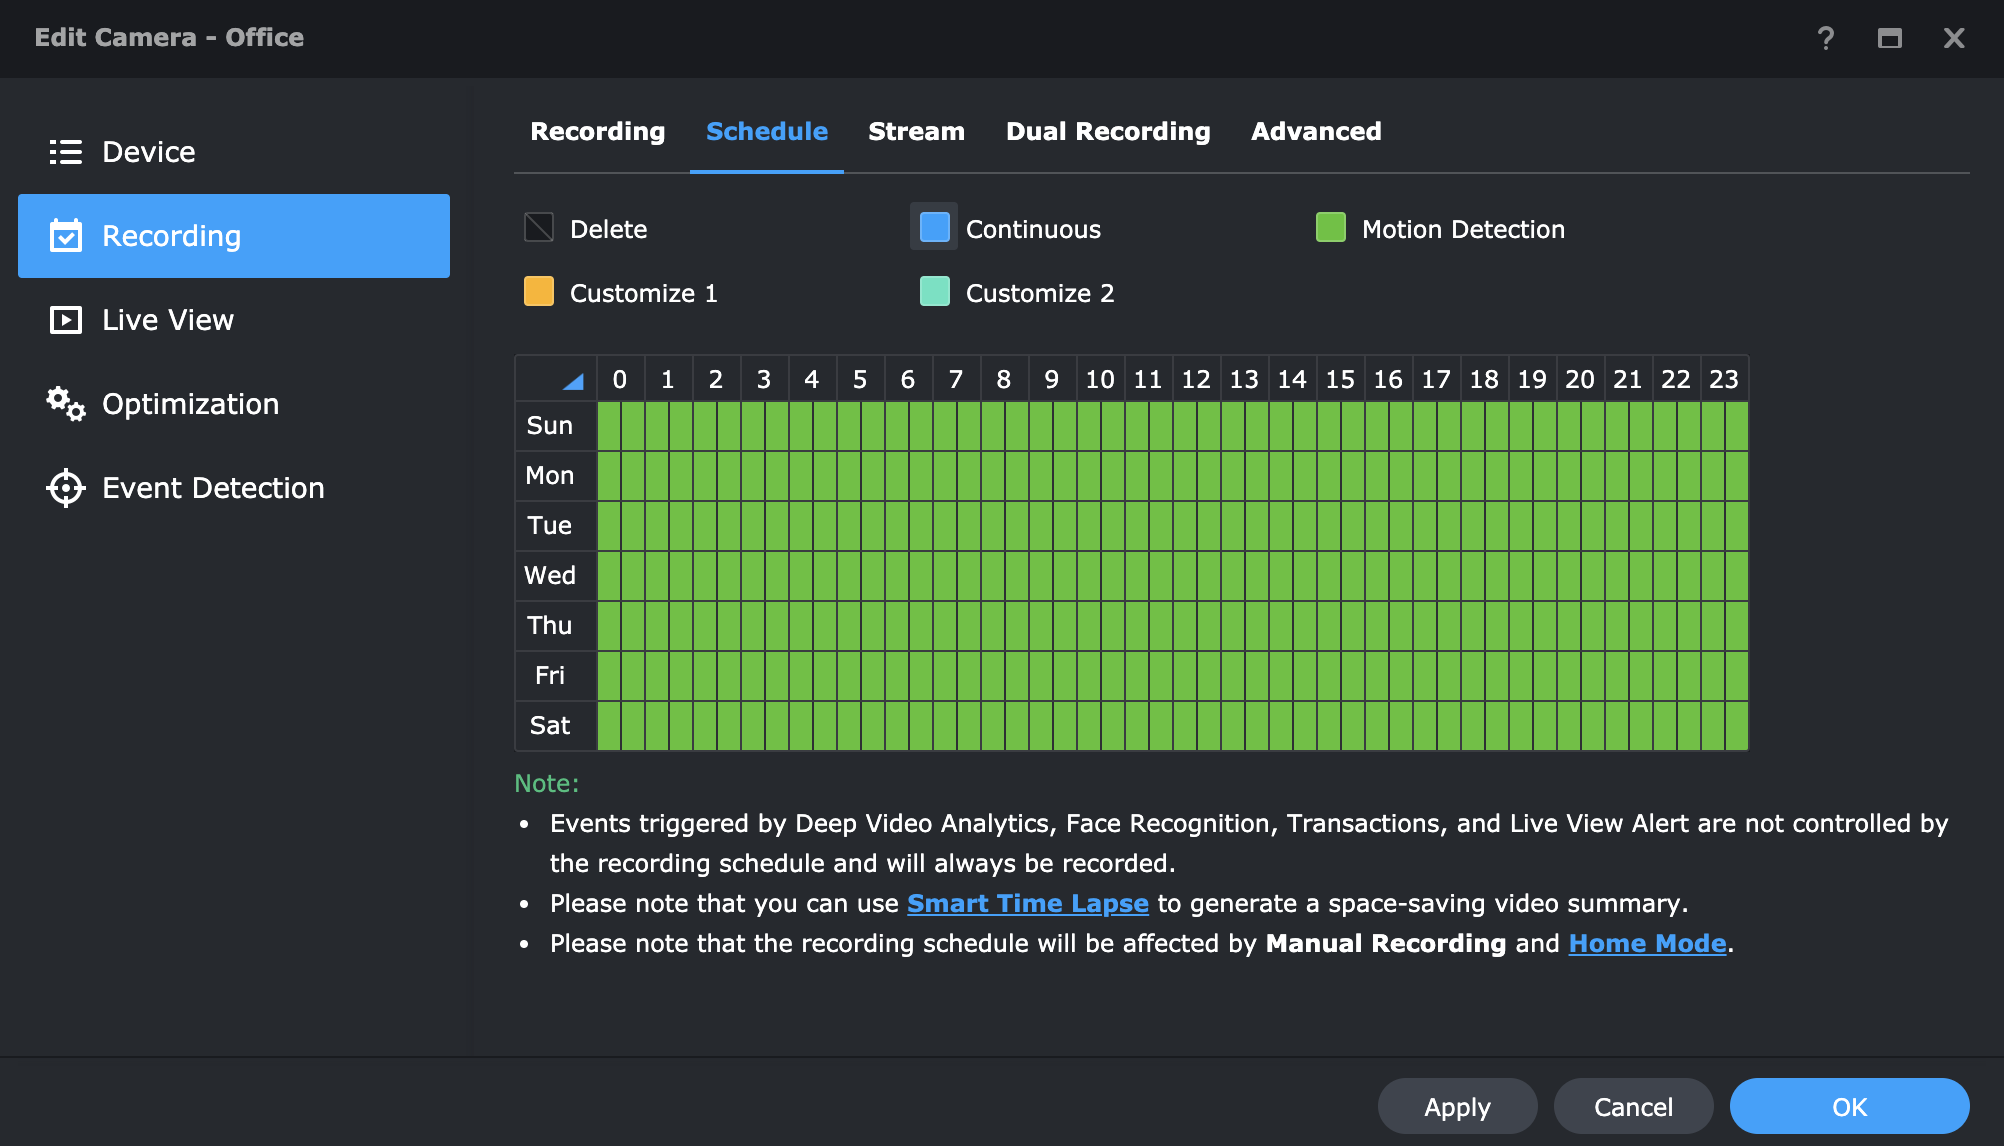
These settings need to be configured for each camera that will be affected by Home Mode, as we can configure HM to work with some cameras and not all of them.
Next, in the HM module under Settings, we need to configure the following.
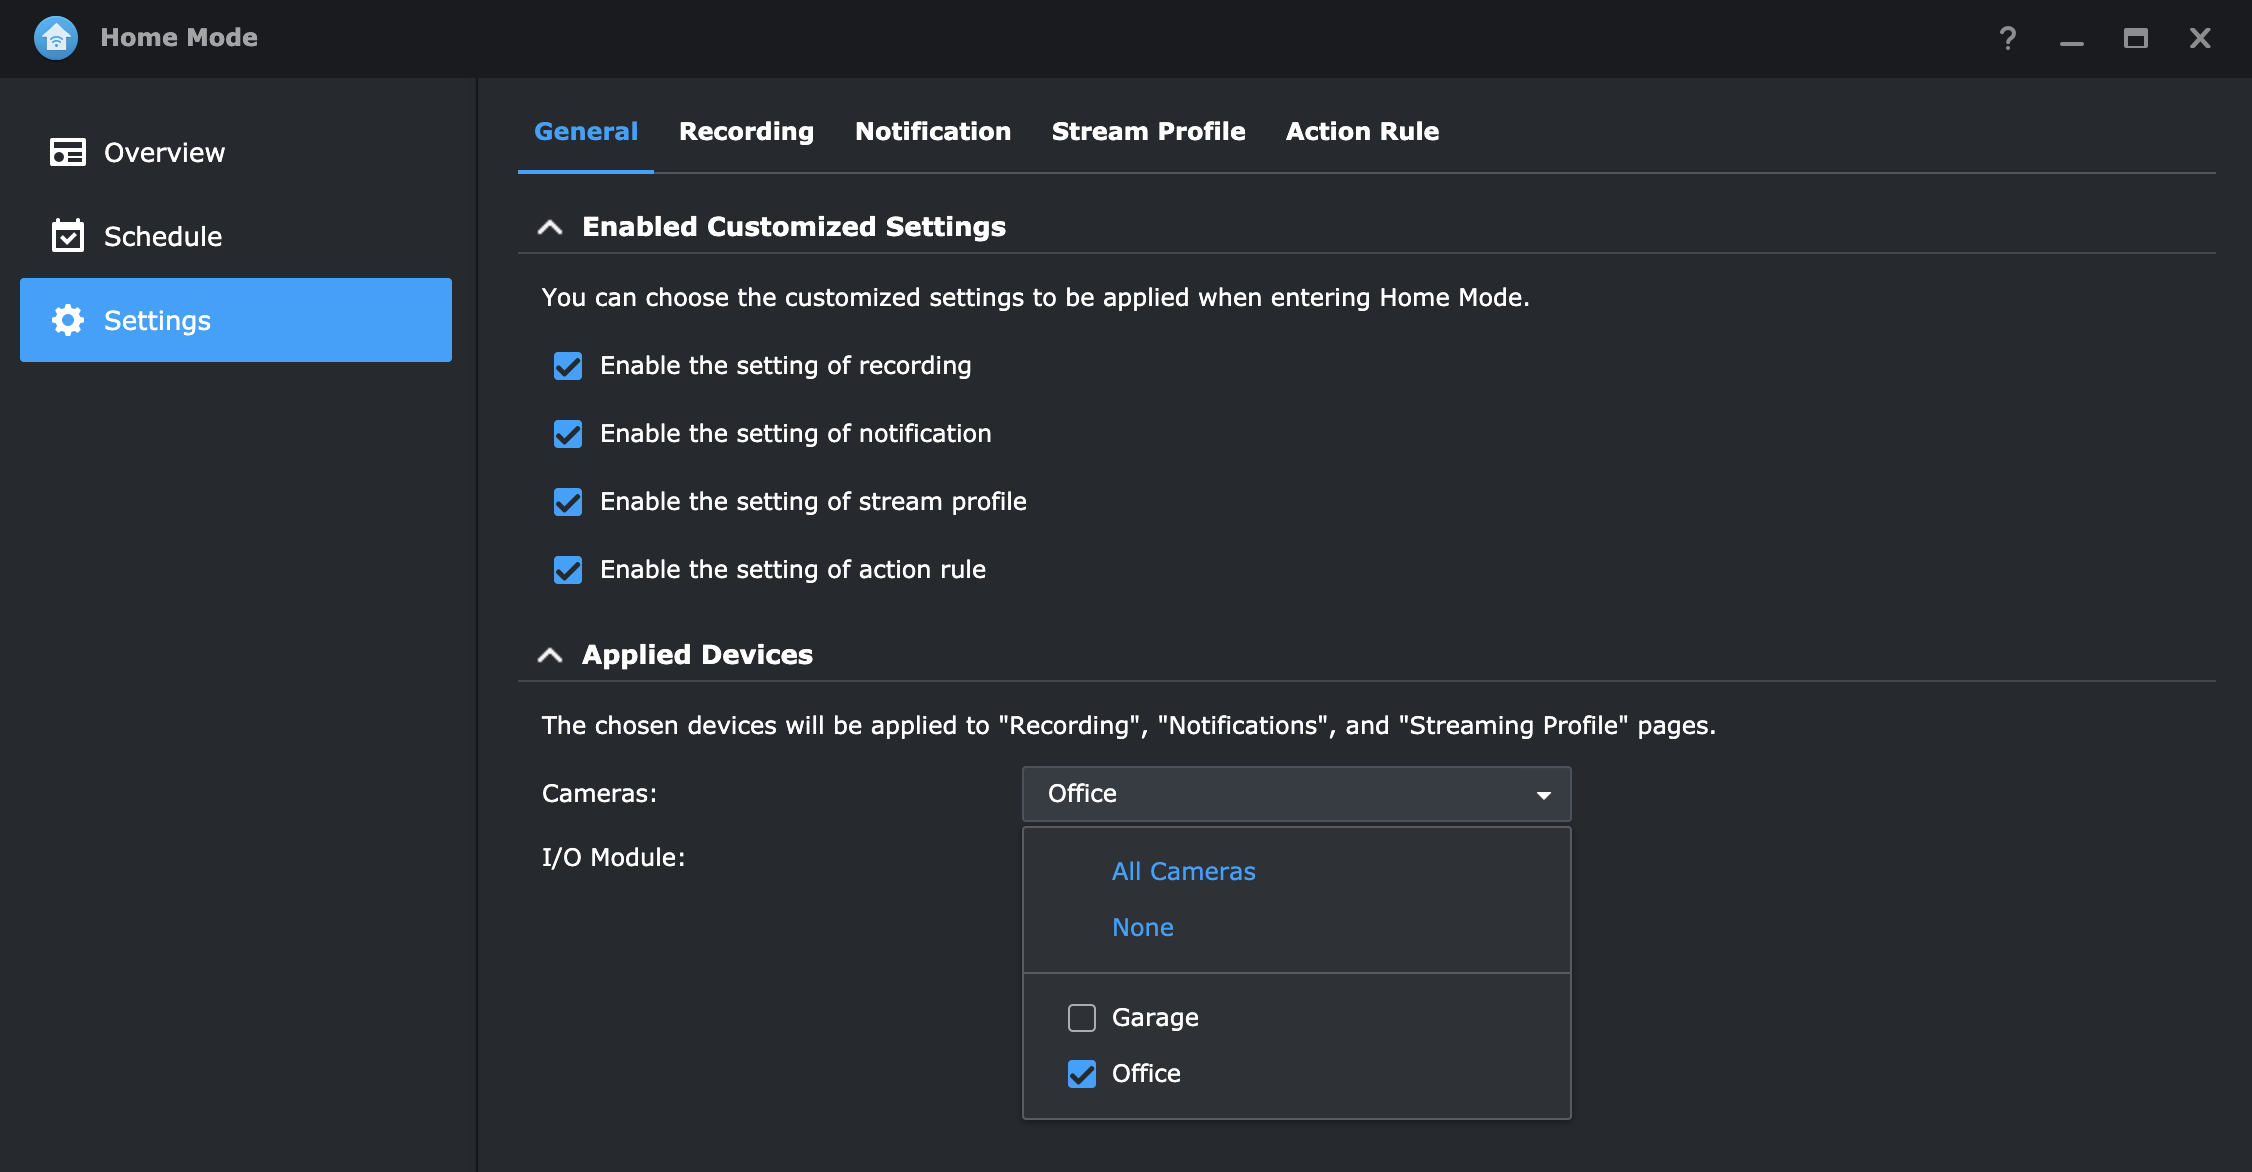
Each of the tabs inside the HM window needs to be activated first using the General tab. The reason is that we might not want to configure specific notifications or stream changes when HM is turned on. So, depending on the needs tabs need to be activated.
As the above image shows, only the office camera will be included when HM is turned on, leaving the garage camera to run under its predefined settings. Now are I said before, I wanted to stop all recording and notifications when I am at home that relates to the office camera.
Jumping over to the recording tab in HM we will have the same grid setup as we did while we were configuring the default camera settings. What we need to do here is turn off all motion detection events.
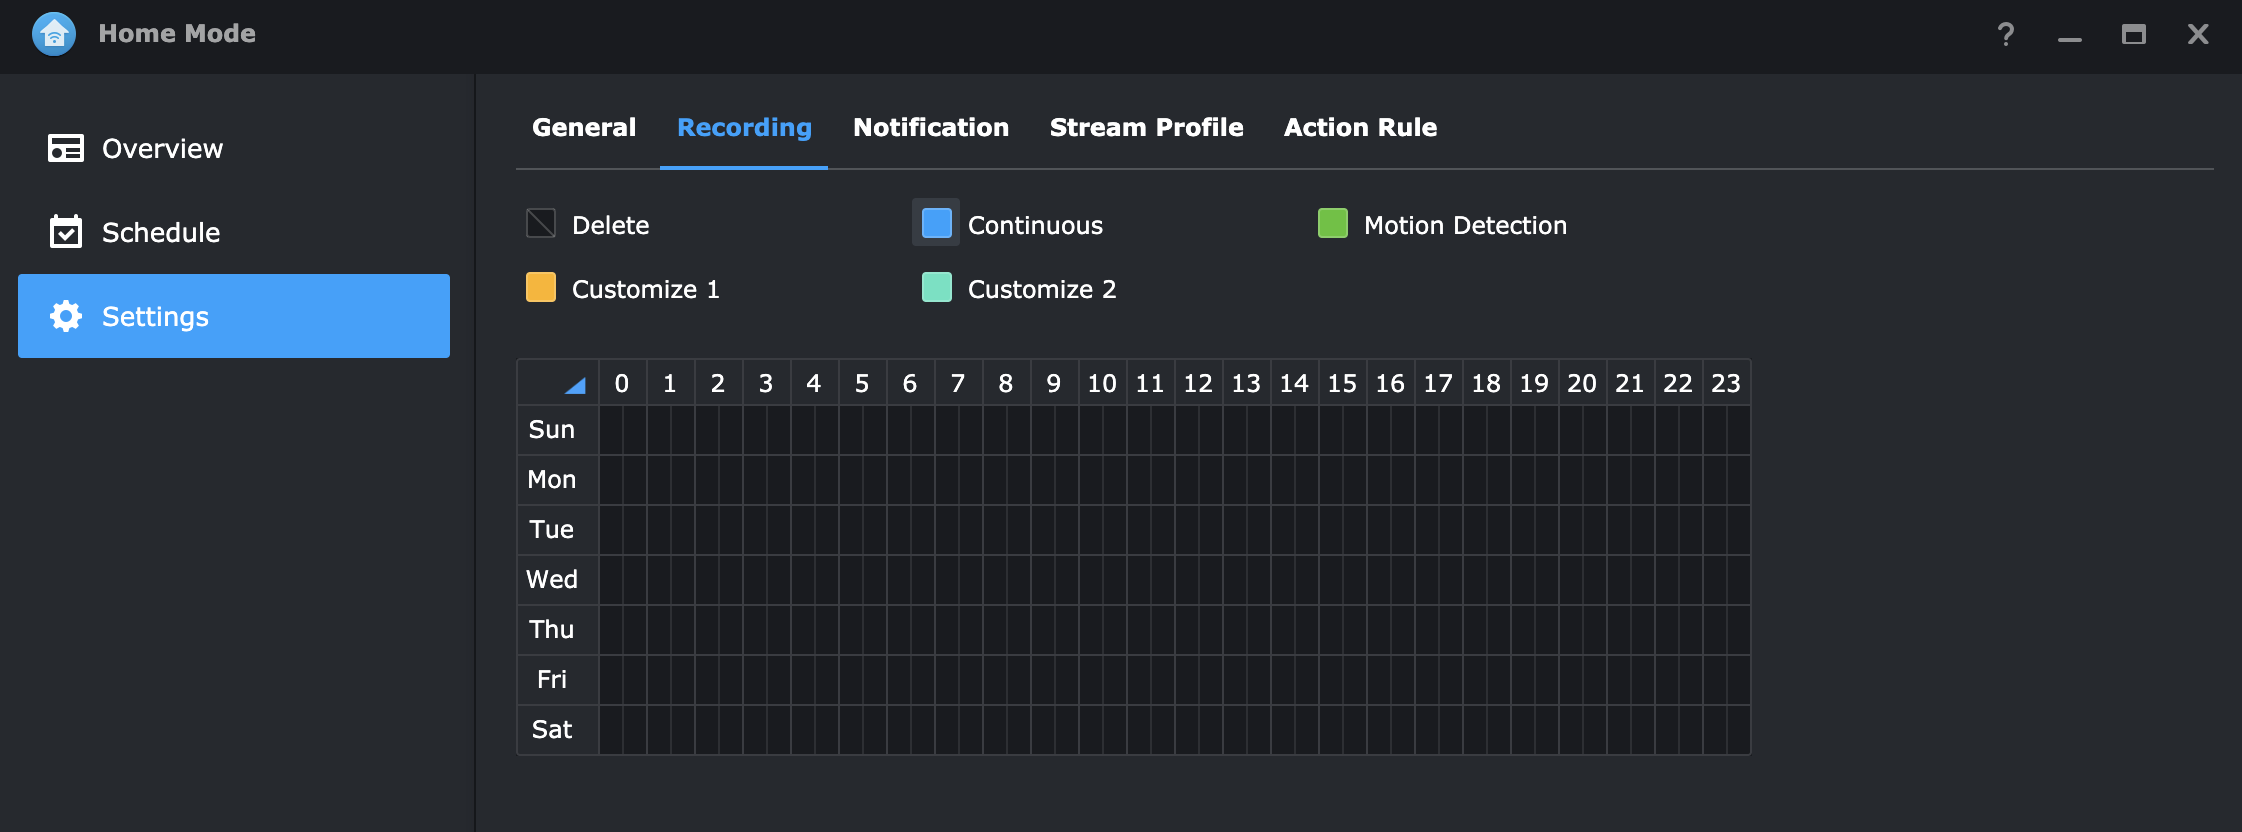
This means that once HM is turned on, meaning while I am at my house, we don't want SVS recording anything over the office camera. These settings will take control over the default settings (1st image) until the HM has been turned off, meaning I have left my house.
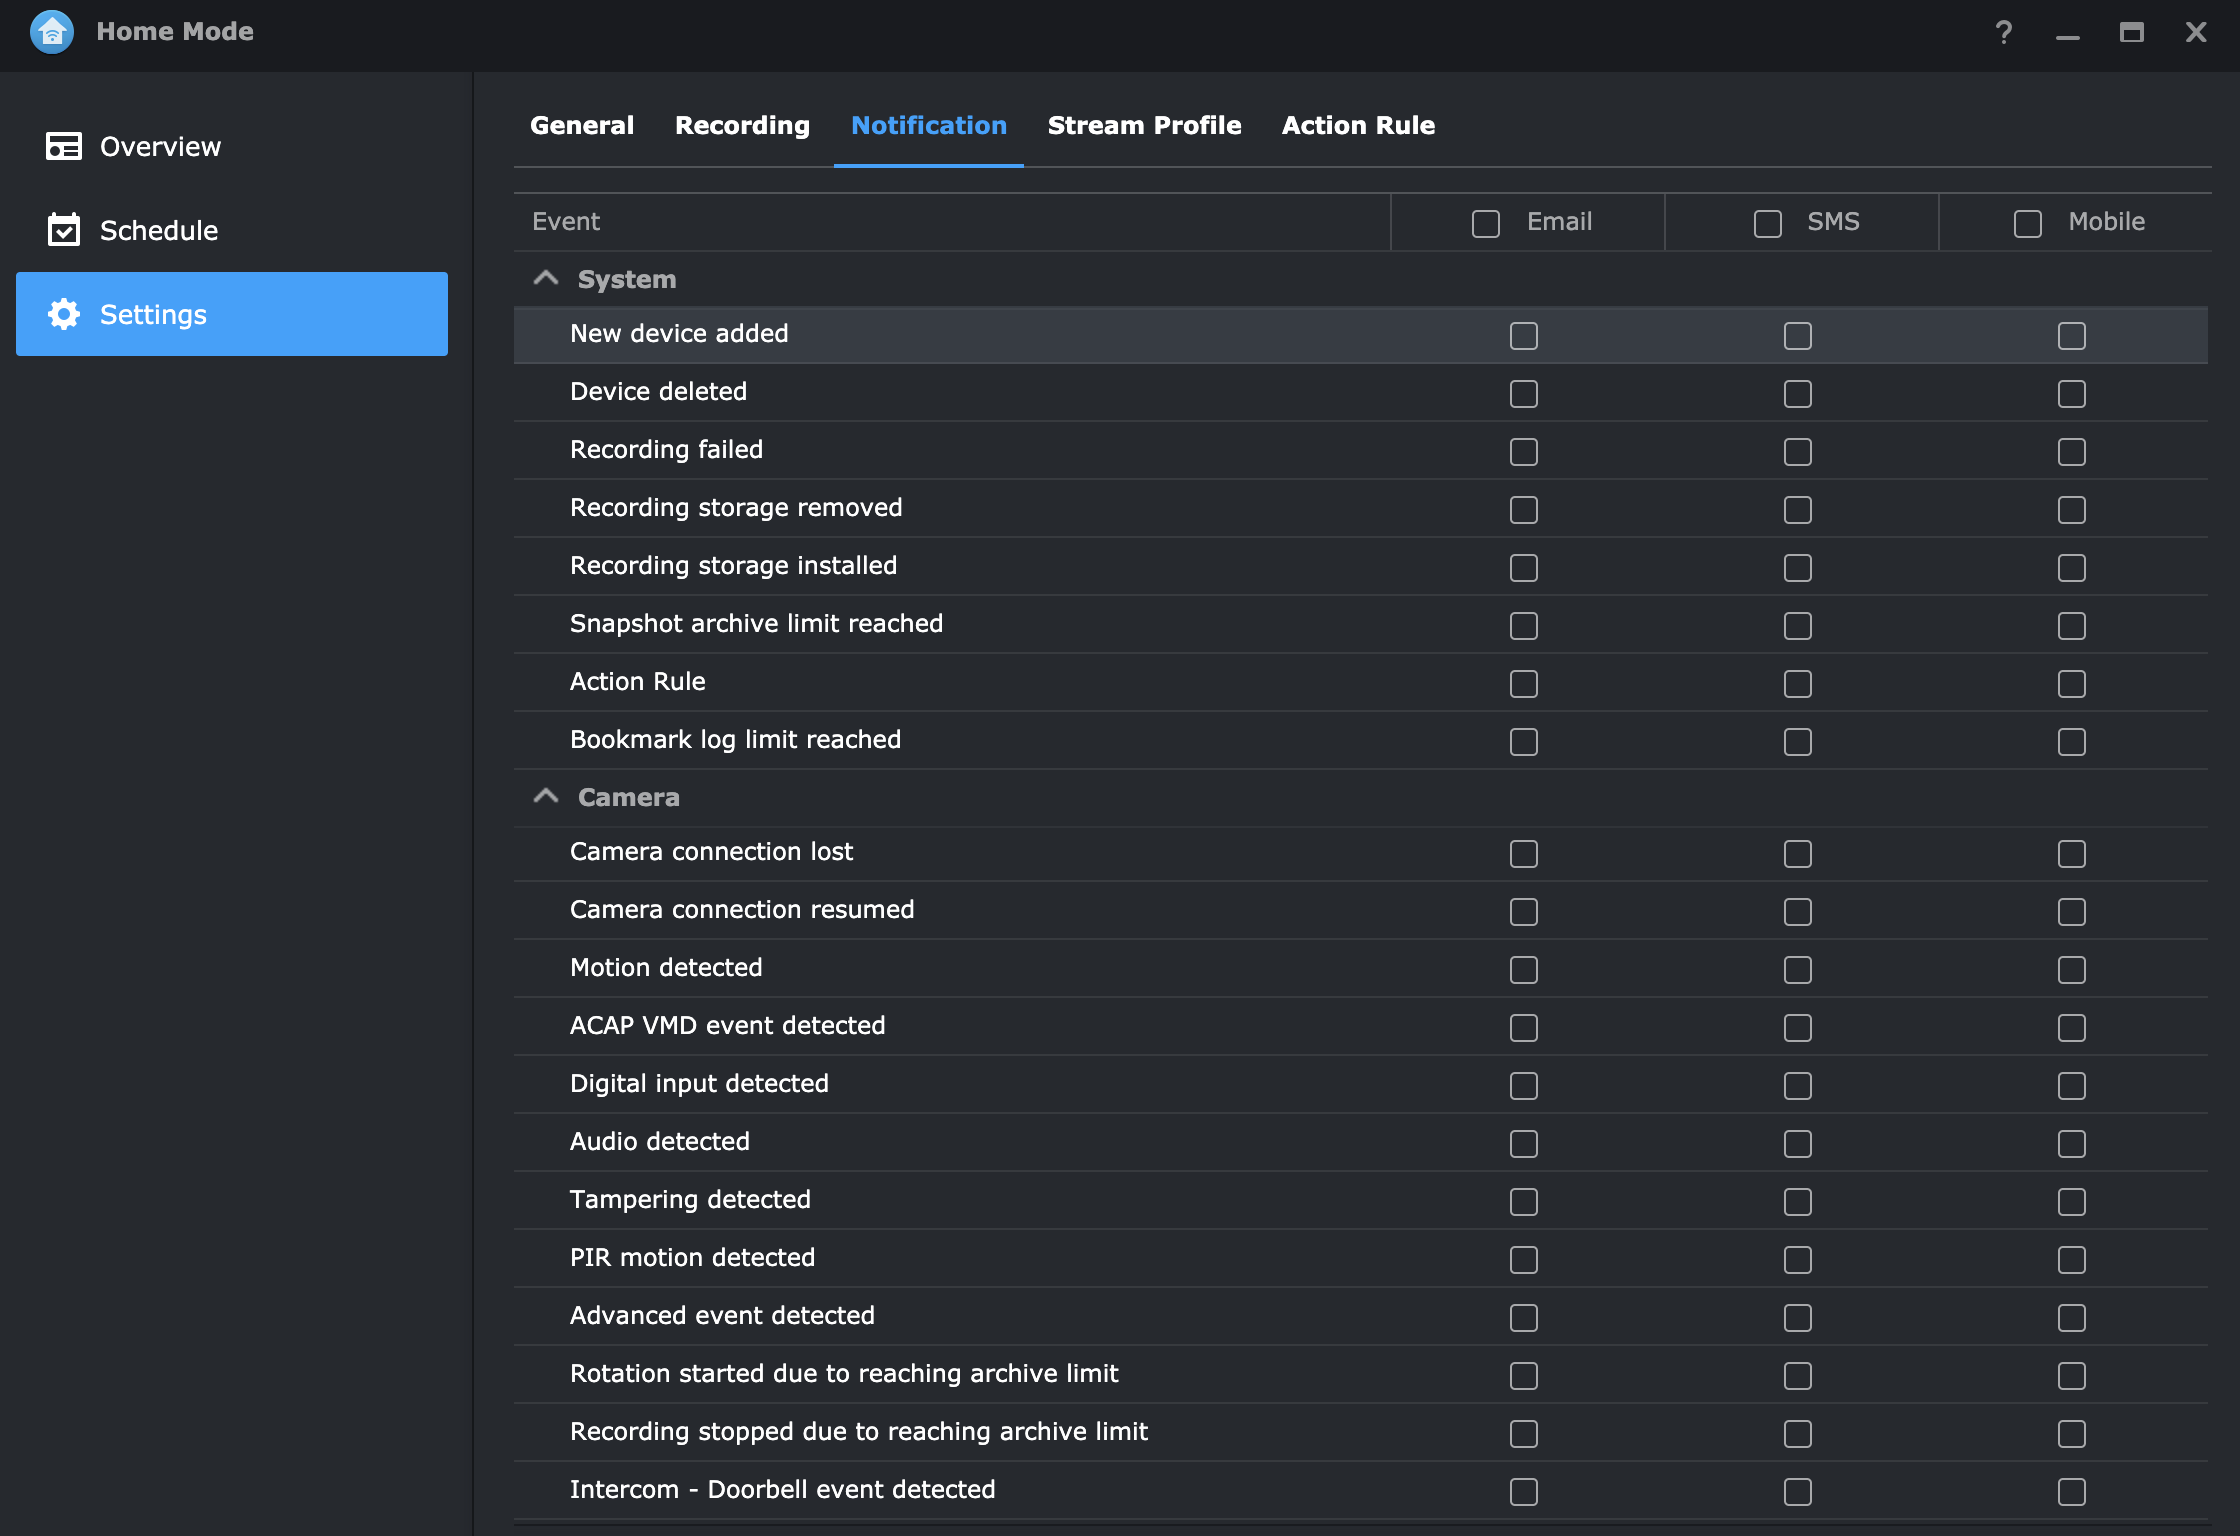
While recording will stop I also want any type of Notifications to not be sent. For that simply disabling all the settings under the notification tab will do.
Finally, I would like to have certain action rules triggered when Home mode has been turned on or off. For this example, I have chosen to send a simple notification using a webhook to an outside chat platform (Mattermost).
When an event is triggered (entering or leaving home) a notification will appear in and outside chat channel like this:

In the above image, we can see that I arrived home at 17:17, then left the house at 18:43 thus arming the cameras, only to arrive back home one minute later and activated home mode again. My setup has been configured and tested using the geofence mode that will be explained below, but I can say that it works great, is fast, and very precise.
So, in short, that is how the Home mode works and as a single-button solution, we can change the way our entire surveillance system works while we are both home and away from it.
Configuring a mobile device to be part of the geofence Home mode operation (optional)
Setting our mobile device to be an approved device when it comes to Home mode geofence, there are certain hoops that we must jump through before this can work.
First, on the mobile device, we need to install the DS Finder app. The app is present both in the App Store as well as in the Google Play Store. Once installed and paired with the DVA3221 we can activate the push notification option as it will be useful when getting notifications.
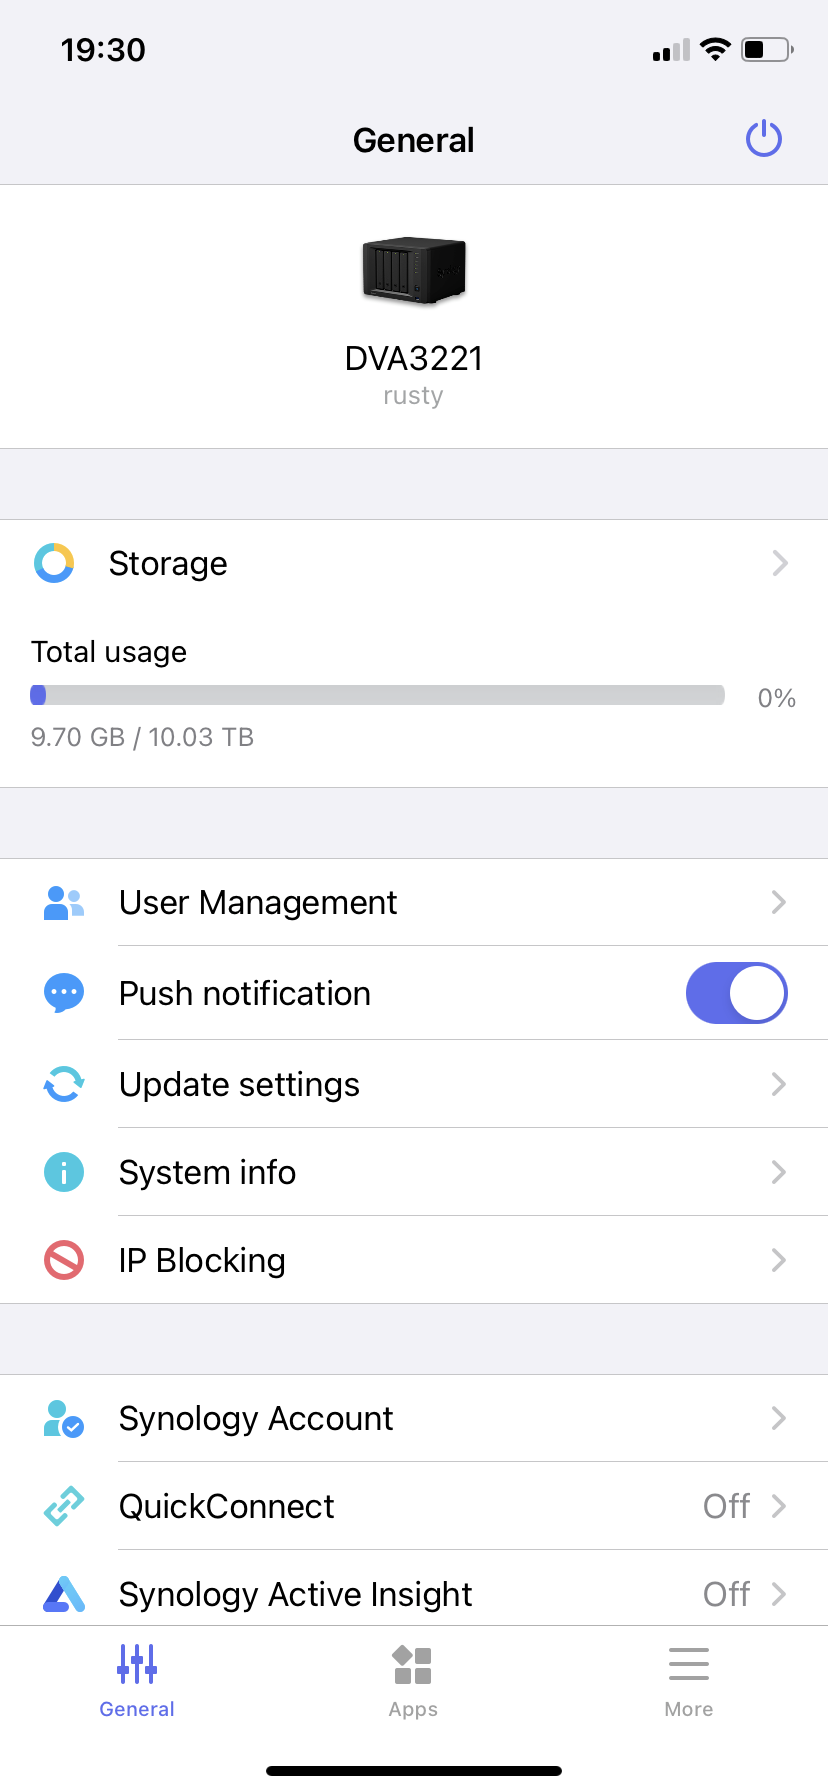
Next, the notification platform inside SVS will not work until a mobile device has been detected, but in order for that to happen we first have to pair the device on the DSM level inside the Control Panel > Notification settings.
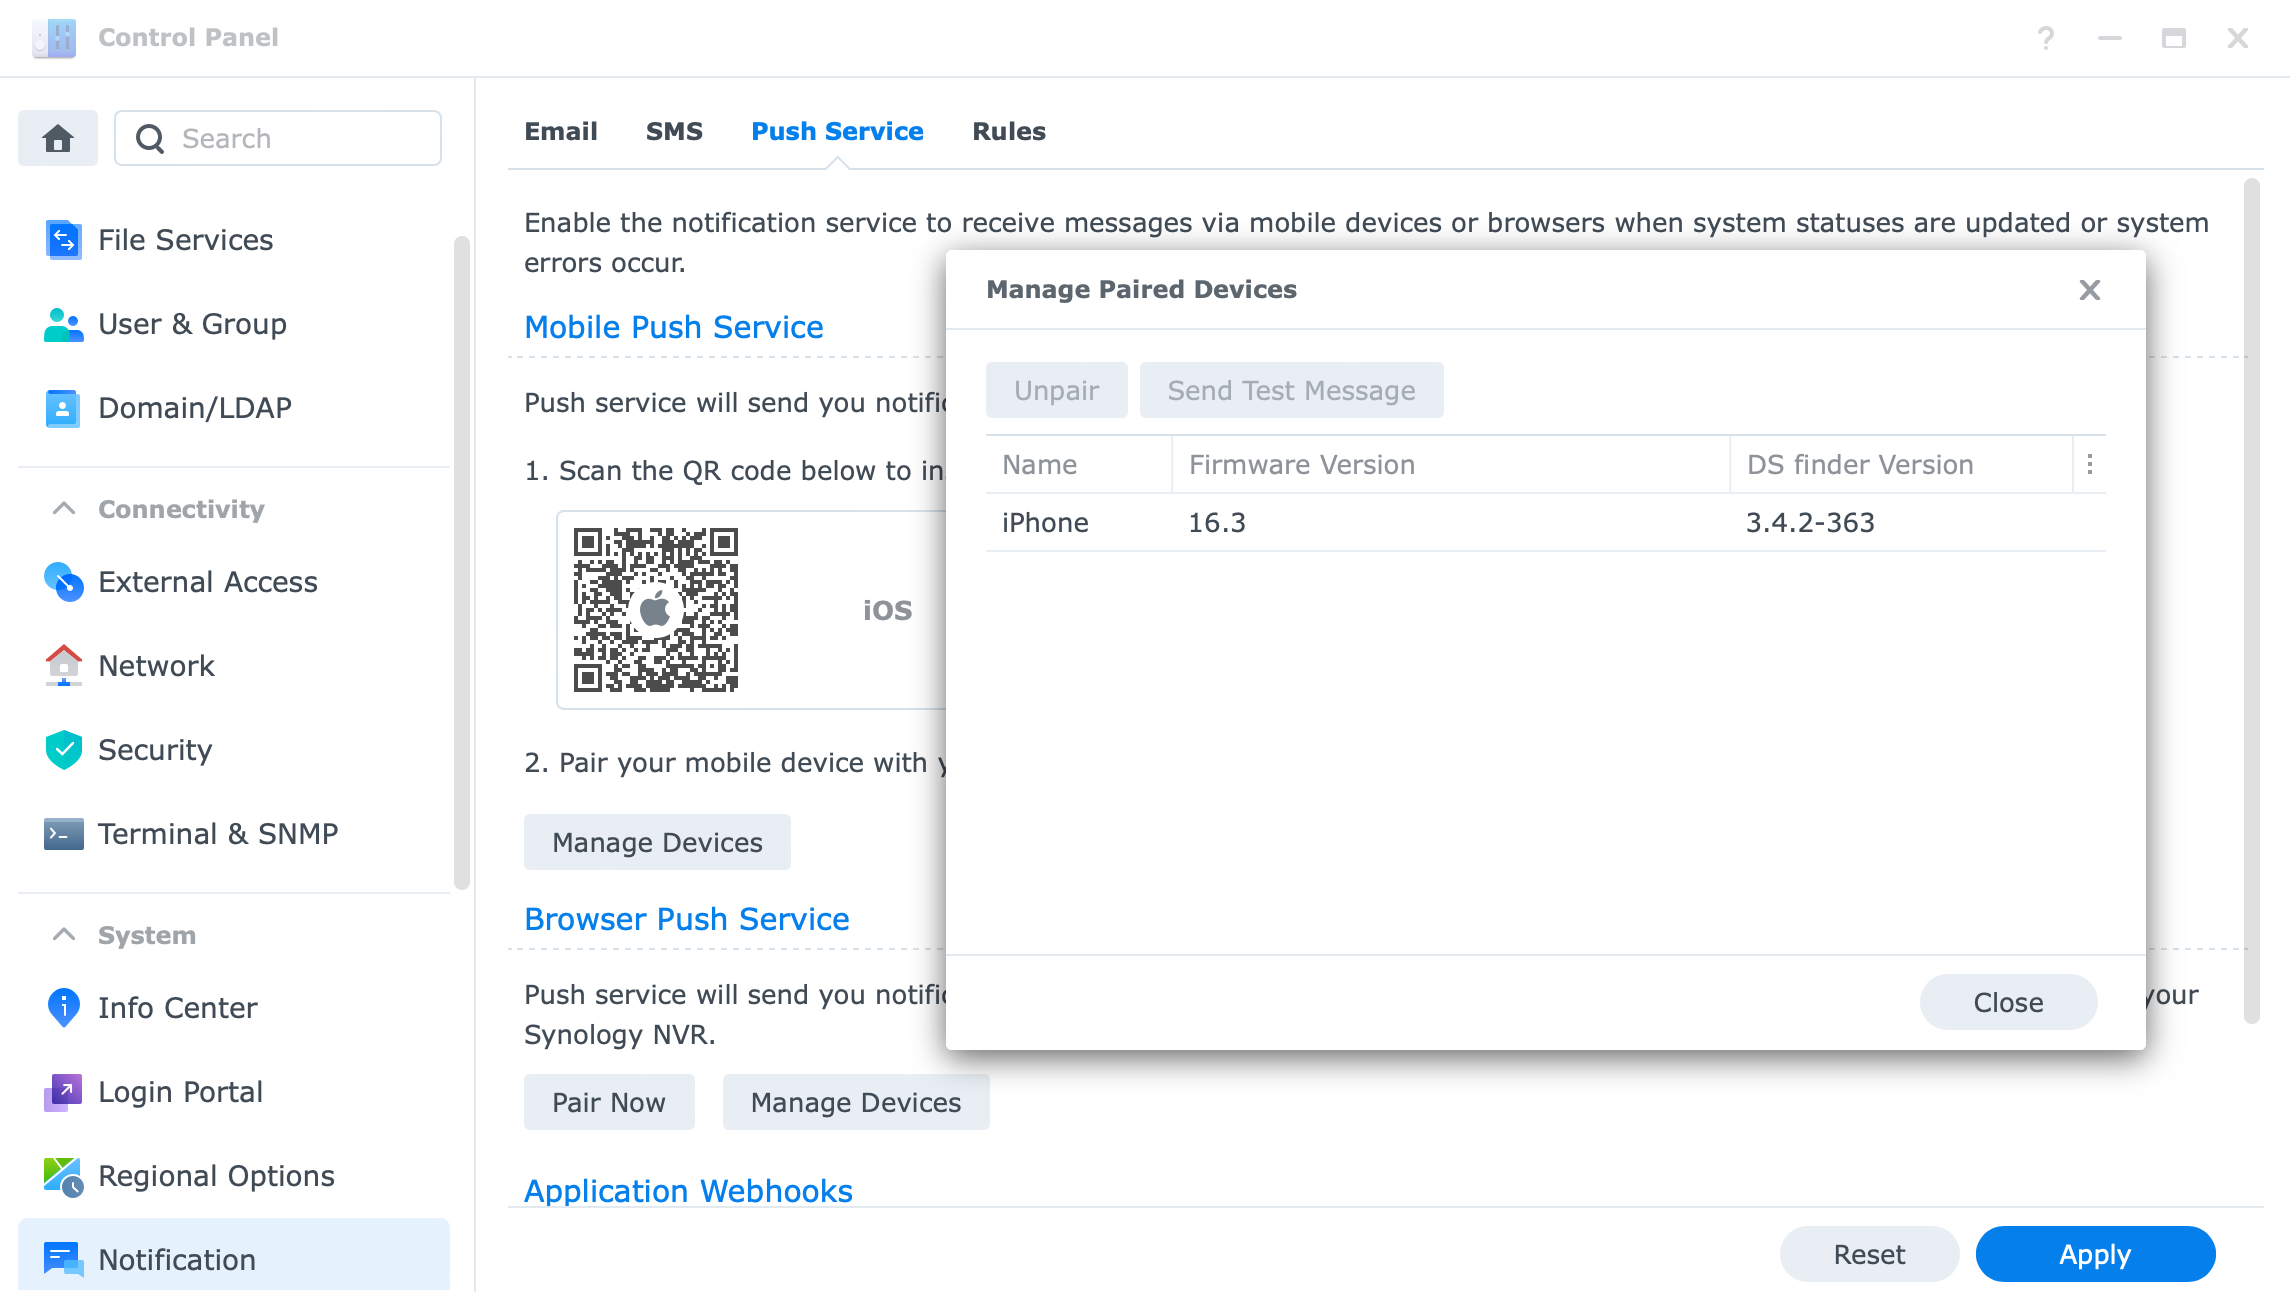
As can be seen in the image, the device was detected automatically because we installed DS Finder in the previous step.
Next, the DS Cam app is what we need. Specifically the Notifications section. Inside it using the three dots in the upper right corner we open the Settings section and enable the Push service. This will register the mobile device with DS Cam as it will be needed as a prerequisite for Home mode.
Now, we can move inside the SVS where the rest of the setup will happen.
Opening now yet again the Notification module inside SVS we can verify that the mobile device is paired via DS Cam and test a test message.
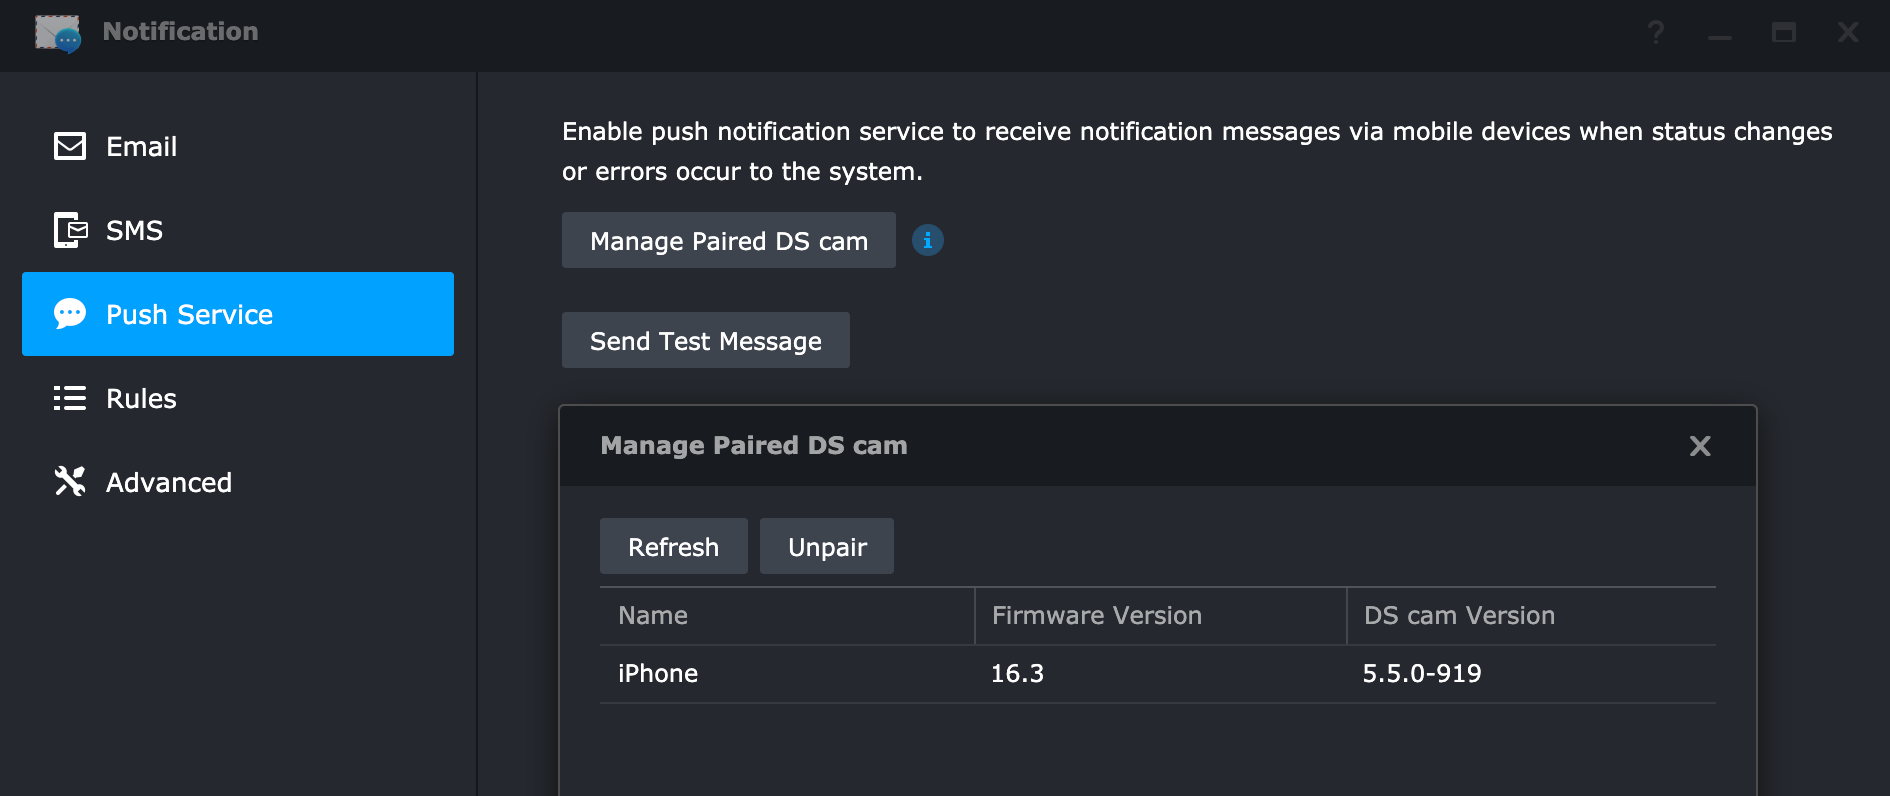
Once we have a confirmation that push messages are coming over to the mobile device we have a working and ready-to-be-used as a Home mode geofence device.
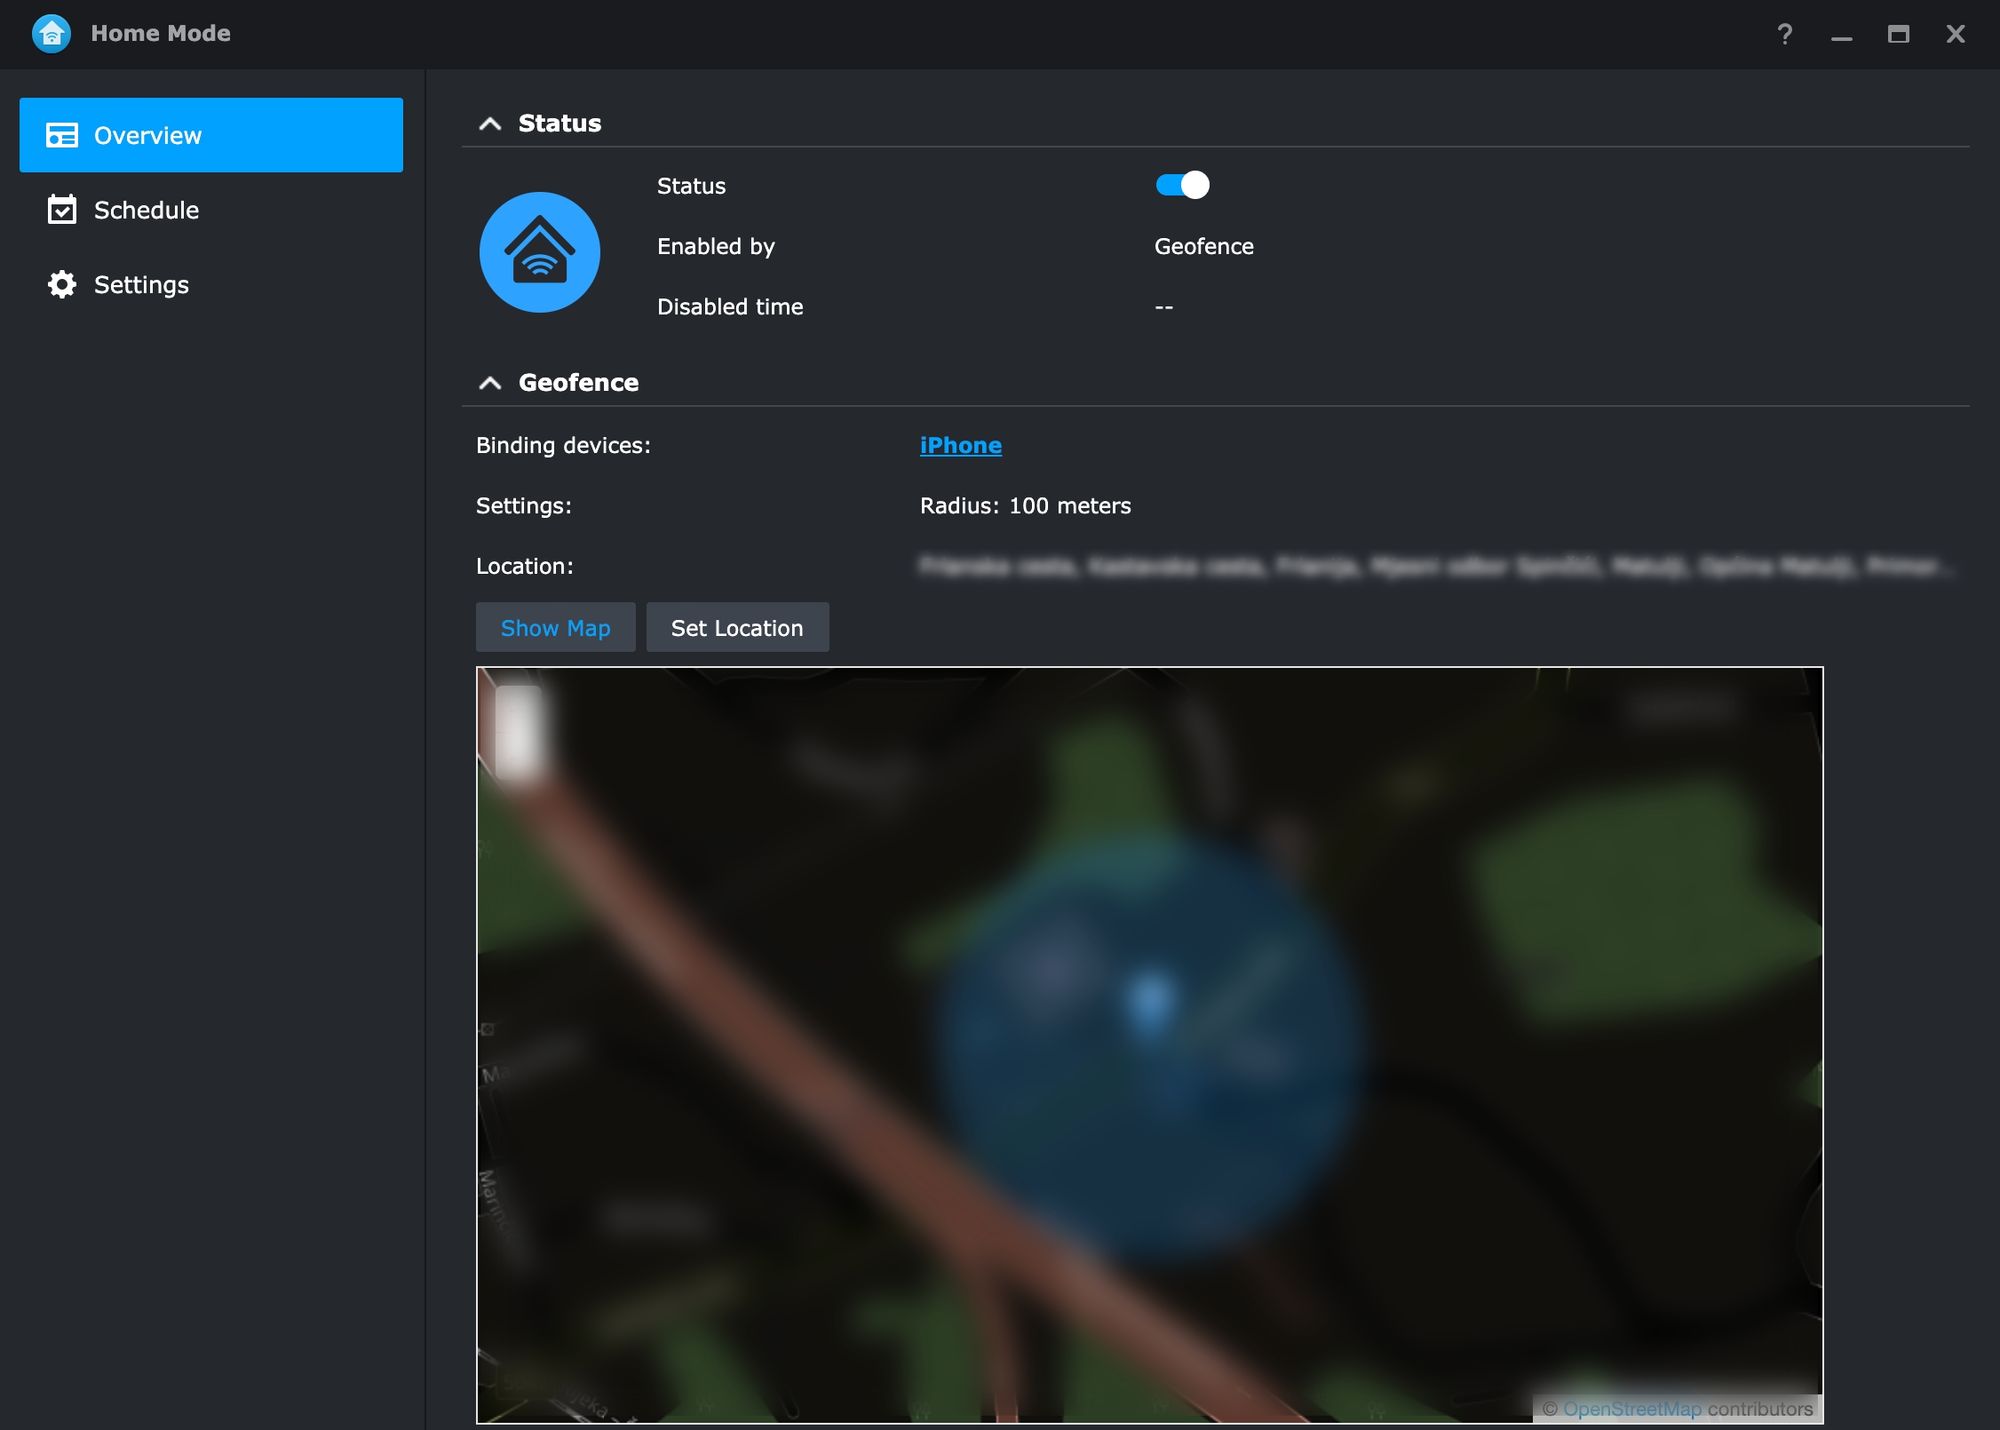
Opening Home mode, on its overview tab we can configure and set the location that will be configured as our home, as well as review all the mobile devices that will trigger Home mode on and off by leaving the configured area or returning to it.
Not the most straightforward configuration, but it does work very well in my testing using the iPhone 11 model as a mobile device.
Leaving the geofence (the wifi network) Home mode will arm itself and all the recording, notification, stream, and action rules will be activated.
Webhook Action rules with Home mode (optional)
Here is another optional step that can be configured with Home mode and previously described Action rules. This example will push a simple notification once the Home mode is on or off towards a configured channel to an outside Mattermost instance.
Using the Action rules module we create a new rule with the following settings:
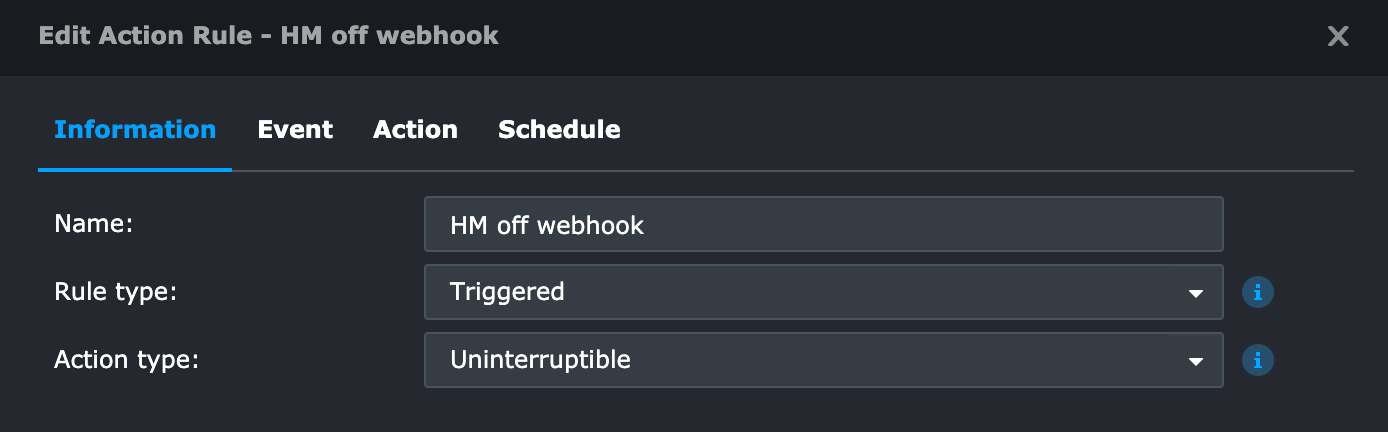
Giving it a name, rule type, and action type to start off.
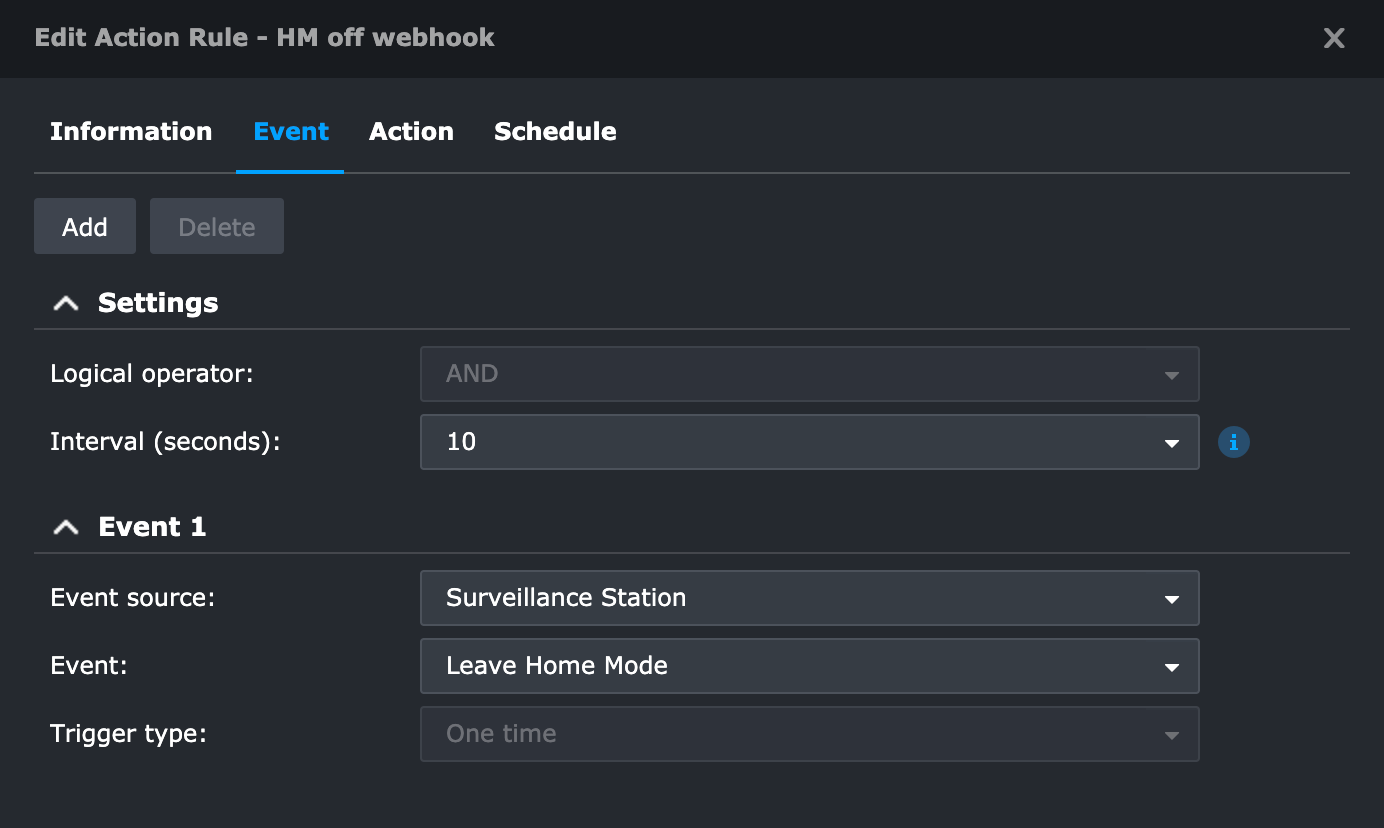
As the event, in this case, will be leaving home (meaning arm the office camera as I am no longer home), we will choose "leave home mode" as the event.
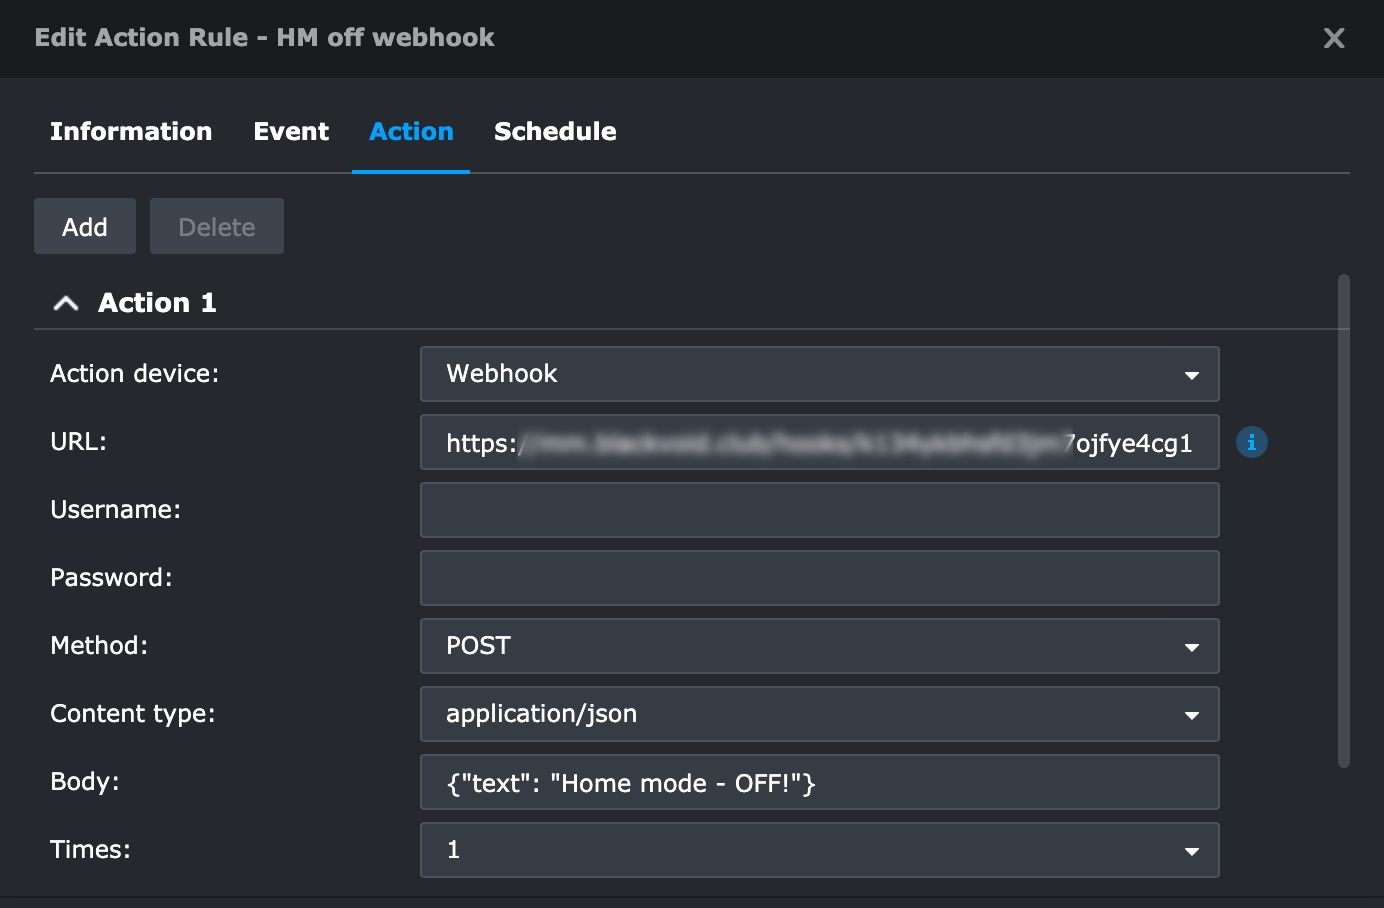
The action that will happen at that point will be a webhook POST method. The payload will have to be entered manually (the body) as webhook are still not supported to use any defined SVS variables but for this example a simple text "Home Mode - OFF" will do.
Considering that the URL has been defined on the Mattermost chat platform, any event trigger will send the text message each time HM has been armed. The same process can be configured when the Home mode is no longer armed, and that way each transition will result in a simple message with a time stamp.
This was just a simple example of utilizing Action rules and webhooks as part of the Home mode process but sending notifications using the built-in notification platform will log them inside the SVS log center or DS Cam app.
: Time Lapse
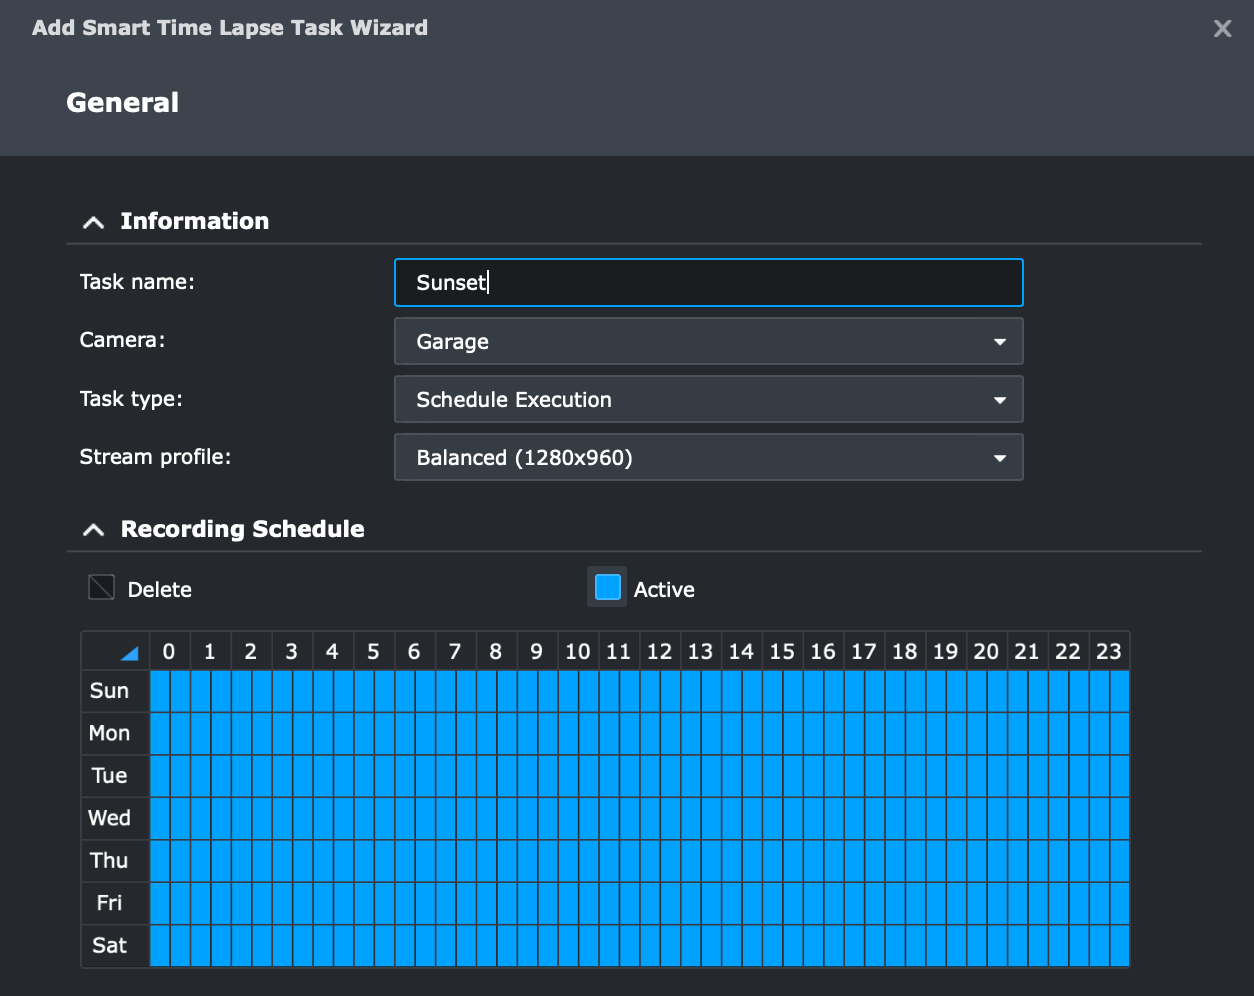
One of the last features that might come in handy would for sure be the ability to create time-lapse videos. If we want to make a short video of a sunset or a simple fun video while cleaning the garage, well that's what this module will offer.
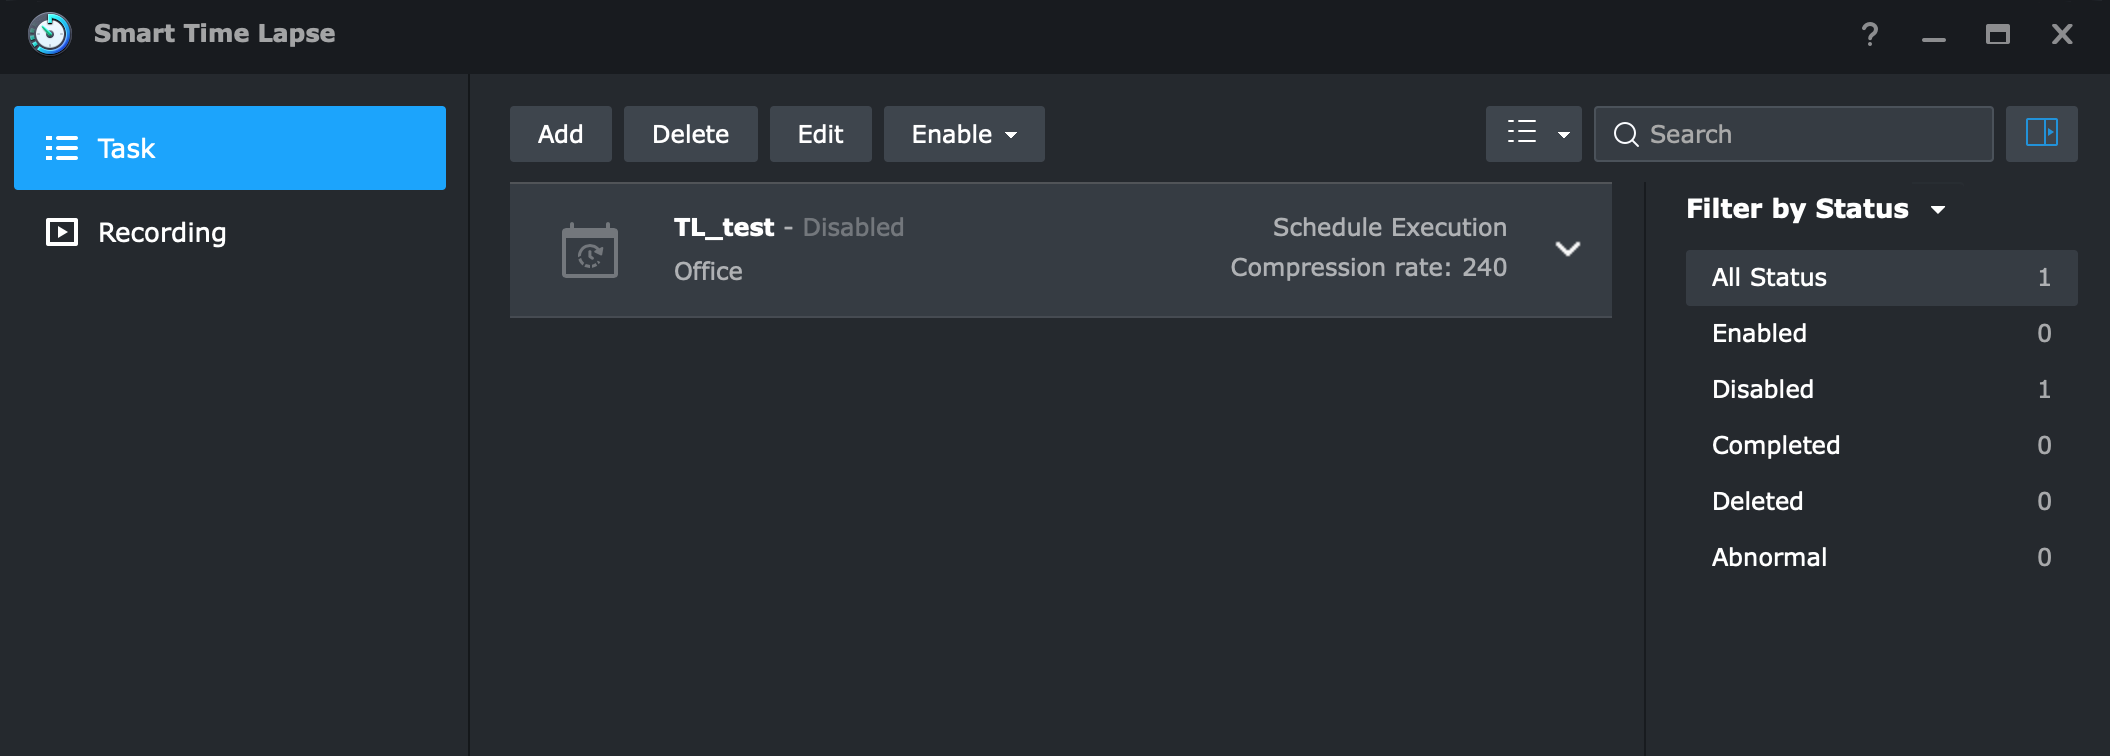
Creating a new task will involve choosing the camera and stream quality, as well as framerate, truncate, and compression ratio.

The size of the video in default settings will be about 200-500MB for about 6h of footage ending with about 1.5 min in length. Of course, this will depend on the compression ratio for the most part as well as FPS and resolution.
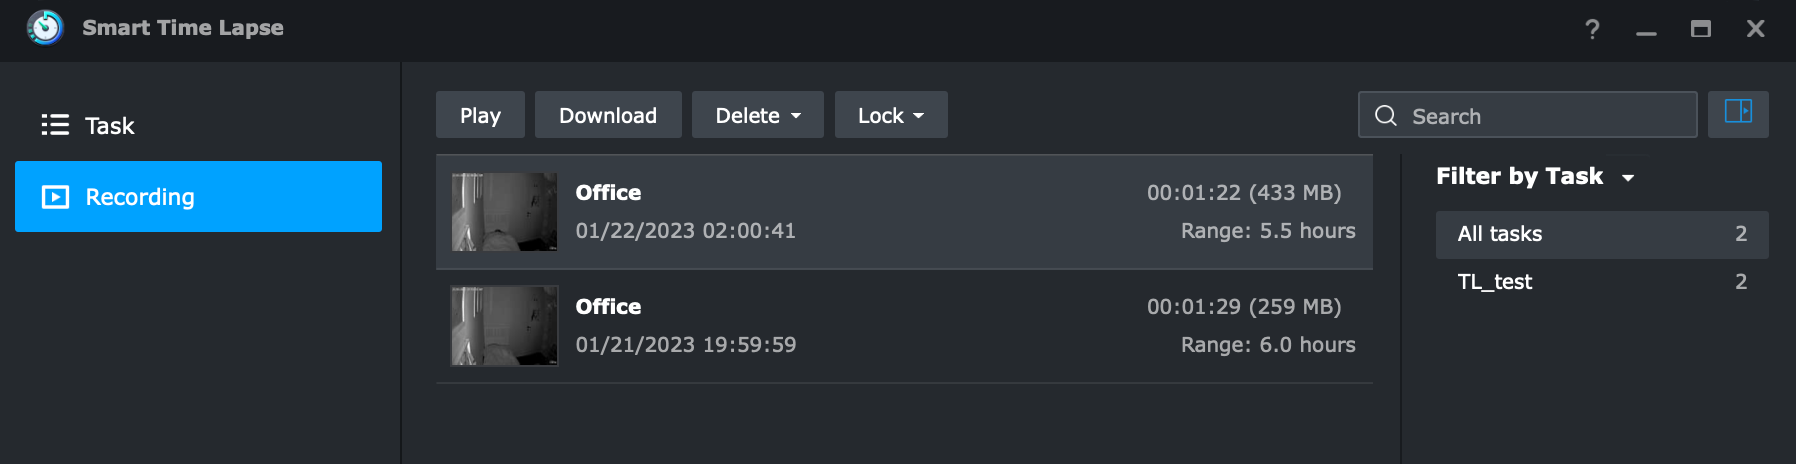
Just as with any other recording in SVS, a time-lapse one can be viewed and downloaded using the recording section inside the module window. Depending on the actual need it might be something that users will never have the need to use, but it is nice to know that it is there if needed.
: Conclusion
The DVA3221 is a great piece of hardware for what is advertised. True, it is on the pricy side but it does offer a lot and it is more than just an NVR device. It can offer all the benefits of a NAS on top of its primary usage and with a dedicated GPU capture a lot of footage at the same time.
With 32 concurrent video streams being handled by a single device, as well as 12 real-time deep video analytic tasks, this model can do what no other in the lineup can. Its ports on the back will offer both expansion options and network redundancy making it also very resilient in terms of any potential downtime.
Hardware was always useless without the software and while DSM plays an essential role, it is Surveillance Station 9 that takes the win here. Even if it will be used in personal protection and security setup, the SVS offers a lot of features. In these two articles, I have covered a fraction of its possibilities but still managed to touch on all the major ones. These features and many more would come to even more light if used in a corporate and professional setup, but these tests were not focused on that.
It is good to see that some advanced features like face recognition and people counting for example are also possible on much smaller and cheaper devices like the new DVA1622, but if you are in a marker for a device offering a lot more horsepower, more concurrent streams, as well as more bays (with possible expansion), then DVA 3221 is still the best Synology can offer.
In the next half of 2023, new Synology cameras will arrive so it will be interesting to see if SVS will evolve with those as well.
In the meantime, I hope the articles were interesting and informative, so let me know in the comment section below if there are any questions on this or any other topic!