WebGrabPlus - self-hosted EPG via Docker

While back, I have written about a popular topic today, cutting the cord. Now cutting the cord means that you are shifting your method of over the air content (or cable) to a single device in your household that will then offer you the option to stream it to any device you want and not just your TV.
In this guide, I will explain how to set up and configure one key element for running your live tv in a self-hosted environment, EPG, or electronic program guide.
There are multiple ways you can run your cut the cord scenario and I chose Plex as my platform of choice. To make this work with Plex you will need a compatible LAN receiver that will be able to broadcast itself on your local network and that way be configured inside Plex so you can use it's LiveTV feature.
But before all that, you will also need a functional EPG, because without it you will not be able to get the grid layout of what's on the air or what's next in line. Of course, if you are using a compatible device and you are located in the country that can broadcast EPG then there is no problem. But what if you are running a virtual receiver with a custom channel source? In that case, you will need a custom source of EPG to complete your setup. Let's see how this can be done via Docker using a popular self-hosted platform, WebGrabPlus.
What is WebGrabPlus?
In a sentence, it is a multi-site incremental xmltv EPG grabber. It collects tv-program guide data from selected tvguide sites for your favorite channels.
Great that's what we need. Before we begin, keep in mind that this is not a web application, so you will not get any visible output in a browser. For this to work you will have to know to maintain it from a command line or a file explorer of some sort.
Considering that we are hosting this on a NAS, most of the time I will show how to maintain your configuration via Midnight Commander application but you can do the same using File Station on your NAS or simply edit the files in your text editor of choice and then upload the files back to your NAS.
STEP 01 - download the Docker image
In my case, I use linuxserver/webgrabplus image. Download it using Synology Docker UI, or using the command line:
docker pull linuxserver/webgrabplus
Keep in mind that all docker commands via SSH need to be done as root account. So log into your NAS via SSH and elevate your credentials to root (using sudo -i) or simply type sudo before any docker command
Once the image is downloaded let's create a container.
STEP 02 - create webgrabplus container
You can create the container using Docker UI on your Synology NAS or you can run it via docker run single command line. I will show both examples here starting with the command line.
Command-line container creation
After you have logged into your NAS via SSH (using Terminal, or PUTTY apps), you will need to elevate your credentials to root. To do that (as I wrote before) run the following command:
sudo -i
and then hit return. You will be prompted for a password, and just as before, enter your current user DSM password. Now you will be logged as root user and your command prompt will look something like this:
root@NAS:~#
Now run the following docker run as a SINGLE line. Make sure to delete all the \ characters at the end as well as all the breaks and leave a single space instead. Of course, you can do this after you have changed all the configuration settings.
docker create \
  --name=webgrabplus \
  -e PUID=1000 \
  -e PGID=1000 \
  -e TZ=Europe/London \
  -v path to config:/config \
  -v path to data:/data \
  --restart unless-stopped \
  linuxserver/webgrabplus
Keep in mind that you will need to change PUID and PGID values to match your own. These are IDs that describe your user and group that your DSM account is a member of. Meaning your account that you want your webgrabplus to run under. To get those values, before running this whole docker create command, open another SSH session as your default DSM user, and DO NOT elevate to root. Simply run:
id
and you will get your current SSH logged user values, similar to these one:
rusty@NAS:~$ id
uid=1029(test_user) gid=100(users) groups=100(users),101(administrators)
rusty@NAS:~$
Now in this example PUID would be 1029, and PGID (considering we want admin permissions) would be 101. So be sure to use those similar values in your docker create command.
TZ variable will be set in this exact format (continent/city) depeding on your location.
Last, we need to configure two-volume mappings. Config and data. These are the folders that you will need to crate and map to the correct location on your NAS. So for example, let's say that you have a docker folder on your NAS (if should exist if you are running docker on your Synology NAS). Inside it create a root folder for your webgrabplus, let's say it is called wgplus.
Now inside that folder create two more folders, config and data. To complete this docker run command line your volume paths should now be something like his:
-v /volume1/docker/wgplus/config:/config
-v /volume1/docker/wgplus/data:/data
The config folder will host all the files and folders needed for WBPlus to run and the data folder will host a single guide.xml file that will be your final EPG file.
Docker UI container creation
If you prefer to create your containers using the docker UI via the web browser, follow these steps.
01. download the image
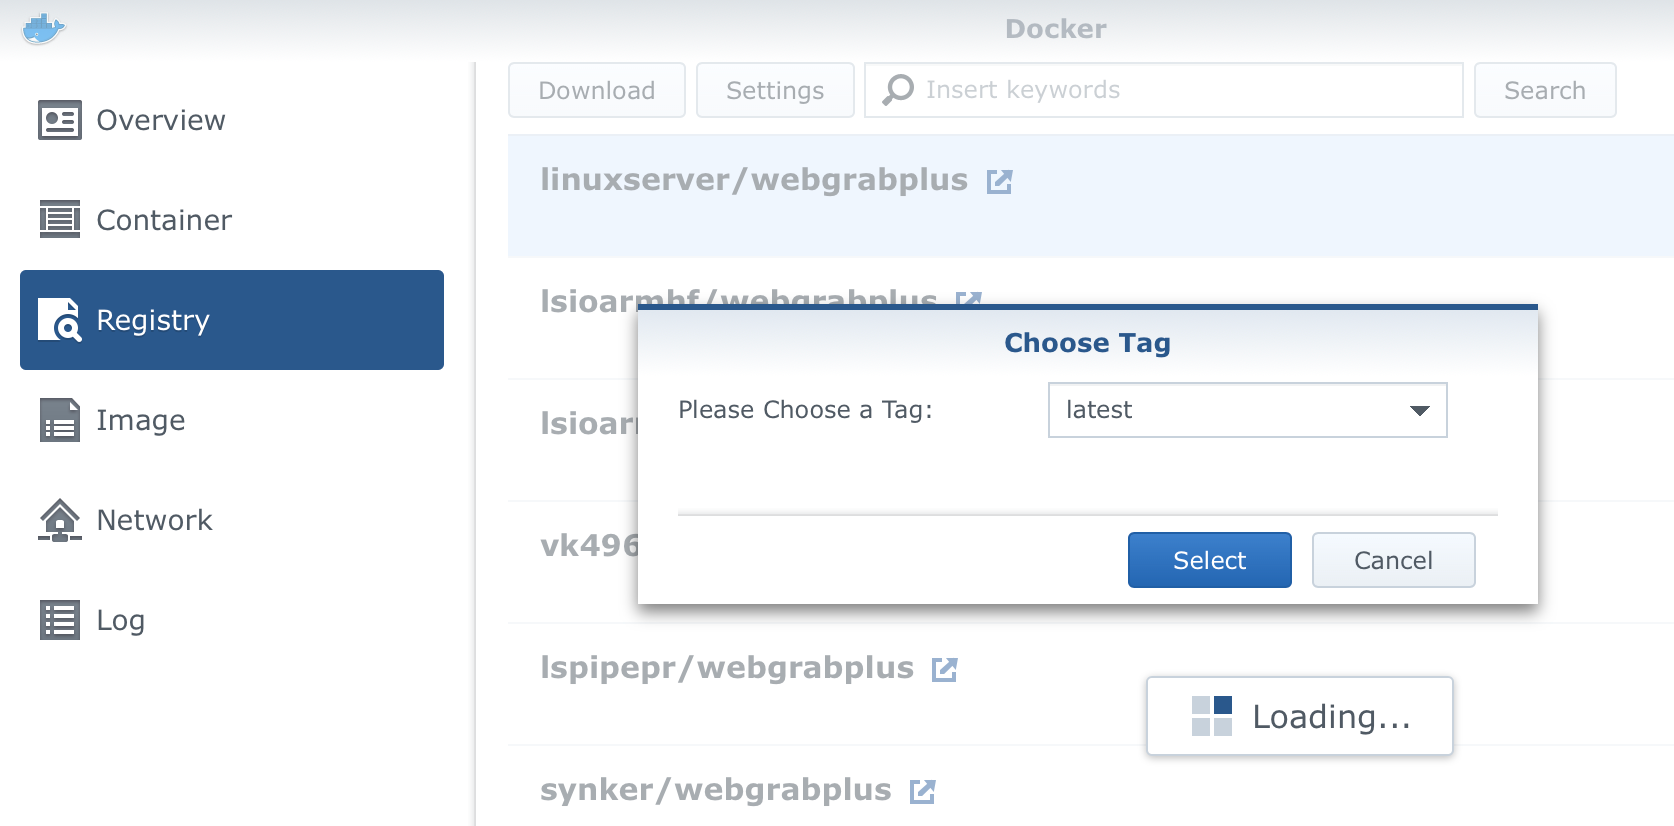
So click in the Registry menu on the left-hand side and then using the search bar find WBPlus by linuxserver. Click the Download button and selecte the tag (version), in this case, the latest.
02. create the container
Once the image has downloaded, create the container by using the Image tab.
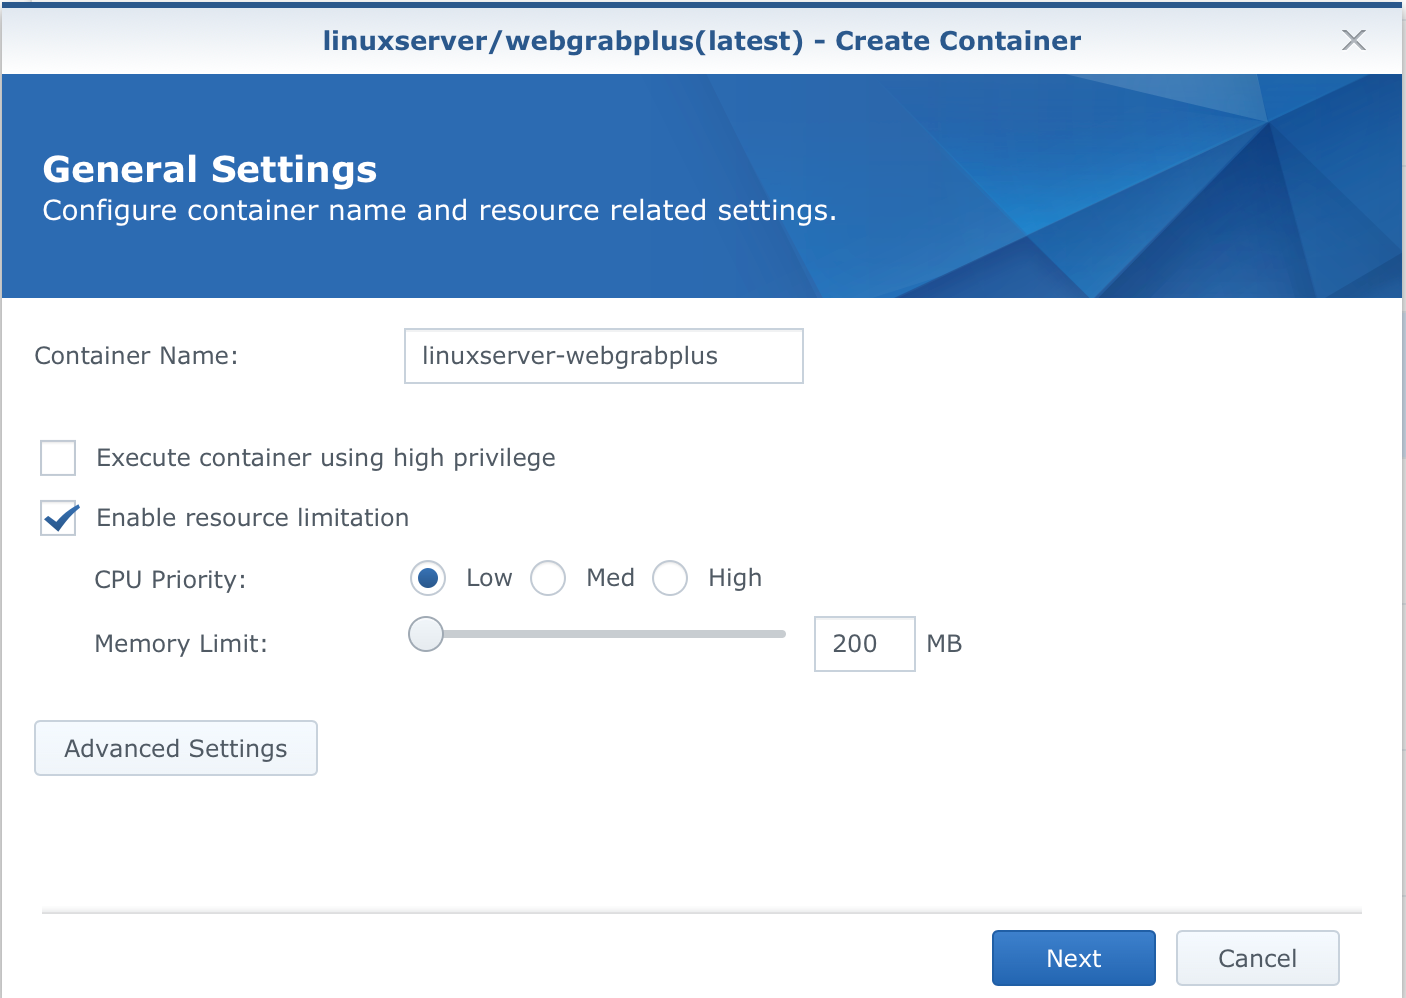
Set the container name, resources, and then be sure to click on the Advanced Settings button.
You will get a dialog box that will have six tabs (Advanced settings, Volume, Network, Port Settings, Link, and Environment). I will post steps and images only from the tabs that need to be changed.
Now we will go in order and the first one that needs change is the Volume tab.
As I mentioned before you will need to have local NAS folders created beforehand, so make sure that the folder structure that I spoke before already exists.
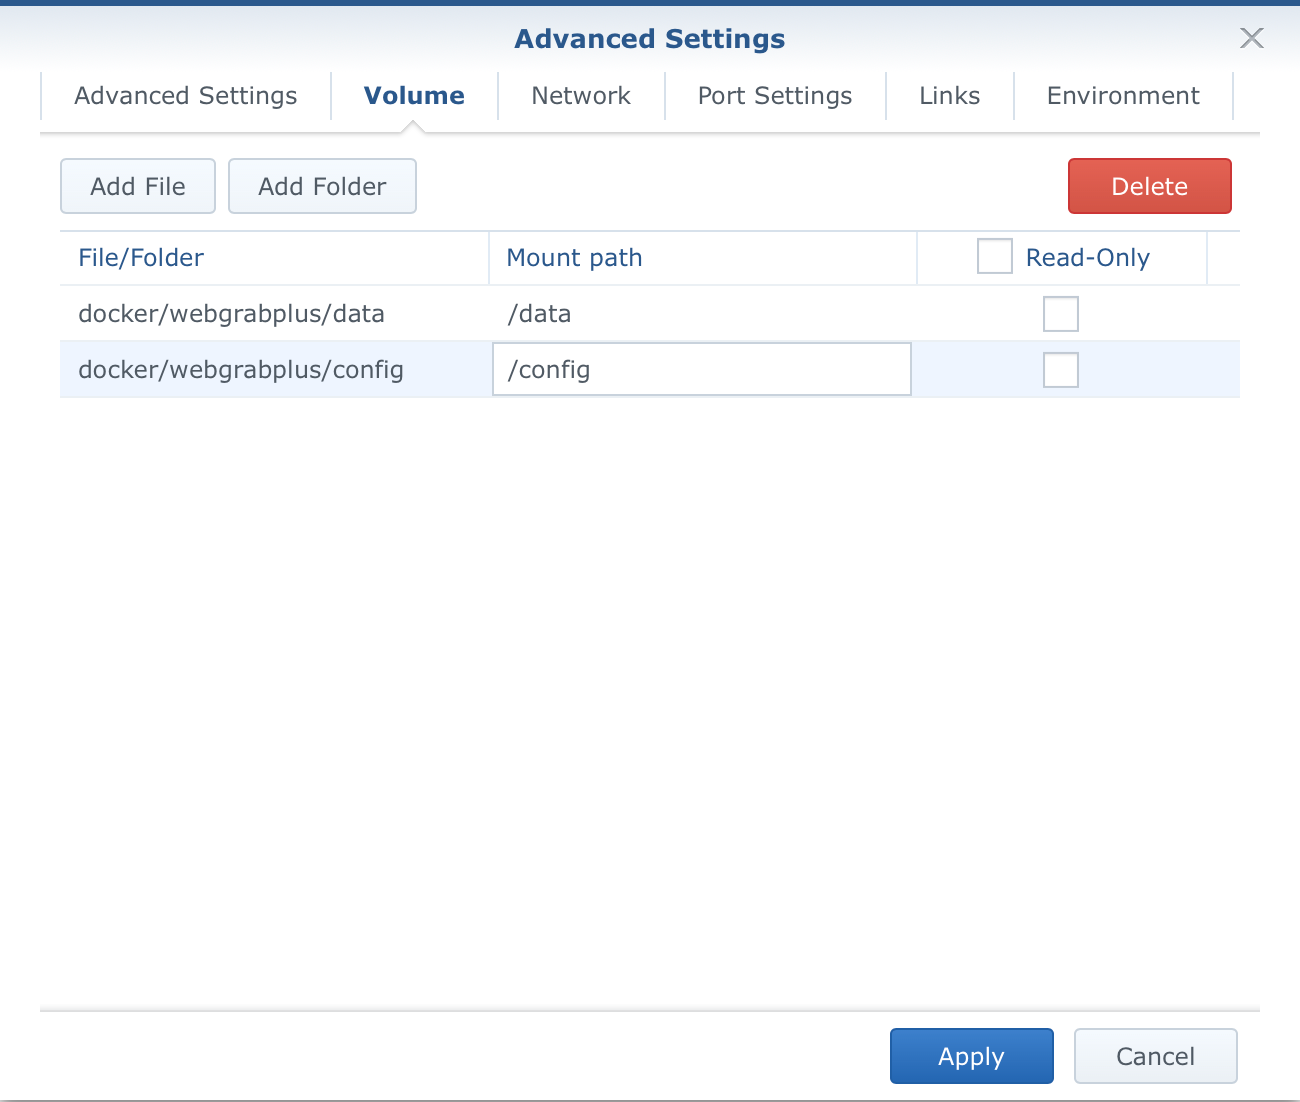
Using the Add folder button, navigate to your config and data folder, and then manually enter the values in the Mount path column.
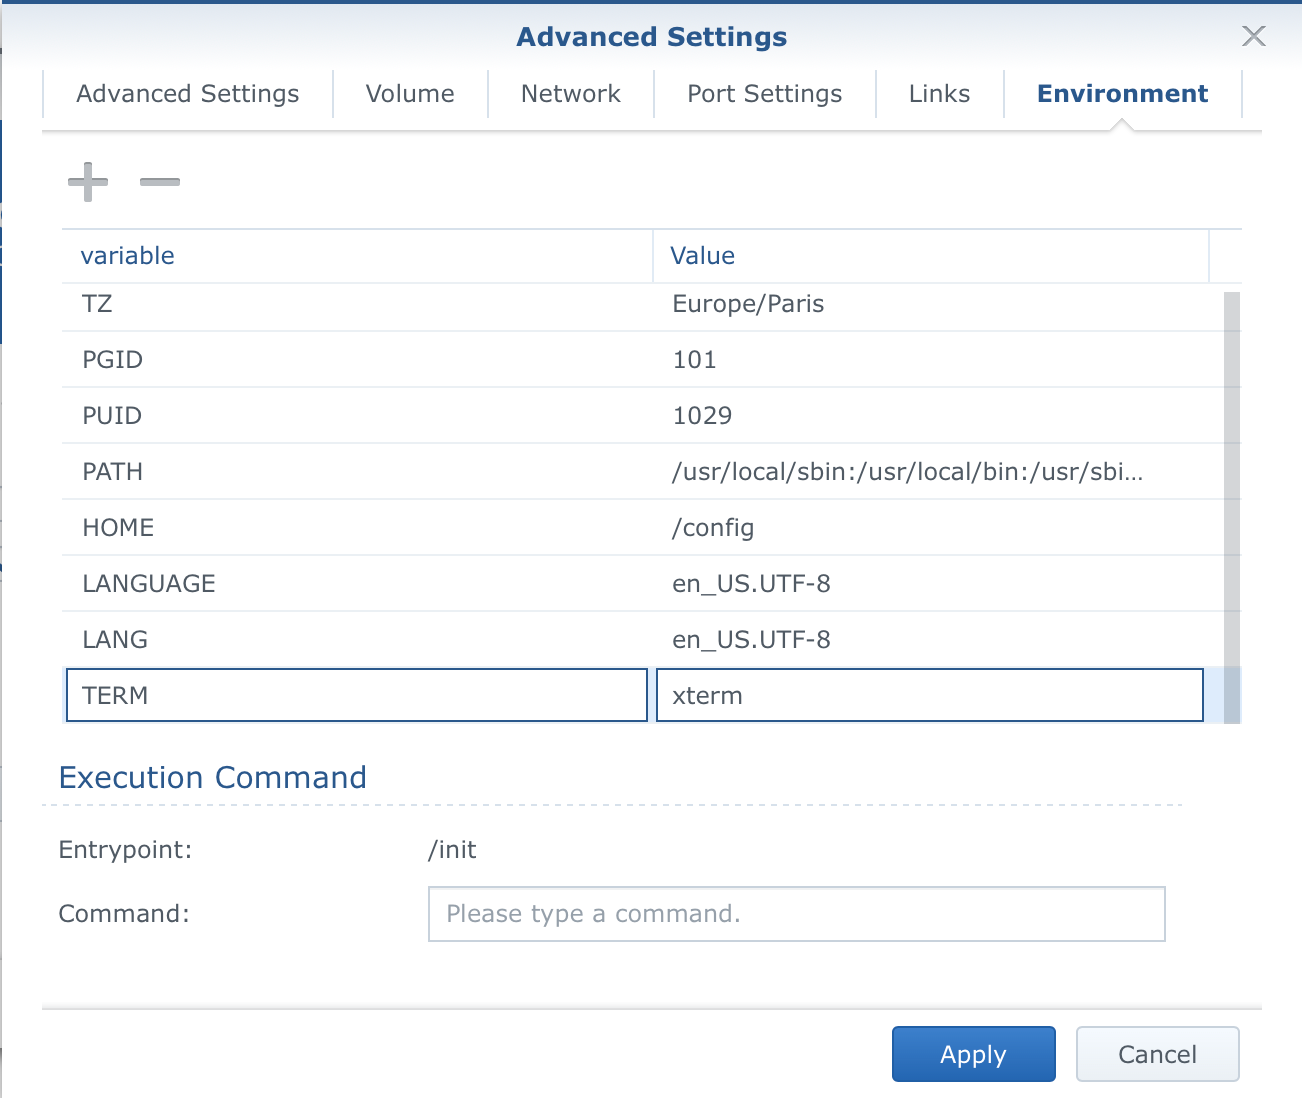
All that is left now, is to configure three variables, PUID, PGID, and TZ. Use the '+' symbol in the upper left corner to create a new variable and enter its name while putting the value of the variable in the right column, named Value, similar to the image above.
Once all that is done, click Apply and you will be be back at the main create container window. Now click Next and you will get a summary of your container configuration.
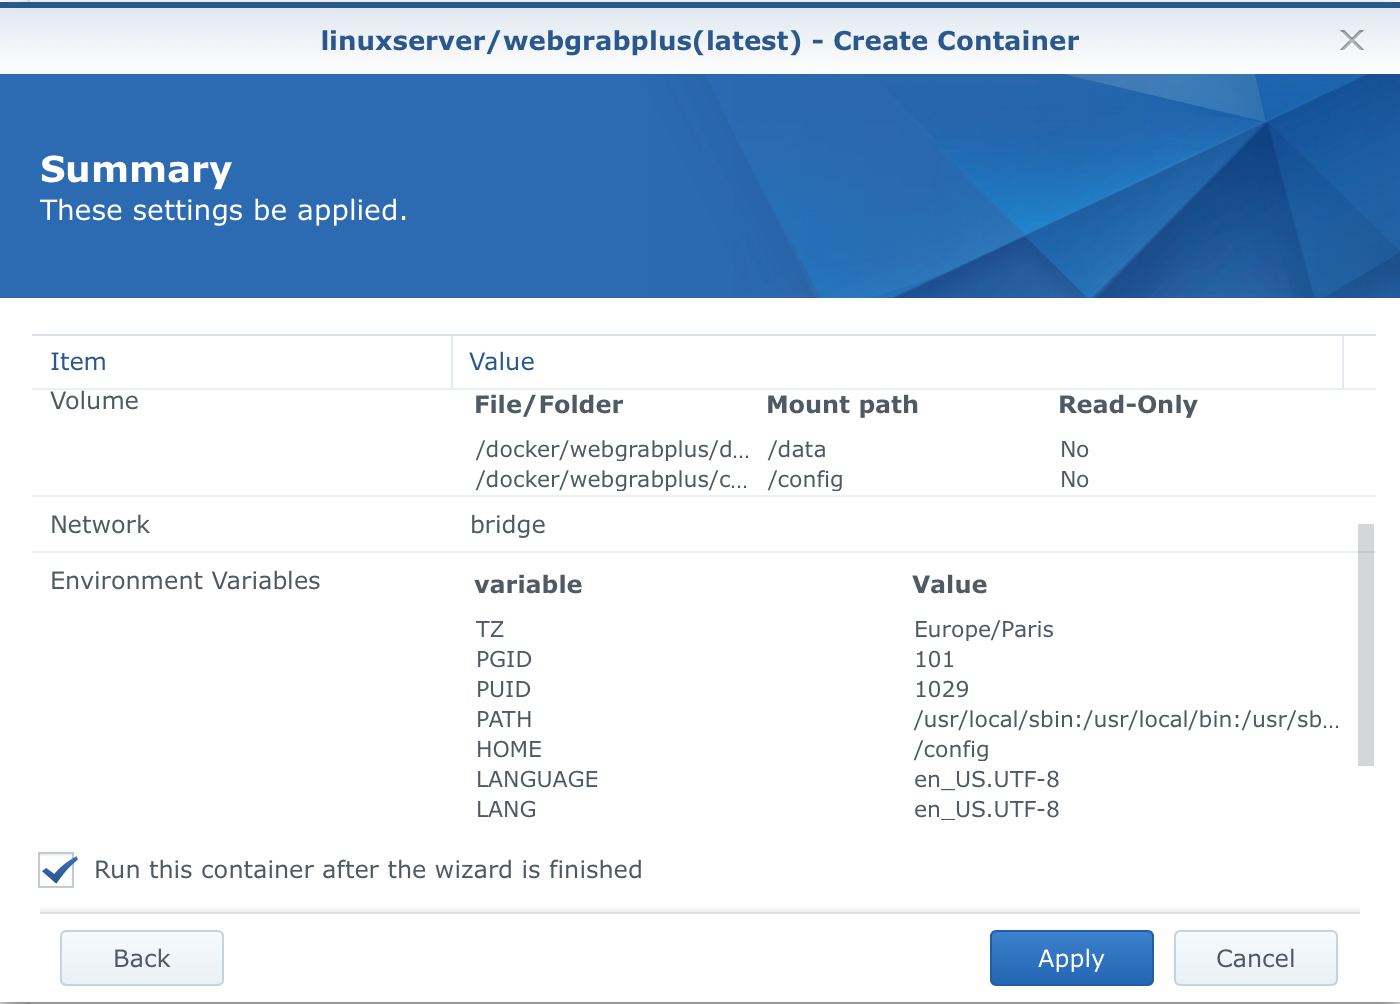
Note that the "Run this container...." checkbox is checked. As soon as you click Apply, the container will be created and it will run. You can then verify that it is running using the Container tab.

Now that we have it up and running it is time to configure your WBPlus instance.
STEP 03 - configure webgrabplus instance
As I said before, this is not a web application so all configurations will be done using your favorite text editor, simple copy-paste commands, and several reboots of your container.
Open up File Station on your NAS and go to your WGPlus folder. The folder structure should look like this:

Most of the files here you will not modify, but there are a few you will need to. Those are WebGrab++.config.xml and wg3-cron.
Now just to make things clear I will not spend too much time here considering that now we are talking about WGPlus configuration and its settings and their web site has a great documentation wiki regarding this.
So, in short, open up the XML file in your favorite text editor (you can even use the one on your Synology, Text Editor) and edit the file.
The main sections that need to be modified here is this one:
  <filename>/data/guide.xml</filename>
  <mode></mode>
  <postprocess grab="y" run="n">rex</postprocess>
  <user-agent>Mozilla/5.0 (Windows NT 10.0; Win64; x64) AppleWebKit/537.36 (KHTML, like Gecko) Chrome/79.0.3945.130 Safari/537.36 Edg/79.0.309.71</user-agent>
  <!--<decryptkey site="site-name">decrypt_userkey</decryptkey>-->
  <license wg-username="username" registered-email="your_email" password="access_code">f</license>
  <logging>on</logging>
  <retry time-out="5">4</retry>
  <timespan>7</timespan>
  <update>f</update>
In this main section, you will find the license tag that needs to be edited with your WGPlus username and password as well as your email.
NOTE: some tv channel sources will be encrypted and in order to use them you will need to pay a small €5/year donation in order to get access to those
Also, the timespan tag is something that will need to be edited. Enter the number of days that you want you EPG to cover. In this example, it is 7 for a seven-day guide. Keep in mind that most channel sources have a maximum of 14 days so don't go crazy here.
Finally, on the bottom of this XML file, there is a dummy list of channels as an example. Replace those channel tags with your own custom list that you want to build your EPG upon. That's it! You are done.
Well, actually one more thing. I did say that you will need to configure two files in your configuration folder. Depending on how often you want your WGPlust instance to go online and collect your data you will need to configure a cron job timer using the wg3-cron.
Keep in mind this is a file with no extension! So if you edit it in a text editor be sure to not save it a txt file or any other format for that matter!
Its content is a single line that will tell WGPlus instance when to run. In my case, I have it running every 12 hours, but you can edit the parameters using https://crontab.guru/examples.html to see what setting will fit your needs.
0 */12 * * * /bin/bash /defaults/update.sh
After you have changed and configured your WGPlus instance it is time to reset the container for these settings to take effect.
Now what?
Now that you have configured your WGPlus instance you will be able to check its progress and any problems using the WebGrab++.log.txt file located also inside your config folder, so keep an eye on it.
Once the process is complete and you get your EPG, check the data folder and you will see a file called guide.xml. This is the file that you need to configure to work with your IPTV platform of choice or Plex Live TV. Be sure to have it up to date because Plex doesn't like it when there is no data inside it (your whole grid view will be empty).