Tornote - self-destructing note platform

UPDATE: After some comparison, I would suggest using PrivateBin over Tornote
Considering that nowadays security and privacy is most important it is not strange that there is a larger number of tools that will help you to achieve that. Today I would like to focus on a new (a few years old) solution that you can self-host on your Docker platform.
It needs to be said that the project has not been abandoned but it is not actively in development. As a result, it is one of the most simple solutions but also as much as it is missing some features that other platforms have, this solution can work in its current state.
Tornote - this message will self-destruct
Developed by @osminogin over at Github, you can customize this solution yourself or simply download it from Docker Hub. Would like to point out that the documentation for this project is only available on the Git site but even there it might take some time for you to get it up and running. Reason why I am writing this little tutorial for it.
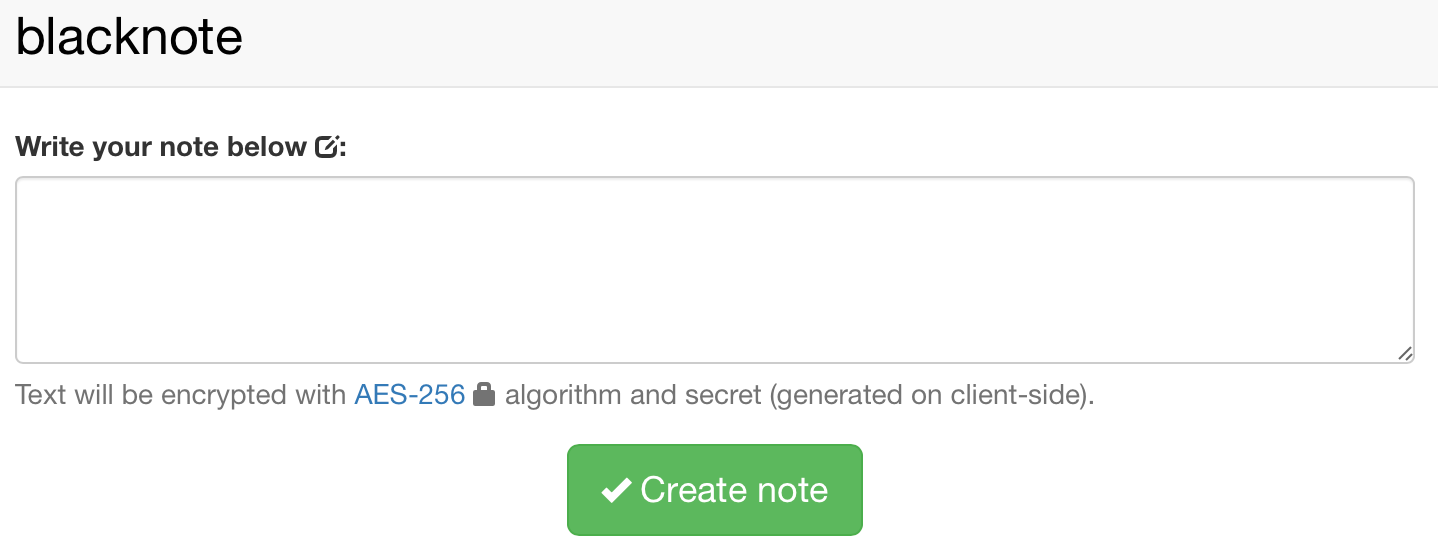
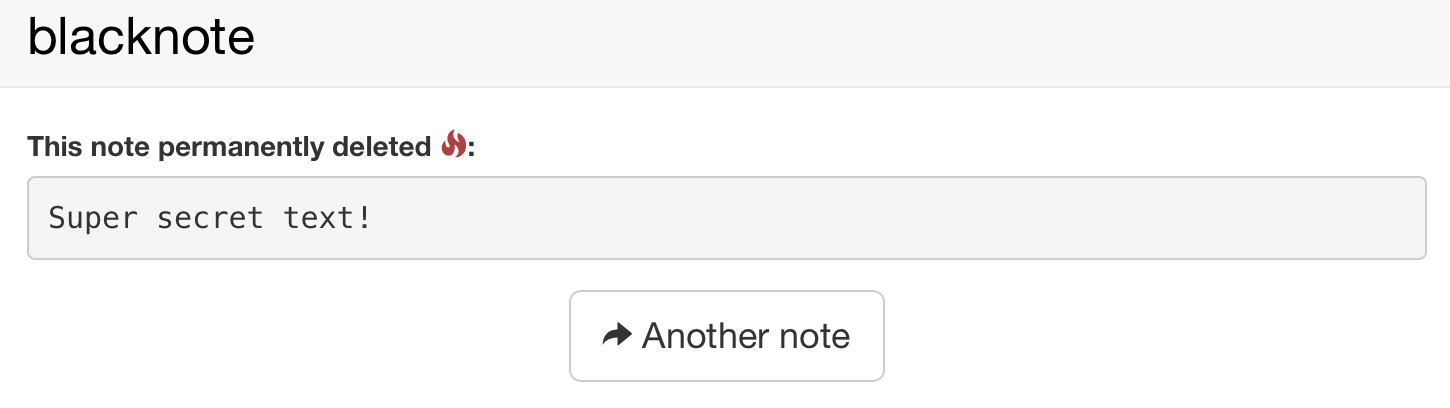
So what is Tornote? It is a simple web app that uses AES 256 client-side encryption to generate a one time URL that upon visiting will display the message and also destroy it. Unless you have copied the content of the message or took a screenshot, it will all be lost.
Now, why would you need this in the first place? Well, there are several reasons for these kinds of solutions. Exchange of sensitive information would be one thing that comes to mind (passcodes, for example). What's sensitive information depends on your point of view so let's leave it at that.
Before we continue forward, know that there are multiple solutions out there, some are publicly open as well, some are free some are not. Most of them have a bit more features that they offer, but this solution might get some love in the future as well.
So why tornote? Even though it lacks some user-friendly features it does offer AES-256 bit encryption that some of the other solutions don't (running on 128 most of the time). Considering that privacy is key here, the stronger the encryption, the better.
Let's dive right into it.
NOTE: Before you continue, keep in mind that you will need to have a functional PostgresDB instance with a DB and username/password with read/write permissions on that DB for this solution to work
Check out this article on how to run PostgresDB instance. Skip to the section called PostgreSQL container
I will focus on the simple Synology Docker UI tutorial for the most part in the following steps but for users out there that are familiar with Docker and do not run Docker on their Synology box here is a quick docker run command line.
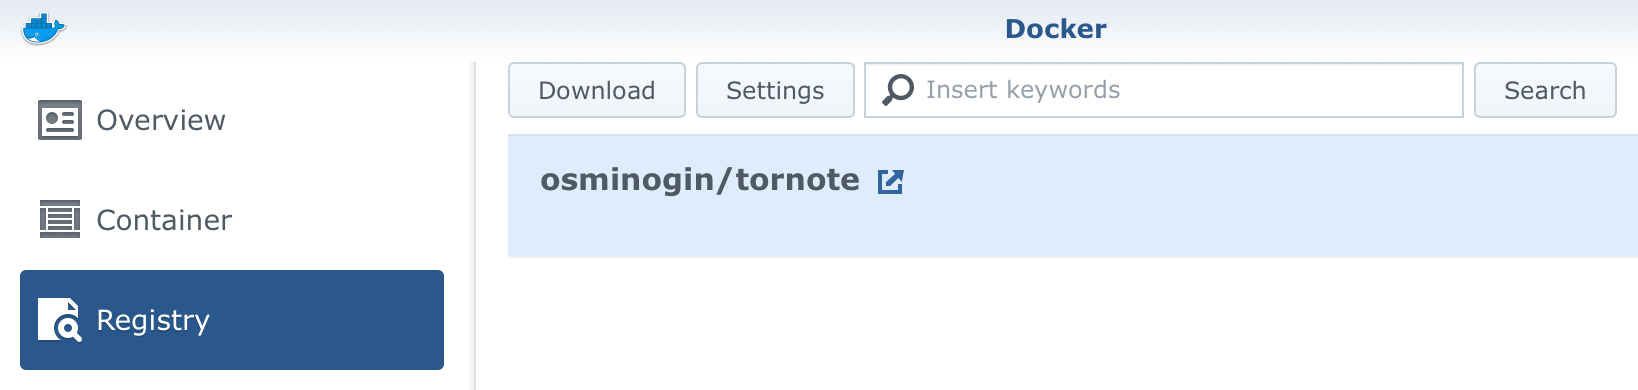
First pull the image
docker pull osminogin/tornote:latest
Then run it
docker run \
--name=tornote \
-p 8000:8000 \
-e DATABASE_URL=postgres://username:pass@NASIP:5432/DB_name?sslmode=disable \
-e SECRET_KEY=0123456789 \
-e PRODUCTION=true \
--restart unless-stopped \
osminogin/tornote
Make sure to edit all the variables with your parameters to fit your set up. After this is up and running jump to STEP 03 of this article to see how to set up this running behind Nginx on your Synology, or just configure it to run behind a custom reverse proxy. The reason is that this will not work as intended if it's not behind an https protocol (for production usage that is).
PRODUCTION variable needs to be set to TRUE for this to work via https. Key variables can be a combination of letters, numbers, or any combination you want (this is just an example).
STEP 01 - download the image from hub
STEP 02 - create container
Jump to the Image tab in your Docker UI, find the image and click the Launch button.
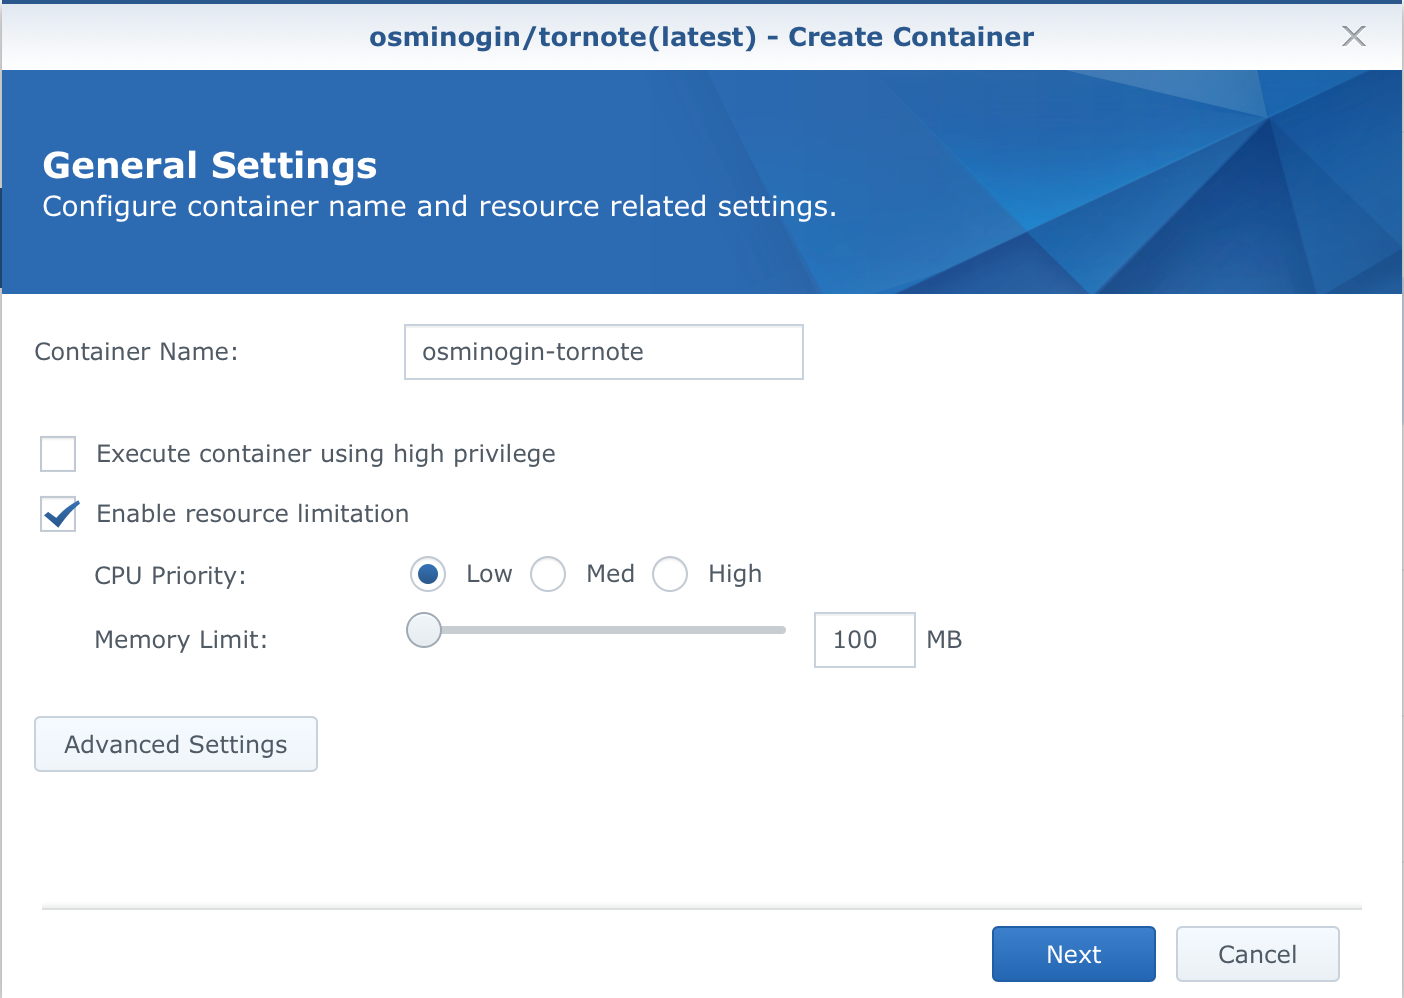
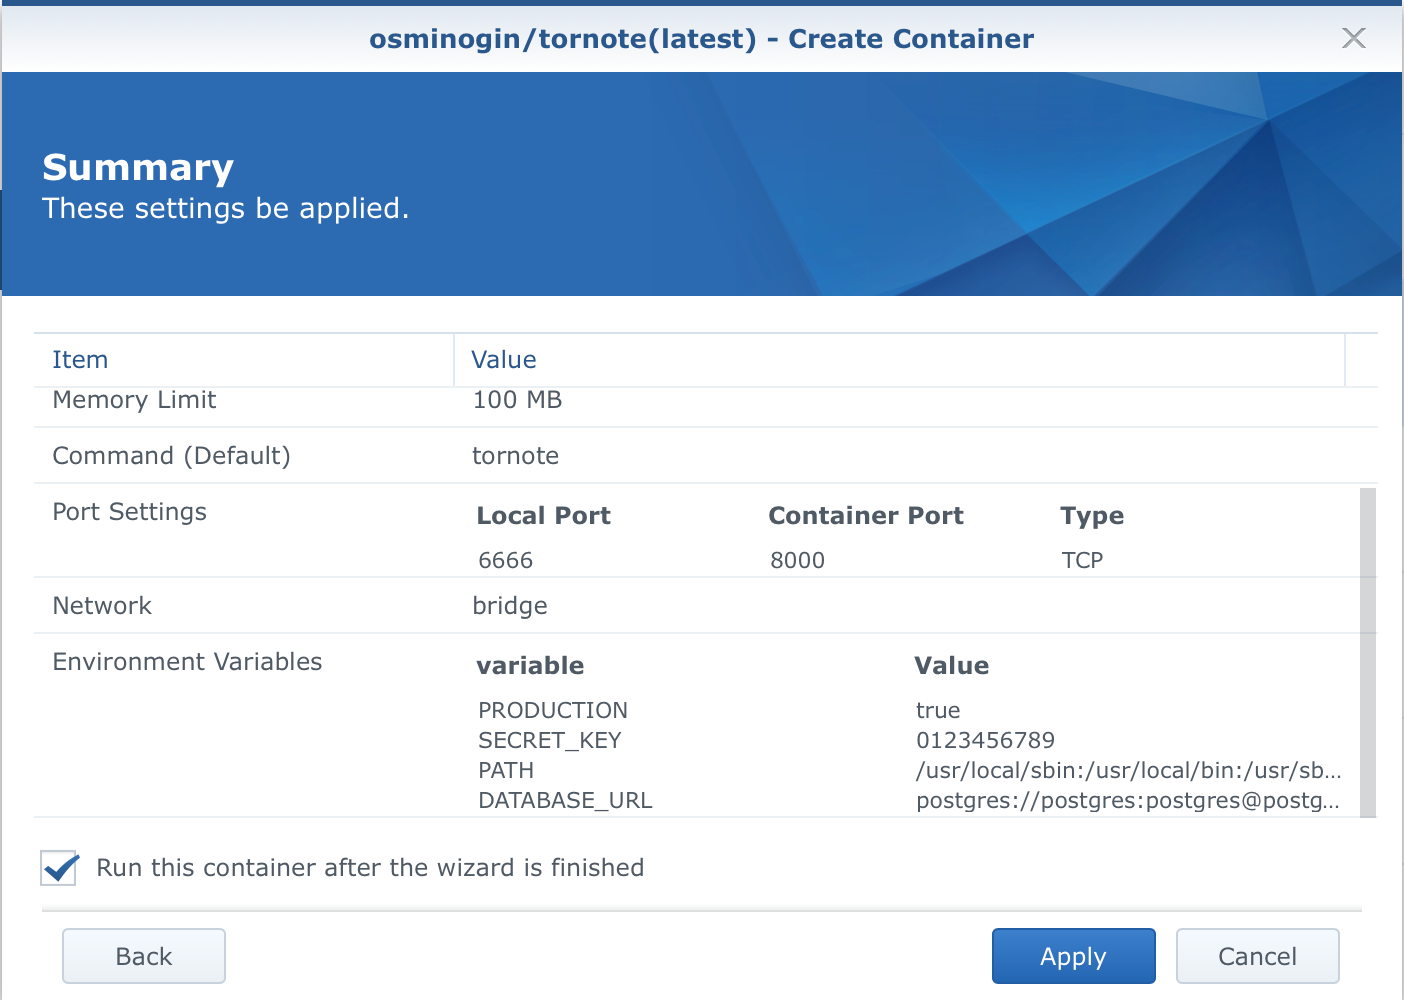
After you name your contaianer and set the resources, click the Advanced Settings button.
Two things need to be configured here. Port Settings tab and Environment.
Set the port to your desired local port number (leave the container port on 8000).

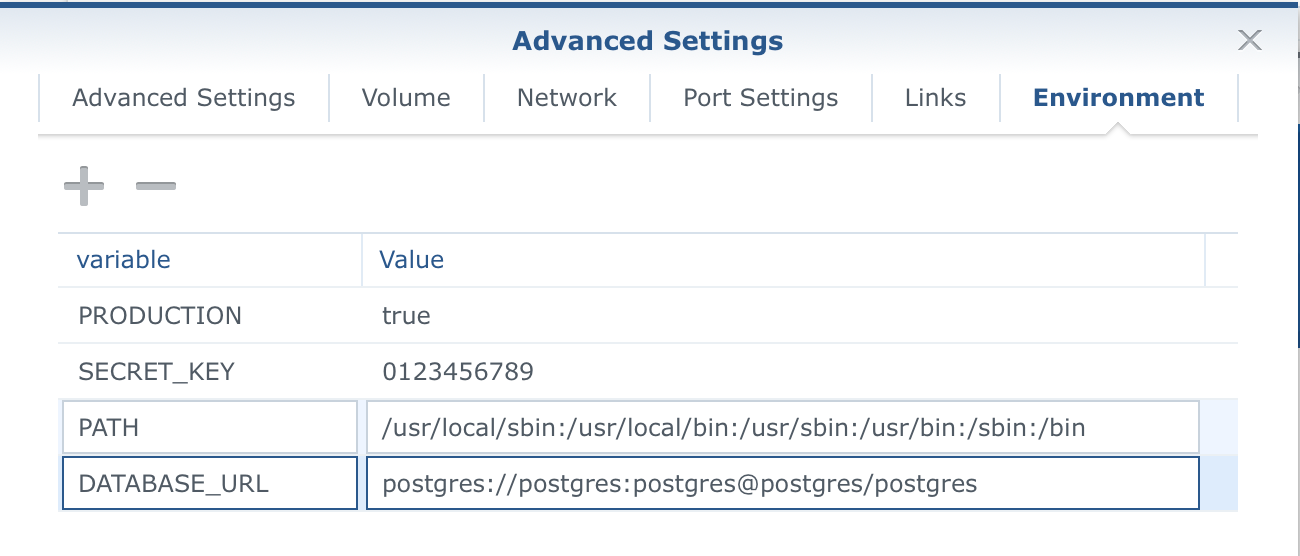
So next, you will need to configure the variables. Change the DATABASE_URL to the correct values depending on your Postgres set up and be sure to use the '+' symbol to add two more variables, SECRET_KEY and PRODUCTION.
Once you have done that, click Apply and you will return to the main wizard window. Confirm your settings and create the container.
Now you can access your Tornote using your NAS IP address and a port you have setup. The page will load but you might get 403 error when clicking the Create note button.
STEP 03 - configure it behind a reverse proxy for https access
Now to get it running via https, you will need to configure it behind a reverse proxy. More on this here.
STEP 04 - share!
Now that you have a working setup via https, you are ready to share your secrets with others!
Keep in mind that if you don't copy the information of the hidden note, you will not be able to get to it again!
Room for more features?
As I said before some features are missing that some other solutions have (message expiration, copy URL button, warning before showing the message, etc...) but in general you still have a quick and easy way to exchange simple secret messages, that are hosted on your server.
One thing to point out here that is a bug in some cases is that once your get a secret URL and you want to share it, be sure to share it in CODE or pure text format. What I mean by this is that if you share the URL in any application that supports previews (like Rocket.Chat, SLACK, Messages, Viber, etc...) your message will be deleted before you open it. Why? Because those apps will try and "access" the URL to see what's behind it, to load up any content and in doing so they will trigger the URL, read the message and mark it for deletion.
So in order to share it be sure to share it as a CODE, like this:
https://notes.supersectetsite.io/MhW0dRI9RIWlUUVlGR6uAw#wD42o6wLnhnhGYVKOwfq3E9v__E
This way apps will not trigger the URL and your message will wait for its recipient. The developer is aware of this problem and will probably fix it shortly.


