Backup Portainer with Synology C2 Object Storage

Table of content
: Preparing C2 Object Storage
: Portainer backup configuration
: Portainer backup restoration
Using Docker nowadays has become very popular but is also useful for both SOHO and enterprise users and businesses. For that reason, there are many platforms that will help in both host and container management.
One such example is Portainer. As a fan of the platform, I have done several articles here on the site on that topic.
Get started with Portainer on Synology NAS using Docker
Those articles will cover most of what is needed to get started, but in this one, I would like to point out how can we utilize a compatible S3 platform to backup Portainer's configuration.
For this particular case, I will be using Synology's very one (and new) C2 service, Object Storage.
Synology's C2 Object Storage platform
The article above explains in detail how the platform works and what is it for, so I will skip that for the moment and focus on using it as a destination for Portainer's configuration backup.
: Preparing C2 Object Storage
Before we can configure Portainer to use OS as its destination we need to make several preparations. First, make sure you have a valid account with Synology using their Synology Account platform.
Next, activate at least a free Object Storage service by going to the Object Storage portal site and registering. The free tier will give you 15GB of space which is more than enough for Portainer config backups.
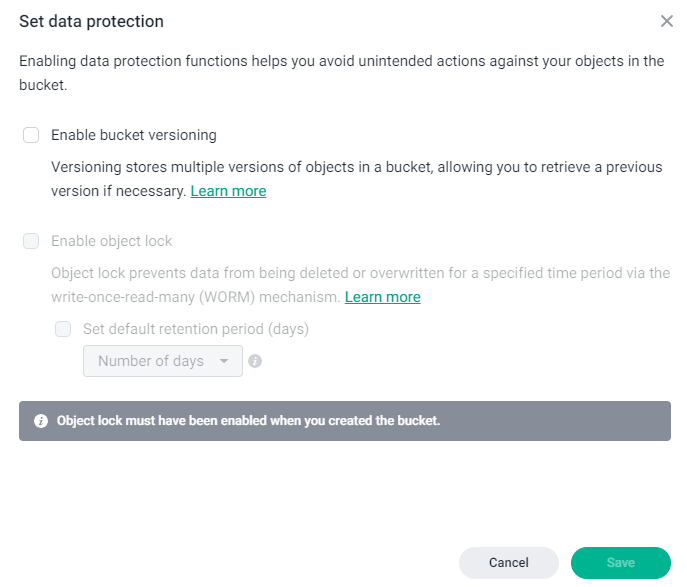
Creating buckets and access key
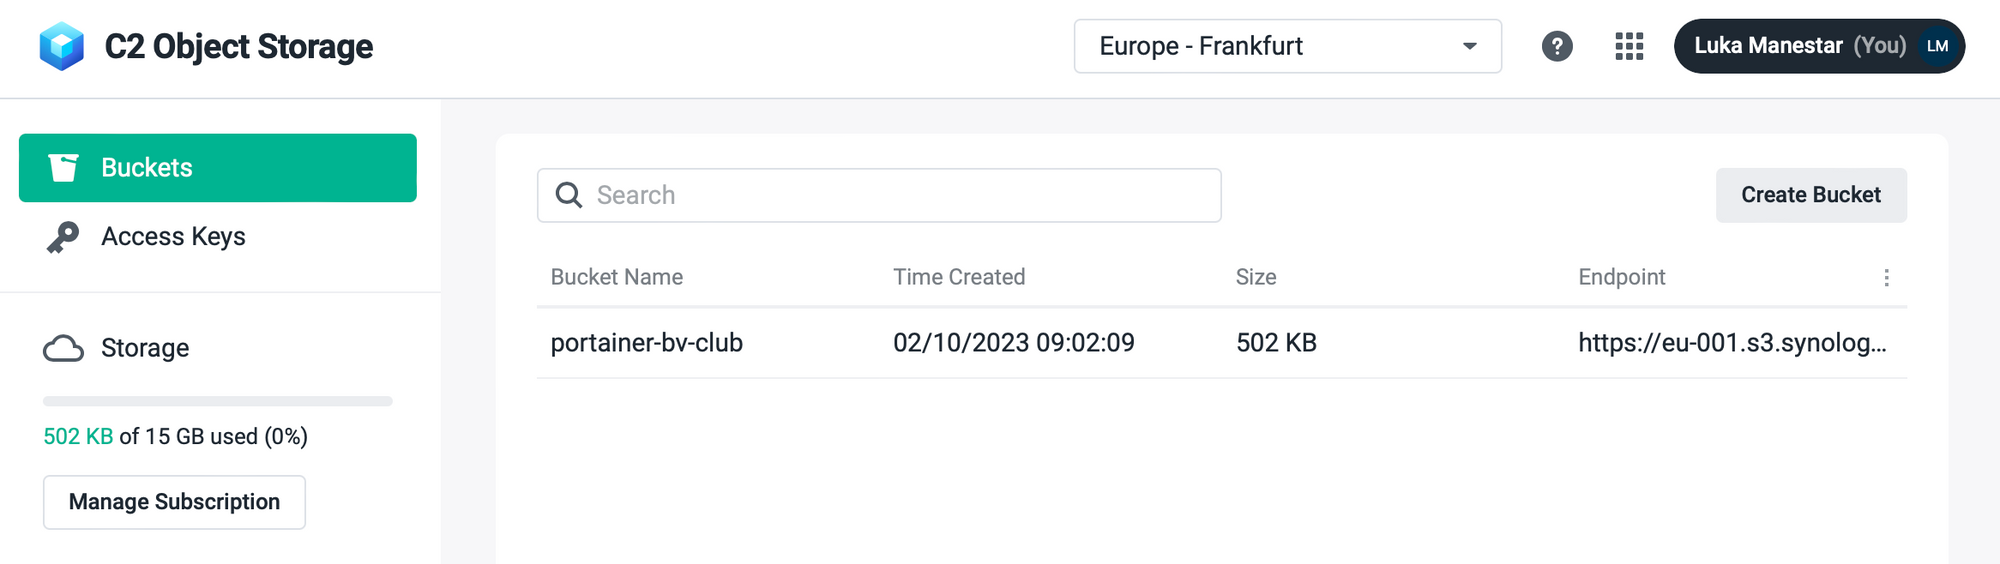
Once inside the portal, there are two things that we need. A bucket and an access key. Clicking on the Create Bucket button a short wizard will guide you through the process of creating both elements.
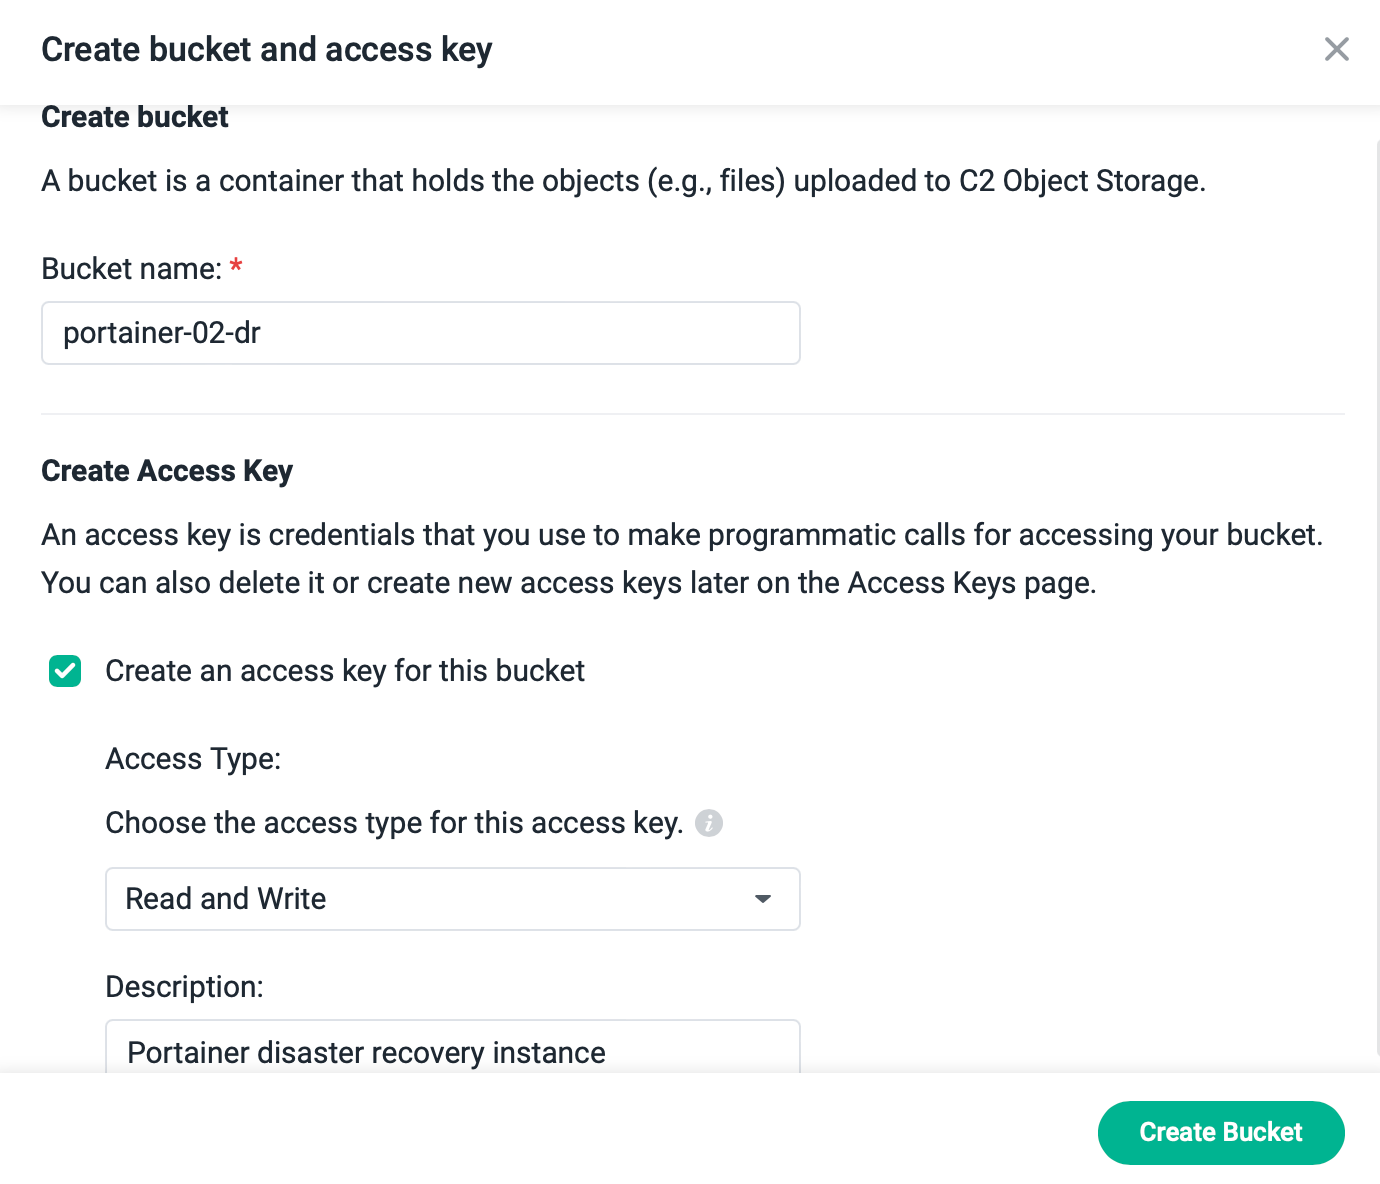
For this to work, we need an access key that has read and write permissions, so be sure to configure it as such.
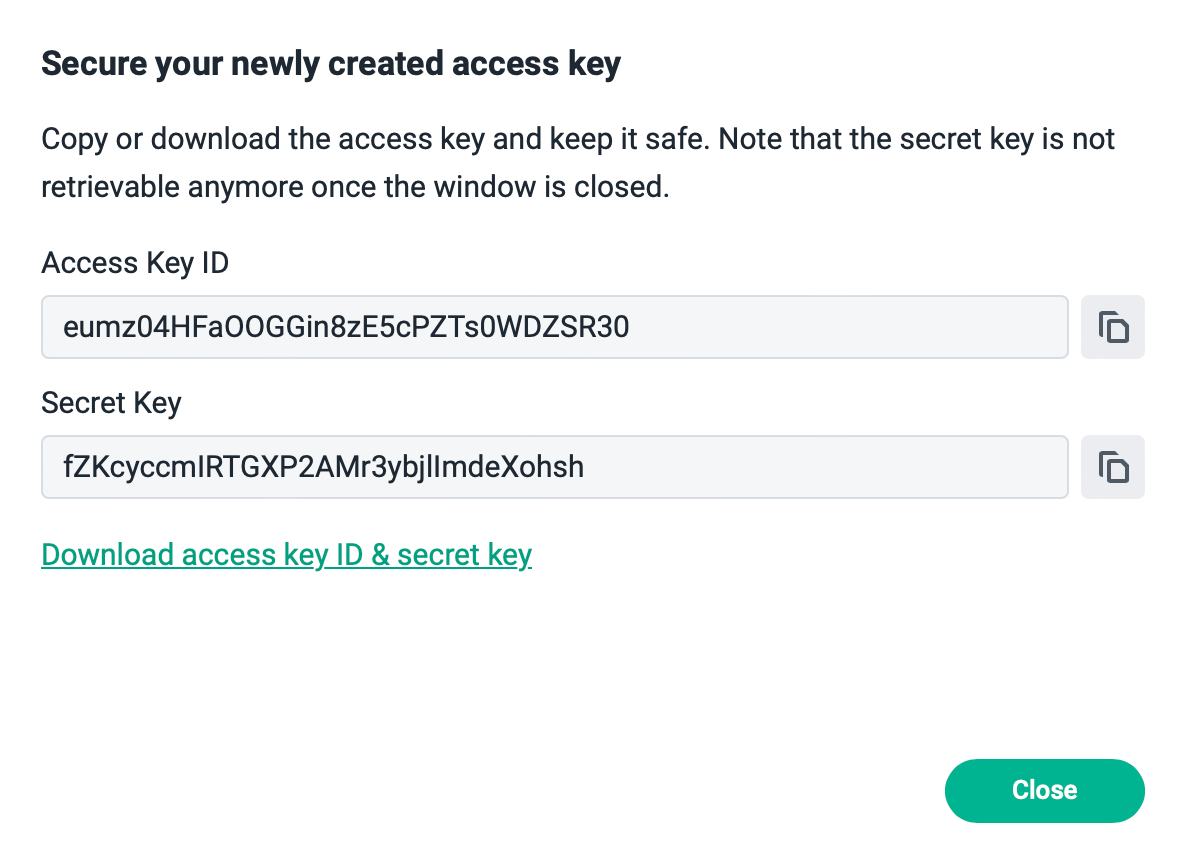
As we can see OS has presented us with an access key ID as well as a secret key. Make sure to write them down as you will need those in the configuration and restoration steps later on!
One last thing will be needed from the portal before we can go into Portainer and configure the backup process. Going back to the OS main page where the buckets are listed we need to grab the endpoint address (URL) to that specific bucket that will be used as a destination.

Alongside the endpoint address, we will also need the bucket name so make sure you know it.
So, a short recap. Four elements in total are needed to make this work and the previous steps have produced them:
- Bucket name
- Access Key ID
- Secret Key
- Endpoint URL
Now we can move into Portainer and start the backup configuration.
: Portainer backup configuration
With the previous elements in place, let's log into Portainer and go to the Settings portion.
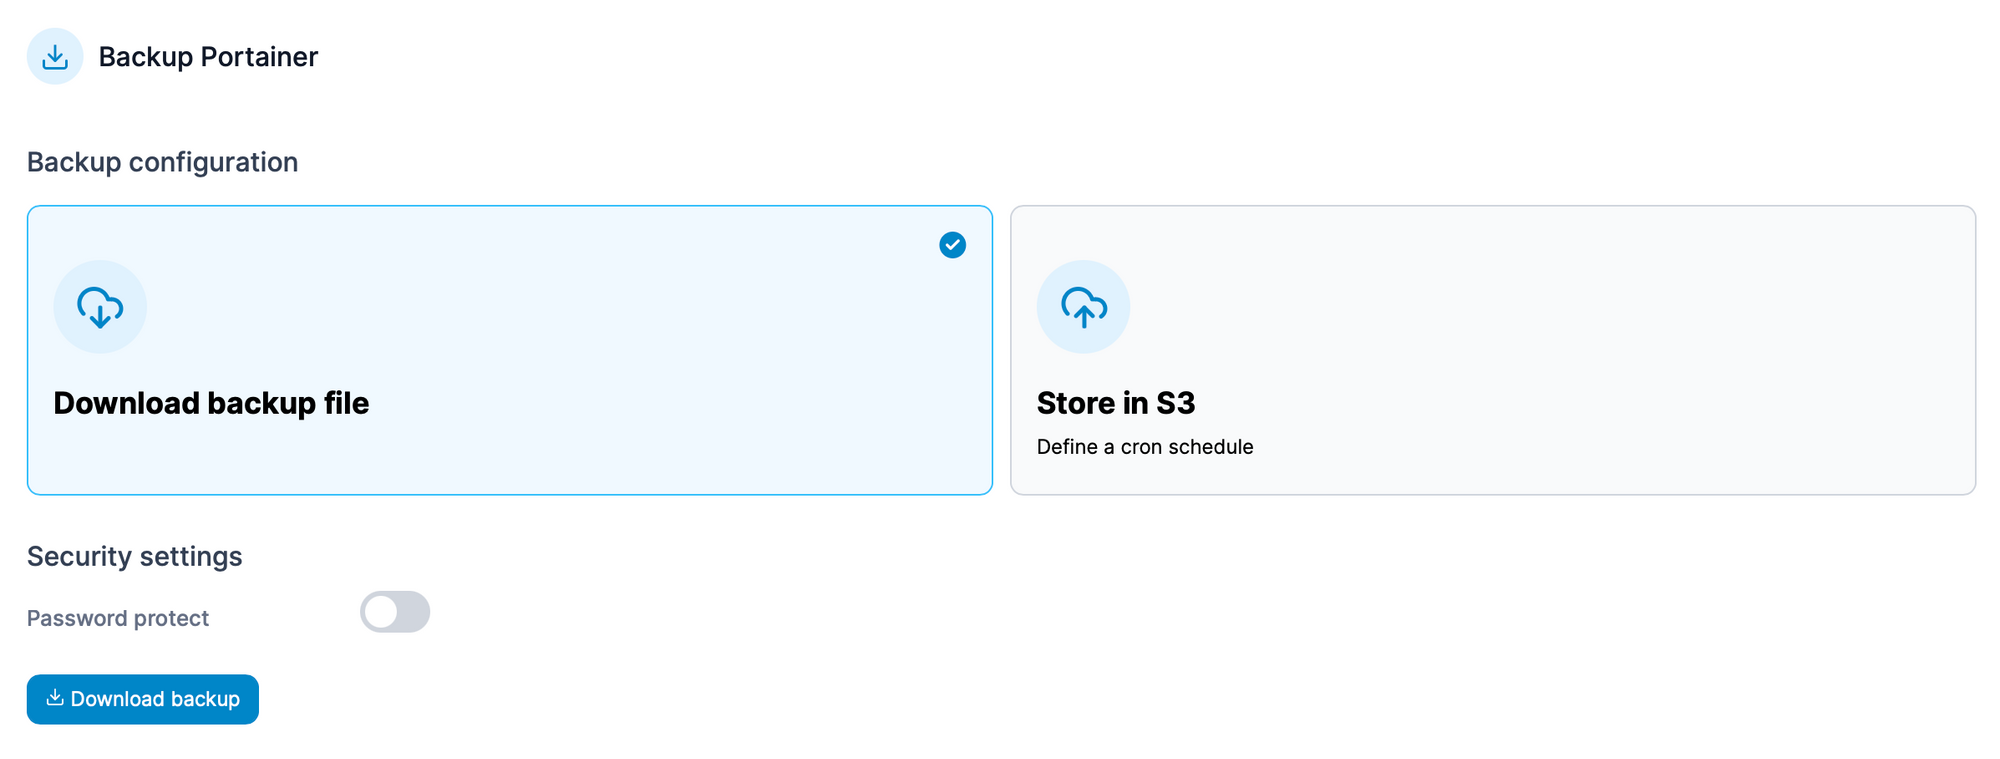
At the bottom of the Settings, there will be a backup portainer section. As we can see at any point we can manually make and download a backup using the Download backup file option on the left. While this is fine, we want to prepare for any possible disaster scenario so backup has to be configured as a task to be triggered automatically and saved on a remote location.
This is where the Store in S3 option comes in.
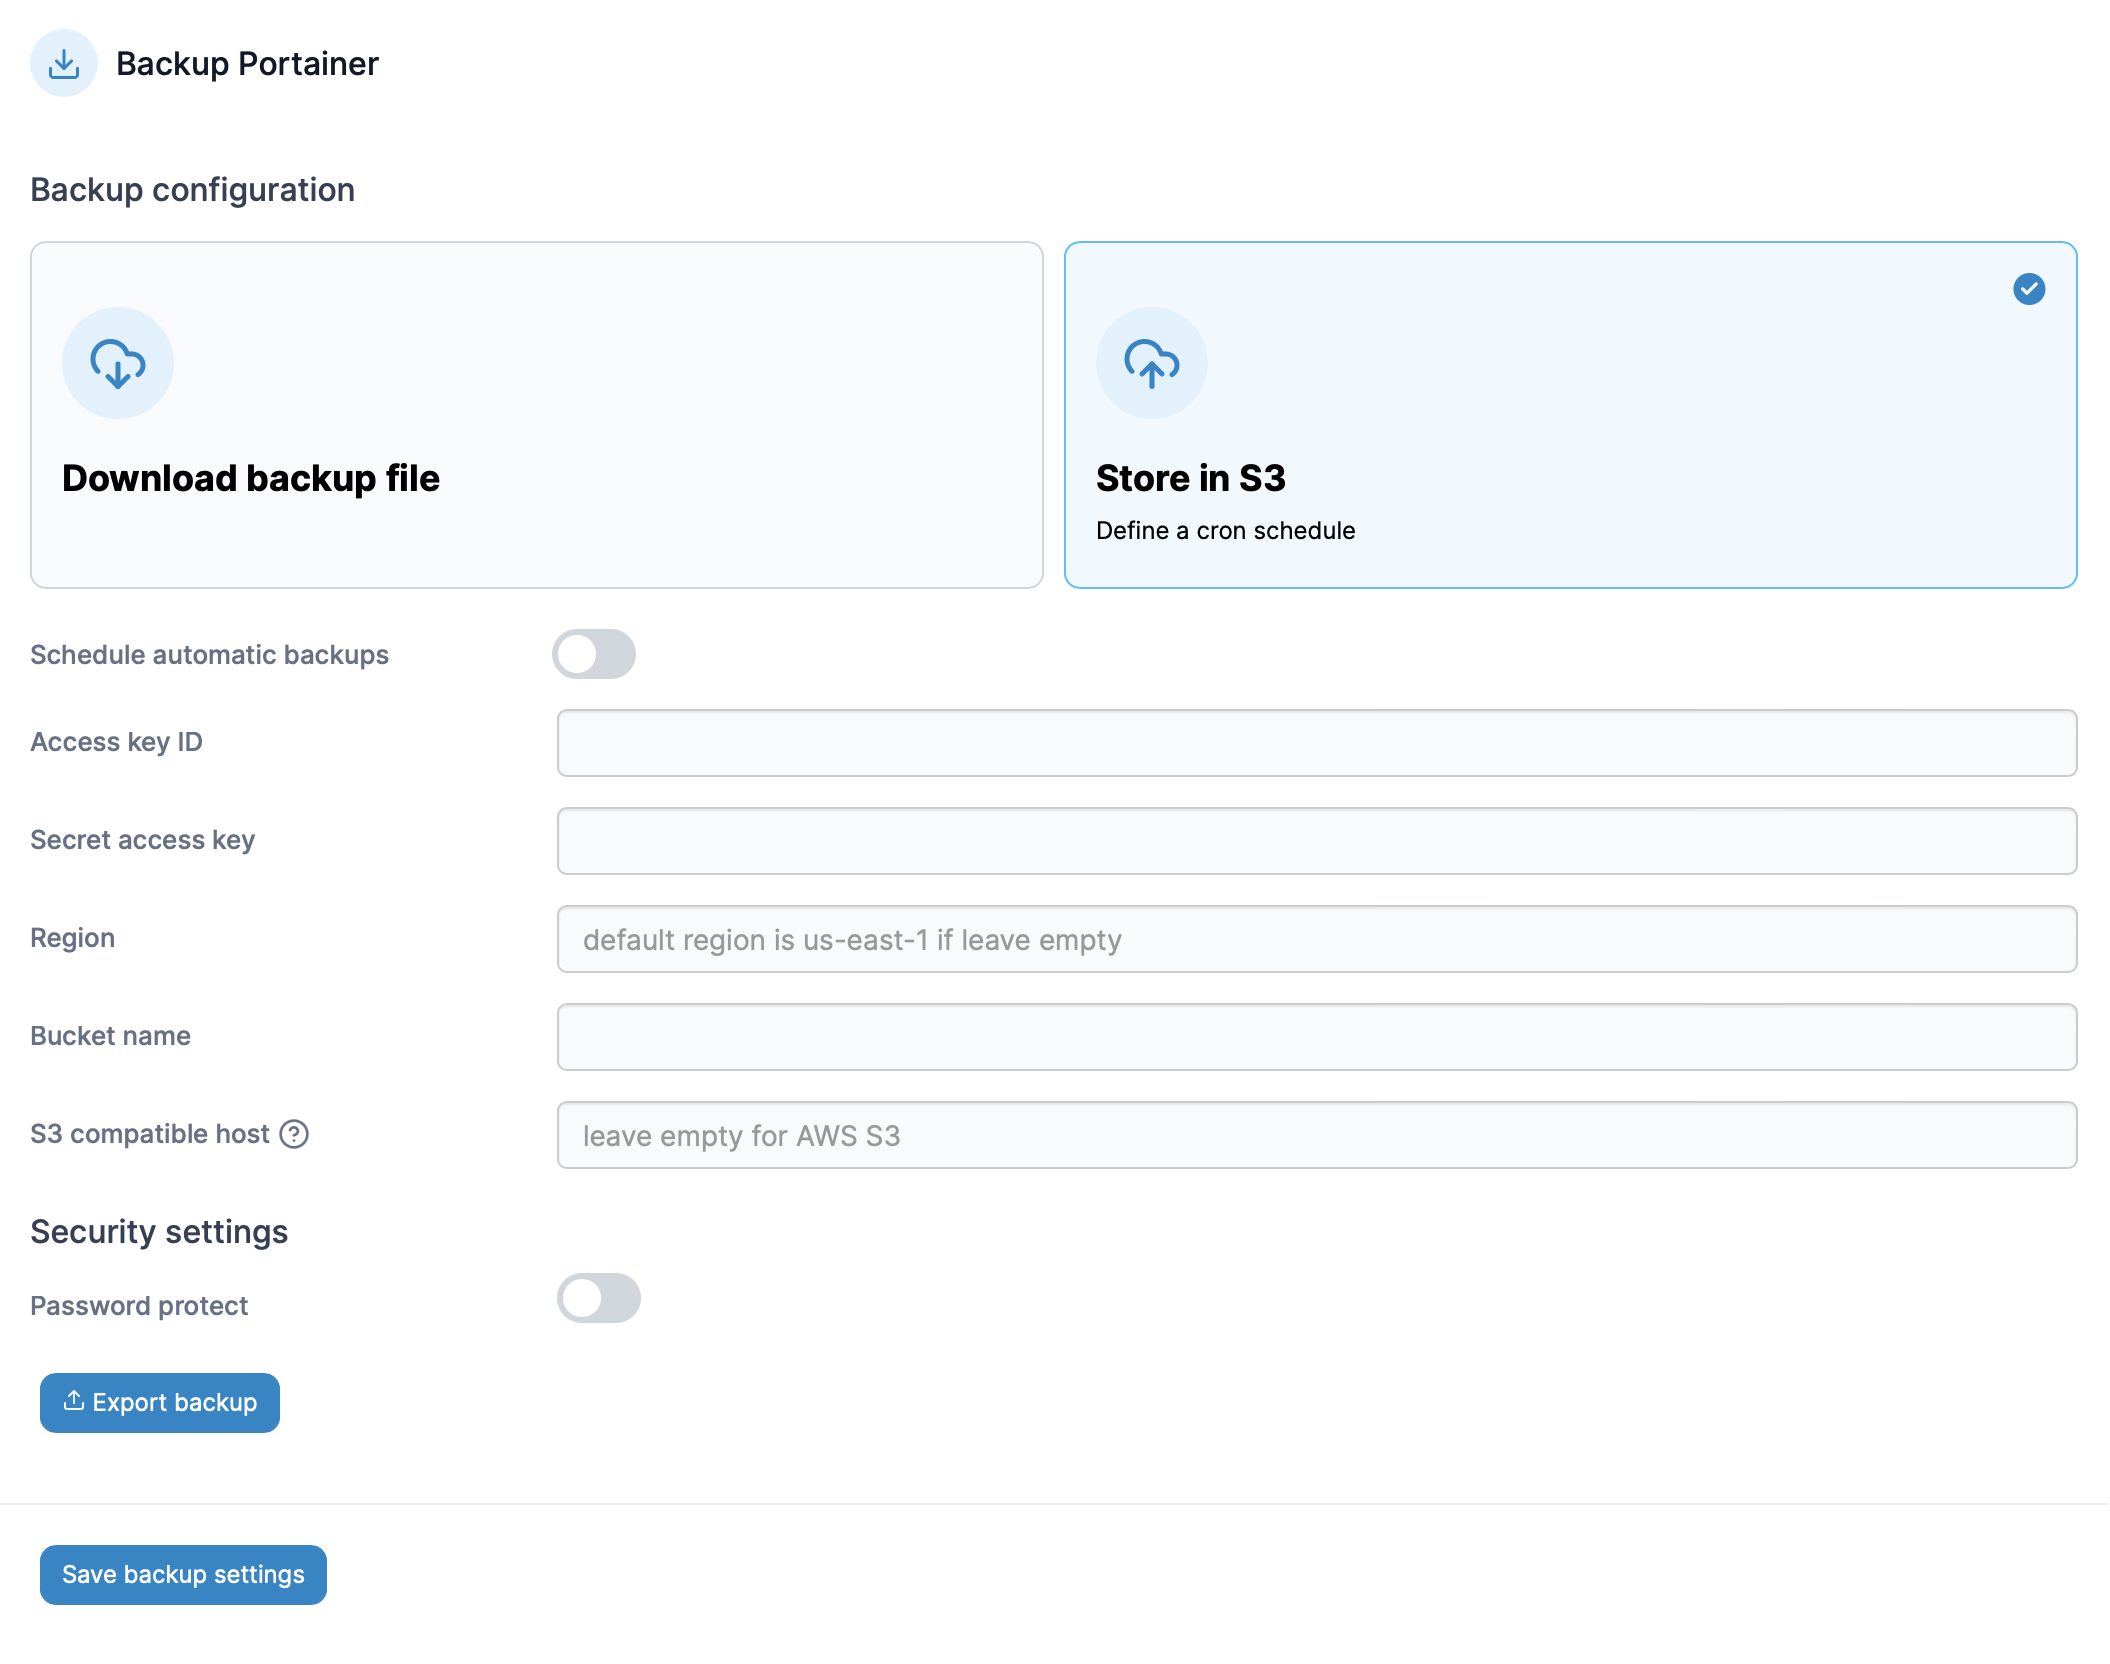
Filling in the form will allow for exactly that, and creating a backup file that we can use at any time in case something happens with the Portainer platform itself. Another example would be to simply migrate the Portainer instance and restore it from this same backup.
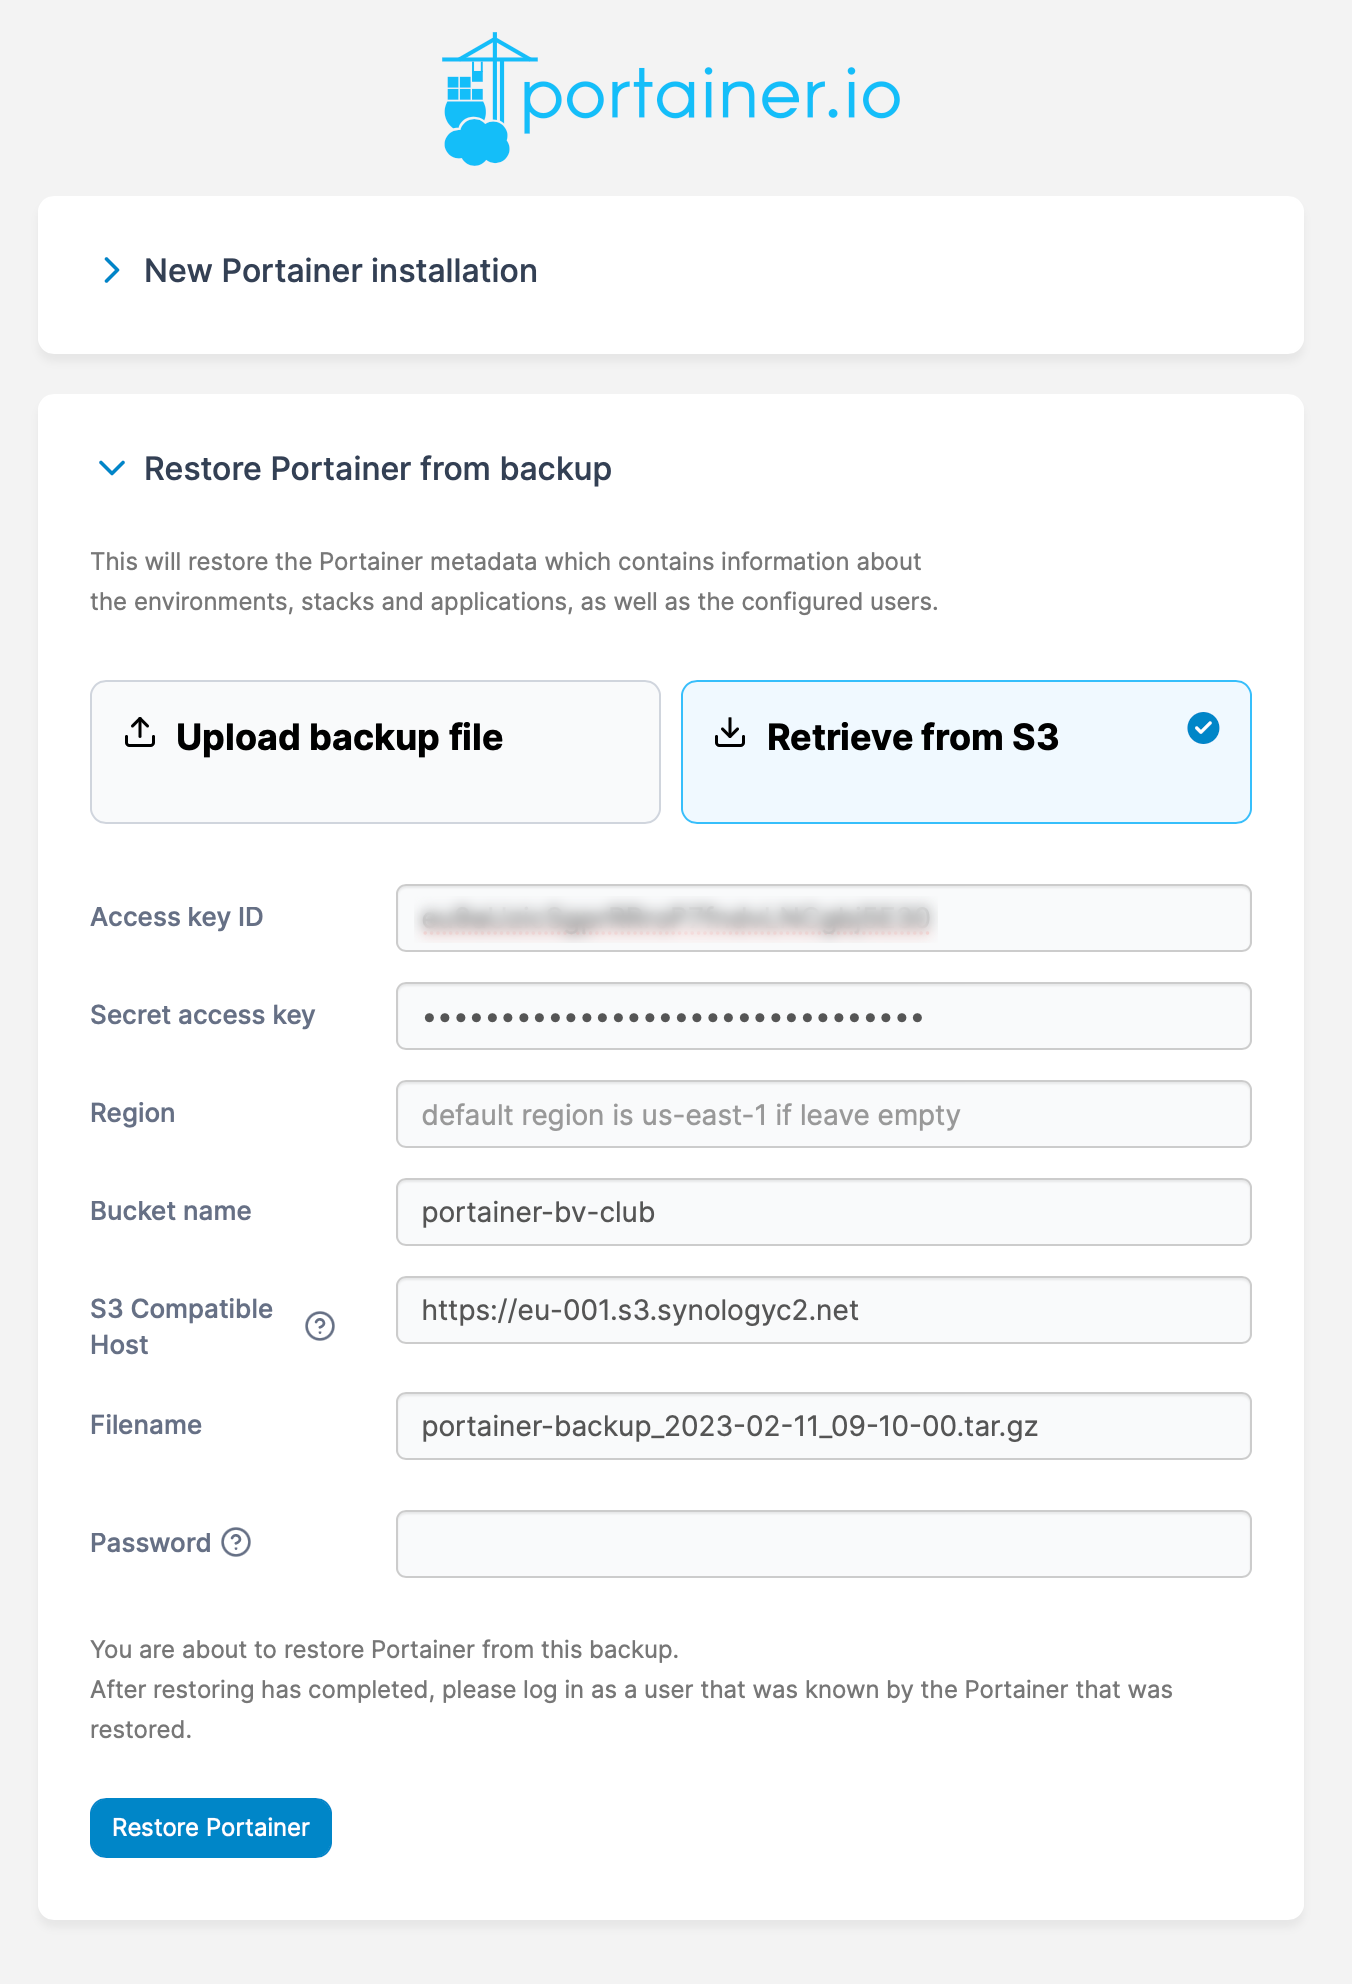
Make sure to fill in the following:
Schedule automatic backup > ON
Cron rule: enter a valid cron job timer format depeding how often the task will run (0 2 * * * will give you 2AM backup for example)
Access key ID: enter the access key from Object Storage
Secret key: enter the secret key from Object Storage
Region: this can be skipped when using the Synology C2 OS platform
Bucket name: enter the bucket name created before
S3 compatible host: enter the C2 OS endpoint URL

Password protection: optional so use it or don't depending on the use case
Finally, click the blue Save Backup settings button to save the configuration.
Once that backup has been completed, visiting the bucket content on the Object Storage portal, will list all available backup configuration files that can be used in the restore process.

: Portainer backup restoration
As said before, this method can be used on any number of occasions but the two that are most obvious would be disaster recovery and migration. In both cases, if we cant to get up and running with our management platform asap, it would be best to simply spring a new Portainer instance and restore from the backup.
Users, hosts, settings, etc, all will be restored and ready to go in seconds So let's see how the process goes.
Once the new Portainer instance is up and running, visiting the main page we will have two options. Configure it as a clean instance, or restore it from backup.
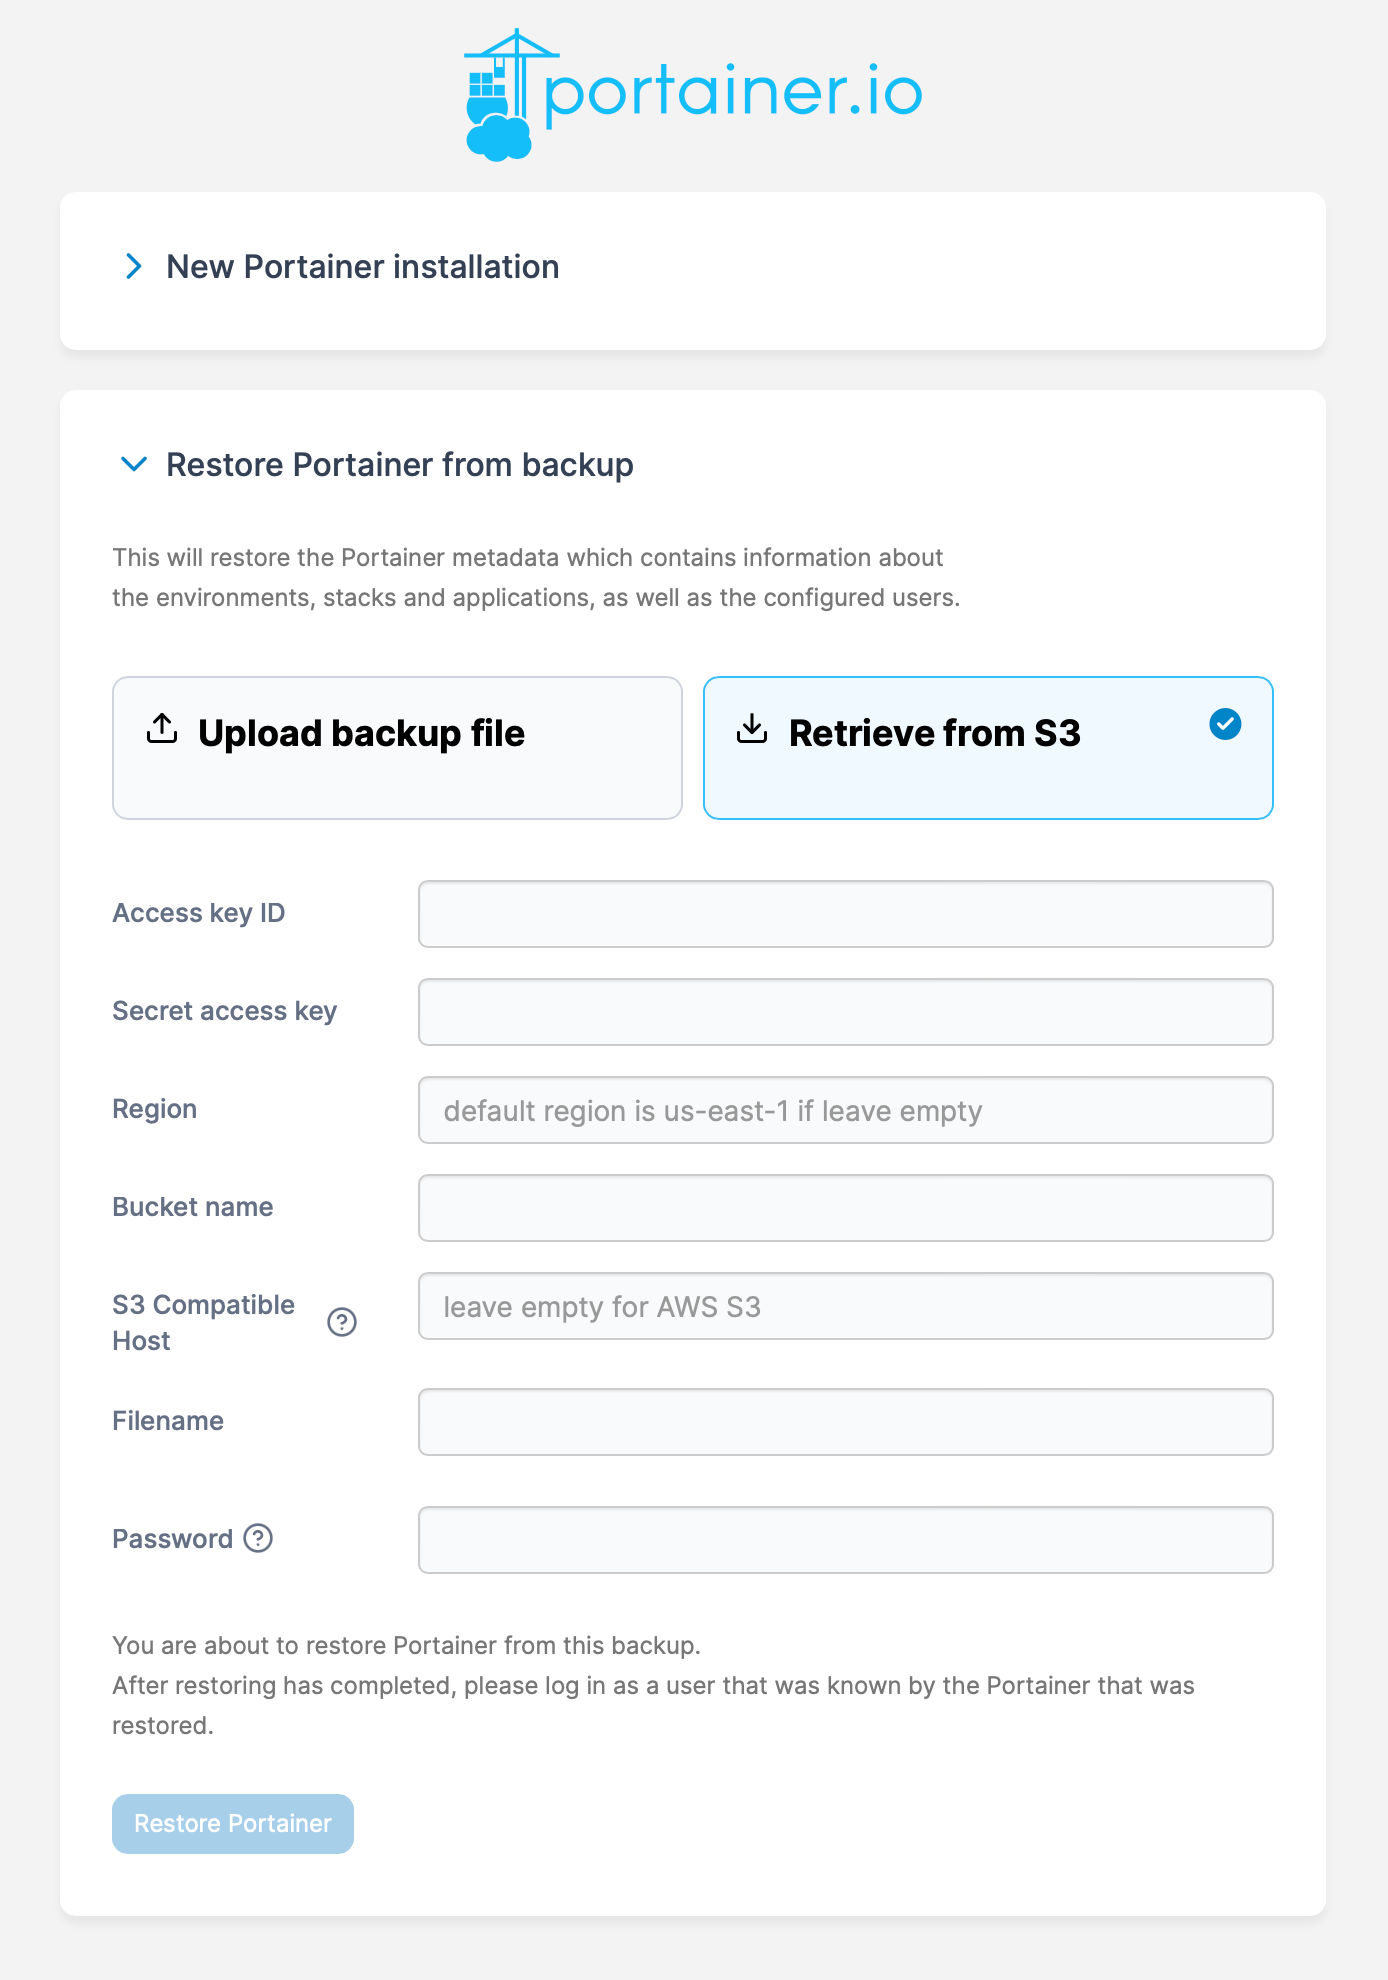
Restore can be done using the local backup file that we have on hand (if we do), or connecting to Object Storage and pulling the actual backup from there. The configuration of the restore form is identical to the settings in the backup configuration section with one exception. We need to enter the actual backup filename that we want to restore from.
Be sure to get the name of the file using the Object Storage portal when filling in the needed information.
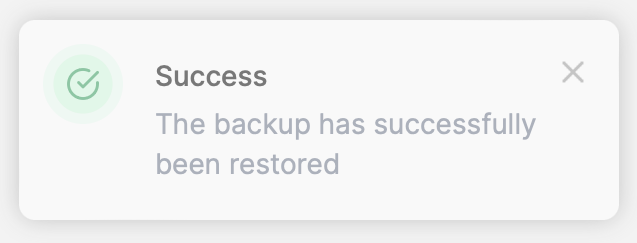
Once the information has been entered click Restore Portainer and wait for the process to complete. After no more than 10 seconds if all is well, we will be redirected to the login screen and allowed access back to the "old" Portainer environment.
So there we have it. A quick, easy, and free way to have a piece of mind knowing that your Portainer setup is safe and sound in case you ever need to restore it.
A few notes on the actual migration in certain cases. Now let's assume that the setup includes already deployed containers, either via the stack option or simply as a single manually configured one. In any event, these steps will not migrate the actual containers, images, or mounted volumes to the new host. This is something that needs to be done by hand.
So in order to actually have a fully working backup/restore process, be sure to backup the content of the mounted volumes, and be prepared to redeploy the containers on the new host.
What this backup covers is all the rest. The whole Portainer configuration, from teams, users, settings, etc. It will also backup the actual compose files and this is important!
Assuming you have a container deployed via a compose (stack feature), after a backup restore, if the compose file is missing on the destination host, we will not be able to edit the compose file as Portainer will flag it as something deployed outside of the actual Portainer setup. The reason for this is that the compose file is missing and the actual container and its deployment are not registered in the Portainer database. This is why we have to use the backup/restore feature in order to have all the configurations in order.
This scenario is particularly important if we have multiple docker hosts connected via the portainer agent. All deployments will be registered with the main Portainer instance, so again, its backup and restore are crucial for getting access and actually usage of the compose files.