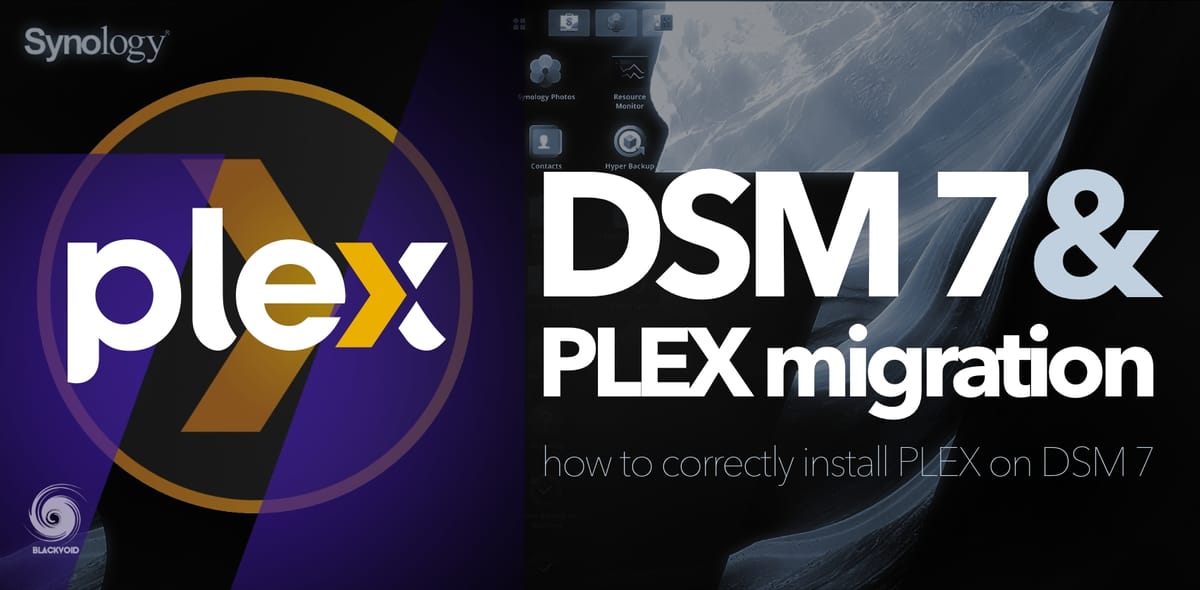
PLEX migration with DSM 7

(Synology) Improve install wizard messaging and 'Plex' share detection
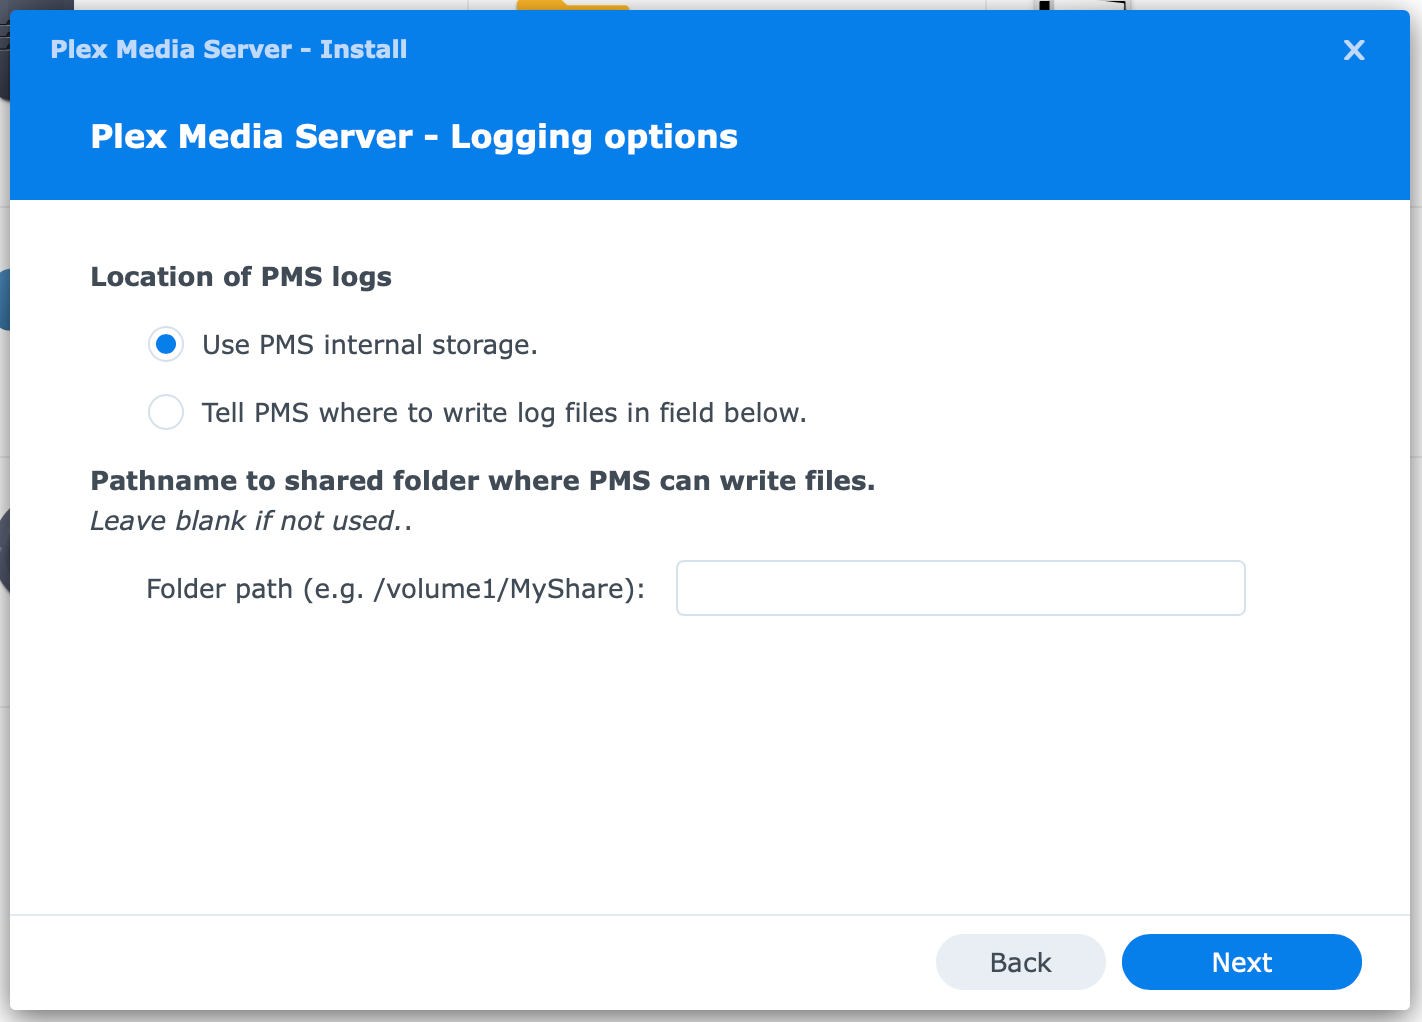
(Synology) Remove log file redirection option from installer
To get past this, the Plex team is working on a version of the Plex installer that will mitigate and solve this problem.
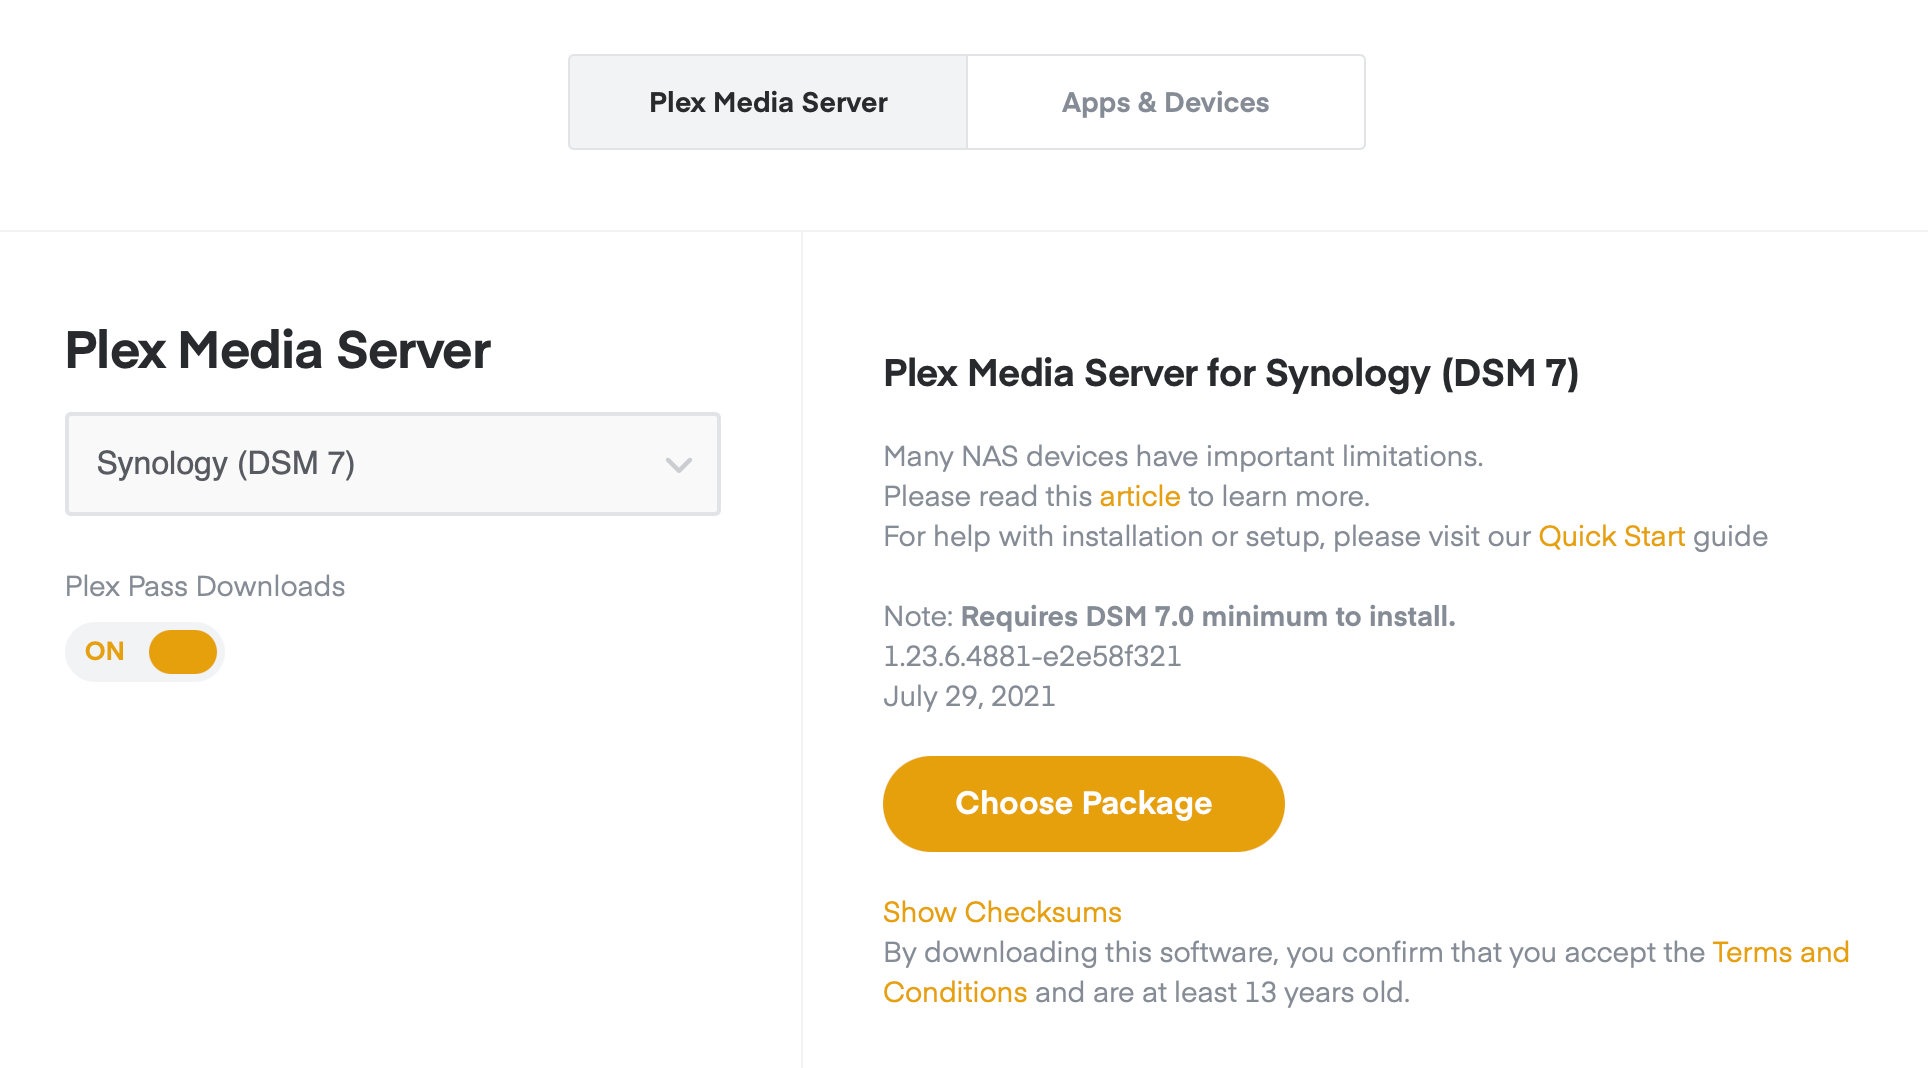
If you want to participate in it, use the following link, and download the package for your NAS in order to get your working DSM 7 Plex setup into a working condition to be able to backup using Hyper Backup.
This package can be downloaded from plex.tv site as part of the DSM 7 installer:
About two weeks ago, DSM 7 came out and we were all so eager to upgrade (who could), but there is also an important note here to take away from this update.
Synology was hard at work to bring us many new features, some visible, some not so much as well as some new and exciting apps and services (C2 new lineup), but also, they made some changes when it comes to permissions and how 3rd party apps work with new DSM OS.
With DSM 7 a lot of apps got axed from being supported by the new OS, and those that will continue to work will demand the developers to adapt to the new security rules. One of those rules is that the apps can no longer run as root on the system. This leads up to this article.
PLEX vs DSM 7
While Plex team was aware of this long before the final release was pushed, there is still a process that needs to be respected in order to continue using Plex on DSM 7. In the following tutorial, I will show and demonstrate a short explanation also accessible on the official Plex.tv forums.
ChuckPa (member of the official Plex team) is the one taking credit for all the help and support that he has given all the users struggling to get this off the ground as well as tweaking the Plex install to be compatible with DSM 7.
This tutorial will focus on a bare-metal installation (not Docker), as that's the one that needs attention.
All the needed information are accessible here:
 philrigby
PLEX Upgrade process
So before you start with the Plex upgrade on your DSM 6, this tutorial will start with a fresh install of Plex on the active DSM 6 instance, add a new library, just to show that all will be well with the process IF YOU FOLLOW IT to the letter.
STEP01 - running Plex on DSM 6

So if you install Plex on your DSM 6 setup, as always, use the Plex.tv version NOT the Package Center one!
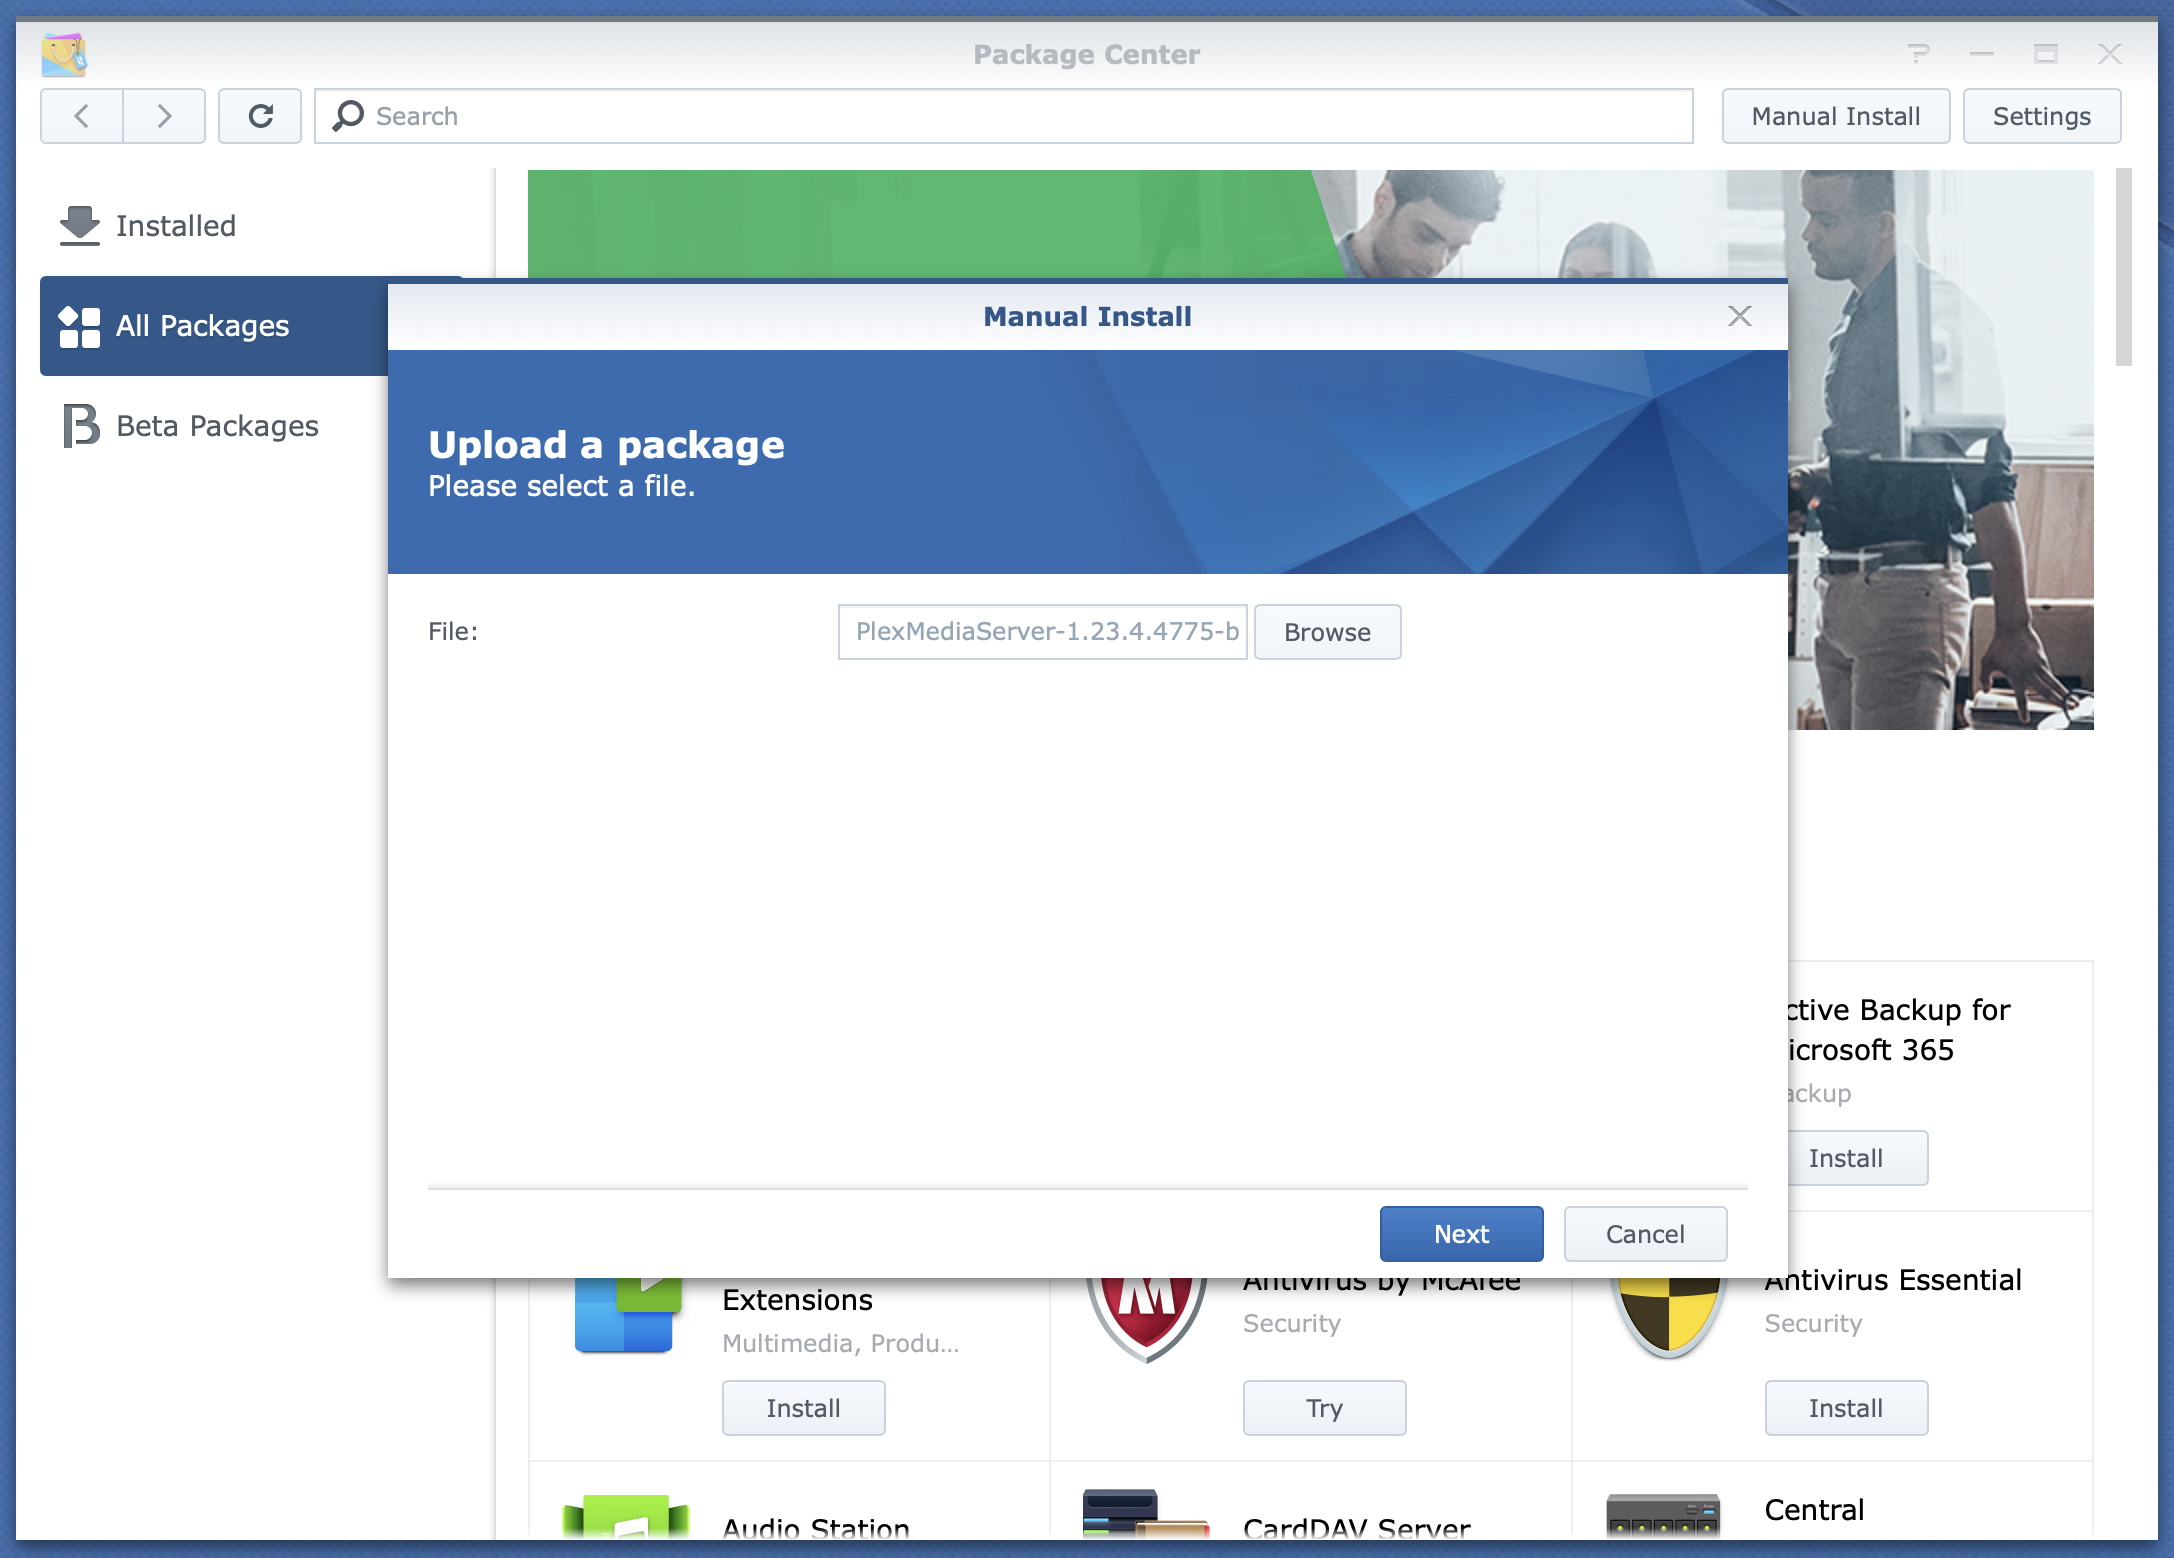
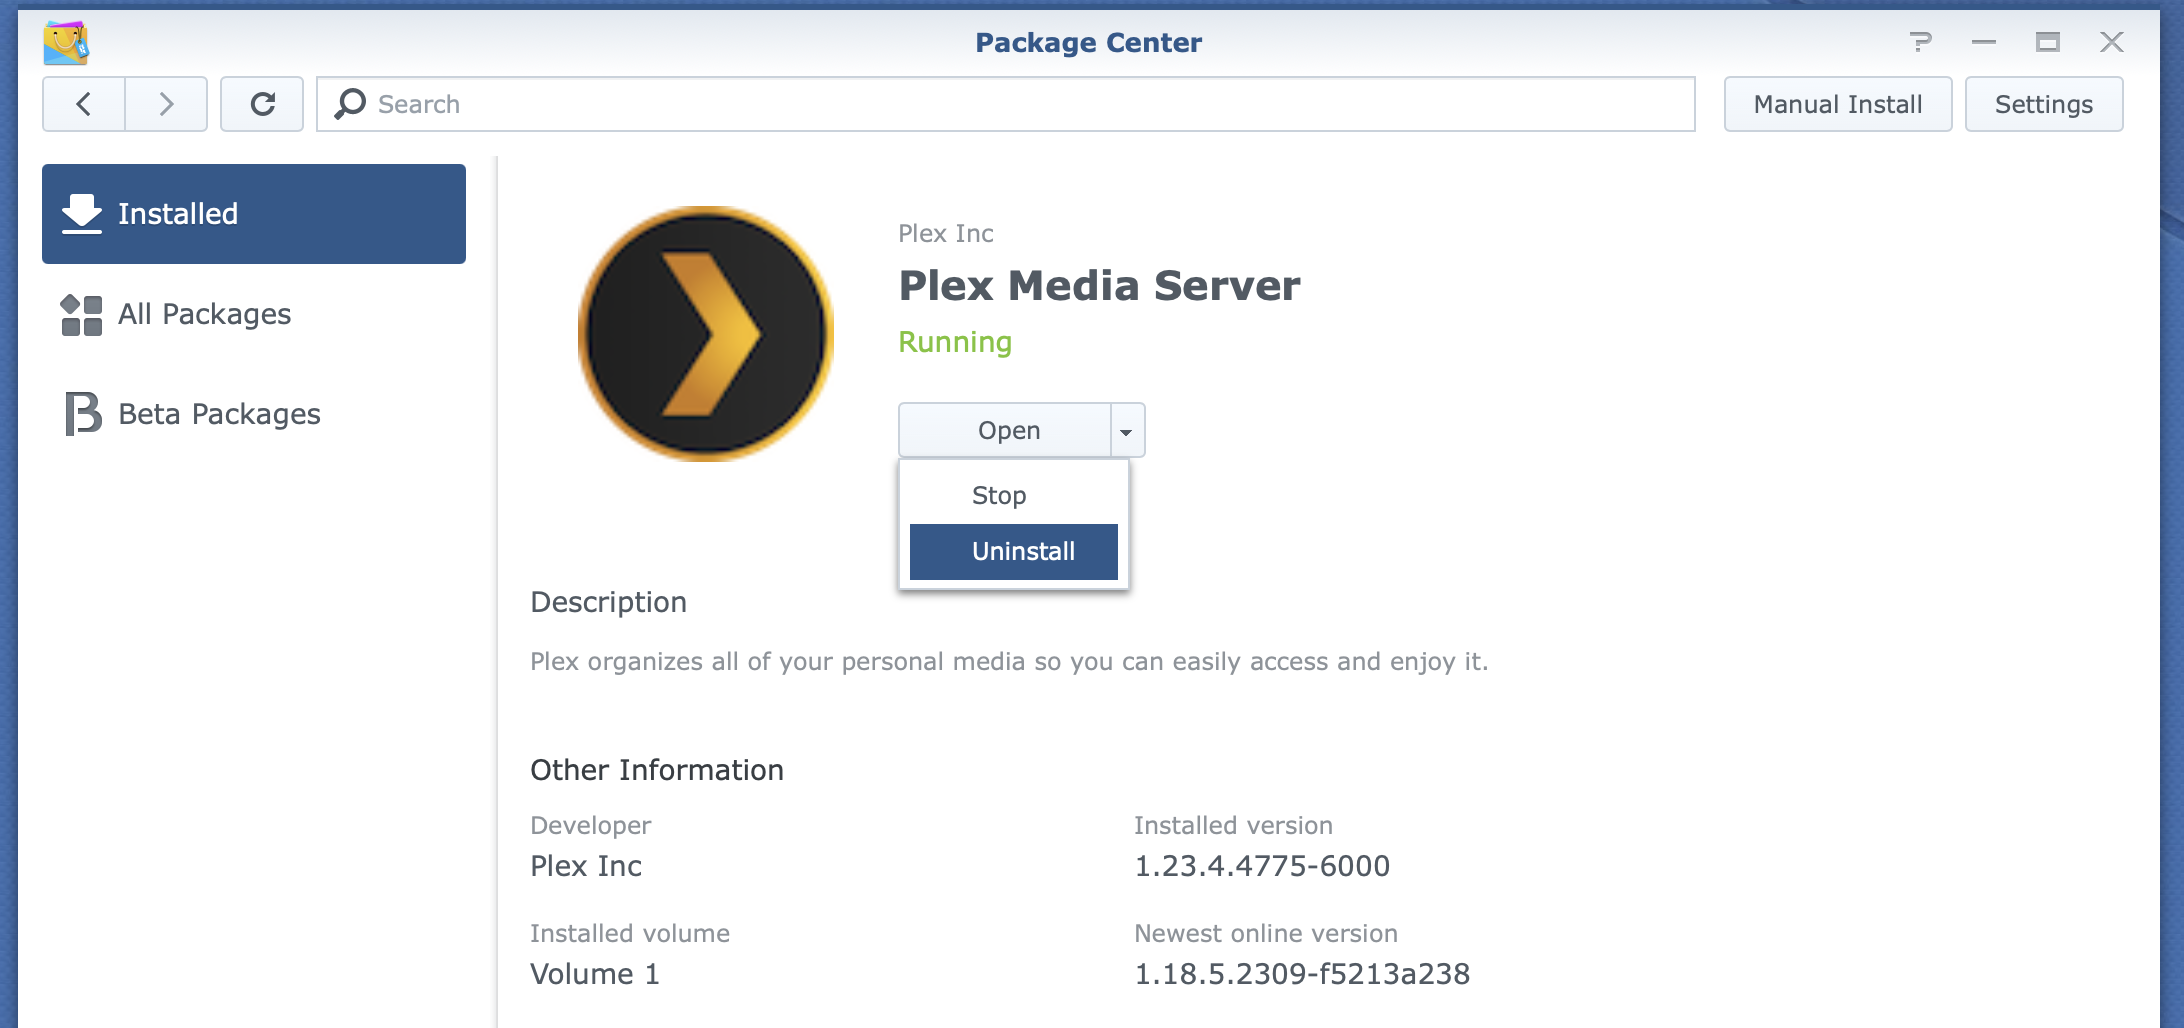
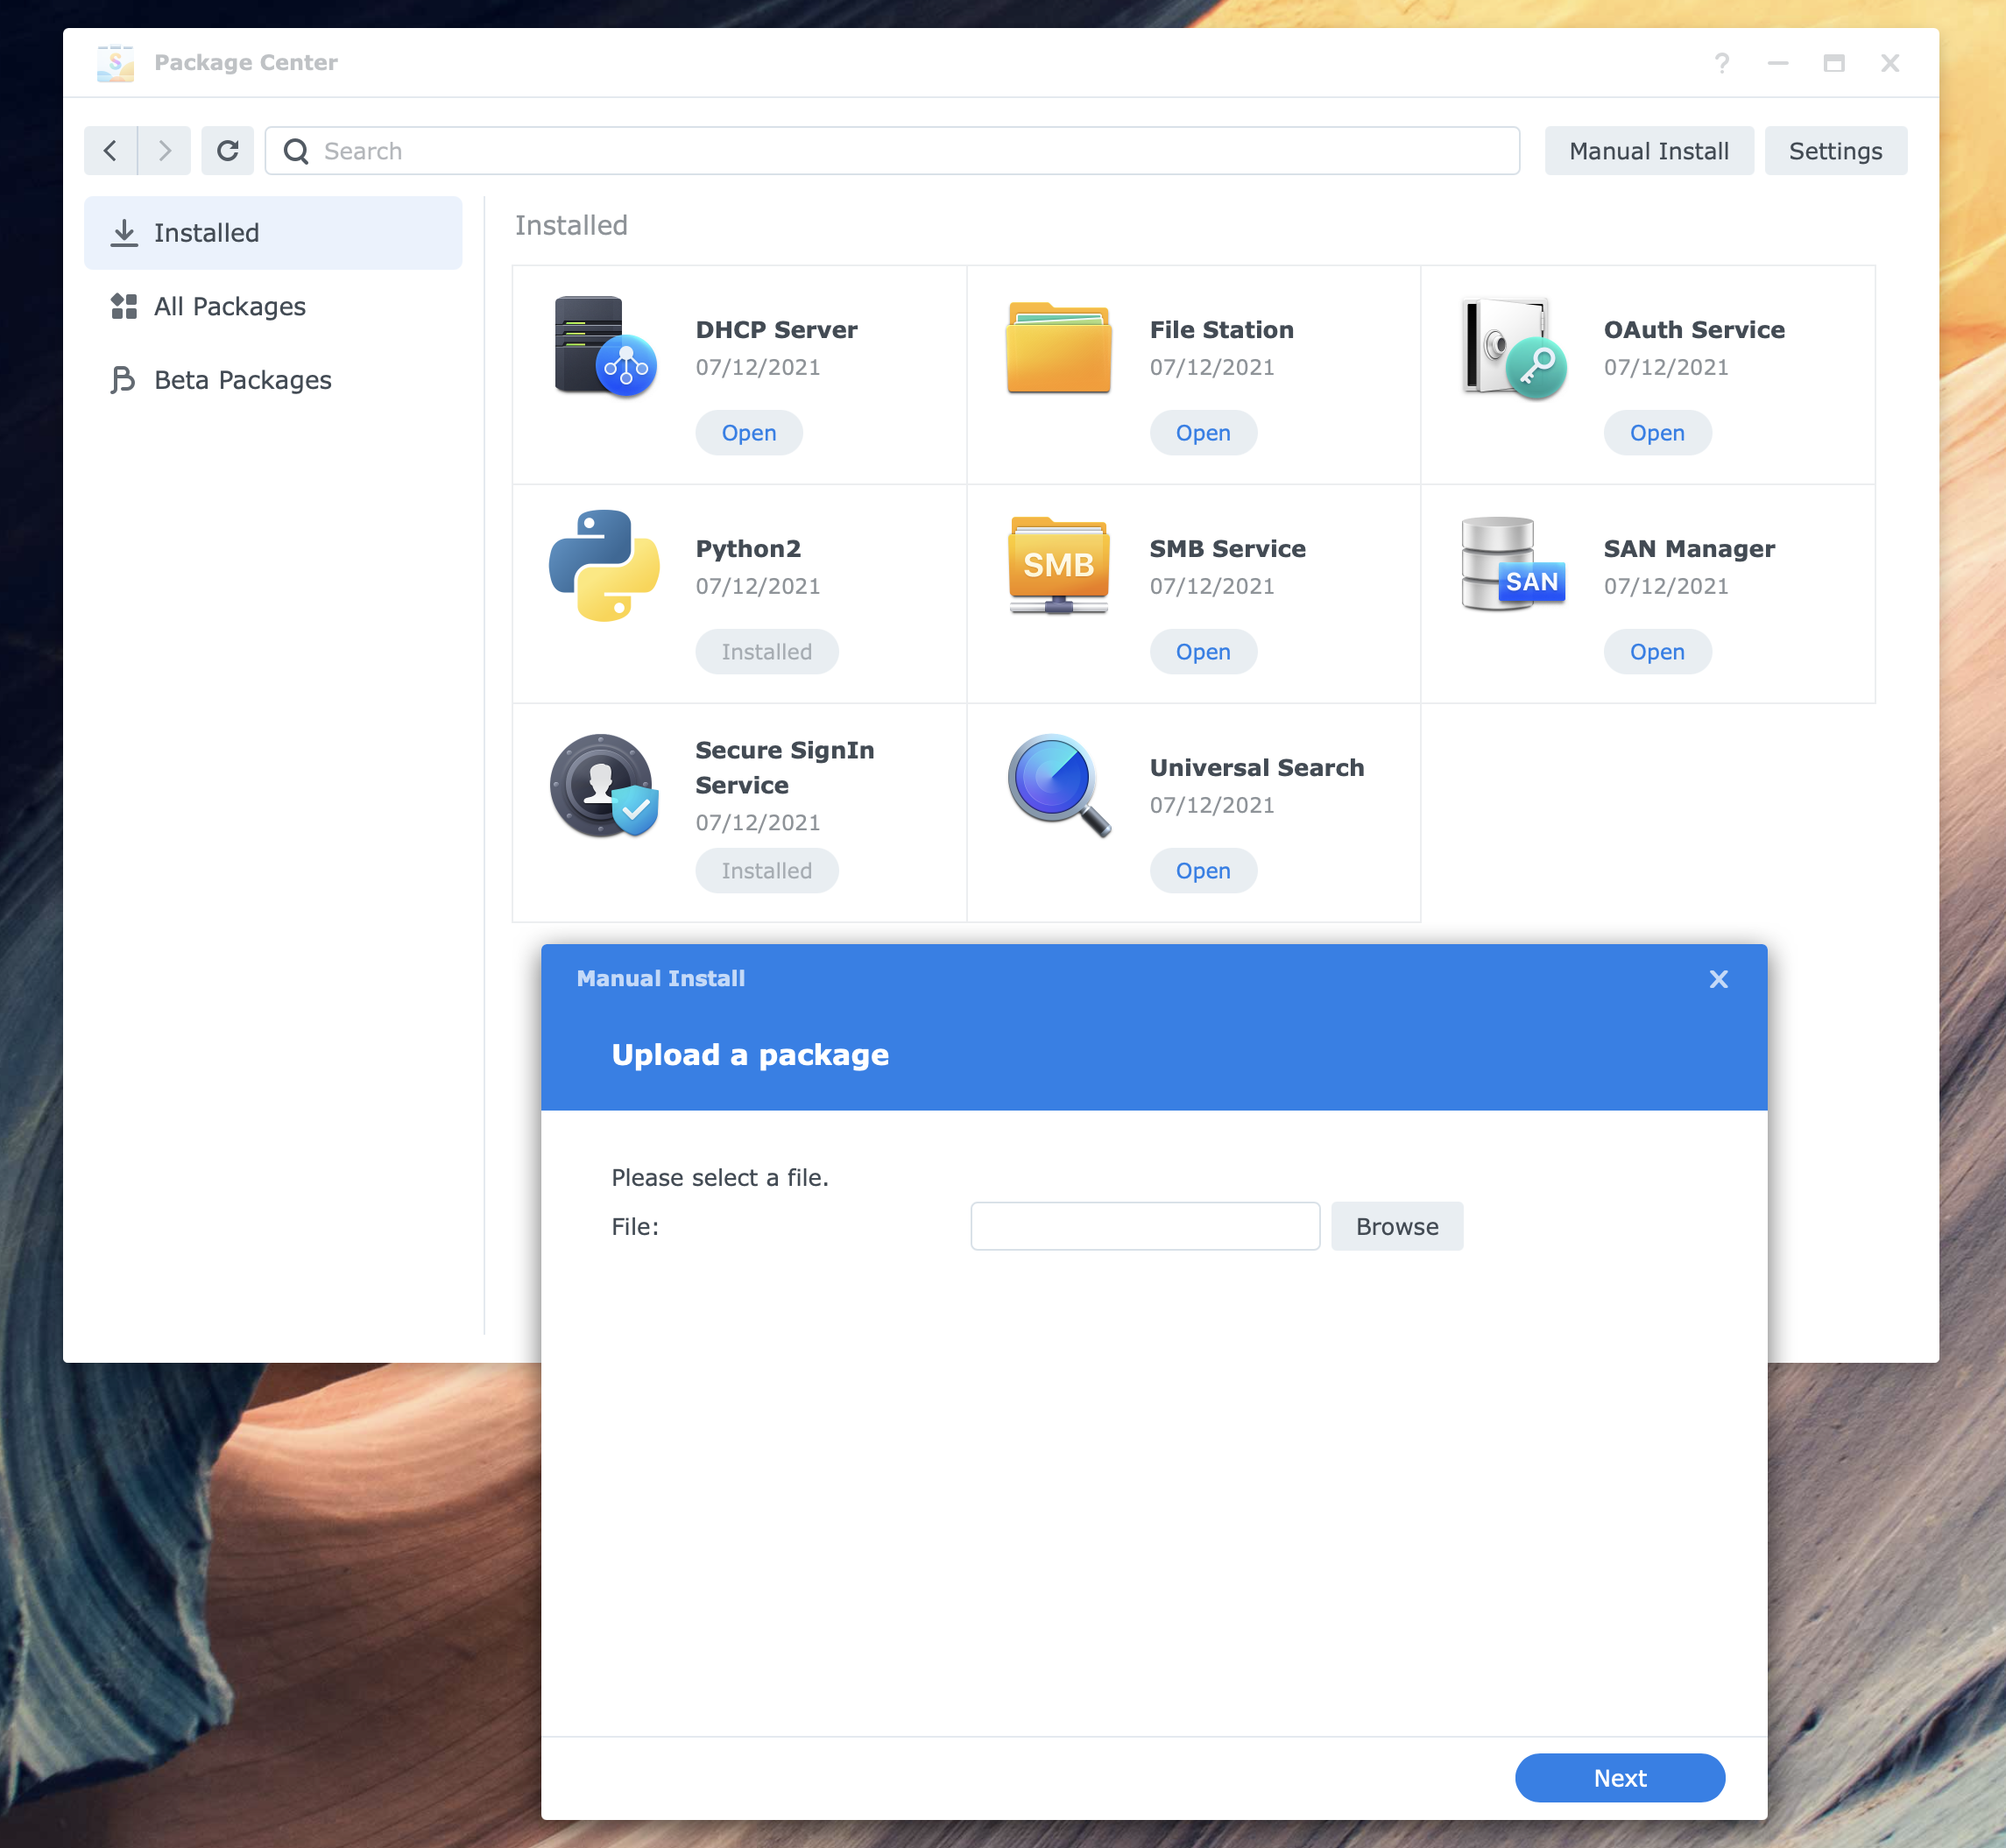
Open Package Center and use the Manual install button in the upper right corner. Follow the wizard to the end and install Plex.
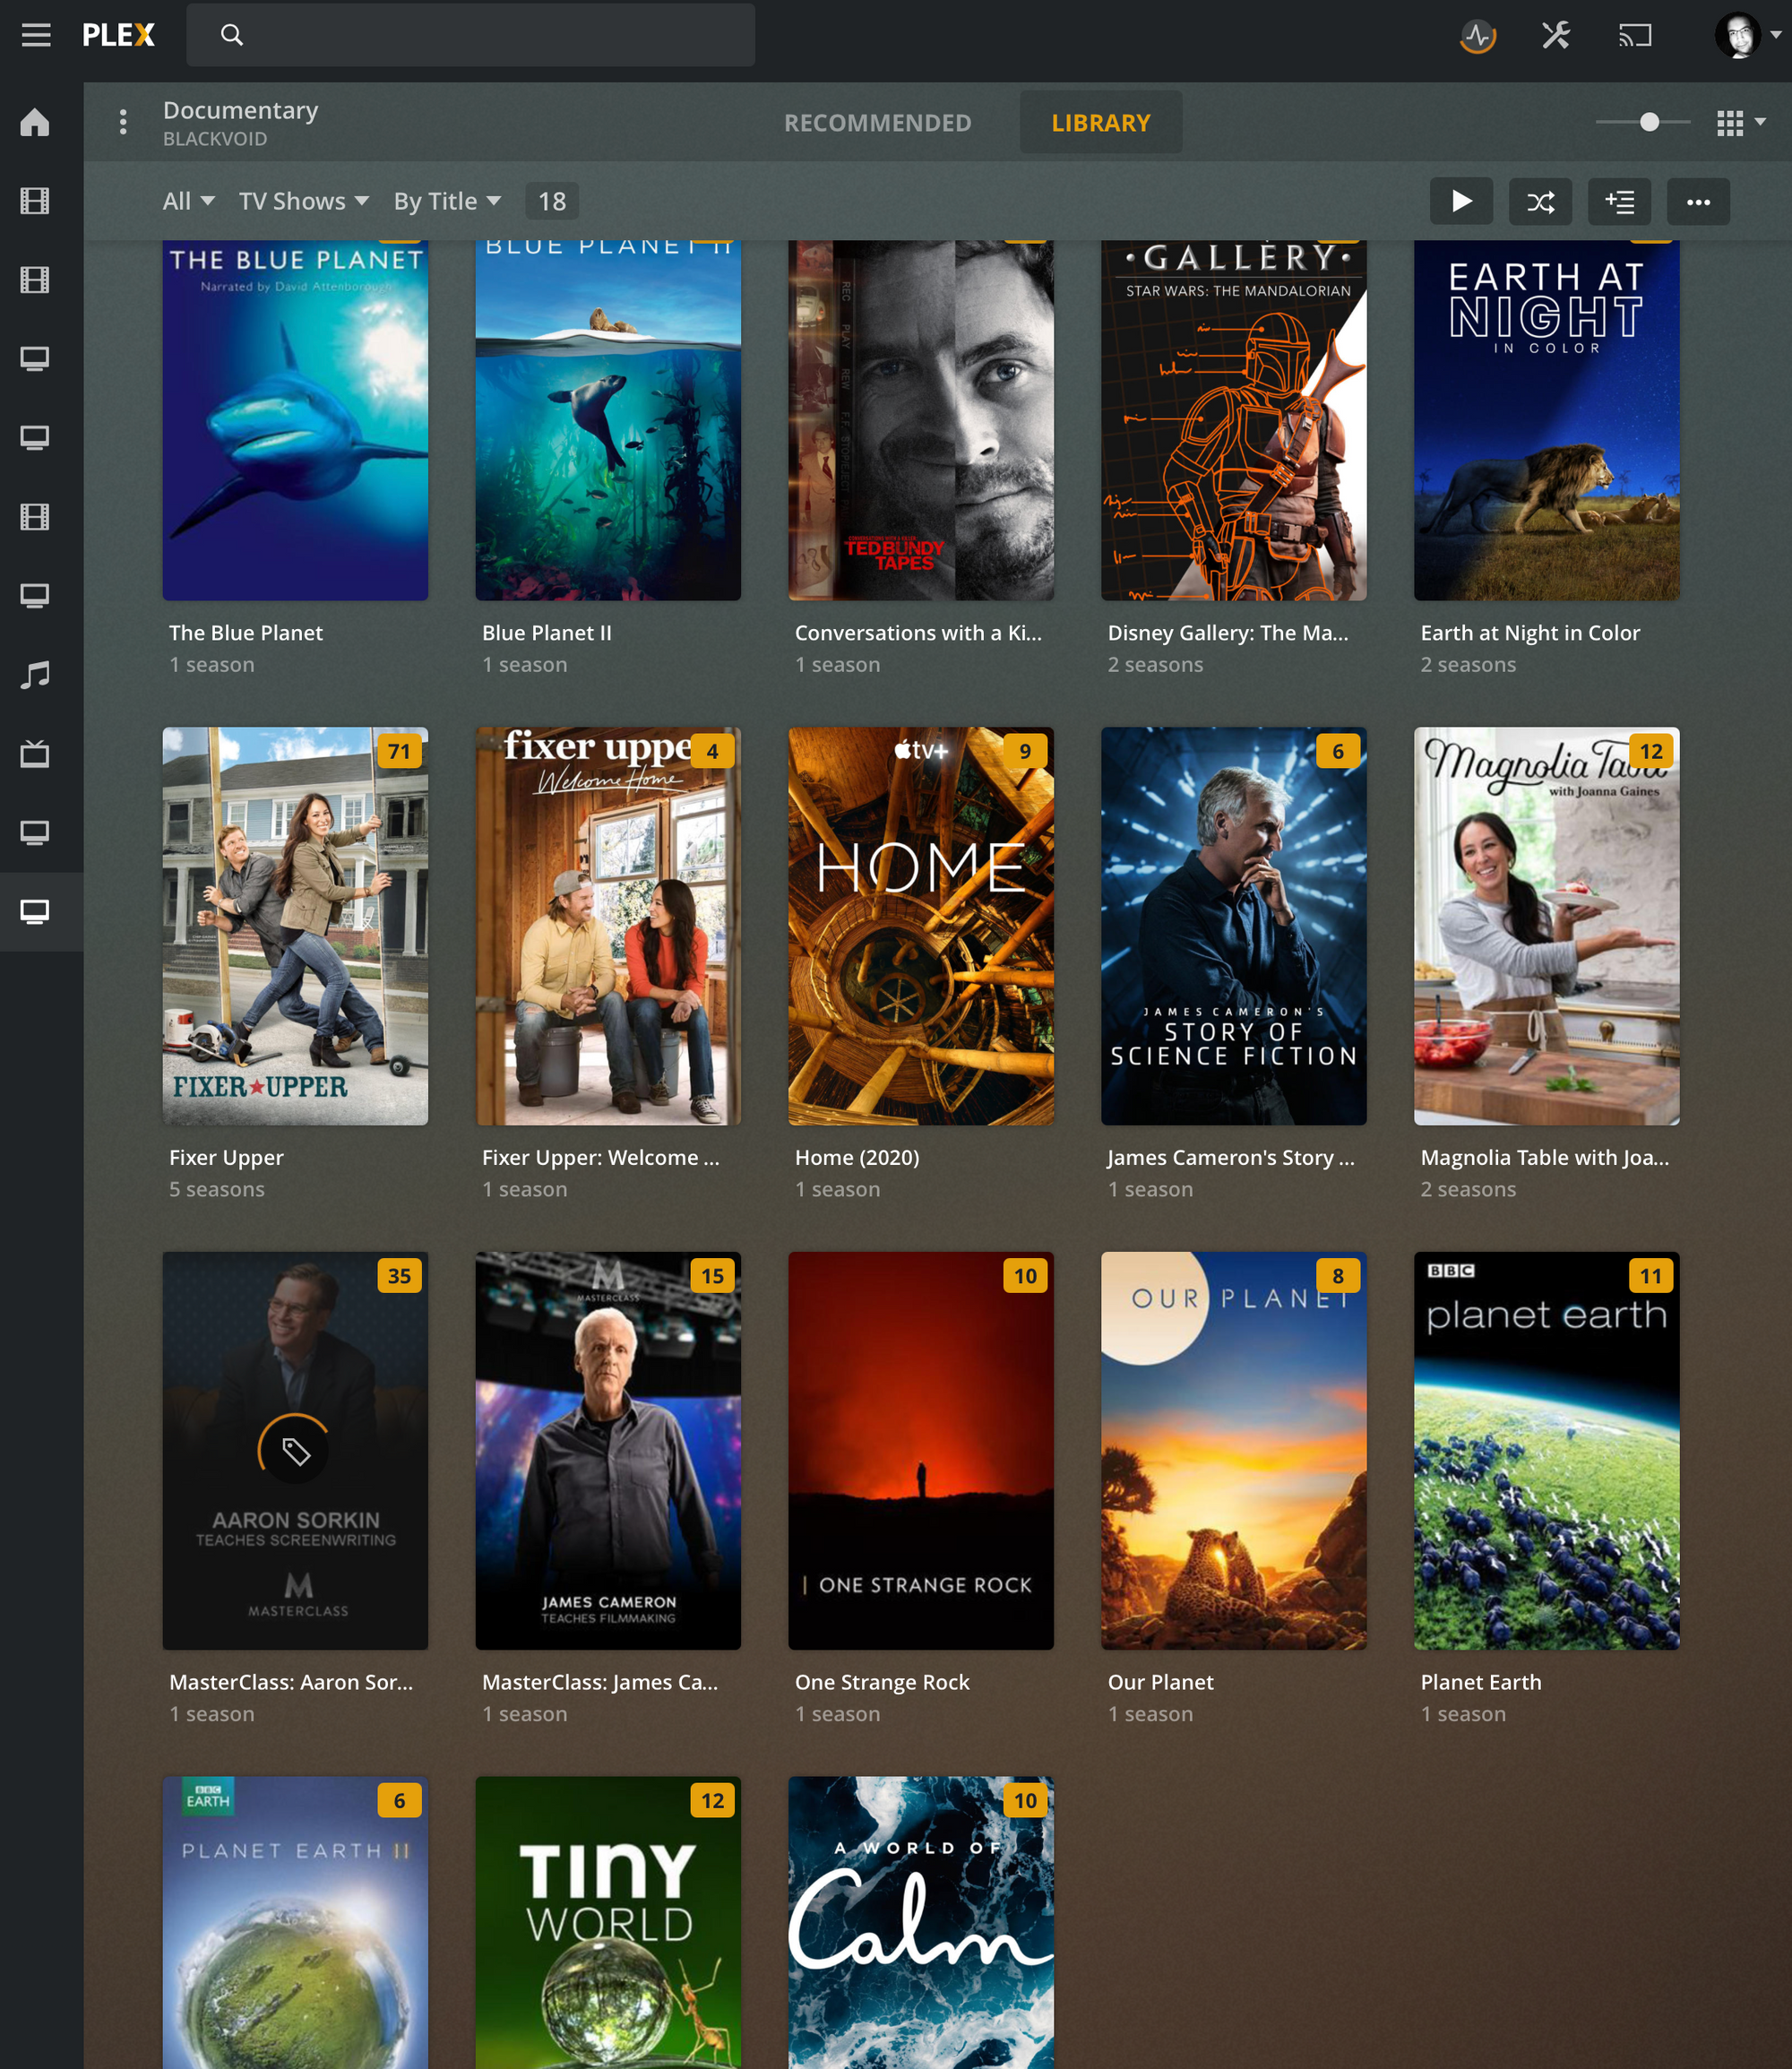
Once you have Plex installed, access it and add some libraries to it (unless you already have this up and running).

STEP02 - Deinstall Plex from DSM 6 (DO NOT SKIP!)
This is the step that most of you will want to start off. So you already have Plex running and you want to upgrade to DSM 7 but also have Plex up and running under it without any problems.
First, we need to uninstall it! So go to Package Center and uninstall your current working version of Plex (under DSM 6).

STEP03 - upgrade DSM 6 to DSM 7
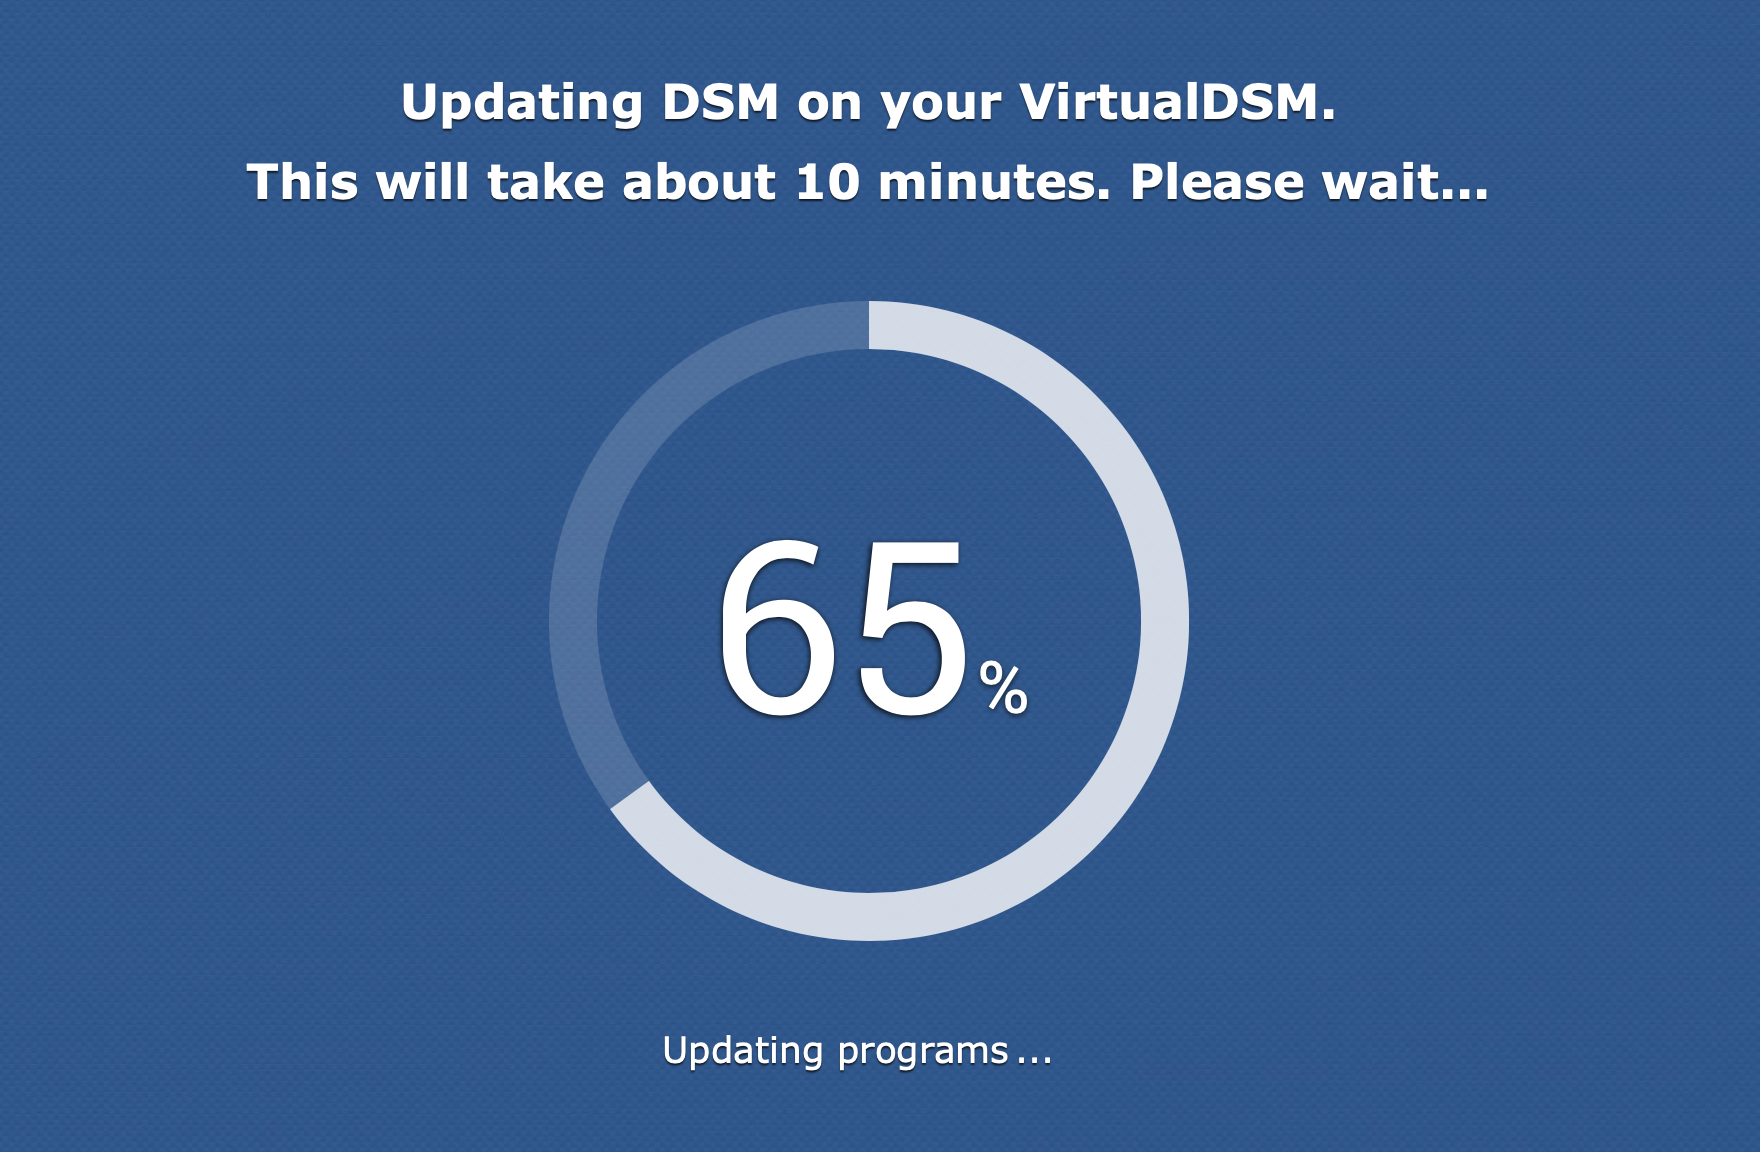
Now that you have uninstalled Plex from your NAS, it is time to upgrade to DSM 7.
STEP04 - additional reboot (DO NOT SKIP)
Even though the DSM install has rebooted the NAS, the Plex team suggests doing another reboot of the NAS before moving forward. Do it.
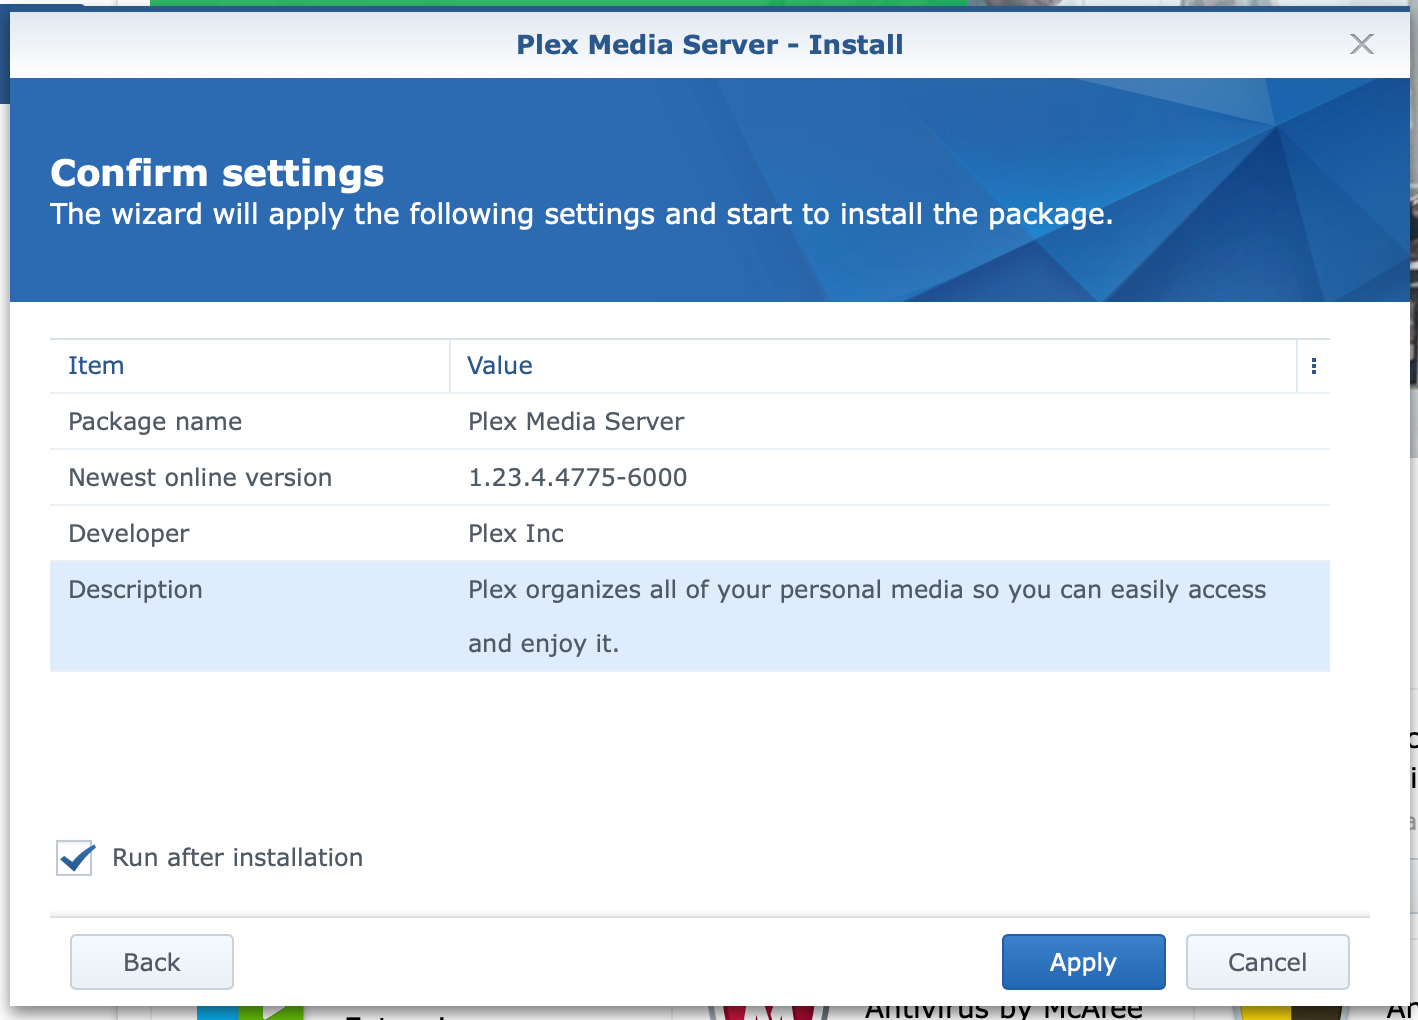
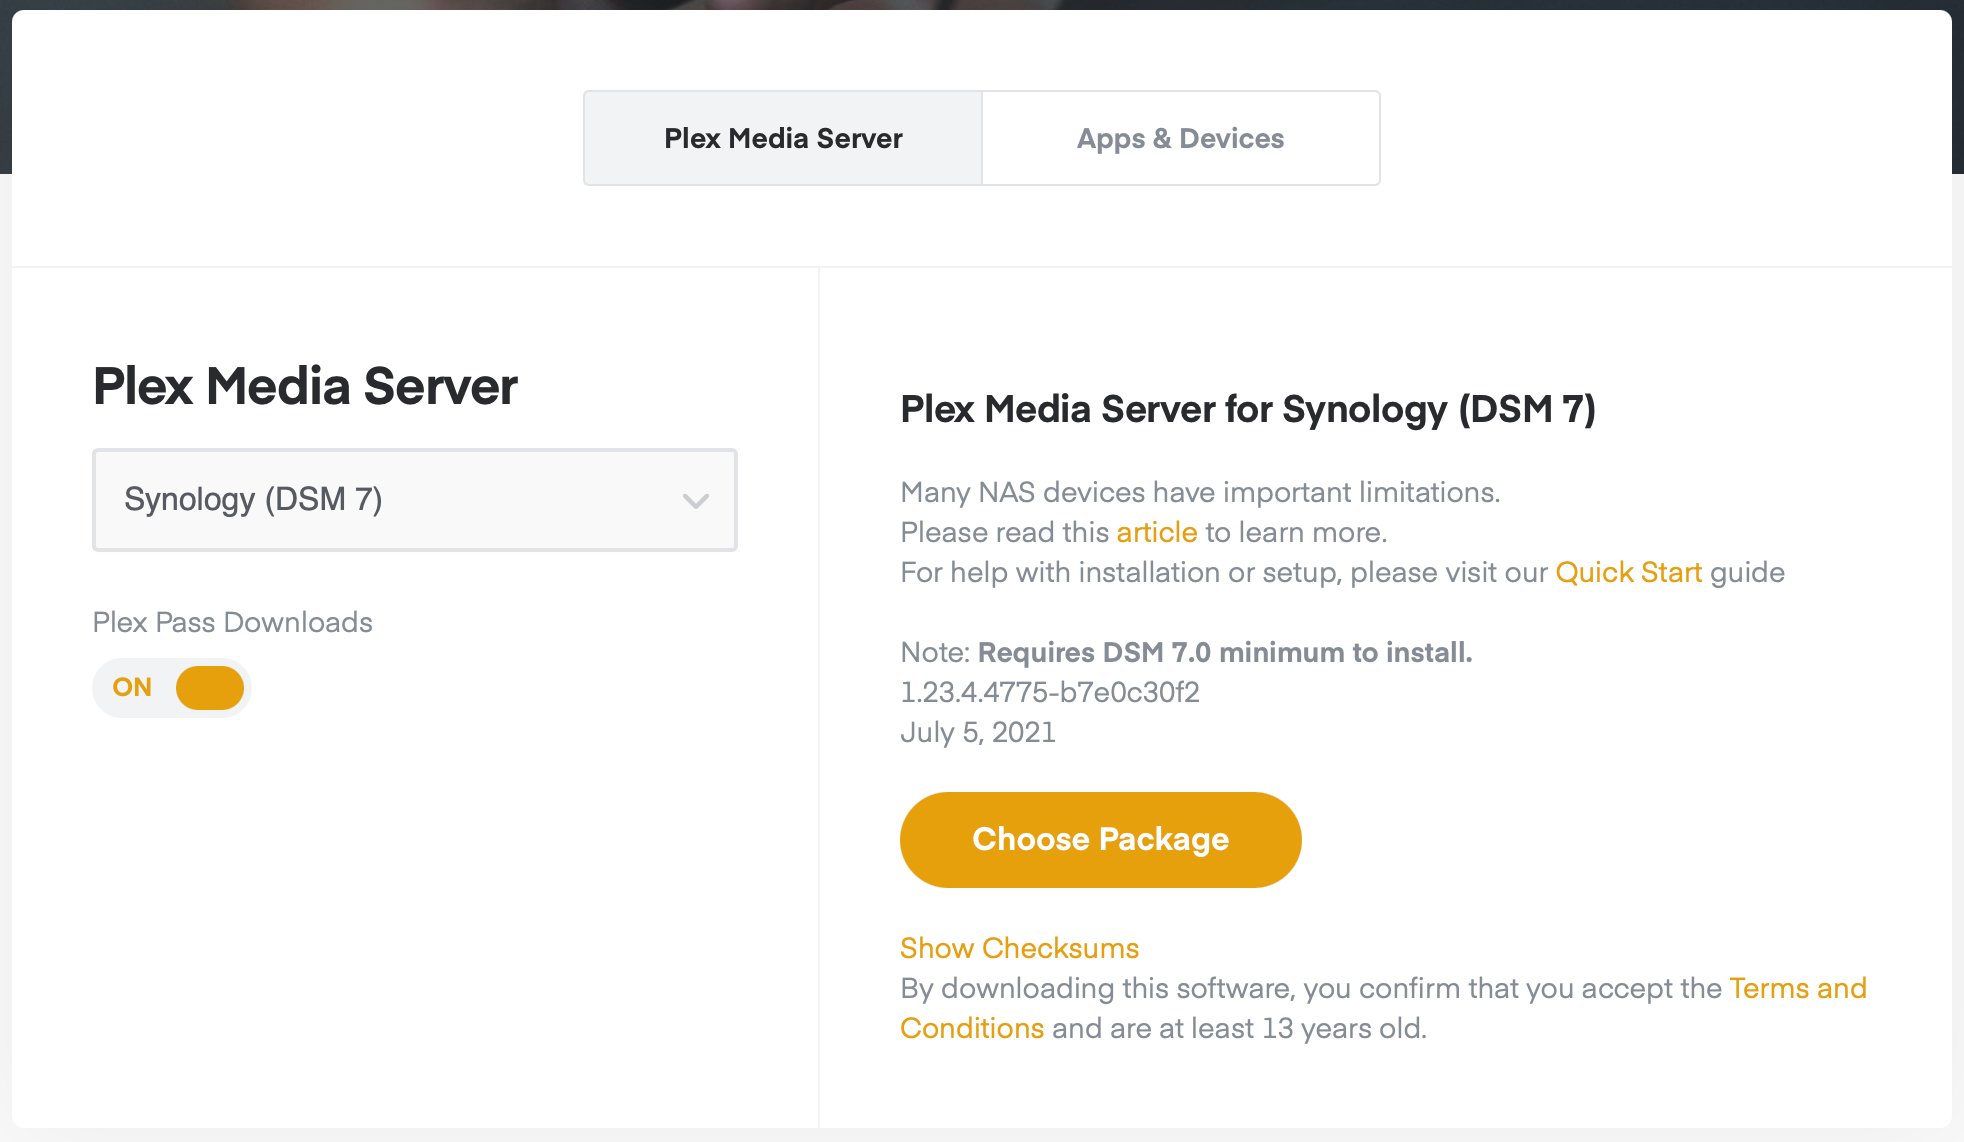
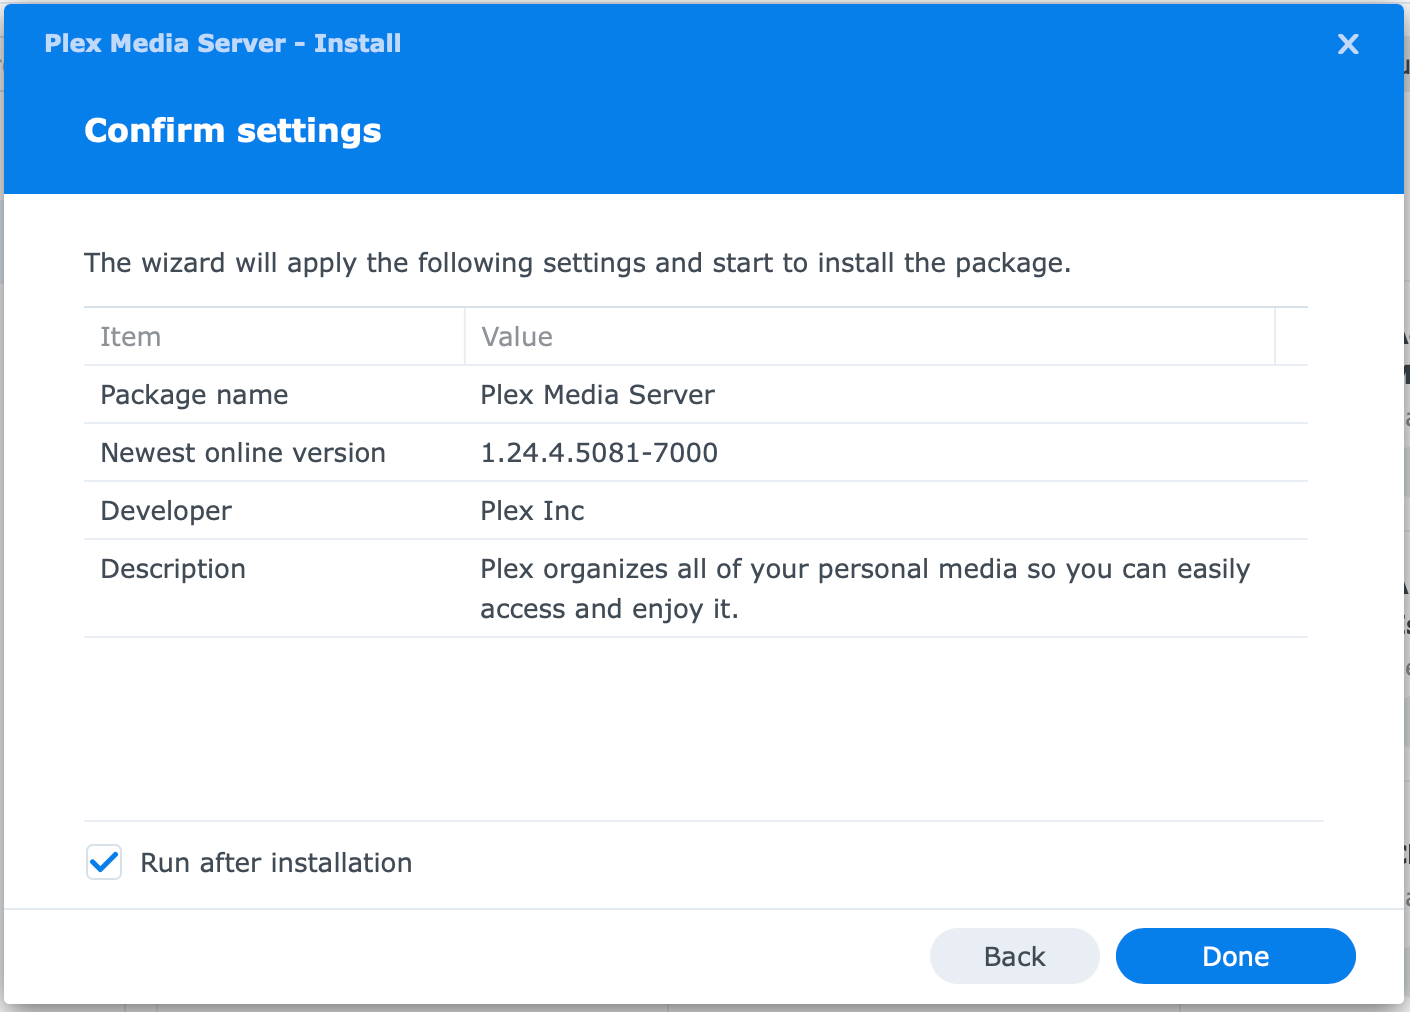
STEP05 - Installing Plex on DSM 7
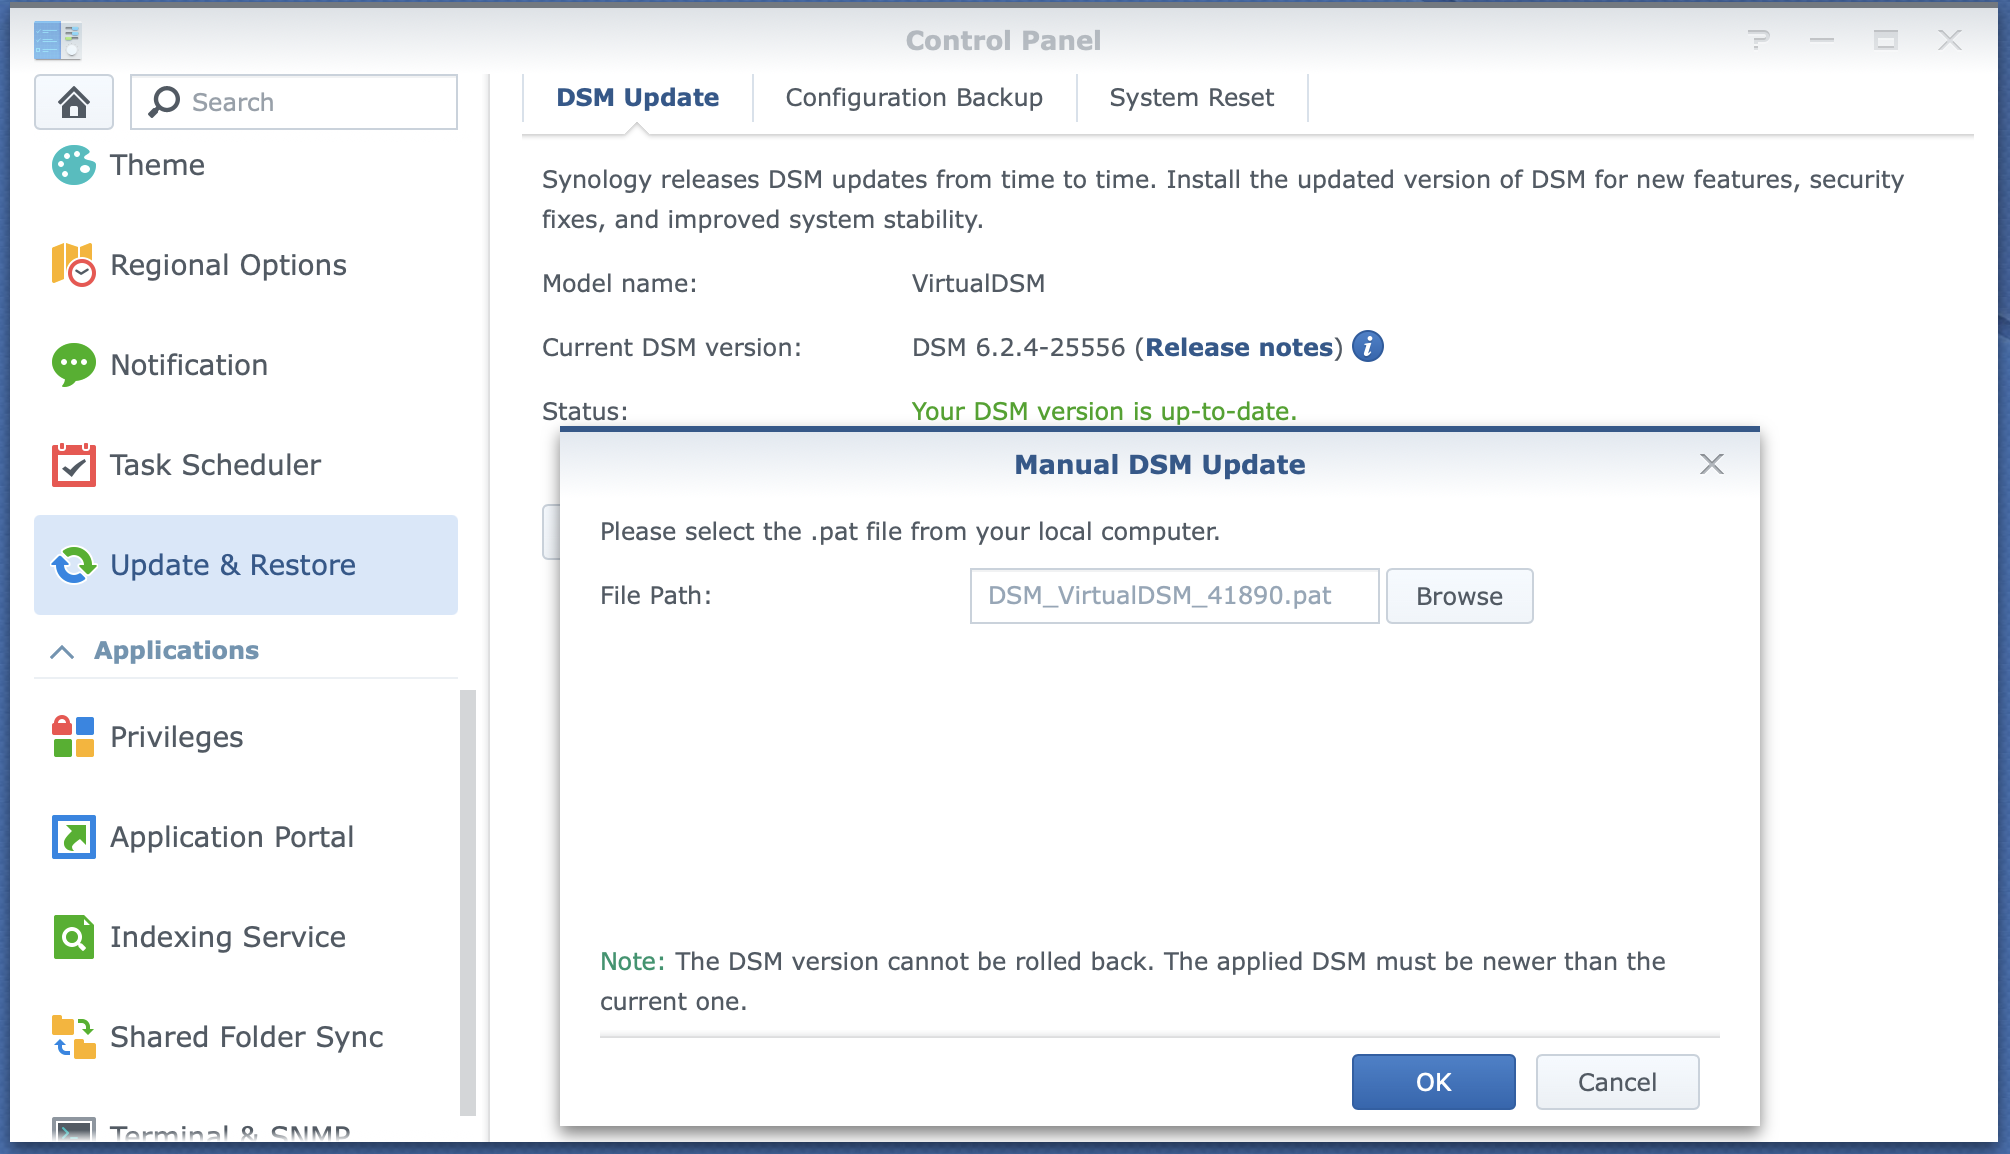
Now we are ready to install Plex so head over to Plex.tv again and download the DSM 7 compatible Plex installation.
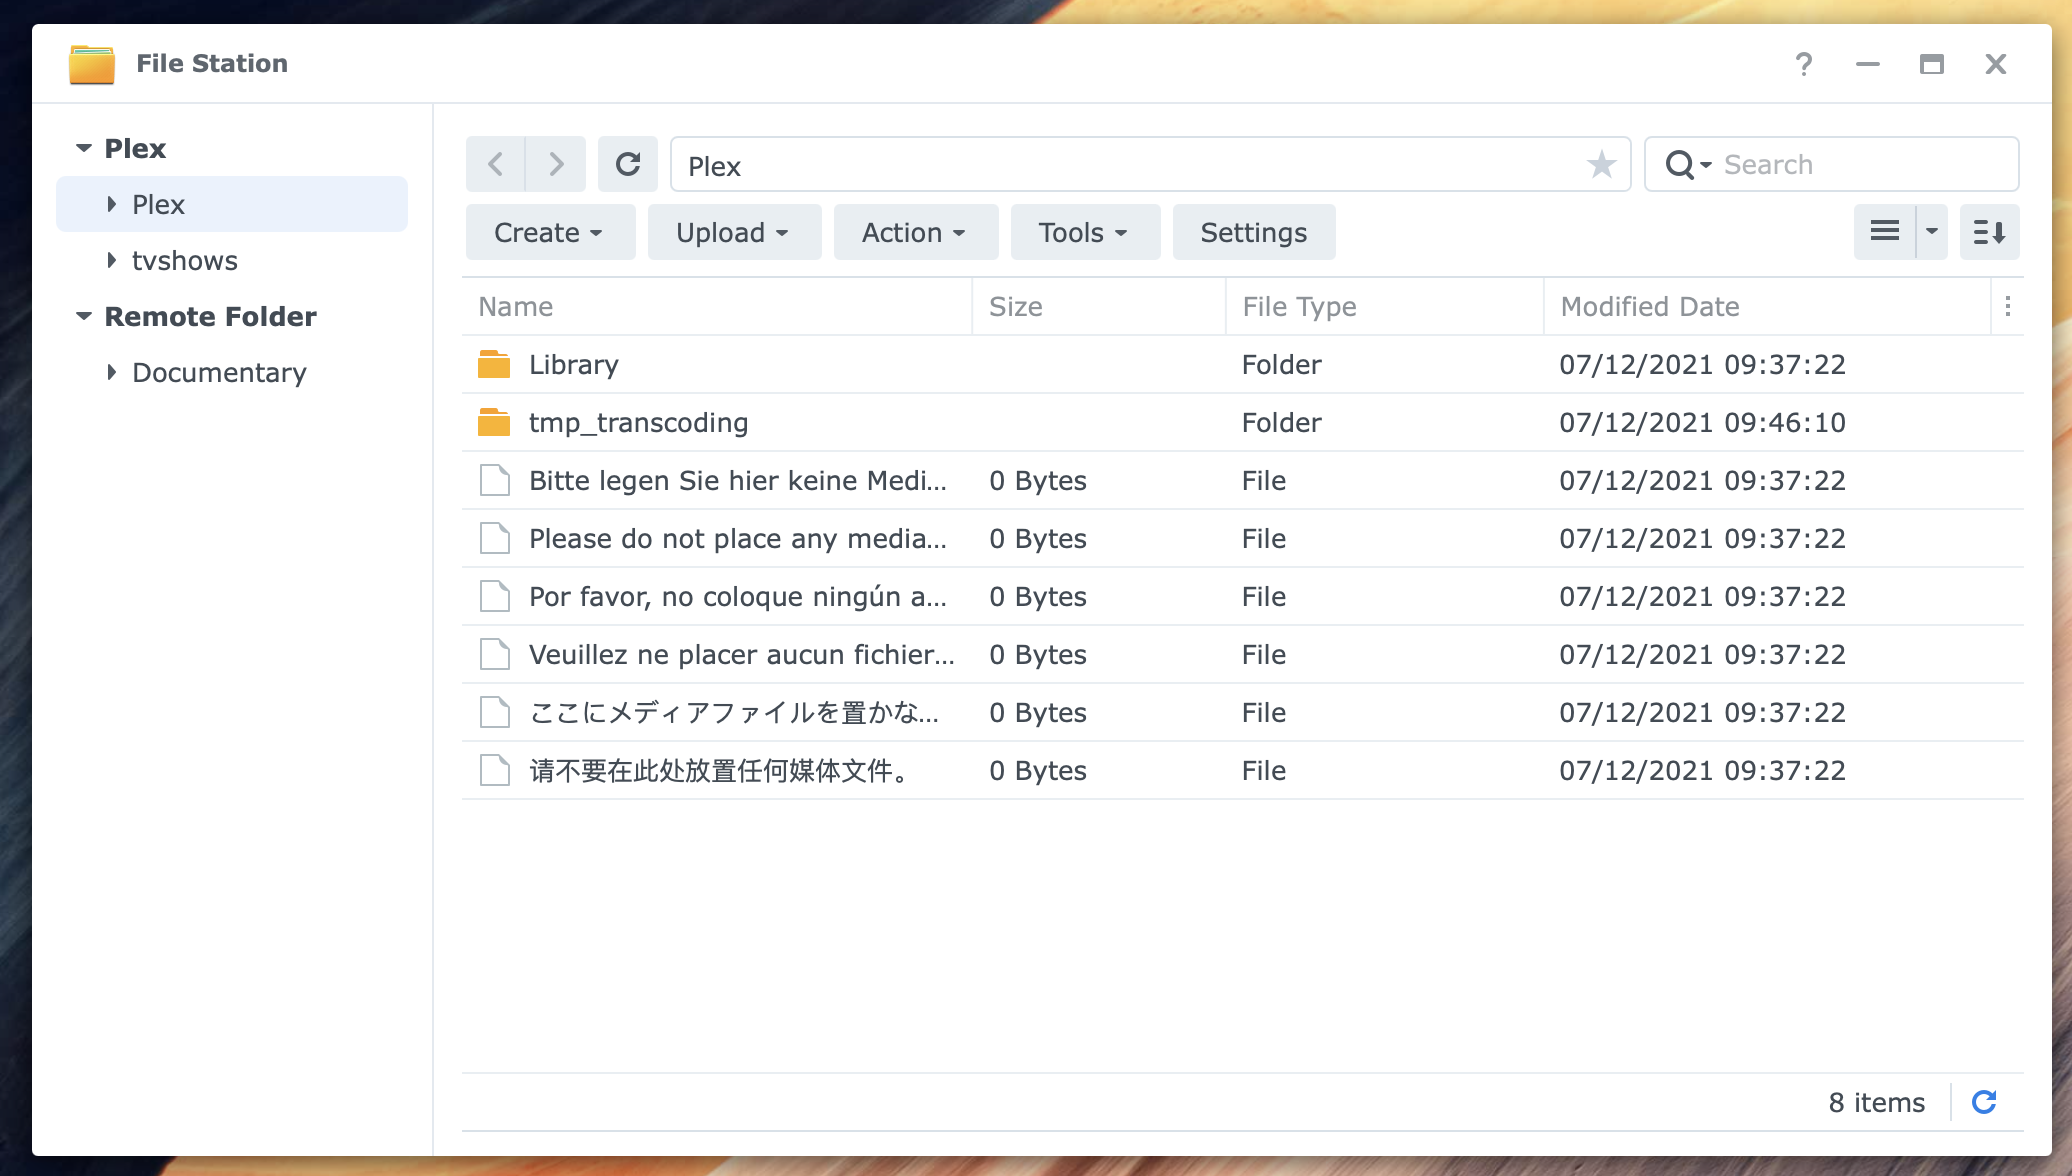
Before running the install, you can go to File Station to make sure that the Plex folder (where all the metadata and app files are) is still there and has some data in it.
Now, open up Package Center and use the manual install to load up the DSM 7 Plex version that you have just downloaded.

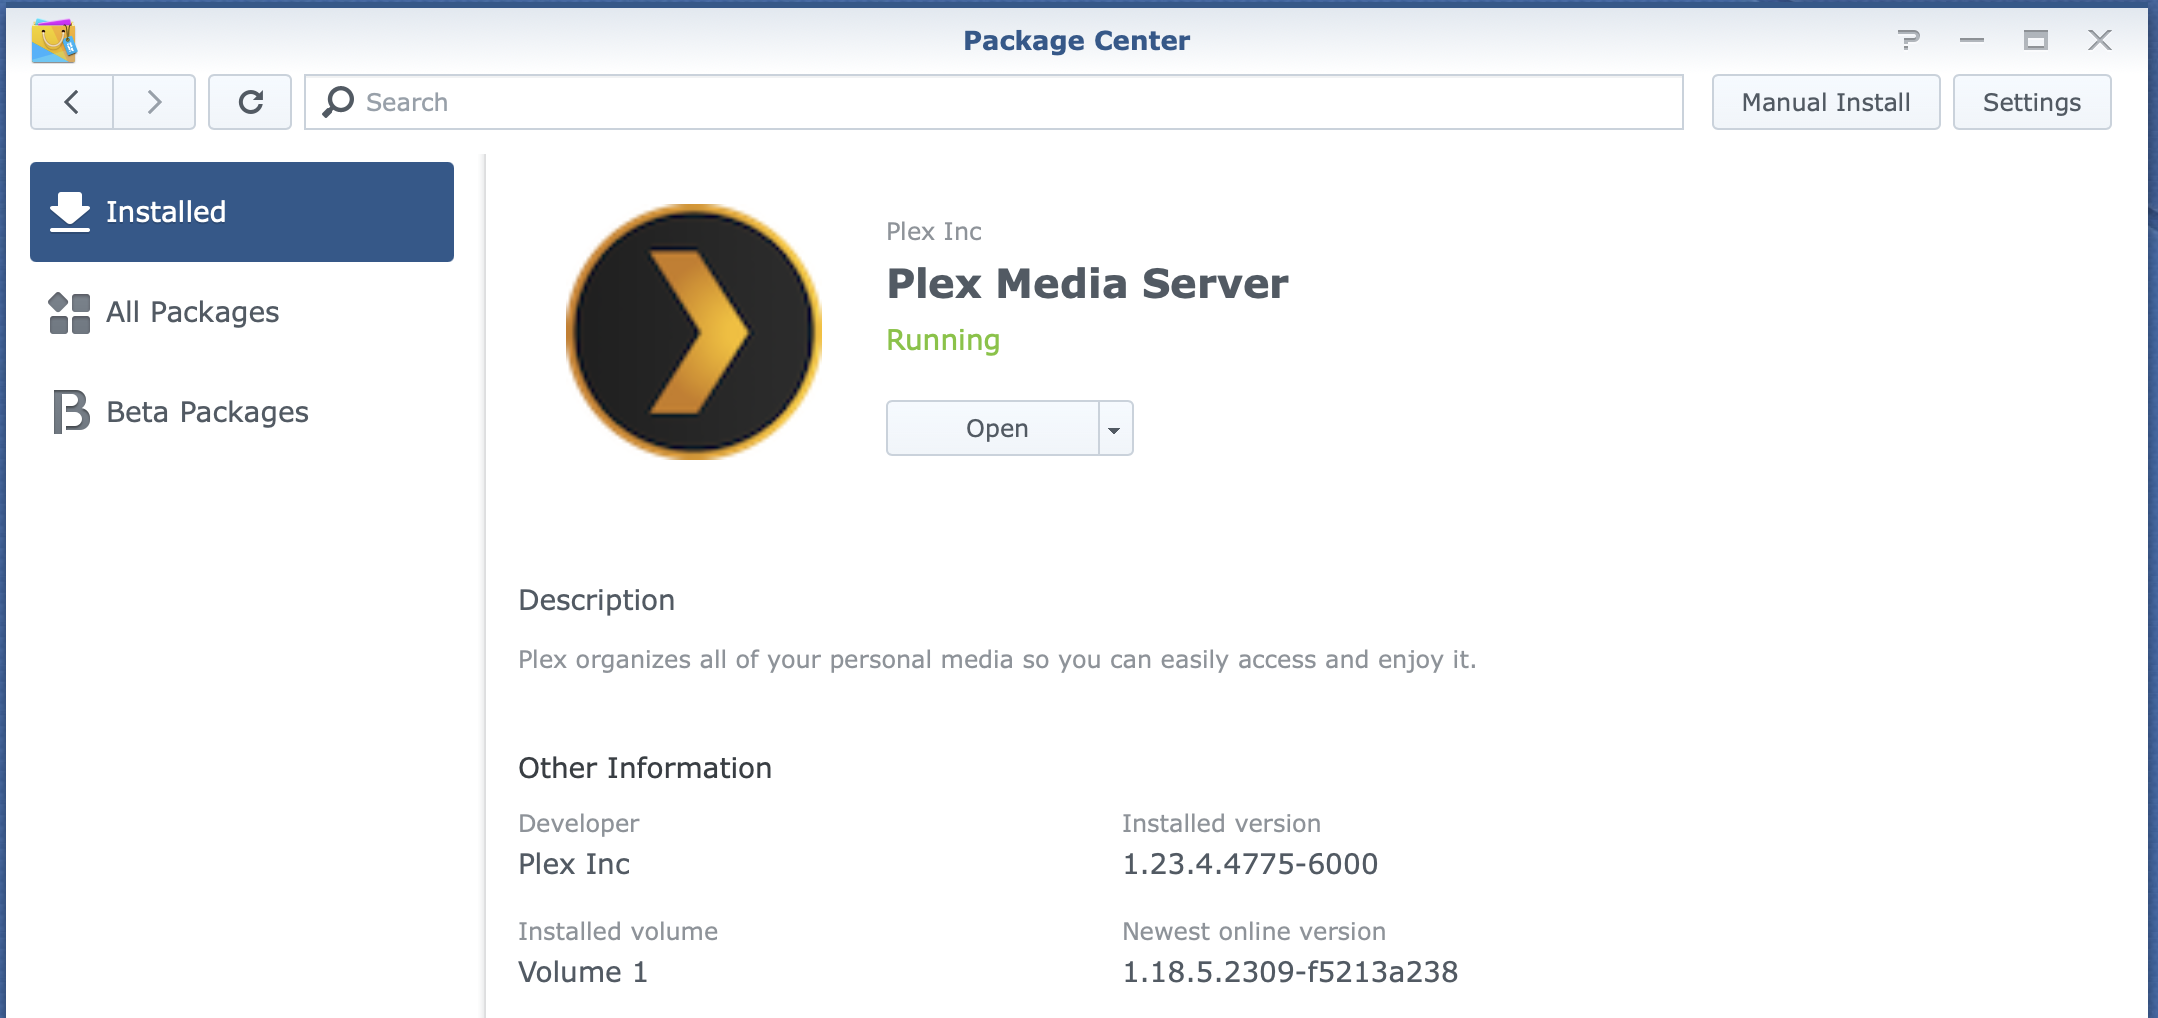
So far we have installed Plex and got a new PlexMediaServer internal account and shared folder.
Next, we need to add permissions to the "old" Plex folder and redo the install once more in order to migrate the Plex instance correctly.
STEP06 - setting permissions (IMPORTANT!!!)
Now we will need to go to Control Panel > Shared folders, and change the permissions for the Plex folder.
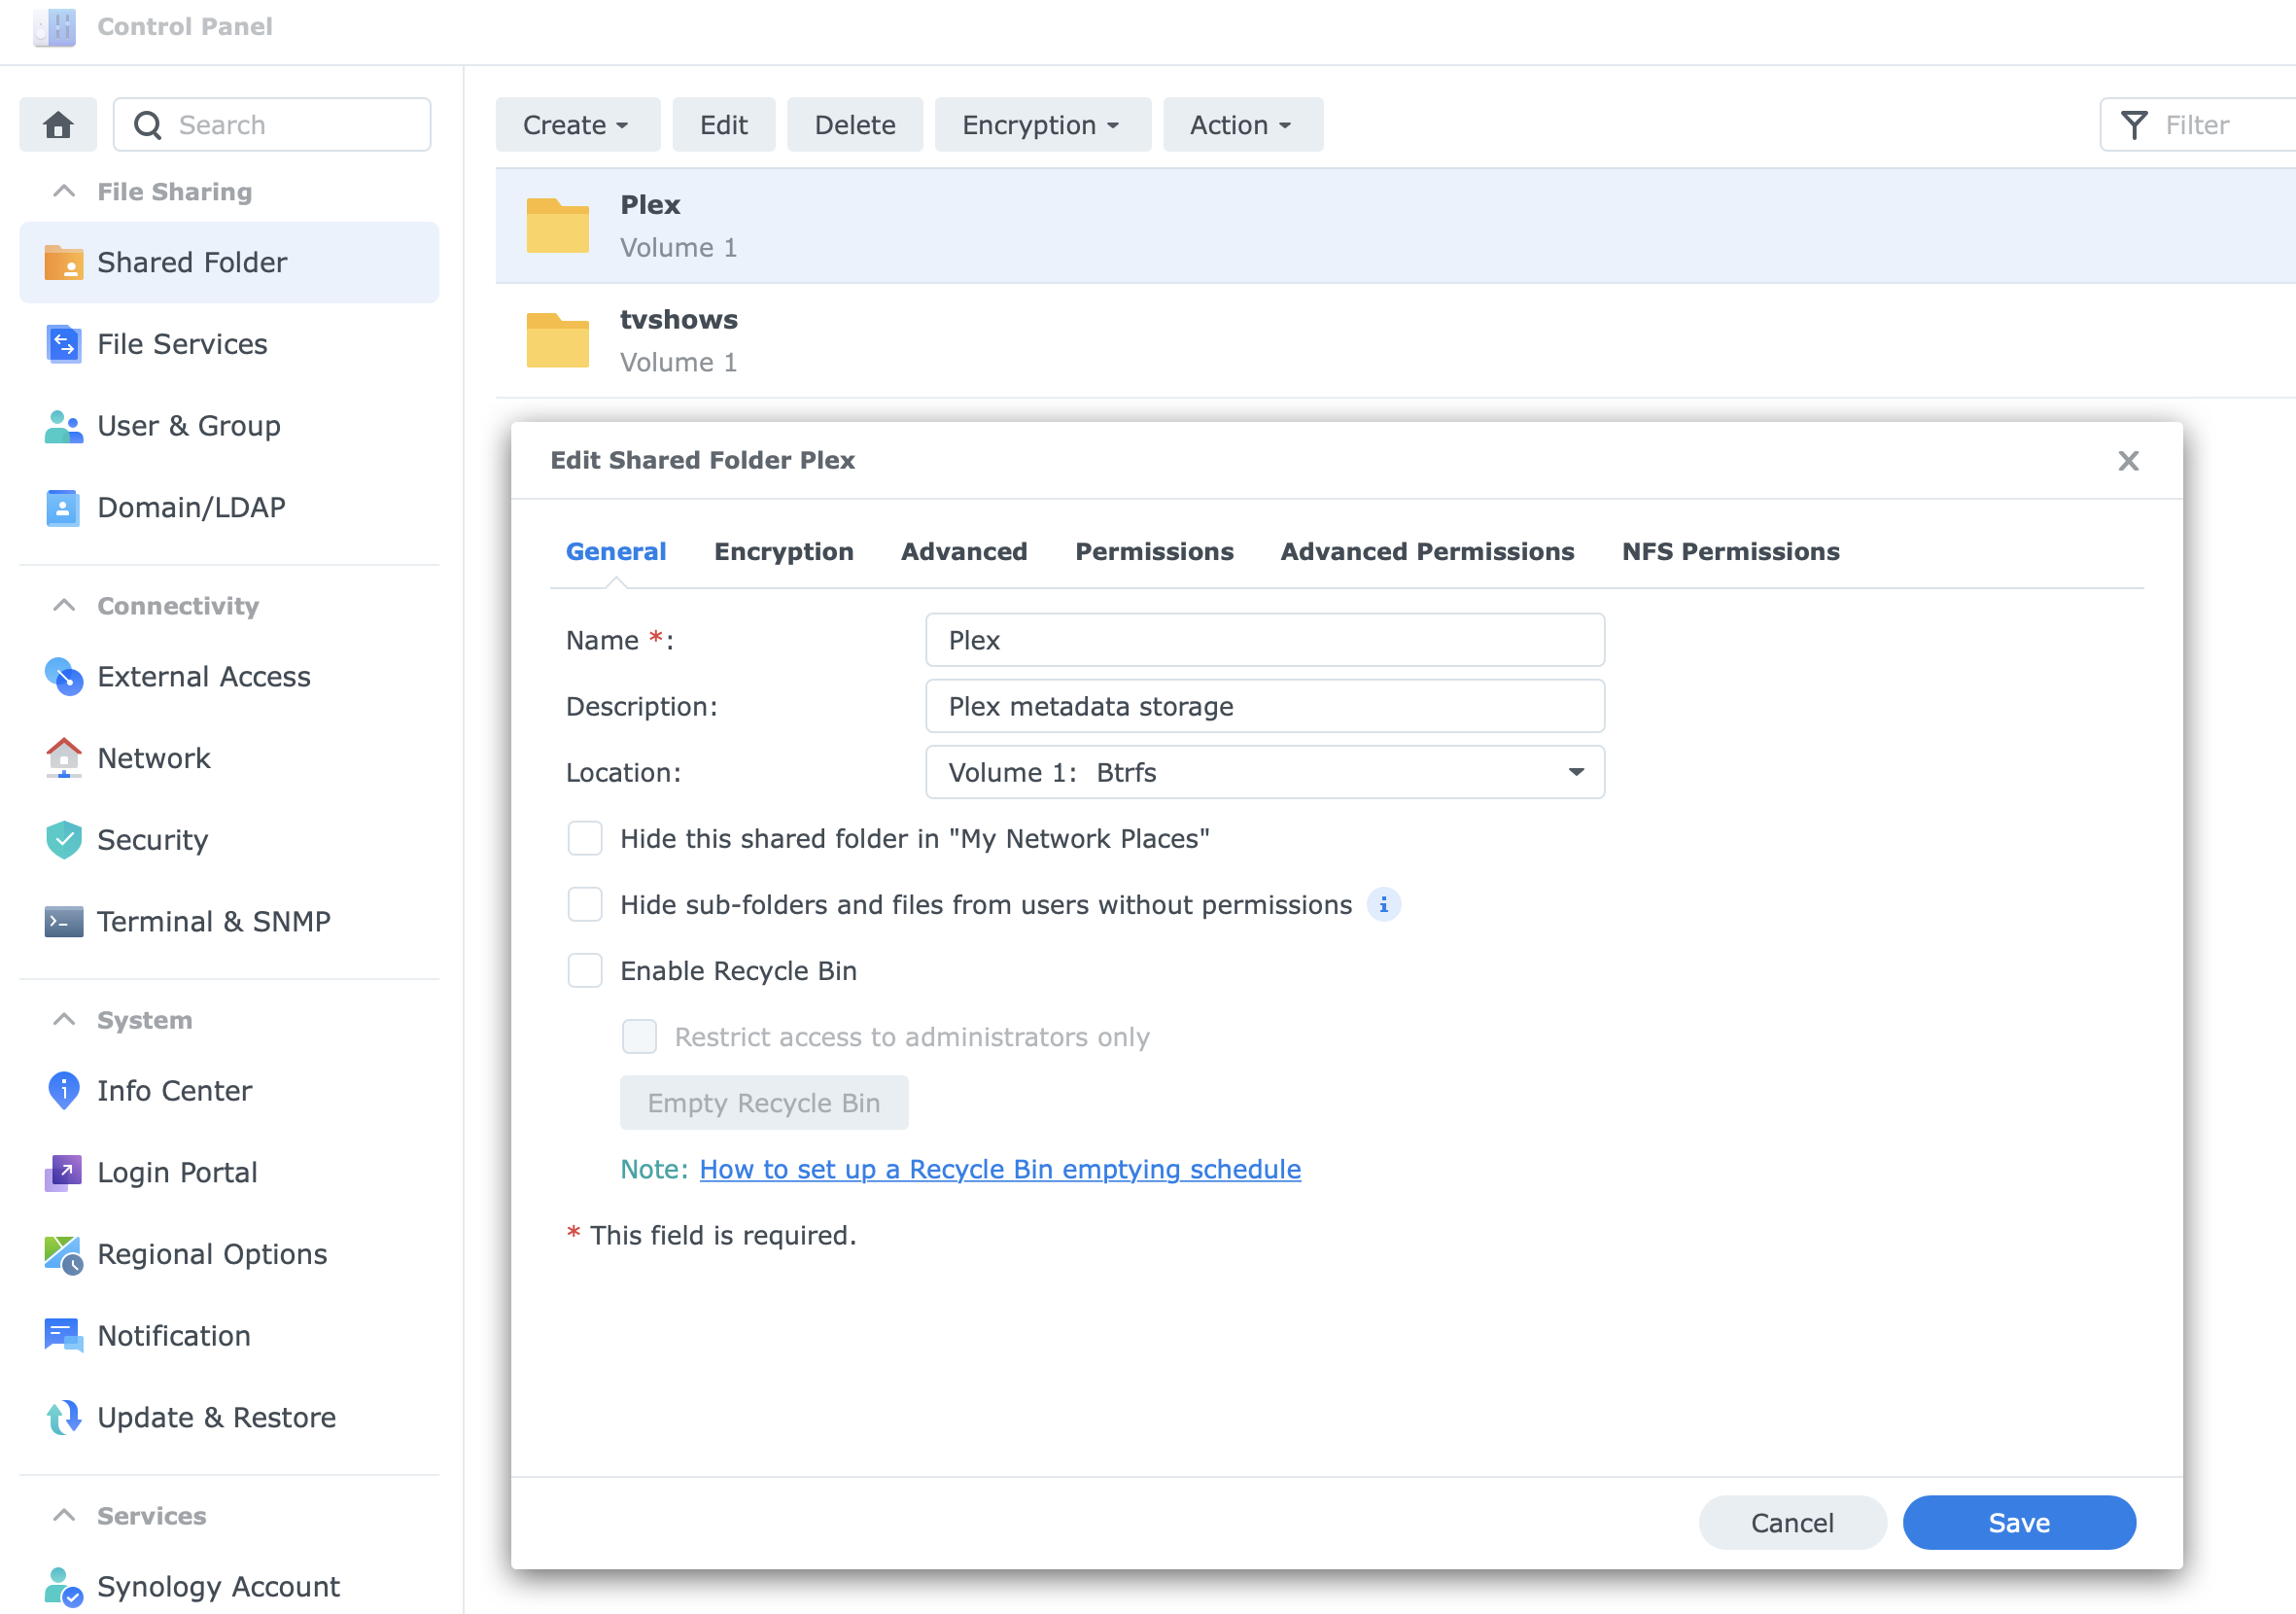
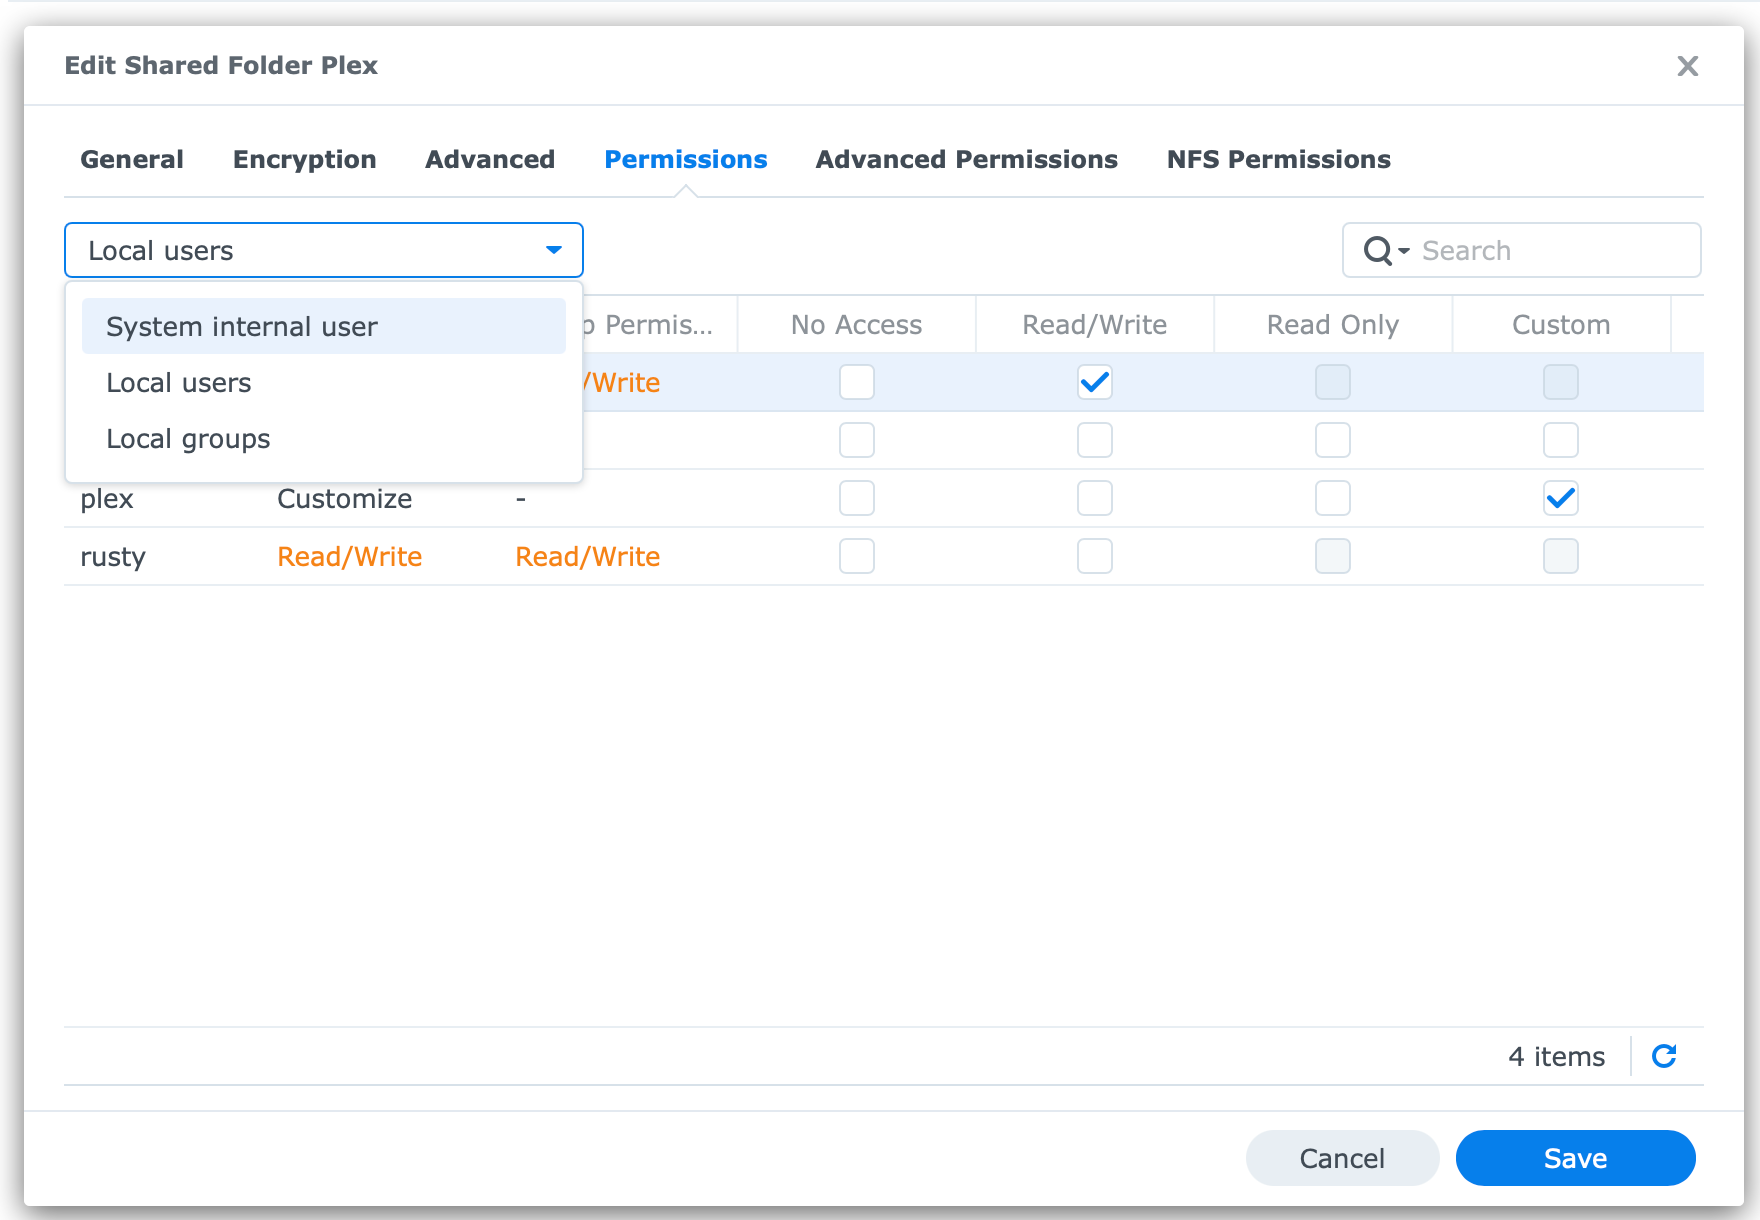
Once you are on the Permissions tab, make sure to change the dropdown menu from Local users to System internal user.

The account in question is PlexMediaServer. Click its Custom column, and add Full Control permissions.
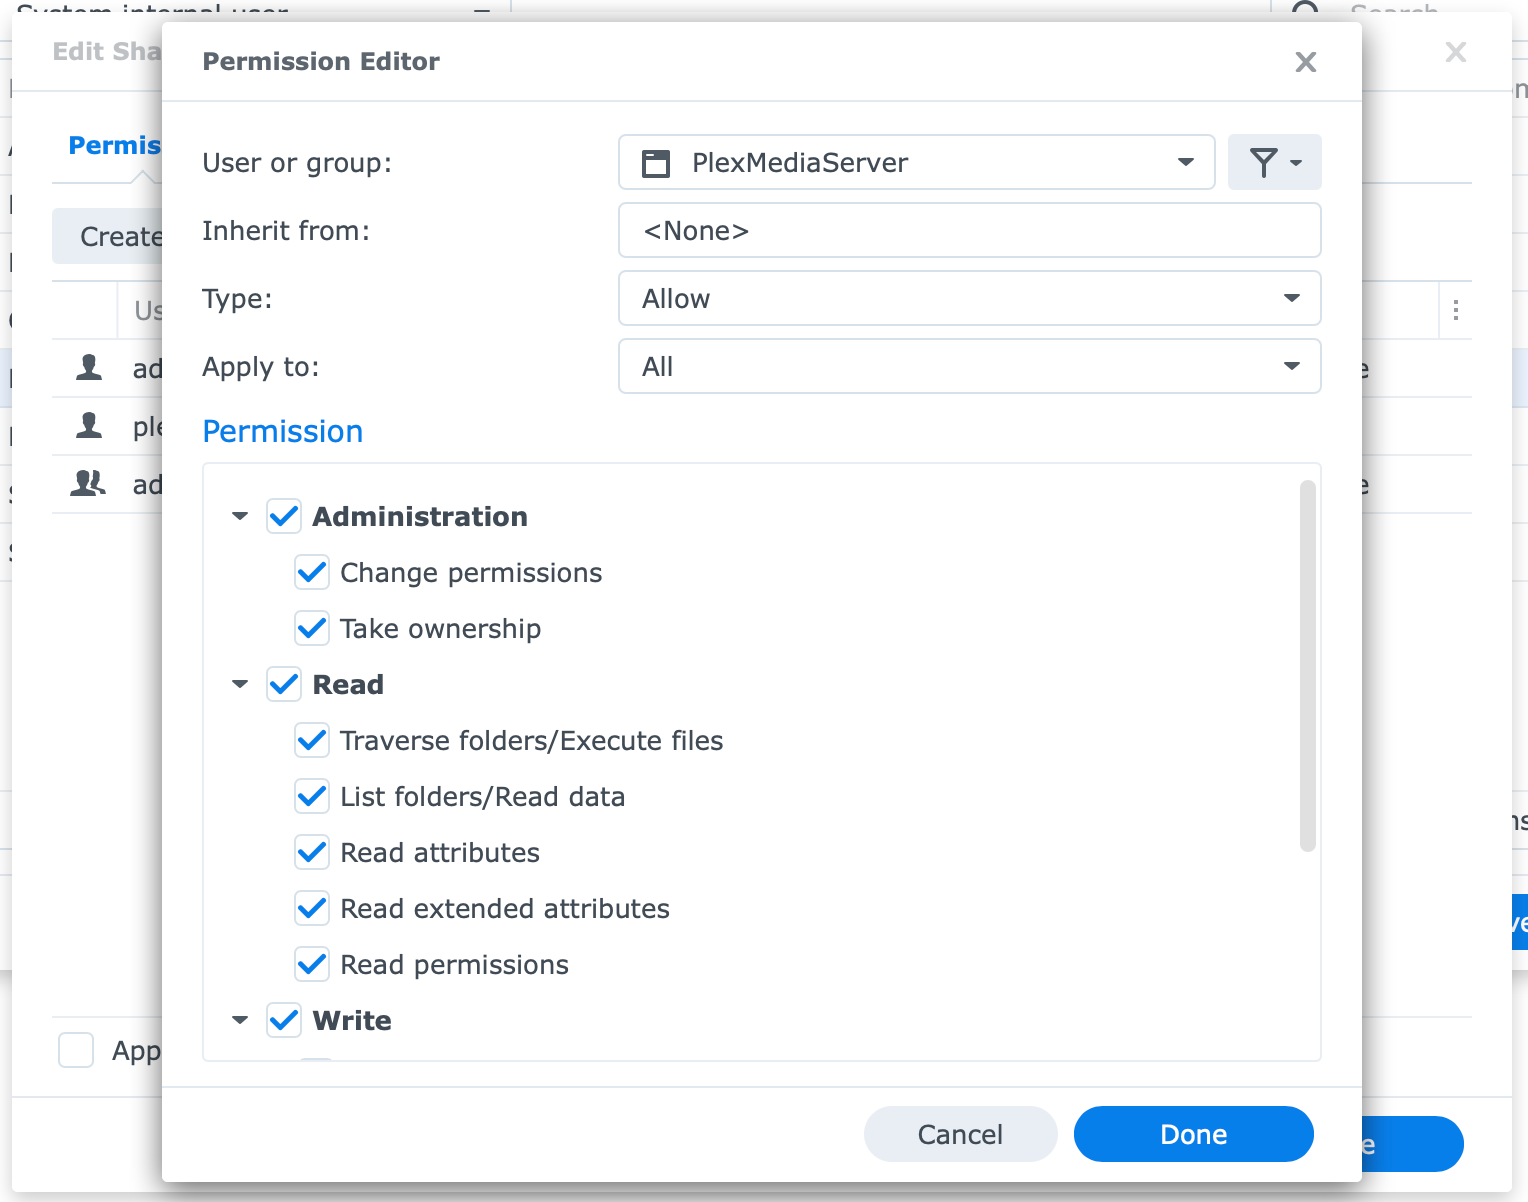
Select Administration, Read, and Write permission for the user and click Done.
Once you have returned to the previous screen YOU MUST SELECT the Apply to this folder, sub-folders, and files check box!

After you have selected the checkbox, click Save, and wait. Depending on the size of your folder and the number of files this can take some time. Be patient.
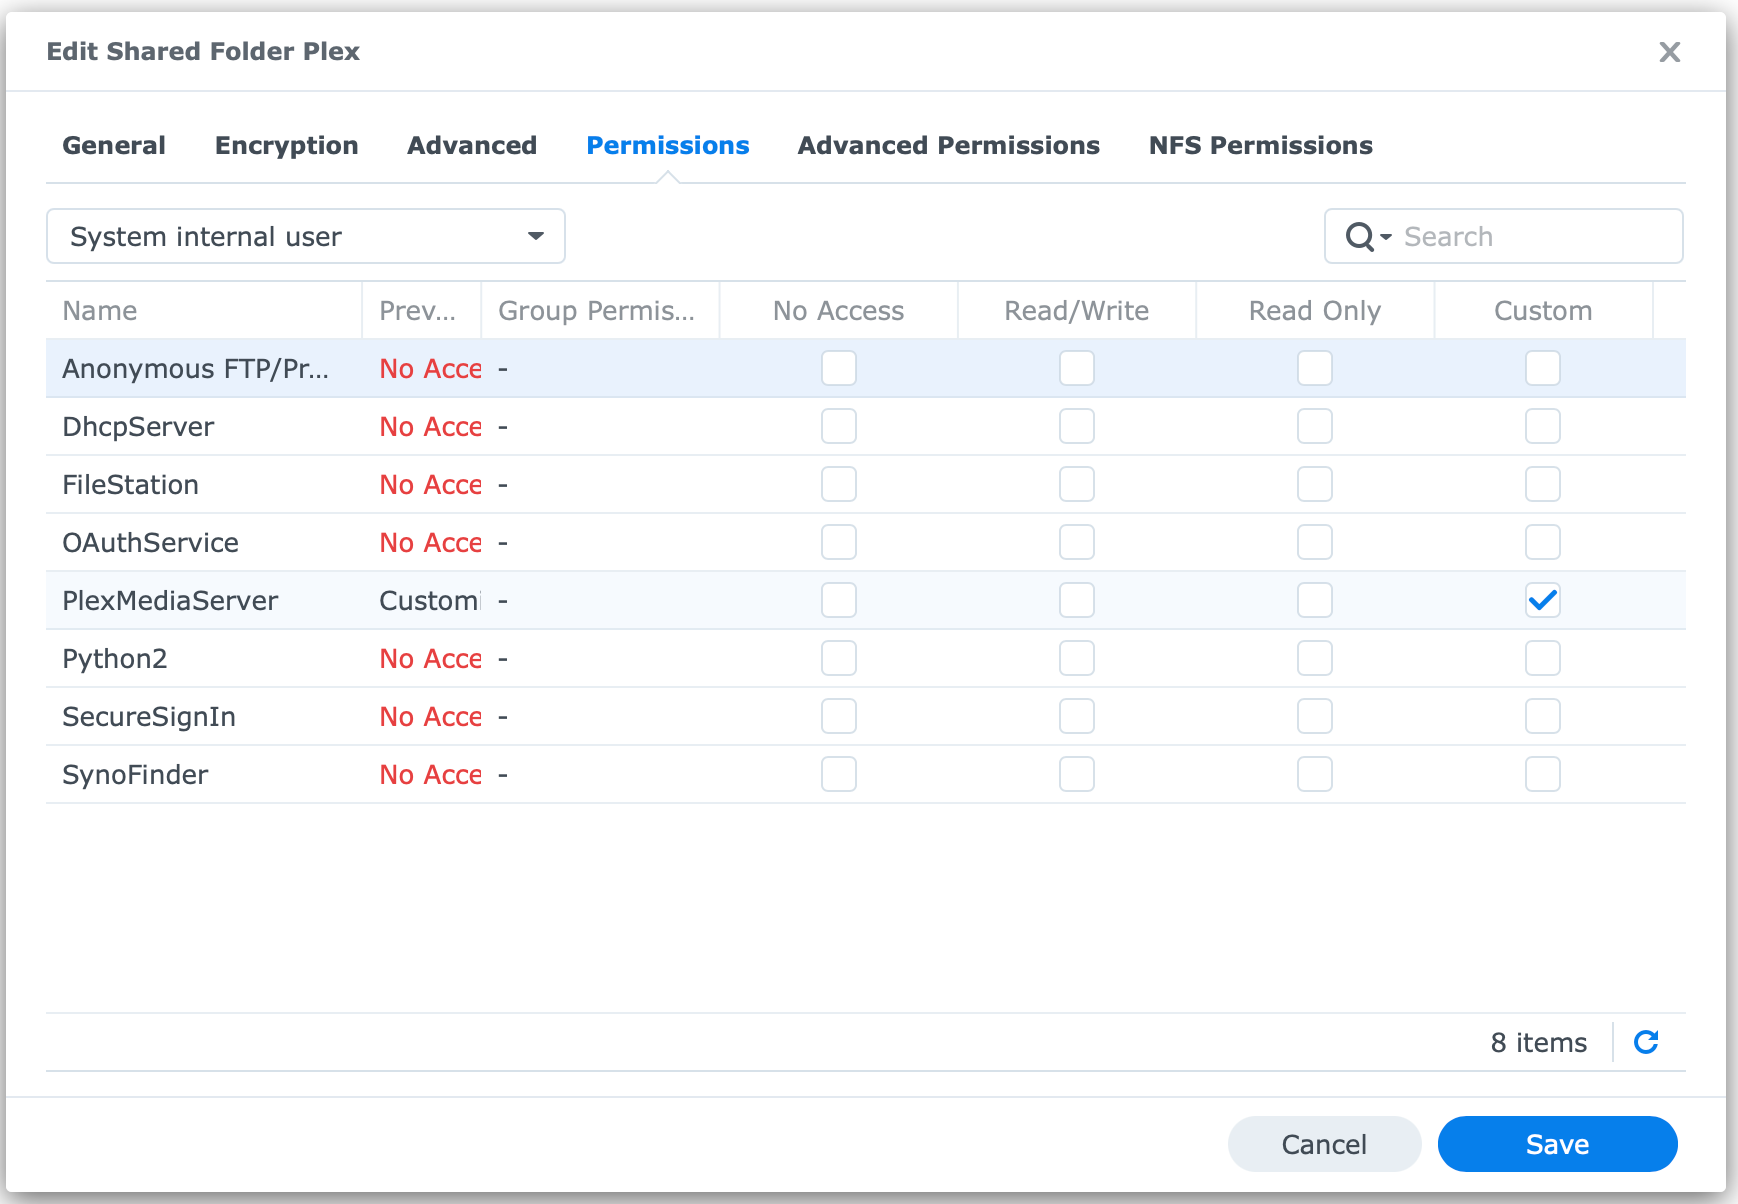
Finally, click Save one more time, and you are done.
STEP07 - Uninstall Plex under DSM 7
Go to Package Center and uninstall Plex with the following option:

Complete the process and move forward.
STEP07a - remove the new PlexMediaServer folder
Now that we have uninstalled the Plex platform, we need to remove the PlexMediaServer folder that was created in Step 07. Use the Control Panel > Shared Folders and delete it.
STEP08 - Final install and migration
Now that we have set the permissions in step 06 on the original Plex folder and have uninstalled Plex it is finally time to install it and let it run its migration.
Start a new install via Package Center and select the following option:
Again, run the normal install. As long as you have set the permissions as indicated in STEP05, Plex will initiate the migration and complete the installation. The only thing left to do is to add permissions to your media library folders.
STEP09 - adding permission to your library folders
In order for your Plex instance to work as expected, the Plex account needs to have permissions on all the folders that are presenting data to your instance as libraries.
So head over to Control Panel again and in Shared folders view, select the folder(s) needed and give them R/W permissions.

Process completed
Your Plex instance should now be running with the old data and libraries waiting for you. Log into your Plex web UI or use the official app.plex.tv to check it out.
So just to recap.
- Uninstall Plex under DSM 6
- Update to DSM 7
- Install Plex (1st time)
- Set permission to the "old" Plex folder
- Uninstall Plex
- Install Plex (2nd time) and let it migrate
- Set permissions to your library folders for the new PlexMediaServer account
In case you get into trouble and end up with a "lost" server, continue to read down the article.
My Plex is lost! Now what?
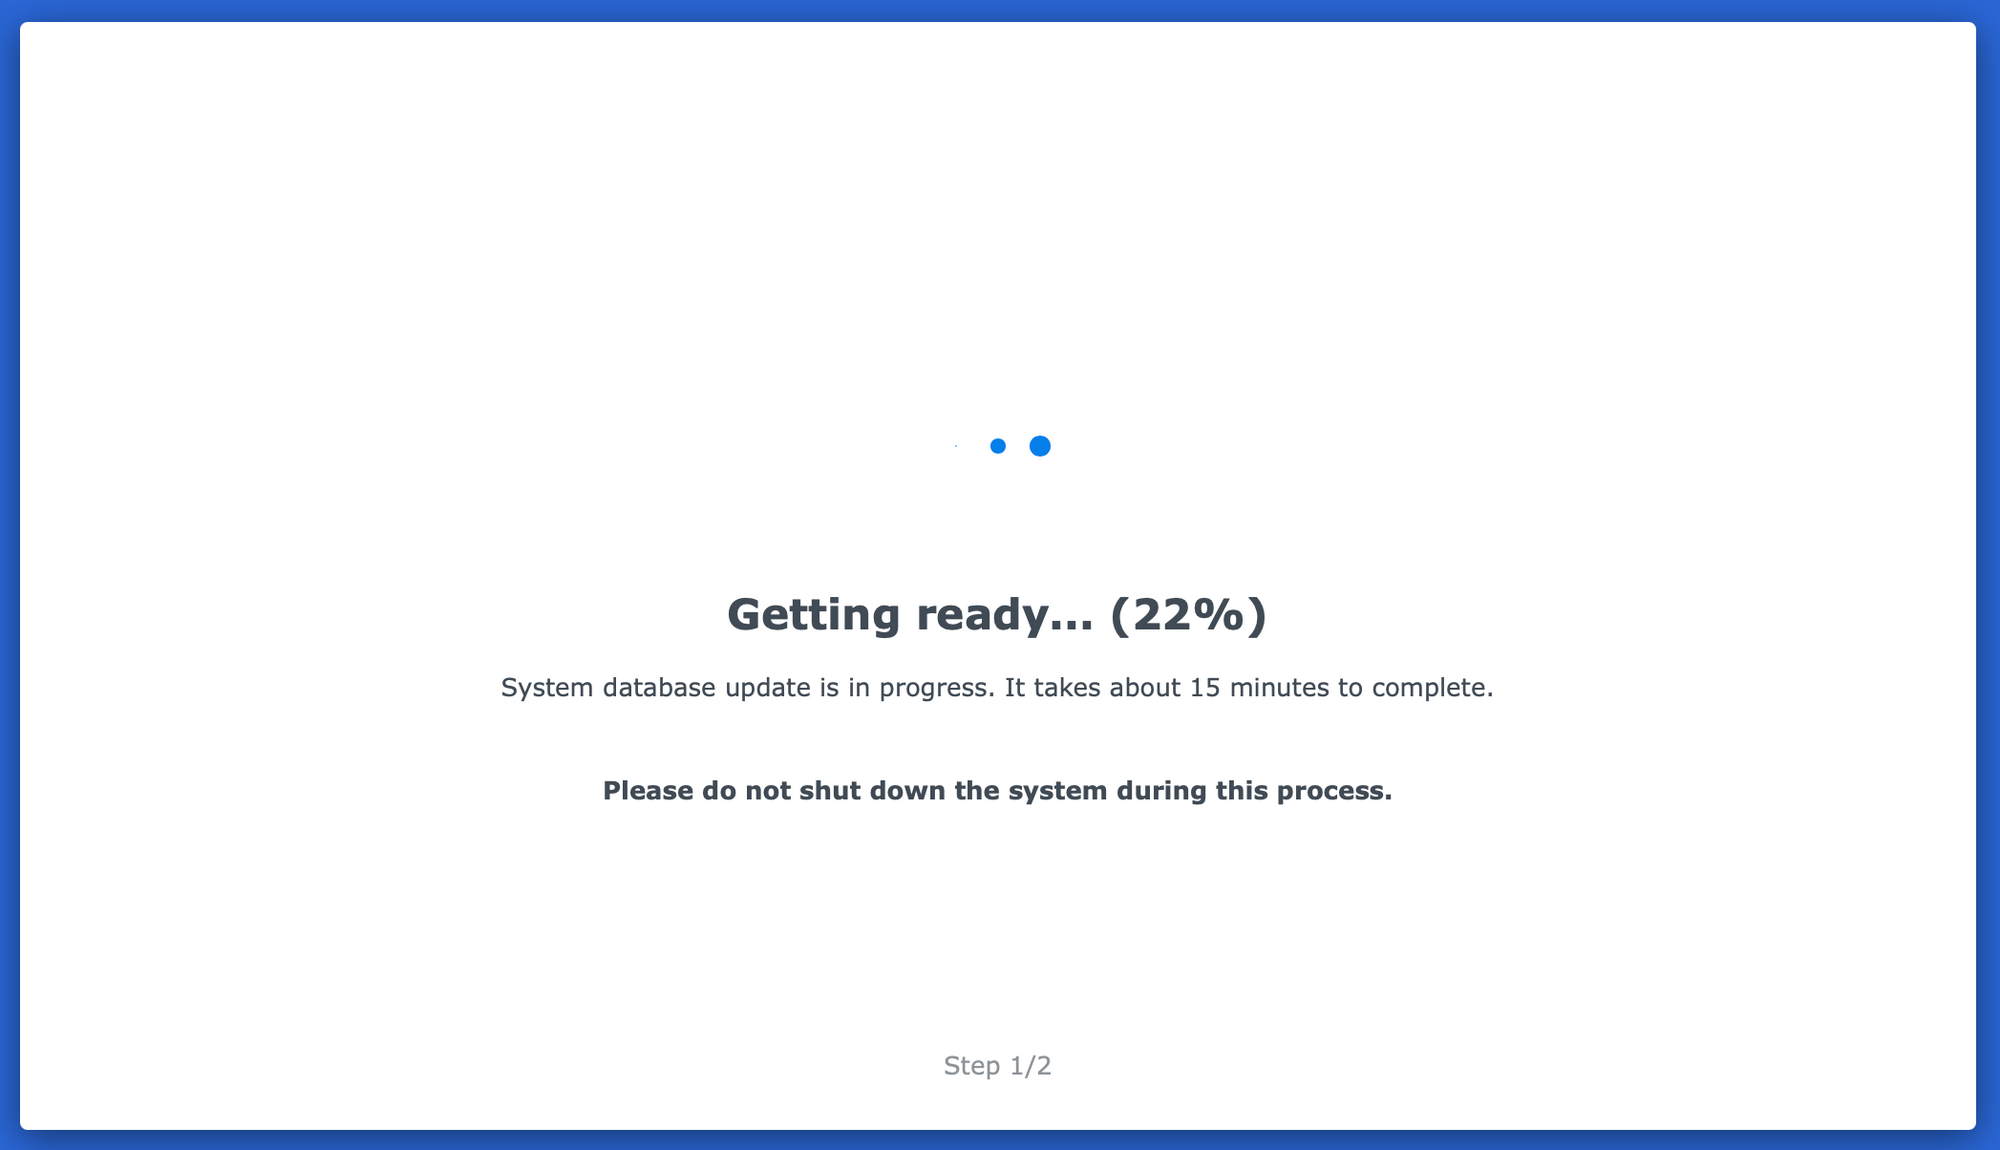
In case you get into trouble and end up with a screen like the one below, follow the process along.
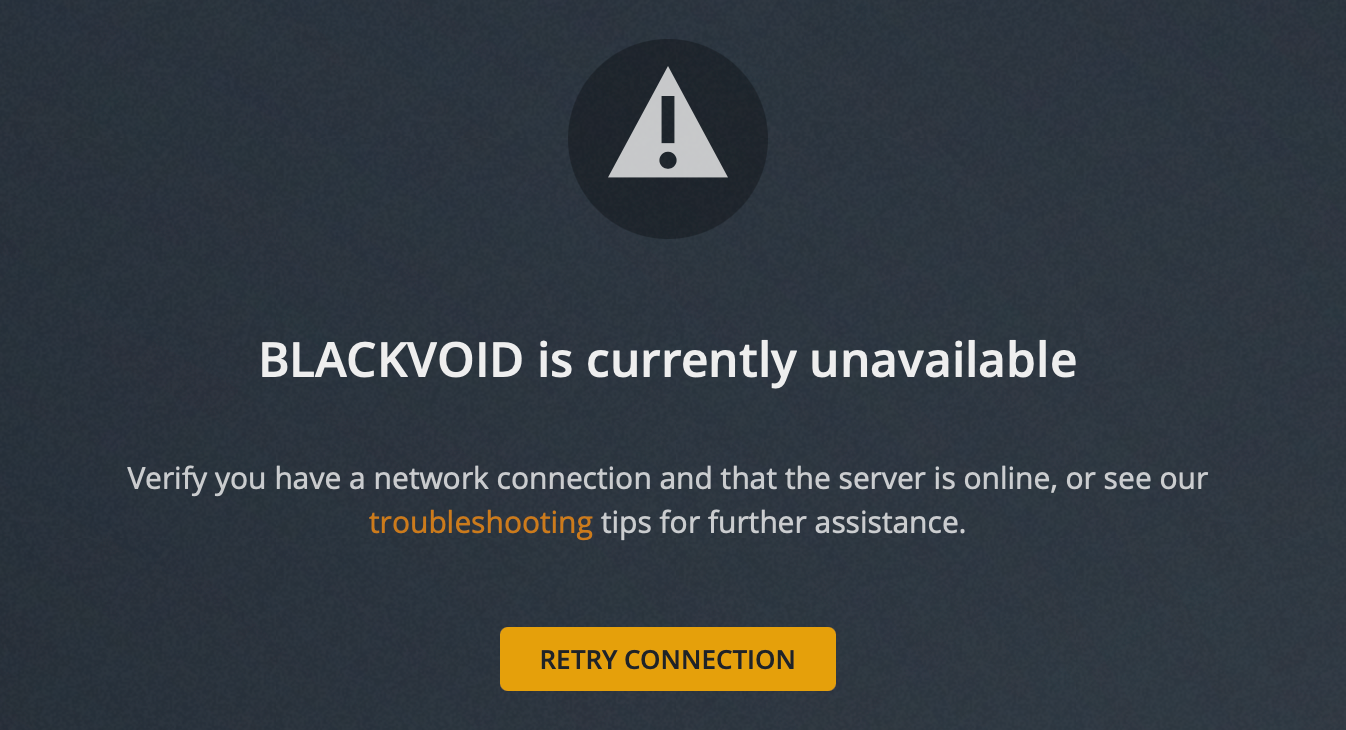
The main reason for this problem might be the fact that you have not executed STEP06. If you have forgotten or failed to give correct permission to your "old" Plex folder for the new account, the migration will be partial, and your server will not boot up. Fix your "old" Plex folder permissions, and then continue on.
No problem, this can be fixed.
STEP01 - uninstall the broken Plex install
First, got to Package Center and uninstall Plex by using the following option:
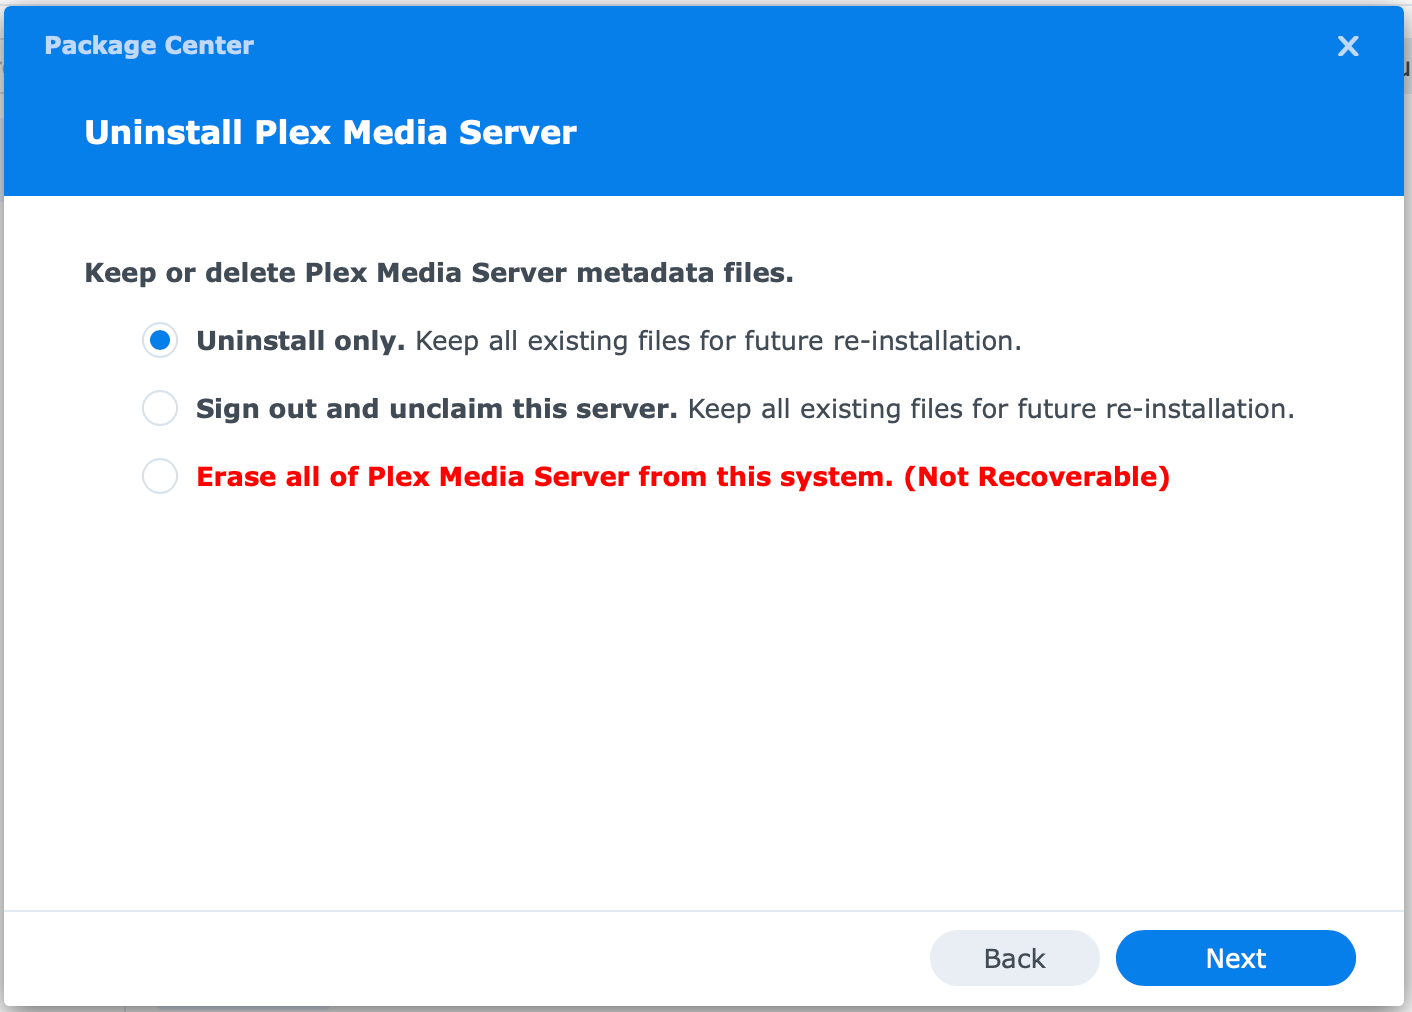
This will remove all the elements needed.
Next, remove the PlexMediaServer shared folder. If you don't upon reinstall it will not detect the "old" Plex folder and start the migration.
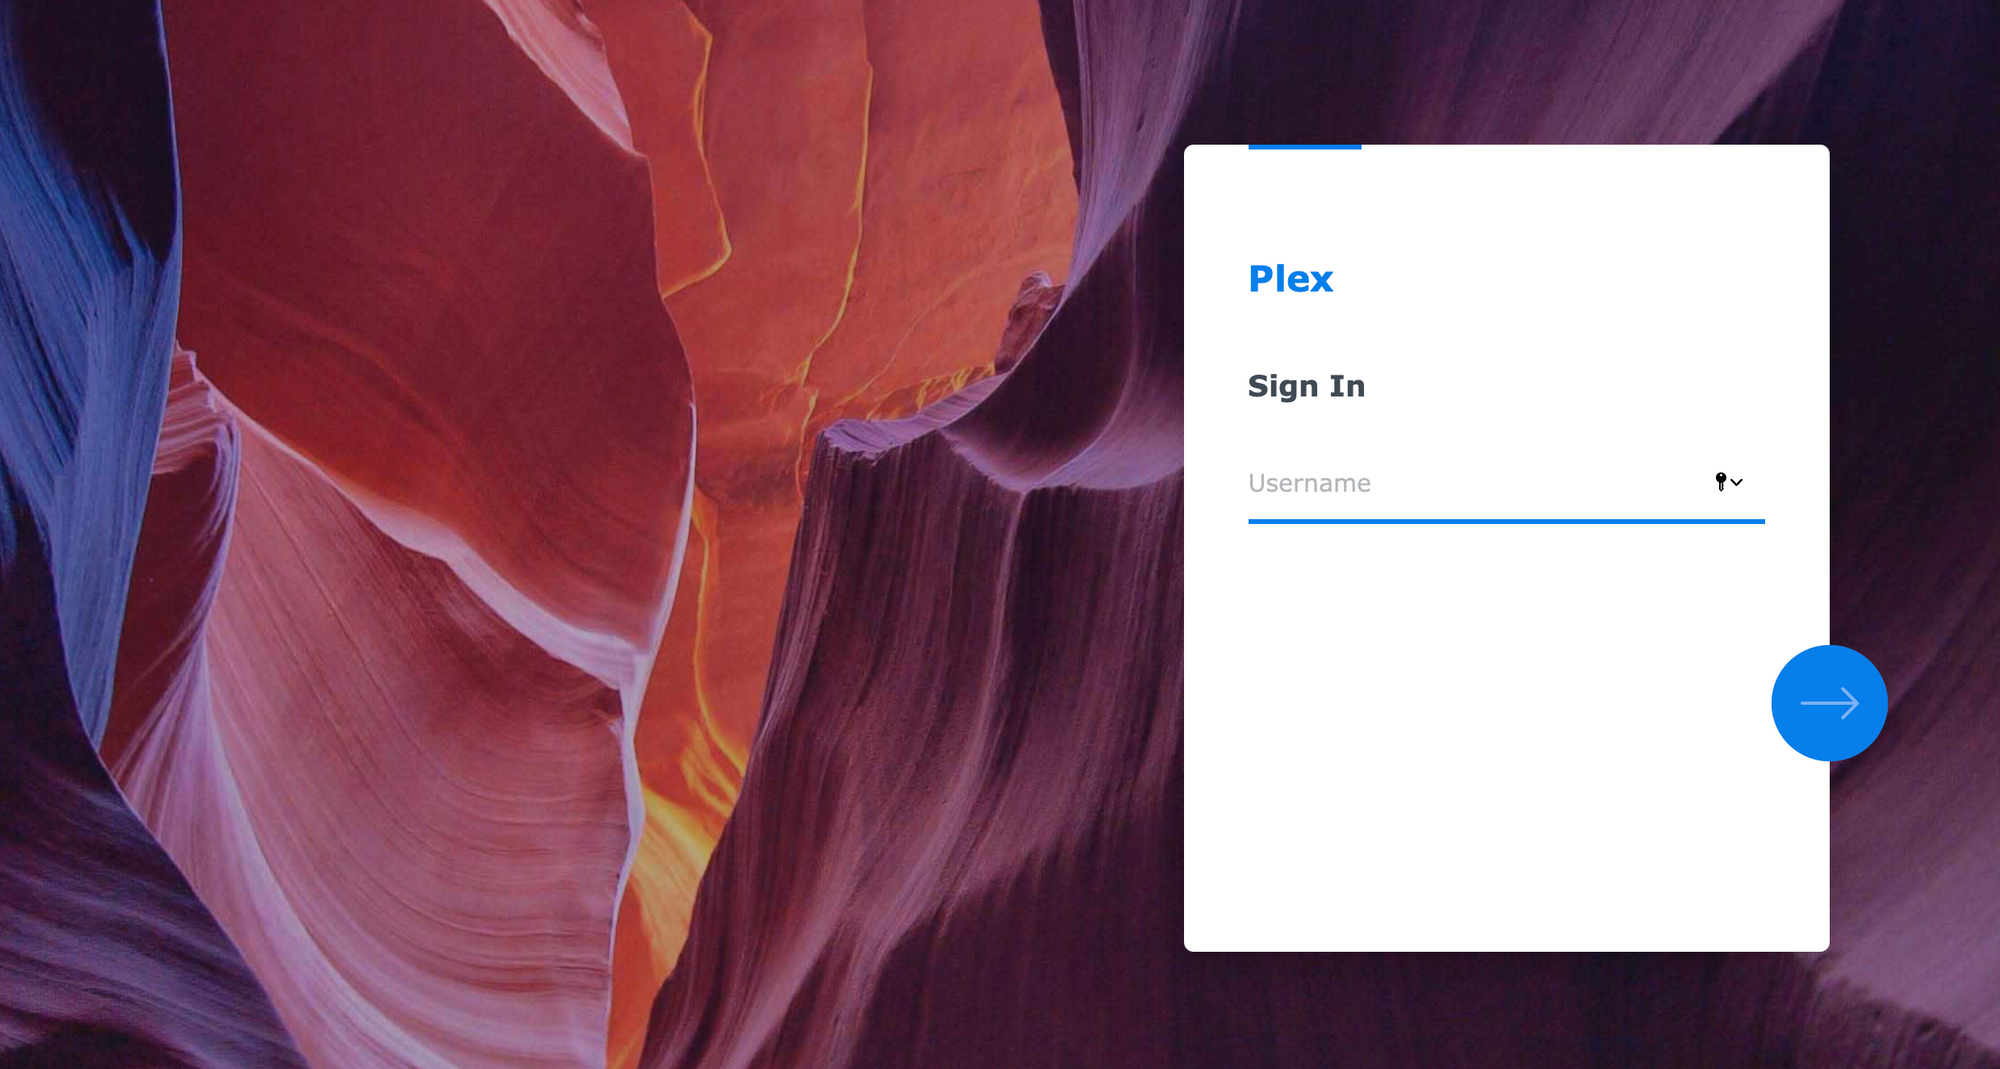
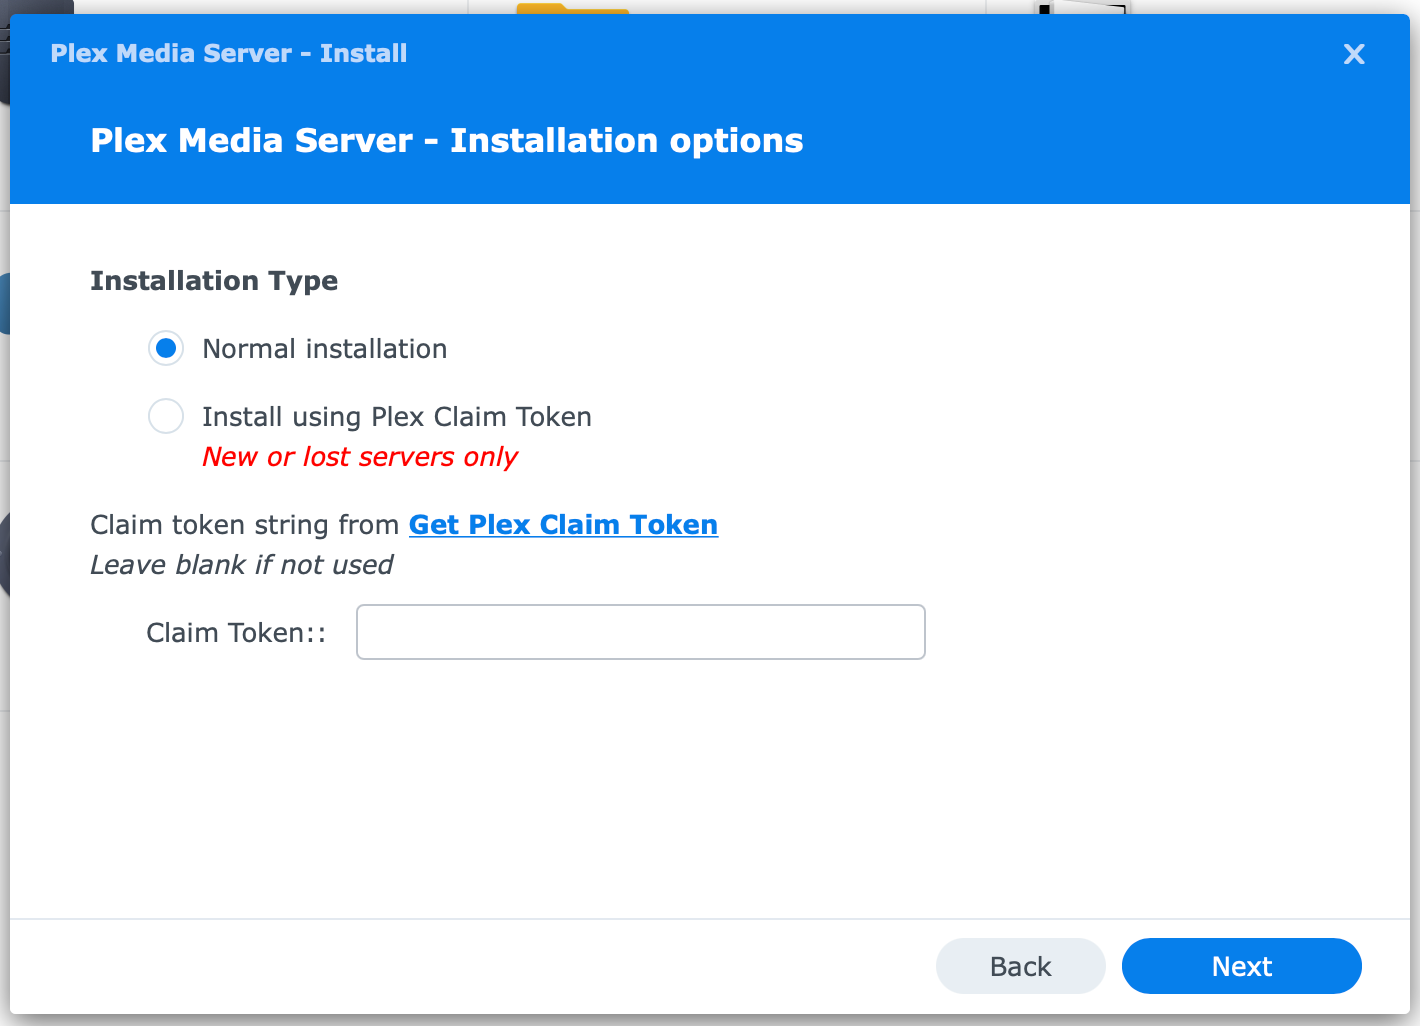
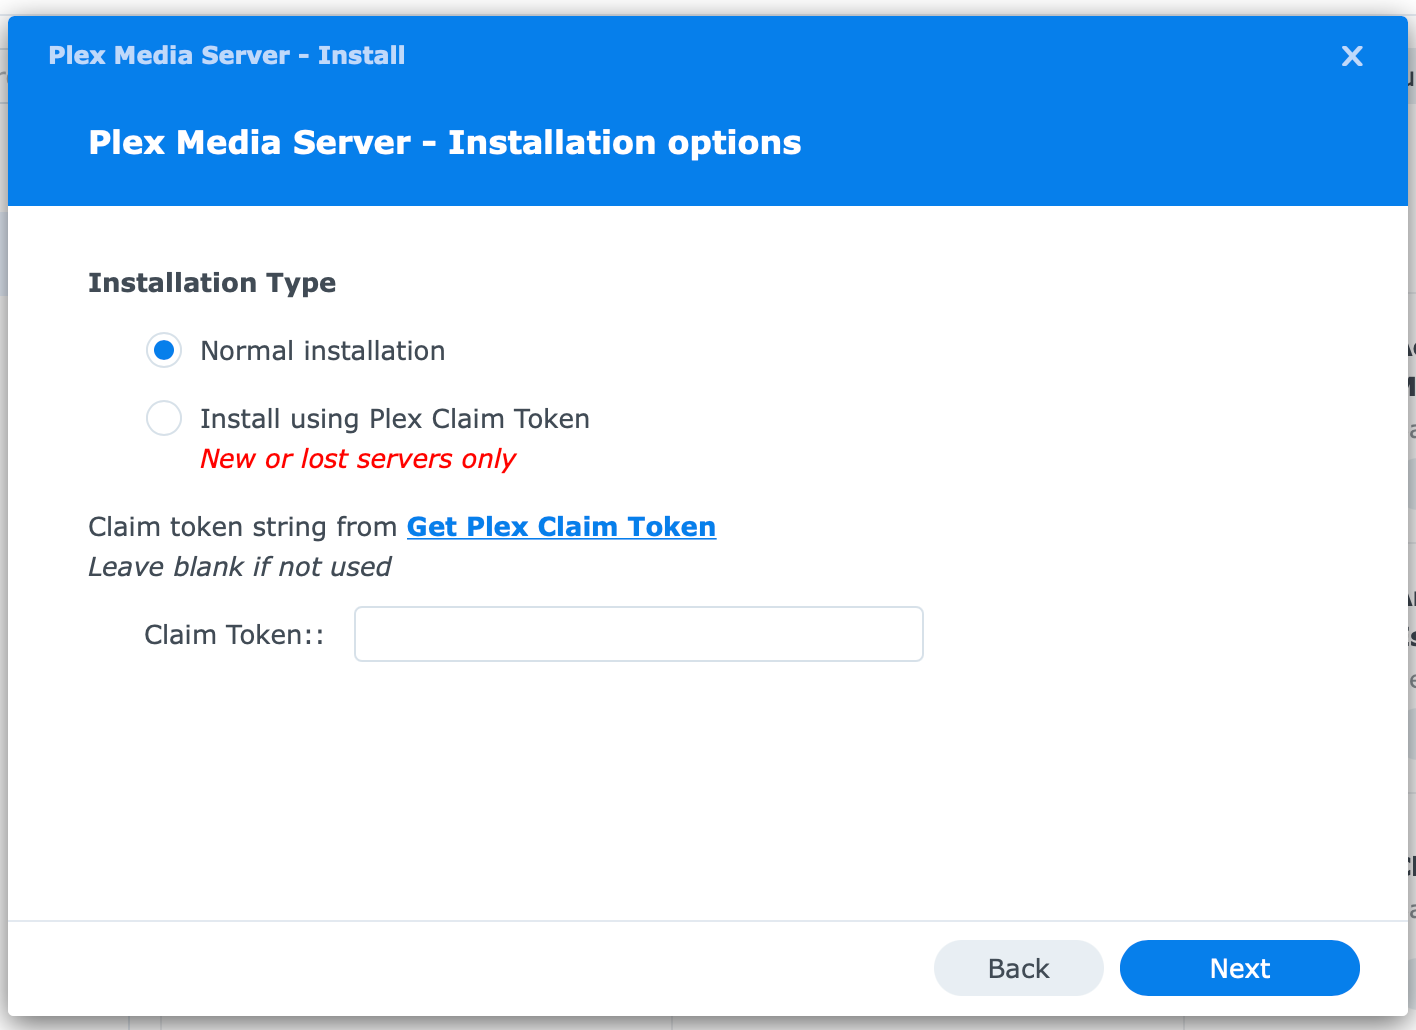
STEP02 - Reinstall Plex again using the claim token
Start a new install using the Package Center and select the second option, Install using Plex Claim Token

Be sure to click the Get Plex Claim Token link to get the token, copy it, and paste it back into the wizard.
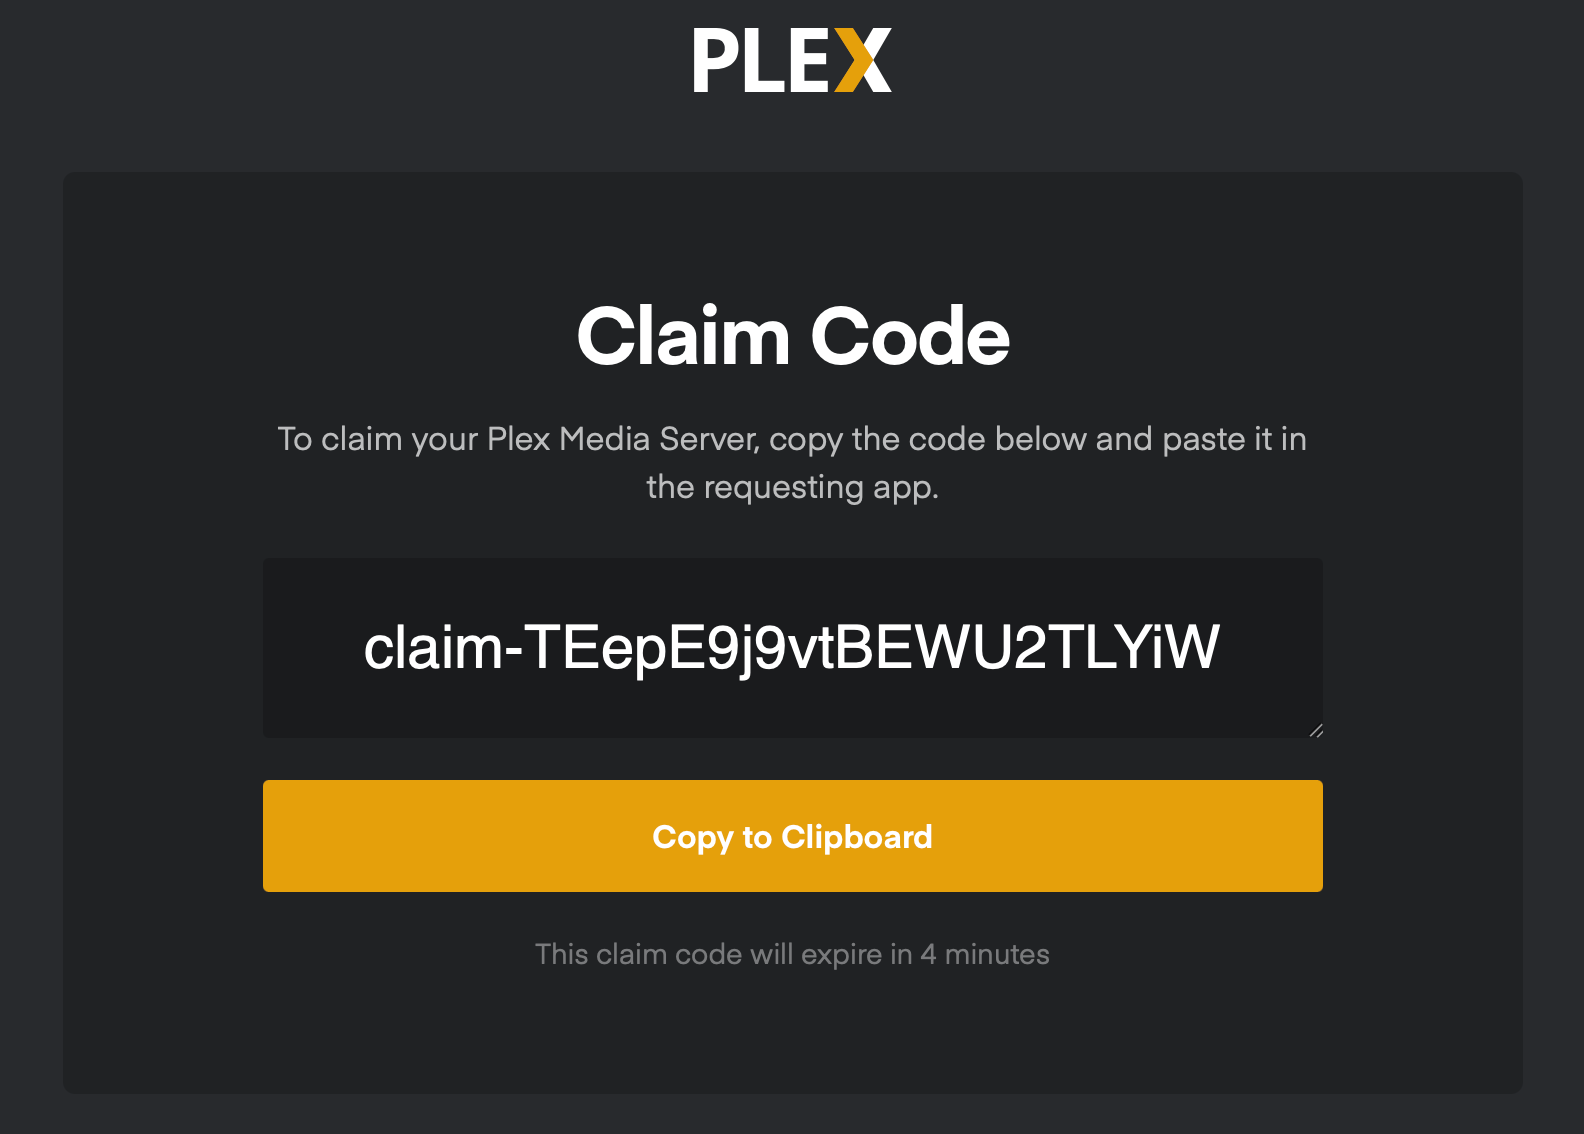
Finally, continue forward with the installation until you see this information:
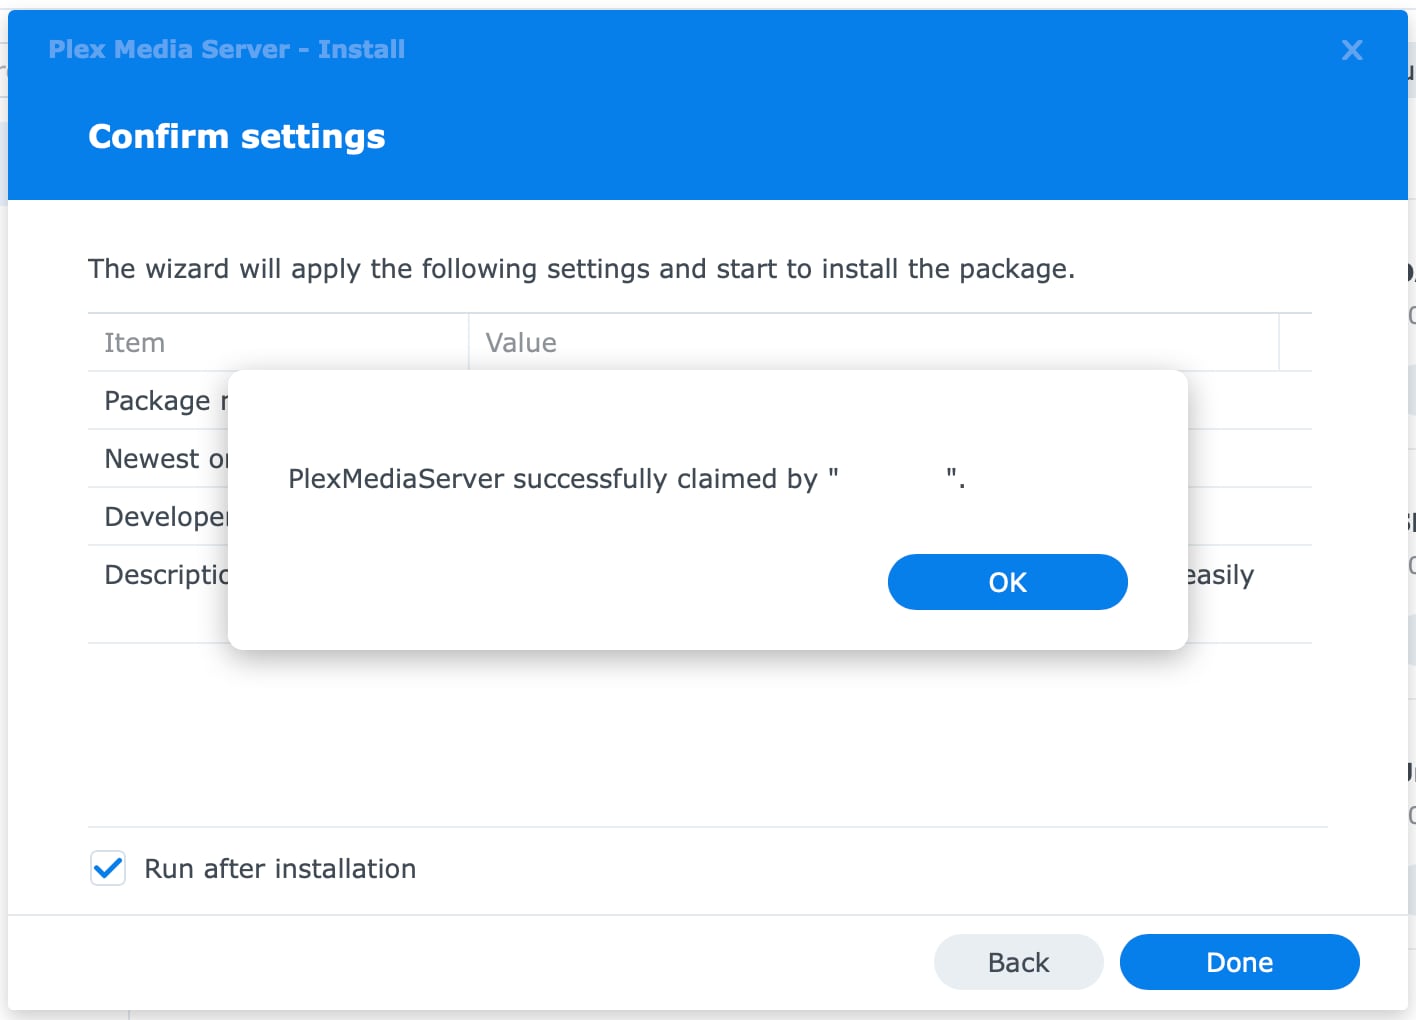
The message should list your Plex.tv account name, saying that the migration is complete and you have claimed your server back. All is well.
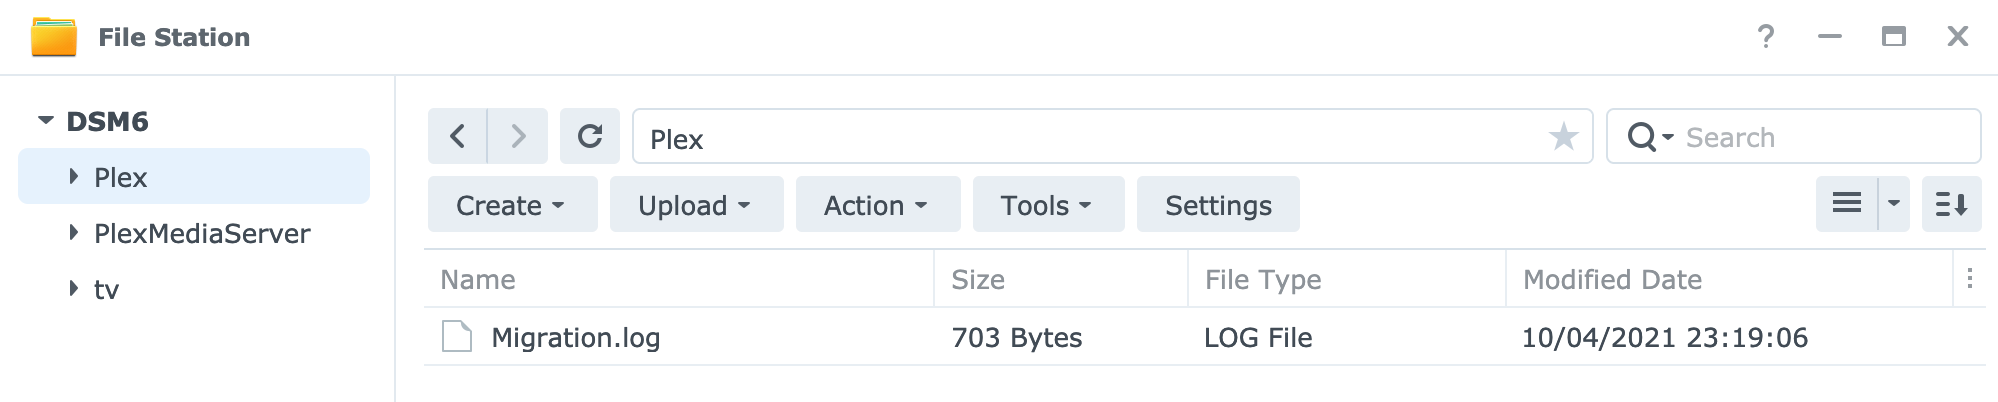
Make sure that the "old" Plex folder is empty and has just the Migration.log file in it.
Problems with transcoding
In case you start to watch something with subtitles for example and get the following error there is a solution for it.
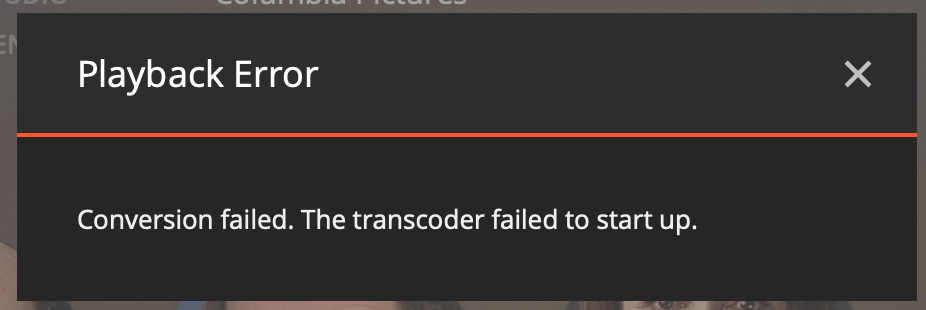
The problem is the metadata. Use your library menu and open Manage Library > Refresh All Metadata.
I know that permission should have been migrated from the old Plex folder, but in case you get this error, just redownload the new meta and the problem will go away. Obviously running without any subs, there will be no problem.
Conclusion
As you can see the process is straight forward, not much that can go wrong if you stick to the "script". If you have already rushed and updated to DSM 7 without uninstalling Plex beforehand, you will have to consult the Plex forums for more details and potentially some help on the matter.
As said before, uninstalling Plex before DSM 7 update is crucial, and if you do it that way you will be up and running in no time. Good luck!
Feel free to comment and share your experience with the rest of us!