ShellNGN - web-based SSH client

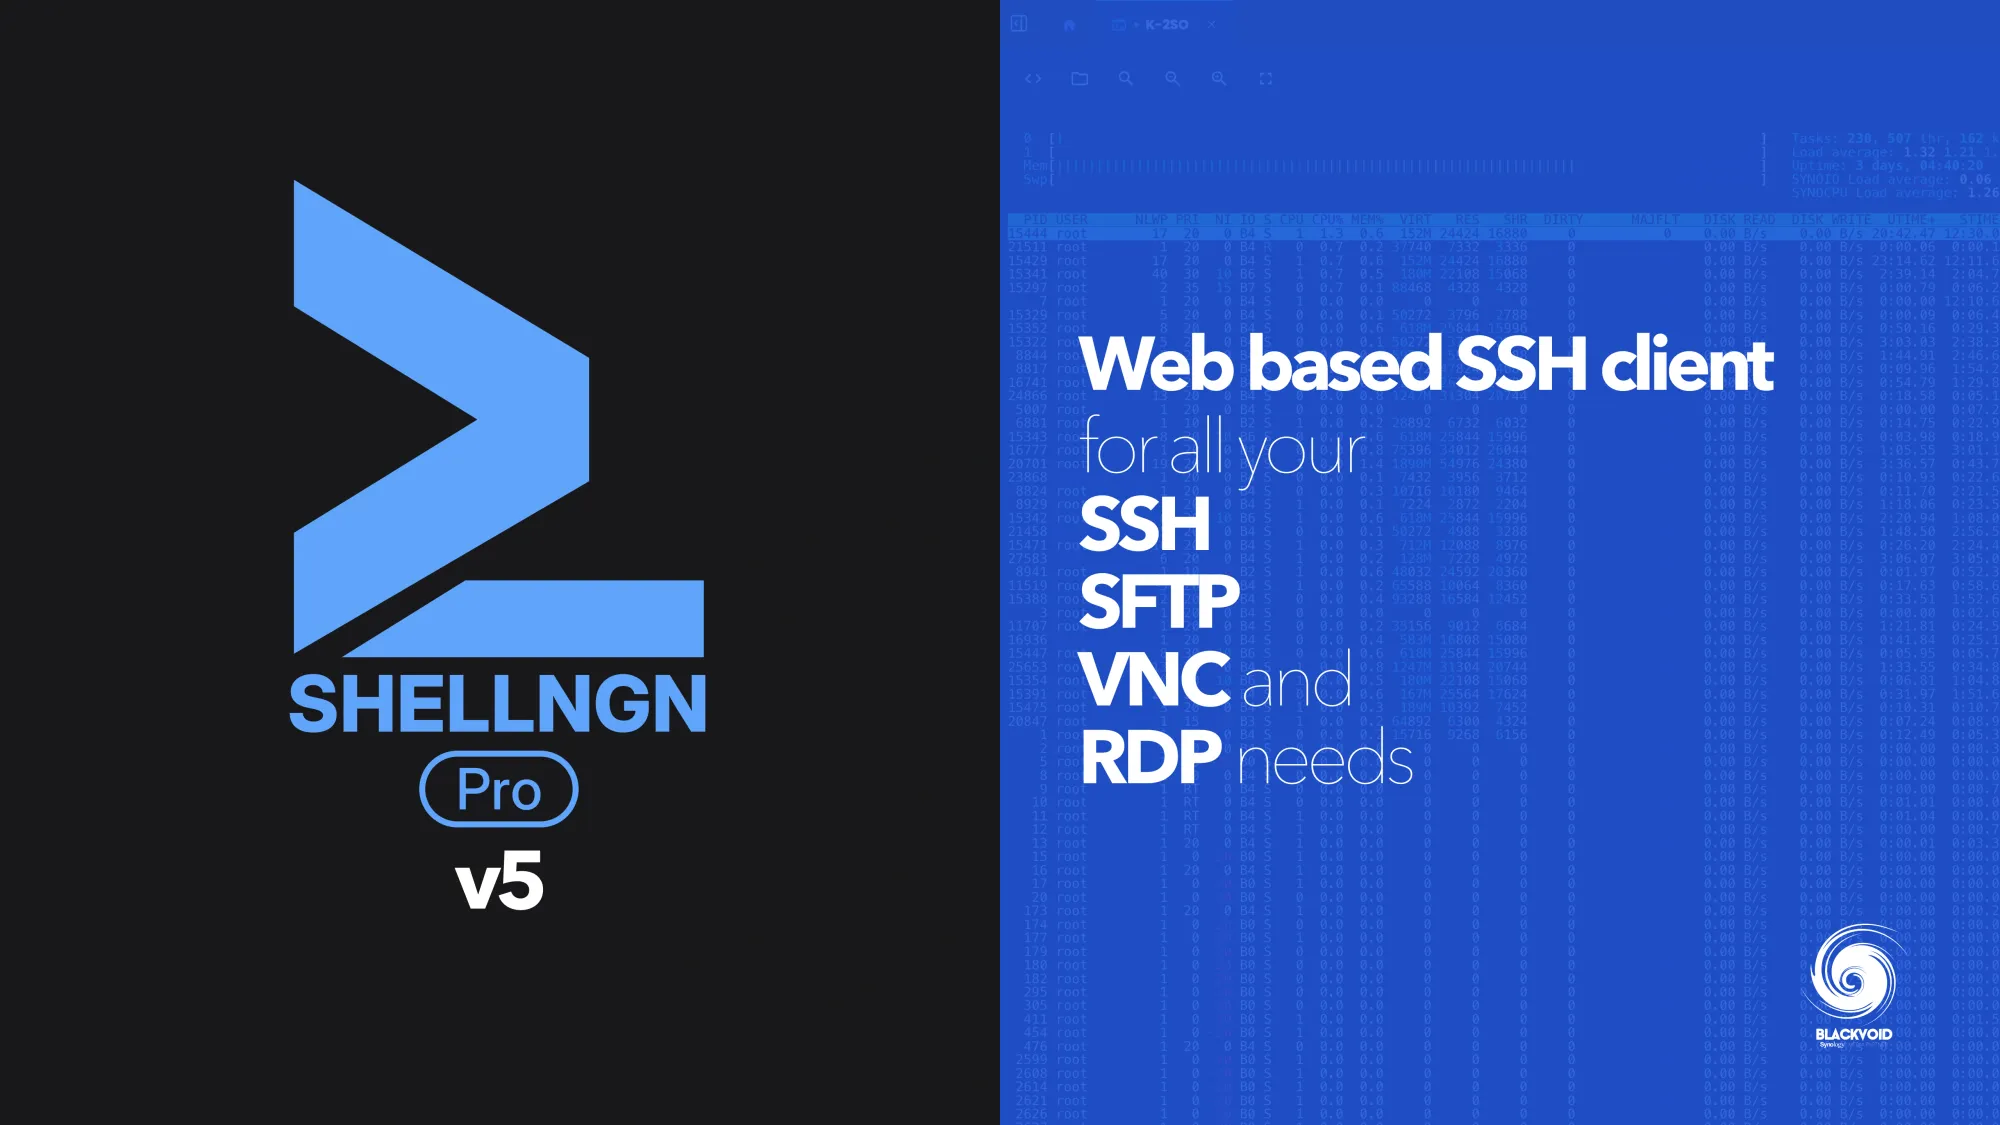
ShellNGN version 5 as a 2025 update (December)
For a while now, I have been looking for a solution that would offer me SSH access from anywhere for all my devices. With COVID still being a "thing", working from home is a better part of my day-to-day operations, but things change when I get back into the office.
Some new policies have changed, and VPN back to my LAN is not easy if I want to use company resources. Fair point, but this has forced my hand even more to find a secure method of getting into SSH from a remote location as secure as possible.
Now there are a number of platforms out there that will offer the same or similar results, but I have decided to use Shell NGN.
So what was the reason to use this platform and not Guacamole, or Bastillion, which are in fact free?
- Has to work on any web browser
- Completly separated and self-hosted
- Docker deploy method
- MFA (like 2FA) support
- Not just a simple SSH access (optional)
These were my requirements when it came to the solution itself. I definitely wanted a Docker deployment solution, modern and up-to-date (active development), and as secure as possible.
What is Shell NGN?
In a word, it's a web-based platform that will allow you to connect to your devices via SSH, SFTP, VNC, or RDP when you are not in the same network subnet (ie. working from a remote location), without the need to VPN back into your LAN or port forward those risky SSH and RDP ports to the Internet (DO NOT DO THAT!!).
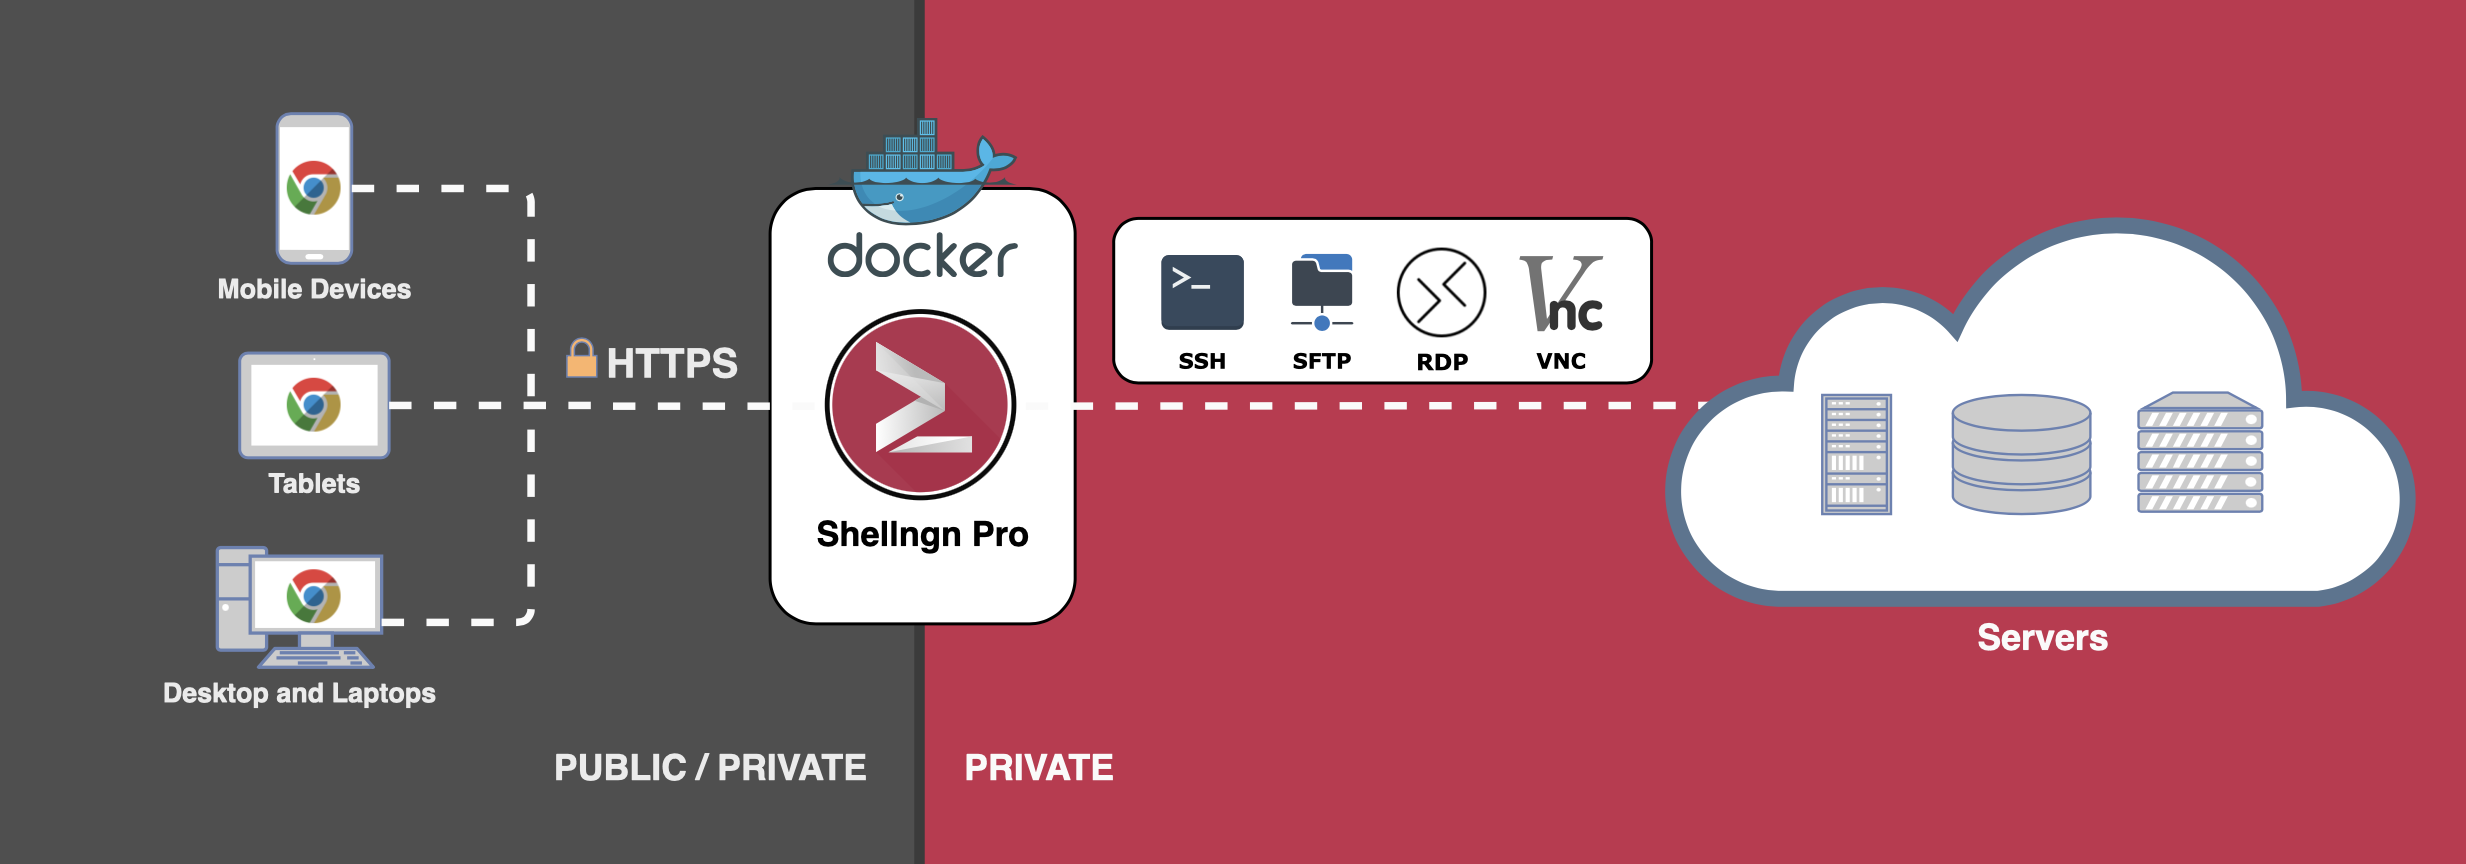
As you can see in the illustration above, using any device today (and yes, it's mobile-friendly), and connecting via HTTPS (443 by default over reverse proxy), you can authenticate with your instance of Shell NGN, and then access all your LAN services using multiple supported protocols.
So instead of opening a custom SSH port on your router, you can access that same service using this secure method.
So this is a free service?
No, it is not. Shell NGN comes as a paid platform in two forms. Cloud-based one, and PRO (self-hosted Docker method). With that said, there are four paid tiers with a 30 day money-back trial period.
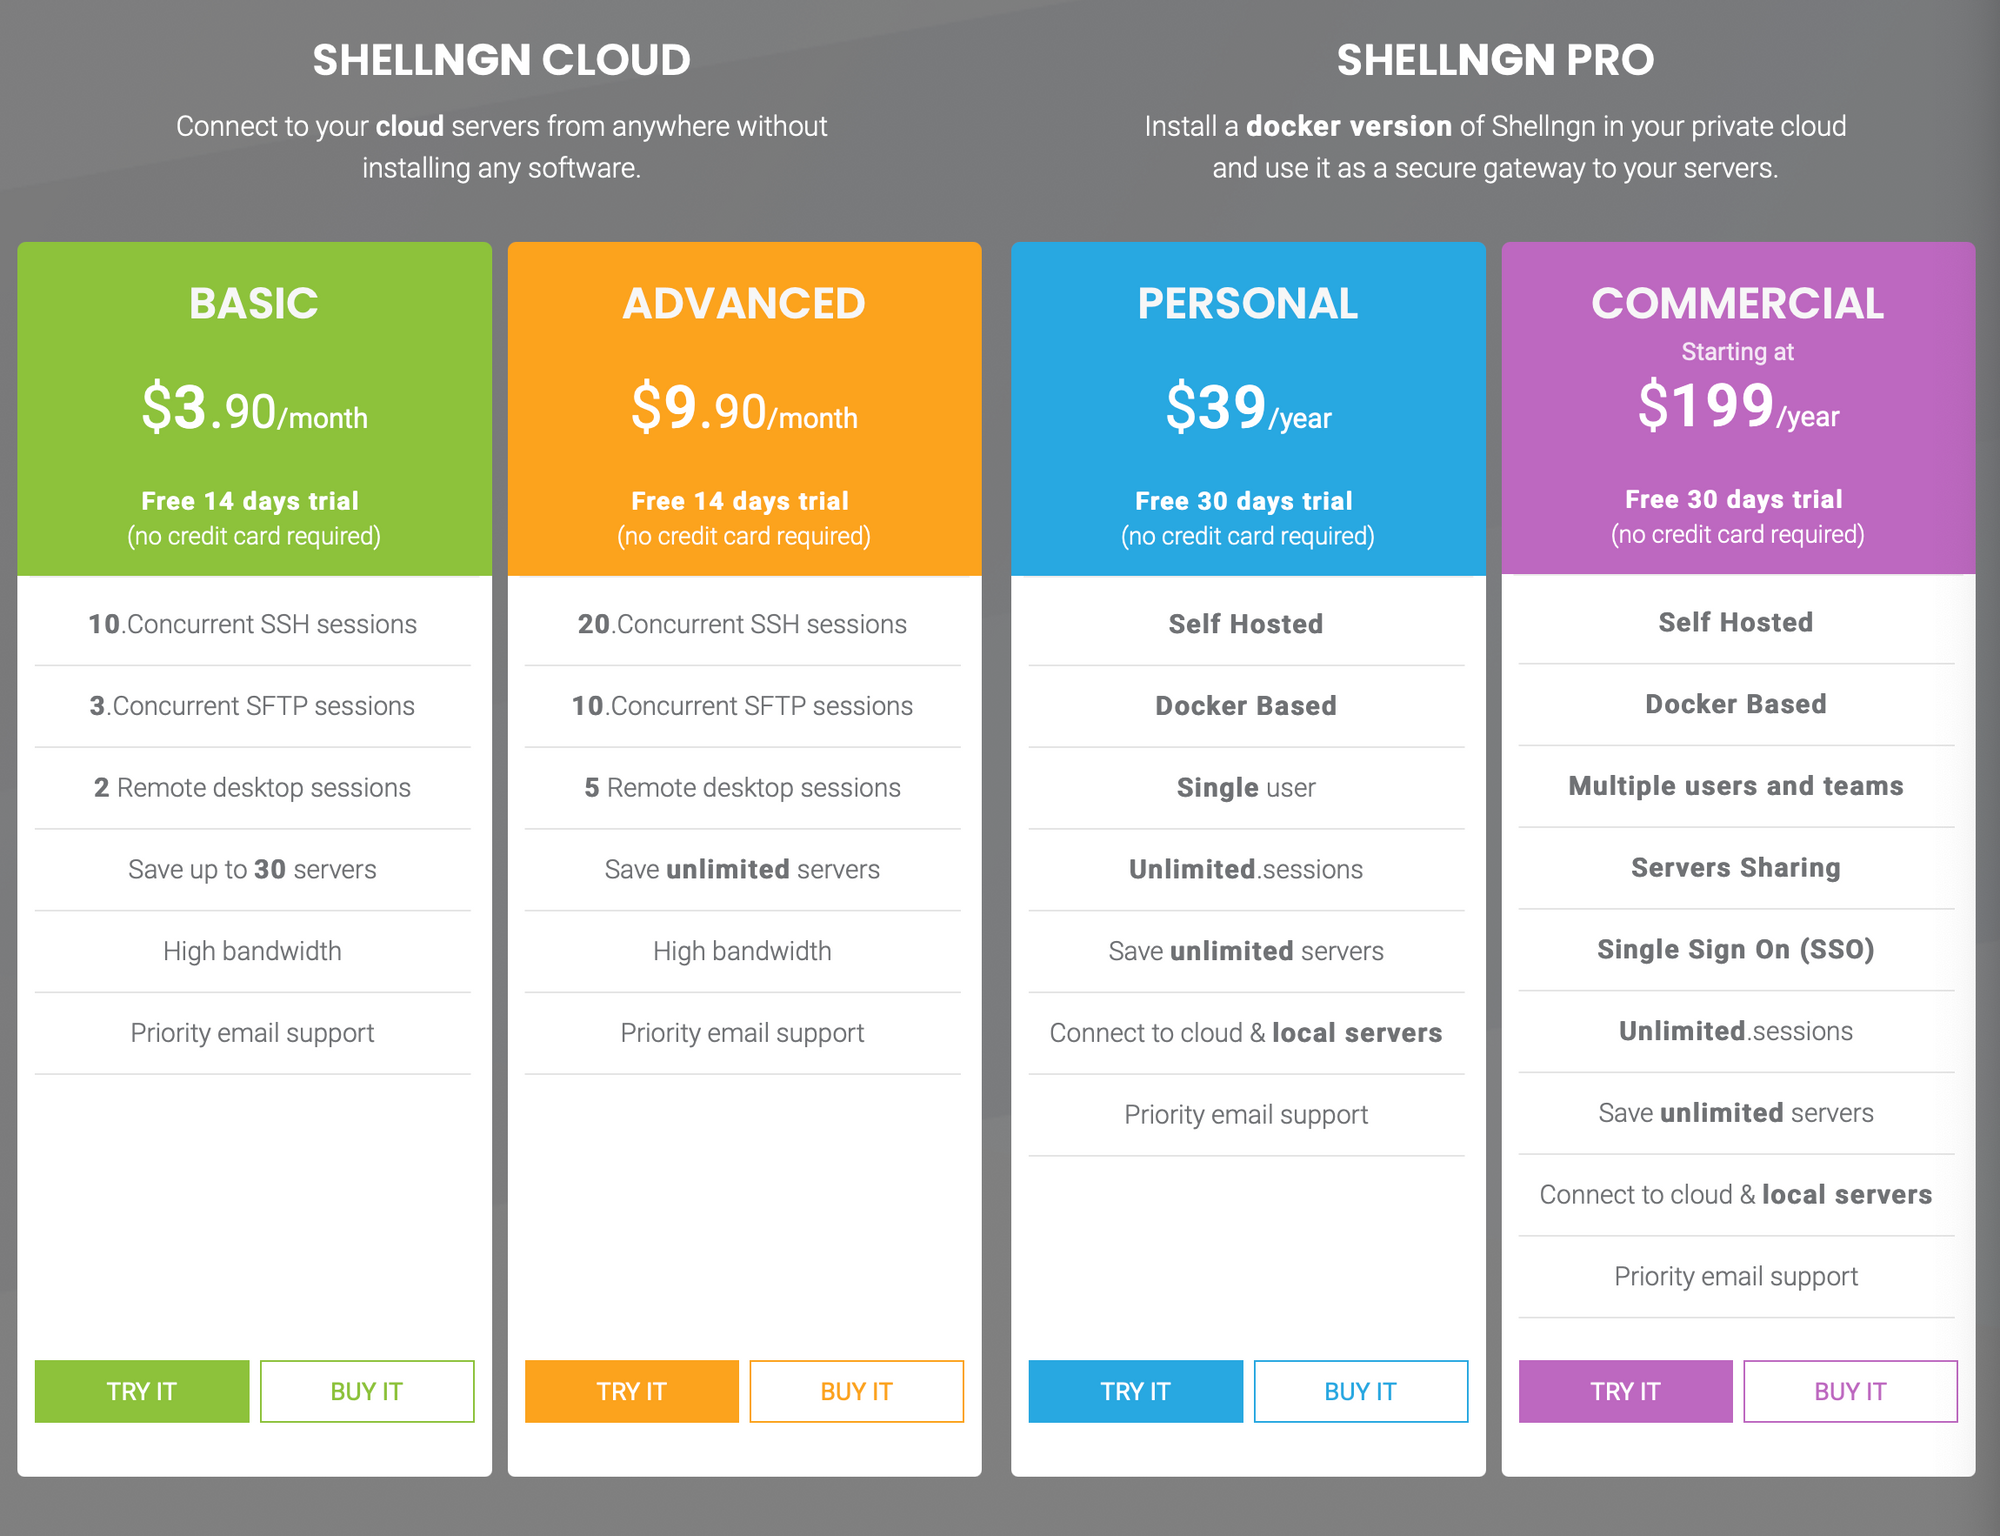
As you can see the PRO segment is geared and priced depending on your needs, and IMHO, fair compared to what it offers and how it works. For as low as $3.3 per month for a full on-premise, self-hosted platform with unlimited sessions and server access, yes thank you.
Now some might argue that you could go all free and open-source with similar results, but to be honest, NGN works really well and is stable, and you can deploy it and have it up and running in minutes.
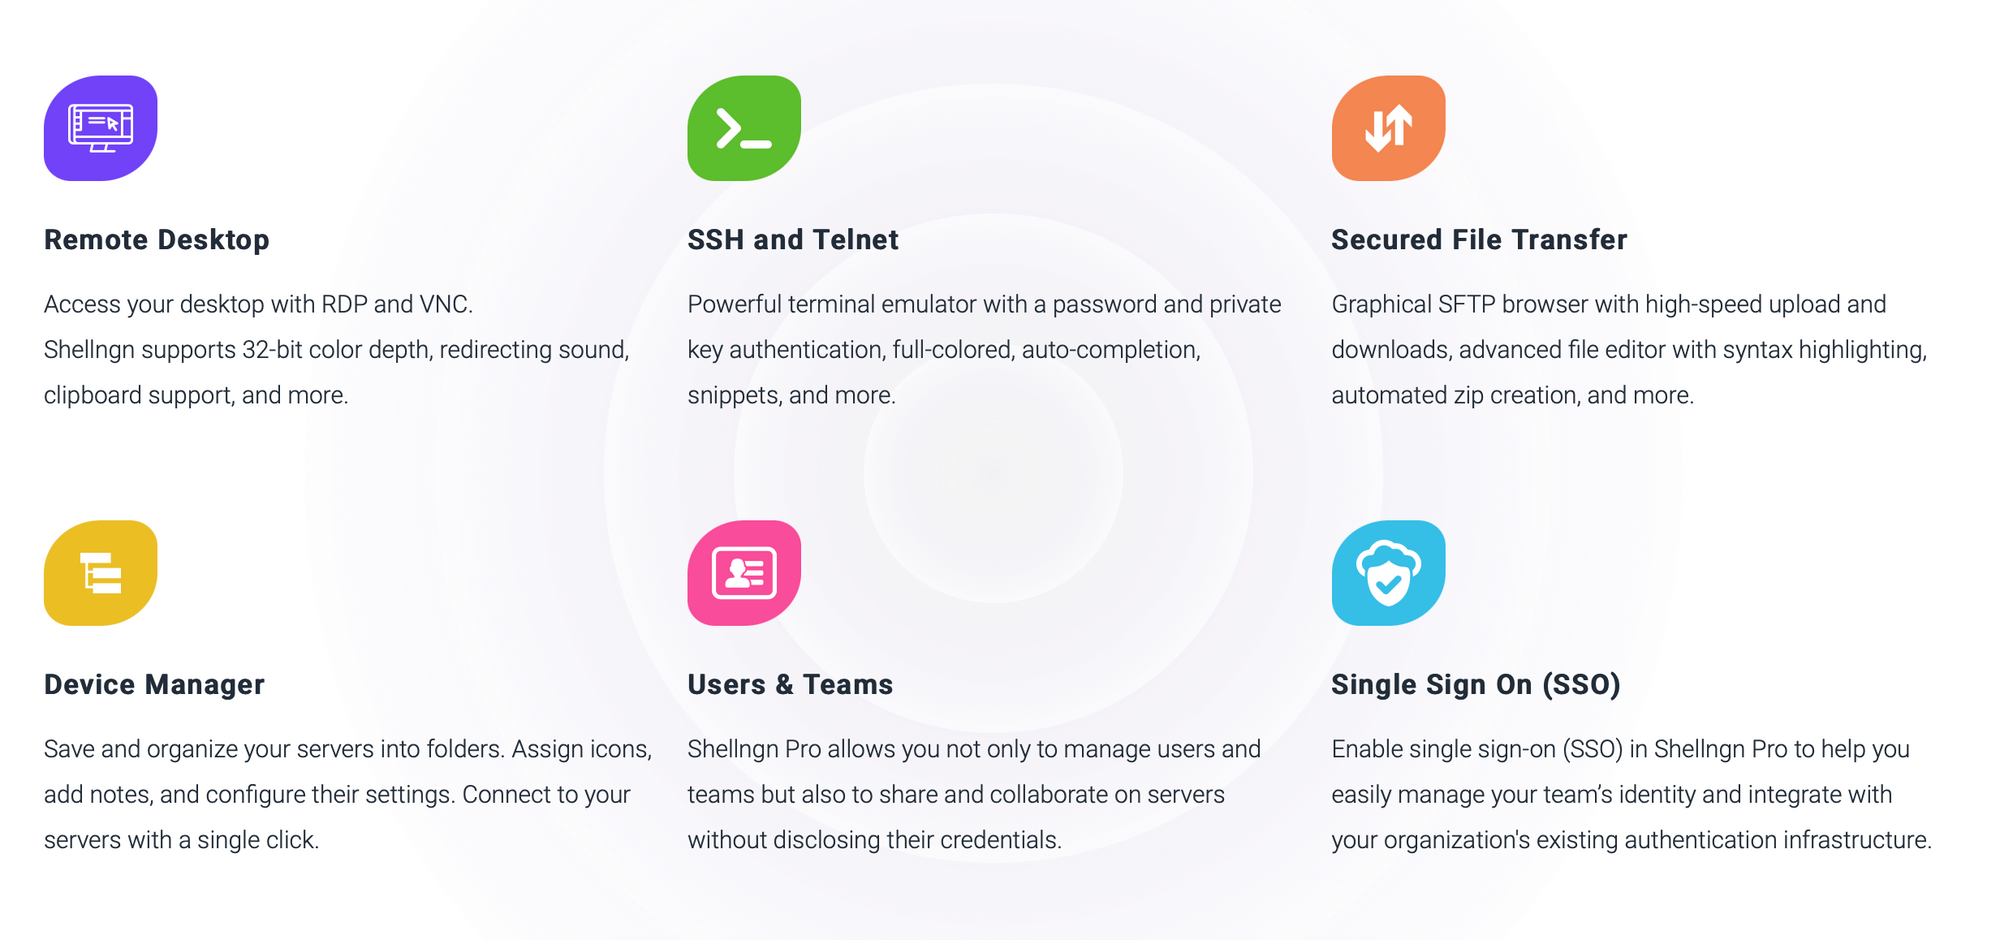
Feature set
Depending on your subscription you will have more or fewer features open to you, but here are the main categories


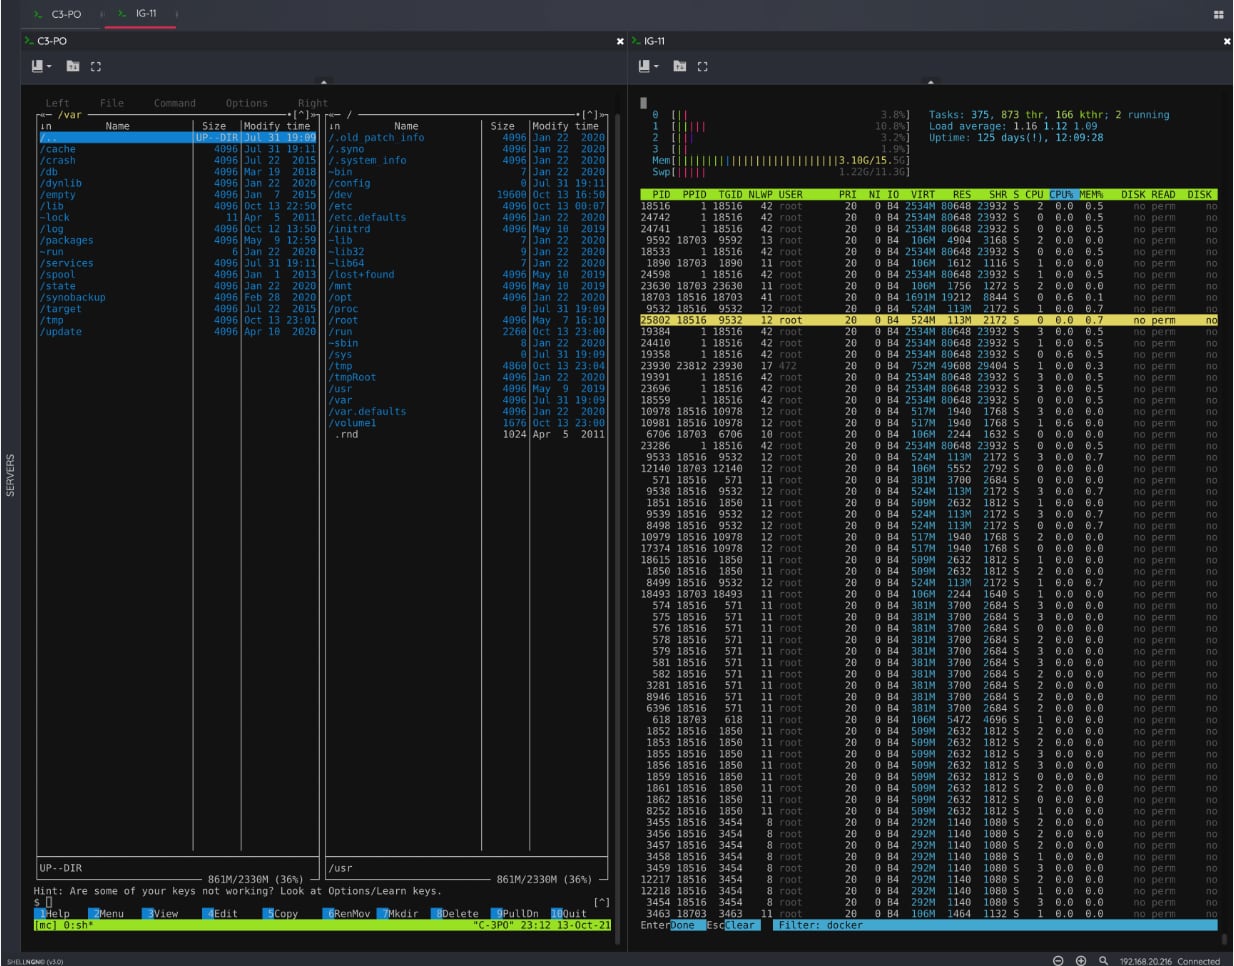
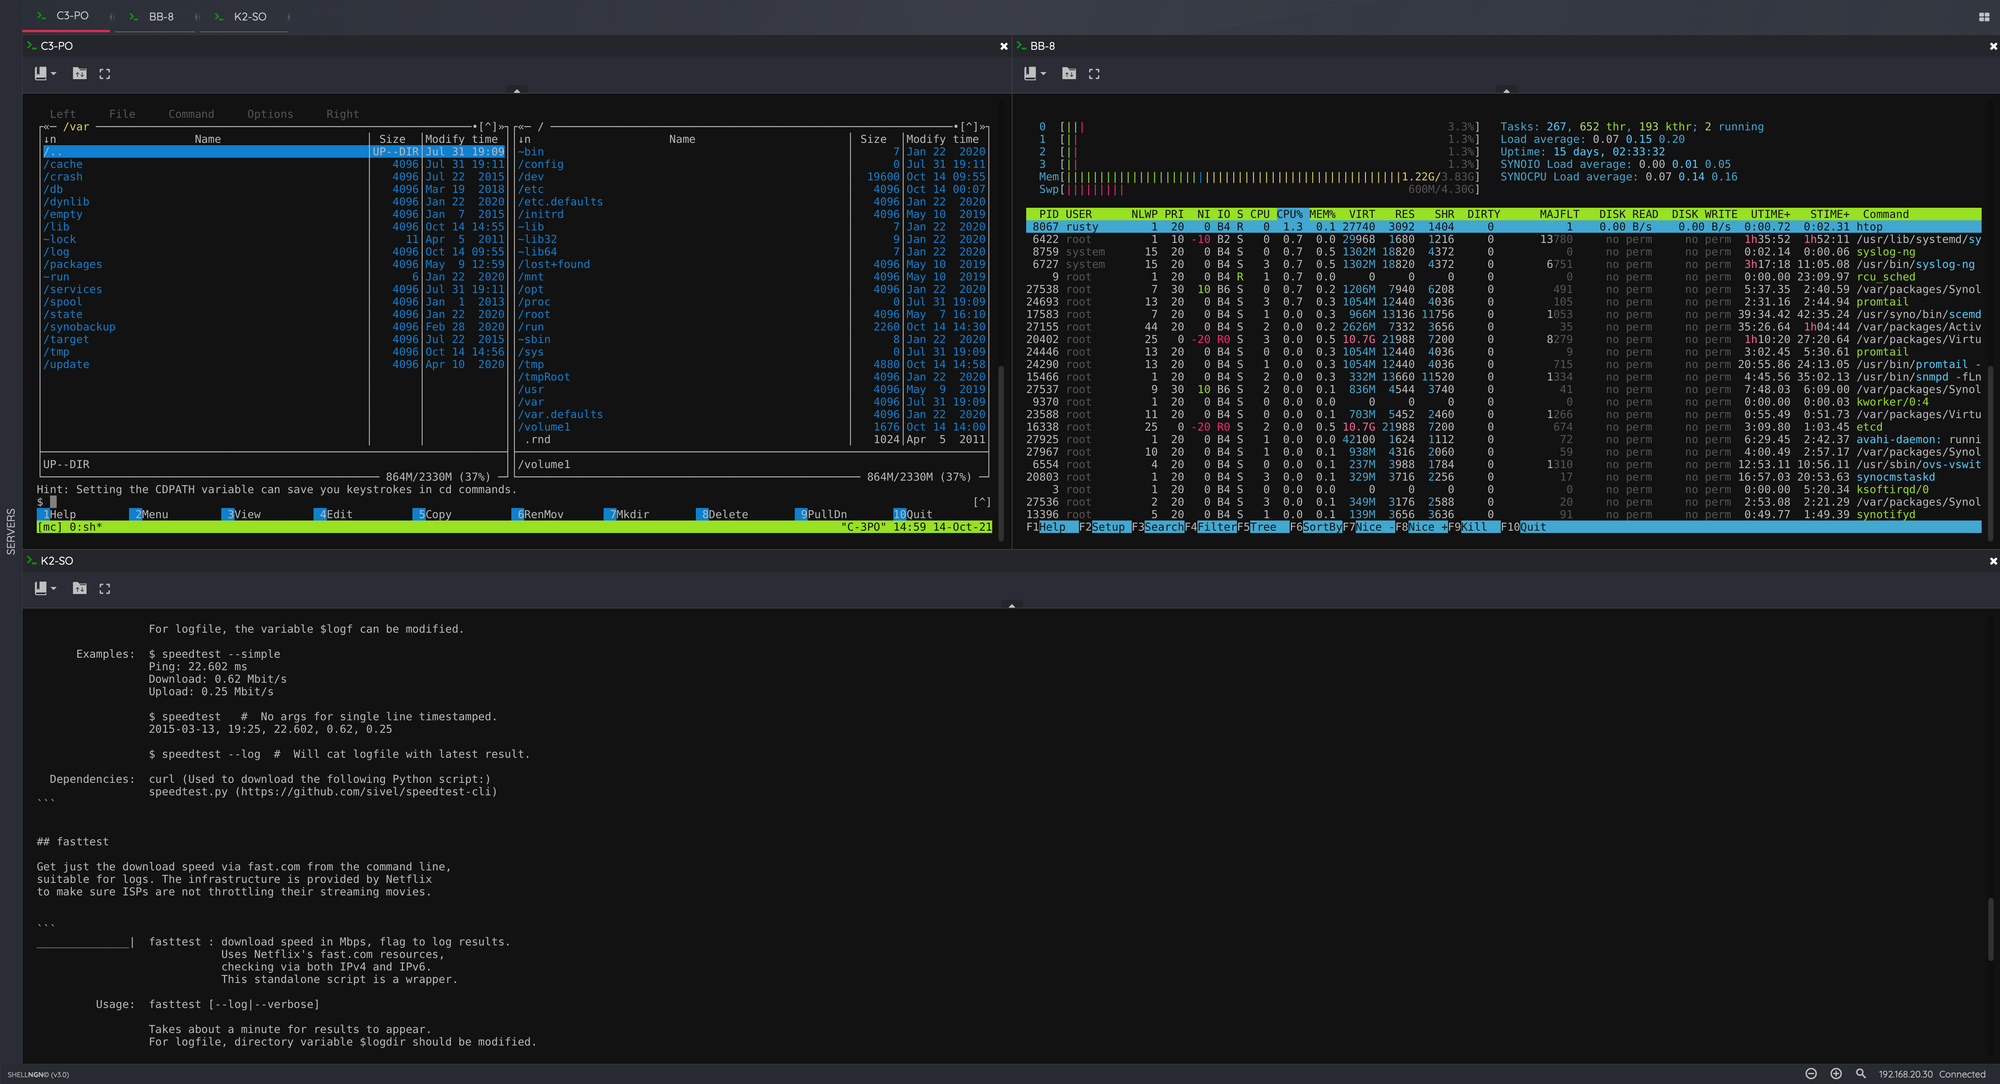
Getting to your servers using SSH or RDP is as simple as a double click on the saved shortcut in the left-hand menu.
After that, you can of course hide it and work in a multi-column view with a concurrent view of multiple hosts at the same time.
This platform will allow you to work from anywhere anytime and pick up right where you left off with your session, and no fear that you will have no access to your resources as all is being done via a secure browser session.
Now, to get this going I will be using a docker-compose method via Portainer, and its "stacks". If you are unfamiliar with Portainer, use the previous links to get it up and running and familiarize yourself with docker-compose and stacks.
Once you have it running, continue forward. You can run this without any Docker UI at all just by using the command line but just wanted to let you know how you can use a more web UI-based tool if you want.
Docker-compose deploy
Shell NGN has an official PRO image in the hub, and it is maintained by the official team.
Below is the docker-compose sample that you can alter if you want (ports, volume name, container, etc), or run it as it is.
version: "3.5"

services:
  shellngn:
    image: shellngn/pro
    network_mode: "bridge"
    container_name: shellngn
    ports:
      - "8080:8080"
    volumes:
      - shellngn-data:/home/node/server/data
    environment:
      - HOST=0.0.0.0
    restart: always
volumes:
  shellngn-data:
Once you have it running you can access your ShellNGN UI using your web browser by pointing it to your docker host IP address and port (in this example 8080 if you haven't changed it).
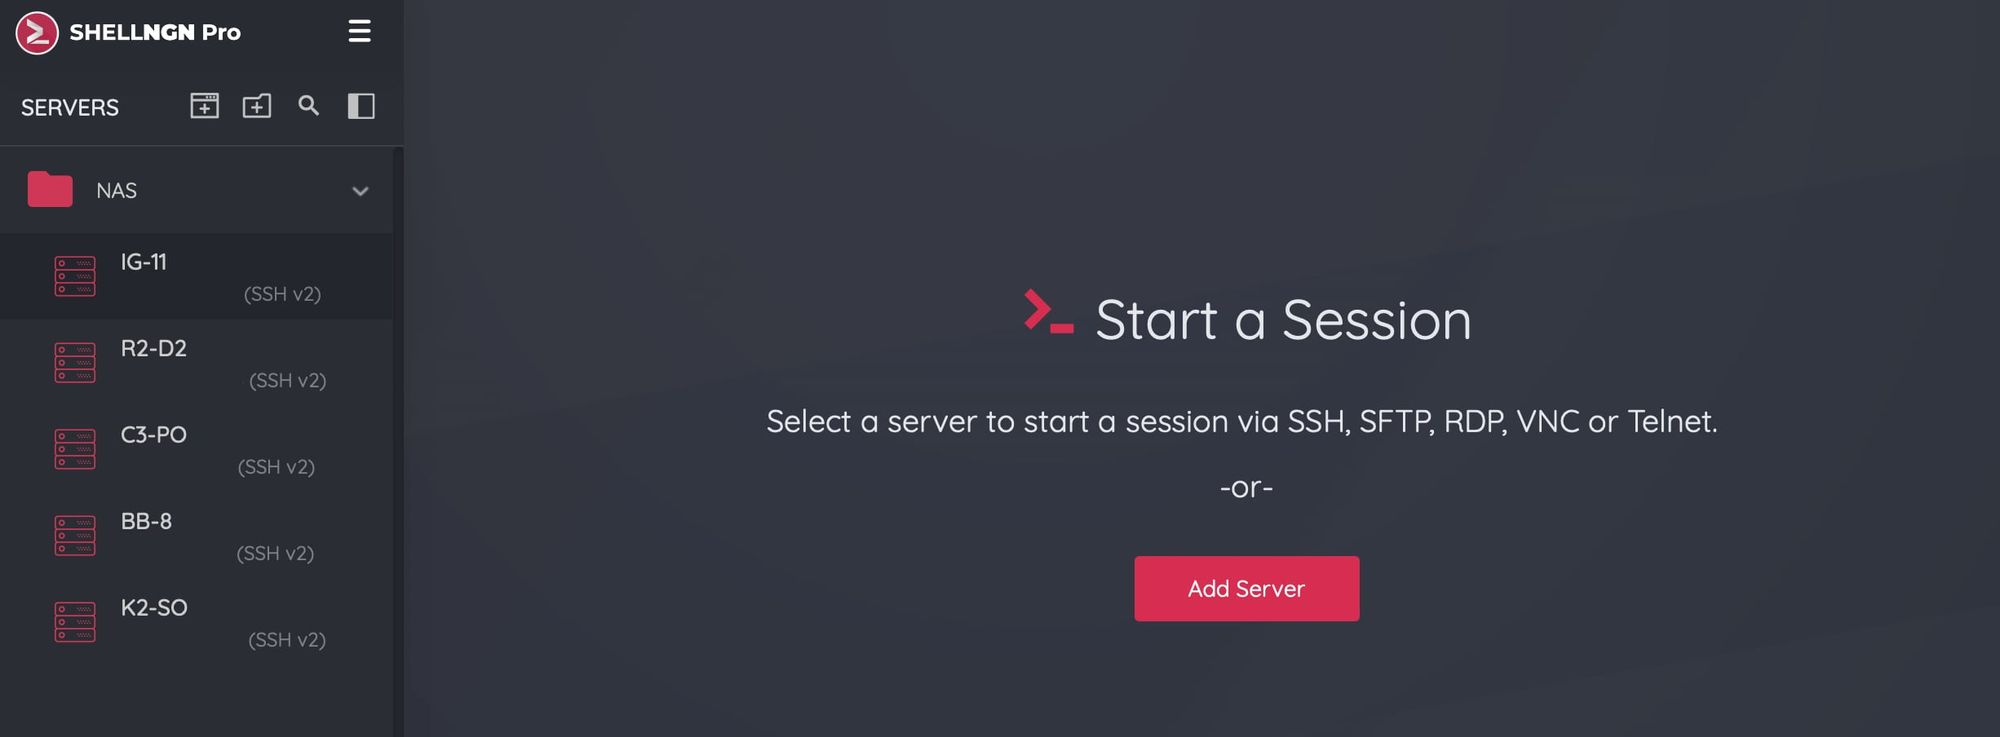
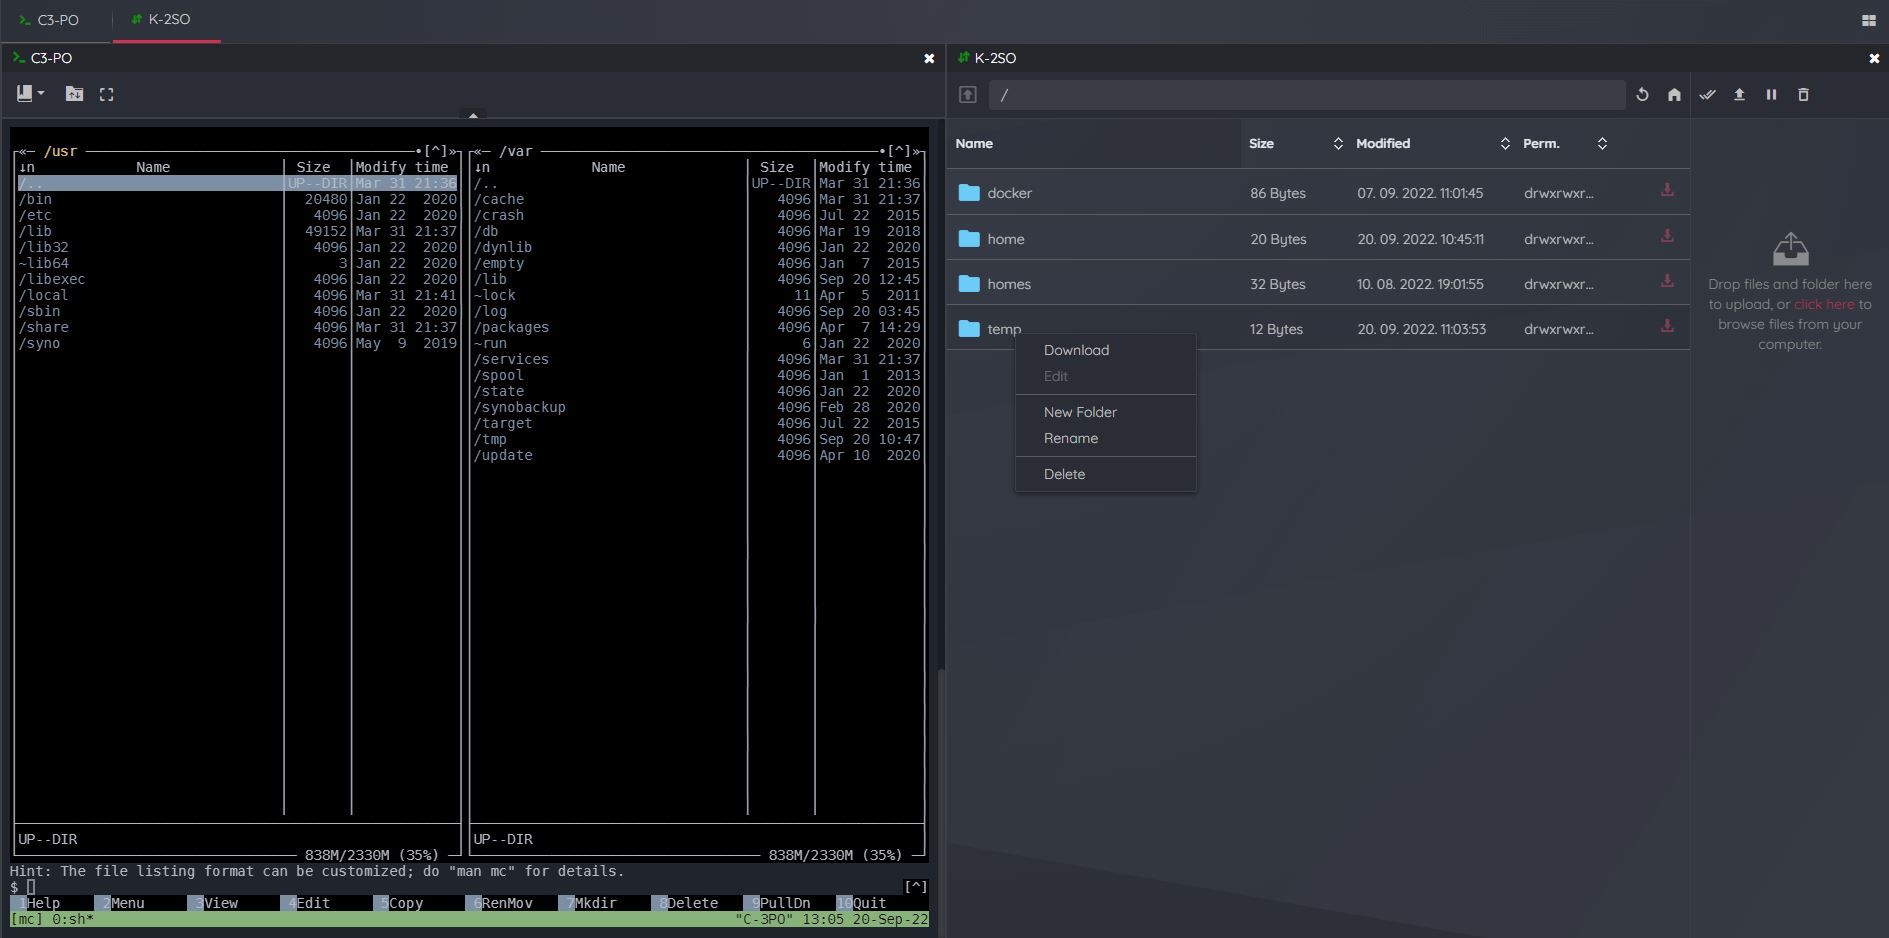
As shown, you can make new folders to have your connection shortcuts organized, and make new connections that you can, later on, move from one folder to the other.
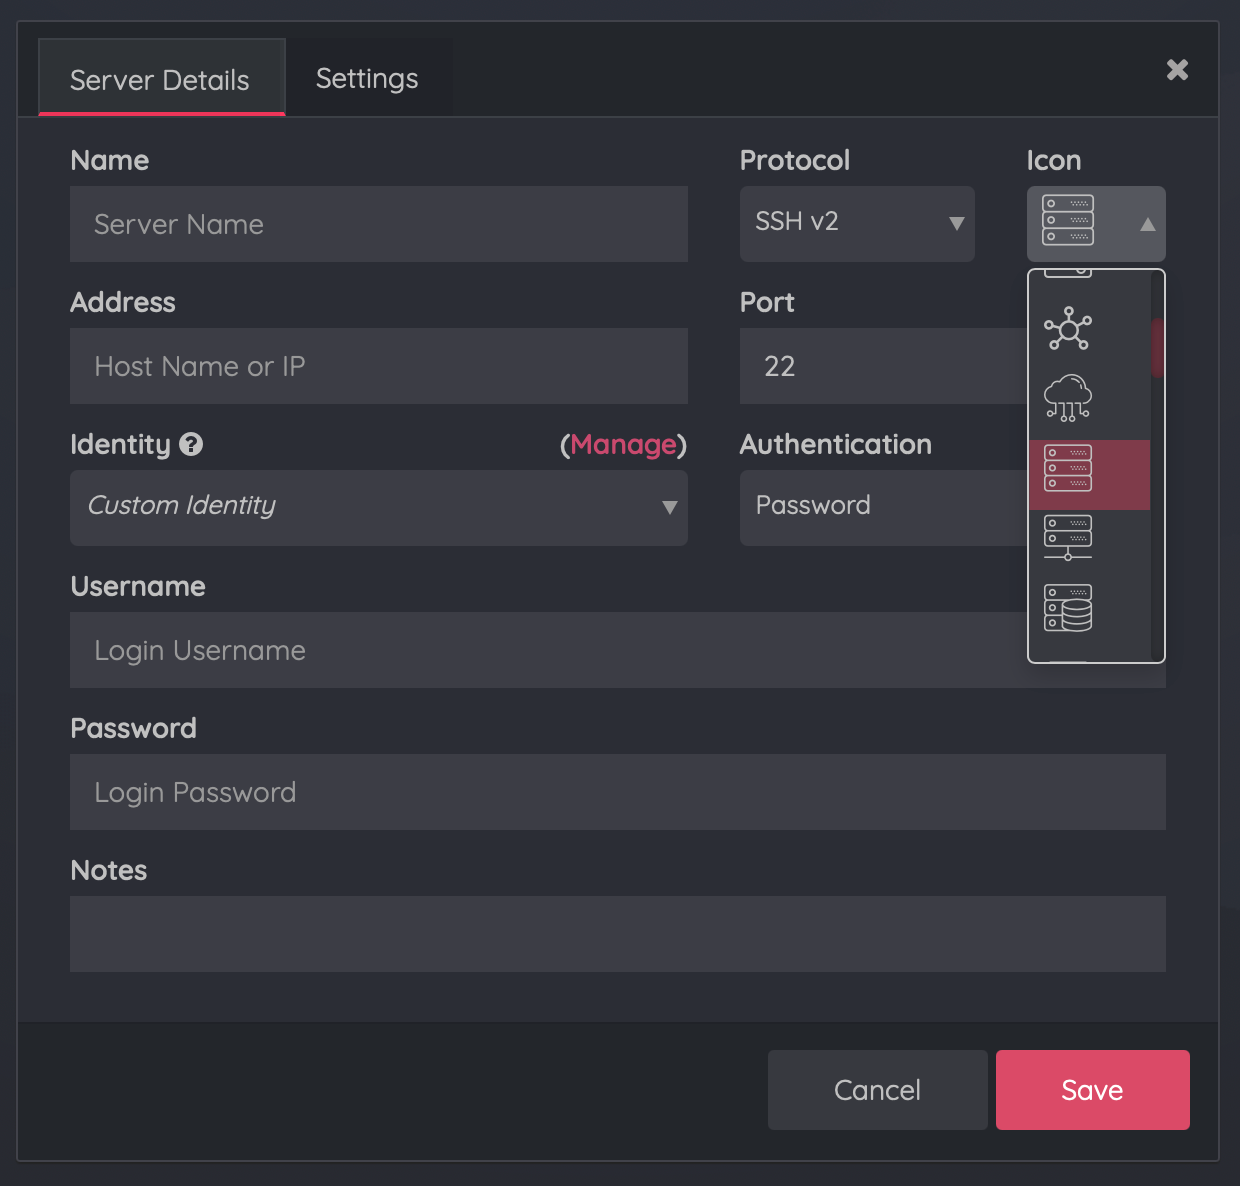
When making a new connection, you can define protocols, ports, authentification as well as user and password. Finally, choose the visible icon to visually match its destination.
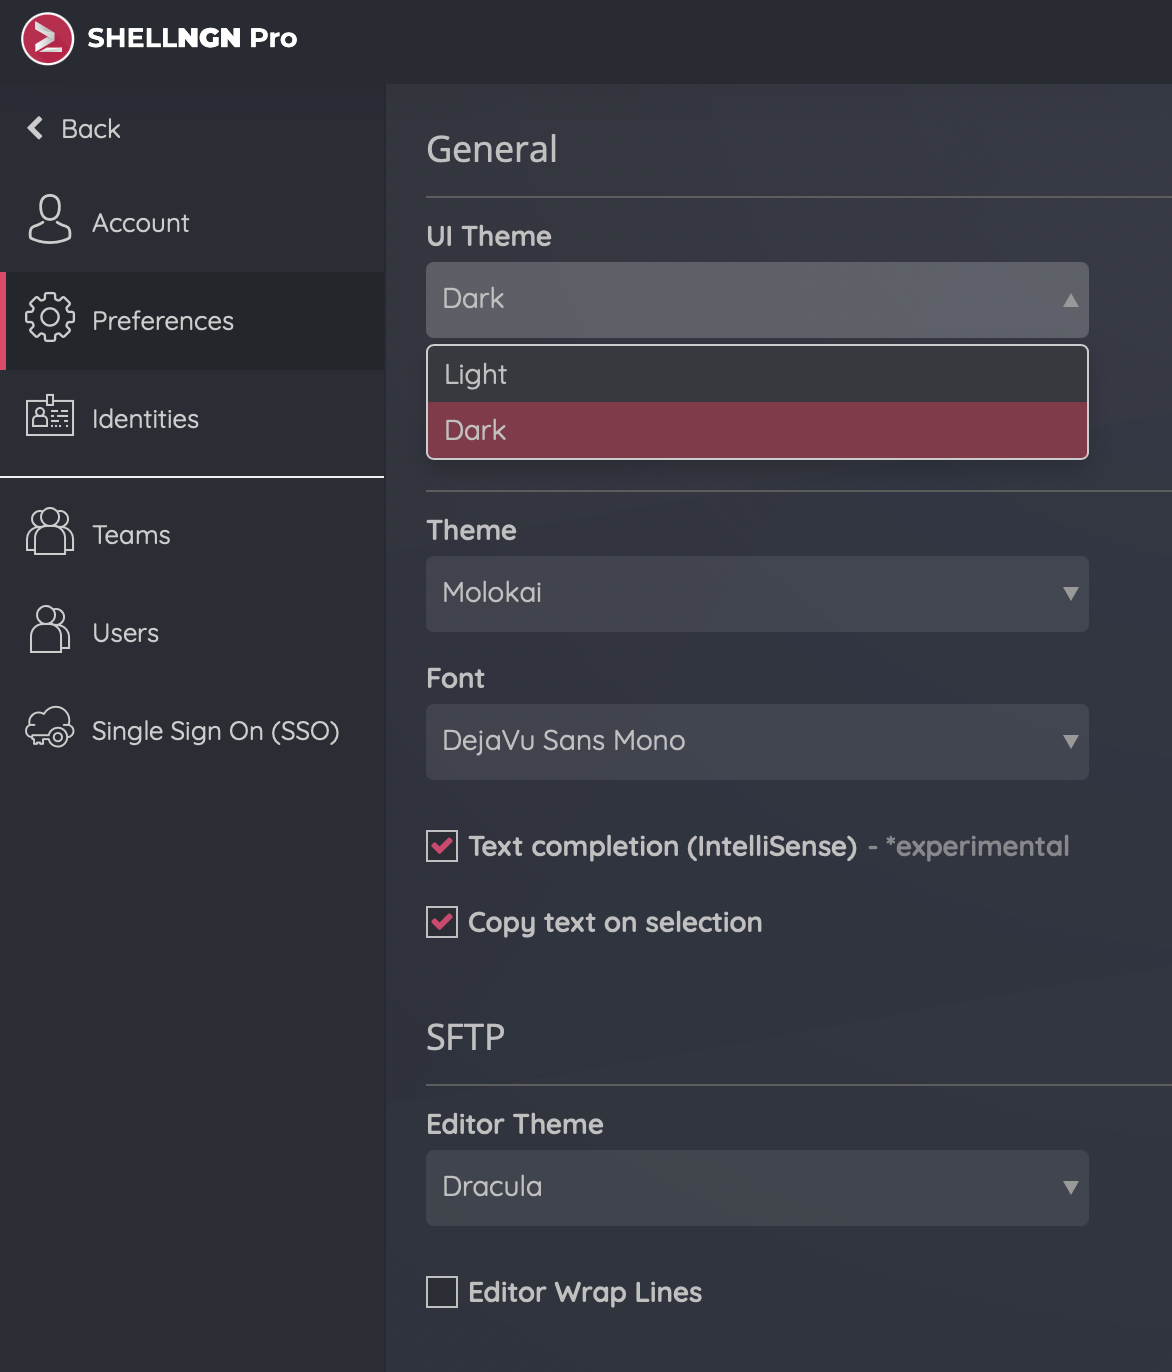
The platform comes with 7 themes and 3 fonts to choose from, so there will be something for everyone.
While in an SSH session, you will have a full mouse, and copy/paste (clipboard) support. The application supports full-screen scaling as well which works very well, and with a multi-column set up, you can do all the work you need.
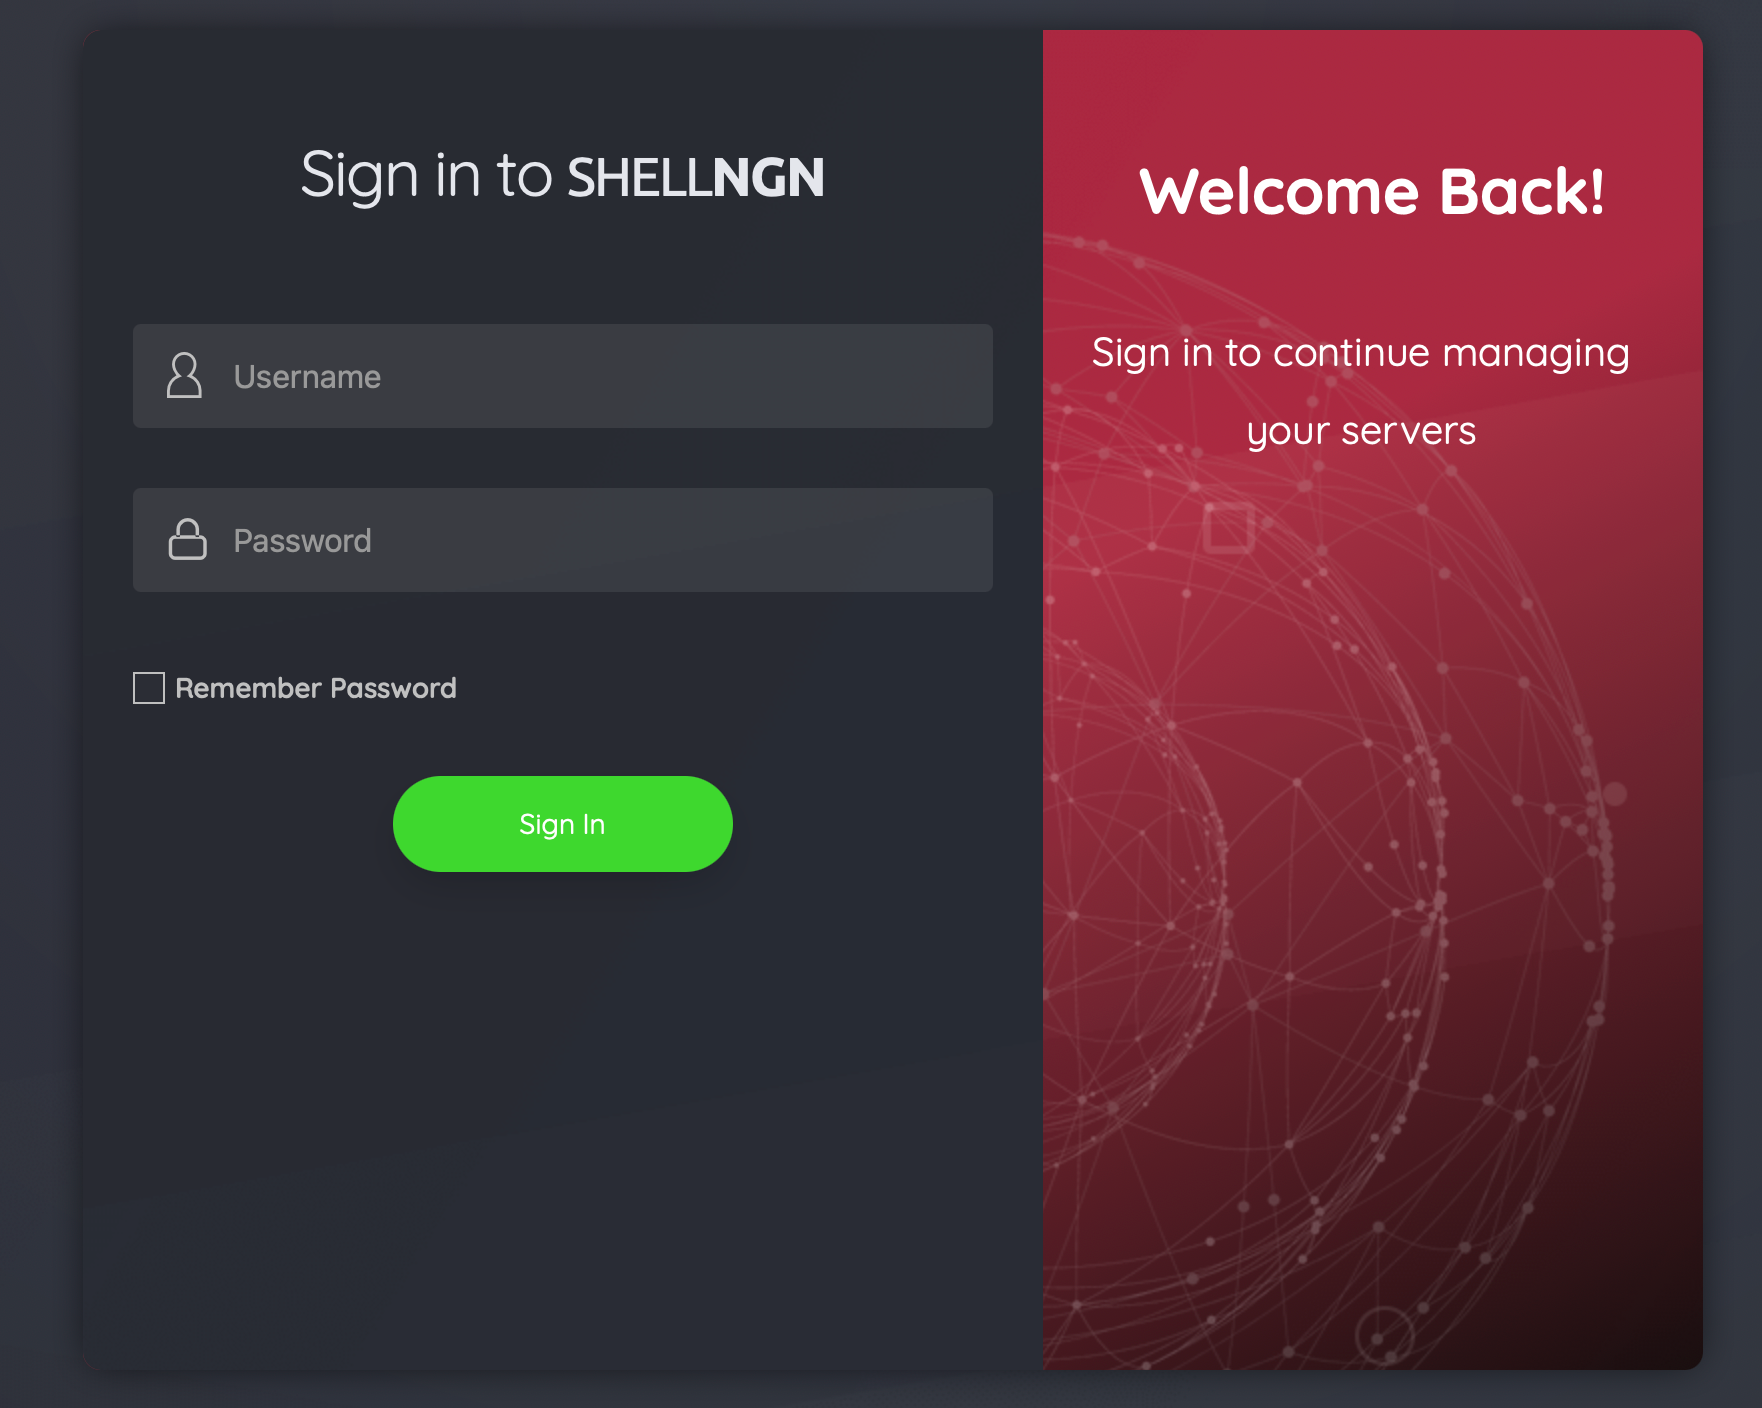
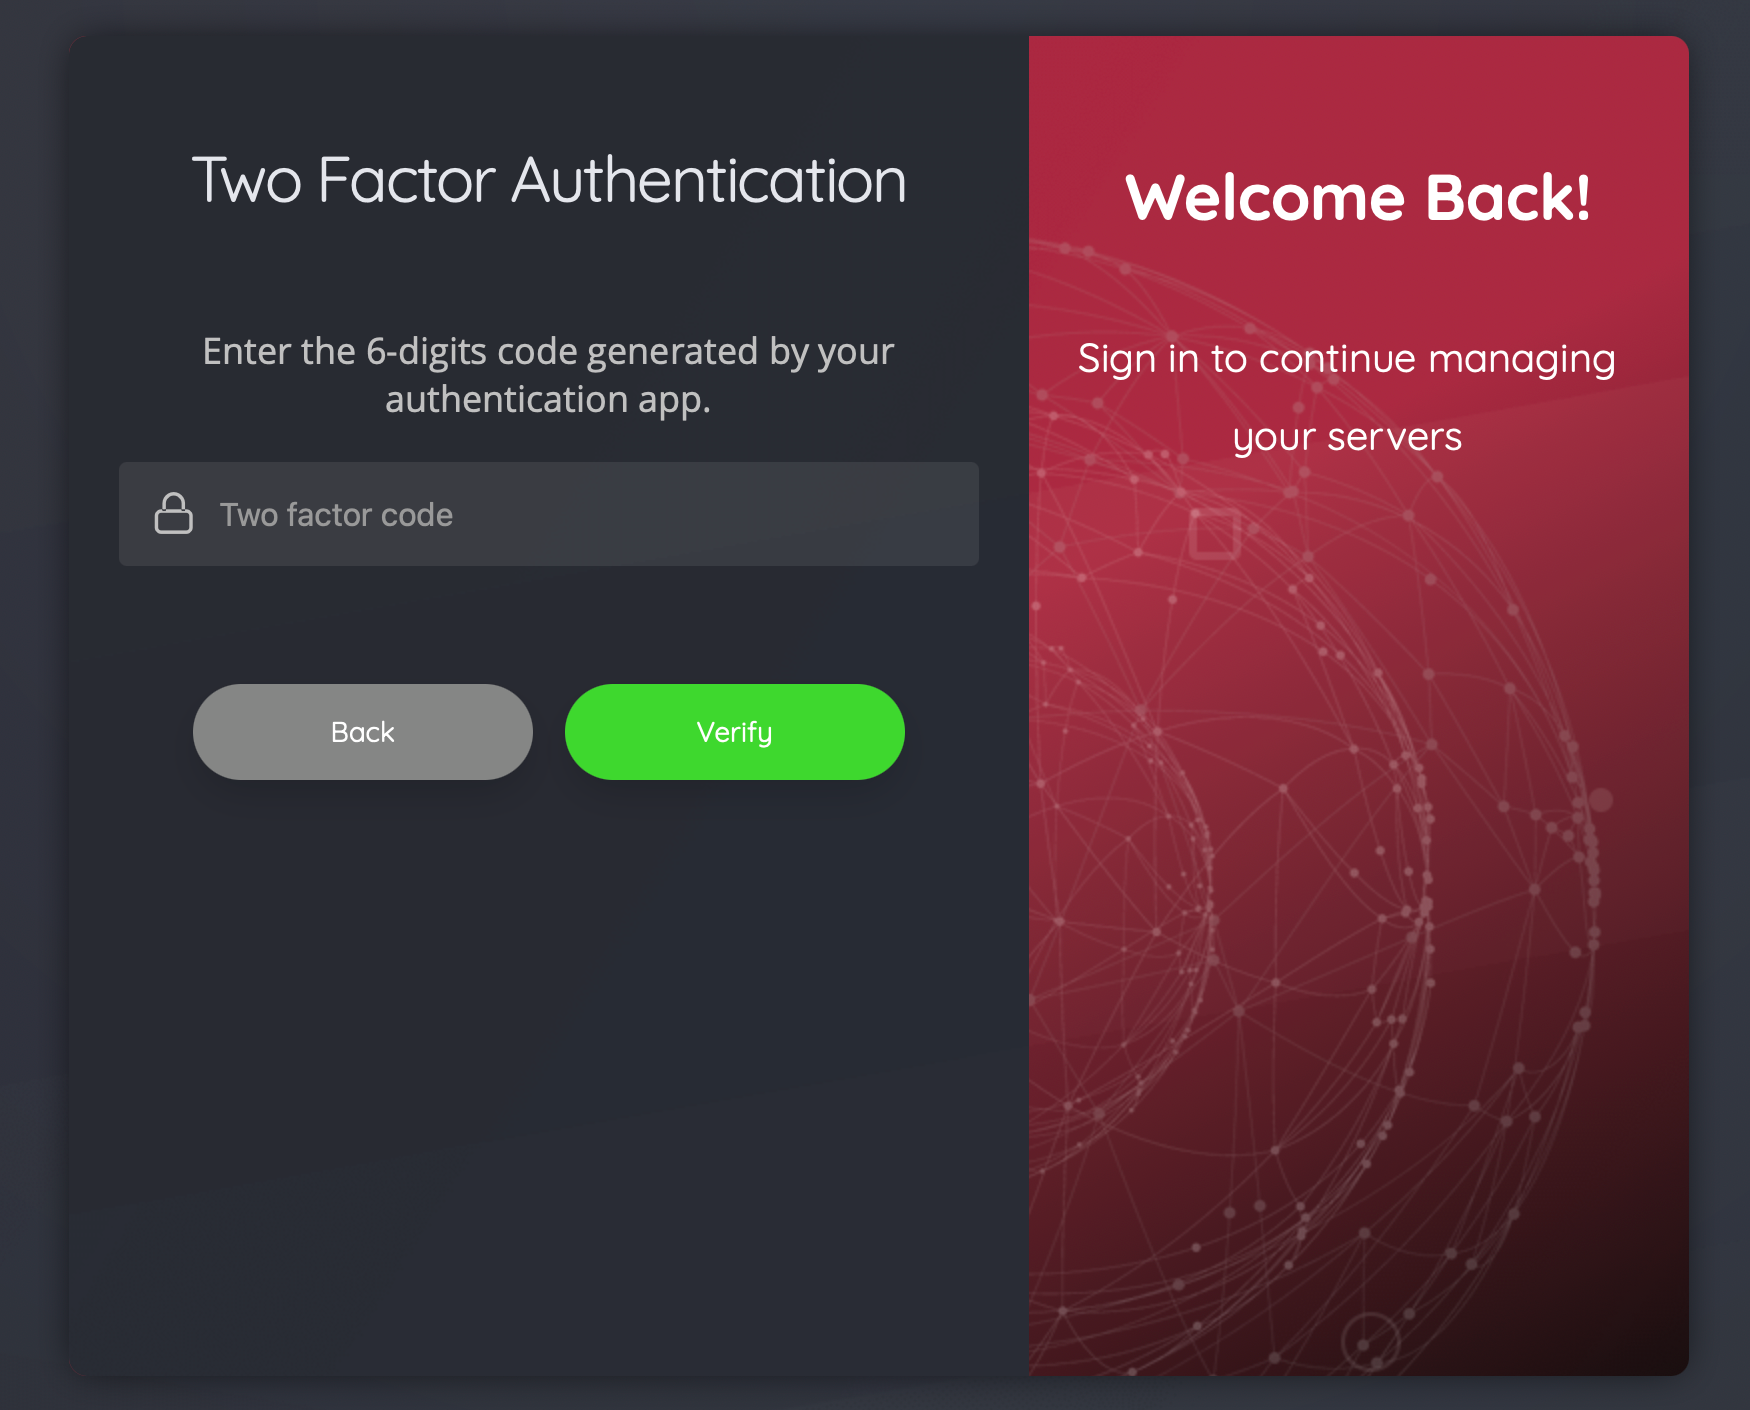
Reverse proxy configuration and 2FA
Getting to your services and servers once you log into your Shell NGN is one thing, but getting to the Shell NGN itself, securely, is another.
Consider running it behind a proxy server so you can have it accessible on an HTTPS secure URL, and log into it using the built-in 2FA feature.
For reverse proxy setup, if you are unfamiliar with it, you can check the following article that explains how to use NGINX proxy manager for all your reverse needs.
As I said before, and you can see it on the initial screens, you can set up 2FA (two-factor authentification) for each individual account (if you are running with a PRO business license).
Personally, I have configured it inside Bitwarden password manager, and there are no problems regarding support and operations.
Conclusion
Well, there you have it. A quick "first" impression of this web-based SSH platform. More than enough for my needs, and the price tag is not high for what it offers. Simple and quick docker setup, with enough features and protocols to cover all your remote needs.
A 30-day trial will be more than enough to test the waters for any bugs or missing day-to-day elements that you might need, so be sure to try it out.
Let me know in the comments what you think about this app, or if have you found out a better one that works for you.