Synology 101 - Part 1: DSM installation & RAID array type

This is the 1st of a total of 5 posts in the "Synology 101" thread. The intro thread covers what this series of posts will be by topics as well as some general information that beginners might find useful.
For a more in-depth read on getting your first NAS, be sure to check out this article as well.

Getting a new piece of hardware... Nothing beats that in the eyes of geeks ;). Well, after the great unboxing of your new Synology NAS, you are faced with an equally simple task of placing the drives into the device, hooking it up to a network, and powering it on. 3 simple steps.
Installing the drives (HDDs or SSDs)
Depending on the model of your NAS you will either have to open up your NAS and install the drives inside it or use outside-accessible trays that you will use to place the drives in and slide them in place. The first scenario is common for Synology "J" and "play" while the "value" and "plus" lineup come with trays accessible from the front of the device (not all of them). Regardless, you can follow the step-by-step diagram that came with your device and follow it along.
If you are wondering if you can use small 2,5" SSDs or just 5,25" HDDs the answer is you can use both. Some models are in a subcategory called "slim". Those NAS devices can only accommodate 2,5" drives. That being said, this does not mean that you can't use 2,5" in a non-slim NAS.
Connecting your NAS to the network
This part is simple enough. Considering that Synology NAS is a network device you should connect it to a switch or a router so that it's accessible to your entire network and/or Internet (depending on your needs).
Some might have a question about connecting a NAS to a single device like a computer via a network cable or even a UBS cable (most Synology devices have multiple USB and eSATA ports as well). The short answer is don't and you can't. That's not entirely true, so if you want, keep reading.
While you still can connect your NAS to your PC via a network cable, you can't do the same with the USB one. USB ports are there to provide connectivity for any external device that you want to have access to via NAS OS (DSM). The same goes for eSATA ports. Still connecting your NAS to a single device kills the definition of NAS as a network-attached device and that's just throwing away money IMHO.
After you connect your NAS (some have multiple ports, more on that a bit later) the last thing you need to do is turn it on!
Power on, installation, and raid configuration
Well, you got this far, all that's left to do now is turn it on and wait for the light show to start. The boot process will depend on the status of the NAS. Considering that it's still not set up and configured with any apps/service it will take a short while for it to be accessible on your network.
After all the lights have turned on you have to find your NAS on the network. This can be done in one of 2 ways:
- Synology assistant
- find.synology.com URL
Synology Assistant is a tool that you install on your local PC (Mac, Linux, Win) and uses the find function to locate your NAS on the network. If we assume that your DHCP (usually by your router) will assign a new IP address to your NAS, it would be a bit of a guessing game on what IP your NAS is currently on. That's what Synology assistant is for.
If you don't want to install any software you can start this 1st step using the find.synology.com URL. It will open up a search web page in your browser and scan your local network for any Synology device, it can detect (NAS, router). This is something that might not work, depending on your network configuration and your NAS configuration, but for the most part, it will work just fine.
DSM Installation
Any hardware without (great) software is worthless. In the case of Synology NAS, the same rules apply. Synology OS is called Disk Station Manager (DSM). It's a Linux-based OS with a fancy HTML5/CSS3 user interface accessible via your favorite desktop or mobile browser/app.
Soon after you have detected your NAS on the network, 1st thing you need is to install DSM on it.
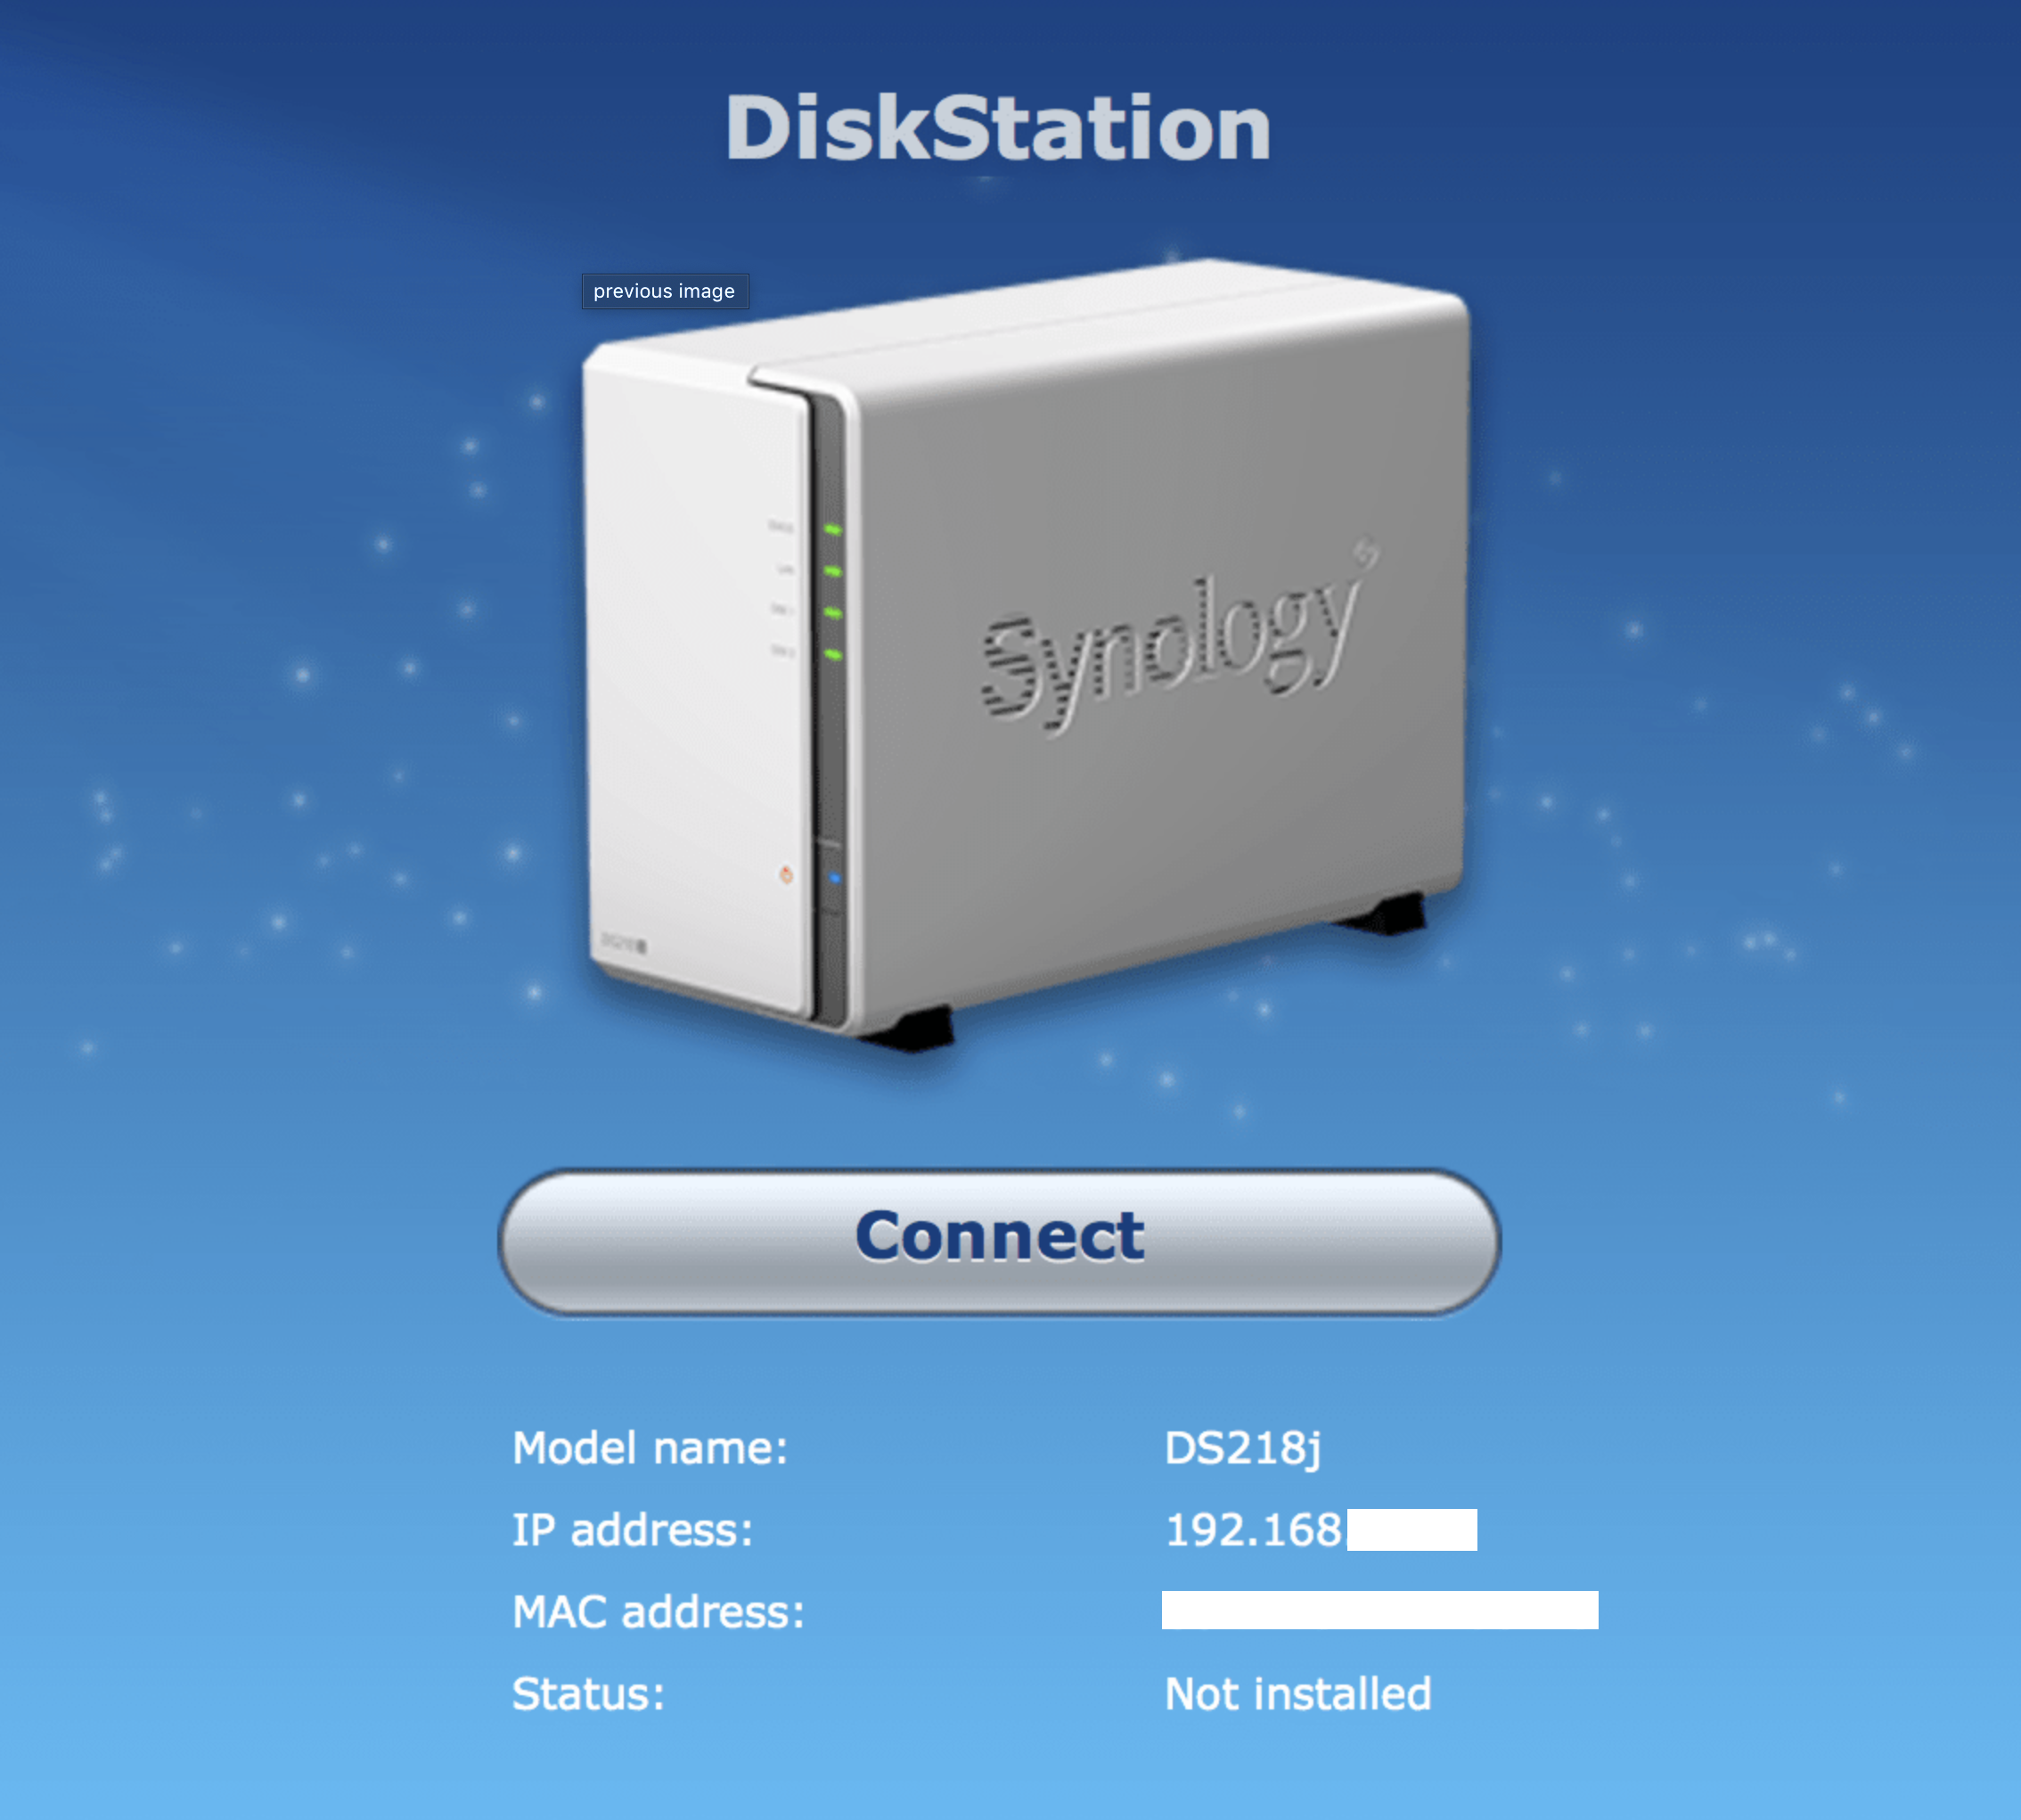
If you use find.synology.com URL you will land on a page similar to the one above. Simply click on the Connect button to continue with the DSM installation.
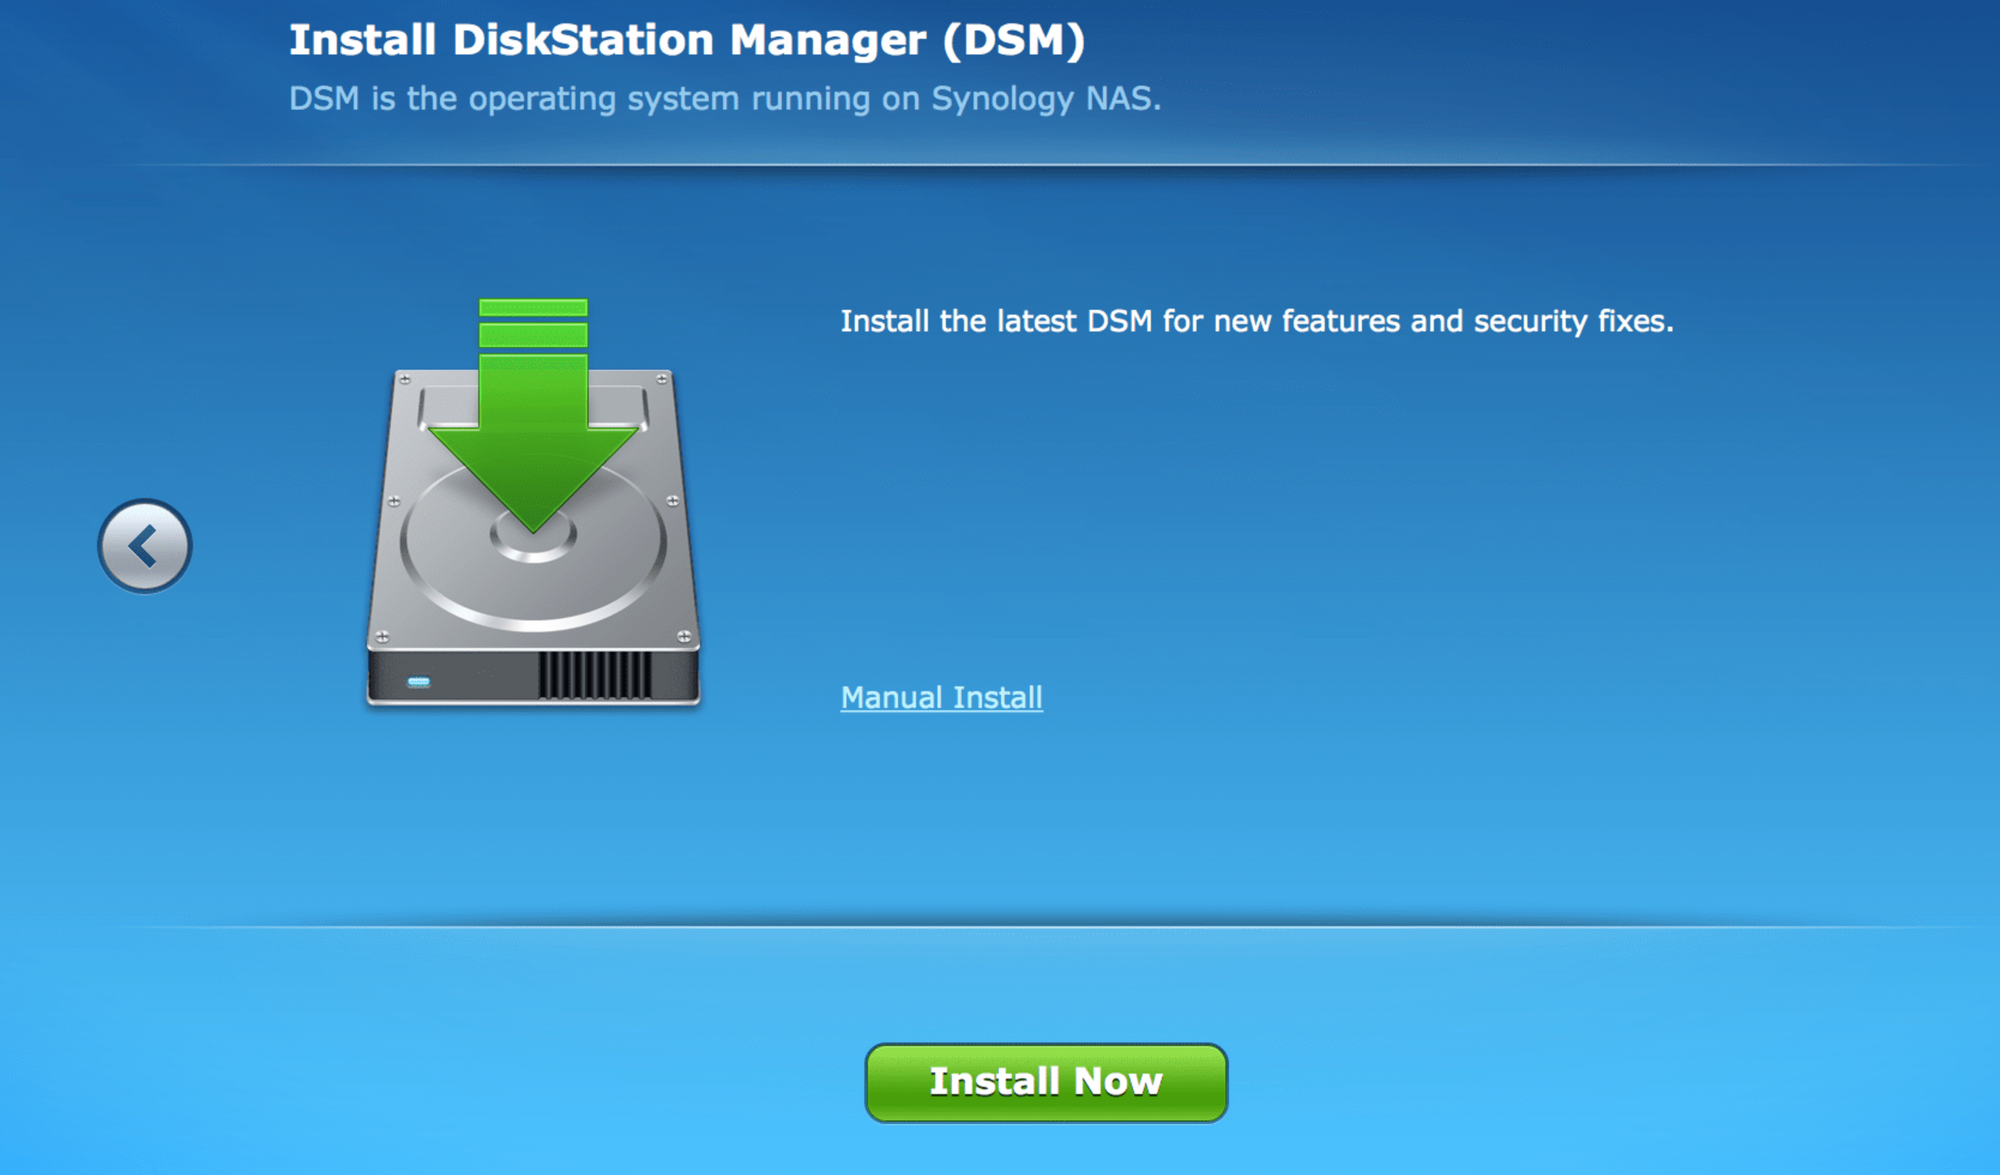
In the second step, you will have the option to manually place a DSM installation package or the wizard can do that for you (not visible on this screen). If you want to place the installation manually, just go to https://www.synology.com/en-global/support/download, select your model and under the Operating system tab (1st one) download the PAT file.
Click on the "Manual Install" link in the wizard (picture) and point it to the PAT file you have downloaded. Finally, click the green button on the bottom, "Install Now".
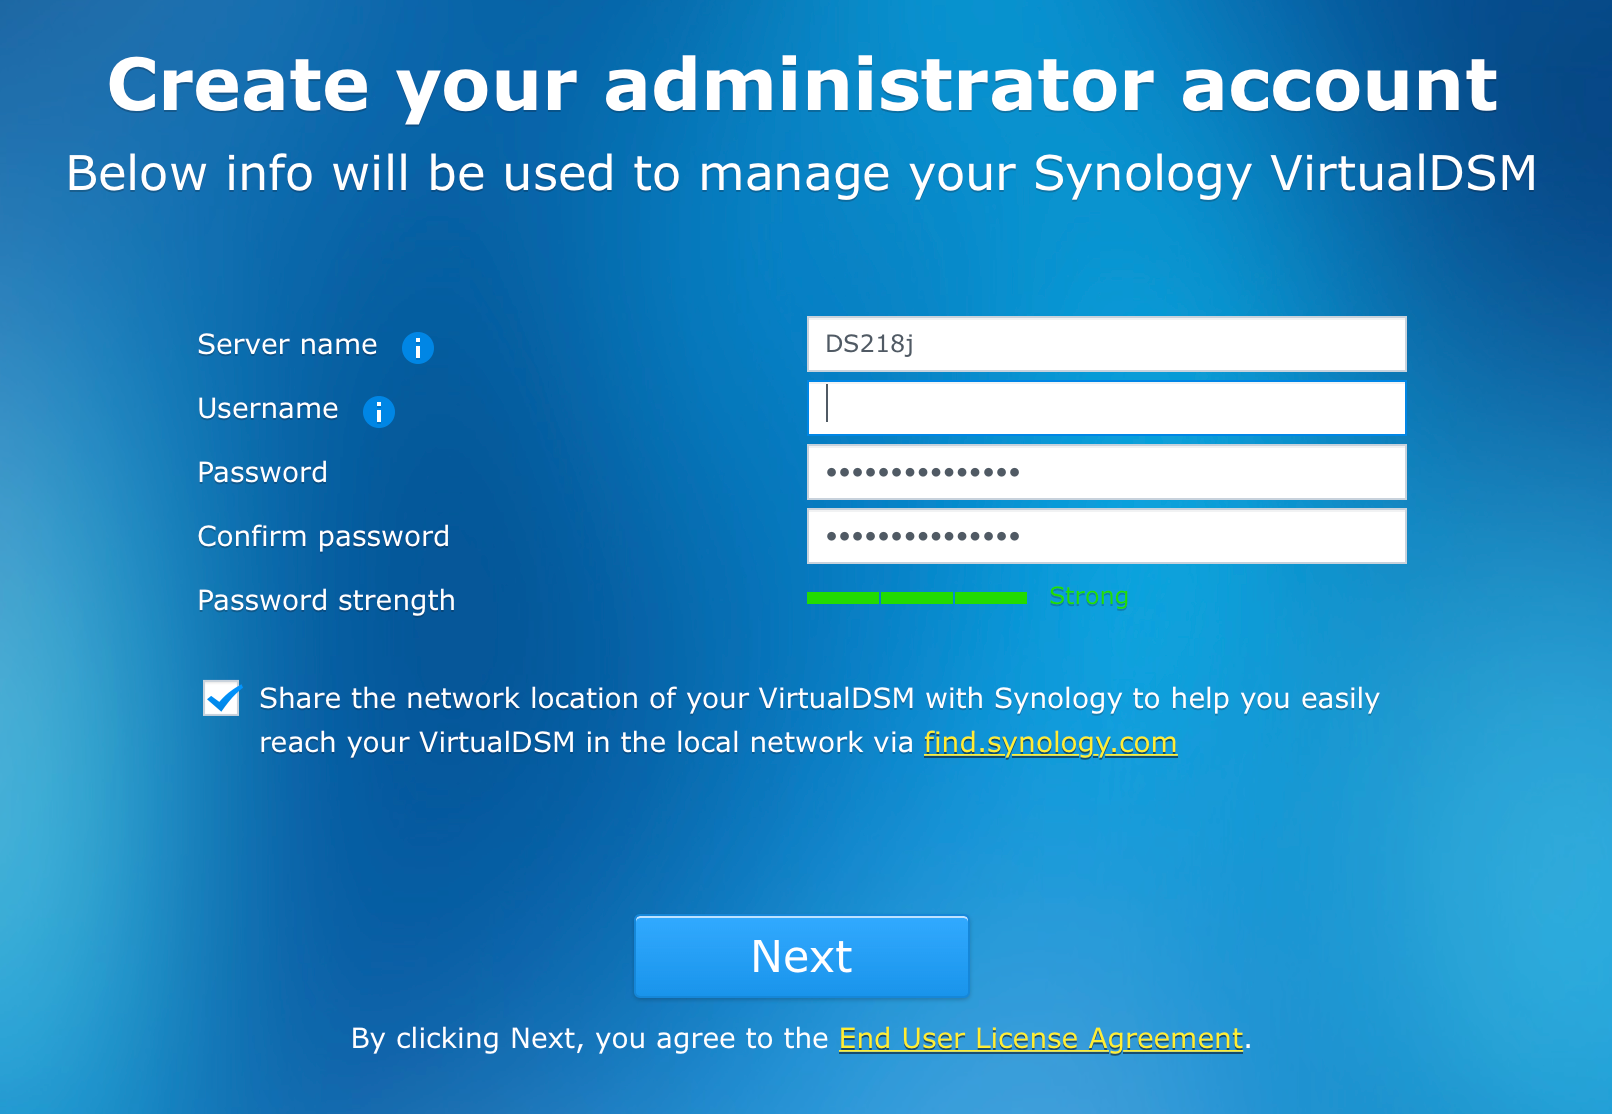
After the installation is completed it's time to set up your account and define some basic settings (like update method and time). Enter your desired username and password and continue to the next step.
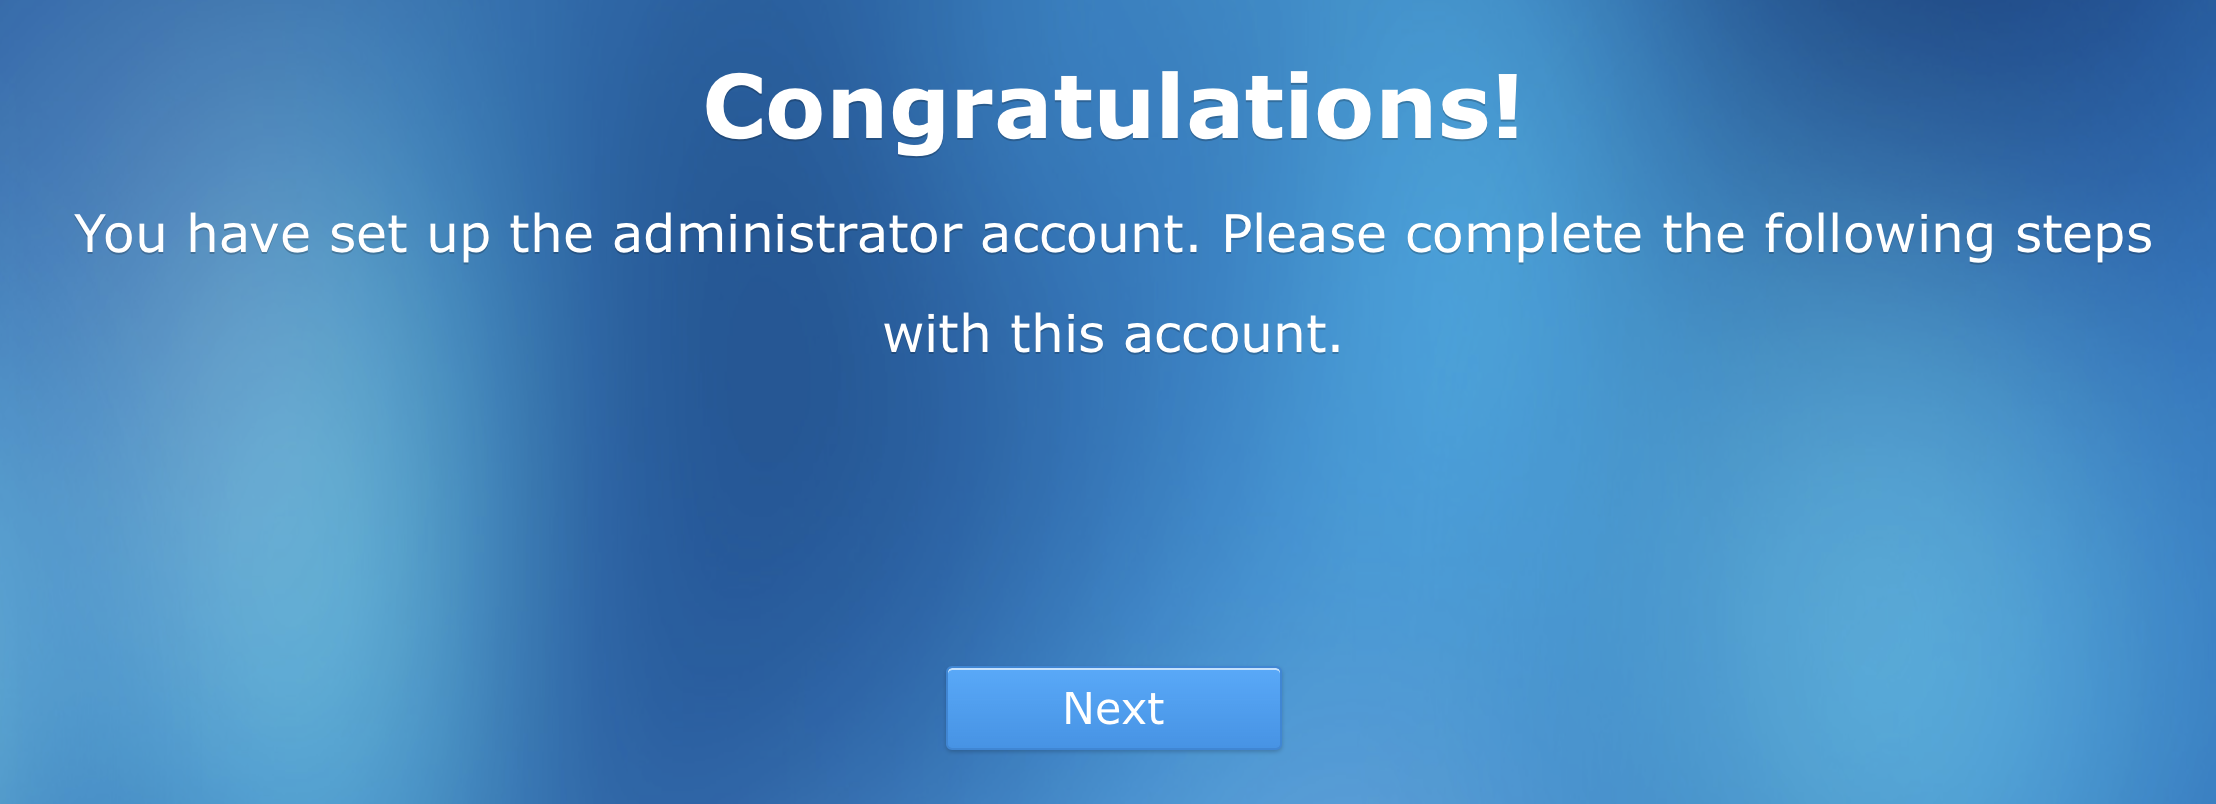
Confirmation screen telling you all is well and good. Let's see what's next!
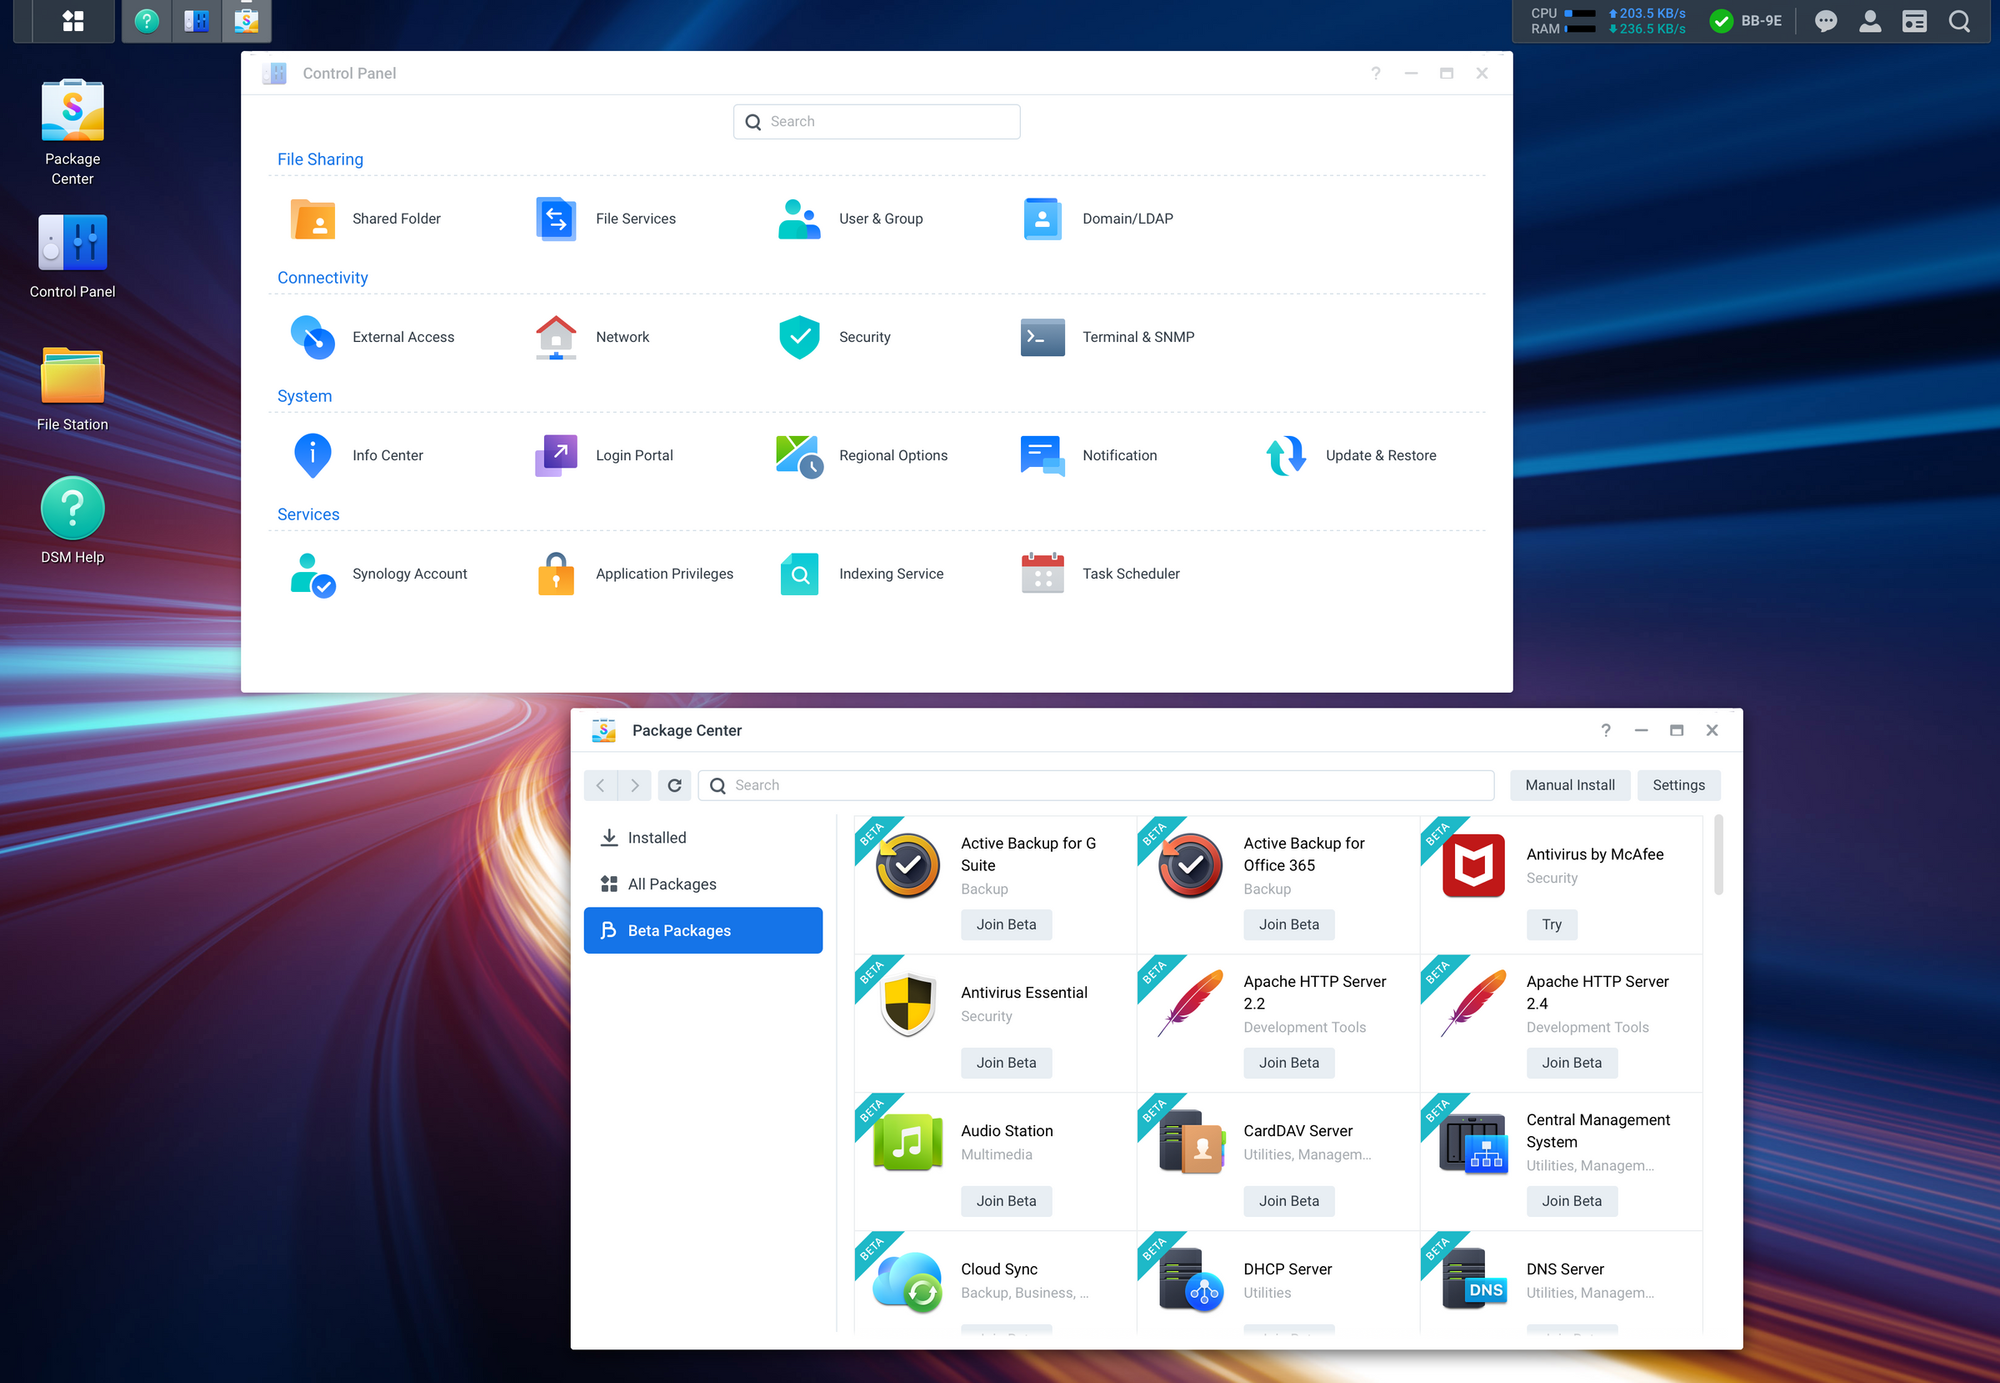
That was easy, right? Who said it's gonna be hard? Well, now that you have installed DSM successfully give yourself a break and enjoy a simple yet powerful and beautiful desktop that will allow you to do all kinds of great things on your NAS.
Ok, now that break is over let's push forward. Details about DSM UI and features will be addressed in the next part(s) when we start working with different sections of the system. Right now we have one more main thing that needs to be done before you can start using your new NAS, and that's RAID configuration.
RAID ARRAY configuration
Before you can start using your NAS, installing apps, copying data, etc, you need to configure how your data will be organized on your hard drives. At this point, I'm not talking about folders but volumes. Volumes in DSM can be configured in multiple ways. Single volume on all drives (as a mirror, one giant volume with or without redundancy), or multiple volumes on the other hand. Separate volume on each HDD you have inside your NAS.
This is something that 1st-time users struggle most with. In a large number of cases, the mistakes are made here and later on, they can "cost" you time and money.
Make sure to use and visit Synology RAID calculator BEFORE you continue forward with this step if you have any questions
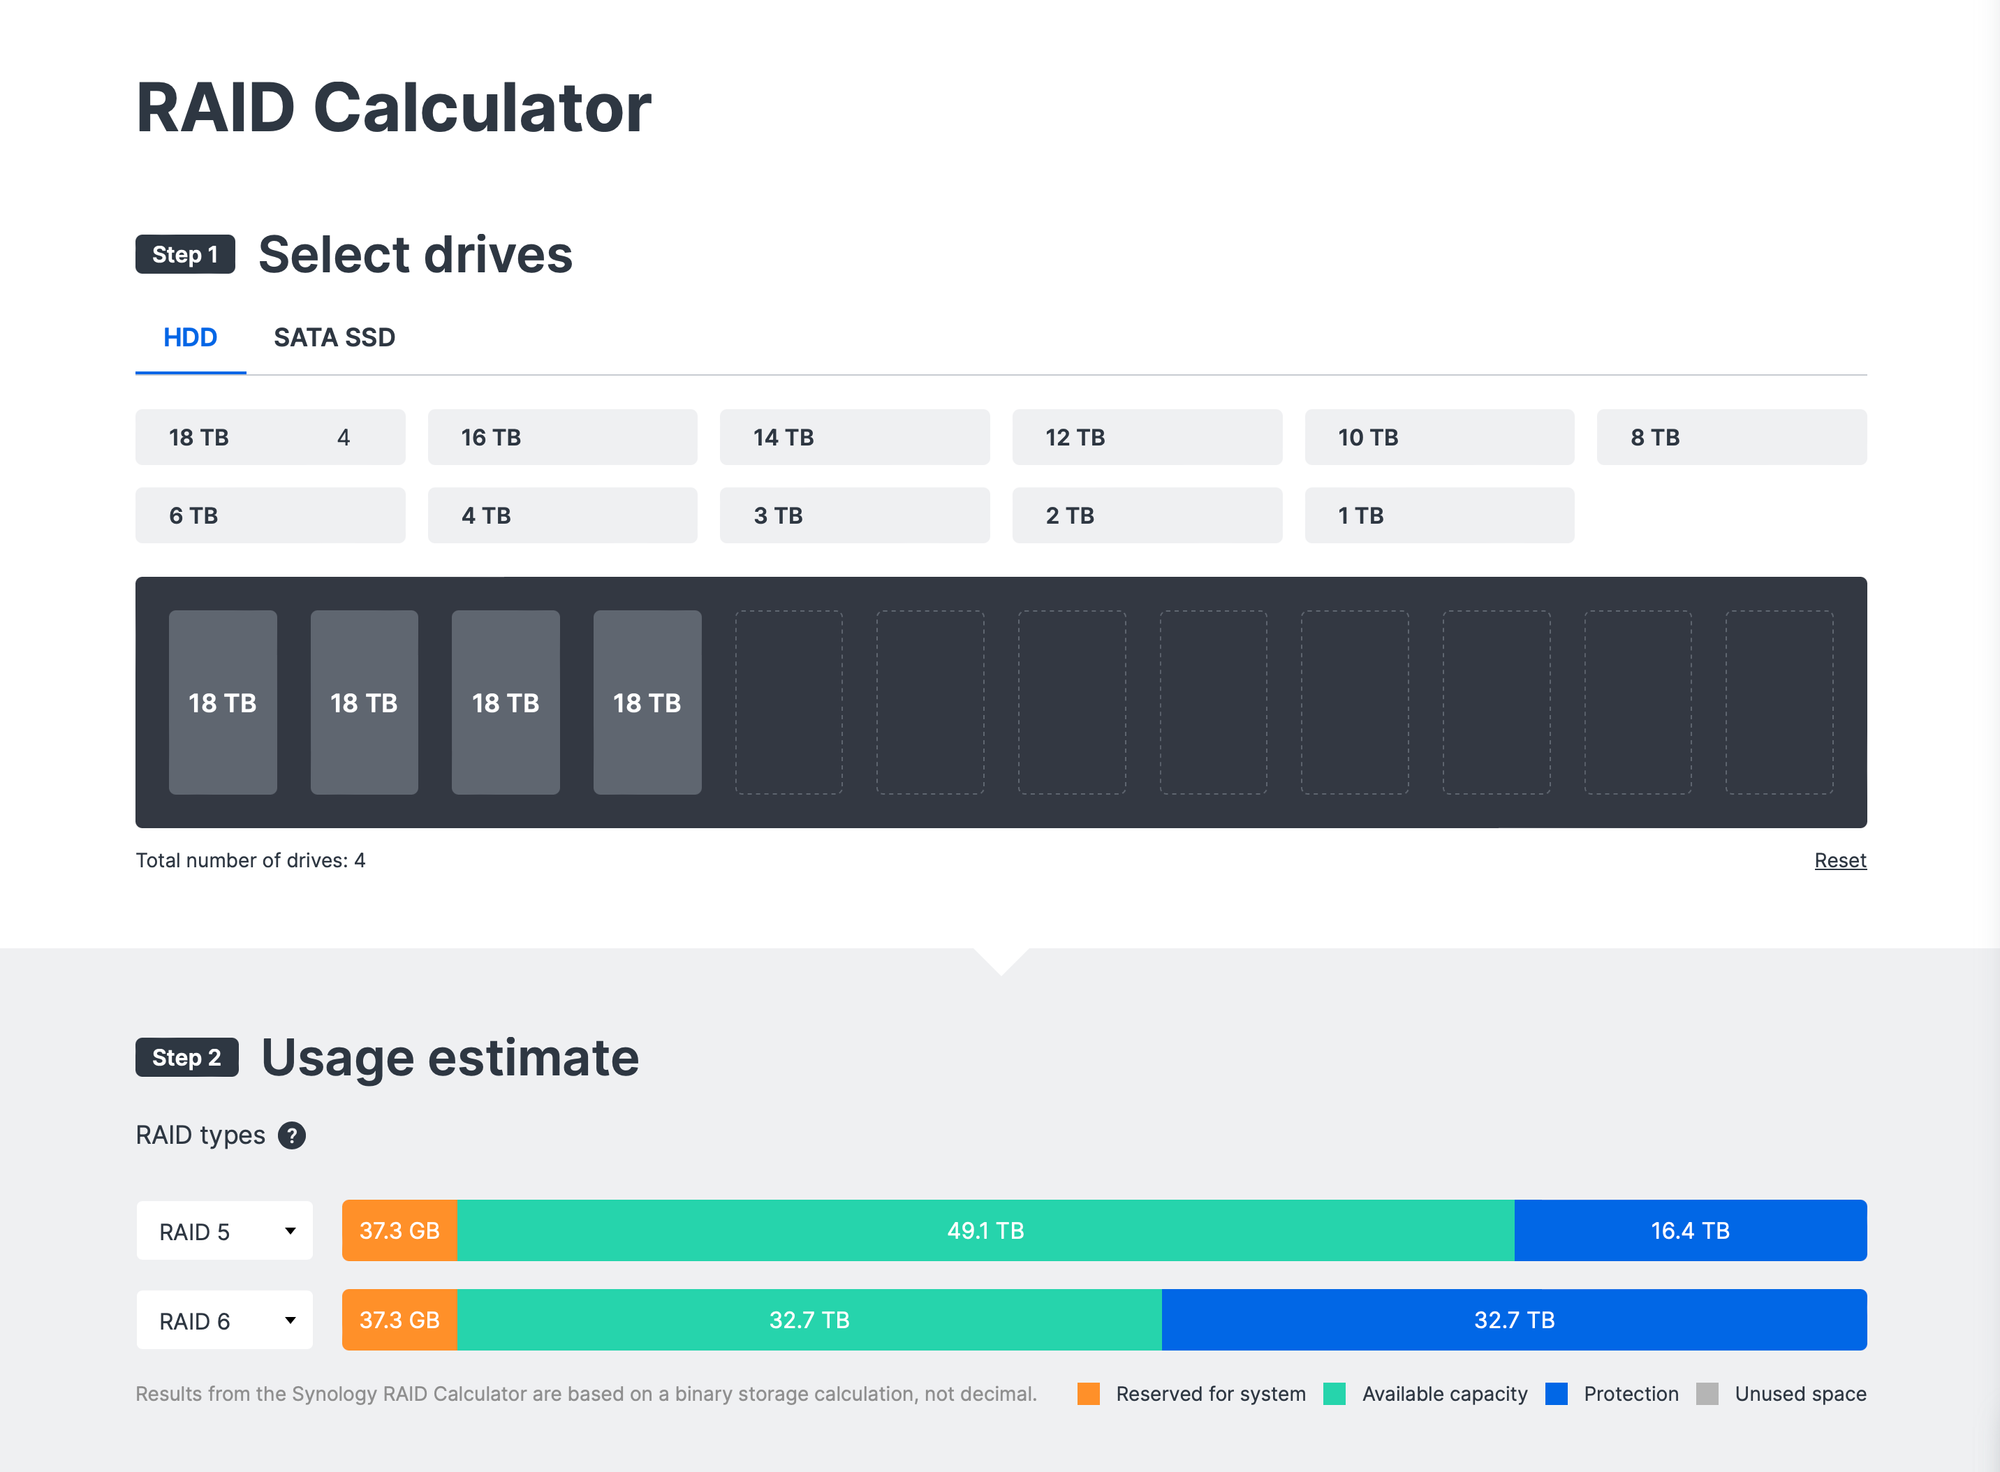
The best thing is to consult the RAID calculator to see just how much space you will get with your NAS and the drives you have chosen.
Synology NAS supports several RAID options (depending on the number of bays and models this can vary). The most common one is SHR or SHR2 (Synology Hybrid RAID). On the other hand, you have your industry-standard RAID0, 1, 5, 6, 10, 0+1, JBOD, Basic, etc.
As I said before, this will depend on the number of bays considering that some options will not be possible because some RAID types require a minimum number of drives (RAID 5 for example needs a minimum of 3 HDDs).
To start with your volume creation use the Storage Manager app from the main menu (upper left-hand corner of your DSM UI).
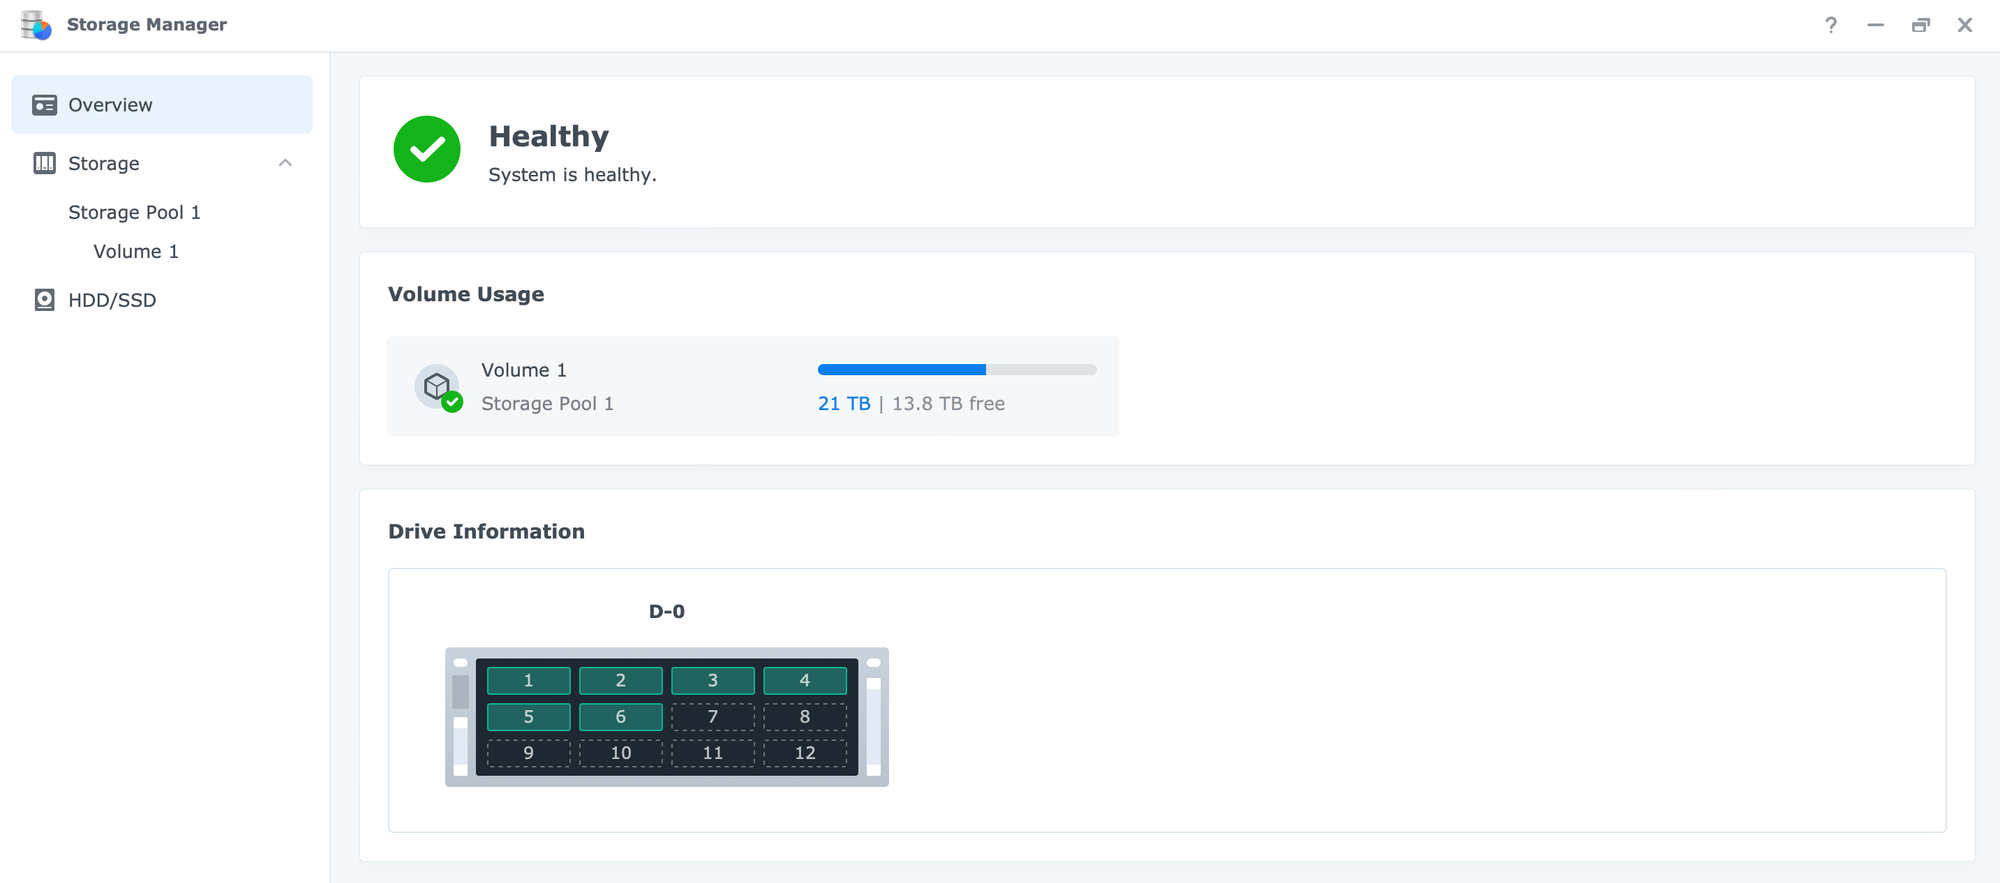
This will open up Storage Manager which will list all the options regarding your volumes, pools, individual HDDs, any host spare drives that you might have as well as SSD cache (on selected models).
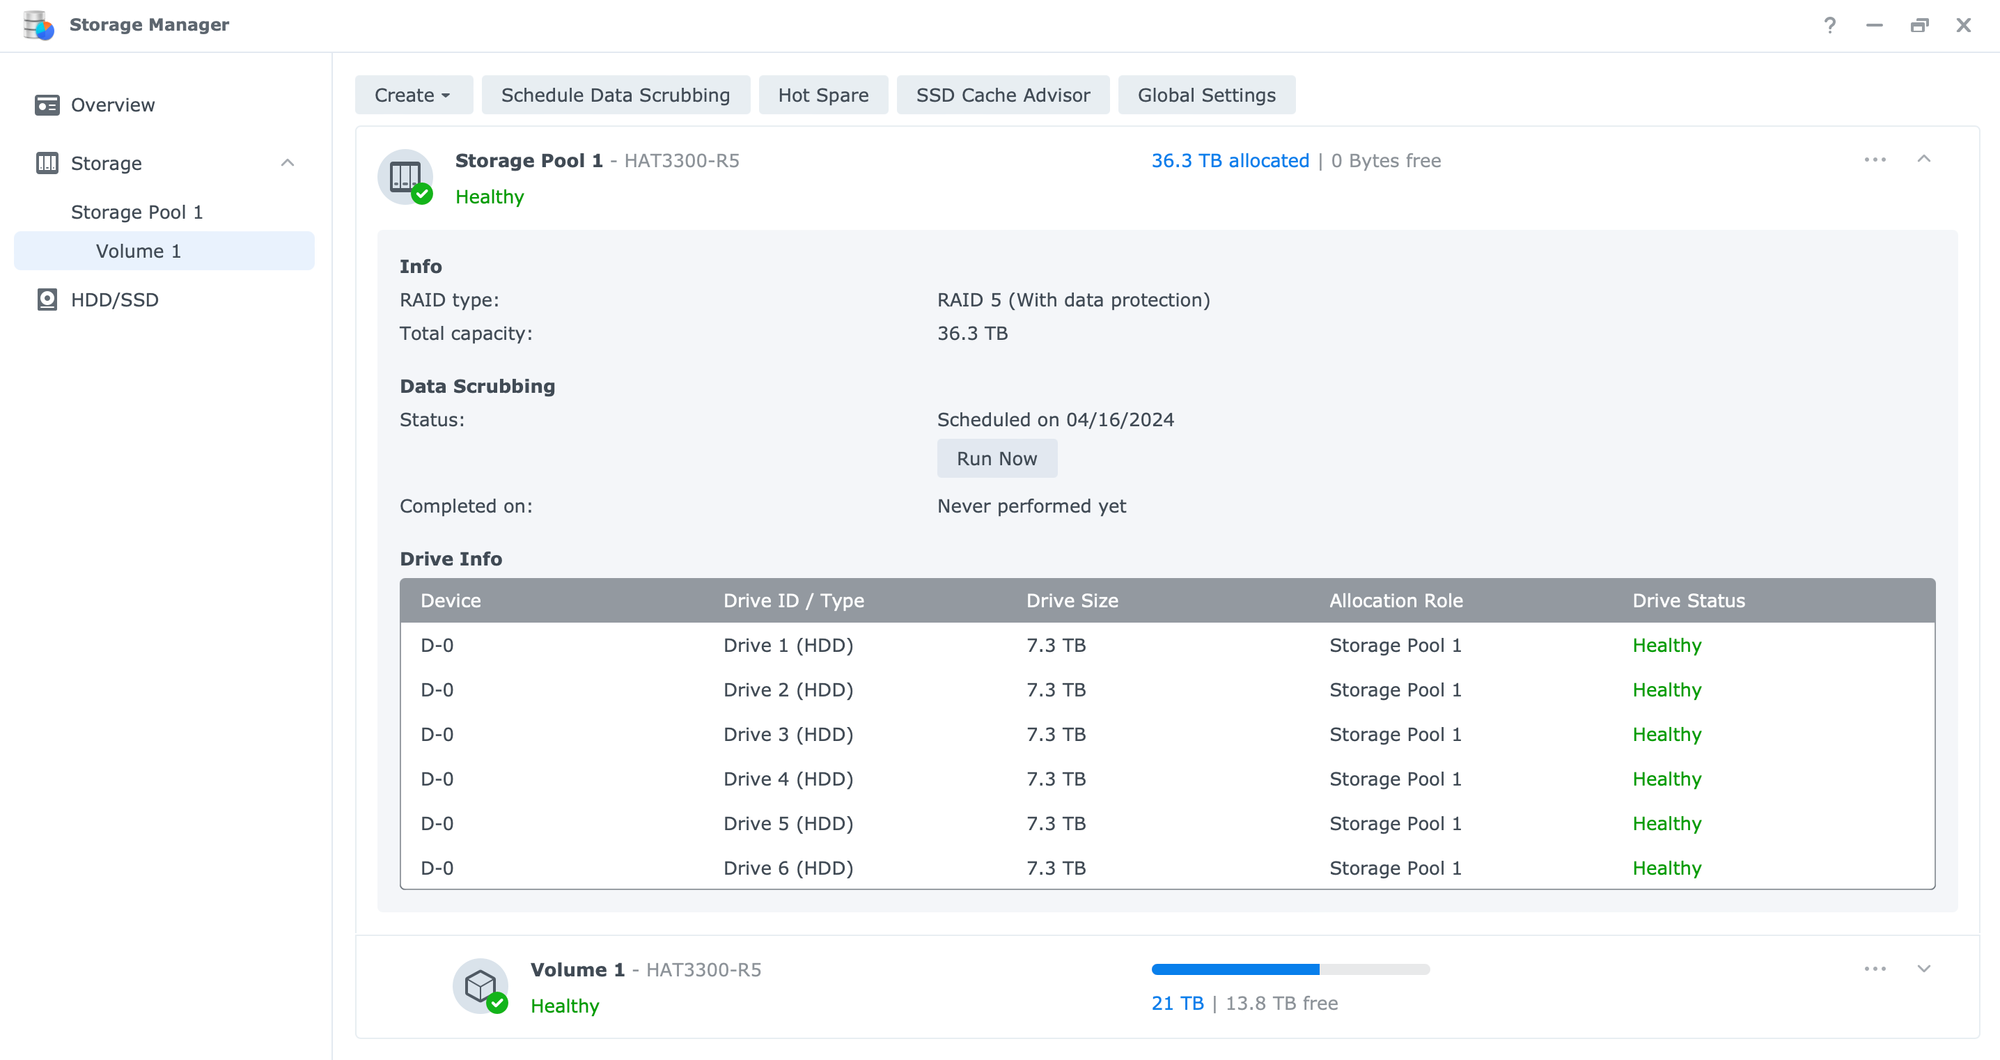
Head down to the Volume section and use the Create button to start with your volume creation. In the following wizard, you will drag all the HDDs that you wanna use with your volume to make one. Depending on the number of drives you will have RAID types that will be listed. Using the raid calculator from the Synology site and your desired total space/redundancy be sure that you are certain what type you have chosen.
I'm saying this because this is something you will not be able to change on the fly later on. Of course, you will be able to change it, but not without destroying your volume and starting again. You can see how this can be a problem if you already move some data on the NAS. This is why this step is very important. Make sure that you know how much space you need/want, and what specific raid array offers that result (again, be sure to read ALL the info on the RAID calculator site!).
Depending on how big the drives are and how big the end volume will be, creation time will depend. It can take a few minutes to a day or even longer. Until the status of a volume in Storage Manager is not saying "Normal" with green letters, it's not ready, leave it be.
You can log off from your NAS for now and let it crunch away. Use the person icon in the upper right-hand corner of your DSM UI and select "Logout". Don't worry, volume creation, as well as any other operation, will continue in the background without you looking at the progress bar.
In the next part of Synology 101, we will focus on the user account, how to create them, allow them permissions on specific apps/services/folders, and more.


