Synology BeeDrive review

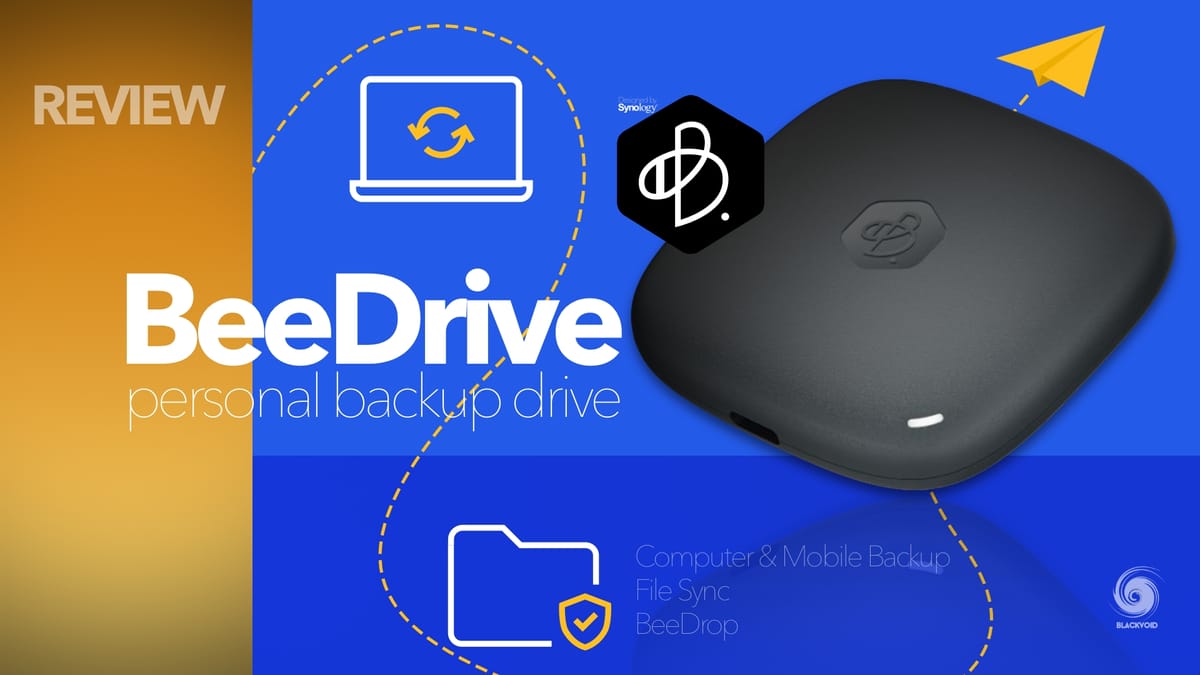
Table of Contents
: Design and packaging
: Connectivity, compatibility, and speed
: The BeeDrive sofware (Windows OS)
: The BeeDrive software (macOS)
: Conclusion and final thoughts
It is more than clear to anyone using Synology products that the company's core business is NAS devices (network-attached storage). While they have also moved into the networking segment since 2015, with five routers that hit the market so far, one thing that was never in their focus was DAS (direct attached storage).
A month ago, everything changed when Synology announced its first device from that segment, the BeeDrive.
Overview of the new BeeDrive device
In this review article, we will have a look at the device itself and all the features that it offers.
: Design and packaging
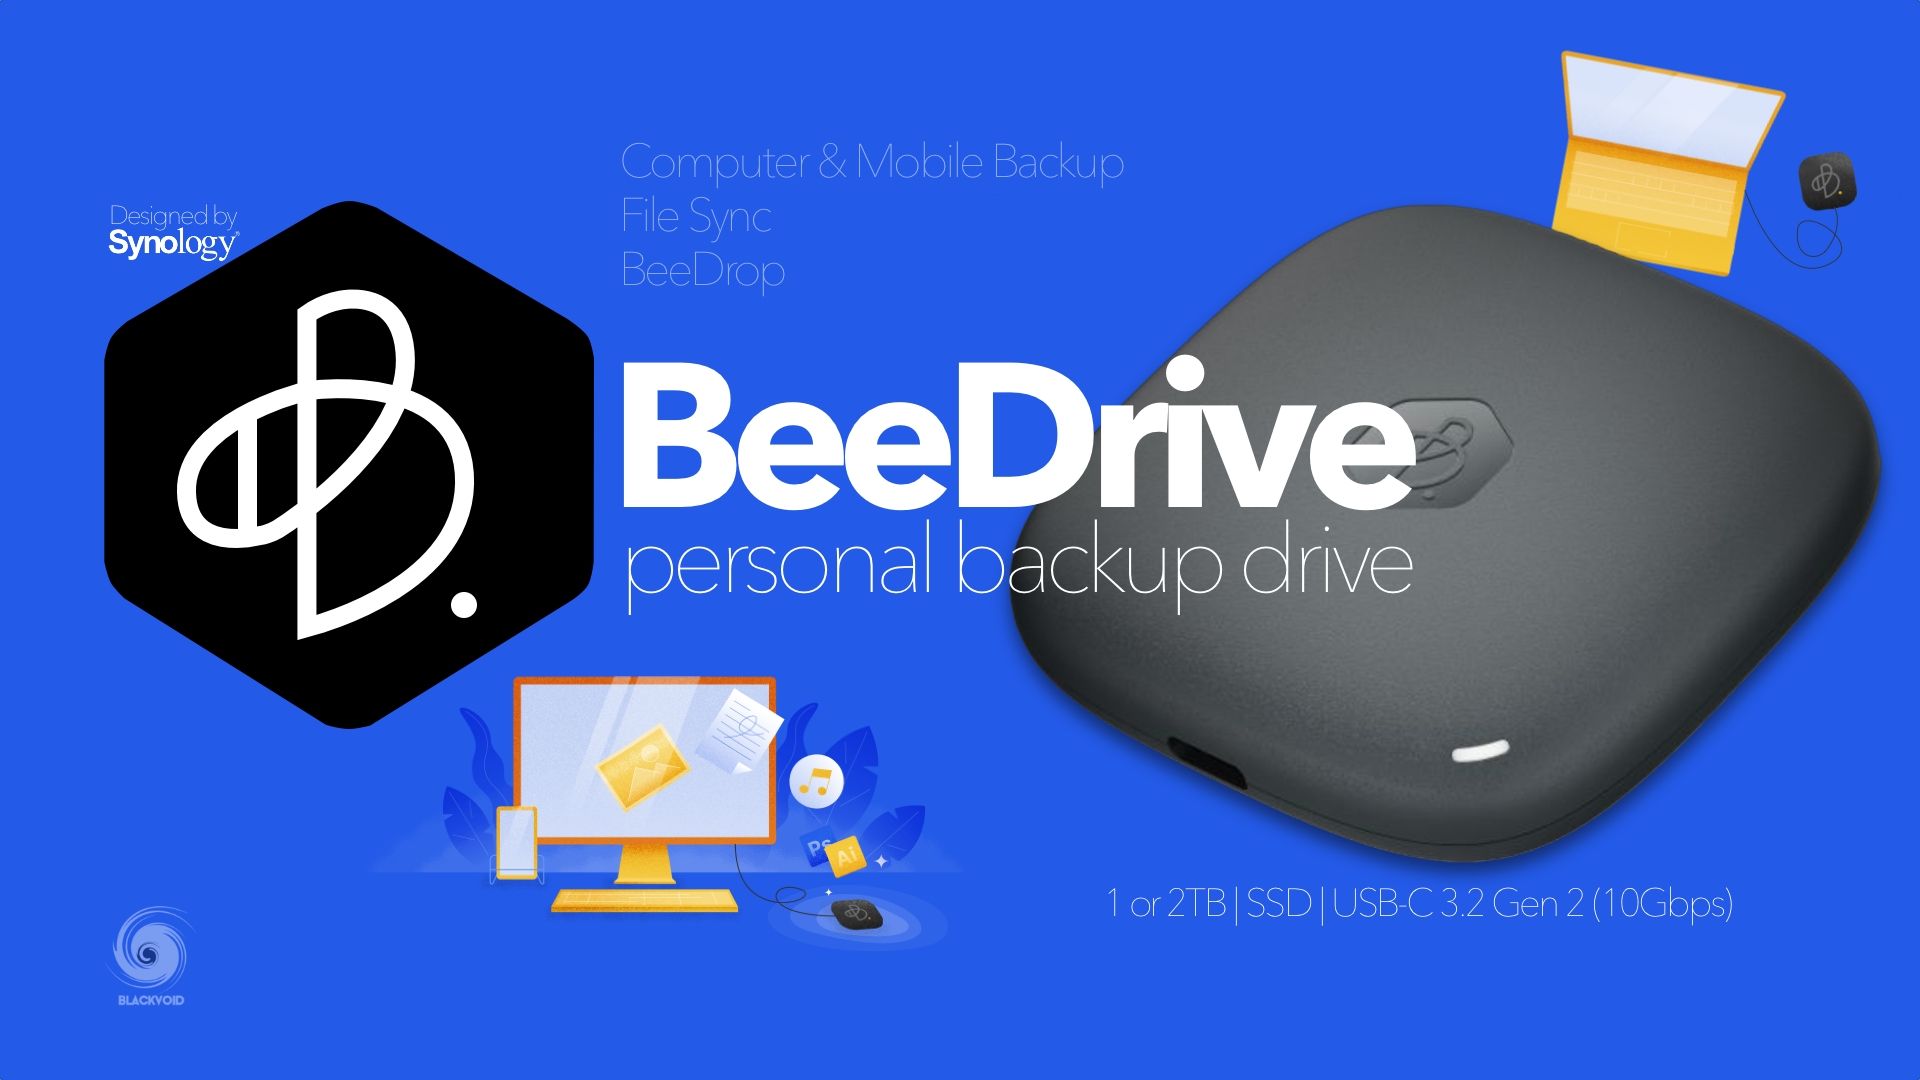
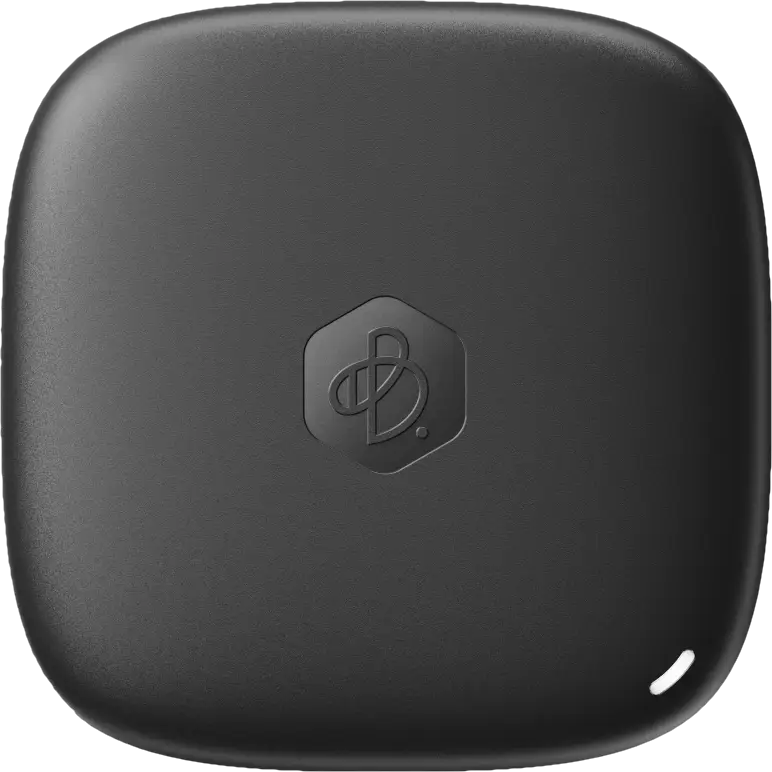
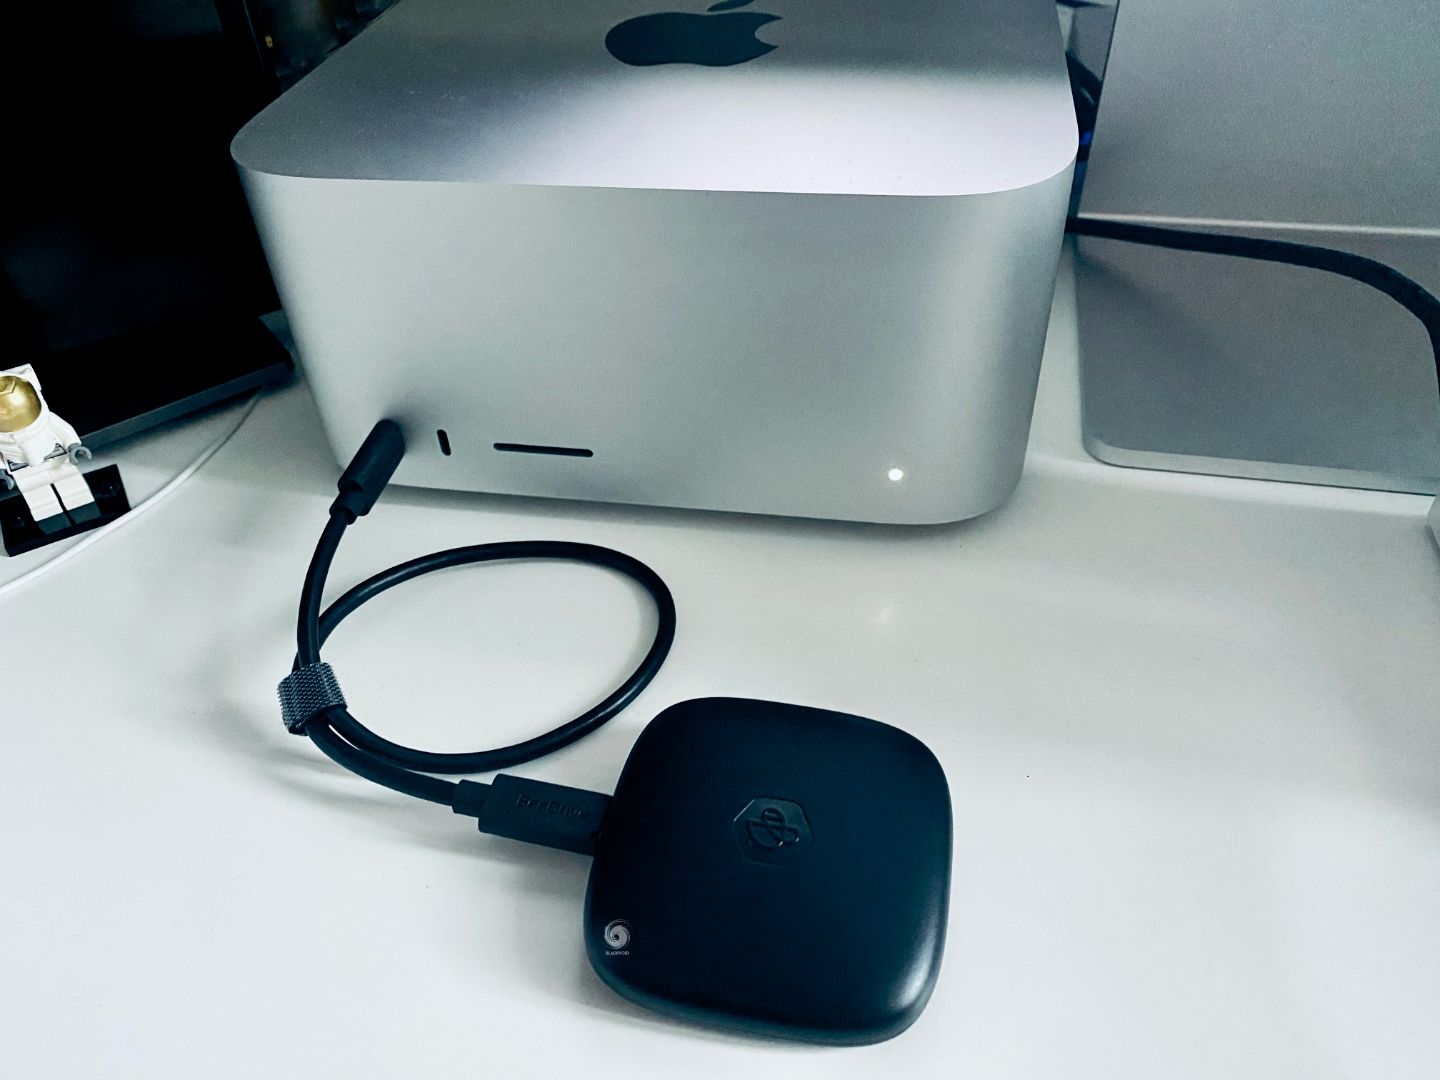
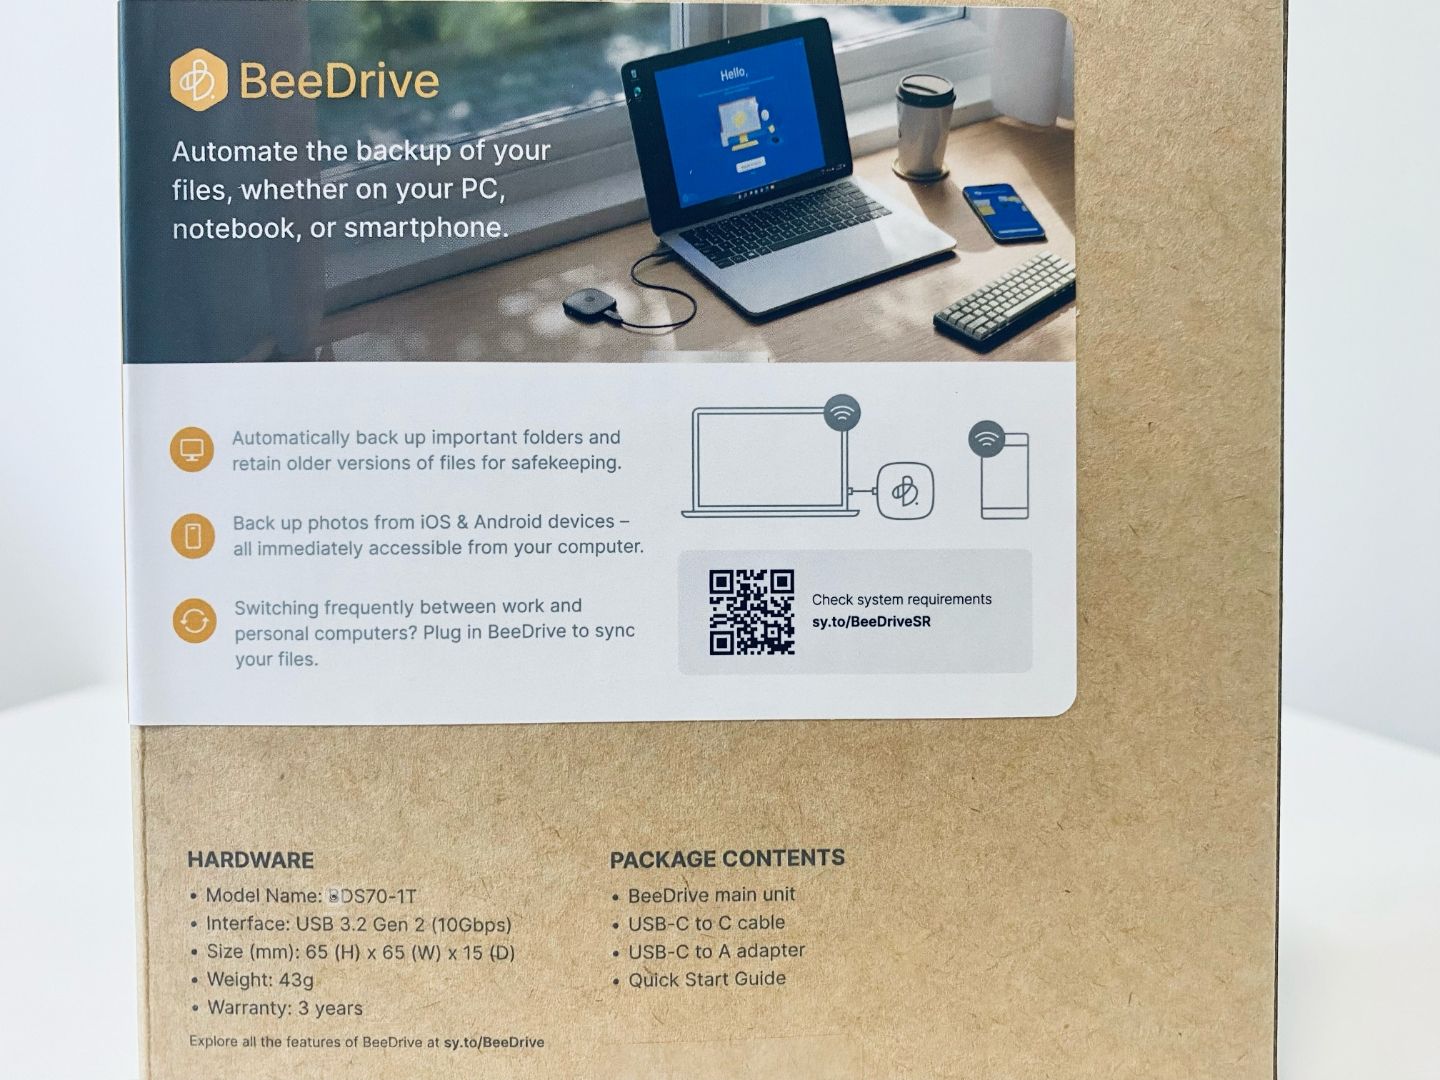
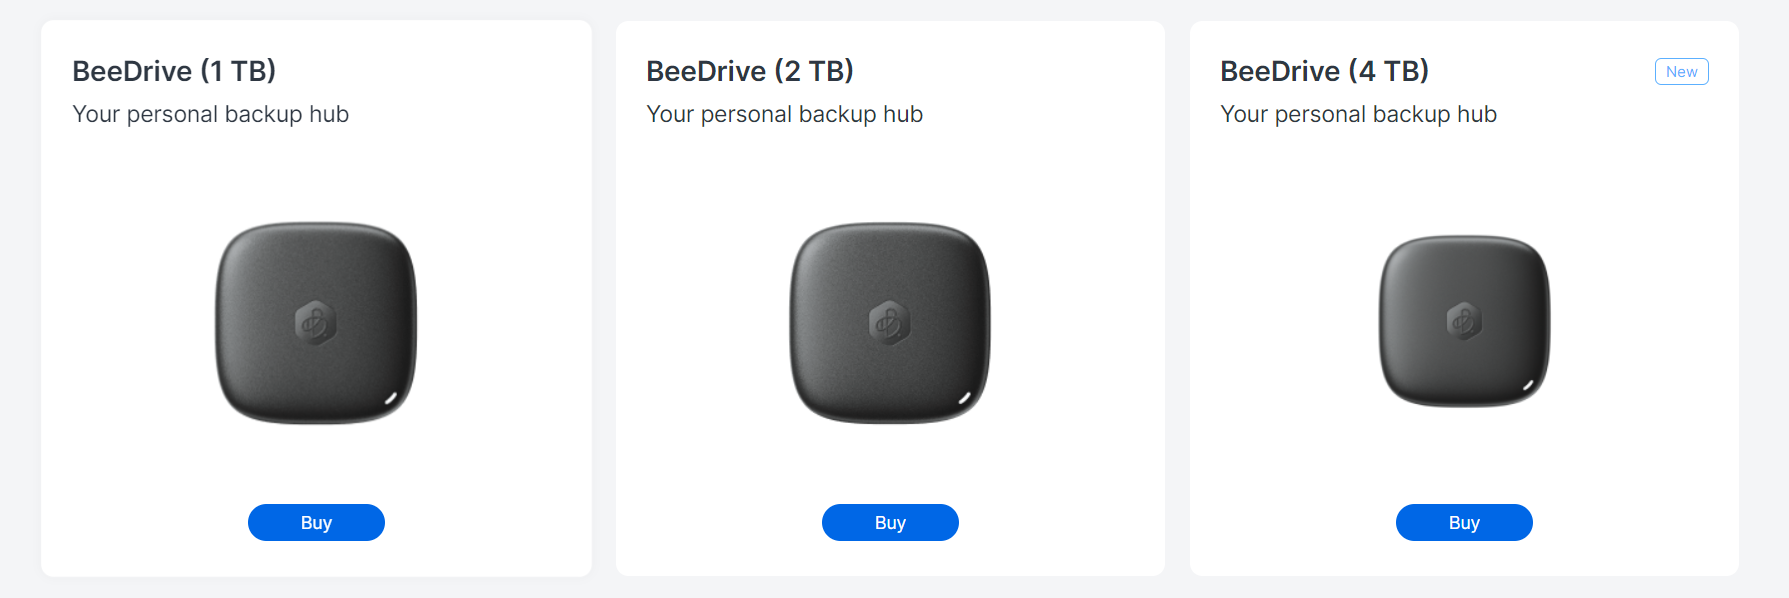
The BeeDrive is a compact USB-powered device designed for SOHO and professional individuals, that offers a moderate amount of data storage. It comes in 1 or 2 TB capacity, with a USB-C 3.2 Gen 2 (10Gbps) connection.
BeeDrive is designed for individuals who handle important data on their computers or mobile devices. These individuals
probably understand the importance of backups, but don’t want to dabble in complex setup processes or continuously pay for cloud subscriptions.

Its small form factor and high speeds will make it an ideal candidate for anyone on the go looking for a large amount of storage and maximum portability and compatibility.
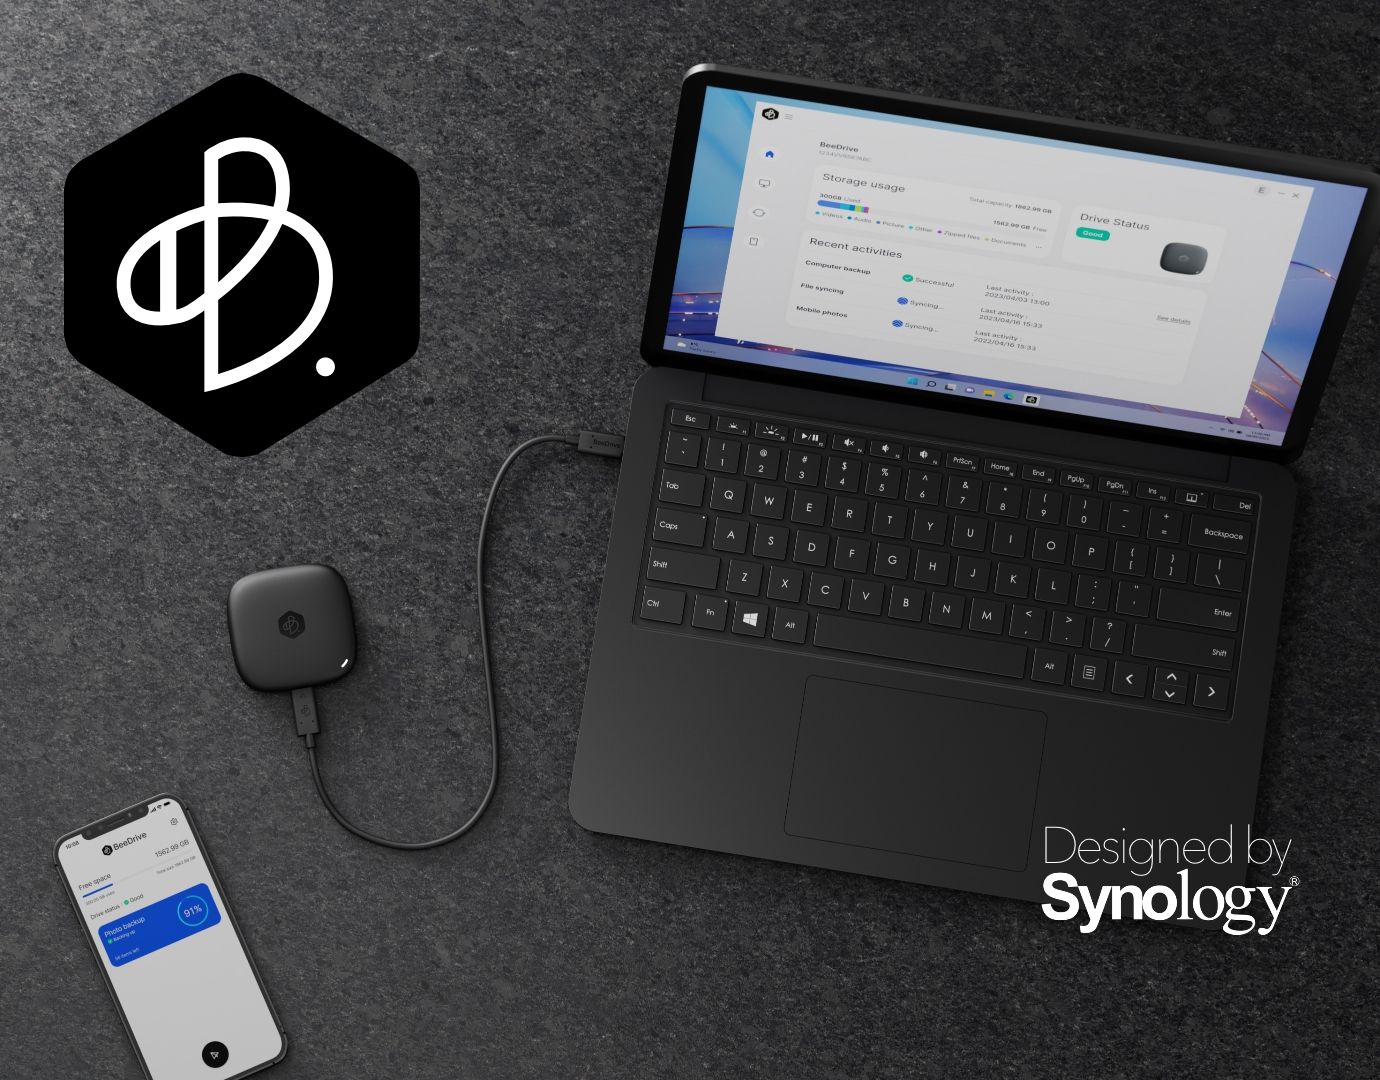
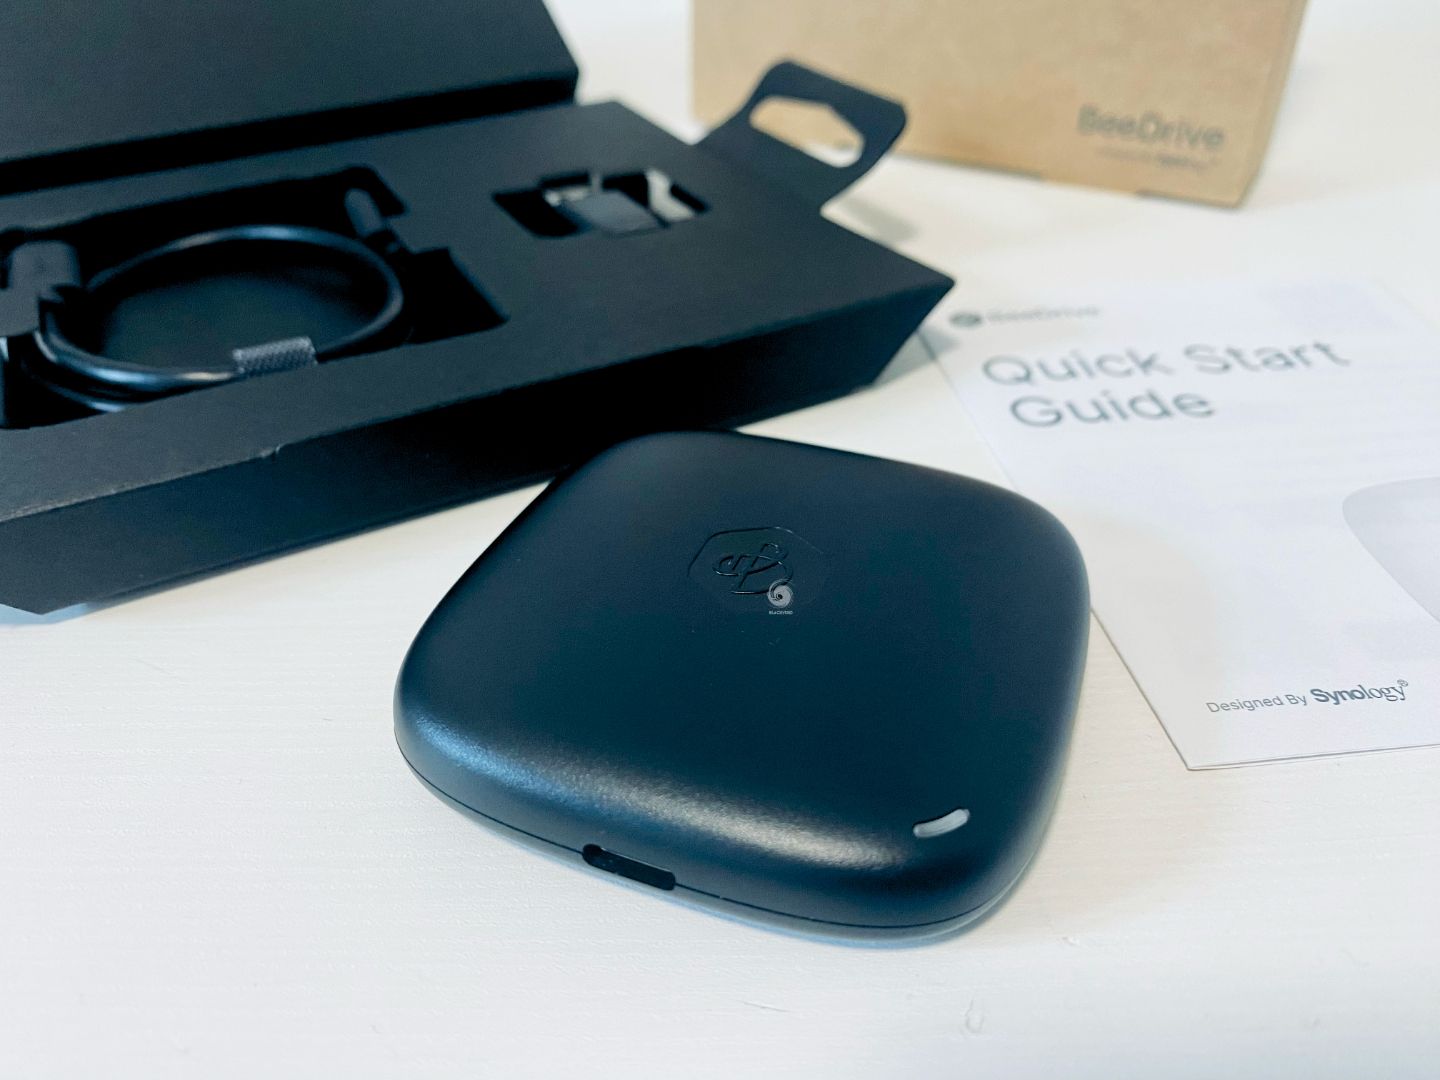
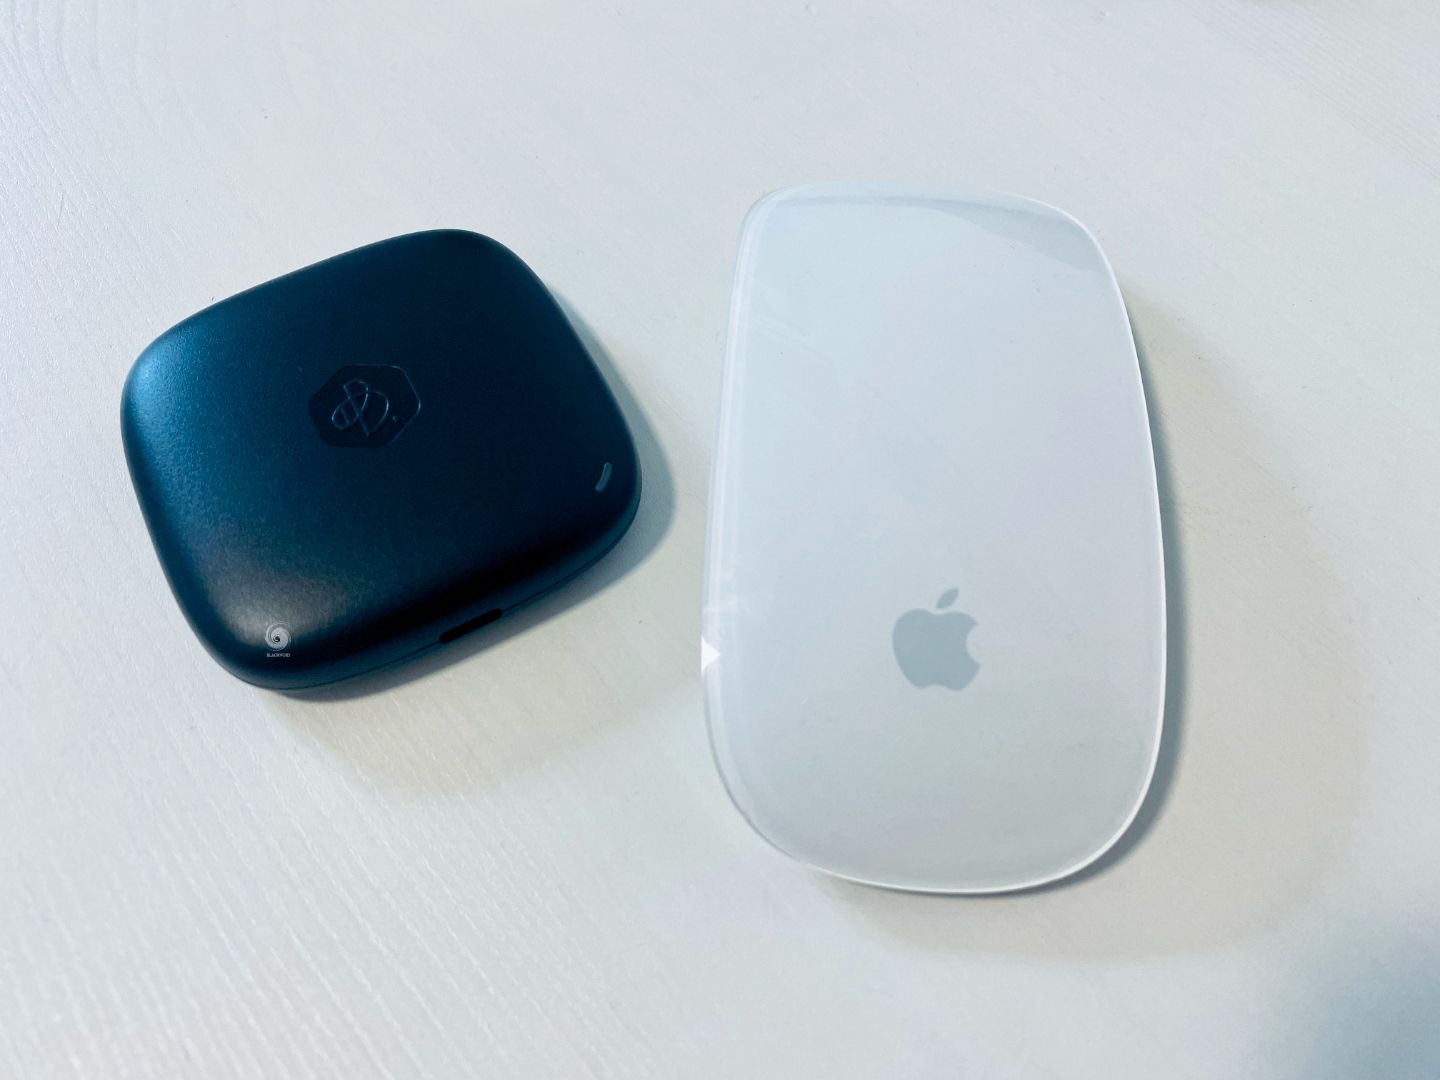
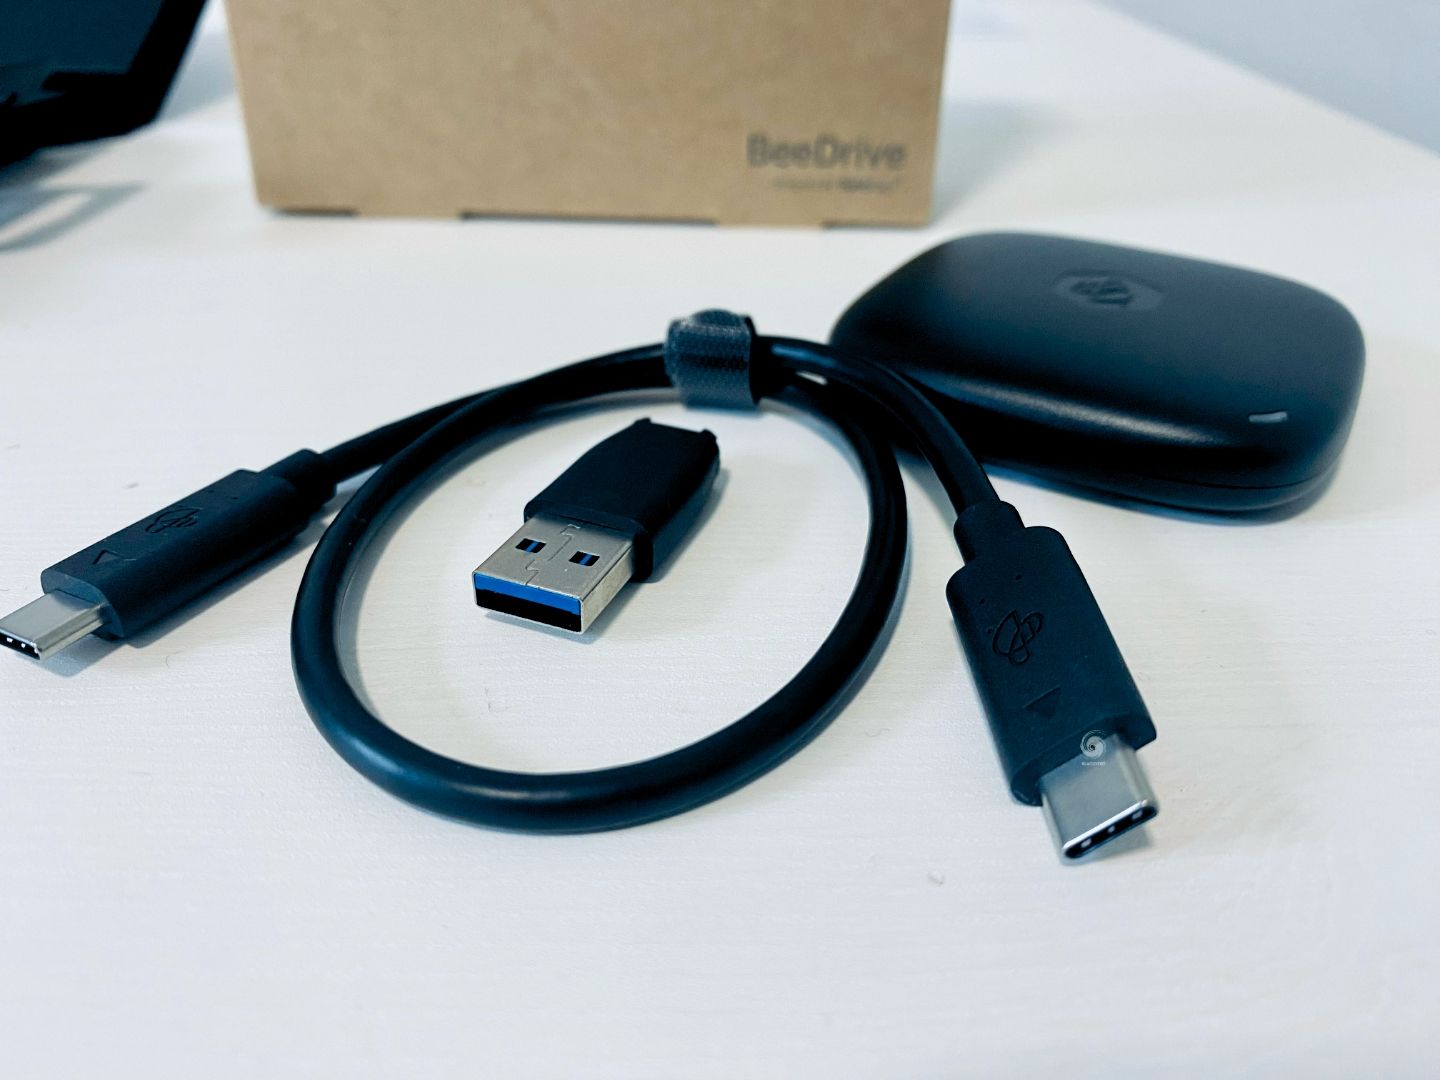
The BeeDrive is 65mm in size and only 15mm thick and weighs only 43 grams. The USB-C to USB-C cable that comes with it is about 30cm long, so don't expect to hook it up too far from the actual port.
Due to its weight, as expected the case is pure plastic, with a hollow-like sound to it. While I have not personally tested how durable it is, I would suggest keeping it inside a case of some sort and making sure you don't drop it to prevent any damage to it.
One more thing that could also be a bit better is the connection of the USB-C cable with the USB-A adapter. It has no secure mechanism to protect it from falling off, and while it will not fall off on its own, it's not the most secure connection. The upside is the light enclosure that can basically hang off the cable with no issue at all.
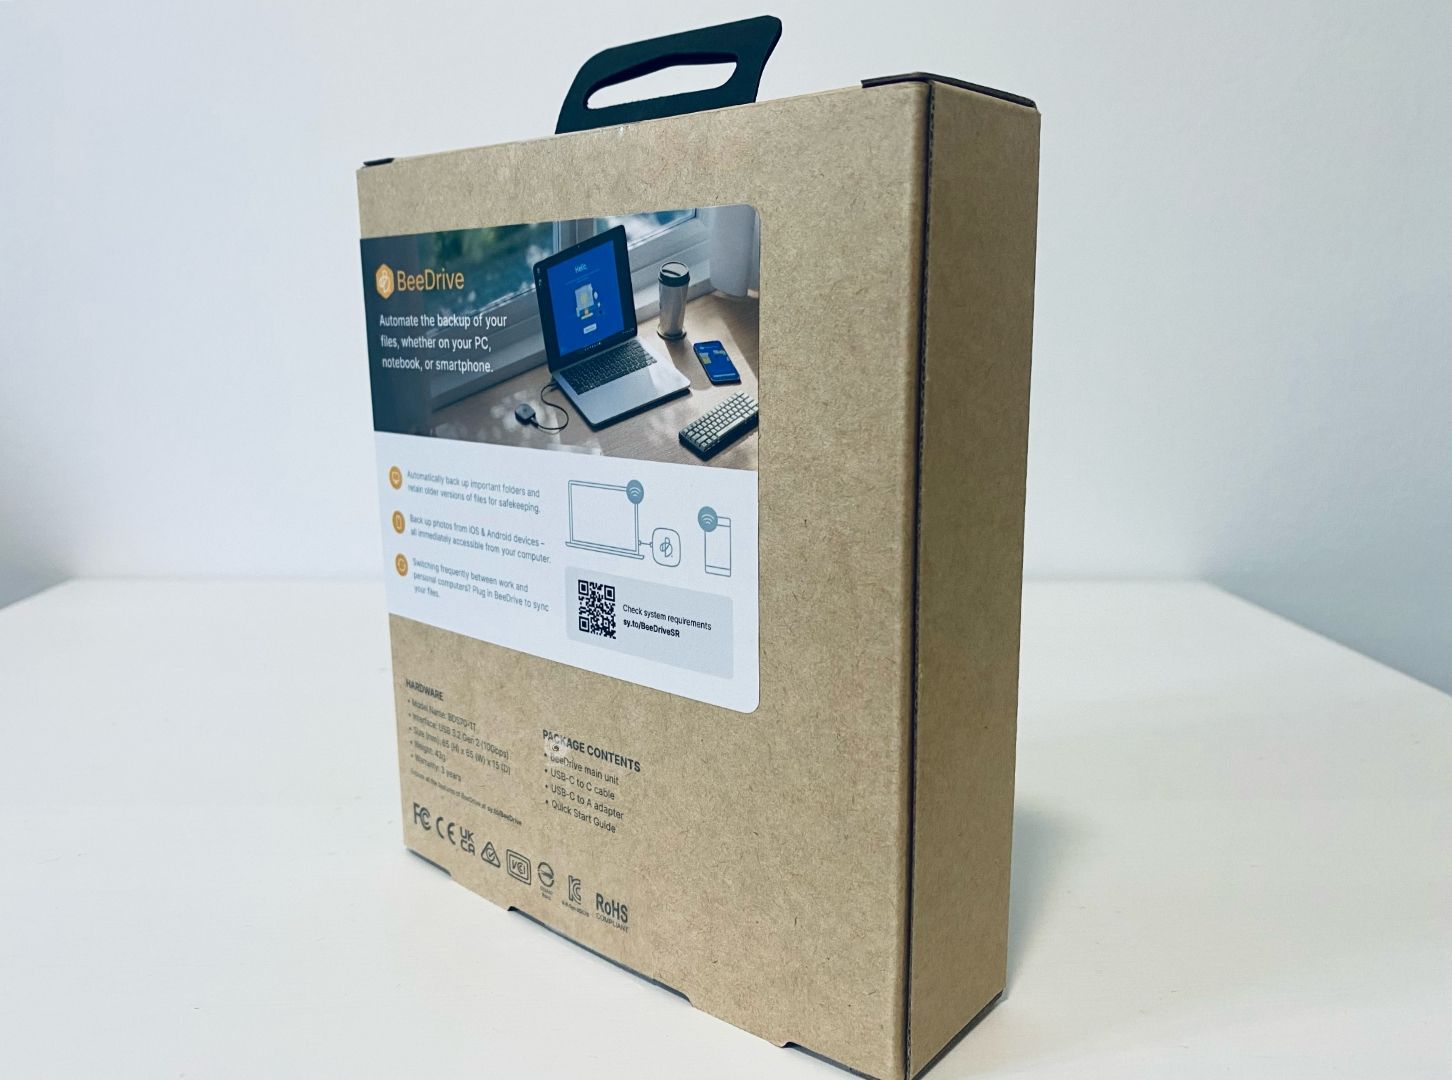
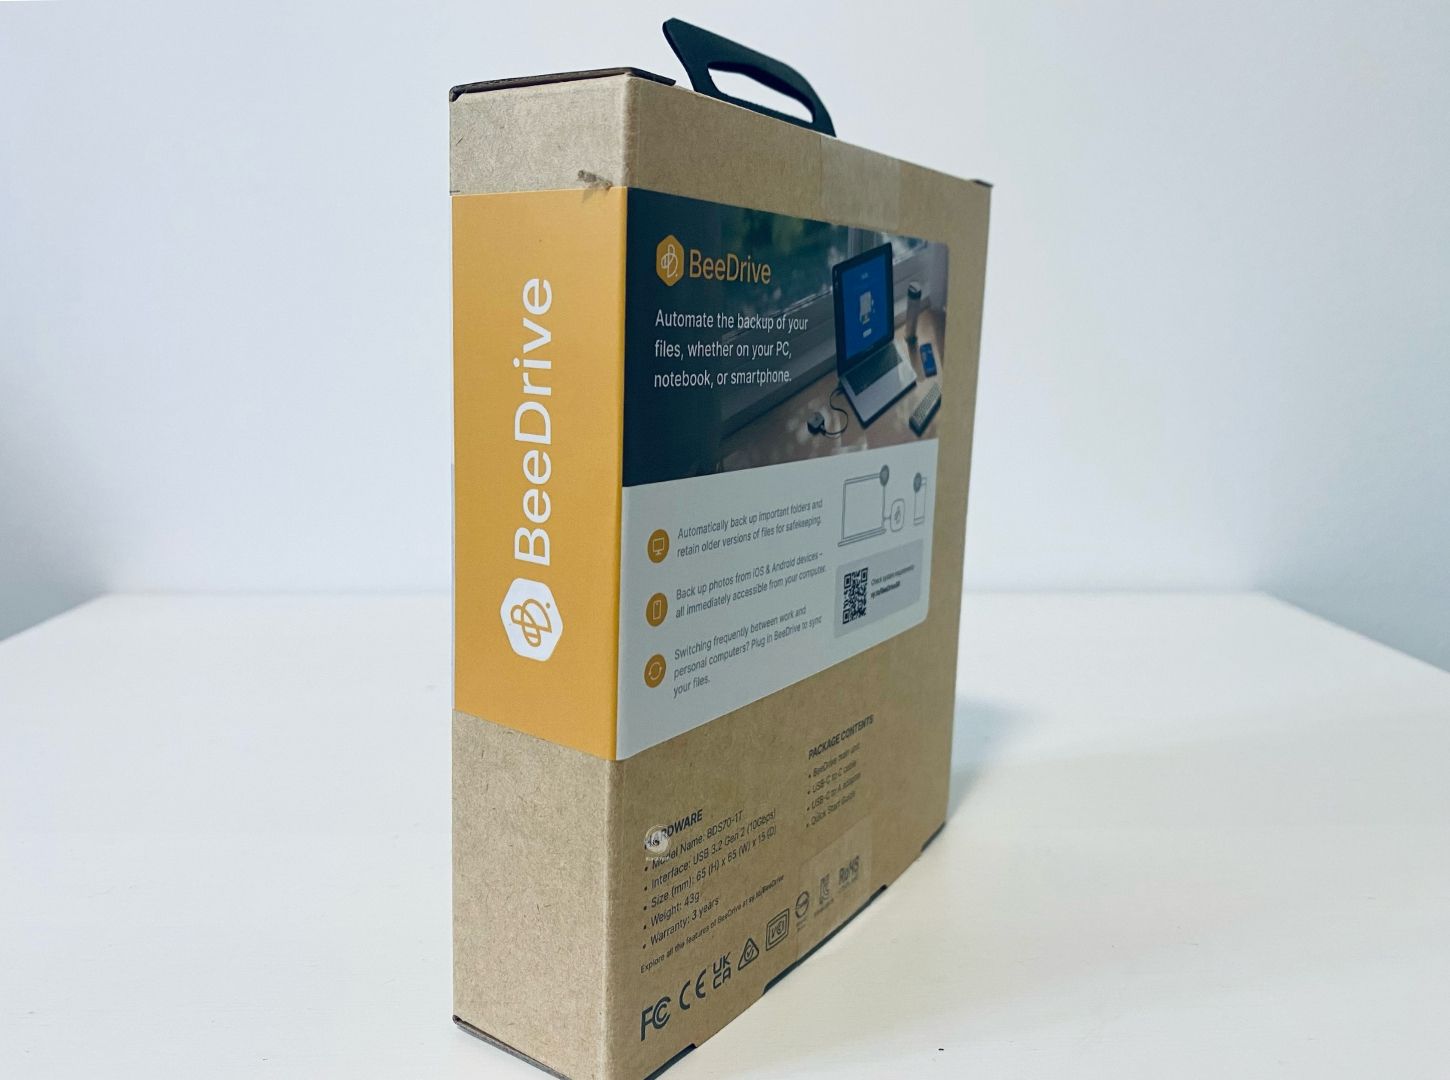
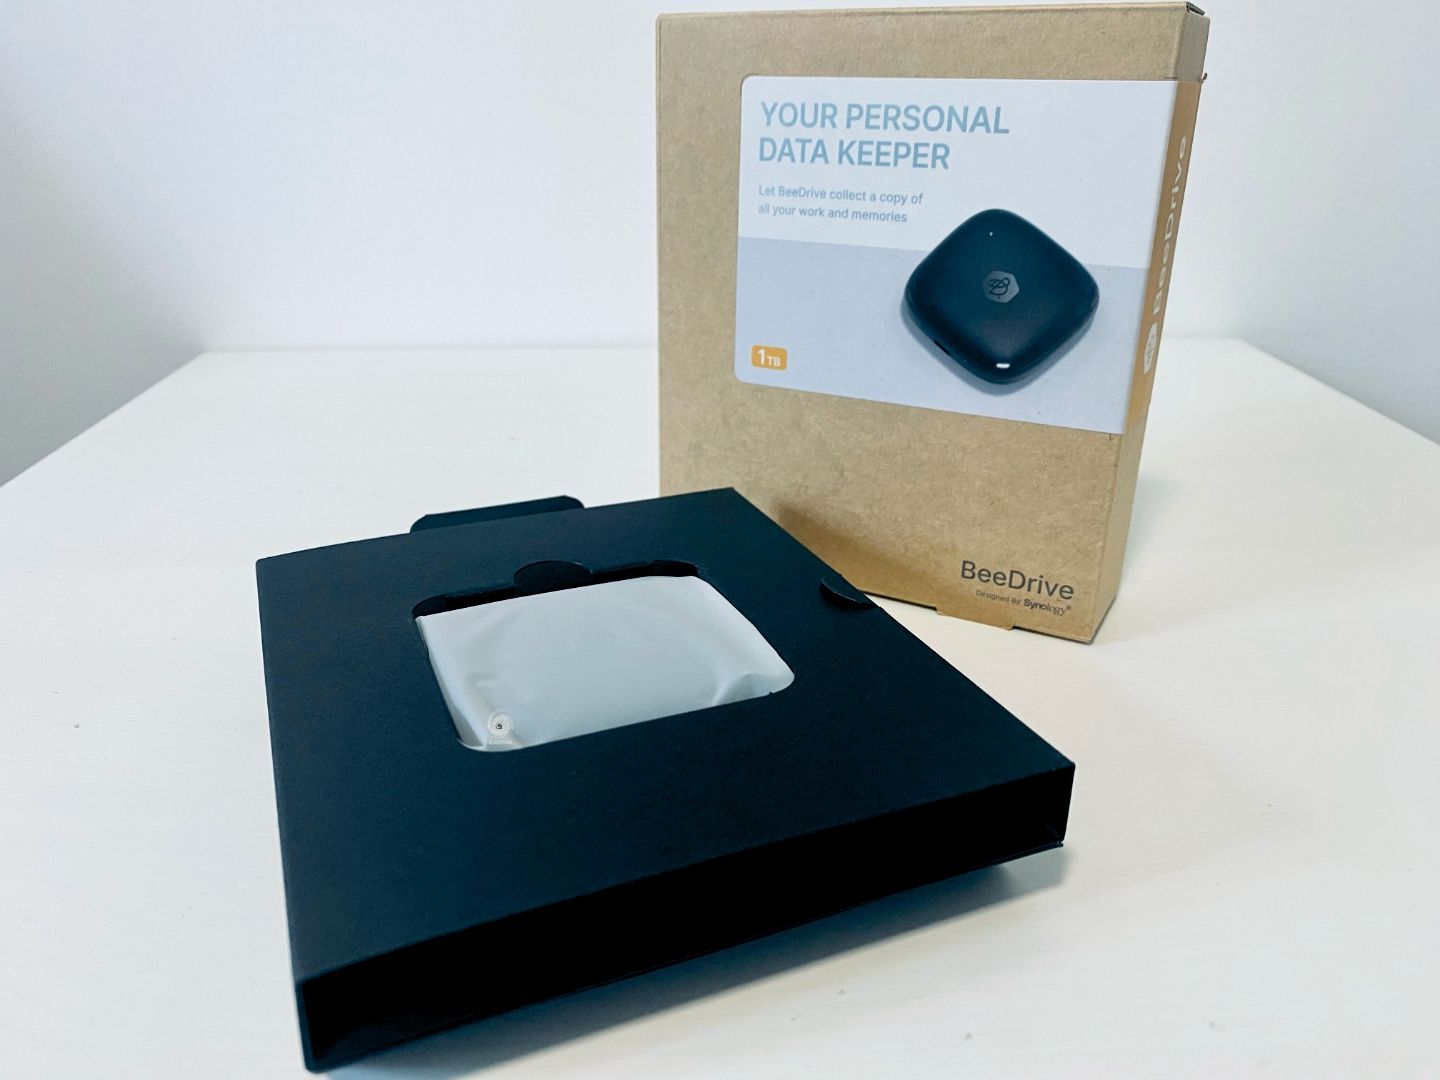
The package it comes with is again very minimalistic as expected from Synology with more than enough information on it to give us the general overview of the product itself.

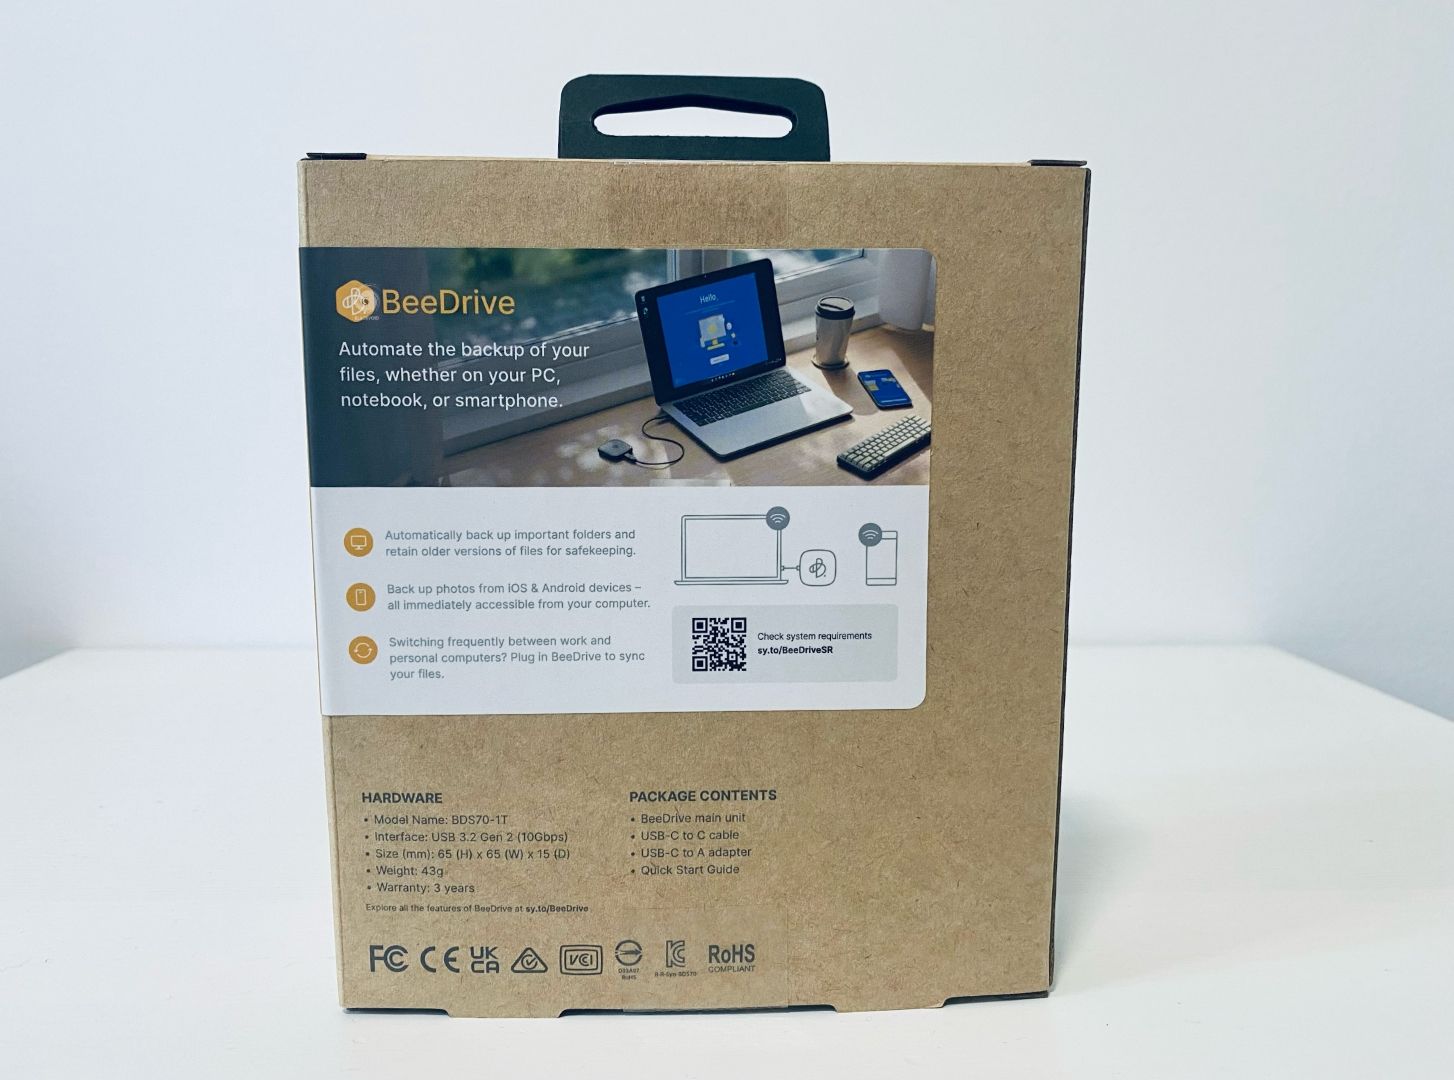
Apart from the unit itself and the USB-C cable, the package contains a USB-A to USB-C adapter and that is a nice touch by Synology just so one doesn't have to go and buy one in case it is needed.
: Connectivity, compatibility, and speed
Currently, BeeDrive supports Windows OS and macOS in terms of its dedicated BeeDrive software app. Saying that we can still use the BeeDrive with any PC, Mac, or Linux-based computer.
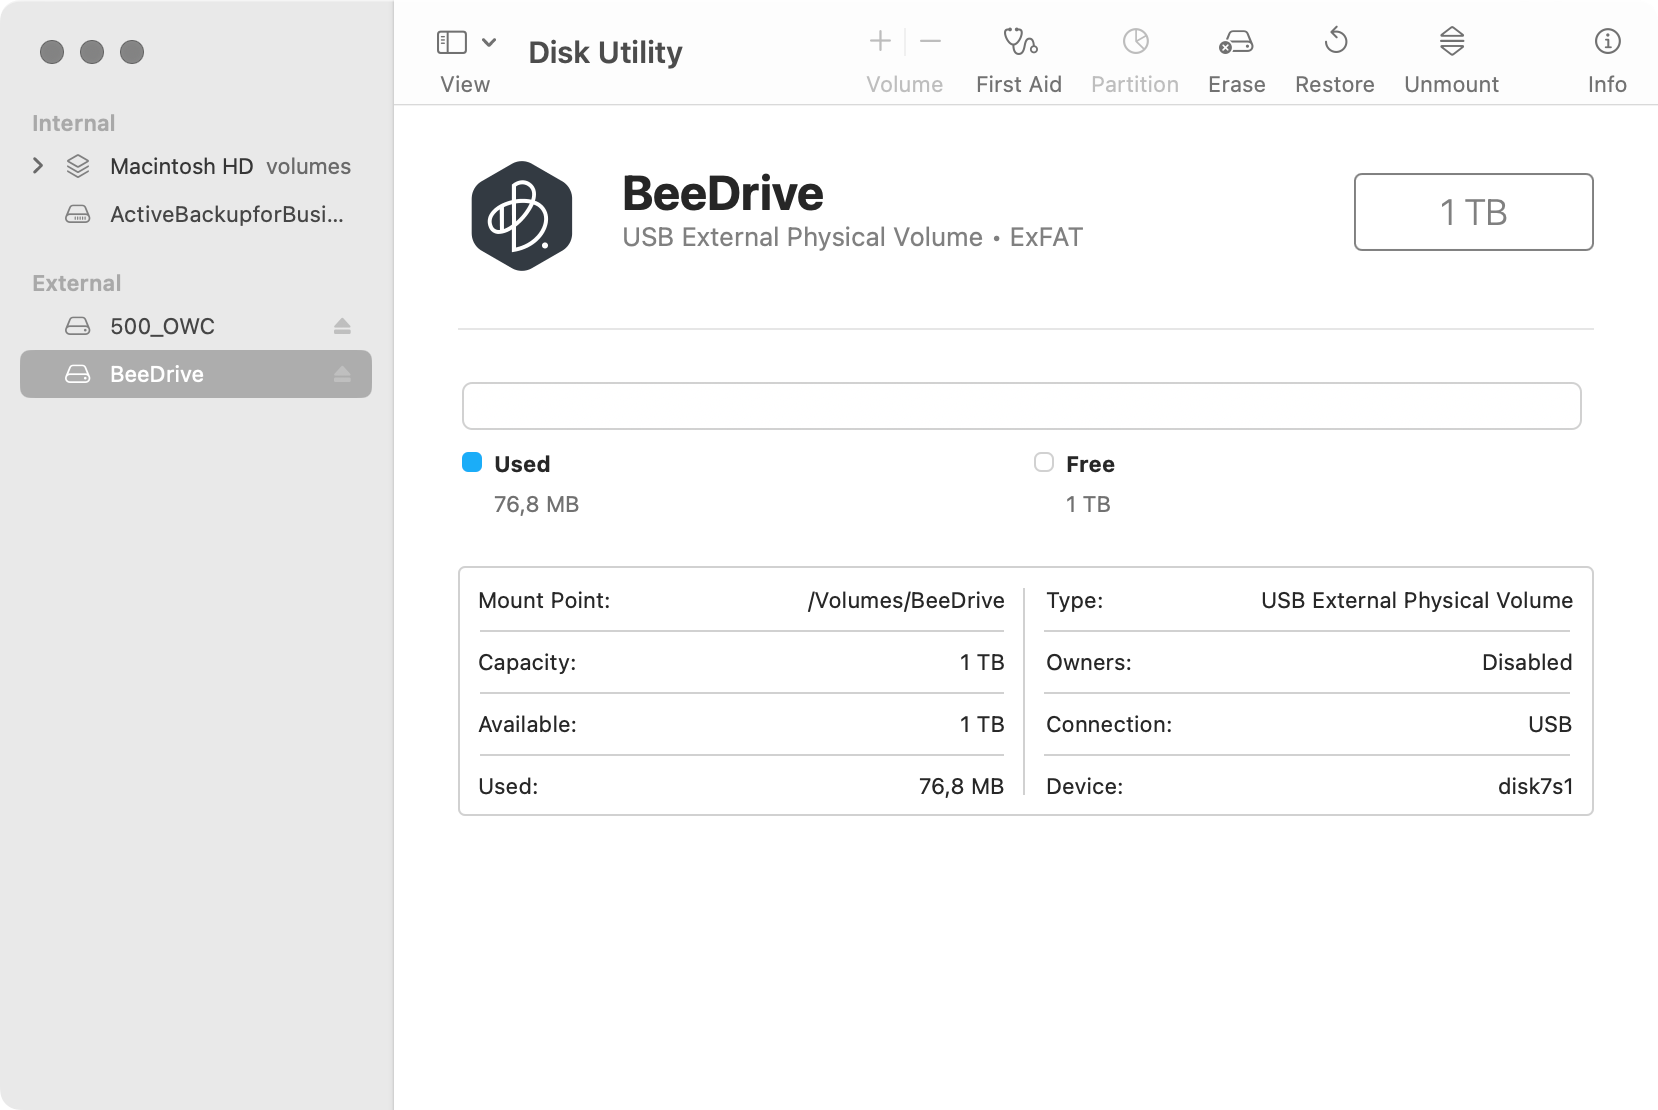
Connecting the drive to a macOS device will work just fine as it will be detected as any other exFAT formatted storage device. The content of the drive will already contain an EXE file for the BeeDrive Windows platform. A nice out-of-the-box experience, especially if we run the said OS.
Alongside macOS, Linux-based OS will behave the same way. As an example, connecting the drive to a Synology NAS, will populate it inside the Control Panel > External device section and allow for usage inside the DSM OS. One piece of information that is immediately visible inside DSM is that the chipset of the BeeDrive is Kingston, something that is not advertised anywhere, but a nice info nevertheless.
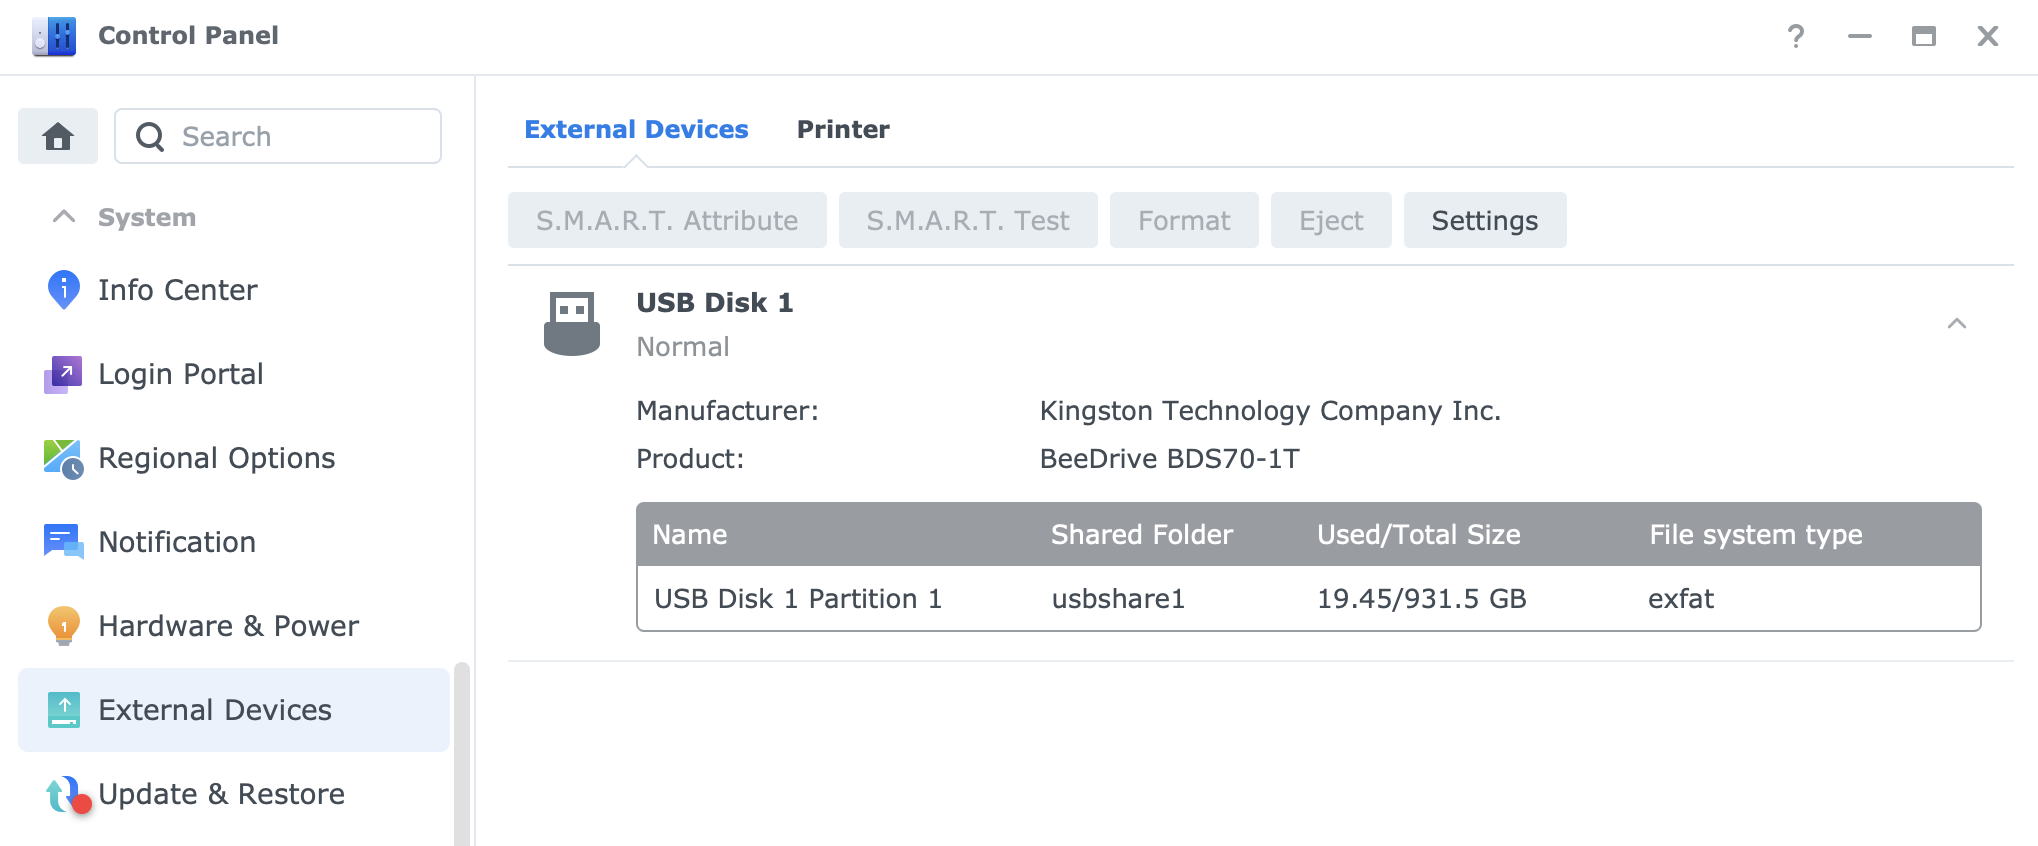
Considering that DSM works with exFAT formatted storage, BeeDrive will be accessible as one under the usual usbshare1 or similar name inside File Station or via the command line.
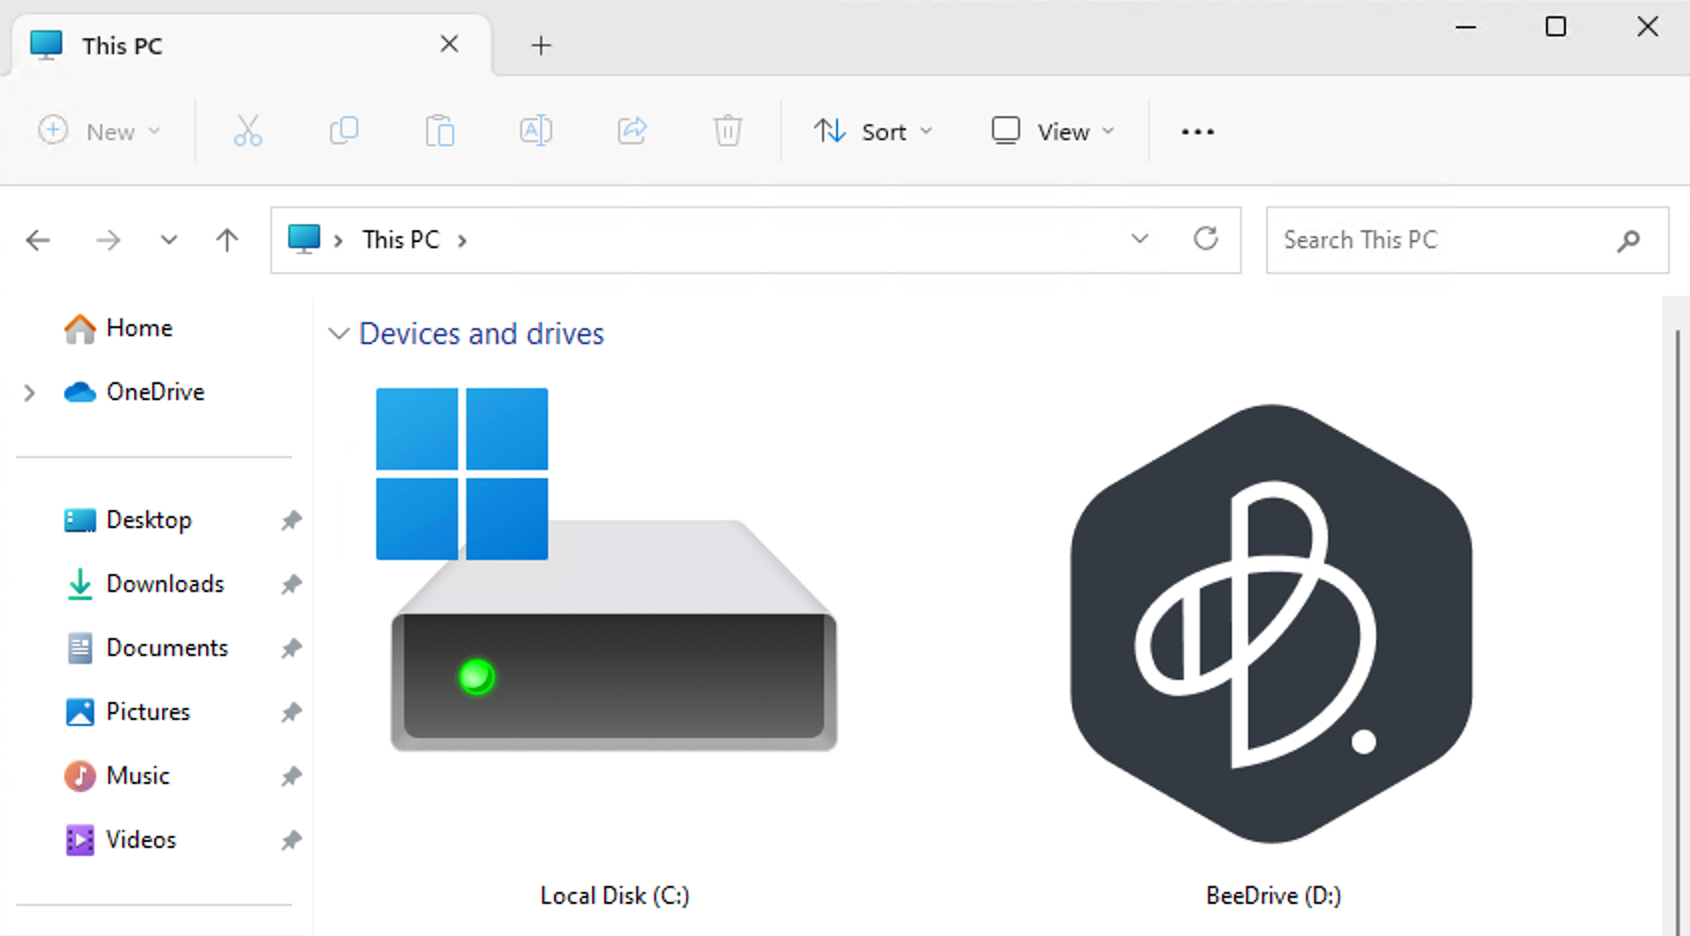
Finally, on a Windows OS-based device, BeeDrive will also initially present itself as a mass storage unit, but apart from a simple storage destination for copy-paste operation, installing the BeeDrive software platform will unlock it for all the advertised features that come with it.
Maximum data transfer speed will directly depend on the speed of the USB port the device is connected to. The drive is advertised to support 10G speed using the USB 3.2 Gen 2, but the actual test show that 1GB/s transfers are not possible.
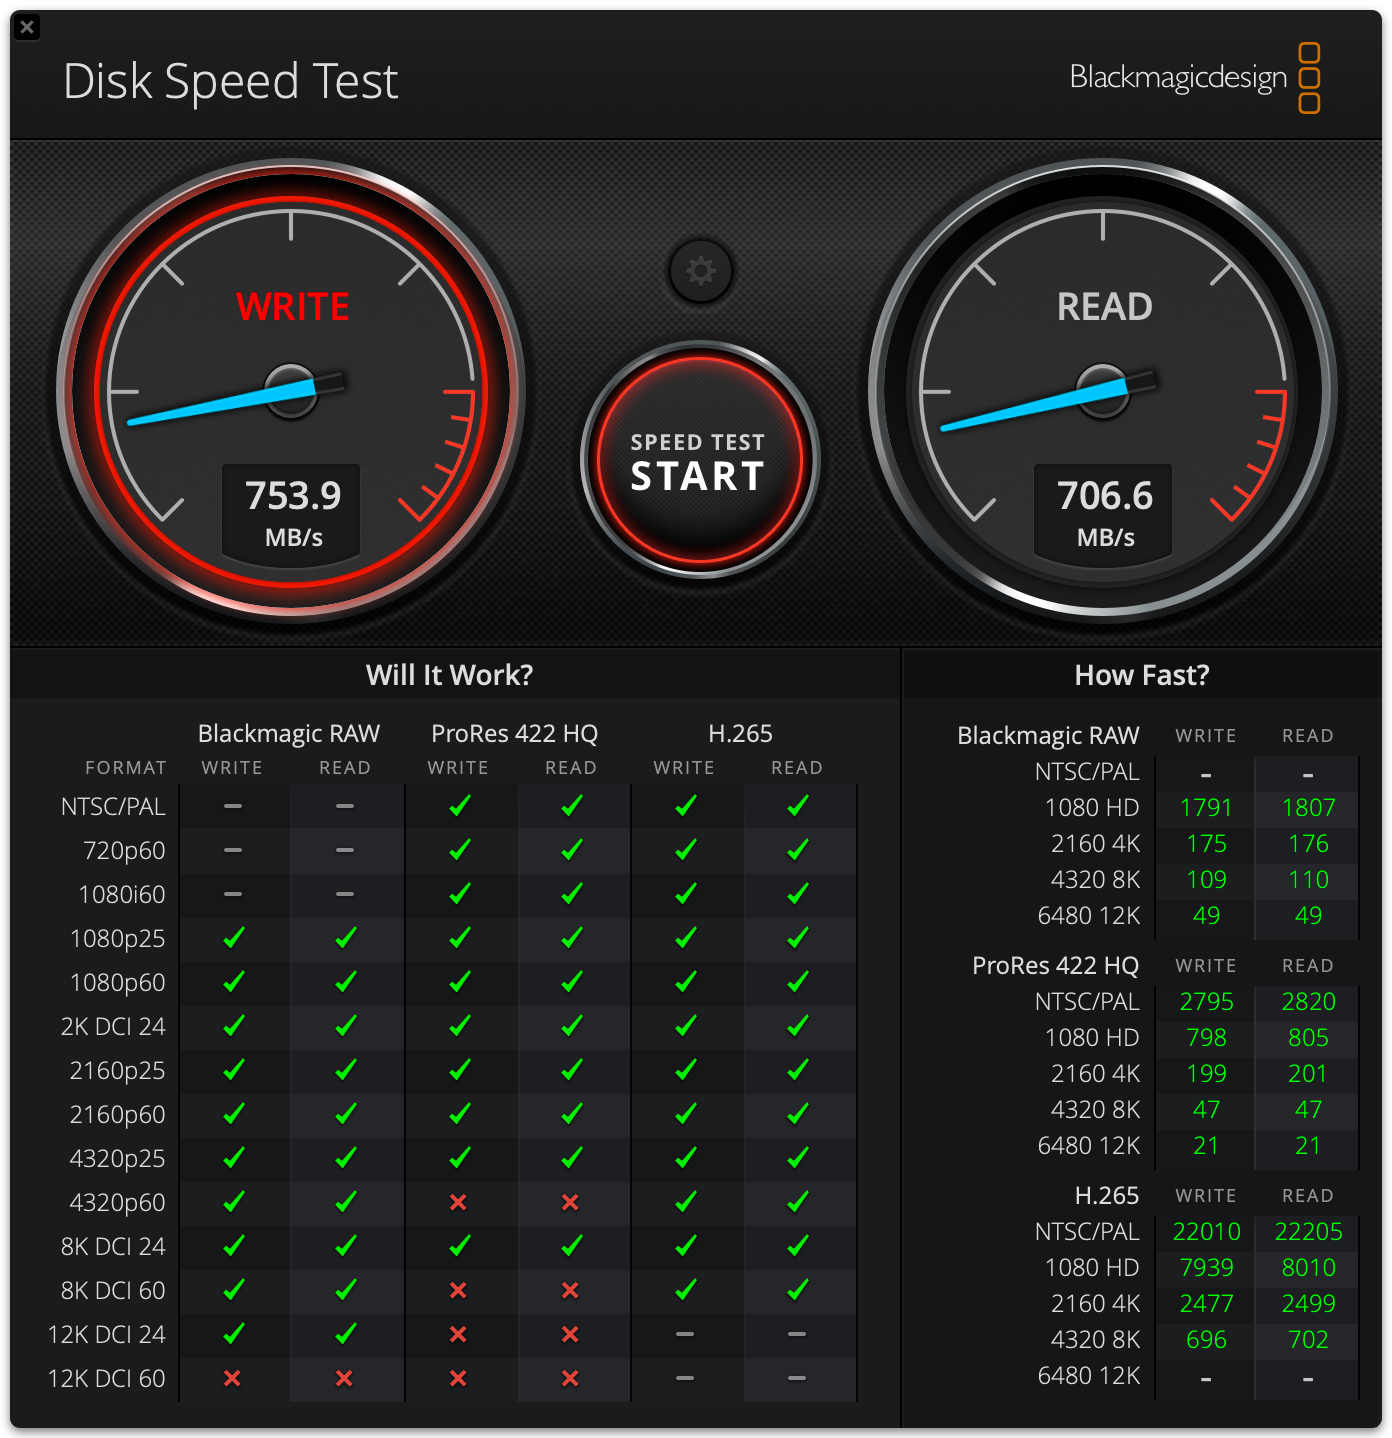
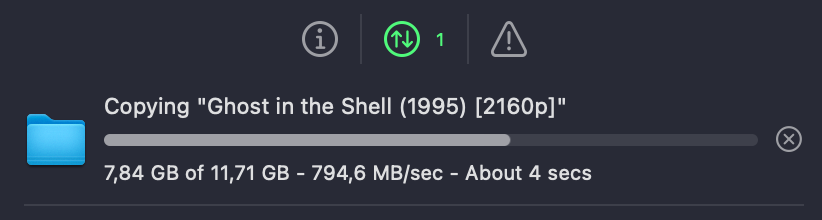
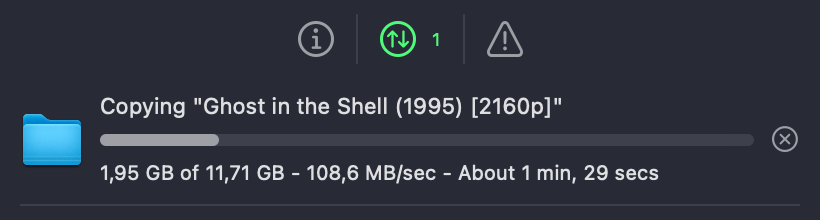
Truth be told, the speeds are not that far off from that declared maximum, achieving about 700-800MB/s on both read and write. Of course, it will also depend on what device is in question, as well as the fact that transfers are happening over the wire or wifi.
Data transfer over SMB, both locally and over the network is as expected. In the examples below, Mac Studio was used as a computer that the BeeDrive was attached to.
With speeds over 8G locally, this device is more than capable of being used in various scenarios be it on the go, at home, or work.
: The BeeDrive software (Windows OS)
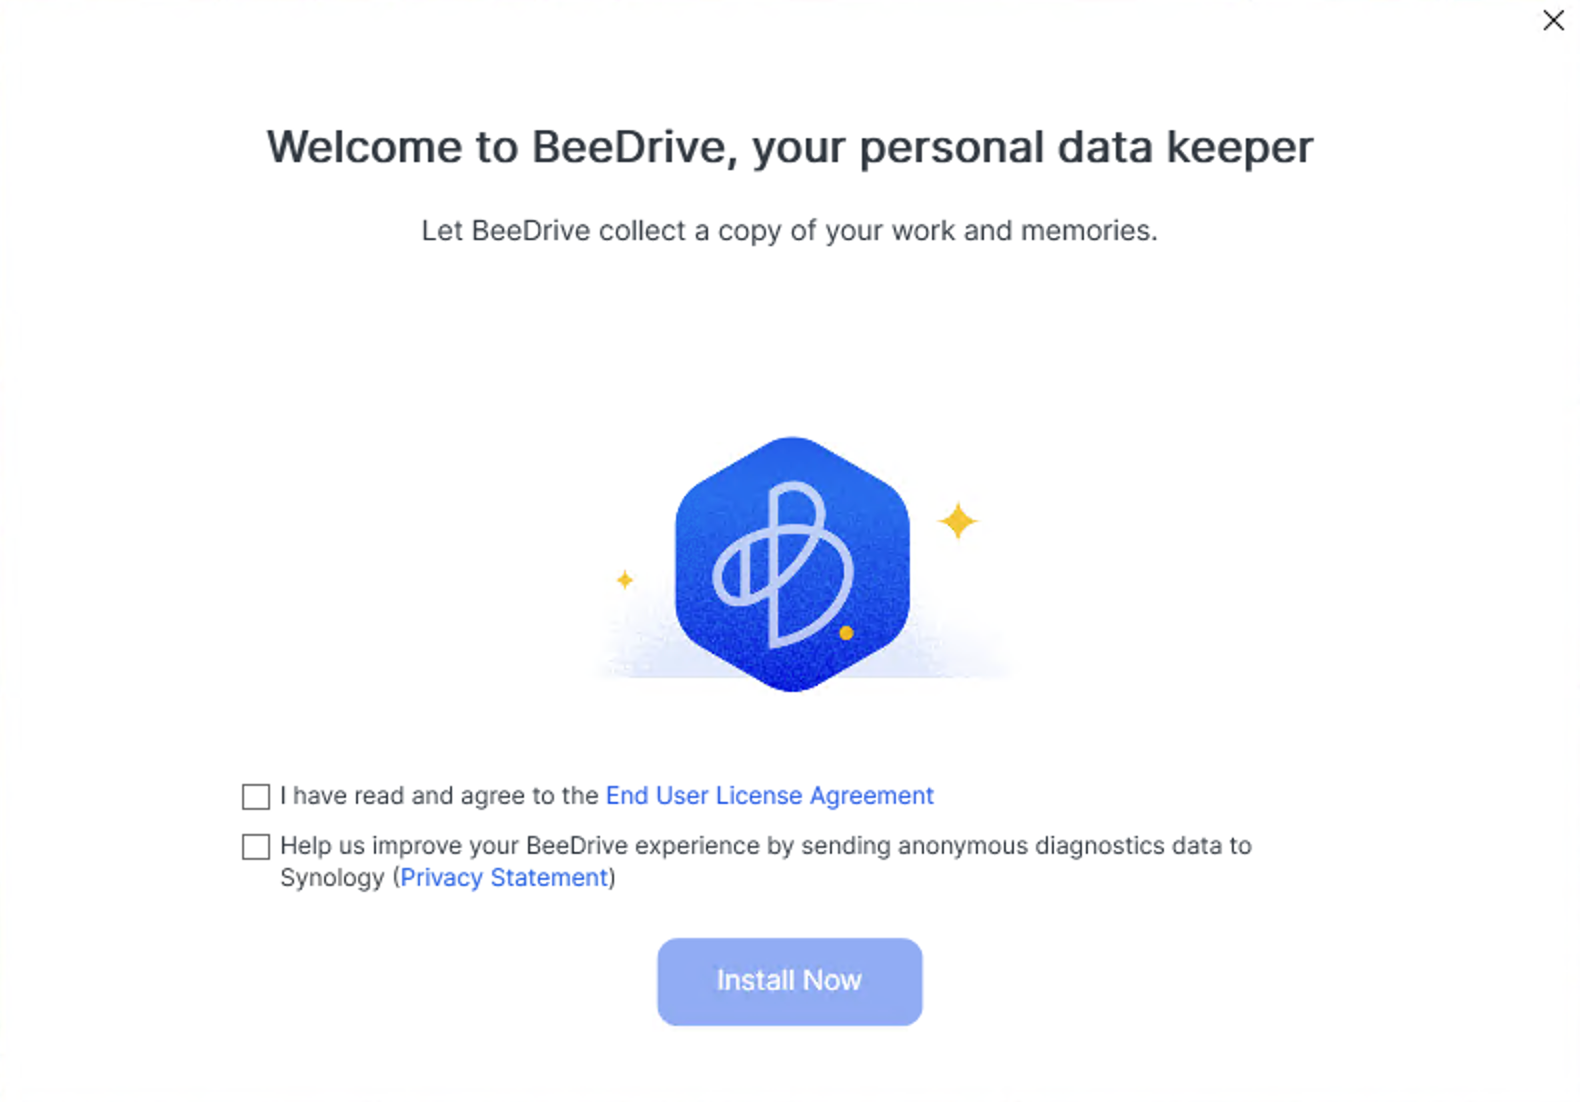
The drive itself out-of-the-box has the setup ready for installation, but it can be downloaded from the Synology website as well.
Running the executable will start the wizard that will install the BeeDrive platform on the computer and allow us to use the full potential of this device.
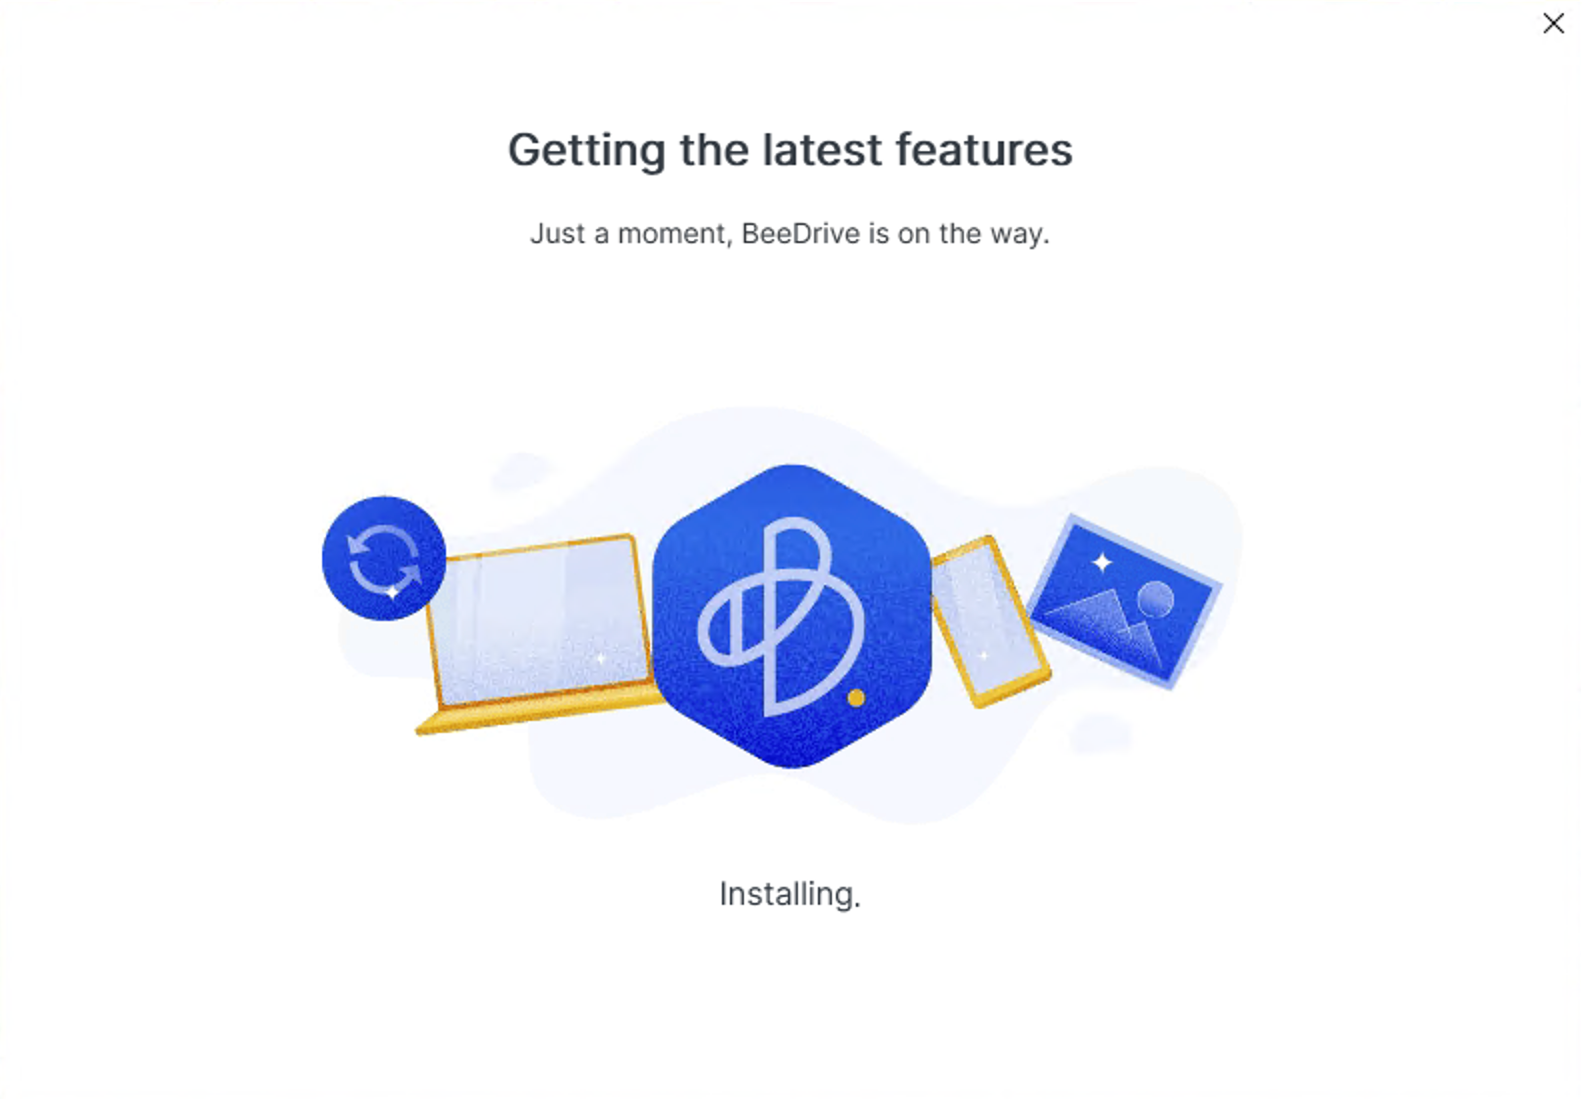
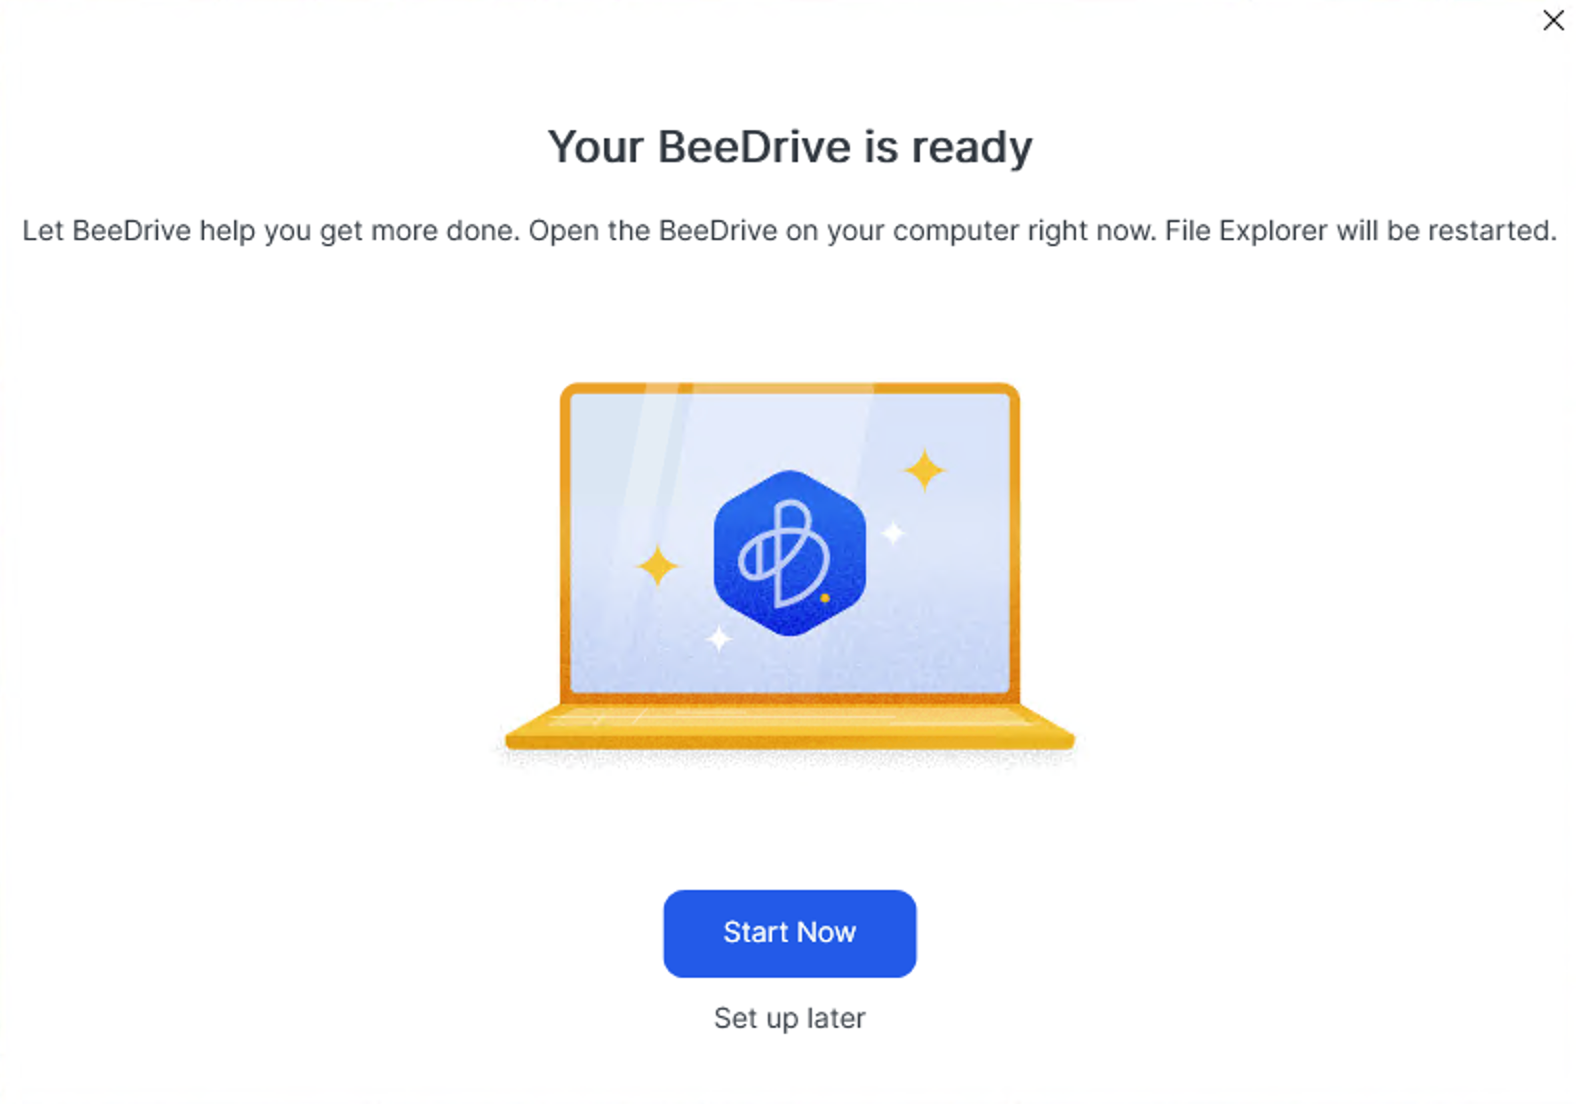
Once the setup has been completed, as instructed the File Explorer will be restarted so expect your desktop to be the only thing you will see for a few seconds. Following the successful installation, the BeeDrive platform will load up.
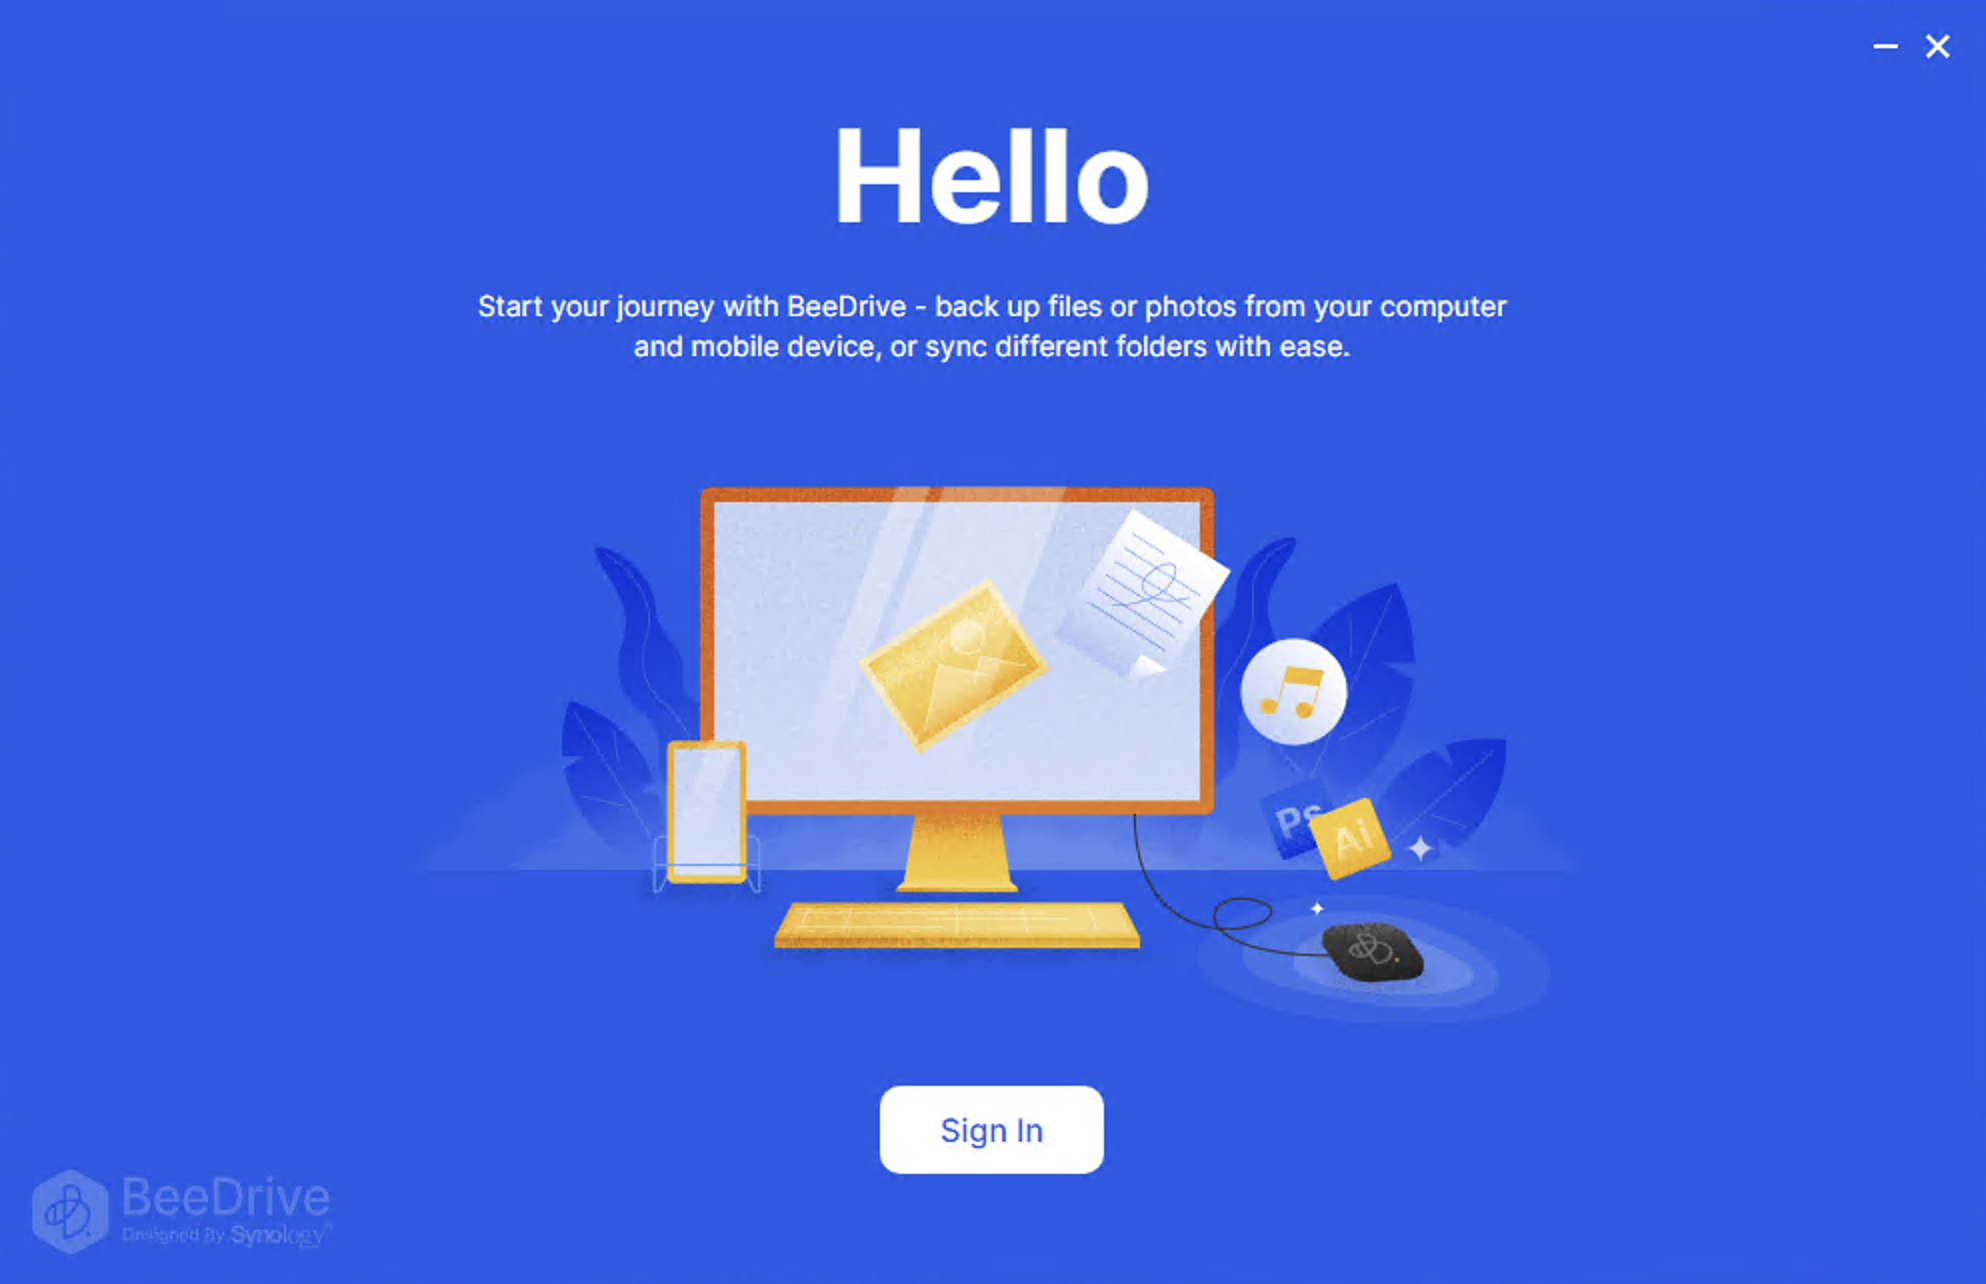
Clicking the Sign In button, we will have to log into a free Synology Account. In case we don't have one, we can create it. A dedicated article on the Synology Account can be found using the link below.
Logging in with a Synology account will also register the BeeDrive with that particular account. Be sure to remove it and unlink the device in case of sale or transfer to another user. They will be unable to use the device until it is associated with their Synology account.
:: The BeeDrive configuration
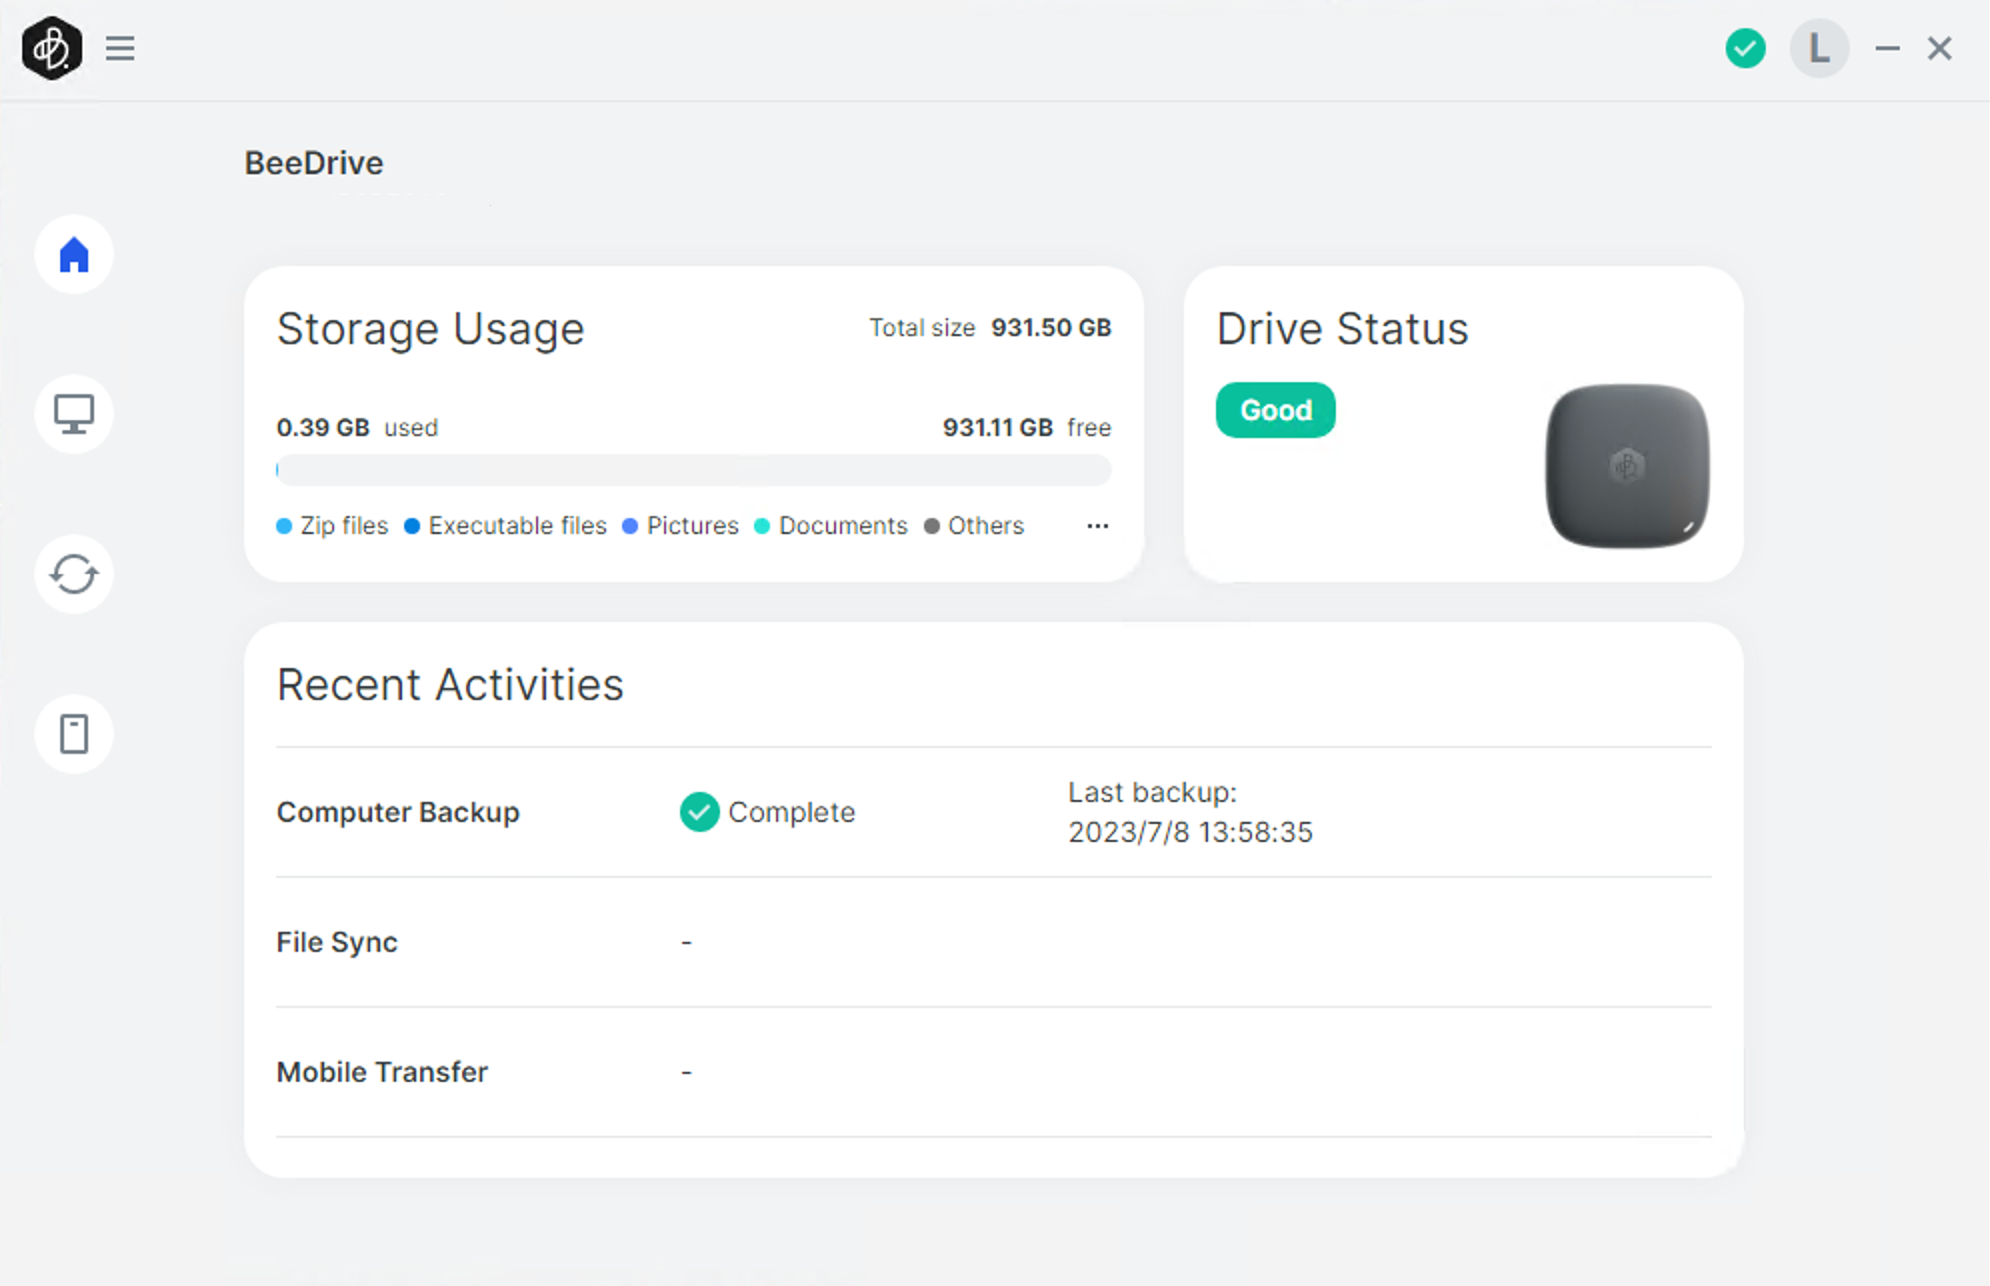
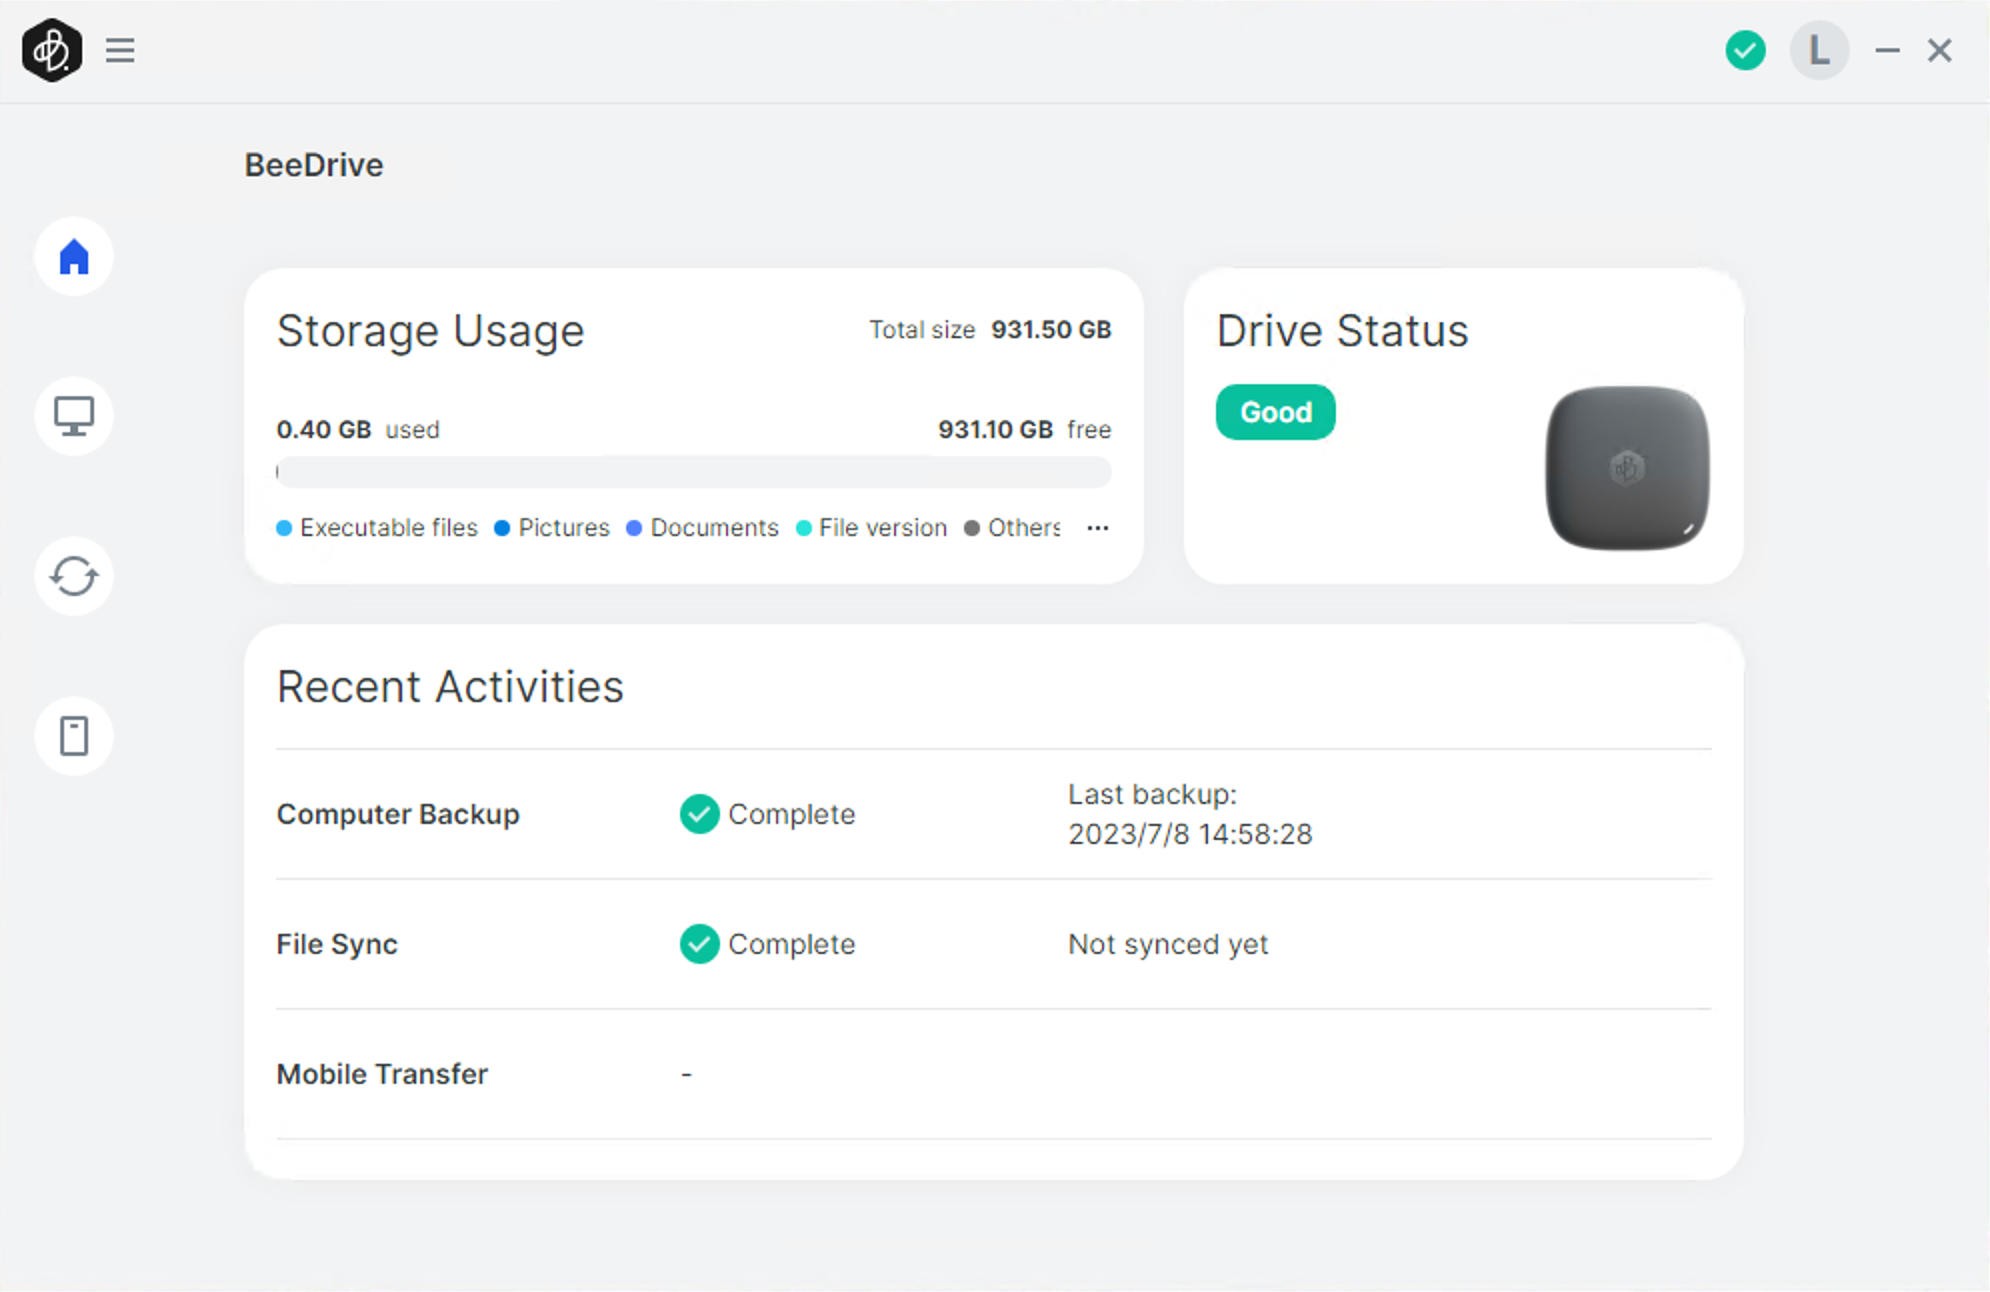
Once we have logged in with our Synology Account, we will be greeted with the BeeDrive main window. Here are multiple settings and tasks that we can do.
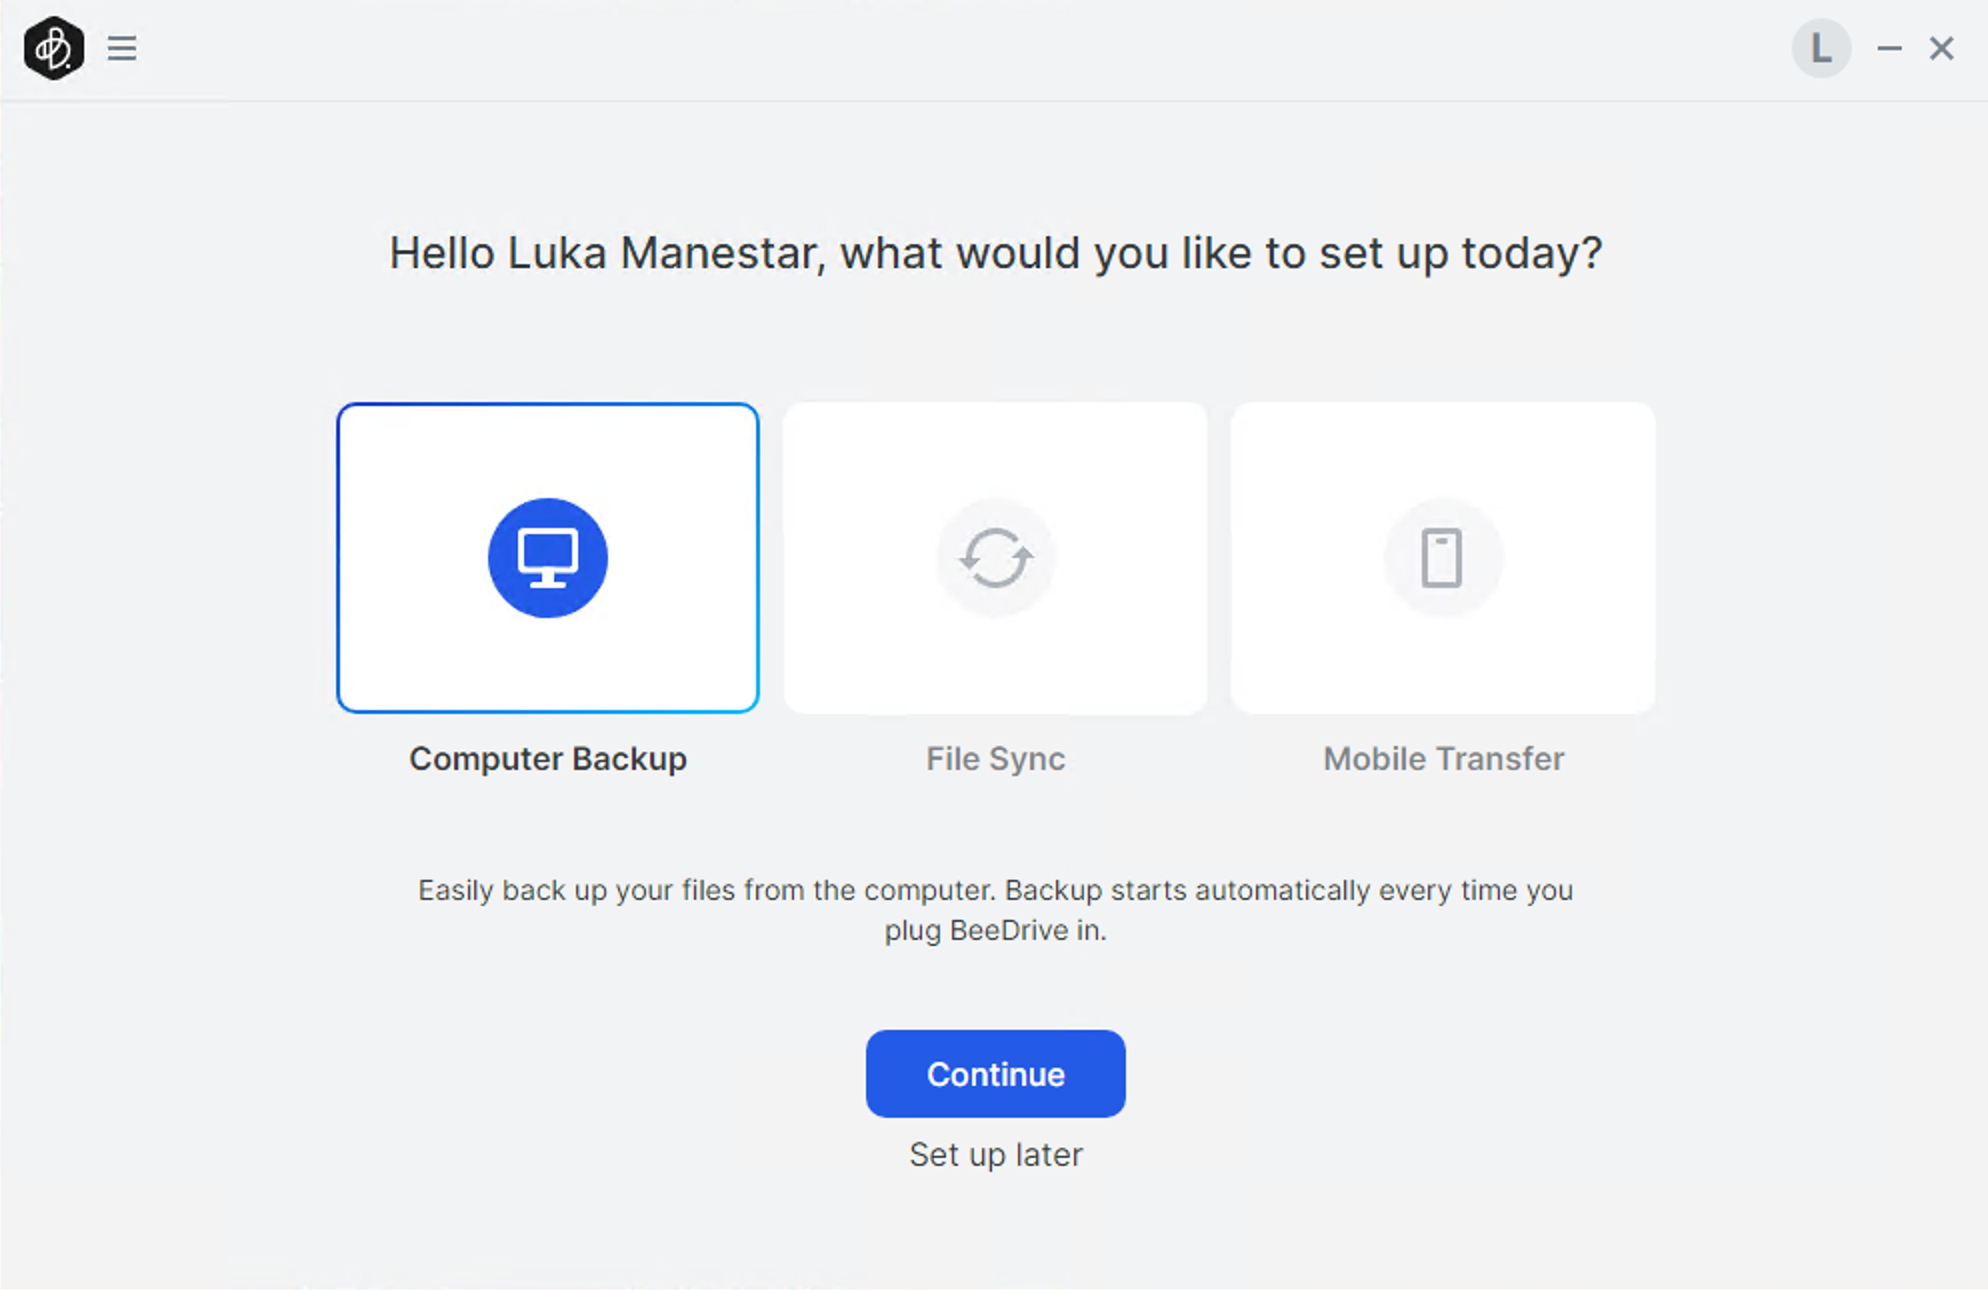
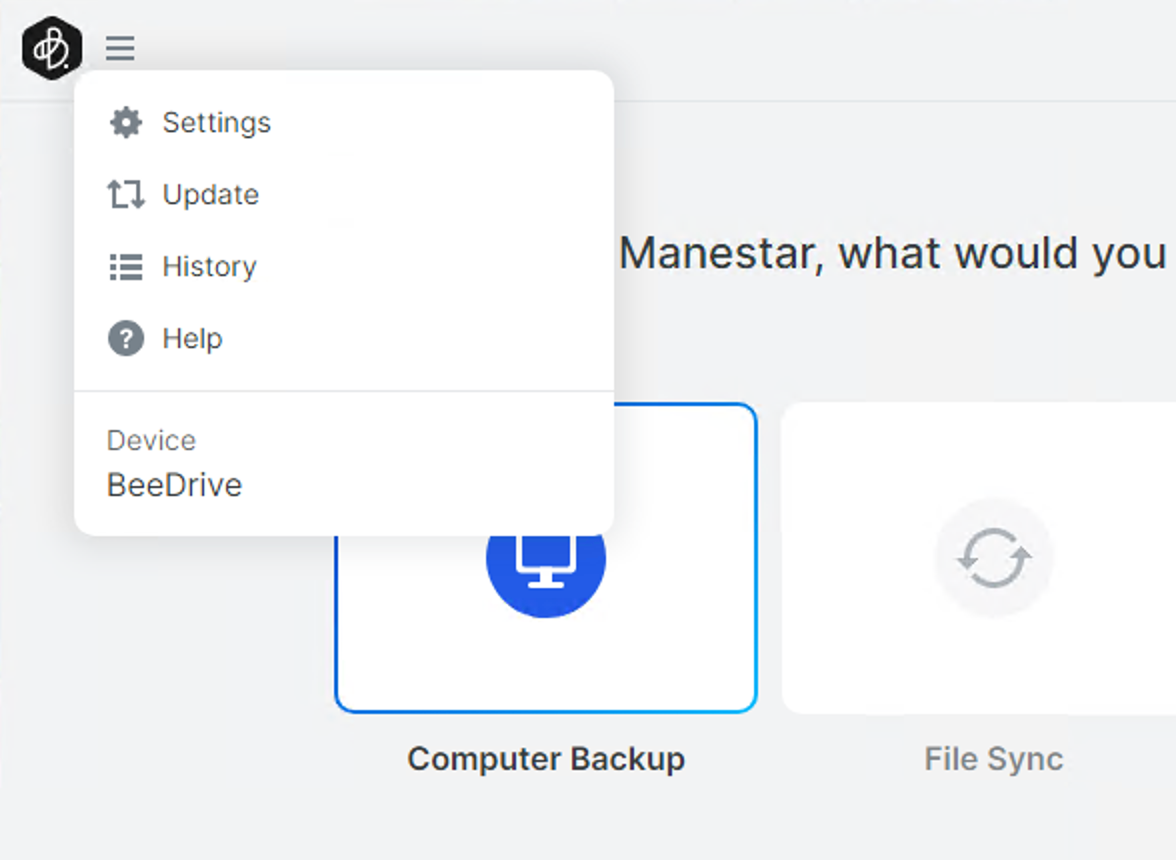
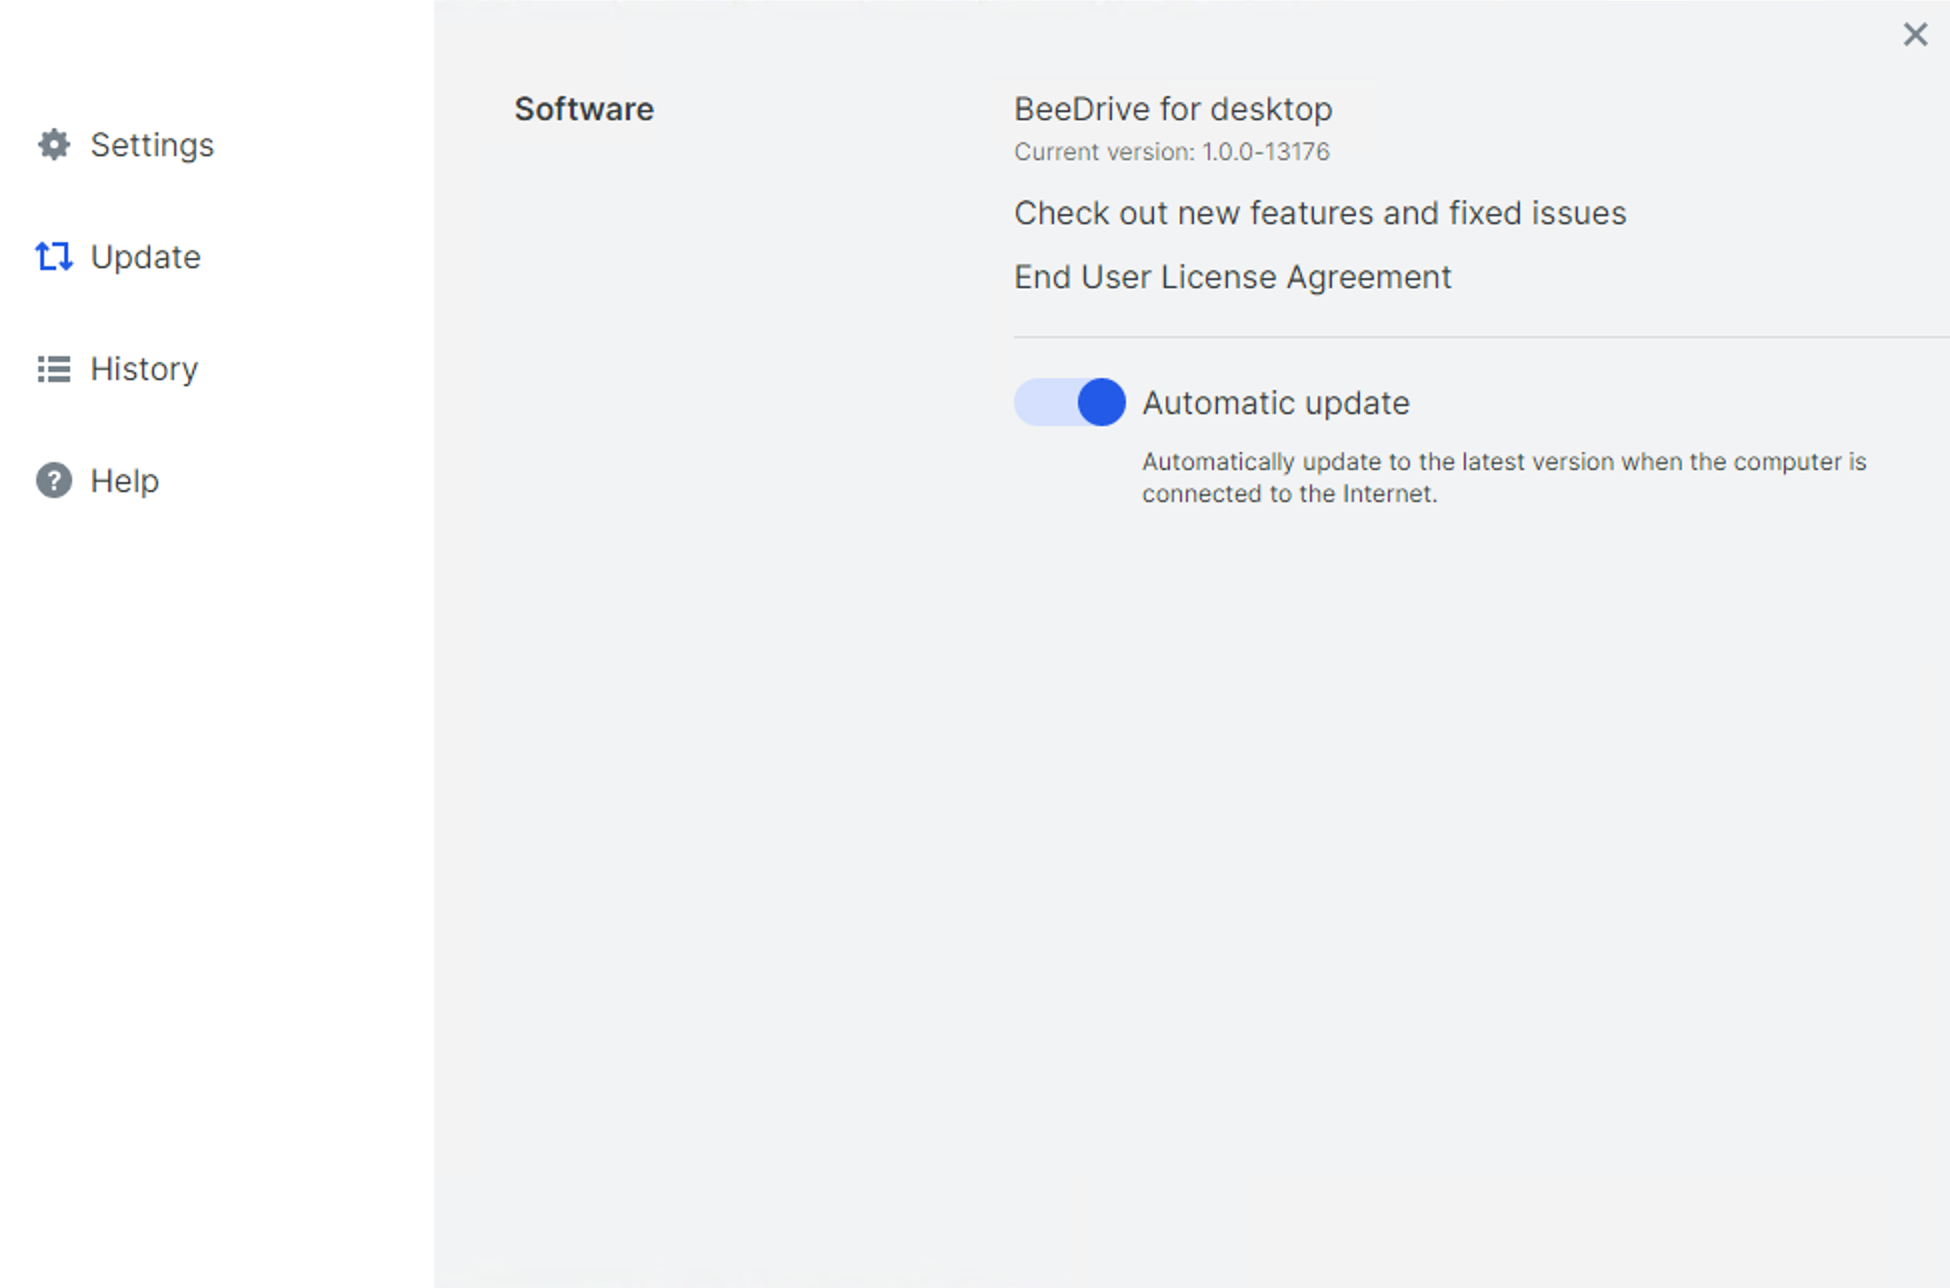
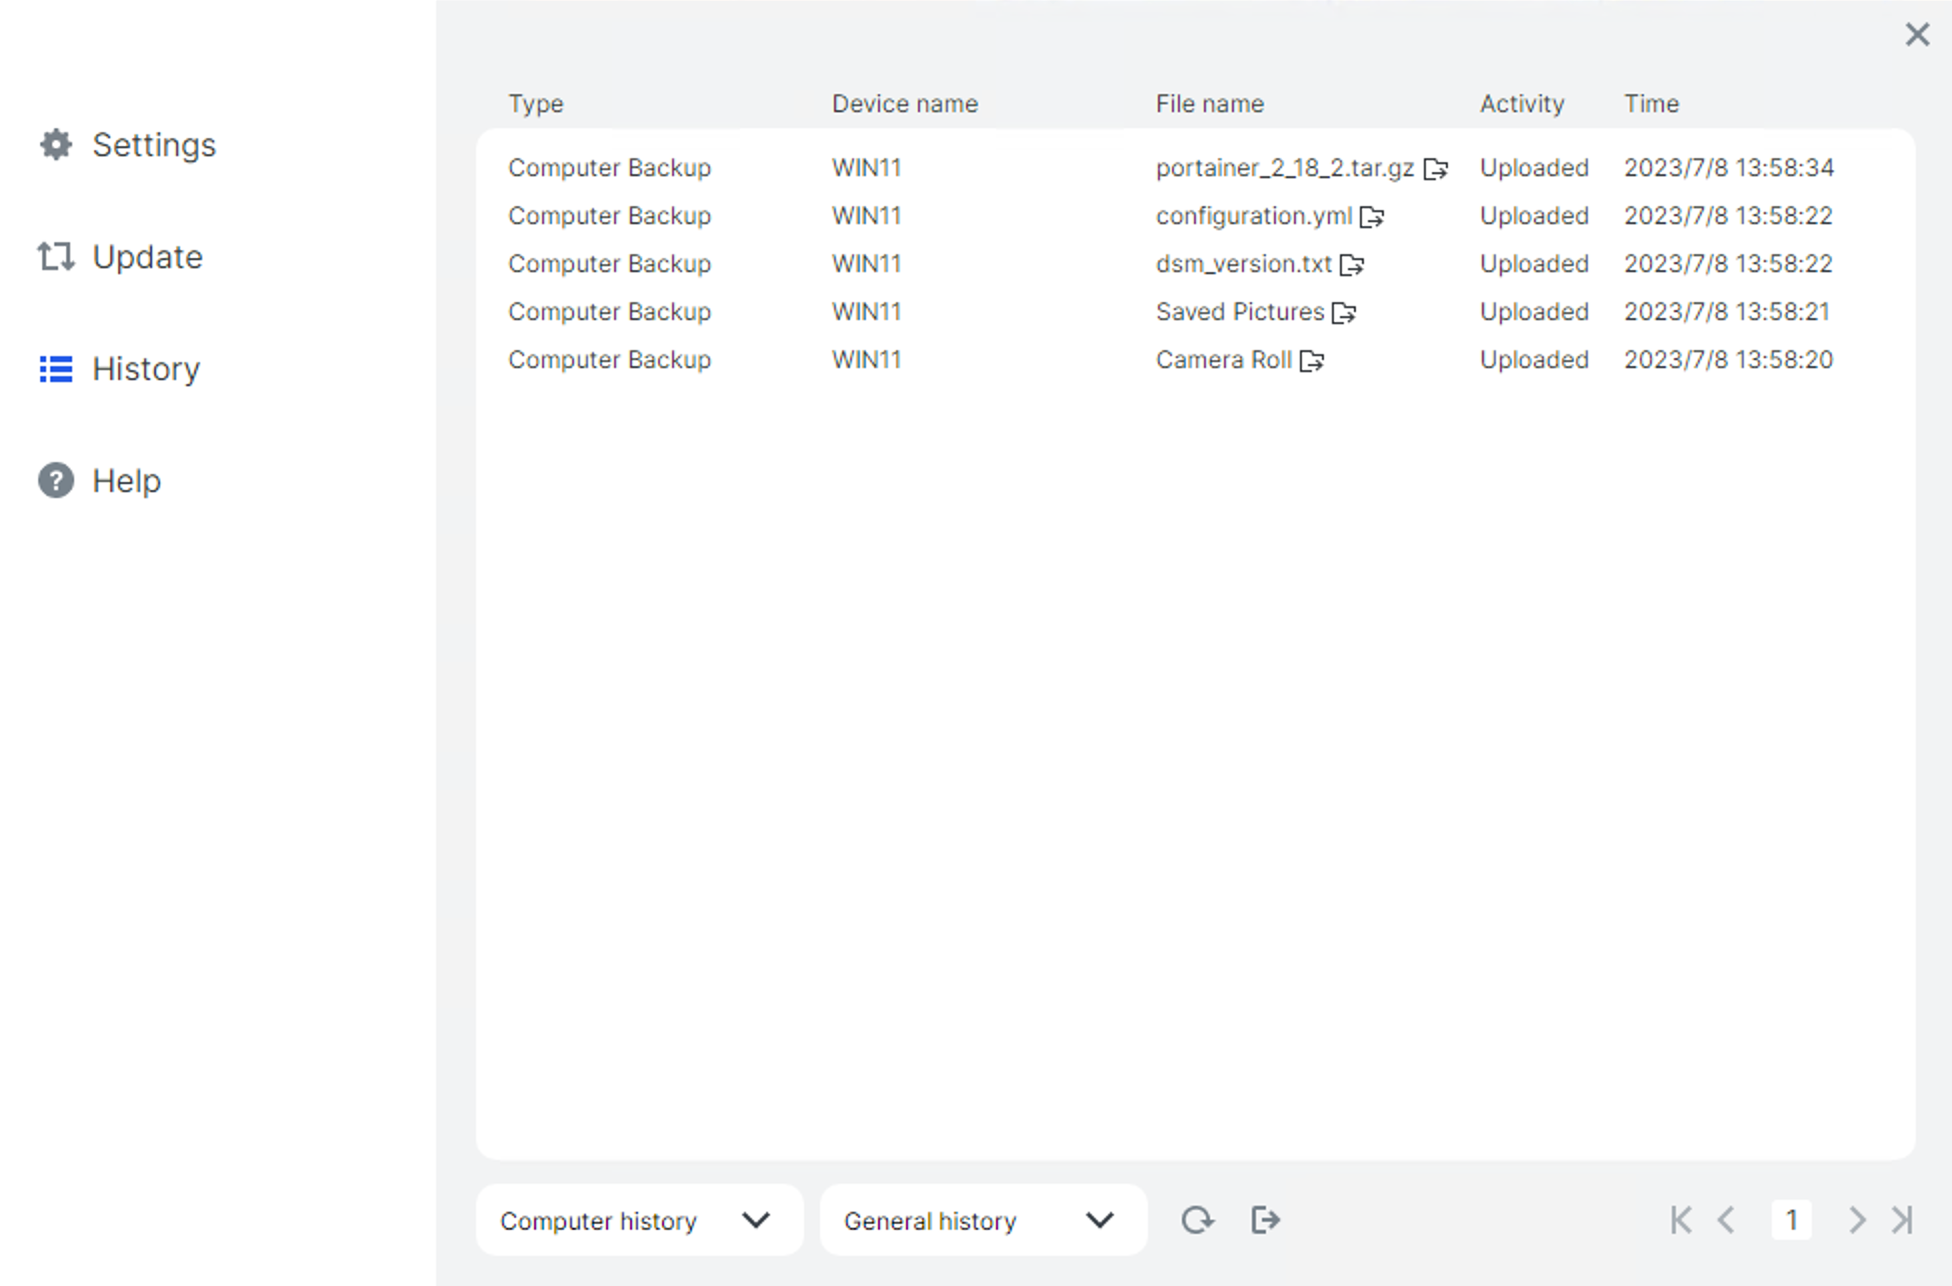
The main tasks that the platform offers are computer backup, file sync, or mobile transfer. Along those, we can use the drop-down menu in the upper left-hand corner to access the settings, updates, and history.
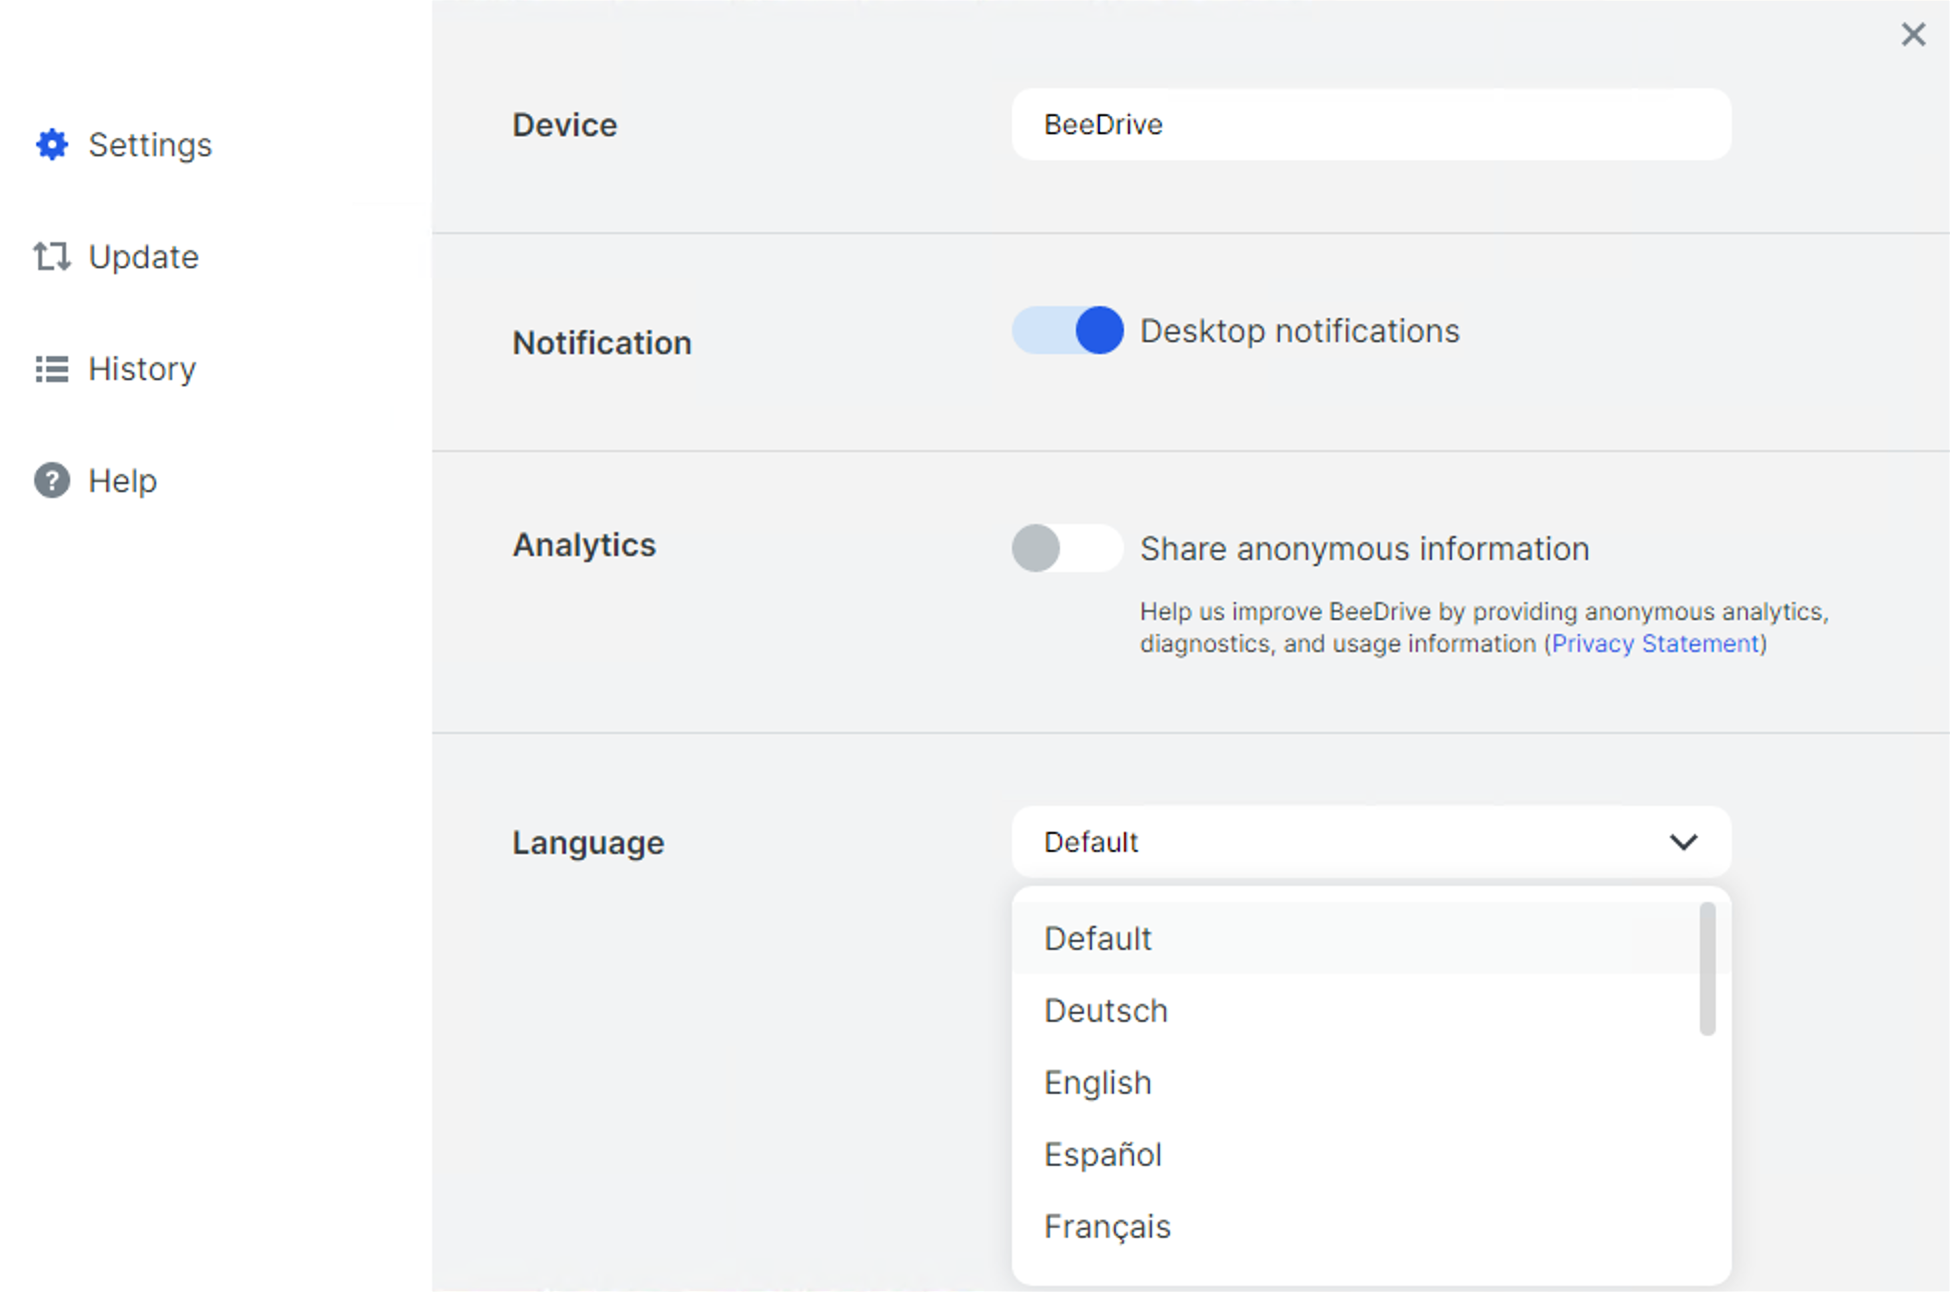
It is nice to see that multilanguage is supported with BeeDrive software as well as desktop push notification.
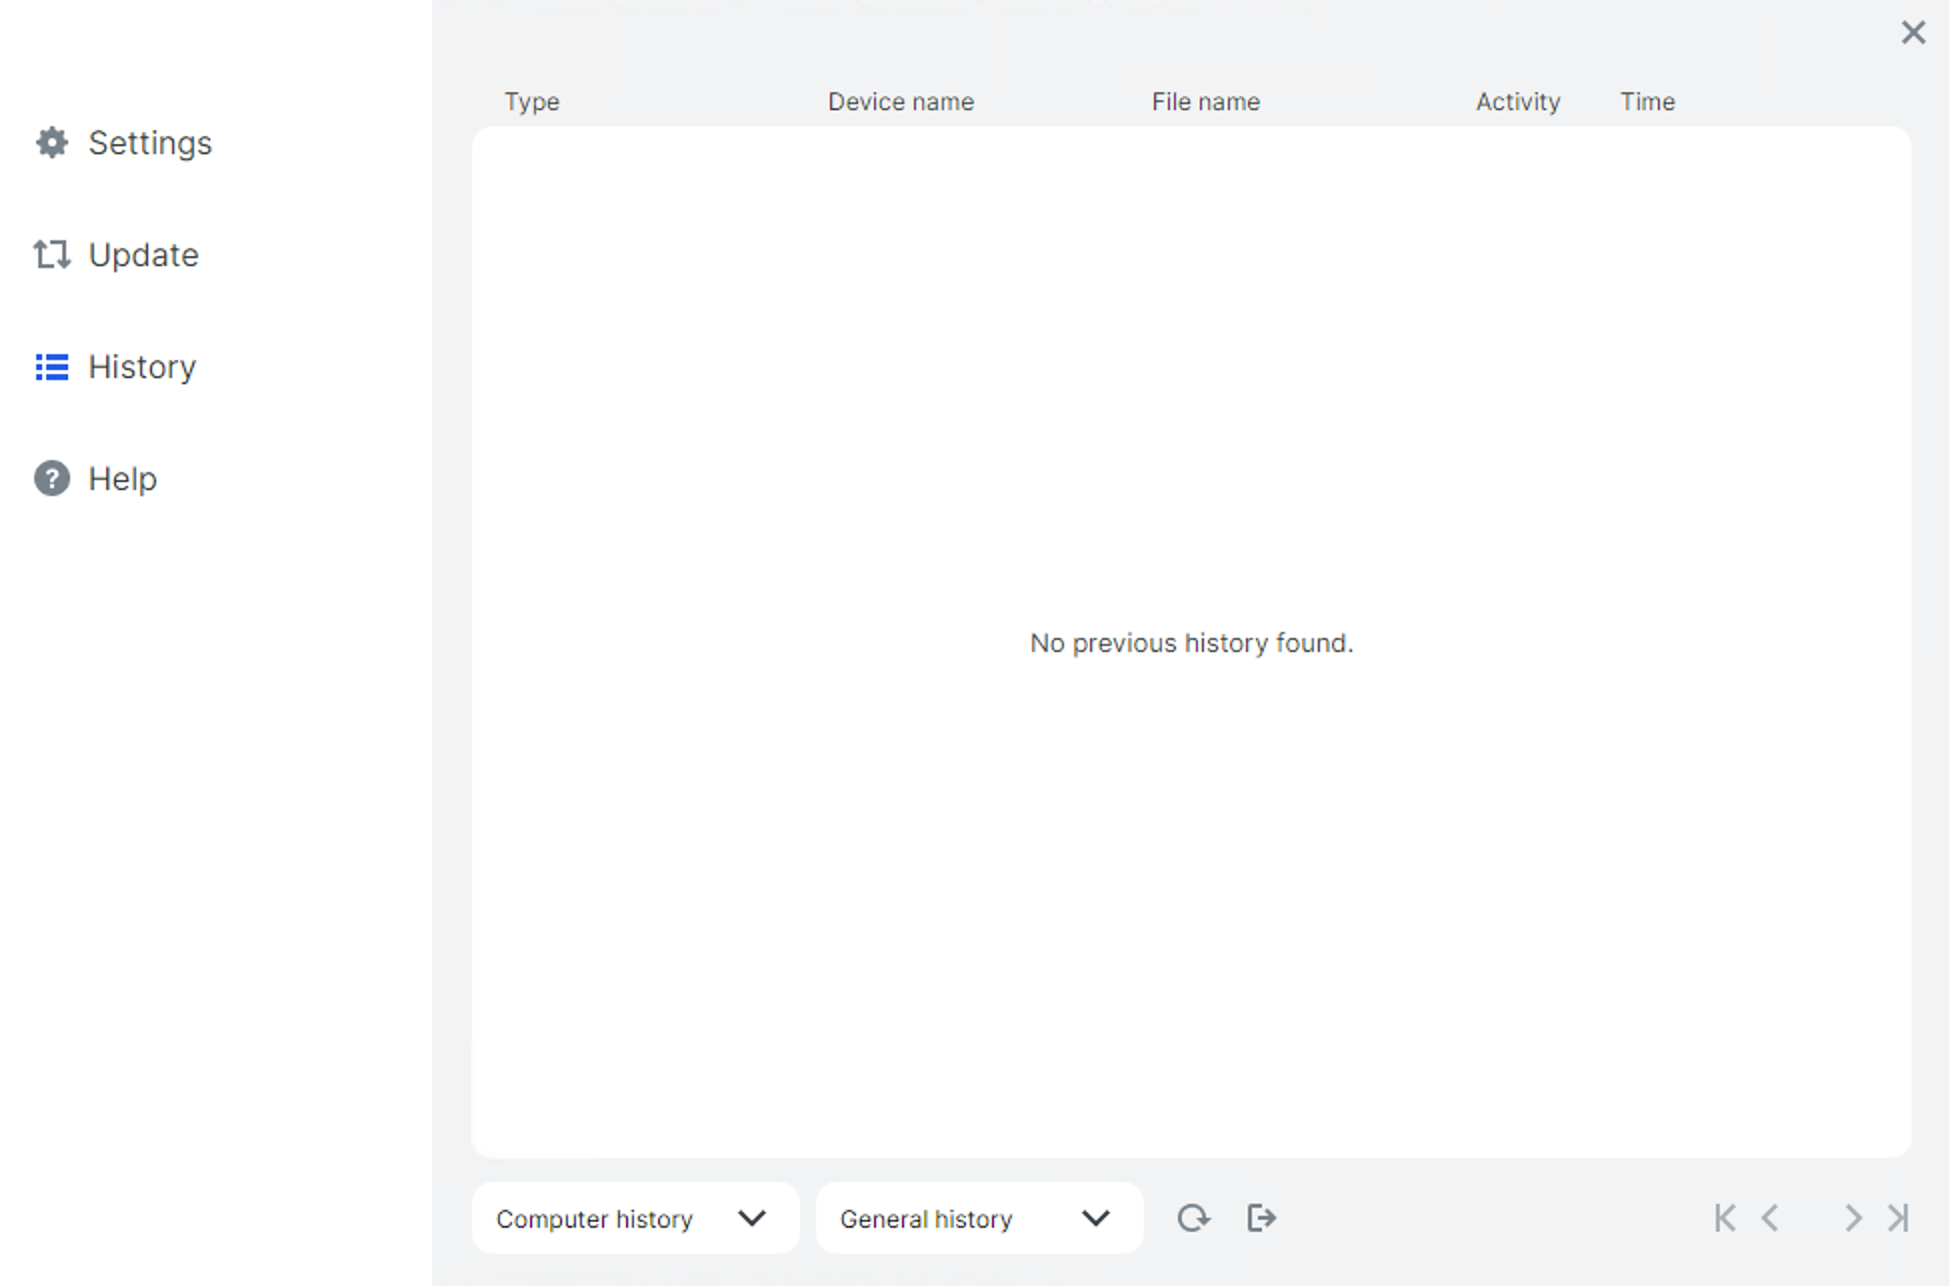
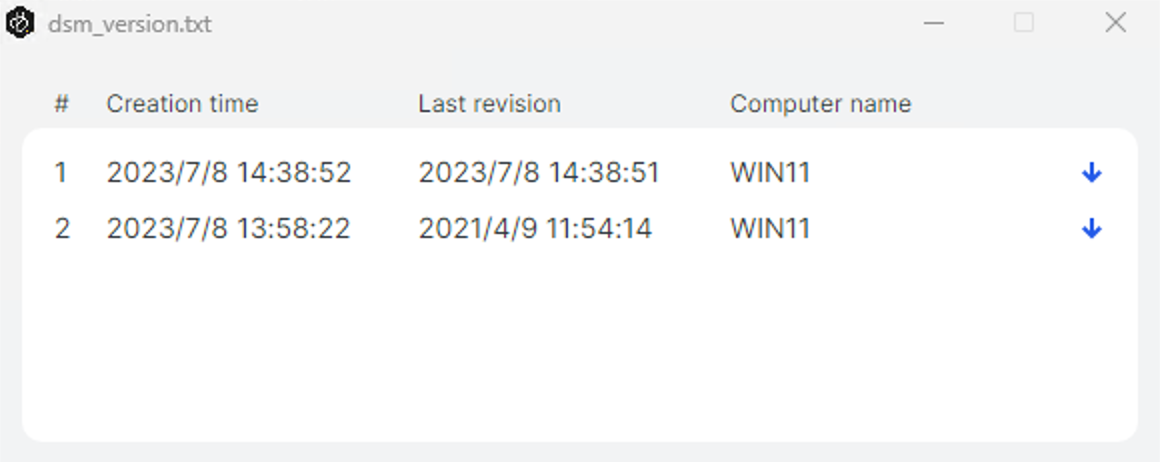
Configuration elements for settings and updates as well as a history list
:: Computer Backup
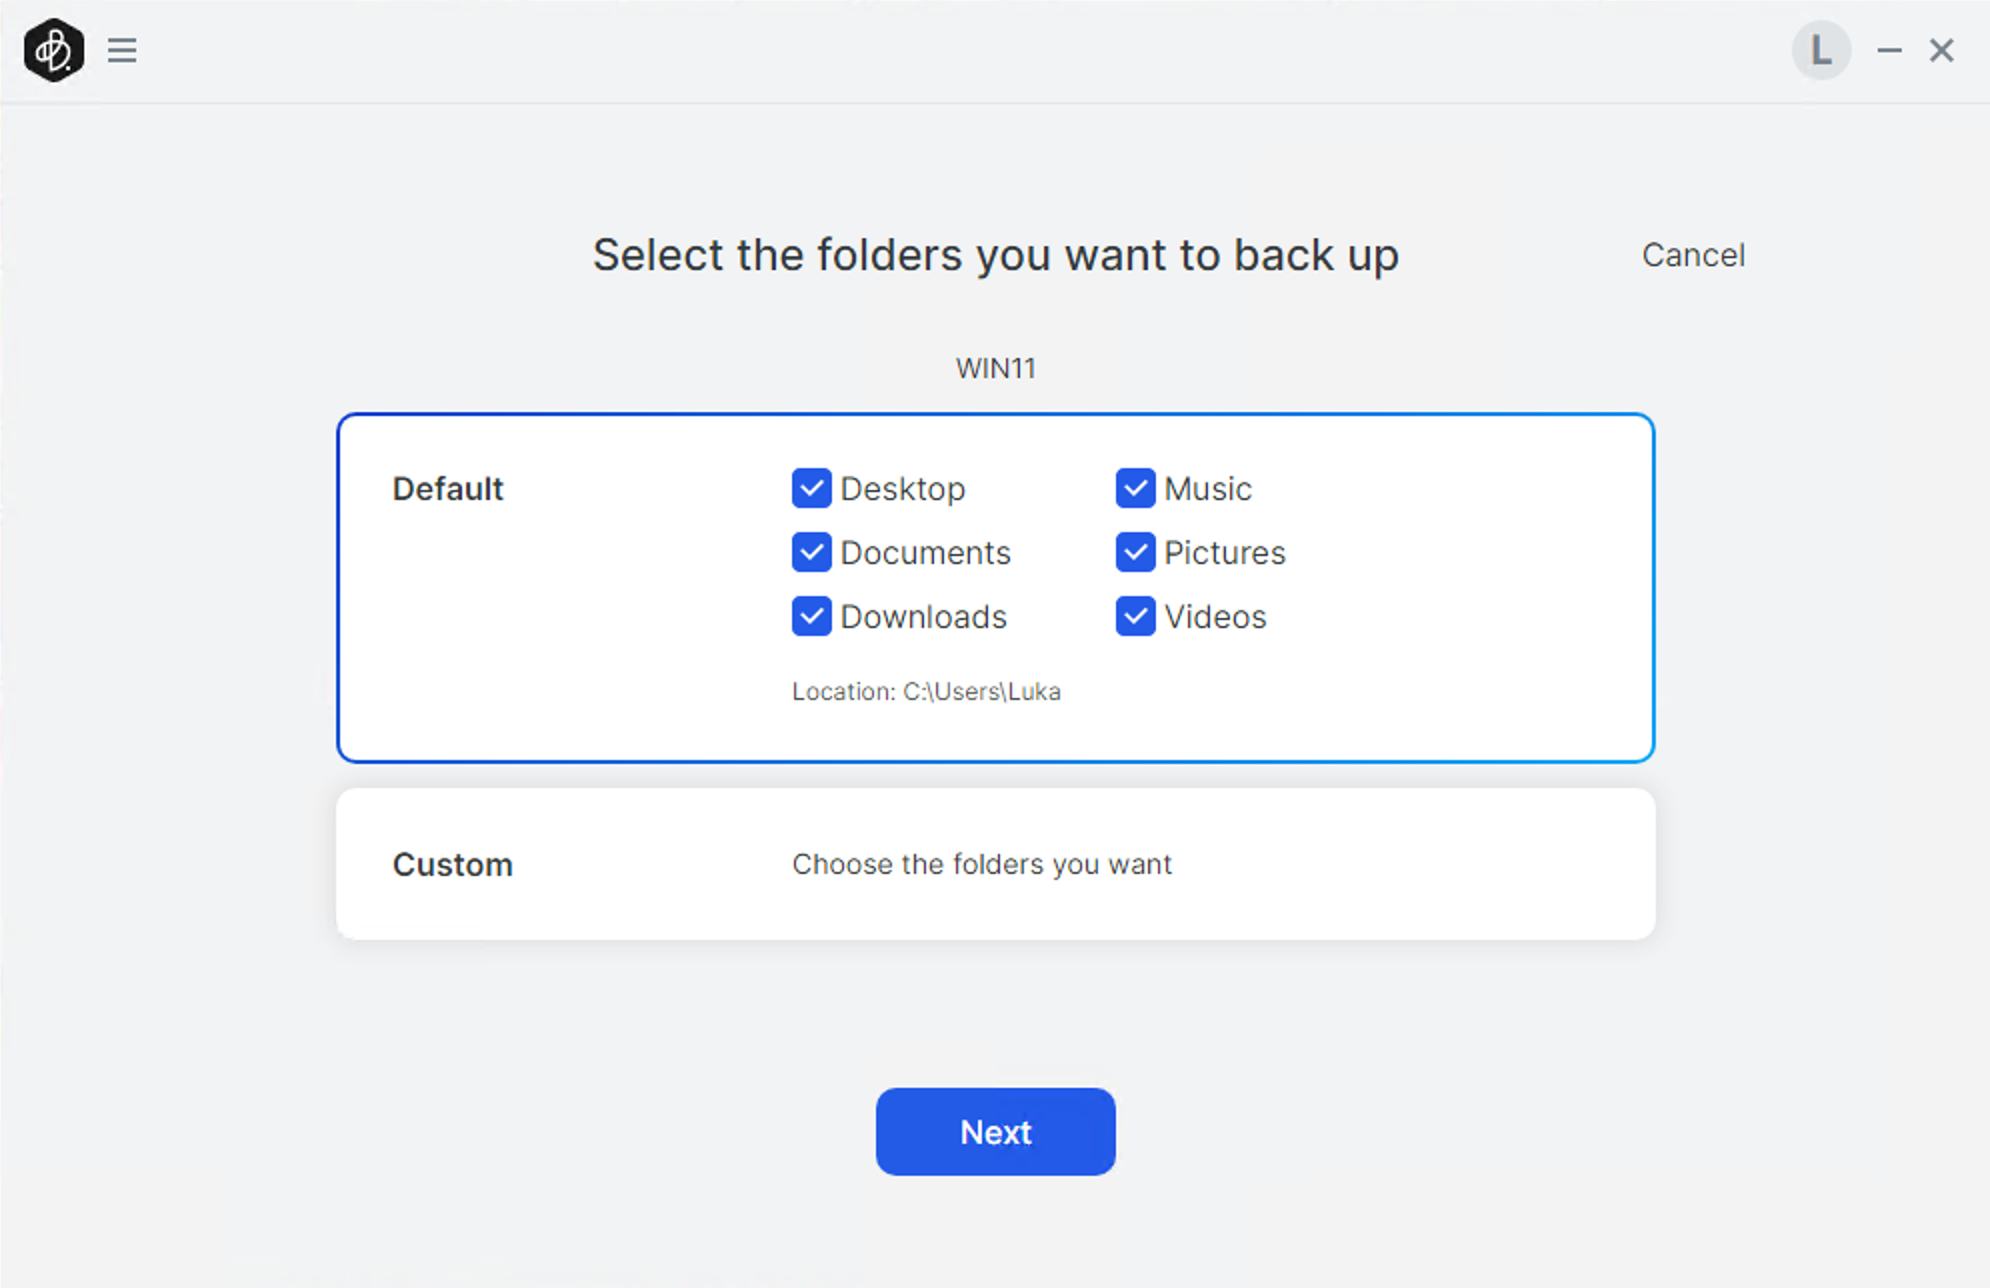
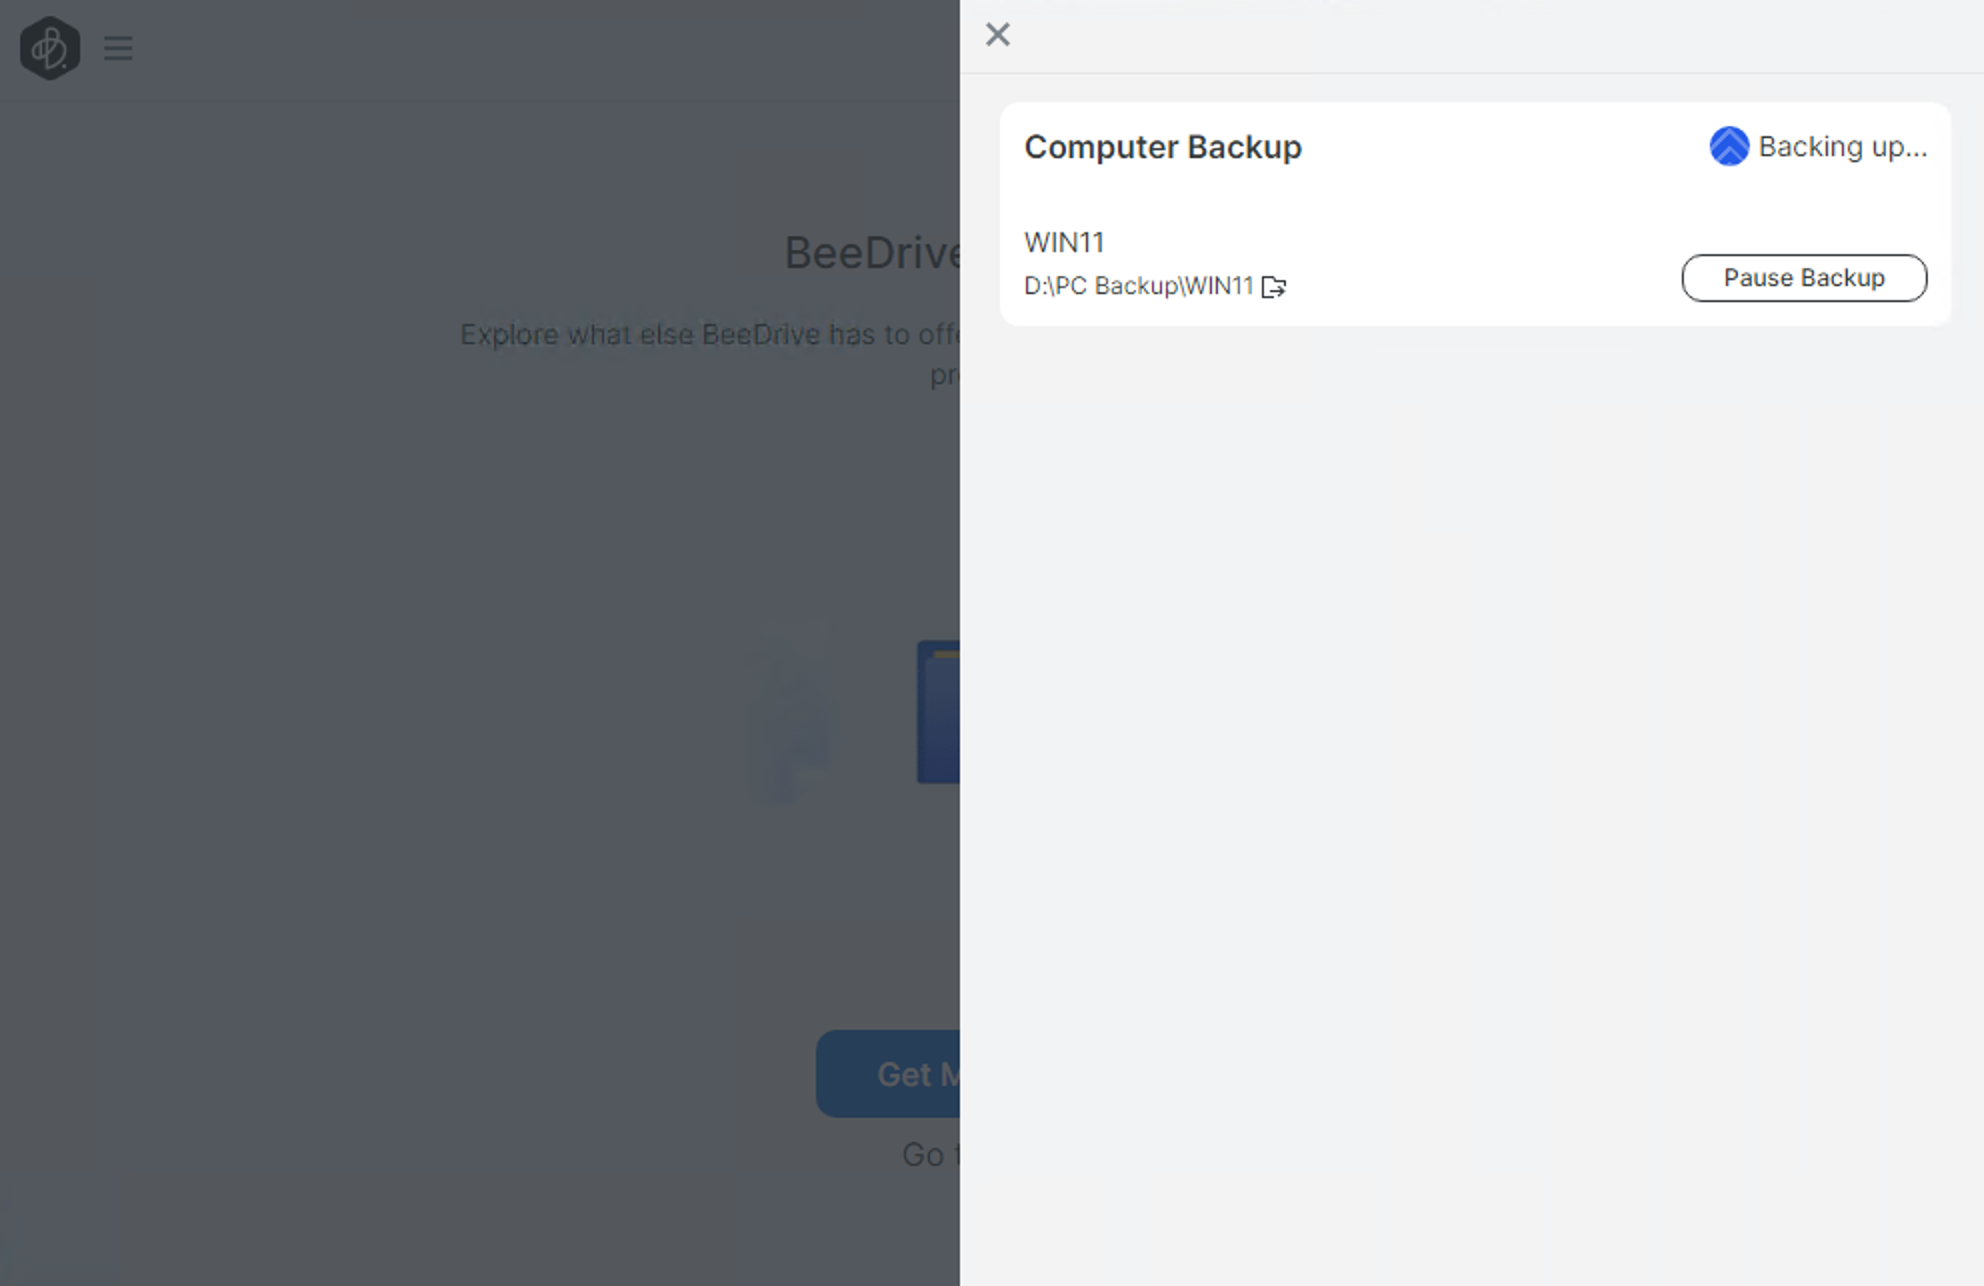
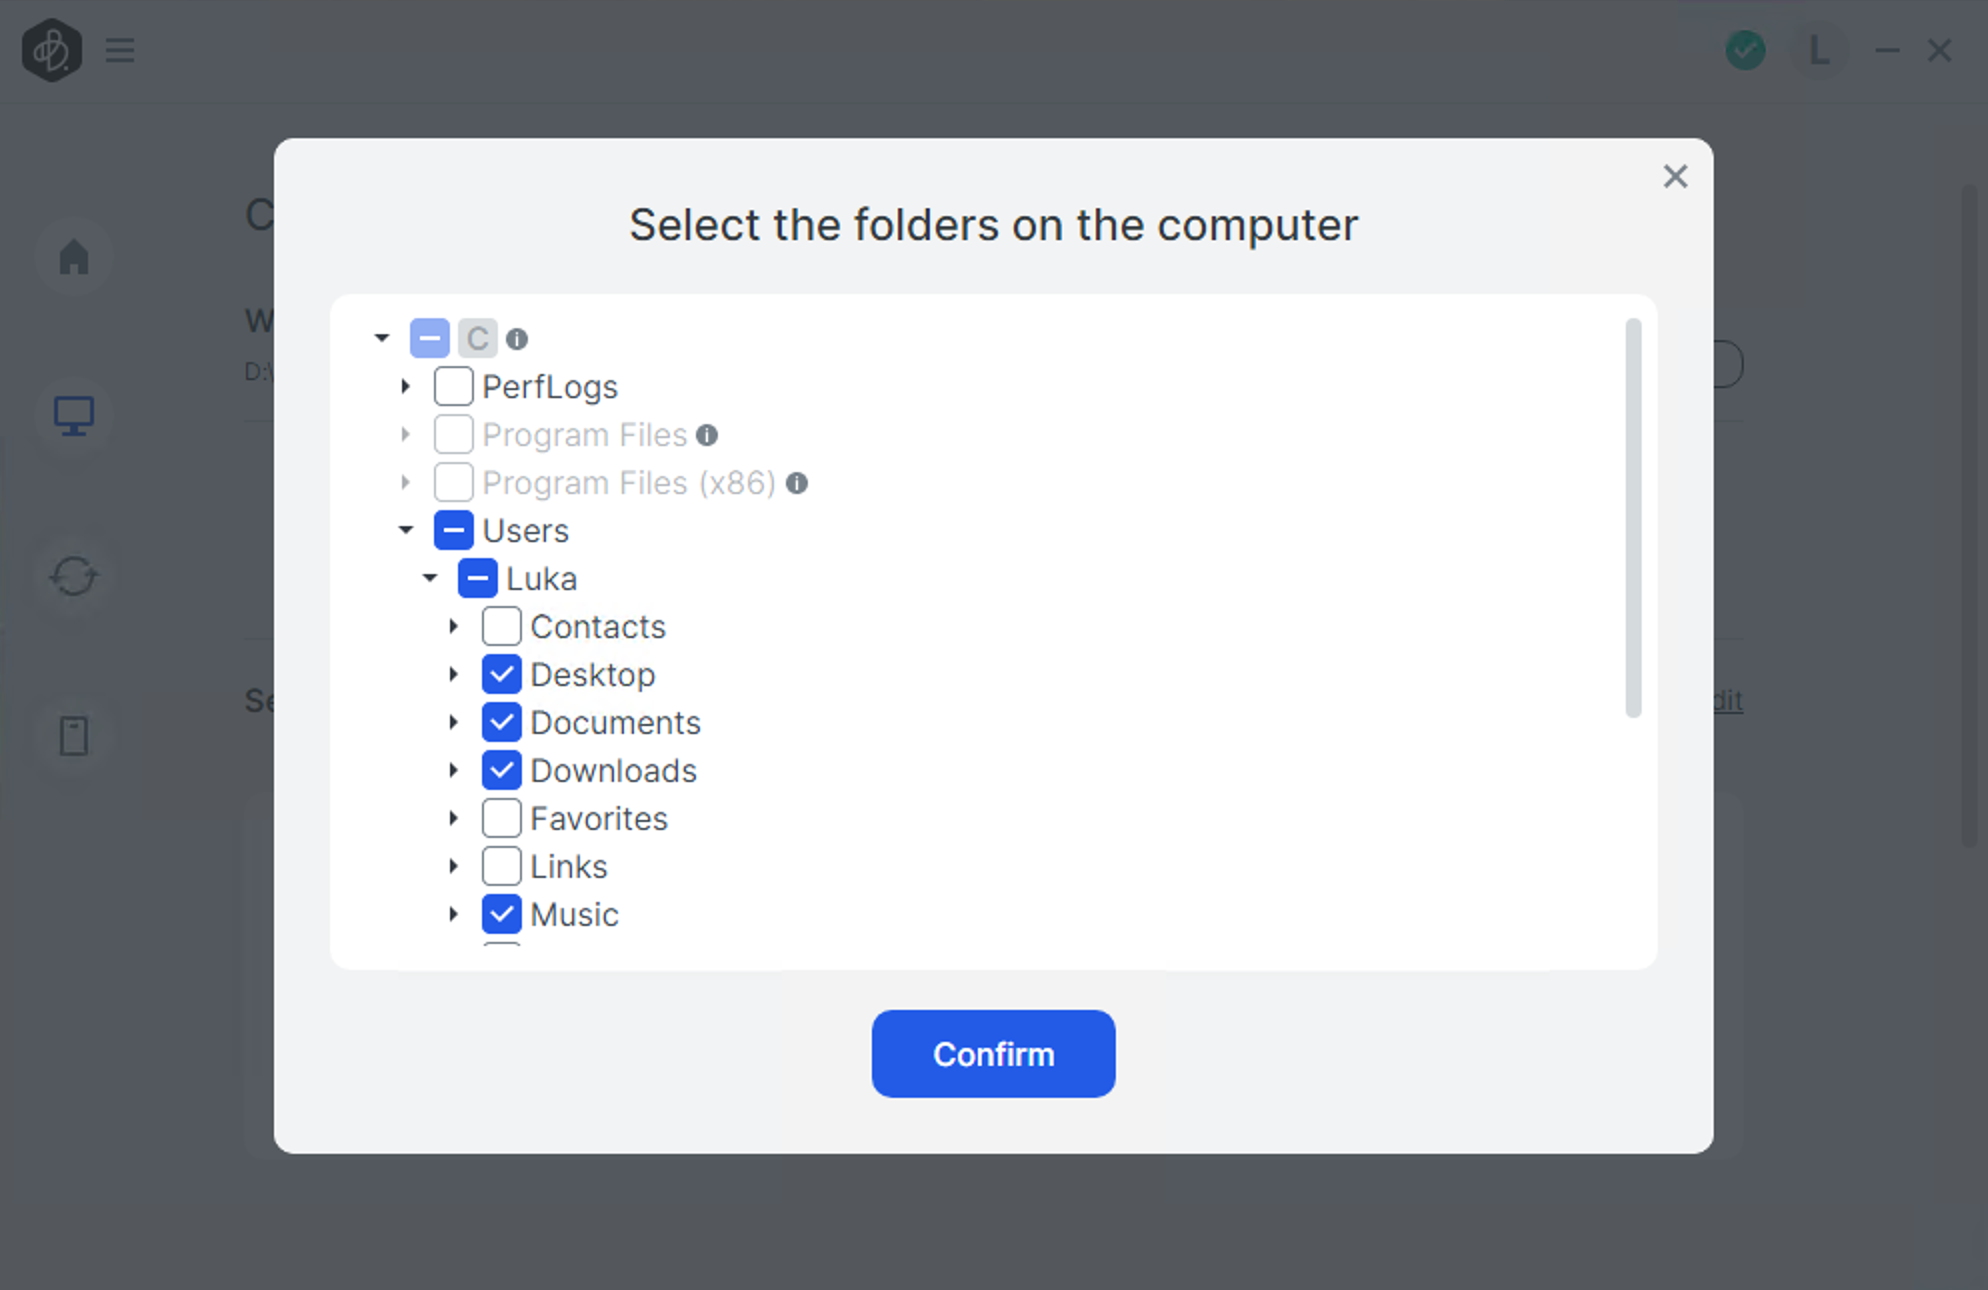
By default one of the most common operations that users of this device might want or need, would be to backup data from the computer the BeeDrive is connected to. The computer backup feature will allow us to backup data from some default profile folders, or from a custom source on the PC. In any event, the backup is not scheduled but rather starts each time the BeeDrive is connected to the computer.
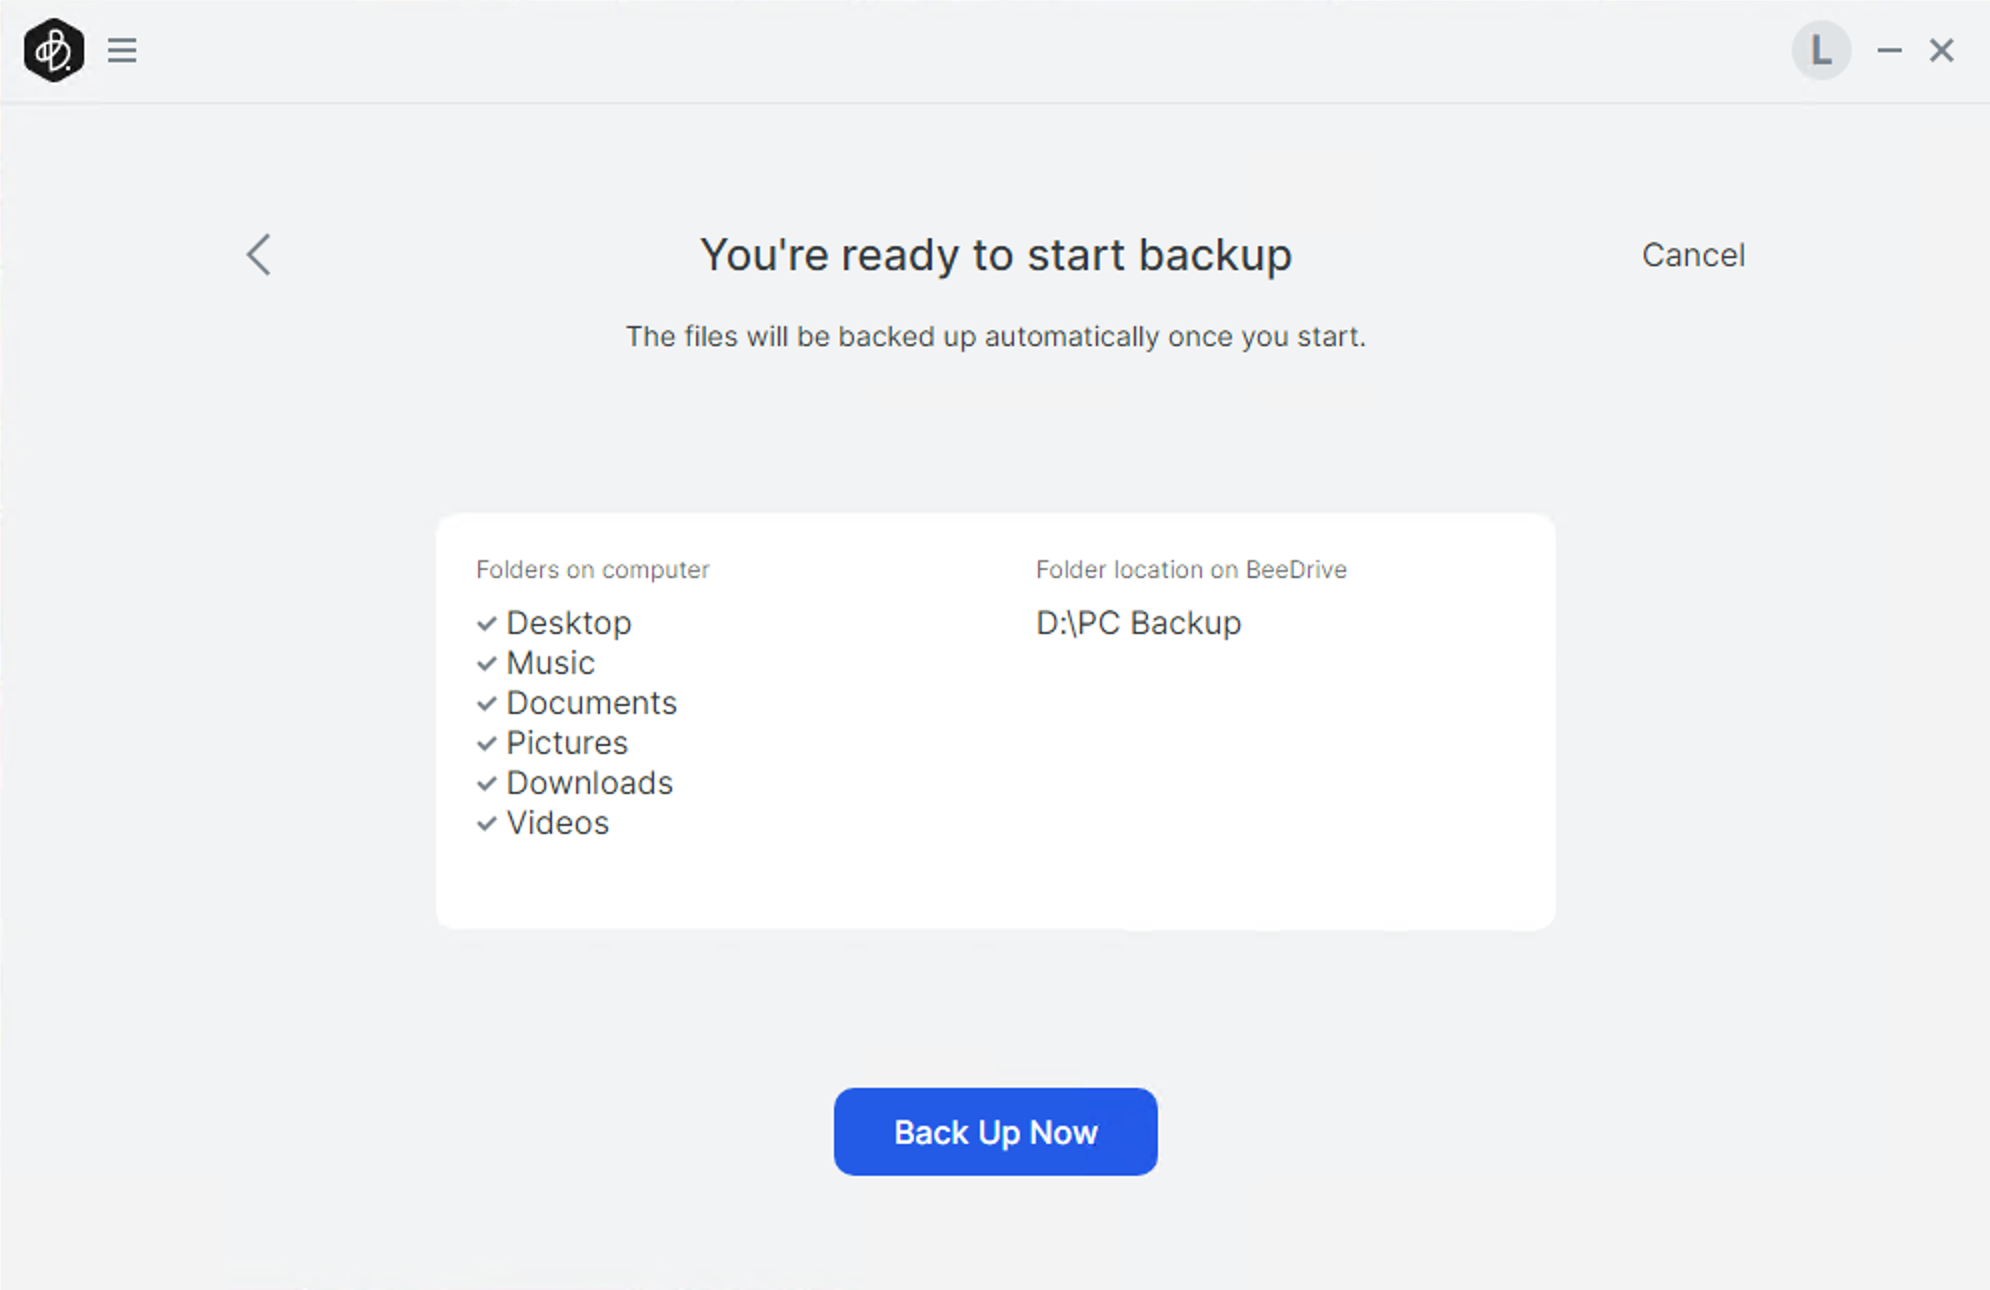
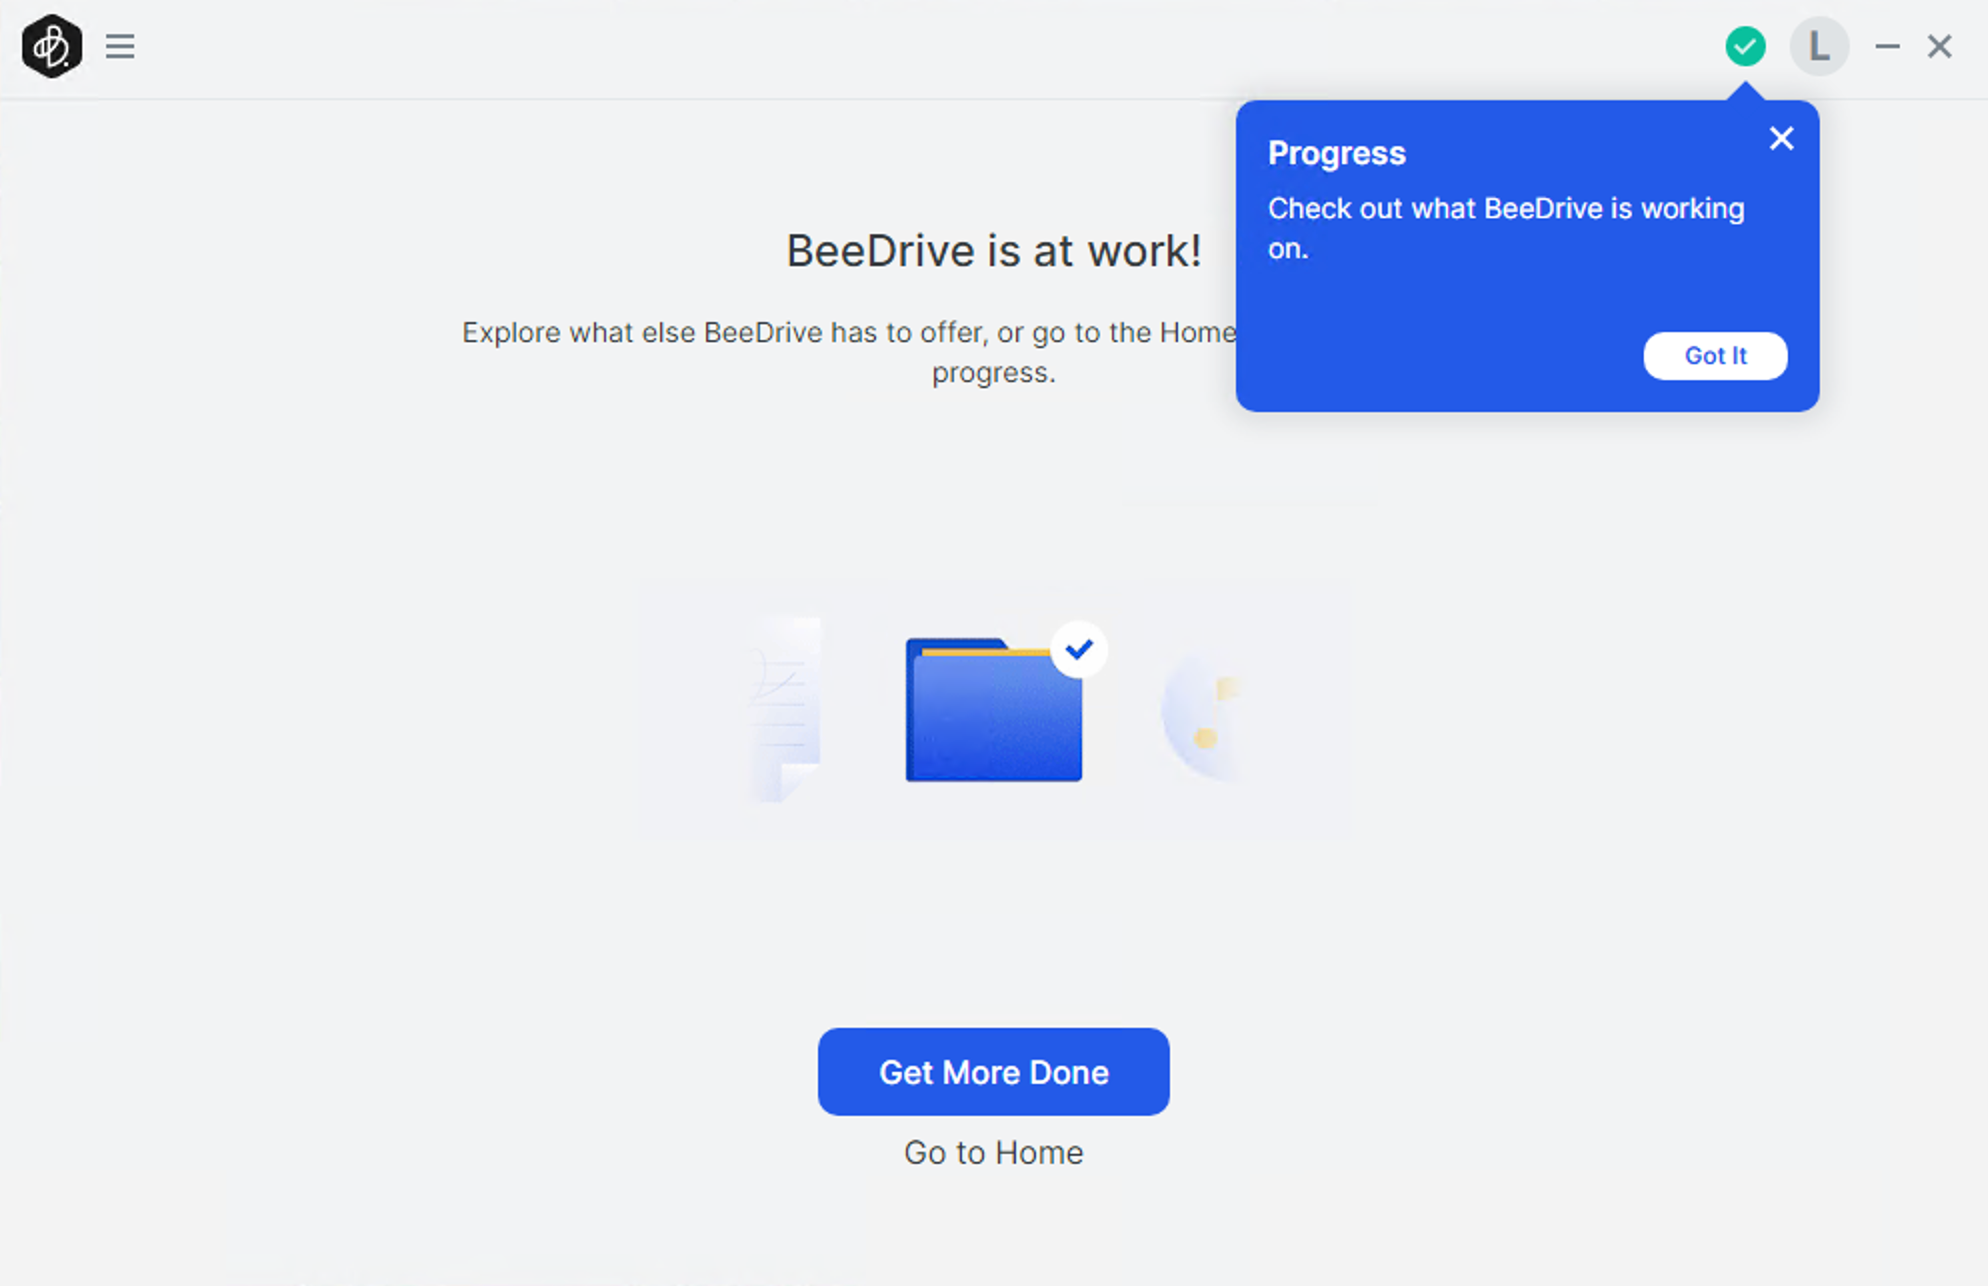
The user interface has a minimalistic look to it, and it is very fluid, with settings and options showing up exactly where you want them and when you need them. Once the backup progress starts we can follow along using the progress menu in the upper right corner of the main window.
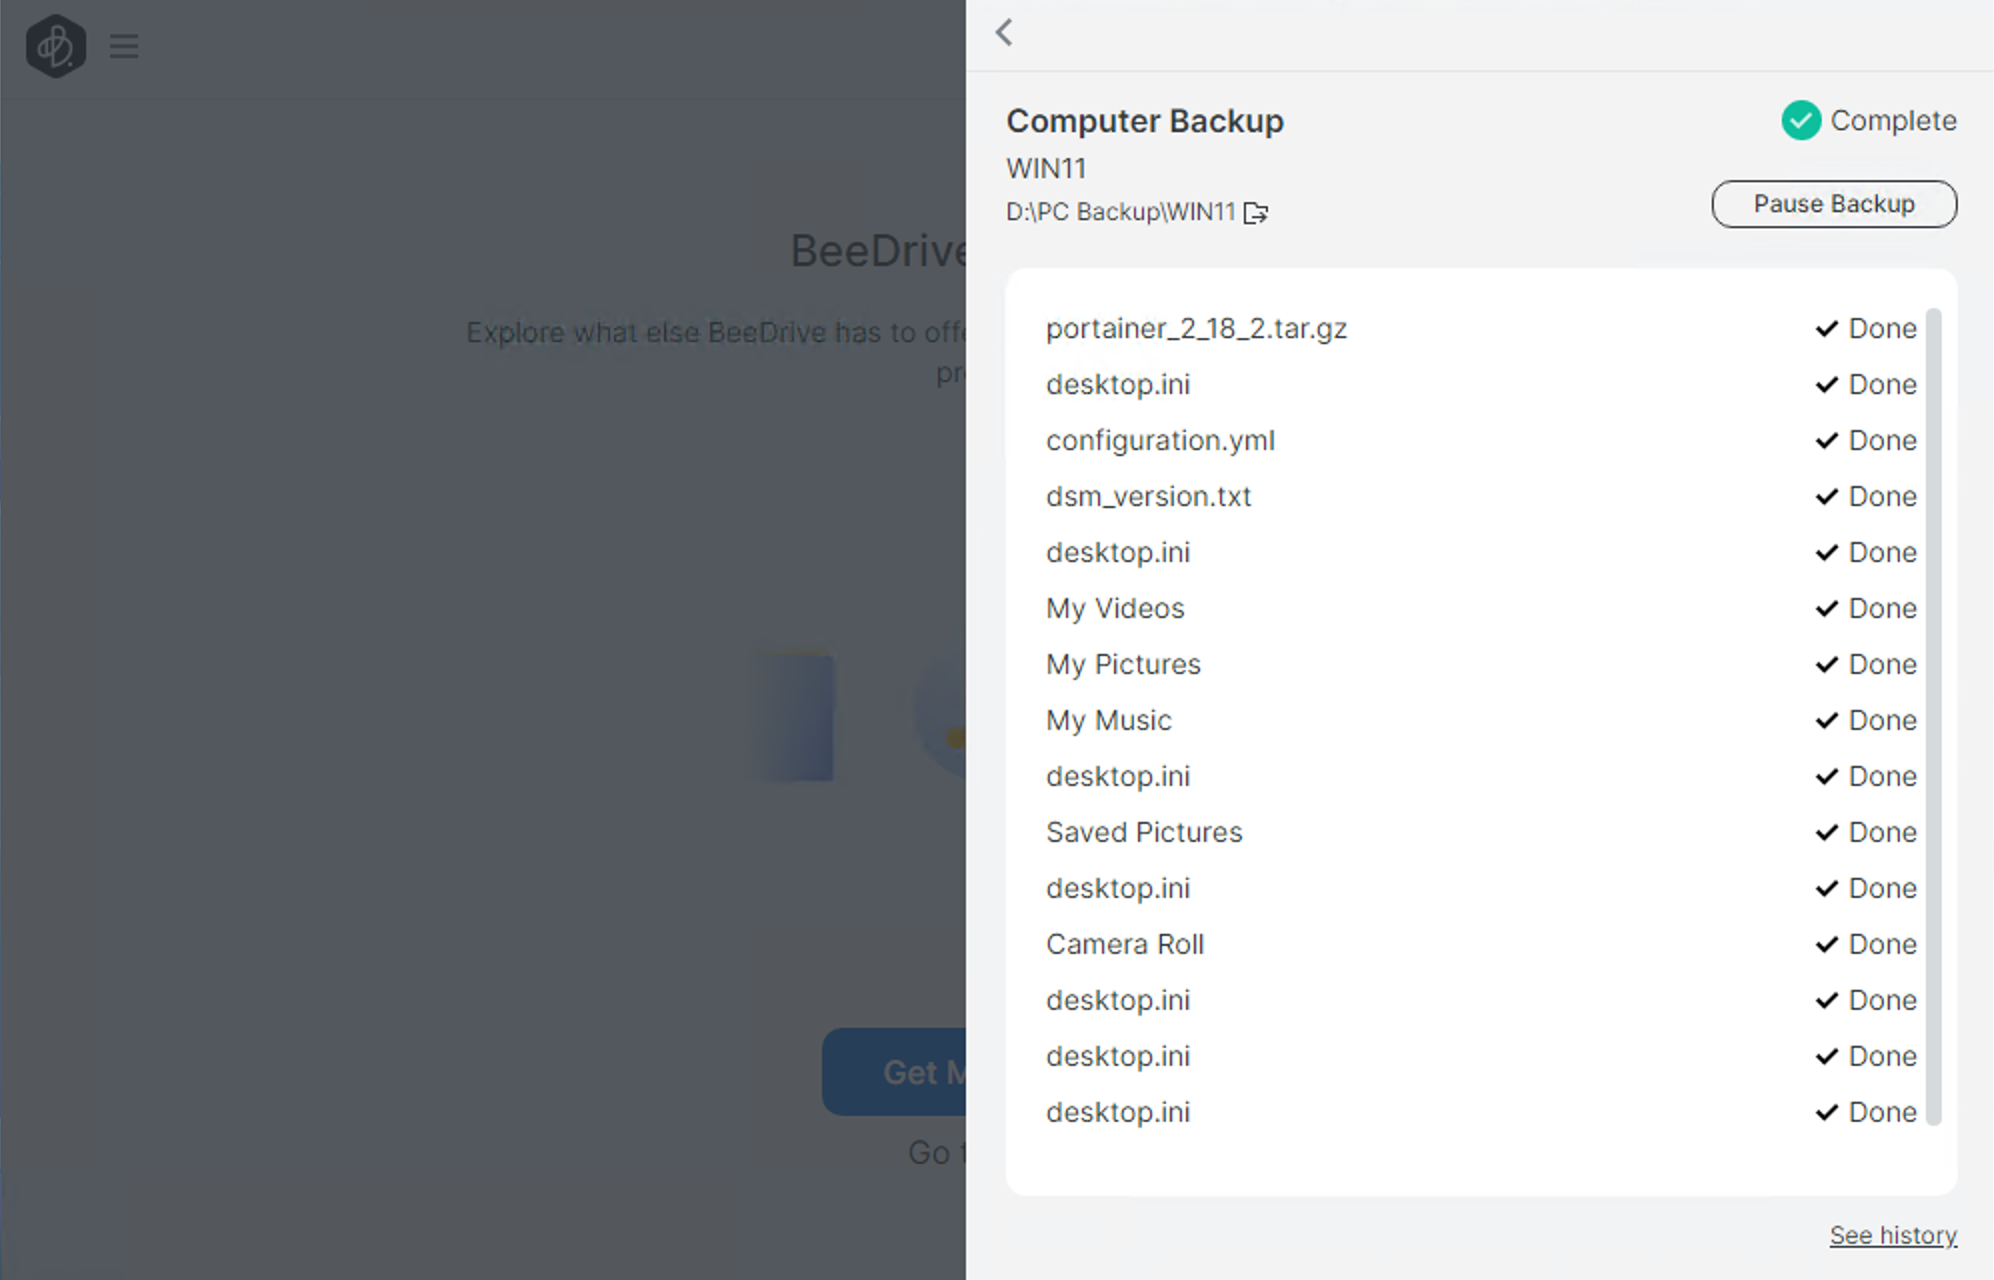
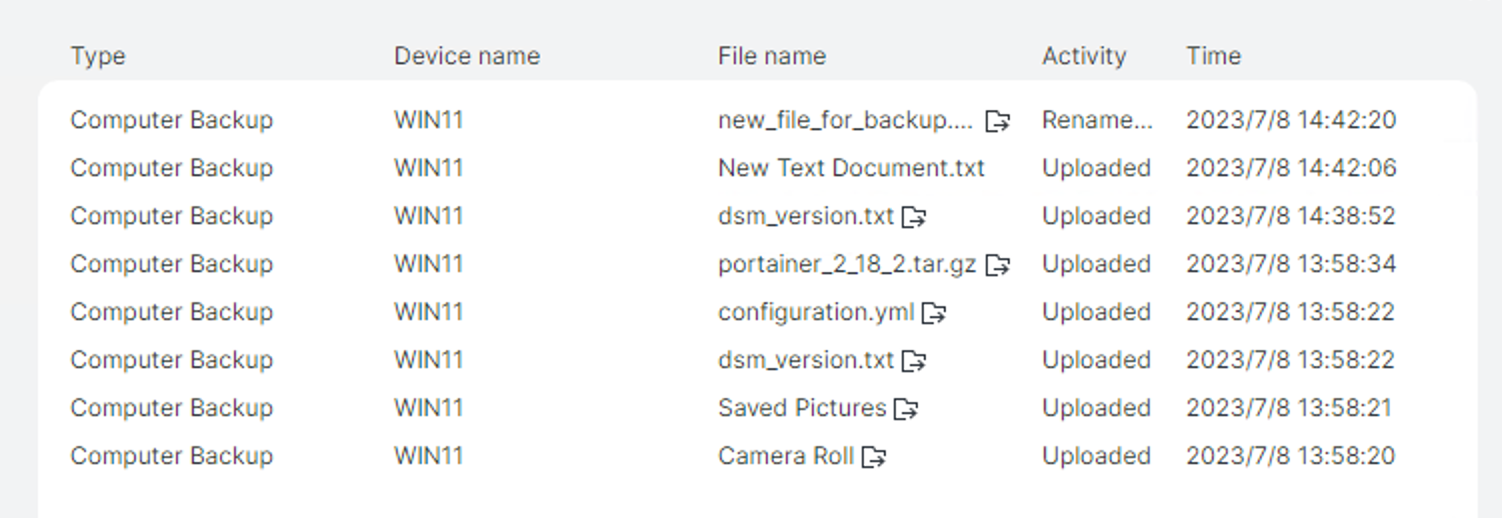
After the task has been completed, a small history link can be clicked from the progress window unless we want to invoke the history overview from the main menu. In any event, we can get a detailed list of file transfers that have happened as well as when those events occurred.
Once all is done, the main screen of the app will list all the functions and details, again in a very modern and slick way.
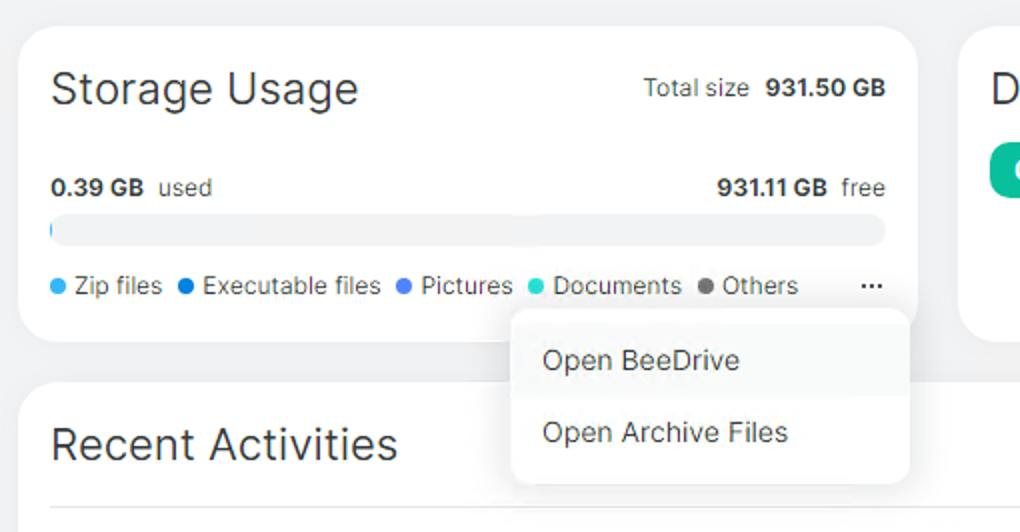
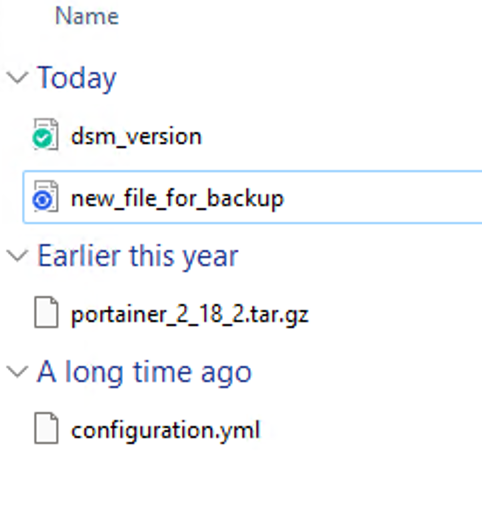
One tiny element in this UI is the fact that we can see the backed-up data by calling the three little dot menu bar to invoke the Windows File Explorer and see the content for the backup.
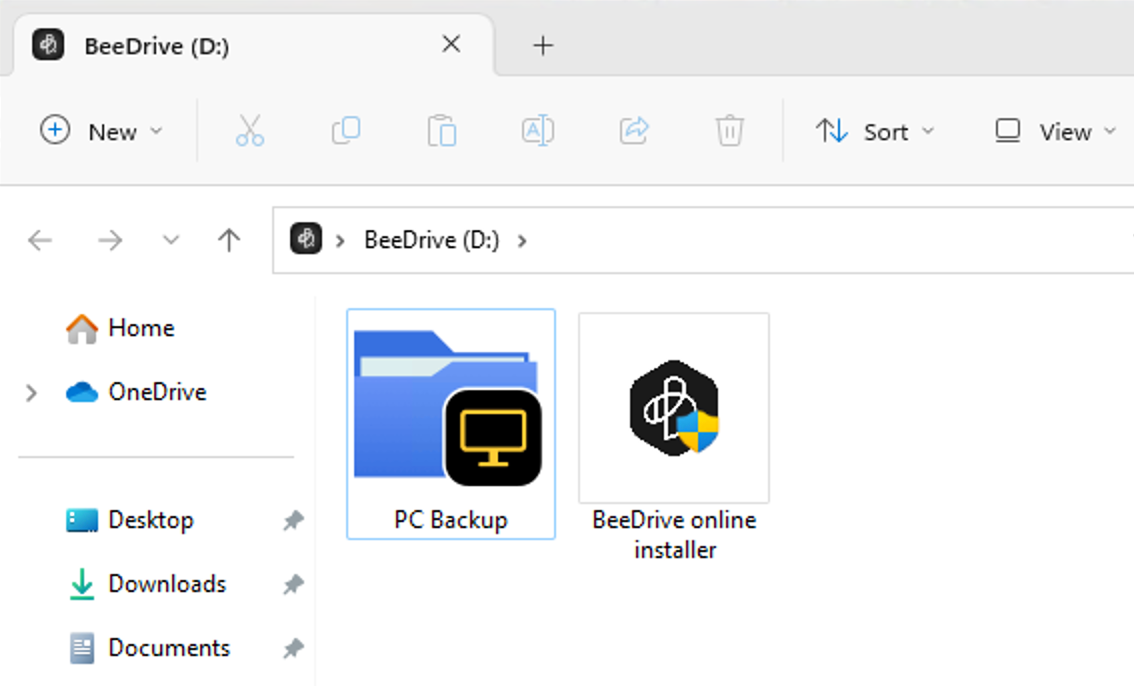
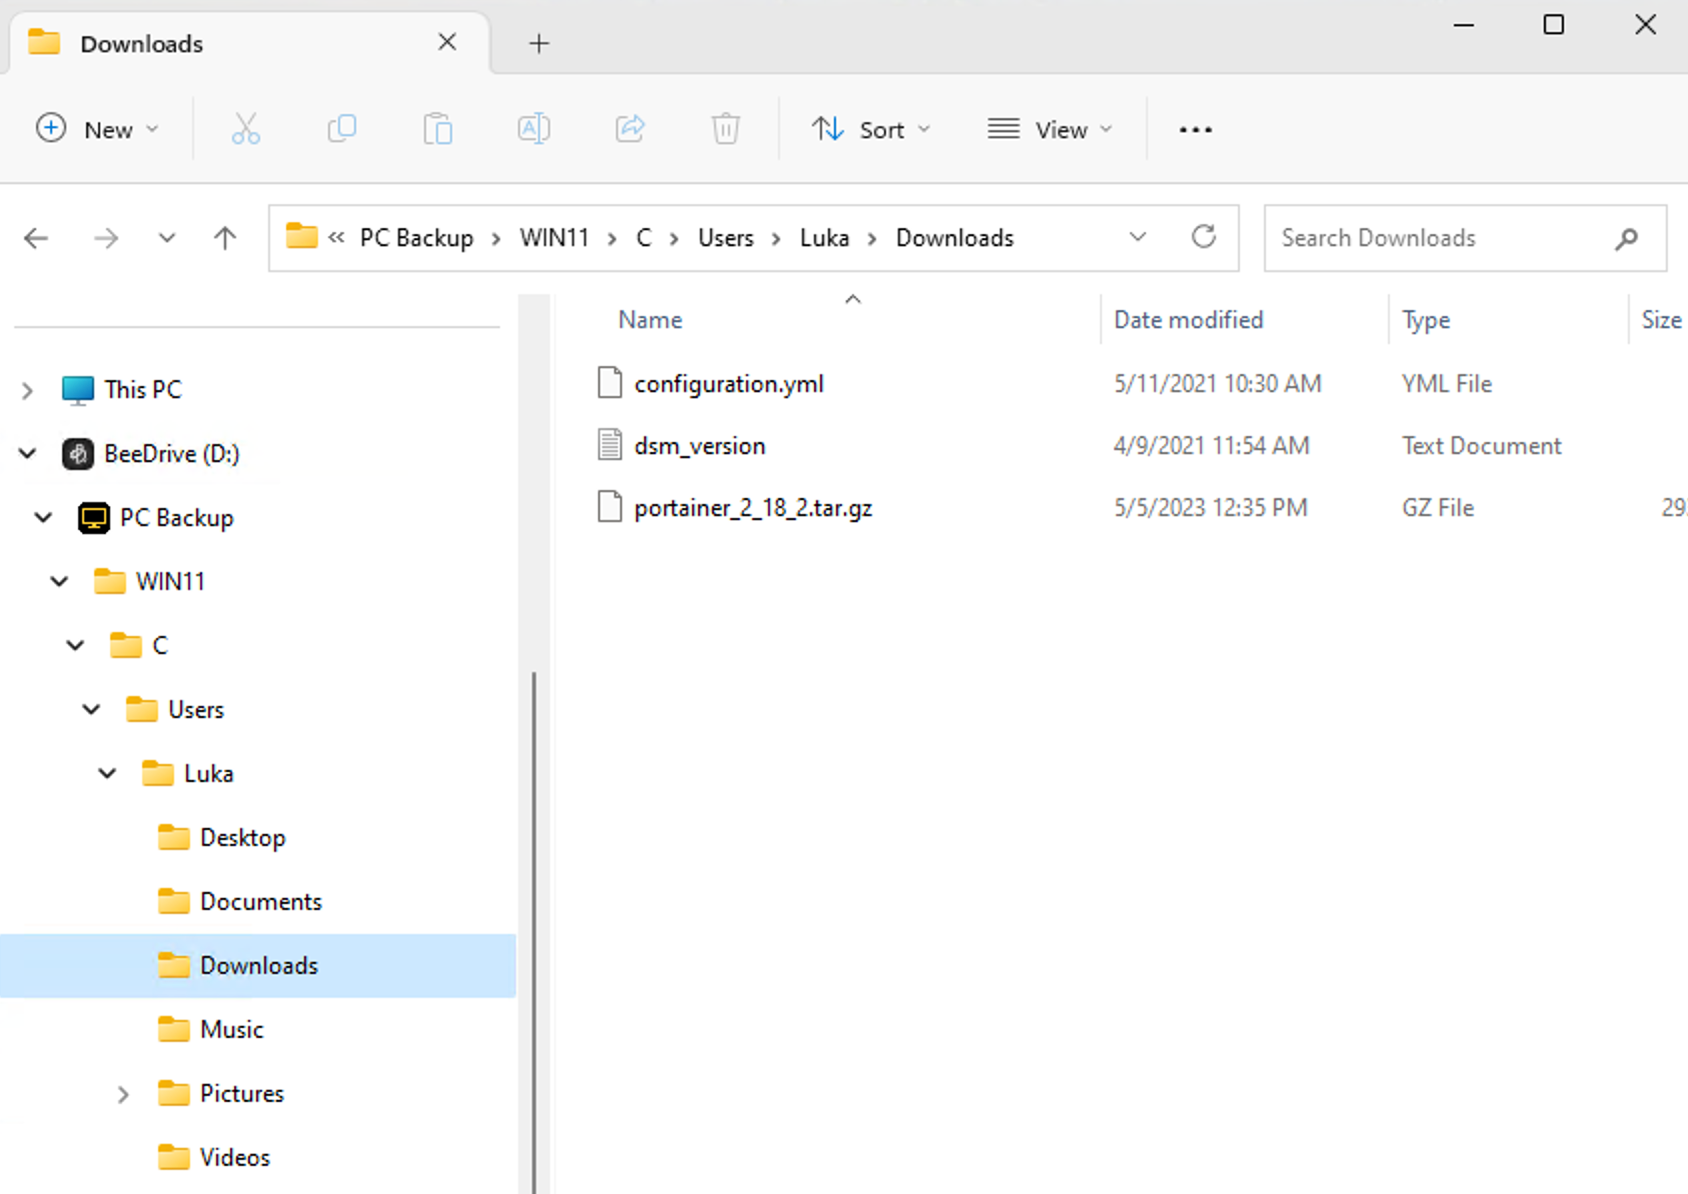
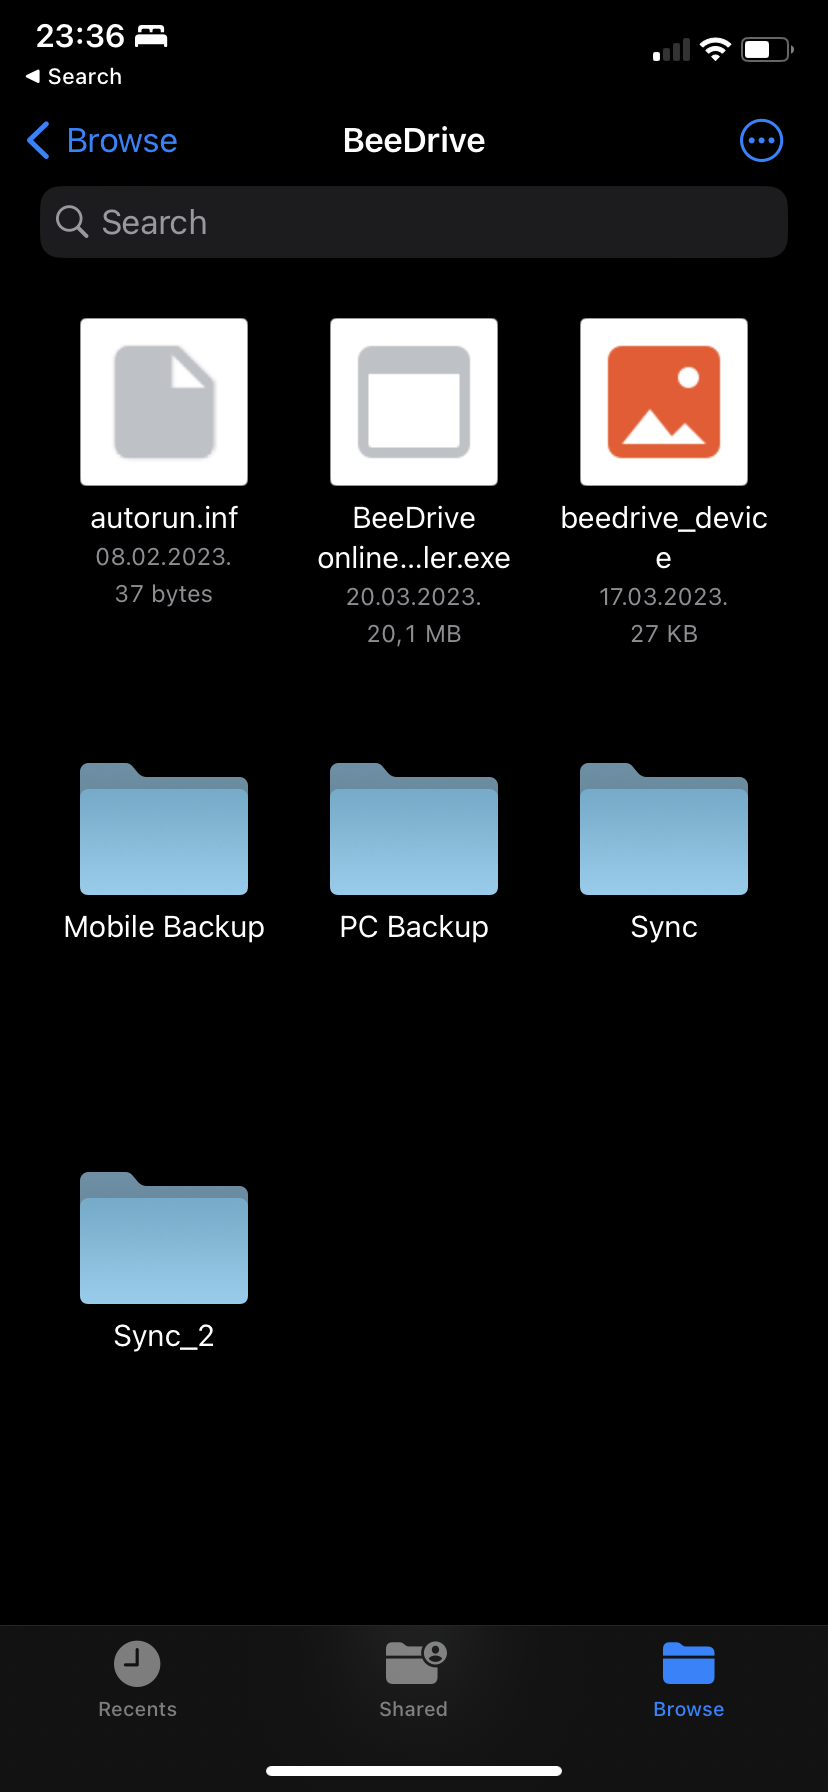
Unlike Synology's Hyper Backup proprietary format that requires HB or HB Vault client to access, BeeDrive saves data in a file/folder format so it can be accessed from any compatible OS. It is nice to see that things are not too complicated in this case.
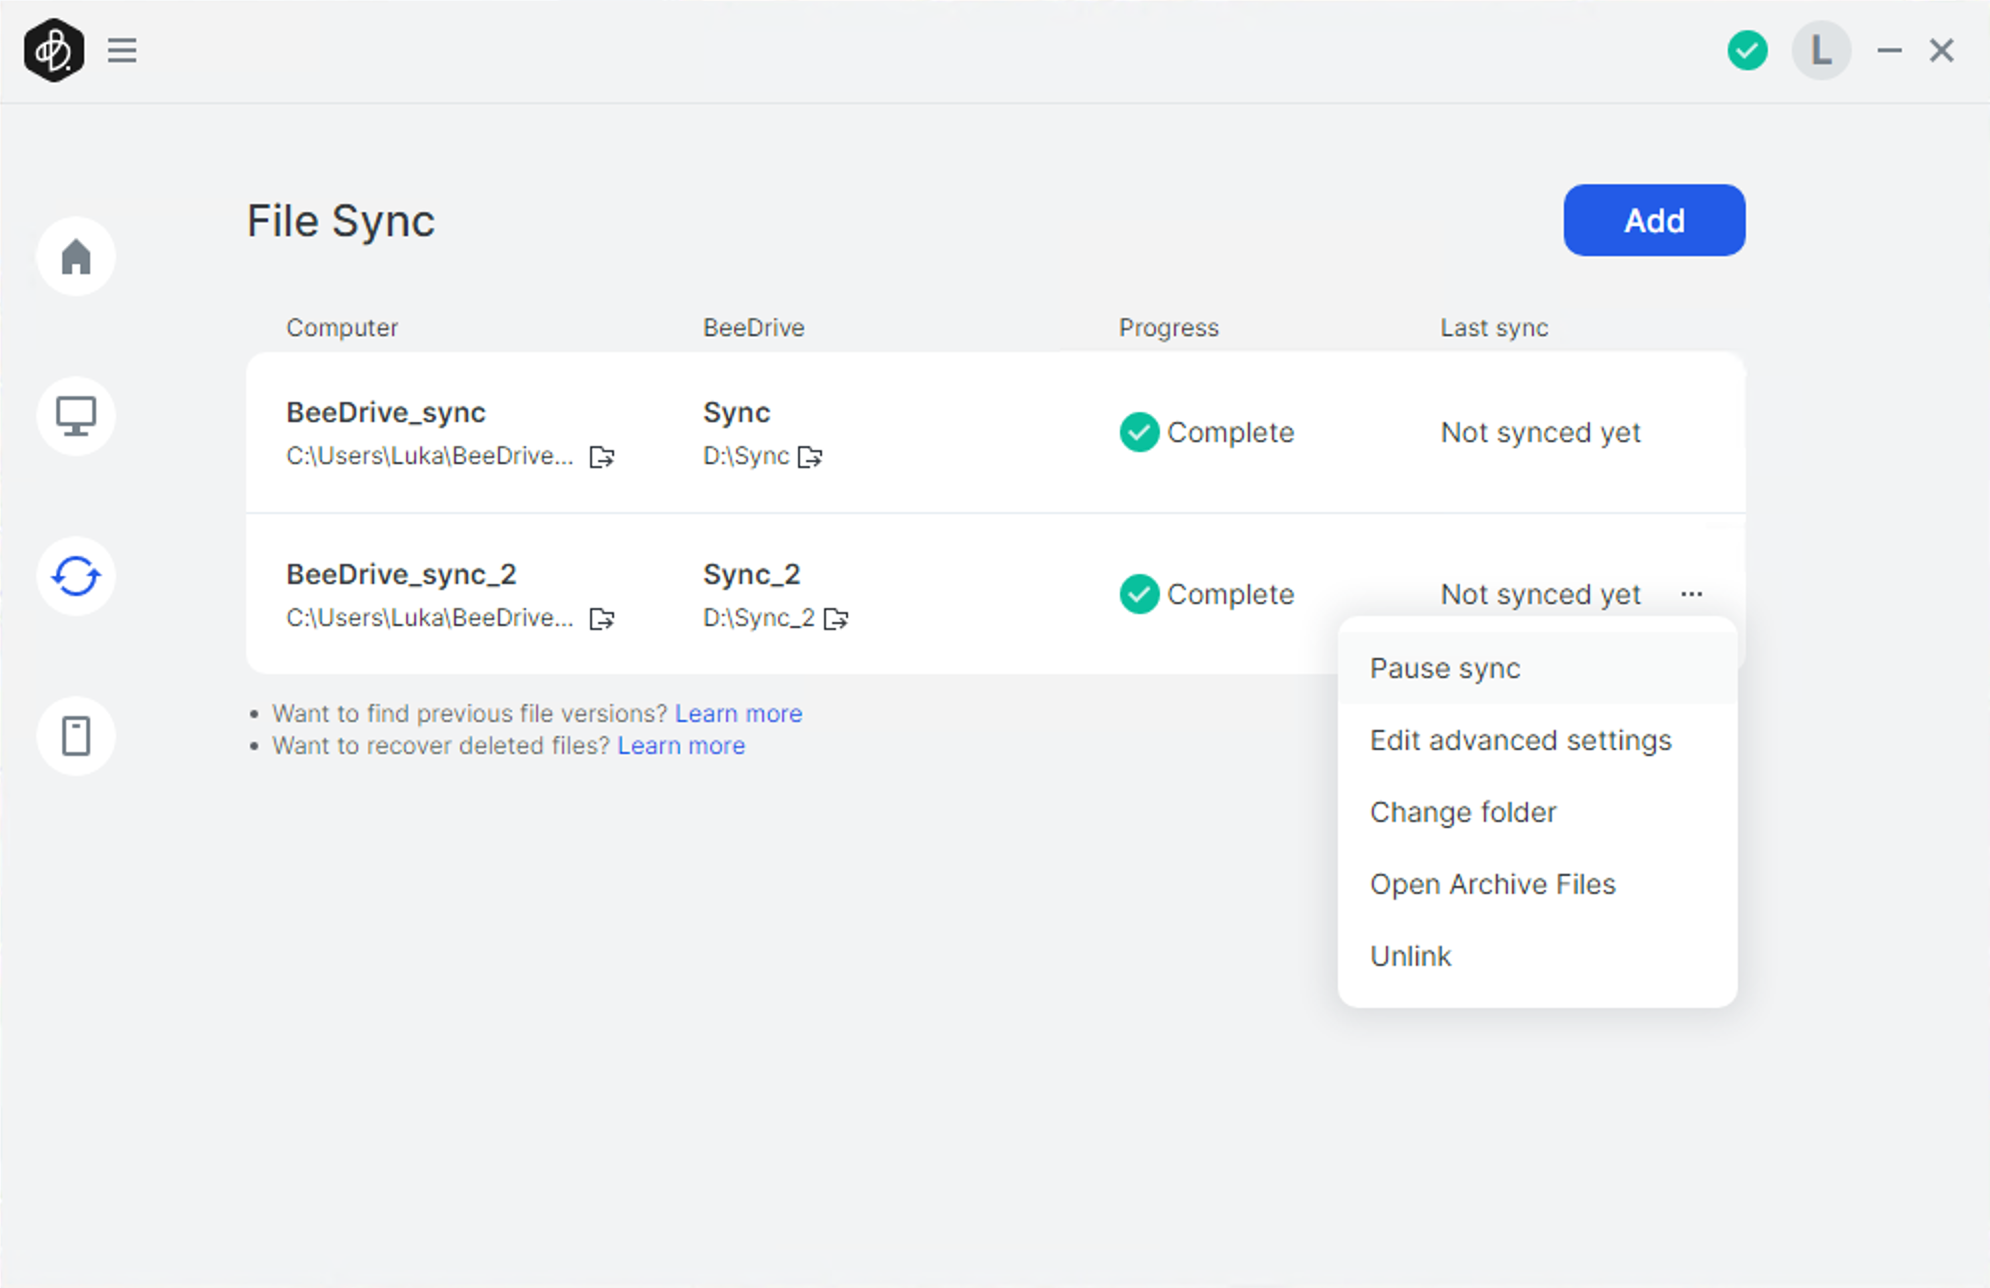
If there is any reason to make changes to the current backup task we have the option to do it using the computer backup section in the main window. It will present all the details needed such as when the backup was last completed, what data is included, as well as the option to pause, edit or delete the task.
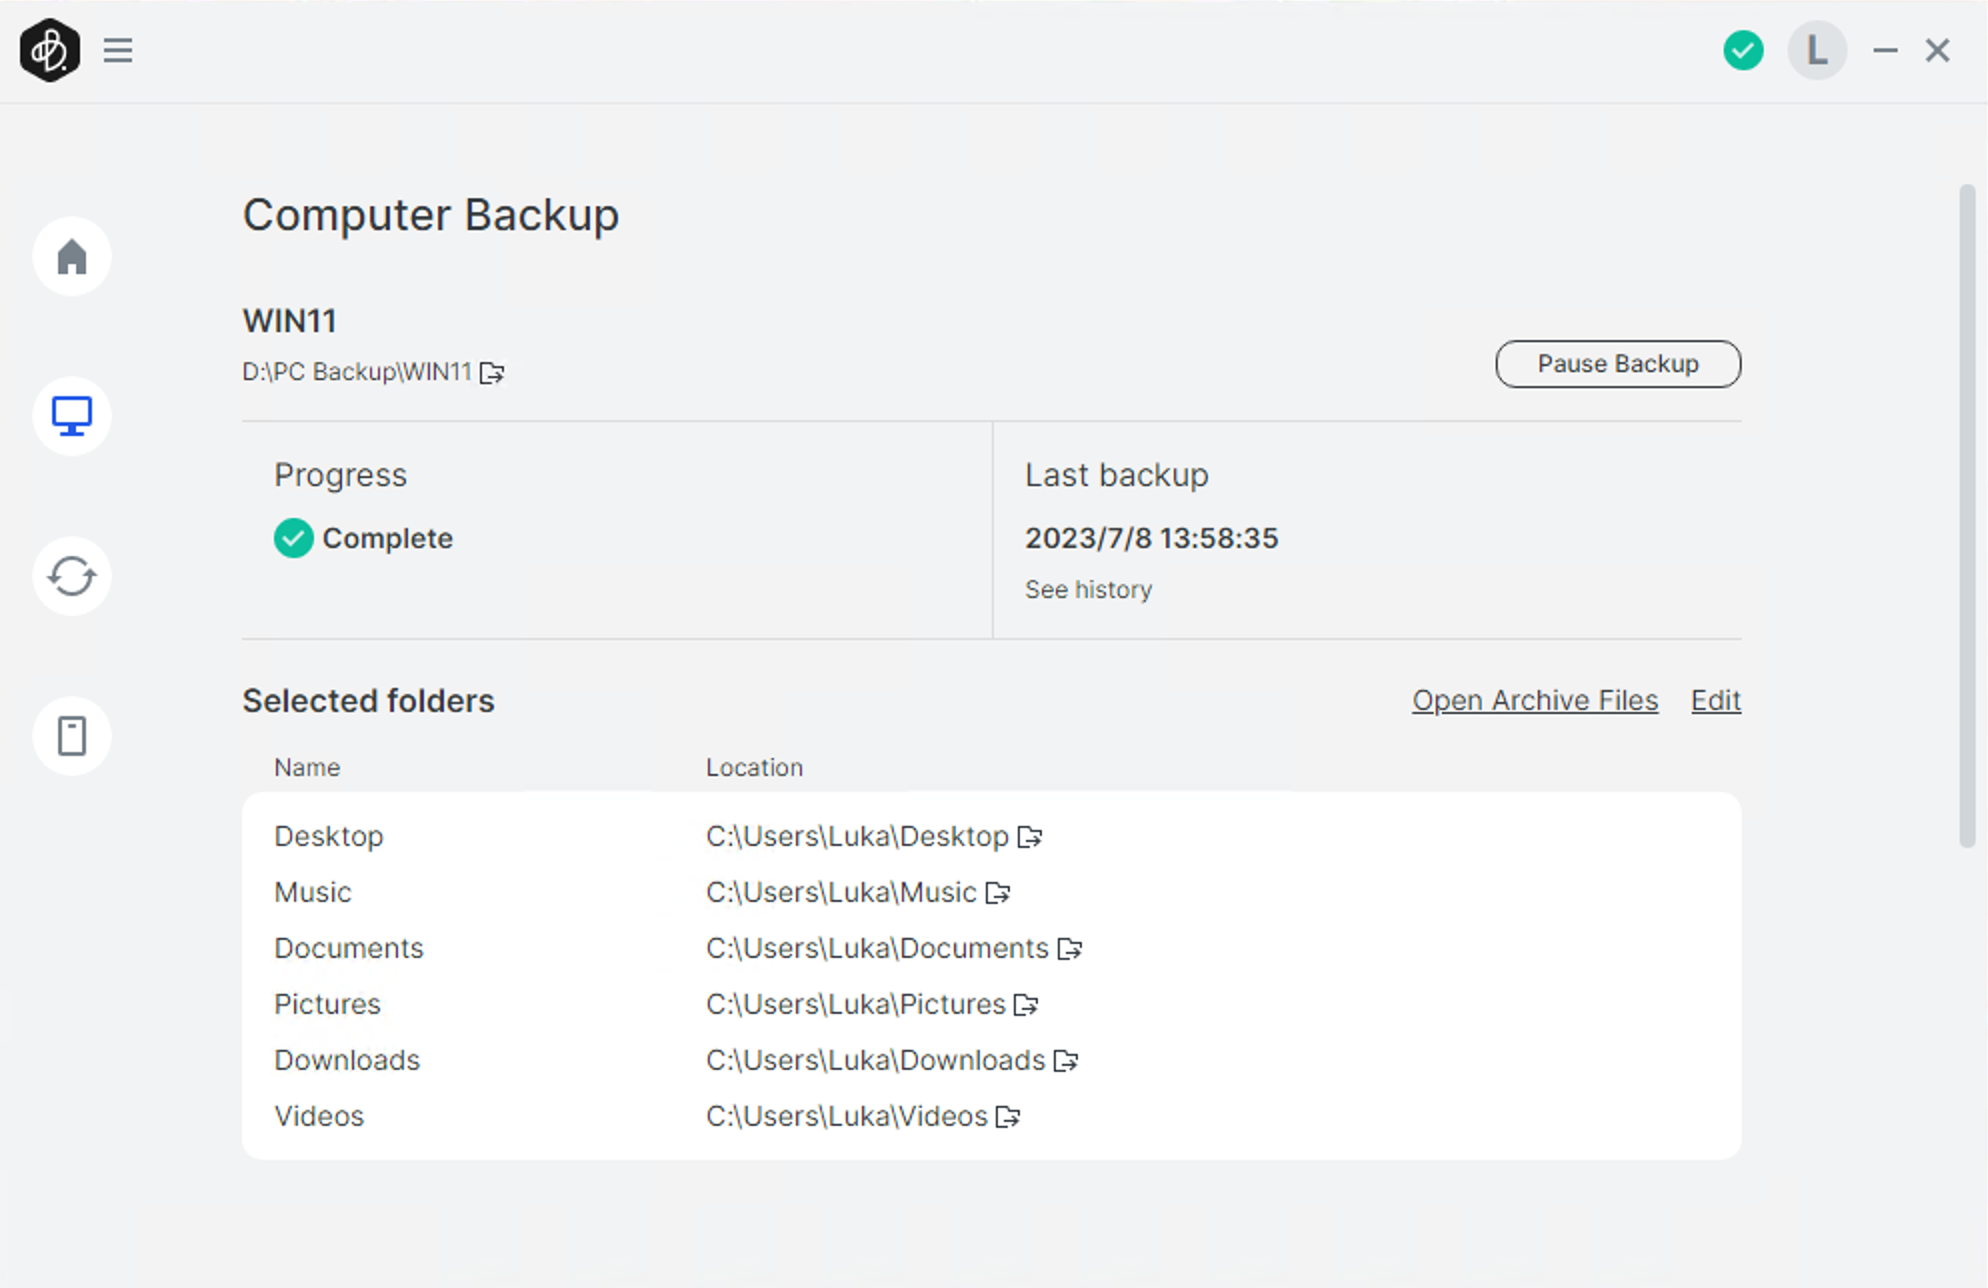
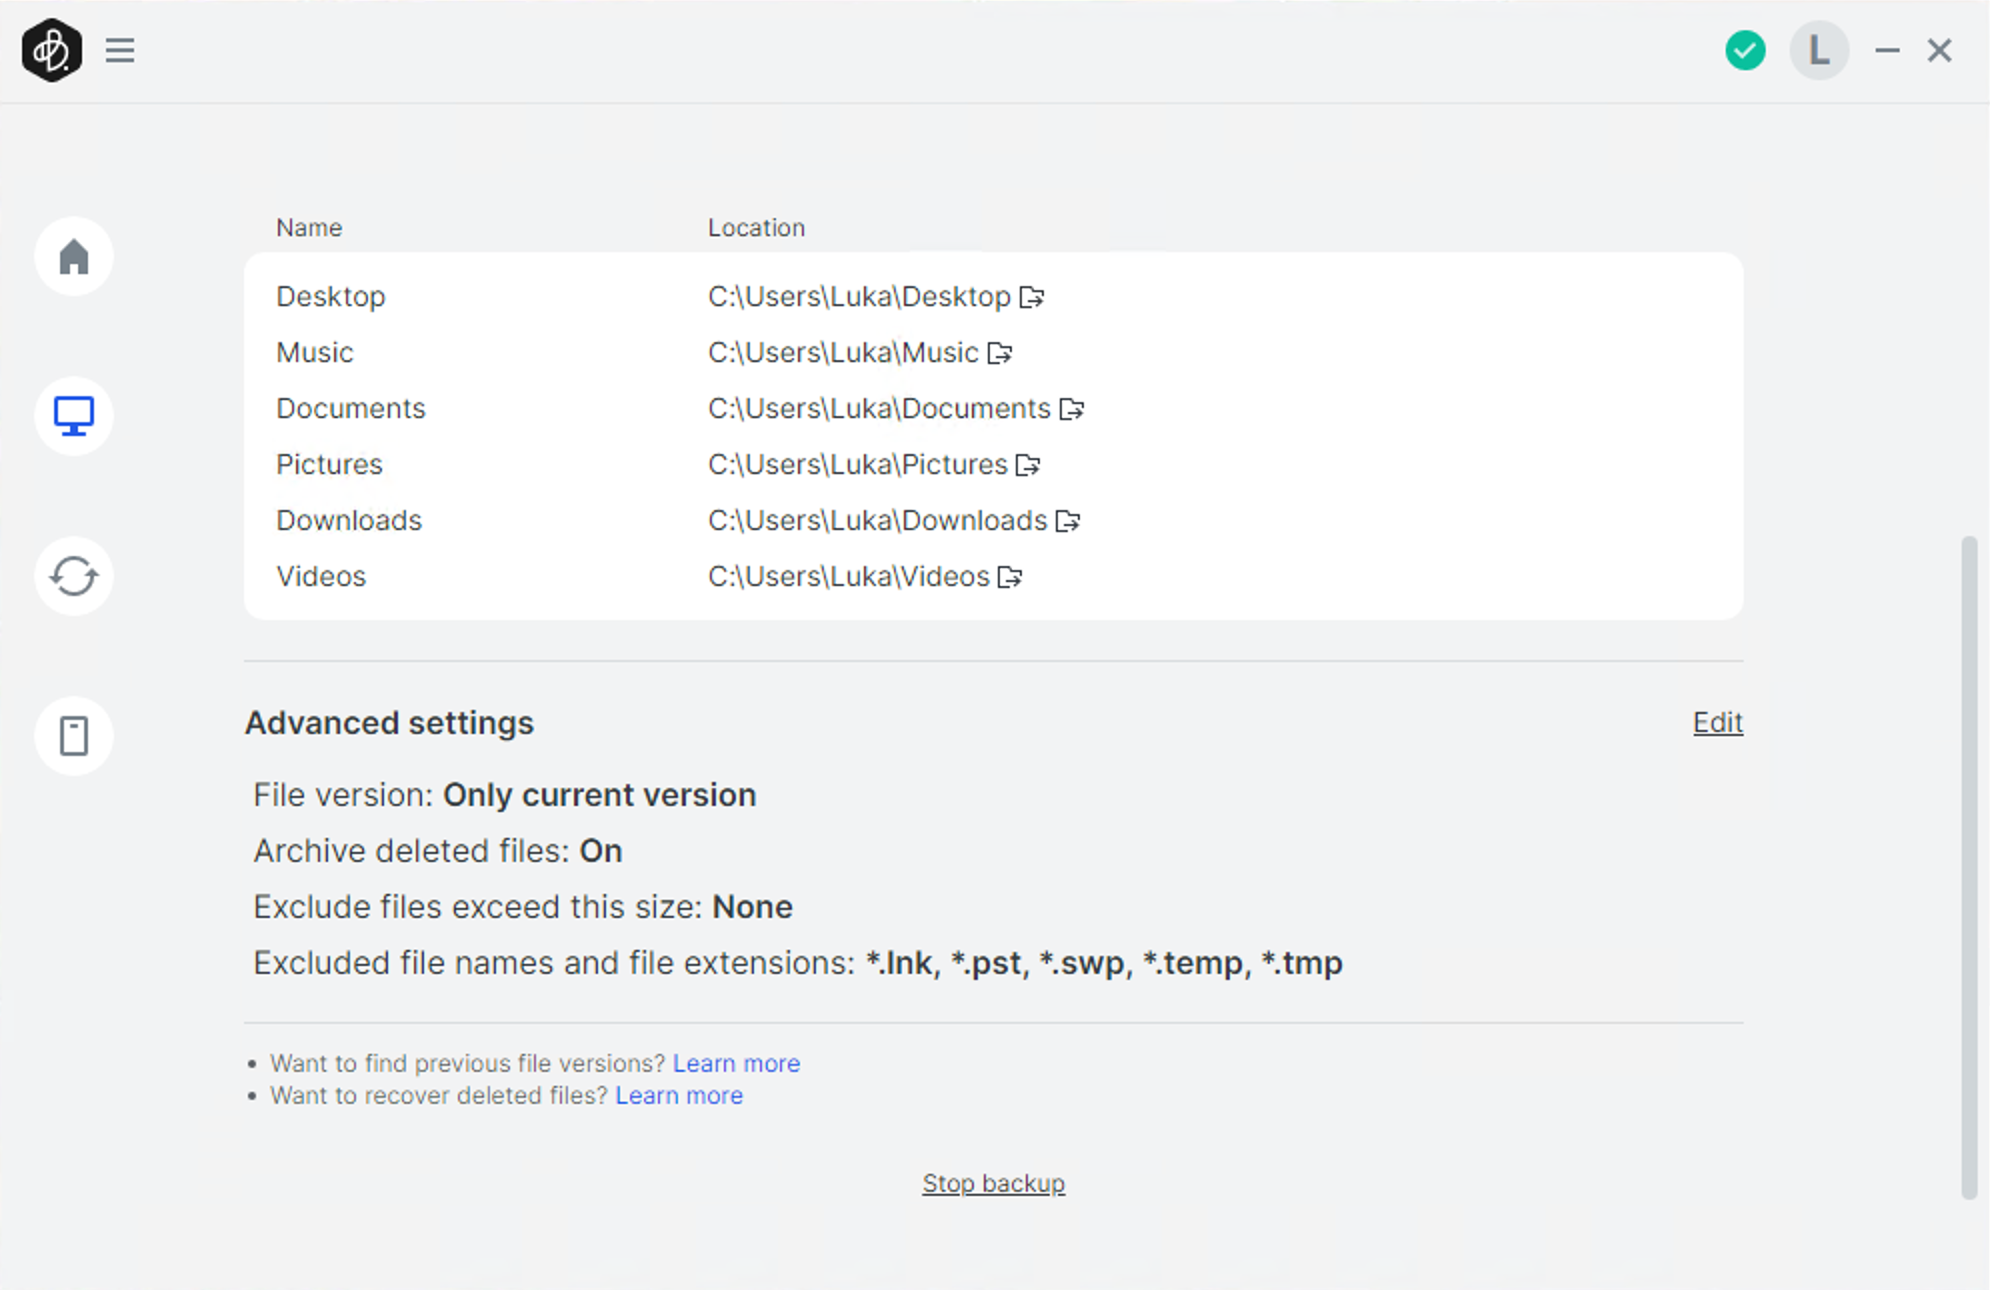
One thing that might not be obvious to start with is the advanced settings section in the bottom part of the backup task window. This is also the location where we will find the stop backup option that will delete the current task. Speaking of tasks, there is no way to set up multiple tasks for a single PC. The only thing we can do is select multiple folders (or remove them), from the current task.
Computer backup advanced options include versioning, deletion of archived files, and exclusion of files depending on their name, extension, or size. A nice set of options that will for the most part cover the majority of user's needs.
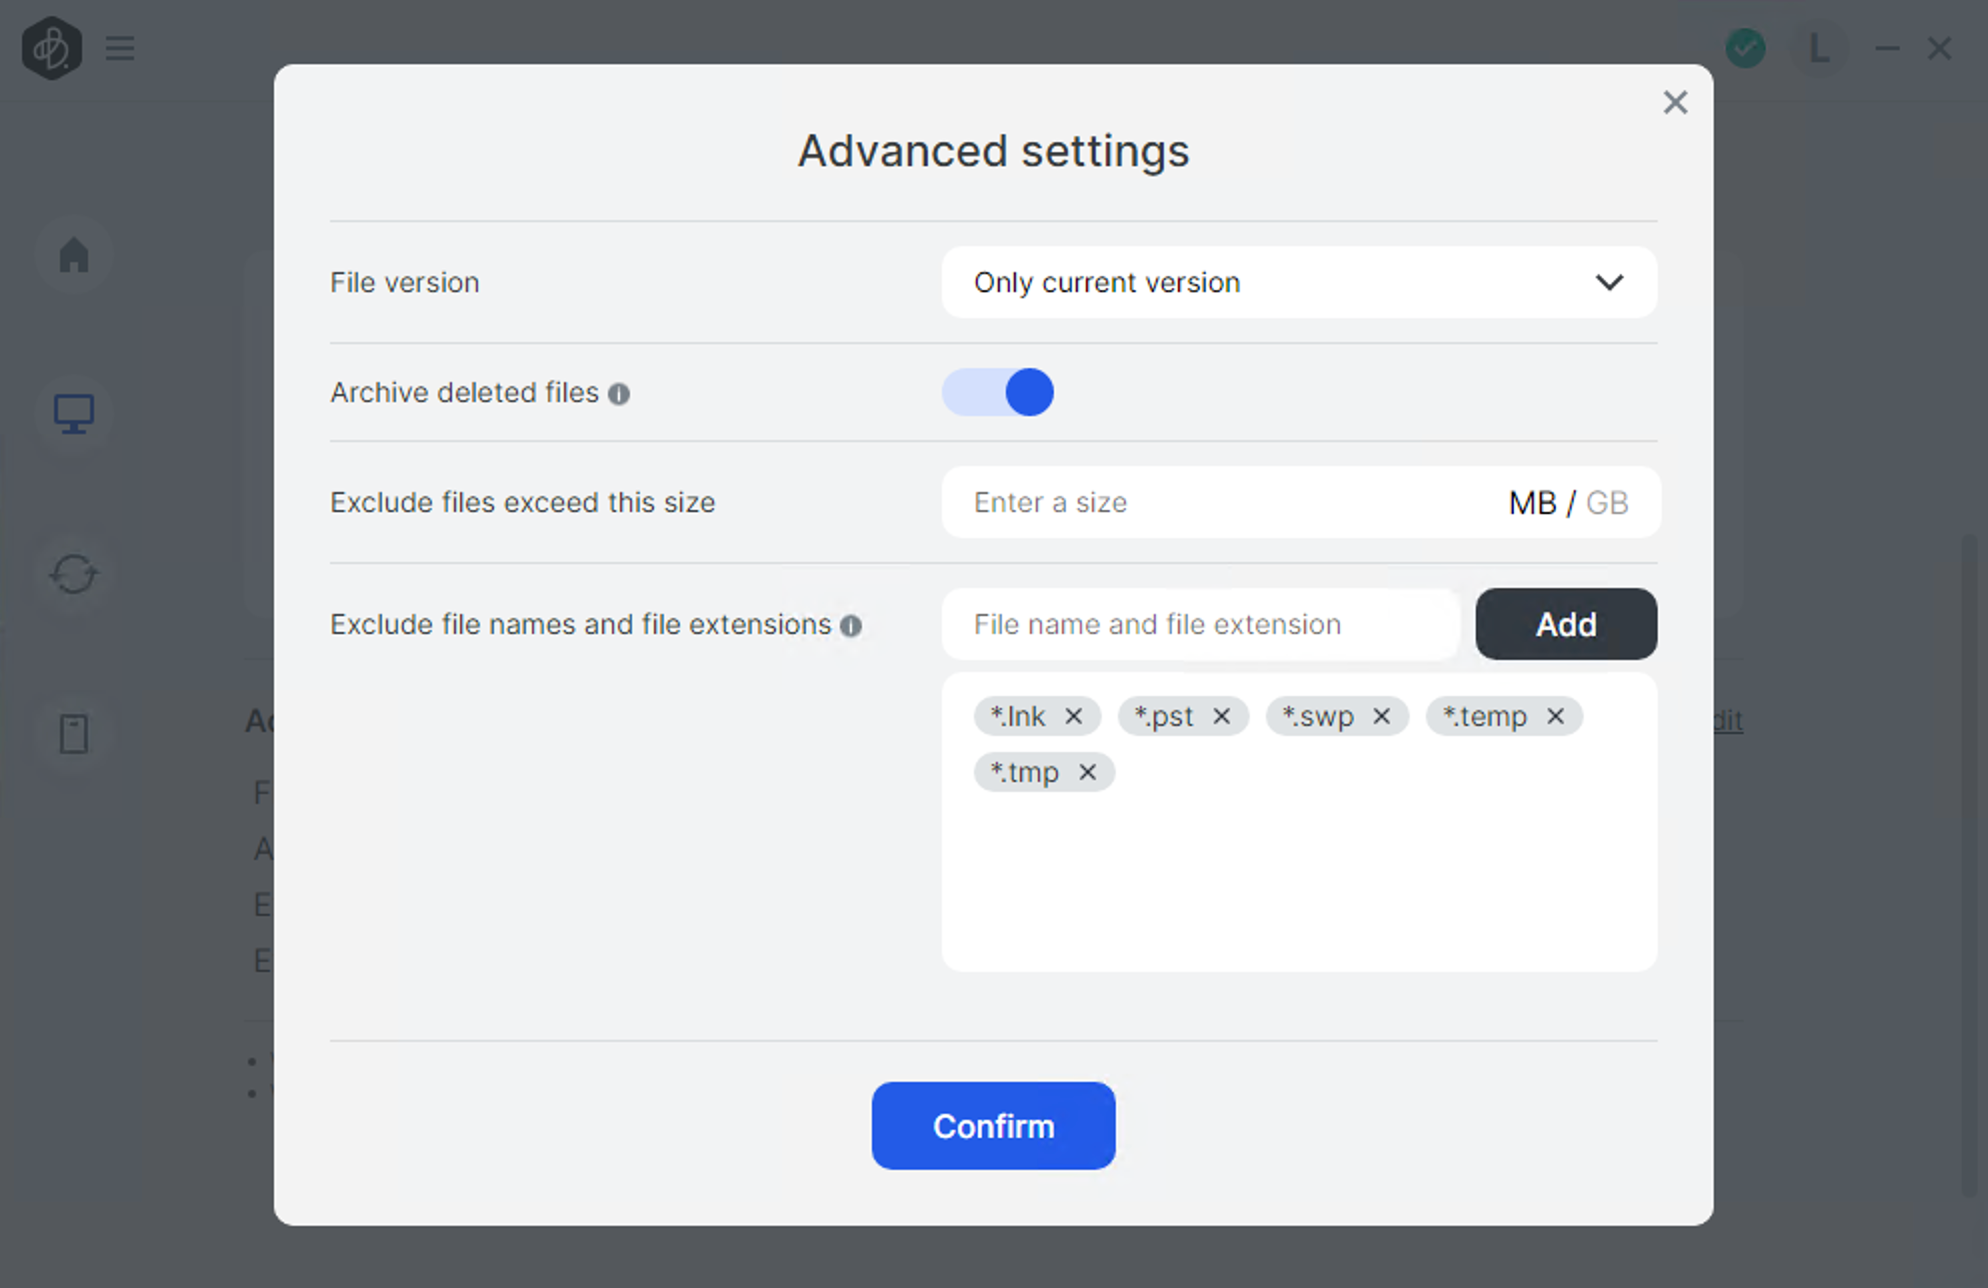
If we need to exclude certain files not just by extension, we can do that as well. Entering the name and the extension, for example, file_001.log the backup task will skip that file completely. Versioning is also present with certain limitations. We can use the one version option (current version), or select from a fixed drop-down menu. The maximum number of versions is five (5).
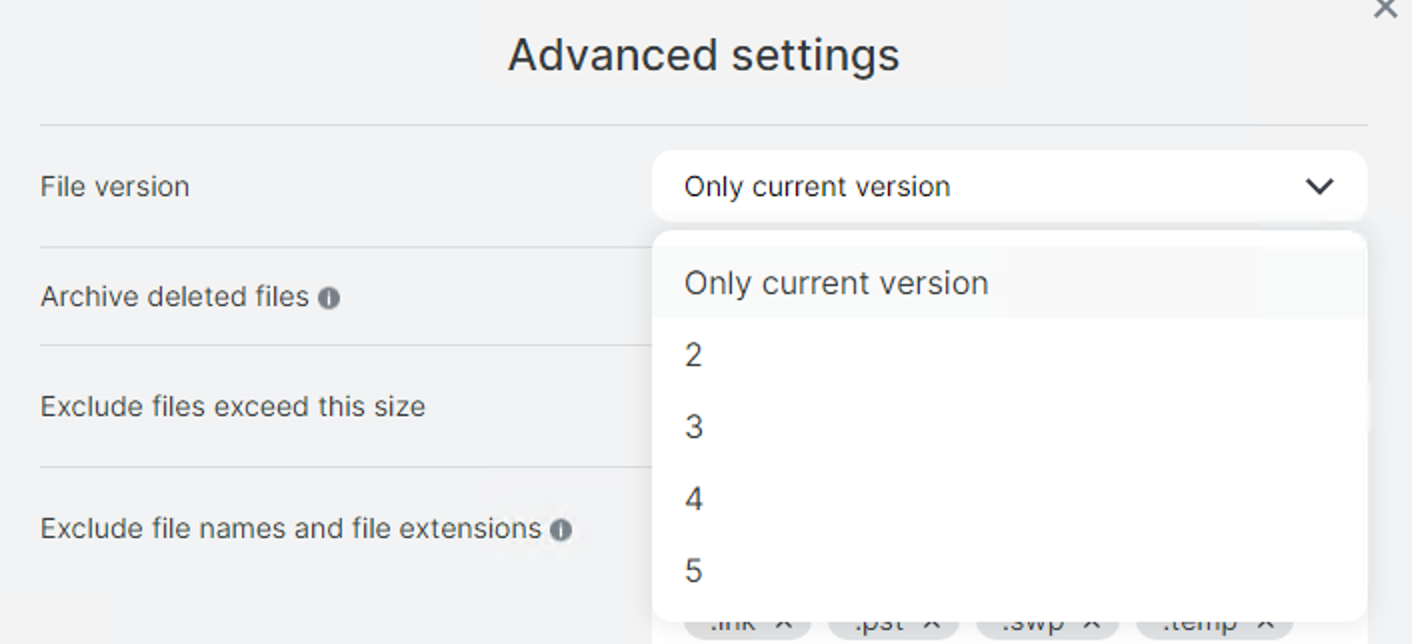
The interesting bit of information on the subject of versions is that BeeDrive will handle the version for both the backup and file sync tasks. The maximum number of versions will always be five, regardless of how many versions we have selected for the backup or file sync task.
Also, the backup job will be active all the time. This means that, unlike a conventional scheduled backup job, a computer backup task is sort of a one-way sync task. There is no start button, to begin with, so if the BeeDrive is plugged in all the time, any changes will reflect as they happen. One example is adding a new file inside a backed-up folder on our PC. The BeeDrive will detect the change and update accordingly.
Versions of the existing files can be seen using the Windows menu that can be called up with the right mouse button for a specific file.
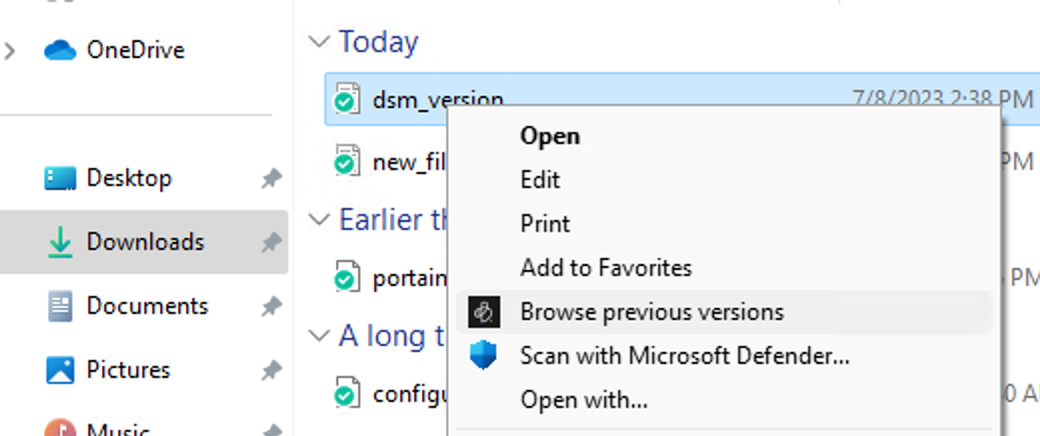
Getting to a previous version will not be possible before it is restored. So reviewing changes in real-time is not possible, but having the option to download and restore one is good enough for this platform. This might be a bit of an issue regarding space with larger files, as no apparent information of any deduplication usage is present.
Finally, restoring deleted files is also an option with BeeDrive. With Archive deleted files set to on, we have the option to browse backed-up files that are deleted on the source.
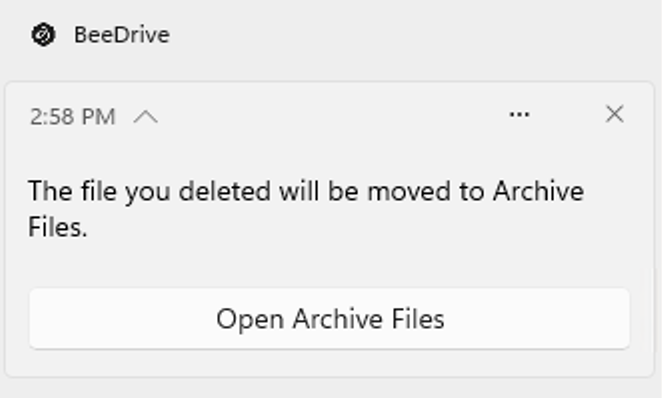
Using the computer backup section inside the BeeDrive UI, we can use the open archive files link that will open up Windows File Explorer and position us inside the root of the Deleted files folder on the BeeDrive device. From there, we can navigate to the file and restore it.
As we can see, the computer backup task has a lot of options and yet it doesn't look that overwhelming or complicated.
:: File Sync
The second functionality that BeeDrive offers is file sync. As the name suggests, it will allow for the syncing of data on a selected destination on a computer and the BeeDrive, and that will extend to any other computer it is connected to.
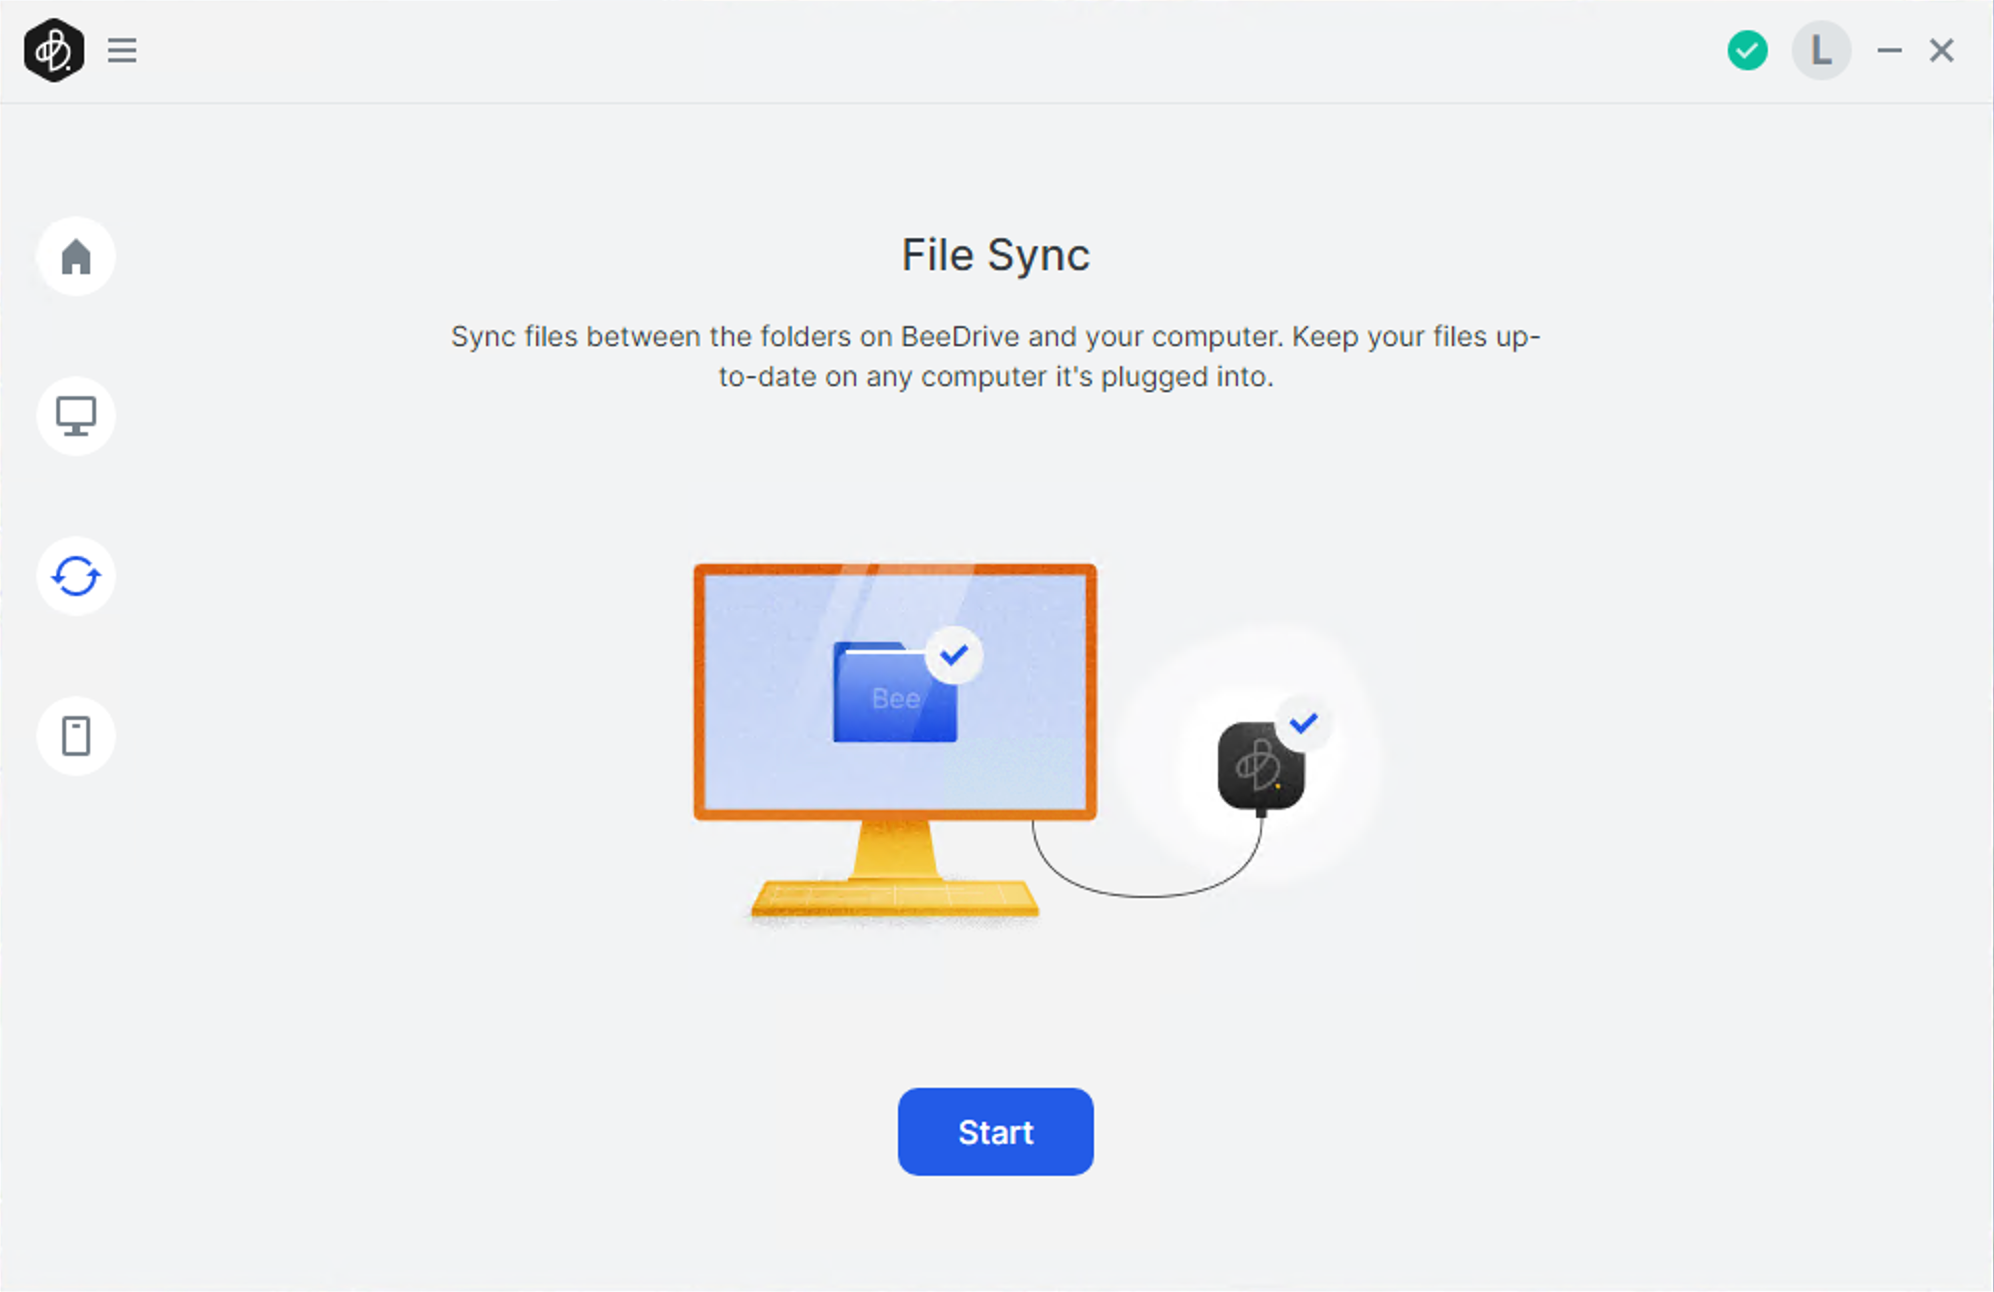
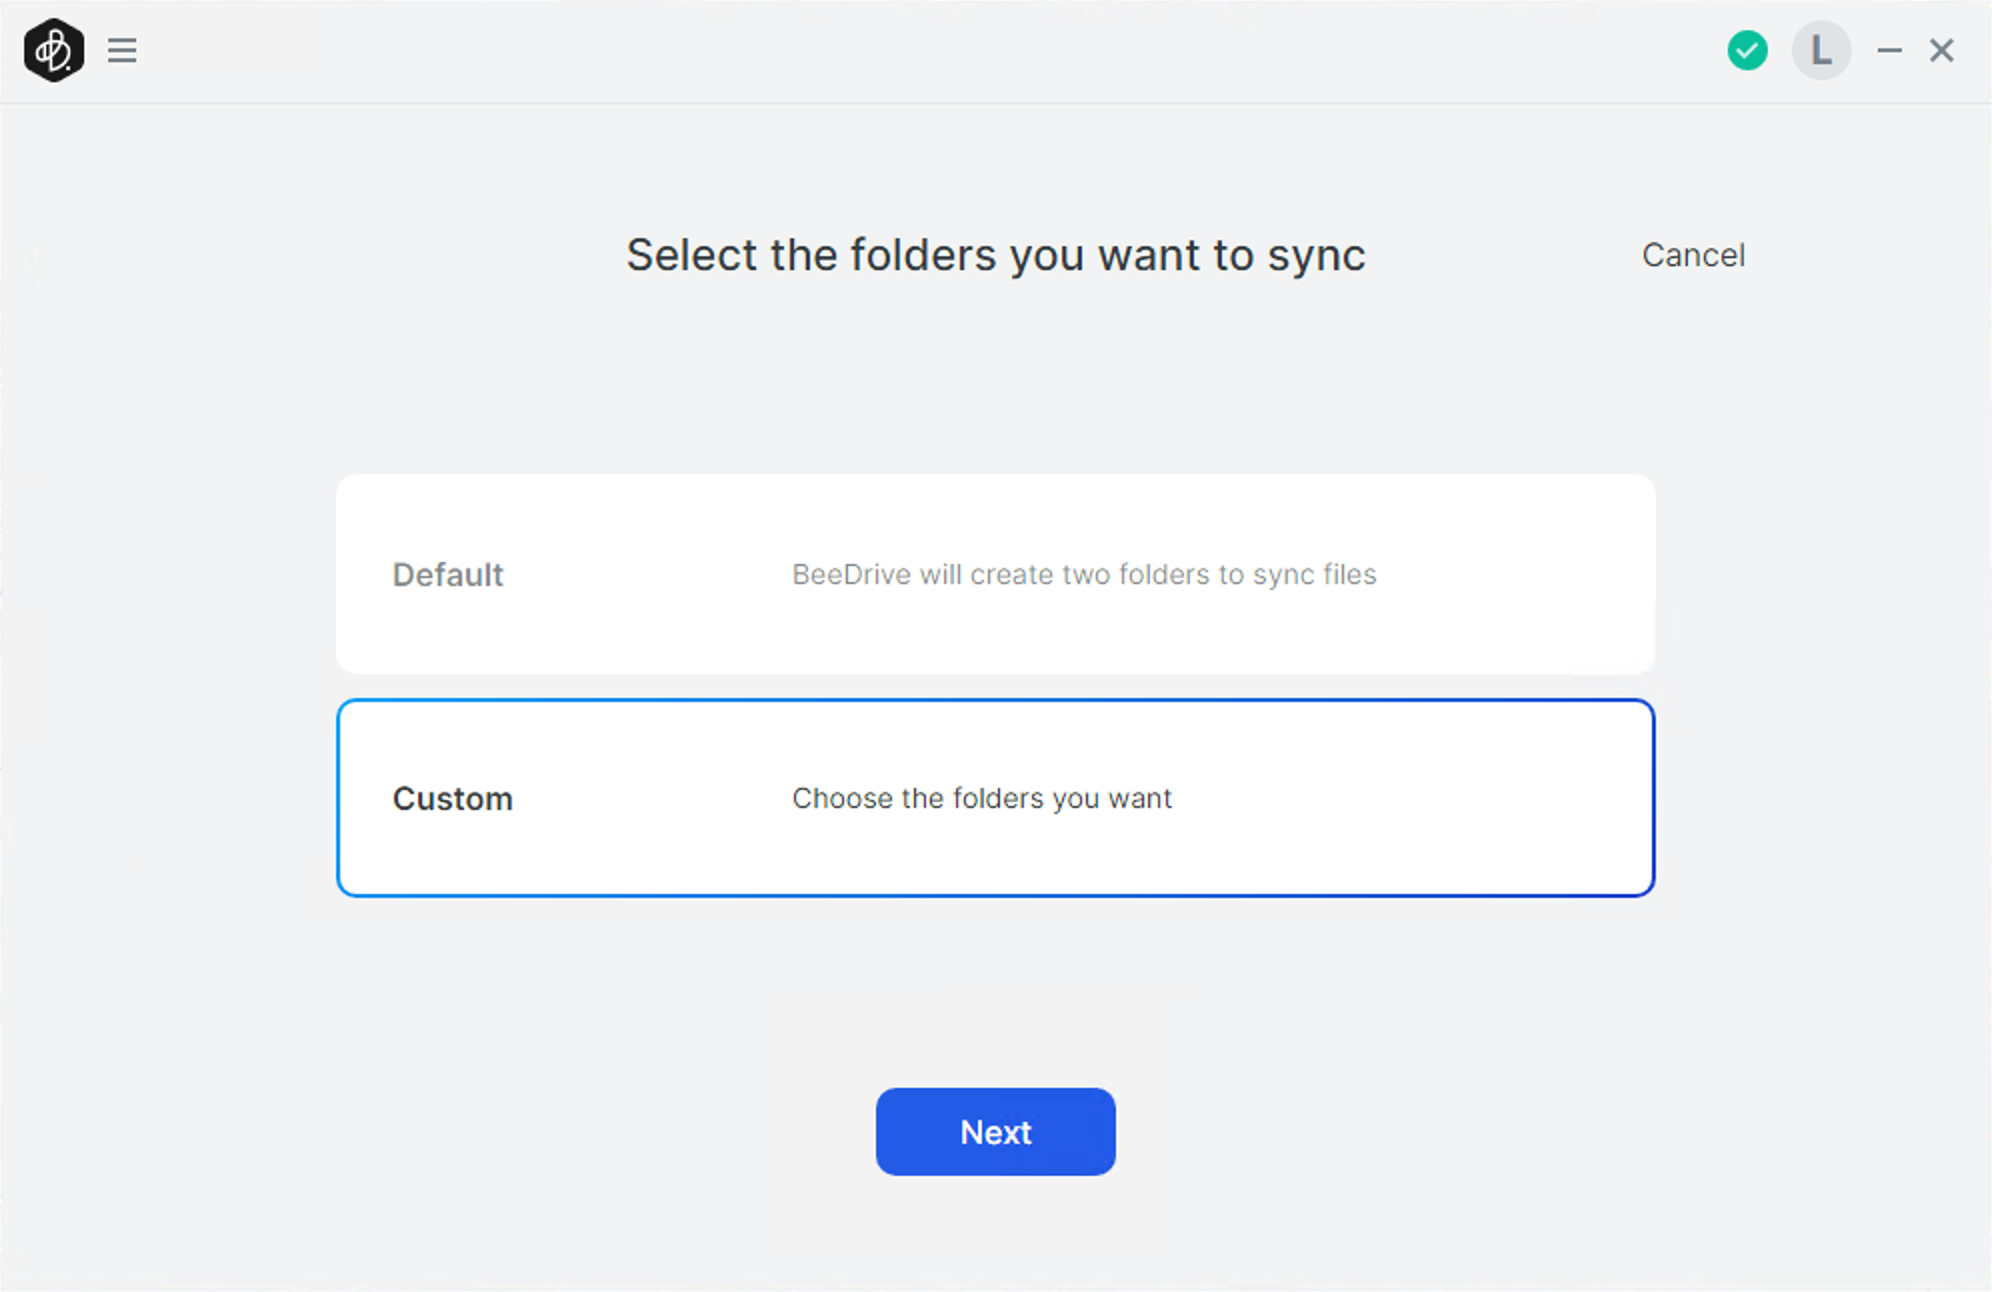
So unlike the computer backup task, the sync task will allow for a single host folder to be synced with the BeeDrive. The principle is identical to the likes of Dropbox, or Google Drive.
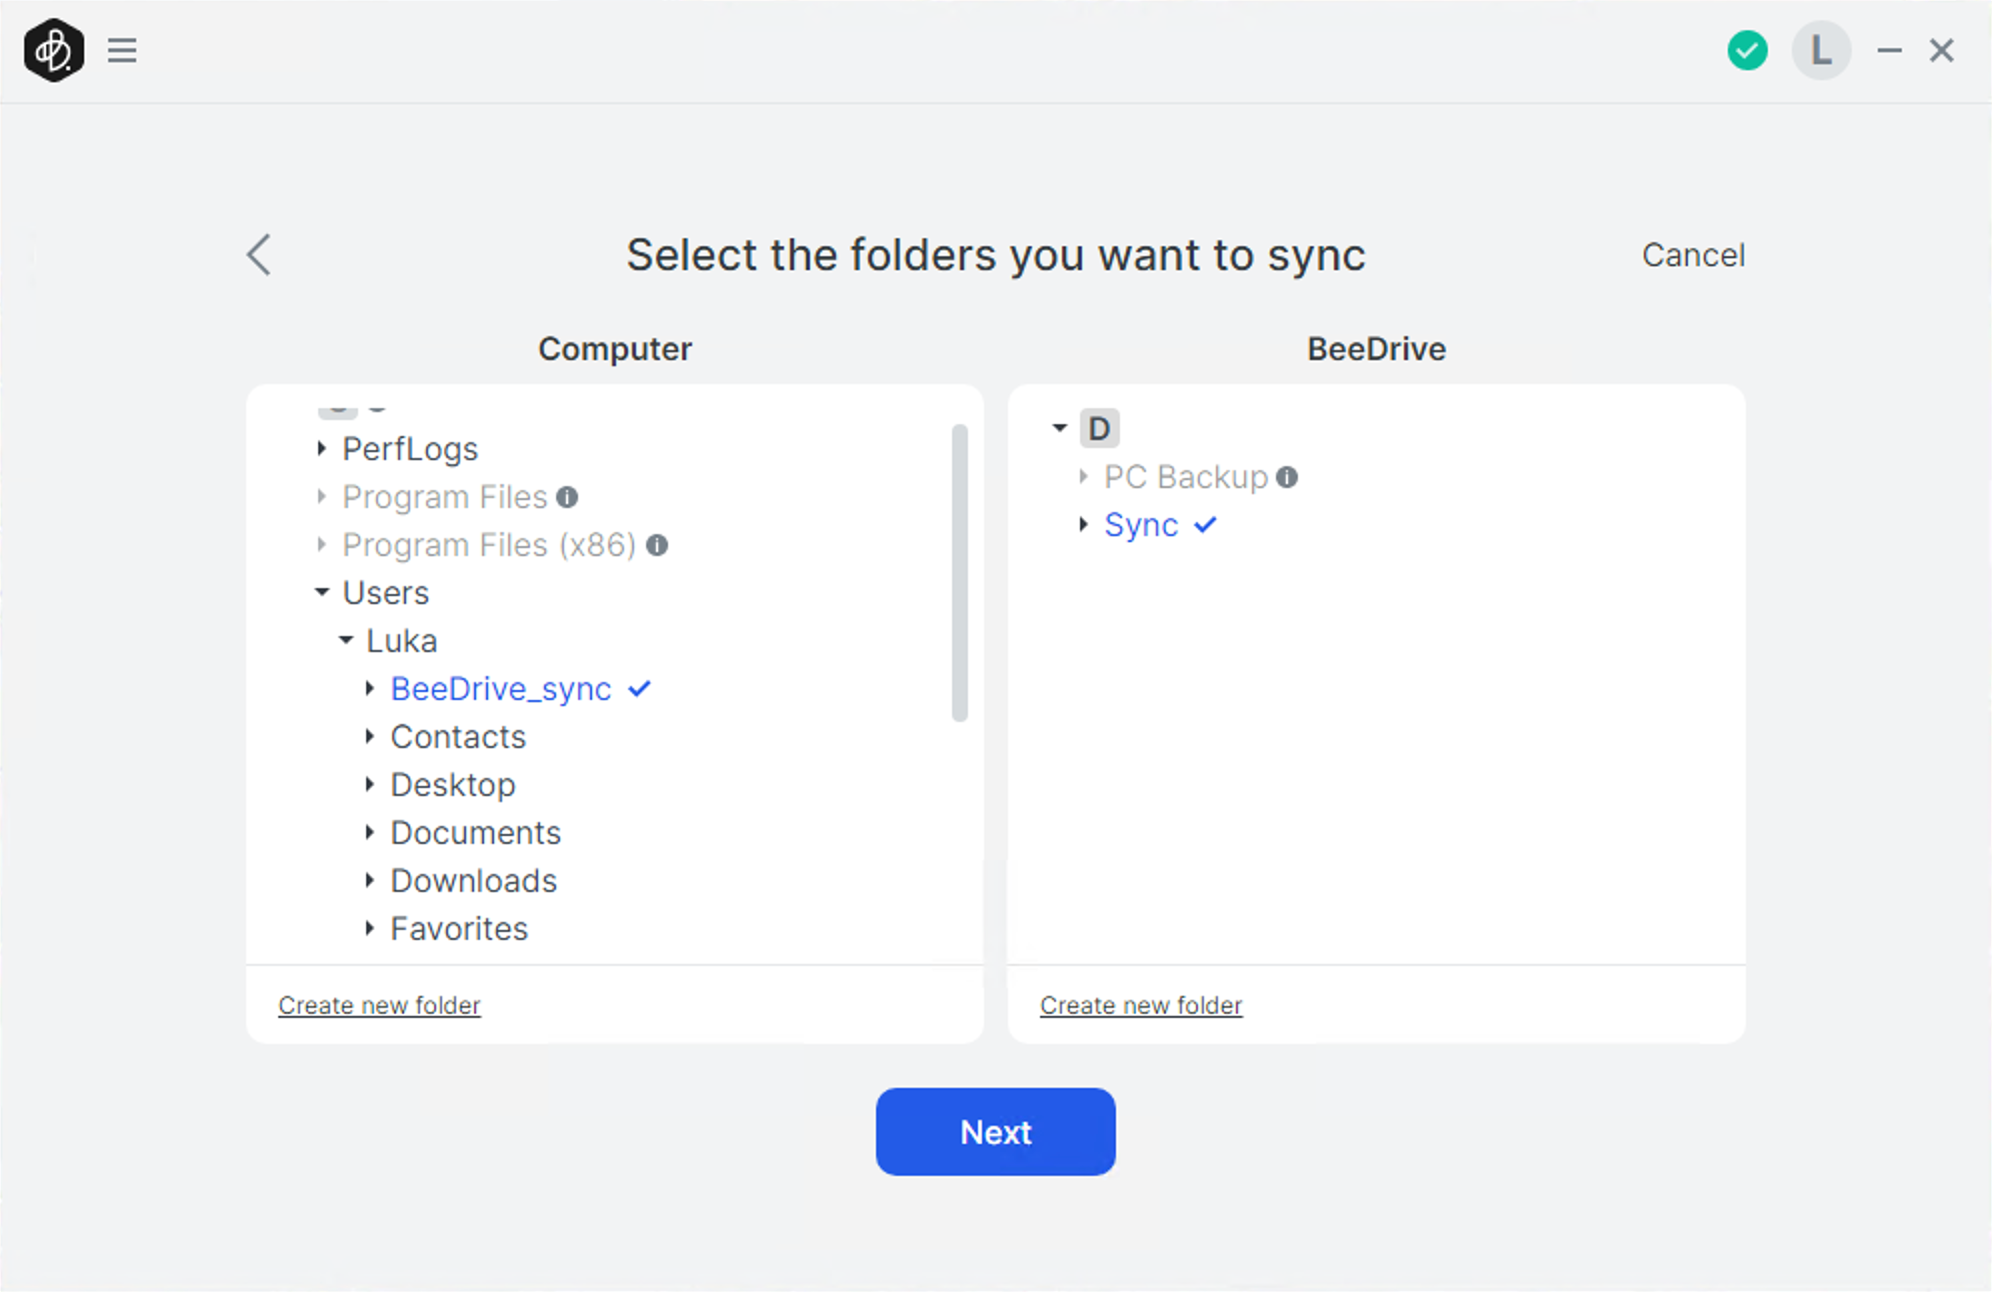
The advanced options will allow for versioning, and direction, as well as excluding files, based on the name, size, or extension.

The sync direction can be two-way or one-way, depending on the direction needed. Once the settings are in order, the sync task will start and show up in the main BeeDrive window.
Unlike the backup task, we can create up to 10 tasks, and on top of that, each task can have its own version and direction rules, as well as exclusions.
The main screen will after setup give the overview of the task that a particular BeeDrive has been configured with. So even with multiple tasks, the main view will show that file sync is active with not many details.
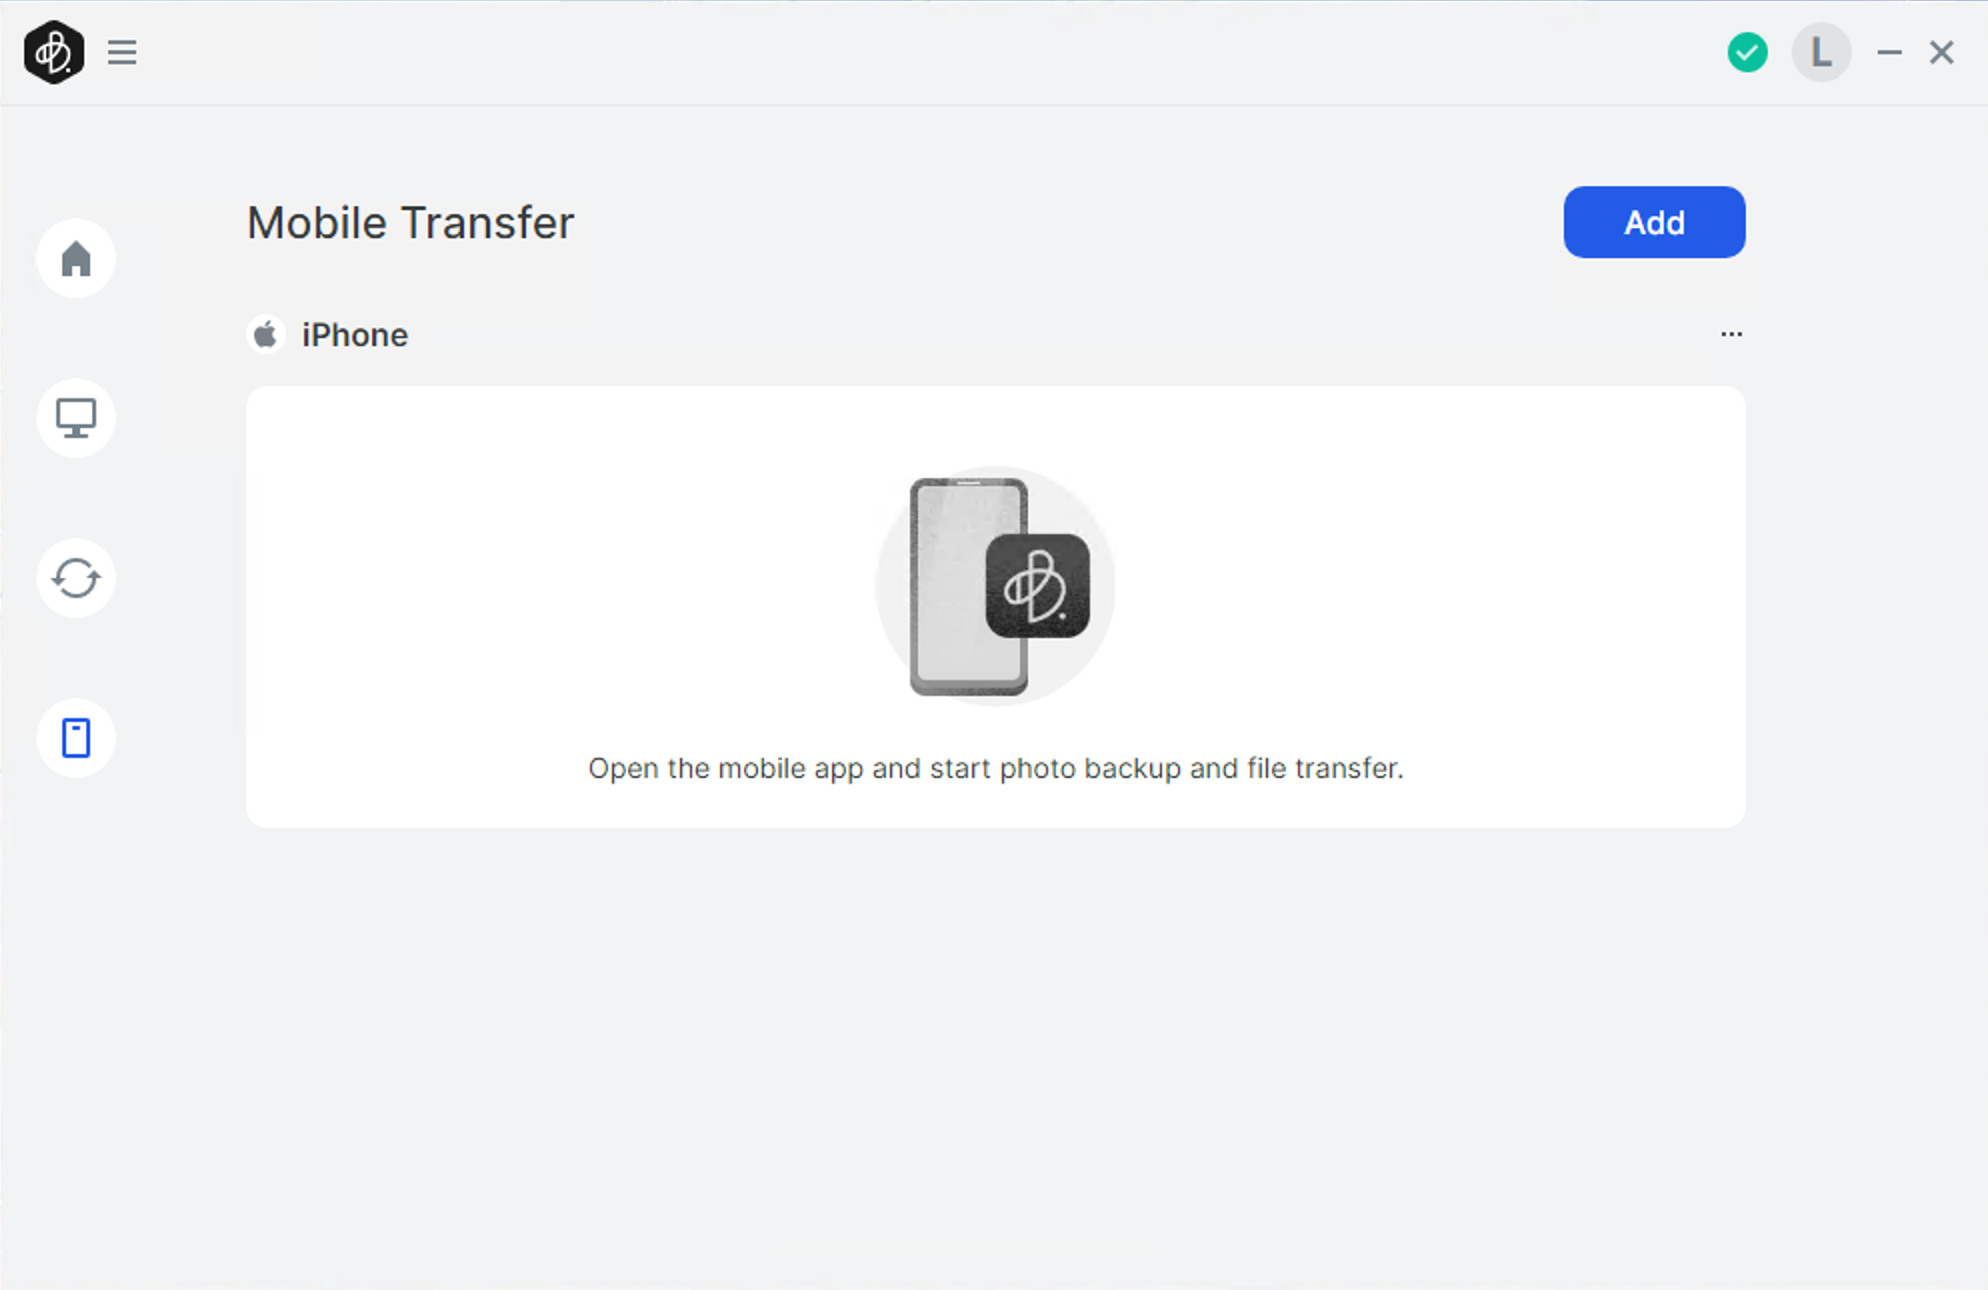
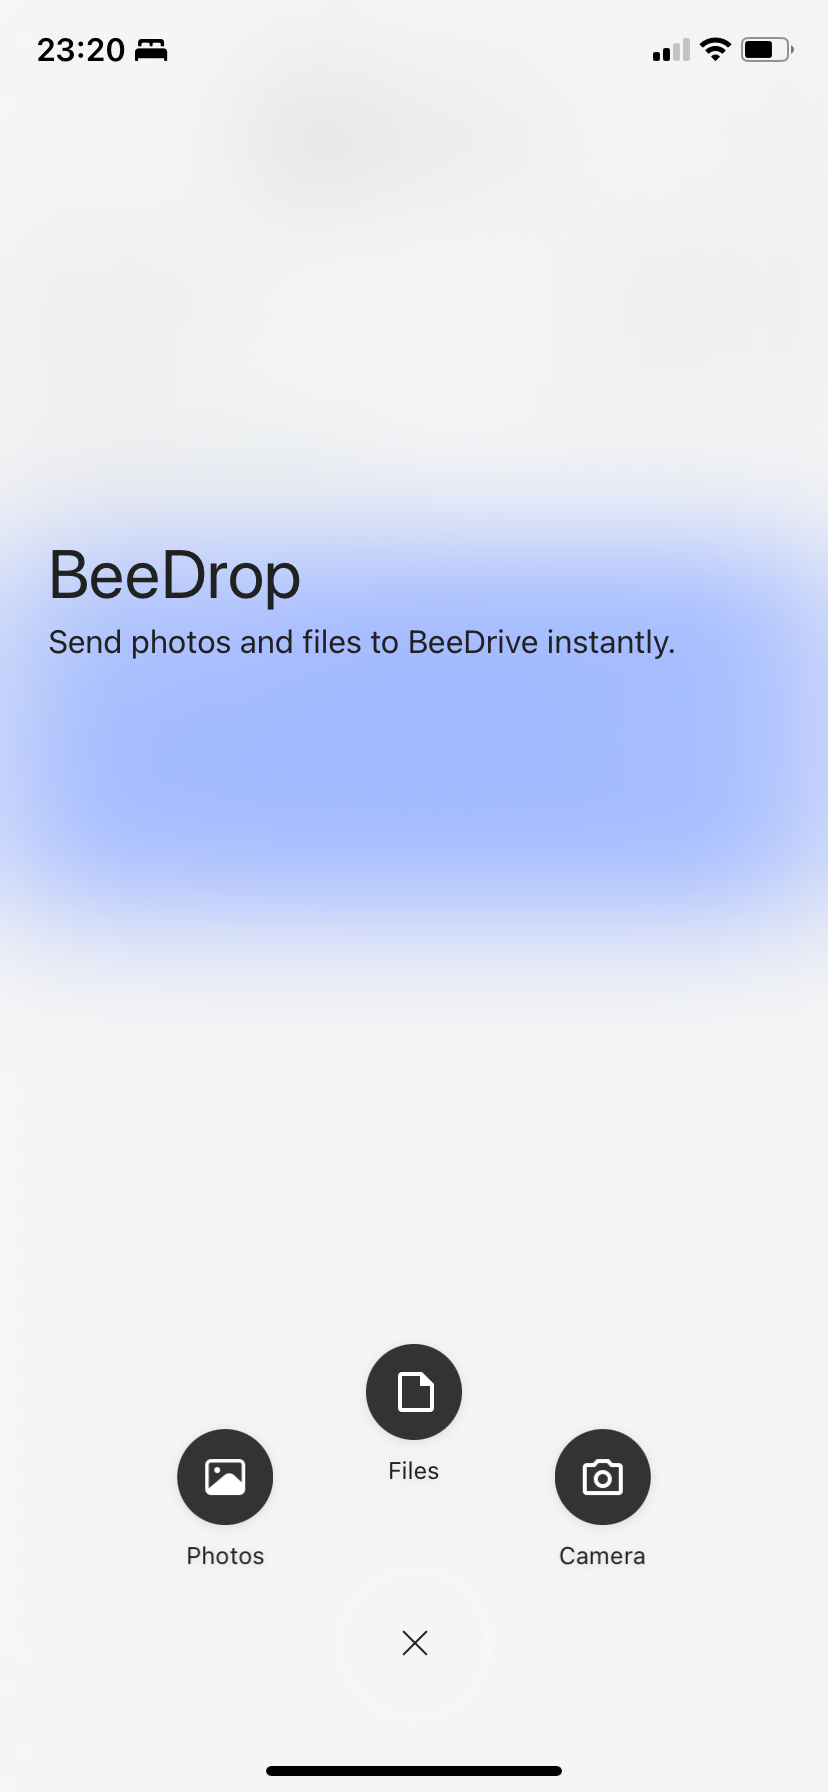
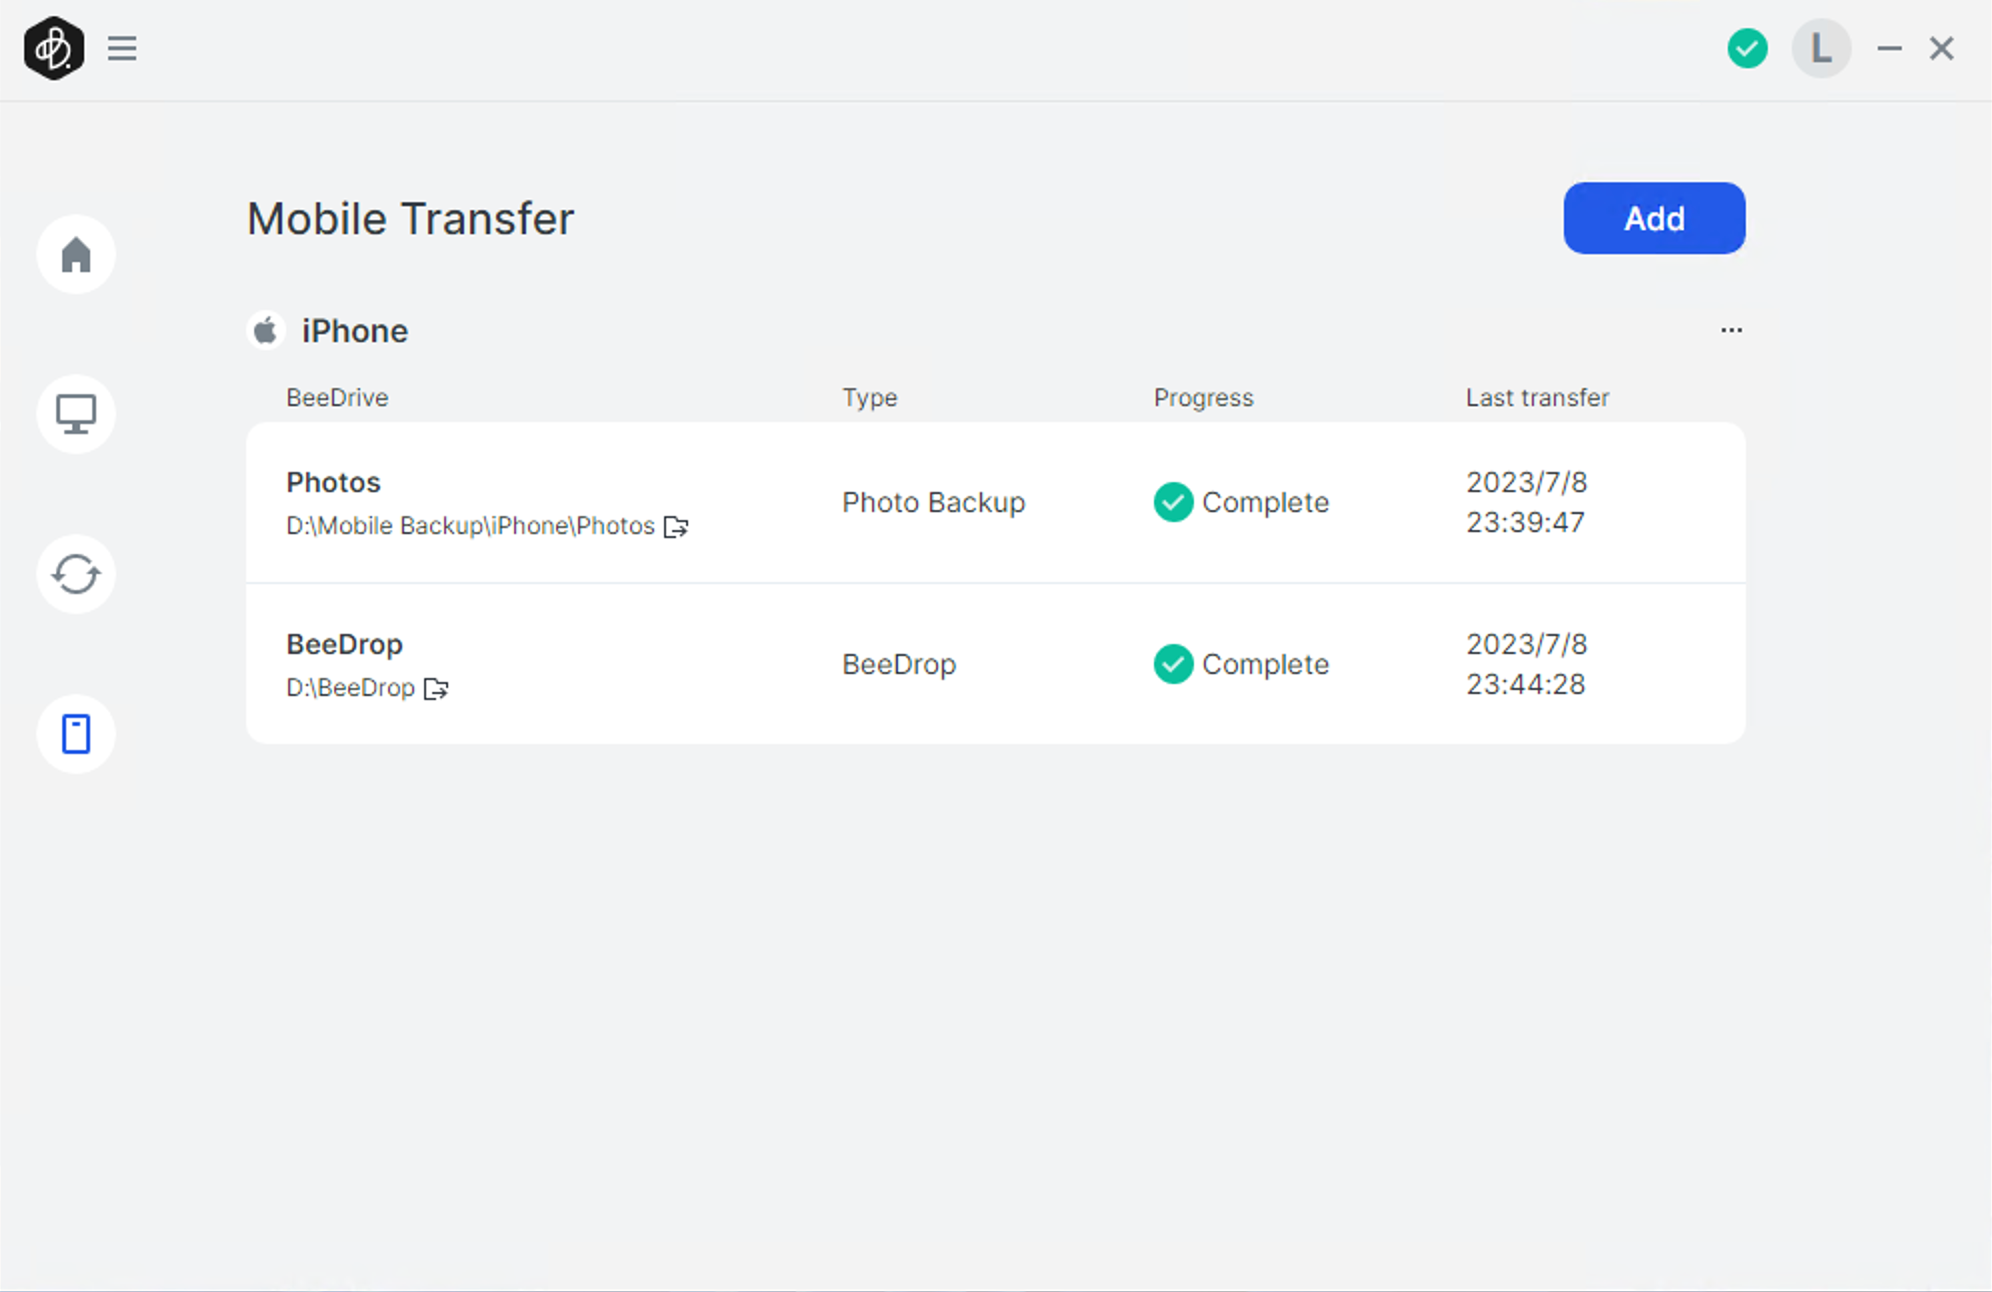
:: Mobile Transfer
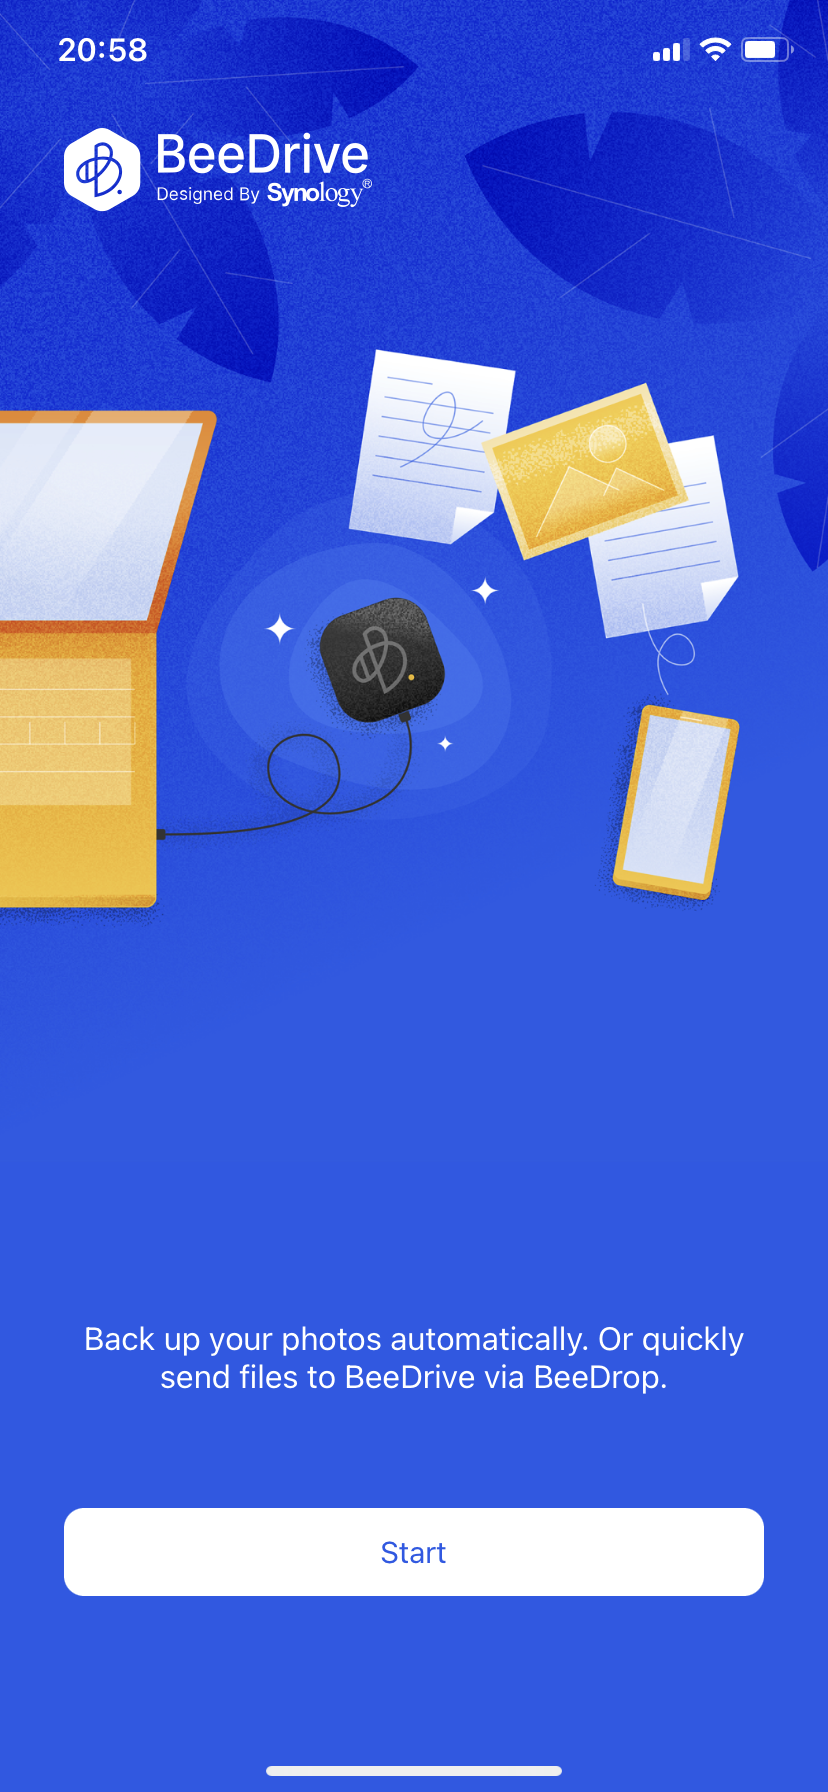
On final feature that the BeeDrive offers is mobile transfer. This will allow for photo backup or transfer of files to the BeeDrive using BeeDrop.
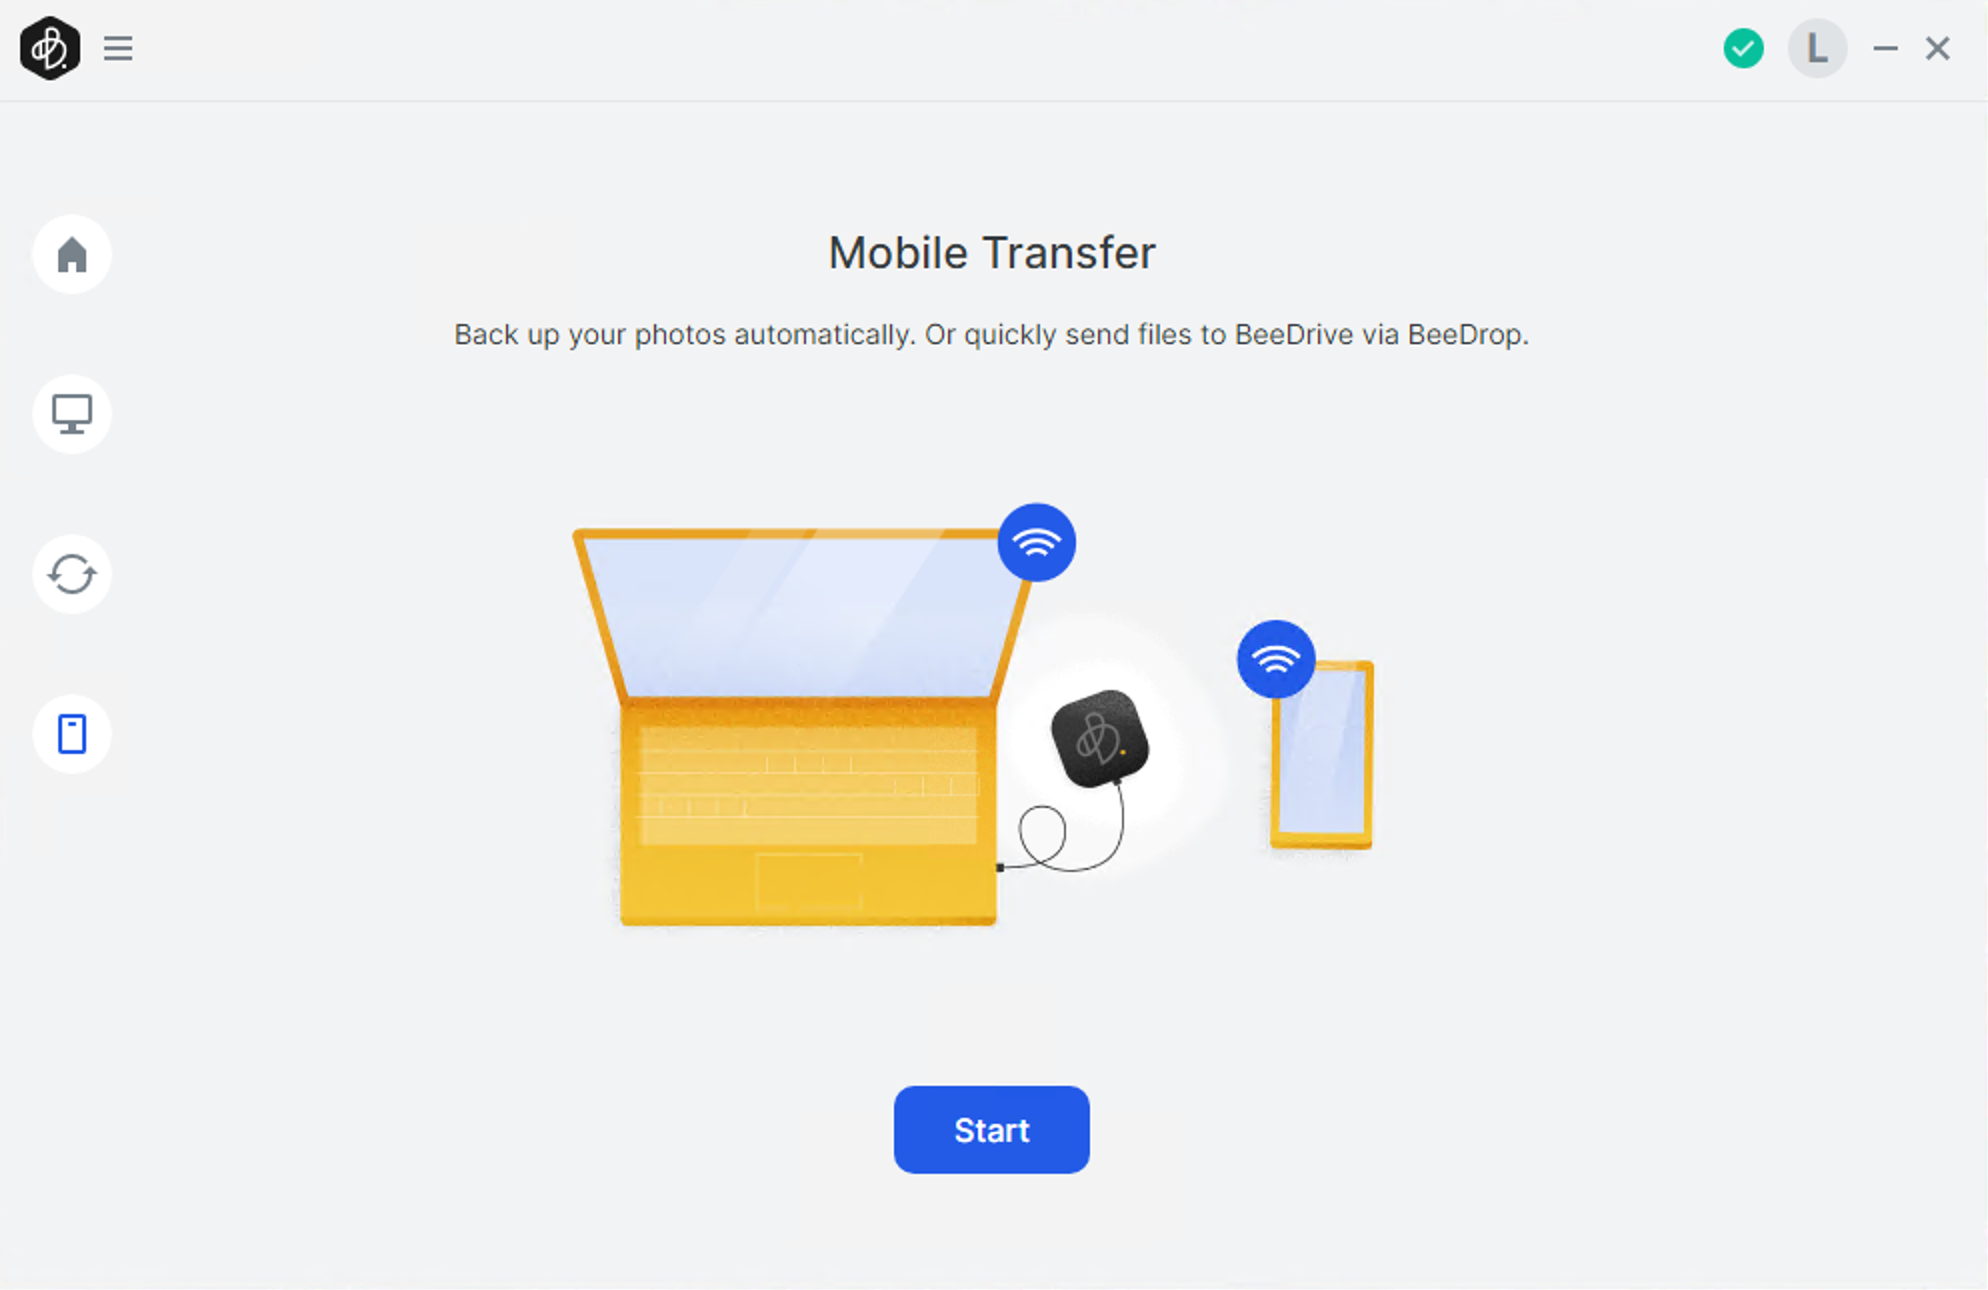
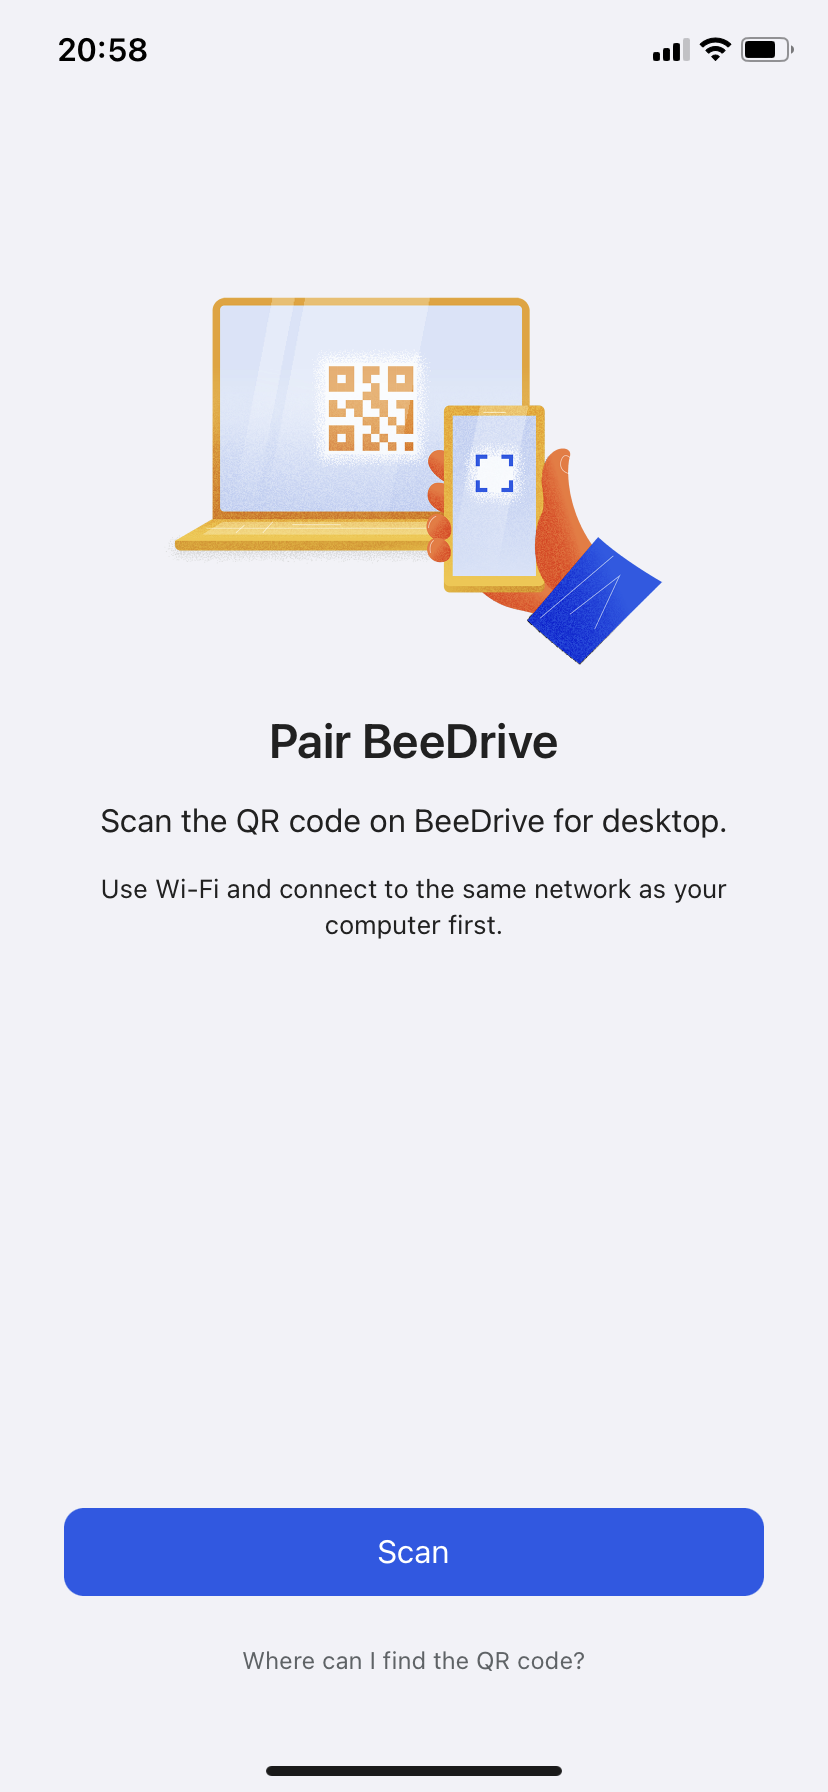
The whole process starts with downloading the app from the mobile store (AppStore or Google Play), and using the QR code to pair the mobile device with the BeeDrive.
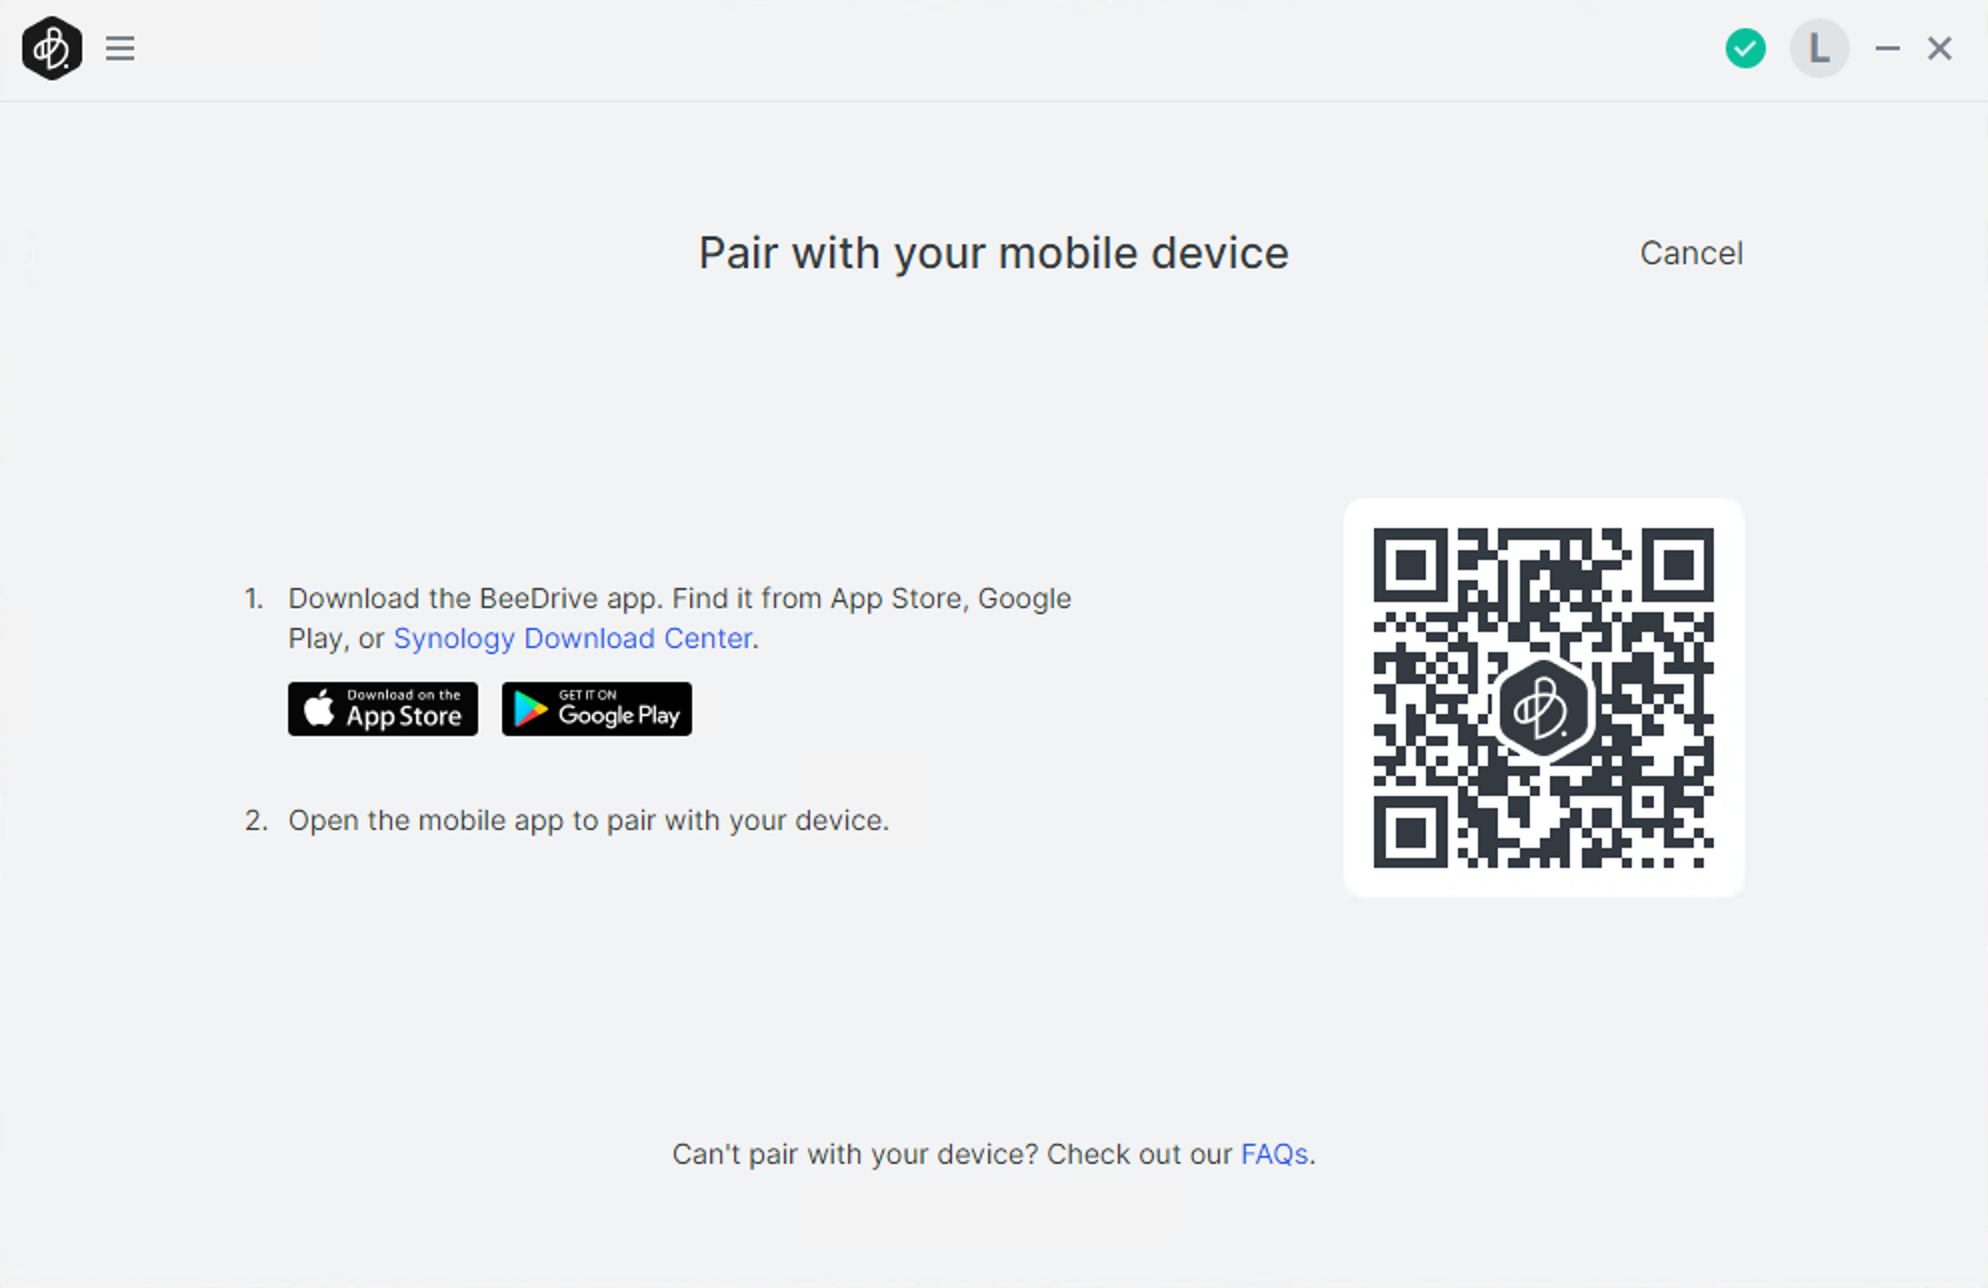
This way we can pair up to 5 mobile devices that can run concurrent backup transfers towards a single BeeDrive. Opening the mobile app will include a few initial steps to pair with the device after scanning the actual QR code.
As soon as the pairing is complete, we can start to back up mobile content to BeeDrive. This can be done in several ways. Backup task, or BeeDrop method. The difference is that the backup task will give the option to back up all images and videos from the mobile device or just new ones if we want to.
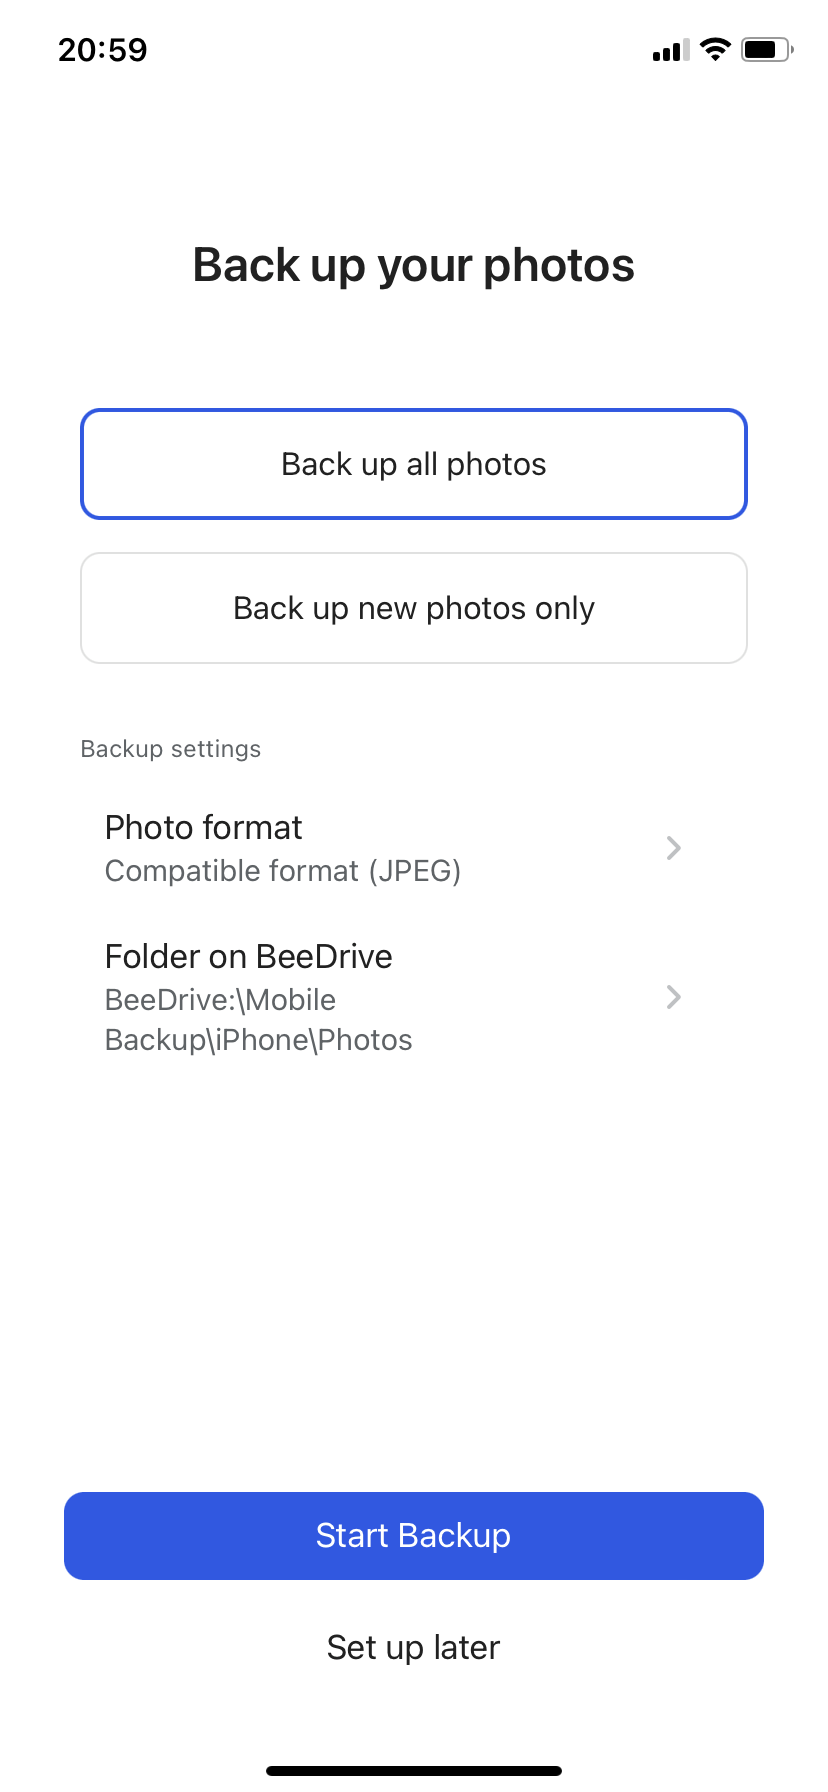
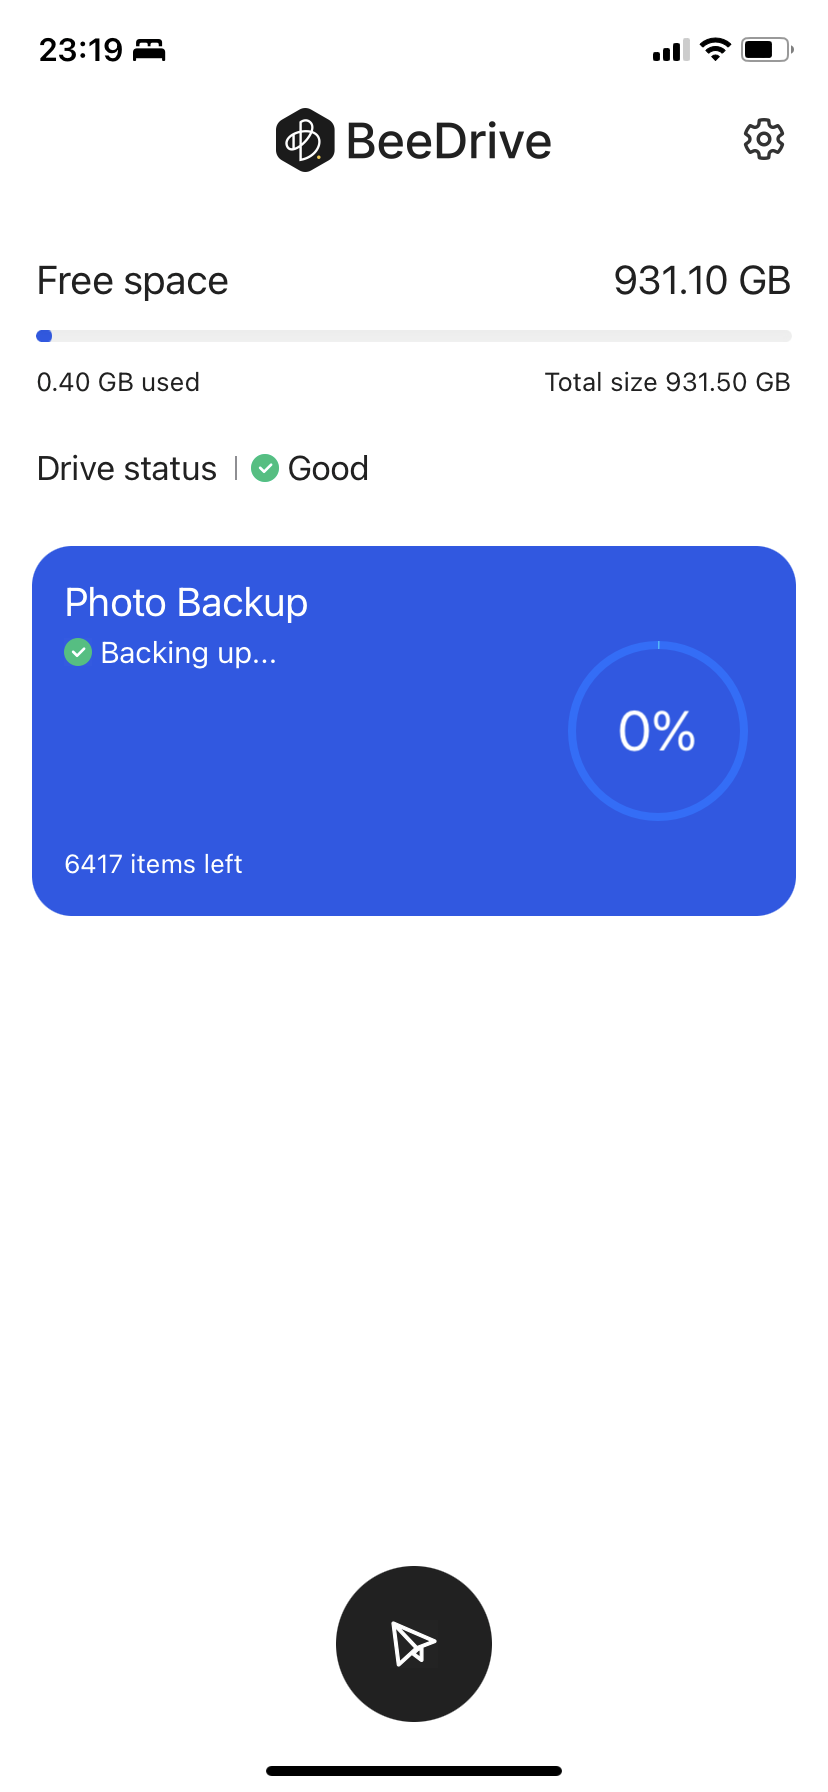
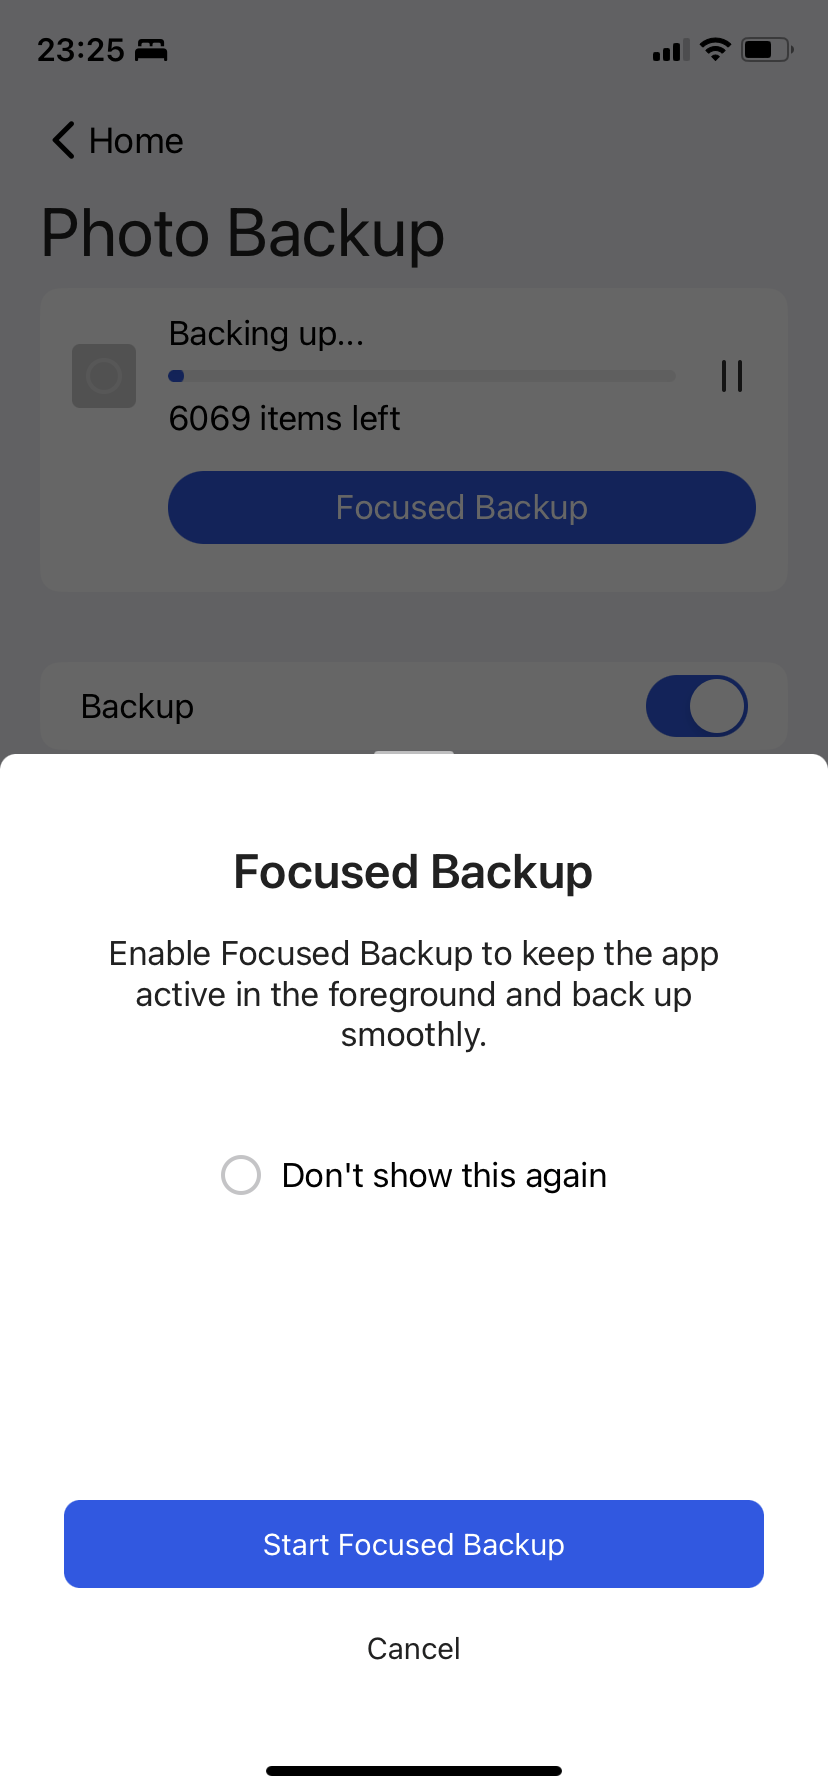
Content can be sent over in JPEG or original format depending on what the user wants. All settings can be changed on the fly, including pausing the task or stopping it altogether. Depending on the size of the content, the BeeDrive mobile app also supports focused backup. This function will keep the app active in the foreground to allow for a faster transfer without iOS pushing it in the background while some other app is being used. This might come in handy while performing the initial backup that has a lot of objects to copy over.
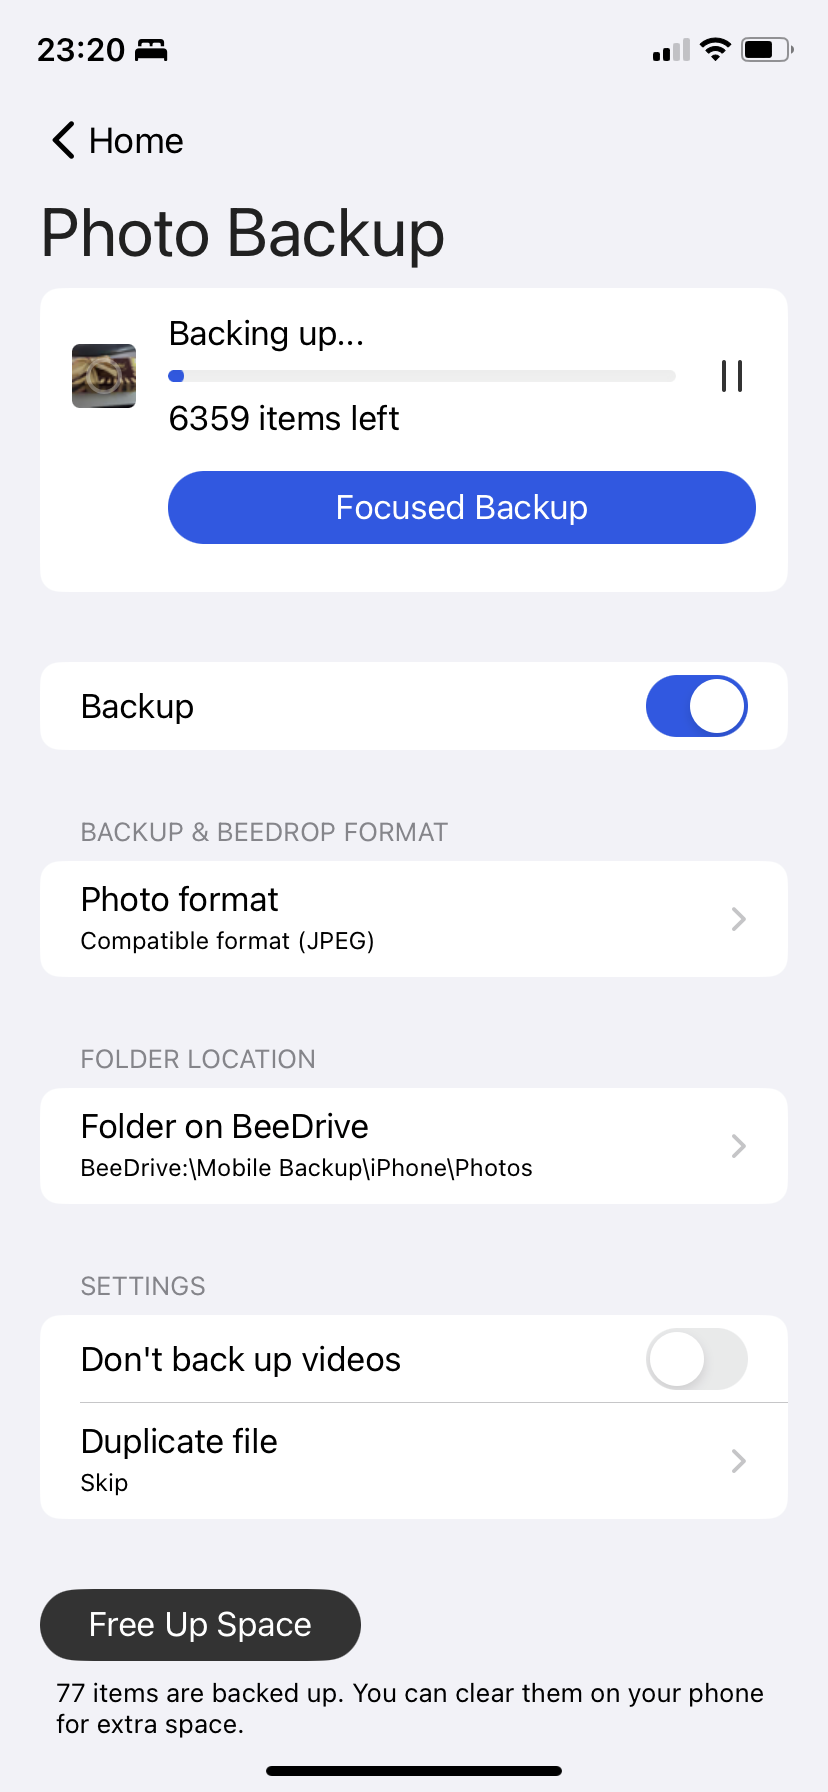
The backup task will also offer free up space function to delete the content from the mobile device for all the files that were already copied over.
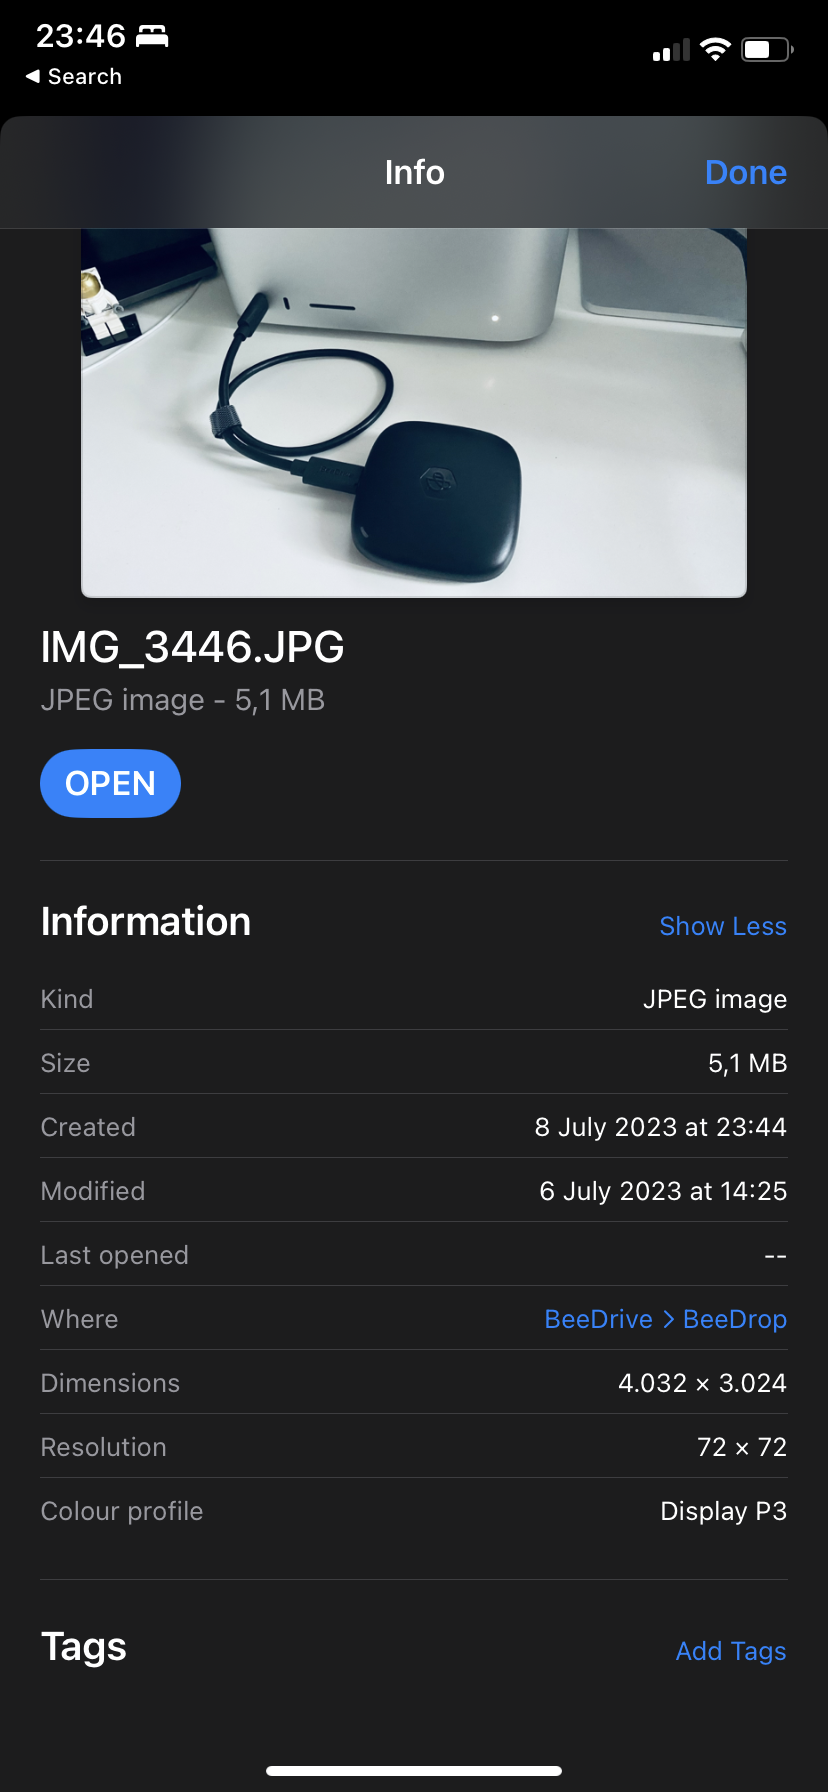
The BeeDrop will allow us to select manual content to backup be it multiple images, a fresh image that we are about to take with the camera, or a 3rd party file, like a PDF.
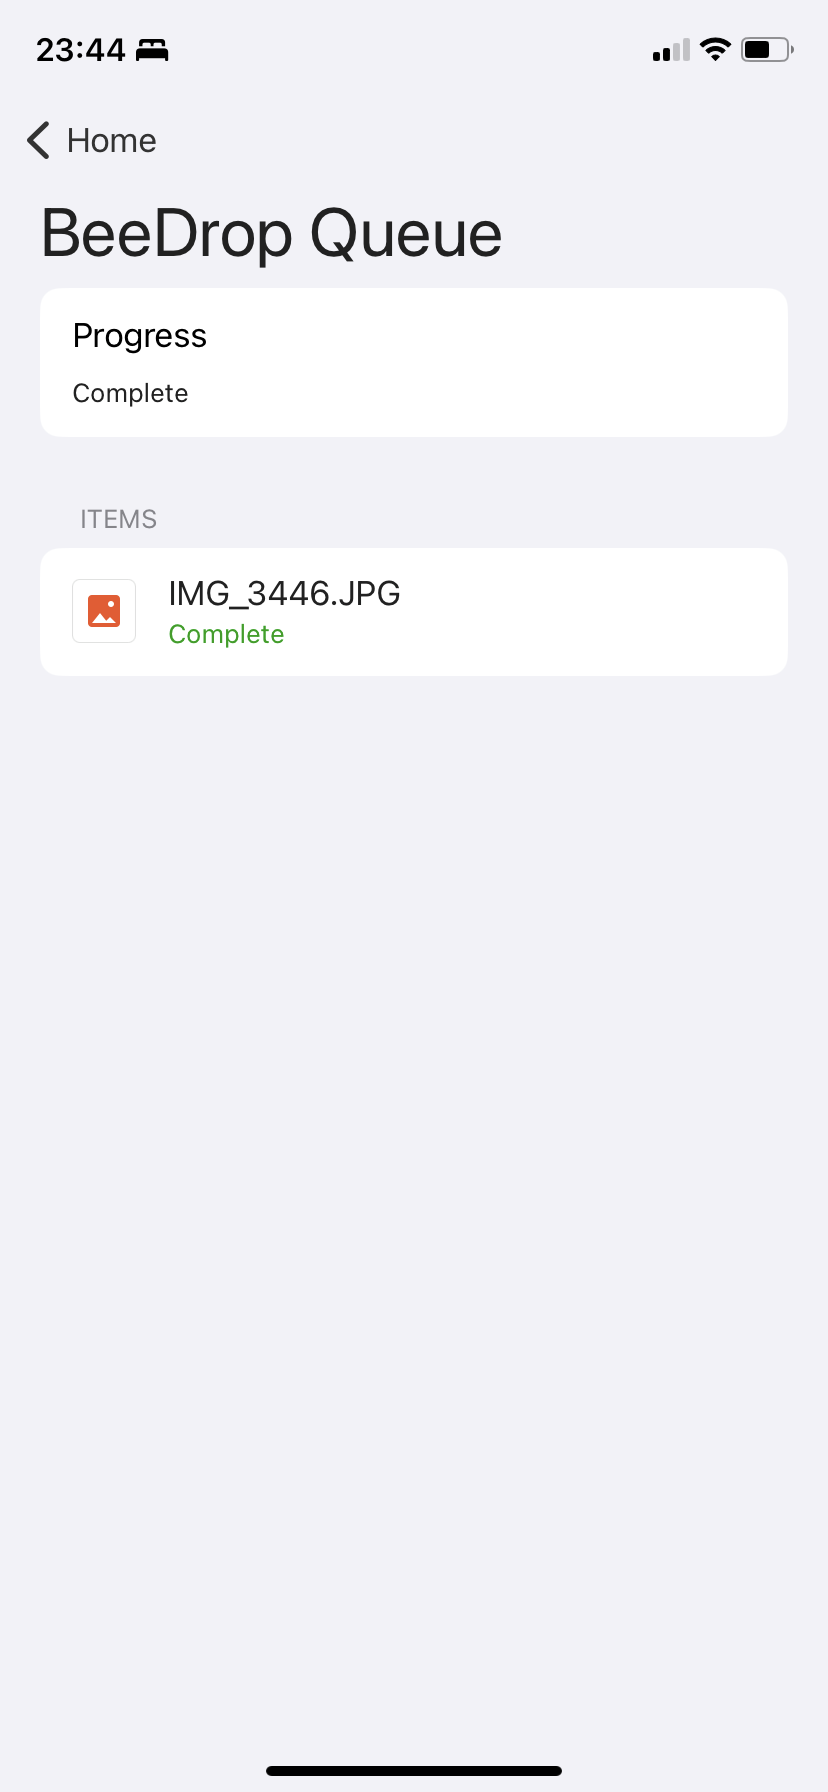
This process works really well and the files are again transferred to the BeeDrive in a typical file/folder format, so the data is immediately accessible on any compatible computer that we hook the BeeDrive to.
One more thing of note is that the files being transferred to the BeeDrive will retain their properties, and creation date. So there is no fear that some old images will be tagged with the time stamp when they are copied over to the drive.
The BeeDrive app will again have essential details on all mobile transfers happening as well as log all of it in its history section.
: The BeeDrive software (macOS)
The support for macOS arrived on Dec 19th, 2023 with some challenges due to changes in macOS version 14.2. More details on this are inside a separate article below.
: Conclusion and final thoughts
I have to say that when I first heard of this device coming out I said to myself, "Why?". Well, now that I have had some time with the unit I can say that it definitely has an audience, and Synology has made a functional, practical, and easy-to-use product.
The BeeDrive is more than just another USB DAS device. Sure, it can be used that way, but for someone looking for a portable backup device that can instantly change to a fast 10G storage with a decent amount of space, they should consider the BeeDrive.
It will allow for 4K on-device editing, concurrent mobile device backup, multiple file sync tasks, and a single computer backup, all happening at the same time.
The lightweight device is powered by minimalistic, neat, and organized software that elevates this ordinary USB to some form of NAS. While it is not a NAS by definition, it will allow for several roles that are usually associated with network-attached storage units.

Just to put it in perspective, this whole testing that I have done was executed using a virtual Windows 11 machine. That machine had the BeeDrive presented via a hypervisor connected to the network over ethernet, with no wifi. What that means is that all the backups, syncs, and mobile transfers in particular were executed using a network that both the virtual machine and mobile devices (those were on wifi of course) were a part of. The BeeDrive was not connected to any particular notebook, or PC to make it work.
So essentially, mobile transfers were in a way pushed to the BeeDrive presented on the network using a virtual machine similar in a way as Synology Photos works on a NAS via DSM.
Considering that I have only positive comments on this whole platform, there might be one issue with it that users will notice. Lack of native encryption. The fact is that no data is encrypted in any way at any point. The reason for this is that under Windows OS we can use BitLocker to setup and encrypt the drive and its data before using it. Now, selective encryption might be better than everything or nothing, but still, keeping track of what is encrypted and what is not might get a bit overwhelming over time.
In order to apply BitLocker encryption on the BeeDrive be sure to follow the KB article on it, listed below.
That demonstrates how the BeeDrive can in some scenarios be used in more ways than an external USB. With a price tag of about €150 for a 1TB model, this device has much to offer, and it will serve both casual users and professionals. Synology will, depending on the success of this device, expand and continue development, but if this debut has shown anything is that this was not a miss, not by a long shot.


