Synology SA3400 - Part 1 - installation and configuration

SA3400 series articles:
Intro - review and testing
Part 1 - Installation and configuration
Part 2 - Backup and restore
Part 3 - Virtualization
Part 4 - Multimedia
This is the first article in the SA3400 series that I was fortunate enough to get on a loan from Synology GmbH.
In the intro article "review and testing", I have mentioned some general information regarding the upcoming articles, but in this one, I will officially start.
Part 1 will cover the installation into a rack, connecting the drives and network, then I will focus on the DSM 7 installation, and RAID configuration. Also, I will reflect on the initial performance of the NAS itself in tasks like storage pool optimization, as well as how well Synology drives compare to Seagate ones.
Rack installation, drives, and network
SA3400 is a 2U 12-bay NAS designed to be installed inside a rack. As such, in my case, it has arrived with an additional Synology RKS1317 rail kit.

Rail and drive installation was standard as expected for rack devices. What is different is the look of the drive caddy itself, as well as the locking mechanism for added security.

Even though you are instructed that two people should maintain the installation process of the SA unit in a rack closet, IMHO, I don't think this is needed as long as you are installing it below 35U height (if you are running a full size 42U rack).
The NAS is just below 15KG or around 19KG with 8 installed drives. You will install the drives after the fact, of course, but just as information, one person should be able to place the NAS in a rack without any problems.
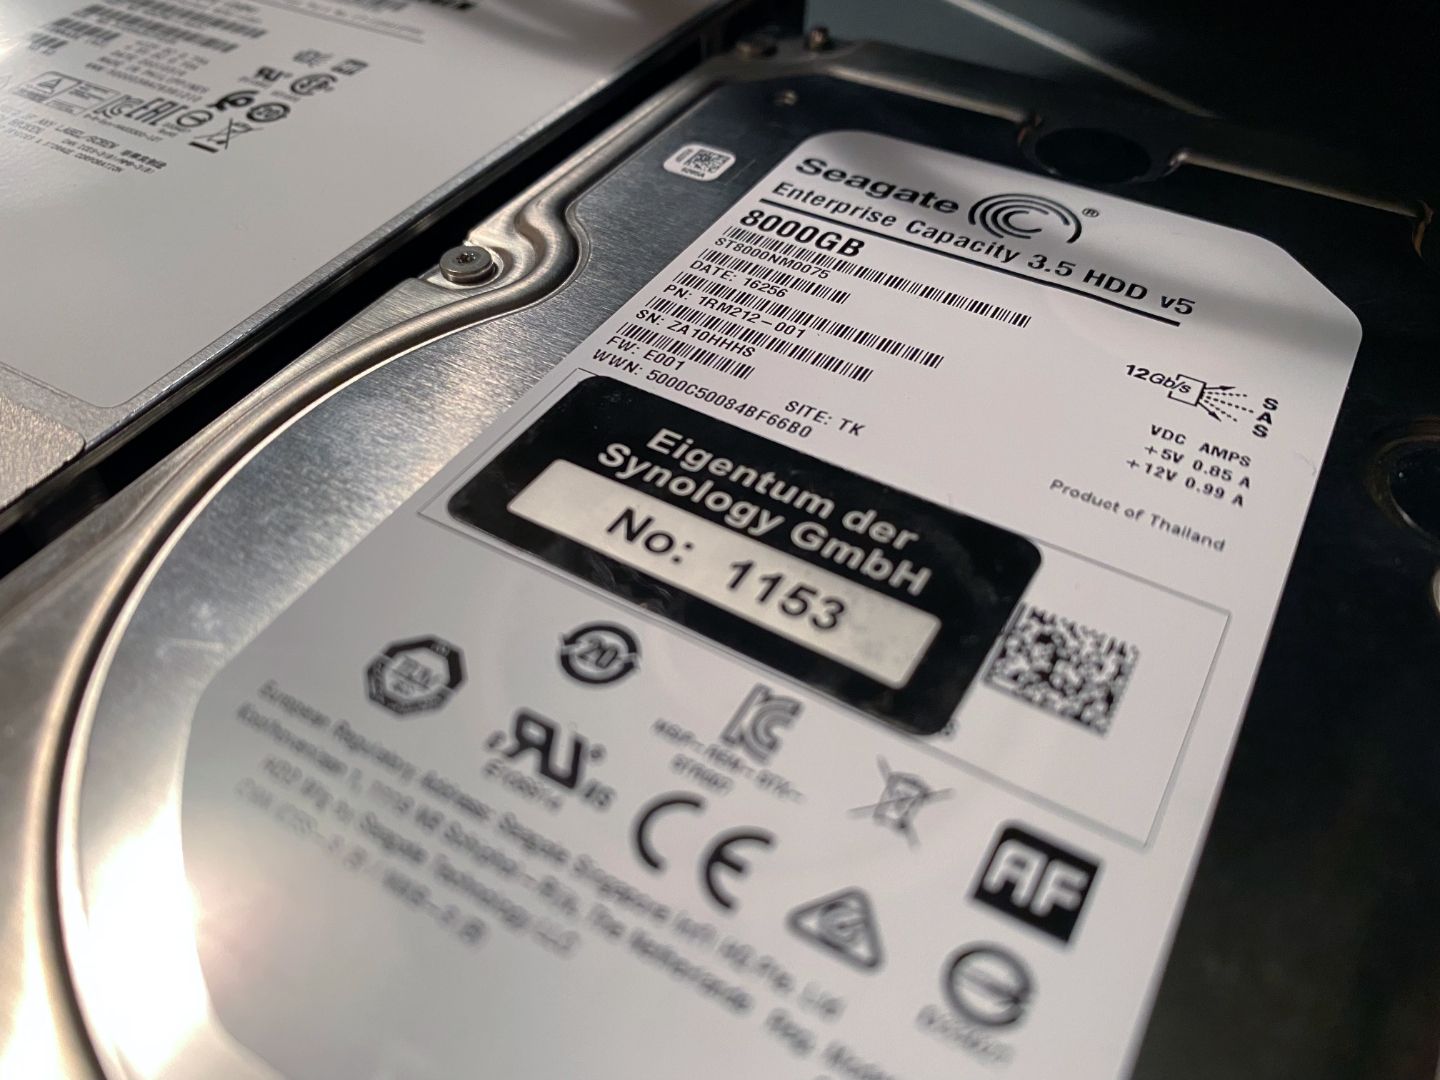
Drives that will be used in the upcoming tests as Synology HAS5300 12TB and Seagate Exos 7E8 8TB. Both models are on the official compatibility list for the SA3400 NAS.
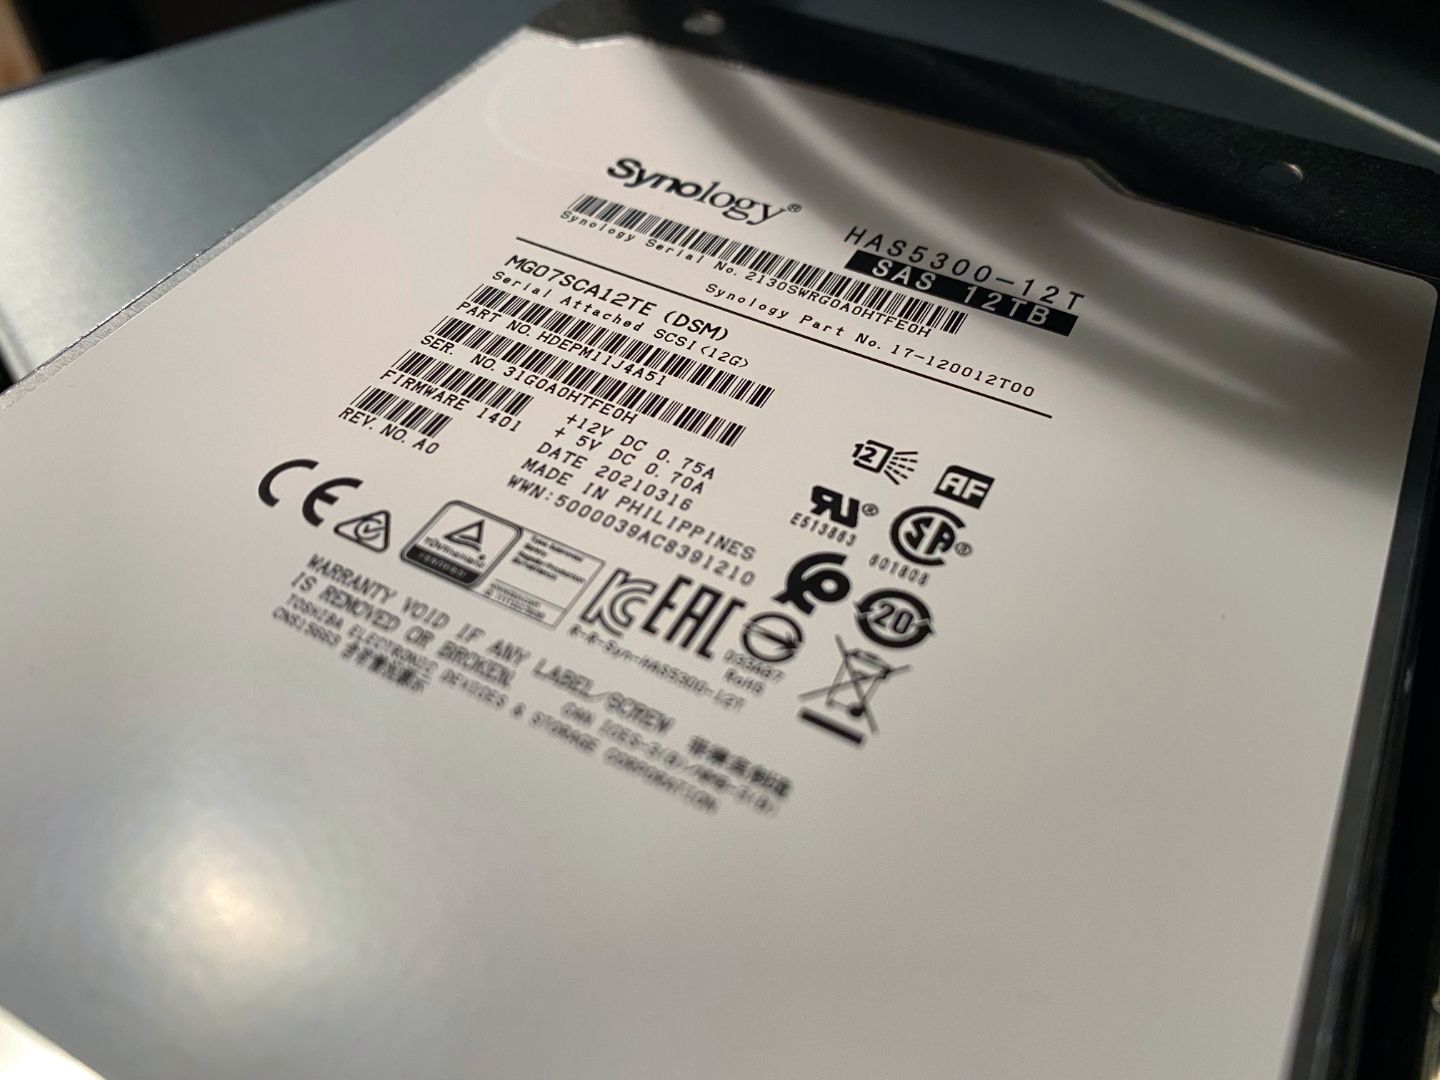
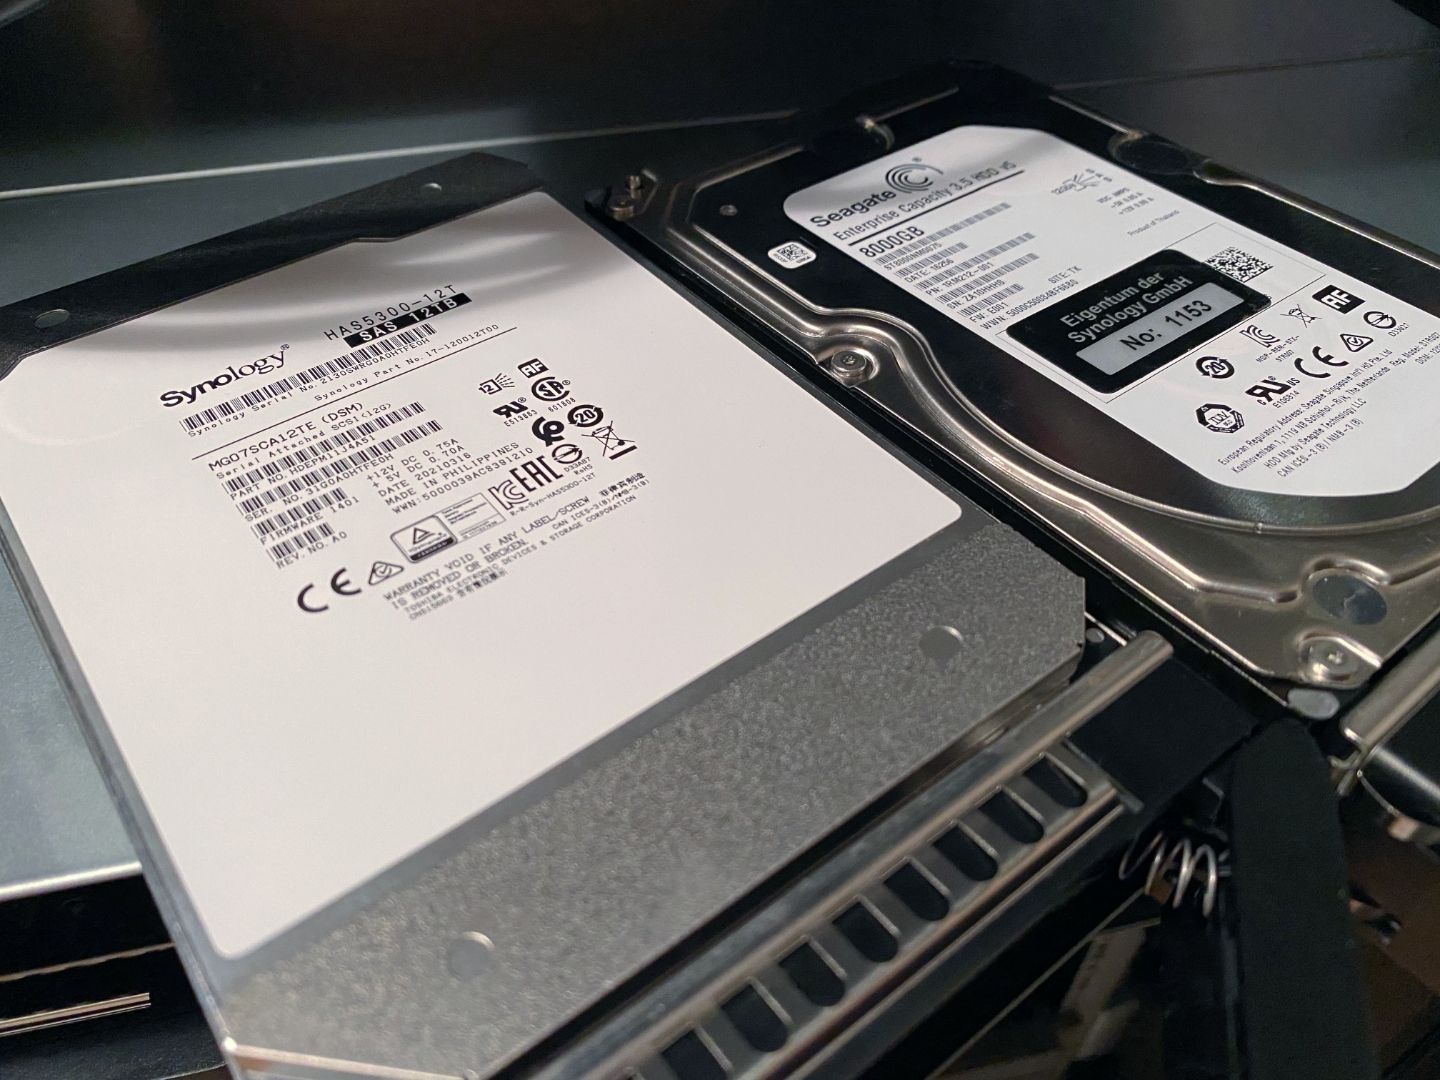
Here are some initial information on the drives themselves using the smartctl command.
Vendor:               Synology
Product:              HAS5300-12T
Revision:             1401
Compliance:           SPC-4
User Capacity:        12,000,138,625,024 bytes [12.0 TB]
Logical block size:   512 bytes
Physical block size:  4096 bytes
Rotation Rate:        7200 rpm
Form Factor:          3.5 inches
Logical Unit id:      0x5000039ac83931c9
Serial number:        2130SWRG0A0PGFE0H
Device type:          disk
Transport protocol:   SAS (SPL-3)
Local Time is:        Fri Nov 19 11:05:21 2021 CET
SMART support is:     Available - device has SMART capability.
SMART support is:     Enabled
Temperature Warning:  Disabled or Not Supported

=== START OF READ SMART DATA SECTION ===
SMART Health Status: OK

Current Drive Temperature:     27 C
Drive Trip Temperature:        65 C

Manufactured in week 11 of year 2021
Specified cycle count over device lifetime:  50000
Accumulated start-stop cycles:  1
Specified load-unload count over device lifetime:  600000
Accumulated load-unload cycles:  1
Elements in grown defect list: 0
Vendor:               SEAGATE
Product:              ST8000NM0075
Revision:             E001
Compliance:           SPC-4
User Capacity:        8,001,563,222,016 bytes [8.00 TB]
Logical block size:   512 bytes
Physical block size:  4096 bytes
LU is fully provisioned
Rotation Rate:        7200 rpm
Form Factor:          3.5 inches
Logical Unit id:      0x5000c50084c7edd3
Serial number:        ZA10J6LE0000J615NE6P
Device type:          disk
Transport protocol:   SAS (SPL-3)
Local Time is:        Fri Nov 19 11:07:40 2021 CET
SMART support is:     Available - device has SMART capability.
SMART support is:     Enabled
Temperature Warning:  Enabled

=== START OF READ SMART DATA SECTION ===
SMART Health Status: OK
Current Drive Temperature:     0 C
Drive Trip Temperature:        0 C

Elements in grown defect list: 0
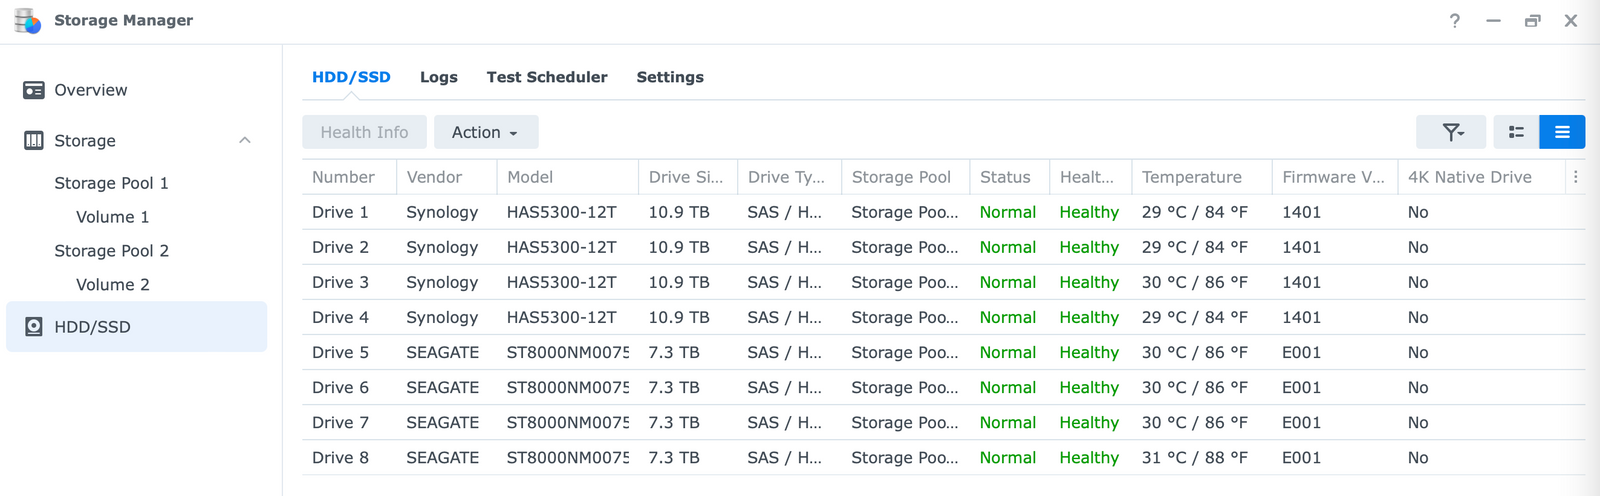
It was expected that the Synology drives will have more information, and although the temperature is not visible on the Seagate output, by looking over in the DSM 7 Storage Manager, you can clearly see them listed for all drives.
One important thing to point out with this model. Unless you have a dedicated space for this device, the noise will be a big problem for you.
The biggest noise generators are the PSU fans. Due to their small size, they tend to spin extremely fast that in return generates a lot of noise.
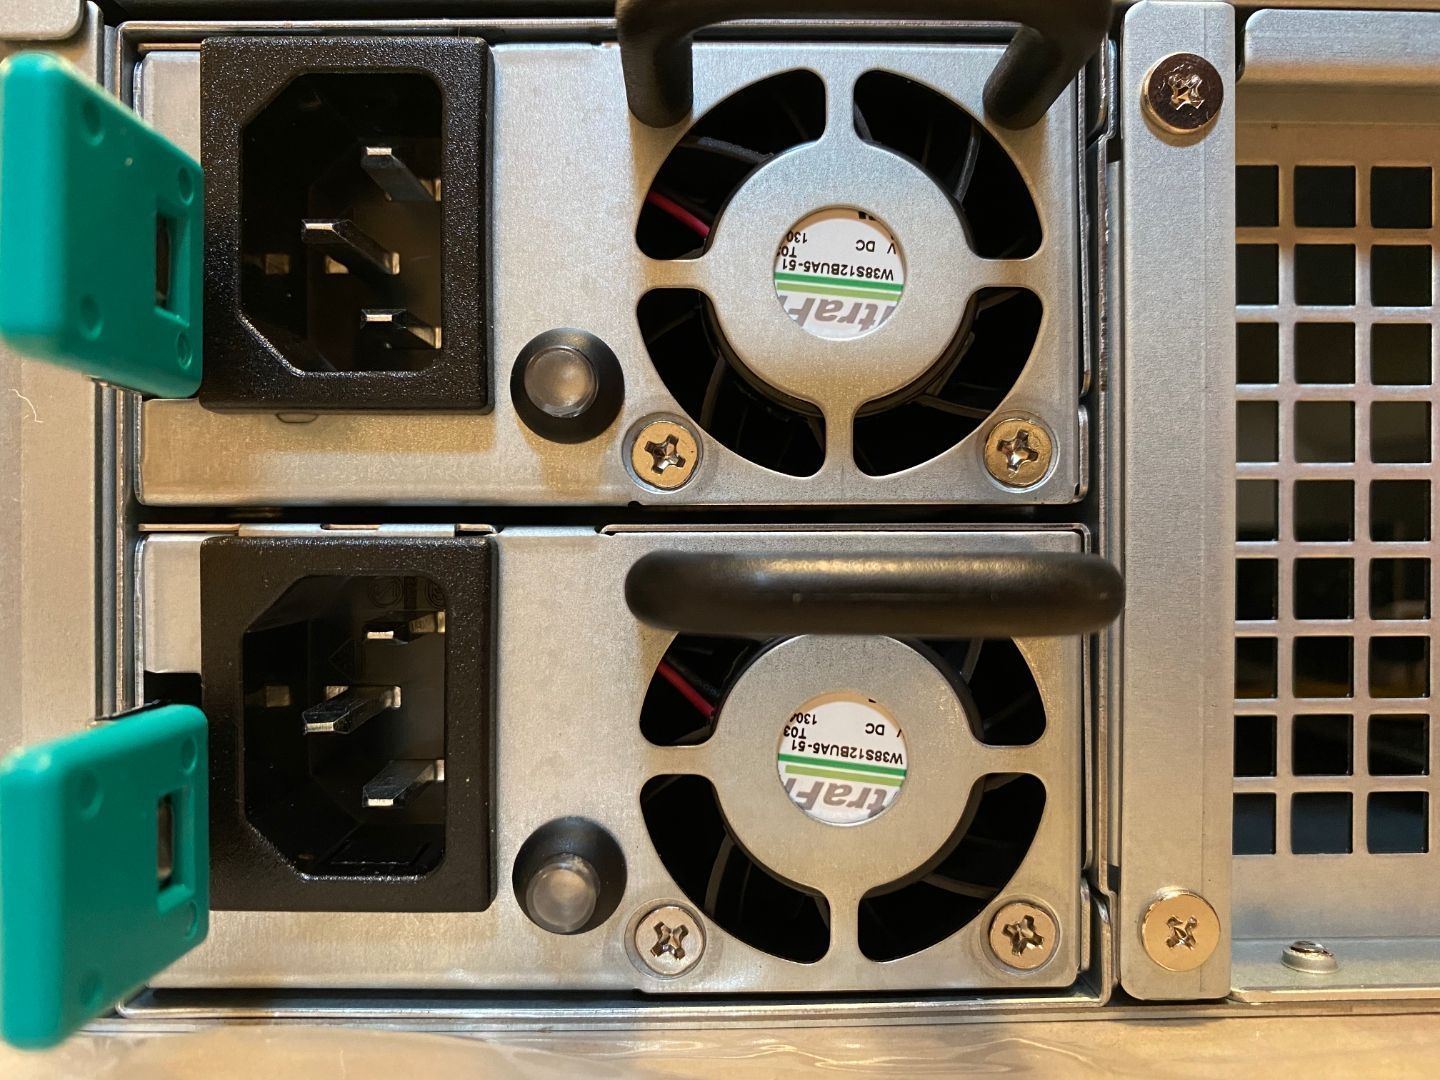
You might have expected that the main internal fans will be the ones that will generate the noise, but that is not true. Even though they do generate a certain amount of dB's while they work, the noise they produce has a deeper, more humming sound.
Do you expect to use this device in a quiet and silenced environment? Absolutely not. I believe you will be able to hear the device in the adjacent room as well, true not as loud, but still.
Most NAS and drive customers nowadays (especially for home use) are interested in noise and heat generation, and in most cases, because they expect to place the device in a closed closet and be done with it. With this model, that is not possible if nothing else, because it was not built to be placed alongside your wardrobe for example. This NAS has a lot of horsepowers, and in return, it needs a lot of cooling that will generate a lot of noise.
You might be wondering how loud are the drives? Well, I really can't say, considering I do not hear them from the fan noise. Considering those are 7200RPM enterprise models, even if you get them for your home use, and place them inside a smaller, more quiet device, you will still hear them for sure, but in this particular setup, they are simply drowning in the fan noise being produced from both the internal and PSU ones.
This is all expected because if you are getting a 6000€ device with this kind of performance, you can't expect it to be silent as well.
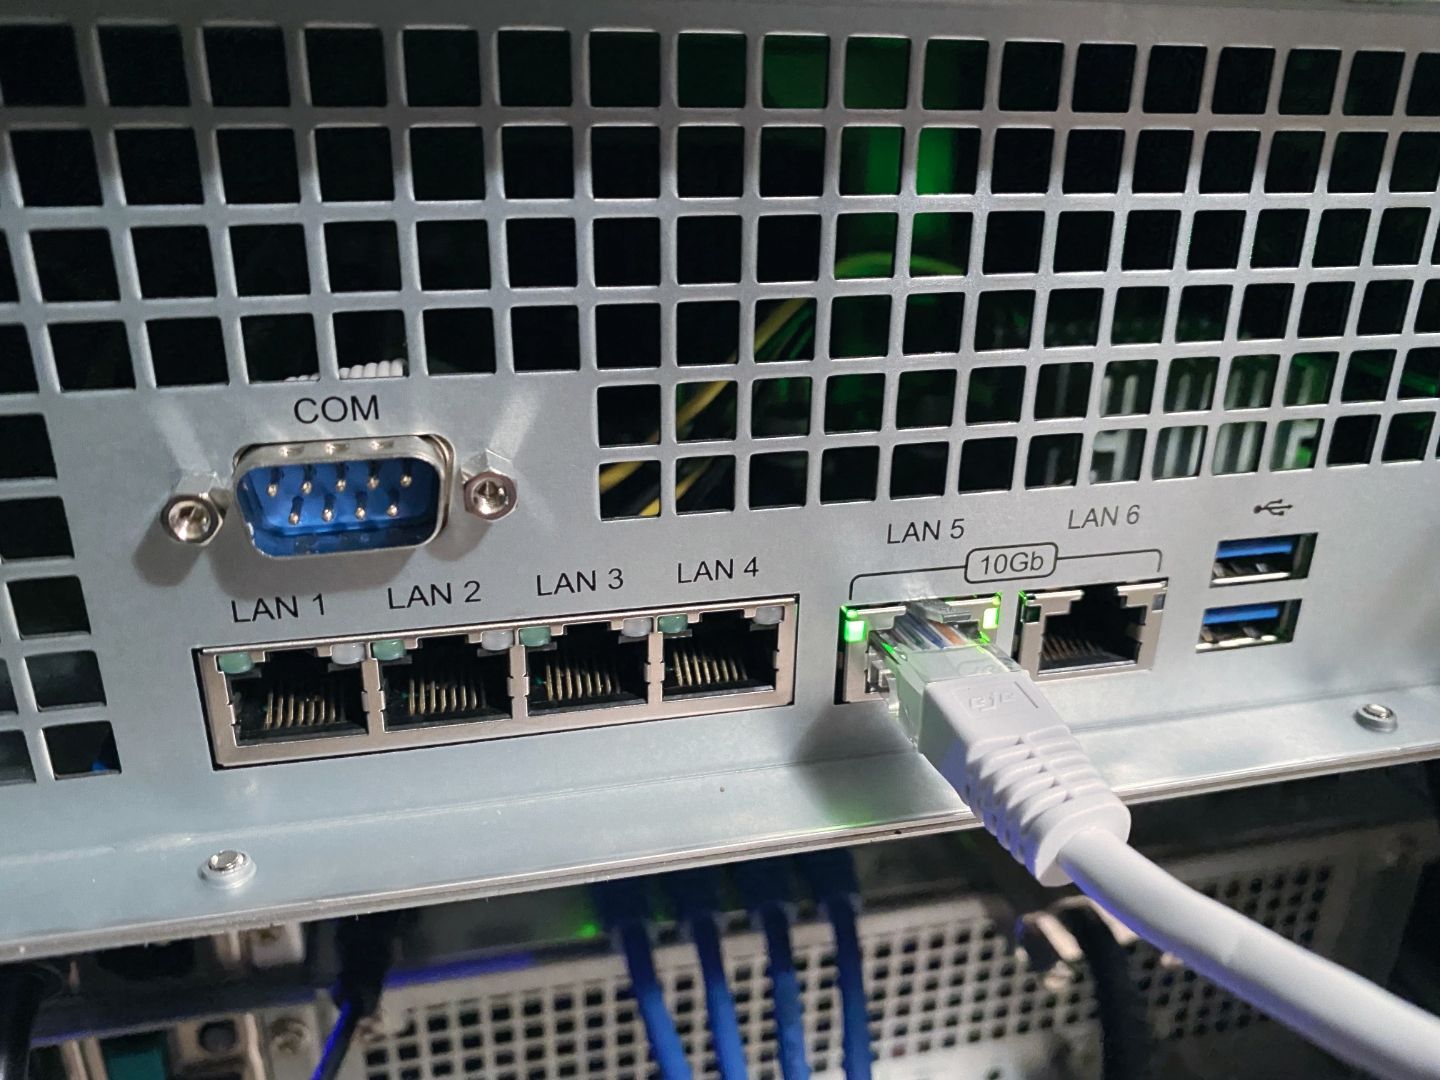
Once the drives are installed, all that is left is to connect it to the network and fire it up. In my case, the device is connected over a single 10G (LAN 5 and 6) interface using an RJ45 connector (not SFP).
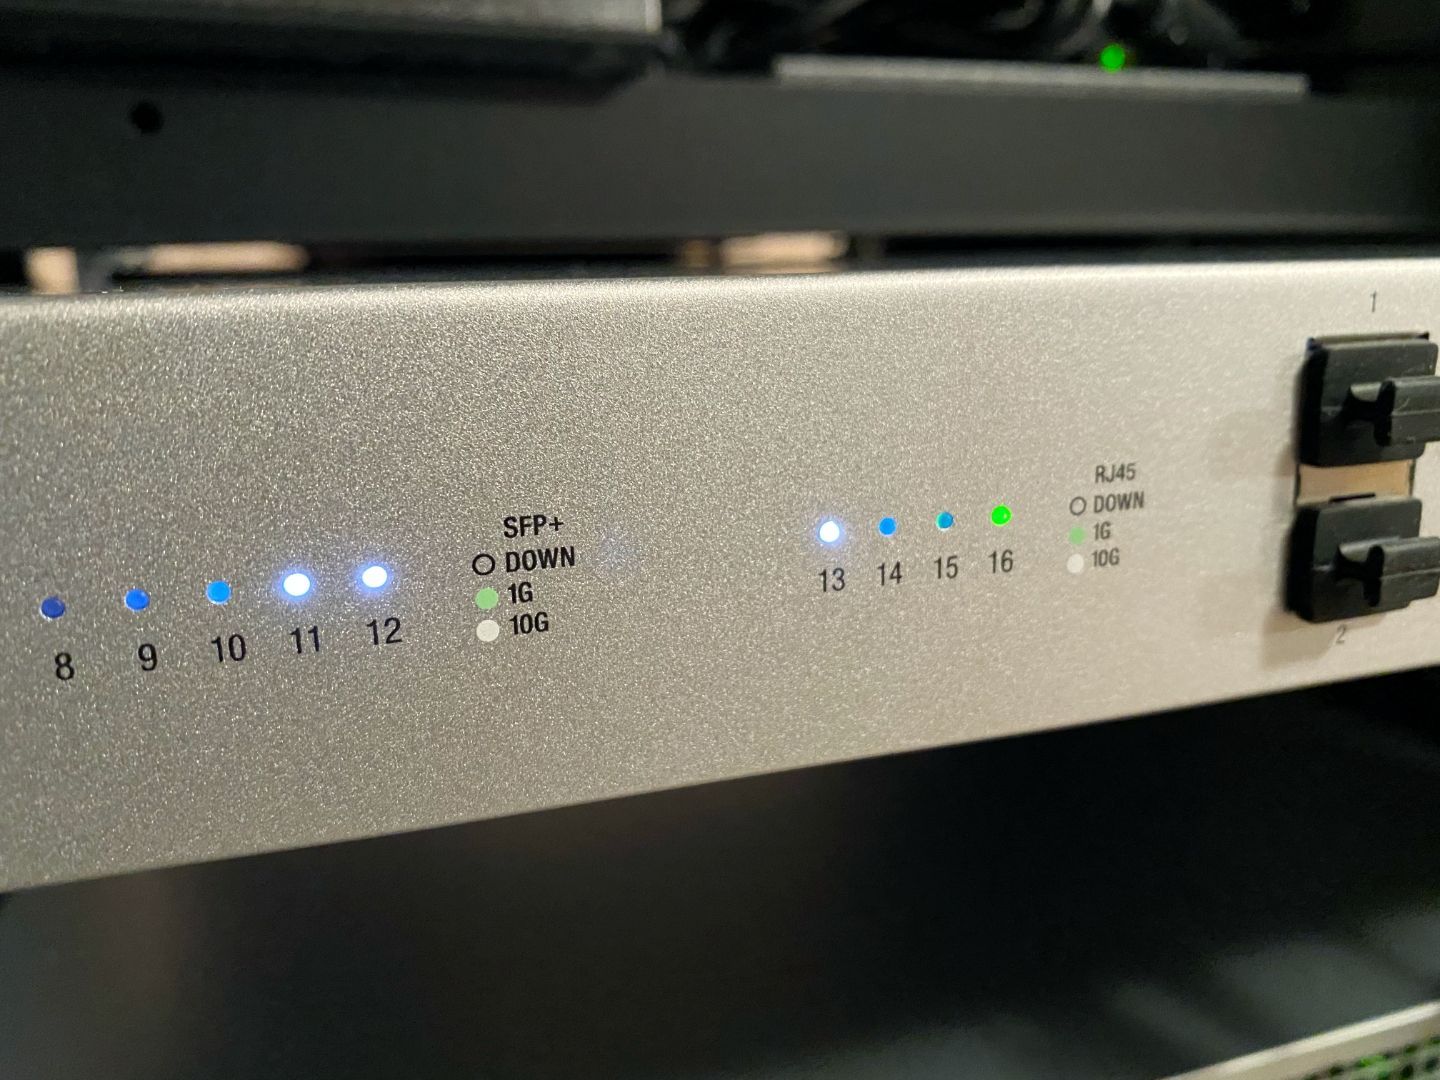
Turning the device on for the first time is always exciting. Like a jet airplane engine, SA3400 starts off with all fans at max RPM. Boot up was less than one minute and shortly after that, the NAS was accessible on the network.
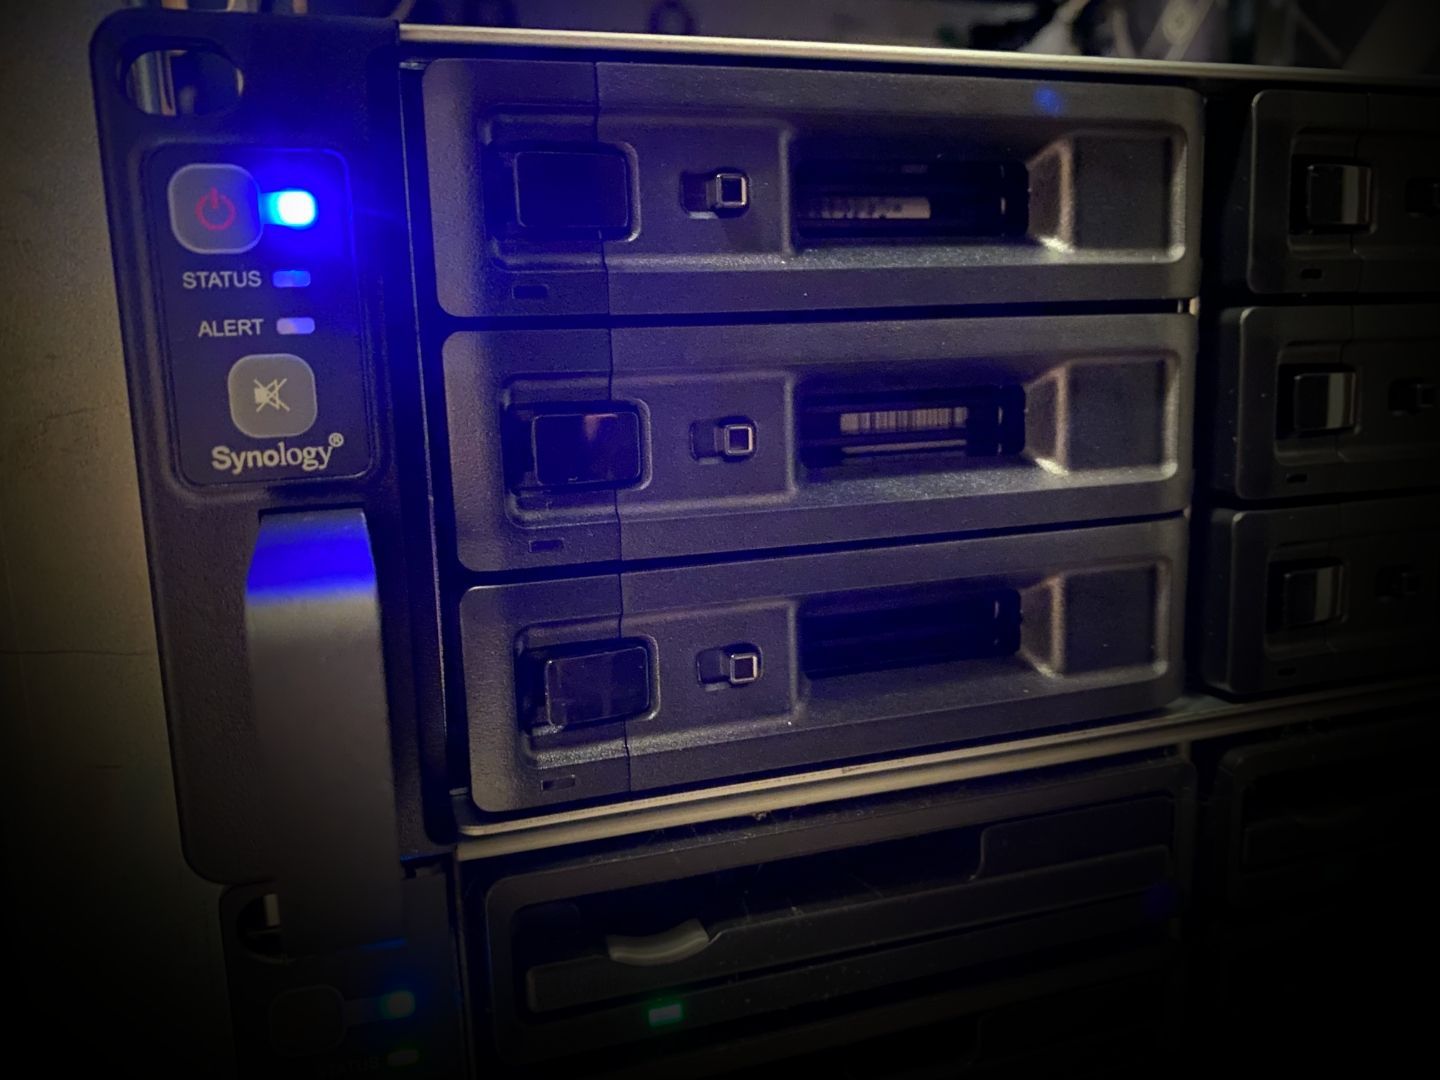
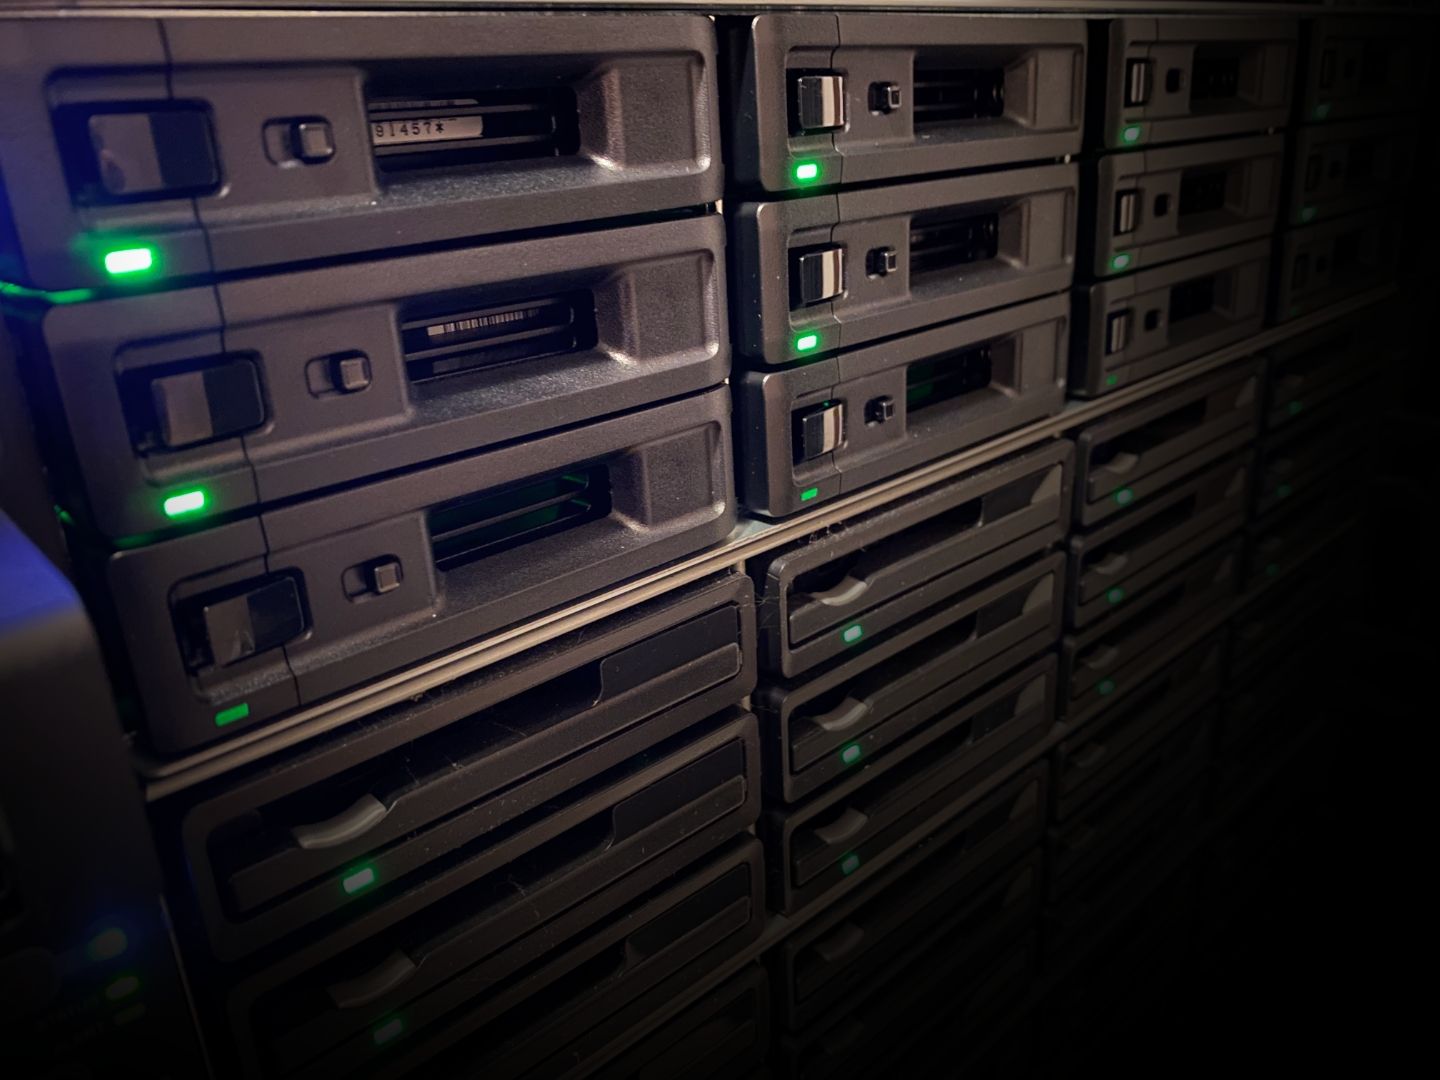
After the initial diagnostics and drive detection are complete, HDD LED lights will signal you any potential problems with the drives. If nothing else, if they are plugged in correctly or not.
Let's now focus on the DSM 7 installation, and see how long it will take to configure and optimize the pools and volumes.

DSM 7 installation
If you have ever done a DSM installation before, the process is identical, regardless of whether you are using a 150€ or a 10000€ device. The same applies to the SA3400 model in this case.
After the device is detected on the network, you can begin the installation using two methods:
- using Synology Assistant app
- using find.synology.com
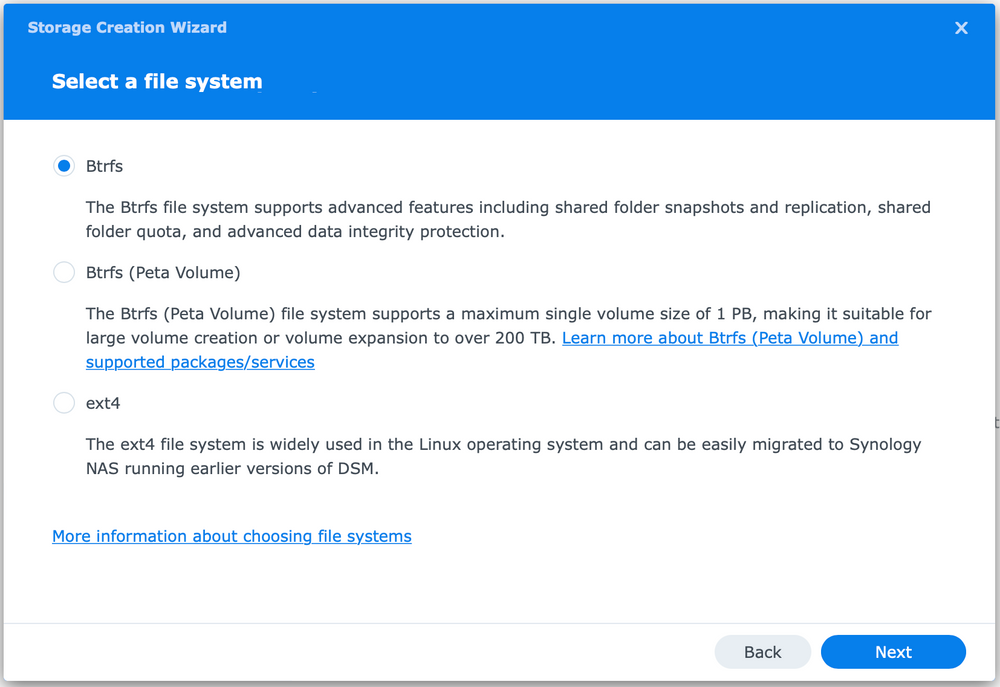
In any case, you will land on the following window where the wizard will guide you through the install process.
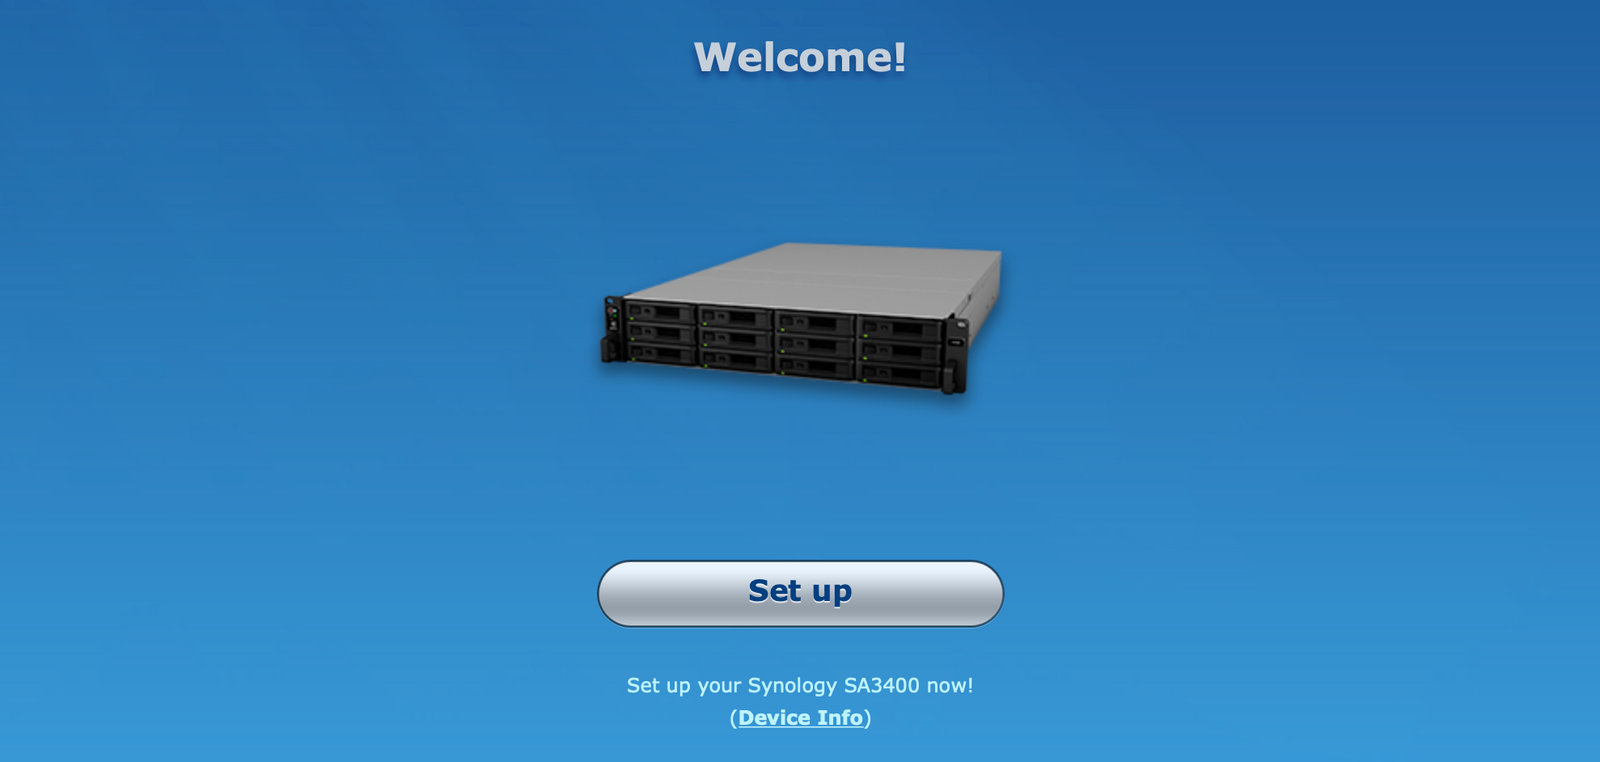
The whole process will boil down to one question. Do you want an offline or online (over the Internet) DSM installation? Regardless of your choice, the process will complete with a NAS reboot.
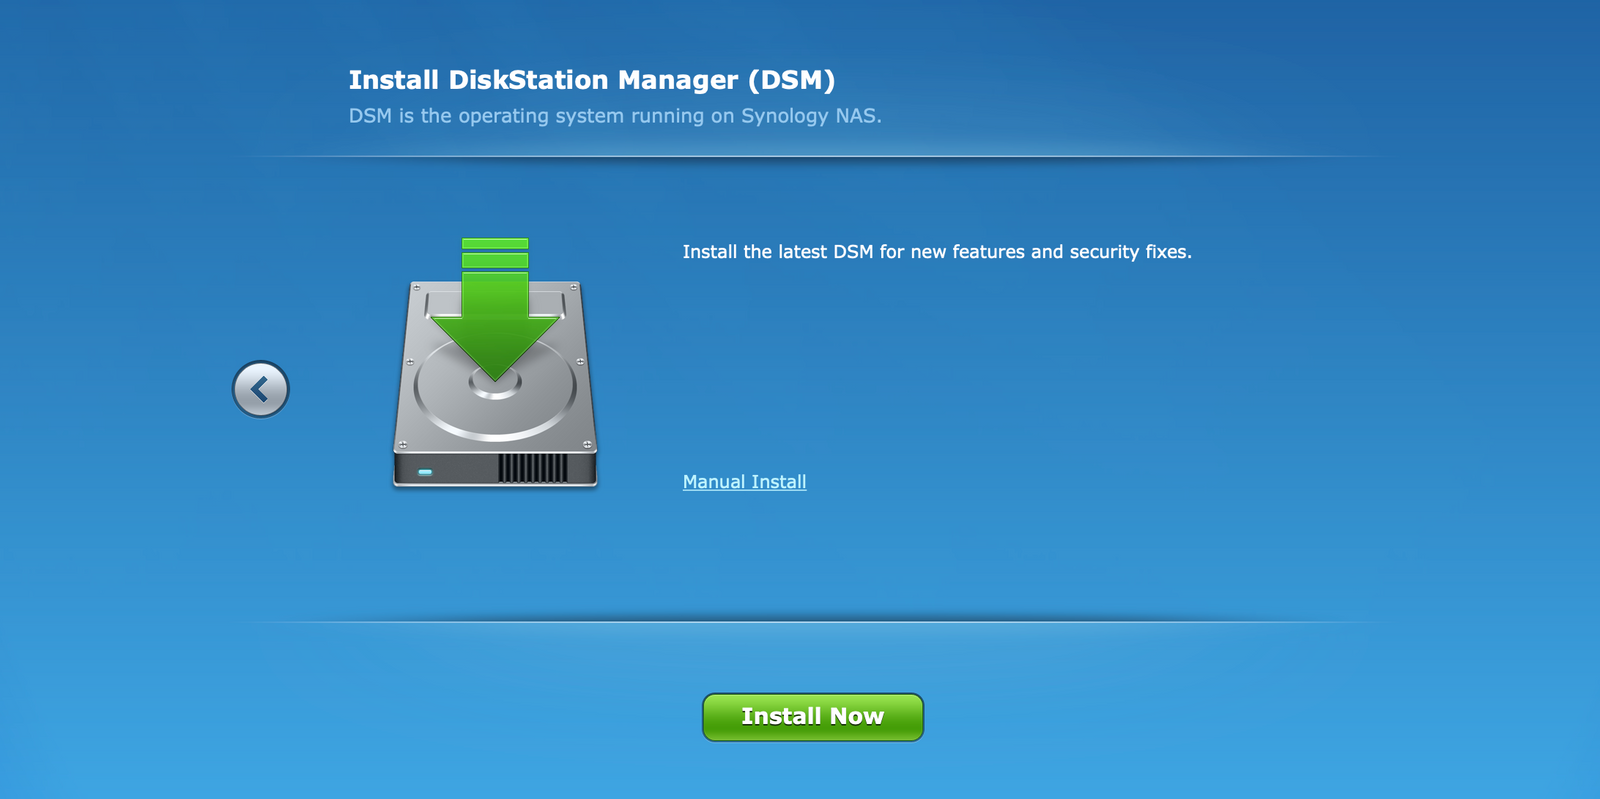

The installation process is incredibly fast, and it took about 1,5 min (that included, DSM download, partition format, and the actual install). As said before, the whole process ends with a reboot of the NAS.
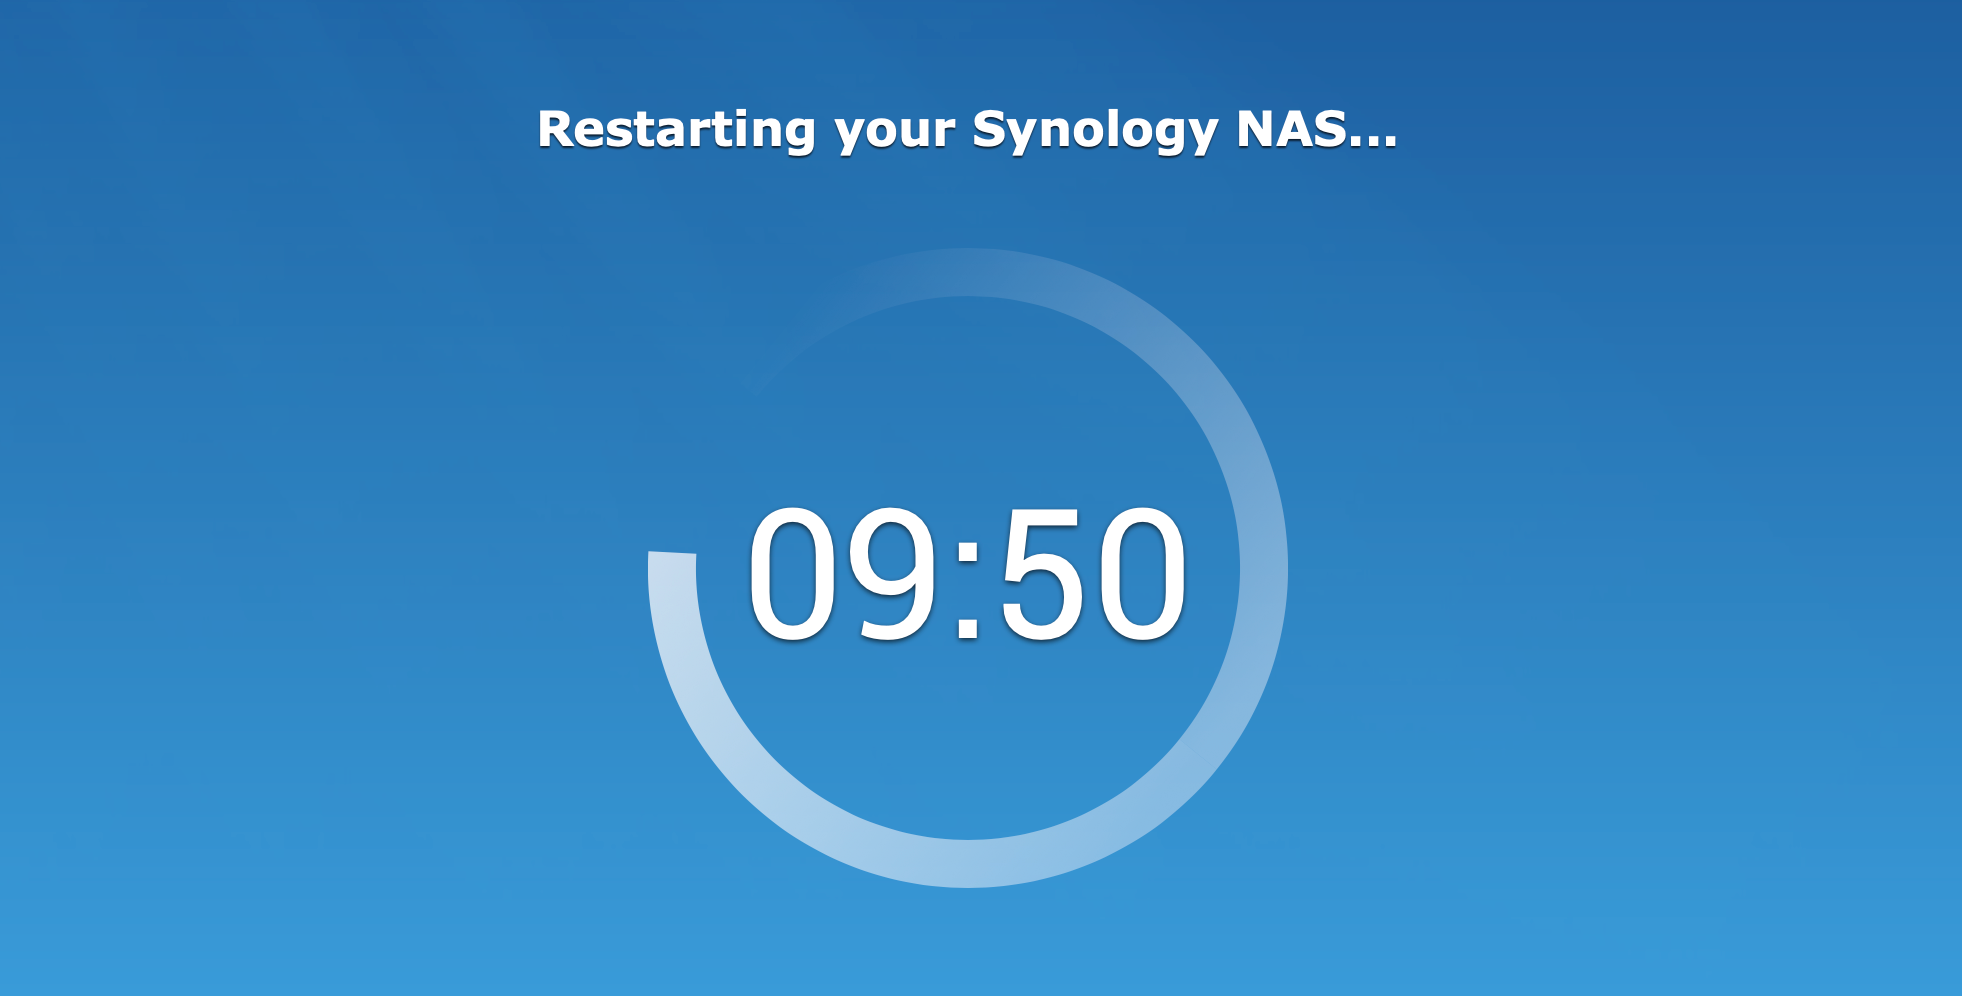
The reboot process was almost as long as the actual install part. So from the start to the DSM login screen, it took about 4 min in total. For all of you that have some DSM install experience on various models and drives, these speeds are usually reserved for fast NAS models and SSD's.
All in all, you will not spend too much time installing the DSM before you get to play around with this monster.
Drive overview and RAID array configuration
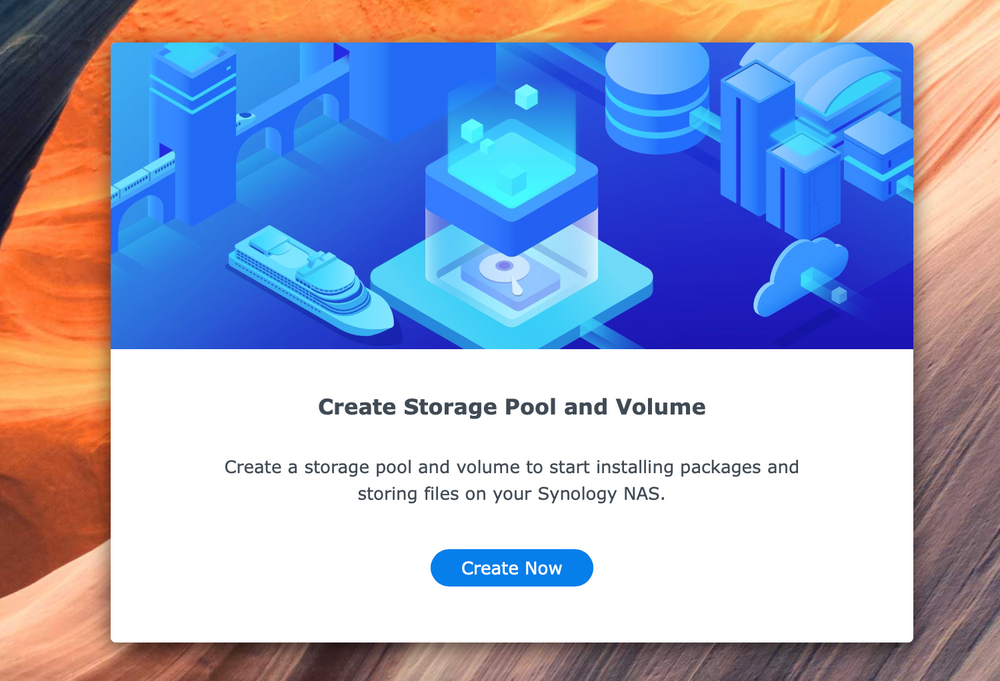
Now that DSM has been installed we need a minimum of one working volume that we can work with.
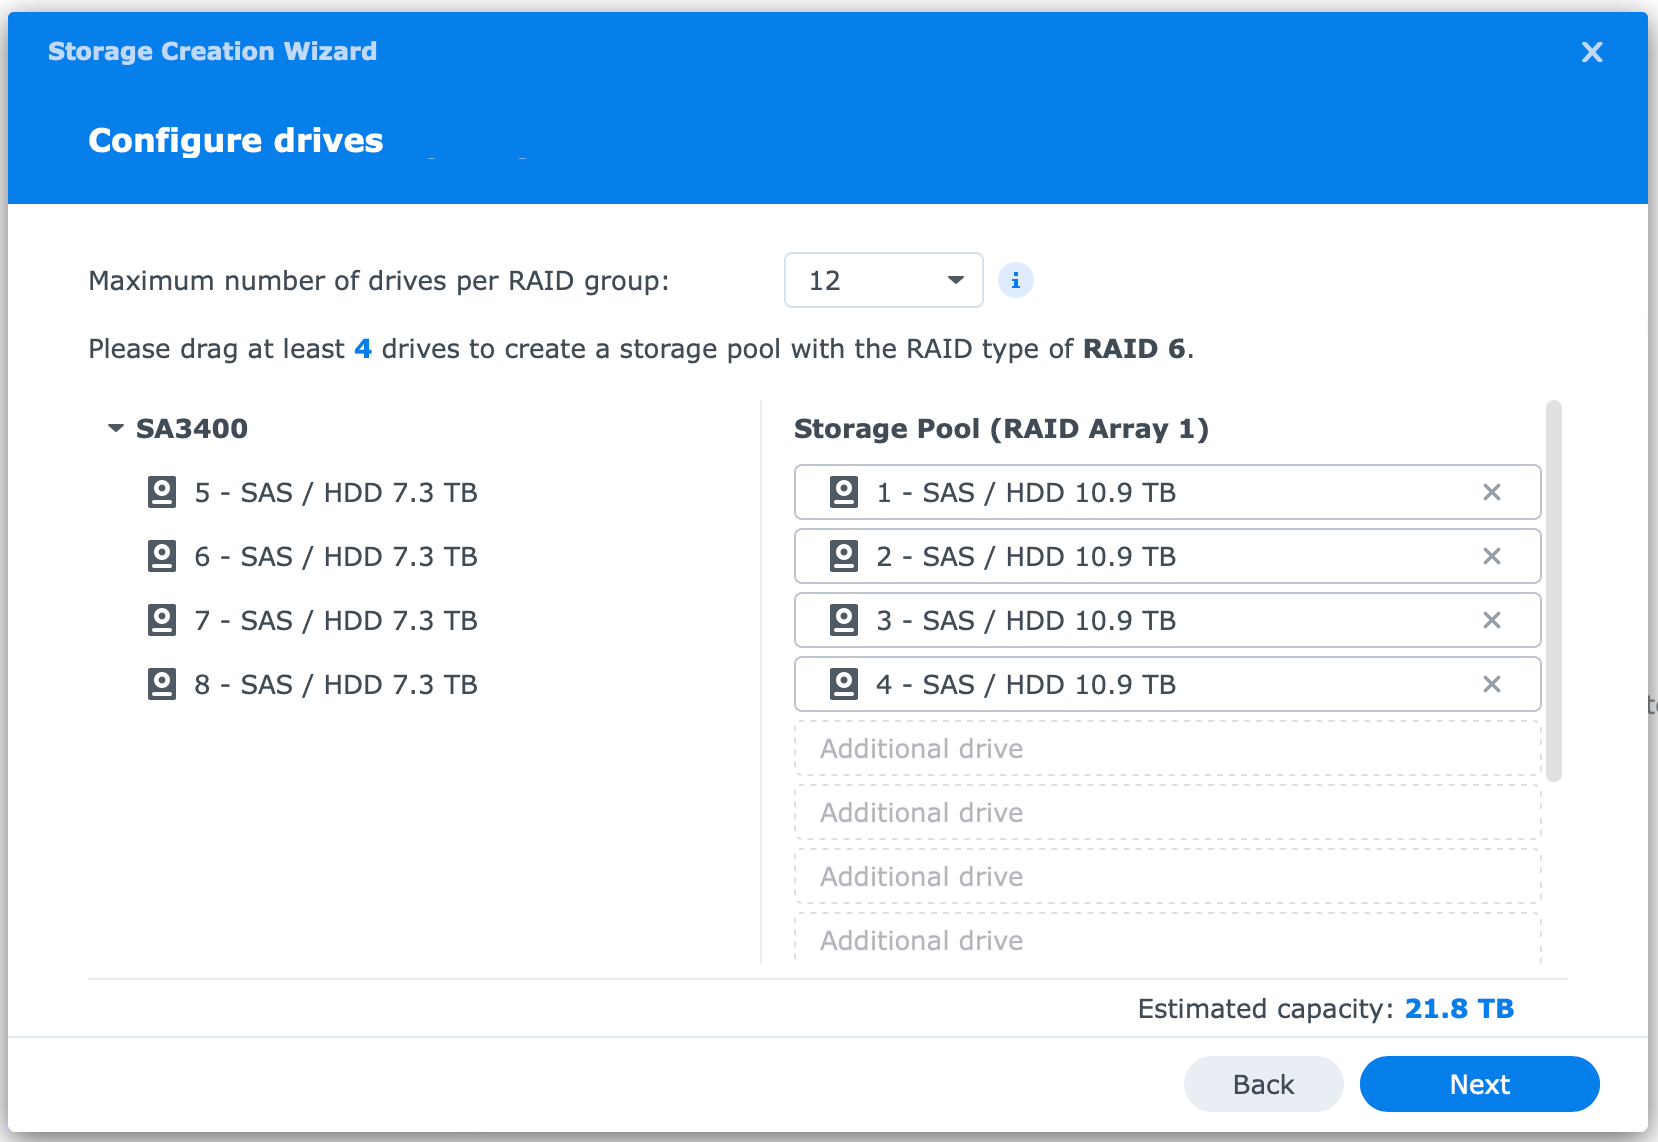
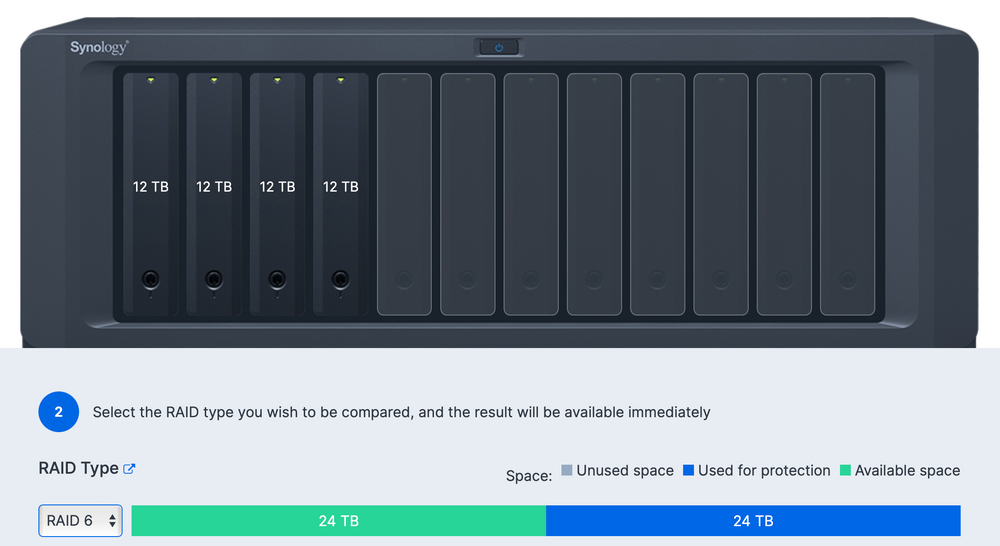
In this article, I will create two separate RAID 6 arrays with four drives in each. As a result, there will be two drive capacities and two drive redundancy.
The arrays will be comprised of Synology or Seagate drives respectably. Furthermore, creation and optimizations will run concurrently so we can get a definitive result in which array is faster for this particular task.
As always, the Storage Manager app will be used for this task.
As I mentioned before, each volume will be a part of its own storage pool.
Once you configure both pools and volumes, your NAS is ready to be used. What follows is storage pool optimization. This is the moment, depending on the device, drives, and their speed, that will last a certain amount of time (more or less).
Personally, I like to not use the NAS while the optimization is in progress (if possible) so there is no additional stress on the system itself that might prolong it further.
Optimization array speed comparison
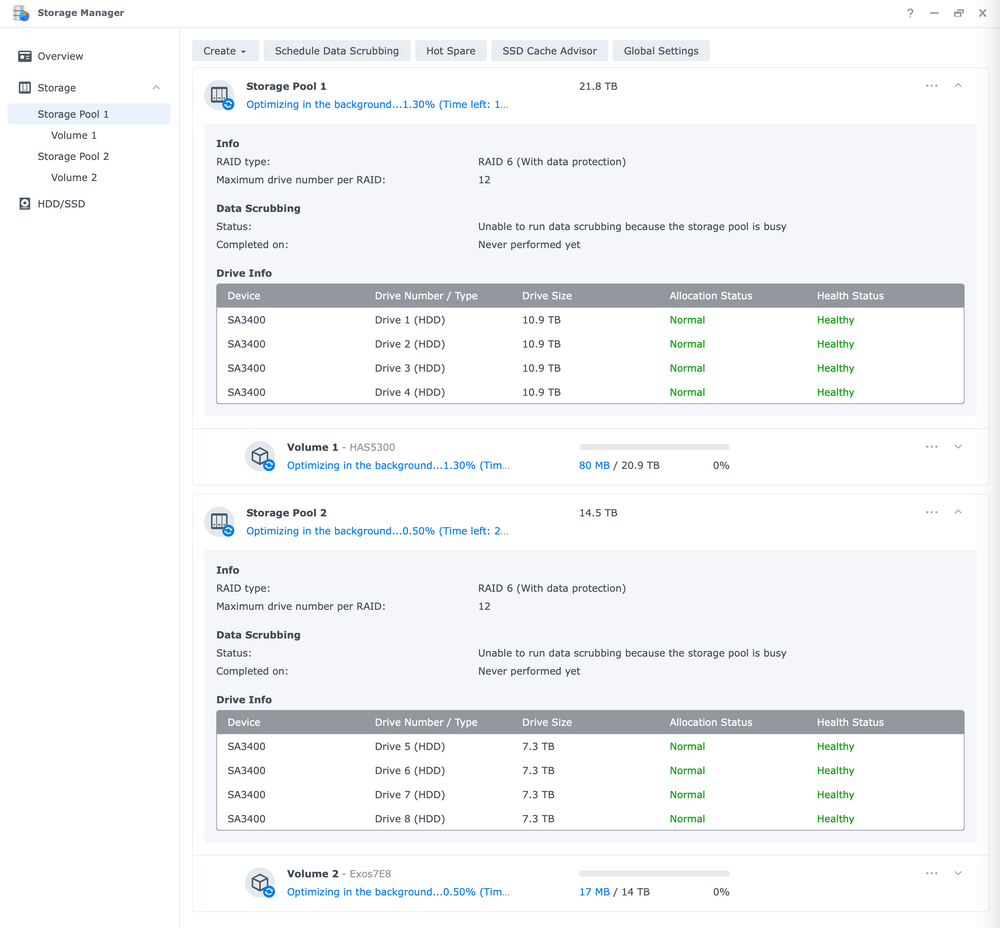
As you can see from the images above, the two arrays are different in total size.
Synology HAS5300 array (RAID 6) > 21.8TB
Seagate Exos 7E8 array (RAID 6) > 14.5TB
Optimization of the arrays was apart a few minutes just because you can't create separate pools and volumes at the same time, but the end result will not be that far off.
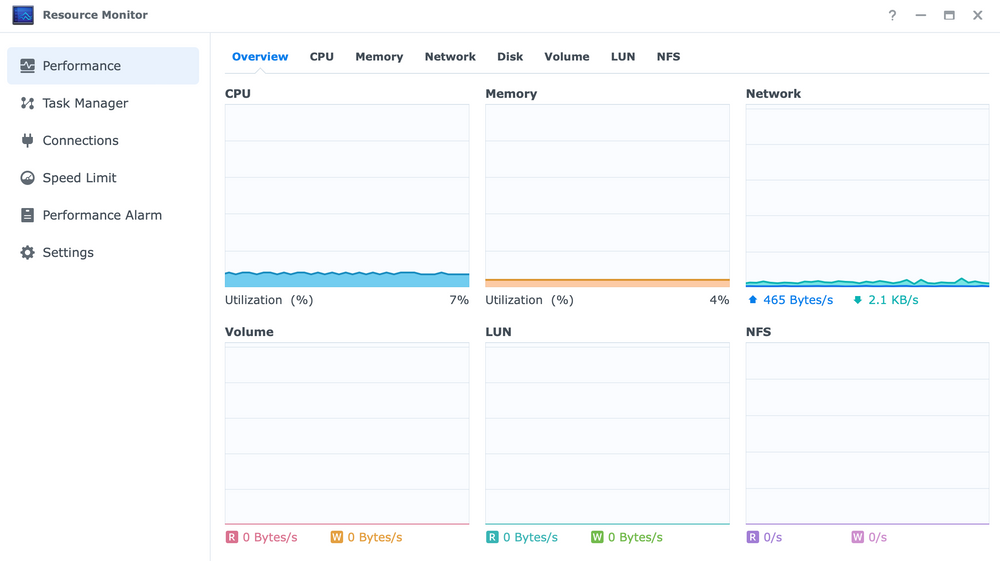
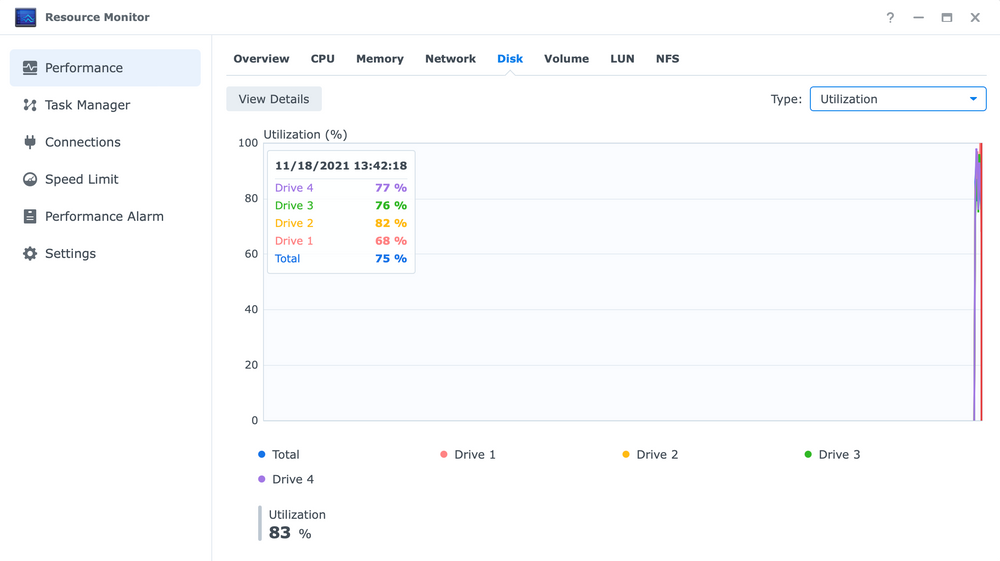
So what array was faster? If we look at the NAS utilization during the process, we can see that this 8-core CPU was just over 7% of utilization at that point, meaning these tasks were nothing special for it.
When it comes to driving speeds, let's see how both Synology and Seagate models did.
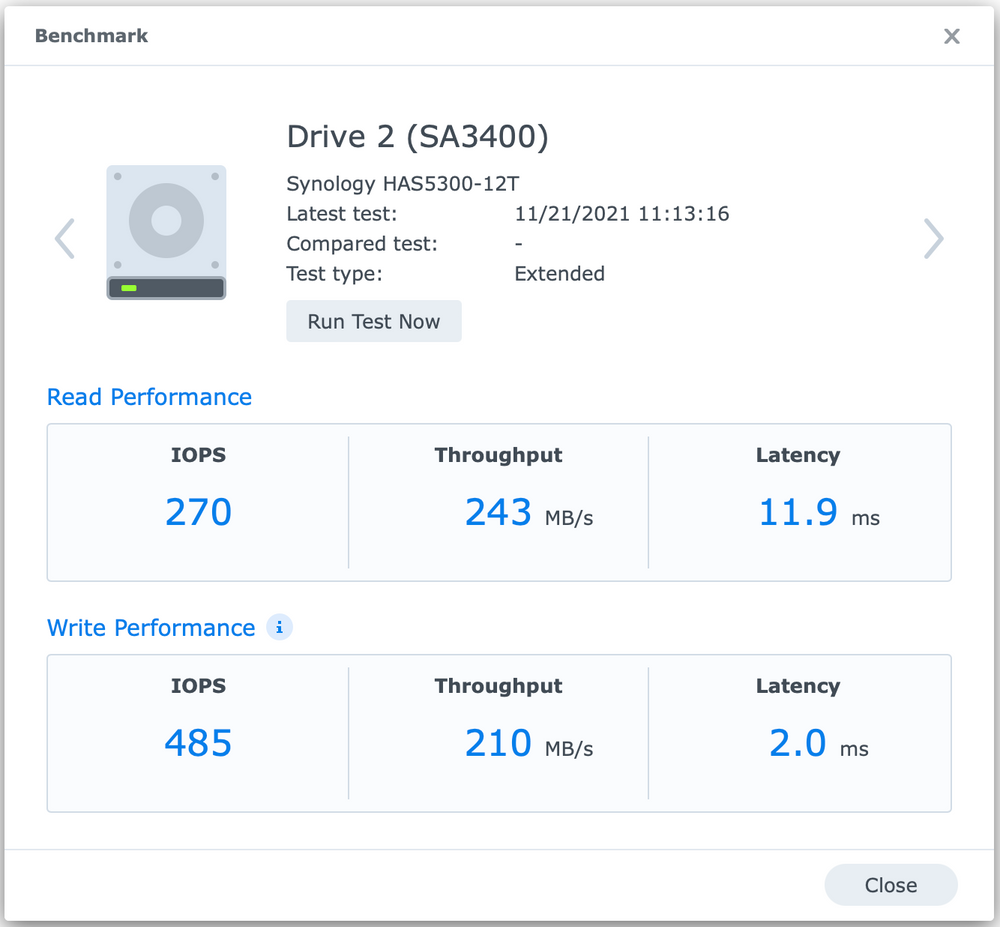
Synology HAS 5300 speeds
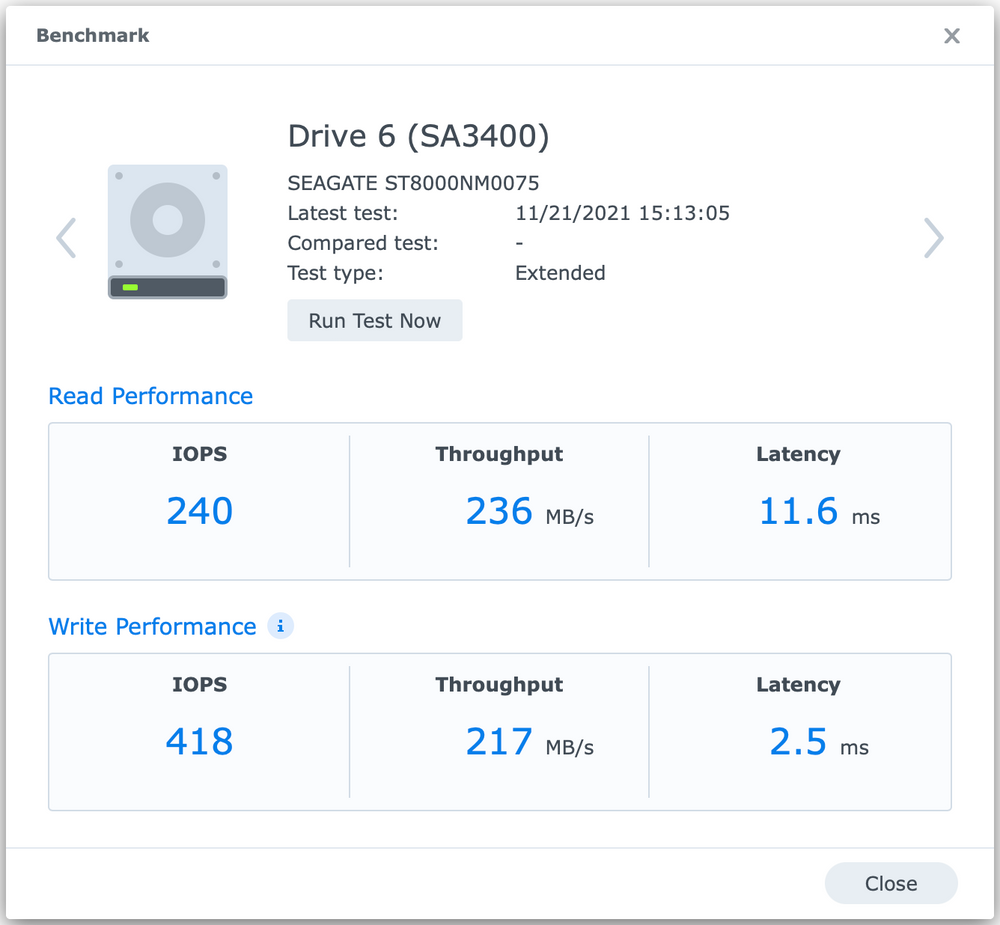
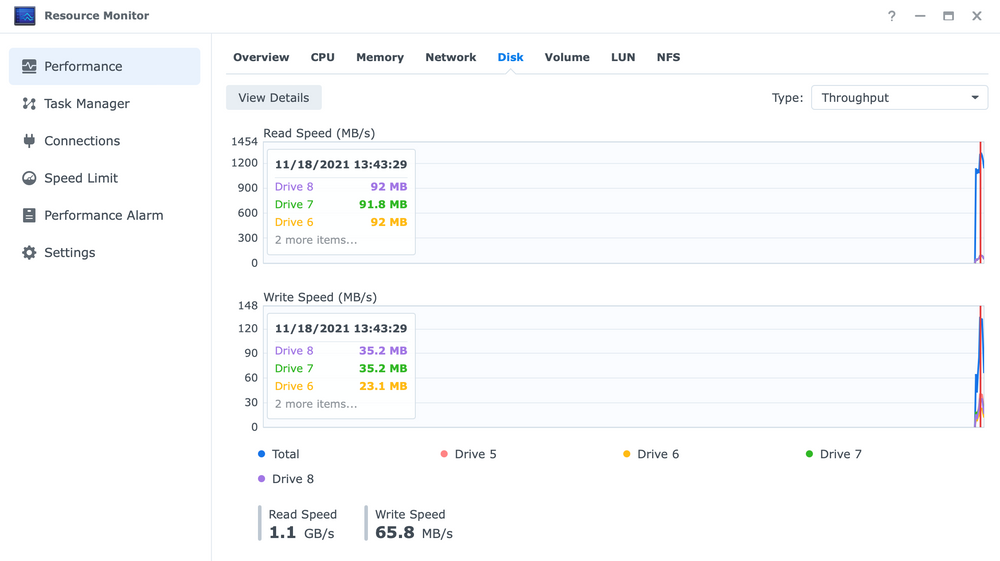
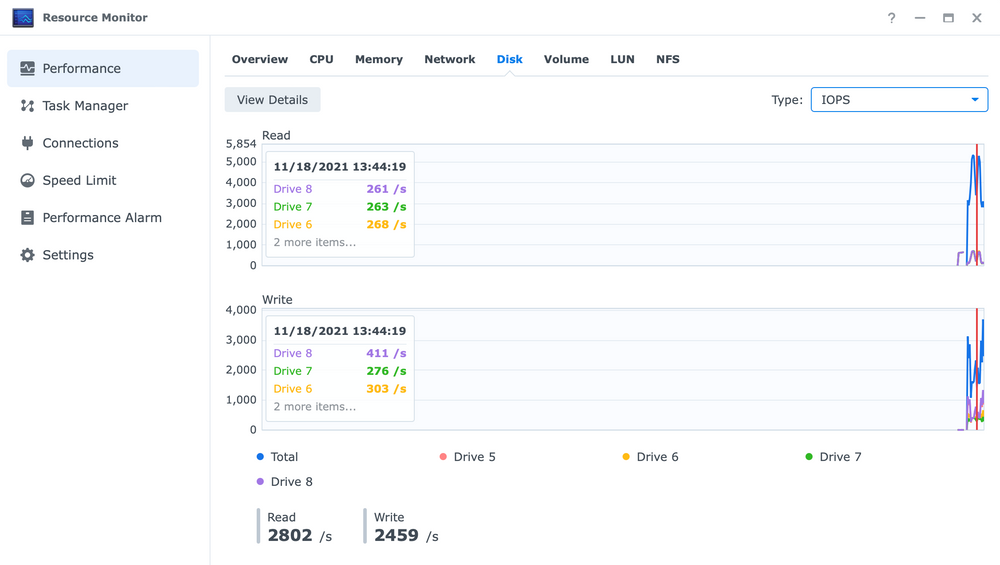
With DSM 7 Storage Manager, you will have the option to benchmark your drives regarding throughput, IOPS, and latency.
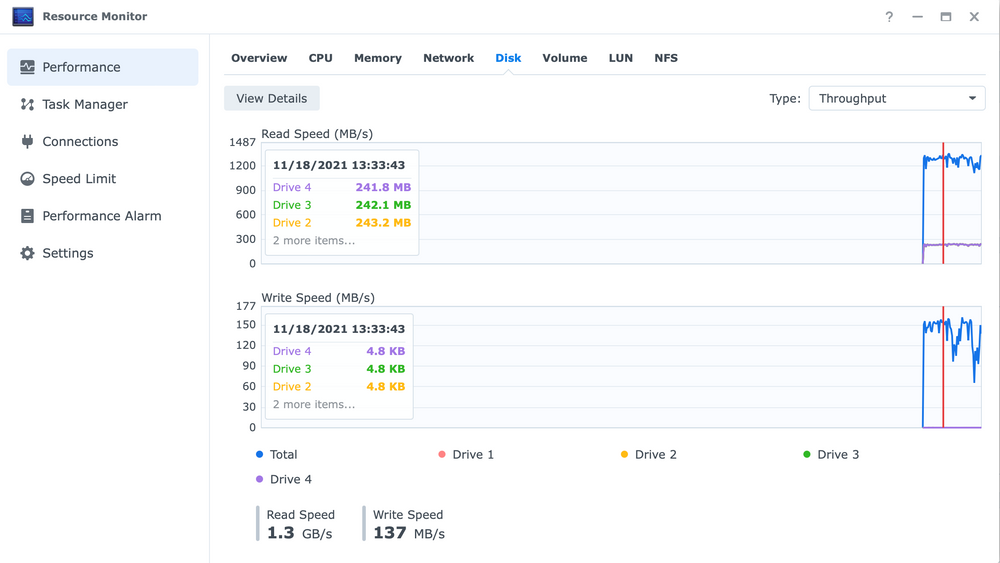
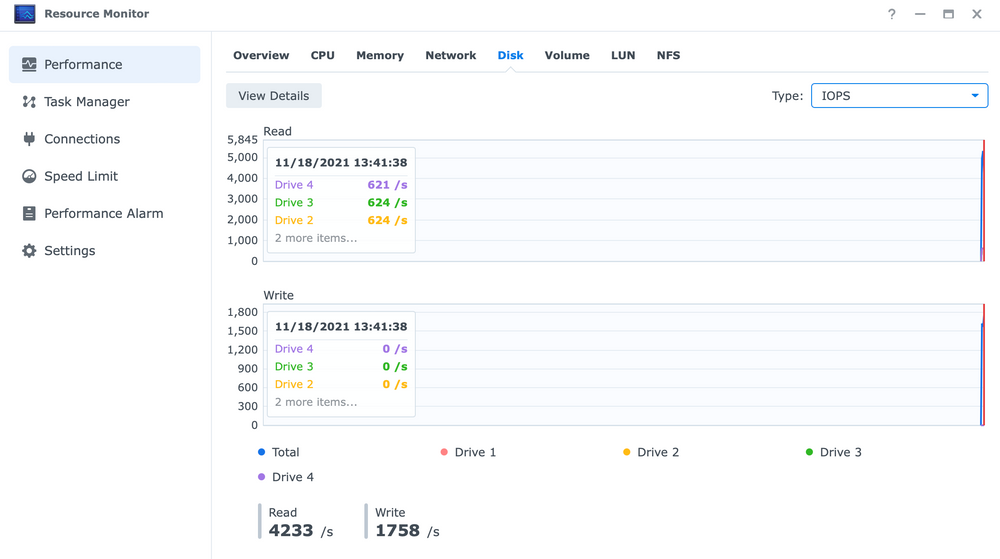
What follows are the results of those benchmarks as well as some random points in time during the optimization period.
Seagate Exos 7E8 speeds

If we look at the difference in array size, you will notice that the Synology array is 33,5% larger.
The optimization process lasted as follows:
Synology array 2021/11/18 13:18:16 - 2021/11/19 06:08:39 > 16h 50min
Seagate array  2021/11/18 13:22:19 - 2021/11/19 04:27:04 > 15h 04min
Even though the Seagate array was smaller and the drives are slower, as expected, the optimization was completed before the Synology array was done. But, if we round up and down those time results and use the Storage Manager array size values we can calculate how many terabytes per hour can each array process.
Synology array - 21.8TB/17h > 1.28TB/h
Seagate array  - 14.5TB/15h > 0.96TB/h
From this result, we can conclude that the Synology array is 25% faster in the pool optimization task than Seagate.
Conclusion
Now there might be some that will say 25% is not a lot, but in the end what needs to be taken into account is the fact how much you will pay for one drive or the other, and see if the price difference justifies buying a faster drive. The current street price of these drives is about a 32% difference in favor of Seagate (cheaper but also smaller capacity).
12TB Synology costs about 561€ while Seagate 8TB is 383€. On the other hand for 30€ less than Synology 12TB drive you can get Seagate 16TB Exos drive. So the math will always help you to make the decision what model and capacity drive to buy depending on your budget and need, but for this first test, it is clear, Synology drives are faster.
Will that be the case moving forwards, it remains to be seen, when I will be running other various tests.