Since its rollout, the BeeStation has had a decent acceptance rate, but the main reason users have an issue with this device is its limiting functionality. To be fair, the BeeStation was always designed as a sync, backup, and share device with a turn-key principle in mind.
Full review of the BeeStation
While the device can back up mobile and desktop devices and its data onto an attached USB drive, it can't be combined with a Synology DSM NAS as a HyperBackup target—not officially.
As it was uncovered early this year, the BSM OS that is running this new device is essentially DSM with only a few main functionalities. Those functions are presented by utilizing DSM packages that existing users might be already familiar with. One of those is unfortunately not HyperBackup in shape and form as it exists on the DSM OS. This means that we can't use the BeeStation as a potential backup target for our existing Synology DSM NAS devices.
What is fortunate, is the fact that BSM, as was said, is a tone-down version of DSM, and that means that rsync is installed on the BeeStation. The exact version is 3.1.2. at the time of this article. Why is this important? Well, HyperBackup can also be used via rsync protocol as well and not just via the dedicated HyperBackup platform that is proprietary to the Synology eco-system.
Prerequisites
Before going forward what needs to be done to make this work?
First, we need to activate the local access setting inside BSM, then remote access to activate SSH access, and finally confirm that rsync is up and running.
Both local account and remote access configuration can be done inside BSM System Settings > Advanced Settings menu.
STEP 01
The local account option is located under the Local Access tab, while remote access is under Synology Technical Support
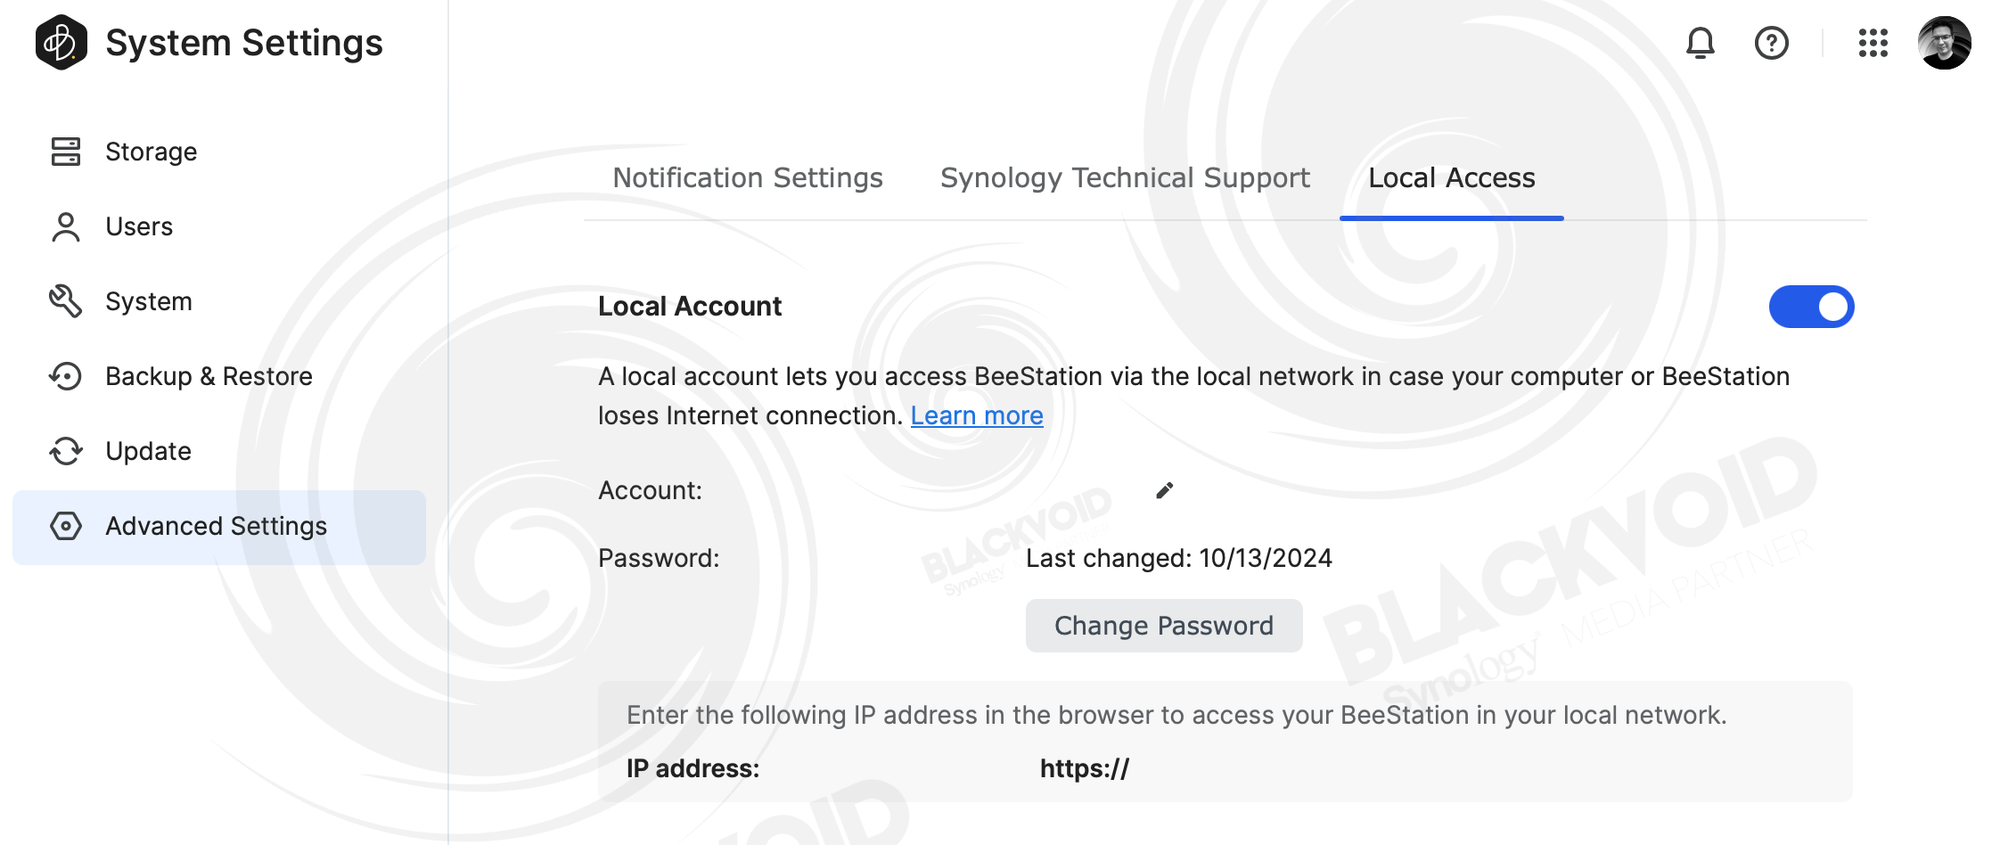
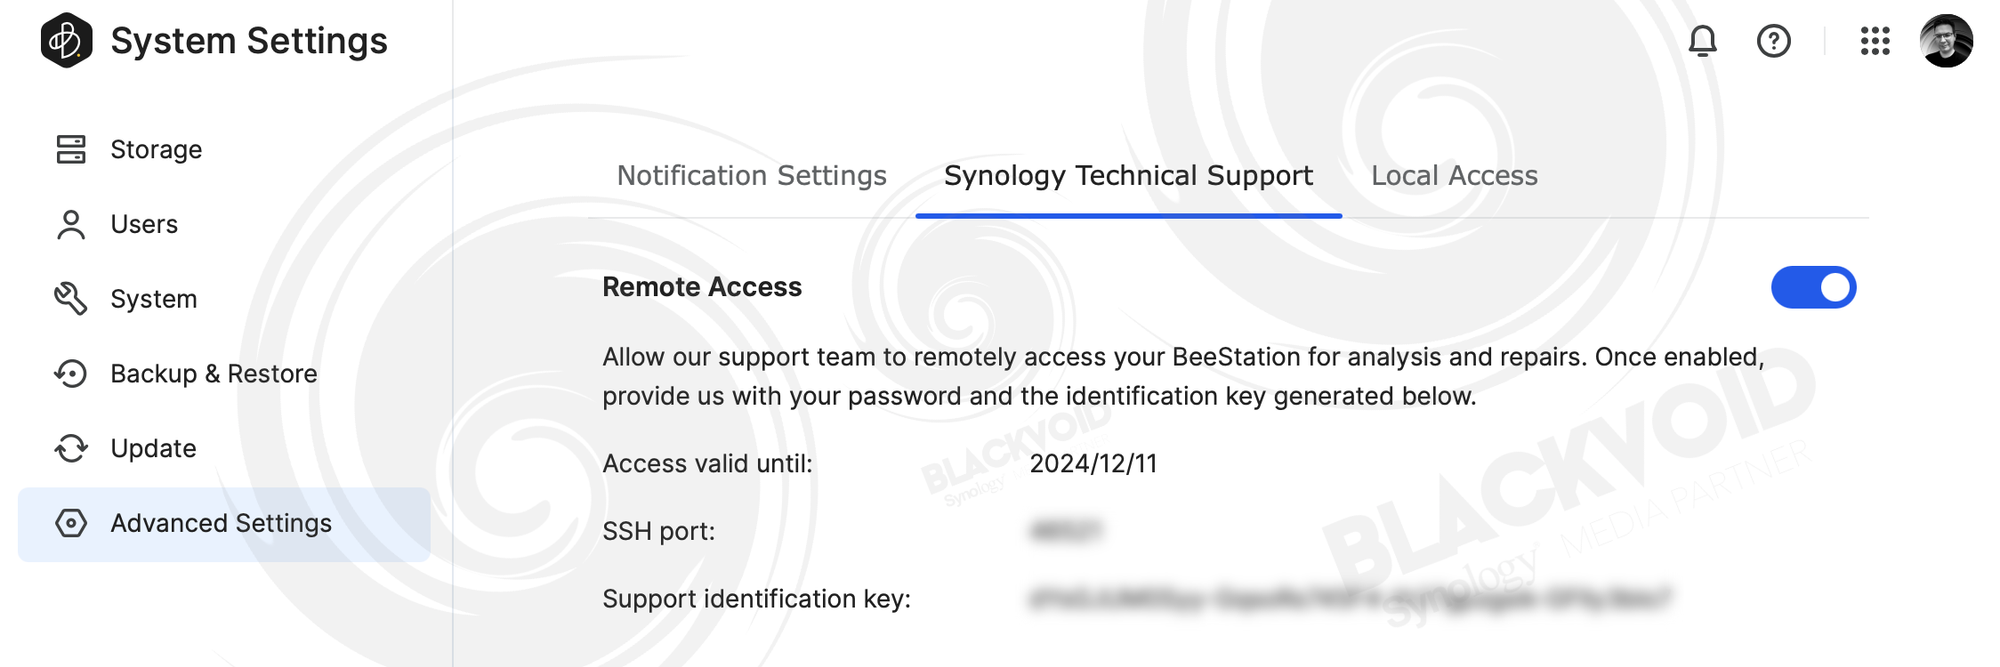
By design, the BeeStation works via QuickConnect URL and uses a Synology Account to log in, but for this local backup operation, we need to use a local BSM account. This is the main reason these settings need to be activated.
The remote access feature will unlock the SSH access and will generate a temporary user account, password, and port number that we need to use to gain access.
To make an SSH connection to the BeeStation, we need to use SSH-compatible applications like PUTTY (Windows), Terminal (macOS/Linux), or any other platform for that matter. I like to use the ShellNGN web SSH solution, but that is really up to the user.
STEP 02
Connecting via SSH is the same as connecting to any other system using the same method.
ssh <generate_beestation_name>@<beestation_IP> -p <custom_generated_port>
Replace the generated name with the value that BeeStation gave you for the remote access, as well as the custom port. The local IP address of the BeeStation will also be presented on the same screen and of course, the password will need to be entered as a follow-up on this SSH command.
This is how the command prompt will look like after login synologysupport_oawi3CLuOz8Nw6E@BEESTATION:~$. Now we can move to the next step.
STEP 03
Next, we need to start up rsync. While it is installed it is not running by default, the same as with DSM. In DSM, we can activate it via UI, but that is not the case here in BSM. This is another reason why we need SSH access.
To start up we need to elevate to root, by using the sudo -i command, and repeating the generated password that we got. Now that we have root access, we will use the same DSM CLI command to start the package because as it was said, under the hood, the OS for the most part is the same.
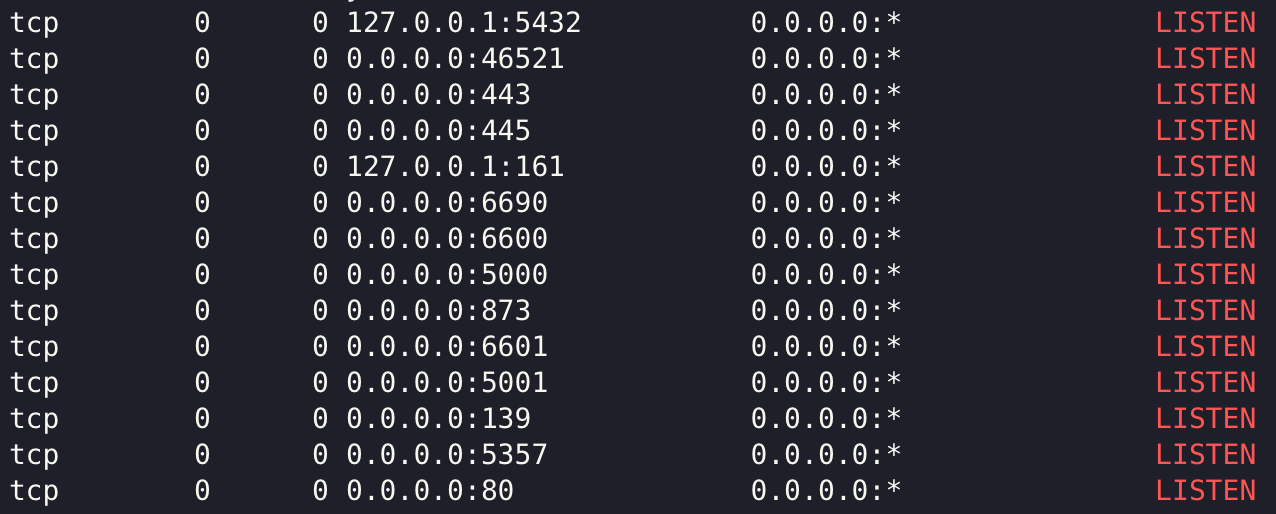
Running synosystemctl start rsyncd will start rsync in the background. To confirm that we have started it with no issues, and to see what port is being used we can run another Linux command line to get the output.
netstat -tulpn | grep LISTEN will output all processes and their ports that are listening and ready on the BeeStation. One that we are looking at is the tcp/873. That is the default rsync port.
Now we are ready to to move over to the Synology DSM NAS side, and try and configure the device to target the BeeStation via rsync as a backup destination.
STEP 04
Now we can start using Hyper Backup on a Synology (DSM) NAS to backup its data onto the BeeStation via rsync protocol.
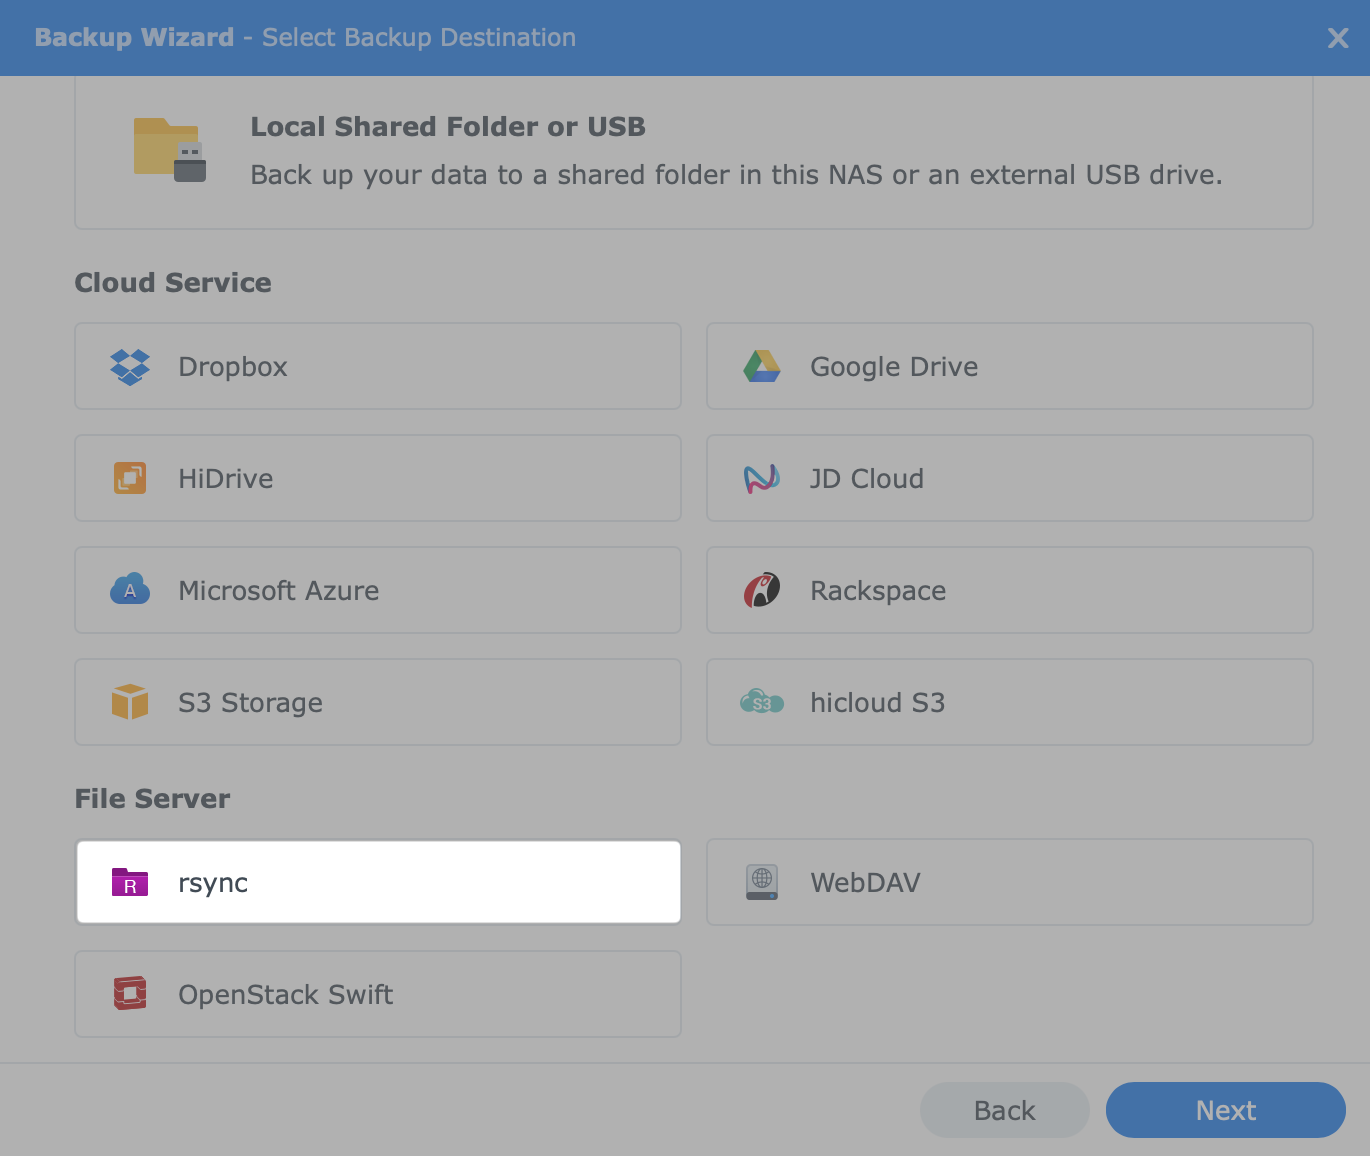
We can use both single or multiple versions depending if we need versioning or not.
The main element here is that the backup will not have its transfer encrypted, because in order to use the aforementioned 873 port we need to turn off the transfer encryption. Considering that this setup will only work in LAN (or via VPN) pushing for transfer encryptions is not a high priority.
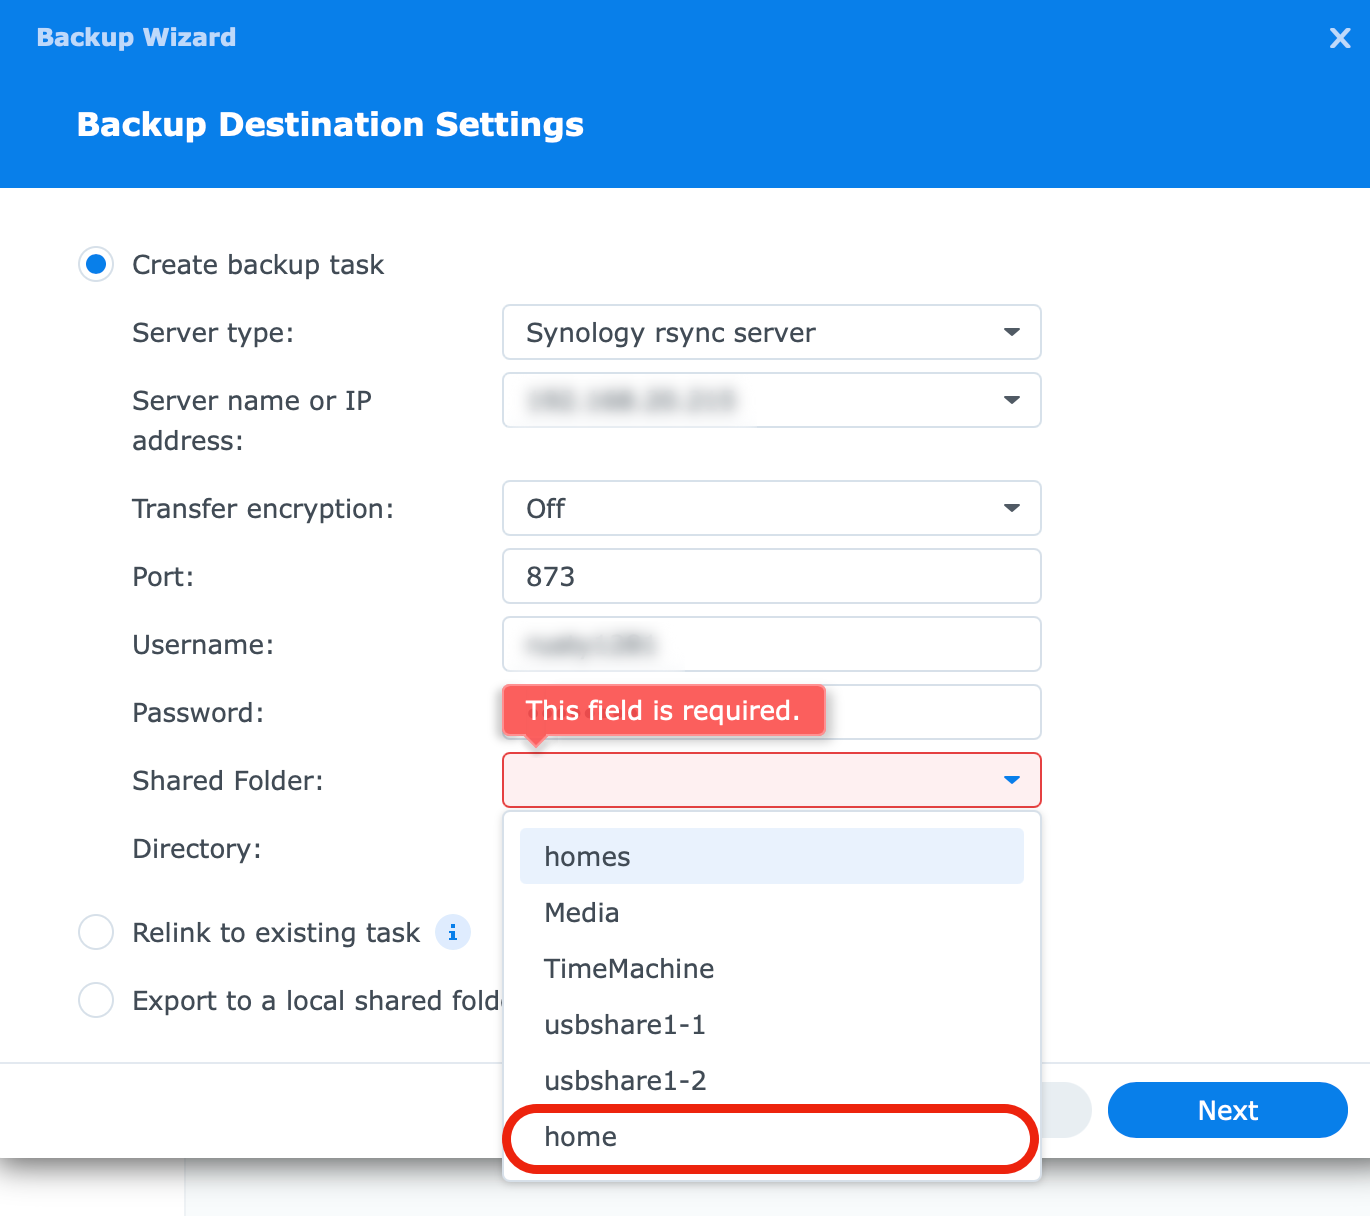
Once the BeeStation's IP address and credentials have been entered, we will have a choice of shared folders where we want the backup to end up. At this point, we will see that we are offered only the main "root" folders, and none of the user-created subfolders (part of the profile).
Unlike the DSM, here we can't see the subset of folders inside the "profile". So in order to get the backup inside the user's home folder, we have to select home from the list.
The following steps are identical HyperBackup steps that involve, selecting the content, and task settings (logs, schedule, data encryption, versions, etc). Once all is set and done the backup can be started.
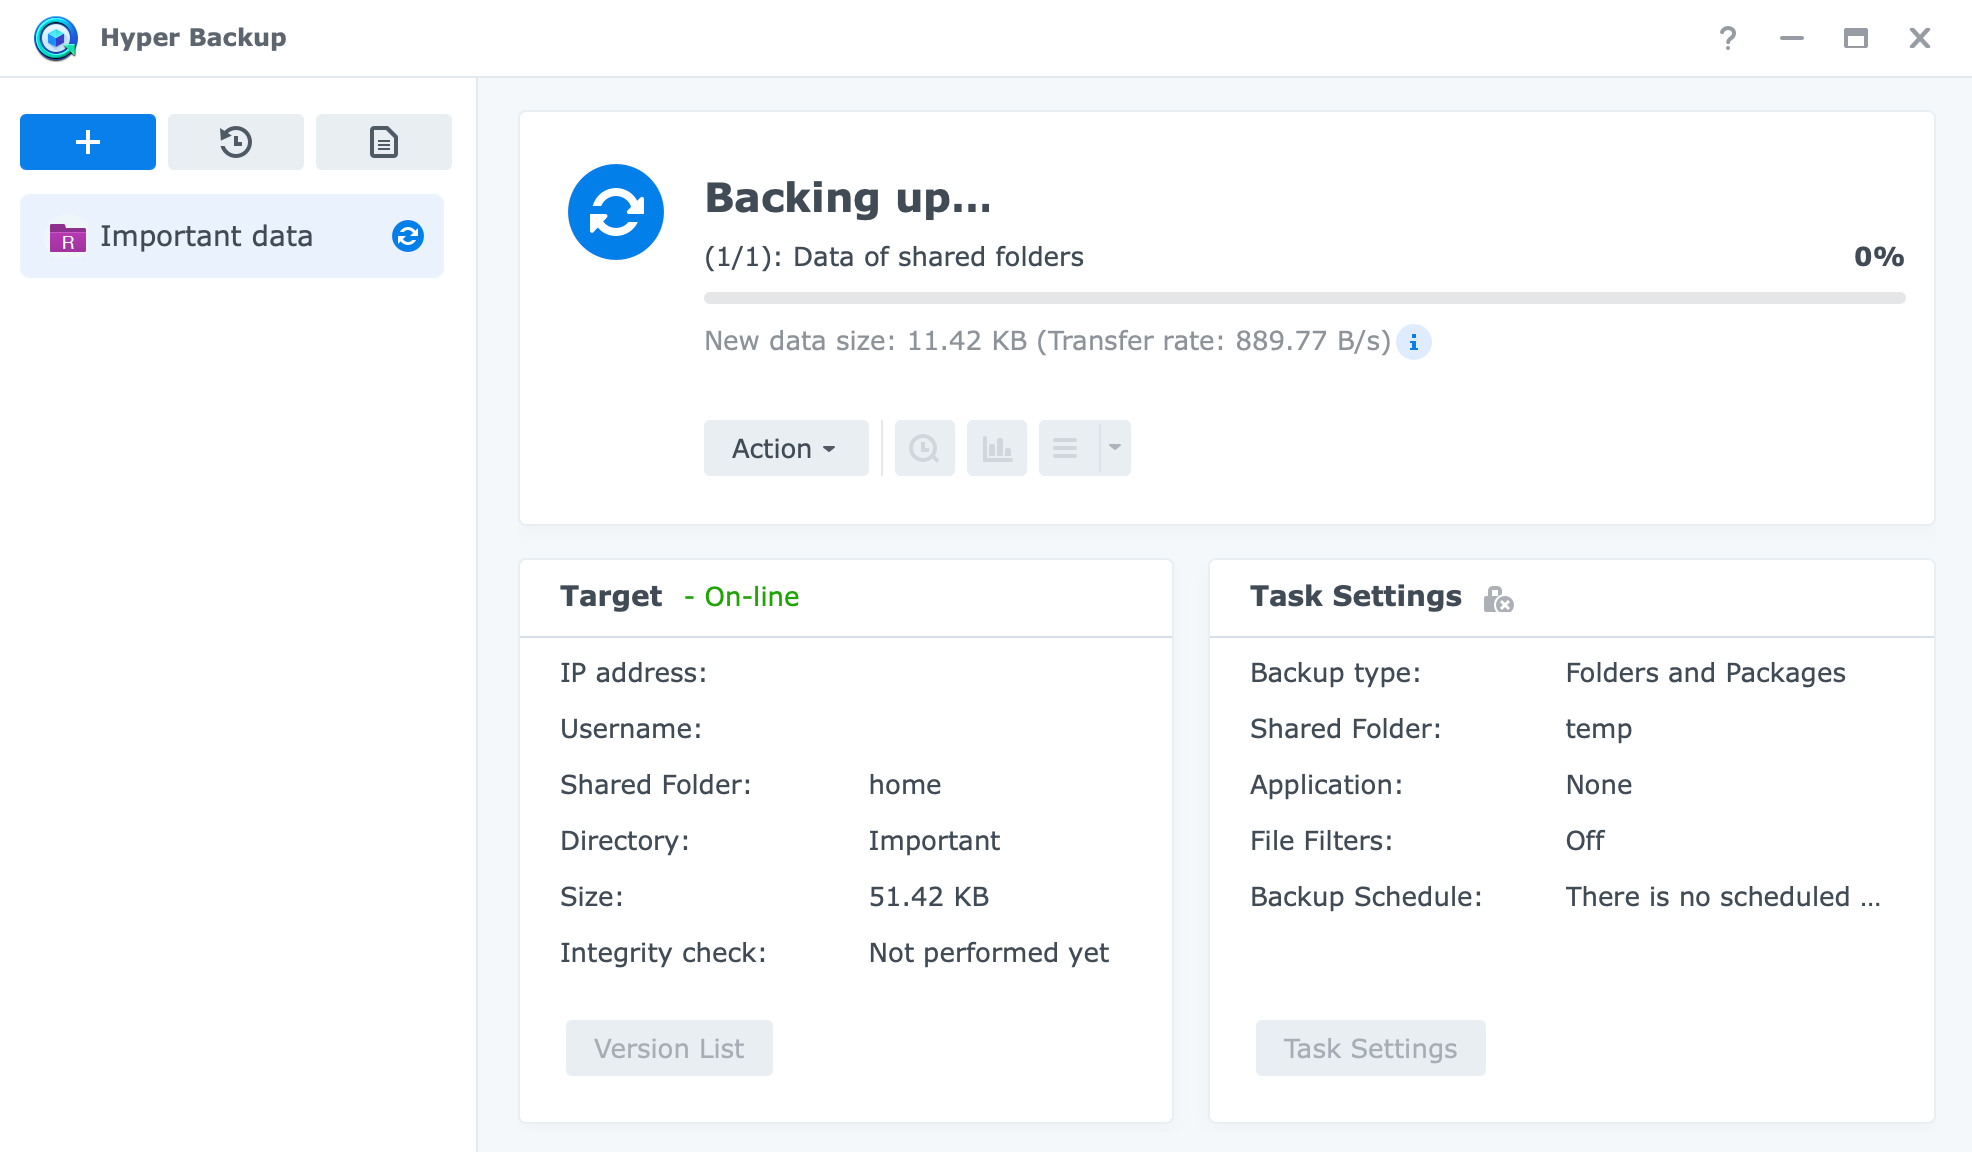
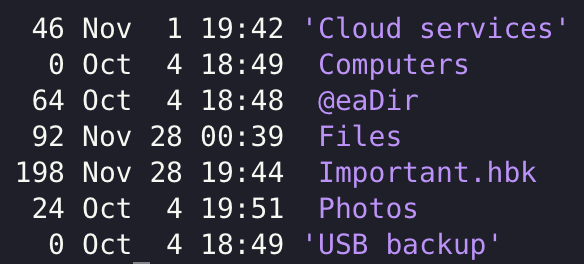
After the backup has been completed the content will end up in the user's home folder. We can see that the content of that folder along with the backup archive called Important.hbk has several root share folders that were created by the BSM OS for each BSM account. These files are not visible via the UI, and the HBK archive will not be as well.
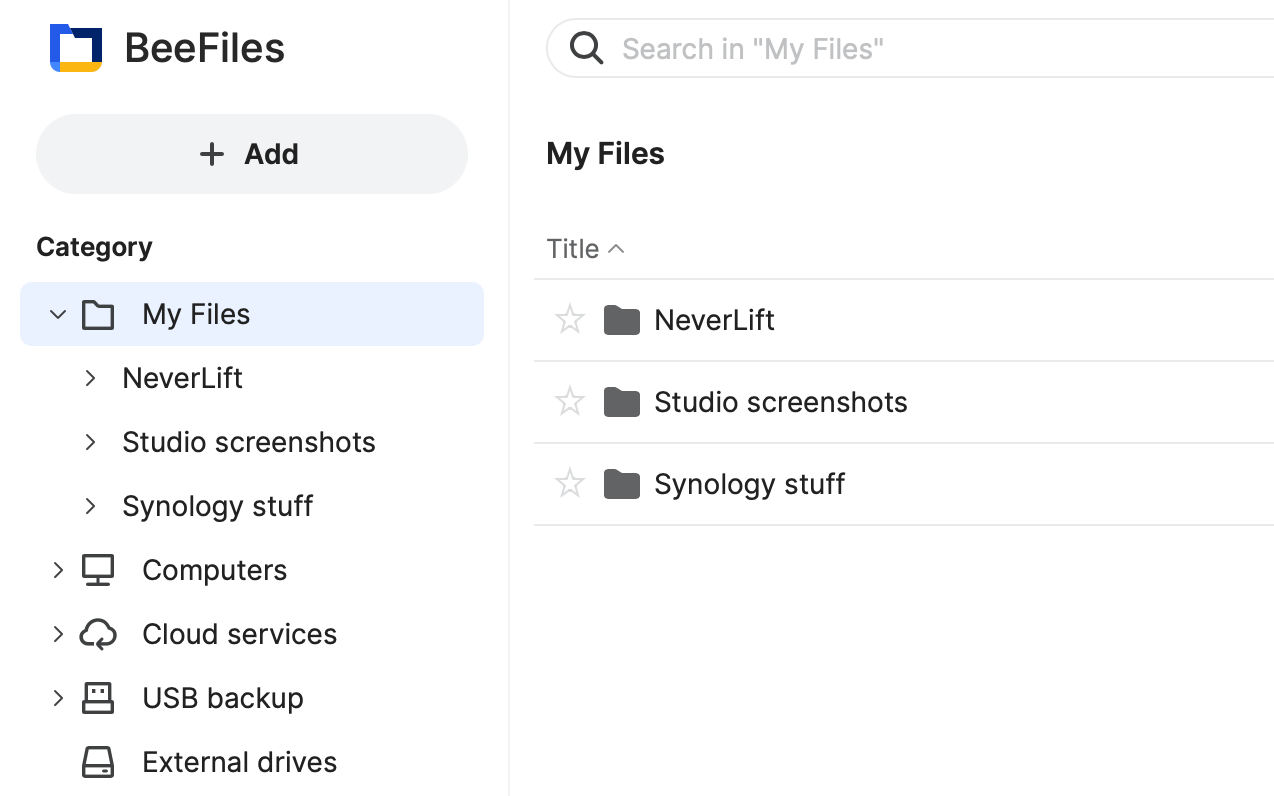
The reason for that is that the BSM OS uses either BeeFiles or BeePhotos web apps to show the content. The BeeFiles app can only present the content of the root Files folder that we can see in the image, but because the HBK file is outside of it, we can't download the file that way.
One way to do it is to copy the archive into the Files folder and then download it via the BeeFiles web app.
Recovery of data
To recover the data we then have to either move (or rather copy the archive) into the Files folder, use the Hyper Backup app on the source NAS, or activate SMB protocol on the BeeStation in order to get to the backup archive in case any disaster hits your main data source.
While the source NAS is working we can of course use the said Hyper Backup interface to recover individual files or all of them, as well as download them if needed.
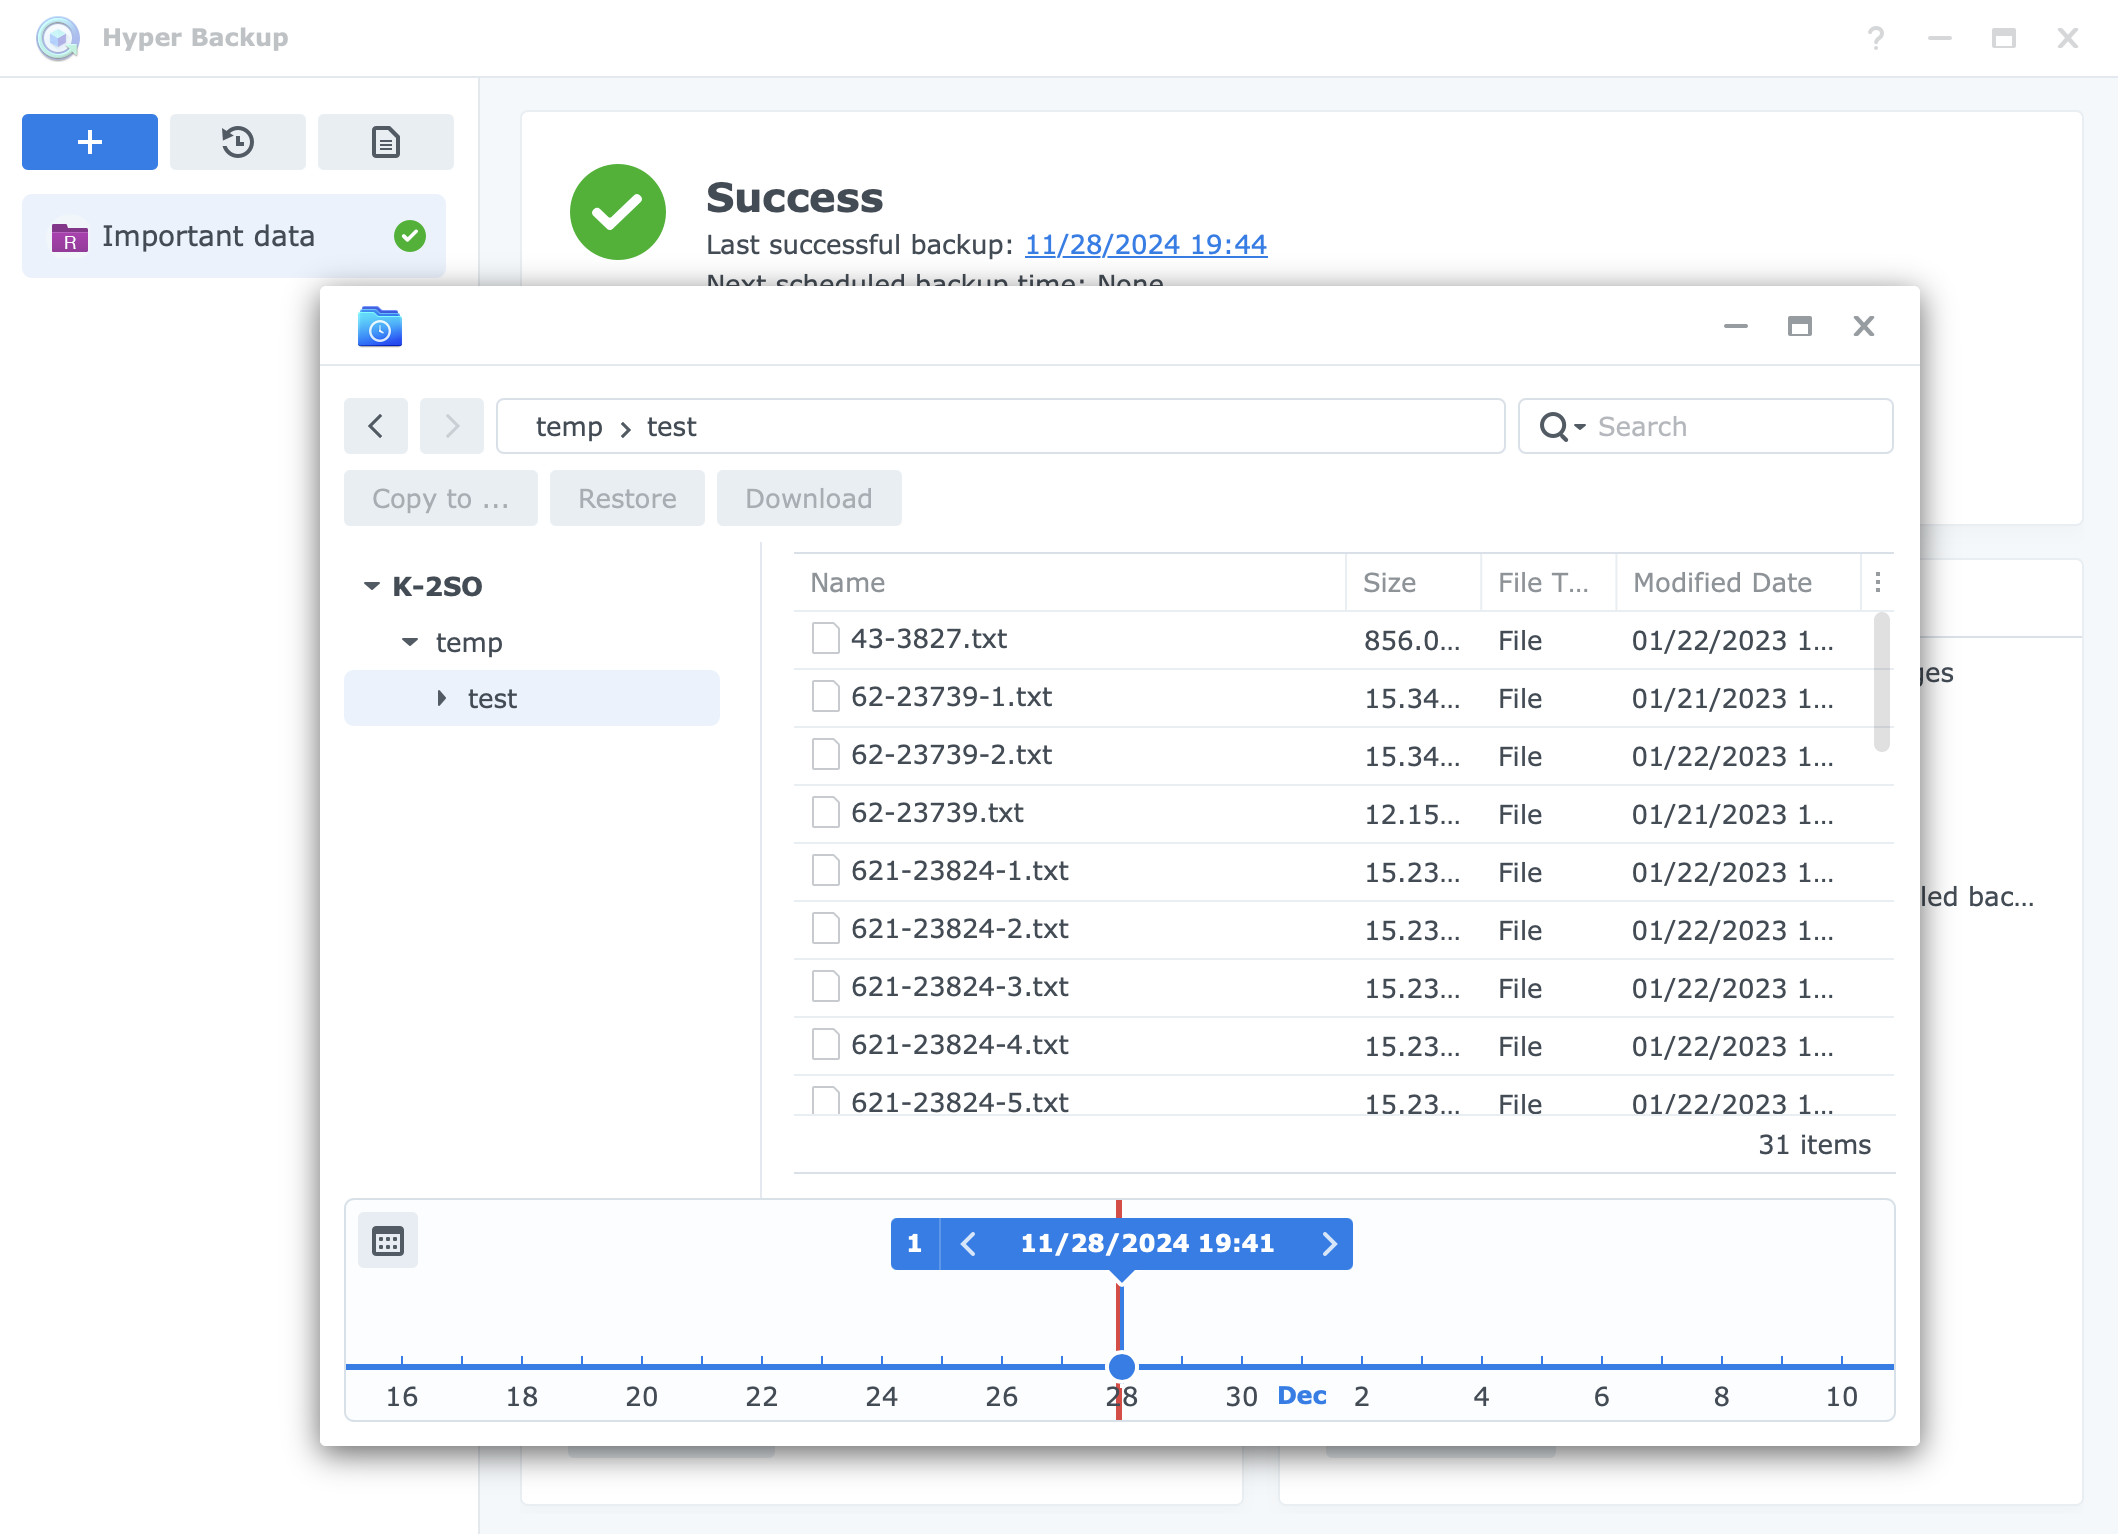
The Hyper Backup backup explorer view will access the archive on the BeeStation, and list all the versions and files that it contains.
Because BeeStation does not have the option to install the Hyper Backup or Hyper Backup Vault app, we are unable to access the backed-up data directly on it. This means that in case the source data is damaged, or the NAS itself is inaccessible, we will have to recover the archive from the BeeStation and move it to a new working Hyper Backup device or use the desktop version of Hyper Backup Vault.
The easiest way would be to activate the SMB protocol on the BeeStation (using the System Settings > Advanced settings section as before), and extract the data that way.
Using any OS compatible with the SMB protocol we can get the overview of the home folder for the specified user and copy the archive.
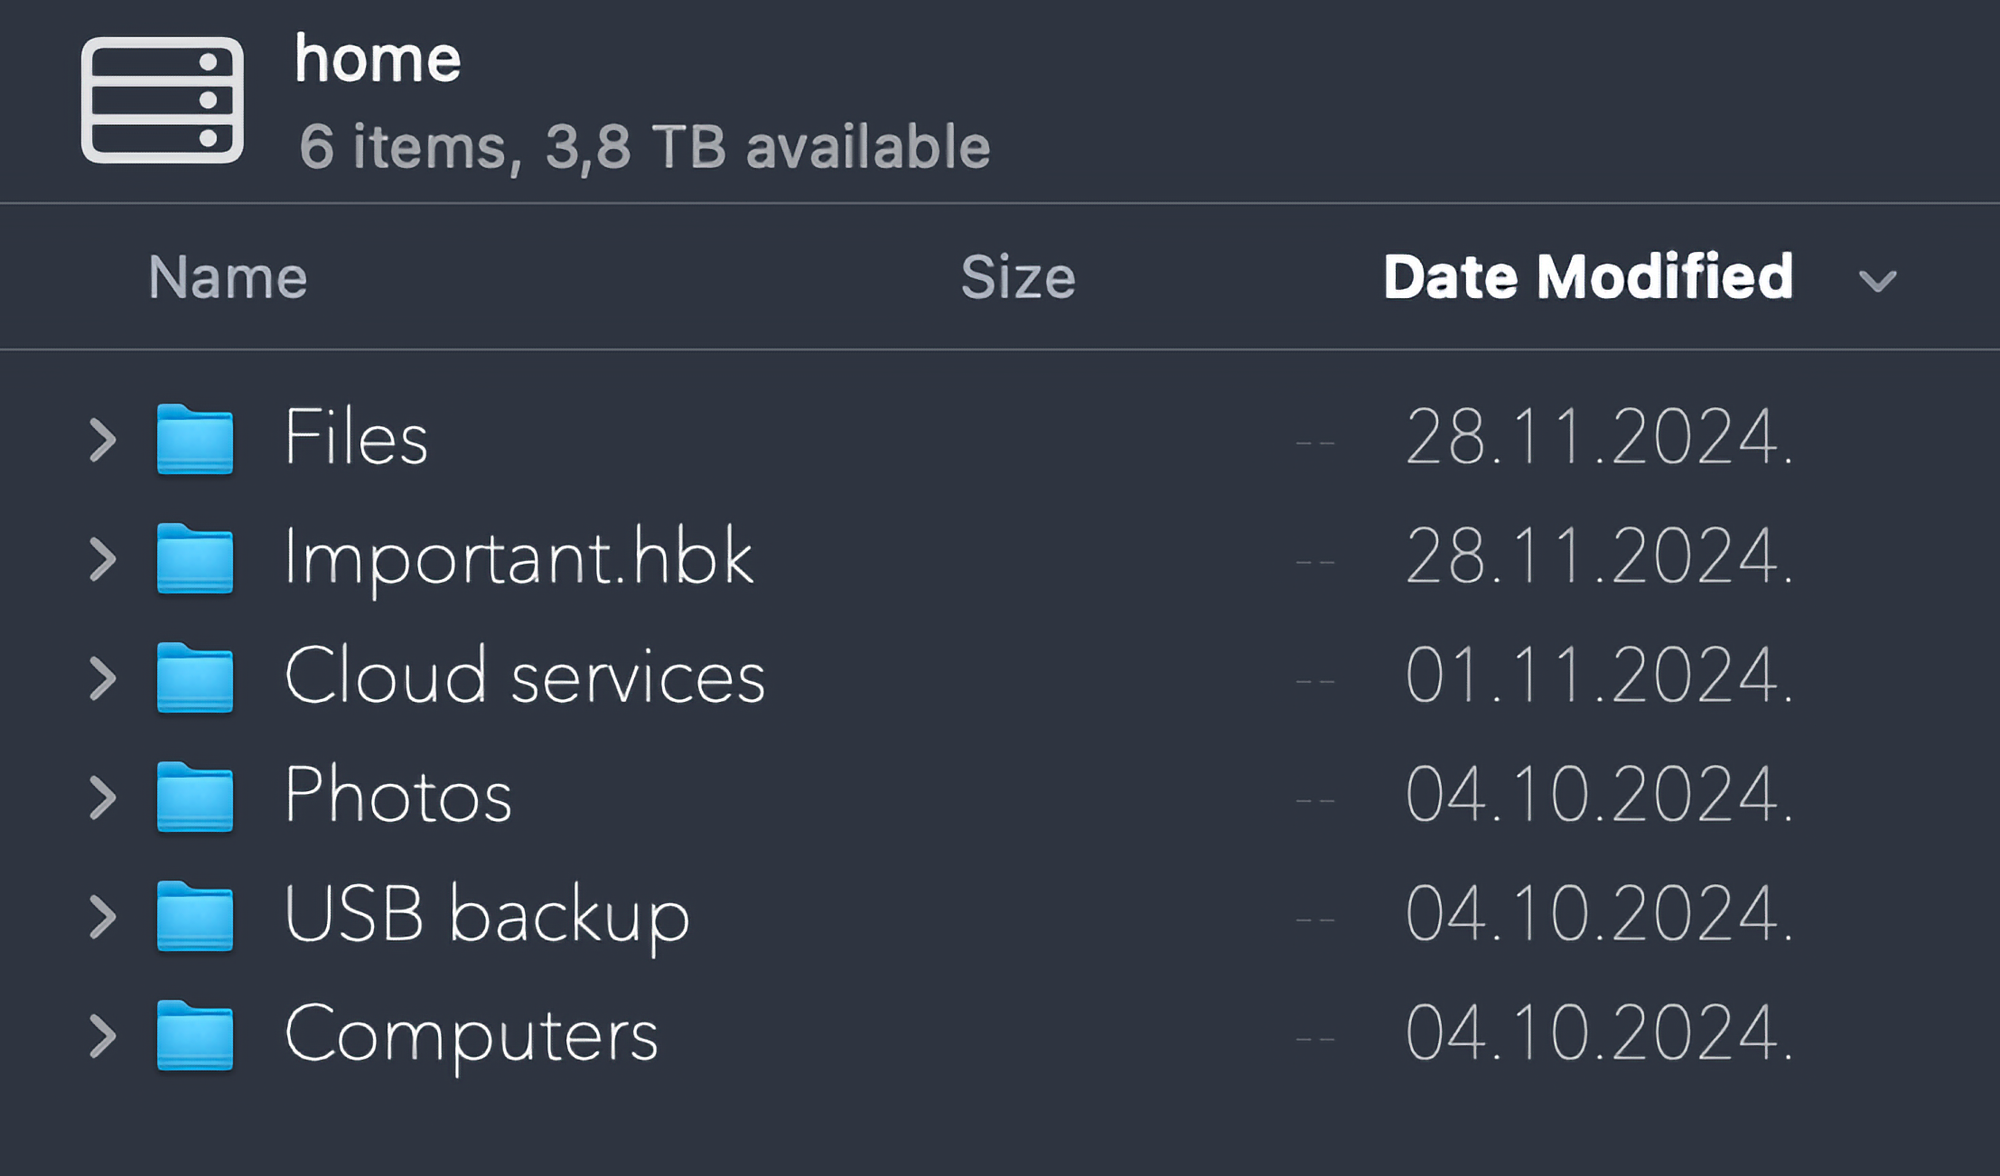
We can notice that the HBK "file" is in fact a folder when not accessed by the Hyper Backup, and that is true. This proprietary "database-like" format contains a lot of elements and not just raw data.
Once we download the file, we can compress it into a ZIP archive and upload it to a compatible DSM system where once decompressed, it will be presented as a single HBK archive.
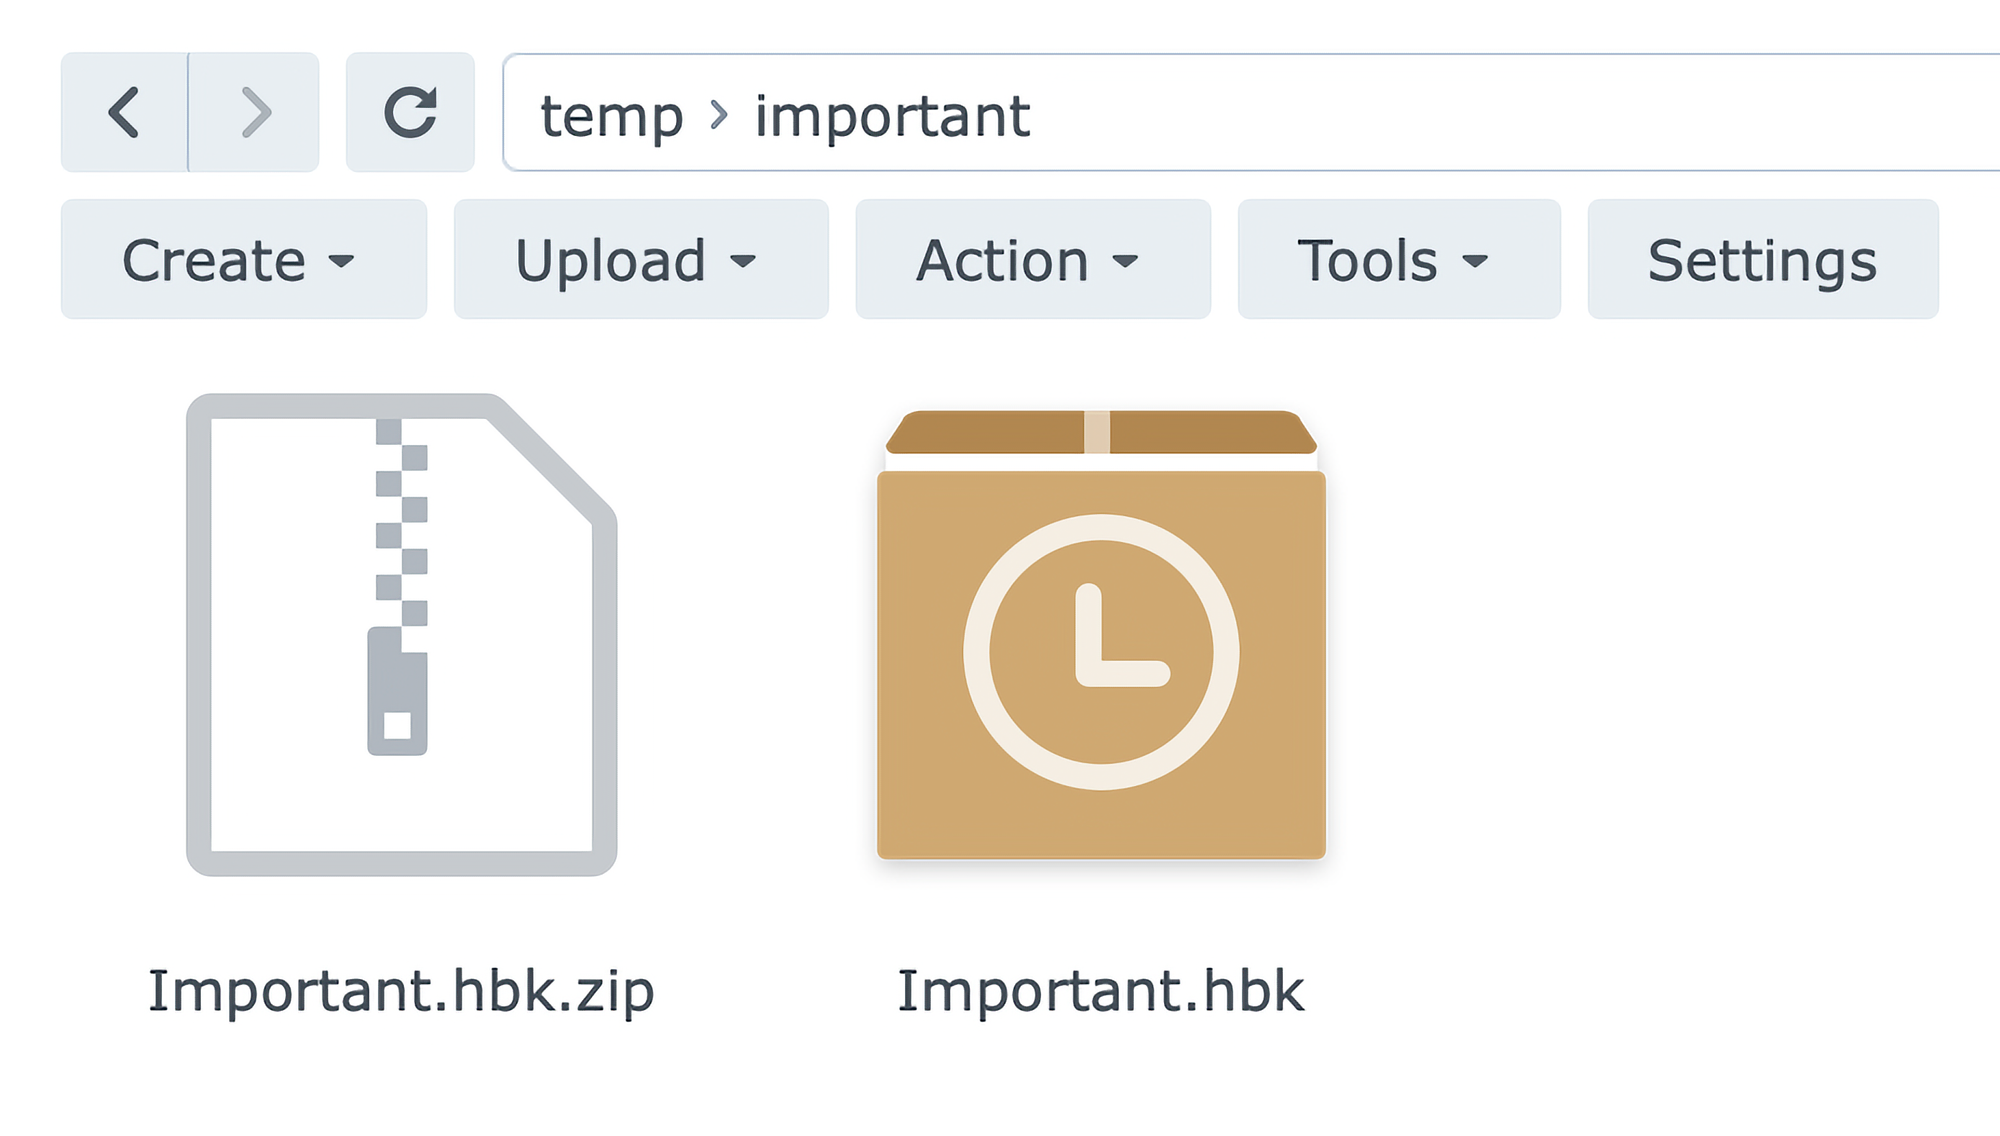
Opening the HBK in question, will invoke Hyper Backup Explorer, and offer the same working window as before. The only difference is that this time, the archive is being accessed "locally" and not remotely from BeeStation.
There we go, simple. Apart from activating the rsync protocol, the rest of the process is straightforward for anyone already using Hyper Backup. Does this mean that BeeStation and BSM might one day support this officially? Maybe. But, until then, at least there is a working tweak to better utilize this new device from the Synology lineup.

