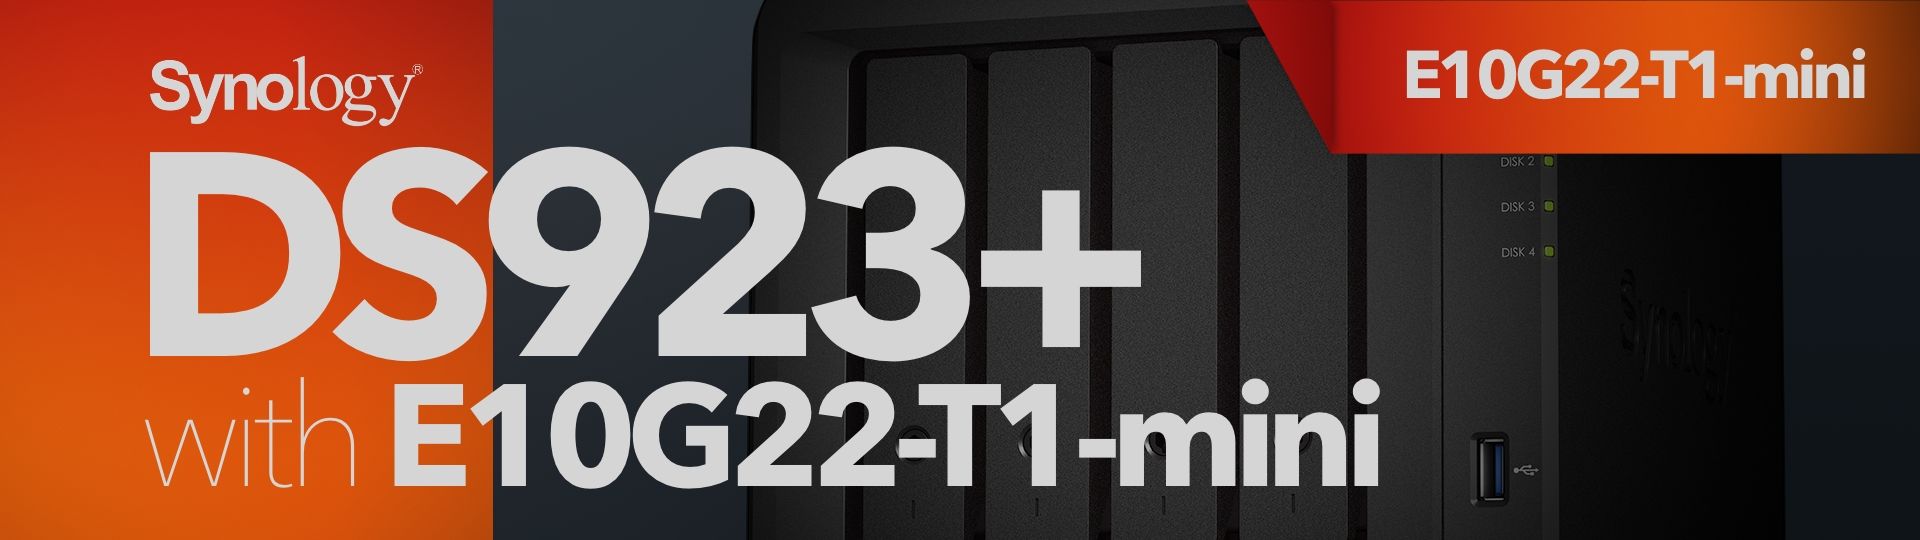
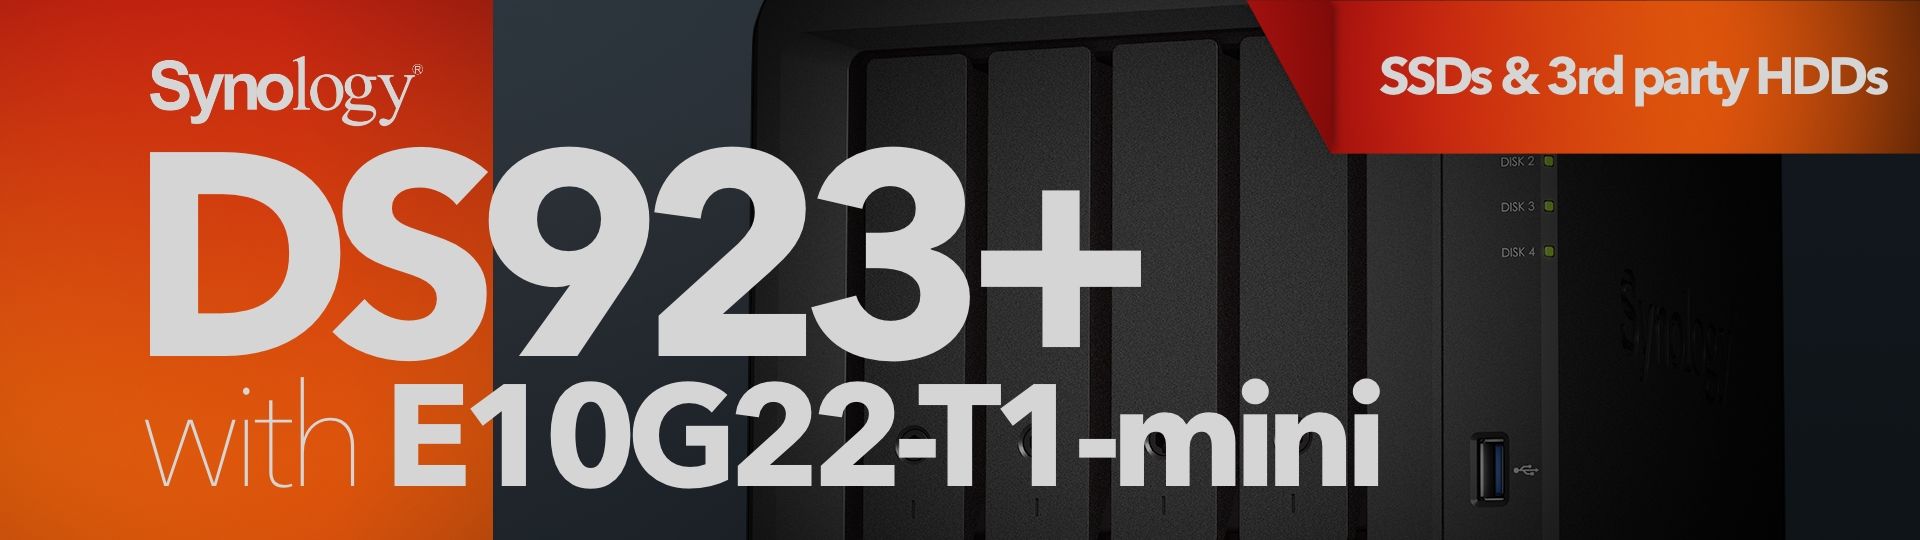
Synology DS923+ review

Table of Contents
: Intro
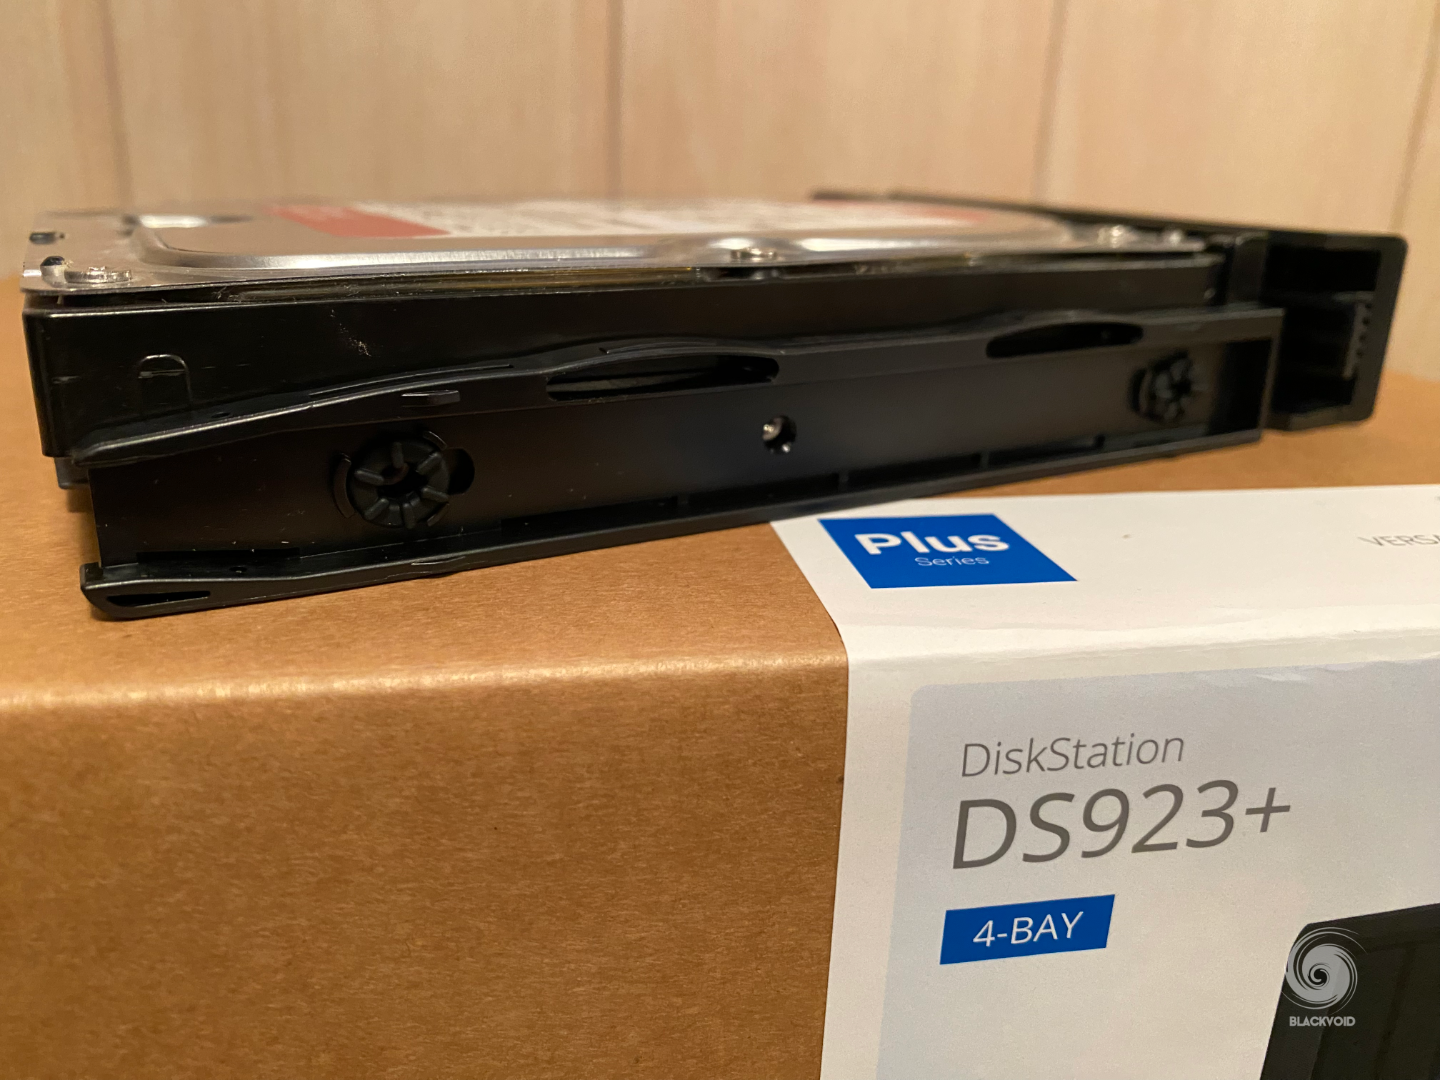
: Packaging
: Specifications
: E10G22-T1-mini card
: SSDs, 3rd party HDDs and NVMe storage pools
: DSM setup and apps installation
: Speed tests
: Virtualization and containerization
: Plex
: Conclusion
: Intro
It was 2016 when Synology started to roll out their popular 4-bay NAS models in a version that supported more potential bays and offered more power to the NAS. These models, starting with the DS916+, had an eSATA port on the back and support for more RAM than their previous 4-bay version (like DS412+ or 415+)
In 2018, Synology released the DS918+ model which had some visible changes to the previous model, and that look remained until today, with the brand new 4-bay version, the DS923+.
Many were expecting this version even sooner but here we are. Just as the new year is about to start, the very first DS device from the new x23 lineup is here.
While there are not many surprises to this model for anyone following the Synology brand, there is one semi-expected surprise that is the first to be introduced to a 4-bay device such as this one.
With that, let's see what the new DS923+ can do for its customers and if this should be a NAS worth spending over €530 (+ tax and drives).

: Packaging
For all "unboxers" out there, let's start with the package and its content first.
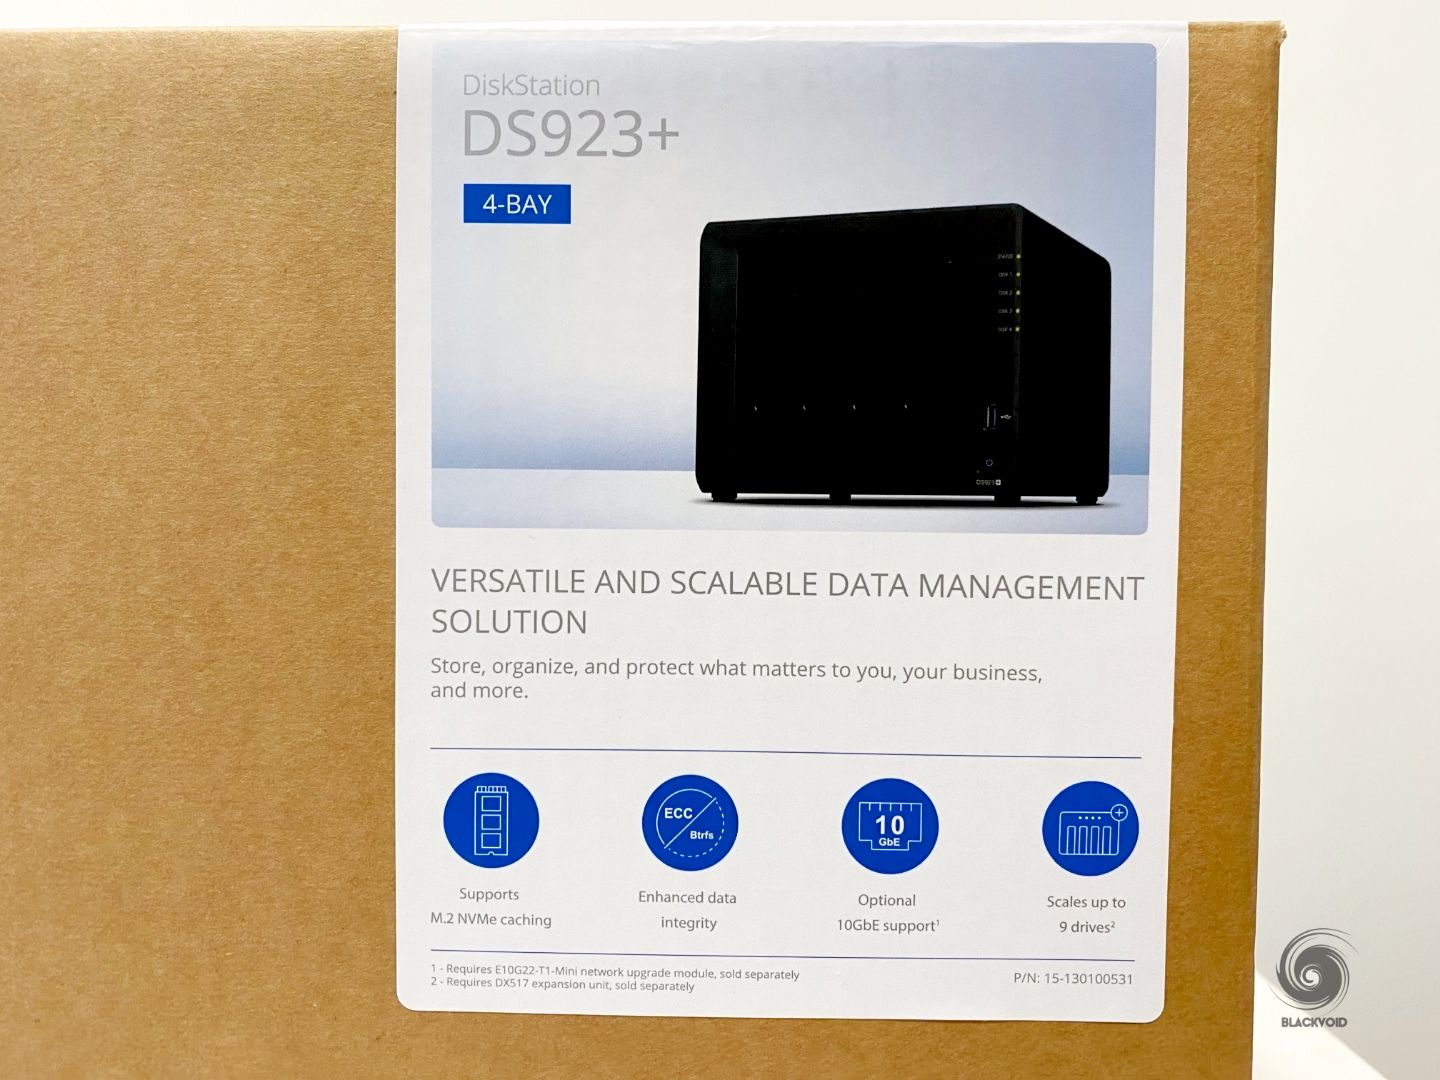

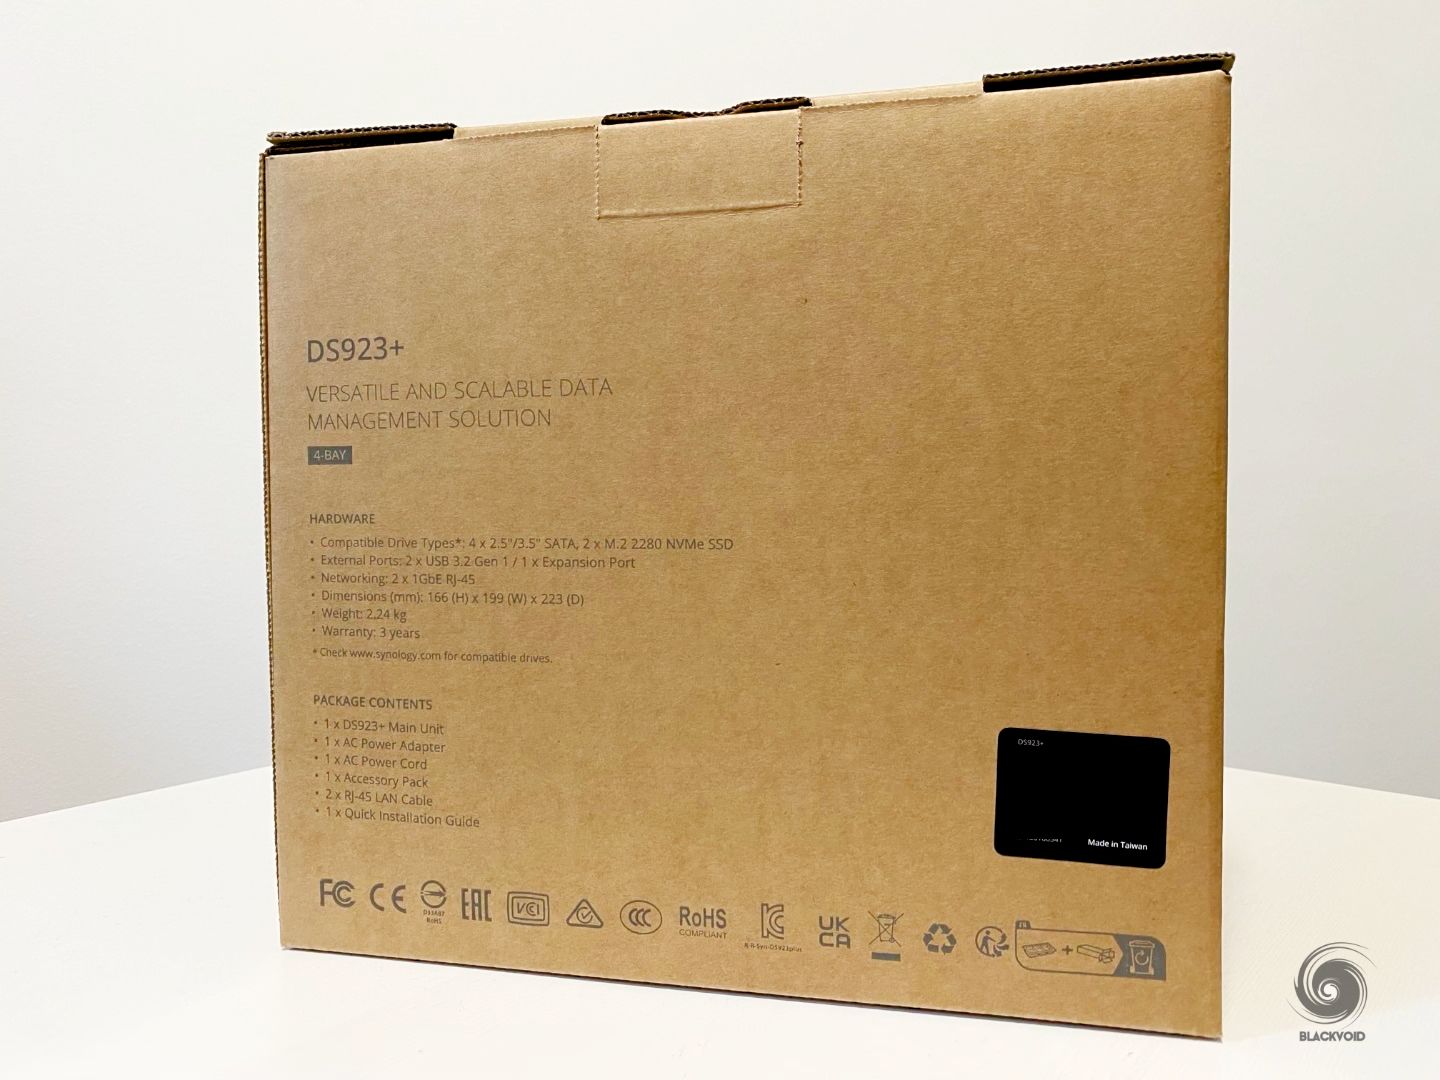
Minimalistic yet informative packaging
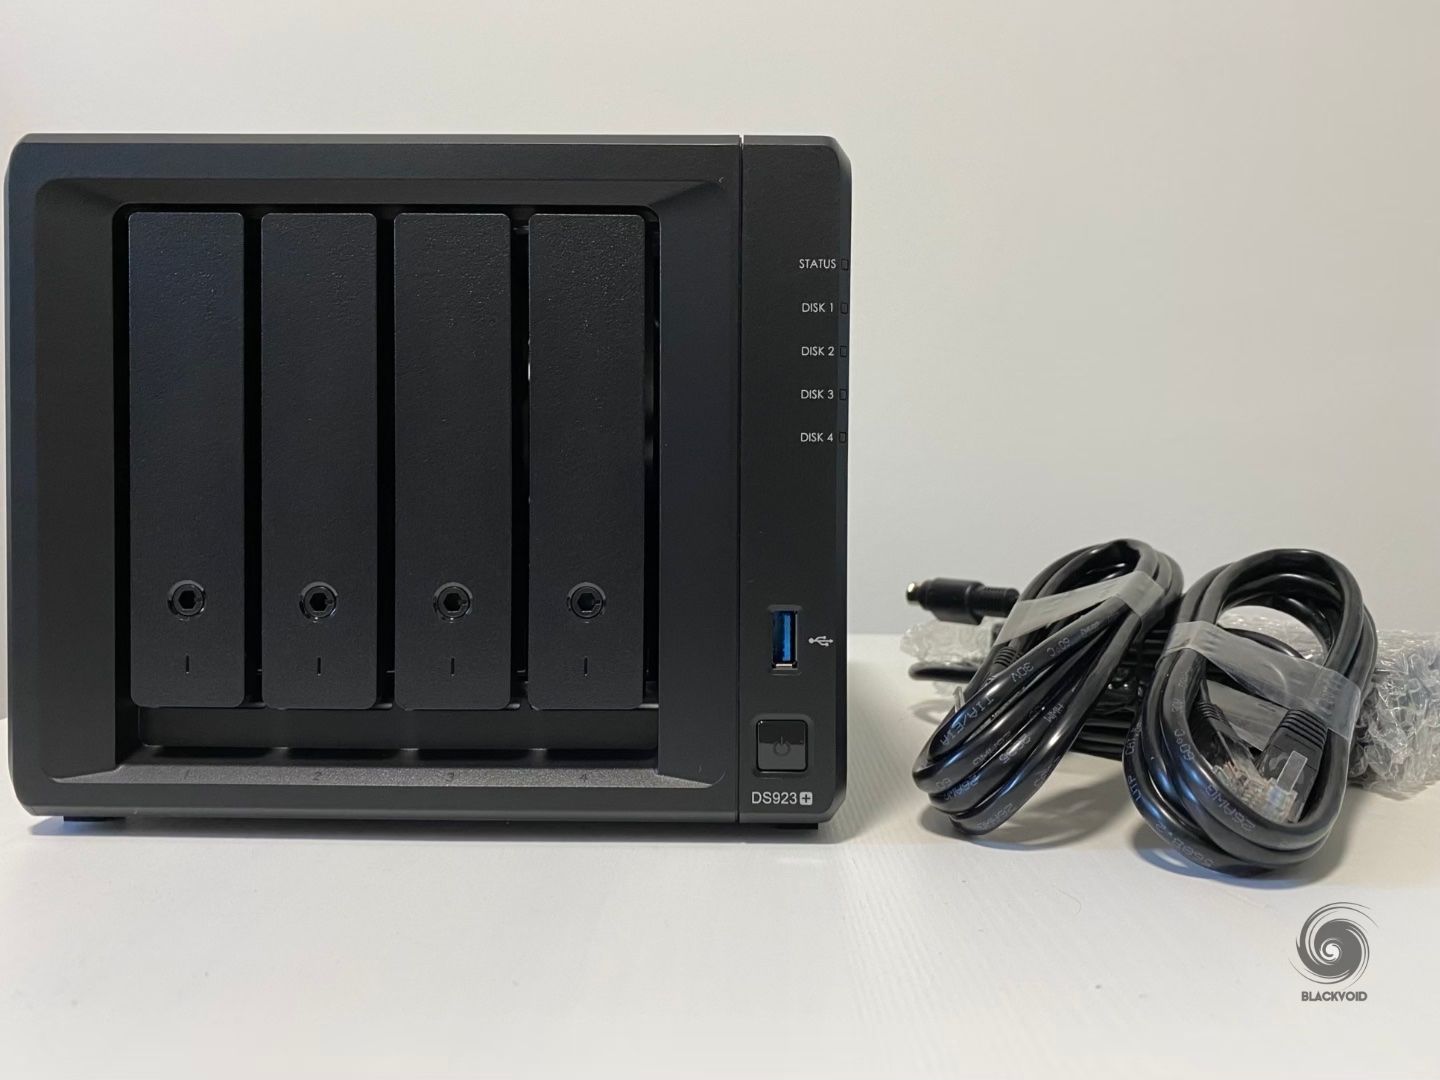
The content of the box as expected contains the NAS itself, the power adapter, and two RJ45 CAT5e cables, along with a pair of bay door lock keys.
This type of packaging has been around for over five years now and incorporated across the whole of Synology's lineup. With a minimalistic and eco-friendly look and feel, let's see what this particular NAS model is made of.

: Specifications
Following the AMD trend that Synology introduced with DS1522+, the DS923+ is also using the same CPU as well as RAM specifications as the mentioned 5-bay model.
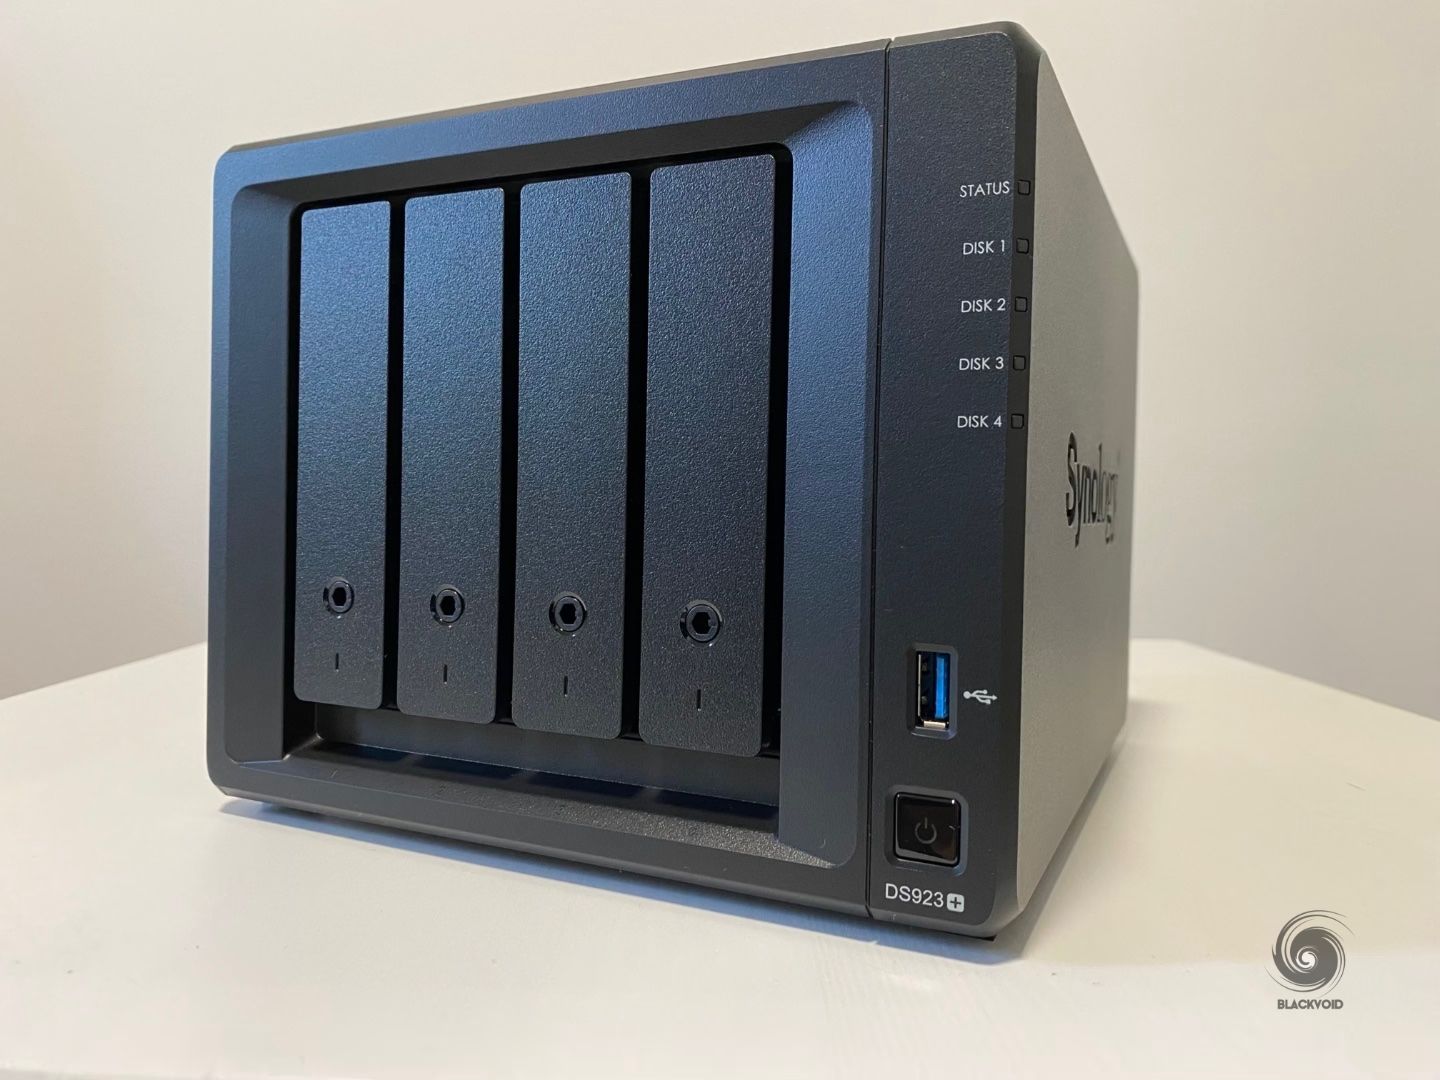

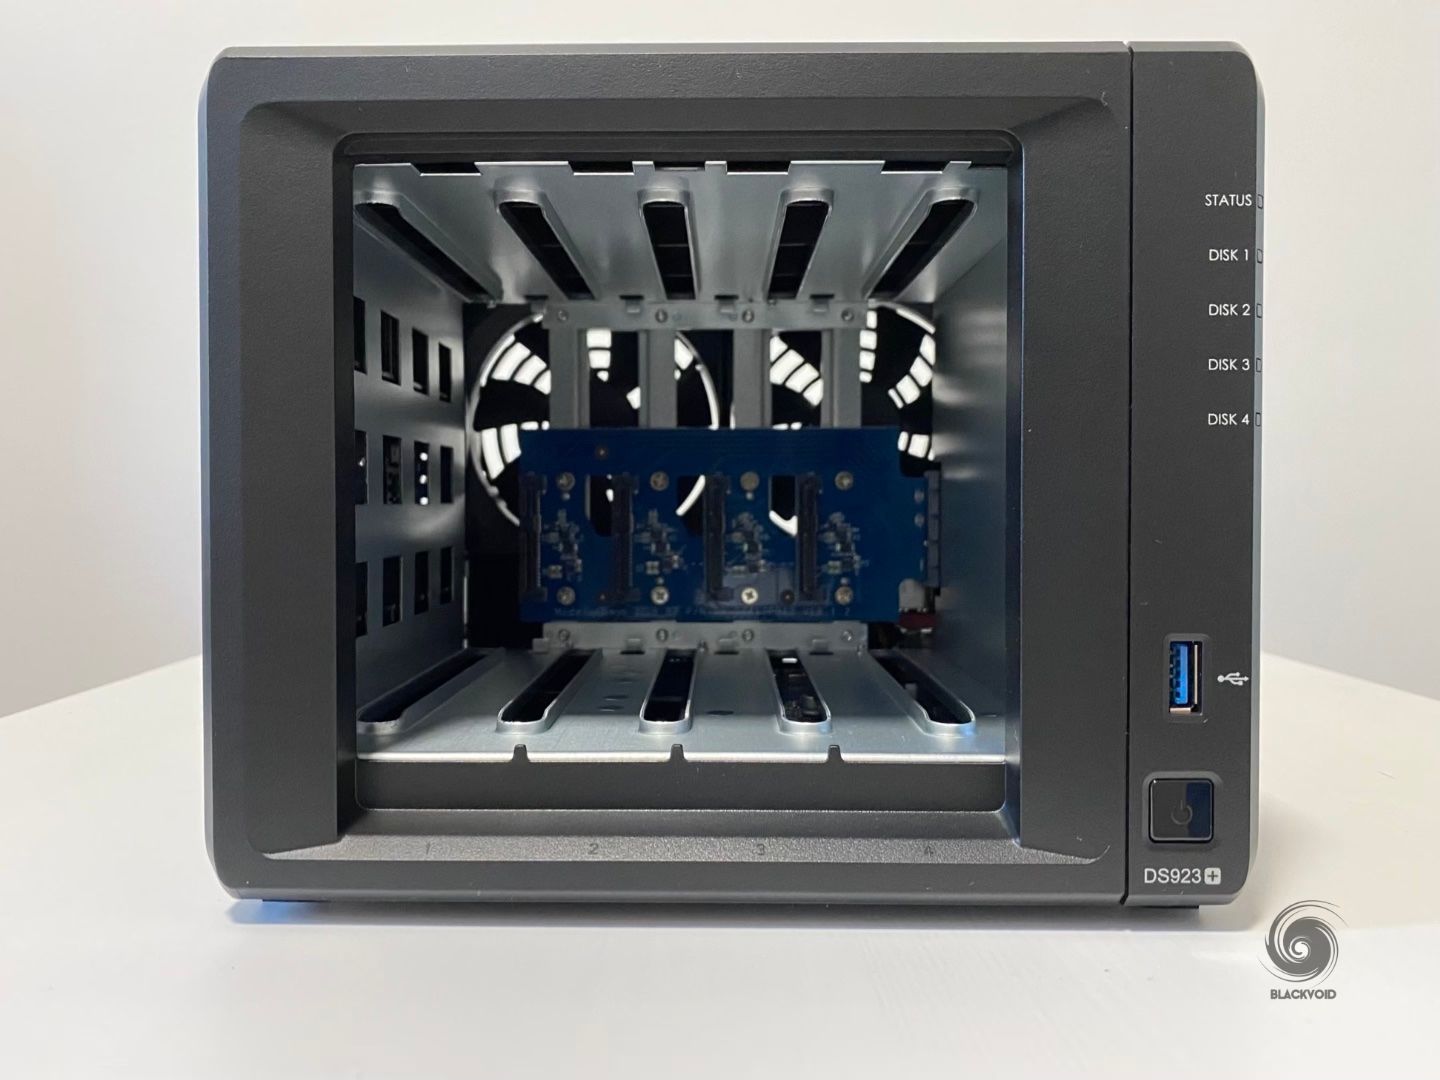
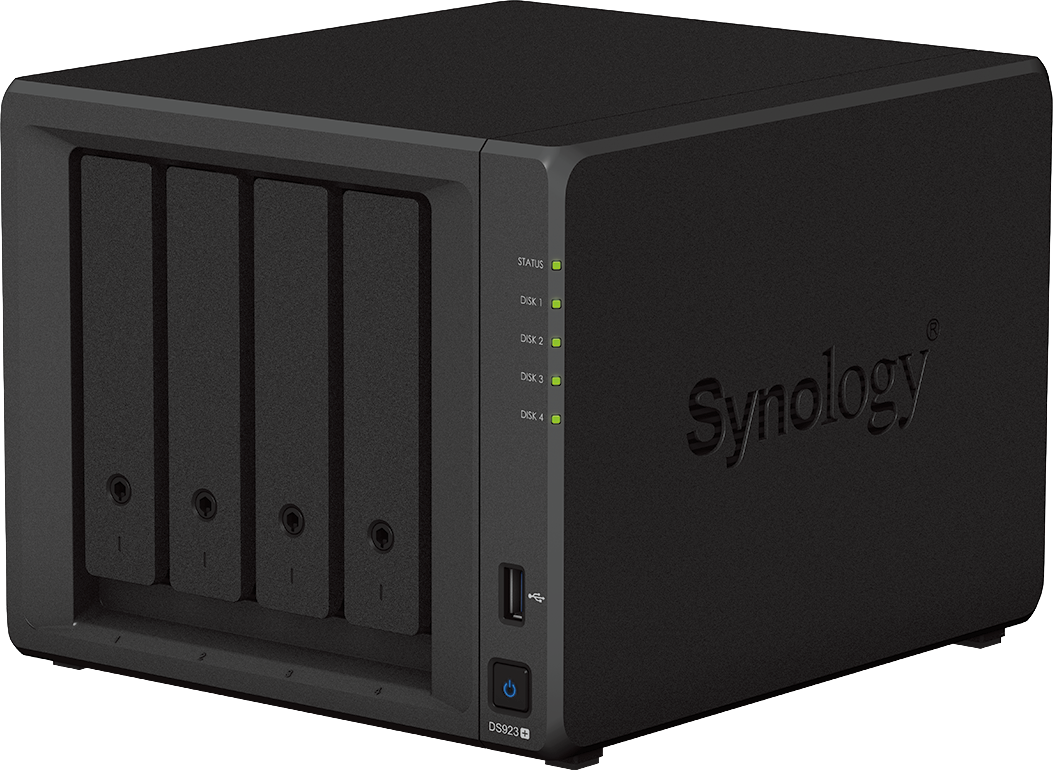
DS923+ front and back. A compact beast
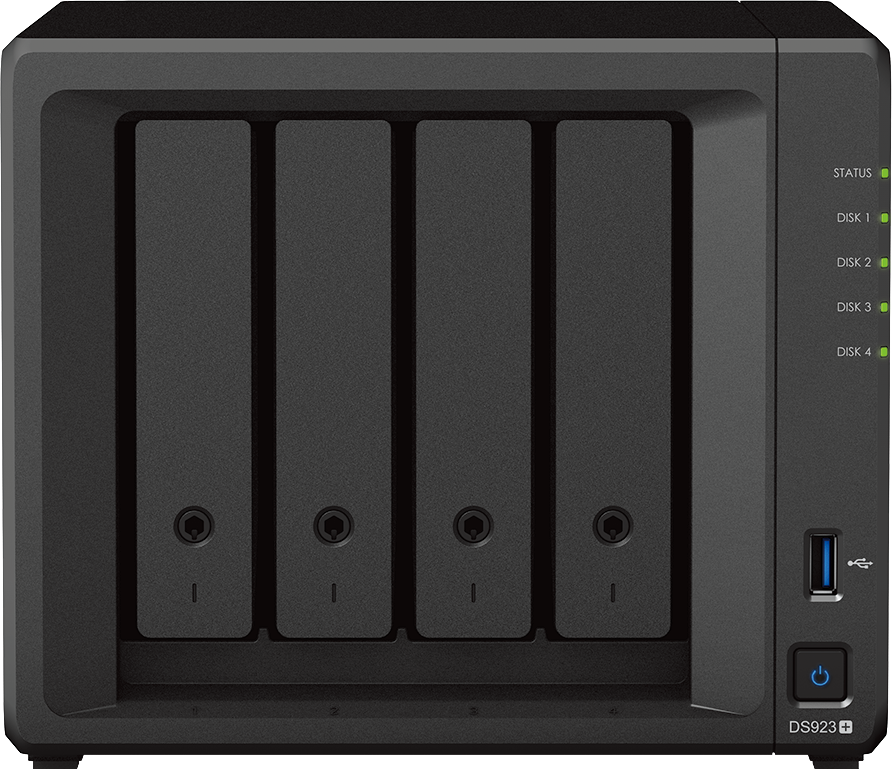
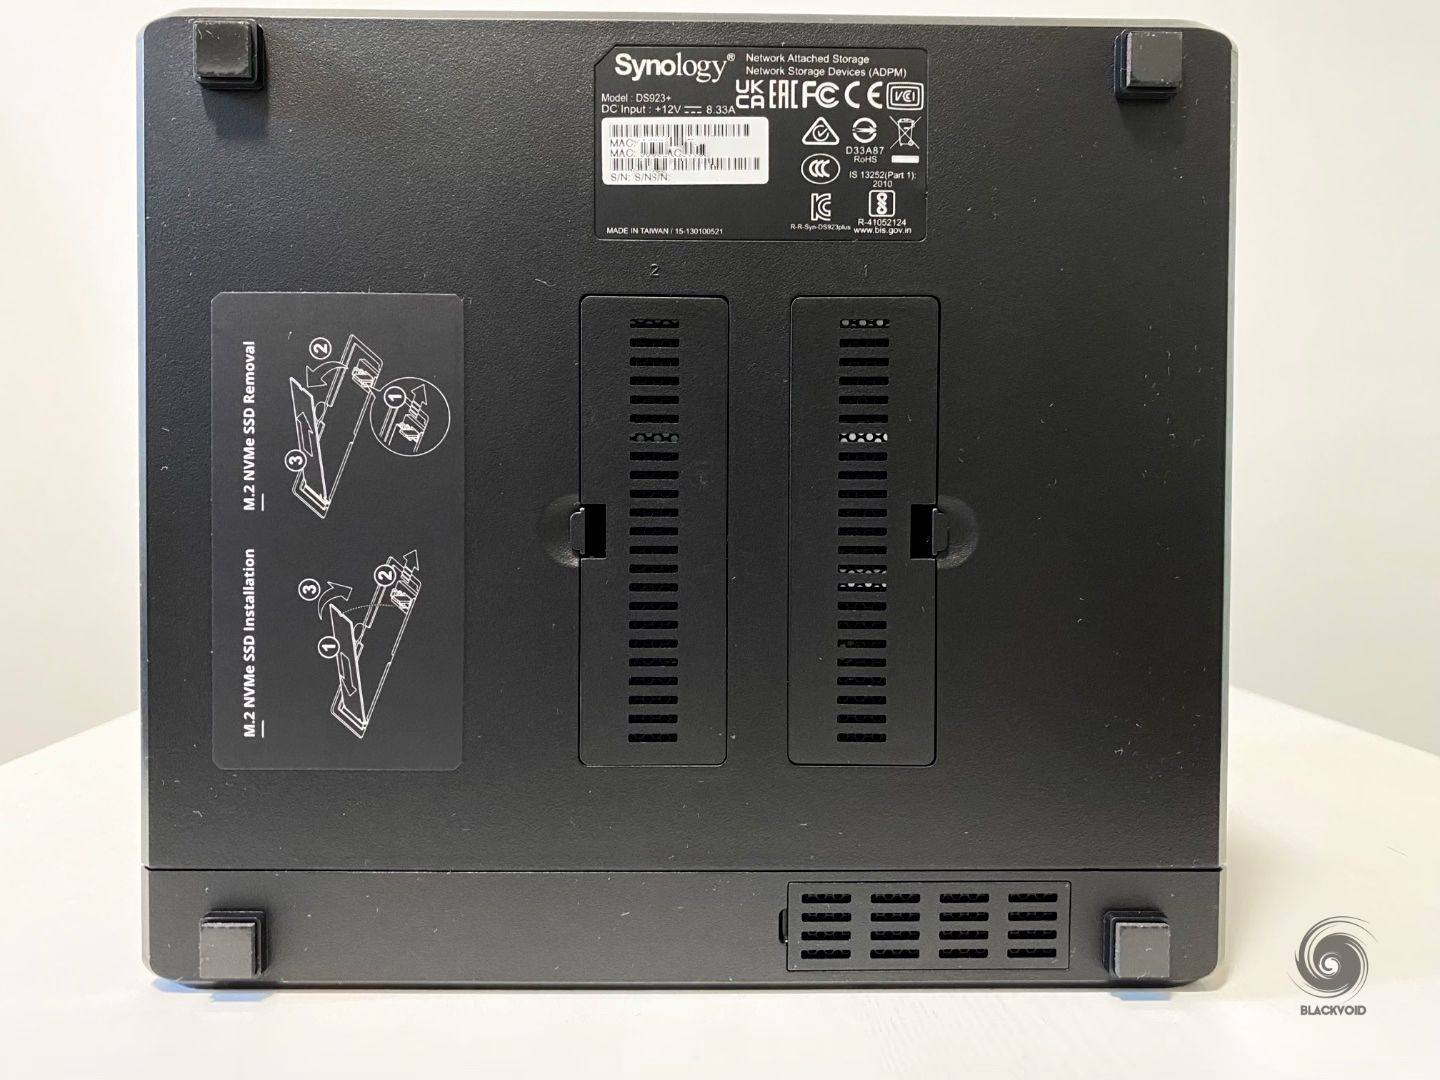
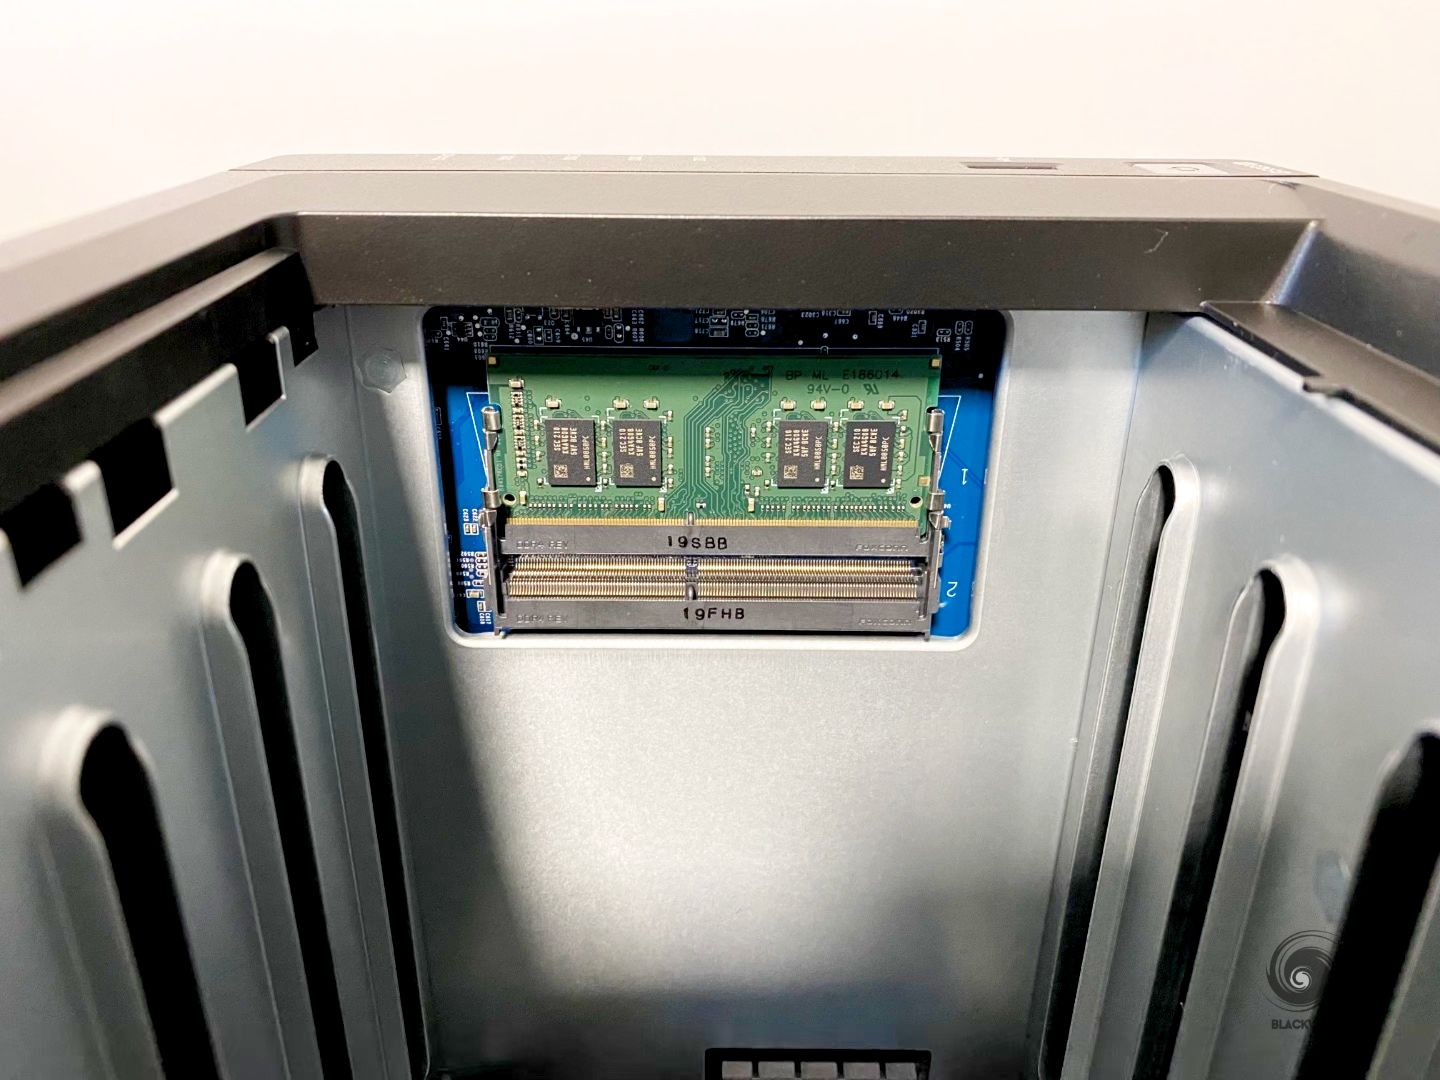
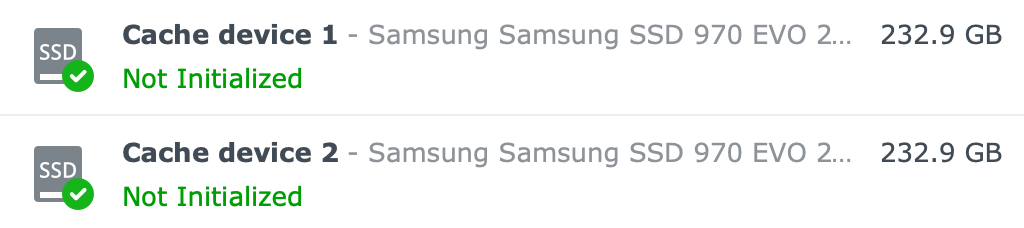
This model is equipt with an AMD Ryzen R1600 dual-core (4-thread) CPU at 3.1GHz, as well as 4 GB or SODIMM DDR4 ECC memory (upgradable to 32 GB). Four bays on the front side can accommodate 2.5" and 3.5" HDD/SSD drives, and two M.2 2280 slots on the bottom, as before, are reserved for NVMe SSDs for cache purposes.
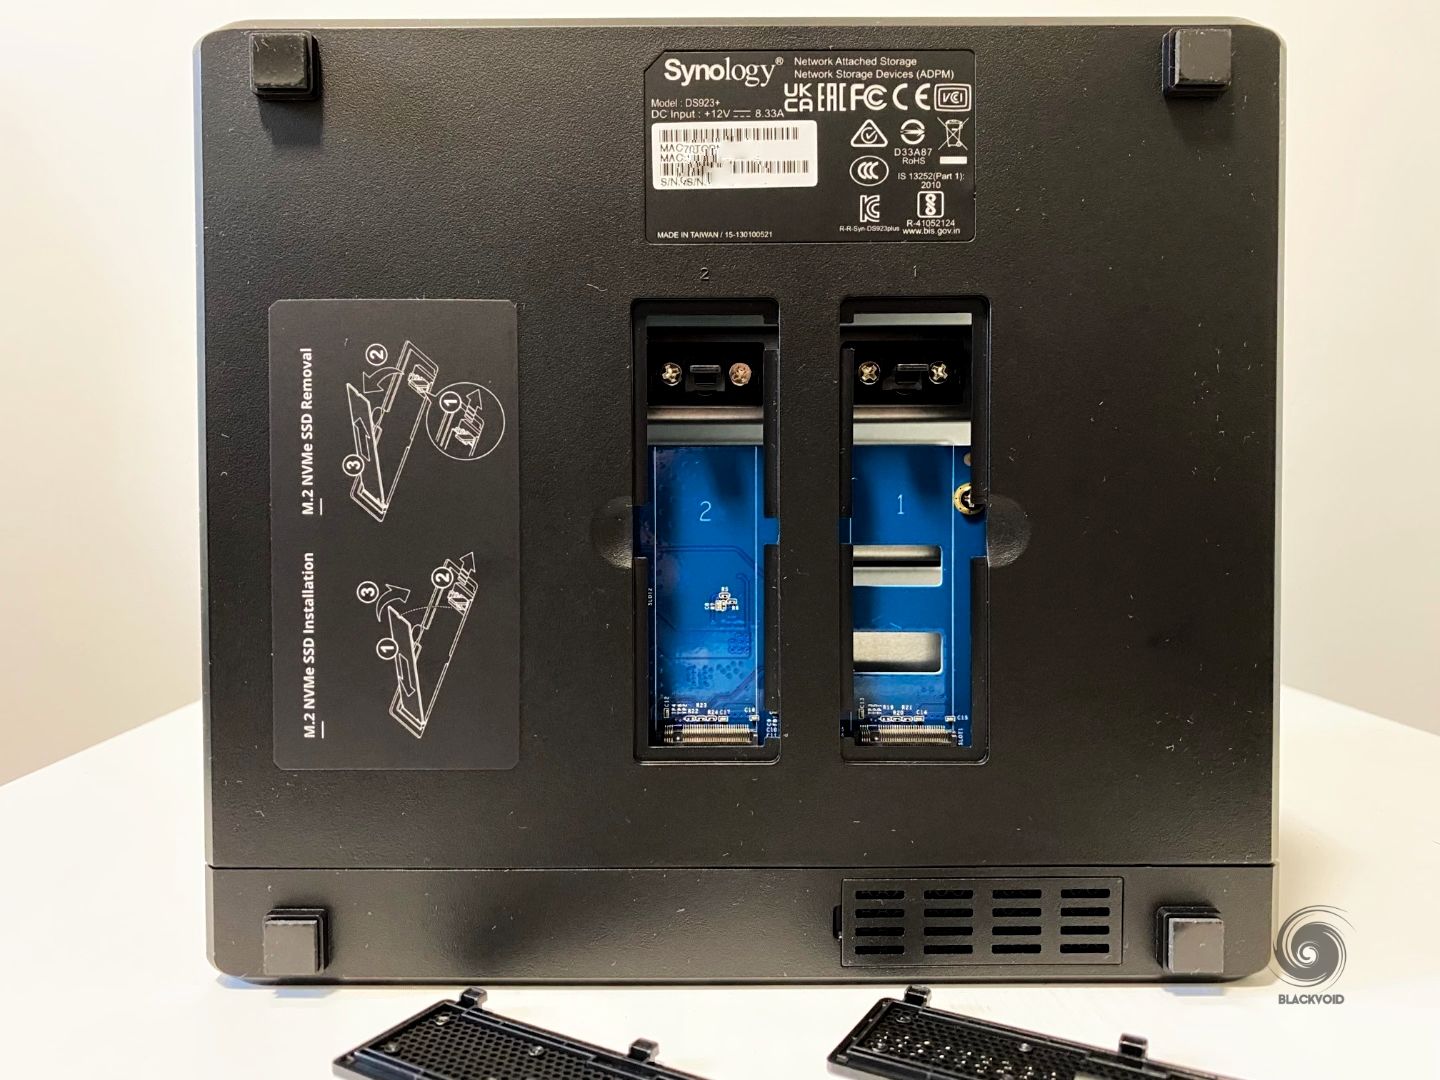
M.2 2280 slots for caching purposes
The big addition to this particular model is the fact that the slots will be usable for both caching and storage pool creation. This is a first for the DS lineup and a real shift from the DS1522+ that does not support this. Also, this feature will not be backward compatible so DS920+ will not support it as well.
This possibility has been at the very top of wishes for a long time, so it's certainly great that the DS923+ finally supports it.
Finally, this is a DSM 7.2 feature, so at the moment it is not possible to configure a working data volume.
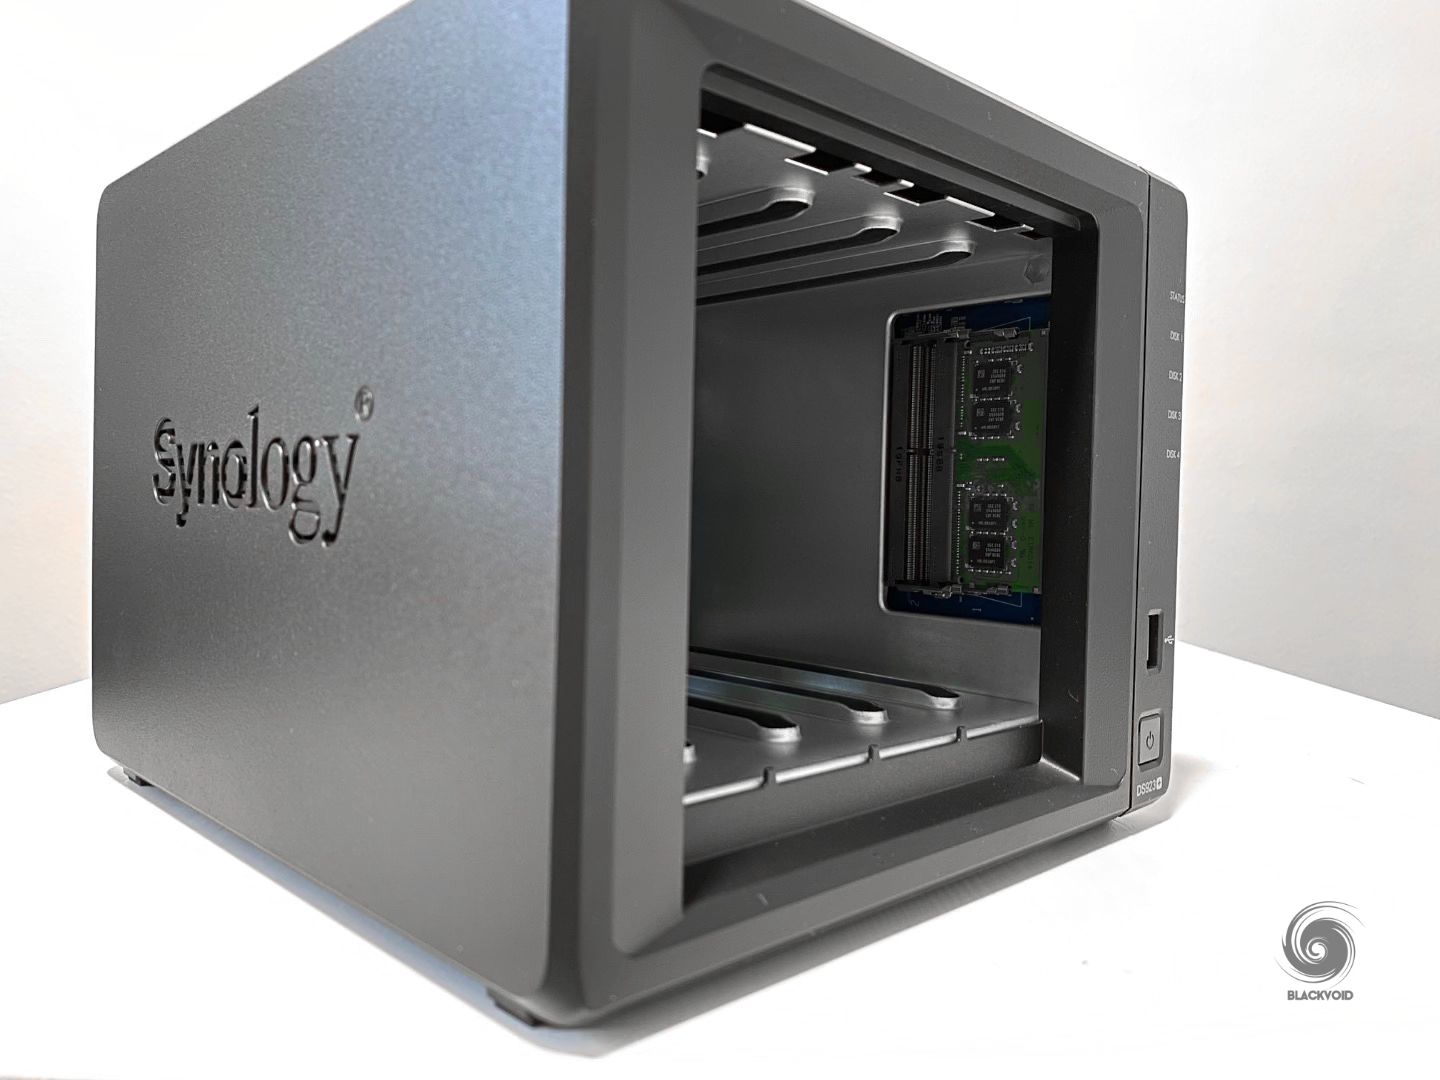
In order to access the two SODIMM memory slots, first remove the drive bays
The DS923+ as compared to the previous lineup is no longer running with the Intel Celeron CPU, and that will also have an effect on the overall power usage. The Celeron TDP on average (by Intel specifications) is around 10 W of TDP, while this R1600 CPU is running between 12 W and 25W. Not a small difference, so be mindful of that. It will offer more speed and allows for some hardware elements that the Celeron was not targeted for, but the price has to come from somewhere, and power usage is one of them.
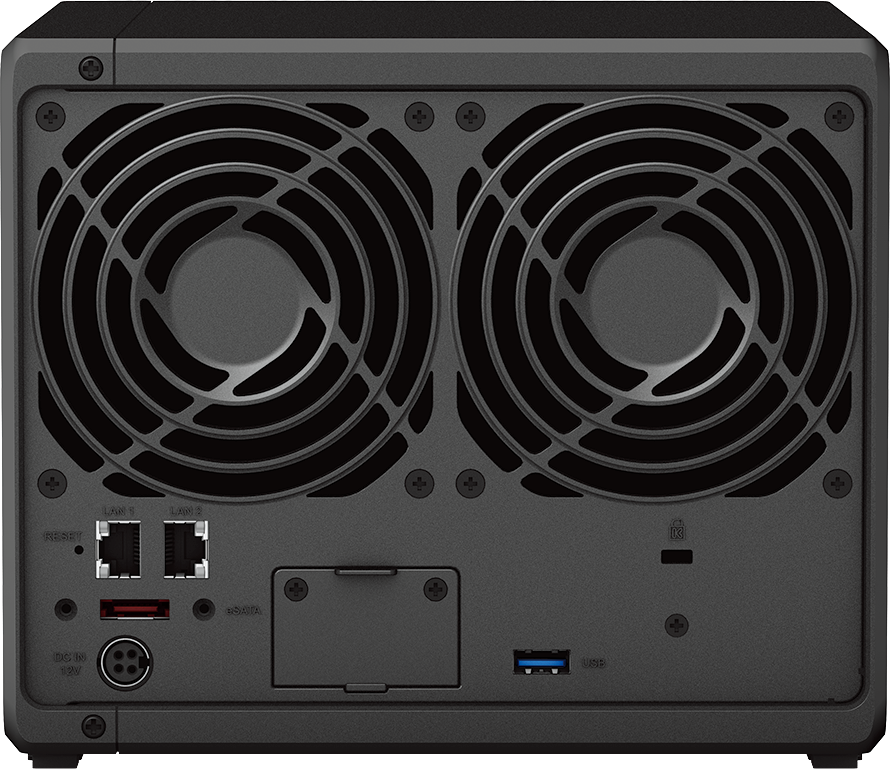
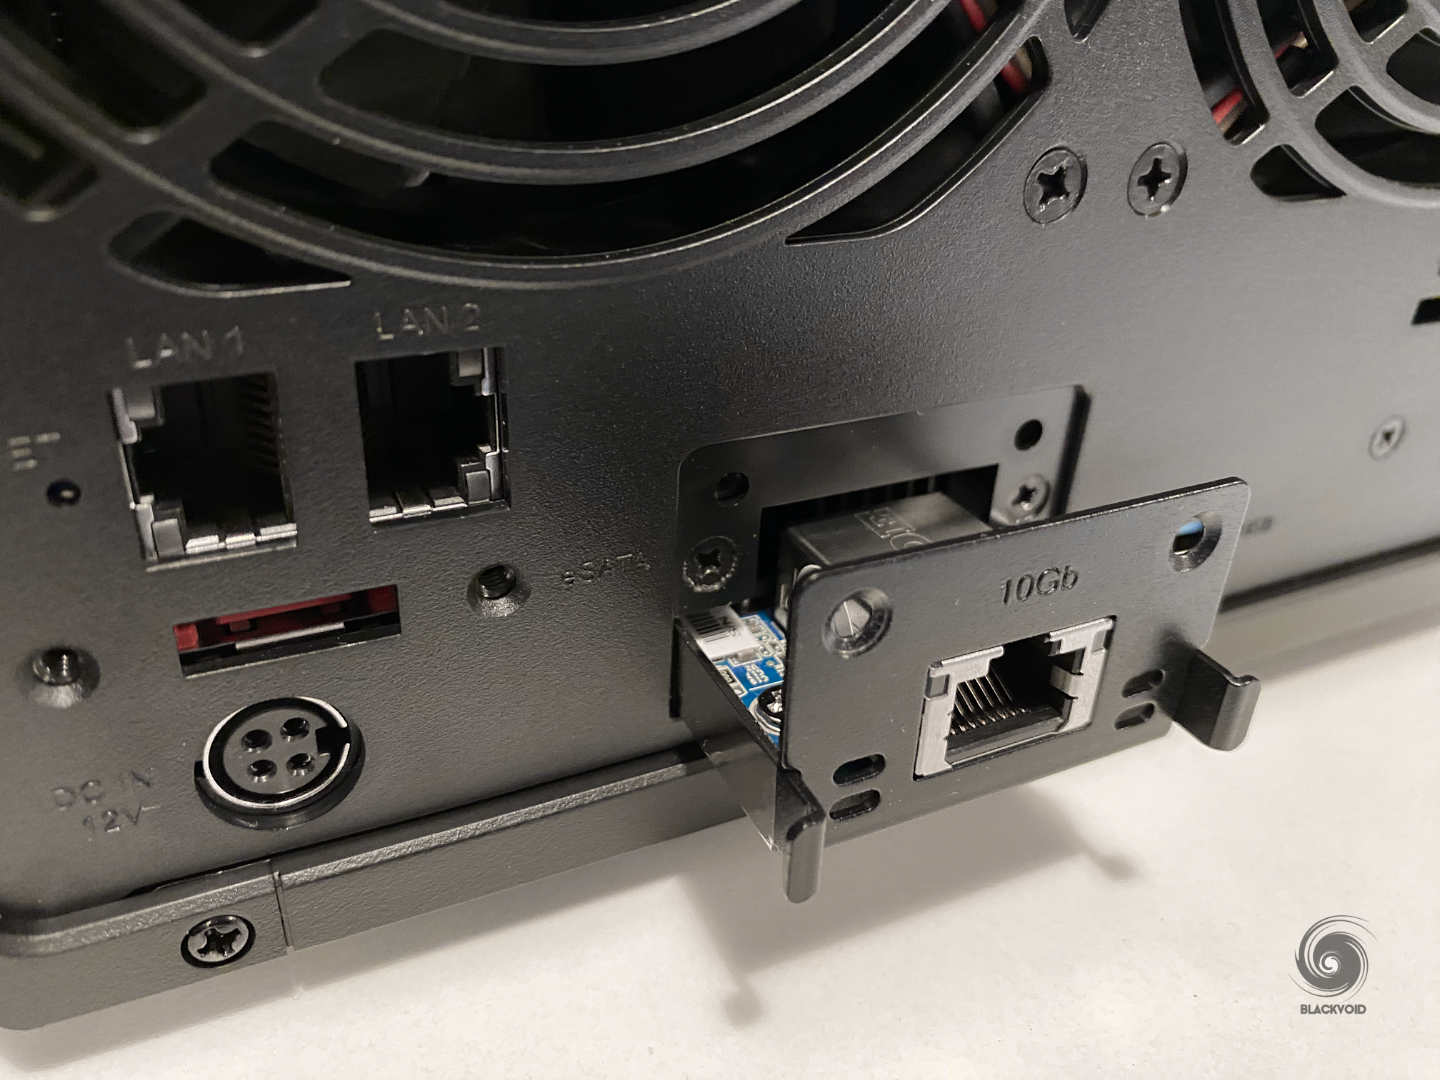
The backside of the unit has two 92 mm fans that will keep the NAS and the drives cool, while also housing 2x 1Gb RJ45J connectors for network usage (separate or in LAG configuration), an eSATA port for connecting DX517 device (if there is a need to connect more drives), and one USB 3.2 Gen 1 port.
The main new element of this form factor is the optional 10G port. This was first introduced in the DS1522+ and RS422+ models but has also found a way onto the 4-bay segment. While expected, considering that the AMD CPU does support 10G speed, it was questioned whether or not Synology will be able to place the port on a smaller case.
Looks like that was not the problem and the proprietary 10G port is here. Compatible exclusively with Synology branded 10G card (E10G22-T1-mini), which will be the only 10G card that will work with this model (at the time of writing).

The price of the 10G card is around 125€ + tax, so if there will be a need for a 10G connection, be sure to calculate that into the NAS price as well. The good news is that the card is compatible with any model supporting this particular format, so if there will ever be a case that a card is needed inside a different NAS model, it will work out of the box.
I think this will be one of the major selling points for this NAS going forward. With added RAM, a faster CPU than the previous generation, and a 10G option, the DS923+ has become a real powerhouse just like its slightly larger brother, the DS1522+.
While some might say that this is no longer the device in the same price range, power consumption, or a model that can do everything the previous models could only do better, they will be right. The fact is that Synology is shifting the targeted audience with these setups and machines (AMD driven one), and while they will offer more for the end user, they will also cost a bit more (with added 10G), and lose some functionalities that previous generations had (like video and audio transcoding).
If this is not something that the user is willing to accept, there are several options. Buy an older version that will cover all the features needed, and have a smaller power footprint as well, or maybe get a different appliance device. One of the biggest issues is also the lack of 2.5G network interfaces. The reason for that is 10G was introduced which can offer far greater speeds than 2.5G, and on top of this, the upcoming DSM 7.2 will arrive with SMB multichannel support. In that case, and with proper network gear and configuration, we will have the option to utilize multiple 1G interfaces and get faster speeds towards a single device with a faster than 1G connection. So DS923+ or any other DSM 7.2 multi-nic compatible model, will be able to utilize greater speeds with no extra cost to the NAS. One thing that will be needed (in case that is already not the case) is a purchase of a compatible switch. This is also true if the NAS had 2.5G ports, as there would be a need for a 2.5G or better switch regardless.
In any event, DS923+ brings more to the table, and in some cases, it will require additional purchases, but still, as a long-term investment, it will be worth it.
There are no compromises between the 5-bay or the 4-bay model, and that is fair, so it will be up to the customers to decide what model best fits their needs.
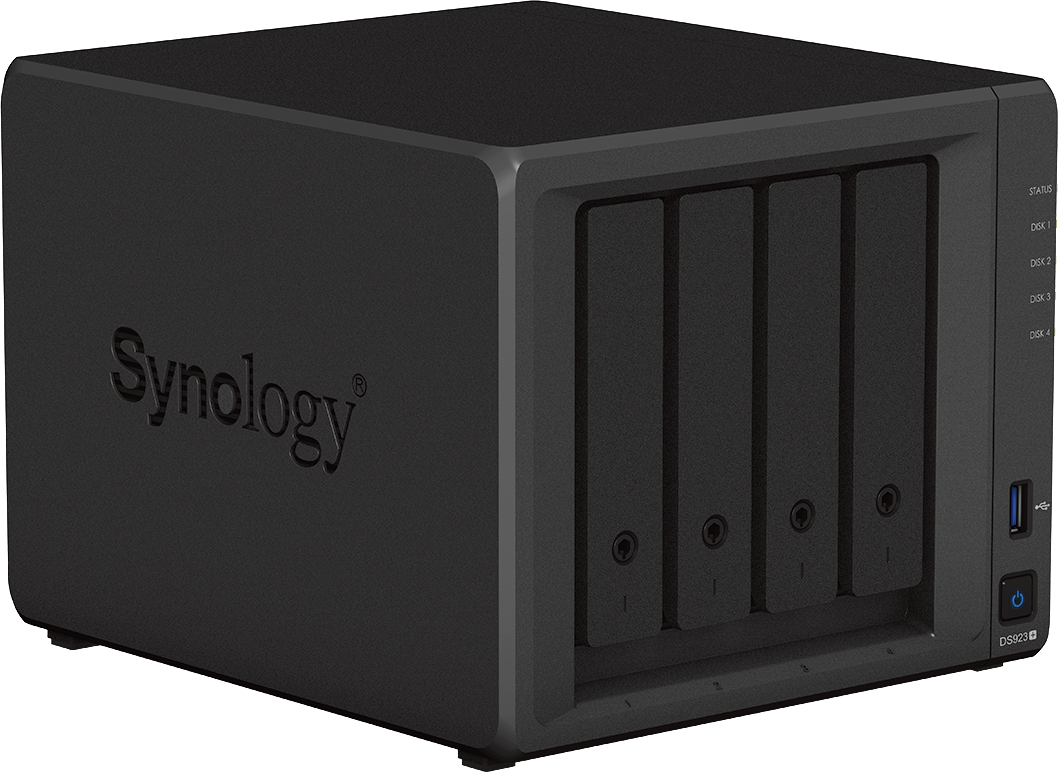
The DS923+ form factor, size, and weight remained the same as the DS920+ version with ventilation openings on the side as well.
NAS is covered with a 3y factory warranty that is possible to extend to a total of 5y via Extended Warranty Plus. Depending on the country it will be around €65 (+tax) for the extra 2y.
Full official specifications can be found in the datasheet here.
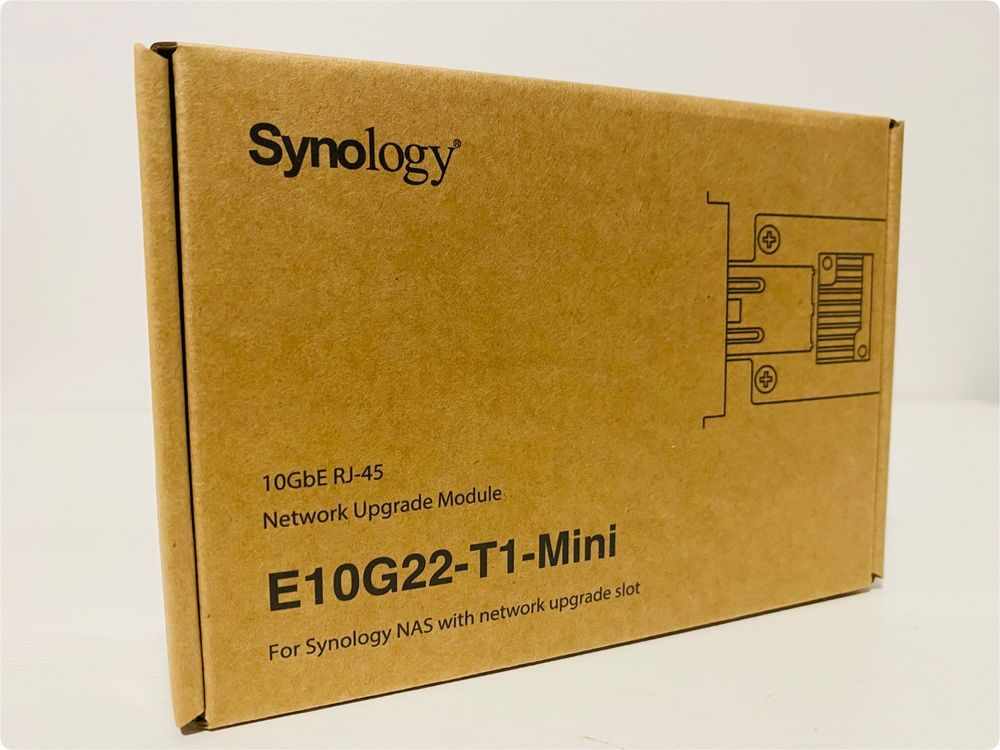
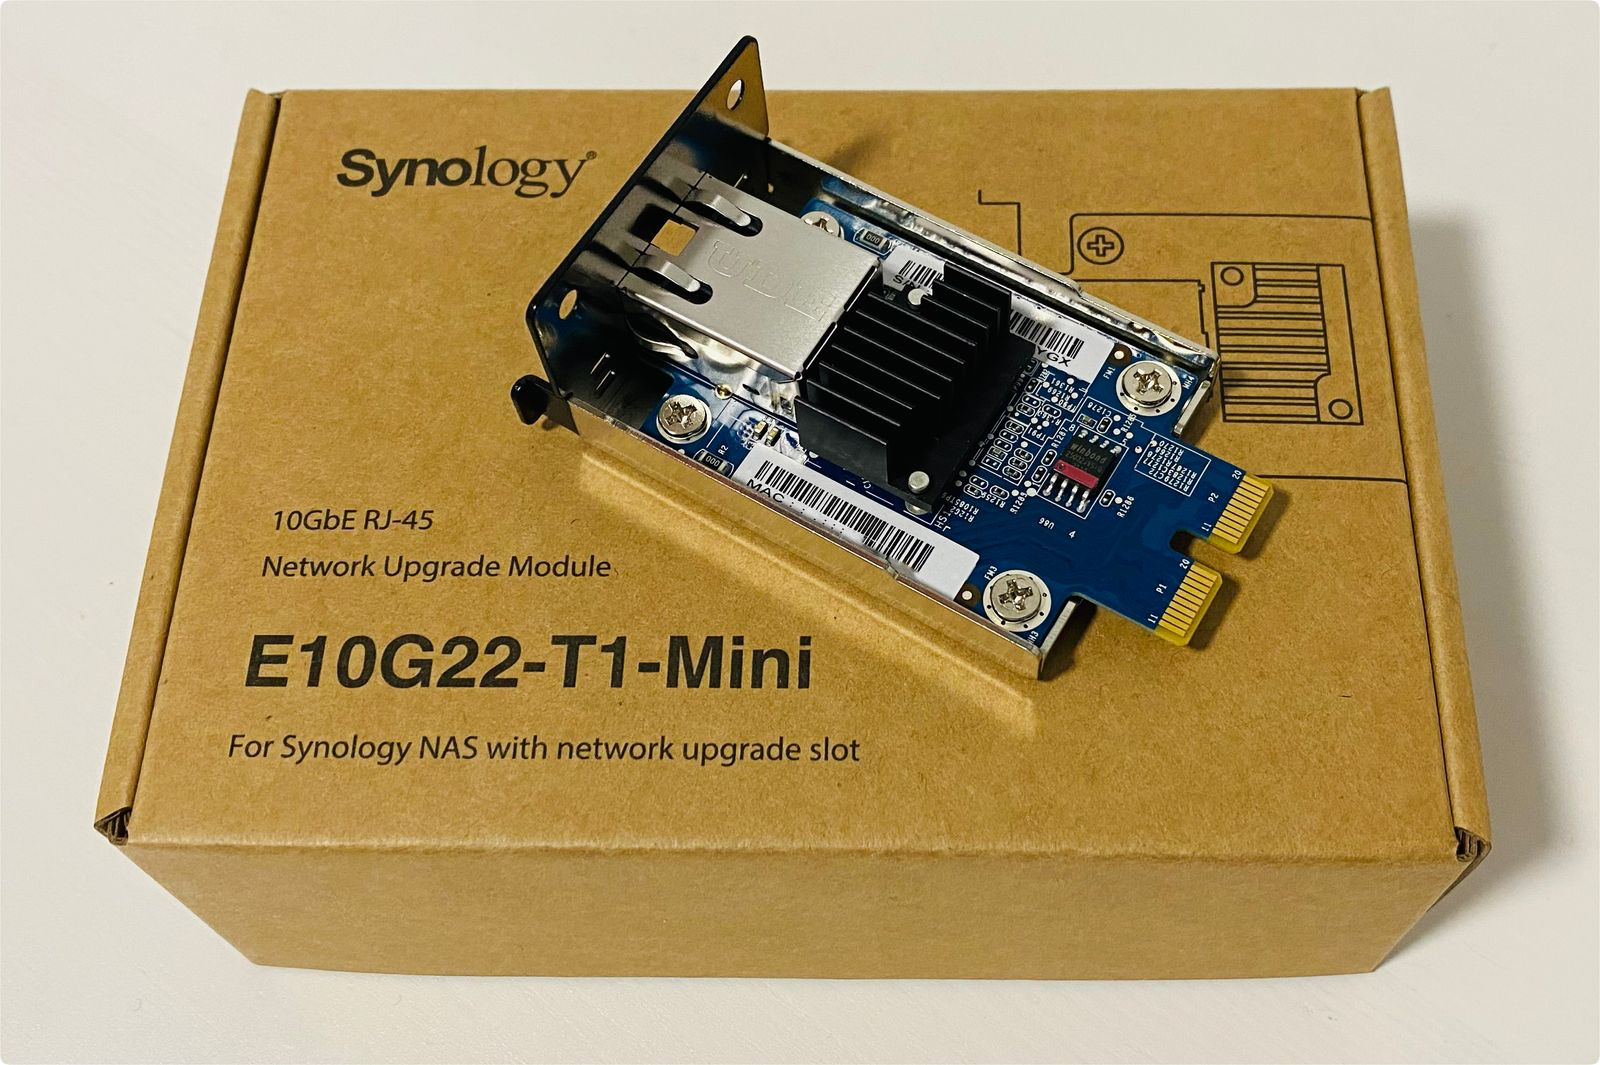
: E10G22-T1-mini card
During the summer of 2022, Synology also rolled out a new custom 10G network interface that first made it to the DS1522+ and RS422+ models. The same card is here as one of the main added features of DS923+.
It is a copper-based RJ45 network adapter that unlocks 1GB/s transfers over a compatible network setup.
With the beforementioned price of around €125 and the fact that the card will detect 5G as well as 2,5G, or 1G network speeds, it might be well worth the extra investment as a futureproof step.
- IEEE 802.3x Flow Control
- IEEE 802.3u Fast Ethernet
- IEEE 802.3ab Gigabit Ethernet
- IEEE 802.3bz 2.5Gbps / 5Gbps Ethernet
- IEEE 802.3an 10Gbps Ethernet
Separately from any compatible NAS, this card is on a fixed 3y manufacturer warranty, which is also a decent time period to consider.
In order to install the card, the first step is to remove the metal plate on the back side of the NAS, slide in the card, and secure it back with two screws.

E10G22-T1 mini card ready to be installed
DSM will detect the card as a default LAN 3 interface (after the default two 1G ports). This also means that booting a fresh device and installing the DSM using the 10G port will not be possible.
: SSDs, 3rd party HDDs and NVMe storage pools
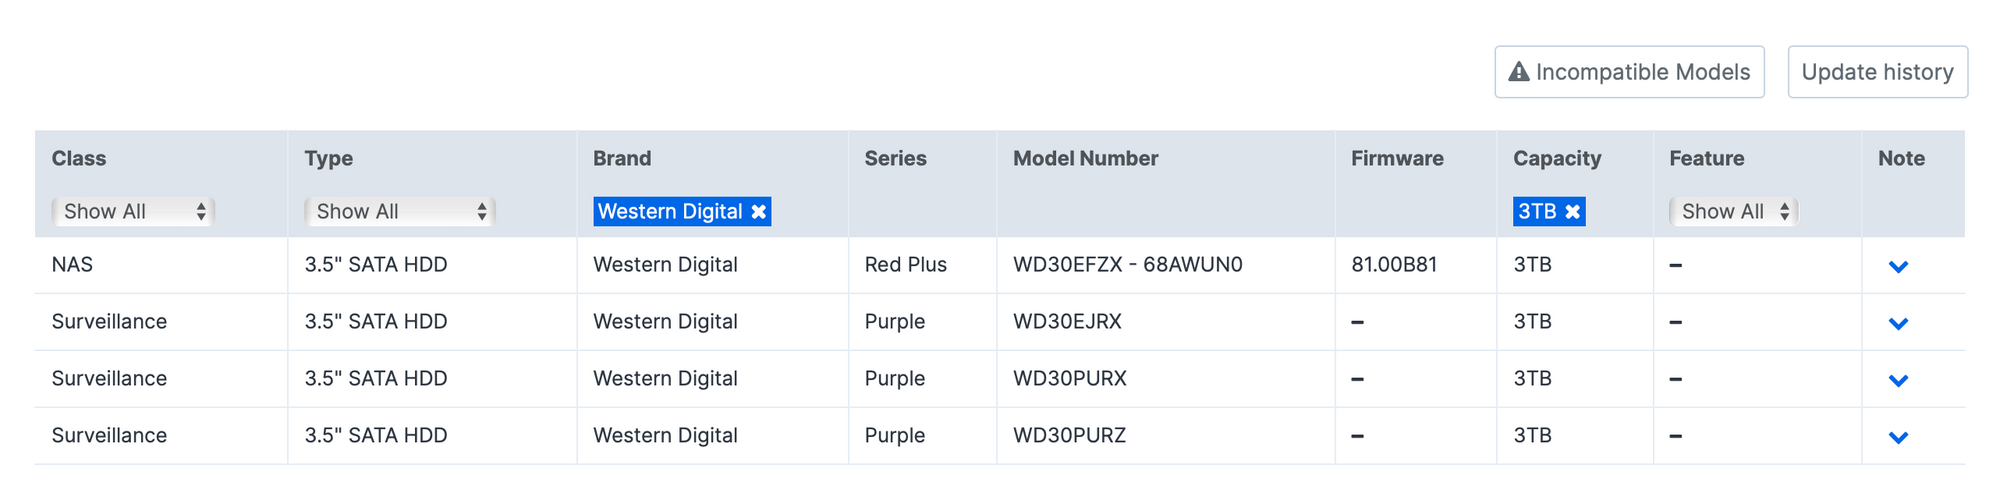
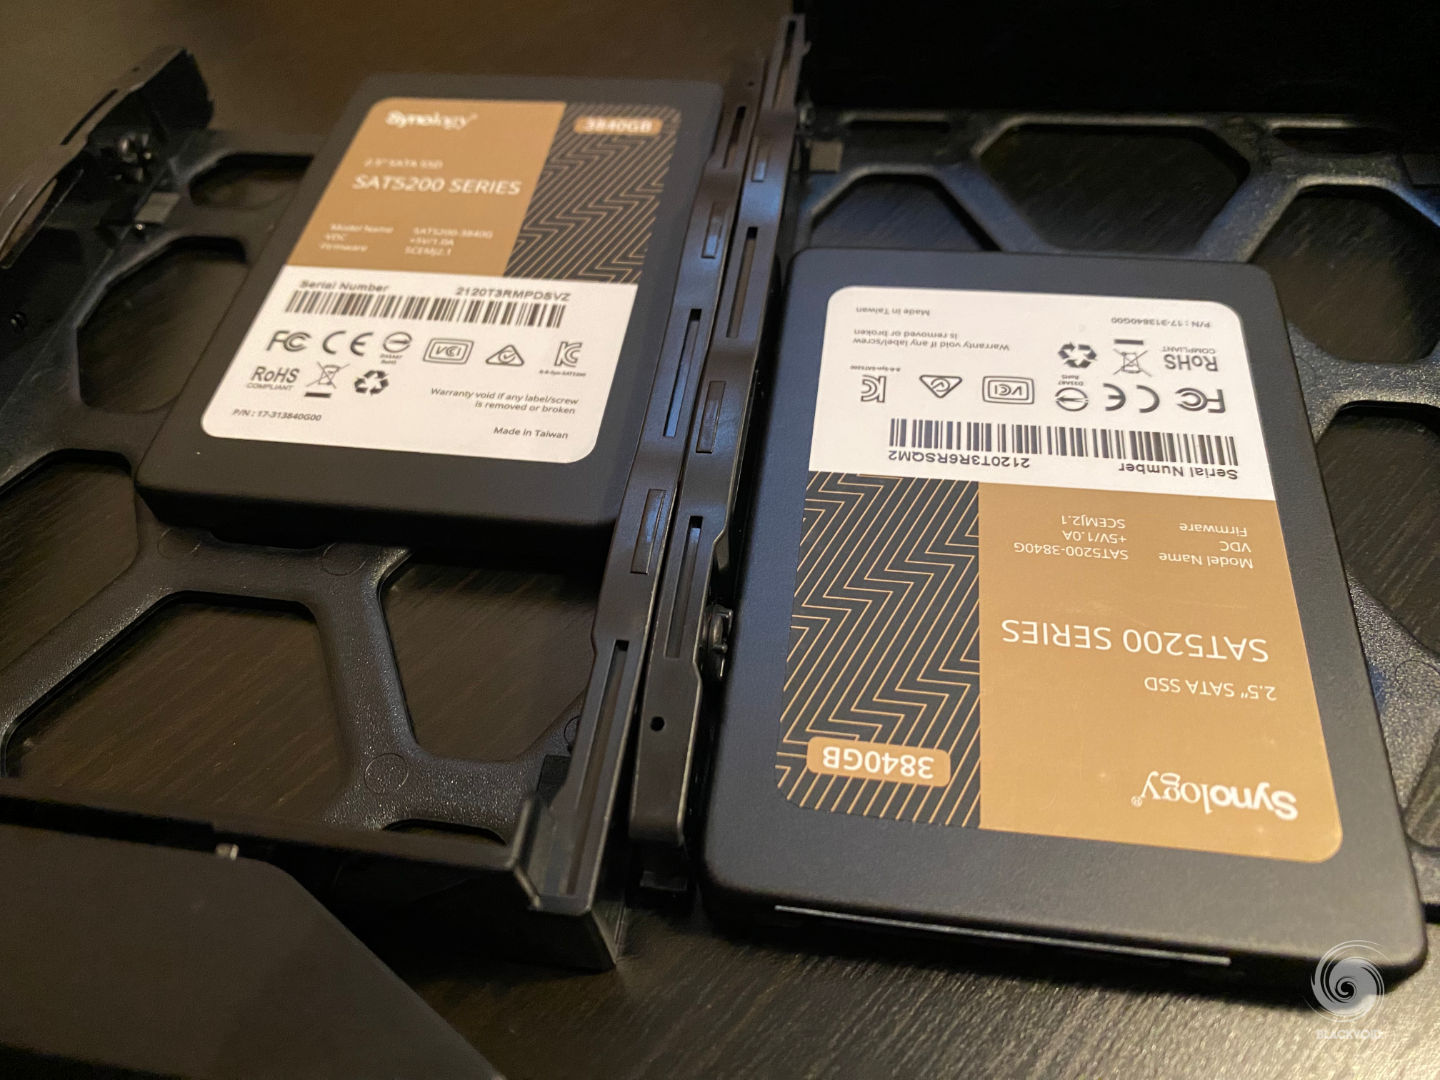
The NAS arrived with Synology enterprise-branded SAT 5200 4TB SSD drives. While these are supported drives for this particular model, those are not the only ones. Unlike some high-end models that require these drives, or the HAT/HAS spindle lineup ones, the DS923+ will work with a wide range of drive vendors.
The Synology HDD policy explains that users of certain models will need to mindful going forward when it comes to buying drives for your NAS.
The best thing that can be done, is to check the compatibility list for a particular NAS before buying the drives.
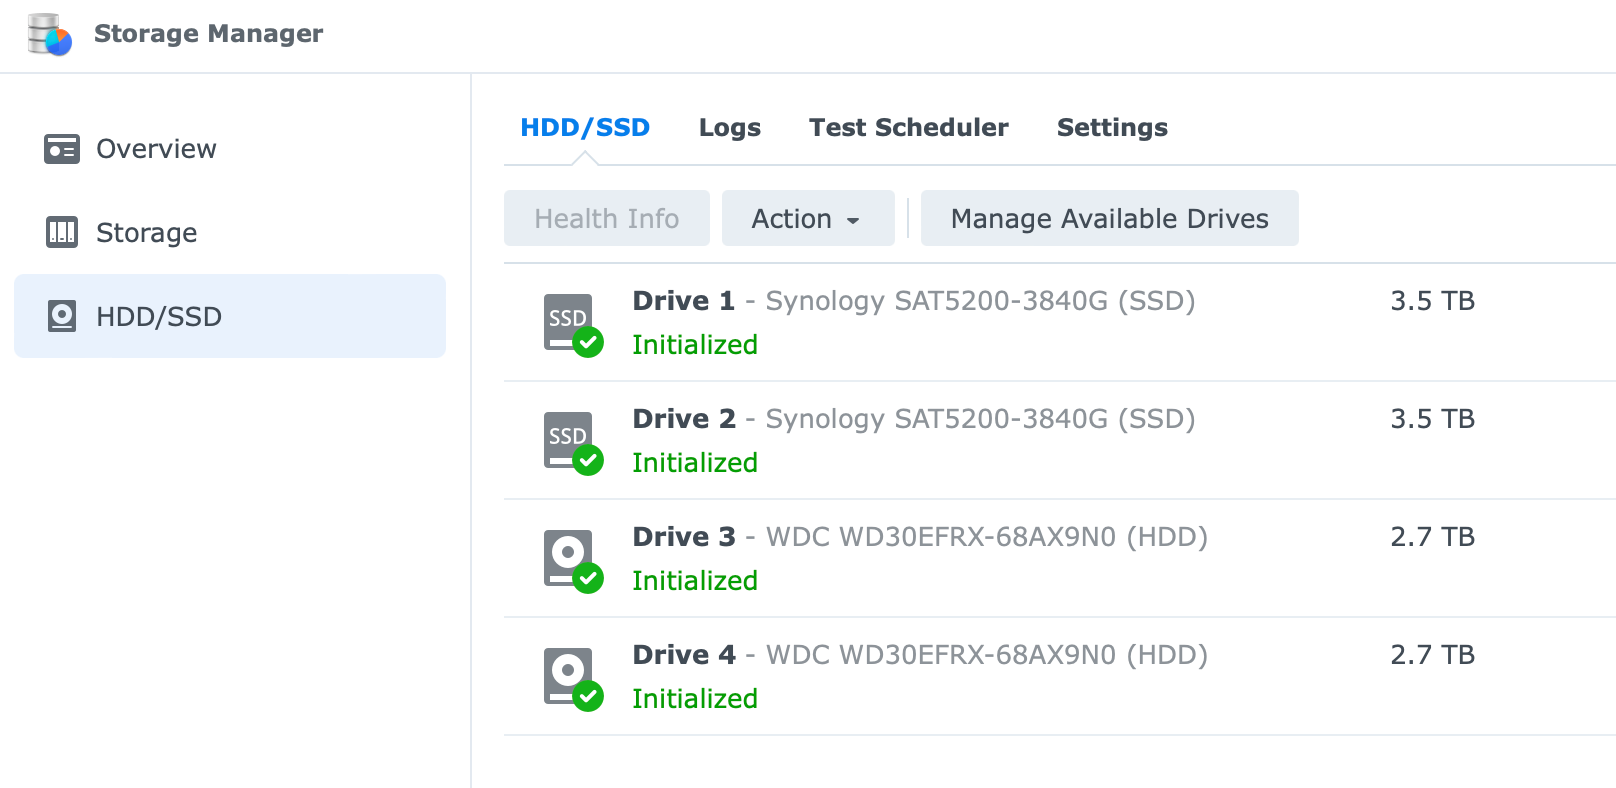
This particular setup includes two types of drives. One is the official Synology branded SAT5200 4TB SSDs, while the other is 12y old WD RED 3TB EFRX.
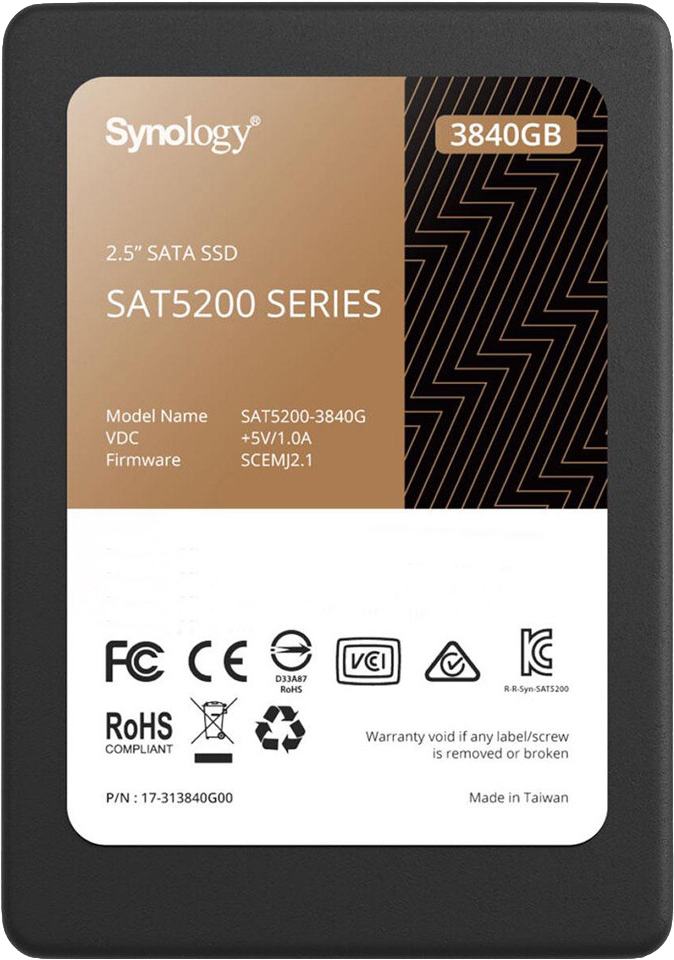
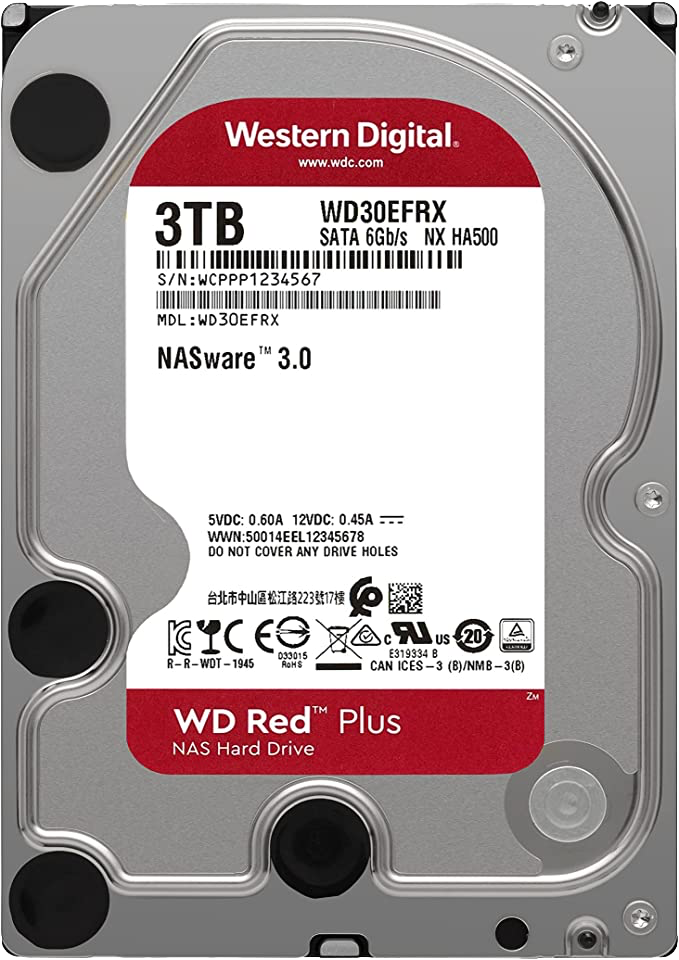
Synology SAT5200 (left) and WD RED (right)
The reason for this is to test out two separate volumes (both in RAID0) using fast SSD compatible and supported drives, and on the other end, unsupported 5400 RPM NAS drives. While DSM 7 will object to the use of these particular RED drives, it will allow a volume to be configured and installed.
RED drives are not incompatible just unsupported, meaning that any issue that might come out of using such drives will not be covered by Synology support.
It is a fact that this particular model of drives is indeed not on the official list, so be sure to always use supported drives. The DS923+ will not force the use of Synology branded drives, but if using 3rd party drives is the preferred way, make sure to consult the official compatibility support site.

When it comes to installing the drives, like the full-size 3.5" there are no tools required, but the 2.5" SSD will need to be screwed using the bottom caddy holes.
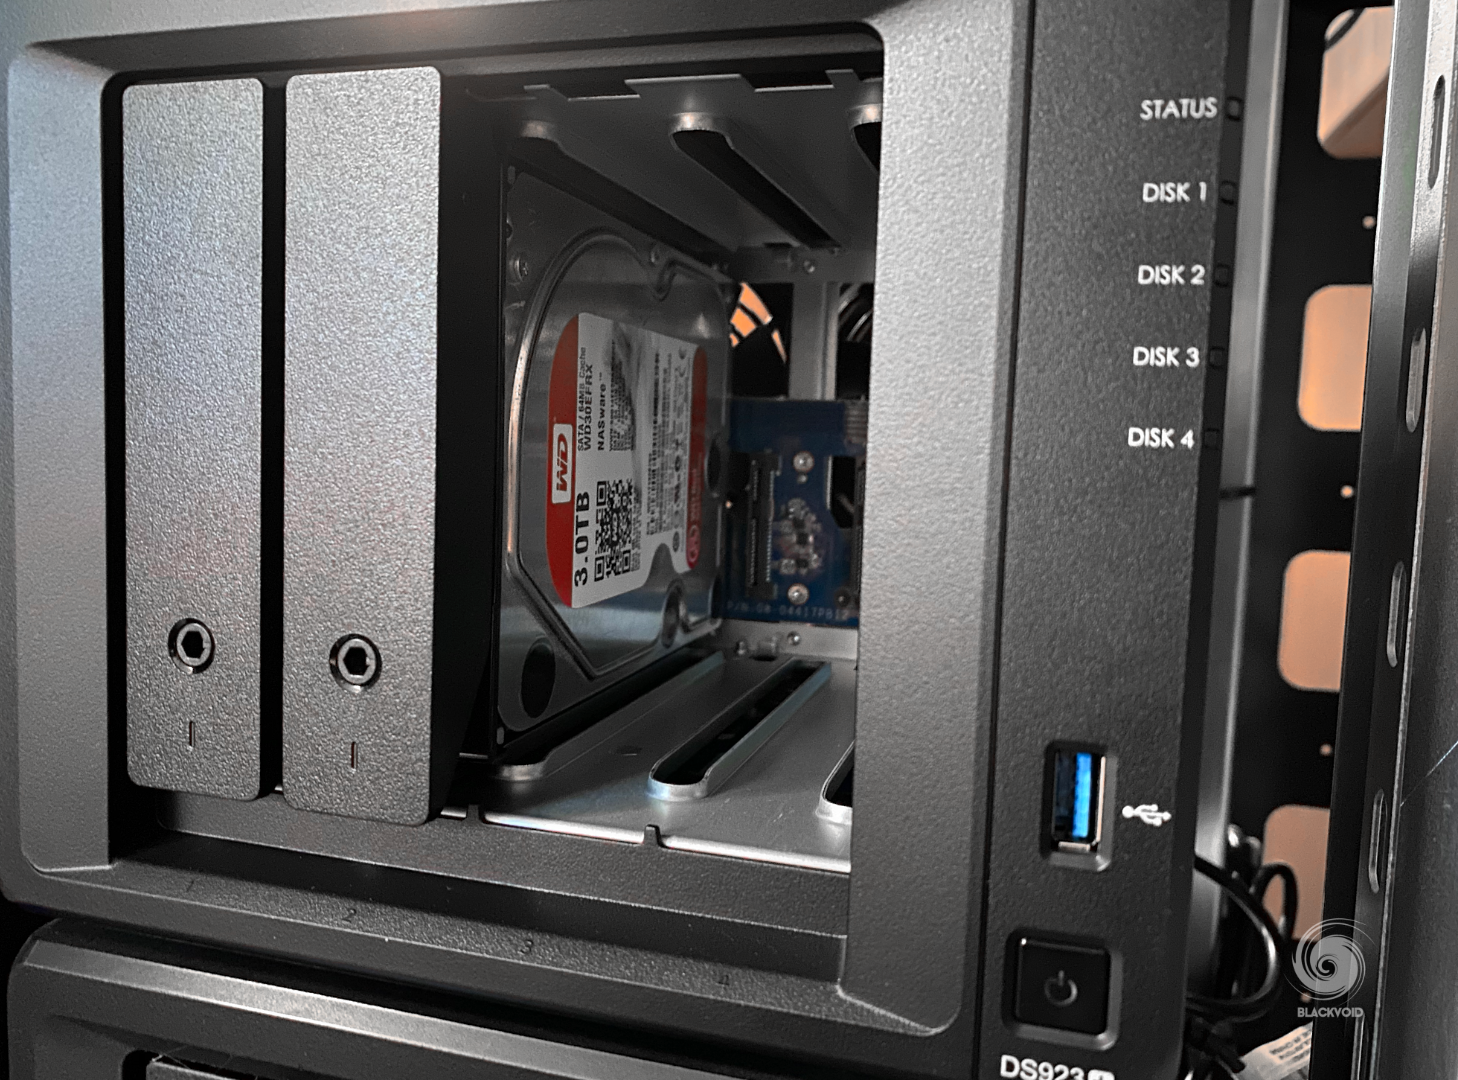
Placing the drives is extremely easy and quick, and on top of it all, each can be locked in place using the small lock on the front pane. In case the drive is not locked in place and pulled out, the DS923+ supports hot-swap, so no major damage will be done in case that happens. Saying that, do keep in mind that pulling multiple drives are the same time, depending on the array configuration, could result in data loss!
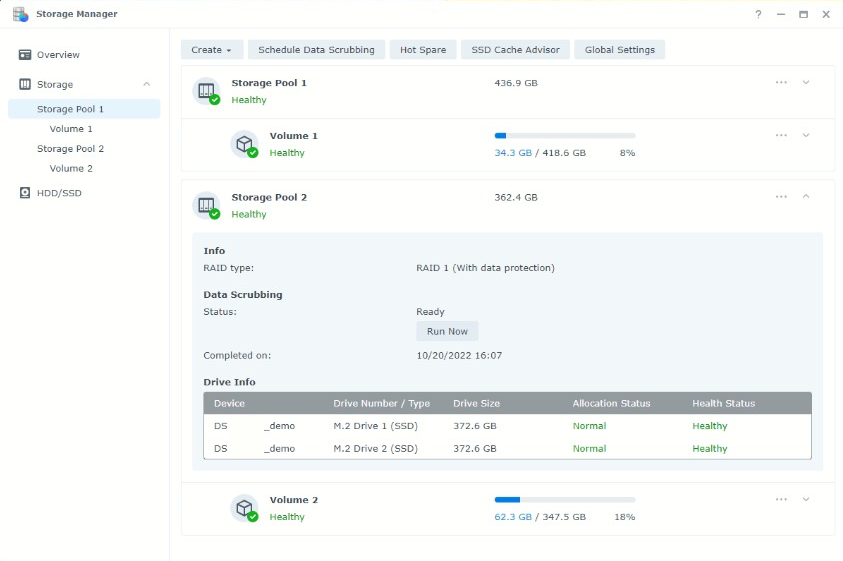
Once the drives are in place and DSM installed (more on this later), we can use the Storage Manager application to monitor and update the drive's firmware, as well as configure pools and volumes.
DSM in a combination with Synology branded drives will allow for on-the-fly firmware updates without any downtime. This is one of the perks when using their branded disks on top of a sustained transfer rate over a longer period of time and 5y warranty.
M.2 NVMe user-usable volumes
As mentioned before, DS923+ supports the creation of user-usable volumes using the M.2 NVMe drives (if installed). Now, this was a highly expected feature for years. With 10G support and an NVMe storage pool, the DS923+ is breaking out of its usual 4-bay enthusiast shell and moving into a new category for sure.
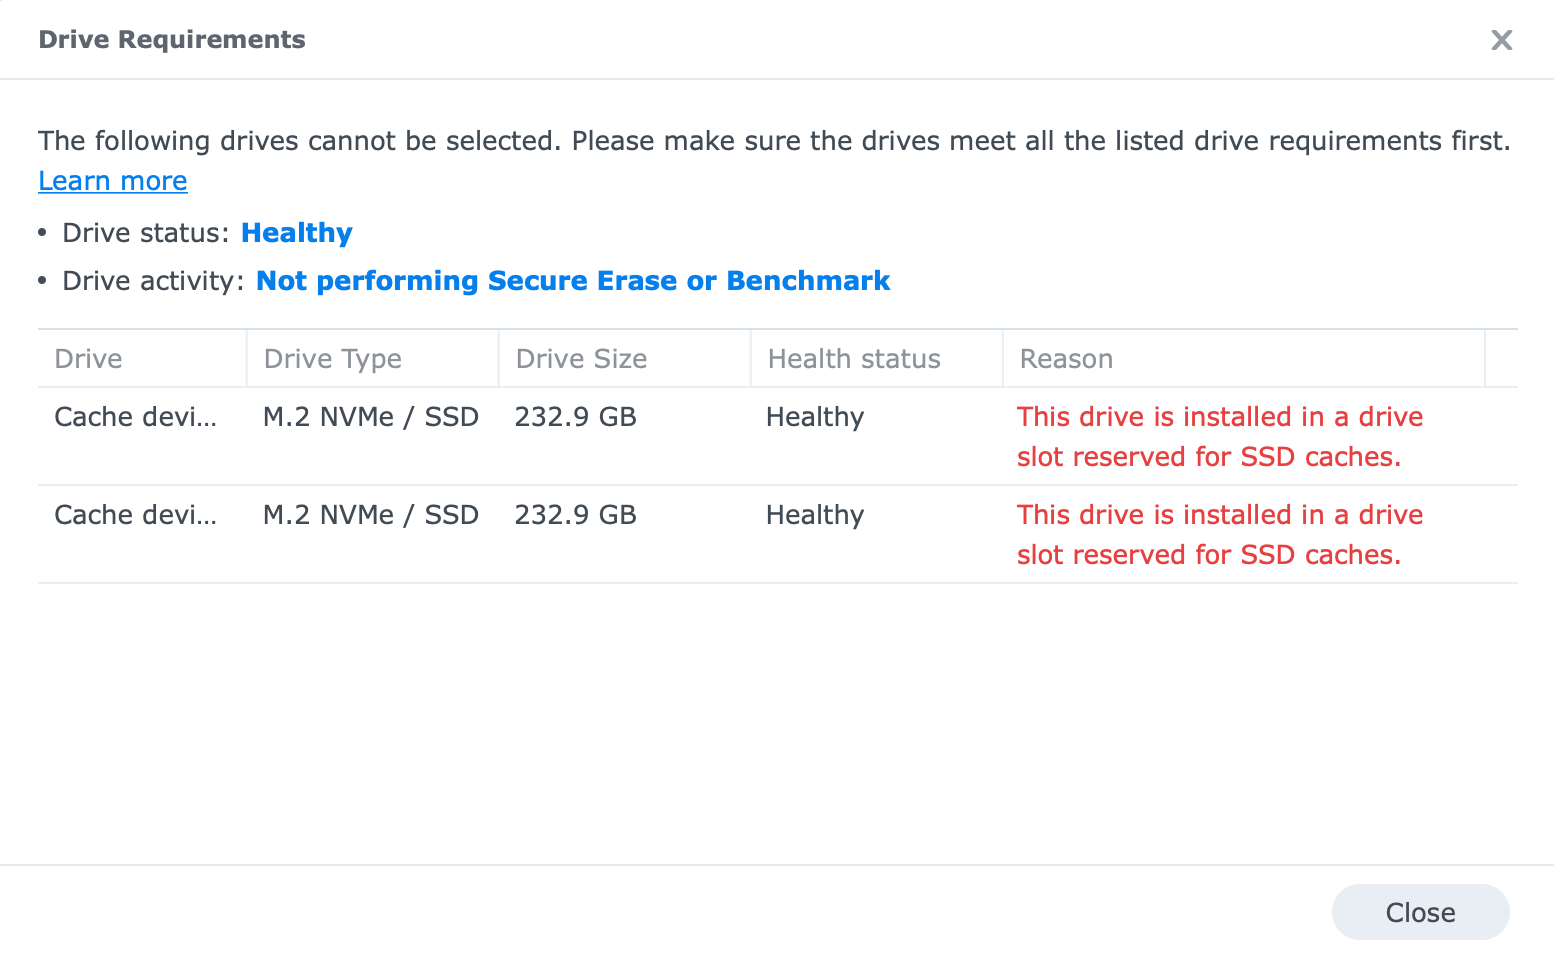
What was once reserved only for the XS+ lineup will now be possible on a smaller and less expensive device. Editing on the fly via a 10G network will no longer require a dedicated DAS device or a Thunderbolt external drive, as DS923+ will be able to do it all on its own.
Official info on the supported models that will benefit from this feature are listed on the following link.
The NVMe drives can be used as single drives in order to make a storage pool and cache (read-only) a single volume at the same time. Finally, it is not possible to boot off the NVMe volumes/drives, and the max transfer speeds will not go over 1GB/s (10GbE).

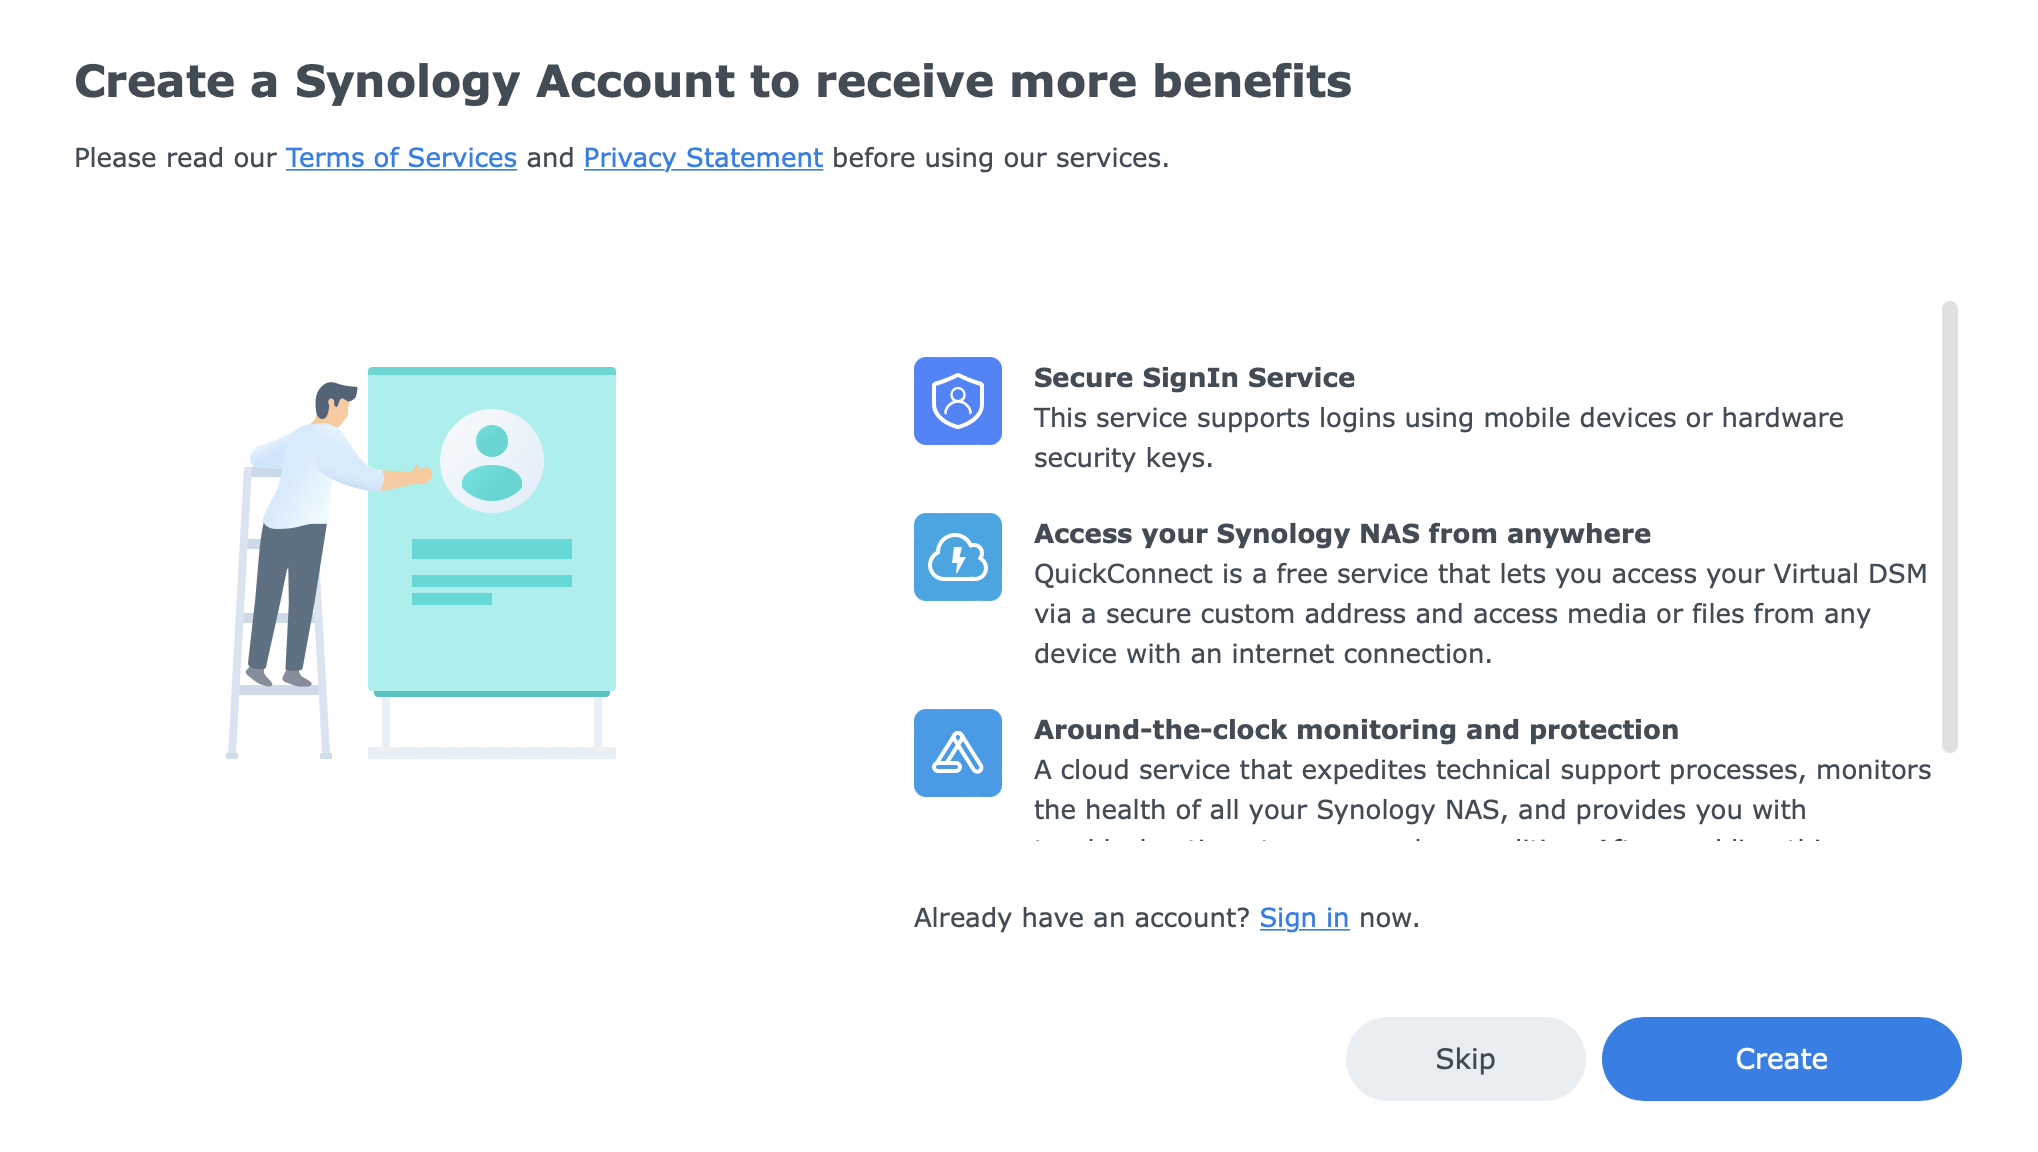
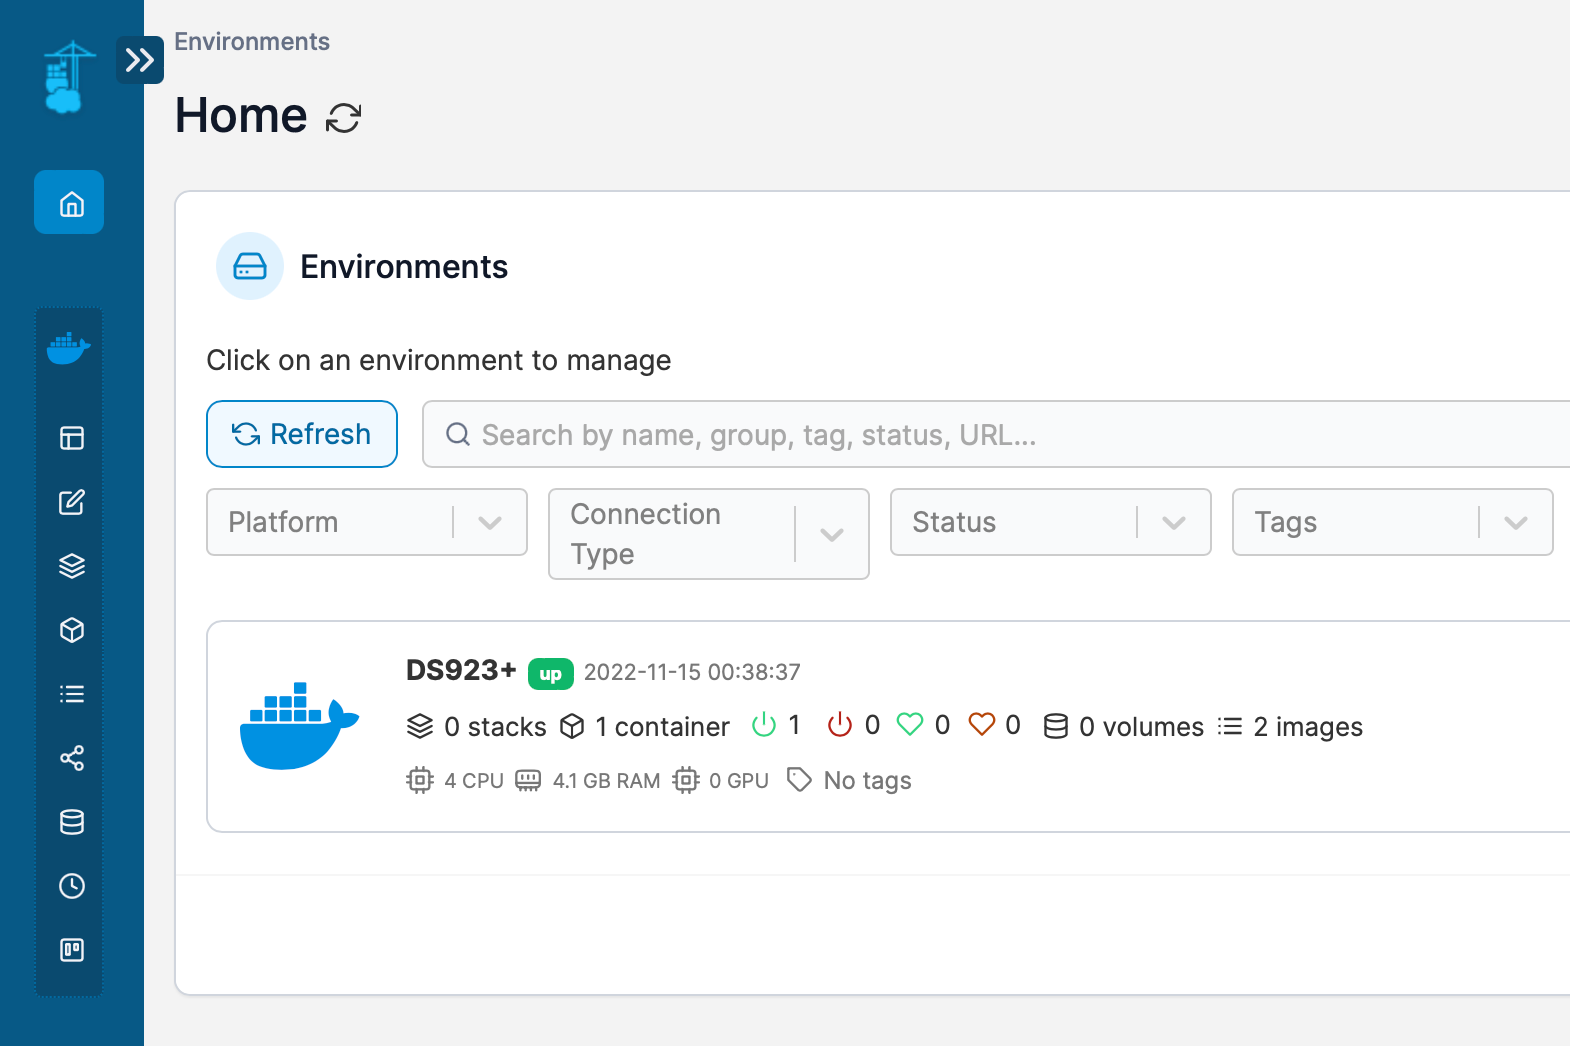
: DSM setup and apps installation
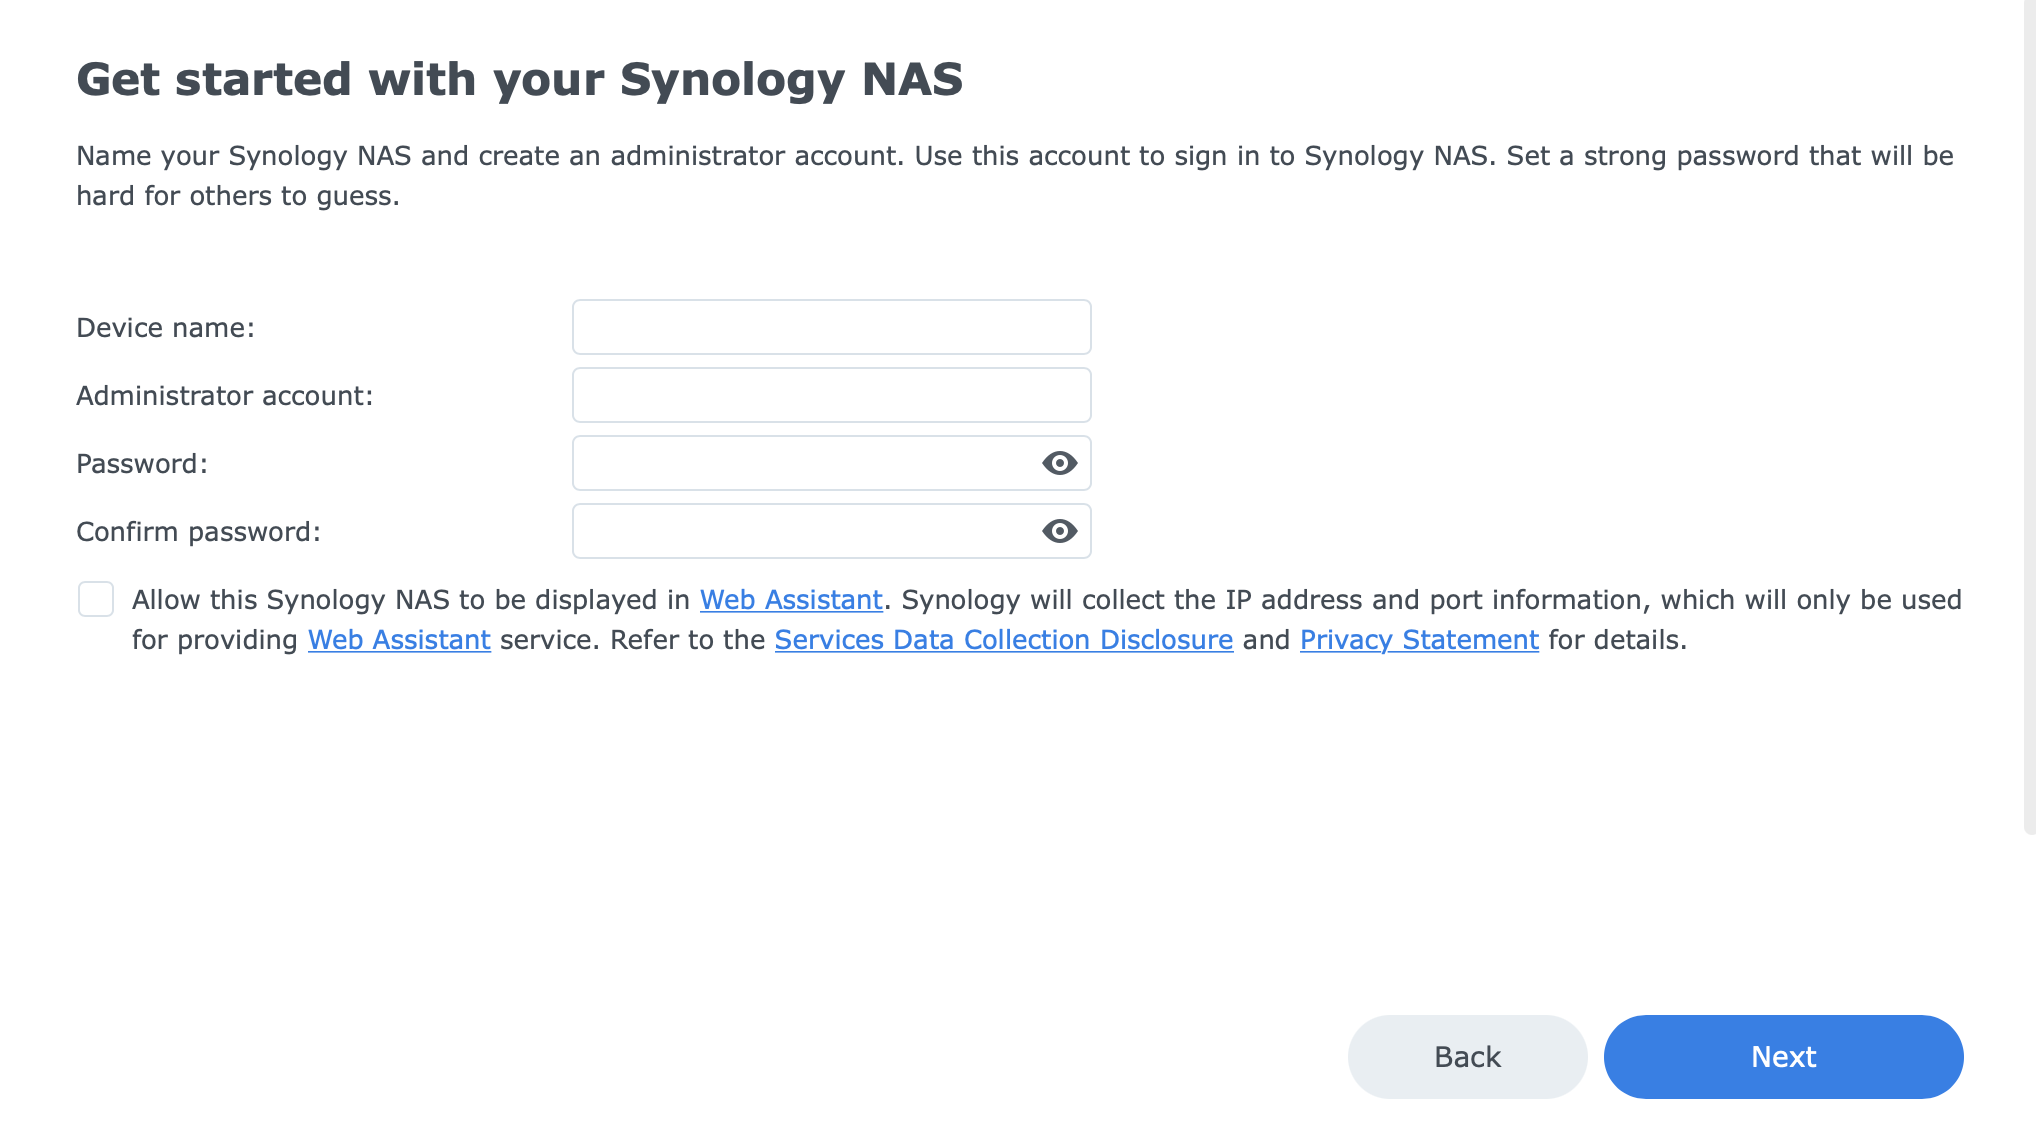
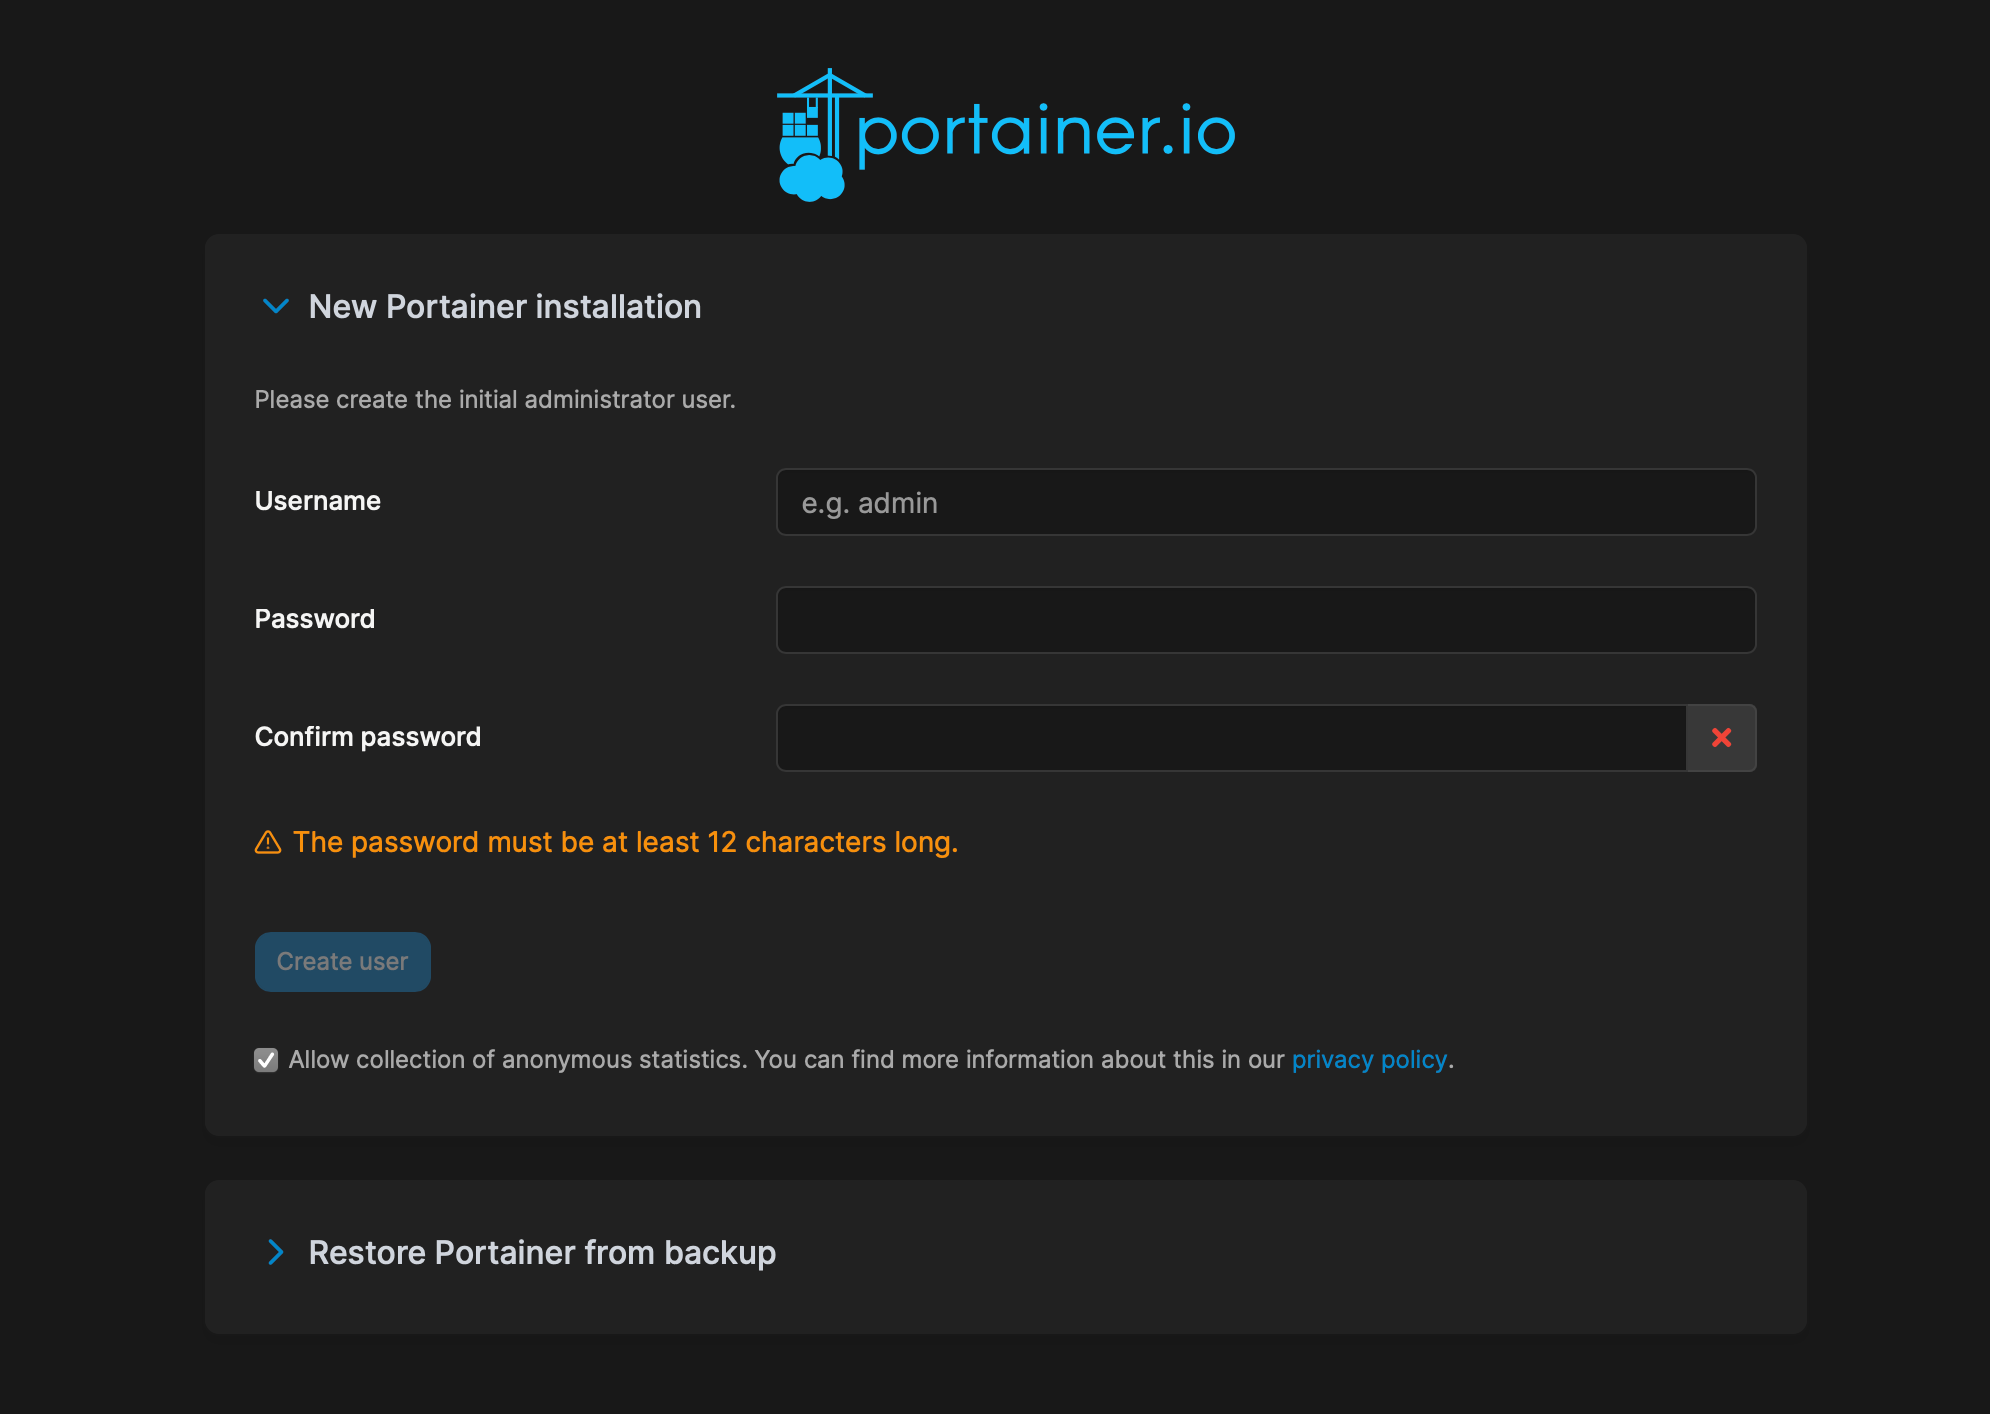
Anyone installing DSM OS onto a NAS for the first time will probably find it straightforward as there is little that can go wrong. There are multiple methods as to how to begin, but some common methods would be using the Synology Assistant desktop app (downloadable via the Synology Download Center page) or using find.synology.com web URL via the desktop browser.
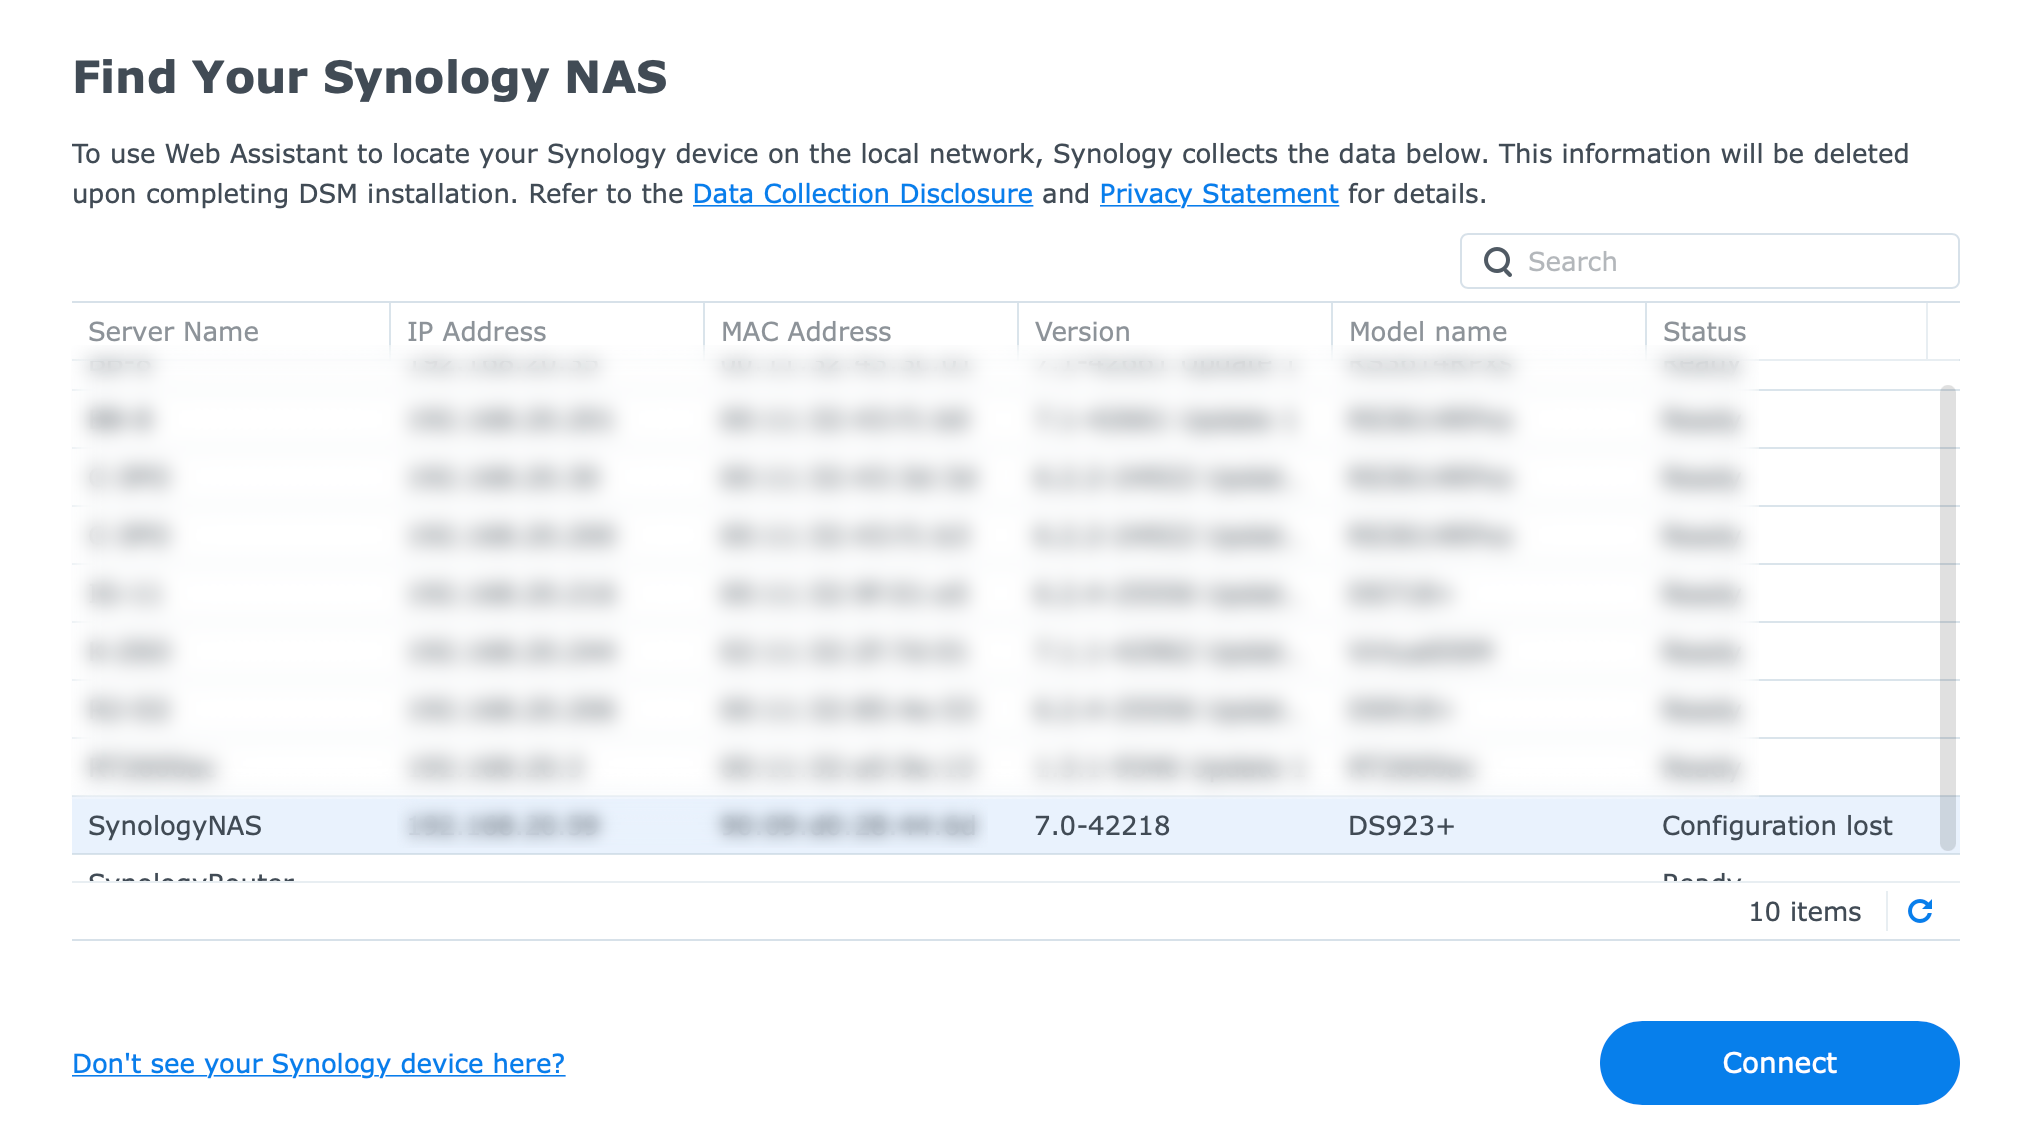
Also, we can use any network detection tool, or the router interface to detect any newly assigned IP addresses from the DHCP pool, and connect to it directly. If the NAS will have Internet access the setup will be pulled from the official site automatically. On the other hand, if that is not an option, the setup can be again downloaded from the Download Center page and installed manually at one point of the setup wizard.

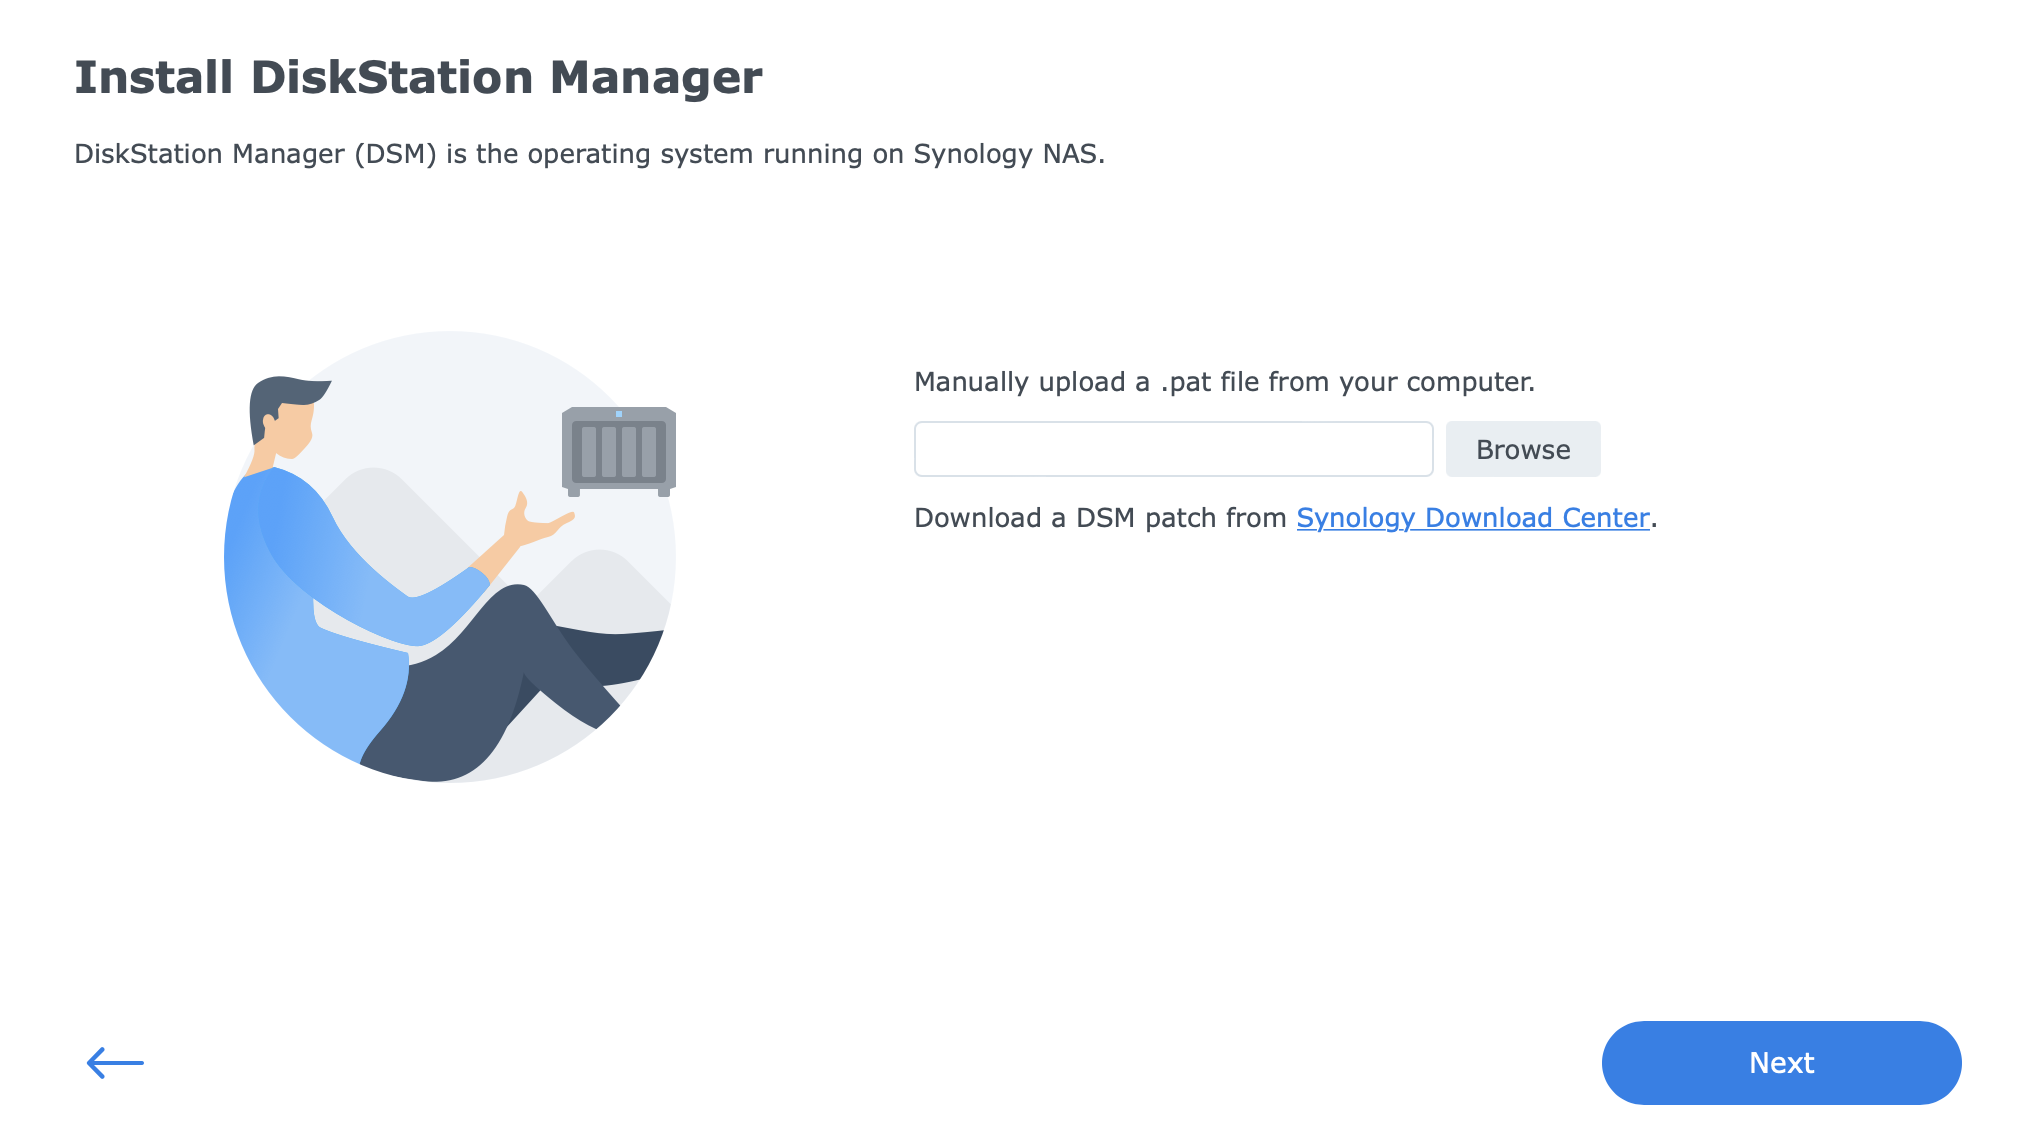
The default DSM install wizard
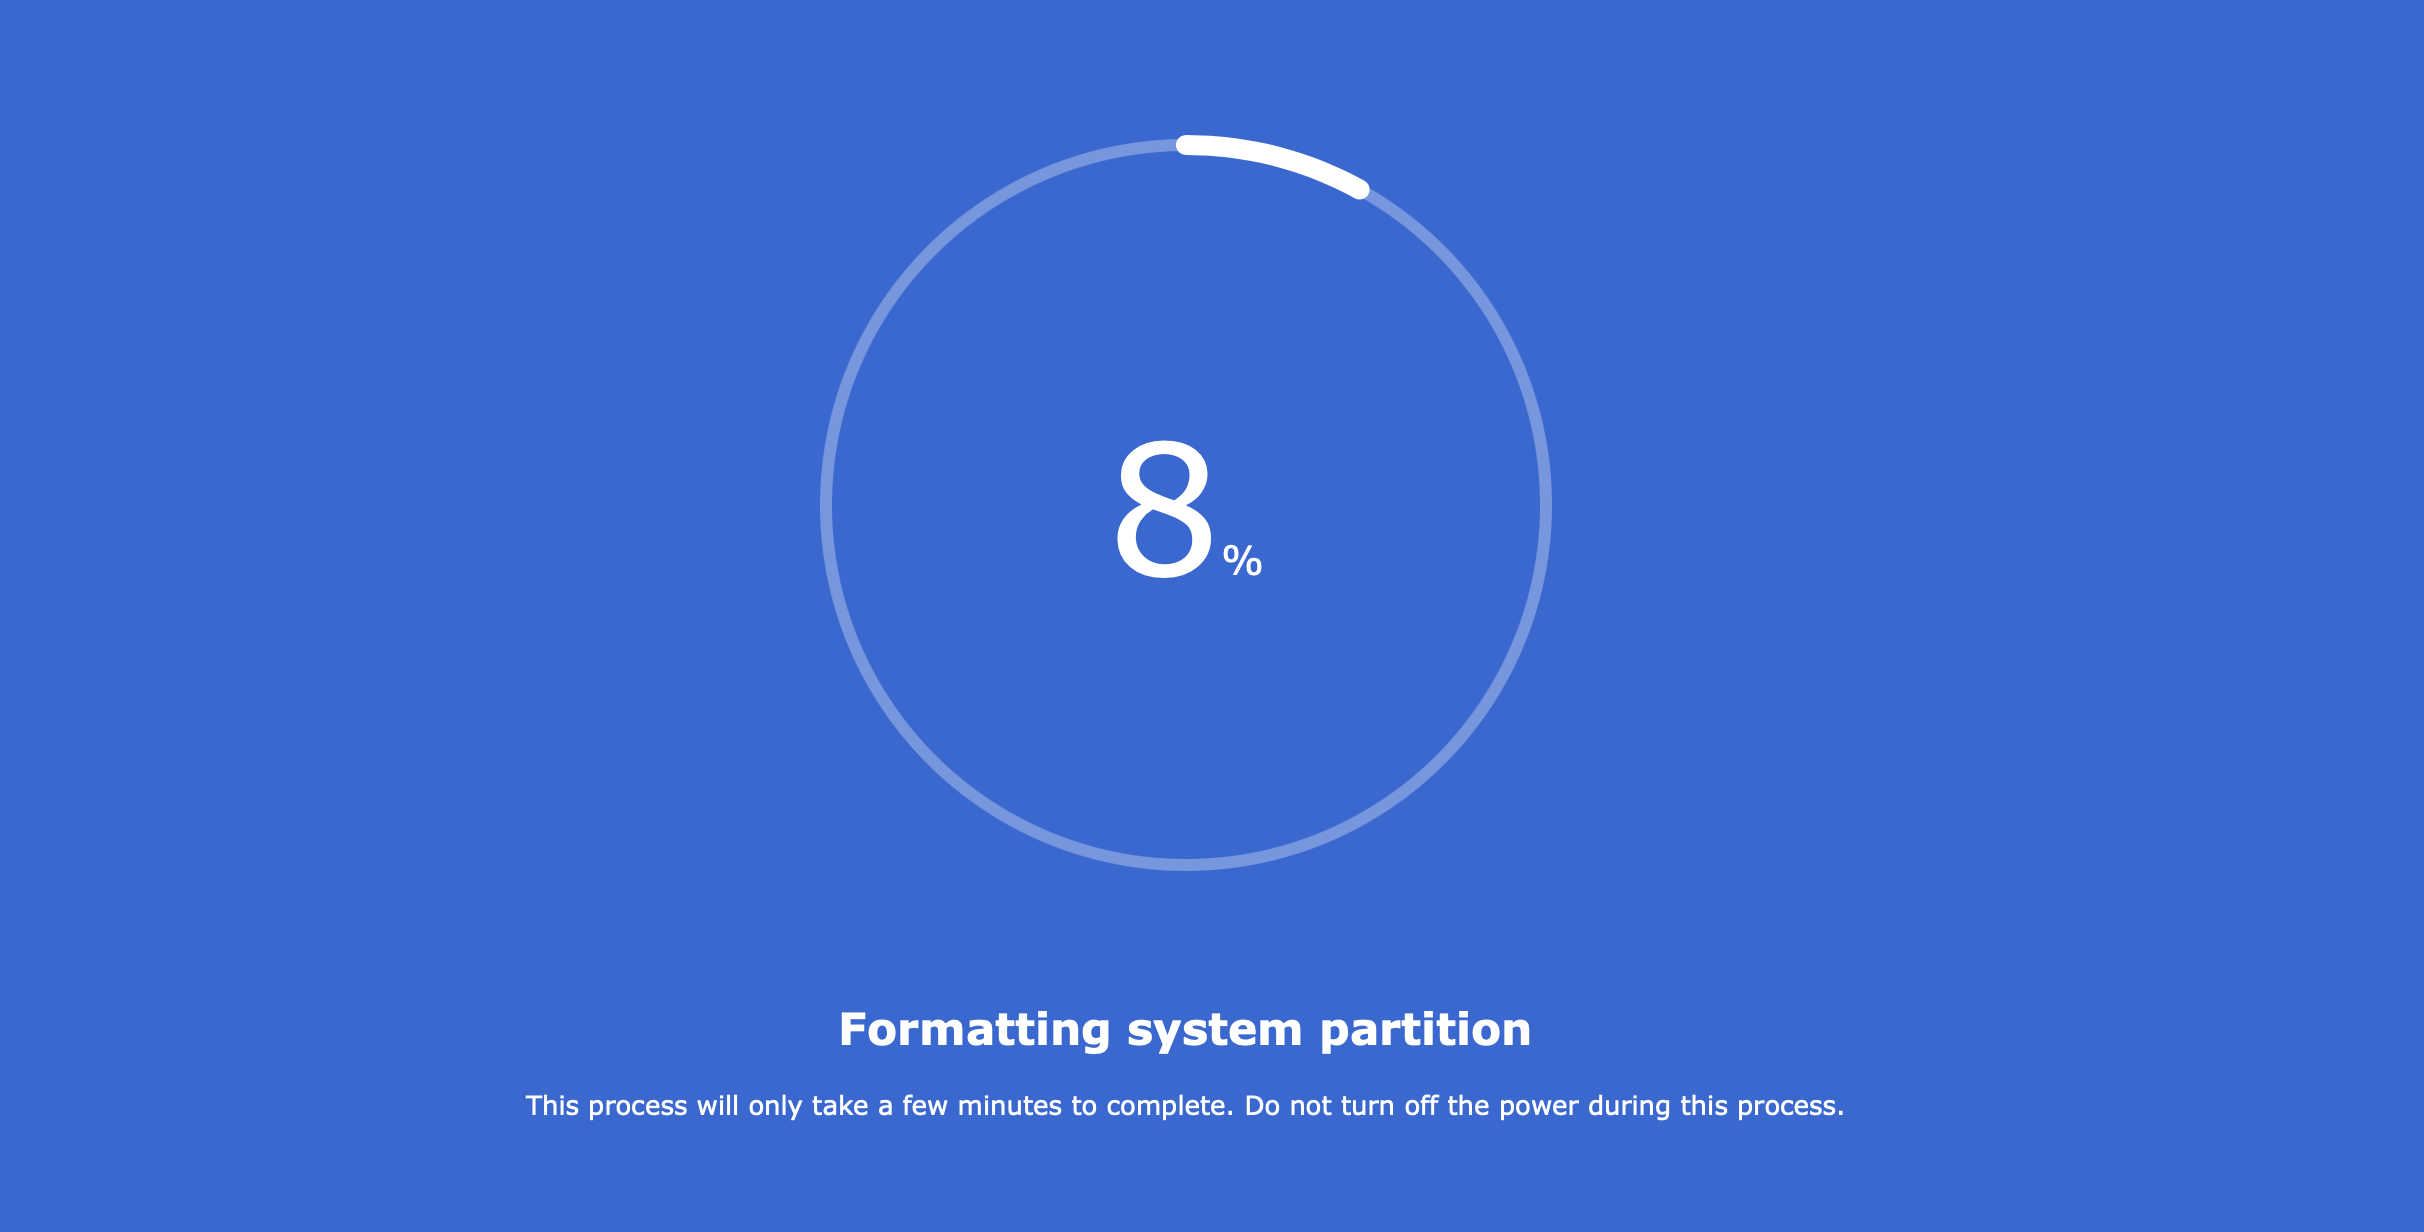
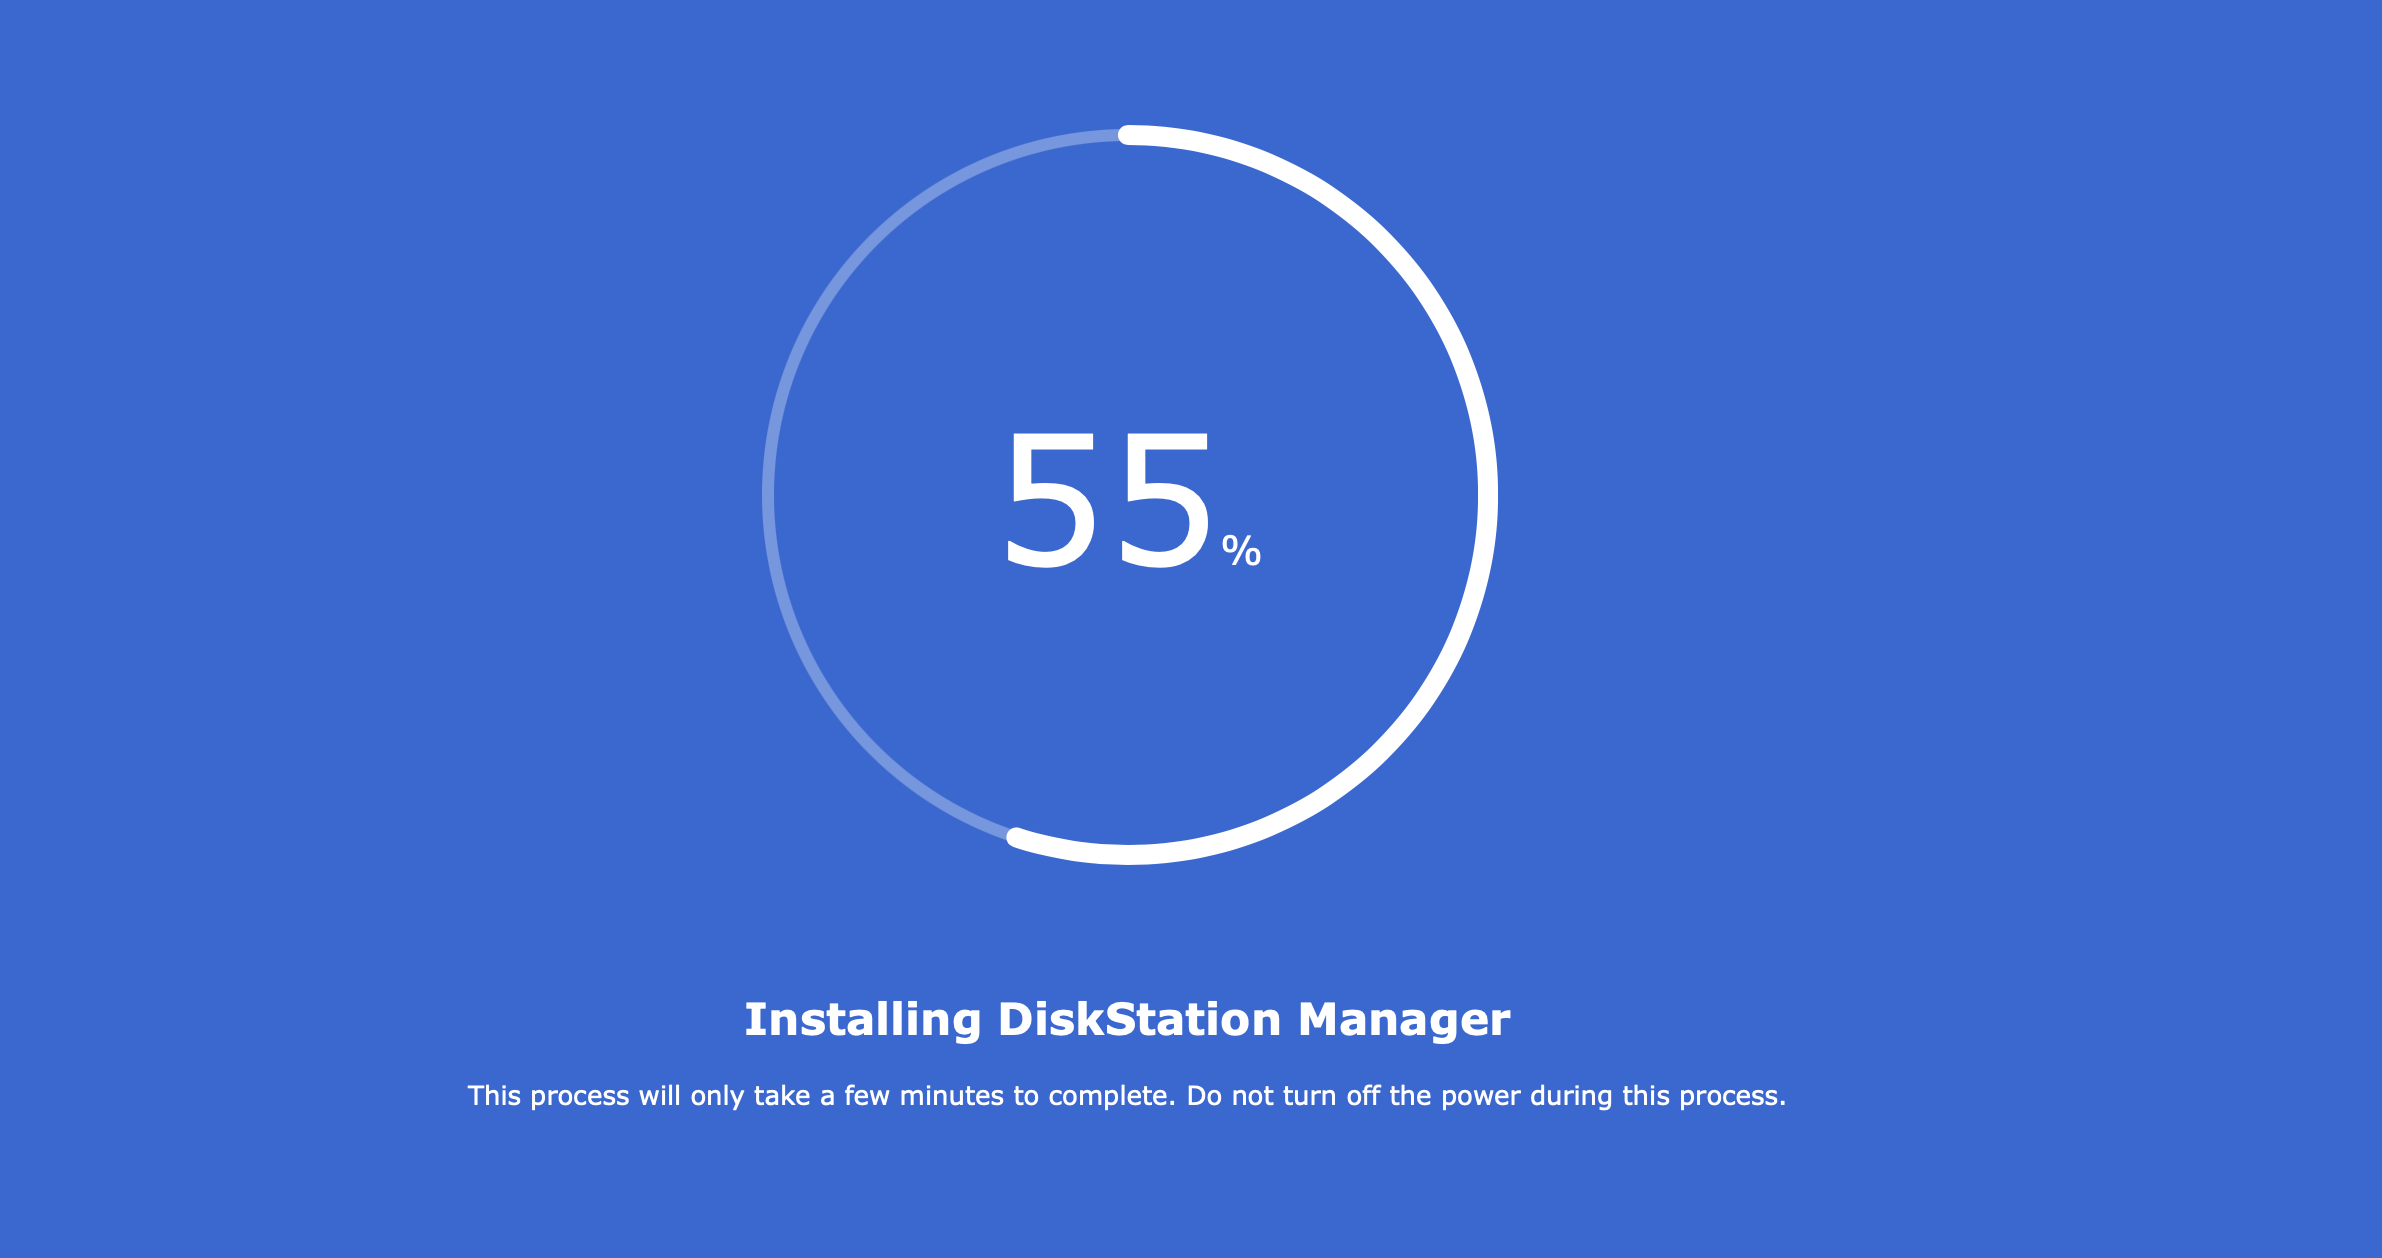
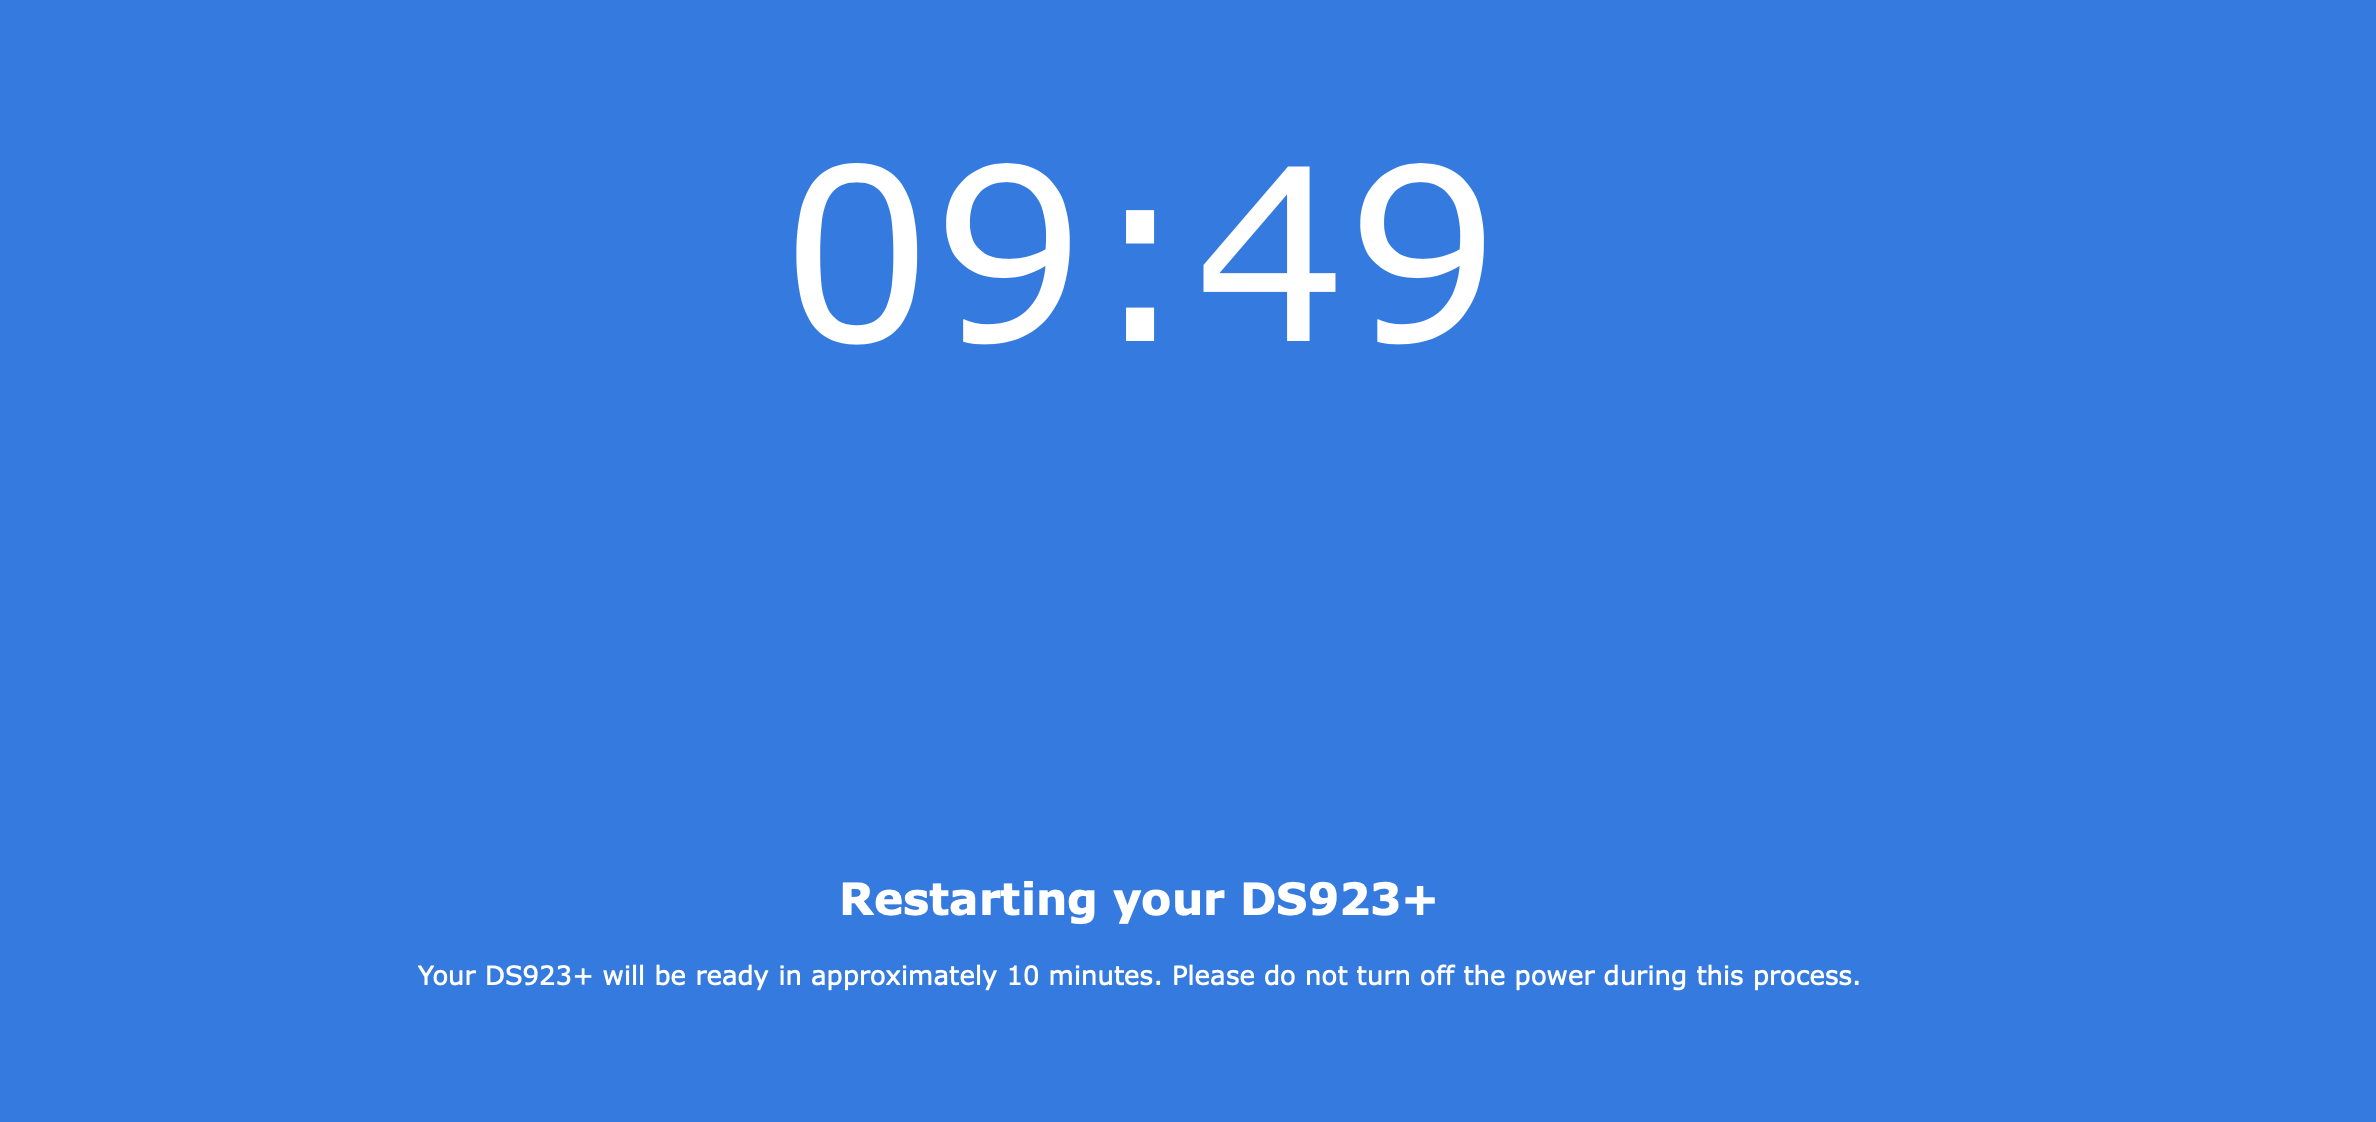
In any event, no matter what method is chosen, within a few minutes, the DSM (Disk Station Manager) OS will be installed. In its current version 7.1.1. it will offer the latest features as well as security fixes. The speed of the installation will depend on the drives inside the NAS (HDD vs SSD), but even on spindle drives, the installation is quick and straightforward.
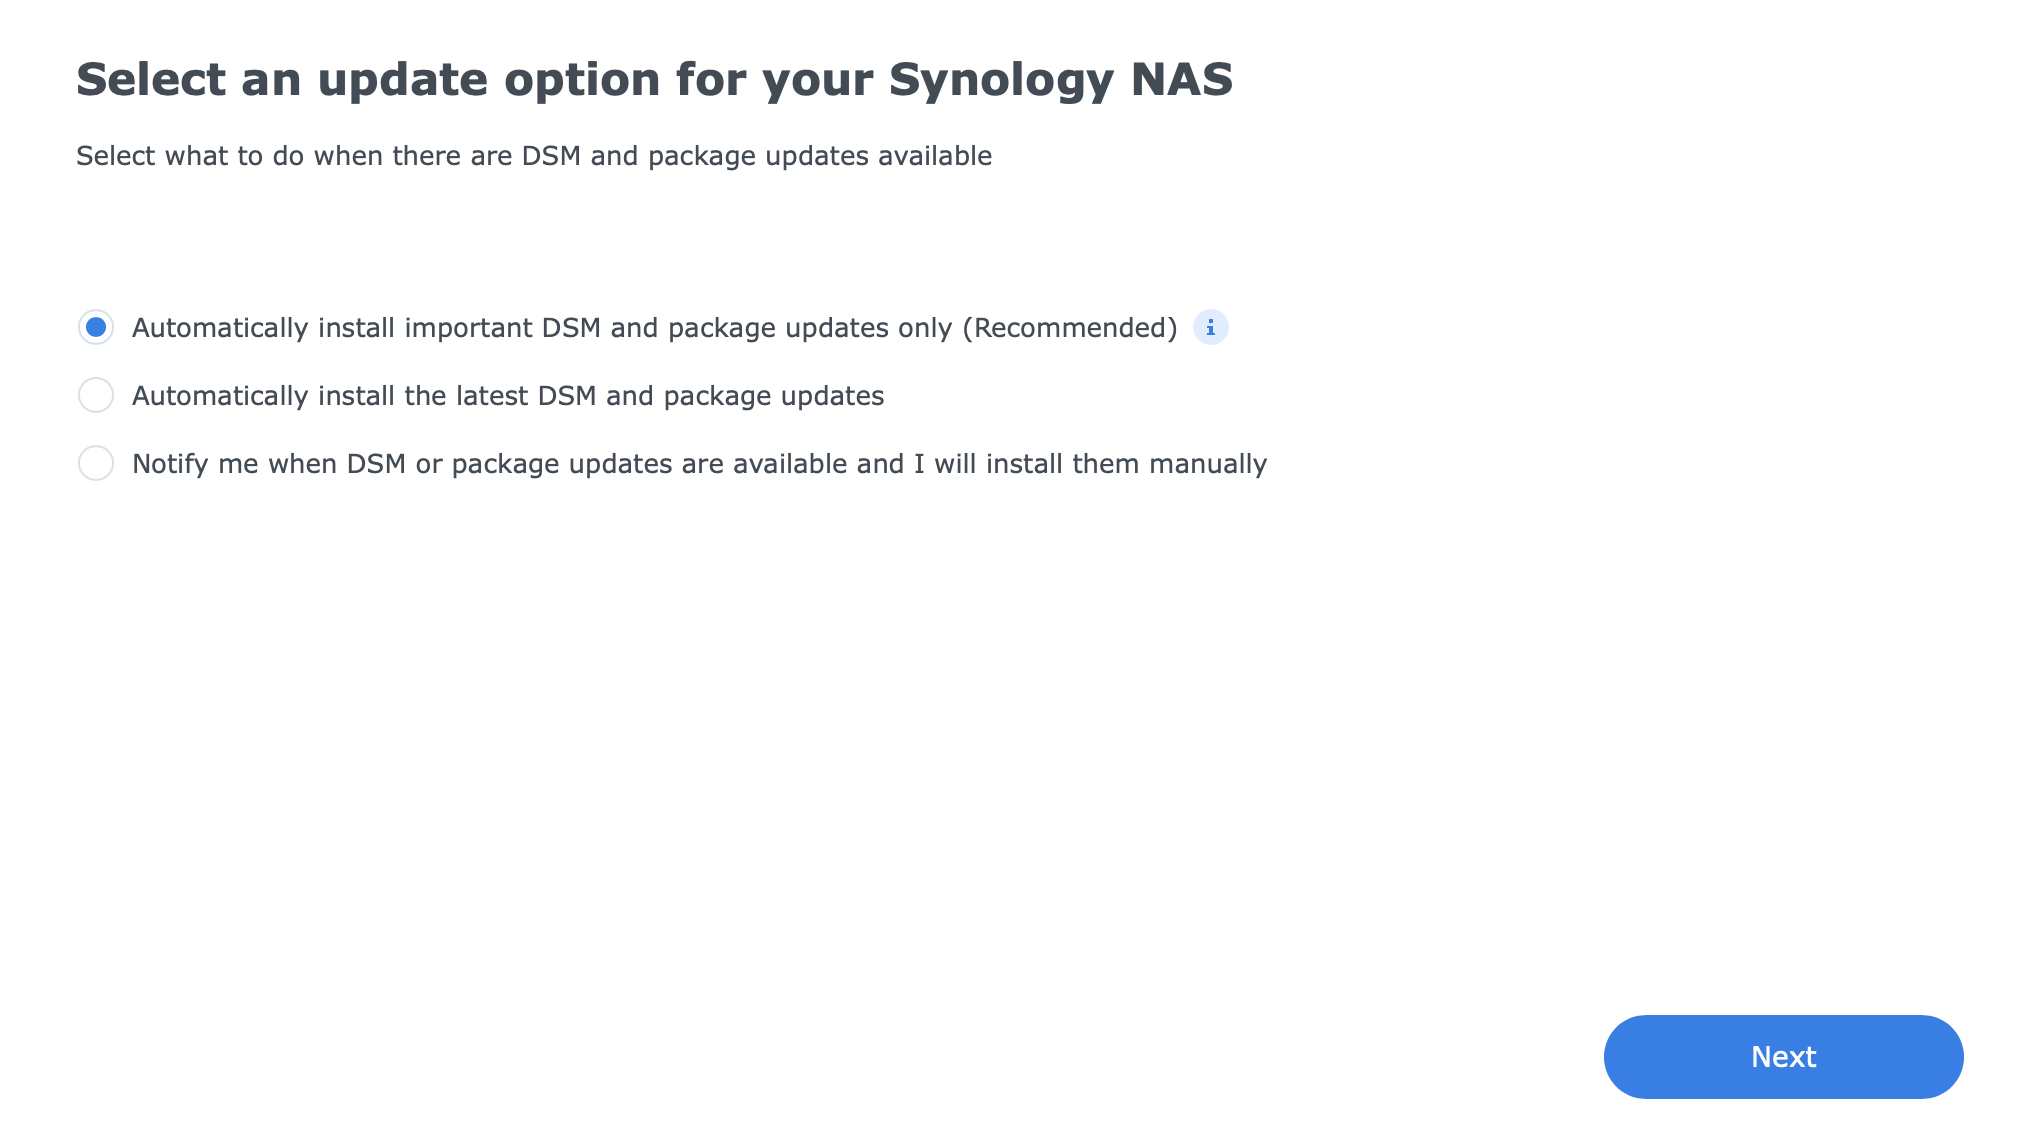
Final wizard before we are allowed to start using the DSM
Volume creation
Before we can do anything on the NAS itself, there is a need to create a storage pool and volume. While the DSM itself has already been installed on all the drives that have been detected, the user volume needs to be configured by us.
This is where most of the packages will be installed, as well where the user data will live.
To get started opening the Storage Manager app we will be greeted with yet another wizard, helping us along the way.
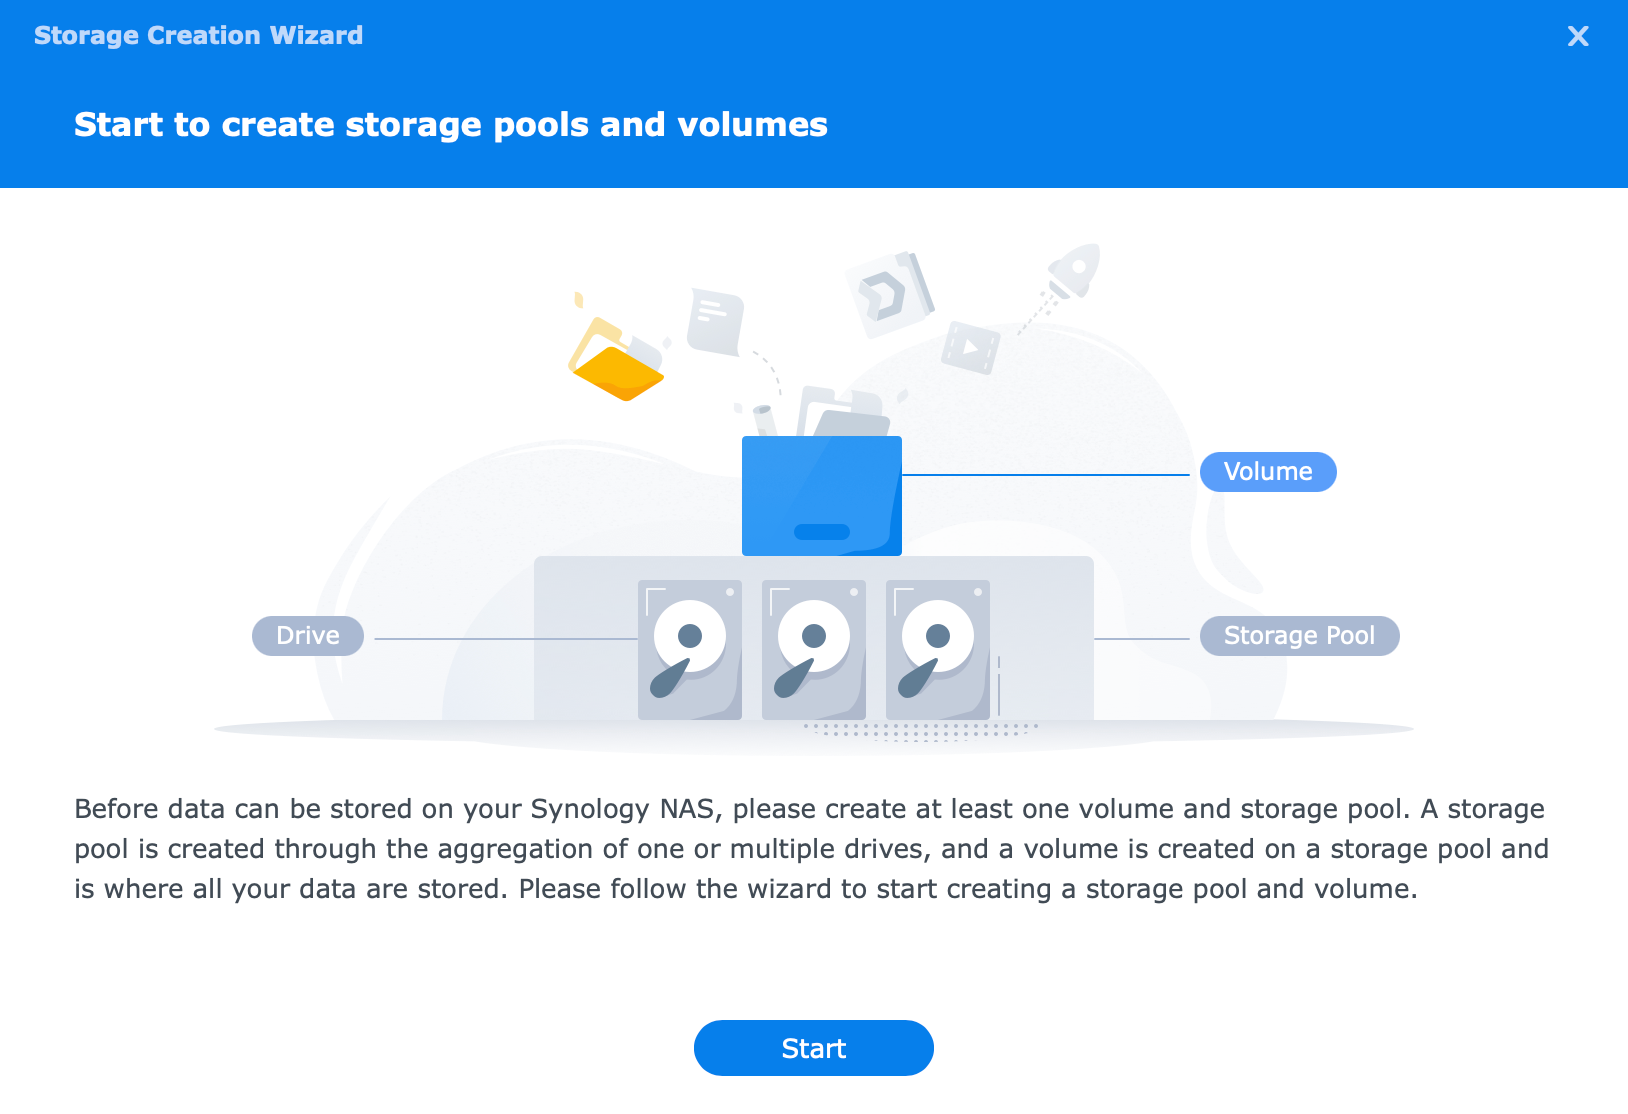
Depending on the size, type, and user's needs, we can create all sorts of pools and volumes. From Synology's own SHR (Synology Hybrid Raid) to basic ones or conventional RAID 1, 5, 6, 10.
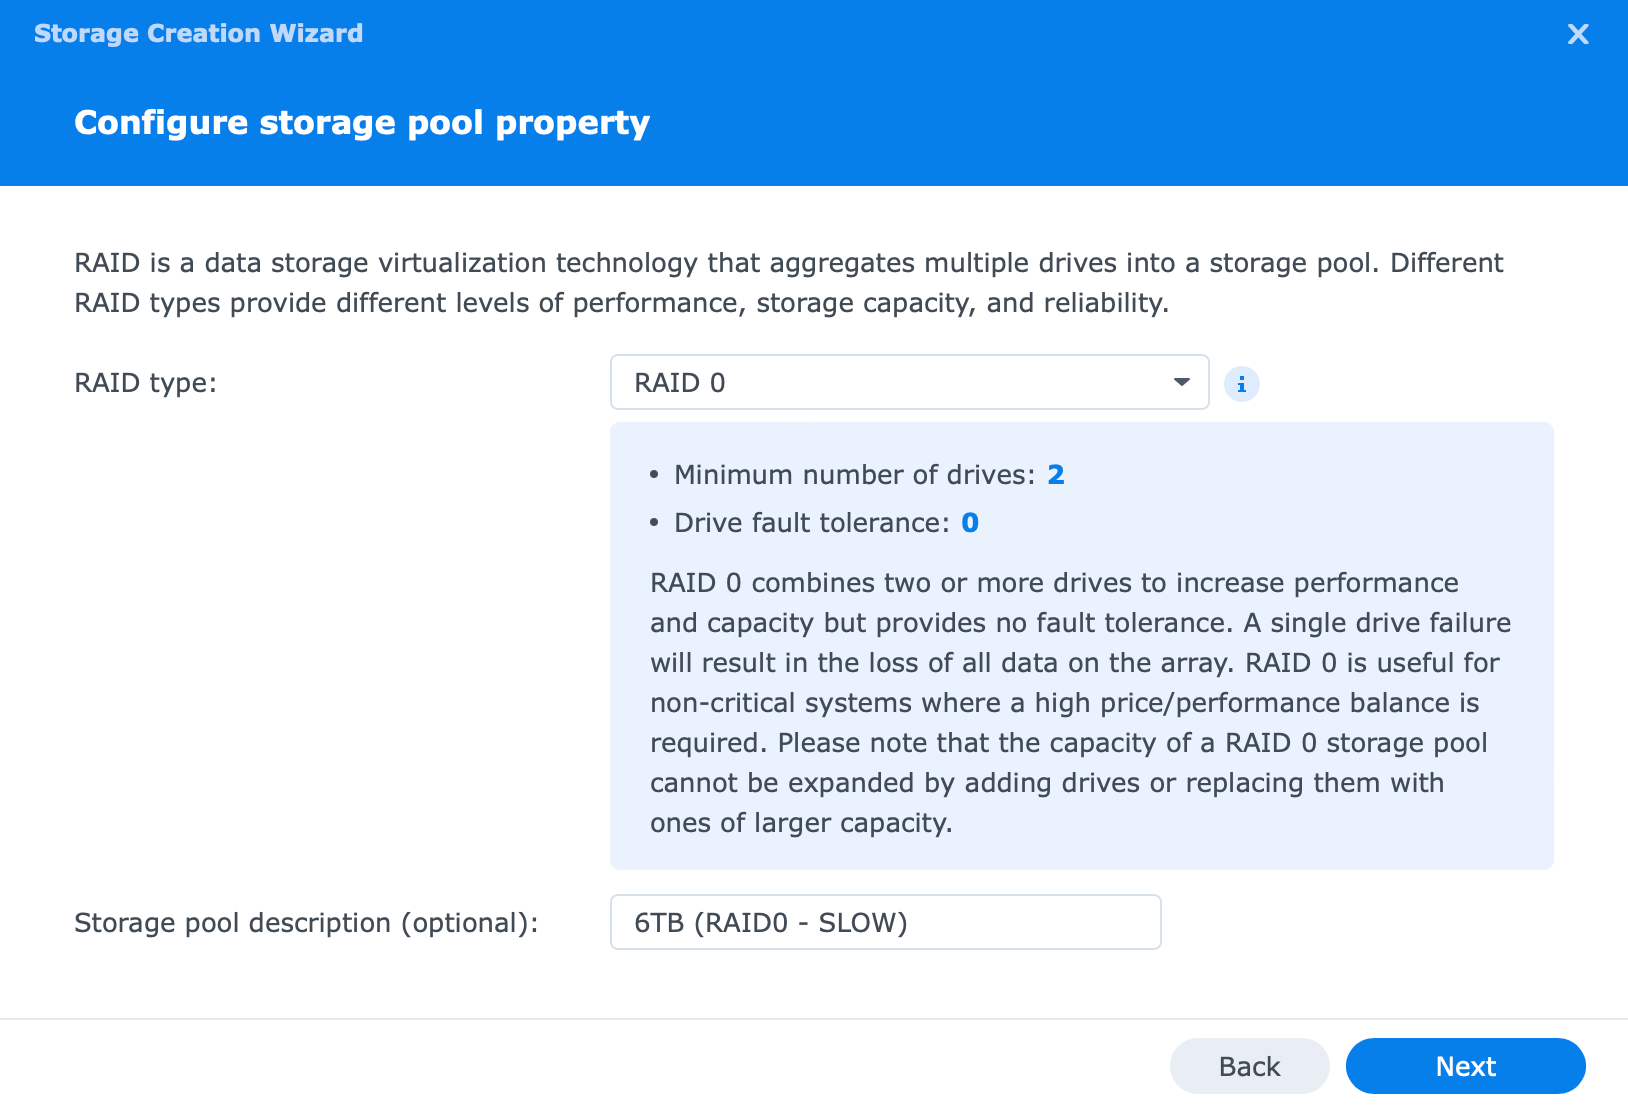
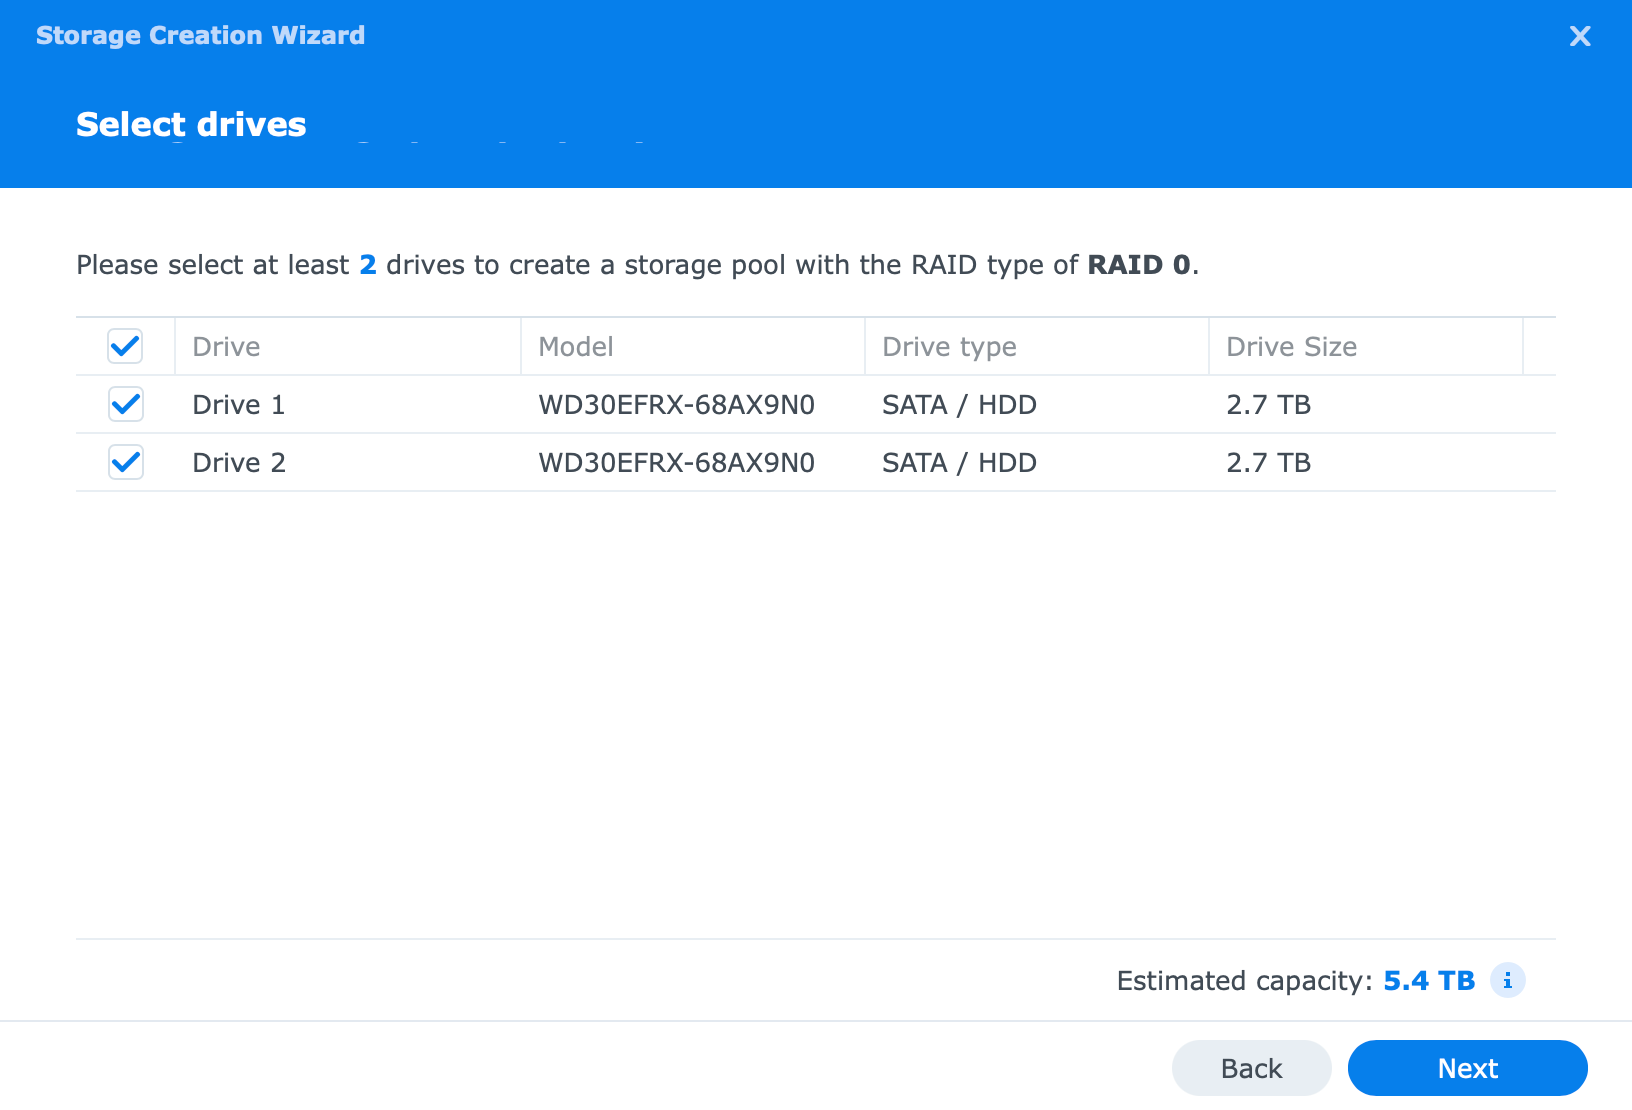

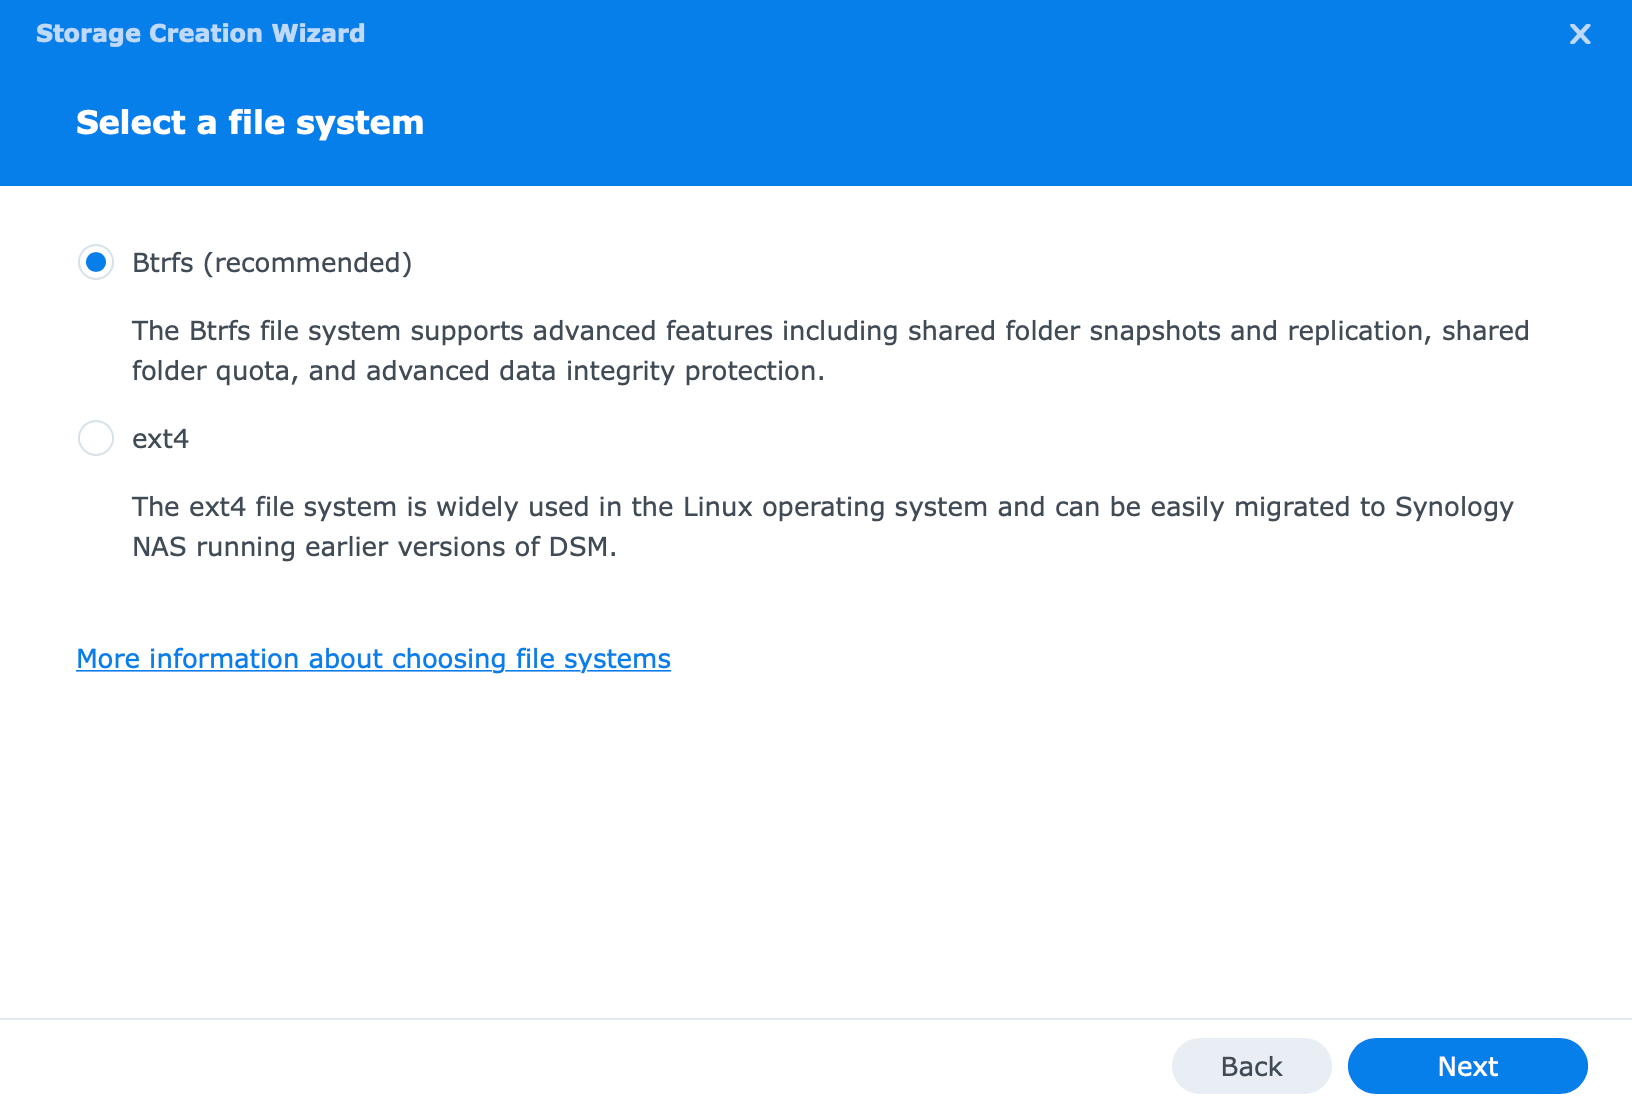
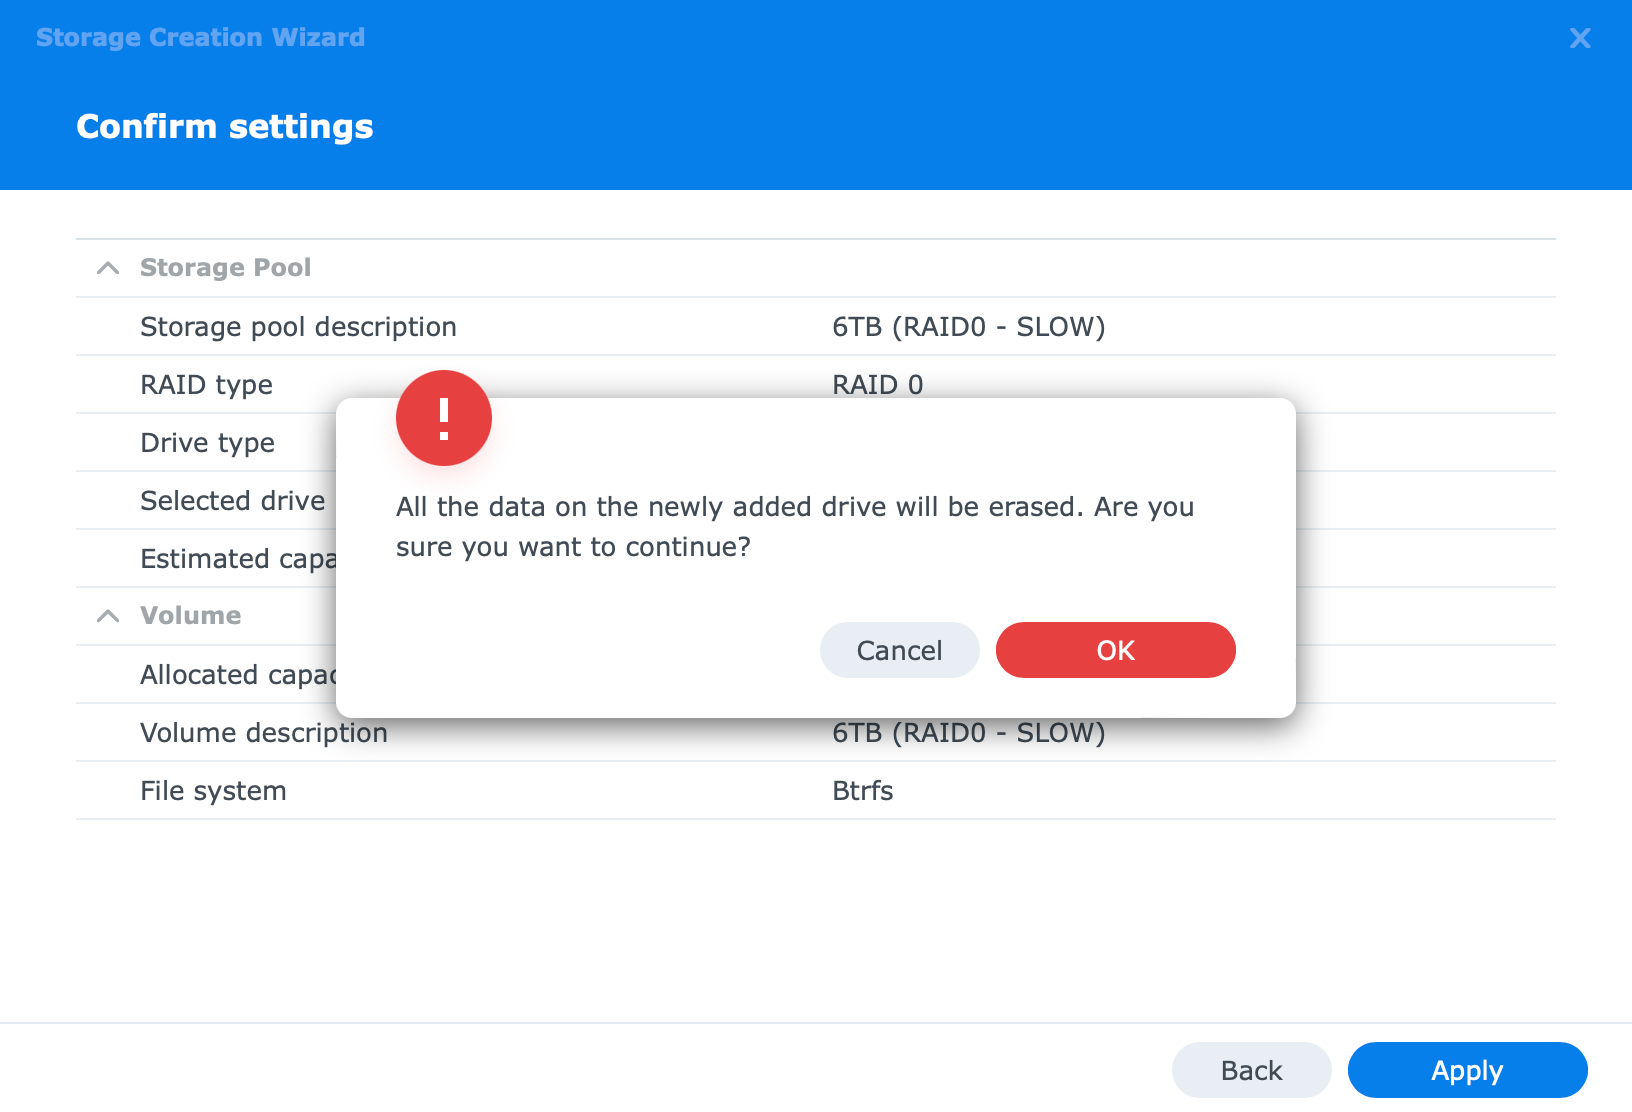
Steps will include, drive and RAID type as well as file system format
During the setup, we will have the option to pick and choose (in a multi-drive setup), what drives will be part of what volume, as well as what RAID options to use, and finally file system preference. In terms of the mentioned file system, BTRFS or EXT4 are the current options. This will also be important to choose wisely, as conversion without data loss is not possible.
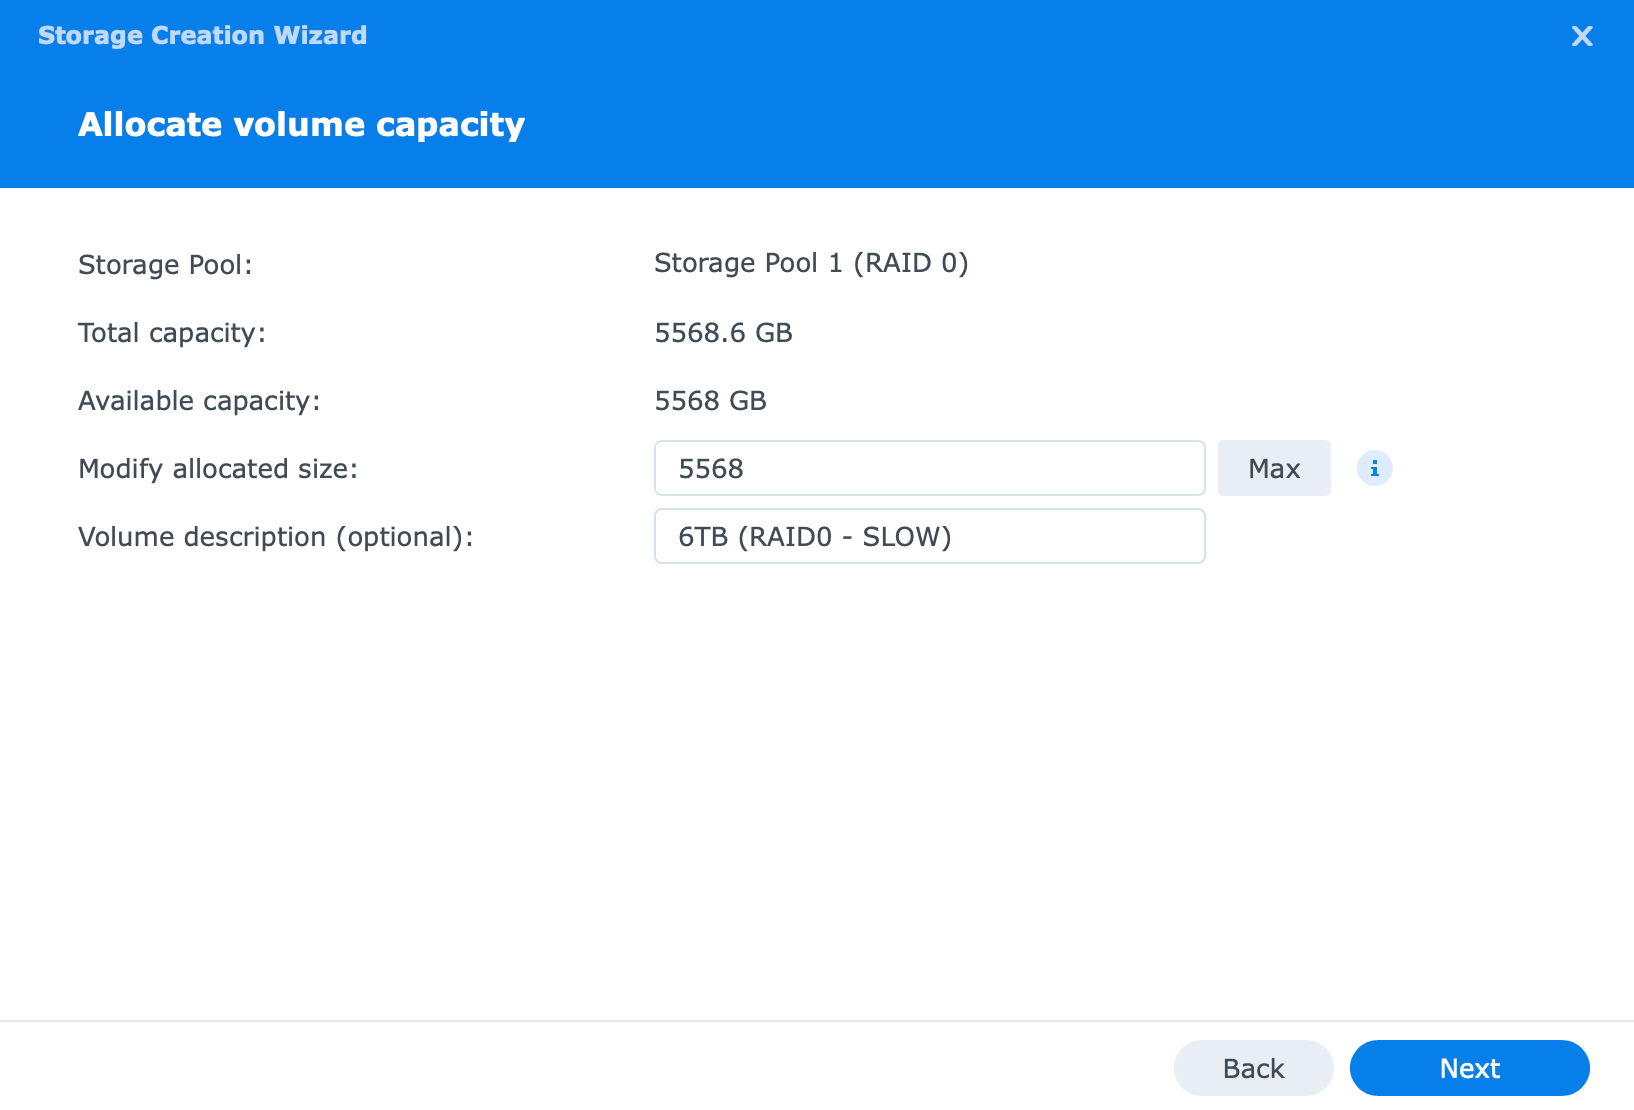
After the wizard pool and volume creation will start. It will take some time depending on the size of the drives and the usable space, so be patient.
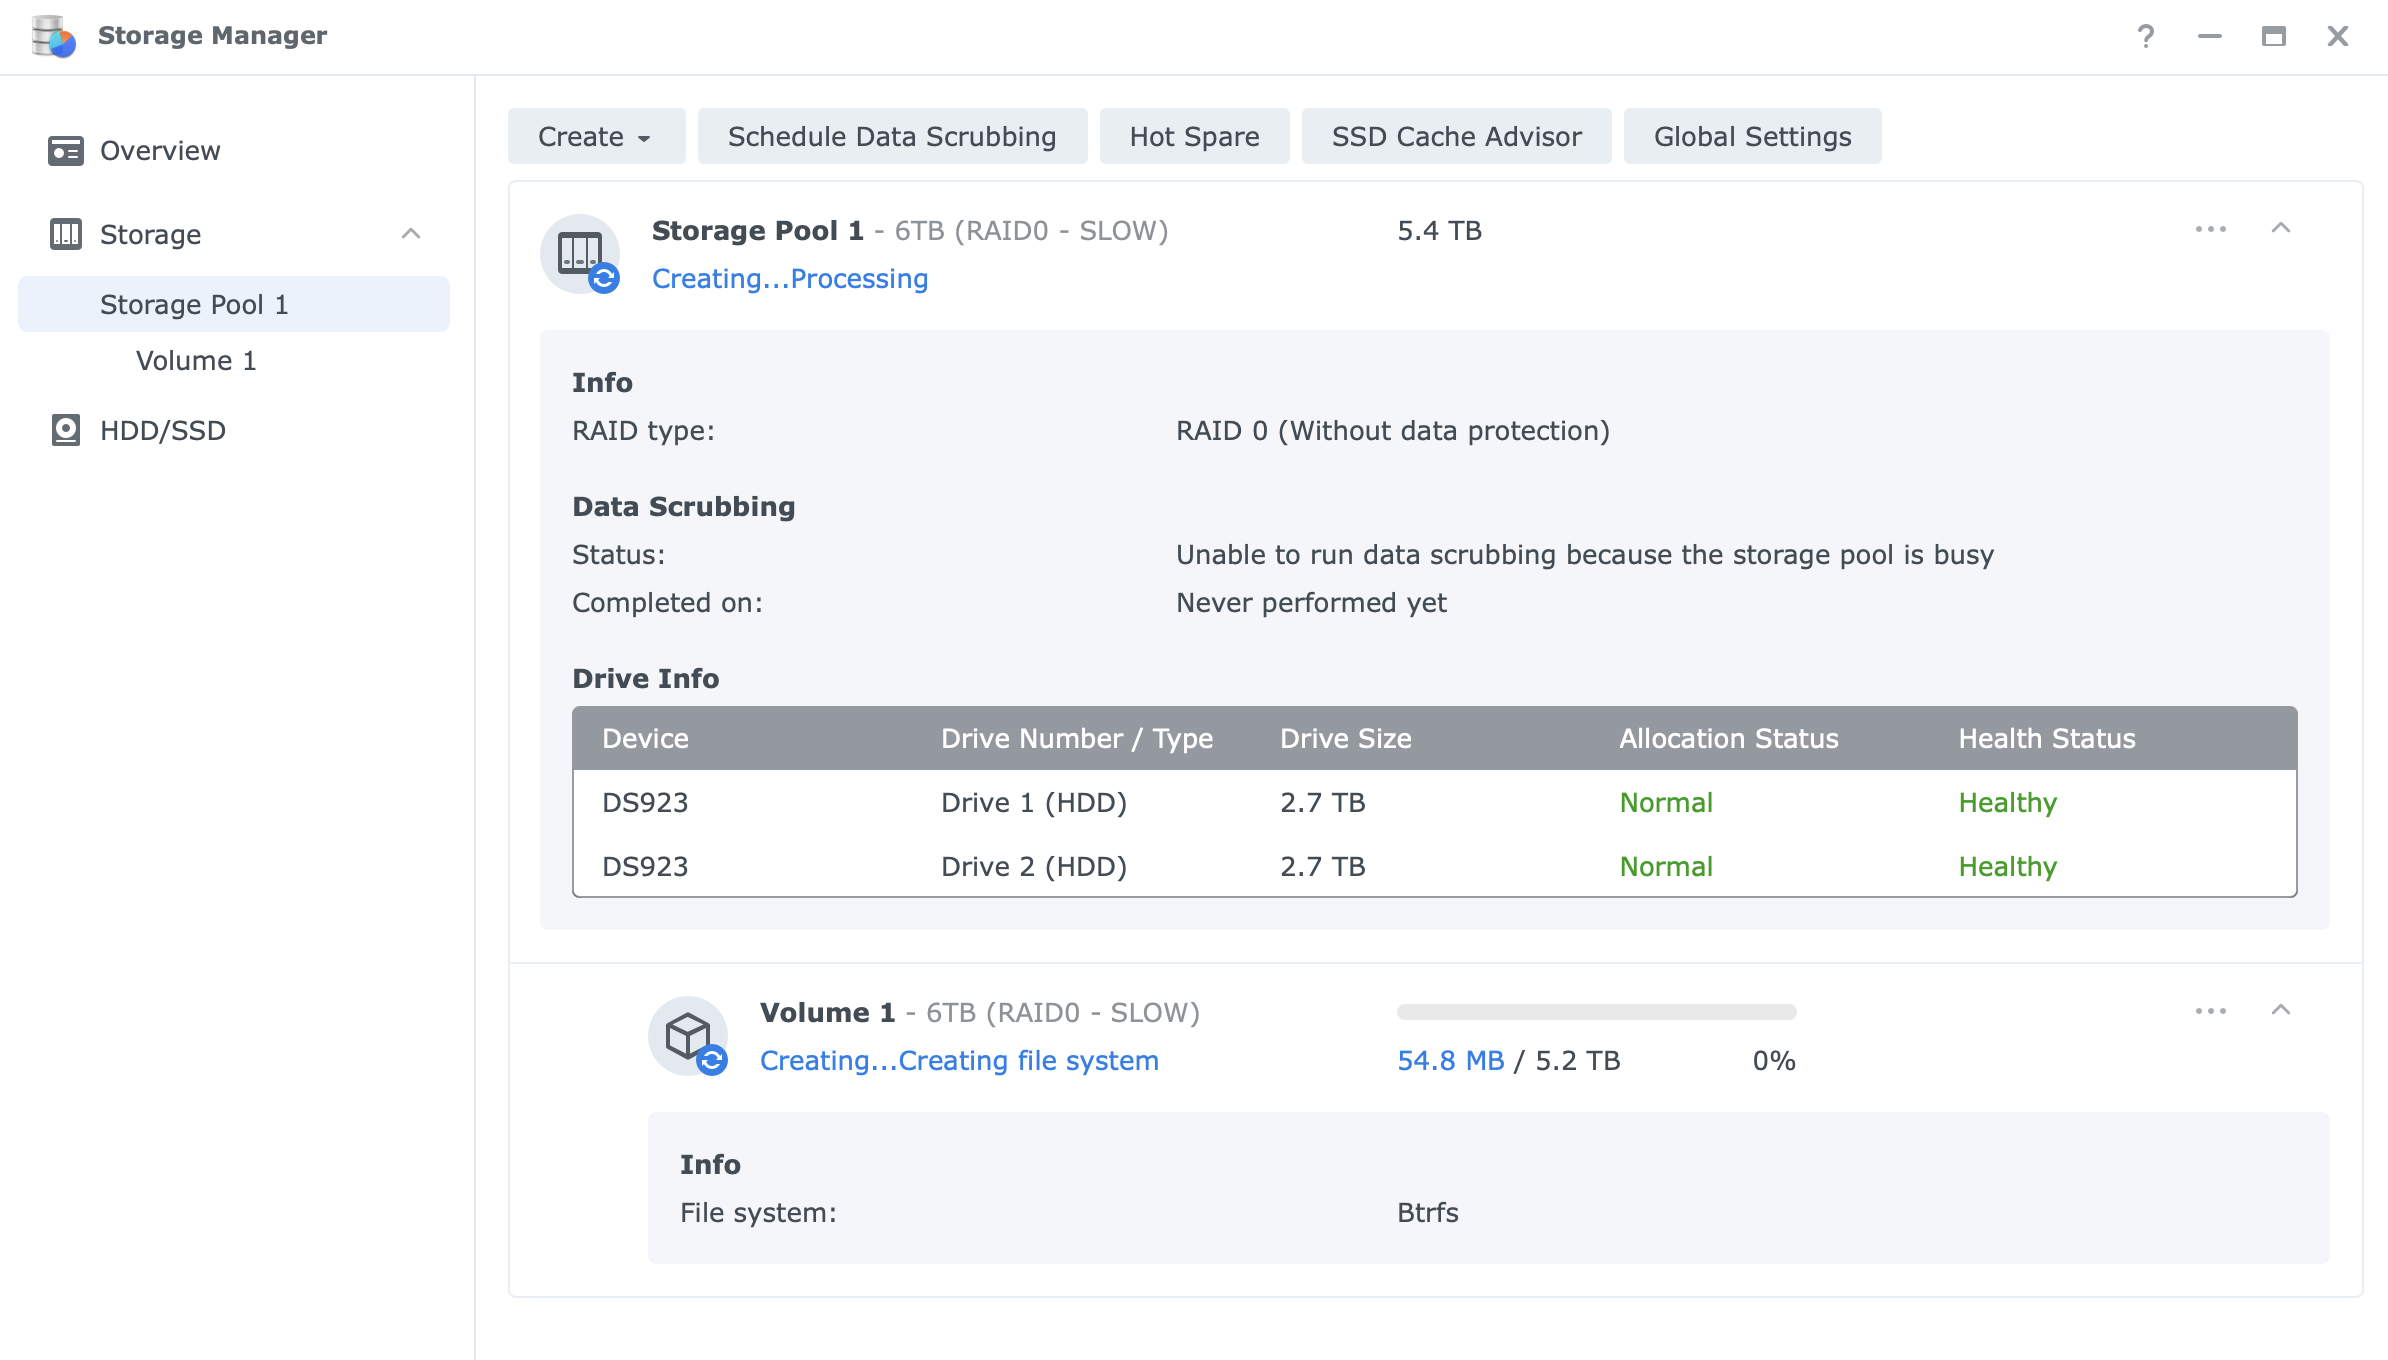
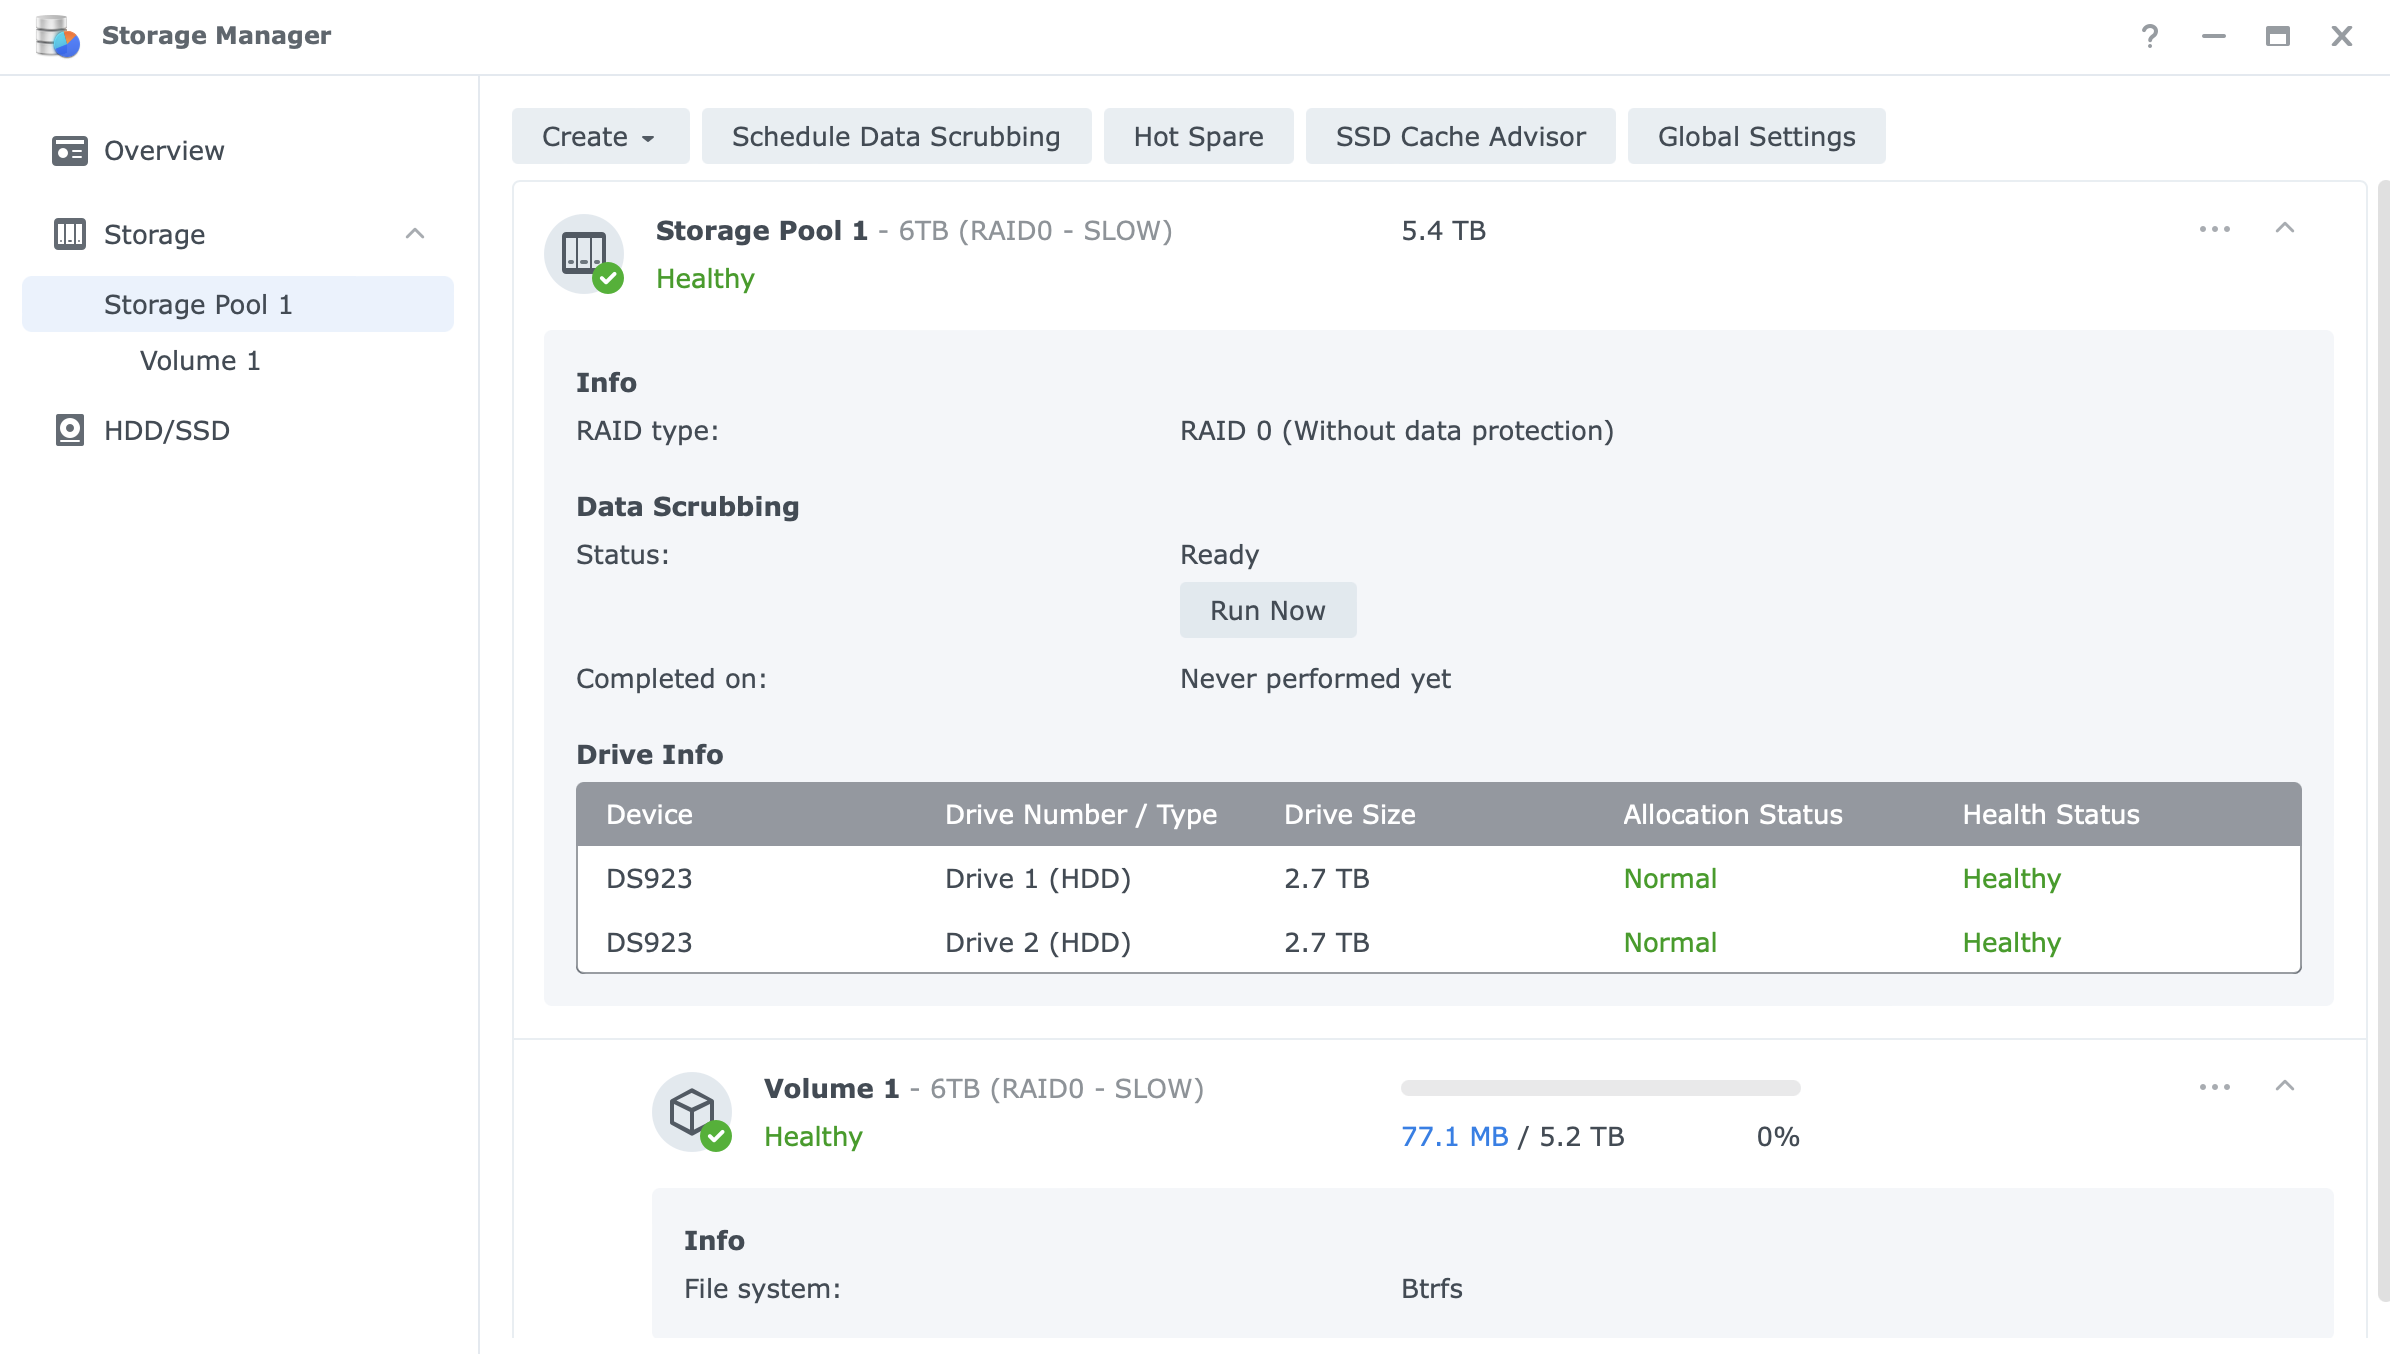
Pool and volume creation (left), and health status upon completion
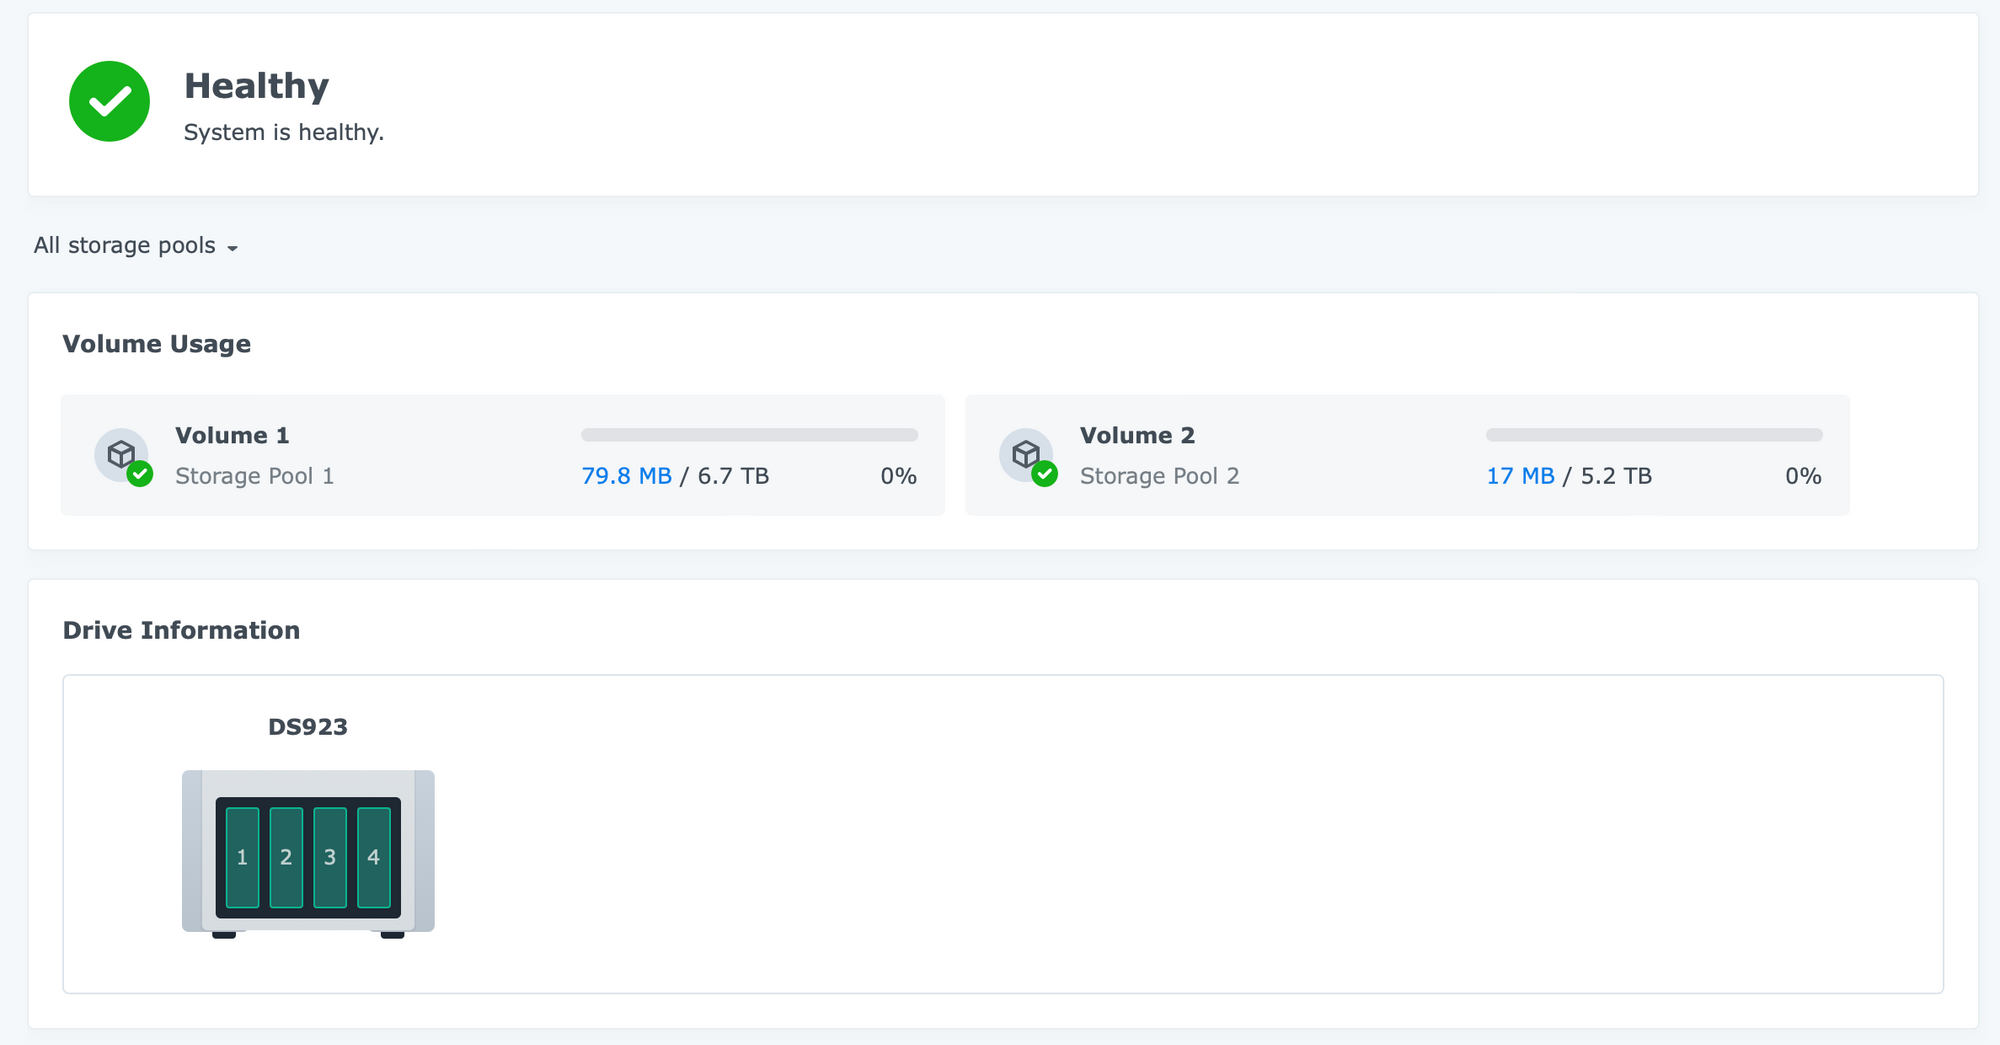
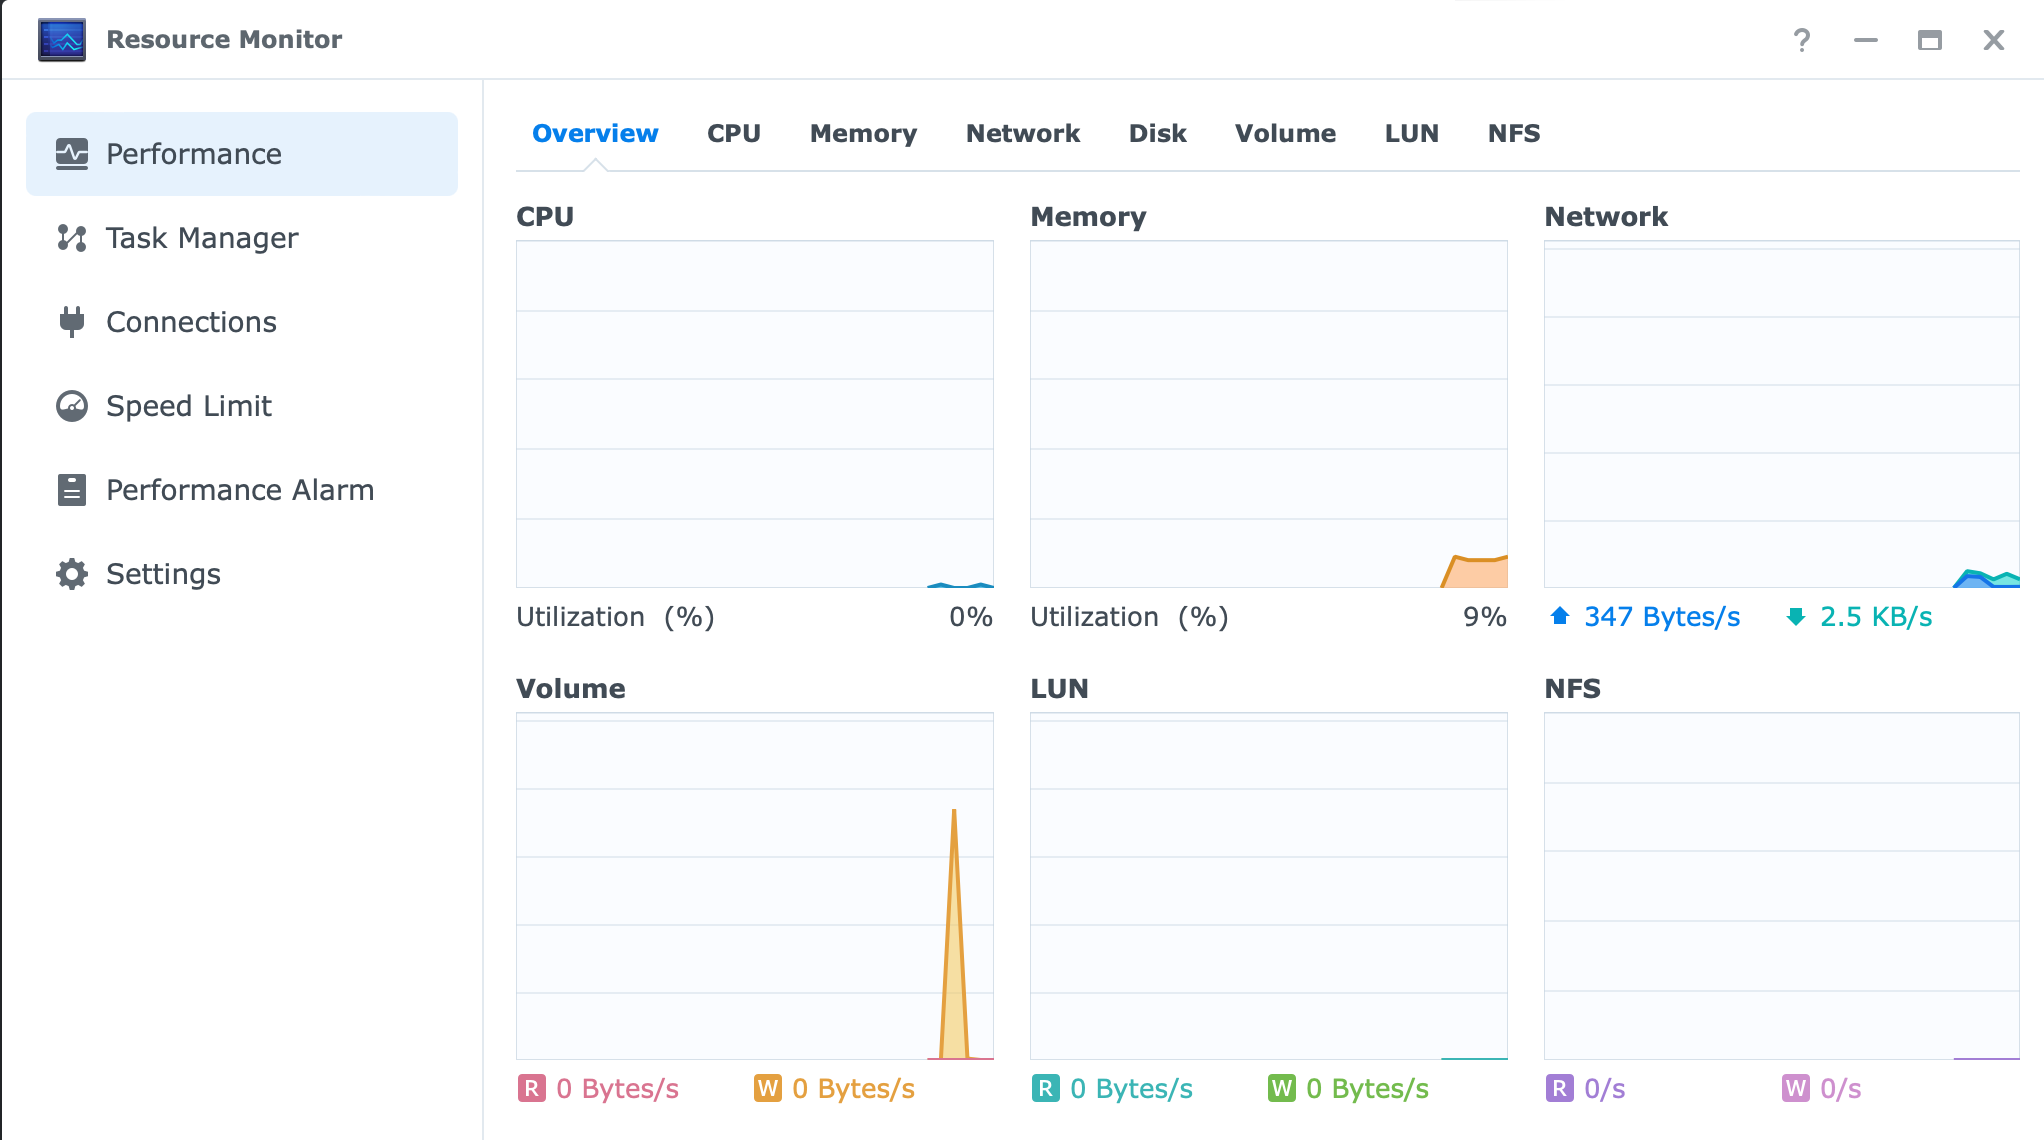
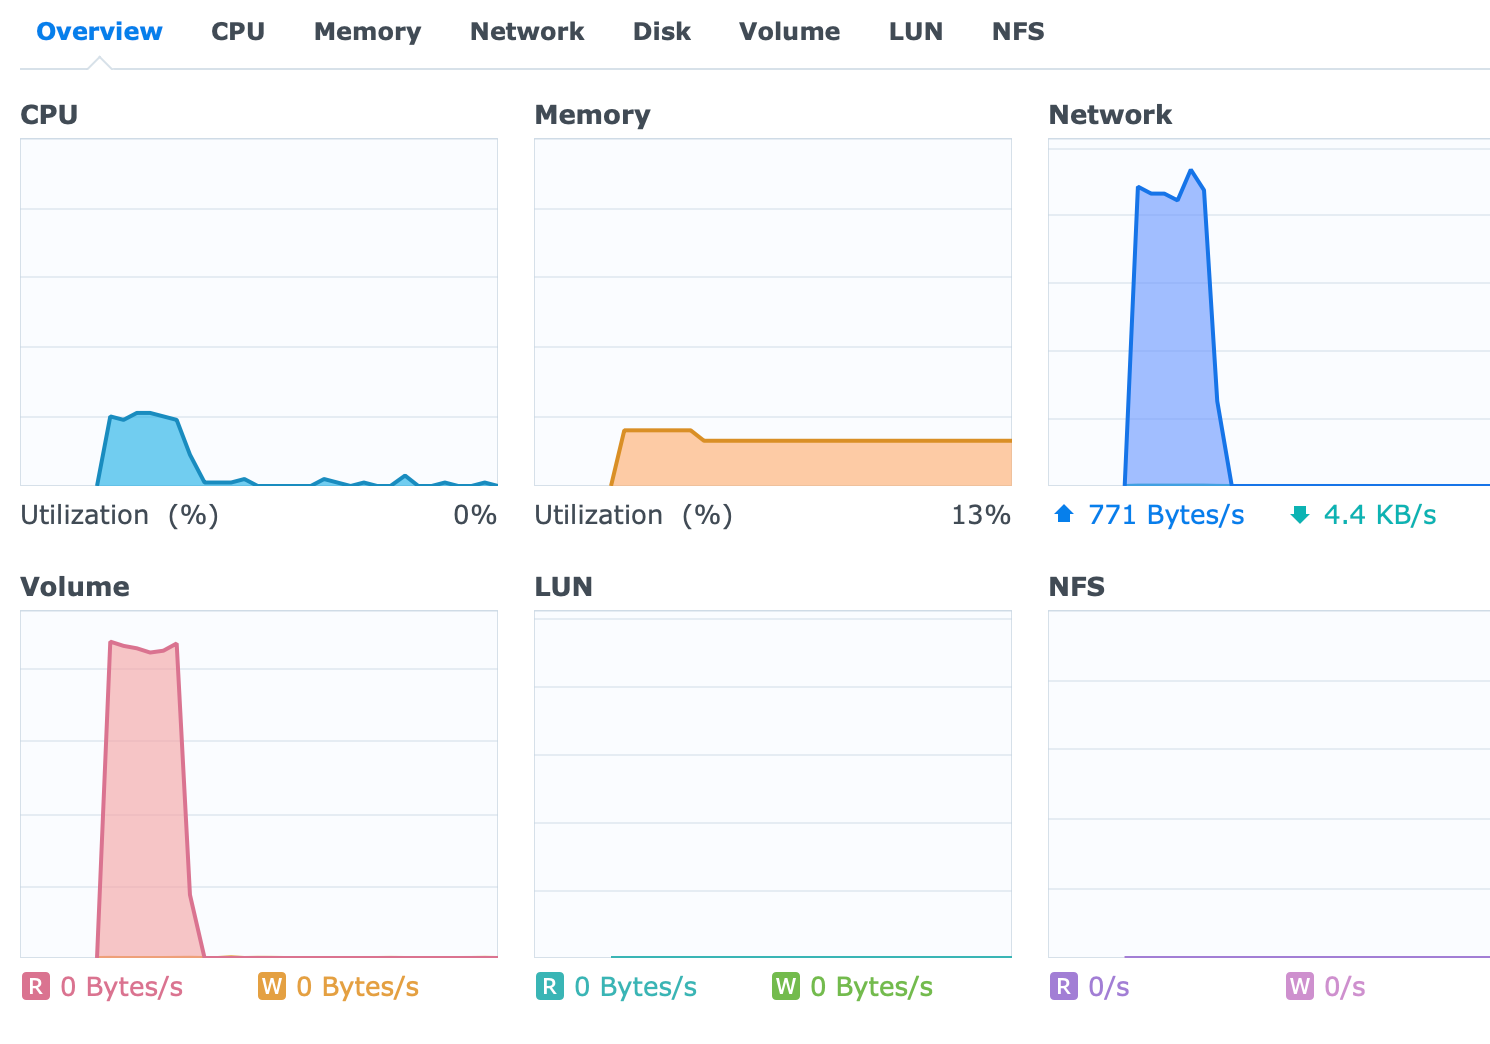
Finally, one more app alongside the Storage Manager that will be of use when it comes to NAS health and utilization is the Resource Monitor. With it, we can monitor in real-time the CPU, RAM, and volume performance as well as network transfer speeds.
On top of its overview, Resource Monitor has a list of active connections and a task manager for a better understanding of what is happening inside the OS.

Application installation
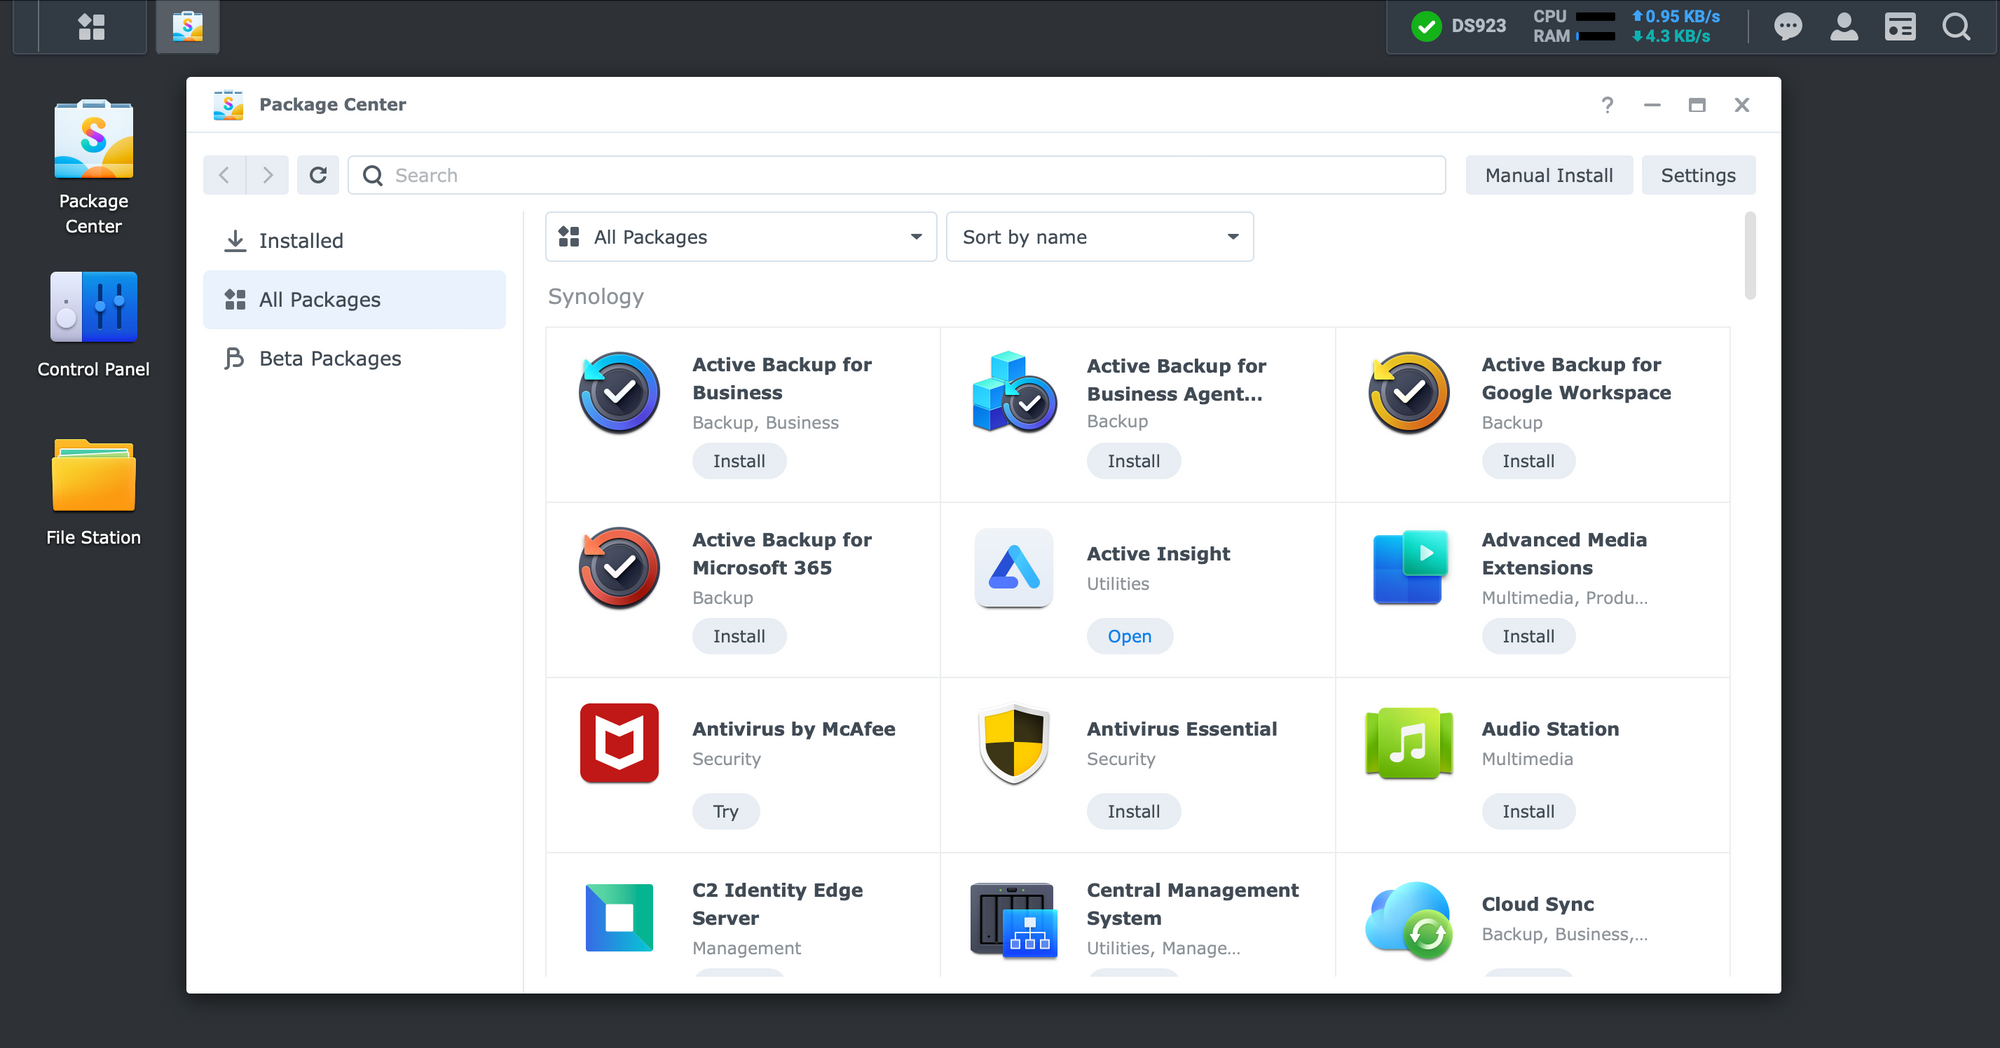
Installing apps onto the NAS itself is a trivial process. Like installing it via an "app store" the same goes for Synology products. Part of the DSM OS is the Package Center. Inside it, there is a number of apps that can be installed depending on the NAS model. If the app is not listed, it means it is not supported on the specific device.
On top of the official app, there are also a number of 3rd party apps that can be added. While their number has gone down since the DSM 7 release in 2021, there are those that are still maintained and working fine.
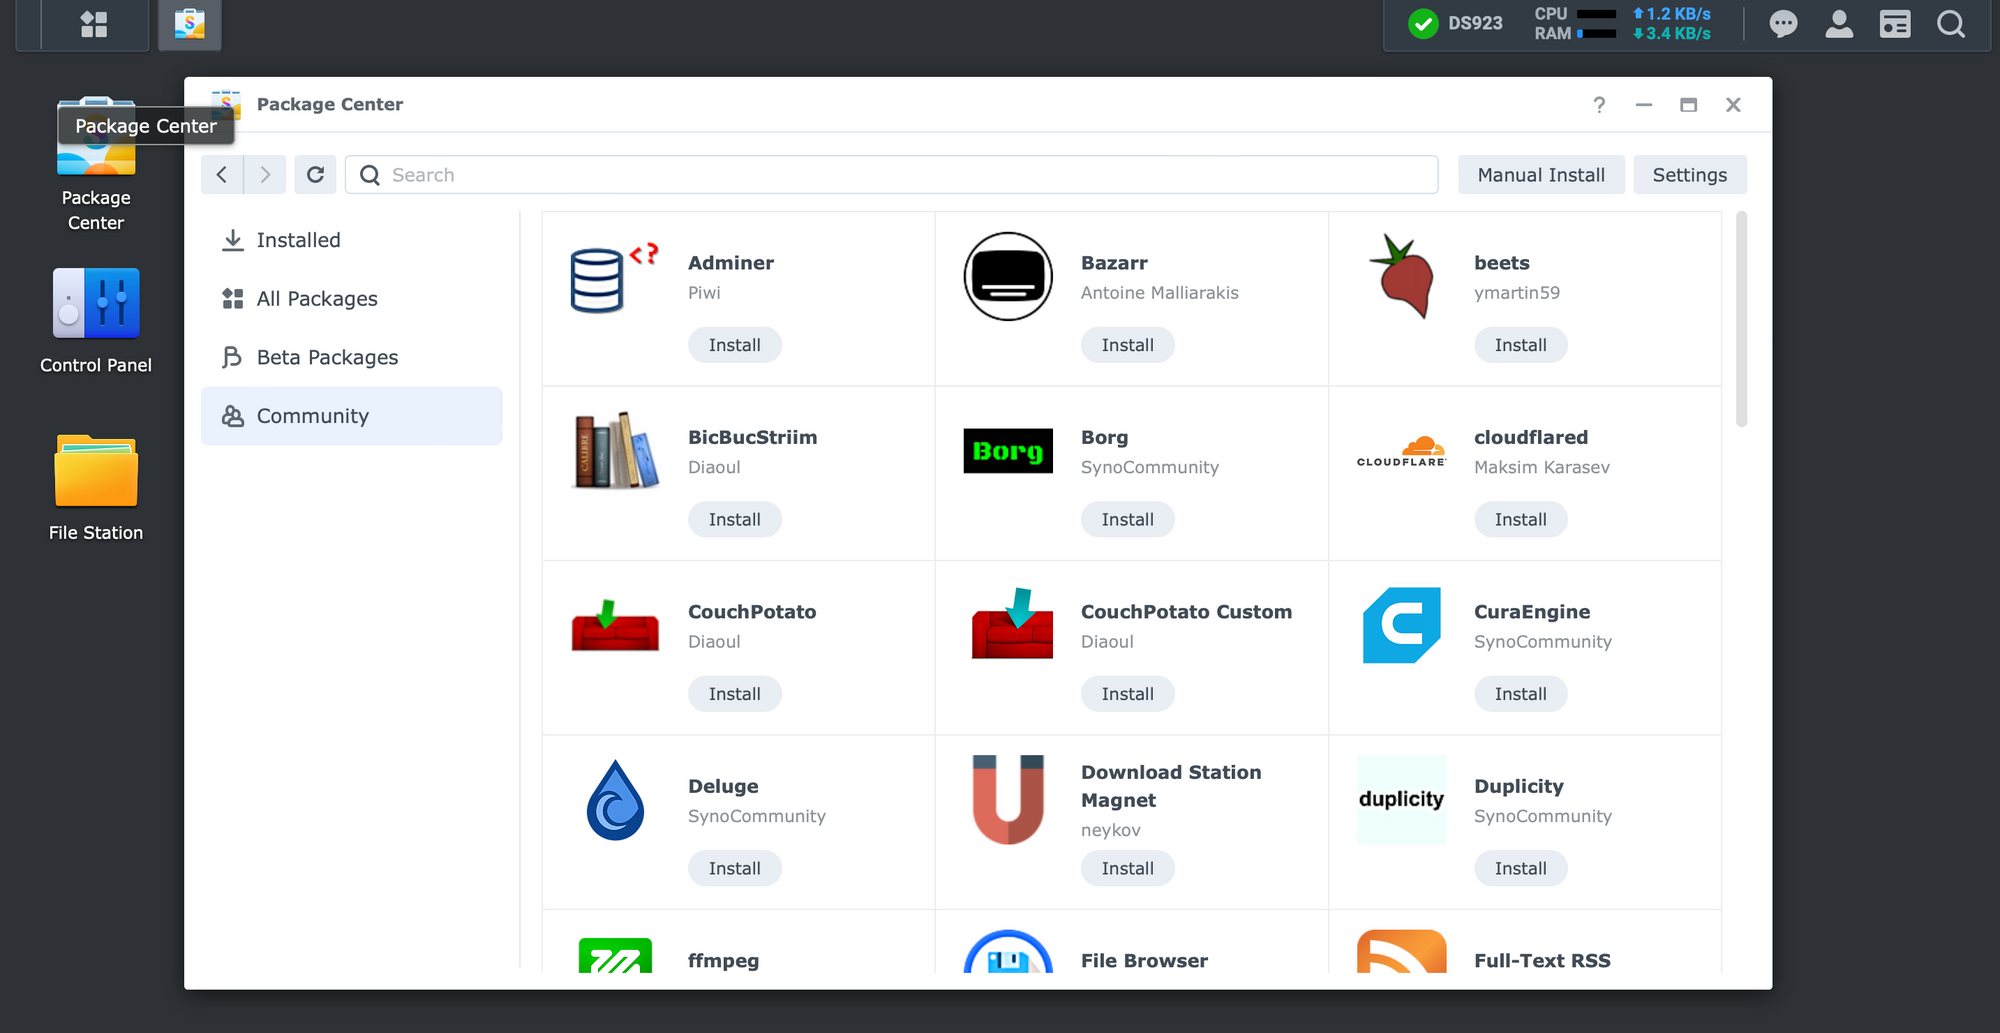
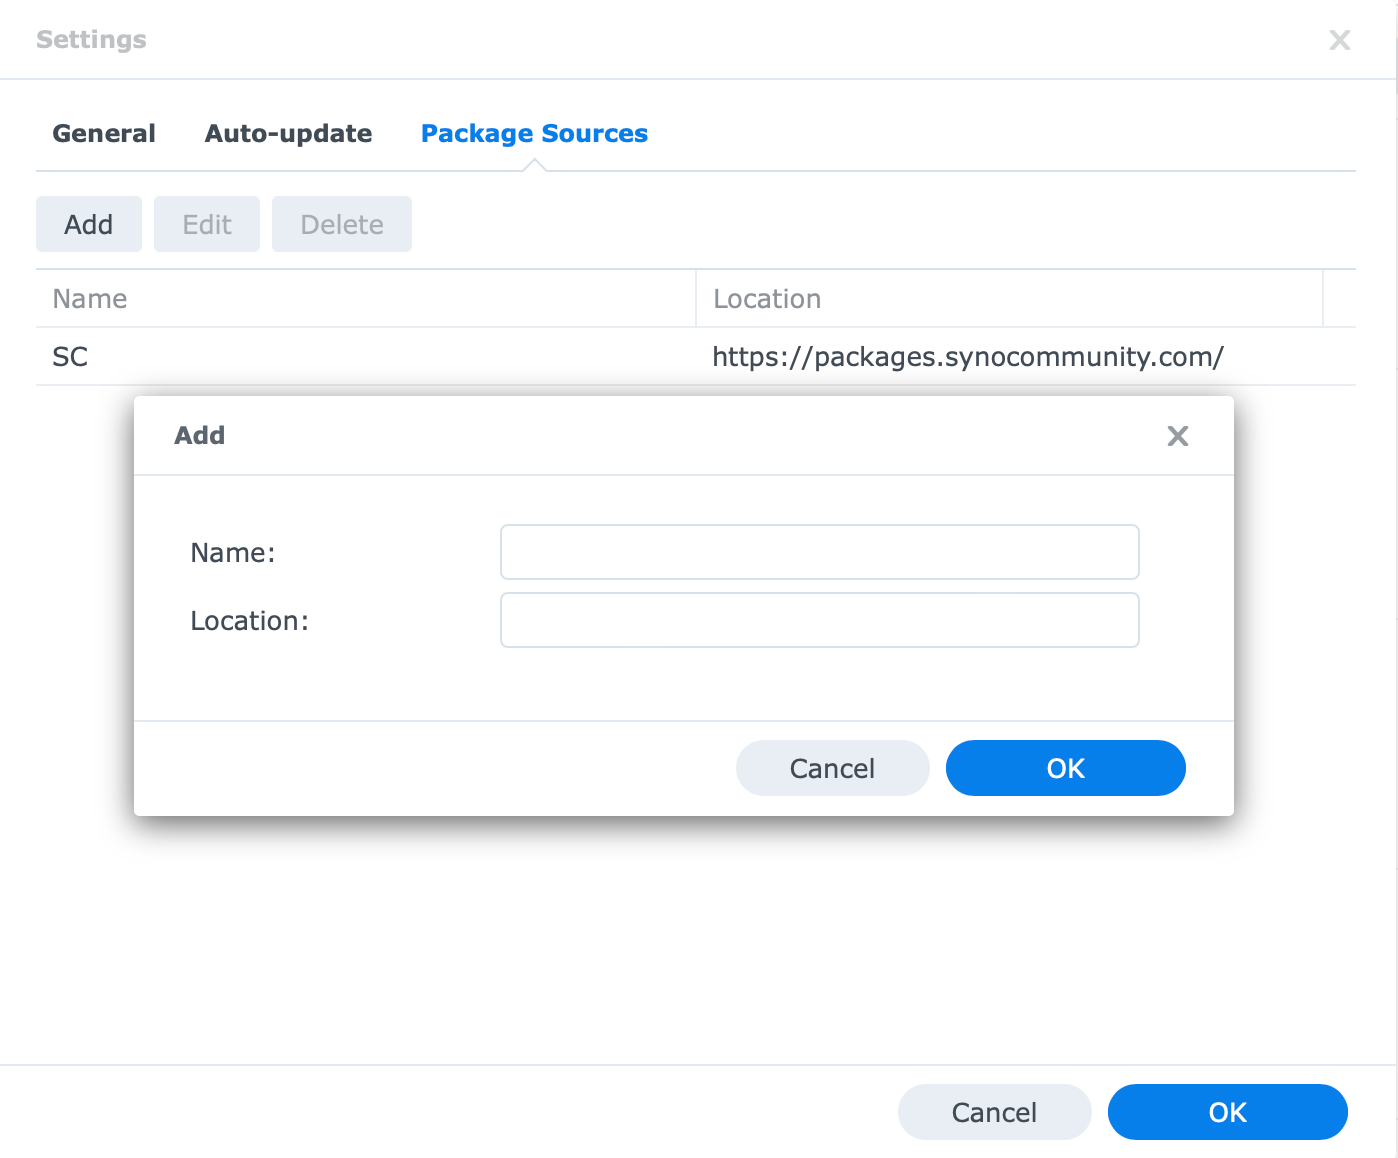
Adding a 3rd party repository is done using the Settings button in the upper right-hand corner of the Package center.
Finally, again on selected models, there is also support for the Docker platform. For those not familiar with it, Docker allows for the containerization of apps and essentially opens NAS to a world of officially unsupported apps. Those solutions are maintained by the developers themselves who have no connection to Synology whatsoever.
While on the subject of 3rd party support and Docker, one example would be running a Wireguard VPN server support off of this device. While DSM at the moment does not support WG VPN protocol, this can be configured using the custom-built package.
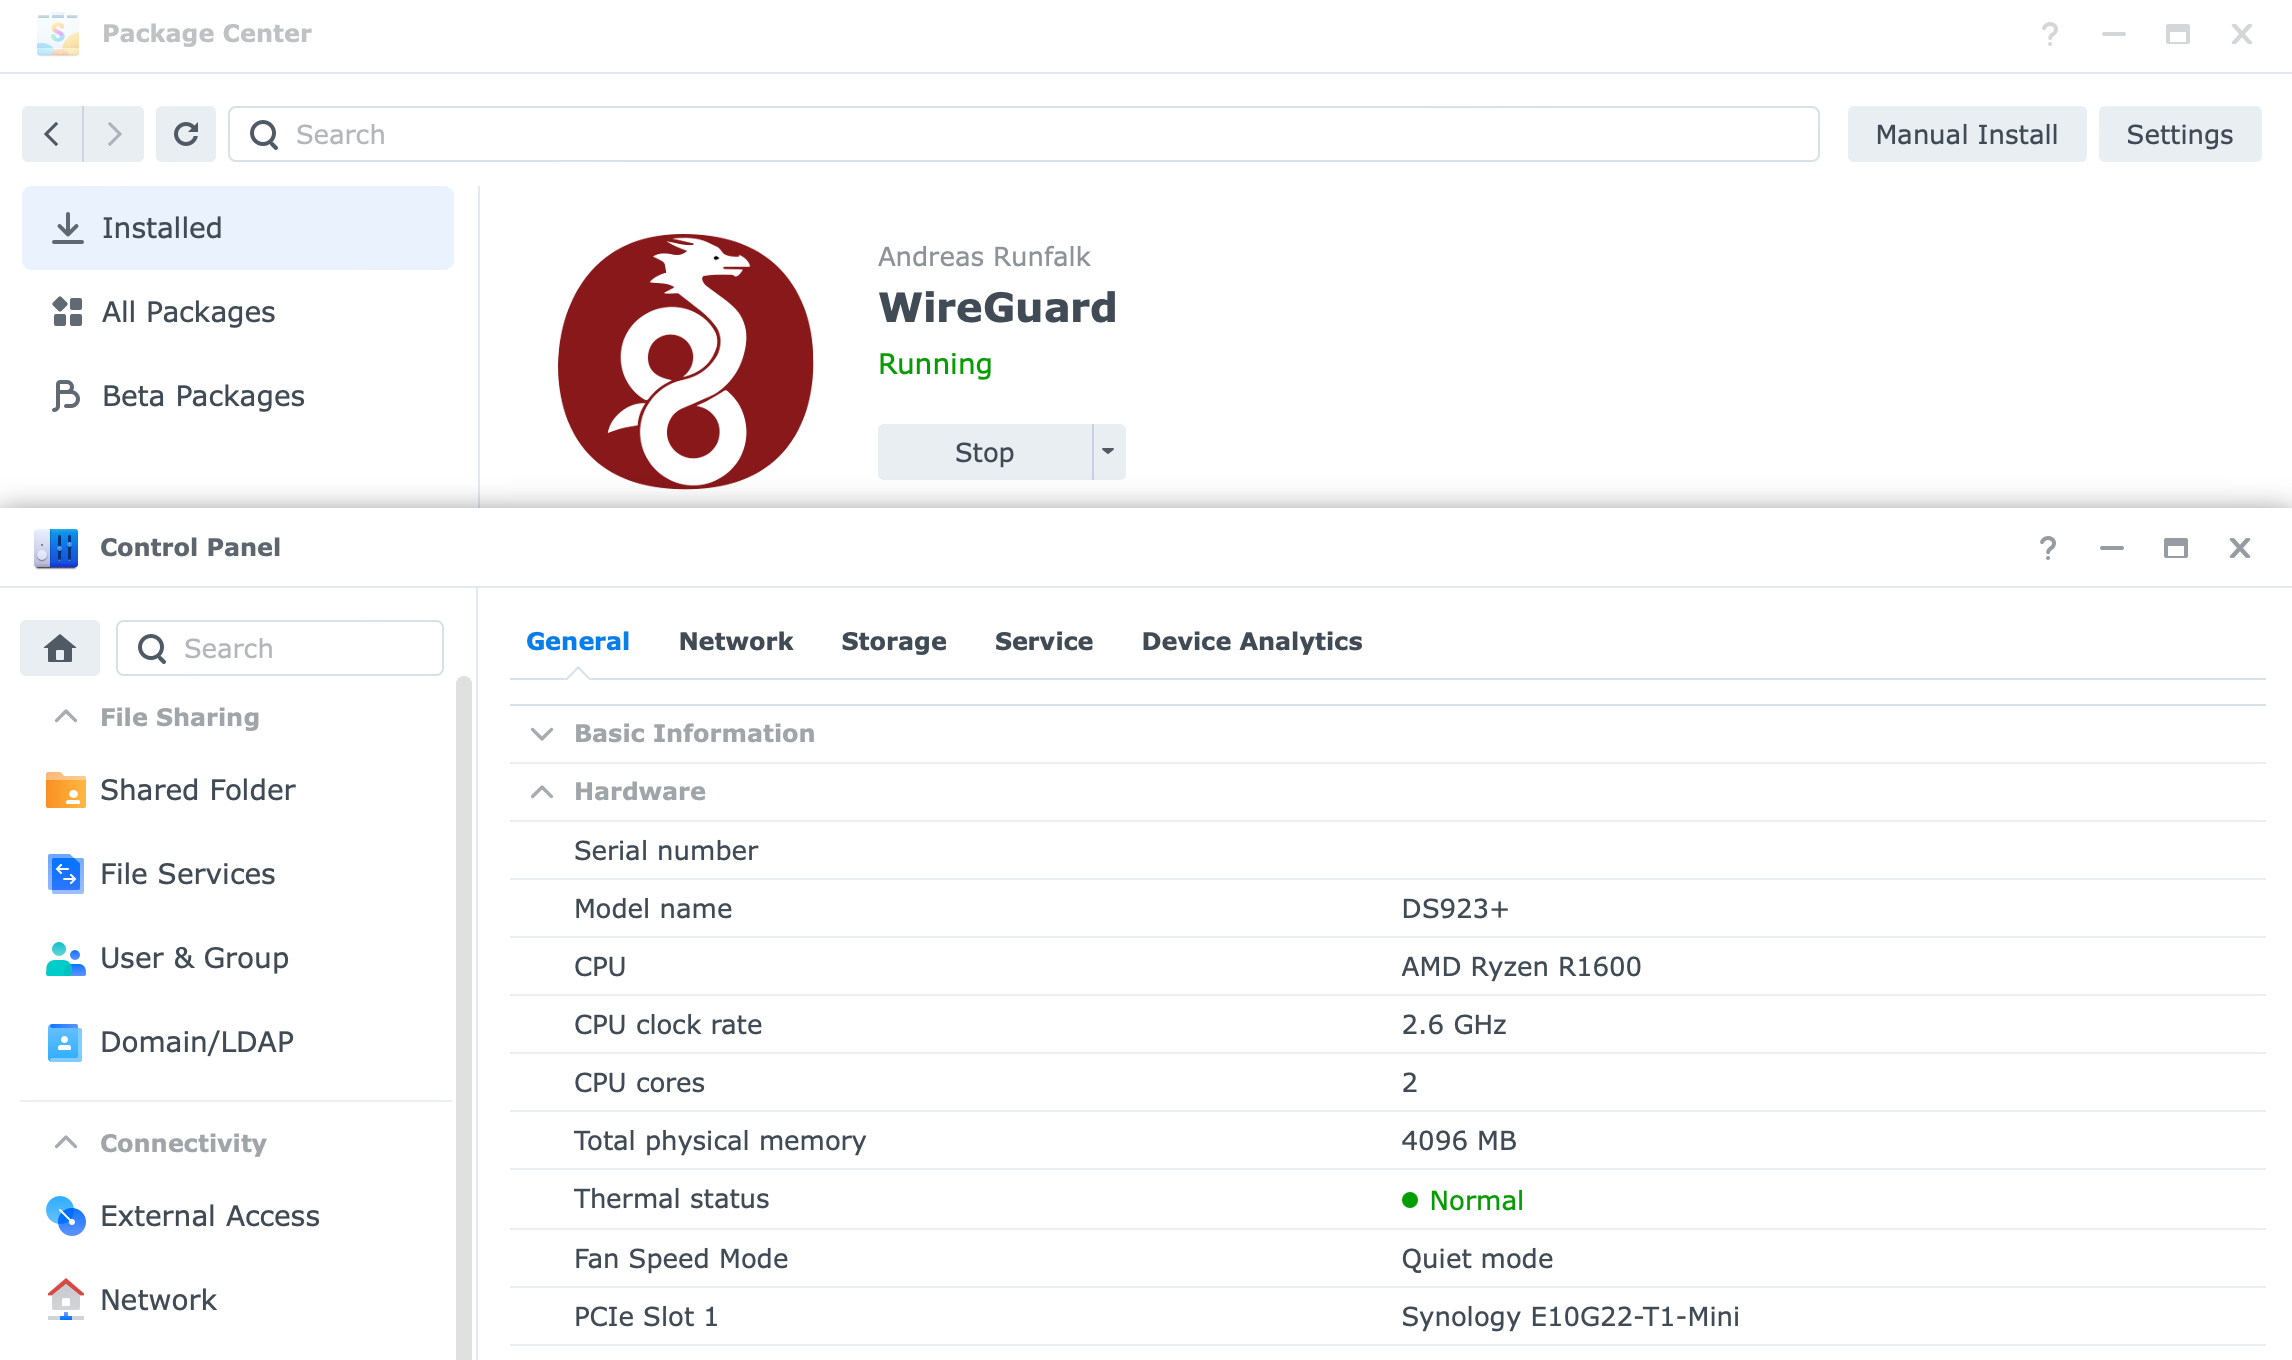
More details on the whole WireGuard set up in the following two articles
: Speed tests
This section will cover some speed tests including network as well as 1G and 10G transfers (SMB and backup apps).
Starting with some basic iPerf network speed tests on both 1 and 10G interfaces.
1G iPerf test
[ ID] Interval           Transfer     Bitrate         Retr  Cwnd
[  5]   0.00-1.00   sec   116 MBytes   973 Mbits/sec    0    469 KBytes
[  5]   1.00-2.00   sec   111 MBytes   933 Mbits/sec    0    516 KBytes
[  5]   2.00-3.00   sec   112 MBytes   944 Mbits/sec    0    540 KBytes
[  5]   3.00-4.00   sec   112 MBytes   944 Mbits/sec    0    540 KBytes
[  5]   4.00-5.00   sec   112 MBytes   944 Mbits/sec    0    540 KBytes
[  5]   5.00-6.00   sec   111 MBytes   933 Mbits/sec    0    540 KBytes
[  5]   6.00-7.00   sec   112 MBytes   944 Mbits/sec    0    568 KBytes
[  5]   7.00-8.00   sec   112 MBytes   944 Mbits/sec    0    568 KBytes
[  5]   8.00-9.00   sec   112 MBytes   944 Mbits/sec    0    568 KBytes
[  5]   9.00-10.00  sec   112 MBytes   944 Mbits/sec    0    568 KBytes
- - - - - - - - - - - - - - - - - - - - - - - - -
[ ID] Interval           Transfer     Bitrate         Retr
[  5]   0.00-10.00  sec  1.10 GBytes   945 Mbits/sec    0             sender
[  5]   0.00-10.06  sec  1.10 GBytes   936 Mbits/sec                  receiver
10G iPerf test
[ ID] Interval           Transfer     Bitrate         Retr  Cwnd
[  5]   0.00-1.00   sec  1.15 GBytes  9.88 Gbits/sec    0   1.13 MBytes
[  5]   1.00-2.00   sec  1.15 GBytes  9.90 Gbits/sec    0   1.19 MBytes
[  5]   2.00-3.00   sec  1.15 GBytes  9.90 Gbits/sec    0   1.19 MBytes
[  5]   3.00-4.00   sec  1.15 GBytes  9.91 Gbits/sec    0   1.19 MBytes
[  5]   4.00-5.00   sec  1.15 GBytes  9.88 Gbits/sec    0   1.38 MBytes
[  5]   5.00-6.00   sec  1.15 GBytes  9.89 Gbits/sec    0   1.52 MBytes
[  5]   6.00-7.00   sec  1.15 GBytes  9.90 Gbits/sec    0   1.52 MBytes
[  5]   7.00-8.00   sec  1.15 GBytes  9.91 Gbits/sec    0   1.52 MBytes
[  5]   8.00-9.00   sec  1.15 GBytes  9.89 Gbits/sec    0   2.28 MBytes
[  5]   9.00-10.00  sec  1.15 GBytes  9.90 Gbits/sec    0   3.42 MBytes
- - - - - - - - - - - - - - - - - - - - - - - - -
[ ID] Interval           Transfer     Bitrate         Retr
[  5]   0.00-10.00  sec  11.5 GBytes  9.89 Gbits/sec    0             sender
[  5]   0.00-10.05  sec  11.5 GBytes  9.84 Gbits/sec                  receiver
As it can be seen, 10G connectivity is possible, and with the right equipment and drive configuration, speeds close to 1GB/s will be possible.
SMB 1G transfer (WD RED RAID0 array)
5.43GB in 1 min with an average speed of 111MB/s.
22.9GB in 4 min with an again average speed of 111MB/s.
The transfer speeds look consistent with no problems in speed over a longer period of time.
SMB 10G transfer (WD RED RAID0 array)
The same 5.43GB content over 10G with an average speed of over 300MB/s took about 20 sec to complete.
SMB 10G transfer (SAT5200 RAID0 array)
Considering that testing 1G speed towards the SSDs array has no meaning, the 10G speed was done with the same 22.9GB file. As opposed to the HDDs, this 10G transfer towards the SSD array is faster and consistent with no drops. The speed was 350+MB/s with 70 sec from start to finish.
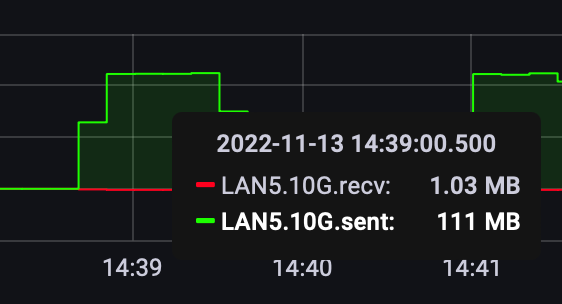
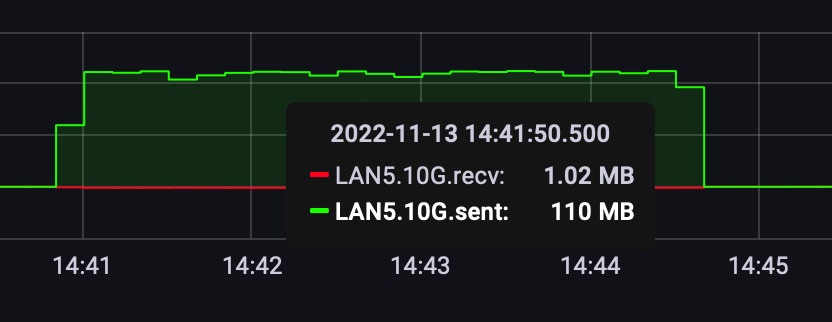
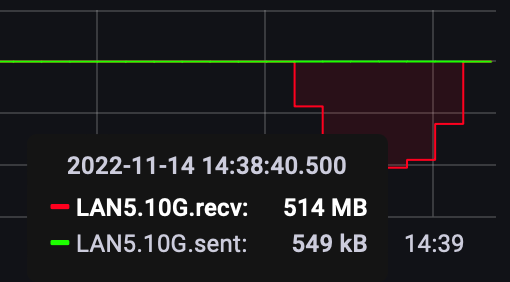
SMB 10G transfer (SAT5200 RAID0 array <>SAT5200 RAID0 array)
The following test included SAT5200 RAID0 arrays on both the RS unit and the DS923+ over 10G. Depending on the direction of the data flow the speeds were higher than when using the HDDs on one end by almost 40%.
The images below are recorded from the RS unit. On the left image, the DS923+ is sending the data over to the RS one at about 630MB/s on average, while the image on the right shows the data being written back to the DS923+ at about 570MB/s.
So well into 6G speeds. Truth be told the RS unit is a production one with ongoing tasks and some load, but still, the speeds of the DS923+ with SSDs are impressive for such a device.
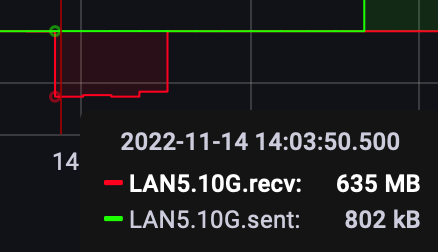
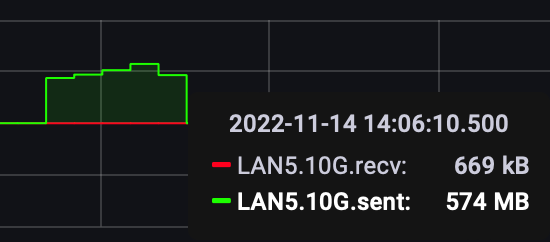
10G transfers using SAT5200 RAID0 arrays on both DS923+ and the RS unit
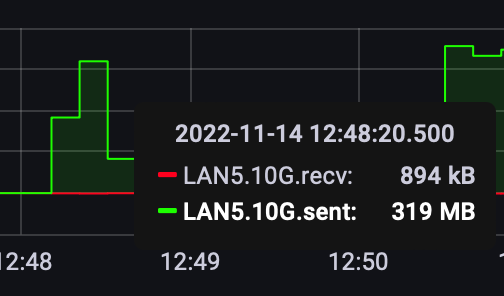
Hyper Backup (10G SSD RAID0 <> SSD RAID0)
Another real-life scenario involving multiple NAS units and 10G transfers only this time using the Hyper Backup platform. DS923+ is in the role of the source device sending about 23GB of data. The task is unencrypted with no compression.
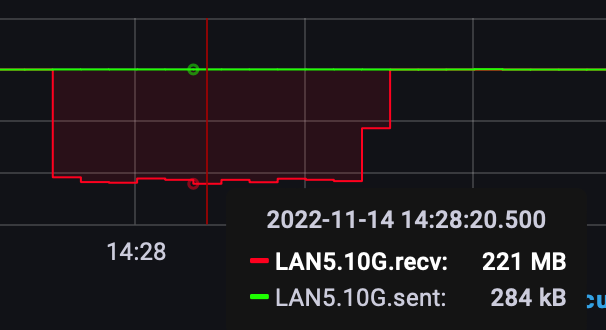
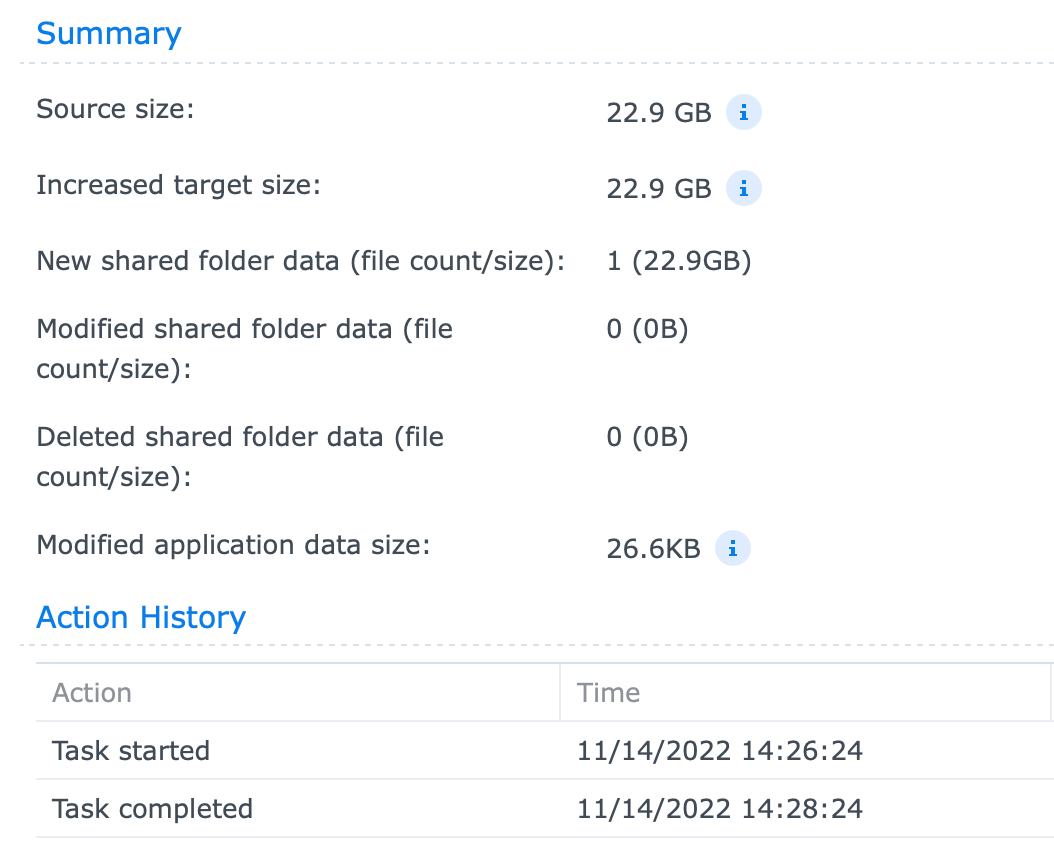
Hyper Backup task statistics
The task lasted exactly 120sec (2 min), with an average speed of about 220MB/s. Maximum CPU utilization at that point was about 14-16%.
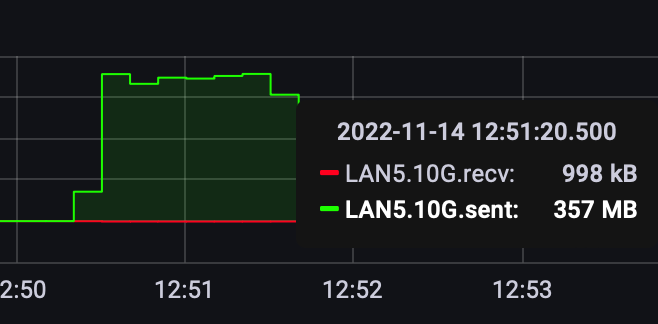
Snapshot replication (10G SSD RAID0 <> SSD RAID0)
Comparing the Hyper Backup method with Snapshot replication using the identical data set as well as direction and devices, the results are following.
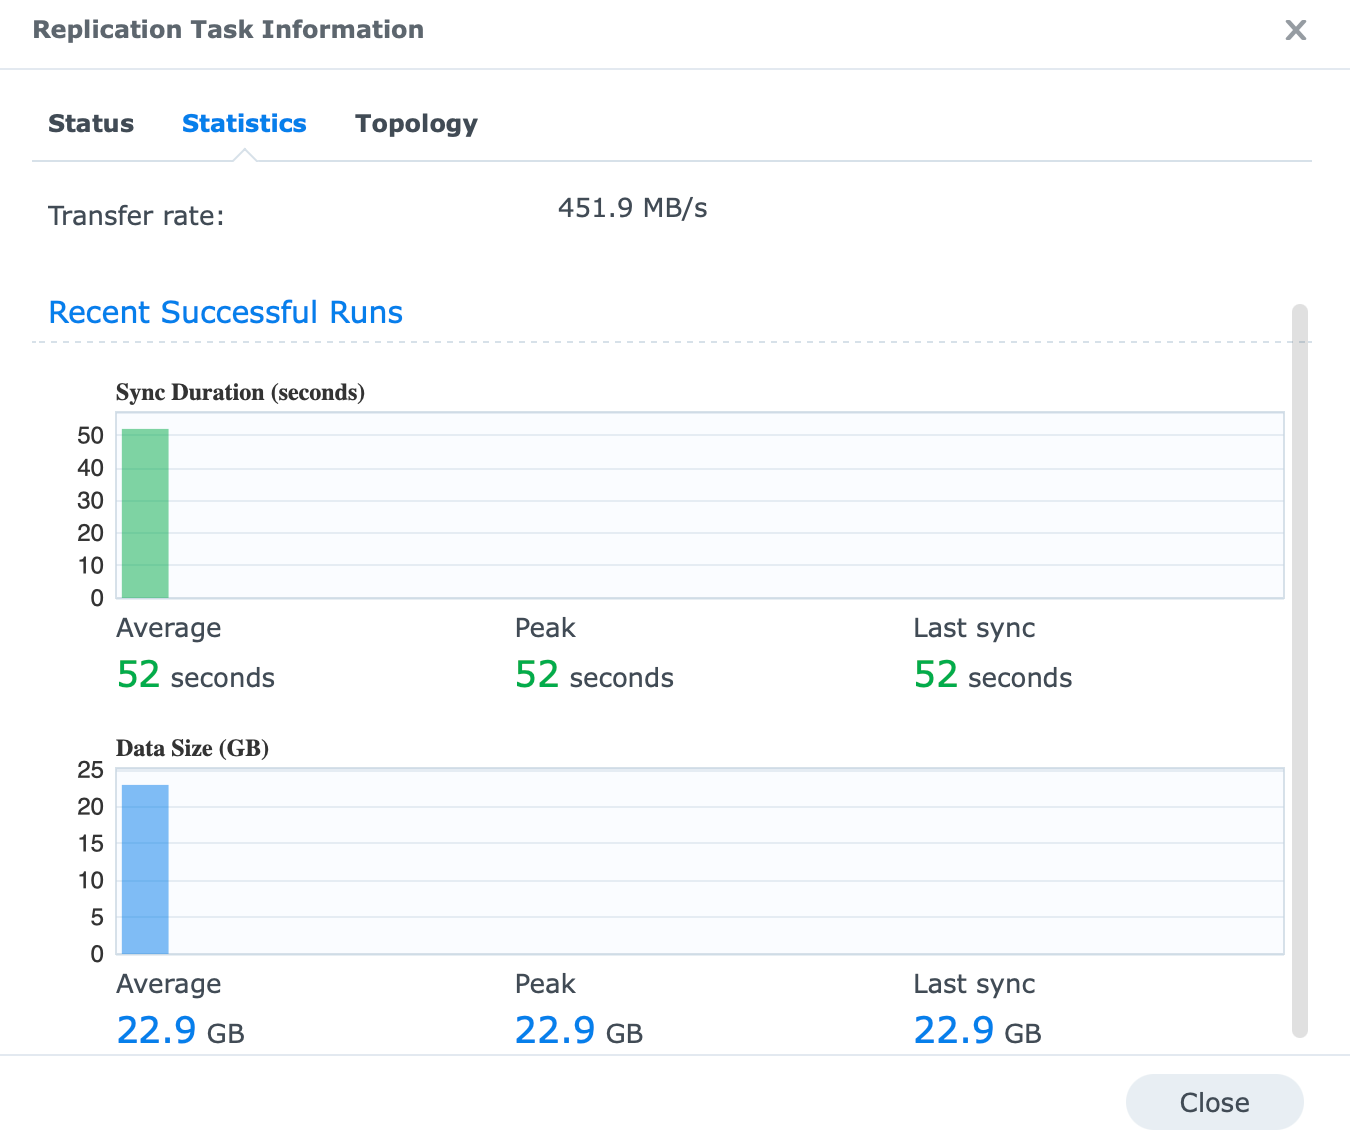
Snapshot replication task statistics
Snapshot Replication task pushing data from DS923+ to the RS unit performed in just under 1min (52 sec), with an average speed of 450MB/s while peeking at about 514MB/s. The CPU utilization was noticeably higher than in the previous test coming at about 34% for the whole duration.
It is no secret that identical setup and data being backed up over Hyper Backup as opposed to Snapshot Replication will finish faster if used over SR, so bear that in mind.
: Virtualization and containerization
Synology "Plus" models were always advertised as devices that can utilize the Virtual Machine Manager app, and it is true. In many cases, you can indeed run various Linux and Windows-based VMs but you will have to maintain your expectations.
I have run VMs on more than a few plus models in various combinations, and always found that the CPU was the weak link in most cases, especially with entry plus models. Once you move up into the RS, or RSxs, or better models that stops being an issue.
Of course, the hard drives are a big factor as well, so running your VM on an HDD volume, vs an SSD volume you can expect a huge difference, but again, if the CPU is not already an issue.
I think it is clear that running a low-end CPU model with spindle drives and not SSD, you really have to manage your expectations.
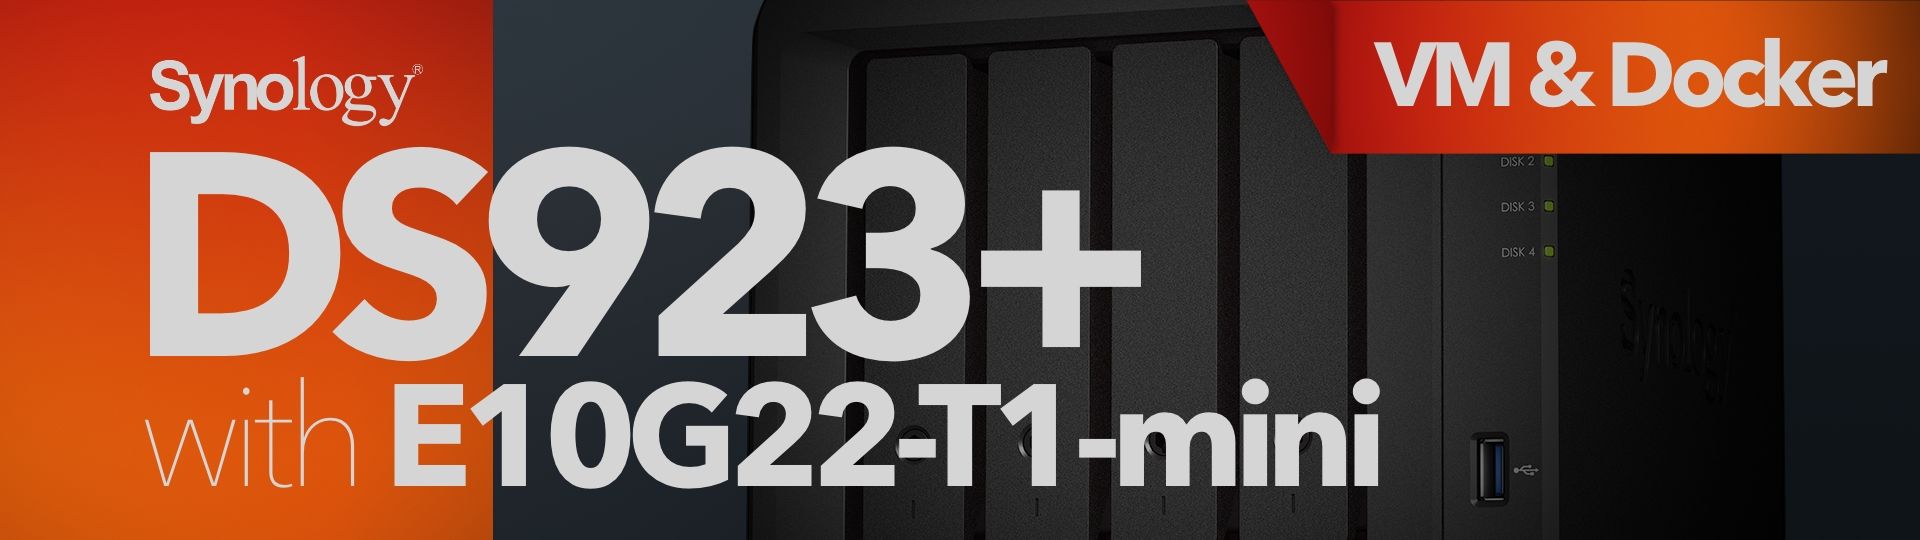
So with all that, let's see how this dual-core (quad-threaded) CPU with a full SSD setup and 4GB of DDR4 RAM will perform for a basic Windows 11 installation.
Windows 11 install process
Aside from configuring the VMM package, installing Windows 11 instance took under 12 min of total time, which I think was great overall.
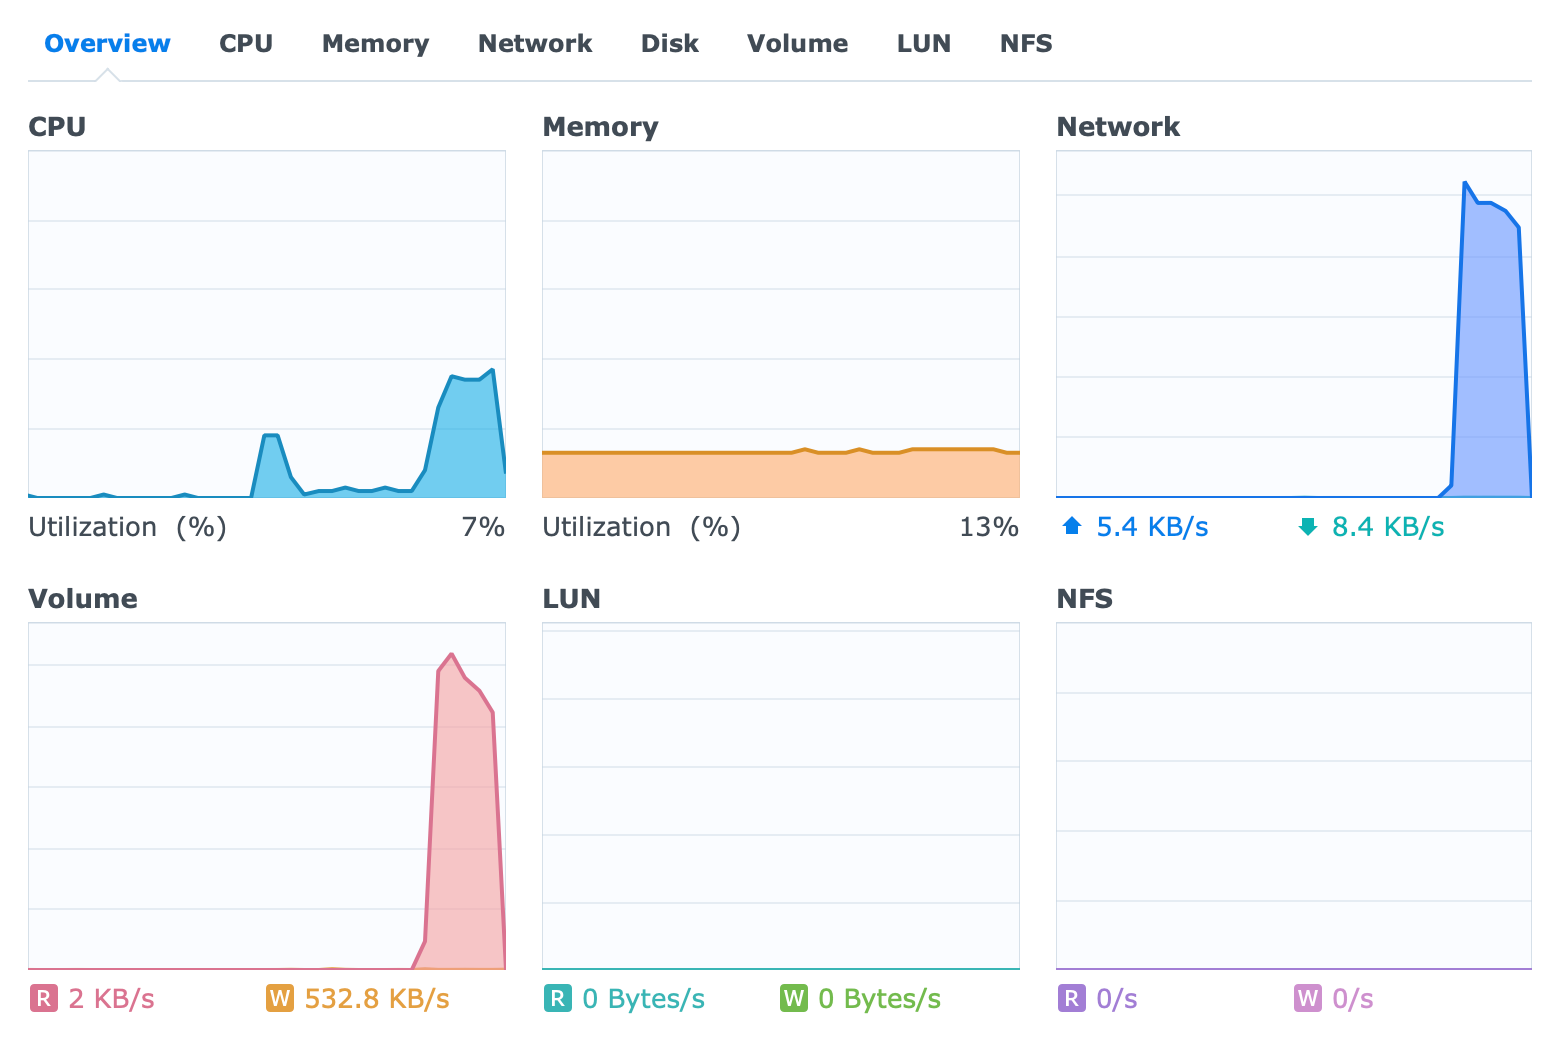
The VM was configured with 4 vCPU and 2GB of RAM, as well as 100GB of storage and 10G capable LAN. This model unlike the DS1522+ arrives with 4GB of RAM stock, so only 2GB was available for this particular setup.
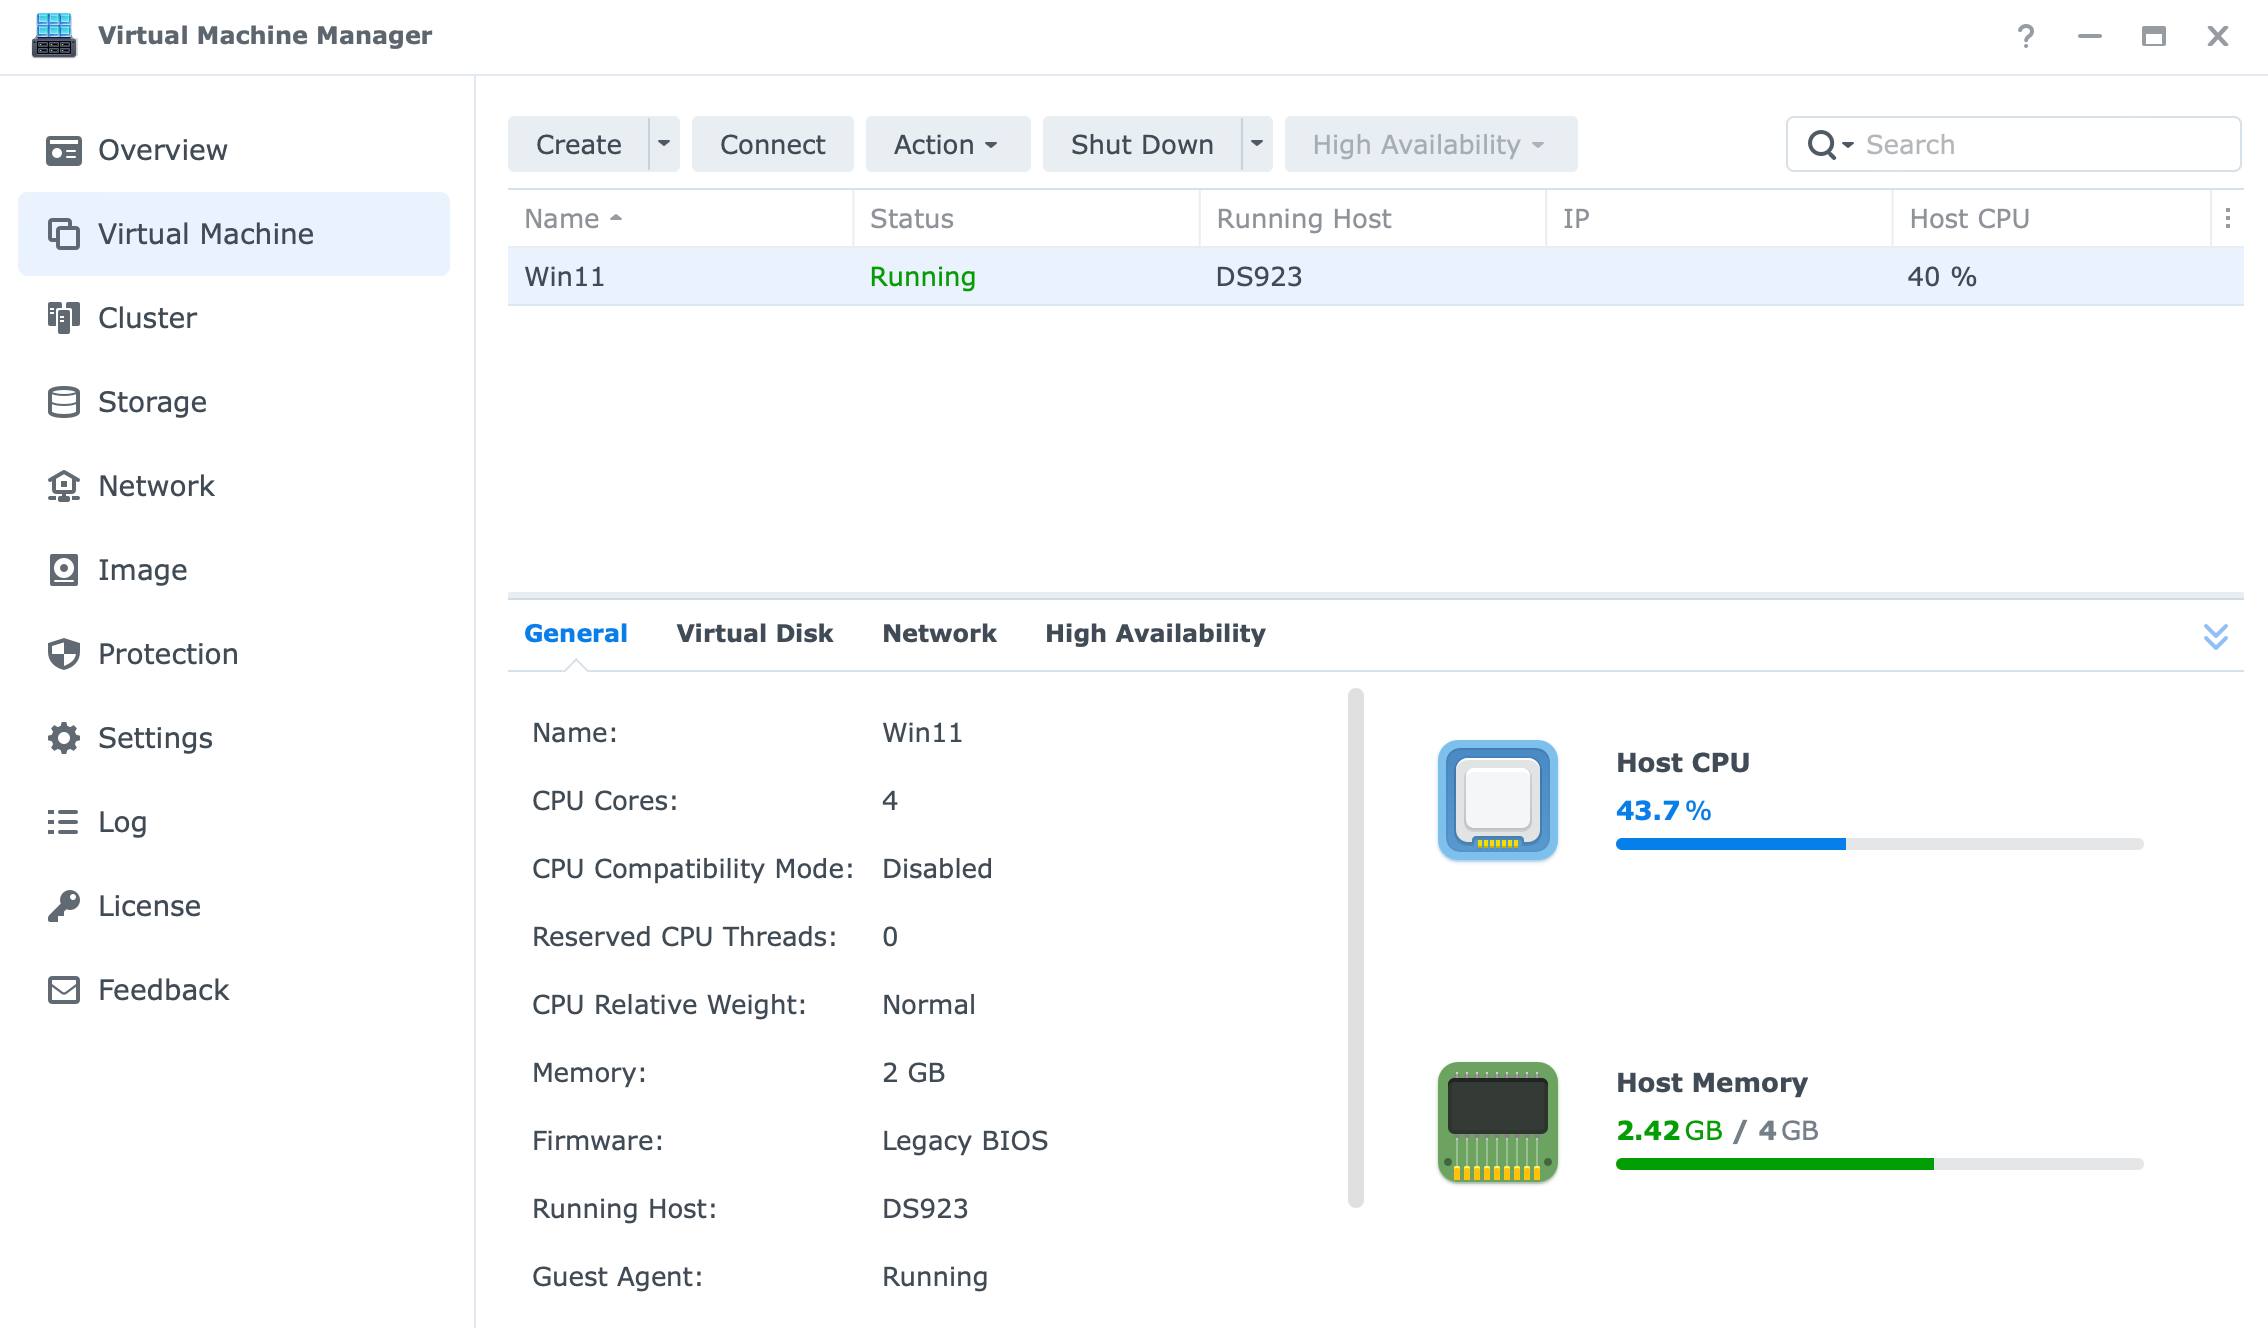
Installation was straightforward with no issues at all, but once the VM was installed and up and running, the DS923+ started to get into trouble. As can be seen in the images below even with some light tasks the CPU is all over the place. Bear in mind this is with the device running no other services at all.
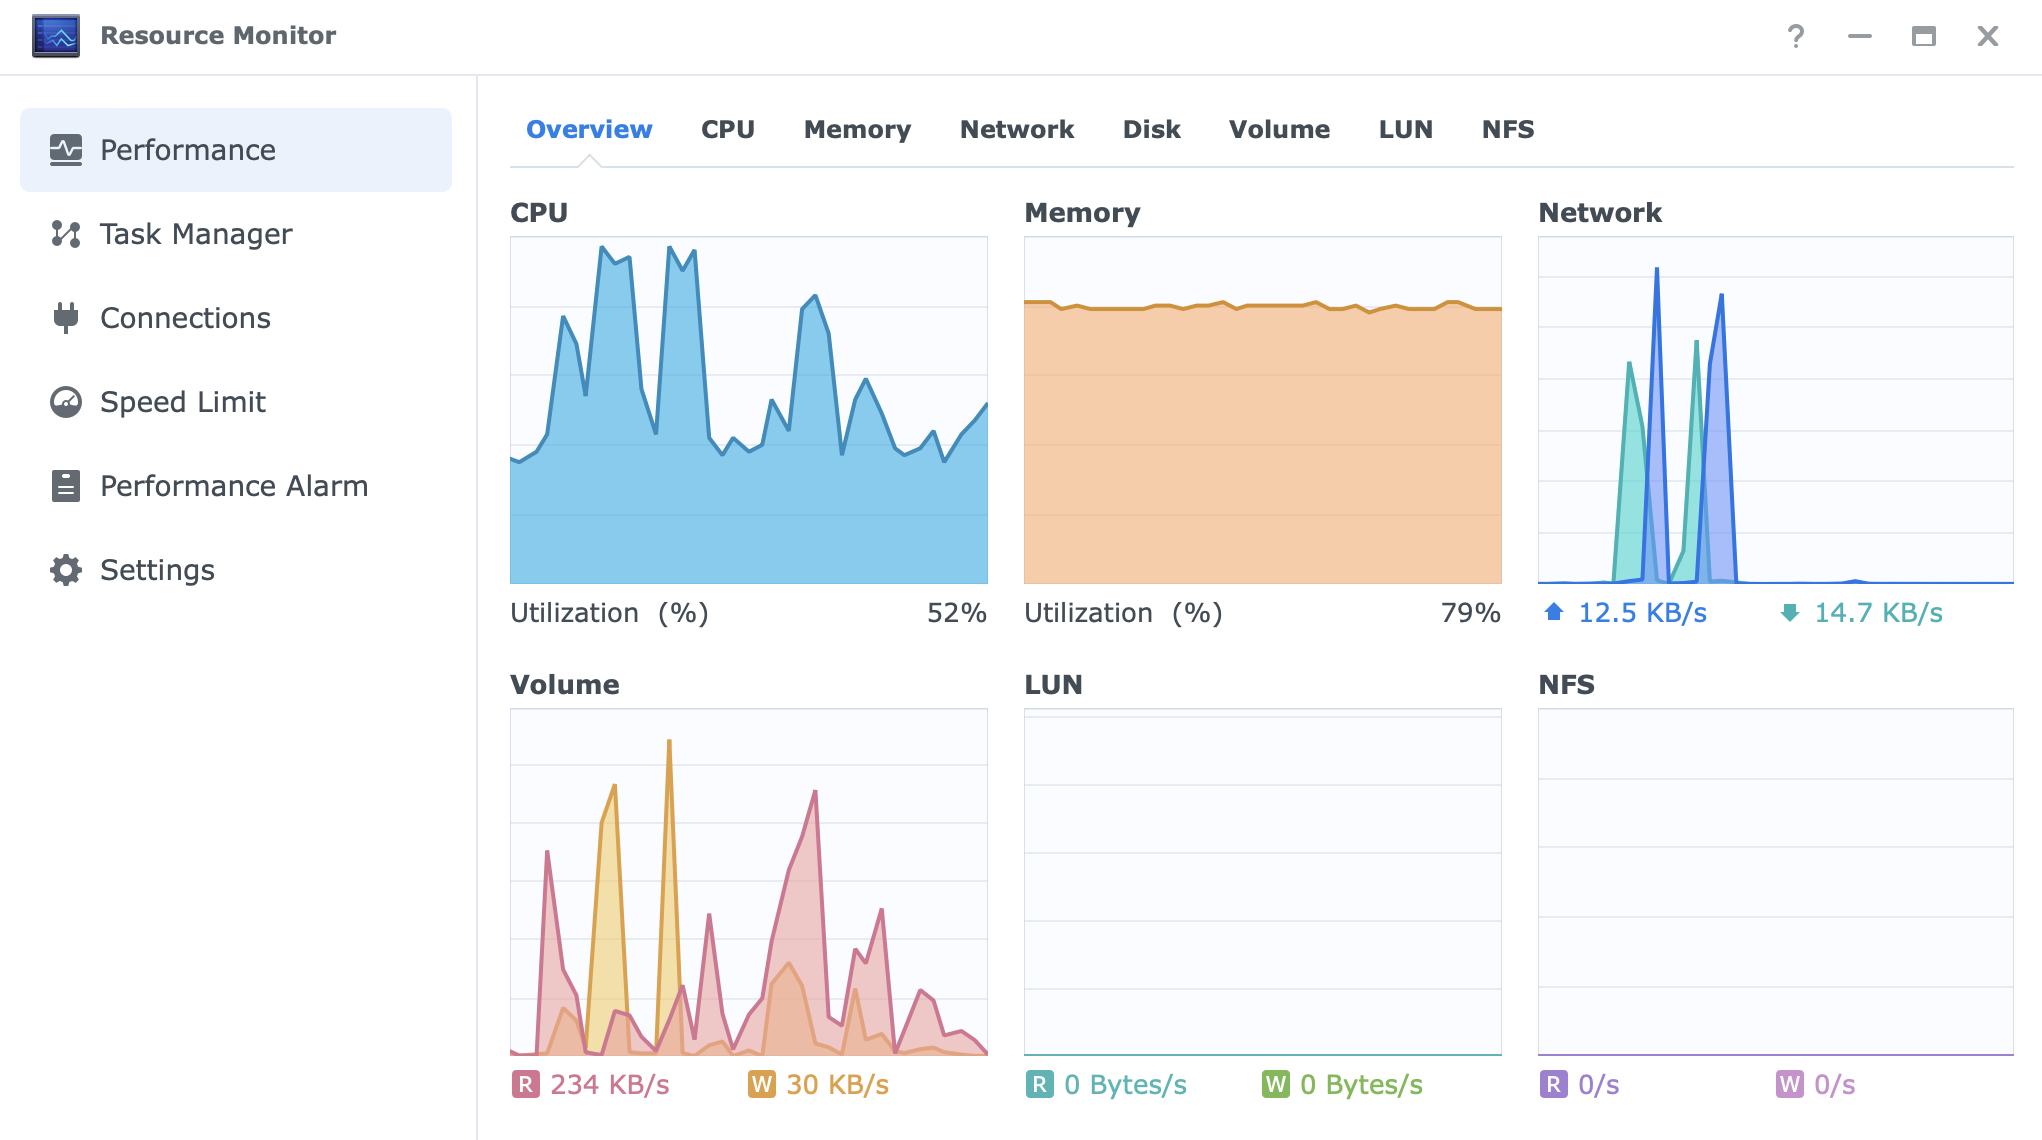
Even just by starting a web browser and running a speed test, the CPU was running well above 80%.
Windows 11 experience
Once the support tools were configured, we can access the machine using the RDP client as the web console is not the best for doing any tasks other than checking the status of the machine itself.
Experience is smooth and fast (but not as a bare metal machine, or on the DS1522+), for most basic and light tasks. I would advise maintaining the usage of this setup for some basic browsing, office tasks, and general file management.
Utilizing this NAS with more apps under a similar VM configuration will significantly deteriorate the overall experience. By this I mean the likes of Photoshop, AutoCAD, or similar.
Still, saying all this, if you do plan on getting this NAS with an SSD setup for the sole purpose of running some VMs, keep in mind that running more than one at a time, you will start to get problems with VMs running a full-blown visual UI.
Running some "core" VMs, or light Linux instances you could get away with a few of them in parallel. All of the above was done without any other "stress" on the NAS itself, so keep that in mind as well. With multiple concurrent users, apps, services, etc, running in parallel, your experience might vary.
Docker support
Unlike a mixed bag when it comes to VMs, DS923+ supports the Docker platform as well. A much better experience for this kind of machine. Containers unlike VMs will not utilize that many resources needed to run the final product, an app for example.
With some more RAM, DS923+ can be a brilliant Docker host for a vast number of apps and platforms out there, so keep that in mind. Running any number of apps like a password manager, database instances, wiki, and web platforms will unlock the hidden potential of this excellent 4-bay device.
Considering Synology's Docker user interface is a bit limiting, installing some other management platform would be advisable. Portainer would be one suggestion.
If you are looking for more details or examples, be sure to check my Docker section for some ideas.
: PLEX
DS923+ will be the 3rd NAS in line that arrived with AMD R1600. Now, this is not the CPU that has an embedded GPU or Intel QuickSync support. That means that Plex as one of the most popular media streaming organizing and streaming platforms out there will not work as expected.
Unlike its predecessors the DS920+ or DS918+ were equipped with Intel Celeron series CPUs with QuickSync support, the DS923+ falls short on that element. Without it, hardware transcoding will not be possible, meaning that any content being streamed from the NAS to an incompatible Plex client will be transcoded in software. This as a result will lead to high CPU usage and buffering of content.
Everything is not all bad as DS923+ is a great Plex server regardless of its lack of hardware transcoding. It will run fine on this machine, and as long as the content will be handled by the client in order to provide Direct Stream/Play, there will be no issues on the NAS itself. Now, this particular model might be an expensive Plex server-only device as there are other less expensive models that can provide the same level of service for less money. If on the other hand this NAS will be used for many other tasks it can provide and Plex will be an added bonus, then great. In any other case, avoid this model for Plex-specific roles, especially if transcoding is involved.
Let's see some examples of where DS923+ will do more than fine as a Plex server and where it falls short.
4K direct play (iOS, iPhone 11, official Plex client)
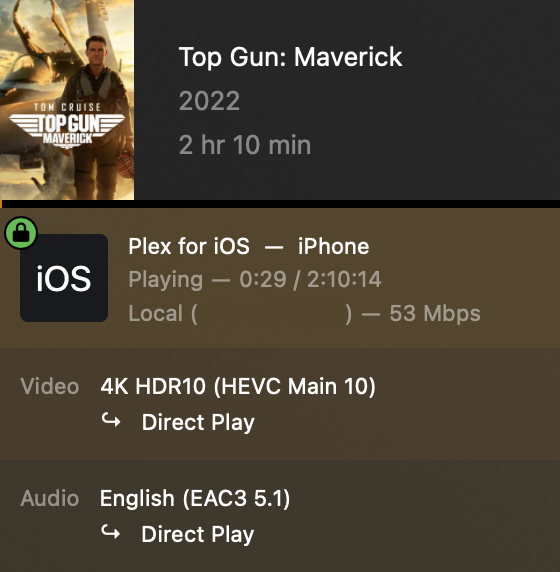
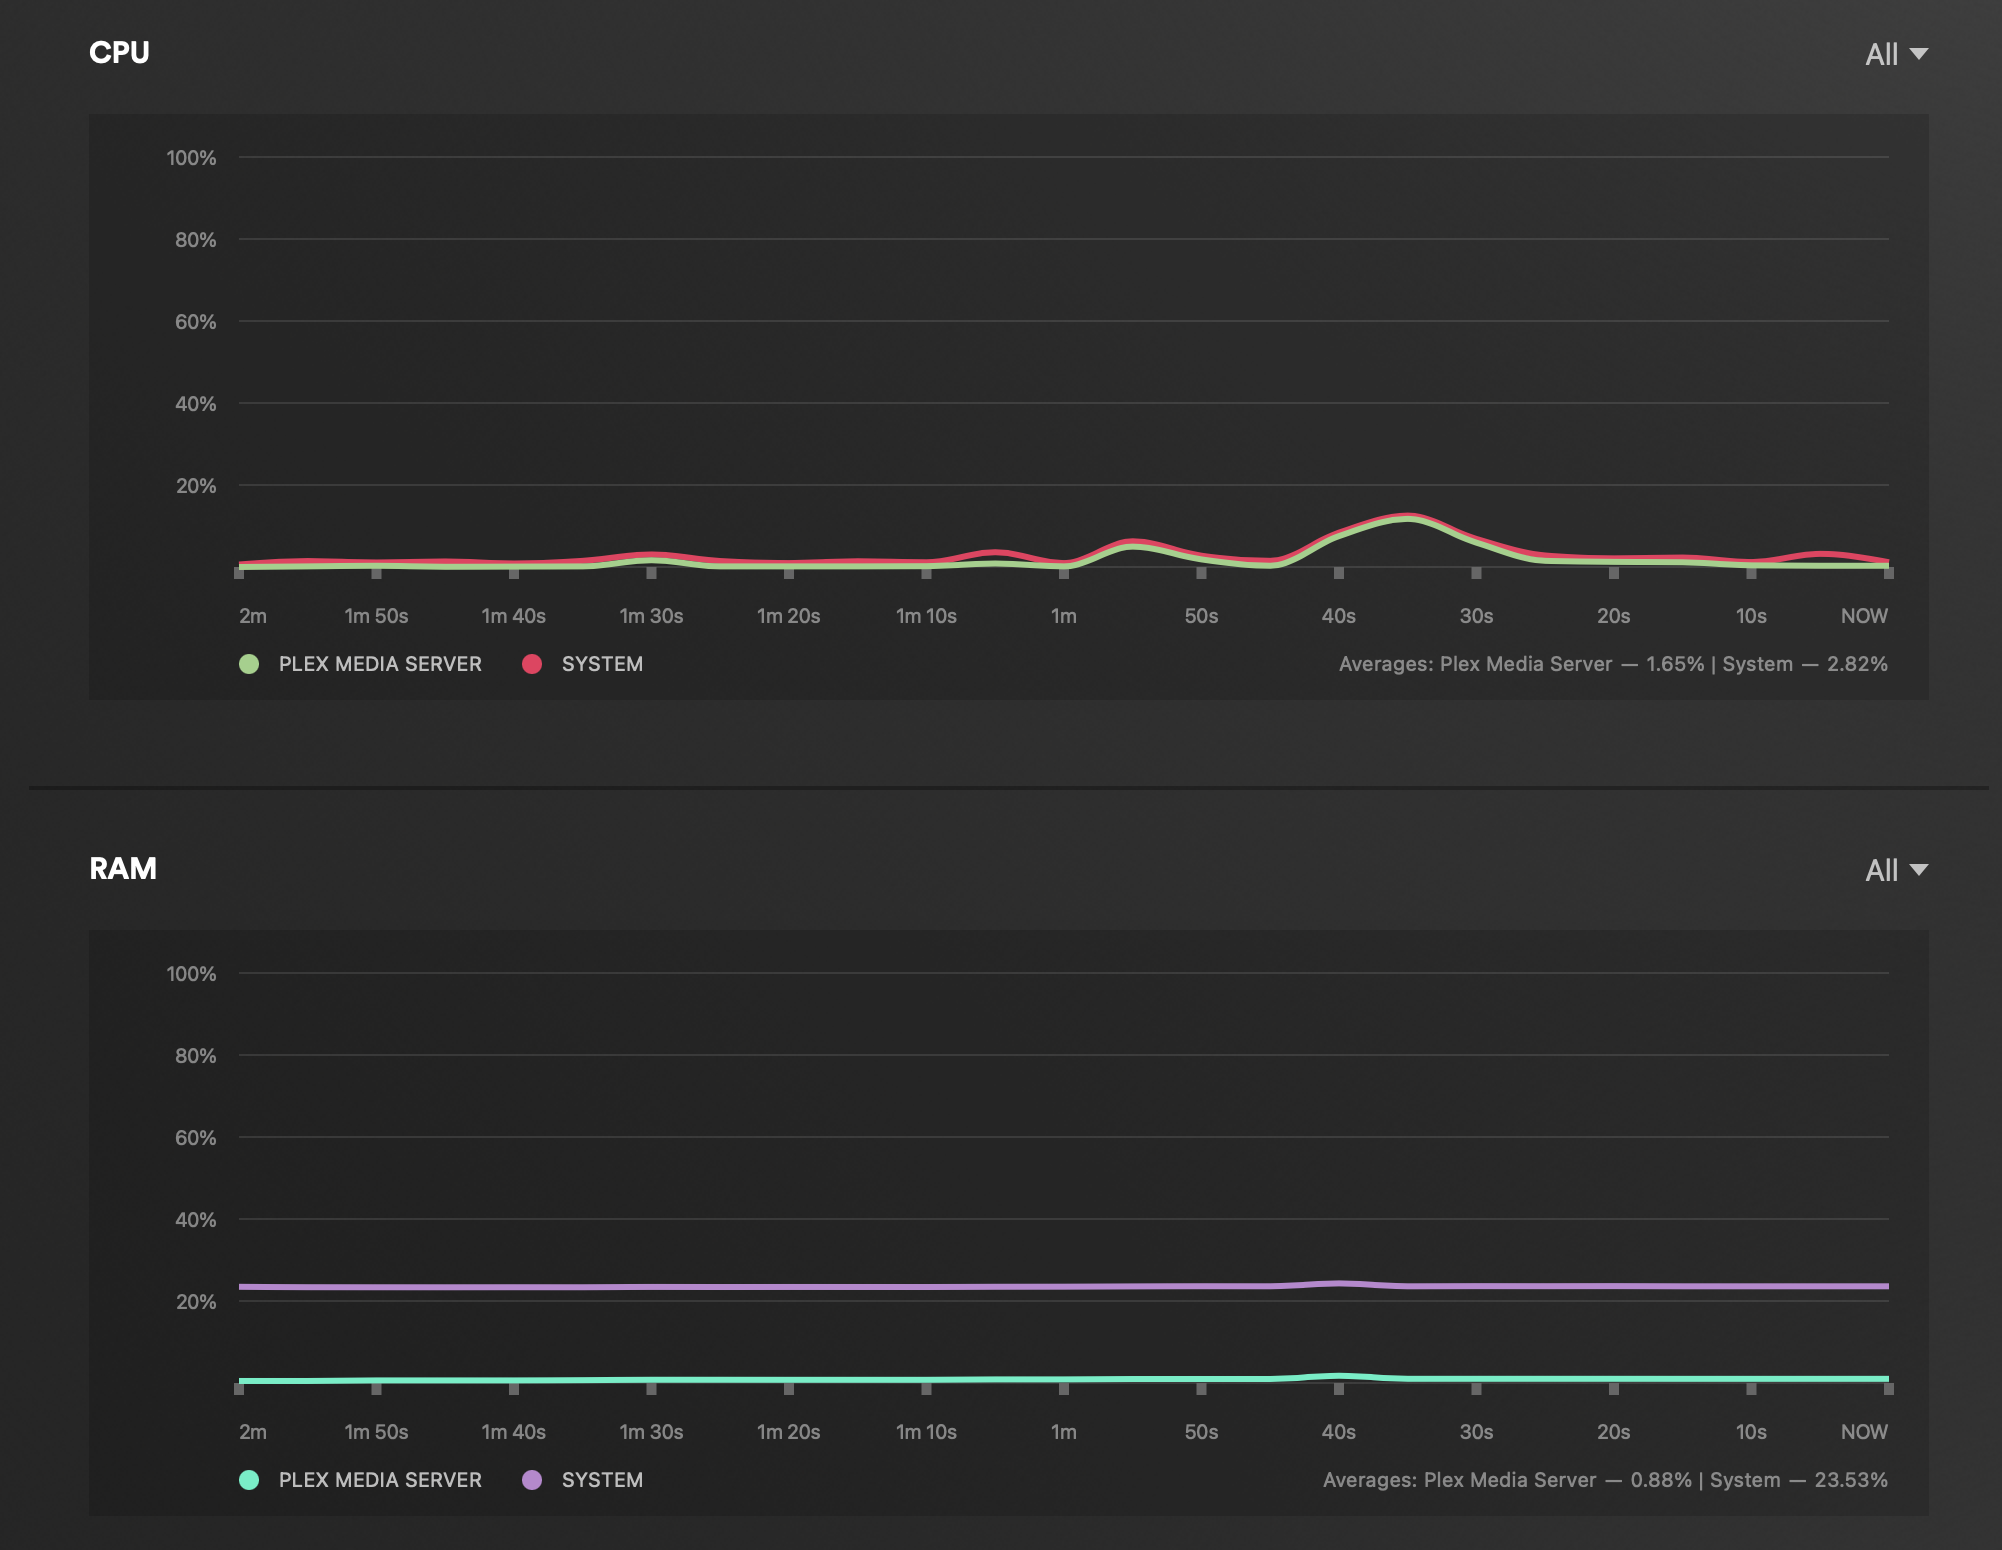
As expected, playing 4K content from a device that is capable of handling it on its own, the pressure on the NAS side is non-existing. CPU, while Direct Play is in effect, is around 1%.
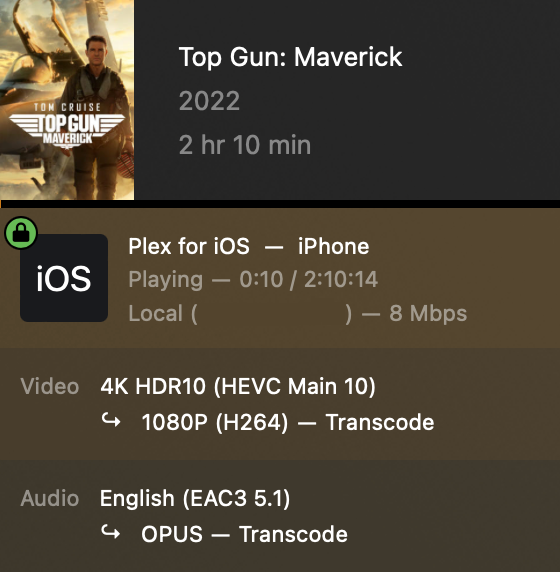
4K > 1080p transcode play (iOS, iPhone 11, official Plex client)
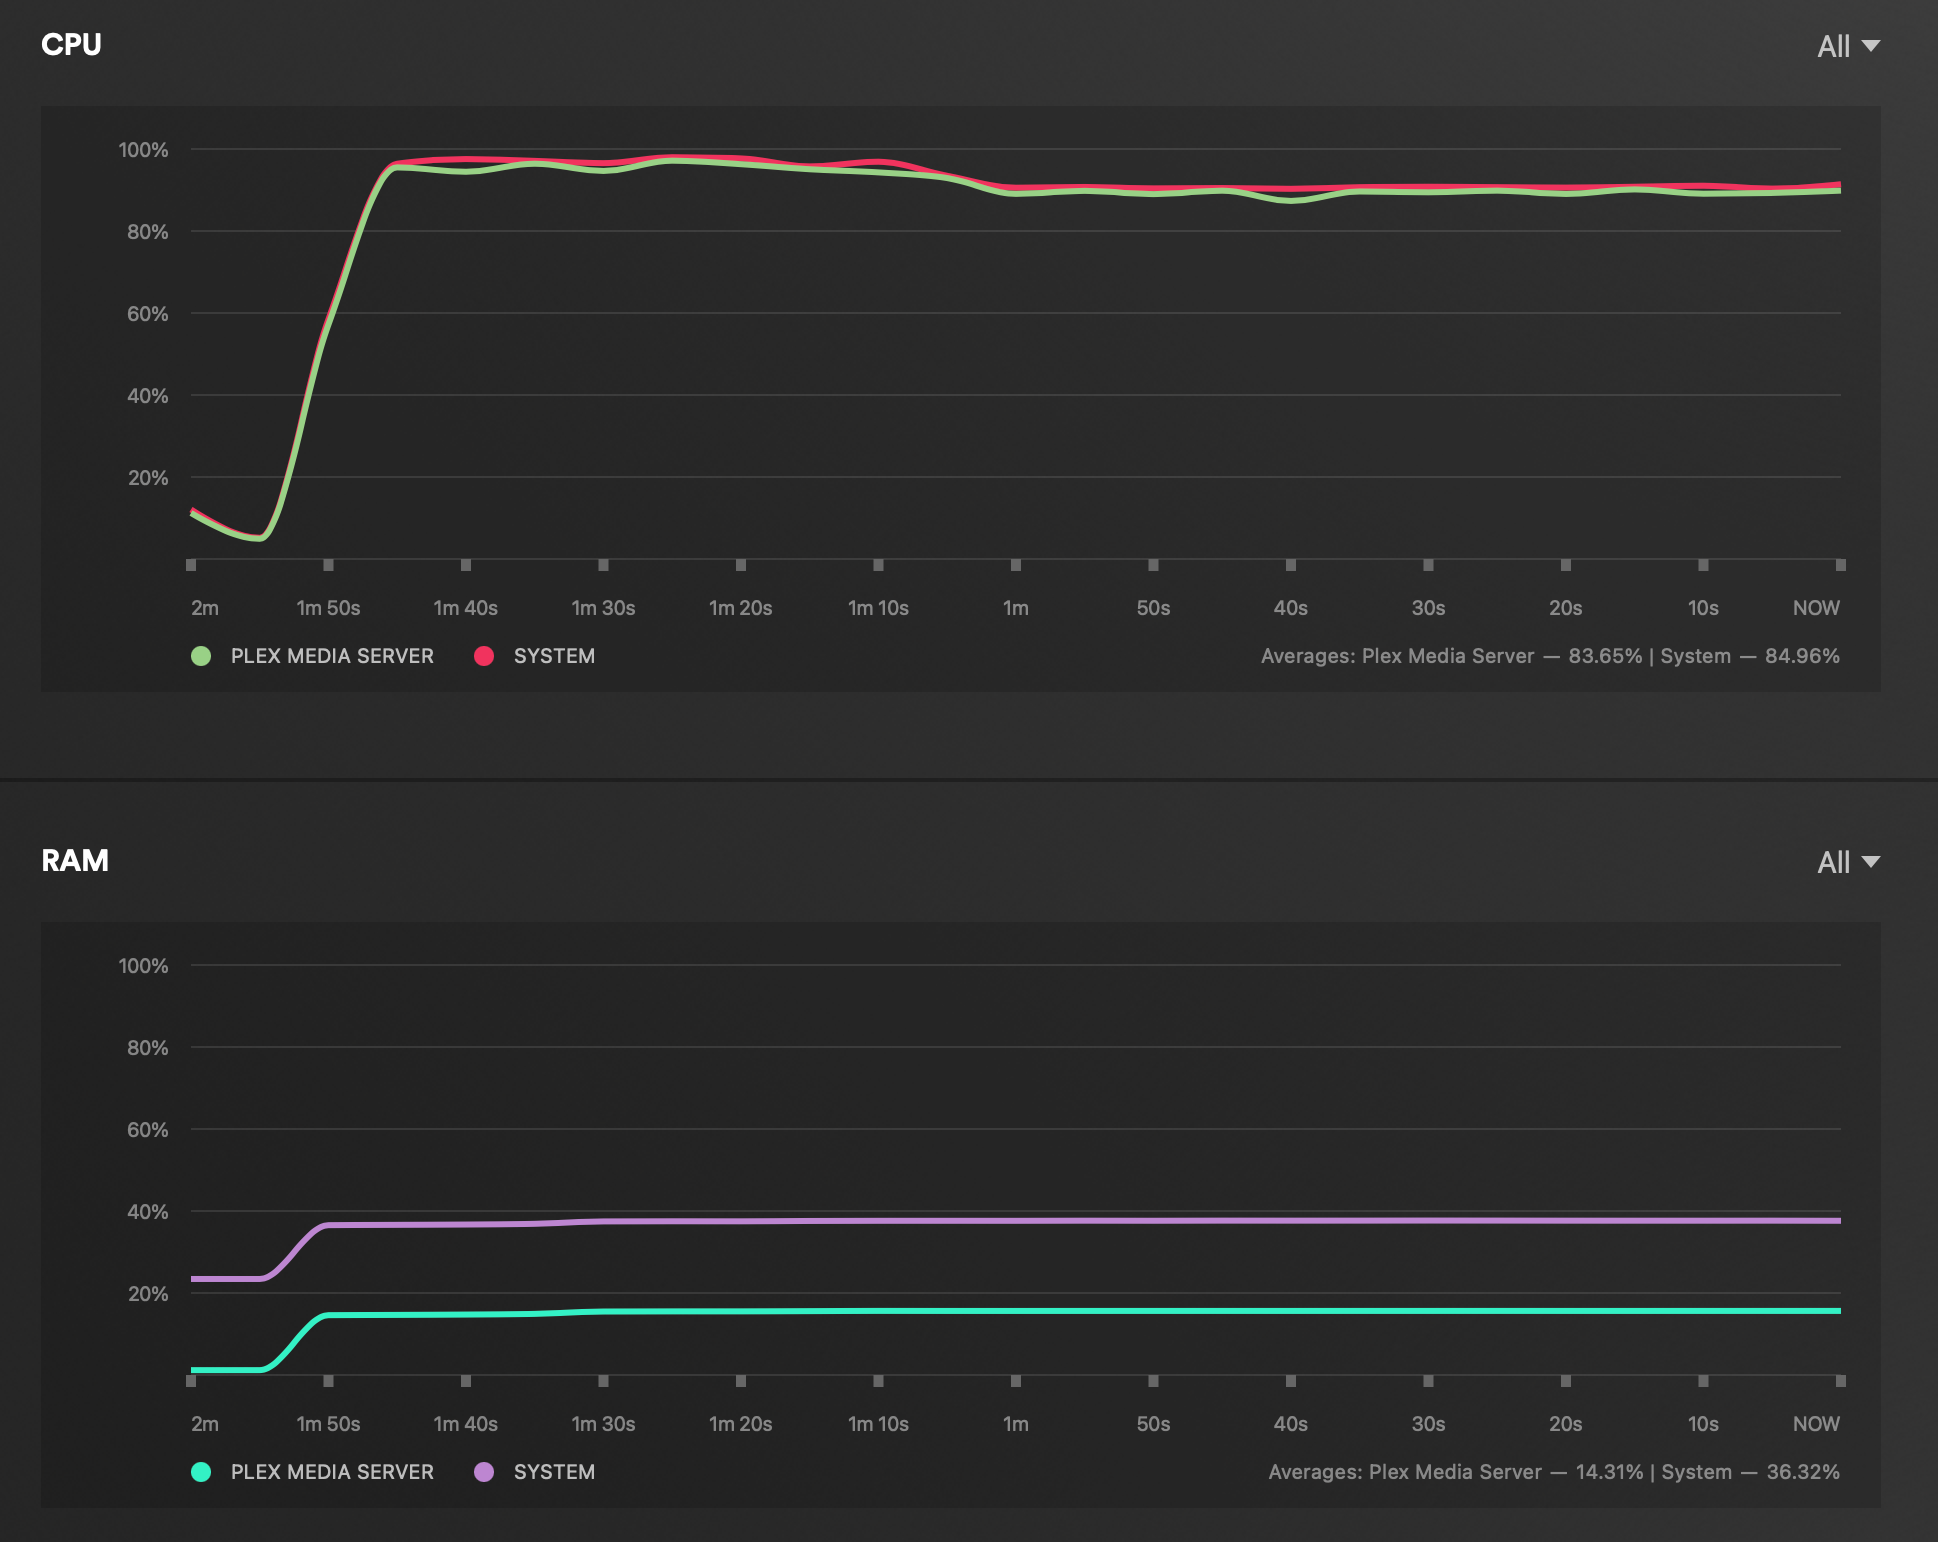
With no support for hardware transcoding, this time around the DS923+ had to convert the video and audio in software resulting in over 96% CPU utilization and buffering every 5-6 seconds.
1080p direct play (iOS, iPhone 11, official Plex client)

With Direct Play streaming a 1080p is no problem for DS923+. CPU utilization was less than 1%.
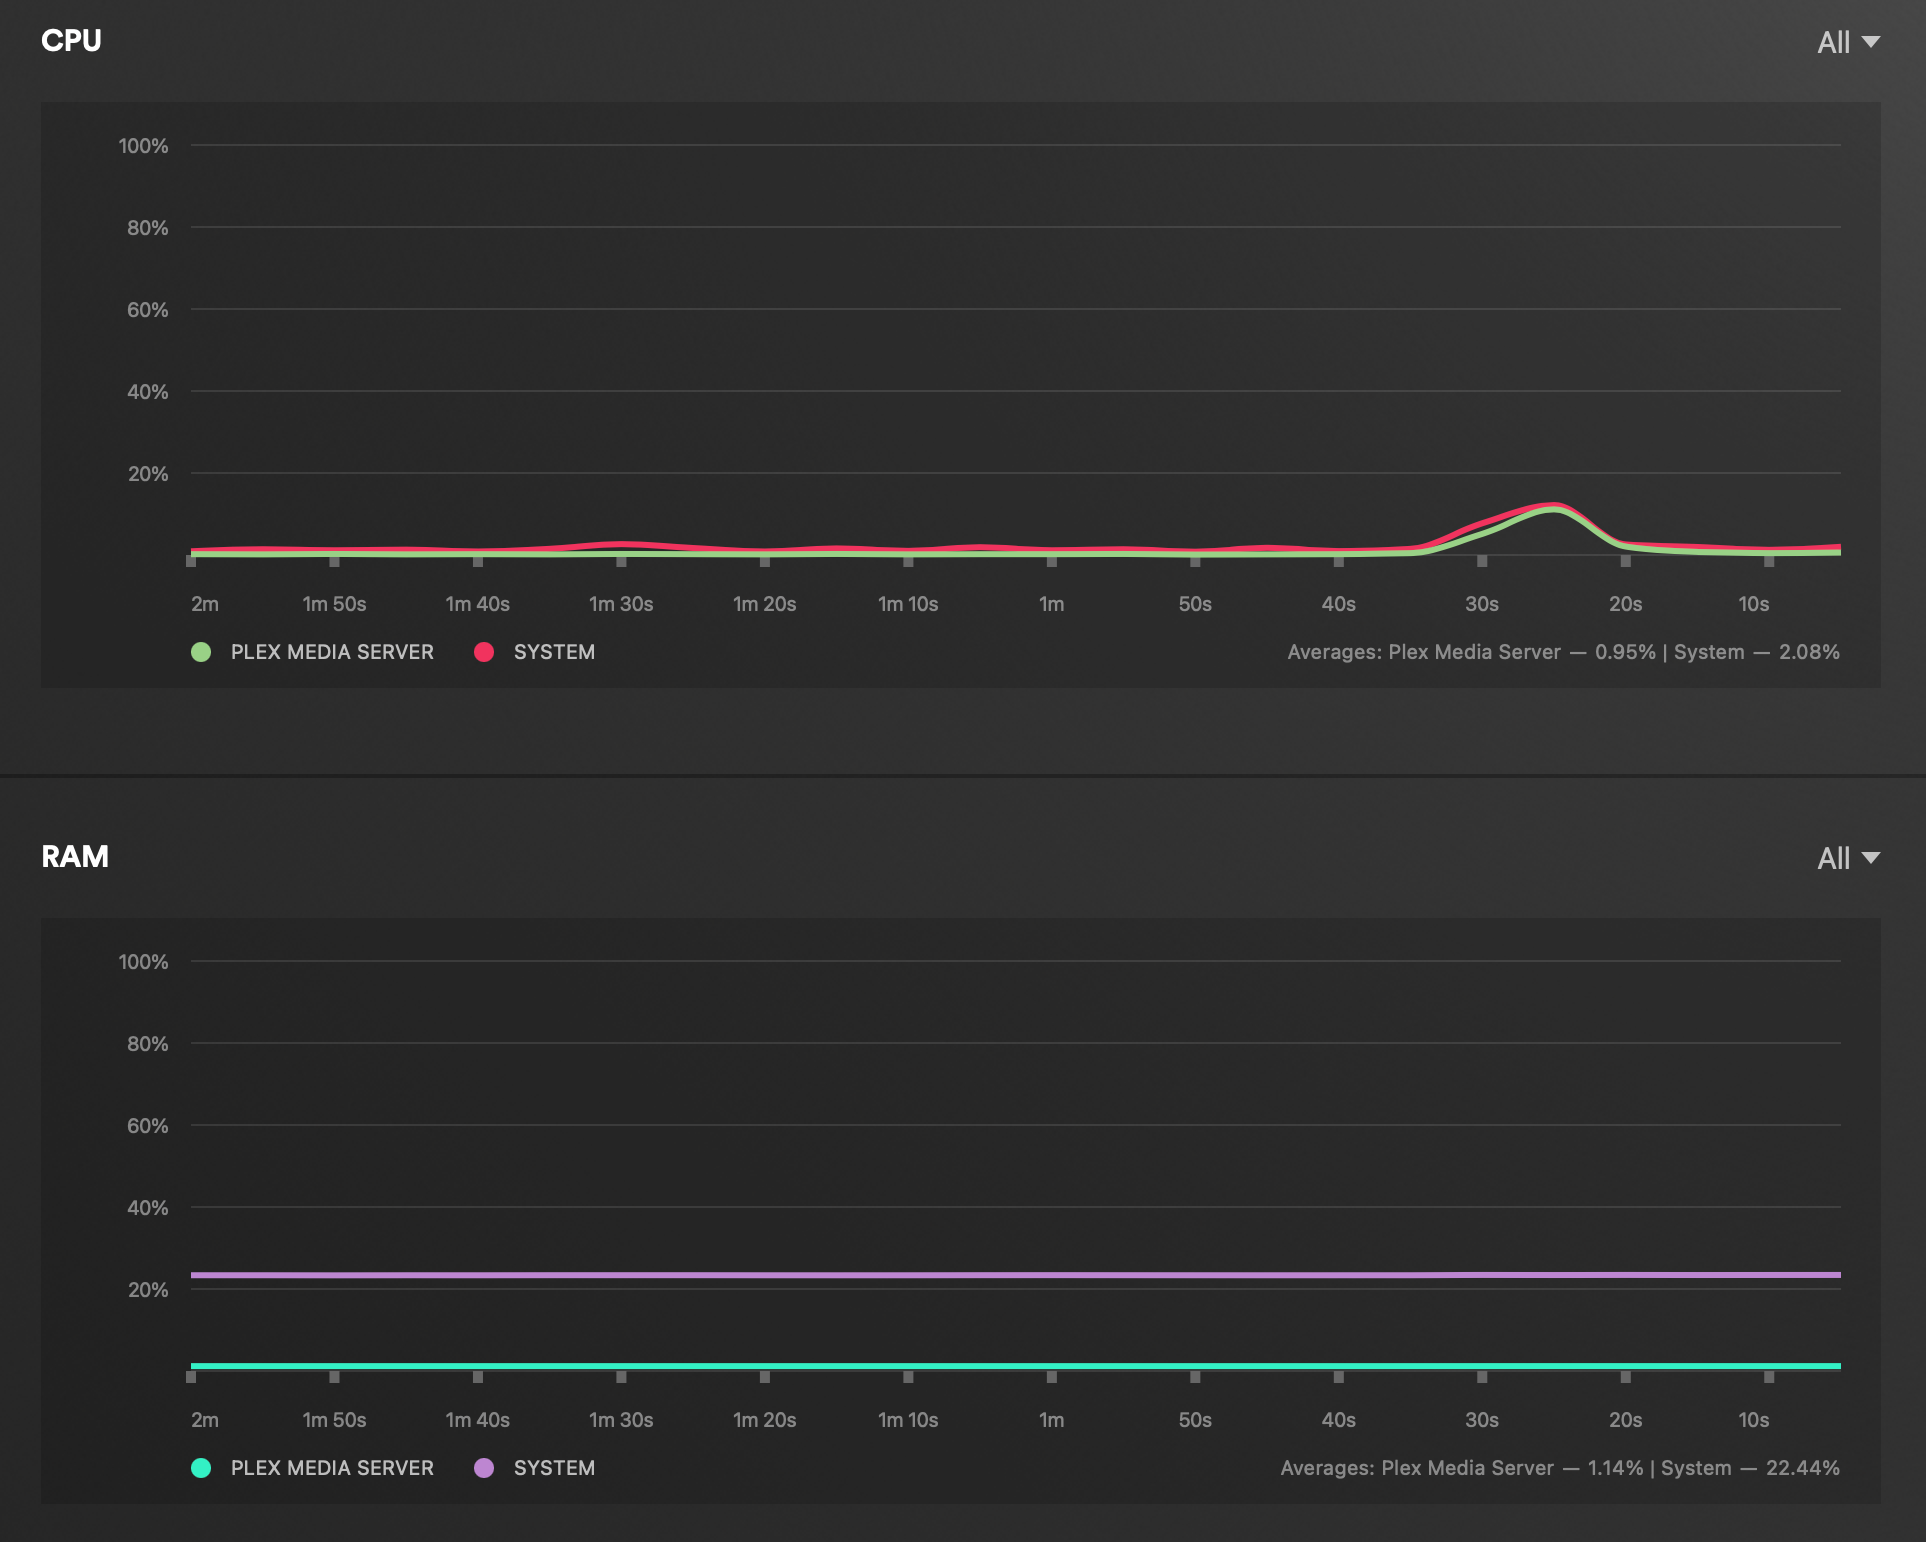
1080p > 720p transcode play (iOS, iPhone 11, official Plex client)
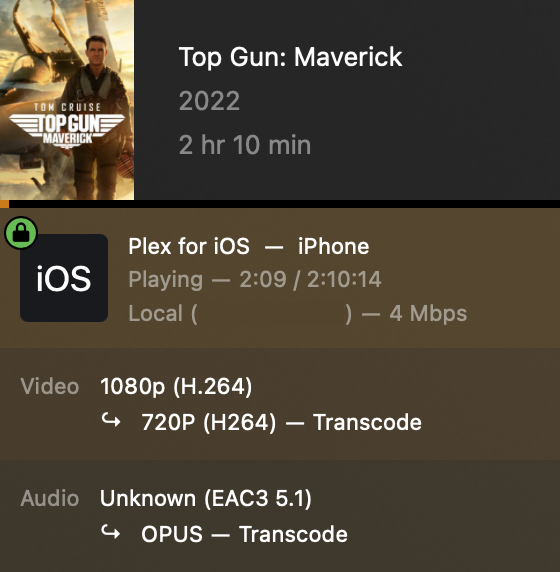
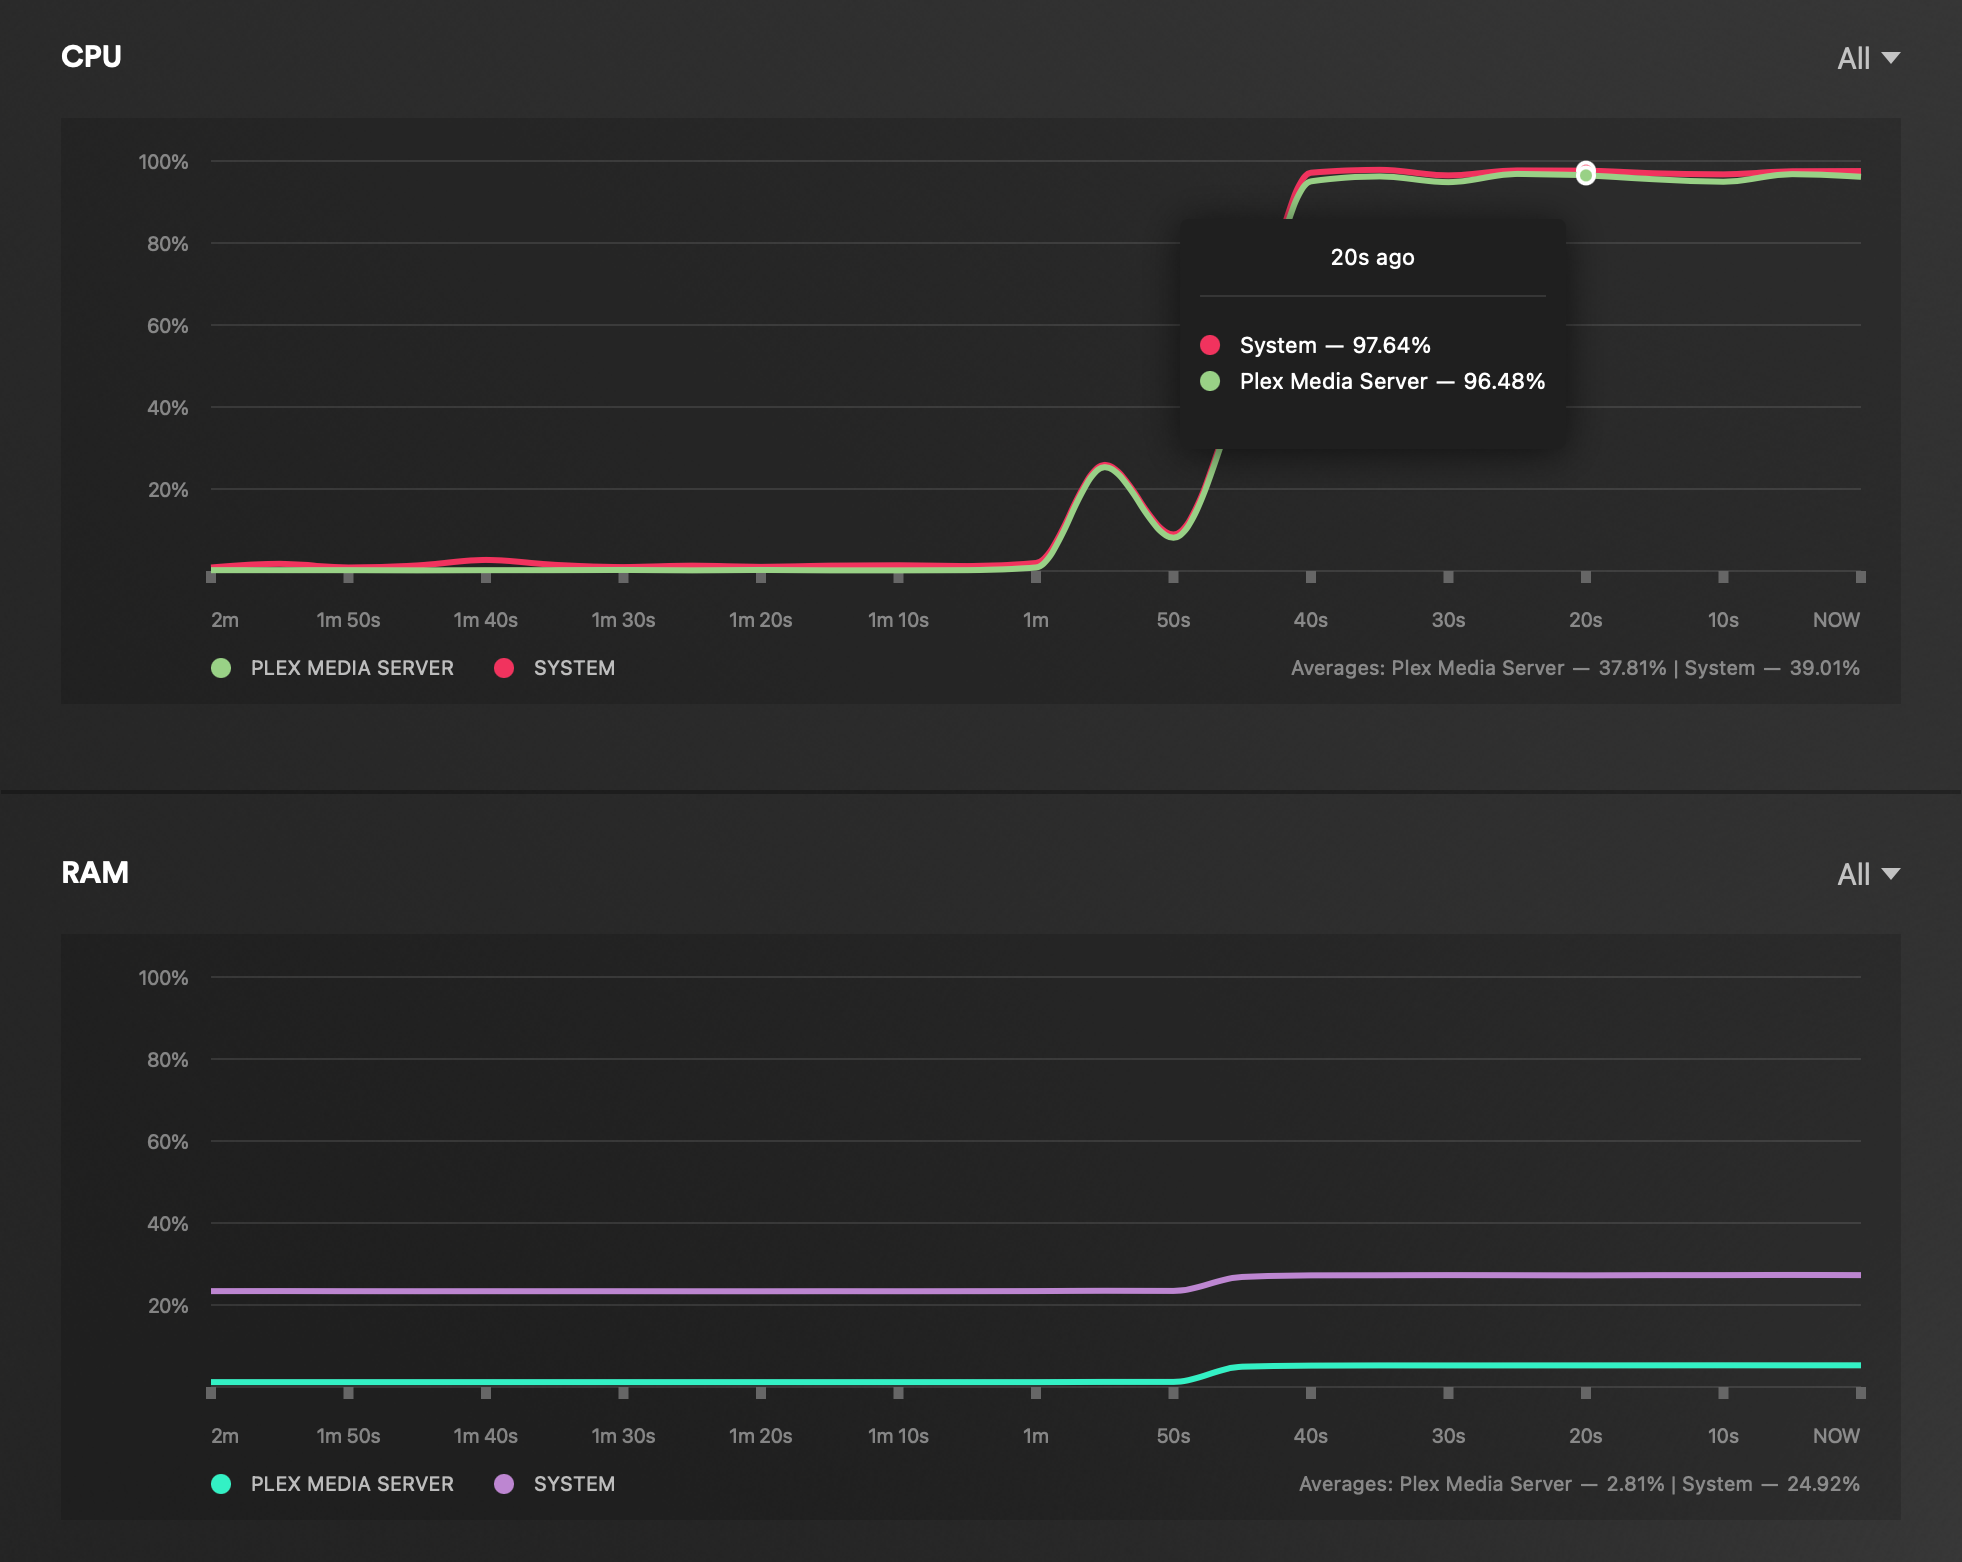
Unlike the 4K to 1080p transcoding that was not playable, this scenario was working without any issue from the perspective of streaming and watching the content. As can be seen, the CPU utilization was still very high (over 96%) but there was no buffering during playback.
This will probably be the maximum that DS923+ will be allowed to be pushed before giving up.
Any other resolution below this also played with no issue but transcode will be a high price to pay if it kicks in often. So again, DS923+ is a stable and worthy Plex server, but not when it comes to transcoding.
: Conclusion
There we have it, the new DS923+. A long-awaited successor in one of the most popular Synology lineup. Just like its bigger brother, the DS1522+, the "biggest" problem users will have is the lack of media transcoding features.
Synology has spoiled us all with the low-power Celeron that handles hardware transcoding with ease in the previous models of this format, so the new DS923+ and all the rest of the AMD R1600-driven NAS leave a bit of a bitter taste.
Still, all of those devices including DS923+ provide a faster CPU, up to 32GB or RAM, an optional 10G network connectivity, and M.2 storage pools (YES!). The truth is that this €530 (+ tax device + 10G card) is a kind of a new category unlike its predecessors in terms of price and features for this form factor. This opens a question what can we expect from yet-to-be-announced DS423+ or DS223+? Also, if those two devices arrive with the same R1600 CPU, will we see maybe a new category of models in the future? Maybe we will, time will tell.
In any event, if the DS923+ was not the model you were hoping for the DS920+ will still be available for some time. On the other hand, as a long-term investment, this particular model brings a lot to the table, and while it does consume more power than the Celeron-based models before it, it also offers much more.
Be sure to use drives of its compatibility list to avoid any issues when it comes to DSM and Synology support, and I am sure the DS923+ will grow on you with all its features and the potential that it has to offer.
If on the other hand, this 4-bay device was just what you were looking for, but you want more bays, have a look at DS1522+. Also, coming soon, a 2-bay version of this identical setup will arrive as the DS723+ will follow along shortly.
I hope this review was informative and interesting, and as always, do let me know in the comment section below what you think about this particular NAS or if you have any comments, suggestions, or critics on the topic.